- 投稿日:2019-05-27T23:13:54+09:00
一足遅れて Kubernetes を学び始める - 10. config&storage その2 -
ストーリー
- 一足遅れて Kubernetes を学び始める - 01. 環境選択編 -
- 一足遅れて Kubernetes を学び始める - 02. Docker For Mac -
- 一足遅れて Kubernetes を学び始める - 03. Raspberry Pi -
- 一足遅れて Kubernetes を学び始める - 04. kubectl -
- 一足遅れて Kubernetes を学び始める - 05. workloads その1 -
- 一足遅れて Kubernetes を学び始める - 06. workloads その2 -
- 一足遅れて Kubernetes を学び始める - 07. workloads その3 -
- 一足遅れて Kubernetes を学び始める - 08. discovery&LB その1 -
- 一足遅れて Kubernetes を学び始める - 09. discovery&LB その2 -
- 一足遅れて Kubernetes を学び始める - 10. config&storage その1 -
- 一足遅れて Kubernetes を学び始める - 10. config&storage その2 -
前回
一足遅れて Kubernetes を学び始める - 10. config&storage その1 -では、configについて学習しました。
今回は、storageを学びます。VolumeとPresistentVolume
Volumeは、あらかじめ決められた利用可能なボリュームを指します。こちらは、ボリュームの削除や新規作成ができません。
PresistentVolumeは、外部にある永続ボリュームを指します。こちらは、ボリュームの削除や新規作成ができます。
DBのようなステートフルなものはPresistentVolumeを使います。
一時的なものなら、Volumeを使うのですかね?
※ PresistentVolumeClaimは、PresistentVolumeをアサインするためのリソース。
Volumeの種類
書籍(kubernetes完全ガイド)で紹介されていたVolumeの種類は、下記のとおりです。
- emptyDir
- 一時的なディスク領域を利用
- pod削除されると、emptyDirも削除
- マウント先を指定できない
- hostPath
- emptyDirのマウント先を指定できる版
- downwardAPI
- Podの情報をファイルとして配置したファイルをマウント
- projected
- secret/configMap/downwardAPI/serviceAccountTokenを1つにまとめたディレクトを作成し、マウント
Volumeを残すことができないので、Podを削除する際は気をつけないとダメですね。
ログをファイルとして保存するなら、一時的にVolumeが良いのですかね。
ただ、定期的に外部ストレージに移さないといけないですので、手間です。
(そもそも、ログはストリームにして外部サービスに流すのがベスト)プロダクトとしては、あんまり使い道ない...?
PresistentVolumeの種類
外部の永続ボリュームを利用します。例えば、下記の種類があります。
- GCE Persistent Disk
- AWS Elastic Block Store
- NFS
- iSCSI
- Ceph
- OpenStack Cinder
- GlusterFS
一足遅れて Kubernetes を学び始める - 06. workloads その2 -では、NFSを使いましたね。
PersistentVolumeの作成方法は、外部の永続ボリュームによって違うのですが、共通して言えるところもあるみたいなので、
そこを書いてみます。
- ラベル
- PersistentVolumeをラベリングすることで、指定しやすくする
- 容量
- Volumeで要求する容量。最も小さい容量からアサインされる。
- アクセスモード
- ReadWriteOnce
- 単一ノードからRead/Writeが可能
- ReadOnlyMany
- 複数ノードからReadが可能
- ReadWriteMany
- 複数ノードからRead/Writeが可能
- Reclaim Policy
- Volumeを使い終わったあと、破棄するか再利用するかのポリシー
- Delete
- PersistentVolumeの実体を削除
- Retain
- PersistentVolumeの実体を残さず保持
- 再度マウントされない
- Recycle
- PersistentVolumeのデータを削除し、再利用可能にする
- 再度マウントされる
- (廃止予定で、DynamicProvisioningを利用すること)
- StorageClass
- 各プロバイザーが提供するストレージの型
- 基本的に自動作成されている
PersistentVolumeClaim
実際に、PresistentVolumeを使うためには、PresistentVolumeClaimで要求を出す必要があります。
必要な項目は、下記です。
- ラベルセレクタ
- ラベルでフィルタリング
- 容量
- 求めている容量
- アクセスモード
- PresistentVolumeのアクセスモードを参照
- StorageClass
- PresistentVolumeのStorageClassを参照
要求を満たしたVolumeがRetainPolicyだった場合、Claimを削除した時点で「Released」になります。
最後に
今回は、書籍をそのまま書いた感じになりました。
実際に試したのは、一足遅れて Kubernetes を学び始める - 06. workloads その2 -です。
まあ、あんまり深くはハマらない方が良いのではと思いました。
- 投稿日:2019-05-27T19:10:21+09:00
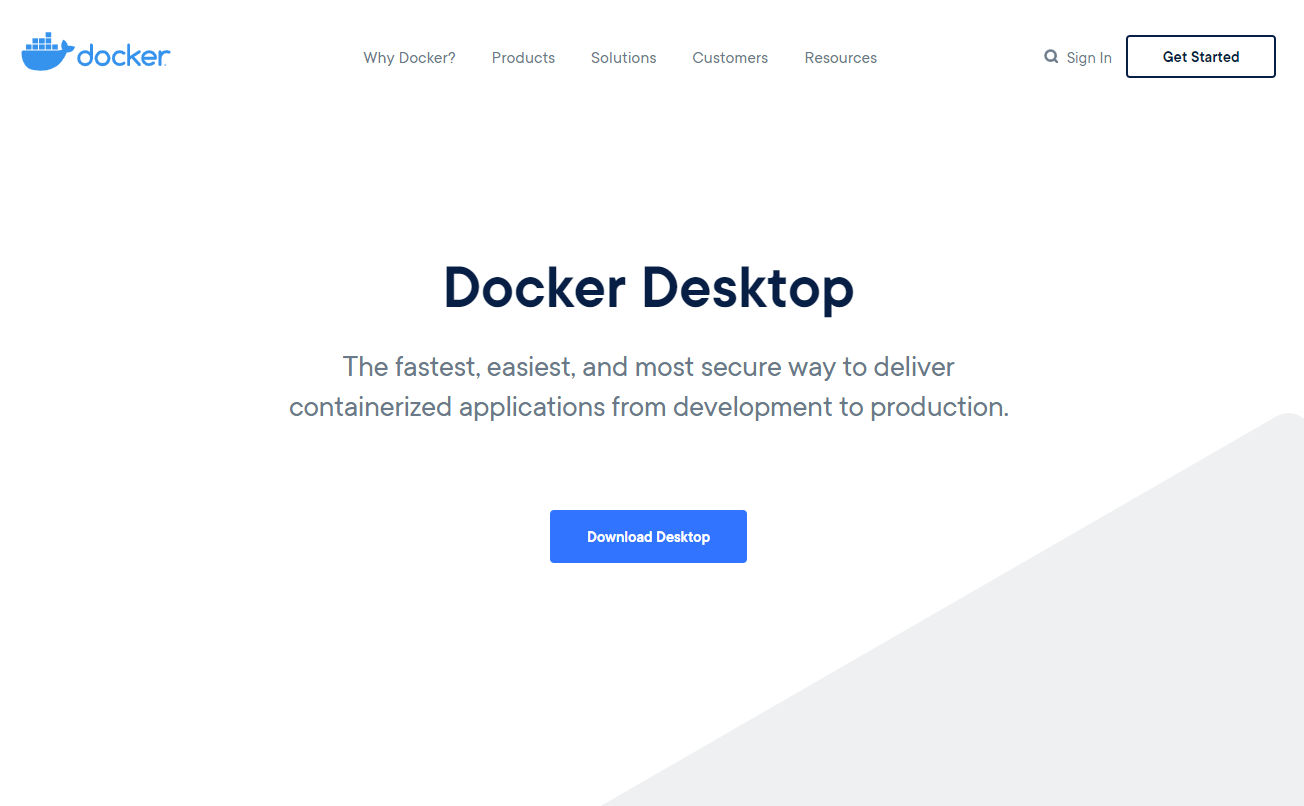
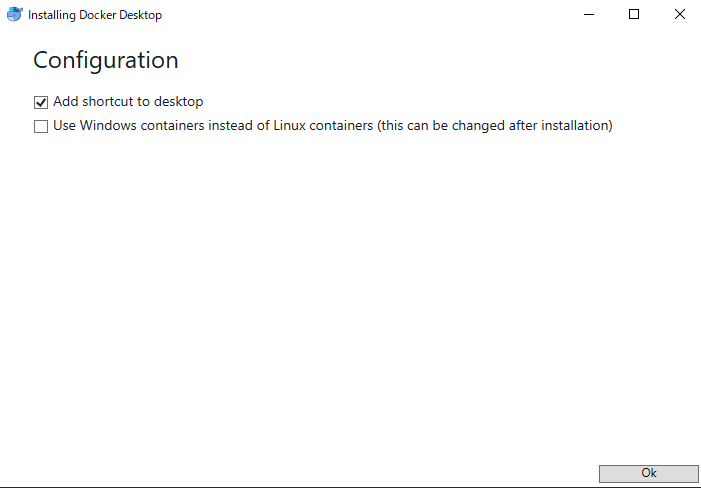
Docker For Desktop セットアップ
概要
- Linux以外でDockerを使ったことがなかったのでWindows版の導入メモ
- 少し前まではDockerForWindowsという名称だった
- 所感として結構インストールつまづく印象
- インストールするとWindowsがすっごい重くなるので注意
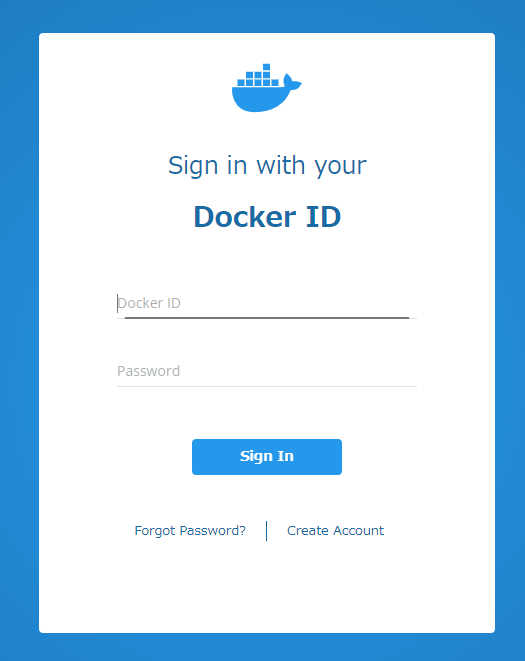
サインイン
以下からexeをダウンロード
https://www.docker.com/products/docker-desktopdockerhubのIDは作成済みの前提
ダウンロード
インストール
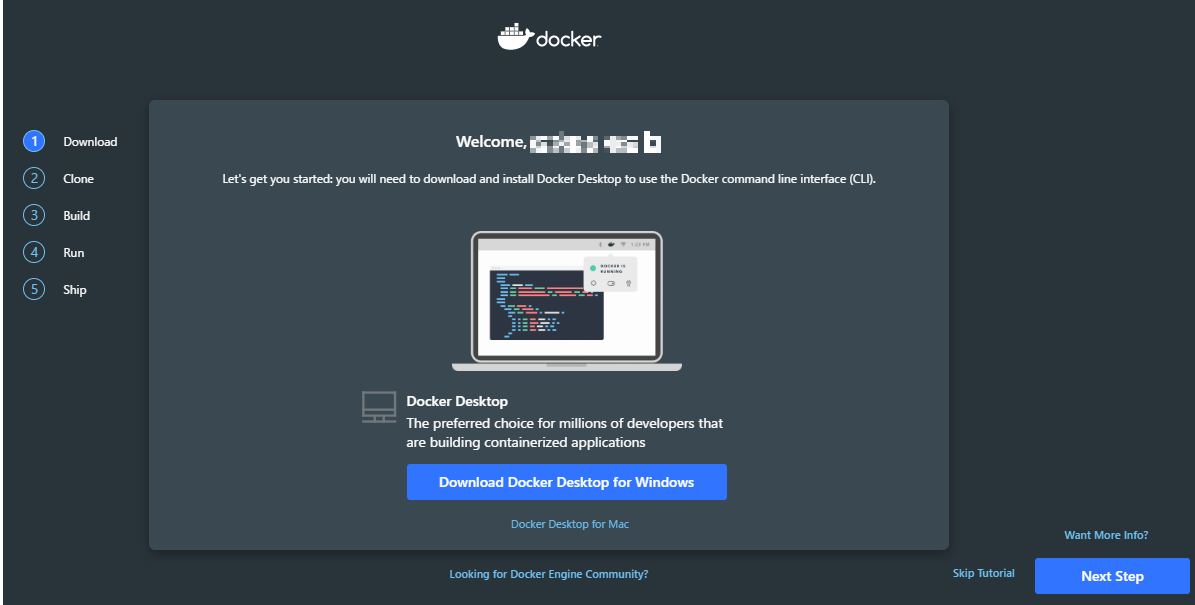
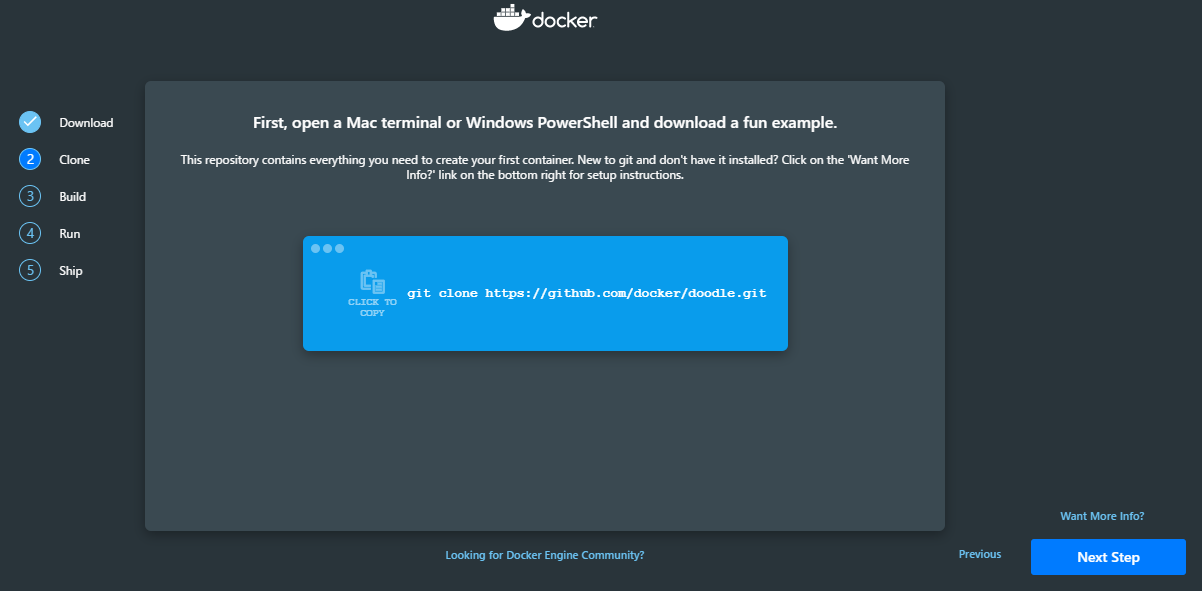
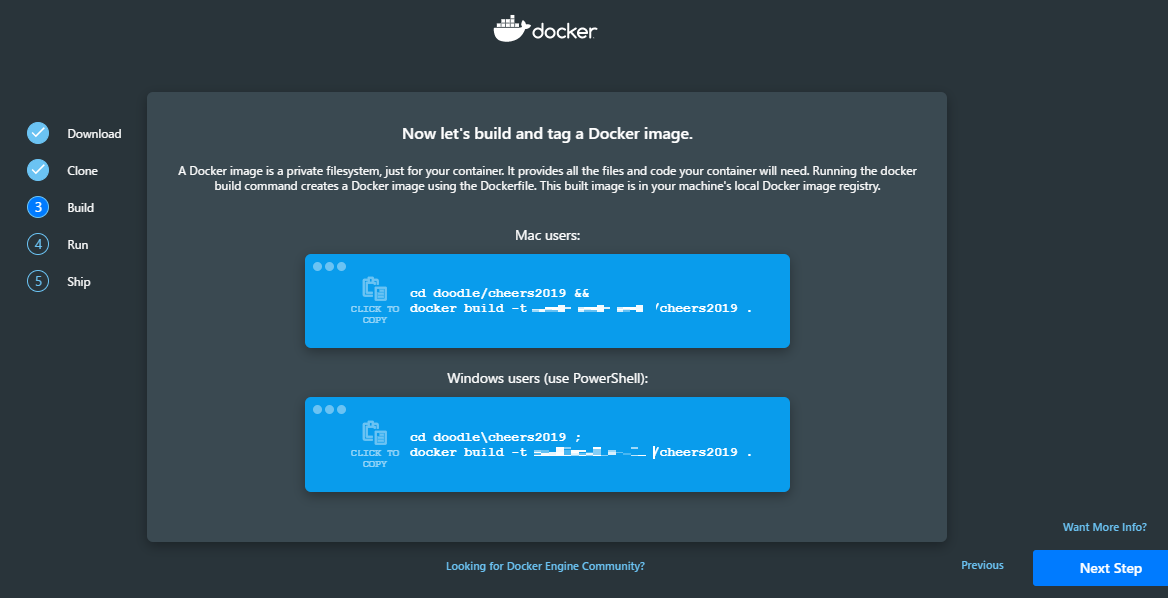
セットアップ
- ステップに従って設定
- 画面の案内通りgit cloneでリソースをダウンロードしてくる
$ ls -l
total 8
drwxr-xr-x 1 ezaki 1049089 0 5月  24 17:44 birthday2019/
drwxr-xr-x 1 ezaki 1049089 0 5月  24 17:44 cheers2019/
- 画面の案内通りビルドをする
- ここで結構つまづく
遭遇したエラー
エラー:1
$ docker build -t hoge/cheers2019 .
unable to prepare context: unable to evaluate symlinks in Dockerfile path: GetFileAttributesEx C:\repo\doodle\Dockerfile: The system cannot find the file specif                                     ied.
エラー:2
$ docker build -t hoge/cheers2019 .
error during connect: Post http://%2F%2F.%2Fpipe%2Fdocker_engine/v1.39/buildbuildargs=%7B%7D&cachefrom=%5B%5D&cgroupparent=&cpuperiod=0&cpuquota=0&cpusetcpus=&
cpusetmems=&cpushares=0&dockerfile=Dockerfile&labels=%7B%7D&memory=0&memswap=0&networkmode=default&rm=1&session=nvkpxkntbjfq7qlbs19i0jtm5&shmsize=0&t=hoge%2Fcheers2019&target=&ulimits=null&version=1: open //./pipe/docker_engine:The system cannot find the file specified. In the default daemon configuration on Windows, the docker client must be run elevated to connect. This error may also indicate that the docker daemon is not running.
- 以下の記事などを参考
https://qiita.com/k_akimoto/items/182418e2d200616e7db6
https://qiita.com/itrec0626/items/aa4d1521b5a7cc20ffad
ビルド出力
- ビルドが成功すると以下のような出力
$ cd /c/repo/doodle/cheers2019/;docker build -t hoge/cheers2019 .
Sending build context to Docker daemon  13.31kB
Step 1/9 : FROM golang:1.11-alpine AS builder
1.11-alpine: Pulling from library/golang
e7c96db7181b: Pulling fs layer
5297bd381816: Pulling fs layer
3a664477889c: Pulling fs layer
f235158035b8: Pulling fs layer
0ebee1528520: Pulling fs layer
f235158035b8: Waiting
0ebee1528520: Waiting
3a664477889c: Verifying Checksum
3a664477889c: Download complete
5297bd381816: Verifying Checksum
5297bd381816: Download complete
e7c96db7181b: Verifying Checksum
e7c96db7181b: Download complete
0ebee1528520: Verifying Checksum
0ebee1528520: Download complete
e7c96db7181b: Pull complete
5297bd381816: Pull complete
3a664477889c: Pull complete
f235158035b8: Verifying Checksum
f235158035b8: Download complete
f235158035b8: Pull complete
0ebee1528520: Pull complete
Digest: sha256:ef839362daebf5e5b03113d48a7f02f42f5090ccf4eb5f2e915db3fc1307bdbd
Status: Downloaded newer image for golang:1.11-alpine
 ---> 419986b2b50a
Step 2/9 : RUN apk add --no-cache git
 ---> Running in 34d76c6cd0b6
fetch http://dl-cdn.alpinelinux.org/alpine/v3.9/main/x86_64/APKINDEX.tar.gz
fetch http://dl-cdn.alpinelinux.org/alpine/v3.9/community/x86_64/APKINDEX.tar.gz
(1/6) Installing nghttp2-libs (1.35.1-r0)
(2/6) Installing libssh2 (1.8.2-r0)
(3/6) Installing libcurl (7.64.0-r1)
(4/6) Installing expat (2.2.6-r0)
(5/6) Installing pcre2 (10.32-r1)
(6/6) Installing git (2.20.1-r0)
Executing busybox-1.29.3-r10.trigger
OK: 20 MiB in 21 packages
Removing intermediate container 34d76c6cd0b6
 ---> 9cb059355c9a
Step 3/9 : RUN go get github.com/pdevine/go-asciisprite
 ---> Running in e62fbe601402
Removing intermediate container e62fbe601402
 ---> d3cc7008df60
Step 4/9 : WORKDIR /project
 ---> Running in ea3a89875300
Removing intermediate container ea3a89875300
 ---> d637b4e5abdc
Step 5/9 : COPY cheers.go .
 ---> e87625cc8a98
Step 6/9 : RUN CGO_ENABLED=0 GOOS=linux go build -a -ldflags '-extldflags "-static"' -o cheers cheers.go
 ---> Running in 46ebb8eae832
Removing intermediate container 46ebb8eae832
 ---> b96addf52dc8
Step 7/9 : FROM scratch
 --->
Step 8/9 : COPY --from=builder /project/cheers /cheers
 ---> 726445b04079
Step 9/9 : ENTRYPOINT ["/cheers"]
 ---> Running in 07124cd1d54f
Removing intermediate container 07124cd1d54f
 ---> 790a722d67bc
Successfully built 790a722d67bc
Successfully tagged hoge/cheers2019:latest
SECURITY WARNING: You are building a Docker image from Windows against a non-Windows Docker host. All files and directories added to build context will have '-rwxr-xr-x' permissions. It is recommended to double check and reset permissions for sensitive files and directories.
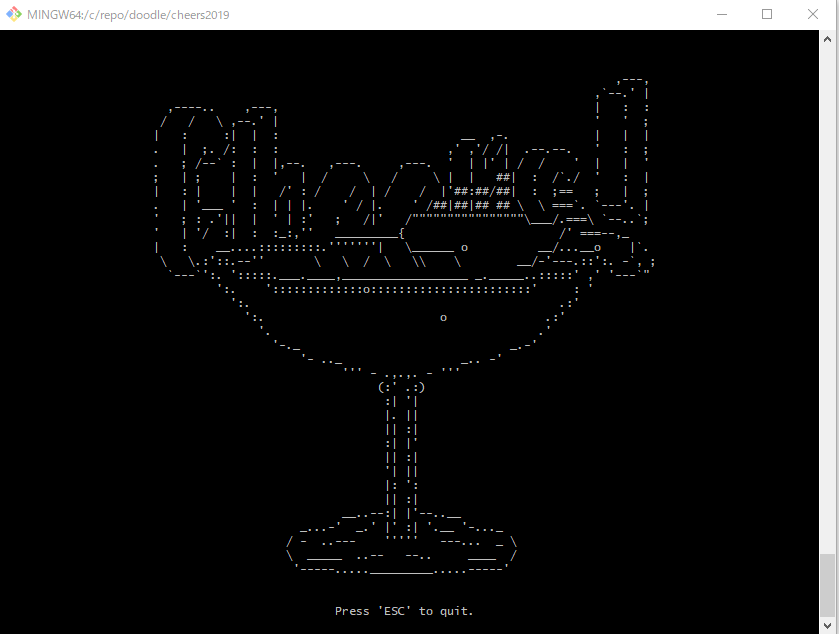
- コンテナ作成
$ docker run -it --rm hoge/cheers2019
the input device is not a TTY.  If you are using mintty, try prefixing the command with 'winpty'

$ winpty docker run -it --rm hoge/cheers2019
- 成功すると以下のような出力
- ログイン
$ docker login ; docker push hoge/cheers2019
Authenticating with existing credentials...
Login Succeeded
The push refers to repository [docker.io/hoge/cheers2019]
83bd27c95501: Preparing
83bd27c95501: Pushed
latest: digest: sha256:a2680c711706d56aad980e7d5ae8a1714e62f06bf02e7544d51fa7b740d7c3a1 size: 528
終わり
- 導入成功


- 投稿日:2019-05-27T19:05:15+09:00
Sonatype Nexusのリポジトリー検証(Docker/Maven/NPM)
はじめに
業務でプライベートなリポジトリーとしてSonatype Nexus(OSS)を使っている。
対象はDocker/Maven/NPMである。
使い方を考える目的で検証した内容を残す。(Nexus3前提。)時間がないけど要点を記録しようと作成した記事です。、あわてて作成したため、ミス等が含まれている可能性がそこそこあります。。
基本情報
リポジトリーのフォーマット
Sonatype Nexusがサポートするリポジトリーのフォーマットはいろいろある。
今回は、Docker/Maven/NPMを対象に検討。
Supported Formatsリポジトリーのタイプ
概念
はじめに覚えておく必要がある概念として、Nexusのリポジトリーのタイプがある。
- Group:HostedやProxyタイプのリポジトリーをまとめて1つのURLを提供できる。
- Hosted:プライベートなリポジトリーとして定義するもの。NexusにHostされる。
- Proxy:キャッシュ・プロキシー的に利用できるリポジトリー。(LAN内で開発を行う場合等でインターネットに接続可能なサーバーや端末が制限されるようなケースで、インターネット上のリポジトリーの情報をcacheしLAN内に共有する等の対応がとれる。)
正式な説明は以下を参照。
Lesson 3: Repository Types制約
- Groupを利用すると、情報を取得(docker pull、mvn install、npm install)する際に指定するURLを1つに統一できる。
- しかし、情報を登録(docker push、mvn deploy、npm publish)する際に指定するURLとしては利用できない。(deploy先のURLはhostedのURLを個別に指定する必要がある。)
機能拡張要望のIssueが起票されている。voteが37ほどある。(以下参照。)
allow deployment to group repositories設定手順
基本的には下記を参考にした。
Using Nexus 3 as Your Repository – Part 1: Maven Artifacts
Using Nexus 3 as Your Repository – Part 2: npm Packages
Using Nexus 3 as Your Repository – Part 3: Docker Images設定例(検証メモ)
(注)以降の設定例はあくまで簡易検証の結果のため、本番運用の際には、単位や名前などはしっかり考える必要がある。(特に、私自身はNPMはあまり詳しくないので、詳しい人と相談したいところ。)
Nexusリポジトリー構造
Name Format Type URL port docker-all docker group https://example.com/nexus/repository/docker-all 5000 docker-myrepo docker hosted https://example.com/nexus/repository/docker-myrepo 5001 docker-hub docker proxy https://example.com/nexus/repository/docker-hub maven-public maven2 group https://example.com/nexus/repository/maven-public maven-mysnapshots maven2 hosted https://example.com/nexus/repository/maven-mysnapshots maven-myreleases maven2 hosted https://example.com/nexus/repository/maven-myreleases maven-central maven2 proxy https://example.com/nexus/repository/maven-central npm-all npm group https://example.com/nexus/repository/npm-all npm-myrepo npm hosted https://example.com/nexus/repository/npm-myrepo npm-registry npm proxy https://example.com/nexus/repository/npm-registry ※docker-hub:https://registry-1.docker.io
※maven-central:https://repo1.maven.org/maven2/
※npm-registry:https://registry.npmjs.org/Docker
Nexusリポジトリー構造
- 「docker-all」グループに「docker-myrepo」と「docker-hub」を含める
クライアントからのアクセス
イメージの取得(groupのreositoryで指定したポートを使う)
$ docker login example.com:5000
$ docker pull example.com:5000/docker-all/jboss:15.0.1.Final
イメージの登録(hostedのrepositoryで指定したポートを使う)
$ docker push example.com:5001/docker-myrepo/jboss:15.0.1.FinalMaven
Nexusリポジトリー構造
- 「maven-public」グループに「maven-central」と「maven-mysnapshots」と「maven-myreleases」を追加。
クライアントからのアクセス
- mirrorとしてライブラリー類を取得するためのURLについてはsettings.xmlにて指定
settings.xml<mirrors> <mirror> <id>my-nexus</id> <name>My Central Mirror</name> <url>http://example.com/nexus/repository/maven-public/</url> <mirrorOf>central</mirrorOf> </mirror> </mirrors>mirrorの使い方そのものについては以下を参照。
Apache MavenでリポジトリのMirrorを設定する
- デプロイ先は、pom.xmlの「distributionManagement」セクションで指定。(認証情報は必要に応じてsettings.xmlに指定。)
pom.xml<distributionManagement> <repository> <id>nexus</id> <name>maven-releases</name> <url>https://example.com/nexus/repository/maven-myreleases/</url> </repository> <snapshotRepository> <id>nexus</id> <name>maven-snapshots</name> <url>https://example.com/nexus/repository/maven-snapshots/</url> </snapshotRepository> </distributionManagement>NPM
Nexusリポジトリー構造
- 「npm-all」グループに「npm-myrepo」と「npm-registry」を登録。
クライアントからのアクセス
- .npmrcにinstall時にパッケージの取得用のproxyのURLを追加。
- _authに指定している値はユーザー認証情報をbase64で暗号化したもの。(echo -n 'myuser:mypassword' | openssl base64、等で生成する。)
- NexusのサーバーのRealmsの設定画面にて事前に「npm Bearer Token Realm」を有効にしておく必要がある。
.npmrcregistry=https://example.com/nexus/repository/npm-all/ _auth="YWRtaW4vYWRtaW4xMjM="
- package.jsonにPublish用のリポジトリーを追加(下記の"publishConfig"セクションを参照。)
package.json{ "name": "hello-hanako", "version": "0.0.1", "description": "self study to use npm repositories", "main": "index.js", "author": "Hanako Yamada", "license": "MIT", "devDependencies": { "http": "0.0.0" }, "publishConfig": { "registry": "https://example.com/nexus/repository/npm-myrepo/" } }以上。
- 投稿日:2019-05-27T18:58:32+09:00
Windows + VirtualBox + vagrant + Ubuntu + Docker + Docker Compose で Ruby on Rails + PostgreSQL の開発環境を構築する手順
タイトルにあるものを使って、Rails + PostgreSQL の環境を構築する手順を書きました。
Rails のソースコードは Windows のローカルにて管理する構成とします。
※Windowsのディレクトリを仮想環境へマウントし、Docker コンテナではそのマウント先を参照させる「Docker Community Edition for Windows を入れる前に確認すること」
(https://qiita.com/lmatsul/items/9f05e76e22d862eb8620)
で書きましたが、Windows 上での Docker 実行が出来なかったので、
仕方なく仮想環境上で Docker を試すことにしました。Windows 10 の Windows Subsystem for Linux (WSL) 上でも試そうかと思いましたが、
以下の記事のように出来ないこともあるようなので、無駄足を踏まないように最初から仮想環境を選びました…。
https://qiita.com/guchio/items/3eb0818df44fdbab3d14仮想環境の構築
VirtualBox をインストールする
https://www.virtualbox.org/wiki/Downloads
※今回試したのは バージョン 5.0.26 r108824vagrant をインストールする
https://www.vagrantup.com/downloads.html
※今回試したのは バージョン 2.2.4今回の環境用のディレクトリを作成
C:\Users\(ユーザー名)\dev_rails で作成したとします
最終的な構成は以下のようになります
構成dev_rails ├ rails │ ├ src │ │ ├ Gemfile │ │ ├ Gemfile.lock │ │ └ (ここにRailsのソースコード一式が入る) │ ├ docker-compose.yml │ ├ Dockerfile │ └ entrypoint.sh └ vagrant └ VagrantfileRuby on Rails 環境構築用のディレクトリを作成
dev_rails 配下へ Ruby on Rails 環境構築用のディレクトリを作成します
今回は dev_rails\rails としますVagrantFile の作成
dev_rails 配下へ Vagrantfile を置くためのディレクトリを作成します
今回は dev_rails\vagrant としますコマンドプロンプトを起動し、作成したディレクトリへ移動して
vagrant initとコマンドを実行しますVagrantfile が作成されるので、以下のように修正して保存します
Vagrantfile# -*- mode: ruby -*- # vi: set ft=ruby : # All Vagrant configuration is done below. The "2" in Vagrant.configure # configures the configuration version (we support older styles for # backwards compatibility). Please don't change it unless you know what # you're doing. Vagrant.configure("2") do |config| # The most common configuration options are documented and commented below. # For a complete reference, please see the online documentation at # https://docs.vagrantup.com. # Every Vagrant development environment requires a box. You can search for # boxes at https://vagrantcloud.com/search. - config.vm.box = "base" + # Vagrant Box で 「ubuntu/bionic64(ubuntu-18.04)」を指定 + config.vm.box = "ubuntu/bionic64" # Disable automatic box update checking. If you disable this, then # boxes will only be checked for updates when the user runs # `vagrant box outdated`. This is not recommended. # config.vm.box_check_update = false # Create a forwarded port mapping which allows access to a specific port # within the machine from a port on the host machine. In the example below, # accessing "localhost:8080" will access port 80 on the guest machine. # NOTE: This will enable public access to the opened port - # config.vm.network "forwarded_port", guest: 80, host: 8080 + # Port転送(Ruby on Rails 用) + config.vm.network "forwarded_port", guest: 3000, host: 3000 # Create a forwarded port mapping which allows access to a specific port # within the machine from a port on the host machine and only allow access # via 127.0.0.1 to disable public access # config.vm.network "forwarded_port", guest: 80, host: 8080, host_ip: "127.0.0.1" # Create a private network, which allows host-only access to the machine # using a specific IP. - # config.vm.network "private_network", ip: "192.168.33.10" + # IPアドレスの固定 + config.vm.network "private_network", ip: "192.168.33.10" # Create a public network, which generally matched to bridged network. # Bridged networks make the machine appear as another physical device on # your network. # config.vm.network "public_network" # Share an additional folder to the guest VM. The first argument is # the path on the host to the actual folder. The second argument is # the path on the guest to mount the folder. And the optional third # argument is a set of non-required options. - # config.vm.synced_folder "../data", "/vagrant_data" + # Windows上の rails ディレクトリを /vagrant_data としてマウント + config.vm.synced_folder "../rails", "/vagrant_data" # Provider-specific configuration so you can fine-tune various # backing providers for Vagrant. These expose provider-specific options. # Example for VirtualBox: # # config.vm.provider "virtualbox" do |vb| # # Display the VirtualBox GUI when booting the machine # vb.gui = true # # # Customize the amount of memory on the VM: # vb.memory = "1024" # end # # View the documentation for the provider you are using for more # information on available options. # Enable provisioning with a shell script. Additional provisioners such as # Puppet, Chef, Ansible, Salt, and Docker are also available. Please see the # documentation for more information about their specific syntax and use. # config.vm.provision "shell", inline: <<-SHELL # apt-get update # apt-get install -y apache2 # SHELL end仮想環境の起動
コマンドプロンプトを起動し、Vagrantfile が置かれている場所で
vagrant upコマンドを実行して仮想環境を起動します$ cd dev_rails/vagrant $ vagrant up起動したらターミナルなどで
192.168.33.10へ SSH 接続します
ログインID はvagrant
秘密鍵はvagrant upを実行した配下の .vagrant\machines\default\virtualbox にある private_key を使用してくださいDocker CE のインストール
https://docs.docker.com/install/linux/docker-ce/ubuntu/#install-docker-ce
を参考にインストールしていきますDocker には
CE(コミュニティエディション)[無償版]
と
EE(エンタープライズエディション)[有償版]
があり、Docker-CE は無償版となります。Docker リポジトリの登録
apt-get で docker-ce をインストールできるようにするために、以下の手順でリポジトリの設定を追加します。
# パッケージの更新
$ sudo apt-get update
# HTTPS利用のためのパッケージをインストール
$ sudo apt-get install apt-transport-https ca-certificates curl software-properties-common
# Docker公式の GPG を追加
$ curl -fsSL https://download.docker.com/linux/ubuntu/gpg | sudo apt-key add -
# 追加されたことを確認
$ sudo apt-key fingerprint 0EBFCD88
# リポジトリの設定
$ sudo add-apt-repository \
   "deb [arch=amd64] https://download.docker.com/linux/ubuntu \
   $(lsb_release -cs) \
   stable"
Docker CE のインストール
以下のコマンドで Docker CE をインストールします
# パッケージの更新
$ sudo apt-get update
# Docker CE のインストール
$ sudo apt-get install docker-ce
# hello-world イメージを実行して動作確認
$ sudo docker container run hello-world
バージョンを指定してインストールしたい場合は、以下のようにバージョンを確認してから、バージョン指定してインストールする
# バージョン一覧を表示
$ apt-cache madison docker-ce
# バージョンを指定して Docker CE をインストール
$ sudo apt-get install docker-ce=<VERSION>
Docker Compose のインストール
https://docs.docker.com/compose/install/
を参考にインストールしていきますDocker Compose とは、複数のコンテナを使う Docker アプリケーションを定義・実行するためのツールです。
# Docker compose のダウンロード
sudo curl -L "https://github.com/docker/compose/releases/download/1.23.2/docker-compose-$(uname -s)-$(uname -m)" -o /usr/local/bin/docker-compose
# 実行権限の付与
sudo chmod +x /usr/local/bin/docker-compose
# 動作確認(バージョン情報が表示されればOK)
$ docker-compose --version
docker-compose version 1.23.2, build 1110ad01
Ruby on Rails 環境の構築
https://docs.docker.com/compose/rails/
を参考に進めますDockerfile の作成
以下の内容のファイルをWindows側で dev_rails\rails へ作成します
※文字コードはUTF-8、改行コードはLFで作成するDockerfile# ベースイメージを Ruby 2.5 へ指定 # ベースイメージは https://github.com/docker-library/official-images/tree/master/library を参照 FROM ruby:2.5 # apt-get を更新し、Node.js、PostgreSQLクライアント、bundler をインストール RUN apt-get update -qq && \ apt-get install -y nodejs postgresql-client && \ gem install bundler # ./src をコンテナ内の /vagrant_data/src として追加し、作業ディレクトリを指定して bundle install する ADD ./src /vagrant_data/src WORKDIR /vagrant_data/src RUN bundle install # entrypoint.sh をコピーし、最初に実行されるものとして登録する COPY entrypoint.sh /usr/bin/ ENTRYPOINT ["entrypoint.sh"] # ポートの公開 EXPOSE 3000 # Rails コマンドでWebサーバを起動(ENTRYPOINTで指定された entrypoint.sh へ引き渡される) CMD ["rails", "server", "-b", "0.0.0.0"]Rails のソースコード用のディレクトリを作成
今回は dev_rails\rails\src とします
Gemfile の作成
上記で作成したディレクトリに以下の内容のファイルを
Gemfileというファイル名で作成します
※文字コードはUTF-8、改行コードはLFで作成するGemfilesource 'https://rubygems.org' gem 'rails', '~>5'Gemfile.lock の作成
Gemfile と同じ階層に
Gemfile.lockというファイル名で空のファイルを作成します
※文字コードはUTF-8、改行コードはLFで作成するentrypoint.sh の作成
Rails固有の問題を修正するための entrypoint.sh を
Dockerfile と同じ階層へ作成します。
このスクリプトはコンテナが起動されるたびに実行されます。
※文字コードはUTF-8、改行コードはLFで作成するentrypoint.sh#!/bin/bash set -e # Rails 用の server.pid が存在する場合は削除する # (server.pid が存在したままだと起動中と判断されてしまうため) rm -f /vagrant_data/src/tmp/pids/server.pid # CMDで渡されたコマンドを実行 exec $@docker-compose.yml の作成
Docker Compose 用の設定ファイル(docker-compose.yml)を
Dockerfile と同じ階層へ作成します。
データベースとWebサーバの構成設定を記述しています。
※文字コードはUTF-8、改行コードはLFで作成するdocker-compose.ymlversion: '3' services: db: # 使用するイメージを postgres に指定 image: postgres # データベースのデータディレクトリを別のVolumeへ逃して永続化 volumes: - data:/var/lib/postgresql/data web: # ビルドパスの指定(Dockerfileのある位置を指定する) build: . # Railsのソースコードディレクトリをマウント volumes: - ./src:/vagrant_data/src # ポートの設定 ports: - "3000:3000" # dbが起動後に起動するように依存関係を設定する depends_on: - db volumes: # データベースのデータ保存用Volume data: external: true
- ハマった点 (T_T)
最初、以下のようにWindows上のディレクトリへPostgreSQLのデータディレクトリをマウントしようとしたが、
services:
  db:
    image: postgres
    volumes:
      - ./tmp/db:/var/lib/postgresql/data
とすると、以下のようなエラーにハマった。
FATAL:  data directory "/var/lib/postgresql/data" has wrong ownership
HINT:  The server must be started by the user that owns the data directory.
データの永続化のためには、今回のように Volume を作成してそこで保持するようにすることで対処可能でした。
Rails プロジェクトの作成(まだRailsのソースコードを作成していない場合)
sudo docker-compose run web rails new . --force --no-deps --database=postgresqlRails の設定ファイルを編集
dev_rails\rails\src\config\database.yml にある Rails のデータベース設定ファイルを以下のように編集します。
database.yml# PostgreSQL. Versions 9.1 and up are supported. # # Install the pg driver: # gem install pg # On OS X with Homebrew: # gem install pg -- --with-pg-config=/usr/local/bin/pg_config # On OS X with MacPorts: # gem install pg -- --with-pg-config=/opt/local/lib/postgresql84/bin/pg_config # On Windows: # gem install pg # Choose the win32 build. # Install PostgreSQL and put its /bin directory on your path. # # Configure Using Gemfile # gem 'pg' # default: &default adapter: postgresql encoding: unicode # For details on connection pooling, see Rails configuration guide # http://guides.rubyonrails.org/configuring.html#database-pooling pool: <%= ENV.fetch("RAILS_MAX_THREADS") { 5 } %> + host: db + username: postgres + password: development: <<: *default database: src_development # The specified database role being used to connect to postgres. # To create additional roles in postgres see `$ createuser --help`. # When left blank, postgres will use the default role. This is # the same name as the operating system user that initialized the database. #username: src # The password associated with the postgres role (username). #password: # Connect on a TCP socket. Omitted by default since the client uses a # domain socket that doesn't need configuration. Windows does not have # domain sockets, so uncomment these lines. #host: localhost # The TCP port the server listens on. Defaults to 5432. # If your server runs on a different port number, change accordingly. #port: 5432 # Schema search path. The server defaults to $user,public #schema_search_path: myapp,sharedapp,public # Minimum log levels, in increasing order: # debug5, debug4, debug3, debug2, debug1, # log, notice, warning, error, fatal, and panic # Defaults to warning. #min_messages: notice # Warning: The database defined as "test" will be erased and # re-generated from your development database when you run "rake". # Do not set this db to the same as development or production. test: <<: *default database: src_test # As with config/secrets.yml, you never want to store sensitive information, # like your database password, in your source code. If your source code is # ever seen by anyone, they now have access to your database. # # Instead, provide the password as a unix environment variable when you boot # the app. Read http://guides.rubyonrails.org/configuring.html#configuring-a-database # for a full rundown on how to provide these environment variables in a # production deployment. # # On Heroku and other platform providers, you may have a full connection URL # available as an environment variable. For example: # # DATABASE_URL="postgres://myuser:mypass@localhost/somedatabase" # # You can use this database configuration with: # # production: # url: <%= ENV['DATABASE_URL'] %> # production: <<: *default database: src_production username: src password: <%= ENV['SRC_DATABASE_PASSWORD'] %>Docker Compose
ビルド
192.168.33.10 へ SSH 接続しているターミナルで
docker-compose.ymlがあるディレクトリへ移動し、以下のコマンドでビルドします。$ cd /vagrant_data $ sudo docker-compose buildデータベースのデータ保存用Volumeの作成
ビルドが完了したら以下のコマンドでデータベースのデータ保存用の Volume を作成をします
$ sudo docker volume create --name=dataデータベースとWebサーバを起動
Volume の作成が完了したら以下のコマンドで各サービスを起動します
# -d を付けることでバックグラウンドで実行されます
$ sudo docker-compose up -d
データベースとWebサーバの起動確認
$ sudo docker-compose ps
# 以下のような表示で State が Up となっていたら起動成功
       Name                     Command               State           Ports
------------------------------------------------------------------------------------
vagrant_data_db_1    docker-entrypoint.sh postgres    Up      5432/tcp
vagrant_data_web_1   entrypoint.sh rails server ...   Up      0.0.0.0:3000->3000/tcp
データベースの作成
sudo docker-compose run web rake db:createRails の起動確認
ブラウザで
http://192.168.33.10:3000へアクセスして Rails の画面が表示されれば、環境構築完了です。その他
- コンテナがうまく起動しない場合、
sudo docker-compose logsでログを確認する- コンテナを終了させたい場合、
sudo docker-compose downで終了させる- コンテナの中に入りたい場合、
sudo docker-compose exec web bashで入ることができる
(webのところは、docker-compose.yml で記述したサービス名)- Volume の一覧を確認したい場合、
sudo docker volume lsで確認ができる- 特定の Volume を削除したい場合、
sudo docker volume rm [volume name]で削除ができる
- 投稿日:2019-05-27T16:55:32+09:00
動画をサムネ表示して再生させるWebアプリ
概要
動画を一覧表示してサムネをクリックすることで再生できるようしたwebアプリ
依存環境
Flask 1.0+
Bootstarp 4
python 3.4+
pymongo,joblib
MongoDB 3.6+(on Docker)
ffmpeg
(Imagemagic-6)
Linux Mint 19.1にて動作確認使い方
GitHubにてプログラムを公開している。(https://github.com/mimaburao/moviebrowser.git)
- 動画の再生
- データベースの新規作成
- 並び順の変更
- データベースの更新感想
初めてのwebアプリの作成であった。実用的なもの作りたいと溜まっていた動画を中身が3コマくらいで見ることできるアプリが欲しかった。
githubに登録してMicrosoft Visual CODEを利用してみたが便利であった。そして、作った自作のクラスや関数もポップアップ形式で引数などを教えてくれて至れりつくせりである。
Flaskも当然初めてなのだが、webアプリとしてメジャーなDjangoは使ったことがなかった。せっかくなのでシンプルなフレームワークにした。
データベースを用いたプログラムにも挑戦したくてNoSQL系のmongoが面白そうと飛びついた。なれると面白かった。
中でもgithubでreadme.mdには力を入れた。プログラムに機能を追加しては追記していくスタイルとなった。プログラムとはこんなプロセスで出来上がった行くものだろう。
利用面では当初考えていた機能はできたので今回公開してみた。
それにしても動画再生アプリのmpvはショートカット動作の上、シンプルでとっても便利である。参照
Bootstrap公式(https://getbootstrap.com/)
Mongo公式(https://www.mongodb.com/jp)
Flask公式(http://flask.pocoo.org/)
- 投稿日:2019-05-27T01:29:17+09:00
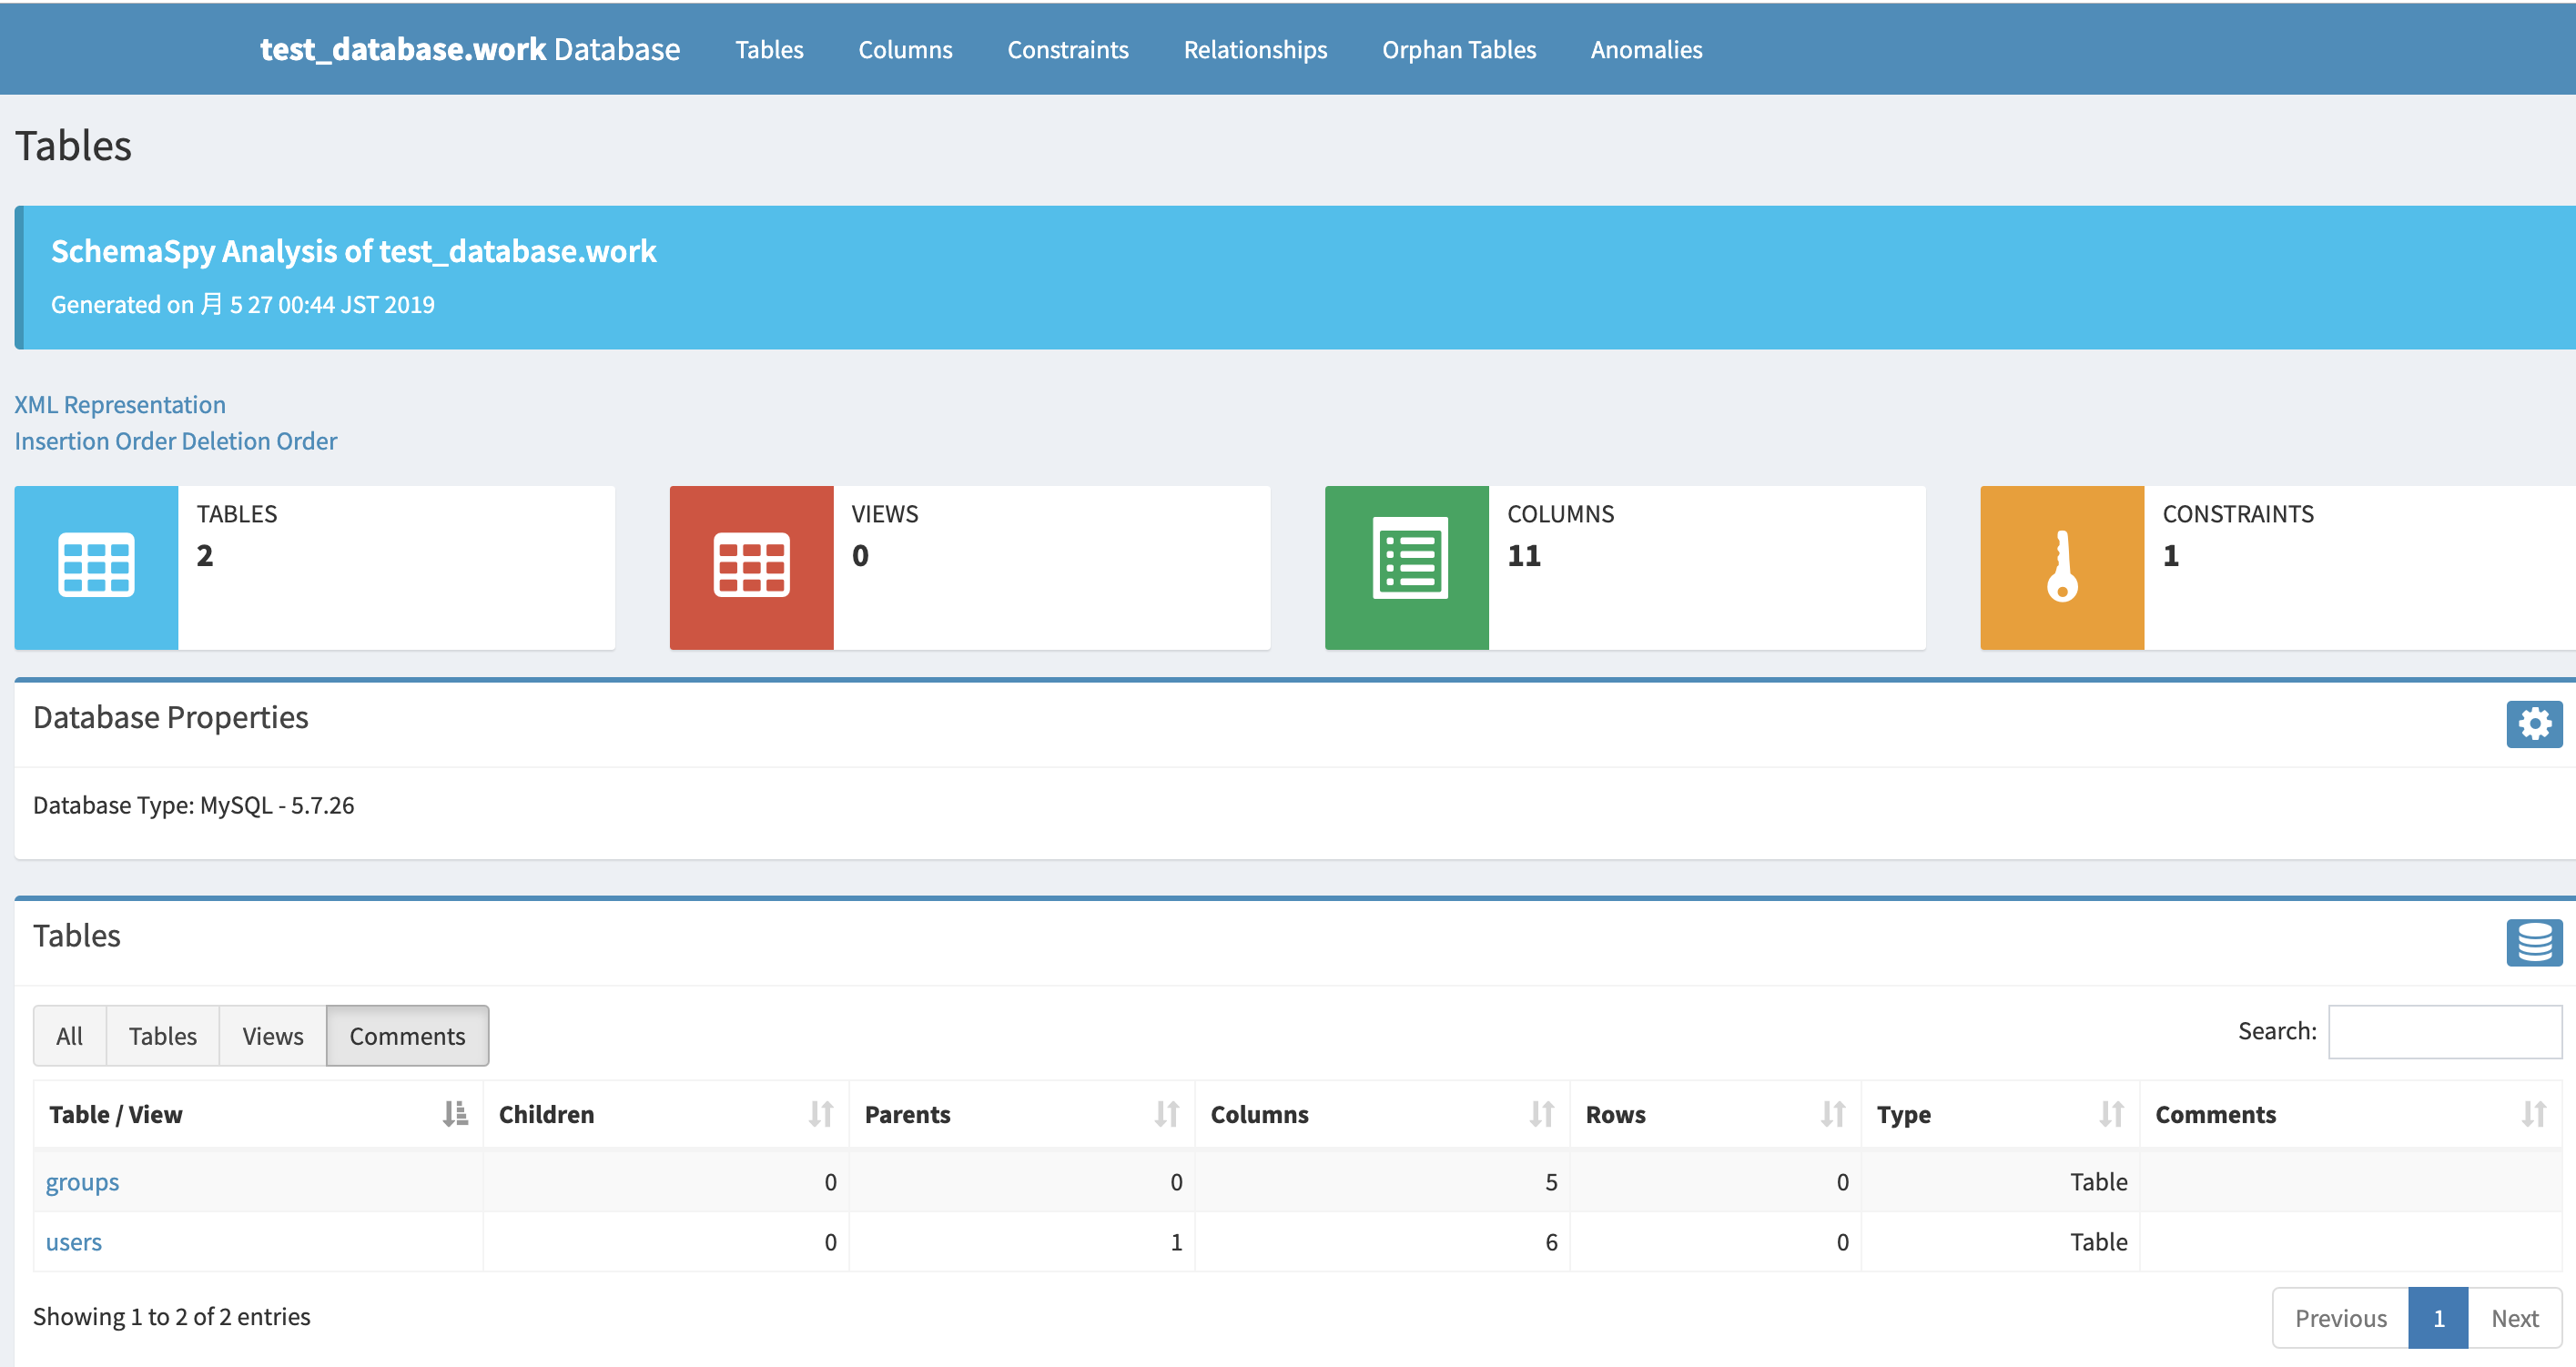
SchemaSpyの環境をdocker-composeで構築
はじめに
ER図作成ツールであるSchemaSpyをdocker環境で構築してみます。
SchemaSpyは以下の点が良さそうです。
1. 既存のDBからリバースできる
2. CUIで実行できる
3. 複数の環境で動作する(Windows / Mac / Unix系OS )githubからクローンしたい方はこちら
環境
以下の環境で検証はしています。
- macOS Mojave 10.14.5
- Docker version 18.09.2, build 6247962
- docker-compose version 1.23.2, build 1110ad01
構成
今回は以下のような構成になります。
.
├── README.md
├── docker
│   ├── mysql
│   │   ├── data
│   │   ├── my.cnf
│   │   └── sql
│   │       └── 001-create-tables.sql
│   ├── nginx
│   │   └── default.conf
│   └── schemaspy
│       ├── Dockerfile
│       └── config
│           └── schemaspy.properties
├── docker-compose.yml
└── schemaspy
    └── (HTMLやJSファイルが自動で作成されます)
手順
1. docker-compose.yml作成
まずは、docker-compose.ymlを作成します。
docker-compose.ymlversion: '3' services: nginx: image: nginx:1.13.9-alpine container_name: schemaspy_nginx volumes: - ./schemaspy:/var/www/html:ro - ./docker/nginx/default.conf:/etc/nginx/conf.d/default.conf:ro ports: - "8081:80" environment: - LANG=ja_JP.UTF-8 - TZ=Asia/Tokyo command: "nginx -g 'daemon off;'" schemaspy: build: ./docker/schemaspy image: treetips/schemaspy-mysql container_name: schemaspy volumes: - ./schemaspy:/app/html:rw - ./docker/schemaspy/config/schemaspy.properties:/app/schemaspy.properties:ro environment: - LANG=ja_JP.UTF-8 - TZ=Asia/Tokyo working_dir: "/app" command: "java -jar schemaspy.jar" mysql: image: mysql:5.7 container_name: mysql_host environment: MYSQL_ROOT_PASSWORD: root MYSQL_DATABASE: test_database MYSQL_USER: docker MYSQL_PASSWORD: docker TZ: 'Asia/Tokyo' command: mysqld --character-set-server=utf8mb4 --collation-server=utf8mb4_unicode_ci volumes: - ./docker/mysql/data:/var/lib/mysql - ./docker/mysql/my.cnf:/etc/mysql/conf.d/my.cnf - ./docker/mysql/sql:/docker-entrypoint-initdb.d ports: - 3306:33062. nginxコンテナ作成
nginxの設定ファイルを作成します。
default.confserver { listen 80 default; server_name localhost; root /var/www/html; charset utf-8; disable_symlinks off; index index.html; access_log off; error_log off; sendfile on; tcp_nodelay on; tcp_nopush on; keepalive_timeout 120s; gzip on; gzip_http_version 1.0; gzip_disable “MSIE [1-6].(?!.*SV1)”; gzip_comp_level 1; gzip_proxied any; gzip_vary on; gzip_buffers 4 8k; gzip_min_length 1100; gzip_types text/plain text/xml text/css application/xml application/xhtml+xml application/rss+xml application/atom_xml application/json application/javascript application/x-javascript application/x-httpd-php; }3. SchemaSpyコンテナ作成
Schemaspyコンテナを作成します。コンテナ用のDockerfileとDB接続情報などを記載したconfigファイルを用意します。
DockerfileFROM openjdk:8u121-jdk-alpine ENV DRIVER_URL http://central.maven.org/maven2/mysql/mysql-connector-java/5.1.45/mysql-connector-java-5.1.45.jar ENV APP_URL https://github.com/schemaspy/schemaspy/releases/download/v6.0.0-rc2/schemaspy-6.0.0-rc2.jar WORKDIR /app RUN apk --update add graphviz ttf-dejavu && \ apk --update add --virtual .builddep tzdata wget libressl && \ cp /usr/share/zoneinfo/Asia/Tokyo /etc/localtime && \ wget -O mysql-connector-java.jar ${DRIVER_URL} && \ wget -O schemaspy.jar ${APP_URL} && \ apk del .builddep && \ rm -rf /var/cache/apk/*schemaspy.properties# type of database. Run with -dbhelp for details schemaspy.t=mysql # optional path to alternative jdbc drivers. schemaspy.dp=/app/mysql-connector-java.jar # database properties: host, port number, name user, password schemaspy.host=mysql_host schemaspy.port=3306 schemaspy.db=test_database schemaspy.u=docker schemaspy.p=docker # output dir to save generated files schemaspy.o=/app/html # db scheme for which generate diagrams schemaspy.s=work4. MySql
MySqlの環境設定ファイルを用意します。
my.cnf[mysqld] character-set-server=utf8mb4 collation-server=utf8mb4_unicode_ci [client] default-character-set=utf8mb4こちらはDocker起動時にサンプルテーブルを作成するsqlを用意します。
ER図でリレーションが確認できるように外部キーをつけるのをお忘れなく。001-create-tables.sqlDROP TABLE IF EXISTS `groups`; CREATE TABLE IF NOT EXISTS `groups` ( `id` INT(11) NOT NULL DEFAULT 0 AUTO_INCREMENT COMMENT 'ID', `created_at` DATETIME NULL DEFAULT NULL COMMENT '登録日時', `updated_at` DATETIME NULL DEFAULT NULL COMMENT '更新日時', `deleted_at` DATETIME NULL DEFAULT NULL COMMENT '削除日時', `name` VARCHAR(255) NOT NULL DEFAULT '' COMMENT '名前', PRIMARY KEY (`id`) ) DEFAULT CHARSET=utf8 COLLATE=utf8_bin; DROP TABLE IF EXISTS `users`; CREATE TABLE IF NOT EXISTS `users` ( `id` INT(11) NOT NULL DEFAULT 0 AUTO_INCREMENT COMMENT 'ID', `created_at` DATETIME NULL DEFAULT NULL COMMENT '登録日時', `updated_at` DATETIME NULL DEFAULT NULL COMMENT '更新日時', `deleted_at` DATETIME NULL DEFAULT NULL COMMENT '削除日時', `group_id` INT(11) NOT NULL DEFAULT 0 COMMENT '組織ID', `name` VARCHAR(255) NOT NULL DEFAULT '' COMMENT '名前', PRIMARY KEY (`id`), FOREIGN KEY (`group_id`) REFERENCES `groups` (`id`) ) DEFAULT CHARSET=utf8 COLLATE=utf8_bin;起動
ビルド
docker-compose build起動
docker-compose up -d停止
docker-compose down確認
http://localhost:8081 にアクセスすると確認できます。
以下のような画面が表示されていれば成功です。
最後に
今回は構築のみご紹介させていただきました。
私もこれから使用してみて、仕事効率化に繋がるか判断したいと思います。
同じようにdocker環境で触ってみたい人の参考になれば幸いです。参考
- 投稿日:2019-05-27T01:18:43+09:00
自動でscreenshotを取る感じの環境メモ
目的
Webページのスクリーンショットを自動的に取得したい・・・
PhantomJSはサポートが終わりそう(終わってる?)ということで、
google-chrome + seleniumな環境で実装。
で、Scriptを実行している都合上、怪しいコードを実行されても嫌なので、
スクリーンショットを取る部分はDocker上で実装して、他のプログラム達
とは若干分けたい!ということでやったことをメモメモ(・ω・;実際はGoogleChromeにもSandboxがあってそれなりに安全らしいのですが、
Chrome自体に脆弱性があった時が嫌なので分離・・・メモなので失敗した内容も失敗例として書いたり、設定の時に打ったコマンドを全部書いてます。
環境
ubuntu 18.04 (english)
Dockerインストール
# apt-get update
# apt-get install docker.io
# systemctl enable docker
# systemctl start docker
# docker pull ubuntu:18.04
取得した画像をホストと共有する設定を先に・・・(やらなくても良いです)
Docker側
# mkdir /tmp/share

ホスト側
# mkdir /opt/share
Docker 起動
# docker run -i -t -d --name="dockername" ubuntu /bin/bash

# docker start dockername

# docker attach dockername
Dockerでの設定
何にも入ってなかったので、設定
wgetと基本コマンド系をインストール
docker# apt-get install iputils-ping net-tools
docker# apt-get install wget
docker# apt-get install unzip
Chromeとchromedriverをダウンロード
docker# wget https://dl.google.com/linux/direct/google-chrome-stable_current_amd64.deb

docker# wget https://chromedriver.storage.googleapis.com/74.0.3729.6/chromedriver_linux64.zip
//※74.0.3729.6と書かれているところはバージョンなので、google-chromeのバージョンと合わせてください。
//http://chromedriver.storage.googleapis.com/
//↑ここに使用可能なバージョンのリストがある。
//google-chrome-stable --version
//でChromeのバージョンは確認できる。
Chromeのインストール
//Chromeのインストール
docker# dpkg -i google-chrome-stable_current_amd64.deb
chromedriverのインストール
docker# unzip chromedriver_linux64.zip
docker# mv chromedriver /usr/bin/
docker# chmod +x /usr/bin/chromedriver
seleniumのインストール
docker# apt-get install python3-pip
docker# apt install python3-selenium
docerイメージにviすら入ってなかったのでviをインストールしたい・・・
docker# apt-get install vim
//↑何故かエラーになった・・・↑

//色々試した結果、このコマンドで解決
docker# apt  --fix-broken install

docker# apt-get install vim
スクリーンショットの取得
docker# adduser user //・・・パスワードなどを設定 docker# su user docker$ vi test.pytest.pyfrom selenium import webdriver from selenium.webdriver.chrome.options import Options import time options = Options() options.binary_location = '/usr/bin/google-chrome-stable' options.add_argument('--headless') options.add_argument('--window-size=1280,2048') driver = webdriver.Chrome('chromedriver', chrome_options=options) //URLはとりあえず自分のQiita driver.get('https://qiita.com/xio_yae/items/f800a8ef250ef851279e') print(driver) driver.save_screenshot('/home/user/screenshot.png') driver.quit()実行するとエラーになった。
$ python3 test.py
---
Traceback (most recent call last):
  File "get.py", line 13, in <module>
    driver = webdriver.Chrome('chromedriver', chrome_options=options)
  File "/usr/lib/python3/dist-packages/selenium/webdriver/chrome/webdriver.py", line 75, in __init__
    desired_capabilities=desired_capabilities)
  File "/usr/lib/python3/dist-packages/selenium/webdriver/remote/webdriver.py", line 154, in __init__
    self.start_session(desired_capabilities, browser_profile)
  File "/usr/lib/python3/dist-packages/selenium/webdriver/remote/webdriver.py", line 243, in start_session
    response = self.execute(Command.NEW_SESSION, parameters)
  File "/usr/lib/python3/dist-packages/selenium/webdriver/remote/webdriver.py", line 311, in execute
    self.error_handler.check_response(response)
  File "/usr/lib/python3/dist-packages/selenium/webdriver/remote/errorhandler.py", line 237, in check_response
    raise exception_class(message, screen, stacktrace)
selenium.common.exceptions.WebDriverException: Message: unknown error: Chrome failed to start: crashed
  (unknown error: DevToolsActivePort file doesn't exist)
  (The process started from chrome location /usr/bin/google-chrome-stable is no longer running, so ChromeDriver is assuming that Chrome has crashed.)
  (Driver info: chromedriver=74.0.3729.6 (255758eccf3d244491b8a1317aa76e1ce10d57e9-refs/branch-heads/3729@{#29}),platform=Linux 4.15.0-22-generic x86_64)
---
docker上でsandboxの実行が引っかかってるらしい
options.add_argument('--no-sandbox')を追加したらOKだった。test.pyfrom selenium import webdriver from selenium.webdriver.chrome.options import Options import time options = Options() options.binary_location = '/usr/bin/google-chrome-stable' options.add_argument('--headless') options.add_argument('--window-size=1280,2048') options.add_argument('--no-sandbox') driver = webdriver.Chrome('chromedriver', chrome_options=options) driver.get('https://qiita.com/xio_yae/items/f800a8ef250ef851279e') print(driver) driver.save_screenshot('/home/user/screenshot.png') driver.quit()画像を確認
dockerからローカルにコピー
# sudo docker cp dockername:/home/user/screenshot.png ./
あれ、文字化けしている・・・
こちらを参考に修正
UbuntuのCLI環境でGoogleChromeを使ってウェブサイトのスクリーンショットを取得する
というか、かなりまとまってて最初から見ればよかった・・・# wget --content-disposition IPAfont00303.zip http://ipafont.ipa.go.jp/old/ipafont/IPAfont00303.php # unzip IPAfont00303.zip -d /usr/share/fonts/ # fc-cache -fv再度実行するとうまく取れてる!