- 投稿日:2020-06-27T19:37:19+09:00
CameraXとOpenCVを使った画像処理Androidアプリのひな形
はじめに
Androidでカメラ画像を入力して、何らかの画像処理を行うためのサンプルプロジェクトです。
以前別の記事( Androidで OpenCV 4を使う方法とカメラライブビューの表示 )で、カメラ読み込みもOpenCVを使った方法を記載しましたが、最新のAndroid SDKだと使えないようでした。
Camera APIが廃止され、Camera2 APIを使うことが推奨されていましたが非常に使いづらいです。より簡単にAndroid上でカメラを触れるCameraXというものが存在しました。今回はこれを使ってみます。
CameraXは使い方が簡単で、チュートリアルも充実しています (https://developer.android.com/training/camerax ) 。ネット上のほとんどのサンプルがKotolin向けだったので、ここではJavaで書いてみようと思います。今回は、入力画像と前フレームの画像との差分を計算して、変化したところが分かるような簡単な画像処理をサンプルにしてみます。
↓の動画は、上がオリジナルのカメラ画像(CameraXのプレビュー画像)、下が画像処理をした結果になります。qiita用 pic.twitter.com/HXYE9fq2Ej
— iwatake (@iwatake2222) June 27, 2020環境
- Host
- Windows 10 64-bit
- Android Studio 4.0
- Android SDK API Level 30
- 多少低くても大丈夫なはず
- Android NDK Version 21.3.6528147
- NDKは不要かも
- opencv-4.3.0-android-sdk.zip
- Target
- Galaxy S7 (Android 8.0.0)
プロジェクトの用意
プロジェクトを作る
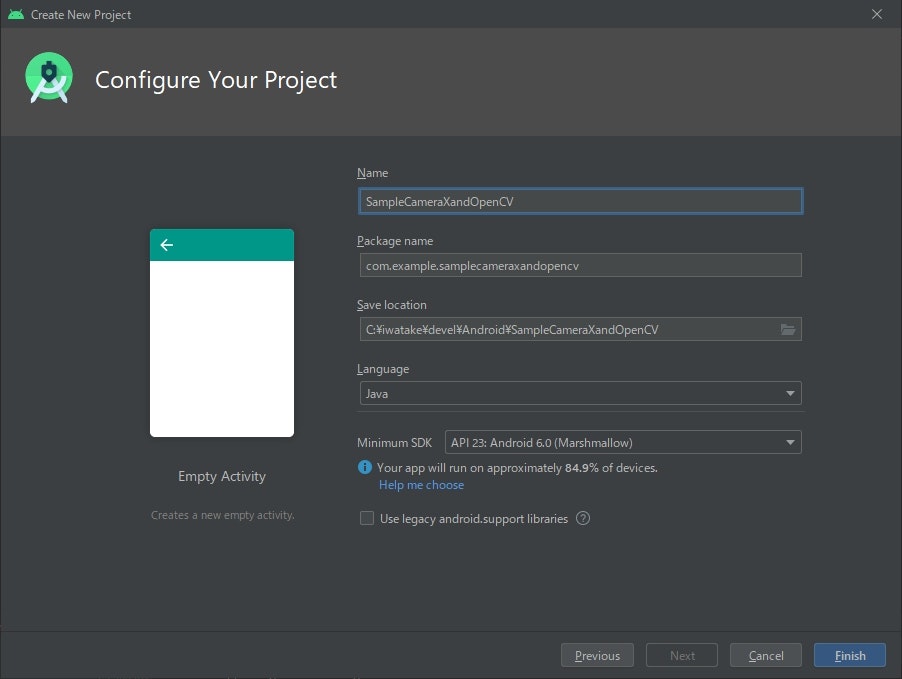
Android StudioのCreate New Projectから、Empty Activityを作ります。
Minimum SDKはAPI23としておきました。CameraXがサポートするAndroid 5.0(API レベル 21)以降であれば何でも大丈夫なはずです。
Manifestの設定
カメラを使用するので、そのための設定をします。
AndroidManifest.xmlを開き、以下のように編集します。(「追加」で検索)AndroidManifest.xml<?xml version="1.0" encoding="utf-8"?> <manifest xmlns:android="http://schemas.android.com/apk/res/android" package="com.example.samplecameraxandopencv"> <!-- ↓↓↓ 追加 ↓↓↓ --> <uses-permission android:name="android.permission.CAMERA"/> <uses-permission android:name="android.permission.WRITE_EXTERNAL_STORAGE"/> <uses-feature android:name="android.hardware.camera" android:required="false"/> <uses-feature android:name="android.hardware.camera.autofocus" android:required="false"/> <!-- ↑↑↑ 追加 ↑↑↑ --> <application android:allowBackup="true" 省略 </application> </manifest>OpenCVを取り込む
- https://github.com/opencv/opencv/releases からopencv-4.3.0-android-sdk.zipをダウンロードして解凍します
- バージョンは4以降なら何でも大丈夫です。3以前だと少しやり方が変わると思います
- メニューバー -> File -> New -> Import Module で、
OpenCV-android-sdk/sdkの場所を指定します- メニューバー -> File -> Project Structure の、Dependenciesを開き、appを選択します。
Declared Dependencies内で+->3 Moduel Dependencyをクリックして追加したsdkを選択します。手順詳細はこちら (https://qiita.com/iwatake2222/items/2642669419fdaa20a8a6#opencvのダウンロード ) を参照。
CameraXを使えるようにする
CameraXのチュートリアルの通りです。(https://codelabs.developers.google.com/codelabs/camerax-getting-started/#1 )
build.gradle(Module: app)を開き、androidセクションとdependenciesセクションを以下のように編集します。(「追加」で検索)build.gradleapply plugin: 'com.android.application' android { compileSdkVersion 30 buildToolsVersion "30.0.0" defaultConfig { applicationId "com.example.samplecameraxandopencv" minSdkVersion 23 targetSdkVersion 30 versionCode 1 versionName "1.0" testInstrumentationRunner "androidx.test.runner.AndroidJUnitRunner" } buildTypes { release { minifyEnabled false proguardFiles getDefaultProguardFile('proguard-android-optimize.txt'), 'proguard-rules.pro' } } // ↓↓↓ 追加 ↓↓↓ compileOptions { sourceCompatibility JavaVersion.VERSION_1_8 targetCompatibility JavaVersion.VERSION_1_8 } // ↑↑↑ 追加 ↑↑↑ } dependencies { implementation fileTree(dir: "libs", include: ["*.jar"]) implementation 'androidx.appcompat:appcompat:1.1.0' implementation 'androidx.constraintlayout:constraintlayout:1.1.3' testImplementation 'junit:junit:4.12' androidTestImplementation 'androidx.test.ext:junit:1.1.1' androidTestImplementation 'androidx.test.espresso:espresso-core:3.2.0' // ↓↓↓ 追加 ↓↓↓ def camerax_version = "1.0.0-beta03" // CameraX core library using camera2 implementation implementation "androidx.camera:camera-camera2:$camerax_version" // CameraX Lifecycle Library implementation "androidx.camera:camera-lifecycle:$camerax_version" // CameraX View class implementation "androidx.camera:camera-view:1.0.0-alpha10" // ↑↑↑ 追加 ↑↑↑ }編集後、右上に
Sync Nowと表示されるのでクリックします。
ここまで完了したら、一度ビルドと実行が出来ることを確認することをお勧めします。レイアウトを作る
まず最初にレイアウトを作ります。
res->layout->activity_main.xmlを開き、コードを表示します。
デフォルトで用意されているTextViewは消して、LinearLayoutでCameraXのプレビュー用のandroidx.camera.view.PreviewViewと処理結果表示用のImageViewを上下に並べます。activity_main.xml<?xml version="1.0" encoding="utf-8"?> <androidx.constraintlayout.widget.ConstraintLayout xmlns:android="http://schemas.android.com/apk/res/android" xmlns:app="http://schemas.android.com/apk/res-auto" xmlns:tools="http://schemas.android.com/tools" android:layout_width="match_parent" android:layout_height="match_parent" tools:context=".MainActivity"> <LinearLayout android:layout_width="match_parent" android:layout_height="match_parent" android:orientation="vertical"> <androidx.camera.view.PreviewView android:id="@+id/previewView" android:layout_width="match_parent" android:layout_height="match_parent" android:layout_weight="1"/> <ImageView android:id="@+id/imageView" android:layout_width="match_parent" android:layout_height="match_parent" android:layout_weight="1"/> </LinearLayout> </androidx.constraintlayout.widget.ConstraintLayout>
コード説明
onCreate()
プレビュー表示と結果表示用のviewを取得します。その後、カメラ使用の権限を取得し、カメラ処理開始関数(
startCamera)を呼びます。startCamera()
チュートリアル(https://codelabs.developers.google.com/codelabs/camerax-getting-started/#3 )に倣ってCameraXの設定をしています。
CameraXではUseCaseという概念で、カメラに関係する処理を登録するようです。チュートリアルでは以下の3つを使用していました。
- Preview
- ImageCapture
- ImageAnalysis
ImageCaptureは静止画撮影用ですが、今回は未使用です。
ImageAnalysisは各フレーム画像を解析して、何らかの処理を行うことが出来ます。チュートリアルでは平均輝度を計算するだけでしたが、今回はこの部分にOpenCVを用いた画像処理を実装します。独自のImageAnalysisを行うためには、
ImageAnalysis.Analyzerインターフェイスを持つクラスを実体化して指定します。今回はMyImageAnalyzerというクラスを作りました。MyImageAnalyzerクラス
public void analyze(@NonNull ImageProxy image)という関数を持つクラスを自分で定義します。この中で処理を行います。
ImageProxy imageにYUV(NV21)形式の画像が入力され、毎フレーム呼ばれます(image.close();するまで次の処理は呼ばれない模様)。最初に、入力されるNV21画像をOpenCVのmatに変換します。変換処理は https://stackoverflow.com/questions/30510928/convert-android-camera2-api-yuv-420-888-to-rgb を参考にしました (
getMatFromImage())。次に、入力画像を適切に回転します。過去の方法でAndroidカメラを使ったことがある方には常識的な処理ですが、どうもCameraXのプレビューだとCameraX側で適切に処理してくれているようです。一方、この関数に入ってくる画像に対してはケアされていないようなので、自分で回転処理をする必要があります。今回はここでもOpenCVを使って回転・反転処理を行いました (
fixMatRotation())。OpenCVのmat(RGB)になったら、後は好きな処理をするだけです。
今回は前回フレームとの画素値差分を計算して、変化のあったところだけ表示するような処理にしてみました。
ついでに、適当に四角形と文字を出力してみました。最後に、OpenCVのmatをBitmapに変換し、ImageViewに出力します。ImageViewへの描画はUIスレッドで行っています。
コード全文
MainActivity.javapackage com.example.samplecameraxandopencv; import androidx.annotation.NonNull; import androidx.appcompat.app.AppCompatActivity; import androidx.camera.core.Camera; import androidx.camera.core.CameraSelector; import androidx.camera.core.ImageAnalysis; import androidx.camera.core.ImageProxy; import androidx.camera.core.Preview; import androidx.camera.lifecycle.ProcessCameraProvider; import androidx.camera.view.PreviewView; import androidx.core.app.ActivityCompat; import androidx.core.content.ContextCompat; import androidx.lifecycle.LifecycleOwner; import android.Manifest; import android.app.Activity; import android.content.Context; import android.content.pm.PackageManager; import android.graphics.Bitmap; import android.os.Bundle; import android.util.Log; import android.view.Surface; import android.widget.ImageView; import com.google.common.util.concurrent.ListenableFuture; import org.opencv.android.Utils; import org.opencv.core.Core; import org.opencv.core.CvType; import org.opencv.core.Mat; import org.opencv.core.Point; import org.opencv.core.Rect; import org.opencv.core.Scalar; import org.opencv.imgproc.Imgproc; import java.nio.ByteBuffer; import java.util.concurrent.ExecutorService; import java.util.concurrent.Executors; public class MainActivity extends AppCompatActivity { /*** Fixed values ***/ private static final String TAG = "MyApp"; private int REQUEST_CODE_FOR_PERMISSIONS = 1234;; private final String[] REQUIRED_PERMISSIONS = new String[]{"android.permission.CAMERA", "android.permission.WRITE_EXTERNAL_STORAGE"}; /*** Views ***/ private PreviewView previewView; private ImageView imageView; /*** For CameraX ***/ private Camera camera = null; private Preview preview = null; private ImageAnalysis imageAnalysis = null; private ExecutorService cameraExecutor = Executors.newSingleThreadExecutor(); static { System.loadLibrary("opencv_java4"); } @Override protected void onCreate(Bundle savedInstanceState) { super.onCreate(savedInstanceState); setContentView(R.layout.activity_main); previewView = findViewById(R.id.previewView); imageView = findViewById(R.id.imageView); if (checkPermissions()) { startCamera(); } else { ActivityCompat.requestPermissions(this, REQUIRED_PERMISSIONS, REQUEST_CODE_FOR_PERMISSIONS); } } private void startCamera() { final ListenableFuture<ProcessCameraProvider> cameraProviderFuture = ProcessCameraProvider.getInstance(this); Context context = this; cameraProviderFuture.addListener(new Runnable() { @Override public void run() { try { ProcessCameraProvider cameraProvider = cameraProviderFuture.get(); preview = new Preview.Builder().build(); imageAnalysis = new ImageAnalysis.Builder().build(); imageAnalysis.setAnalyzer(cameraExecutor, new MyImageAnalyzer()); CameraSelector cameraSelector = new CameraSelector.Builder().requireLensFacing(CameraSelector.LENS_FACING_BACK).build(); cameraProvider.unbindAll(); camera = cameraProvider.bindToLifecycle((LifecycleOwner)context, cameraSelector, preview, imageAnalysis); preview.setSurfaceProvider(previewView.createSurfaceProvider(camera.getCameraInfo())); } catch(Exception e) { Log.e(TAG, "[startCamera] Use case binding failed", e); } } }, ContextCompat.getMainExecutor(this)); } private class MyImageAnalyzer implements ImageAnalysis.Analyzer { private Mat matPrevious = null; @Override public void analyze(@NonNull ImageProxy image) { /* Create cv::mat(RGB888) from image(NV21) */ Mat matOrg = getMatFromImage(image); /* Fix image rotation (it looks image in PreviewView is automatically fixed by CameraX???) */ Mat mat = fixMatRotation(matOrg); Log.i(TAG, "[analyze] width = " + image.getWidth() + ", height = " + image.getHeight() + "Rotation = " + previewView.getDisplay().getRotation()); Log.i(TAG, "[analyze] mat width = " + matOrg.cols() + ", mat height = " + matOrg.rows()); /* Do some image processing */ Mat matOutput = new Mat(mat.rows(), mat.cols(), mat.type()); if (matPrevious == null) matPrevious = mat; Core.absdiff(mat, matPrevious, matOutput); matPrevious = mat; /* Draw something for test */ Imgproc.rectangle(matOutput, new Rect(10, 10, 100, 100), new Scalar(255, 0, 0)); Imgproc.putText(matOutput, "leftTop", new Point(10, 10), 1, 1, new Scalar(255, 0, 0)); /* Convert cv::mat to bitmap for drawing */ Bitmap bitmap = Bitmap.createBitmap(matOutput.cols(), matOutput.rows(),Bitmap.Config.ARGB_8888); Utils.matToBitmap(matOutput, bitmap); /* Display the result onto ImageView */ runOnUiThread(new Runnable() { @Override public void run() { imageView.setImageBitmap(bitmap); } }); /* Close the image otherwise, this function is not called next time */ image.close(); } private Mat getMatFromImage(ImageProxy image) { /* https://stackoverflow.com/questions/30510928/convert-android-camera2-api-yuv-420-888-to-rgb */ ByteBuffer yBuffer = image.getPlanes()[0].getBuffer(); ByteBuffer uBuffer = image.getPlanes()[1].getBuffer(); ByteBuffer vBuffer = image.getPlanes()[2].getBuffer(); int ySize = yBuffer.remaining(); int uSize = uBuffer.remaining(); int vSize = vBuffer.remaining(); byte[] nv21 = new byte[ySize + uSize + vSize]; yBuffer.get(nv21, 0, ySize); vBuffer.get(nv21, ySize, vSize); uBuffer.get(nv21, ySize + vSize, uSize); Mat yuv = new Mat(image.getHeight() + image.getHeight() / 2, image.getWidth(), CvType.CV_8UC1); yuv.put(0, 0, nv21); Mat mat = new Mat(); Imgproc.cvtColor(yuv, mat, Imgproc.COLOR_YUV2RGB_NV21, 3); return mat; } private Mat fixMatRotation(Mat matOrg) { Mat mat; switch (previewView.getDisplay().getRotation()){ default: case Surface.ROTATION_0: mat = new Mat(matOrg.cols(), matOrg.rows(), matOrg.type()); Core.transpose(matOrg, mat); Core.flip(mat, mat, 1); break; case Surface.ROTATION_90: mat = matOrg; break; case Surface.ROTATION_270: mat = matOrg; Core.flip(mat, mat, -1); break; } return mat; } } private boolean checkPermissions(){ for(String permission : REQUIRED_PERMISSIONS){ if(ContextCompat.checkSelfPermission(this, permission) != PackageManager.PERMISSION_GRANTED){ return false; } } return true; } @Override public void onRequestPermissionsResult(int requestCode, @NonNull String[] permissions, @NonNull int[] grantResults) { // super.onRequestPermissionsResult(requestCode, permissions, grantResults); if(requestCode == REQUEST_CODE_FOR_PERMISSIONS){ if(checkPermissions()){ startCamera(); } else{ Log.i(TAG, "[onRequestPermissionsResult] Failed to get permissions"); this.finish(); } } } }

- 投稿日:2020-06-27T15:13:13+09:00
日本Androidの会浜松支部 第108回ミーティングでFlutter勉強会やるのでWindows10にFlutterの開発環境を整えた話
日本Androidの会浜松支部 第108回ミーティング
でFlutter入門が開催されるので、Flutterの環境を整える。
こういったハンズオン系のイベントの場合、あらかじめ環境を用意しておくと、セットアップだけで終わってしまって、本来イベントで学ぶべきことを学ばないで終わってしまうというもったいない事態に陥ることが少ないです。
(これホント大事!)
環境構築で分からない場合は、事前に知ってる人に質問しましょう!このドキュメントは前提として、開発経験があって、環境変数の設定とかできる人向け。
(初心者向けじゃないです)あらかじめ、Androidの開発環境は整っています。
Android Studioの環境構築は他の人の記事を探してください。やったことは以下のこと
- Flutterのダウンロード(公式サイトからダウンロード)
- Flutterのbinディレクトリを環境変数 PATHへの追加
- <インストールディレクトリ>\binを追加してね。例えば、C:\flutterにインストールしたら C:\flutter\binを追加する。
- 環境変数の設定方法がわからない人は@ITのWindows 10でPath環境変数を設定/編集するを参考にして下さい。
- Android StudioにFlutterプラグインを追加
- flutter doctorでライセンスの確認
- Android StudioでFlutterプロジェクトを作って試す
GitとPowershellが必要なように公式サイトに書いてあるけど、なくても大丈夫そう。
Android Studioはあらかじめインストールして、エミュレータの起動までやっておくといい。
これやっとかないと、イベント中にイメージのダウンロードが発生して時間を無駄にする。
あと、Hyper-Vを無効にしたいとといわれたことがあったけど、Hyper-Vがあってもエミュレータを起動出来たので、今はHyper-Vが有効な状態でも問題なさそう(検証不十分)flutter doctorを実行すると、問題のある個所が[!]で表示されるので、それをつぶしていく。
以下、実行例
1番目はライセンス確認みたい。(これが必須かどうかわからない)
2番目はAndroid StudioにFlutterプラグインがなくて[!]がついている
3番目はVSCodeなので今回は無視
4番目はデバイスがつながってないよって言っていると思われる。(これは無視していい)C:\Users\dev-t>flutter doctor Doctor summary (to see all details, run flutter doctor -v): [√] Flutter (Channel stable, v1.17.4, on Microsoft Windows [Version 10.0.18362.900], locale ja-JP) [!] Android toolchain - develop for Android devices (Android SDK version 28.0.3) ! Some Android licenses not accepted. To resolve this, run: flutter doctor --android-licenses [!] Android Studio (version 3.6) X Flutter plugin not installed; this adds Flutter specific functionality. X Dart plugin not installed; this adds Dart specific functionality. [!] VS Code, 64-bit edition (version 1.40.2) X Flutter extension not installed; install from https://marketplace.visualstudio.com/items?itemName=Dart-Code.flutter [!] Connected device ! No devices available ! Doctor found issues in 4 categories.・・・なんか、特に躓くことなくできちゃったw
Android Studioでプロジェクトを作るときにSDKを指定できるので、もしかして、パスを通さなくてもAndroid Studioのターミナルならパスと押さなくてもコマンド打てるのか!?とおもって、パスをからflutterのパスを外してターミナルでコマンド打ってみた
C:\data\dev\Android\flutter_app>flutter doctor
'flutter' は、内部コマンドまたは外部コマンド、
操作可能なプログラムまたはバッチ ファイルとして認識されていません。
・・・パスは必ず設定しましょうw
- 投稿日:2020-06-27T15:04:59+09:00
Android画面各部の名称
正しい呼び方を知らなかったので画面の各部の名称をまとめました。
出典は主に
Androidデベロッパー|ユーザーインターフェースおよびナビゲーション
Material Design
です。システムバー
通知の表示や、デバイスステータスの通信、デバイスの操作を行うための専用の画面領域。
システムバーはステータスバーとナビゲーションバーで構成される。
1. ステータスバー
通知アイコンやシステムアイコンが表示される。
2. ナビゲーションバー
左から戻る、ホーム、タスクボタンが配置されている。
またAndroid9から2ボタンナビゲーション、Android10からジェスチャーナビゲーションが追加されたため3つボタンが表示されているとは限らない。トップアプリバー(アクションバー)
アプリの上部に現在の画面に基づく情報やアクションを表示する。
- コンテナ
- ナビゲーションアイコン
- タイトル
- アクションアイテム
- オーバーフローメニュー
ボトムナビゲーション
ナビゲーションドロワー
アプリのメインナビゲーションメニューを表示するUIパネル。フローティング操作ボタン(フローティングアクションボタン) FAB
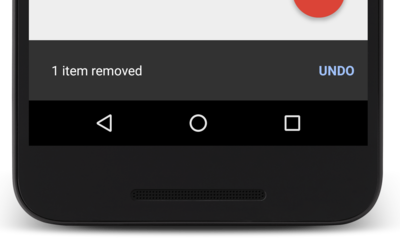
アプリの UI でメインとなる操作をトリガーする円形のボタン。トースト
操作に関する簡単なフィードバックを表示する小さなポップアップ。スナックバー
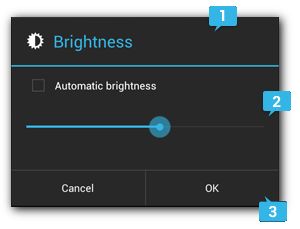
トーストに代わるより高機能なクラス。ダイアログ
1. タイトル
2. コンテンツエリア
3. アクションボタンスピナー
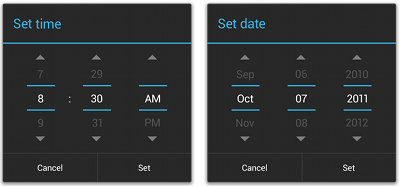
タイムピッカー・デートピッカー
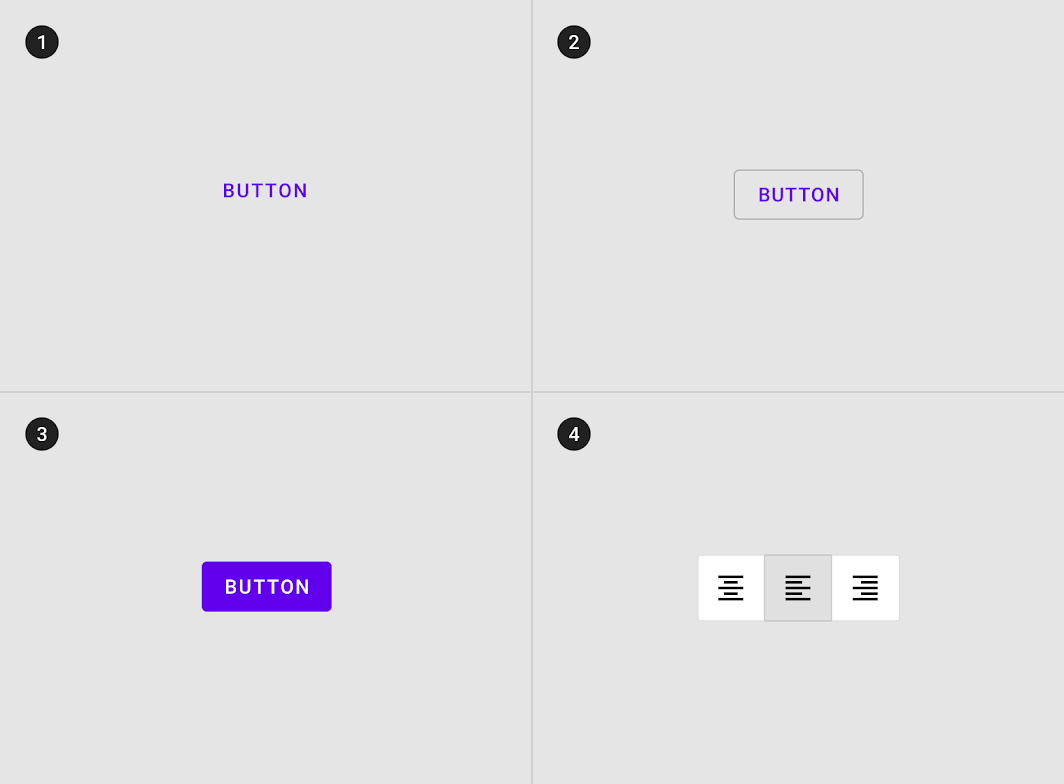
ボタン
1. テキストボタン
2. アウトラインボタン
3. ボタン
4. トグル(切り替え)ボタンスライダー
通知ドロワー
ステータスバーを下にスワイプして開くことができる画面。
通知の詳細な情報を確認し各通知をタップしてアクションを実行することができる。ヘッドアップ通知
ウィジェット
アプリの特に重要なデータや機能を「ひと目で」確認できるようにし、そうしたデータや機能にユーザーのホーム画面から直接アクセスできるようにするもの
コントロールウィジェット
ユーザーがよく使う機能をアプリを開かなくてもホーム画面から直接起動・操作できるようにするもの。


- 投稿日:2020-06-27T00:19:41+09:00
Android + ViewPager2で特定のページ(ポジション)を最初に表示する
概要
ViewPager2を使ってカレンダーの実装をしていたのですが、みなさんもご存知だと思うのですがカレンダーは先の月だけではなく前の月もスクロールしたら見れますよね?
それを実装するためにはViewPagerで真ん中辺りのページを開く必要があったのでその方法を記載します。試してだめだったこと
ViewPager2について調べてみると、currentItemなるものがあり、そちらが現在のItem(ページ)を示すみたいだったので、そこの値をかえればいいのでは?と思い
MainActivity.ktprivate lateinit var binding: ActivityMainBinding override fun onCreate(savedInstanceState: Bundle?) { binding = DataBindingUtil.setContentView(this, R.layout.activity_main) super.onCreate(savedInstanceState) // setContentView(R.layout.activity_main) val pager = ScreenSlidePagerAdapter(this) binding.pager.adapter = pager //ここで指定 binding.pager.currentItem = 4 } private inner class ScreenSlidePagerAdapter(fa: FragmentActivity) : FragmentStateAdapter(fa) { override fun getItemCount(): Int = Int.MAX_VALUE override fun createFragment(position: Int): Fragment = CalendarFragment(position) }一旦このように実装してみたのですが、起動してみると一番最初のページスタートになってしまいました...
成功した例
そこで色々調べてみると、ただcurrentItemの値を返るだけではだめなようで、オプションも設定する必要があるとのこと。
https://stackoverflow.com/questions/56311862/viewpager2-default-position
ここの記事では時間を開けて処理を実行してるのですが、おそらくそれはする必要がなくbinding.pager.setCurrentItem(4, false)こんな感じで特定のページを指定してあげるだけで良さそう。
実行結果
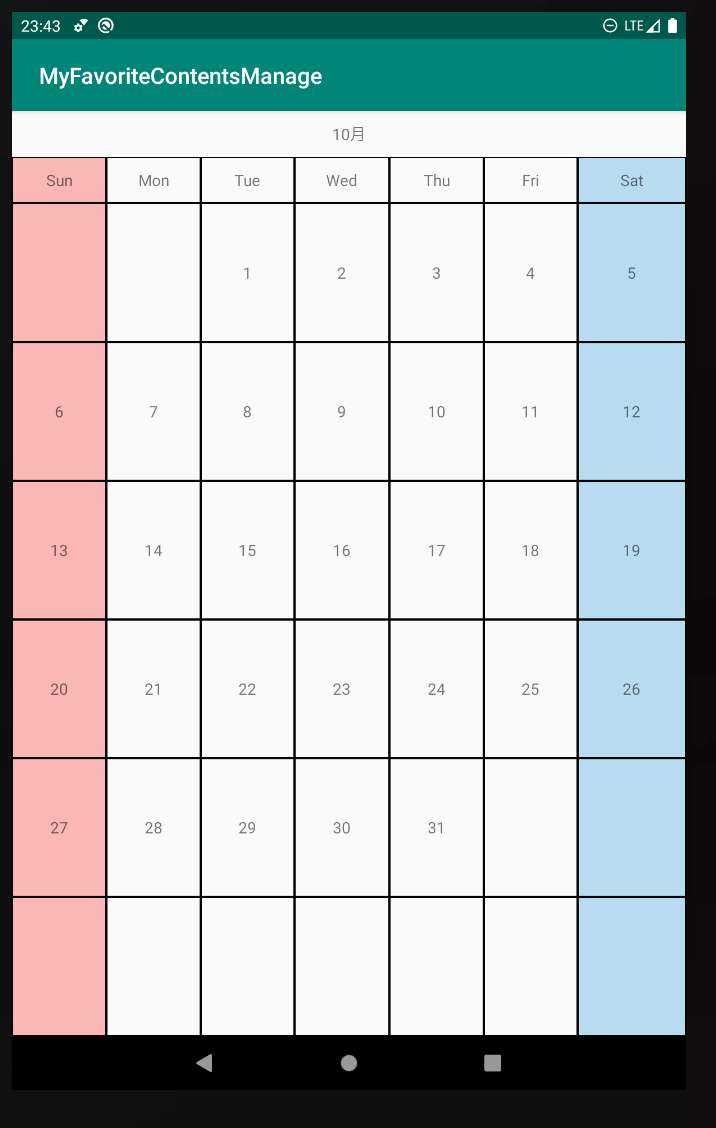
昨日の記事を読んでいた方にはわかると思うのですが、月を表示するようにしたところ10月スタートになりました。(ただこれでは困るので6月の状態で途中スタートにしたい)
(+α)月の表示調節
カレンダーはほぼ無限スクロールなので開始位置はIntのMAX_VALUEの半分スタートにします。
MainActivity.ktbinding.pager.setCurrentItem(Int.MAX_VALUE / 2, false)そしてフラグメントの方で今月(6月)を真ん中に表示しつつ月のラベルを渡すには
CalendarFragment.ktval default = Int.MAX_VALUE / 2 binding = FragmentCalendarBinding.inflate(inflater, container, false) inflater.inflate(R.layout.fragment_calendar, container, false) val calendar = Calendar.getInstance() val year = 2019 val month = 6 val minDay = 1 calendar.set(year, month, 1) calendar.add(Calendar.MONTH, position - default) val maxDay = calendar.getActualMaximum(Calendar.DAY_OF_MONTH) val blankDays = calendar.get(Calendar.DAY_OF_WEEK) val dayArray: MutableList<String> = mutableListOf() for (i in minDay until blankDays) { dayArray.add("") } for (i in minDay..maxDay) { dayArray.add(i.toString()) } binding.date = dayArray.toTypedArray() binding.monthData = (((month - 1 + (position - default)) % 12) + 1).toString() + "月" return binding.rootこんな感じに書けばよいかと。
最終的な実行結果
左右にスクロールでき、ちゃんと月も正しい値になりました!!

- 投稿日:2020-06-27T00:09:08+09:00
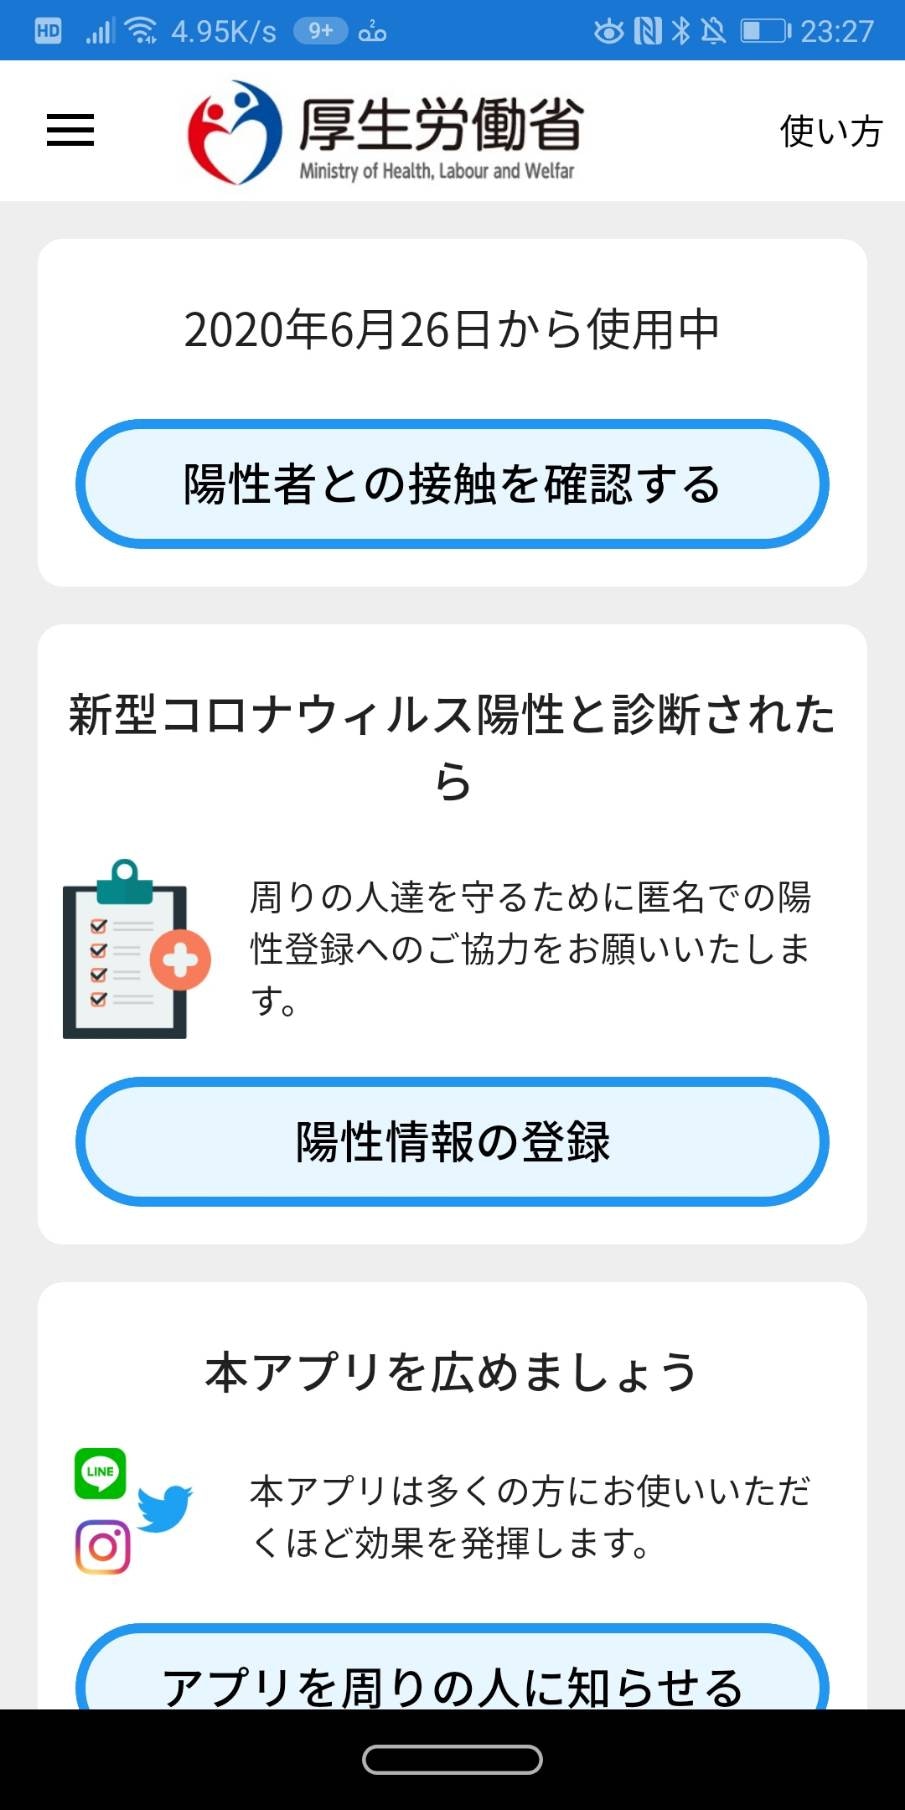
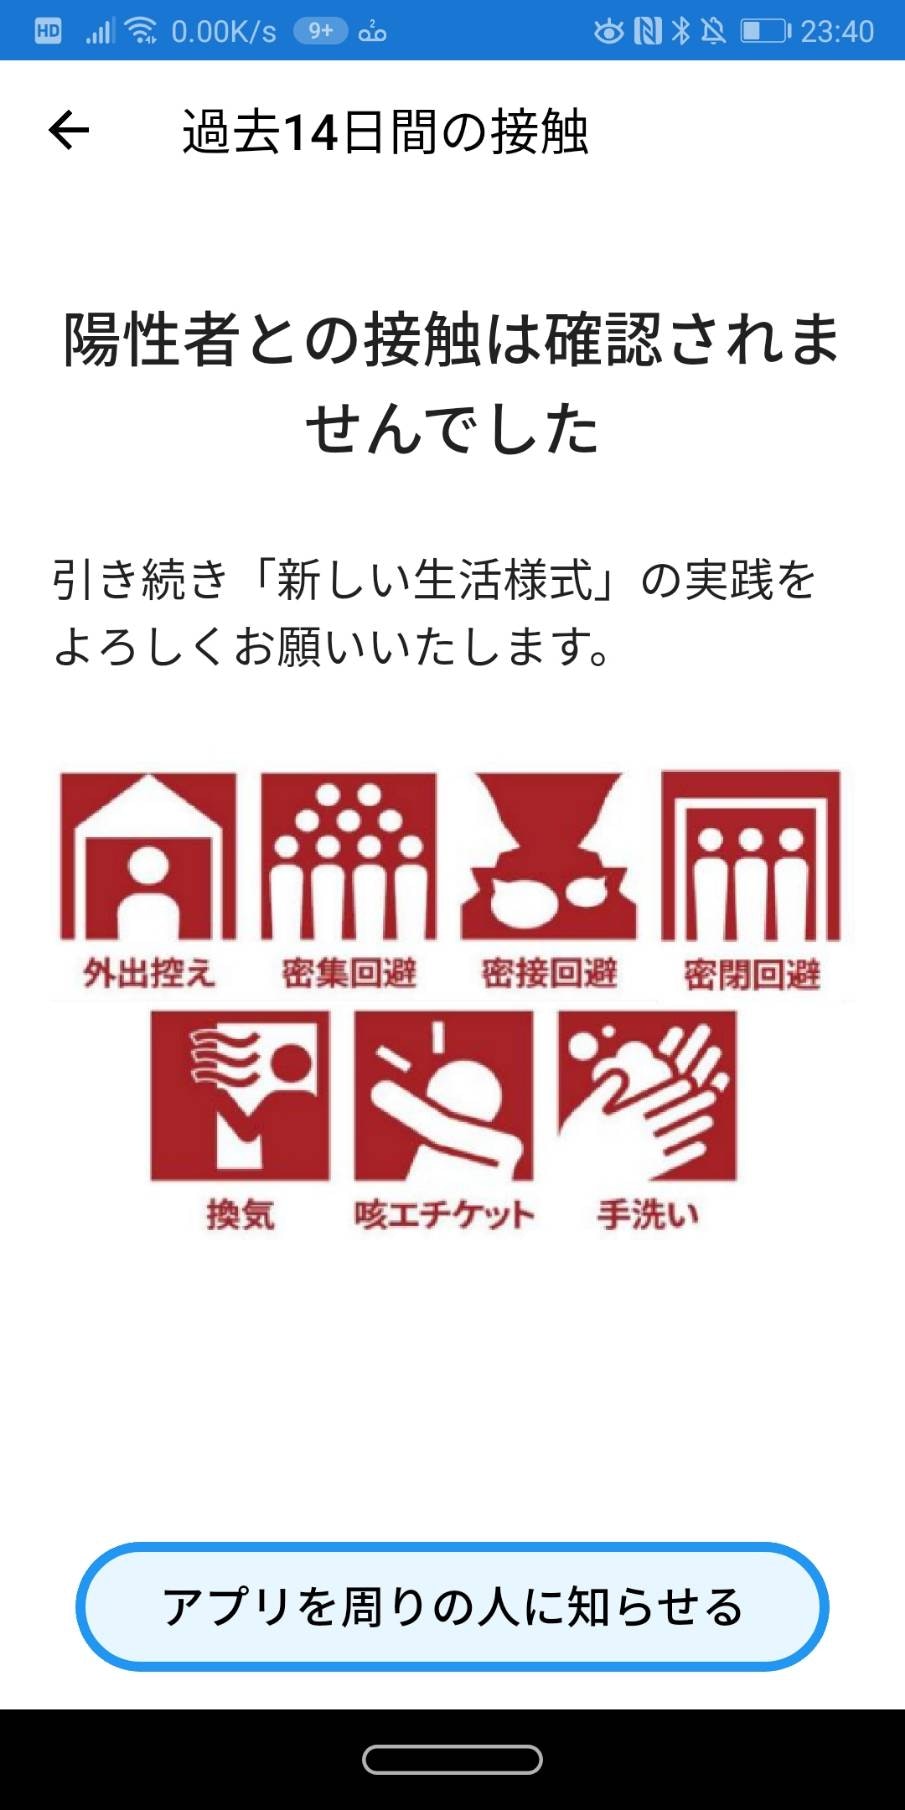
JKが接触確認アプリ「Cocoa」の開発に貢献した話。〜1日でXamarinを学びアプリ改善〜
こんにちは、あんはるです。
接触確認アプリ「Cocoa」の開発に貢献したこと、そして、簡単に開発に参加する方法を紹介します。みなさんに接触確認アプリ「Cocoa」の開発の参加は簡単にできるということを伝えたくて書きました
— あんはる@アプリ作れるJK (@_anharu) June 26, 2020
実際自分で改善してみた経験も書いています
cocoaが使いにくい!と思ったら是非この記事を読んで改善してみるといいと思います?
是非読んでみてください?♂️https://t.co/3G1UEL9Rb2接触確認アプリ「Cocoa」はOSSだった!
ニュースで話題になっていた接触確認アプリ「Cocoa」。誰が、どこの会社が、作っているのだろうか、と気になっていましたが、OSSで開発されていると知りました。
つまり、自分でも「Cocoa」の開発ができるということです。
私がした改善(マージされたプルリク)
問題を発見
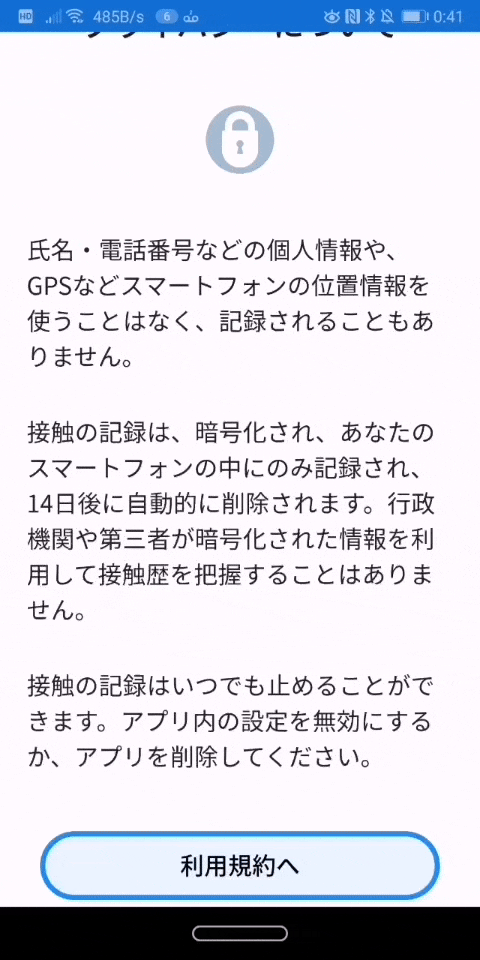
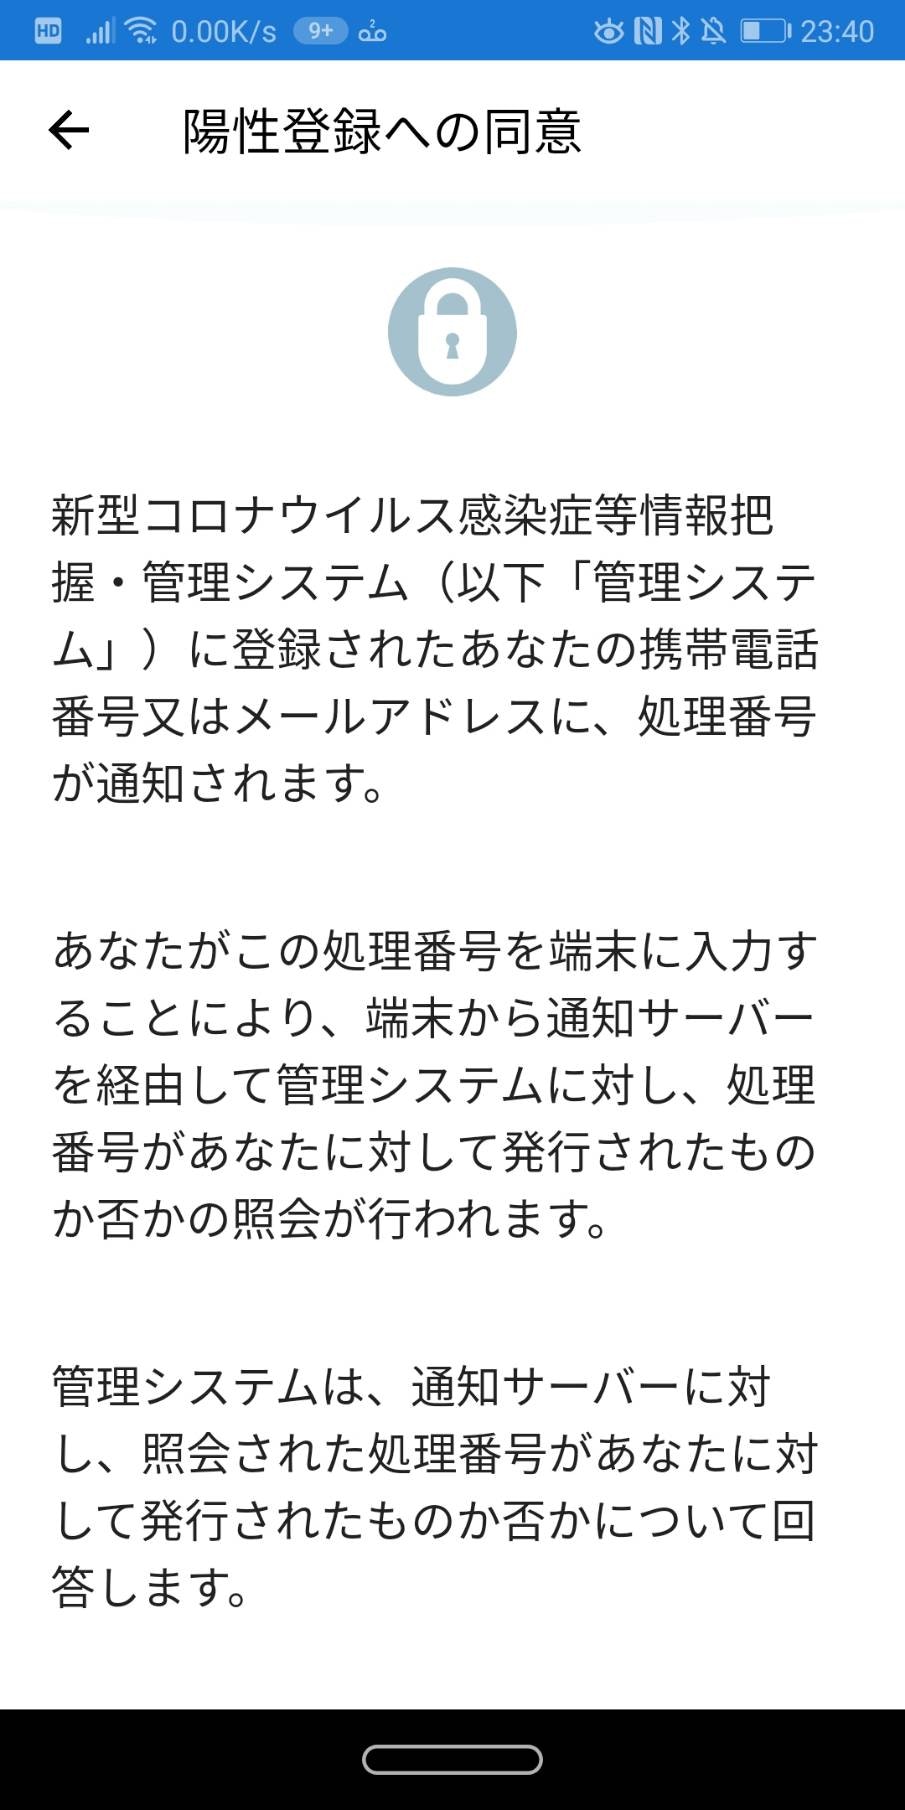
初めてアプリを起動しとき、利用規約の同意するページが出ます。
その時、利用規約のウェブページがはめ込まれているのですが、読み込んでる間何も出ないという問題です。あれ、固まってしまったのか?っと思ってしまいます。
ソースコードを編集
このアプリは、Xamarinで書かれています。今まで使ったことがなかったので、ちょっと勉強しました。
編集した箇所
まず、
ProgressBarを追加します。Covid19Radar/Covid19Radar/Views/Tutorial/TutorialPage3.xaml<Grid Style="{StaticResource DefaultGridLayout}"> <Grid.RowDefinitions> <RowDefinition Height="Auto" /> <RowDefinition Height="*" /> <RowDefinition Height="Auto" /> </Grid.RowDefinitions> <Label Grid.Row="0" Margin="0,0,0,20" Style="{StaticResource DefaultTitleLabel}" Text="{x:Static resources:AppResources.TutorialPage3Title}" /> <StackLayout Grid.Row="1"> <ProgressBar Progress="0.0" IsVisible="false" HorizontalOptions="FillAndExpand" x:Name="activity_indicator" /> <views:NavigatePopoverWebView Source="{x:Static resources:AppResources.UrlTermOfUse}" Style="{StaticResource DefaultWebView}" VerticalOptions="FillAndExpand" Navigating="OnNavigating" Navigated="OnNavigated" HorizontalOptions="FillAndExpand" /> </StackLayout> <Button Grid.Row="2" AutomationId="NextButton" Command="{Binding Path=OnClickAgree}" Style="{StaticResource DefaultButton}" Text="{x:Static resources:AppResources.TutorialPage3ButtonText}" /> </Grid>そして、ProgressBarが動くようにするのと、ローディングが終わったら消えるようにします。
Covid19Radar/Covid19Radar/Views/Tutorial/TutorialPage3.xaml.csusing Xamarin.Forms; using Xamarin.Forms.Xaml; namespace Covid19Radar.Views { [XamlCompilation(XamlCompilationOptions.Compile)] public partial class TutorialPage3 : ContentPage { public TutorialPage3() { InitializeComponent(); } protected async override void OnAppearing() { base.OnAppearing(); await activity_indicator.ProgressTo(1.0, 900, Easing.SpringIn); } public void OnNavigating(object sender, WebNavigatingEventArgs e) { activity_indicator.IsVisible = true; } public void OnNavigated(object sender, WebNavigatedEventArgs e) { activity_indicator.IsVisible = false; } } }プルリクを出す(改善依頼)
この編集をプルリクに出して、レビュワーにレビューしてもらいます。
プルリクのスクリーンショット↓
一日もたたずに採用?
@Kazumihirose さんのレビュー・マージにより、私の改善が採用されました? ?
おそらく、次のアップデートには反映されていると思います。あなたもできる、一日でXamarinを学びアプリ改善してみよう
Twitterで日々寄せられるバグ報告
接触確認アプリ、「〇月〇日から使用中」が更新されている(現在日になっている)のを見てアンインストール。ただの表示のバグだろうが、内部データも初期化されてる(接触が確認できない!)かもしれないからね。
— klein-2 (@klein2_def) June 20, 2020政府公認の #接触確認アプリ 初歩的なバグで失笑。デバッグしとらんやんけ。こんなんだから個人情報は安全ですと言われても不信感が拭えないんだよな。
— はんだ (@hadchix) June 23, 2020
政府側がそんな気なくても悪意あるユーザーはいるんだから…「なんかCocoa使いづらいなぁ」「この表示なんか変じゃない?」と思ったら、実際にアプリを改善してみましょう。
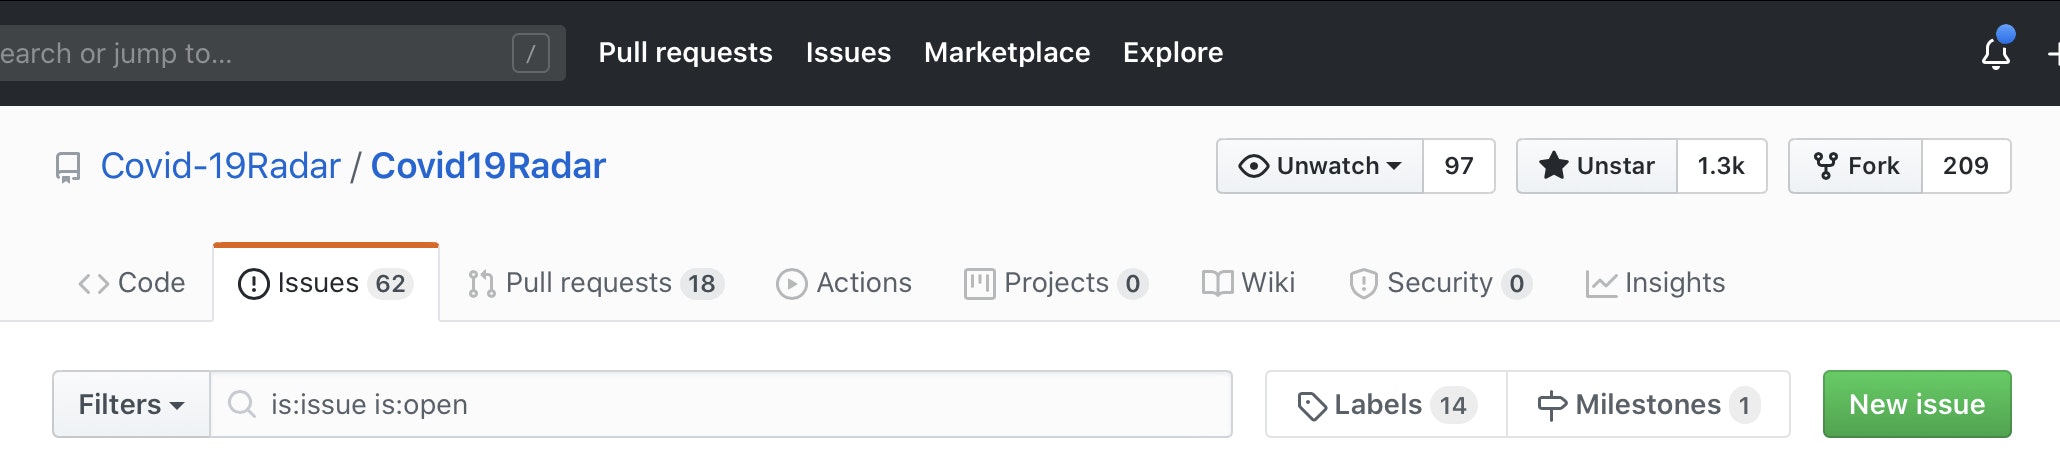
誰でも改善できるのがOSSの良いところです。見つけた問題・バグをGitHubのissueで報告
https://github.com/Covid-19Radar/Covid19Radar/issues
を開き、
右下の、
New issueボタンを押しましょう。
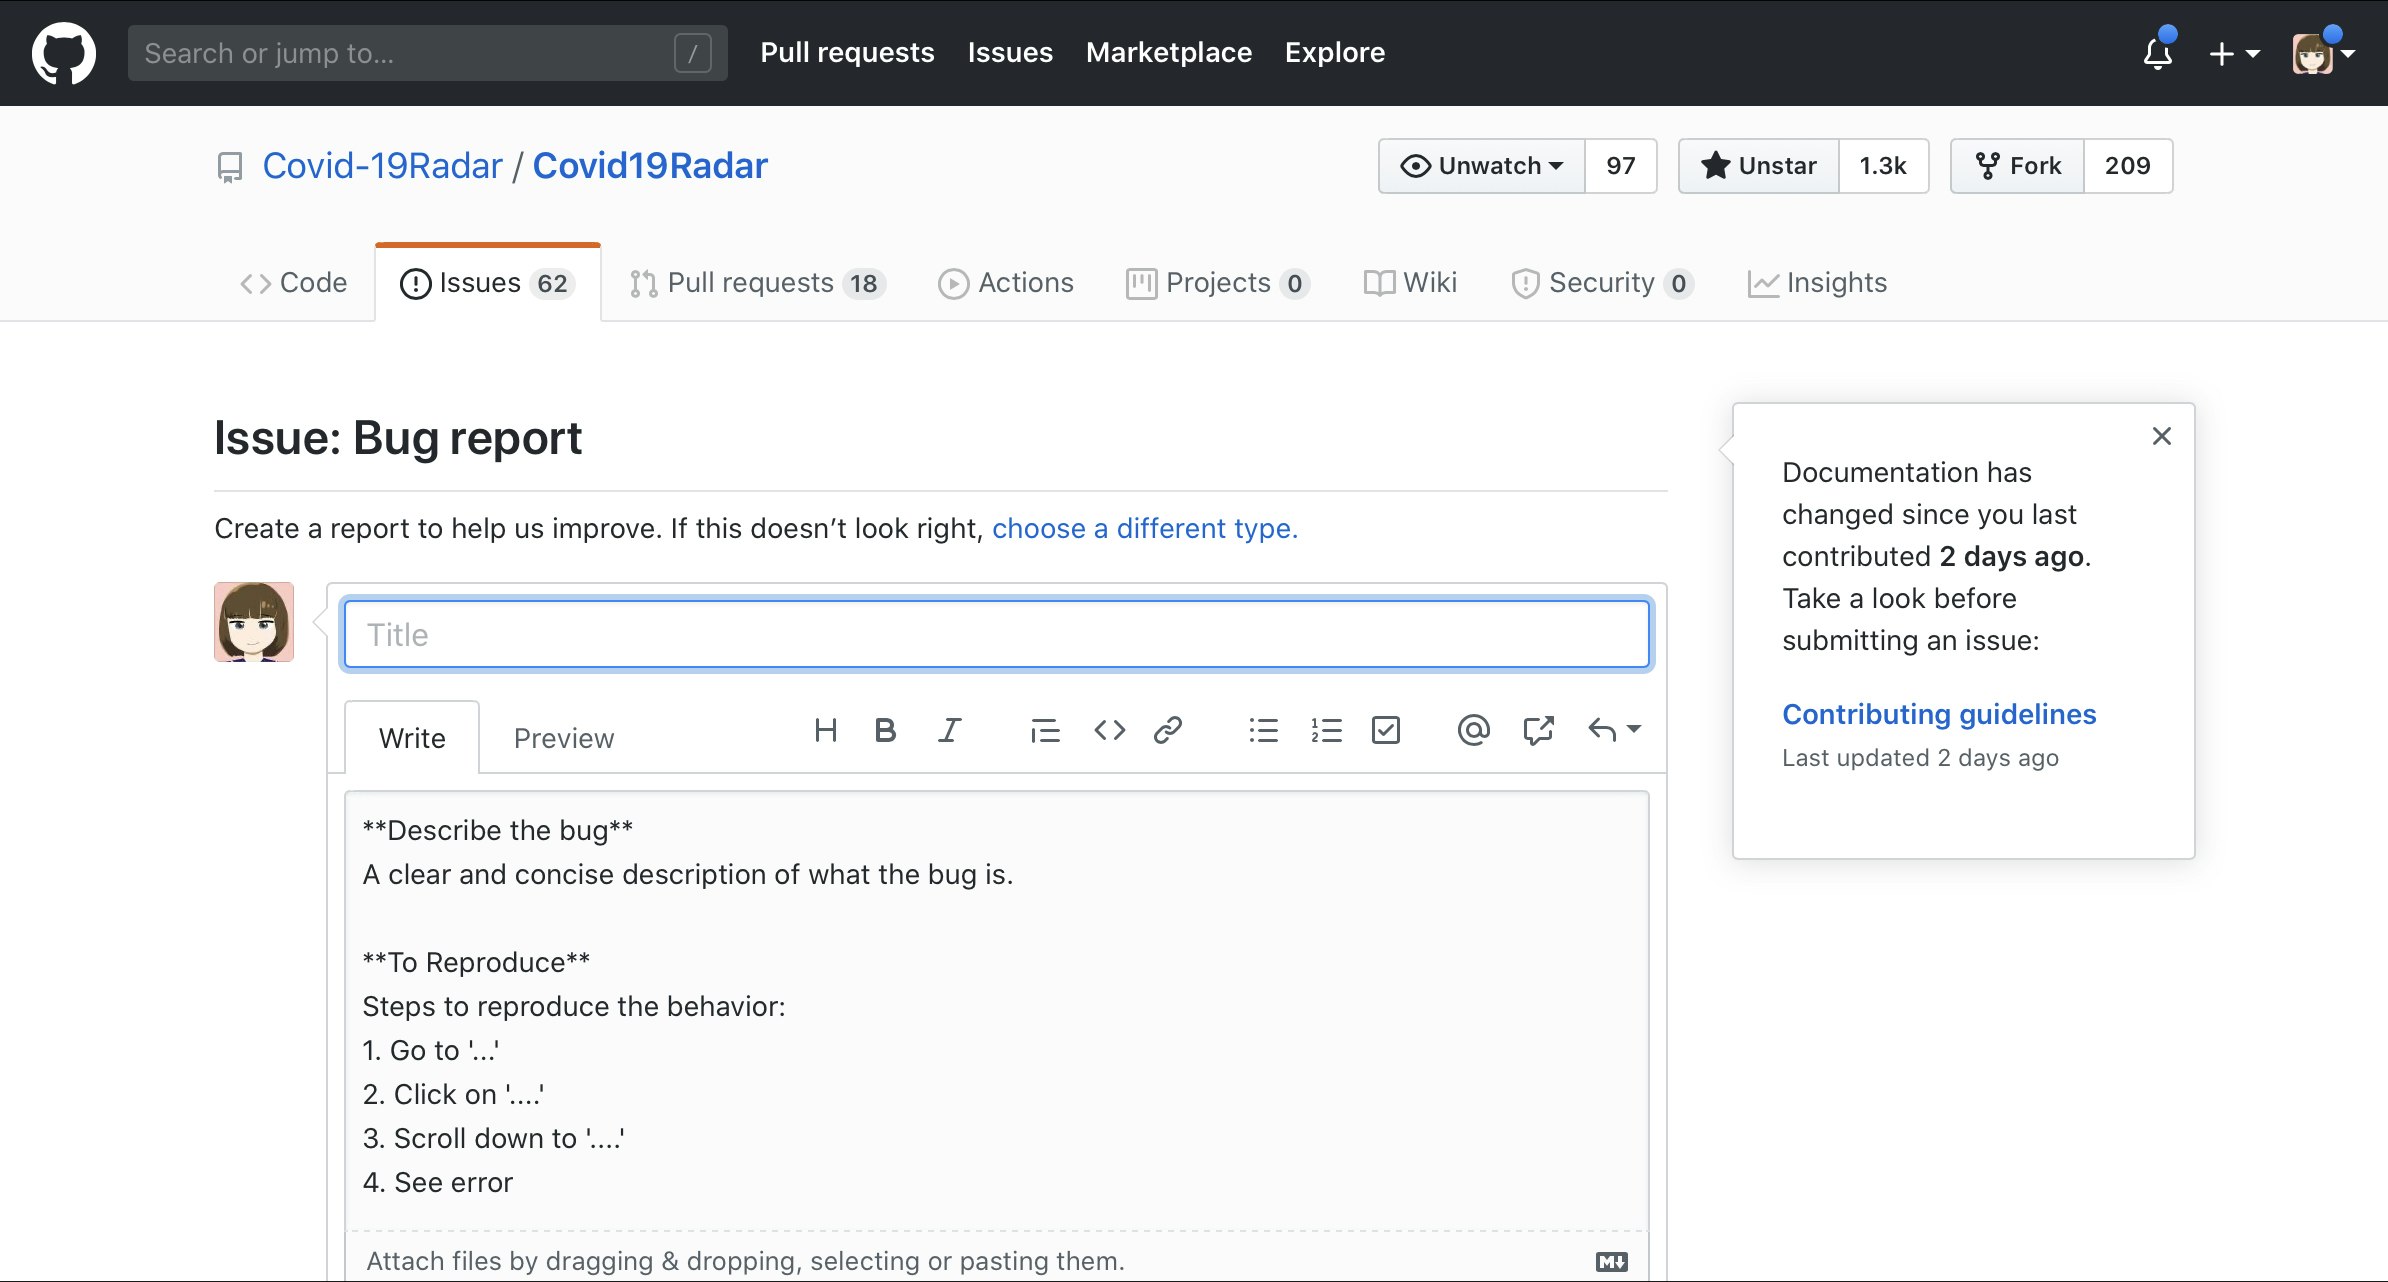
Issueの作成画面に映るので、問題に関して説明やどういう手順を踏んだら問題が起こるのかはっきりさせましょう。
規約などはありませんが、英語で書いている方が多いので英語の方がいいのかもしれません。(日本語でもOK)
環境構築
https://github.com/Covid-19Radar/Covid19Radar/blob/master/doc/Developer.md
このリンクに、インストールすべきものは書いてあります。
主に、Xamarinの導入なので、https://docs.microsoft.com/ja-jp/xamarin/get-started/installation/
を参考にしてみましょう。Xamarin入門する
コードを改善するには、Xamarinをわかっていないといけません。
しかし、アプリの見た目の改善ならば本当に一部くらいわかっていればOKなのでそんなに入門に時間がかかりません。アプリの見た目の改善ができるようになる Xamarin入門
アプリを操作してて見つかる問題の大多数はアプリの見た目や挙動の改善だと思うので、Xamarin.formsによるユーザー インターフェイス(画面の見た目)を作成する方法を紹介します。
公式でみたい方は、https://docs.microsoft.com/ja-jp/xamarin/xamarin-forms/user-interface/
を見るといいと思います。C#で書かれている
c#の文法については、https://ufcpp.net/study/csharp/
などを見ながらやっていきましょう。ユーザー インターフェイス(画面の見た目)を作成しよう
ユーザー インターフェイス(UI)は、画面の見た目のことです。
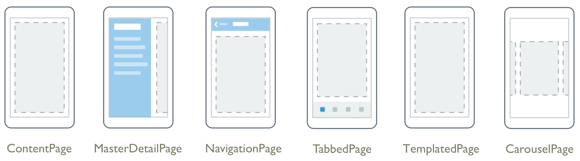
UIを作成するために理解しておくべき4つの概念があります。
- ページ
- レイアウト
- ビュー
ページ
画面のすべてまたは大部分を占めます。
https://docs.microsoft.com/ja-jp/xamarin/xamarin-forms/user-interface/controls/pages
から引用
Android でいうActivityのようなものです。
ContentPage、MasterDetailPage、NavigationPage、TabbedPage、CarouselPage、TemplatedPageという6種類のPageあります。接触確認アプリ「Cocoa」のページ
HomePageのコードをみてみましょう。
https://github.com/Covid-19Radar/Covid19Radar/blob/master/Covid19Radar/Covid19Radar/Views/HomePage/HomePage.xaml
よりHomePage.xaml<?xml version="1.0" encoding="utf-8" ?> <ContentPage x:Class="Covid19Radar.Views.HomePage" xmlns="http://xamarin.com/schemas/2014/forms" xmlns:x="http://schemas.microsoft.com/winfx/2009/xaml" xmlns:ffimageloading="clr-namespace:FFImageLoading.Forms;assembly=FFImageLoading.Forms" xmlns:ios="clr-namespace:Xamarin.Forms.PlatformConfiguration.iOSSpecific;assembly=Xamarin.Forms.Core" xmlns:prism="http://prismlibrary.com" xmlns:resources="clr-namespace:Covid19Radar.Resources;assembly=Covid19Radar" ios:Page.UseSafeArea="true" prism:ViewModelLocator.AutowireViewModel="True" NavigationPage.TitleIconImageSource="HeaderLogo.png" Style="{StaticResource DefaultPageStyle}" Visual="Material"> <ContentPage.ToolbarItems> <ToolbarItem AutomationId="LabelMainTutorial" Command="{prism:NavigateTo 'HelpMenuPage'}" Order="Primary" Priority="1" Text="{x:Static resources:AppResources.MainTutorial}" /> </ContentPage.ToolbarItems> <ScrollView> <StackLayout Padding="15" BackgroundColor="#EEEEEE" Spacing="15"> <Frame Padding="10" CornerRadius="10" HasShadow="False"> <StackLayout Spacing="0"> <Label HorizontalTextAlignment="Center" Style="{StaticResource DefaultLabel}"> <Label.FormattedText> <FormattedString> <Span Text="{Binding StartDate}" /> <Span Text="{x:Static resources:AppResources.HomePageDescription0}" /> <Span Text=" " /> <Span Text="{Binding PastDate}" /> <Span Text=" " /> <Span Text="{x:Static resources:AppResources.HomePagePastDays}" /> <Span Text=" " /> <Span Text="{x:Static resources:AppResources.HomePageDescription1}" /> </FormattedString> </Label.FormattedText> </Label> <Button AutomationId="ButtonExposures" Command="{Binding Path=OnClickExposures}" Style="{StaticResource DefaultButton}" Text="{x:Static resources:AppResources.HomePageDescription2}" /> </StackLayout> </Frame> <Frame Padding="10" CornerRadius="10" HasShadow="False"> <StackLayout Spacing="0"> <Label Style="{StaticResource DefaultSubTitleLabel}" Text="{x:Static resources:AppResources.HomePageDescription3}" /> <Grid ColumnSpacing="15" RowSpacing="0"> <Grid.ColumnDefinitions> <ColumnDefinition Width="0.2*" /> <ColumnDefinition Width="0.8*" /> </Grid.ColumnDefinitions> <Grid.RowDefinitions> <RowDefinition Height="Auto" /> </Grid.RowDefinitions> <ffimageloading:CachedImage Grid.Row="0" Grid.Column="0" Aspect="AspectFit" Source="HOMEPage10.png" /> <Label Grid.Row="0" Grid.Column="1" Style="{StaticResource DefaultLabelSmall}" Text="{x:Static resources:AppResources.HomePageHeader2Description}" VerticalTextAlignment="Center" /> </Grid> <Button Command="{prism:NavigateTo 'SubmitConsentPage'}" Style="{StaticResource DefaultButton}" Text="{x:Static resources:AppResources.HomePageDescription4}" /> </StackLayout> </Frame> <Frame Padding="10" CornerRadius="10" HasShadow="False"> <StackLayout Spacing="0"> <Label Style="{StaticResource DefaultSubTitleLabel}" Text="{x:Static resources:AppResources.HomePageHeader3Title}" /> <Grid ColumnSpacing="15" RowSpacing="0"> <Grid.ColumnDefinitions> <ColumnDefinition Width="0.2*" /> <ColumnDefinition Width="0.8*" /> </Grid.ColumnDefinitions> <Grid.RowDefinitions> <RowDefinition Height="Auto" /> </Grid.RowDefinitions> <ffimageloading:CachedImage Grid.Row="0" Grid.Column="0" Aspect="AspectFit" Source="HOMEPage11.png" /> <Label Grid.Row="0" Grid.Column="1" Style="{StaticResource DefaultLabelSmall}" Text="{x:Static resources:AppResources.HomePageHeader3Description}" VerticalTextAlignment="Center" /> </Grid> <Button Command="{Binding Path=OnClickShareApp}" Style="{StaticResource DefaultButton}" Text="{x:Static resources:AppResources.HomePageDescription5}" /> </StackLayout> </Frame> </StackLayout> </ScrollView> </ContentPage>このように、画面の一番大きな単位は、Pageであり、
HomePageは、ContentPageが使われていますね。レイアウト
レイアウトは画面を分けたり、要素をまとめたりする役目をしています。
HomePageでは、各塊ごとに、Frameというレイアウトが使われていますね。HomePage.xaml<Frame Padding="10" CornerRadius="10" HasShadow="False"> <StackLayout Spacing="0"> <Label HorizontalTextAlignment="Center" Style="{StaticResource DefaultLabel}"> <Label.FormattedText> <FormattedString> <Span Text="{Binding StartDate}" /> <Span Text="{x:Static resources:AppResources.HomePageDescription0}" /> <Span Text=" " /> <Span Text="{Binding PastDate}" /> <Span Text=" " /> <Span Text="{x:Static resources:AppResources.HomePagePastDays}" /> <Span Text=" " /> <Span Text="{x:Static resources:AppResources.HomePageDescription1}" /> </FormattedString> </Label.FormattedText> </Label> <Button AutomationId="ButtonExposures" Command="{Binding Path=OnClickExposures}" Style="{StaticResource DefaultButton}" Text="{x:Static resources:AppResources.HomePageDescription2}" /> </StackLayout> </Frame> <Frame Padding="10" CornerRadius="10" HasShadow="False"> <StackLayout Spacing="0"> <Label Style="{StaticResource DefaultSubTitleLabel}" Text="{x:Static resources:AppResources.HomePageDescription3}" /> <Grid ColumnSpacing="15" RowSpacing="0"> <Grid.ColumnDefinitions> <ColumnDefinition Width="0.2*" /> <ColumnDefinition Width="0.8*" /> </Grid.ColumnDefinitions> <Grid.RowDefinitions> <RowDefinition Height="Auto" /> </Grid.RowDefinitions> <ffimageloading:CachedImage Grid.Row="0" Grid.Column="0" Aspect="AspectFit" Source="HOMEPage10.png" /> <Label Grid.Row="0" Grid.Column="1" Style="{StaticResource DefaultLabelSmall}" Text="{x:Static resources:AppResources.HomePageHeader2Description}" VerticalTextAlignment="Center" /> </Grid> <Button Command="{prism:NavigateTo 'SubmitConsentPage'}" Style="{StaticResource DefaultButton}" Text="{x:Static resources:AppResources.HomePageDescription4}" /> </StackLayout> </Frame> <Frame Padding="10" CornerRadius="10" HasShadow="False"> <StackLayout Spacing="0"> <Label Style="{StaticResource DefaultSubTitleLabel}" Text="{x:Static resources:AppResources.HomePageHeader3Title}" /> <Grid ColumnSpacing="15" RowSpacing="0"> <Grid.ColumnDefinitions> <ColumnDefinition Width="0.2*" /> <ColumnDefinition Width="0.8*" /> </Grid.ColumnDefinitions> <Grid.RowDefinitions> <RowDefinition Height="Auto" /> </Grid.RowDefinitions> <ffimageloading:CachedImage Grid.Row="0" Grid.Column="0" Aspect="AspectFit" Source="HOMEPage11.png" /> <Label Grid.Row="0" Grid.Column="1" Style="{StaticResource DefaultLabelSmall}" Text="{x:Static resources:AppResources.HomePageHeader3Description}" VerticalTextAlignment="Center" /> </Grid> <Button Command="{Binding Path=OnClickShareApp}" Style="{StaticResource DefaultButton}" Text="{x:Static resources:AppResources.HomePageDescription5}" /> </StackLayout> </Frame>そのほかにも、
StackLayoutやGridなどがありますね。
それぞれ役割があるので、詳しくはhttps://docs.microsoft.com/ja-jp/xamarin/xamarin-forms/user-interface/controls/layouts をみてみましょう。ビュー
ビューは、ボタンやラベル(テキストを表示できる)やイメージ(画像を表示できる)などの要素です。他のフレームワークでは、ウィジットなどと呼ばれたりします。
上のコードを見れば、
ButtonやLabelがたくさん使われていますね。接触確認アプリ「Cocoa」のUIはどこに書いてある?
- ページ
- レイアウト
- ビュー
が理解できたのなら、属性を変えたり、要素を追加することでUIを改善できます。
データを提供する部分はもう備わっているのでそれについては考えずUI改善に集中できます。
最後に、どの画面がどこのファイルにあるのかみてみましょう。
HomePage
HelpMenuPage
MenuPage
NotContactPage
SubmitConsentPage
SettingsPage
主な、Pageを紹介しました。問題を見つけたら、問題のPageにいき、ソースコードを編集してみましょう。
プルリクエストを出してみよう!
あなたのUIの改善を反映させるには、プルリクエストを送り、レビュワーに許可をもらって、改善が反映されます。(レビュー→masterへマージ→リリースという流れ)
プルリクエストを出す方法は https://qiita.com/Anharu/items/572f5f6c30c6edbec349#コードを編集する で紹介しているので、そちらをみていただければ嬉しいです。
まとめ
賛否両論あった、接触確認アプリ「Cocoa」。だけど、悪いところを見つけたら、自分で修正していけば、「Cocoa」はもっともっと良くなっていくと思います。
開発の初期メンバーさん(@kazumihiroseさん, @DarkCrash3さん, norijiさん,runceelさん)は日本中で使われるであろう社会性の高いアプリに対して、プレッシャーやストレスを感じているかもしれません。
その方々に対して、尊敬の念を示し、OSSの利点を生かしてみんなの力を合わせて改善するということが大事だと思います。参考文献
https://github.com/Covid-19Radar/Covid19Radar
https://docs.microsoft.com/ja-jp/xamarin/xamarin-forms/user-interface/
https://dev.classmethod.jp/articles/getting-started-xamarin-forms/