- 投稿日:2019-04-05T23:47:19+09:00
[iOS]UIBezierPath, CAShapeLayer, UIColor.init(patternImage:) でUITabBarの形、色、外観を変える
Swift4.2とSwift5 で動作確認済
https://itunes.apple.com/sg/app/pripara/id1039257927?mt=8
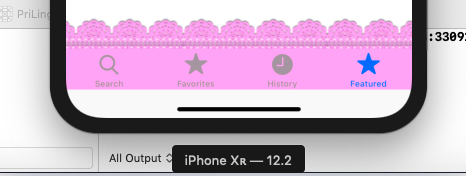
(香港のAppStoreじゃないとダウンロードできません)実現できたUITabBar(アイコンは今回の記事と関係ないです)
https://github.com/Satoru-PriChan/ChangeUITabBarAppearance
方法
⑴UIBezierPathを使って、どんなグラフィックを描きたいかを定義します。今回は、スタート地点のY座標をマイナスとし、縦に少し拡張しているだけです。
MyTabBarController.swiftfunc createLengthExpandShape() -> CGPath { let path = UIBezierPath() //Starting point (left top) then draw lines until the it returns to the starting point with close(). let startX: CGFloat = 0 let startY: CGFloat = -37 path.move(to: CGPoint.init(x: startX, y: startY)) path.addLine(to: CGPoint.init(x: self.tabBar.frame.width, y: startY)) path.addLine(to: CGPoint.init(x: self.tabBar.frame.width, y: self.tabBar.frame.height)) path.addLine(to: CGPoint.init(x: startX, y: self.tabBar.frame.height)) path.close() return path.cgPath }参考 https://medium.com/@philipp307/draw-a-custom-ios-tabbar-shape-27d298a7f4fa
(2)CAShapeLayerに(1)のパスを追加し、レイヤーの形を変えます。
MyTabBarController.swiftoverride func viewDidLoad() { super.viewDidLoad() // Do any additional setup after loading the view. //中略 ここでUITabBarControllerの他の設定を色々することになると思います //Change tabbar shape self.changeTabBarShape() } func changeTabBarShape() { let shapeLayer = CAShapeLayer() //Get CGPath shapeLayer.path = self.createLengthExpandShape() //Set image shapeLayer.fillColor = UIColor.init(patternImage: UIImage.init(named: "MyImage.png")!).cgColor //Set layer self.tabBar.layer.insertSublayer(shapeLayer, at: 0) }(3)UIColor.init(patternImage:) でセットしたい画像を用意し、Xcodeにドラッグ&ドロップで追加してください。その際Copy Items If Neededにチェックを入れることをお勧めします。
画像の準備が一番わかりにくい点です。
画像はランタイム時上下逆にして使われるので、画像編集ソフトなどで画像の内容をあらかじめ上下逆にしておいてください。また画像が貼られ始めるのは「拡張前の」レイヤーの左上角からという点に注意してください。今回、画像下のピンク色で雑に塗りつぶしただけの部分がUITabBarの本来の左上から貼られます。
その上のCAShapeLayerで拡張した部分には、画像上のレースのひらひら部分が貼られます。
ひらひら部分と、塗りつぶしただけの部分の間をpngで透過しておくと、UITabBarが画像に合わせて複雑に形を変える(ように見える)ため、デザイン性が増します。
CAShapeLayerの拡張法をもっと複雑に変えたい場合は、画像の中身も調整する必要があると思います。今回は縦長にしただけなので、簡単に済んでいます。
全プロジェクト
https://github.com/Satoru-PriChan/ChangeUITabBarAppearance気に入ったら、GitHubの方に星もらえると助かります。
もっとエクセレントなやり方があると思うので、誰か教えてください・・・
以上
- 投稿日:2019-04-05T23:10:03+09:00
iOSの照度センサーを使って画面を暗くしたり明るくしたりする
iOSの照度センサーを使って、なにかできないか模索していたときのメモ
iPhoneのカメラ部分を触ると画面を暗くできる
import UIKit

class ViewController: UIViewController {

    override func viewDidLoad() {
        super.viewDidLoad()
        // 近接監視が有効(true)か無効かを示すブール値
        UIDevice.current.isProximityMonitoringEnabled = true
        //照度センサーを監視
        NotificationCenter.default.addObserver(self,
                                               selector: Selector("proximityChanged"),
                                               name:UIDevice.proximityStateDidChangeNotification,
                                               object: nil)
    }

    override func viewDidDisappear(_ animated: Bool) {
        super.viewDidDisappear(animated)
    }

    override func didReceiveMemoryWarning() {
        super.didReceiveMemoryWarning()
    }

    @objc func proximityChanged() {
        //状態を表示
        print("\(UIDevice.current.proximityState)")
    }
}
- 投稿日:2019-04-05T19:48:58+09:00
FirebaseをCarthageで設定する時のXcodegenのyml
こちらを参考にxcodegenのymlを書きました。
https://qiita.com/lovee/items/09d33b7c8b1e3ff3dcc6targets: App: settings: base: OTHER_LDFLAGS: $(inherited) $(OTHER_LDFLAGS) -ObjC dependencies: - framework: Carthage/Build/iOS/Firebase.framework embed: false link: false - framework: Carthage/Build/iOS/FIRAnalyticsConnector.framework embed: false - framework: Carthage/Build/iOS/FirebaseAnalytics.framework embed: false - framework: Carthage/Build/iOS/FirebaseAuth.framework embed: false - framework: Carthage/Build/iOS/FirebaseCore.framework embed: false - framework: Carthage/Build/iOS/FirebaseCoreDiagnostics.framework embed: false - framework: Carthage/Build/iOS/FirebaseInstanceID.framework embed: false - framework: Carthage/Build/iOS/GoogleAppMeasurement.framework embed: false - framework: Carthage/Build/iOS/GoogleUtilities.framework embed: false - framework: Carthage/Build/iOS/GTMSessionFetcher.framework embed: false - framework: Carthage/Build/iOS/nanopb.framework embed: false - sdk: libc++.tbd - sdk: libsqlite3.tbd - sdk: CoreTelephony.framework - sdk: StoreKit.frameworkFirebaseAnalyticsとAuthのサンプル
- 投稿日:2019-04-05T17:02:40+09:00
React Native 動的にUIを更新
- 投稿日:2019-04-05T16:23:34+09:00
UIFeedbackGeneratorを簡単に使えるようにする
開発環境
- Xcode10.2
- Swift 5.0
UIFeedbackGeneratorとは
Apple公式から引用
概要
このクラスのインスタンスを自分でサブクラス化したり作成したりしないでください。代わりに、提供されている具象サブクラスの1つをインスタンス化してください。UIImpactFeedbackGenerator。影響が発生したことを示すには、影響フィードバックジェネレータを使用します。たとえば、ユーザーインターフェイスオブジェクトが何かにぶつかったり、所定の位置に固定されたときに、インパクトフィードバックを引き起こすことがあります。
UISelectionFeedbackGenerator。選択の変化を示すために選択フィードバックジェネレータを使用します。
UINotificationFeedbackGenerator。成功、失敗、および警告を示すために通知フィードバックジェネレータを使用します。
何かのアクションのフィードバックとしてユーザさんの端末をブルッてさせてフィードバックするやつです。
通常の実装方法
UIFeedbackGeneratorの使い方と便利に使えるライブラリから引用させていただきました。
class ViewController: UIViewController {

    private let feedbackGenerator: Any? = {
        if #available(iOS 10.0, *) {
            let generator: UIImpactFeedbackGenerator = UIImpactFeedbackGenerator(style: .light)
            generator.prepare()
            return generator
        } else {
            return nil
        }
    }()

    @IBAction private func light() {
        if #available(iOS 10.0, *), let generator = feedbackGenerator as? UIImpactFeedbackGenerator {
            generator.impactOccurred()
        }
    }
各VCに記述するにはしんどいなという印象でした。
簡単に使う方法
以下の構造体でラップして利用します。
/// UIFeedbackGeneratorを簡単に利用するためのラッパー
struct Feedbacker {

  static func notice(type: UINotificationFeedbackGenerator.FeedbackType) {
    if #available(iOS 10.0, *) {
      let generator = UINotificationFeedbackGenerator()
      generator.prepare()
      generator.notificationOccurred(type)
    }
  }

  static func impact(style: UIImpactFeedbackGenerator.FeedbackStyle) {
    if #available(iOS 10.0, *) {
      let generator = UIImpactFeedbackGenerator(style: style)
      generator.prepare()
      generator.impactOccurred()
    }
  }

  static func selection() {
    if #available(iOS 10.0, *) {
      let generator = UISelectionFeedbackGenerator()
      generator.prepare()
      generator.selectionChanged()
    }
  }

}
使い方
フィードバックをさせたいところでstaticメソッドをコールします。
/// 例
override func viewDidLoad() {
  // ViewControllerの読み込みが終わったらフィードバック
  Feedbacker.notice(type: .success)
}
コールの仕方は以下になりますので用途によって使い分けてください。
// notice
Feedbacker.notice(type: .success)
Feedbacker.notice(type: .warning)
Feedbacker.notice(type: .error)

// impact
Feedbacker.impact(style: .heavy)
Feedbacker.impact(style: .light)
Feedbacker.impact(style: .medium)

// selection
Feedbacker.selection()
おわり
間違えてる部分や編集リクエストありましたらよろしくお願いいたします
- 投稿日:2019-04-05T14:45:33+09:00
iOS Major Updates-Apple's WWDC Event
WWDC (Worldwide Developers Convention) is the biggest event that has upgraded many changes ruled iOS market place that is ever before. Top Mobile App developers from all the corner of the countries wait for this largest event to increase their credibility, empowerment and motivations towards the development of software products. Tim Cook has brought drastic updates for the operating system of iOS 12 which is really more beneficial for the users, the company and the largest app market place as well.
Swift language is becoming more powerful and useful than ever before, it is adopted by more millions of iOS app developers in India, USA and other countries like Canada, Japan, France, etc…and progress will go on achieving more precise upgrades on iOS. Fastest adoption is more possible on the operating system of iOS compared to Android and the adoption rate of iOS was 81 %, whereas newly released Android is only 6%. So people will recommend for iOS than going with the less speed of Android.
More than 6000 developers from more than 80 countries were live in the event. The latest update for the operating system of iOS 12 will achieve app load up to 40% faster, 50% faster if use keyboard, when comes to the camera it is up to 70% faster.
Here are a few keynotes which are delivered by Tim Cook in WWDC event:
Password Auto-fill: Password auto-fill is actually an amazing feature of iOS 12 which allows the third party to fill out the password.Auto-fill 2FA SMS: Auto-fill 2 FA feature fills the OTP automatically like passwords in some applications while reducing the manual actions like copy and paste.
Social Sharing from Safari: Safari always asks users whether they want to allow tracking or not to allow. Likewise, it enables/disables Social sharing apps.
Gestures on iPhone X and iPad: iPhone X and iPad have brilliant gesture on their phones, swipe down from the top right corner that will take you to control centre and swipe from anywhere on the dock will take you to home.
Smoother Animations: when you perform things like swipe to control centre, swipe while multitasking and scroll in apps make you feel more responsive.
Improved Siri Shortcuts: Siri has brought a lot of changes to iOS devices bringing more shortcuts which allow you to speak and perform actions for certain functions. This is for making life with iOS easy and effortlessly. With these Siri Shortcuts iOS users can easily remember the passwords.
Fun with Memoji: iOS has fun-filled emoji and Animojis on iPhone X. In addition to these emojis, iOS has updated Memojis, users can create custom emojis which look like themselves, these custom created emojis are named as Memojis on iOS.
ARKit 2: Newly updated ARKit 2 allows you to share 3D objects on iOS using USDZ file format. It is to catch multiple iOS devices from the same practical objects from different points for multiple user perspectives.
A relationship between iOS and MacOS: From 2019, iOS enable their apps to run on MacOS, but it doesn't mean that Apple is planning to unite both iOS and MacOS. Thing is MacOS able to run both apps on it including MacOS apps and iOS apps.
Face-Time: iOS has launched group Face Time Chat, allows users to group 32 participants at a time which will be integrated with messages app. Hence users can easily switch to group messaging or video call.
My Personnel Recommendation for iOS App Development: FuGenX is a game-changer for the iOS market place, as it’s a fast-growing mobile apps development in Hyderabad, Pune, Gurgaon and Ahmedabad, India. Offering the best app development services for creating smart iPhone and iPad apps to achieve your business goals.
- 投稿日:2019-04-05T12:38:46+09:00
【iOS】Appleから送られてきたクラッシュログを解析し、その結果を読み解く
はじめに
クラッシュが原因でAppleからリジェクトを食らうと、ご丁寧にクラッシュログを添付してくれることがあります。
しかしそれを見ただけでは実際どこでクラッシュしたのか分かりません。そんなときに必要となるのが「ログの解析」です。
今回は備忘録として、解析の手順から結果の読み解き方までを記しておきたいと思います。手順
下準備
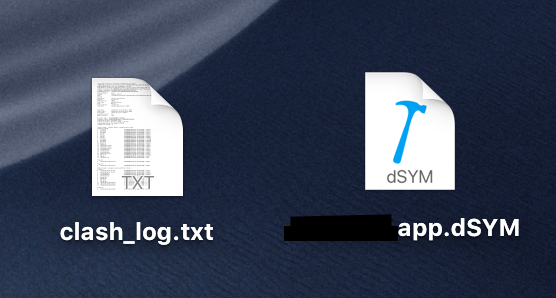
まずはAppleから送られてきたクラッシュログを
clash_log.txtとかでデスクトップに保存します。
あと審査に提出したArchiveの.dSYMファイルも必要なので、下記の手順で同様にデスクトップ保存します。- Xcodeを起動する - Window > Organizerを選択 - アプリ申請時に指定したArchiveを右クリック > Show in Finderを選択 - 対象の.xcarchiveファイルを右クリック > パッケージの内容を表示を選択 - dSYMsディレクトリの中にアプリ名.app.dSYMファイルがあるのでデスクトップにコピーする解析する
ファイルを保存したデスクトップに移動します。
cd ~/Desktopこのあとのコマンドでエラーが出ないようにするおまじないをかけます。
export DEVELOPER_DIR=/Applications/Xcode.app/Contents/Developer/最後に解析結果を書き出します。
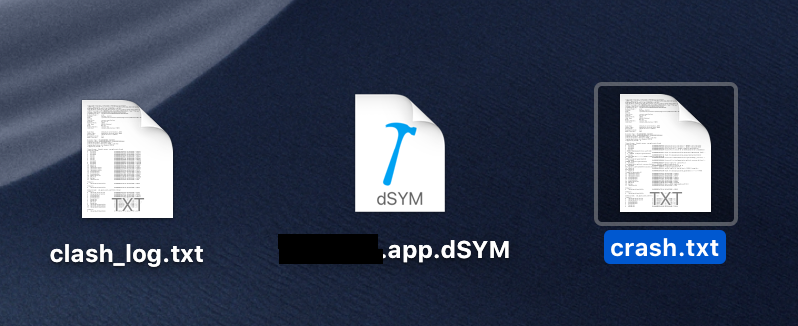
/Applications/Xcode.app/Contents/SharedFrameworks/DVTFoundation.framework/Versions/A/Resources/symbolicatecrash -v ~/Desktop/clash_log.txt ~/Desktop/アプリ名.app.dSYM > crash.txtうまくいくとターミナルに結果がぶわっと吐き出されて、ファイル(crash.txt)が書き出されます。
ファイルの中身をエディタで見てみると、解析されたっぽいログが並んでいるのが確認できると思います。(空のファイルができてしまった場合、残念ながら失敗です)解析結果を読み解く
結果が出たのはいいものの、ざっと1000行近くのログが並んでおり、「これどうやって見たらいいんだ…」と途方に暮れたくなるかもしれません(わかります、私もそうでした)。
とりあえず上の方から見ていきましょう。
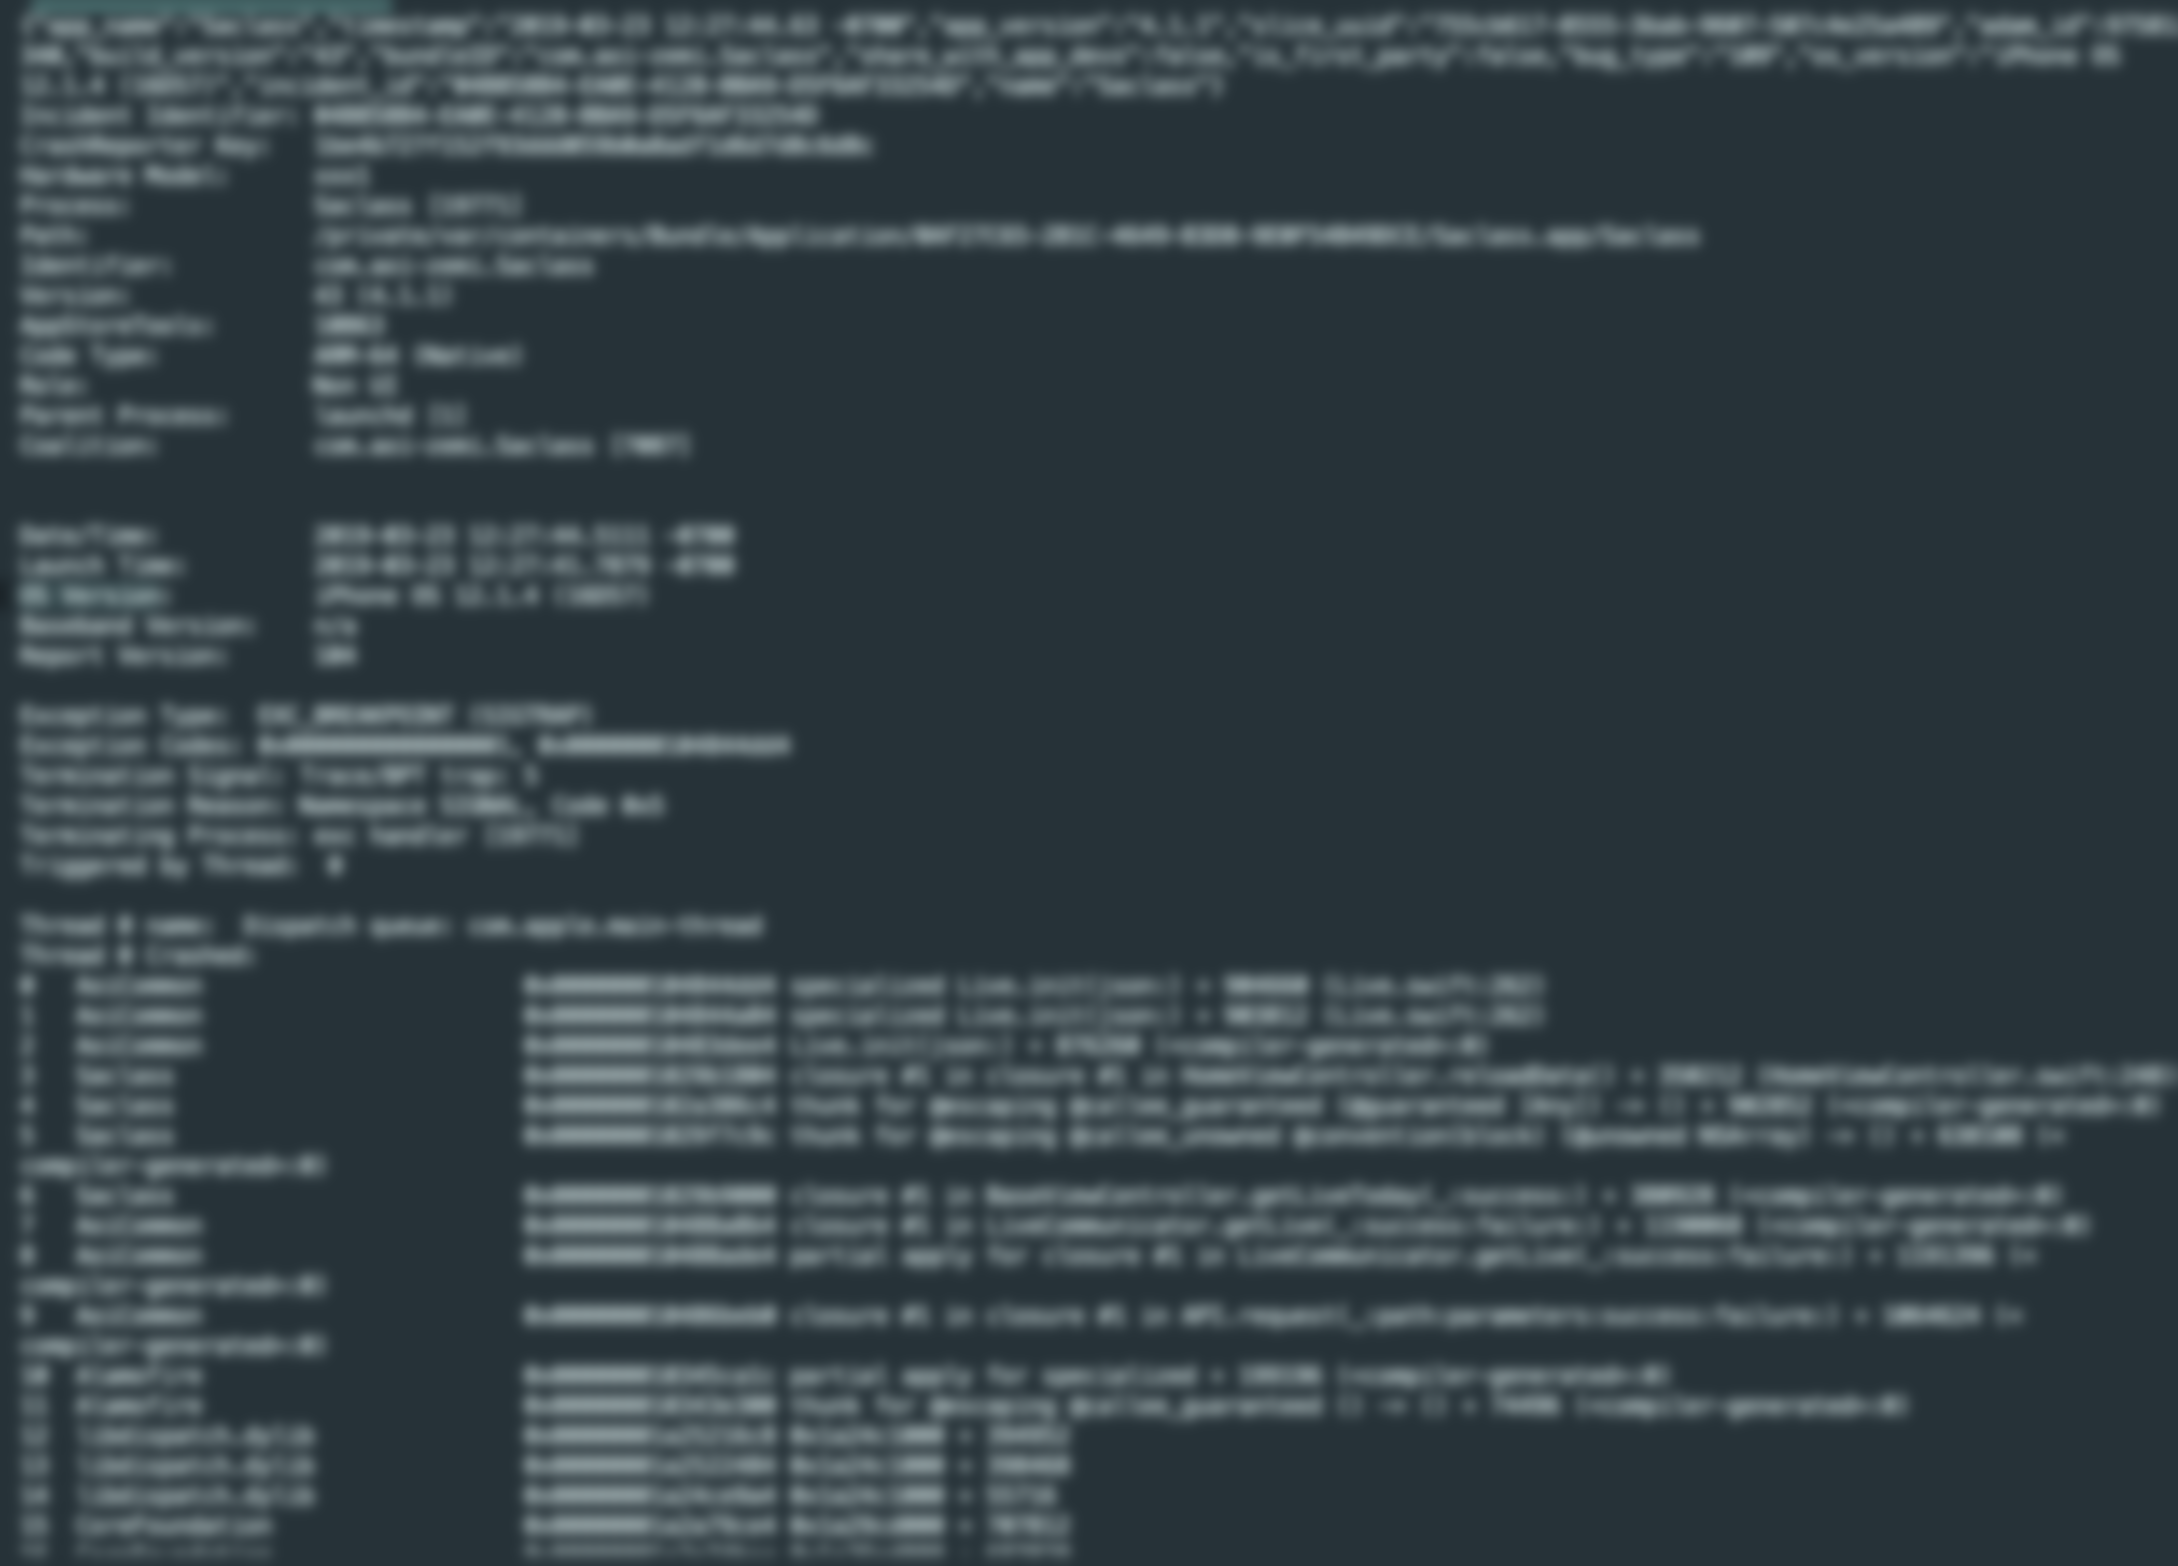
app_name:
Date/Time:
OS Version:よく見知った単語が並んでおり少し安心できます。はじめの20行ほどはログの基本情報だと見て取れました。
その先に出てくるのがクラッシュした原因です。Exception Type: EXC_BREAKPOINT (SIGTRAP)
今回の
EXC_BREAKPOINTというのは、Appleのドキュメントによると
・使用しようとしたオプショナル型がnilだった
・型変換に失敗した
といった原因が考えられるようです。じゃあそれが具体的にどこで起きているのか。それがその先にずらーっと並んでいるスタックトレースに記されています。
Thread 0 name: Dispatch queue: com.apple.main-thread
Thread 0 Crashed:
0 HogeApp 0x0000000104844dd4 specialized Fuga.init(json:) + 904660 (Fuga.swift:355)
1 HogeApp 0x0000000104844a84 specializedFuga.init(json:) + 903812 (Fuga.swift:355)
2 HogeApp 0x000000010483dee4 Fuga.init(json:) + 876260 (:0)
・・・「え、このトレース全部読まないといけないの…?」と絶望感に苛まれる方もいるかもしれません(わかります、私もそうでした)。
スタックトレースは例外の発生状況と発生個所を示すもので、プログラムを実行した情報を「下から上に」積み上げていきます。
つまり一番上(とその周辺)に書かれた行のクラス・行数を見ることで、実際にどこでクラッシュしたのかを読み取ることができるのです。全ての行に目を通す必要はありません。
Thread 0というのはメインスレッドのことなので、
上の例だとメインスレッドの、Fugaクラス355行目で、オプショナル型がnilだったり型変換に失敗したりしたというような理由でクラッシュしたのだ!と突き止めることができると思います。これで無事にバグを修正し、再申請に持っていくことができそうですね
さいごに
一度手順を覚えてしまえばどうってことのないクラッシュログ解析ですが、初めて自分でやろうとすると結構骨が折れました。「解析」という難しそうな言葉に尻込みしてしまう方もいるかもしれません。そんなときこの記事が少しでもお役に立てば嬉しく思います。
以下に参考にさせていただいた記事を載せておくので、さらに詳しく知りたいという方は合わせてどうぞ。
iOSのクラッシュログをSymbolicate(復元)して解析する - Qiita
iOSアプリのクラッシュログを解析する - 備忘録
スタックトレースからデバッグのヒントを読み取る:デバッグのヒント教えます(2) - @IT
Javaのエラー解決の王道~スタックトレースの読み方~ | ITのおもちゃ箱
iOS - appleからのクラッシュ報告でリジェクトをくらい、クラッシュログの解決が出来ない。|teratail
- 投稿日:2019-04-05T11:05:51+09:00
Swift で RTMP Handshake を実装する
RTMPとは
RTMPは、Adobe が開発している Adobe Flash プレーヤーとサーバーの間で、音声・動画・データをやりとりするストリーミングのプロトコルです。
RTMP の主要な利用法は Flash Video を再生することでしたが、低遅延でのストリーミングを実現できることから、ストリーミングサーバーへの映像伝送に使われたりもします。ネットで調べると大体のLive配信アプリはRTMPで配信し、HLSで視聴しているものが多いようです。
RTMP Handshakeとは
RTMPはTCP上で動きます。
TCPによる接続が確立すると、RTMPの接続をハンドシェイクから行っていきます。
RTMPのハンドシェイクは他のプロトコルとは異なります。
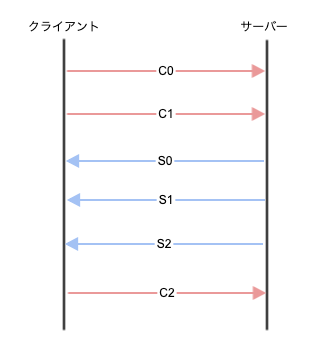
クライアント(接続を開始したエンドポイント)とサーバーはそれぞれ3つの固定長のチャンクを送信します。
これらのチャンクは、クライアントから送信されるものはC0、C1、C2、サーバーから送信されるものは0、S1、S2と呼ばれています。ハンドシェイクは、クライアントがC0およびC1チャンクを送信することから始まります。
クライアントは、C2を送信する前にS1が受信されるまで待つ必要があります。
また、その他のデータ(音声や映像など)を送信するためにはS2の受信を待つ必要があります。
逆にサーバーはS0、S1を送る前にC0が受け取られる必要があります。(C1の受信まで待機してもOK)
S2を送信するにはC1が受信されるまで待つ必要があります。
そしてクライアントと同様その他のデータを送信するにはC2の受信を待つ必要があります。
図にするとこんな感じです。しかし、C0とかS0とか言われても正直良くわかりません。
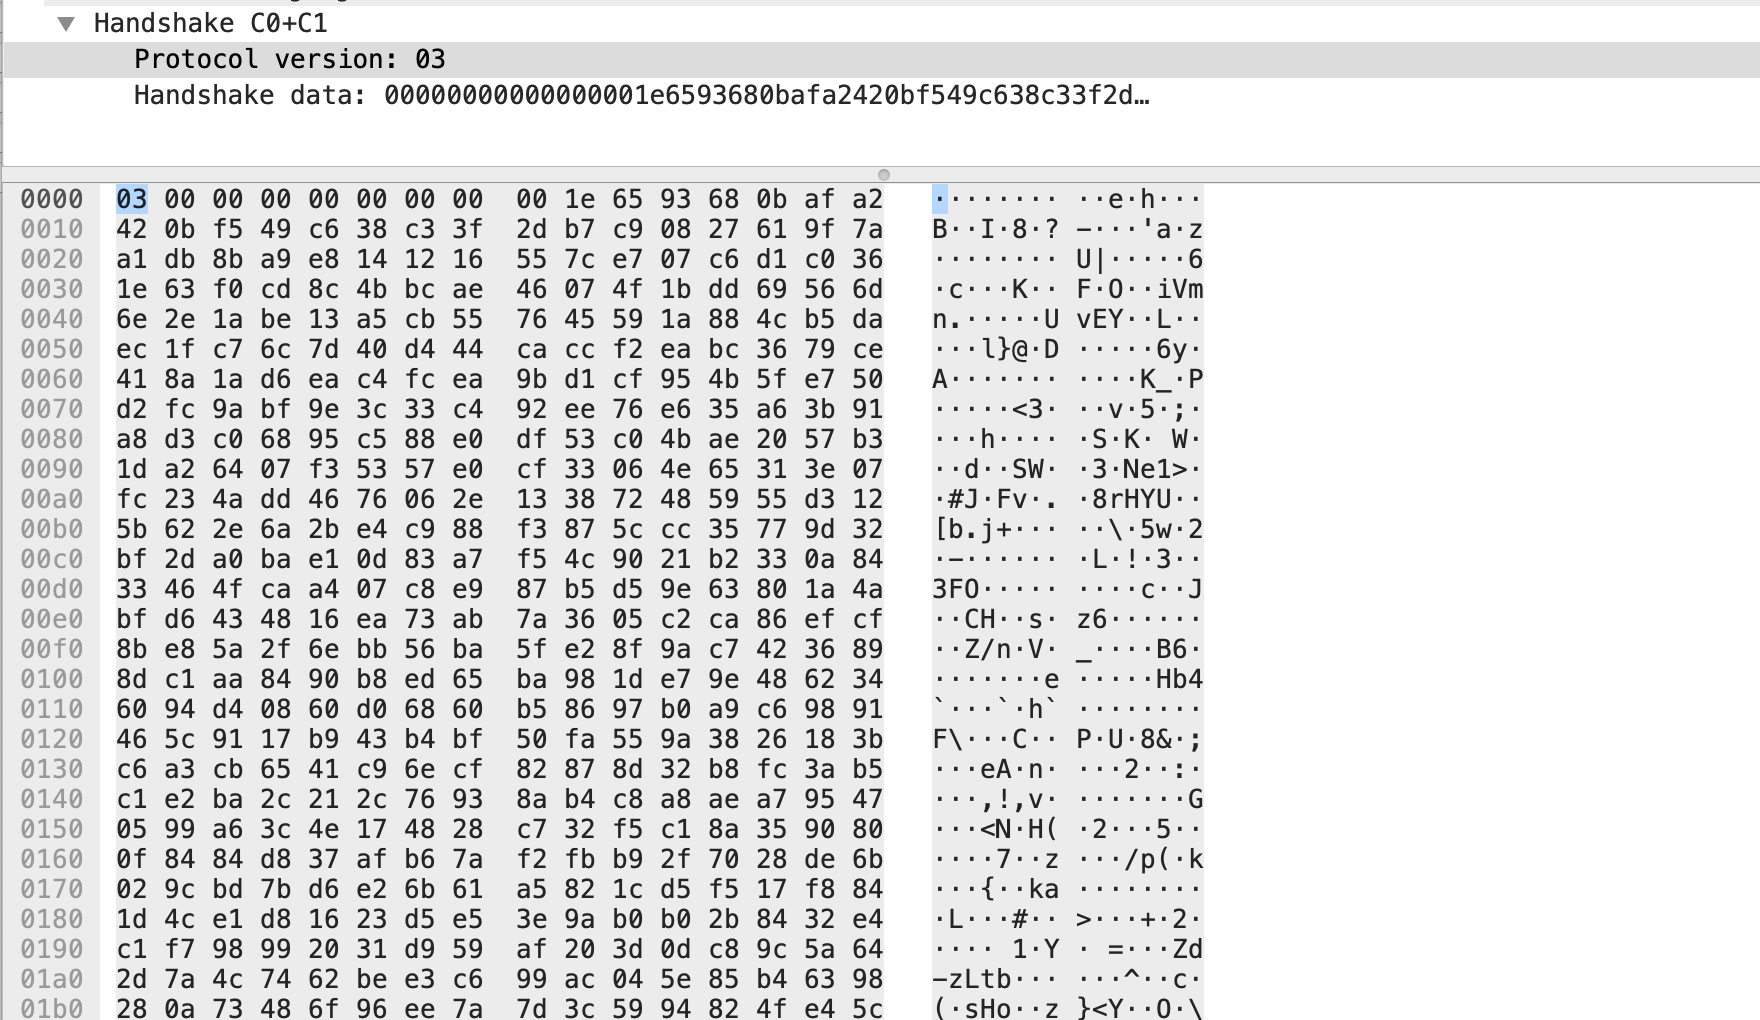
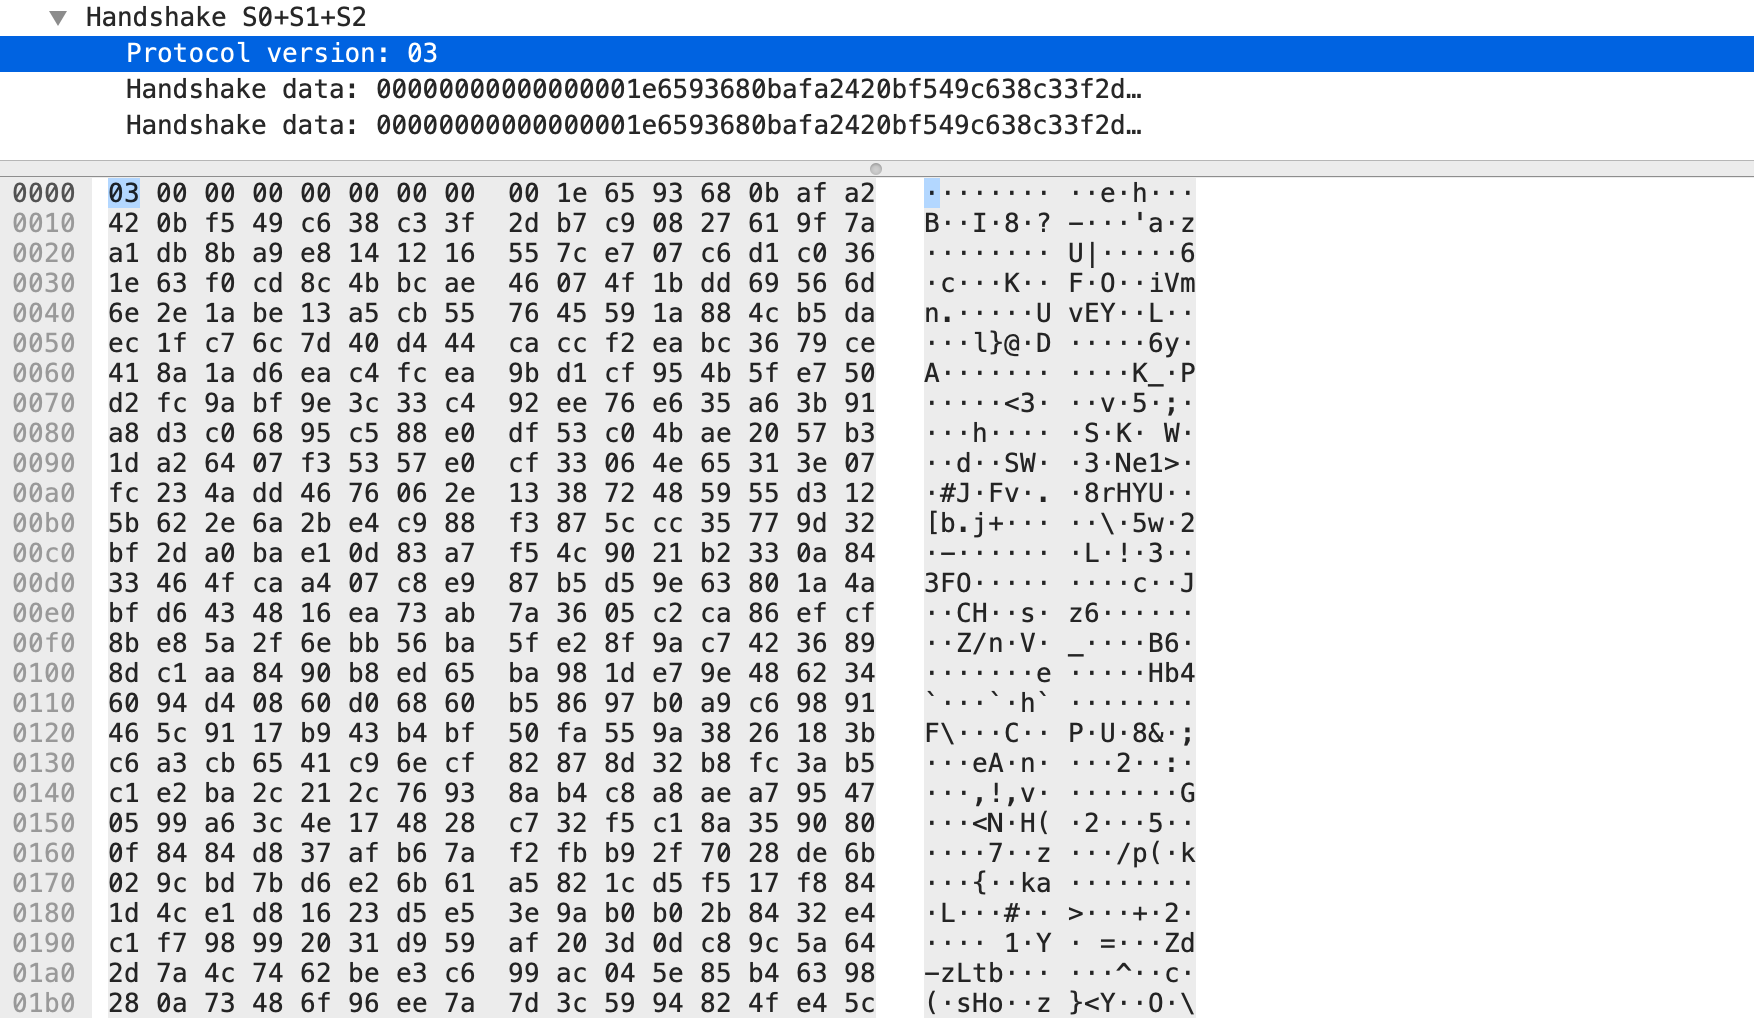
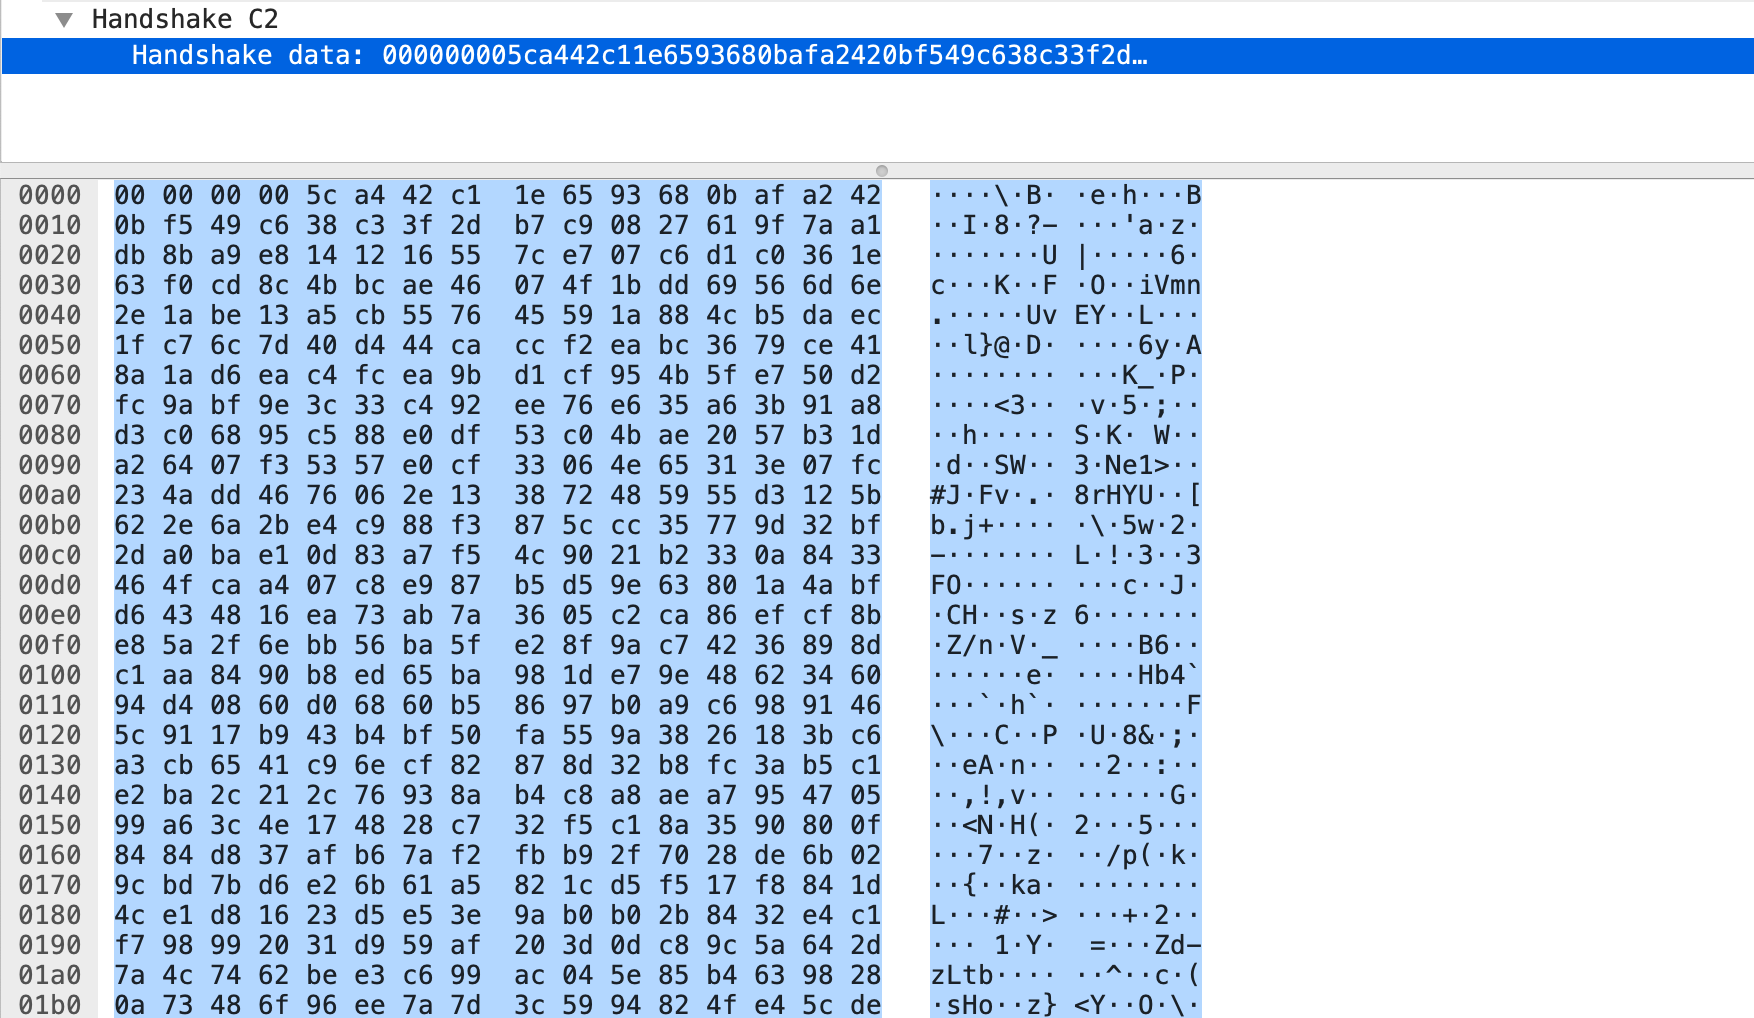
実際の通信を見ると、なるほど、ほんとにC0とかが送られているんだなとわかります。ほんとにそういう名前なんですねー。
これらのチャンクには決まったフォーマットがありますが、フォーマットに関する説明は 仕様書 の「5.2.2. C0 and S0 Format」「5.2.3. C1 and S1 Format」「5.2.4. C2 and S2 Format」に詳しく書いてあるので割愛します。
こちらの記事も仕様書の日本語版くらいわかりやすかったので参考にしてみてください。
https://developers.cyberagent.co.jp/blog/archives/13739/#handshakeこれも実際の通信を見てみると当たり前ですがフォーマット通りのチャンクが送受信されていることがわかります。
ハンドシェークの実装
では実装していきます。
ソケット接続自体は NSStream を使えば簡単です。let inputQueue = DispatchQueue(label: "NetSocket.input") let outputQueue = DispatchQueue(label: "NetSocket.output") var inputStream: InputStream? var outputStream: OutputStream? func open(hostname: String, port: Int) { Stream.getStreamsToHost( withName: hostname, port: port, inputStream: &self.inputStream, outputStream: &self.outputStream ) inputQueue.async { self.inputStream?.delegate = self self.inputStream?.schedule(in: .main, forMode: .default) self.outputStream?.delegate = self self.outputStream?.schedule(in: .main, forMode: .default) self.inputStream?.open() self.outputStream?.open() } }読み込みと書き込みについてはそれぞれ
InputStream#readとOutputStream#writeを使って以下のように書けます。func read() { outputQueue.async { let maxLength = Int(UInt16.max) let buffer = UnsafeMutablePointer<UInt8>.allocate(capacity: maxLength) let count = self.inputStream?.read(buffer, maxLength: maxLength) ?? 0 var data = Data() if 0 < count { data.append(buffer, count: count) self.listen(data) // listen(_:)ついては後述 } } } func write(data: Data) { DispatchQueue.main.async { let length = data.count var leftLength = length data.withUnsafeBytes { (buffer: UnsafePointer<UInt8>) -> Void in while leftLength > 0 { let count = self.outputStream?.write(buffer + (length - leftLength), maxLength: length) ?? 0 leftLength -= count } } } }Input/OutputのStreamの状態が変化すると
StreamDelegate#stream(Stream, handle: Stream.Event)が呼ばれます。
これで通信可能になったとき(.openCompleted)と何かを受信したとき(.hasBytesAvailable)がわかるのでここからチャンクの送受信をおこなっていきます。ソケットをオープンして通信が可能になったらクライアントからC0とC1を送信します。
C1まで送信するとサーバーからS0、S1、S2が送られてくるので先程のread()メソッドを使って受信したチャンクを読みます。func stream(_ aStream: Stream, handle eventCode: Stream.Event) { switch eventCode { case .openCompleted: guard inputStream?.streamStatus == .open, outputStream?.streamStatus == .open else { break } if aStream == inputStream { sendC0C1packet() } case .hasBytesAvailable: if aStream == inputStream { read() } case .errorOccurred: print("errorOccurred") default: break } }まずはC0とC1の送信です。
※整数のバイト配列への変換については HaishinKit.swift の ExpressibleByIntegerLiteral+Extension.swift を使わせてもらってます。func sendC0C1packet() { var data = Data() // C0 let protocolVersion: UInt8 = 3 data.append(protocolVersion.data) // C1 let time = UInt32(0) data.append(time.bigEndian.data) let zero = Data([0x00, 0x00, 0x00, 0x00]) data.append(zero) let size = 1536 - 8 // C1の固定長 - time+zero var random = Data(count: size) var _ = random.withUnsafeMutableBytes { bytes in SecRandomCopyBytes(kSecRandomDefault, size, bytes) } data.append(random) write(data: data) handshakeStatus = .c0c1 }次にS0、S1、S2の読み取りです。
先程read()メソッドの中に登場したlisten(_:)を実装していきます。
※ HaishinKit.swift を参考にしています。ハンドシェイクのステータスをenumで管理しています。
先程のsendC0C1packet()を実行した時点でステータスは.c0c1になっています。
ハンドシェイクは上述の通りルールが決まっているので、C0とC1を送ったならサーバからはS0、S1が来るはずです。
というわけで、.c0c1の状態でサーバーからチャンクを受け取ったらそれはS0、S1だろうということで次はC2を送ります(ステータスは.c2)。
.c2の状態でサーバーからチャンクを受け取ったらそれはS1だろうということでこれでハンドシェイクは完了です。enum HandshakeStatus { case none case c0c1 case c2 case done } func listen(_ data: Data) { switch handshakeStatus { case .none: break case .c0c1: if data.count <= 1536 { break } sendC2packet(data) handshakeStatus = .c2 var data = data data.removeSubrange(0... 1536) // S0、S1、S2はいっぺんに送られてくることもあるのでS0、S1を取り除いてS2を渡して再起実行します if 1536 <= data.count { listen(data) } case .c2: handshakeStatus = .done // ハンドシェイク完了 case .done: break } }func sendC2packet(_ s0s1packet: Data) { var data = Data() let time = s0s1packet.subdata(in: 1..<5) data.append(time) let time2 = UInt32(Date().timeIntervalSince1970) data.append(time2.bigEndian.data) let random = s0s1packet.subdata(in: 9..<1536+1) data.append(random) write(data: data) handshakeStatus = .c2 }まとめ
RTMP配信の序章を実装してみましたが、ハンドシェイクの仕様を理解するのが一番のハードルでした。
通信処理自体はNSStreamを使えば簡単に書けてしまうので実装自体はそう難しくなかったと思います。
ハンドシェイクの段階ではまだ受信したデータのパース処理が無いので(比較的)楽ですね。
しかしハンドシェイクが終わっても、このあとクライアントからconnectコマンドメッセージを送信してサーバーからresultを受信して今度はクライアントから...みたいな感じで音声や映像を送信するまではまだ道が長いです。。
自前で実装するのはかなりめんどくさいですが、仕様書や実際の通信をキャプチャして仕様を理解していくのは面白いなと思いました。参考
- Real-Time Messaging Protocol (RTMP) specification (Version 1.0) http://wwwimages.adobe.com/www.adobe.com/content/dam/acom/en/devnet/rtmp/pdf/rtmp_specification_1.0.pdf
- RTMP 1.0 準拠のサーバーをGo言語で実装する https://developers.cyberagent.co.jp/blog/archives/13739/#c0s0format
- shogo4405/HaishinKit.swift https://github.com/shogo4405/HaishinKit.swift

