- 投稿日:2019-02-18T21:39:49+09:00
Swiftの命名規則を理解する(Swift API Design Guidelines - Naming 日本語まとめ)
私は普段Swiftをメインで書いていますが、Namingがとても苦手です。
どうやったらNamingがうまくなるか、考えました、
公式ドキュメントを見つけて、考えるのをやめました。Namingがうまくなるためには、公式ドキュメントに従うのが一番です。
そこでSwift API Design GuidelinesのNamingを読みました。
https://swift.org/documentation/api-design-guidelines/#naming他の方の翻訳もありますが、当時から公式ドキュメントが更新されていたようですので、
2019/02時点での翻訳をまとめてみました。
- 翻訳というより、日本語意訳に近いと思います。
- 構成や日本語表現を独断と偏見で一部編集しています。
- 忙しい人は、「fuwamakiまとめ」だけ見れば十分かもしれません。
- 忙しくない人や英語ができる人は、公式ドキュメントを見てください。
命名
クリアな使い方にしましょう
1. 曖昧さを避けるために全ての単語を含めよう
呼び出し側を読む人にとって曖昧な意味に捉えられないように、全ての単語を含めよう。
良い例:
extension List {
  public mutating func remove(at position: Index) -> Element
}
employees.remove(at: x)
良くない例:
[color=red] employees.remove(x)
-> xが何を示しているか明確でないのはアカン。
2. 不要な単語は省略しよう
全ての単語は、呼び出し側にとって意味のある情報であるべき。
意図を明確にするため、意味の違いを明確にするために多くの単語を使うこともある。
ただ、読み手にとって不要な情報(なくても理解できるもの)は省略しよう。良くない例:
public mutating func removeElement(_ member: Element) -> Element?
allViews.removeElement(cancelButton)->
Elementは呼び出し部分で、意味のある情報を与えないのでアカン。良い例:
public mutating func remove(_ member: Element) -> Element?
allViews.remove(cancelButton) // clearer
曖昧さを避けるために型情報を繰り返すことが時々あるが、
一般的には型よりパラメータの役割を説明する単語を使うことが望ましい。
詳細は次項にて。3. 役割に応じて変数・パラメータ・関連型を命名しよう
型制約ではなく、役割に応じて変数・パラメータ・関連型を命名しよう。
良くない例:
var string = "Hello"
protocol ViewController {
associatedtype ViewType : View
}
class ProductionLine {
func restock(from widgetFactory: WidgetFactory)
}-> エンティティの役割を表す名前を選択すべき、アカン。
良い例:
var greeting = "Hello"
protocol ViewController {
  associatedtype ContentView : View
}
class ProductionLine {
  func restock(from supplier: WidgetFactory)
}
関連付いた型がProtocol制約に密接に結びついて、Protocol名が役割になっている場合、
衝突を回避するためにProtocol名にProtocolを付けるのは問題ない。protocol Sequence { associatedtype Iterator : IteratorProtocol } protocol IteratorProtocol { ... }4. 弱い型情報には理解補助をしましょう
パラメータの役割を明確にするために、弱い型情報には理解補助で単語を補う。
パラメータ型が[NSObject, Any, AnyObject, Int, String]などの基本型の場合、
使用時の型情報とコンテキストが意図をちゃんと伝えられない可能性がある。良くない例:
func add(_ observer: NSObject, for keyPath: String)
grid.add(self, for: graphics) // vague-> 宣言は明確だが、使用法が曖昧でアカン。
良い例
弱く型付けられたパラメータの前に、役割を示す名詞を付ける
func addObserver(_ observer: NSObject, forKeyPath path: String)
grid.addObserver(self, forKeyPath: graphics) // clear
fuwamakiまとめ
- 必要な単語を全て含んだ命名にしよう
- 意味を示さない単語は省略してOK
- 型制約じゃなくて役割に応じた命名をしよう
- 意味を示しきれない型情報には理解補助で単語を補ってOK
スムーズな利用を心掛けよう
1. メソッド名と関数名で、文法的な英語のフレーズにしよう
良くない例:
x.insert(y, position: z)
x.subViews(color: y)
x.nounCapitalize()良い例:
x.insert(y, at: z)          “x, insert y at z”
x.subViews(havingColor: y)  “x's subviews having color y”
x.capitalizingNouns()       “x, capitalizing nouns”
メインの意味を示す引数の後に、フレーズとしての流暢さが低下する引数が続くのは許容
AudioUnit.instantiate(
  with: description,
  options: [.inProcess], completionHandler: stopProgressBar)
-> withがメインの意味を示す引数。optionとcompletionHandlerは付属する引数。
2. factoryメソッドは、makeから始めよう
ex.)
x.makeIterator().3. initializerやfactoryメソッドの最初の引数は、関数名で始まる英語フレーズにしてはいけない
ex.)
x.makeWidget(cogCount: 47)良くない例:
let foreground = Color(havingRGBValuesRed: 32, green: 64, andBlue: 128)
let newPart = factory.makeWidget(havingGearCount: 42, andSpindleCount: 14)
let ref = Link(to: destination)-> API作成者が最初の引数を使って文法的な連続性を示そうとしていてアカン。
良い例:
let foreground = Color(red: 32, green: 64, blue: 128)
let newPart = factory.makeWidget(gears: 42, spindles: 14)
let ref = Link(target: destination)
呼び出しが値保存型変換をしていない限り、最初の引数にラベルがあることを示す。
let rgbForeground = RGBColor(cmykForeground)4. 副作用に応じて関数・メソッドを命名しよう
副作用がない場合は、名詞として読もう
ex.)
x.distance(to: y),i.successor()副作用がある場合は、命令動詞句として読もう
ex.)
print(x),x.sort(),x.append(y)mutatingとnonmutatingのメソッド名は一貫したものにしよう
mutating methodは、似た意味を持つnonmutatingな変化をすることがあるけれど、
それはインスタンスが置き換わるのではなく、新しい値が返されている。動作が動詞で記述される際は、変更方法に応じて
edまたはingをつけよう
Mutating Nonmutating x.sort() z = x.sorted() x.append(y) z = x.appending(y) 操作が名詞で記述される場合は、
formをつけよう
Nonmutating Mutating x = y.union(z) y.formUnion(z) j = c.successor(i) c.formSuccessor(&i) Booleanメソッドとプロパティは使用法が変化しない場合、そのまま明示しよう
ex.)
x.isEmpty,line1.intersects(line2)プロトコルは何が名詞として読まれるべきかを記述しよう
ex.)
Collectioncapabilityを示すプロトコルには接尾に
able,ible,ingをつけようex.)
Equatable,ProgressReportingその他の型,プロパティ,変数,定数は名詞として読む
fuwamakiまとめ
- メソッド名&関数名で英語のフレーズしよう
- 生成メソッドは、makeから始めよう
- initと生成メソッドは、関数名と引数でフレーズ作っちゃダメ
※副作用のとこはまとめられませんでしたごめんなさい
Term of Art(専門用語)をうまく使う
Term of Artとは…特定の分野または職業の範囲内で、特別な意味を持つ単語・フレーズ
1. 曖昧な用語を避けよう
一般用語を使って良い場面では、わざわざ専門用語を使わず一般用語を使おう。
例)
epidermis(表皮) よりskin(肌)を使って問題なければ、一般用語であるskinを使いましょう。epidermisのような専門用語は、それでなければダメな場合にのみ利用しましょう。2. 専門用語は、確立された意味を示す時に使おう
一般用語より専門用語を使うのは、それがなければ曖昧で不明瞭になるモノを正確に示すため。
例)
APIのような技術用語も、確立された意味を示す場合に使いましょう。専門家を驚かせない!
我々が用語に新しい意味を見出して利用していたら、専門家は驚き、怒るでしょう。アカン。
初心者を惑わせない!
初心者はその専門用語の意味を調べるためWeb検索して、伝統的な意味を見つけるでしょう。
伝統的な意味でその専門用語を使いましょう。3. 略語は避けよう
特に非標準の略語は、人によって専門用語化してしまうのでアカン。
使用している略語の意味は、web検索で簡単に見つけられるようにすべき。4. 先例に習おう
既にある文化を無視して、初心者に向けて分かりやすくするのは、アカン。
例1) 連続したデータ構造に対して
○
Array
✕List
Listの方が分かりやすいかもしれないが、
配列は現代コンピューティングにおいて基本であり、
全てのプログラマがArrayを学び、知っています。例2) 数学のような特定のプログラミング領域において
○
sin(x)
✕verticalPositionOnUnitCircleAtOriginOfEndOfRadiusWithAngle(x)略語を避けることは大切だが、sin(x)は数学者の間で数世紀前から使われていた共通用語。
fuwamakiまとめ
- 曖昧な用語は避けよう、意味に合った単語を使おう
- 専門用語でしか表せない時に専門用語を使おう
- 略語は避けよう
- 先例には従おう
参考
https://qiita.com/moaible/items/fbe87b343b9eaa48816e
https://qiita.com/yamoridon/items/b89a18a037631b6770b9
https://qiita.com/mono0926/items/11203c8cce0d7f4548db
- 投稿日:2019-02-18T20:43:29+09:00
コードで書くStackViewとAutoLayout
Storyboardでしか書いたことなかったけど、データが動的な場合はコードの方が楽なのでメモ。
import UIKit

class MainViewController : UIViewController {

    let listView = ListView()

    override func viewDidLoad() {
        self.view.addSubview(listView)
        listView.translatesAutoresizingMaskIntoConstraints = false
        listView.widthAnchor.constraint(equalToConstant: 300).isActive = true
        listView.heightAnchor.constraint(equalToConstant: 100).isActive = true
        listView.centerYAnchor.constraint(equalTo: self.view.centerYAnchor, constant: 0).isActive = true
        listView.centerXAnchor.constraint(equalTo: self.view.centerXAnchor, constant: 0).isActive = true

        let item1 = Item()
        let item2 = Item()
        let item3 = Item()
        stackView.addArrangedSubview(item1)
        stackView.addArrangedSubview(item2)
        stackView.addArrangedSubview(item3)

    }
}

class StackView : UIView {
    let stackView = UIStackView()

    override init(frame: CGRect) {
        super.init(frame: frame)
        self.setup()
    }

    required init?(coder aDecoder: NSCoder) {
        super.init(coder: aDecoder)
        self.setup()
    }

    func setup(){
        self.backgroundColor = UIColor.white

        self.addSubview(stackView)
        stackView.translatesAutoresizingMaskIntoConstraints = false
        stackView.distribution = .fillEqually
        stackView.alignment = .fill
        stackView.spacing = 10.0
        stackView.leftAnchor.constraint(equalTo: self.leftAnchor, constant: 0).isActive = true
        stackView.rightAnchor.constraint(equalTo: self.rightAnchor, constant: 0).isActive = true
        stackView.topAnchor.constraint(equalTo: self.topAnchor, constant: 0).isActive = true
        stackView.bottomAnchor.constraint(equalTo: self.bottomAnchor, constant: 0).isActive = true


    }
}

class Item : UIView {
    let imageView = UIImageView()
    let name = UILabel()

    override init(frame: CGRect) {
        super.init(frame: frame)
        self.setup()
    }

    required init?(coder aDecoder: NSCoder) {
        fatalError("init(coder:) has not been implemented")
    }

    func setup(){
        self.addSubview(imageView)

     imageView.backgroundColor = UIColor.gray
        imageView.translatesAutoresizingMaskIntoConstraints = false
        imageView.leftAnchor.constraint(equalTo: self.leftAnchor, constant: 0).isActive = true
        imageView.rightAnchor.constraint(equalTo: self.rightAnchor, constant: 0).isActive = true
        imageView.topAnchor.constraint(equalTo: self.topAnchor, constant: 0).isActive = true

        self.addSubview(name)
        name.text = "TEST"
        name.translatesAutoresizingMaskIntoConstraints = false
        name.leftAnchor.constraint(equalTo: self.leftAnchor, constant: 0).isActive = true
        name.rightAnchor.constraint(equalTo: self.rightAnchor, constant:0).isActive = true
        name.topAnchor.constraint(equalTo: imageView.bottomAnchor, constant: 5).isActive = true
        name.bottomAnchor.constraint(equalTo: self.bottomAnchor, constant: 0).isActive = true
    }
}
メモ
- stackViewにはwidth,heightの指定が必須。指定しないとサイズが0になる
- Item(StackViewに追加するView)は
addSubViewじゃなくてaddArrangedSubviewで追加する- Itemのサイズは指定しないと最小になる。サイズを持つ要素(UILabelとか)の場合はテキスト分のサイズに。ただ
distributionとalignmentで拡大のルールは決められる。- Webでいうflexboxと考え方は一緒。
思ったよりAutoLayoutをコードで書くのがめんどくさくないので今後はコードで書いていきたい。
isActive = trueはよく忘れる。
- 投稿日:2019-02-18T11:25:45+09:00
Flutterウィークリー #46
Flutterウィークリーとは?
FlutterファンによるFlutterファンのためのニュースレター
https://flutterweekly.net/この記事は#46の日本語訳です
https://mailchi.mp/flutterweekly/flutter-weekly-46※Google翻訳を使って自動翻訳を行っています。翻訳に問題がある箇所を発見しましたら編集リクエストを送っていただければ幸いです。
アナウンス
VSコード拡張v2.23
https://groups.google.com/forum/?linkId=52478434&linkId=63655583#!topic/flutter-dev/k9M81Zmh0AM
Flutter用の素晴らしいVSコードプラグインの最新バージョンの公式発表。
IJとASの新しいツーリングリリース
https://groups.google.com/forum/?linkId=52478434&linkId=63655583#!topic/flutter-dev/6UeOXzFIAoM
AS 3.3.1およびIJ 2019.1をサポートする、 Flutter用のIJプラグインの新バージョン。
読み物&チュートリアル
Flutterスクリーンキーボードを避ける
https://medium.com/flutter-nyc/avoiding-the-on-screen-keyboard-in-flutter-ae0e46ecb96c
Martin Rybakによる記事で、キーボードで処理するときにさまざまな構成を処理する方法を説明しています。Flutterのscoped_modelを使った簡単に反応するウィジェット
https://medium.com/flutter-community/easy-reactive-widgets-with-flutters-scoped-model-228272314dc
Nick ManningによるScopedモデルの簡単な紹介(長いビデオへのリンクが含まれています)。Flutter開発のための絶対最高のVSCodeプラグイン
https://blog.maskys.com/my-vscode-plugins-for-flutter/
Flutter開発にVSCodeを使用しますか?もしそうなら、Kifah Meeranはあなたに最高のVSCodeプラグインのいくつかをもたらします。高度なFlutterレイアウト - フロー
https://medium.com/flutter-community/advanced-flutter-layout-flow-32300bf3b7b3
Raouf Rahicheが、Flowウィジェットの目的と使用時期について説明します。Flutter 、Whatsapp、Twilio
https://medium.com/flutterpub/flutter-whatsapp-and-twilio-50bdd0fe7a8c
Aseem Wangooによるwhatsappメッセージを送信するためにFlutterアプリでtwilioを使用する方法。Flutter StackとIndexedStackを調べる
https://medium.com/flutter-community/a-deep-dive-into-stack-in-flutter-3264619b3a77
Deven JoshiがStackのしくみと、それを使った例をいくつか示します。ライブテンプレート、またはIntelliJを使用してFlutterで定型コードを書く時間を短縮する方法
GonçaloPalmaの助けを借りて、Live Templatesのパワーと時間を節約しましょう少ないコードでBLoCアーキテクチャを採用する
https://aloisdeniel.com/post/p9OCupX71qaLtGYHpnV0
Alois Denielは、簡単な方法でBLoCアーキテクチャを使い始めるのを助けます。
Codemagic - Flutter CI / CD
https://medium.com/flutter-community/codemagic-flutter-ci-cd-i-ee56abd749e0
Chema RubioがCodemagicを構成して、CI / CDが完全に動作する環境をFlutter用にする方法を紹介します。2019年におけるクロスプラットフォームモバイル開発の現状
https://medium.com/@move4mobile/the-state-of-cross-platform-mobile-development-in-2019-da40fc2435d
Flutterを含むさまざまなマルチプラットフォーム開発技術のための比較と「最先端」。Firebaseを設定する
https://nickcullen.net/blog/flutter/setup-firebase/
FlutterアプリからFirebaseを使い始めるためのFirebaseの設定方法に関するNick Cullenによるチュートリアル。“ flutter_bloc”の天気アプリ
https://medium.com/flutter-community/weather-app-with-flutter-bloc-e24a7253340d
Felix AngelovがBLoCを使ってWeatherアプリを作成し、そのプロセスを段階的に説明します。ステートレスウィジェットを作成する方法
https://medium.com/flutter-io/how-to-create-stateless-widgets-6f33931d859?linkId=63650953
数ヶ月前にMarting Aguinisによって公開されたビデオの執筆版。ビデオ&メディア
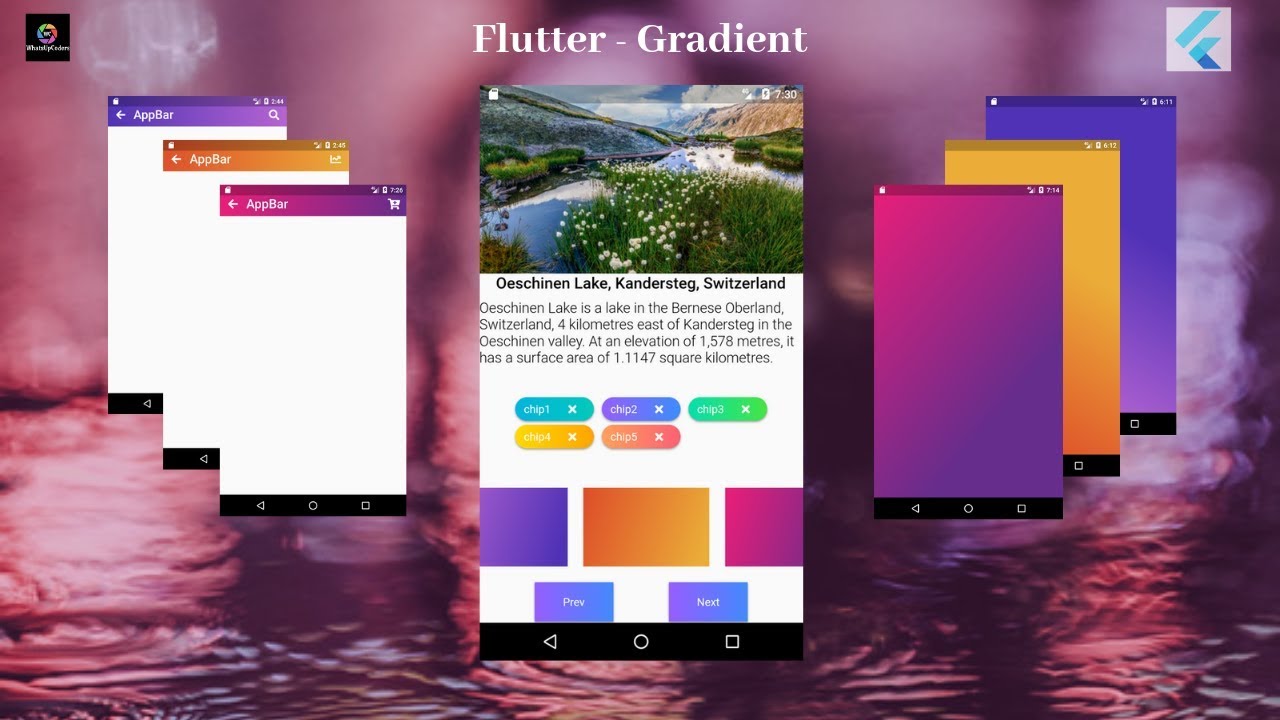
Flutterグラデーション効果
https://www.youtube.com/watch?v=LNHrg7D_MWo
whatsupcodersによるFlutterグラデーションに関するチュートリアル。GoogleマップとFirestoreの位置情報のFlutter
https://www.youtube.com/watch?v=MYHVyl-juUk
Uberのようなものを作りたいですか? Flutter 、Firestore、およびGoogle Mapsを組み合わせてリアルタイムの地理位置情報アプリを作成する方法を学びます。Flutter UI - 最小限のアプリ - 通貨
https://www.youtube.com/watch?v=KQgRaufECvw
Raja Yoganは、最小限のインターフェースでクールな通貨アプリを作成します。Flutter : Flutterアプリにテーマを追加する
https://www.youtube.com/watch?v=TDurCau5fqc
このビデオでは、フラッターモバイルアプリにテーマを追加および変更する方法を学びます。配置済み(今週のFlutterウィジェット)
https://www.youtube.com/watch?v=EgtPleVwxBQ&t=0s&index=27&list=PLOU2XLYxmsIL0pH0zWe_ZOHgGhZ7UasUE
今週は、Positionedウィジェットを使ってStack内にアイテムを配置する方法を学びましょう。Flutterエフェクトチャレンジ - スプラッシュタップ
https://www.youtube.com/watch?v=7qkhpeZdD7U
このビデオでは、タップスプラッシュ効果をアニメーション化するカスタムウィジェットを作成する方法を説明します。ライブラリ&コード
Flutter開く/ flutter_screenutil
https://github.com/OpenFlutter/flutter_ScreenUtil
画面とフォントサイズを調整するためのフラッタープラグイン
giandifra / clustering_google_maps
https://github.com/giandifra/clustering_google_maps
Google Mapsウィジェットでクラスタリング手法を再作成したFlutterパッケージ
マシューキャロル/ fluttery_seekbar
https://github.com/matthew-carroll/fluttery_seekbar
Flutterカタログは、 Flutterとプログレスバーを求めています。
imaNNeoFighT / circular_bottom_navigation
https://github.com/imaNNeoFighT/circular_bottom_navigation
アイコンにクールな丸い効果を加えた素敵なナビゲーションバーを作成するためのライブラリ。


- 投稿日:2019-02-18T08:05:30+09:00
FlutterでFacebookログインしてFirebaseでユーザー作成(iOS)
必要なもの
- Facebook Developerでアプリ作成
- appID
- secret key
- Direbaseでアプリ作成
- Google-Service.plist
- 利用パッケージ
- flutter_facebook_login: ^1.2.0
- firebase_core: ^0.3.0
- firebase_auth: ^0.8.1
事前準備
実装以外の基礎設定はFlutterの仕組みに乗り切れないので、自前でやる必要があります。
Runner.xcworkspaceを開いて、Google-Service.plistを入れる。Facebookログインの事前準備である上記IDを等をinfo.plistに追加する。
実装
必要なとこだけ抜粋、未だによくbloc patterが理解できていないのでマイページのルートになるコンポーネントにblocをもたせて子に伝搬させていく感じを想定。
こんな実装昔MVVMでもViewModelを子に伝搬させて状態遷移を同期させるのやったことあるんですが、親への依存度が上がるのであんまやりたくないな・・・どうやるんだろう??import 'package:flutter/material.dart'; import 'package:loool/pages/profile/page.dart'; import 'package:loool/blocs/UserBloc.dart'; import 'package:firebase_auth/firebase_auth.dart'; import 'package:flutter_facebook_login/flutter_facebook_login.dart'; import 'package:flutter_bloc/flutter_bloc.dart'; import 'package:loool/models/user.dart'; class MyPagePage extends StatefulWidget { final UserBloc userBloc = UserBloc(); @override _MyPagePageState createState() => _MyPagePageState(); } class _MyPagePageState extends State<MyPagePage> { final FirebaseAuth _auth = FirebaseAuth.instance; FirebaseUser currentUser = null; UserBloc get _userBloc => widget.userBloc; String get title => this.currentUser != null ? 'マイページ' : 'ログイン'; @override void initState() { super.initState(); this.updateUserStatus(); } void updateUserStatus() async { this.currentUser = await _auth.currentUser(); if (this.currentUser != null){ _userBloc.dispatch(UserEvent.login); } } @override Widget build(BuildContext context) { Future<FirebaseUser> _signInToFirebase(FacebookAccessToken accessToken) async { final credential = FacebookAuthProvider.getCredential(accessToken: accessToken.token); final FirebaseUser user = await _auth.signInWithCredential(credential); return user; } Future<FacebookLoginResult> _loginToFacebook() async { var facebookLogin = FacebookLogin(); var facebookLoginResult = await facebookLogin.logInWithReadPermissions(['email']); return facebookLoginResult; } void login() async{ FacebookLoginResult facebookLoginResult = await _loginToFacebook(); switch (facebookLoginResult.status) { case FacebookLoginStatus.loggedIn: _signInToFirebase(facebookLoginResult.accessToken); this.updateUserStatus(); break; default: break; } } return Scaffold( body: BlocBuilder<UserEvent, bool>( bloc: _userBloc, builder: (BuildContext context, bool loginState) { if (loginState) { return ProfilePage( userBloc: _userBloc, user: User( id: this.currentUser.uid, name: this.currentUser.displayName, introduction: "", imageURL: this.currentUser.photoUrl ) ); } else { debugPrint('is not Logined'); return Center( child: Column( crossAxisAlignment: CrossAxisAlignment.center, mainAxisAlignment: MainAxisAlignment.center, children: <Widget>[ RaisedButton.icon( color: Colors.white, icon: const Icon( Icons.add, size: 18.0, color: Colors.grey), label: const Text('サインイン', style: TextStyle( fontWeight: FontWeight.bold, color: Colors.grey, fontSize: 13.0)), onPressed: () { login(); }, ), ], ) ); } } ) ); } }
- 投稿日:2019-02-18T00:00:58+09:00
SwiftyJSON/Decodableを利用してAPI通信を行い、UITableViewCellに表示する
これは続きです!
PART1: https://qiita.com/ostk0069/items/8bd4173ff4f083e35951この記事はPARTが2つに分かれています。これはPART2に該当します。PART1ではPART2のベースのコードとなるUITableViewの実装を行なっています。ぜひ確認してみてください。
今回実装にあたって実装したものをGitHubに作成しておいたのでコードだけ見たい人はこちらからどうぞ。
とりあえずswift内のデータを表示させたもの(PART1の内容)*
https://github.com/takumaosada/customCellTutorial*終了後、Alamofire, SwiftyJSONを用いてAPI通信を行い表示させたもの
https://github.com/takumaosada/customCellTutorial/tree/feature/swifty_json*終了後、Alamofire, Decodable(codable)を利用してAPI通信を行い表示させたもの
https://github.com/takumaosada/customCellTutorial/tree/feature/decodableCarthageからpackageをインストールする
という話をするにあたって人によっては「CocoaPodsにしよう」という人もいると思います。僕はCarthageでやってと言われたのでCarthageでやっただけのことなので好きな方を選んでください。
インストール方法に関しては他の方の記事を参考にした方がわかりやすいと思うので載せておきます。
- Carthage
Carthageを使ってビルド時間を短縮しよう
【Swift】Carthage導入手順
Carthage について
- CocoaPods
【Swift】CocoaPods導入手順
iOSライブラリ管理ツール「CocoaPods」の使用方法今回インストールするのはAlamofire, SwiftyJSONの2つです。(decodableはswiftが標準で使うことのできるものです)
ちなみに僕はカーセッジと呼びたい派です。
使用するAPIについて
今回使用するのは駅すぱあとのAPIです。利用方法は以下の記事に詳細に書かれています。
駅すぱあとAPIを使ってみた
これを使用する上で申請が必要なので申請するのがめんどいのは他のAPIを使うことを推奨します。
この後わかることなのですが、駅すぱあとのAPIは俗に言うnestedJSON(出力されるJSONが複雑で扱いにくい)のでむしろ他のAPIを使う方が苦労しません。
[2018] 個人でも使える!おすすめAPI一覧を参考にするといいと思います。APIからJSONを受け取る前に
実装していくにあたって駅すぱあとのAPIを利用する場合はデフォルトの設定のXcodeがHTTPSではなく、HTTPのURLのAPIを利用することを拒否してきます。なので解消することをお忘れなく!
解消方法: 「http://」のAPIを実行できるようにする(Swift)SwiftJSONとDecodableを利用するにあたって
これはどちらもJSONをいい感じに変換して使用する方法です。なのでどちらか(あるいは他にも選択肢はあると思いますが)選ぶ必要があります。
どっちがいいのかと言う正解みたいなのはないとは思いまずが、最近ではdecodableの方が主流と聞きました。持ち間違っていたらコメントください。1. SwiftyJSONを利用する方法
他の言語でJSONの処理をやったことがある人はdecodableよりもこちらの方が考え方として慣れているかなと思います。(そもそもcodableの考え方はswiftにしかないっぽい)今回はとりあえずこれ以上の機能を考えていないのでViewControllerに記述しちゃいたいと思います。
ViewControllerへの記述
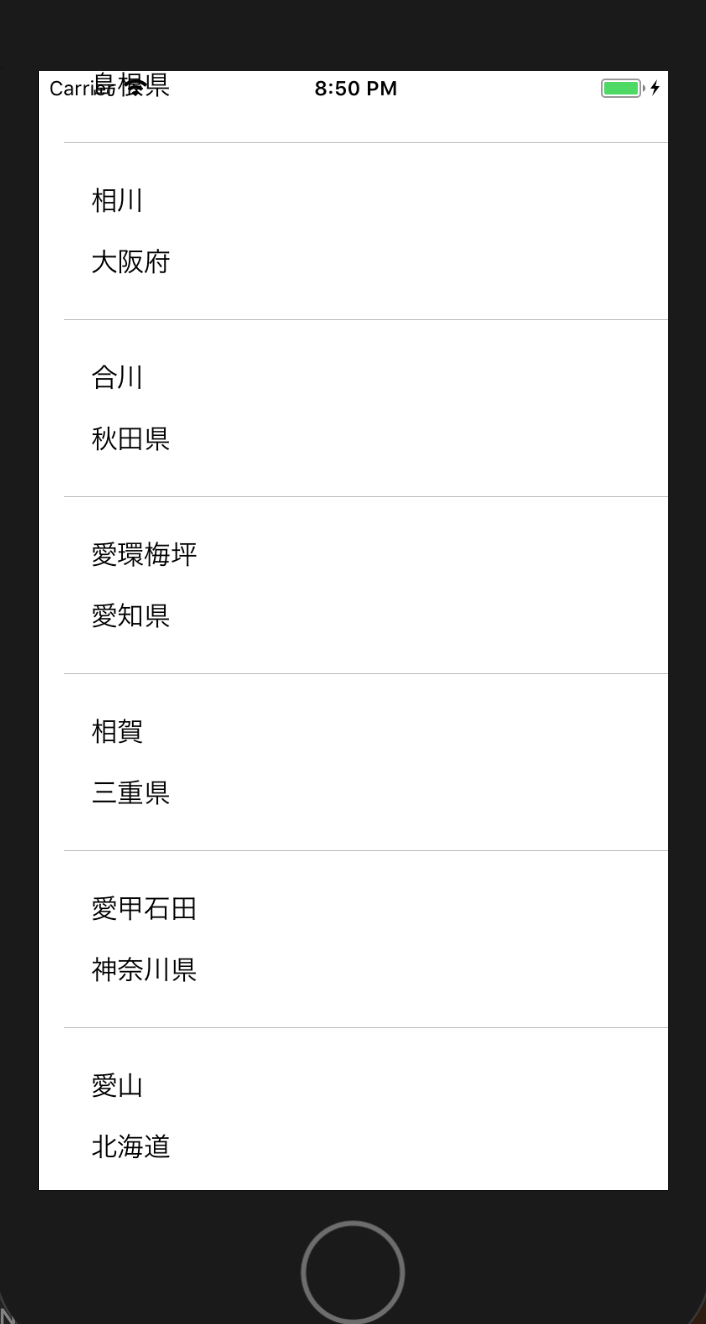
ViewController.swiftimport UIKit import Alamofire import SwiftyJSON class ViewController: UIViewController, UITableViewDelegate, UITableViewDataSource { @IBOutlet weak var stationList: UITableView! var stations:[Station] = [Station]() override func viewDidLoad() { super.viewDidLoad() stationList.dataSource = self stationList.delegate = self stationList.register(UINib(nibName: "StationTableViewCell", bundle: nil), forCellReuseIdentifier: "StationTableViewCell") self.setupStations() } override func didReceiveMemoryWarning() { super.didReceiveMemoryWarning() // Dispose of any resources that can be recreated. } func setupStations() { // stations = [Station(name: "飯田橋", prefecture: "東京都新宿区"), Station(name: "九段下", prefecture: "東京都千代田区"), Station(name: "御茶ノ水", prefecture: "東京都文京区") ]; let url = URL(string: "http://api.ekispert.jp/v1/json/station?key=[駅すぱあとのKEY]")! Alamofire.request(url, method: .get).responseJSON { response in switch response.result { case .success: let json:JSON = JSON(response.result.value ?? kill) let resData:JSON = json["ResultSet"]["Point"] var stationInfo: [Station] = [] resData.forEach { (_, resData) in let station: Station = Station.init(name: resData["Station"]["Name"].string!, prefecture: resData["Prefecture"]["Name"].string!) stationInfo.append(station) } self.stations = stationInfo self.stationList.reloadData() case .failure(let error): print(error) } } } func numberOfSectionsInTableView(tableView: UITableView) -> Int { return 1 } func tableView(_ tableView: UITableView, numberOfRowsInSection section: Int) -> Int { return stations.count } func tableView(_ tableView: UITableView, cellForRowAt indexPath: IndexPath) -> UITableViewCell { let cell = tableView.dequeueReusableCell(withIdentifier: "StationTableViewCell", for: indexPath ) as! StationTableViewCell cell.setCell(station: stations[indexPath.row]) return cell } }その後、Buildする
一覧が取得されていることが確認されました。次に今回書いたコードについて解説していきます。
ViewController.swiftAlamofire.request(url, method: .get).responseJSON { response in switch response.result { case .success: let json:JSON = JSON(response.result.value ?? kill) let resData:JSON = json["ResultSet"]["Point"] var stationInfo: [Station] = [] resData.forEach { (_, resData) in let station: Station = Station.init(name: resData["Station"]["Name"].string!, prefecture: resData["Prefecture"]["Name"].string!) stationInfo.append(station) } self.stations = stationInfo self.stationList.reloadData() case .failure(let error): print(error) } }今回で変わっているのはここだけです。Alamofireの使い方については今回は省略します。受け取ったデータを
resDataと置き、その後forEach文で取ってきた値を1つ1つ代入しています。最後にそれをstationsとしてまとめることで他のファイルの記述に合わせています。最後にself.stationList.reloadData()を記述することを忘れないようにしましょう。今回使用したコードの詳細はこちらにあります。
https://github.com/takumaosada/customCellTutorial/tree/feature/swifty_jsondecodableを利用する方法
こちらがdecodable(codable)の公式のドキュメントです。
https://developer.apple.com/documentation/swift/swift_standard_library/encoding_decoding_and_serialization
僕の解釈としては受け取ったJSONを自分がやりやすいようにカスタマイズして出力するのがSwiftyJSONだとすると、受け取ったJSONを、受け取ったJSONの構造のまま使う制約を設けることでデータを出力させやすくするのがCodableだと思っています。そのためチーム開発するときにメンバーがstructの構造を見ればすぐにどんなJSONを受け取ったのか理解することができるメリットがあります。ここで言うstructの構造というのは受け取るJSONの設計図みたいなものです。じゃあ実際にそれをコードに起こしていくのが次になります。structの構造を確認する
Station.swift/* { "ResultSet":{ "Point": [ { "Station":{ "code":"00000", "Name":"ほげ", "Yomi":"ほげ" }, "Prefecture":{ "Name":"ほげ県" }, } ] } } */今回受け取る駅すぱあとのJSONはこのような構造になっていました。これに合わせてstructを構築していったものが次になります。
それに合わせてstructを記述していく
Station.swiftimport Foundation class StationSet : NSObject { var code: String var name: String var prefecture: String init(code: String, name: String, prefecture: String){ self.code = code self.name = name self.prefecture = prefecture } } struct Data: Decodable { var ResultSet: ResultSet } public struct ResultSet: Decodable { var Point: [Point] } public struct Point: Decodable { public let Station: Station public let Prefecture: Prefecture } public struct Station: Decodable { public let code: String public let name: String public let yomi: String public enum CodingKeys: String, CodingKey { case code case name = "Name" case yomi = "Yomi" } } public struct Prefecture: Decodable { public let name: String public enum CodingKeys: String, CodingKey { case name = "Name" } }今まで作っていたmodelの
Stationは名前が被っているのでやむなくStationSetに変更しました。それに応じて他のファイルでの記述も変更が必要です。nested JSONにおけるstructの構造を理解する上でCodingKey理解は必須です。 (自分はまだ完全に理解してないです。)ViewControllerへの記述
ViewController.swiftimport UIKit import Alamofire import SwiftyJSON class ViewController: UIViewController, UITableViewDelegate, UITableViewDataSource { @IBOutlet weak var stationList: UITableView! var stations:[StationSet] = [StationSet]() override func viewDidLoad() { super.viewDidLoad() stationList.dataSource = self stationList.delegate = self stationList.register(UINib(nibName: "StationTableViewCell", bundle: nil), forCellReuseIdentifier: "StationTableViewCell") self.setupStationSets() } override func didReceiveMemoryWarning() { super.didReceiveMemoryWarning() // Dispose of any resources that can be recreated. } func setupStationSets() { //stations = [StationSet(name: "飯田橋", prefecture: "東京都新宿区"), StationSet(name: "九段下", prefecture: "東京都千代田区"), StationSet(name: "御茶ノ水", prefecture: "東京都文京区") ]; let url = URL(string: "http://api.ekispert.jp/v1/json/station?key=[駅すぱあとのKEY]")! Alamofire.request(url, method: .get).responseJSON { response in switch response.result { case .success: do { let resultSetInfo = try JSONDecoder().decode(Data.self, from: response.data!) let stations = resultSetInfo.ResultSet.Point.map({ (Point) -> StationSet in let name = Point.Station.name let code = Point.Station.code let prefecture = Point.Prefecture.name let stationArray = StationSet(code: code, name: name, prefecture: prefecture) return stationArray }) self.stations = stations DispatchQueue.main.async { self.stationList.reloadData() } } catch { print(error) } case .failure(let error): print(error) } } } func numberOfSectionsInTableView(tableView: UITableView) -> Int { return 1 } func tableView(_ tableView: UITableView, numberOfRowsInSection section: Int) -> Int { return self.stations.count } func tableView(_ tableView: UITableView, cellForRowAt indexPath: IndexPath) -> UITableViewCell { let cell = tableView.dequeueReusableCell(withIdentifier: "StationTableViewCell", for: indexPath ) as! StationTableViewCell cell.setCell(station: self.stations[indexPath.row]) return cell } }Buildしましょう
無事に取得することができました。次に解説をしていきます。
ViewController.swiftAlamofire.request(url, method: .get).responseJSON { response in switch response.result { case .success: do { let resultSetInfo = try JSONDecoder().decode(Data.self, from: response.data!) let stations = resultSetInfo.ResultSet.Point.map({ (Point) -> StationSet in let name = Point.Station.name let code = Point.Station.code let prefecture = Point.Prefecture.name let stationArray = StationSet(code: code, name: name, prefecture: prefecture) return stationArray }) self.stations = stations DispatchQueue.main.async { self.stationList.reloadData() } } catch { print(error) } case .failure(let error): print(error) }SwiftyJSONの時と結構似てます。
forEach文ではなくmapで一つ一つに代入してまたもやstationsとしてまとめている感じです。このコードの詳細はこちらにあるのでぜひ見てみてください。
https://github.com/takumaosada/customCellTutorial/tree/feature/decodable