- 投稿日:2019-08-22T18:26:23+09:00
Android BottomNavigationView と Navigation利用時の状態保持
はじめに
AndroidでBottomNavigationViewとNavigationを併用する場合、デフォルトでタブ切り替え時にFragmentが再生成されます。
よって、再生成されないようにするためにはFragmentの状態保持を実装する必要があります。この実装方法について調べた際、最新バージョンのNavigationを使った実装方法にたどり着けなく、苦労したのでまとめます。
言語はKotlinでバージョンは1.3.31です。
導入
app/build.gradle// ... dependencies { // ... // Navigation def arch_navigation_version = '2.2.0-alpha01' implementation "androidx.navigation:navigation-fragment:$arch_navigation_version" implementation "androidx.navigation:navigation-fragment-ktx:$arch_navigation_version" implementation "androidx.navigation:navigation-ui:$arch_navigation_version" implementation "androidx.navigation:navigation-ui-ktx:$arch_navigation_version" // Material implementation 'com.google.android.material:material:1.0.0' }FragmentNavigatorクラスのnavigate()を上書き
Navigationライブラリに実装されている
FragmentNavigatorクラスのnavigate()でタブ切り替え時にFragmentが再生成されるようになっています。
よって、FragmentNavigatorクラスを継承したCustomNavigatorクラスを作成し、状態保持されるようにnavigate()を上書きます。アニメーション周りの実装とBackStack周りの実装を排除し、状態保持したタブ切り替えのみを行う
navigate()が以下です。CustomNavigator.kt@Navigator.Name("custom_fragment") class CustomNavigator( private val context: Context, private val manager: FragmentManager, private val containerId: Int ) : FragmentNavigator(context, manager, containerId) { @Suppress("DEPRECATION") override fun navigate( destination: Destination, args: Bundle?, navOptions: NavOptions?, navigatorExtras: Navigator.Extras? ): NavDestination? { if (manager.isStateSaved) { return null } var className = destination.className if (className[0] == '.') { className = context.packageName + className } val tag = destination.id.toString() val transaction = manager.beginTransaction() val currentFragment = manager.primaryNavigationFragment if (currentFragment != null) { transaction.hide(currentFragment) } var fragment = manager.findFragmentByTag(tag) if (fragment == null) { fragment = instantiateFragment(context, manager, className, args) transaction.add(containerId, fragment, tag) } fragment.arguments = args transaction.show(fragment) transaction.setPrimaryNavigationFragment(fragment) transaction.commit() return destination } }NavHostFragmentクラスのcreateFragmentNavigator()を上書き
次に、Navigationライブラリに実装されている
NavHostFragmentクラスのcreateFragmentNavigator()を上書きます。FragmentNavigatorクラスのインスタンスが戻り値になっているためです。
NavHostFragmentを継承したCustomNavHostFragmentを作成し、上記のCustomNavigatorクラスのインスタンスが戻り値になるようにcreateFragmentNavigator()を上書きます。CustomNavHostFragment.ktclass CustomNavHostFragment : NavHostFragment() { override fun createFragmentNavigator(): Navigator<out FragmentNavigator.Destination> { return CustomNavigator(requireContext(), childFragmentManager, id) } }navigationレイアウトの作成
CustomNavigatorクラスにつけた@Navigator.Nameアノテーションの引数に指定しているcustom_fragmentを利用します。navigation.kt<?xml version="1.0" encoding="utf-8"?> <navigation xmlns:android="http://schemas.android.com/apk/res/android" xmlns:app="http://schemas.android.com/apk/res-auto" android:id="@+id/bottom_navigation" app:startDestination="@+id/tab1"> <custom_fragment android:id="@+id/tab1" android:name="hoge.HogeFragment" android:label="tab1" android:tag="tab1" /> <custom_fragment android:id="@+id/tab2" android:name="hoge.HogeHogeFragment" android:label="tab2" android:tag="tab2" /> </navigation>fragmentとBottomNavigationViewをレイアウトに作成
BottomNavigationViewとFragmentを表示したいレイアウトに
BottomNavigationViewとfragmentを記載します。activity_main.xml<?xml version="1.0" encoding="utf-8"?> <layout xmlns:android="http://schemas.android.com/apk/res/android" xmlns:app="http://schemas.android.com/apk/res-auto" xmlns:tools="http://schemas.android.com/tools"> <androidx.constraintlayout.widget.ConstraintLayout android:id="@+id/container" android:layout_width="match_parent" android:layout_height="match_parent" tools:context="hoge.MainActivity"> <androidx.appcompat.widget.Toolbar android:id="@+id/toolbar" app:layout_constraintEnd_toEndOf="parent" app:layout_constraintStart_toStartOf="parent" app:layout_constraintTop_toTopOf="parent"> </androidx.appcompat.widget.Toolbar> <fragment android:id="@+id/bottom_navigation_view_fragment" android:name="hoge.navigation.CustomNavHostFragment" android:layout_width="match_parent" android:layout_height="wrap_content" app:defaultNavHost="true" app:layout_constraintBottom_toTopOf="@id/bottom_navigation_view" app:layout_constraintTop_toBottomOf="@+id/toolbar" app:navGraph="@navigation/navigation" /> <com.google.android.material.bottomnavigation.BottomNavigationView android:id="@+id/bottom_navigation_view" android:layout_width="match_parent" android:layout_height="wrap_content" android:background="?android:attr/windowBackground" app:layout_constraintBottom_toBottomOf="parent" app:layout_constraintEnd_toEndOf="parent" app:layout_constraintStart_toStartOf="parent" app:menu="@menu/bottom_navigation_menu" /> </androidx.constraintlayout.widget.ConstraintLayout> </layout>以下が注意点です
- fragment
android:nameにCustomNavHostFragmentを指定app:navGraphに上記で記載したnavigationレイアウトを指定- BottomNavigationView
app:menuに指定するmenuレイアウトのitemのandroid:idをcustom_fragmentのandroid:idと揃えること
- 投稿日:2019-08-22T18:26:23+09:00
Android BottomNavigationView と Navigation併用時の状態保持
はじめに
AndroidでBottomNavigationViewとNavigationを併用する場合、デフォルトでタブ切り替え時にFragmentが再生成されます。
よって、再生成されないようにするためにはFragmentの状態保持を実装する必要があります。この実装方法について調べた際、最新バージョンのNavigationを使った実装方法にたどり着けなく、苦労したのでまとめます。
言語はKotlinでバージョンは1.3.31です。
導入
app/build.gradle// ... dependencies { // ... // Navigation def arch_navigation_version = '2.2.0-alpha01' implementation "androidx.navigation:navigation-fragment:$arch_navigation_version" implementation "androidx.navigation:navigation-fragment-ktx:$arch_navigation_version" implementation "androidx.navigation:navigation-ui:$arch_navigation_version" implementation "androidx.navigation:navigation-ui-ktx:$arch_navigation_version" // Material implementation 'com.google.android.material:material:1.0.0' }FragmentNavigatorクラスのnavigate()を上書き
Navigationライブラリに実装されている
FragmentNavigatorクラスのnavigate()でタブ切り替え時にFragmentが再生成されるようになっています。
よって、FragmentNavigatorクラスを継承したCustomNavigatorクラスを作成し、状態保持されるようにnavigate()を上書きます。アニメーション周りの実装とBackStack周りの実装を排除し、状態保持したタブ切り替えのみを行う
navigate()が以下です。CustomNavigator.kt@Navigator.Name("custom_fragment") class CustomNavigator( private val context: Context, private val manager: FragmentManager, private val containerId: Int ) : FragmentNavigator(context, manager, containerId) { @Suppress("DEPRECATION") override fun navigate( destination: Destination, args: Bundle?, navOptions: NavOptions?, navigatorExtras: Navigator.Extras? ): NavDestination? { if (manager.isStateSaved) { return null } var className = destination.className if (className[0] == '.') { className = context.packageName + className } val tag = destination.id.toString() val transaction = manager.beginTransaction() val currentFragment = manager.primaryNavigationFragment if (currentFragment != null) { transaction.hide(currentFragment) } var fragment = manager.findFragmentByTag(tag) if (fragment == null) { fragment = instantiateFragment(context, manager, className, args) transaction.add(containerId, fragment, tag) } fragment.arguments = args transaction.show(fragment) transaction.setPrimaryNavigationFragment(fragment) transaction.commit() return destination } }NavHostFragmentクラスのcreateFragmentNavigator()を上書き
次に、Navigationライブラリに実装されている
NavHostFragmentクラスのcreateFragmentNavigator()を上書きます。FragmentNavigatorクラスのインスタンスが戻り値になっているためです。
NavHostFragmentを継承したCustomNavHostFragmentを作成し、上記のCustomNavigatorクラスのインスタンスが戻り値になるようにcreateFragmentNavigator()を上書きます。CustomNavHostFragment.ktclass CustomNavHostFragment : NavHostFragment() { override fun createFragmentNavigator(): Navigator<out FragmentNavigator.Destination> { return CustomNavigator(requireContext(), childFragmentManager, id) } }navigationレイアウトの作成
CustomNavigatorクラスにつけた@Navigator.Nameアノテーションの引数に指定しているcustom_fragmentを利用します。navigation.kt<?xml version="1.0" encoding="utf-8"?> <navigation xmlns:android="http://schemas.android.com/apk/res/android" xmlns:app="http://schemas.android.com/apk/res-auto" android:id="@+id/bottom_navigation" app:startDestination="@+id/tab1"> <custom_fragment android:id="@+id/tab1" android:name="hoge.HogeFragment" android:label="tab1" android:tag="tab1" /> <custom_fragment android:id="@+id/tab2" android:name="hoge.HogeHogeFragment" android:label="tab2" android:tag="tab2" /> </navigation>fragmentとBottomNavigationViewをレイアウトに作成
BottomNavigationViewとFragmentを表示したいレイアウトに
BottomNavigationViewとfragmentを記載します。activity_main.xml<?xml version="1.0" encoding="utf-8"?> <layout xmlns:android="http://schemas.android.com/apk/res/android" xmlns:app="http://schemas.android.com/apk/res-auto" xmlns:tools="http://schemas.android.com/tools"> <androidx.constraintlayout.widget.ConstraintLayout android:id="@+id/container" android:layout_width="match_parent" android:layout_height="match_parent" tools:context="hoge.MainActivity"> <androidx.appcompat.widget.Toolbar android:id="@+id/toolbar" app:layout_constraintEnd_toEndOf="parent" app:layout_constraintStart_toStartOf="parent" app:layout_constraintTop_toTopOf="parent"> </androidx.appcompat.widget.Toolbar> <fragment android:id="@+id/bottom_navigation_view_fragment" android:name="hoge.navigation.CustomNavHostFragment" android:layout_width="match_parent" android:layout_height="wrap_content" app:defaultNavHost="true" app:layout_constraintBottom_toTopOf="@id/bottom_navigation_view" app:layout_constraintTop_toBottomOf="@+id/toolbar" app:navGraph="@navigation/navigation" /> <com.google.android.material.bottomnavigation.BottomNavigationView android:id="@+id/bottom_navigation_view" android:layout_width="match_parent" android:layout_height="wrap_content" android:background="?android:attr/windowBackground" app:layout_constraintBottom_toBottomOf="parent" app:layout_constraintEnd_toEndOf="parent" app:layout_constraintStart_toStartOf="parent" app:menu="@menu/bottom_navigation_menu" /> </androidx.constraintlayout.widget.ConstraintLayout> </layout>以下が注意点です
- fragment
android:nameにCustomNavHostFragmentを指定app:navGraphに上記で記載したnavigationレイアウトを指定- BottomNavigationView
app:menuに指定するmenuレイアウトのitemのandroid:idをcustom_fragmentのandroid:idと揃えること
- 投稿日:2019-08-22T17:02:18+09:00
Navigation Drawerだけを持つ背景が透過したActivityを作成した時にハマった事
背景
アプリの仕様上の問題で、Navigation Drawerを出すときに、Navigation Drawerだけを持つ背景が透過しているActivityをメニューを出す画面の上に重ねて表示することで実現することになった。
その時にハマった事及びそれを解決する過程で学んだことがあった。領域外タッチでdrawerが閉じない!
最初、Navigation Drawerだけを置いたactivityのレイアウトは以下のようにしてた。
<layout xmlns:android="http://schemas.android.com/apk/res/android"
    xmlns:app="http://schemas.android.com/apk/res-auto">

    <androidx.drawerlayout.widget.DrawerLayout
        android:id="@+id/drawer"
        android:layout_width="fill_parent"
        android:layout_height="fill_parent"
        android:fitsSystemWindows="true">

        <com.google.android.material.navigation.NavigationView
            android:id="@+id/navigation"
            android:layout_width="wrap_content"
            android:layout_height="fill_parent"
            android:layout_gravity="left"
            android:background="#ffffff"
            android:fitsSystemWindows="false"
            app:headerLayout="@layout/navigation_header" />


    </androidx.drawerlayout.widget.DrawerLayout>
</layout>
しかしこうすると、表示はされるしNavigation Drawerを左にスライドをすれば閉じることはできるものの、Navigation Drawer以外の領域をタッチしても閉じなくなってしまいました。
解決法
そこで以下のように、DrawerLayoutの直下に透明なViewを置いてやったところ、領域外をタッチして閉じるようになりました。
<layout xmlns:android="http://schemas.android.com/apk/res/android"
    xmlns:app="http://schemas.android.com/apk/res-auto">

    <androidx.drawerlayout.widget.DrawerLayout
        android:id="@+id/drawer"
        android:layout_width="fill_parent"
        android:layout_height="fill_parent"
        android:fitsSystemWindows="true">

     <!--ハンバーガーメニュー外の領域をタッチした時に閉じるようにするようにするための透明なView-->
        <View
            android:id="@+id/view"
            android:layout_width="match_parent"
            android:layout_height="match_parent"
            android:background="#00000000" />

        <com.google.android.material.navigation.NavigationView
            android:id="@+id/navigation"
            android:layout_width="wrap_content"
            android:layout_height="fill_parent"
            android:layout_gravity="left"
            android:background="#ffffff"
            android:fitsSystemWindows="false"
            app:headerLayout="@layout/navigation_header" />


    </androidx.drawerlayout.widget.DrawerLayout>
</layout>
どうやらDrawerLayoutはメインコンテンツがないとNavigationViewの領域外へのタッチでハンバーガーメニューが閉じるようにならないらしい。
(というより直下のViewをメインコンテンツと認識する?)上記を解決する過程で発見したこと - Navigation Drawerの背景色の変え方
ところで、元々DrawerLayout+NavigationViewだけの時はNavigation Drawerの領域外の部分の背景色がActivityの色になっていたため、自前でActivityの背景を黒の半透明色にしていた。
だが、透明なViewを追加したところActivityの背景色を透明にしていてもNavigation Drawer外の部分の背景色が勝手によく見る黒の半透明になった。なぜだろう…?とDrawerLayoutの公式ドキュメントを見たところsetScrimColor(int color)という背景色をセットするメソッドを発見した。
https://developer.android.com/reference/android/support/v4/widget/DrawerLayout.html#setscrimcolor
そこでsetScrimColorメソッドの実装を確認すると/** * Set a color to use for the scrim that obscures primary content while a drawer is open. * * @param color Color to use in 0xAARRGGBB format. */ public void setScrimColor(@ColorInt int color) { mScrimColor = color; invalidate(); }そして、このメソッドで値をセットされる変数mScrimColorは、子Viewを描写するときにNavigation Drawer外の部分を描写する際に
 @Override
    protected boolean drawChild(Canvas canvas, View child, long drawingTime) {
        (略)

        if (mScrimOpacity > 0 && drawingContent) {
            final int baseAlpha = (mScrimColor & 0xff000000) >>> 24;
            final int imag = (int) (baseAlpha * mScrimOpacity);
            final int color = imag << 24 | (mScrimColor & 0xffffff);
            mScrimPaint.setColor(color);

            canvas.drawRect(clipLeft, 0, clipRight, getHeight(), mScrimPaint);
        }

       (以下略)
    }
という風に使われている。
また、setScrimColorで値をセットしている変数mScrimColorの初期値はprivate static final int DEFAULT_SCRIM_COLOR = 0x99000000; (中略) private int mScrimColor = DEFAULT_SCRIM_COLOR;である。
つまりメインコンテンツを足したことでNavigation Drawerの背景にあたる部分がちゃんと描写されるようになり、変数mScrimColorの値が反映されるようになり、今回は明示的に背景色をセットしなかったので初期値の0x99000000になったらしい。
そして、Navigation Drawerの背景色を例えばピンクなど、アプリのデザインにあったカラーにカスタマイズしたいときはsetScrimColorメソッドを呼べばいいらしい。なるほど。
- 投稿日:2019-08-22T16:40:09+09:00
Google MediaPipeのサンプルアプリをビルドしてAndroidにインストールする手順
Hand Trackingが実装されたことで話題になったGoogle MediaPipeを、ビルドしてAndroidにインストールするまでの手順です。
基本的には公式README通りにやれば良いですが、何箇所が躓いたところがあるので、それを中心に書いておきます。
ちなみに、MediaPipeについてはHand Trackingの話題で存在自体を初めて知りました。日本語の解説記事があったので、合わせて読むと少しは理解が進むかも。
GoogleのMediaPipeでMLアプリ開発が楽になる · tkat0.github.io
MadiaPipeのビルド環境を整える
公式ドキュメントの通り進めていきます。Mac+Android Studioなら、以下の順序で読み進めていけばOKです。
以下、躓いたところと解決方法です。
Run the Hello World desktop example.でビルドエラー
bazel runで以下のようなエラーが出ました。$ export GLOG_logtostderr=1 [(master) ~/Development/oss/mediapipe] $ bazel run --define MEDIAPIPE_DISABLE_GPU=1 \ [(master) ~/Development/oss/mediapipe] mediapipe/examples/desktop/hello_world:hello_world Extracting Bazel installation... Starting local Bazel server and connecting to it... ... still trying to connect to local Bazel server after 10 seconds ... DEBUG: Rule 'build_bazel_rules_apple' indicated that a canonical reproducible form can be obtained by modifying arguments commit = "6c9fcae7a3597aabd43f28be89466afe0eab18de", shallow_since = "1565379803 -0700" and dropping ["tag"] DEBUG: Call stack for the definition of repository 'build_bazel_rules_apple' which is a git_repository (rule definition at /private/var/tmp/_bazel_keita/d5c0de304ea3ae0df121006f1a08079f/external/bazel_tools/tools/build_defs/repo/git.bzl:181:18): - /Users/keita/Development/oss/mediapipe/WORKSPACE:251:1 ERROR: /private/var/tmp/_bazel_keita/d5c0de304ea3ae0df121006f1a08079f/external/local_config_cc/BUILD:62:5: in apple_cc_toolchain rule @local_config_cc//:cc-compiler-watchos_arm64_32: Xcode version must be specified to use an Apple CROSSTOOL. If your Xcode version has changed recently, verify that "xcode-select -p" is correct and then try: "bazel shutdown" to re-run Xcode configuration INFO: Call stack for the definition of repository 'com_google_absl' which is a http_archive (rule definition at /private/var/tmp/_bazel_keita/d5c0de304ea3ae0df121006f1a08079f/external/bazel_tools/tools/build_defs/repo/http.bzl:237:16): - /Users/keita/Development/oss/mediapipe/WORKSPACE:16:1 INFO: Call stack for the definition of repository 'com_github_glog_glog' which is a http_archive (rule definition at /private/var/tmp/_bazel_keita/d5c0de304ea3ae0df121006f1a08079f/external/bazel_tools/tools/build_defs/repo/http.bzl:237:16): - /Users/keita/Development/oss/mediapipe/WORKSPACE:61:1 ERROR: Analysis of target '//mediapipe/examples/desktop/hello_world:hello_world' failed; build aborted: Analysis of target '@local_config_cc//:cc-compiler-watchos_arm64_32' failed; build aborted INFO: Elapsed time: 48.317s INFO: 0 processes. FAILED: Build did NOT complete successfully (24 packages loaded, 108 targets configured) FAILED: Build did NOT complete successfully (24 packages loaded, 108 targets configured)Xcodeの新しいコマンドラインツールのディレクトリを見られてないのが原因です。ちなみに、Xcodeが古い場合は最新版にしておきましょう。
$ xcode-select -p                                                                                                                                                                                 [(master) ~/Development/oss/mediapipe]
/Library/Developer/CommandLineTools
# このディレクトリだとエラーになる

$ sudo xcode-select -r
# xcode-selectをリストアする

$ xcode-select -p                                                                                                                                                                                 [(master) ~/Development/oss/mediapipe]
/Applications/Xcode.app/Contents/Developer
# このディレクトリになったらOK

$ bazel shutdown
# bazelサーバーを一度落とす

$ bazel run --define MEDIAPIPE_DISABLE_GPU=1 \                                                                                                                                                    [(master) ~/Development/oss/mediapipe]
    mediapipe/examples/desktop/hello_world:hello_world
# 再度ビルドを実行
getting Xcode-related error with Bazel - Google グループ
Android Studioの
Configureって何?
Configure | SDK Manager | SDK PlatformsみたいになってるところのConfigureはメニューバーにあるAndroid Studio > Preferencesに読み替えればOKです。
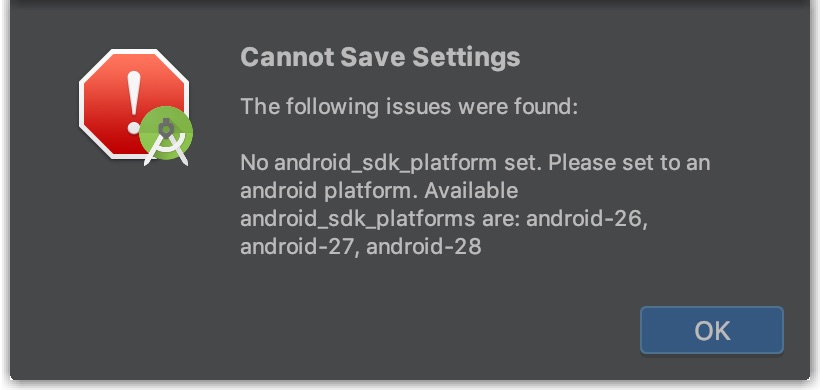
Import Bazel Projectの最後のFinishを押すとエラー
最後の方にあるandroid_sdk_platformのコメントアウトを1つ外さないとエラーになります。基本的には最新の
android_sdk_platform: android-28のコメントアウトを外せば問題ないです。
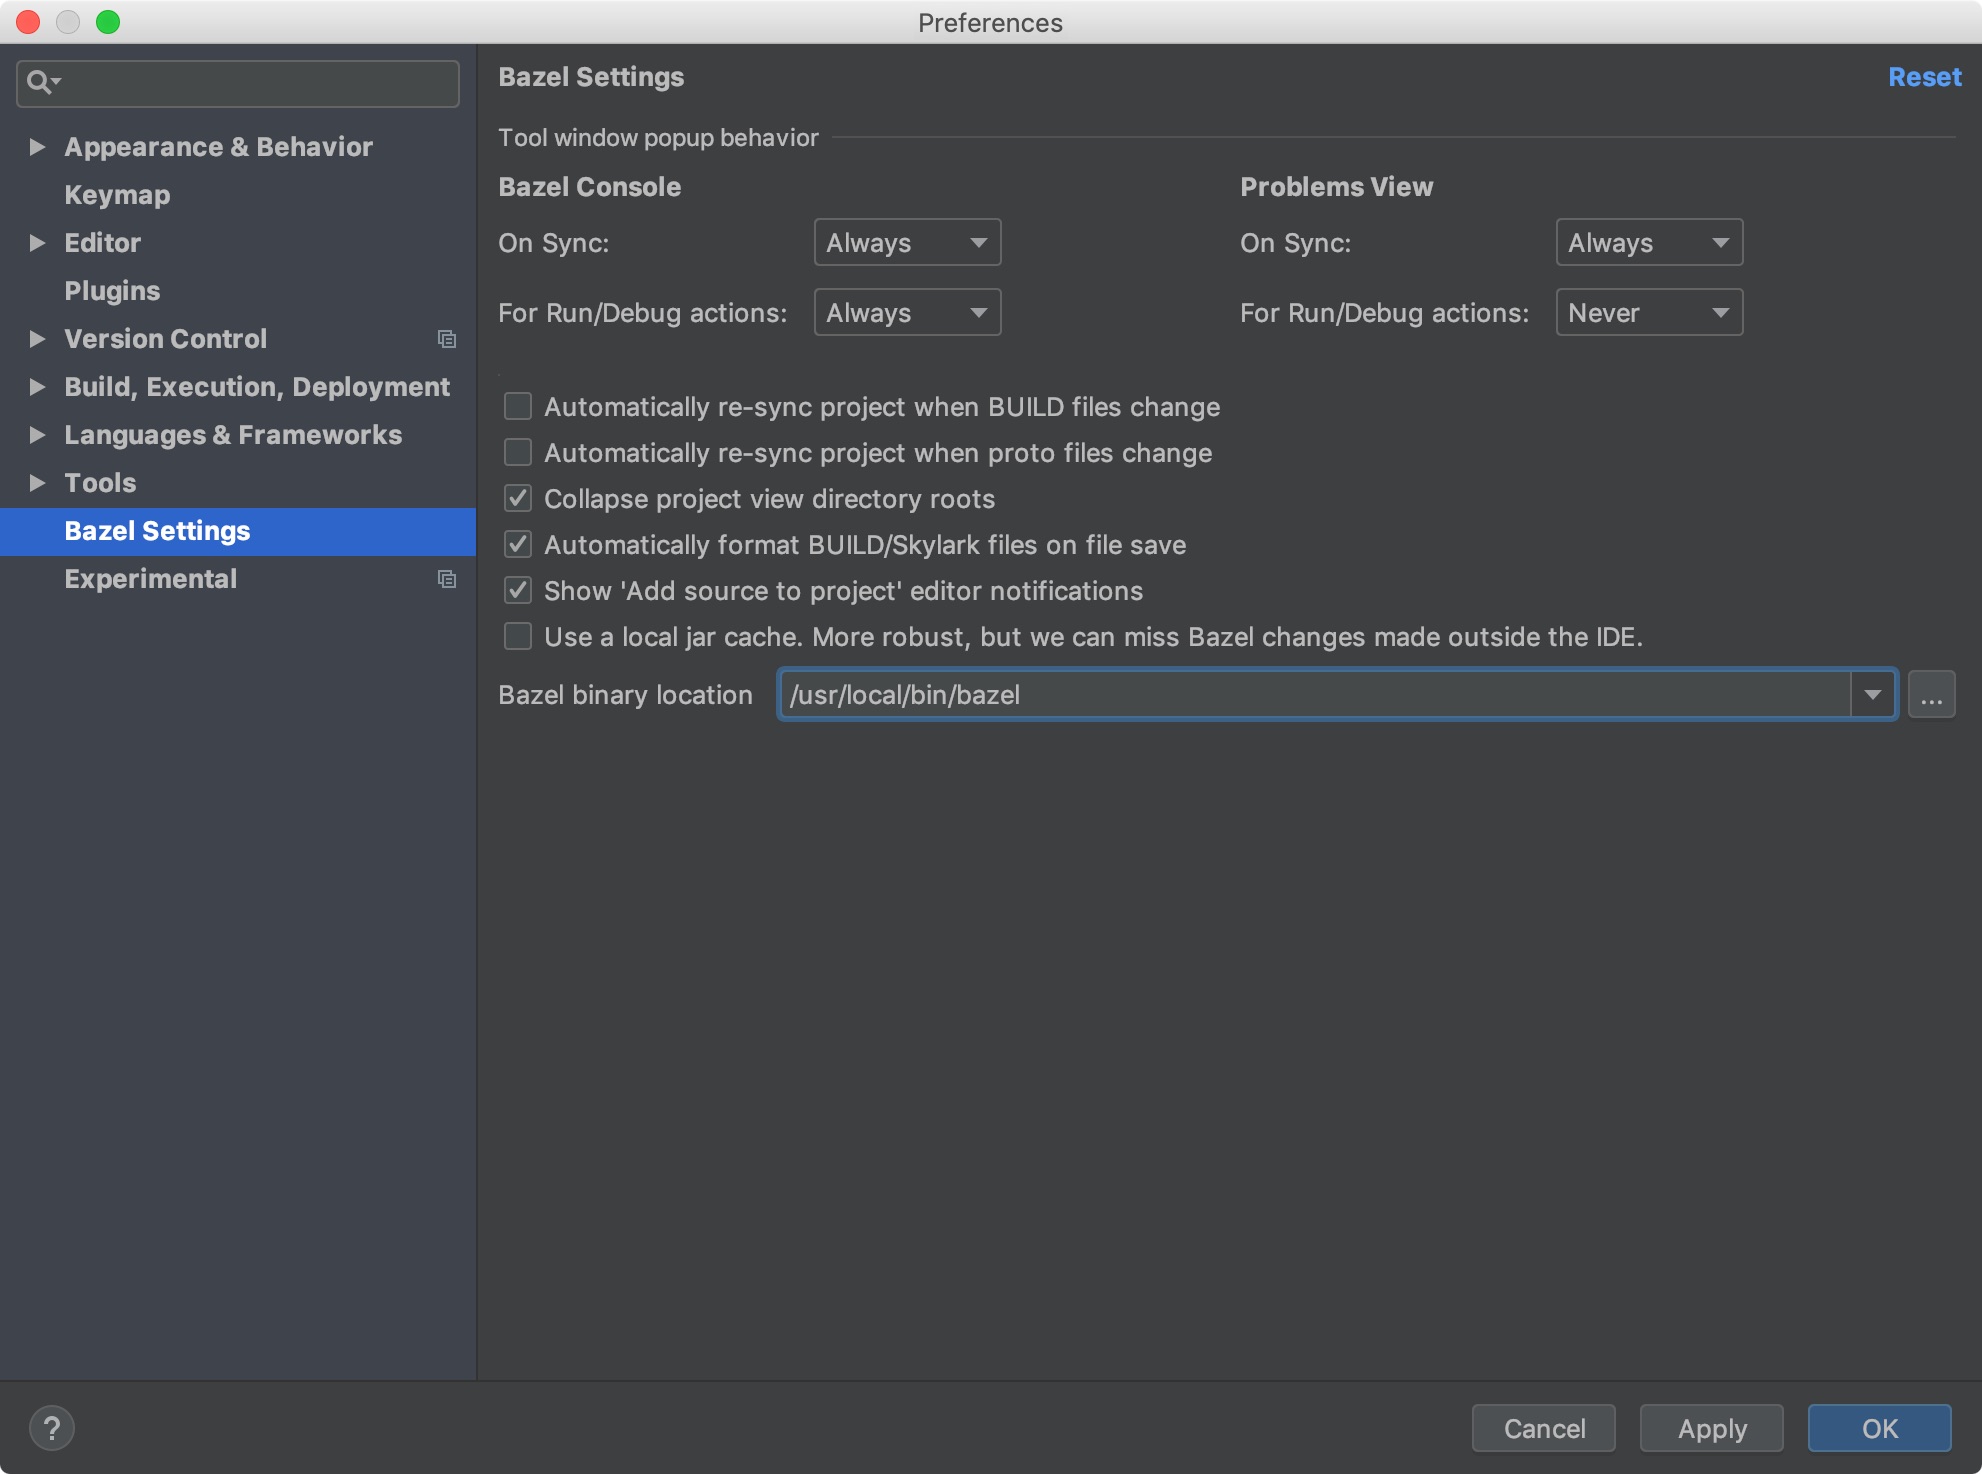
Syncエラー
Error:Cannot run program "bazel" (in directory "/Users/keita/Development/oss/mediapipe"): error=2, No such file or directorybazelコマンドのロケーションをAndroid Studioに設定する必要があります。まずはbazelコマンドの場所を特定します。
$ which bazel
/usr/local/bin/bazel
Android Studio > Preferences > Bazel SettingのBazel binaru locatiopnにパスを入力してOKを押します。
Cannot run program "bazel".. No such file or directory · Issue #285 · bazelbuild/intellijアプリビルドでエラー
ERROR: /Users/keita/Development/oss/mediapipe/WORKSPACE:243:1: //external:android/sdk depends on @androidsdk//:sdk in repository @androidsdk which failed to fetch. no such package '@androidsdk//': Either the path attribute of android_sdk_repository or the ANDROID_HOME environment variable must be set.環境変数にSDKとNDKのロケーションは設定しているのに、それが見つからないというエラーです。色々試したけど、環境変数の方法では解決しなかったので、WORKSPACEファイルにそれぞれの場所を記入する方法でビルドできるようになりました。
プロジェクトルートにある
WORKSPACEファイルにandroid_ndk_repositoryとandroid_sdk_repositoryがすでにあるので、そこにpath =の行を追記します。# You may run setup_android.sh to install Android SDK and NDK. android_ndk_repository( name = "androidndk", path = "/Users/keita/Library/Android/sdk/ndk-bundle", ) android_sdk_repository( name = "androidsdk", path = "/Users/keita/Library/Android/sdk", )SDKのパスは Tools > SDK Manager で開く画面の
Android SDK Locationです。NDKはAndroid StudioのSDK Managerを使って入れている場合は[SDKパス]/ndk-bundleです。現在ビルドできるアプリ一覧
mediapipe/mediapipe/examples/android/src/java/com/google/mediapipe/apps at master · google/mediapipe
Hand Trackingのビルドとインストール
bazel build -c opt --config=android_arm64 mediapipe/examples/android/src/java/com/google/mediapipe/apps/handtrackinggpuadb install bazel-bin/mediapipe/examples/android/src/java/com/google/mediapipe/apps/handtrackinggpu/handtrackinggpu.apkmediapipe/hand_tracking_mobile_gpu.md at master · google/mediapipe


- 投稿日:2019-08-22T14:39:08+09:00
GooglePlayの新しい評価が公開されてた件
自分の手元でPlayStoreを久々にみたところレビューが思ったよりも高くなっていてびっくりしました。
3.9 => 4.6
あれ!?どうしたのかなと思ったらコンソール上にこのように表示されていました。
新しい評価?とは
I/O 2019: New features to help you develop, release, and grow your business on Google Play
上のサイトに書かれていたのを一部抜粋すると・・・。We’re also making big changes to another key source of performance data: your user reviews. Many of you told us that you want a rating that reflects a more current version of your app, not what it was years ago — and we agree. So instead of a lifetime cumulative value, your Google Play Store rating will be recalculated to give more weight to your most recent ratings. Users won’t see the updated rating in the Google Play Store until August, but you can preview your new rating in the Google Play Console today.何年間も積み重なったレビューの累積値ではなく、最新の評価の方が重要視されるようにGoogle Playストアの評価が再計算されるようです。
↑英語よめないので間違ってたらコメントください。新しい評価が全ての人に表示されてるの?
違うみたいです。
まだ一部ユーザーだけでした。結果
最近良いレビューがついていてよかったなぁとホッとしました。
マーケティングに携わる人とか困ったりしないのかなぁ・・・。


- 投稿日:2019-08-22T11:27:05+09:00
android studioでのユニットテストでandroidTestと、testフォルダの違い
androidTestと、testの違い。
Androidで、単体テストを記述すると、以下の2種類のフォルダの内どちらにテストファイルを作成しますか?と聞いてくる。
androidTest
android環境でテストを行う。androidのライブラリを使え、エミュレータ上でテストが行われるためエミュレーター固有のバグをテストすることができる。
ヘッドレスエミュレーターを立ち上げてテストするため遅い。test
Jvm上で、テストを行う。androidのライブラリは使えないが高速。
結論
基本的に、ビジネスロジッククラスは、testフォルダでテストすることで、責務を分けることが出来そう。
Statelessなロジックを扱うだけのクラスは、pureなjavaで書かれていることが望ましいので、なるべくtestフォルダでテストするのかな。完
- 投稿日:2019-08-22T09:50:39+09:00
ステップバイステップでDaggerを使った引数ありのViewModelの初期化を理解する
ViewModel周りの作り方、ちょっともやもやしていたので、改めてまとめてみました。
ViewModelの作り方
何も工夫せずにViewModelを取得すると以下のようになります
class SampleViewModel() : ViewModel()

// (Fragment内でのコード)
ViewModelProviders.of(this).get(SampleViewModel::class.java)
これは内部的に以下と同じです。 Fragmentから
viewModelStoreというのを取得して、それとAndroidViewModelFactoryを渡して作ります。(Fragment内でのコード)
val factory = ViewModelProvider
        .AndroidViewModelFactory
        .getInstance(requireActivity().application)
ViewModelProvider(this.viewModelStore, factory).get(SampleViewModel::class.java)
つまり、内部的なロジックだと以下と同じで、
fragment.viewModelStoreでキャッシュしていて、AndroidViewModelFactoryで作っているだけです。(Fragment内でのコード)
private fun createViewModel(): SampleViewModel {
    val factory = ViewModelProvider
        .AndroidViewModelFactory
        .getInstance(requireActivity().application)
    // ViewModelStore内からViewModelを取得
    val existsViewModel: ViewModel? = this
        .viewModelStore
        .get(SampleViewModel::class.java.canonicalName)
    // viewModelStore内にあればそれを返す
    if (existsViewModel != null) {
        return existsViewModel as SampleViewModel
    }
    // 無ければAndroidViewModelFactoryで作る
    return factory.create(SampleViewModel::class.java)
}
引数ありのViewModelの作り方
このFactoryを変えることができれば、引数ありで初期化できそうです。
AndroidViewModelFactoryをオーバーライドして実装すると以下のようになります。class SampleViewModel(val sampleParameter: String) : ViewModel() ... // Fragment内のコード val factory = object : ViewModelProvider .AndroidViewModelFactory(requireActivity().application) { // **AndroidViewModelFactoryをオーバーライドしてカスタムしたcreateロジックを入れる** override fun <T : ViewModel?> create(modelClass: Class<T>): T { if (modelClass == SampleViewModel::class.java) { // 普通にnewする! return SampleViewModel("sample parameter") as T } return super.create(modelClass) } } println( ViewModelProvider(this.viewModelStore, factory) .get(SampleViewModel::class.java).sampleParameter )I/System.out: sample parameterDaggerでのViewModelの作り方
さて、初期化するときにRepositoryとか渡したいので、みなさんはDaggerを使いたいですよね?
class SampleViewModel @Inject constructor(val repository: SessionRepository) : ViewModel()Fragmentに直接以下のように書くとViewModelStoreで管理されないインスタンスができてしまいます。
☓
// ☓ ViewModelStoreに保存されていないインスタンス!!
@Inject lateinit var viewModel: SampleViewModel
そこでDaggerのProviderというgetを呼ぶまでインスタンスが作られないものを利用します。
そして、Factoryで返させることで、ViewModelStoreで管理されるようにします。○
@Inject lateinit var viewModelFactory: Provider<SampleViewModel>val factory = object : ViewModelProvider .AndroidViewModelFactory(requireActivity().application) { override fun <T : ViewModel?> create(modelClass: Class<T>): T { if (modelClass == SampleViewModel::class.java) { return viewModelFactory.get() as T } return super.create(modelClass) } } ViewModelProvider(this.viewModelStore, factory).get(SampleViewModel::class.java)Daggerでのカスタムした引数をもつViewModelの使い方
例えばページの詳細画面などではpageIdなどを渡して、ViewModelを作りたくなりますよね?
AssistedInjectというライブラリを使うとDaggerでRepositoryとかをinjectしつつ、カスタムした引数をFactoryで渡して、カスタムした引数を渡せます。class SampleViewModel @AssistedInject constructor( // カスタムした引数を使いたいものに@Assistedをつける! @Assisted val pageId: String, val repository: SessionRepository ) : ViewModel() { @AssistedInject.Factory interface Factory { fun create(pageId: String): SampleViewModel } } @Inject lateinit var viewModelFactory: SampleViewModel.Factory val factory = object : ViewModelProvider .AndroidViewModelFactory(requireActivity().application) { override fun <T : ViewModel?> create(modelClass: Class<T>): T { if (modelClass == SampleViewModel::class.java) { // 引数を渡して作る! return viewModelFactory.create("sample_page") as T } return super.create(modelClass) } } ViewModelProvider(this.viewModelStore, factory).get(SampleViewModel::class.java)実用的なコードに落とし込む
Android Jetpackのfragment-ktxを使うと
viewModels()でViewModelを初期化できます。内部的には普通にFragmentからviewModelStoreを使ったりなど、同じことをやっているだけです。class SimpleViewModel() : ViewModel() ... // Fragment内 val viewModel: SimpleViewModel by viewModels()
viewModelsはFactoryを渡せるので、以下のように書くことができます。// Fragment内 val viewModel:SampleViewModel by viewModels { object : ViewModelProvider.AndroidViewModelFactory(this.requireActivity().application) { override fun <T : ViewModel?> create(modelClass: Class<T>): T { @Suppress("UNCHECKED_CAST") return viewModelFactory.create("sample_page") as T } } }自分で
viewModelsを使ったextension functionを定義すると以下のようになり、かなり実用的にかけるようになりました。class SampleViewModel @AssistedInject constructor( @Assisted val pageId: String, val repository: SessionRepository ) : ViewModel() { @AssistedInject.Factory interface Factory { fun create(pageId: String): SampleViewModel } } // Fragment内 @Inject lateinit var viewModelFactory: SampleViewModel.Factory val viewModel: SampleViewModel by assistedViewModels { viewModelFactory.create("sample_page") } inline fun <reified T : ViewModel> Fragment.assistedViewModels( crossinline body: () -> T ): Lazy<T> { return viewModels { object : ViewModelProvider.AndroidViewModelFactory(this.requireActivity().application) { override fun <T : ViewModel?> create(modelClass: Class<T>): T { @Suppress("UNCHECKED_CAST") return body() as T } } } }まとめ
自分はなんとなく完全に理解できました。
こうしたらわかりやすいとか、ツッコミなどあれがコメントやTwitterなどでください