- 投稿日:2019-01-27T23:45:55+09:00
SPA(Vue.js)でGooleMapAPIを導入する方法
インスタンスのcreated時にライブラリを読み込み、destroy時にgoogleオブジェクトを空にしてあげると下記のエラーは回避できる。
You have included the Google Maps JavaScript API multiple times on this page. This may cause unexpected errors.SPA実装していてindex.htmlにscriptタグを書きたくない人はこれで良い。
GoogleMap.vue<template> <div id="map"></div> </template> <script> import { GOOGLEMAP_API_KEY } from "@/common/config"; export default { name: "GoogleMap", data() { return { map: null, mapPosition: {lat: 35.658034, lng: 139.701636} }; }, methods: { loadJS(src) { const ref = window.document.getElementsByTagName("script")[0]; const script = window.document.createElement("script"); script.src = src; script.async = true; script.setAttribute('id', 'google-map'); ref.parentNode.insertBefore(script, ref); }, initMap() { this.map = new google.maps.Map(document.getElementById('map'), { center: this.mapPosition, }); }, }, created(){ this.loadJS(`https://maps.googleapis.com/maps/api/js?key=${GOOGLEMAP_API_KEY}&callback=initMap`) window.initMap = this.initMap; }, destroyed(){ const oldTag = document.getElementById('google-map') oldTag.parentNode.removeChild(oldTag); window.google = {} } }; </script>余談: BiSHは良いぞ〜
- 投稿日:2019-01-27T23:30:09+09:00
vue-svg-loaderを使って画像をcomponent化させる
以前にvue-svg-loaderを使ったことがあったので、知見として記事を書こうと思いました。
vue-svg-loaderをインストール
npm i -D vue-svg-loader

or

yarn add --dev vue-svg-loader
基本設定
次にvue-svg-loaderの設定です。
Vue CLI
vue cliの場合は以下のコードをwebpackに記入します。
module.exports = {
  chainWebpack: (config) => {
    const svgRule = config.module.rule('svg');

    svgRule.uses.clear();

    svgRule
      .use('vue-svg-loader')
      .loader('vue-svg-loader');
  },
};
Nuxt.js
vue cliの場合は以下のコードをnuxt.config.jsに記入します。
nuxt.config.jsmodule.exports = { build: { extend: (config) => { const svgRule = config.module.rules.find(rule => rule.test.test('.svg')); svgRule.test = /\.(png|jpe?g|gif|webp)$/; config.module.rules.push({ test: /\.svg$/, loader: 'vue-svg-loader', }); }, }, };これで基本的な設定は終了です。
実際にvueファイルで使用する
実際に使用するにはcomponentと同じような使い方で、importで画像のパスを指定して、componentsにimportしたcompoent名を記述します。
最後に使用したい部分にcomponentを追加すると、実際にsvgの画像が描画されます。<template> <nav> <a href="https://hogehoge.com/"> <SampleLogo /> </a> </nav> </template> <script> import SampleLogo from './assets/images/sample_image.svg' export default { name: 'Sample', components: { SampleLogo, }, }; </script>
- 投稿日:2019-01-27T23:23:10+09:00
第3回「FirebaseAuthによるログイン・ログアウト導入」@FirebaseAuth+Nuxt.js+Go(v1.11)+GAE開発シリーズ
お題
前回でFirebaseAuth導入前の準備が出来たので、今回からようやくFirebaseAuthを導入する。
前提
以下は他にいくらでもよい記事があるので省略。
- 開発環境の構築(GolangやらYarnやらのインストール等)
- Google Cloud Platform環境の取得(App Engine有効化)
- Firebase環境の取得
- Vue.jsやNuxt.jsのチュートリアル
開発環境
# OS
$ cat /etc/os-release
NAME="Ubuntu"
VERSION="18.04.1 LTS (Bionic Beaver)"
# 依存モジュールのバージョン
package.jsonの内容より、以下の通り。"nuxt": "^2.3.4", "vuetify": "^1.3.14", "vuetify-loader": "^1.0.8", "@nuxtjs/axios": "^5.3.6"# Yarn
$ yarn -v
1.12.3
# Golang
$ go version
go version go1.11.4 linux/amd64
実践
■FirebaseAuthをフロントエンドに導入
自作のWebサイトにFirebaseAuthの認証機能を使うにあたって、まず、Firebaseをフロントエンドのプロジェクトに導入する必要がある。
下記によると、FirebaseAPIを使うためのAPIキーやら認証ドメインやらの設定を書いてfirebase SDKのアプリ初期化コードを実行するとよいらしい。
https://firebase.google.com/docs/web/setup?hl=ja導入コマンドと結果確認
$ yarn add firebase 〜〜省略〜〜 $ yarn add firebase-admin 〜〜省略〜〜[package.json]$ cat package.json { "name": "frontend", 〜〜省略〜〜 "dependencies": { 〜〜省略〜〜 "firebase": "^5.8.0", "firebase-admin": "^6.5.0", 〜〜省略〜〜 }, 〜〜省略〜〜 }プラグインとして初期化コードを実装
Firebaseアプリの初期化は1回きりでいいのでプラグインとして実装
[frontend/plugins/firebase.js]import firebase from 'firebase' if (!firebase.apps.length) { firebase.initializeApp( { apiKey: process.env.apiKey, authDomain: process.env.authDomain, databaseURL: process.env.databaseURL, projectId: process.env.projectId, storageBucket: process.env.storageBucket, messagingSenderId: process.env.messagingSenderId } ); } export default firebaseAPIキー等の情報は
process.envから取得
実際の値は下記の環境に応じて適用されるファイルに記載(間違ってもpublicなGitHubリポジトリにアップしてはならない・・・)
※このあたり、ローカルでだけ動作確認するレベルならローカルストレージに実値を持たせておけばいいのだけど、GAEデプロイするとなるとそうもいかない。。。$ tree -L 1 frontend/ frontend/ ├── README.md ├── assets ├── components ├── dist ├── env.development.js ├── env.production.js ├── jest.config.js ├── layouts 〜〜省略〜〜[frontend/env.development.js]module.exports = { apiBaseUrl: 'http://localhost:8080/api/v1', apiKey: "<API_KEY>", authDomain: "<PROJECT_ID>.firebaseapp.com", databaseURL: "https://<DATABASE_NAME>.firebaseio.com", projectId: "<PROJECT_ID>", storageBucket: "<BUCKET>.appspot.com", messagingSenderId: "<SENDER_ID>", }[frontend/env.productio.js]module.exports = { apiBaseUrl: 'https://<PROJECT_ID>.appspot.com/api/v1', apiKey: "<API_KEY>", authDomain: "<PROJECT_ID>.firebaseapp.com", databaseURL: "https://<DATABASE_NAME>.firebaseio.com", projectId: "<PROJECT_ID>", storageBucket: "<BUCKET>.appspot.com", messagingSenderId: "<SENDER_ID>", }■メールアドレス・パスワードを用いたSignIn
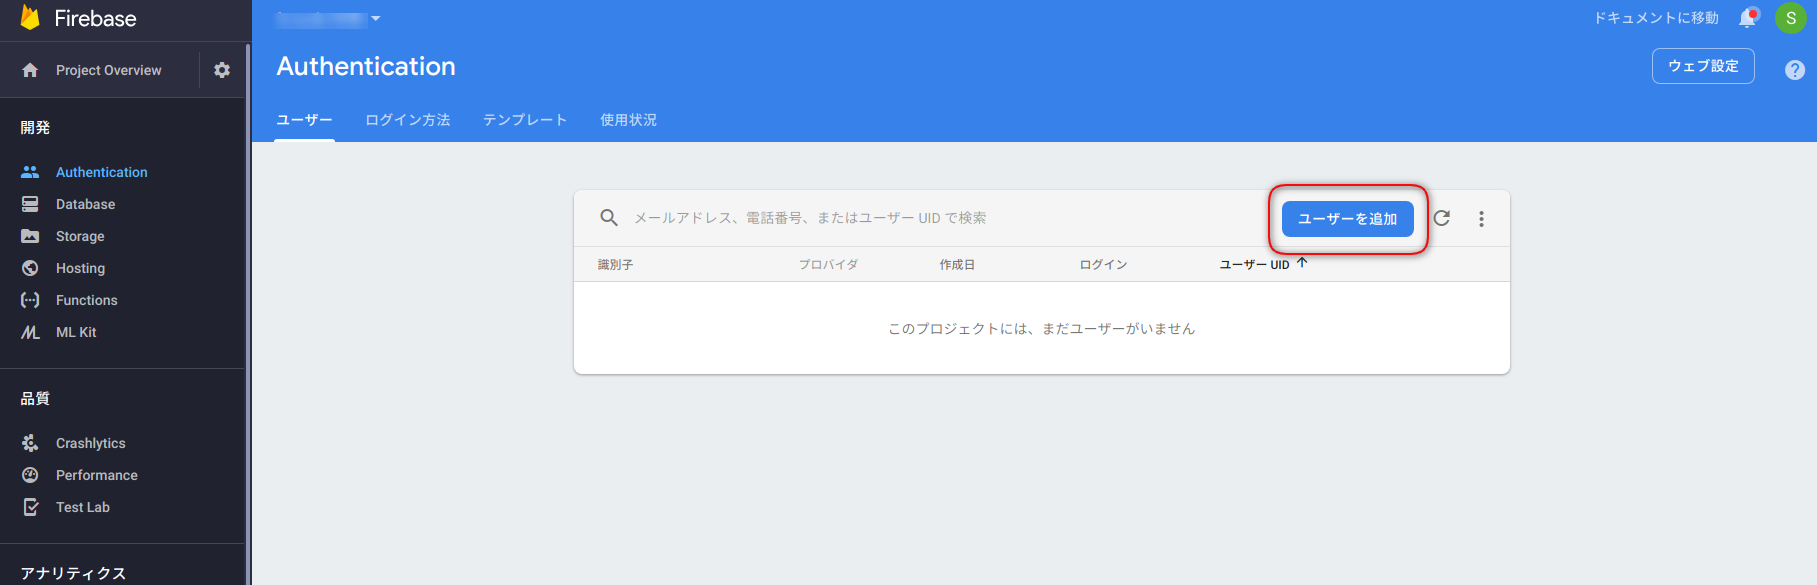
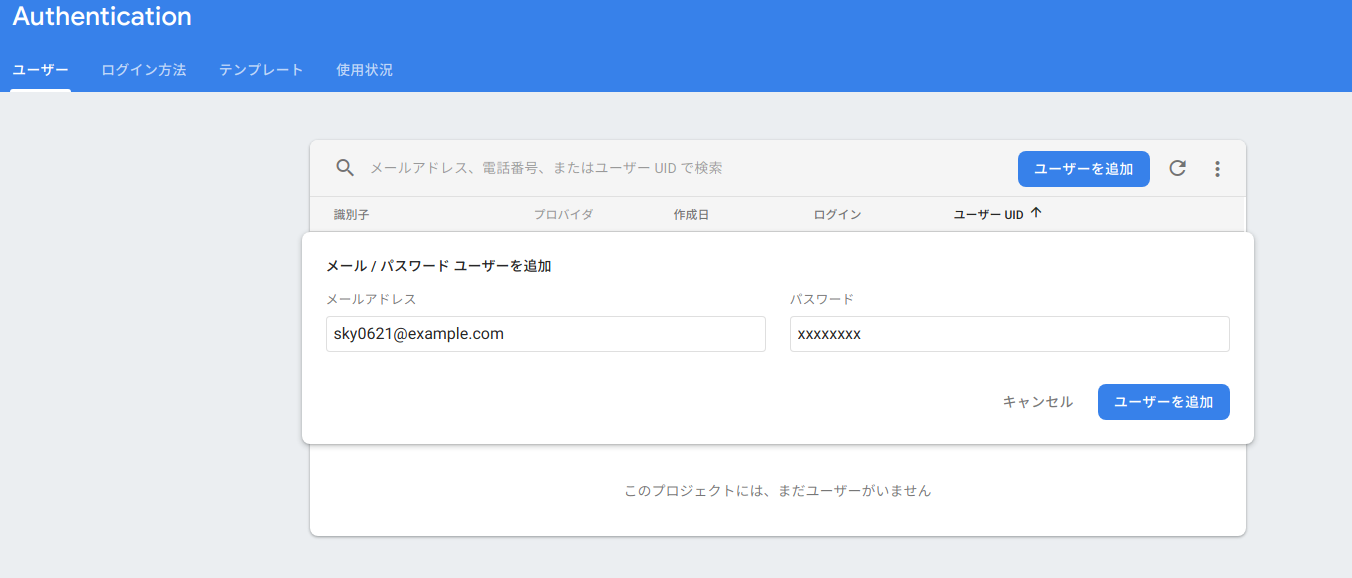
FirebaseAuthコンソールで事前のユーザ作成
なにはともあれ、最初のユーザがいないとログインができないので作っておく。
loginコンポーネントにFirebaseAuthのSignIn機能を実装
frontend/components/login.vueにSignInロジックを追加[frontend/components/login.vue(<template>部分は省略)]<script> import firebase from '~/plugins/firebase' export default { data() { return { email: '', password: '', errMsg: '' } }, methods: { async login() { await firebase .auth() .signInWithEmailAndPassword(this.email, this.password) .then(res => { // ログイン正常終了時はログイン後の初期画面に遷移する。 this.$router.push('/') }) .catch(error => { this.errMsg = error.message console.log( 'errorCode:' + error.code + ', errorMessage:' + error.message ) }) } } } </script>動作確認
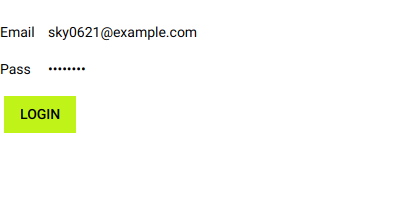
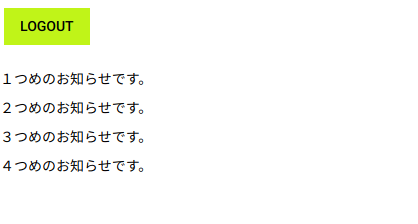
FirebaseAuthコンソールで事前登録したユーザのメールアドレスとパスワードを入力して「LOGIN」ボタン押下すると
ログイン後トップ画面に遷移する。
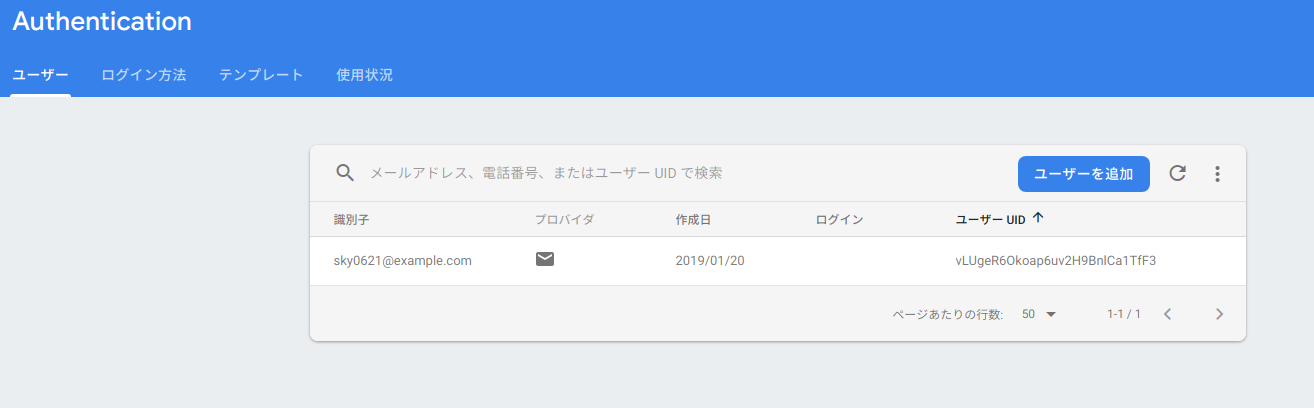
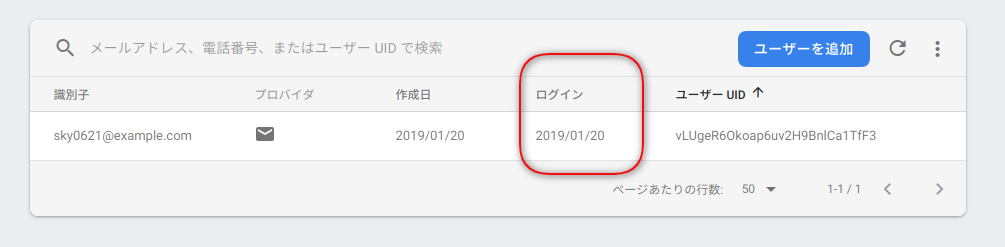
FirebaseAuthコンソールにて先ほど作成したユーザのログイン状況を見てみると
ちゃんとログイン日が記載されている。
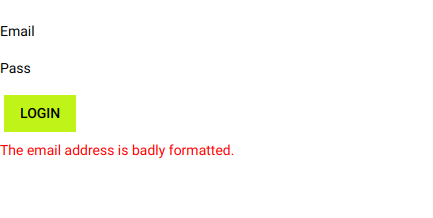
試しにメールアドレスとパスワードなしでログインしてみると
ちゃんとFirebaseAuthのSDKからエラーメッセージが取得できる。
■SignOut
SignInが終わったら、今度は当然SignOut
defaultレイアウトにFirebaseAuthのSignOut機能を実装
frontend/layouts/default.vueにSignOutロジックを追加[frontend/layouts/default.vue]<template> <v-app light> <v-btn class="mx-1 my-2 px-3 py-2 lime" @click="logout" > LOGOUT </v-btn> <nuxt /> </v-app> </template> <script> import firebase from '~/plugins/firebase' export default { methods: { async logout() { await firebase .auth() .signOut() .then(res => { // ログアウト正常終了時はログイン画面に遷移する。 this.$router.push('/login') }) .catch(error => { console.log( 'errorCode:' + error.code + ', errorMessage:' + error.message ) }) } } } </script>動作確認
「LOGOUT」ボタンを押下すると
SignOutが正常終了してログイン画面に遷移する。
■ここまでの全ソース


- 投稿日:2019-01-27T23:22:21+09:00
第2回「FirebaseAuth導入前(ログインフォーム実装とバックエンドプロジェクトのガワ作成)」@FirebaseAuth+Nuxt.js+Go(v1.11)+GAE開発シリーズ
お題
前回に続き、今回もまだFirebaseAuth導入前。ログインフォームを実装する。
また、フロントだけでなくバックエンドともゆくゆく連携が必要なのでガワを作っておく。前提
以下は他にいくらでもよい記事があるので省略。
- 開発環境の構築(GolangやらYarnやらのインストール等)
- Google Cloud Platform環境の取得(App Engine有効化)
- Firebase環境の取得
- Vue.jsやNuxt.jsのチュートリアル
開発環境
# OS
$ cat /etc/os-release
NAME="Ubuntu"
VERSION="18.04.1 LTS (Bionic Beaver)"
# 依存モジュールのバージョン
package.jsonの内容より、以下の通り。"nuxt": "^2.3.4", "vuetify": "^1.3.14", "vuetify-loader": "^1.0.8", "@nuxtjs/axios": "^5.3.6"# Yarn
$ yarn -v
1.12.3
# Golang
$ go version
go version go1.11.4 linux/amd64
実践
frontend/components/login.vueを下記の通り修正してみる。
せっかくvuetifyを使っていても、デザインは適当。。。
とりあえず、FirebaseAuthを使うにあたって、べたな「メールアドレス」と「パスワード」での認証を試す予定なので、フォームの要素もそれに合わせる。
※バリデーションやエラーハンドリングなど、お試しレベルでは不要なものは未実装。修正後のソース
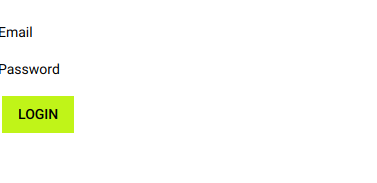
[frontend/components/login.vue]<template> <v-layout class="py-3" > <v-form> <v-text-field v-model="email" label="Email" class="py-2" /> <v-text-field v-model="password" label="Password" :type="`password`" class="py-2" /> <v-btn class="mx-1 my-2 px-3 py-2 lime" @click="login" > LOGIN </v-btn> </v-form> </v-layout> </template> <script> export default { data() { return { email: '', password: '' } }, methods: { login: function() { console.log('login') // FIXME: ここにFirebaseAuthを用いたログイン処理を書く想定 // ログイン正常終了時はログイン後の初期画面に遷移する。 this.$router.push('/') } } } </script>修正後の画面表示
■ログイン後トップ画面のデザイン修正
固定文字列を表示していた
frontend/pages/index.vueを修正する。
ログイン後には、お知らせくらい表示するだろうということで、「お知らせコンポーネント」を追加。
それを使うことにする。修正後のソース
[frontend/pages/index.vue]<template> <v-content> <notice /> </v-content> </template> <script> import notice from '~/components/notice.vue' export default { components: { notice } } </script>[frontend/components/notice.vue]<template> <v-layout class="py-3" > <v-list two-line> <v-list-tile v-for="notice in notices" :key="notice"> <v-list-tile-content class="mb-2"> <v-list-tile-title>{{ notice.sentence }}</v-list-tile-title> </v-list-tile-content> </v-list-tile> </v-list> </v-layout> </template> <script> export default { data() { return { notices: [] } }, mounted() { this.$axios .get(process.env.apiBaseUrl + '/notices') .then(res => { console.log(res.data) this.notices = res.data }) .catch(err => { console.log(err) }) } } </script>お知らせの内容は axiosを用いてバックエンド(GoでWebAPIを実装)から取得する。
修正後の画面表示
■バックエンド(GoによるWebAPI実装)のディレクトリ構造
巷ではクリーン・アーキテクチャが流行りだけど、お試しプロジェクトでそこまでの汎用性は不要なので、当初は
main.goだけで済まそうとした。
ただ、一応、ある程度機能拡張する可能性も考慮し、MVC+S くらいの作りにはしておくことに。
※MVC+Sに関しては過去に記事化していた。
https://qiita.com/sky0621/items/c7b196a1ba0e126cc3f5$ tree -L 2 backend/ backend/ ├── README.md ├── app.yaml ├── controller │ ├── apierror.go │ ├── form │ ├── notice.go │ ├── response │ └── router.go ├── go.mod ├── go.sum ├── index.yaml ├── logger │ └── logger.go ├── main.go ├── middleware │ ├── basic.go │ └── custom.go ├── model │ ├── dto.go │ └── notice.go ├── service │ └── notice.go ├── system │ ├── local.go │ └── setting.go ├── util │ ├── stringbuilder.go │ └── util.go └── view★controller -> service -> model の呼び出し関係
★viewの下にはfrontendでビルドしたファイルを出力する。■バックエンドの使用フレームワーク
■バックエンドのつくり
この時点ではFirebaseAuthとの絡みは出てこないので省略。
実際のソースは下記。
https://github.com/sky0621/Dotato-di-una-libreria/tree/38261c1768ca8da0aba77ced9d5a1b795172e89c/backend■ここまでの全ソース
https://github.com/sky0621/Dotato-di-una-libreria/tree/38261c1768ca8da0aba77ced9d5a1b795172e89c

- 投稿日:2019-01-27T22:02:58+09:00
Vue.jsでPugを使ってみる
やること
HTMLが簡単に書けるテンプレートエンジンであるPugをVue.jsで使ってみます。
環境構築
vue-cliのインストール
VueCLIを使うので入れていない場合はインストールします。
$ npm install -g @vue/cliプロジェクトの作成
適当な名前でプロジェクトを作成します。
--defaultはセットアップをデフォルト設定で行うことを指定するオプションです。$ vue create pug-test --default $ cd pug-testPug関連のパッケージのインストール
次にVue.jsでPugを使うために必要なパッケージをインストールします。
プロジェクトのルートフォルダへ移動したことを確認してから以下のコマンドを実行してください。
ESLintを無効にしている場合はeslint-plugin-pugを含める必要はありません。$ npm install --save-dev pug pug-plain-loader eslint-plugin-pugvueファイルでの使い方
さっそく使ってみます。
src/App.vueを開いて1行目にlang="pug"を追加してください。
これはtemplateタグ内でPugを使用するという宣言です。# App.vue <template lang="pug> ...略Pugが有効になっているはずなので適当に書いてみます。
<template lang="pug">
  div
    h1 This is a Pug example
    #container
      p Hello world!
</template>
ファイルを変更して保存したら
コマンドラインでnpm run serveとしてください。
ブラウザでlocalhost:8080を開いてきちんと表示されて入れば成功です。

- 投稿日:2019-01-27T18:21:19+09:00
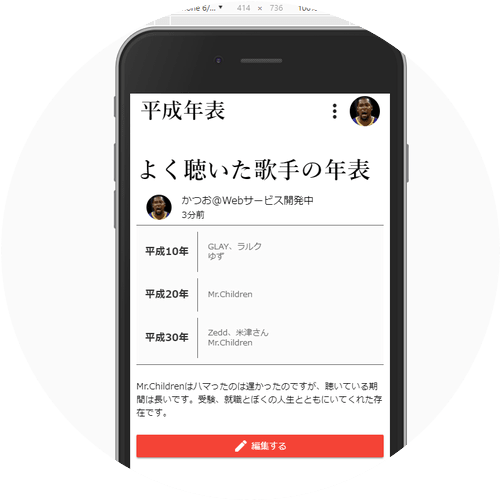
平成年表というWebサービスを5日で個人開発してリリースしました
平成年表というWebサービスを5日間で作ってリリースしました。
こんにちは、かつおです。本日、「平成年表」というWebサービスを構想から5日間でリリースしました。選定した技術、助けられたQiita記事などなどを紹介したいと思います。
つくったサービス
平成年表
* 気軽に平成の想い出を年表にして投稿することができます
* 自由なテーマで投稿できます
* 投稿した年表をSNSへシェアしたり、サイト上でコメントしたりして盛り上がれますサービスへの想い
平成がもう終わってしまいます。あと3か月です!!平成は本当にいろんなことがあったと思います。たぶん皆さんも同じだと思います。いろんな想い出を年表にして、みんなで懐かしんだり盛り上がったりしませんか?平成をあと少しだけ…
使った技術
- vue.js => [フロント]
- vue-router
- vuex
- vuetify
- firebase => [バック]
- Hosting
- functions
- firestore
- Authentication
要はvue.js+firebaseのみです。firebaseのfirestoreでデータを保存してます。サーバー回りを全部firebaseに寄せることでフロントの開発だけに時間を集中することができました。firebaseはほんと凄いよ。私なんてエンジニアといえるほどの実力ないので、多分この構成じゃないと開発するのは無理だっただろうなぁって思ってます。
助けられたドキュメント
firebaseの公式ドキュメント
firebaseはほんとうに公式ドキュメントが充実していて助けられました。
Qiita
https://qiita.com/zaru/items/829b4017a33df907f087
色々見ましたけど、とくにこちらの記事。平成年表はサーバーサイドレンダリングをやっていませんでした。リリース間際になって本番で色々と試していた時、Twitterカードが出ないことに気づいたんですね。SNSへシェアできるという手軽さを売りにしたかったのに、これは焦りました。この解決方法ってSSR化することが一般的なのだとは思うのですが、経験も知識もなく困ってたところ、この記事に出会いました。この記事では、SNS向けのリンクからのアクセスの場合、firebase Functionsにルーティングし、FunctionからSNSへ必要なタグだけ返すという実装方法を紹介いただいてます。ほんとに神記事でした。ありがとうございます。5日間でリリースできた理由
1 Vue、firebaseの開発の手軽さ
ほんとうに手軽に開発できるのでオススメの組み合わせです。ただ全文検索などできない(別サービスと組み合わせれば可能)なのでやりたいこととスピード感との比較にはなるでしょう。vue.jsは長きに渡っていたDOMとの戦いを一切やらなくていいので、開発のストレスが本当に少なく、サクサクとUIを作り進めることができました。
2 機能を絞る
例えば、こんな感じで絞りました。
* ログインはTwitterのみ(facebookも実装したい)
* 投稿できるのはテキストのみ(画像も追加したい)
* 投稿者のみしか編集できない(共同編集機能も作りたい)
* 検索機能なし笑(新着順と人気順ソートのみ、タグもなし)⇒投稿が多いようなら何か実装する
* プロフィール編集機能なし笑 ⇒Twitterのみの間はいいかなと...facebookログイン導入の際に実装かな。。
* デザインへのあきらめ(泣)3 Twitterと嫁さんに宣言する
これは絶対にやったほうがいいでしょう。
4 平成自体のタイムリミット
のんびり作ってたら平成のタイムリミットに間に合わない!というプレッシャーも笑
さいごに
なんとかリリースすることができました。作っている間は本当にワクワクすることができたなぁと思ってます。使ってくれる人が出てきてくれることを祈ります!よろしくお願いいたします。
- 投稿日:2019-01-27T17:20:00+09:00
Vue.js の主要な機能をざっくりとつかってみたときのメモ(Firebase認証・認可編)
「Vue.js の主要な機能をざっくりとつかってみたときのメモ」や「Vue.js の主要な機能をざっくりとつかってみたときのメモ(Firebase編)」のつづきです。。
前回までで、FirebaseのFirestoreにTodoリストをCRUDしました。今回はFirebaseのOAuthの認証・認可機能を使ってみます。
OAuthってのは、いわゆる「Googleアカウントでログイン」などのリンクを押すと、Googleのサイトのポップアップが出てきて、このアカウントをつかってログインしていい?って聞かれるヤツです。
本来は、認可サーバであるGoogleが「Firebaseをつかった(WEB)アプリに、あなたのGoogleアカウント情報を読ませてもいいかな?」って、Googleアカウントのオーナ(ユーザ)に許可つまり認可させるという「認可のための」仕組みなのですが、その際にポップアップでユーザを認証するため、結果として「Firebaseをつかった(WEB)アプリにGoogleアカウントでログインする(ユーザ情報が連携される)という処理シーケンスとなります。
参考:Authleteを使った認可サーバの構築と、OAuthクライアント(Webアプリケーション)からの疎通
そのまえに bootstrap-vue いれさせて
そのまえに、前回から、今回の記事作成までの最中にbootstrap-vue を導入しているので、そのインストールについて。
インストールとコードへの反映
$ npm install bootstrap-vue --saveインストールはこれだけであとは main.js に以下を追加します。
main.jsimport BootstrapVue from "bootstrap-vue" import "bootstrap/dist/css/bootstrap.min.css" import "bootstrap-vue/dist/bootstrap-vue.css" Vue.use(BootstrapVue)これでvue.jsでbootstrap-vueが利用可能になりました。。Header.vueなどにログインリンクなどをつけたり適度に装飾してますが、コードはあとで出てくるので、ココでは割愛します :-)
Firebaseの認証をやってみる
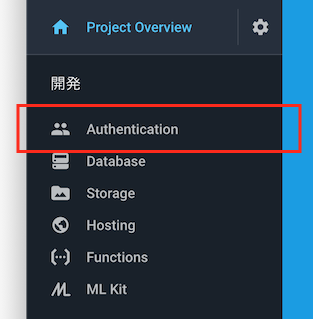
Google認証を有効にする
Firebaseのコンソールから、自分が作成したプロジェクトを選択し、左のメニュー部の「Authentication」を選択。
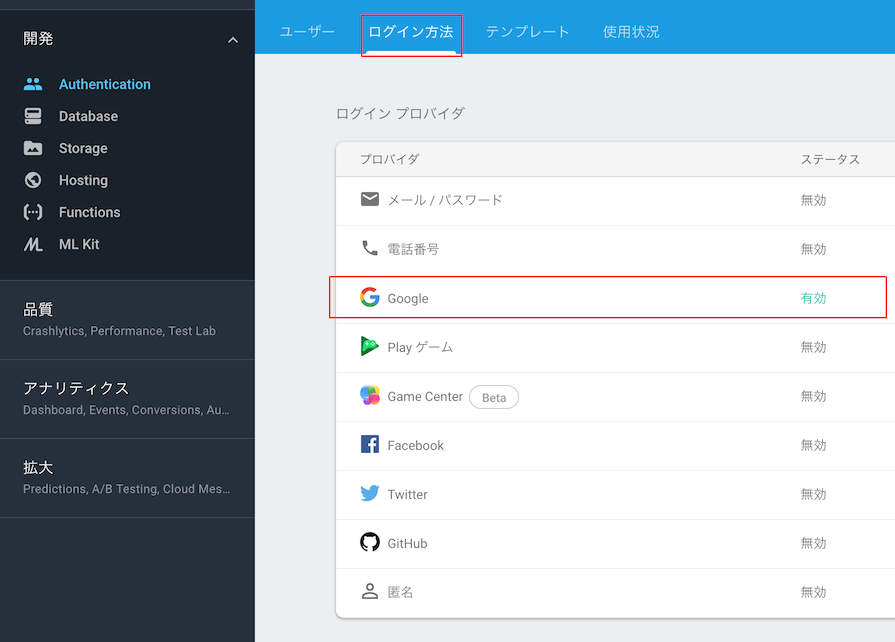
「ログイン方法」を選択すると、下記のようにログイン方法を選択する画面になります。今回はGoogleをつかうので、プロバイダのGoogleを「有効」にしておきましょう。
OAuthの認可サーバを使用するときって、認可サーバ側からWEBアプリに対して「client_id/client_secret」を払い出してもらい、それらをパラメタに載せることでWEBアプリ自体の認証を行うのですが、Google もFirebaseもGoogle だからですかね、この辺はあらかじめ設定済みになってるようです。
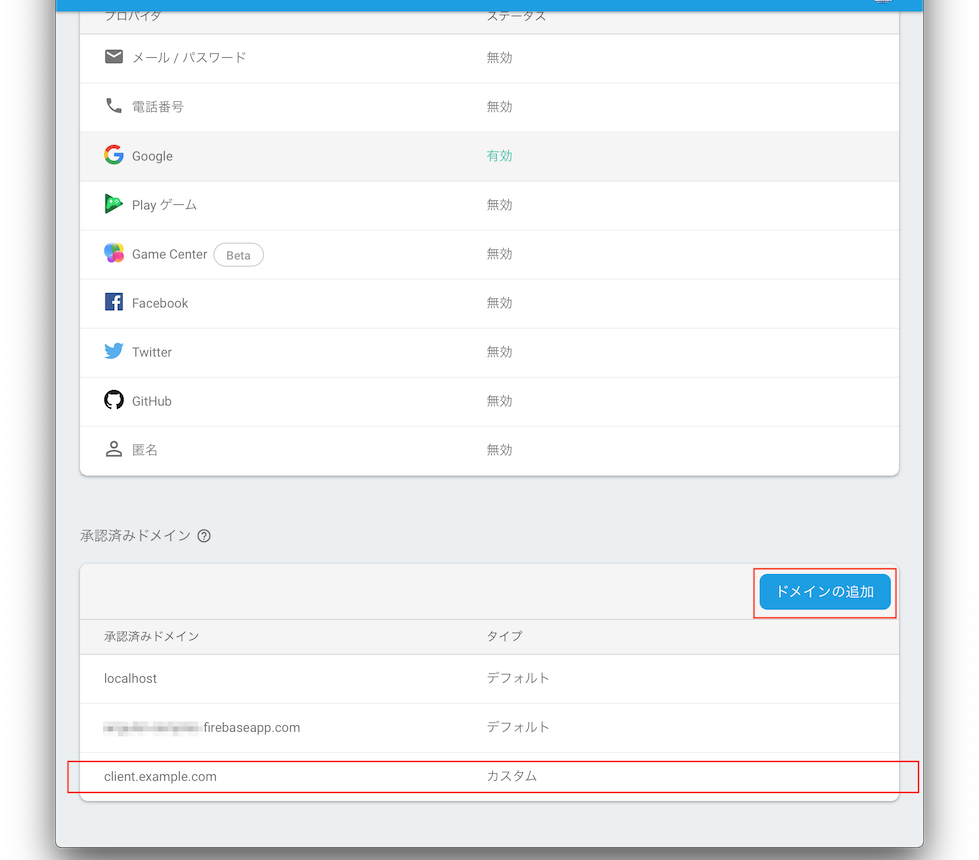
承認済みドメインを追加する
この認証機能を利用出来るドメインを指定します。いまはlocalhostで起動しているので設定不要ですが、外部に公開するサーバのURLが http://client.example.com:8080 などだった場合、 client.example.com を設定追加しておきましょう。
ライブラリのインストール
Firebaseのライブラリは前回インストール済みなのですが、ログインしているユーザ情報やログイン状態をjsやvue間で共有するために、オブジェクトの状態を管理するフレームワークVuexを導入します。
Vuexは、 Vuex.Store というオブジェクトに対して、
store.jsimport Vue from 'vue' import Vuex from 'vuex' import createPersistedState from 'vuex-persistedstate' Vue.use(Vuex) export default new Vuex.Store({ state: { user: {}, loginStatus: false }, mutations: { user (state, user) { state.user = user }, loginStatus (state, loginStatus) { state.loginStatus = loginStatus } }, plugins: [createPersistedState({storage: window.sessionStorage, key: 'vuex-todo-examples'})] })というインスタンスを保持する領域
user,loginStatusを作成しておき、jsやvueからはHeader.vue(のscript部)<script> import firebase from 'firebase' export default { name: 'Header', computed: { loginStatus () { return this.$store.state.loginStatus // vuexのインスタンスを参照 }, user () { return this.$store.state.user // vuexのインスタンスを参照 } }, ... } </script>とやることで参照ができます。
保存しているインスタンスの更新については、直接プロパティを操作するのではなく
Login.vue(のscript部。あとで出てますが新規で作ったログイン画面)<script> import firebase from 'firebase' export default { name: 'Login', ... 割愛 methods: { loginWithGoogle(){ const provider = new firebase.auth.GoogleAuthProvider(); firebase .auth() .signInWithPopup(provider).then((result)=> { this.$store.commit('user', result.user) // インスタンスの更新 this.$store.commit('loginStatus', true) // インスタンスの更新 this.$router.push( this.$route.query.redirect ? this.$route.query.redirect : '/' ) }) .catch(function (error) { const errorCode = error.code const errorMessage = error.message alert(errorMessage) }) } } } </script>このように
$store.commit('メソッド名','値')という仕様でVuex.Storeにmutationsで定義していたメソッドを呼びだすことで、データを更新します。このVuexをつかえばアプリケーション全体で状態が管理出来るので、Googleログインが成功した際やユーザ情報が更新されたとき、そのインスタンスを保存しておき、各画面ではそのインスタンスのあるなしで、ログイン済みかどうかを判定することができそうです。
ということでVuexのインストール
npm install --save vuex vuex-persistedstatevuexはライブラリそのもの、vuex-persistedstate がそのデータをLocalStorageやSessionStorageに保存するためのライブラリです。
ソース追加・修正内容
さてソースについて。多いので一覧をつけました。
- src/main.js で、Firebaseのユーザ情報の更新を検知
- src/store.js: Vuexの追加
- components/Header.vue: ヘッダにログアウトリンクを追加
- router/index.js にログイン画面のルーティング追加
- components/Login.vue: /loginで呼ばれる画面を追加
順番に見ていきましょう。
src/main.js で、Firebaseのユーザ情報の更新を検知
ユーザがログイン中かの判定は、Googleアカウントログイン後や、そのユーザ情報が更新された際、そのユーザ情報をvuexに保存しておいて、そのあるなしをチェックすればよいという話でした。
なのでmain.jsで先ほどのstore.jsをimportし「Firebaseの認証機能を経由してユーザ情報が更新されたときに呼ばれるコールバック」で、vuexのユーザ情報とログイン状態を更新することにしました。
src/main.js// The Vue build version to load with the `import` command // (runtime-only or standalone) has been set in webpack.base.conf with an alias. import Vue from 'vue' import App from './App' import router from './router' import store from '@/store' // 追加 import firebase from 'firebase' import firebaseConfig from '@/firebaseConfig' import BootstrapVue from 'bootstrap-vue' import 'bootstrap/dist/css/bootstrap.min.css' import 'bootstrap-vue/dist/bootstrap-vue.css' Vue.use(BootstrapVue) firebase.initializeApp(firebaseConfig) firebase.auth().setPersistence(firebase.auth.Auth.Persistence.SESSION) // 追加 Vue.config.productionTip = false // 追加 firebase.auth().onAuthStateChanged(function (user) { // ユーザ情報が変更されたら呼ばれる if (user) { // User is signed in. store.commit('user', user) store.commit('loginStatus', true) } else { store.commit('user', {}) store.commit('loginStatus', false) } }) // ここまで // router.beforeEach((to, from, next) => { // あとで追加する /* eslint-disable no-new */ new Vue({ el: '#app', router, store, components: { App }, template: '<App/>' })src/store.js: Vuexの追加
ユーザ情報とログイン状態を保持するためのvuexを作成しました。先のソースとおなじものです。
src/store.js(新規)// さっき載せたのとおなじ import Vue from 'vue' import Vuex from 'vuex' import createPersistedState from 'vuex-persistedstate' Vue.use(Vuex) export default new Vuex.Store({ state: { user: {}, loginStatus: false }, mutations: { user (state, user) { state.user = user }, loginStatus (state, loginStatus) { state.loginStatus = loginStatus } }, plugins: [createPersistedState({storage: window.sessionStorage, key: 'vuex-todo-examples'})] })components/Header.vue: ヘッダにログアウトリンクを追加
つづいてHeader.vueです。共通ヘッダにしていた箇所に(まだログインも実装してないんですがorz)ログアウトのリンクを追加します。
<template>に色々書いてますが、bootstrapのGUIの記述がほとんどです。ログアウトリンクの表示可否をvuexのloginStatusで制御しています。また、ログアウトリンクをクリックしたときに呼ばれる
logout()メソッドも追加しています。こちらもfirebase.auth().signOut()を呼び出している程度で、とてもシンプルです。components/Header.vue<template> <b-navbar toggleable="md" type="dark" variant="info"> <b-navbar-toggle target="nav_collapse"></b-navbar-toggle> <b-navbar-brand href="#">ToDo管理</b-navbar-brand> <b-collapse is-nav id="nav_collapse"> <!-- Right aligned nav items --> <b-navbar-nav class="ml-auto" v-if='loginStatus' > <b-nav-item-dropdown right> <!-- Using button-content slot --> <template slot="button-content"> <em><span>{{user.displayName}}</span></em> </template> <b-dropdown-item @click="logout()" >{{user.displayName}}さんを Signout</b-dropdown-item> </b-nav-item-dropdown> </b-navbar-nav> </b-collapse> </b-navbar> </template> <script> import firebase from 'firebase' export default { name: 'Header', computed: { loginStatus () { return this.$store.state.loginStatus }, user () { return this.$store.state.user } }, methods: { logout () { firebase.auth().signOut() // のちに画面遷移処理を追加する。 } } } </script> <!-- Add "scoped" attribute to limit CSS to this component only --> <style scoped> </style>router/index.js にログイン画面のルーティング追加
Routerについては、/login でログイン画面を表示させるためのルーティングを追加しています。
router/index.jsimport Vue from 'vue' import Router from 'vue-router' import HelloWorld from '@/components/HelloWorld' import Login from '@/components/Login' Vue.use(Router) export default new Router({ routes: [ { path: '/', name: 'HelloWorld', component: HelloWorld }, // ↓追加 { path: '/login', component: Login } ] })components/Login.vue: /loginで呼ばれる画面を追加
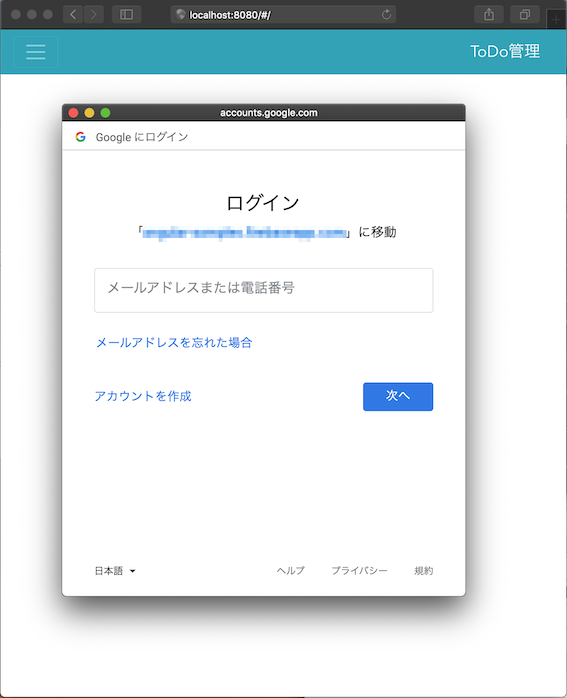
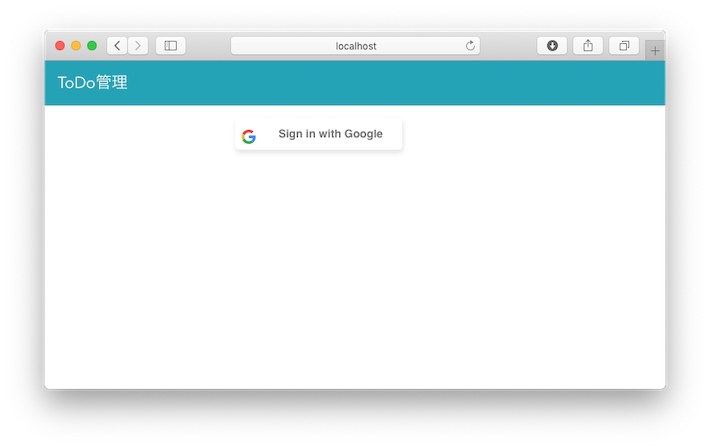
さて /login で呼び出される実際のログイン画面です。
http://localhost:8080/#/login で表示されるログイン画面となります。
components/Login.vue(新規)<template> <b-container> <div class="form-signin"> <button type="button" class="google-button" @click='loginWithGoogle'> <span class="google-button__icon"> <svg viewBox="0 0 366 372" xmlns="http://www.w3.org/2000/svg"><path d="M125.9 10.2c40.2-13.9 85.3-13.6 125.3 1.1 22.2 8.2 42.5 21 59.9 37.1-5.8 6.3-12.1 12.2-18.1 18.3l-34.2 34.2c-11.3-10.8-25.1-19-40.1-23.6-17.6-5.3-36.6-6.1-54.6-2.2-21 4.5-40.5 15.5-55.6 30.9-12.2 12.3-21.4 27.5-27 43.9-20.3-15.8-40.6-31.5-61-47.3 21.5-43 60.1-76.9 105.4-92.4z" id="Shape" fill="#EA4335"/><path d="M20.6 102.4c20.3 15.8 40.6 31.5 61 47.3-8 23.3-8 49.2 0 72.4-20.3 15.8-40.6 31.6-60.9 47.3C1.9 232.7-3.8 189.6 4.4 149.2c3.3-16.2 8.7-32 16.2-46.8z" id="Shape" fill="#FBBC05"/><path d="M361.7 151.1c5.8 32.7 4.5 66.8-4.7 98.8-8.5 29.3-24.6 56.5-47.1 77.2l-59.1-45.9c19.5-13.1 33.3-34.3 37.2-57.5H186.6c.1-24.2.1-48.4.1-72.6h175z" id="Shape" fill="#4285F4"/><path d="M81.4 222.2c7.8 22.9 22.8 43.2 42.6 57.1 12.4 8.7 26.6 14.9 41.4 17.9 14.6 3 29.7 2.6 44.4.1 14.6-2.6 28.7-7.9 41-16.2l59.1 45.9c-21.3 19.7-48 33.1-76.2 39.6-31.2 7.1-64.2 7.3-95.2-1-24.6-6.5-47.7-18.2-67.6-34.1-20.9-16.6-38.3-38-50.4-62 20.3-15.7 40.6-31.5 60.9-47.3z" fill="#34A853"/></svg> </span> <span class="google-button__text">Sign in with Google</span> </button> </div> </b-container> </template> <script> import firebase from 'firebase' // import 'firebaseui/dist/firebaseui.css' export default { name: 'Login', methods: { loginWithGoogle(){ const provider = new firebase.auth.GoogleAuthProvider(); firebase .auth() .signInWithPopup(provider).then((result)=> { this.$store.commit('user', result.user) this.$store.commit('loginStatus', true) this.$router.push( this.$route.query.redirect ? this.$route.query.redirect : '/' ) }) .catch(function (error) { const errorCode = error.code const errorMessage = error.message alert(errorMessage) }) } } } </script> <!-- Add "scoped" attribute to limit CSS to this component only --> <style scoped> html, body { height: 100%; } body { display: -ms-flexbox; display: flex; -ms-flex-align: center; align-items: center; padding-top: 40px; padding-bottom: 40px; background-color: #f5f5f5; } .form-signin { width: 100%; max-width: 330px; padding: 15px; margin: auto; } .form-signin .checkbox { font-weight: 400; } .form-signin .form-control { position: relative; box-sizing: border-box; height: auto; padding: 10px; font-size: 16px; } .form-signin .form-control:focus { z-index: 2; } .form-signin input[type="email"] { margin-bottom: -1px; border-bottom-right-radius: 0; border-bottom-left-radius: 0; } .form-signin input[type="password"] { margin-bottom: 10px; border-top-left-radius: 0; border-top-right-radius: 0; } /* Shared */ .loginBtn { box-sizing: border-box; position: relative; /* width: 13em; - apply for fixed size */ margin: 0.2em; padding: 0 15px 0 46px; border: none; text-align: left; line-height: 34px; white-space: nowrap; border-radius: 0.2em; font-size: 16px; color: #fff; cursor: pointer; } .loginBtn:before { content: ""; box-sizing: border-box; position: absolute; top: 0; left: 0; width: 34px; height: 100%; } .loginBtn:focus { outline: none; } .loginBtn:active { box-shadow: inset 0 0 0 32px rgba(0, 0, 0, 0.1); } .google-button { height: 40px; border-width: 0; background: white; color: #737373; border-radius: 5px; white-space: nowrap; box-shadow: 1px 1px 0px 1px rgba(0,0,0,0.05); transition-property: background-color, box-shadow; transition-duration: 150ms; transition-timing-function: ease-in-out; padding: 0; box-shadow: 1px 4px 5px 1px rgba(0,0,0,0.1); } .google-button:hover { cursor: pointer; } .google-button:active { box-shadow: 3px 6px 7px 3px rgba(0,0,0,0.1); transition-duration: 10ms; } .google-button__icon { display: inline-block; vertical-align: middle; margin: 8px 0 8px 8px; width: 18px; height: 18px; box-sizing: border-box; } .google-button__icon--plus { width: 27px; } .google-button__text { display: inline-block; vertical-align: middle; padding: 0 24px; font-size: 14px; font-weight: bold; font-family: 'Roboto',arial,sans-serif; } </style>
npm run devして表示してみると、こんな感じ。
コードが長くてちょっとアレですが、
<template>と<style>、<script>それぞれみてみましょう。まずtemplate部とstyle部いわゆる画面は、Googleログインのリンクボタンを追加しているだけです。styleはまあ長いですがボタンに適用しているcssですね。
つぎにボタンのクリックで呼ばれるメソッド
loginWithGoogle(script部)ですが、methods: { loginWithGoogle(){ const provider = new firebase.auth.GoogleAuthProvider(); firebase.auth().signInWithPopup(provider).then(......) ... } }まずココまででポップアップが表示され、そのWindowsにGoogleがログイン画面を表示してくれます。
ポープアップ画面でGoogleへのログインとユーザの認可オペが完了すると、ポップアップは自動で閉じられ、
thenに記述した下記のコールバックが呼び出されます。then内のコールバックresult => { this.$store.commit('user', result.user) this.$store.commit('loginStatus', true) this.$router.push( this.$route.query.redirect ? this.$route.query.redirect : '/' // あとで詳細説明 ) }このコールバック処理ではvuexにあるuser/loginStatusを
- コールバックに渡ってくるユーザ情報(
result.user)- ログインステータスを
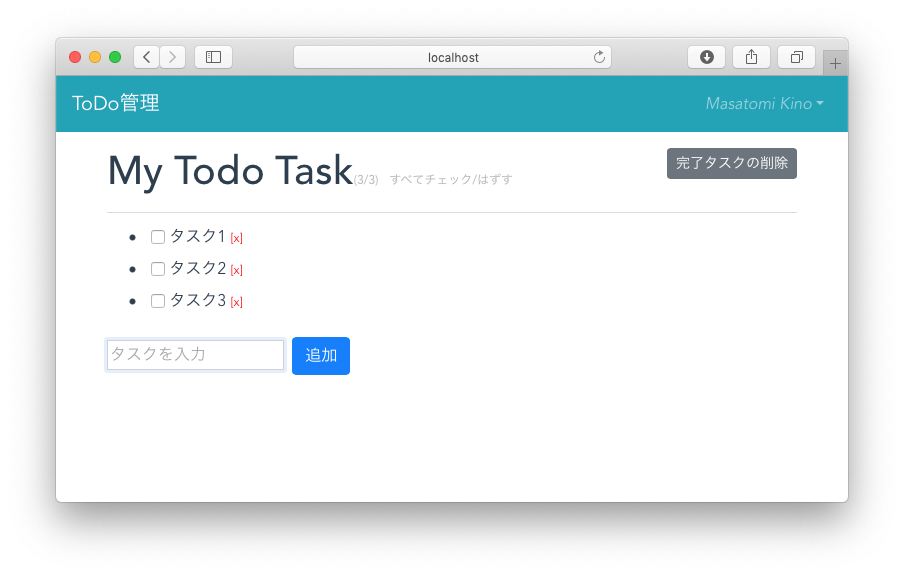
trueで更新し、'/' へ画面遷移します。 '/'はルーティングでいままでのToDo画面が定義されているので、結果としてGoogle認証が完了するとToDo画面が表示されることになります。
ちなみにToDo画面であるHelloWorld.vue については、全体を
<main v-if="$store.state.loginStatus" class="container">で囲うことで、ログインステータスが
trueのときのみコンテンツを表示するようにしています。HelloWorld.vue(のtemplate部)<template> <main v-if="$store.state.loginStatus" class="container"> <h1> My Todo Task<span class='info'>({{remainingTask.length}}/{{todos.length}})</span> <span class='info' style='cursor:pointer' @click='checkAll()' v-if='!isAllChecked()'>すべてチェック/はずす</span> <span class='info' style='cursor:pointer' @click='unCheckAll()' v-if='isAllChecked()'>すべてチェック/はずす</span> <b-button size="sm" variant="secondary" @click="deleteEndTask">完了タスクの削除</b-button></h1> <ul> <li v-for='todo in todos' :key='todo.id'> <input type='checkbox' v-model='todo.isDone' @click='toggle(todo.id)' > <span v-bind:class='{done: todo.isDone}'>{{todo.name}}</span> <span @click='deleteTask(todo.id)' class='xButton'>[x]</span> </li> </ul> <form @submit.prevent='addTask'> <input type='text' v-model='newTask' placeholder="タスクを入力" > <b-button type='submit' variant="primary" style='margin:4px'>追加</b-button> </form> </main> </template>いま時点のソース
ここまでのソースは
https://github.com/masatomix/todo-examples/tree/for_qiita_auth_001へコミット済みです。
一応このタグから構築する手順を示しておきます。
$ git clone --branch for_qiita_auth_001 https://github.com/masatomix/todo-examples.git $ cd todo-examples/ $ npm install src/firebaseConfig.js を自分の設定に書き換え $ npm run devこれで、http://localhost:8080/#/login にブラウザでアクセスできるとおもいます。
いったん整理
さてここまでで、Googleアカウントでログインして、ToDoアプリケーションを使用するという基本的なところができあがりました。しかしながらまだ
- ヘッダ右上のドロップダウンの「ログアウト」を選んだら、ログイン画面に遷移させたい(今はログアウトさせるだけ)
- 画面に応じて、ログインが必要・必要でない、を制御したい
- 画面にアクセスしたときに、ログイン済みでない場合はログイン画面を表示し、認証したら該当画面へ遷移するようにしたい
- Firestore へのデータアクセスを、認証されたユーザのみに制限したい
などを対応したいので、つづけてやっていきます。
ヘッダ右上のドロップダウンの「ログアウト」を選んだら、ログイン画面に遷移させたい
ヘッダのログアウトを選択すると、
logout()が呼ばれますが、Header.vue(のscript部)methods: { logout () { firebase.auth().signOut() // のちに画面遷移処理を追加する。 } }にログアウト後のコールバックを追加します。
Header.vue(のscript部)methods: { logout () { firebase.auth().signOut() .then(() => { this.$router.push('/') window.location.reload() // 保持してた不要な情報を一度クリア(vuexはきえない) }) .catch(function (error) { const errorCode = error.code const errorMessage = error.message alert(errorMessage) }) } }
this.$router.push('/')だとログイン画面ではなくてToDo画面に行こうとするんですが、このあとの機能追加で 「ログイン済み状態じゃなかったらログイン画面に飛ばす」処理を入れるので、結果ログイン画面に遷移します。ちなみに
firebase.auth().signOut()のコールバックに入った時点でユーザ情報は変更され、その結果main.jsに追加したsrc/main.jsfirebase.auth().onAuthStateChanged(function (user) { // ユーザ情報が変更されたら呼ばれる if (user) { // User is signed in. store.commit('user', user) store.commit('loginStatus', true) } else { store.commit('user', {}) store.commit('loginStatus', false) } })がうごきだして、vuex上の
user,loginStatusはそれぞれ{}とfalseで更新されます。画面に応じて、ログインが必要・必要でない、を制御したい
さて、認証されていない場合はログイン画面に飛ばしたいのですが、ログイン画面が認証が必要だと無限ループするので、画面によってログインの必要可否を制御したいですね。
ということで、画面ごとの定義を router/index.js に追加します。
router/index.jsimport Vue from 'vue' import Router from 'vue-router' import HelloWorld from '@/components/HelloWorld' import Login from '@/components/Login' Vue.use(Router) export default new Router({ routes: [ { path: '/', name: 'HelloWorld', component: HelloWorld }, { path: '/login', component: Login, meta: { isPublic: true // このプロパティ追加 } } ] })isPublicがtrueの場合は、認証状態をチェックしないで画面を表示します。デフォルトはfalseなので、ログイン画面以外は認証が必要という設定になりました。
この次の項の画面遷移の制御で、上記の定義を参照する機能を追加します。
画面にアクセスしたときに、ログイン済みでない場合はログイン画面を表示し、認証したら該当画面へ遷移する
さあもうすこしです。
src/main.js にナビゲーションガードを追加する
公式のナビゲーションガード に説明がありますが、ナビゲーションガード機構を使うことで、画面の遷移をフックして、状態をチェックするなどの処理を入れ込むことが出来ます。
こんな感じに、main.jsでナビゲーションガードを追加します。
src/main.jsrouter.beforeEach((to, from, next) => { const currentUser = store.state.user if (currentUser.uid) { if (to.path == '/login') { firebase.auth().signOut().then(() => next()) } } if (to.matched.some(record => record.meta.isPublic)) { // alert('isPublic = true '+ to.path) next() } else { // alert('isPublic = false '+ to.path) if (currentUser.uid) { next() } else { next({ path: '/login', query: { redirect: to.path } }) } } })つまり、URLが変更されるときに変更前のURL情報(from)と変更後のそれ(to)が渡ってくるので、
- vuex からユーザ情報が取れたときは、toがログイン画面(/login)へのアクセスだったら、いちどログアウトさせてユーザ情報をクリアしてから、ログイン画面へ遷移(next())させる
- 遷移先(to)のURLについて、isPublicがtrueの場合は、そのまま遷移(next())させる
- isPublicがfalseの場合は、
- vuex からユーザ情報(
store.state.user.uid)が取れたときはそのまま遷移(next())- vuex からユーザ情報(
store.state.user.uid)が取れない場合は、ログイン画面へ遷移させる(※))最後の処理(※)は
next({
  path: '/login',
  query: {
    redirect: to.path
  }
})
の処理のことです。
/login に遷移する際 redirect というクエリパラメタに to.pathという変数をセットしていますが、たとえば /ui001 に遷移しようとしてナビゲーションガードによってログイン画面に遷移させられたとき、遷移後のログイン画面(/login)のURLが
http://localhost:8080/#/login?redirect=%2Fui001
とクエリパラメタが後ろにつくようにしています。このように redirect にto.pathを渡しているのは、ログインが成功した際に本来行きたかった画面のURL(/ui001ですね) の情報が必要だからです。
Login.vue でのログイン成功後の遷移先
さて、渡されたredirectパラメタですが、Login.vue でログイン成功後の画面遷移 はこのようになっていました。
Login.vue(抜粋)this.$router.push( this.$route.query.redirect ? this.$route.query.redirect : '/' )コレはつまり、redirectパラメタがある場合はそこのURLへ遷移、パラメタがない場合は '/' へ遷移(デフォルト値) するってことですね。
以上で、認証が必要な画面に行こうとした場合、ナビゲーションガードによって認証されているかがチェックされ、必要に応じてログイン画面を出した後、本来行きたい画面に遷移する流れを実装することが出来ました。
うーん、疲れましたね。。。
Firestore へのデータアクセスを、認証されたユーザのみに制限したい
さあFirebaseでの認証ができたので、せっかくなのでFirestoreへのアクセスを、認証されたユーザのみに出来たらよりセキュアですね。
そのための制御はFirebase側の画面にあります。
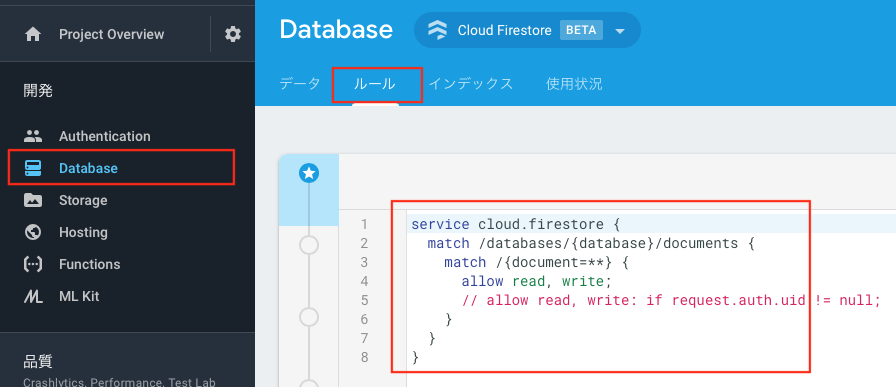
https://console.firebase.google.com から自分のプロジェクトに移動し、Database >> ルール に遷移します
ココですが、ワタクシまえに権限エラーに対応するため、下記の通りだれでもOK!ってしていたんですが、
だれでもOKの設定service cloud.firestore { match /databases/{database}/documents { match /{document=**} { allow read, write; } } }これを
認証されてるヒトだけOKservice cloud.firestore { match /databases/{database}/documents { match /{document=**} { allow read, write: if request.auth.uid != null; } } }にして「公開」ボタンを押せばOKです。ほどなくして反映されるようで、認証状態でないFirestoreへのアクセスにはエラーが返るようになりました。
ナビゲーションガードなどを入れたソース
最終形のソースは
https://github.com/masatomix/todo-examples/tree/for_qiita_auth_002へコミット済みです。
下記手順でビルドできます。$ git clone --branch for_qiita_auth_002 https://github.com/masatomix/todo-examples.git $ cd todo-examples/ $ npm install src/firebaseConfig.js を自分の設定に書き換え $ npm run devこれで、http://localhost:8080/#/ にブラウザでアクセスできるとおもいます。
ログイン画面 '/login' とToDo画面 '/' の他に、'/ui001','/ui002'という画面を追加でコミットしています。/ui001だけ認証が必要な画面にしてあるので、
http://localhost:8080/#/ui001 などに直接アクセスしてみて、ログイン画面が表示され、ログインするとちゃんと行きたかった画面に遷移できること、などを確認してみてください。
まとめ
Firebase認証をつかえば、OAuthをつかったGoogle認証機能を簡単に実装することが出来ましたね。
ザックリまとめると、、ログイン状態はVuexで管理し、ログイン時やユーザ情報の変更に従ってVuexの情報を更新します。また、画面遷移時にログイン状態をチェックするナビゲーションガードを導入することで、必要な時だけログイン画面を挟むことができるようになりました。最後にFirestoreへのアクセスを、Firebaseログインしているユーザに制限することで、データを保護することも出来ました。
以上です。おつかれさまでした。
関連リンク
- Vue vuexでfirebaseのログイン保持
- 面倒なログイン機能の実装はFirebase Authenticationに丸投げしよう 概要が整理されています
- Firebase Authentication を使って得られた知見まとめ - トークンの仕様や注意点など 戻り電文のJWTの仕様が丁寧に説明されています。
- Firebase Auth のユーザ認証機能を自前のデータベースと連携する Firebaseを認証だけにつかう場合。
- ブラウザでログインしたFirebaseのユーザー情報をサーバー側で取得する その2
- Authenticating a Vue JS Application With Firebase UI Firebase UI っていう、画面まで作ってくれちゃうライブラリをつかう場合。
- Vue.jsにおけるFirebaseの主要な機能の取扱い
- Vue Routerのナビゲーションガードによるアクセス制限を試した&コードを読み解いた
- 【備忘録】【Vue.js】routeを使ってログインしてないと見れないように設定する方法
- Firebase / Firestore を使って簡単な Chat を作ってみる。(JS, Vue)
- 投稿日:2019-01-27T14:06:07+09:00
Vue.js + TypeScript + GAE/Go で SPA 開発をしている感想
自己紹介
Twitter @mochizukikotaro
普段の仕事は、
- Rails、CakePHP がメイン
- Laravel はこれから入門
- Vue.js、AWS、GCP、k8s、Go は少し触ります
プライベートで、
- SPA の Webアプリケーションを作り中
- 英語勉強中。2019年中に TOEIC 900点をとりたい(615点/2018年)
構成
今
Vue.js + TypeScript + Go + GAE/Go 1.111年前
Vue.js + Vuex + Go + heroku
変更の理由
- わりと勉強がてらのプロジェクトなので、深い理由はなく。
- TS はみんなが良いっていうから。
- GAE/Go は Go の runtime を動かすだけなら heroku よりカンタンなイメージだから。
- Vuex は前しんどくて、今はつくり直し中でそこまで大きくないから。なので、今後導入する可能性は高い。
Vue.js + TypeScirpt + Vuex 使っている方いたら、感触教えてください

良い点、学んだ点
- TS 気持ちいいい
- GAE/Go へのデプロイが楽
- 開発環境の CORS は vue の proxy で対応
困った点
- TS の declaration file がない問題
- GAE/Go のスタンダード環境だとインスタンスに ssh できない(そんな困ってない)
- GAE/Go へのデプロイ
gcloud app deployが遅い
良い点、学んだ点
TS 気持ちいい
あんまり頑張ってないです。使えるところは使う感じです。
例えば interface 使うので、オブジェクトがどんなものか分かるし、エディタの補完も気持ちいい。IUser.vue<script lang="ts"> export interface IUser { ID: number; ScreenName: string; TwitterID: number; ProfileImage: string; } </script>interface に対して
Iprefix を使う使わない問題みたいのもあるようですが、ぼくは結論Iをつけています。
GAE/Go へのデプロイが楽
app.yamlruntime: go111$ gcloud app deployこれだけで、GAE にデプロイができる。
開発環境の CORS について
開発環境は docker-compose でやっていますので、node(frontend) と go(backend) のコンテナがあります。
docker-compose.ymlversion: '3' services: golang: ports: - "8081:8080" ... note: ports: - "8080:8080" ...node は
loalhost:8080で server はlocalhost:8081で動かしているので、フロントからサーバーへのリクエストで CORS 問題がおきます。
以前はサーバー側でなんとかしてました ?
server.goe.Use(middleware.CORSWithConfig(middleware.CORSConfig{ AllowOrigins: []string{"http://localhost:8080"}, AllowCredentials: true, }))
今は vue の proxy で対応 ?
vue.config.jsmodule.exports = { devServer: { proxy: { '/api': { target: 'http://golang:8080' } } } }これで、 AllowOrigins とか書かなくて済みました。
Vue CLI 3 Configuration Reference: devServer.proxy
困った点
TS declaration file がない問題
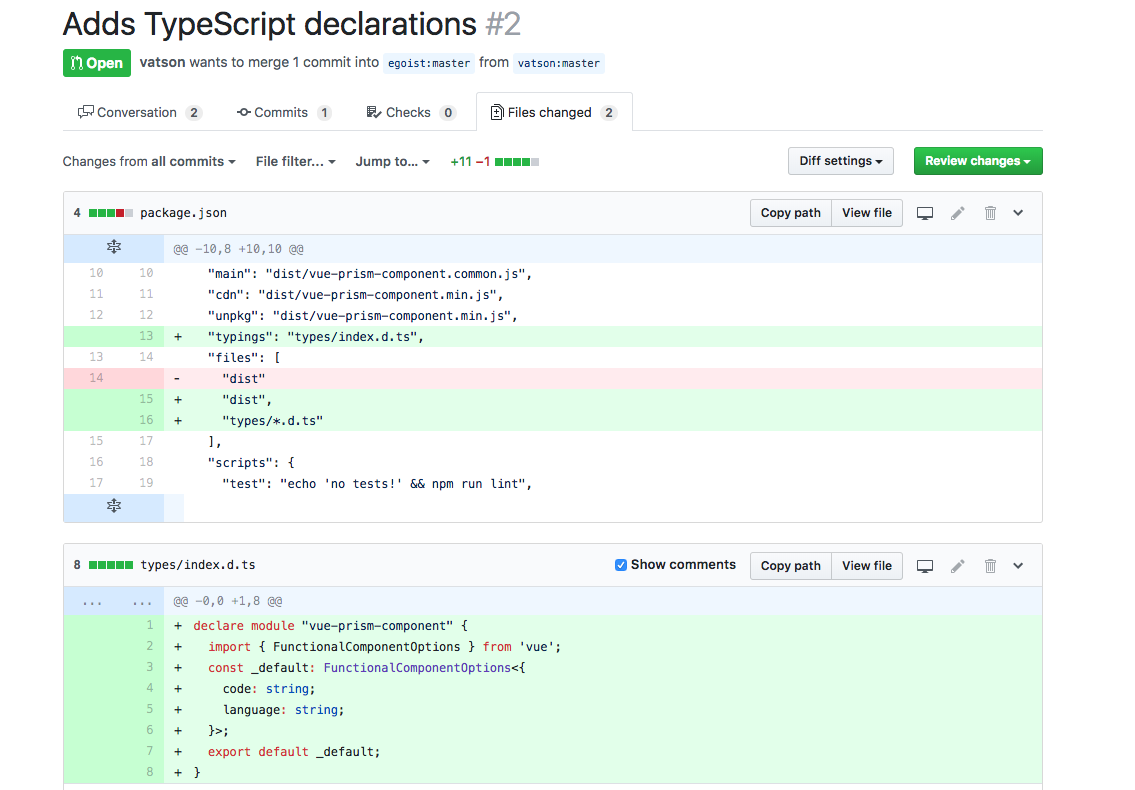
なにかしらのパッケージを使っている状態で
yarn buildなどすると現れるエラー。import Prism from "vue-prism-component";$ yarn build ... Could not find a declaration file for module '...'.
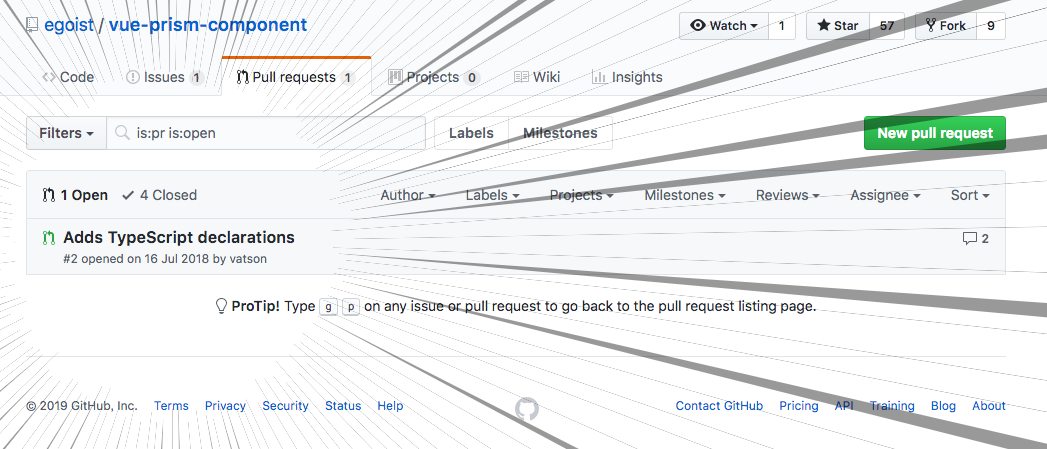
PullRequest を見てみると
ちゃんとでています。が、マージはされていません。
マージされるのを祈るばかり...?
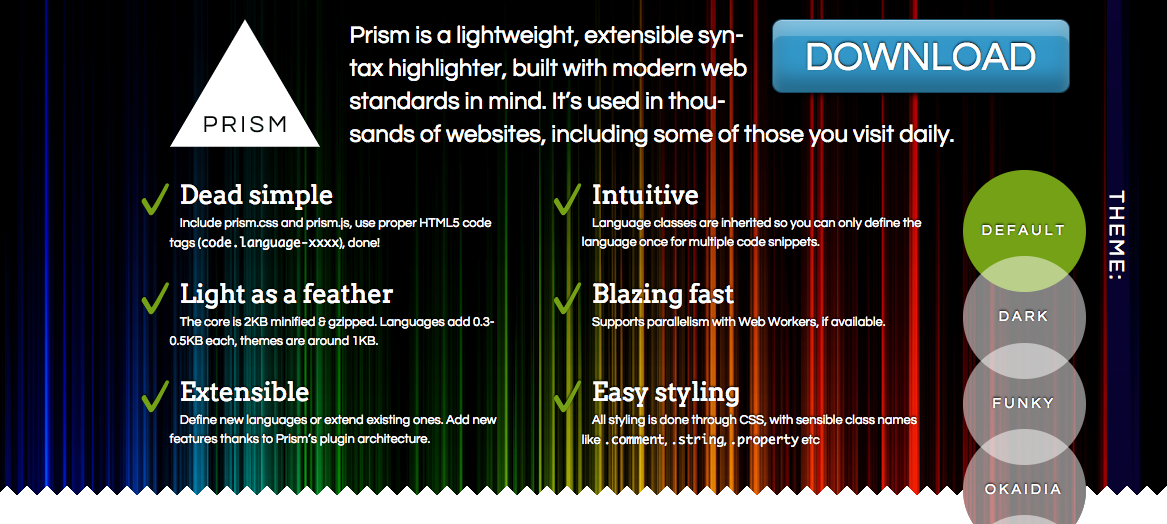
結局どうしたのか
今回使いたかったのは、 vue-prism-component というコードハイライターの Prismjs を vue で使いやすくするパッケージでした。
なので、vue-prism-component を使わずに直接 Prismjs を使ってごにょごにょしようとおもったのですが...。
なんかうまく動かなかったのでフロントでやるのをやめて、サーバーサイドで対応することにしました ?
chroma: A general purpose syntax highlighter in pure Go
結果、フロントのコンポーネント構成などがスッキリしてよかったです...。
GAE/Go 1.11 の困りごと
- スタンダード環境だと ssh できないけどフレキシブル環境だといけそう(ためしてません)
- gcloud app deploy は普通に遅いと思いますが、
.gcloudignoreで適切に ignore しておかないと、本当に無駄な時間をすごくことになるとおもいます。(泣きそうでした ?.gcloudignorefrontend/node_modules/ frontend/public/ frontend/src/ vendor/
以上ありがとうございました!
補足(全体のファイル構成)
$ tree . -L 2
.
├── Gopkg.lock
├── Gopkg.toml
├── README.md
├── app.yaml
├── containers
│   ├── golang
│   └── node
├── db
│   └── db.go
├── docker-compose.yml
├── frontend
│   ├── README.md
│   ├── babel.config.js
│   ├── dist
│   ├── node_modules
│   ├── package.json
│   ├── postcss.config.js
│   ├── public
│   ├── src
│   ├── tsconfig.json
│   ├── vue.config.js
│   ├── yarn-error.log
│   └── yarn.lock
├── handler
│   ├── about.go
│   ├── auth.go
│   ├── note.go
│   └── user.go
├── highlight
│   ├── transform.go
│   ├── transformNote.go
│   ├── transformNote_test.go
│   └── transform_test.go
├── migrations
│   ├── 1812151700_add_users_table.down.sql
│   ├── 1812151700_add_users_table.up.sql
│   ├── 1812160000_add_notes_table.down.sql
│   └── 1812160000_add_notes_table.up.sql
├── model
│   ├── note.go
│   └── user.go
├── repository
│   └── note.go
├── server.go
├── templates
│   └── index.html
└── vendor
    ├── github.com
    └── google.golang.org
- 投稿日:2019-01-27T11:19:48+09:00
Vue CLI 3でAWS Amplify + TypeScriptでビルド時のエラー解消
概要
- Vue CLI 3でプロジェクト作成時のオプション指定で、TypeScriptを組み込みました
- このVueプロジェクトに、AWS Amplifyを組み込み、ビルドを実行したところエラーになりました
- エラーの再現手順と解消方法を記述します
注意
2019年1月27日時点で確認しているものです。
この時点のaws-apmlifyのバージョンは、"1.1.19"です。
バージョンアップに伴い、修正されているかもしれないので、ご注意ください。
検証環境
ツールバージョン
$node -v
v8.15.0

$npm -v
6.4.1

$yarn -v
1.13.0
モジュールバージョン
"dependencies": {
  "@types/graphql": "^14.0.5",
  "@vue/cli-service-global": "^3.3.0",
  "aws-amplify": "^1.1.19",
  "aws-amplify-vue": "^0.2.5",
  "pug": "^2.0.3",
  "pug-plain-loader": "^1.0.0",
  "register-service-worker": "^1.5.2",
  "vue": "^2.5.21",
  "vue-class-component": "^6.0.0",
  "vue-property-decorator": "^7.0.0",
  "vue-router": "^3.0.1",
  "vuex": "^3.0.1"
},
"devDependencies": {
  "@types/jest": "^23.1.4",
  "@vue/cli-plugin-babel": "^3.3.0",
  "@vue/cli-plugin-e2e-nightwatch": "^3.3.0",
  "@vue/cli-plugin-eslint": "^3.3.0",
  "@vue/cli-plugin-pwa": "^3.3.0",
  "@vue/cli-plugin-typescript": "^3.3.0",
  "@vue/cli-plugin-unit-jest": "^3.3.0",
  "@vue/cli-service": "^3.3.0",
  "@vue/eslint-config-prettier": "^4.0.1",
  "@vue/eslint-config-typescript": "^3.2.0",
  "@vue/test-utils": "^1.0.0-beta.20",
  "babel-core": "7.0.0-bridge.0",
  "babel-eslint": "^10.0.1",
  "eslint": "^5.8.0",
  "eslint-plugin-vue": "^5.0.0",
  "lint-staged": "^8.1.0",
  "stylus": "^0.54.5",
  "stylus-loader": "^3.0.2",
  "ts-jest": "^23.0.0",
  "typescript": "~3.1.1",
  "vue-template-compiler": "^2.5.21"
},
再現手順
Vue CLIでプロジェクト作成
vue create ts-projectpresetは以下にしています。(全部入り)
{
  "useConfigFiles": true,
  "plugins": {
    "@vue/cli-plugin-babel": {},
    "@vue/cli-plugin-typescript": {
      "classComponent": true,
      "useTsWithBabel": true
    },
    "@vue/cli-plugin-pwa": {},
    "@vue/cli-plugin-eslint": {
      "config": "prettier",
      "lintOn": [
        "save",
        "commit"
      ]
    },
    "@vue/cli-plugin-unit-jest": {},
    "@vue/cli-plugin-e2e-nightwatch": {}
  },
  "router": true,
  "routerHistoryMode": true,
  "vuex": true,
  "cssPreprocessor": "stylus"
}
AWS Amplifyインストール
cd ts-project
yarn add aws-amplify aws-amplify-vue
AWSa Amplifyでバックエンドの構築
vue側のmain.tsで、Amplifyクライアントの初期化(configure)が必要ですが、この際 aws-exports.js
を読み込む必要があります。aws-exports.jsは、amplify-cliでバックエンド環境を初期化(amplify init)し、環境を構築(amplify push)する際に生成されます。
エラー再現のため、最小限のバックエンド構築を行います。
amplify-cliのインストールやconfigureは予め必要となります。
今回はエラーの再現手順なので、amplify によるバックエンド構築の詳細は割愛します。
まず、バックエンド初期化を行います。
amplify init対話型で以下のような内容を設定しました。
この時点で、プロジェクトのルートに、amplifyディレクトリが作成されます。
? Choose your default editor: IDEA 14 CE
? Choose the type of app that you're building javascript
Please tell us about your project
? What javascript framework are you using vue
? Source Directory Path:  src
? Distribution Directory Path: dist
? Build Command:  npm run-script build
? Start Command: npm run-script serve
Using default provider awscloudformation
次に、バックエンド環境をAWS上に構築します。
この時点で、aws-exports.jsが生成されます。
amplify pushaws-exports.js
// WARNING: DO NOT EDIT. This file is automatically generated by AWS Amplify. It will be overwritten.

const awsmobile = {
    "aws_project_region": "ap-northeast-1"
};


export default awsmobile;
main.tsへamplify configの記述
生成されたaws-exports.jsonを読み込んで、amplifyクライアントの設定を記述します。
main.tsimport Amplify, * as AmplifyModules from 'aws-amplify' // @ts-ignore import { AmplifyPlugin } from 'aws-amplify-vue' // @ts-ignore import aws_exports from './aws-exports' Amplify.configure(aws_exports) Vue.use(AmplifyPlugin, AmplifyModules)tsconfig.jsonへ追記
Typescriptのコンパイルオプションのtypesに"node"を追加します。
この設定がないと、node_modules/aws-sdk内のコードに対して、大量にエラーが出力されます。
{
  "compilerOptions": {
    ...snip
    "types": [
      "webpack-env",
      "jest",
      "node" <-追加
    ],
    ...snip
疑問
tsconfig.jsonには、excludeにnode_modulesが指定されているはずなのに、なぜnode_modules/aws-sdk配下のコードが除外されていないのは、なぜだろう。
"exclude": [
  "node_modules"
]
ビルドを実行
yarn buildエラー内容
2つのエラーが出力されます。
エラーその1
ERROR in /Users/yoshinori/WebstormProjects/amplify-twitter-auth/node_modules/@aws-amplify/api/lib/types/index.d.ts
1:30 Could not find a declaration file for module 'graphql/language/ast'. '/Users/yoshinori/WebstormProjects/amplify-twitter-auth/node_modules/graphql/language/ast.js' implicitly has an 'any' type.
  Try `npm install @types/graphql` if it exists or add a new declaration (.d.ts) file containing `declare module 'graphql/language/ast';`
  > 1 | import { DocumentNode } from 'graphql/language/ast';
      |                              ^
    2 | /**
    3 | * RestClient instance options
    4 | */

 error  in /Users/yoshinori/WebstormProjects/amplify-twitter-auth/node_modules/aws-amplify/lib/index.d.ts
「モジュールが見つけられないから、@types/graphqlをインストールしろ」という内容です。
これは、指示の通りに@types/graphql モジュールを追加すると解消されました。
yarn add @types/graphqlエラーその2
ERROR in /Users/yoshinori/WebstormProjects/amplify-twitter-auth/node_modules/aws-amplify/lib/index.d.ts
8:16 Could not find a declaration file for module '@aws-amplify/ui'. '/Users/yoshinori/WebstormProjects/amplify-twitter-auth/node_modules/@aws-amplify/ui/dist/aws-amplify-ui.js' implicitly has an 'any' type.
  Try `npm install @types/aws-amplify__ui` if it exists or add a new declaration (.d.ts) file containing `declare module '@aws-amplify/ui';`
     6 | import Cache from '@aws-amplify/cache';
     7 | import Interactions, { InteractionsClass } from '@aws-amplify/interactions';
  >  8 | import UI from '@aws-amplify/ui';
       |                ^
     9 | import XR, { XRClass } from '@aws-amplify/xr';
    10 | import Amplify, { ConsoleLogger as Logger, Hub, JS, ClientDevice, Signer, I18n, ServiceWorker } from '@aws-amplify/core';
    11 | export default Amplify;

 ERROR  Build failed with errors.
error Command failed with exit code 1.
info Visit https://yarnpkg.com/en/docs/cli/run for documentation about this command.
こちらもモジュールが見つけられないというエラーですが、@types/aws-amplify__uiというモジュールが存在していませんでした。
i$ yarn add @types/aws-amplify__ui
yarn add v1.13.0
[1/4] ?  Resolving packages...
error An unexpected error occurred: "https://registry.yarnpkg.com/@types%2faws-amplify__ui: Not found".
aws-amplifyのバージョンを調整する
色々模索したところ、aws-amplifyのバージョンを調整することで、エラーが解消しました。
package.json の "aws-amplify"のバージョンを"1.1.10"固定にします。(^も外します)
"aws-amplify": "1.1.10", // ^1.1.19 -> 1.1.10ビルドを再度実行
モジュール更新とビルドを実行します。
yarn && yarn buildエラーが解消されて、ビルド成功します。
- 投稿日:2019-01-27T09:45:01+09:00
Vue.js初めて触るときに参考にしたもの・作ったもの
jQueryでプラグインちょっと作れるレベルの人です。
Udemyで入門コース買った
年始の新春セールをやっていたので。
聞きとりやすい声だし、ゆっくり話すし、サポートサイトもあるのでおすすめのコースです。
このコースの先生がまずはjsFiddleでの作業をおすすめしていたので、アカウントを作成。
初めて作るアプリも大方はJSFiddleで作った。
エラーとかがわかりやすいし、scss使えるし、ボイラープレートが最初から用意されているしでフロントの人がVue.jsを使う時にはまずおすすめしたい。
※普段codepen派なので、エディターのレイアウトは「Bottom results」が一番使いやすい気がしました。まだ見終わってないです。
初めてのアプリに手を付ける
Udemyのセクション2のセッション16を聞いたところで、何か作ってみたくなったので一旦jQueryで作ったものをVue.js+SCSS@jsFiddleで作ってみることに。
難しいサブウェイの注文内容をあらかじめ決めるジェネレータ:サブウェイのじゅもん
(参考:「サブウェイ」が苦境と聞いてガチ勢が注文のフローチャートを作ってみたら愛が重すぎた - Togetter)※いつもオリーブ抜きで、くらいしかカスタムしてなかったんですが、オリーブはアクセント野菜という追加をお願いしないと追加されないやつでした。
ググった
初めてのアプリで詰まったときに。
- Vue.js v-forでインデックス(カウンタ)を付けるサンプル(v-for でindex) | クルーデザイン
- Vue.jsで条件によって:classの値を変える - Qiita
- Vue.jsのv-bind:classで動的なクラス割り当て - 親バカエンジニアのナレッジ帳
- テンプレート構文 — Vue.js
- vue.js tips - v-bind:class を使って class の on/off を切り替えよう | phiary
- FN1702008 | Vue.js入門 05: 項目を数えて表示する | HTML5 : テクニカルノート
本を読んだ
初めてのアプリで詰まったときに、家にあったので。
- 投稿日:2019-01-27T02:11:59+09:00
docker-composeでシンプルにvue.js環境構築
はじめに
今回はdocker-composeでvue.jsの開発環境をシンプルに構築してみます。
環境
Dockerとdocker-composeは用意できている前提です。
Docker version 18.06.0-ce
docker-compose version 1.22.0構成
以下の構成を想定しています。
server/ 以下にvue.jsのプロジェクトが作成されます。project ├── docker │ └── Dockerfile ├── docker-compose.yml └── server構築
環境構築の手順を解説を簡単に交えながら紹介していきます。
1. docker-compose.yml作成
docker-compose.ymlversion: '3' services: web: container_name: web build: ./docker ports: - 8080:8080 privileged: true volumes: - ./server:/app tty: true stdin_open: true command: /bin/sh【備考】
vue.jsはデフォルトでポート8080を使用するようになっているため、それに合わせてます。
必要な方は以下のように変更することもできます。docker-compose.ymlports: - 9000:90002. Dockerfileの作成
DockerfileFROM node:8.11.3-alpine WORKDIR /app RUN apk update && \ npm install && \ npm install -g npm && \ npm install -g vue-cli3. Docker起動&コンテナに入る
# Docker構築&起動
docker-compose up -d

# コンテナに入る
docker-compose exec web sh
4. vue.jsプロジェクト作成または更新
新規構築と更新(gitで共有された場合など)でコマンドが変わりますのでご注意ください。
新規作成の場合
/app # vue init webpack
# y/nで質問されますが、こだわりなければ基本yesまたはEnterでOKです。
環境設定
hostやポートを変更しましょう。
今回は、hostを'localhost'から'0.0.0.0'に変更します。server/config/index.js// Various Dev Server settings host: '0.0.0.0', // can be overwritten by process.env.HOST更新の場合
/app # npm updatenpm実行(共通)
/app # npm run dev5. 確認
http://0.0.0.0:8080 にアクセスしましょう。
下記の画面が表示されればOKです。
