- 投稿日:2020-07-31T16:00:01+09:00
FlutterでSemanticsクラスを使ってコンテキストメニューを作成
表題の機能を組み込むときに参考情報が少なかったので、メモとして記します。
実現したいこと
アプリにはタップや長押しで呼び出すメニューの他に、スクリーンリーダー(Android→TalkBack、iOS→VoiceOver)向けにコンテキストメニューを提供することができます。
Androidでは
[[ローカルコンテキストメニュー]] → [操作]
iOSでは縦のスワイプ
でそれぞれ呼び出すことができます。
これにより素早く機能を呼び出すことが可能です。
作成は対象のウィジェットを[[Semantics()]]で囲い[[customSemanticsActions]]プロパティでメニューを定義します。また[[onTap]]と[[onLongPress]]プロパティでタップと長押しの動作も定義できます。
これは[[GestureDetector()]]でウィジェットを囲い定義することと同様です。
Semantics()ではそれぞれ[[onTaphint]]と[[onLongPressHint]]プロパティを使うことで、スクリーンリーダーがアナウンスする内容を指定することができます。
それぞれのジェスチャーで何ができるのか、事前に把握できるのはユーザにとって有益です。下記のサンプルコードは新規プロジェクトで作成されるコードに上記の内容を書き加えた物です。
スクリーンリーダーの挙動はこちらで確認できます。サンプルコード
import 'package:flutter/material.dart';
import 'package:flutter/semantics.dart';void main() {
runApp(MyApp());
}class MyApp extends StatelessWidget {
// This widget is the root of your application.
@override
Widget build(BuildContext context) {
return MaterialApp(
title: 'Flutter Demo',
theme: ThemeData(
// This is the theme of your application.
//
// Try running your application with "flutter run". You'll see the
// application has a blue toolbar. Then, without quitting the app, try
// changing the primarySwatch below to Colors.green and then invoke
// "hot reload" (press "r" in the console where you ran "flutter run",
// or simply save your changes to "hot reload" in a Flutter IDE).
// Notice that the counter didn't reset back to zero; the application
// is not restarted.
primarySwatch: Colors.blue,
// This makes the visual density adapt to the platform that you run
// the app on. For desktop platforms, the controls will be smaller and
// closer together (more dense) than on mobile platforms.
visualDensity: VisualDensity.adaptivePlatformDensity,
),
home: MyHomePage(title: 'Flutter Demo Home Page'),
);
}
}class MyHomePage extends StatefulWidget {
MyHomePage({Key key, this.title}) : super(key: key);// This widget is the home page of your application. It is stateful, meaning
// that it has a State object (defined below) that contains fields that affect
// how it looks.// This class is the configuration for the state. It holds the values (in this
// case the title) provided by the parent (in this case the App widget) and
// used by the build method of the State. Fields in a Widget subclass are
// always marked "final".final String title;
@override
_MyHomePageState createState() => _MyHomePageState();
}class _MyHomePageState extends State {
int _counter = 0;_incrementCounter() {
setState((){
_counter ++;
});
}@override
Widget build(BuildContext context) {
// This method is rerun every time setState is called, for instance as done
// by the incrementCounter method above.
//
// The Flutter framework has been optimized to make rerunning build methods
// fast, so that you can just rebuild anything that needs updating rather
// than having to individually change instances of widgets.
return Scaffold(
appBar: AppBar(
// Here we take the value from the MyHomePage object that was created by
// the App.build method, and use it to set our appbar title.
title: Text(widget.title),
),
body: Center(
// Center is a layout widget. It takes a single child and positions it
// in the middle of the parent.
child: Column(
// Column is also a layout widget. It takes a list of children and
// arranges them vertically. By default, it sizes itself to fit its
// children horizontally, and tries to be as tall as its parent.
//
// Invoke "debug painting" (press "p" in the console, choose the
// "Toggle Debug Paint" action from the Flutter Inspector in Android
// Studio, or the "Toggle Debug Paint" command in Visual Studio Code)
// to see the wireframe for each widget.
//
// Column has various properties to control how it sizes itself and
// how it positions its children. Here we use mainAxisAlignment to
// center the children vertically; the main axis here is the vertical
// axis because Columns are vertical (the cross axis would be
// horizontal).
mainAxisAlignment: MainAxisAlignment.center,
children: [
Text(
'You have pushed the button this many times:',
),
Semantics(
child: Text(
'$counter',
style: Theme.of(context).textTheme.headline4,
),
onTap: _incrementCounter,
onTapHint: '値を増加',
onLongPress: () => setState((){ _counter = 0;}),
onLongPressHint: 'リセット',
customSemanticsActions: {
CustomSemanticsAction(label: 'Increment'): _incrementCounter,
CustomSemanticsAction(label: 'reset'): () => setState(() => _counter = 0),
},
),
],
),
),
floatingActionButton: FloatingActionButton(
onPressed: () { _incrementCounter (); },
tooltip: 'Increment',
child: Icon(Icons.add),
), // This trailing comma makes auto-formatting nicer for build methods.
);
}
}
補足
ボタンにコンテキストメニューを不可する場合は更に
excludeSemantics: true,
value: 'increment',
button: true,
などのプロパティが必要です。
プロパティがなくても動作しますが、スクリーンリーダーがアナウンスしないため、ユーザがメニューに気が付けません。
- 投稿日:2020-07-31T12:49:49+09:00
【Swift5】UserDefaultsを使ったTodoアプリ
はじめに
だいぶ前に書いた前回の記事の情報が古くなり、また掲載しているコードも今ならもう少し綺麗にできるなと思ったので更新記事を書くことにしました。
注意点
UserDefaults.synchronize()について
いつの間にか公式ドキュメントにて「使うべきではない」と明示されてました。どうやらiOS12のリリースノートでも告知されていたようですね。なので本記事でも使わないことにします。
ただ、同期が少し遅い気がします。例えばチェックマークをつけて即座にキルすると次回起動時に反映されたりされてなかったりします(TODOの追加、編集、削除も同様です)。手元の環境では大体5秒くらい待てば確実にストレージに保存されてる気がします(僕のコードの問題かもしれませんが・・・)。
Todoタイトルをアラート内で記入させることについて
あまり話をややこしくしないために、前回の「新しいTodoのタイトルはアラートで記入する」という仕様はそのままにして、今回は「Todoタイトルの編集もアラートで行う」という仕様も追加しました。
ただし、このようにアラートをmodal viewの如く扱うのはHuman Interface Guidelines的にはあまりよくないかもしれません。あくまでアプリに関する重要な情報や問題を伝えるためのものであり、そもそもTODOを追加したり編集するたびにアラート(やmodal view)を表示させるのもUXとして好ましくはないでしょう。
設計
今回はなるべく「単一責務の原則」を意識しました。各オブジェクトが変更されるとしたら、その理由はただひとつでなければなりません。
UserDefaultsとアプリの間のやりとりは
TodoRepositoryを介して行います。取得したTODOはViewModelで保持され、view層に適宜展開されます。TODOの変更はViewModelを介してリポジトリまで通知され、ストレージに書き込まれます。ソースコード
Todo前回はTodoモデルをclassで実装していましたが、参照型である必要はないので今回はstructで実装します。
Todo.swiftimport Foundation struct Todo: Codable { static let storeKey = "Todo" let id: String let title: String let isDone: Bool init(id: String = UUID().uuidString, title: String, isDone: Bool) { self.id = id self.title = title self.isDone = isDone } }
storeKeyはUserDefaultsに保存するためのキーで、idは個々のTODOを区別するためのものです。この辺はもしかしたら工夫の余地があるかもしれません。
TodoRepositoryUserDefaultsに対するCRUD操作を担うclassです。エラーは全て
guard let hoge = try? ...という形で潰しています。TodoRepository.swiftimport Foundation final class TodoRepository { private let userDefaults = UserDefaults.standard private let jsonEncoder = JSONEncoder() private let jsonDecoder = JSONDecoder() func allTodos() -> [Todo] { guard let data = userDefaults.data(forKey: Todo.storeKey), let todos = try? jsonDecoder.decode([Todo].self, from: data) else { return [] } return todos } func save(todos: [Todo]) { guard let data = try? jsonEncoder.encode(todos) else { return } userDefaults.set(data, forKey: Todo.storeKey) } }
ViewModel今回の設計では、TODOの追加、変更、削除はどれも
currentTodosの変更に置き換えられ、都度リポジトリはcurrentTodosを丸ごと保存します。ViewModel.swiftimport Foundation final class ViewModel { private let repository: TodoRepository private(set) var currentTodos: [Todo] { didSet { repository.save(todos: currentTodos) } } init() { repository = TodoRepository() currentTodos = repository.allTodos() } func add(todo: Todo) { currentTodos.append(todo) } func deleteTodo(for id: String) { guard let index = currentTodos.firstIndex(where: { $0.id == id }) else { return } currentTodos.remove(at: index) } func updateTodo(for id: String, to newTodo: Todo) { guard let index = currentTodos.firstIndex(where: { $0.id == id }) else { return } currentTodos[index] = newTodo } }
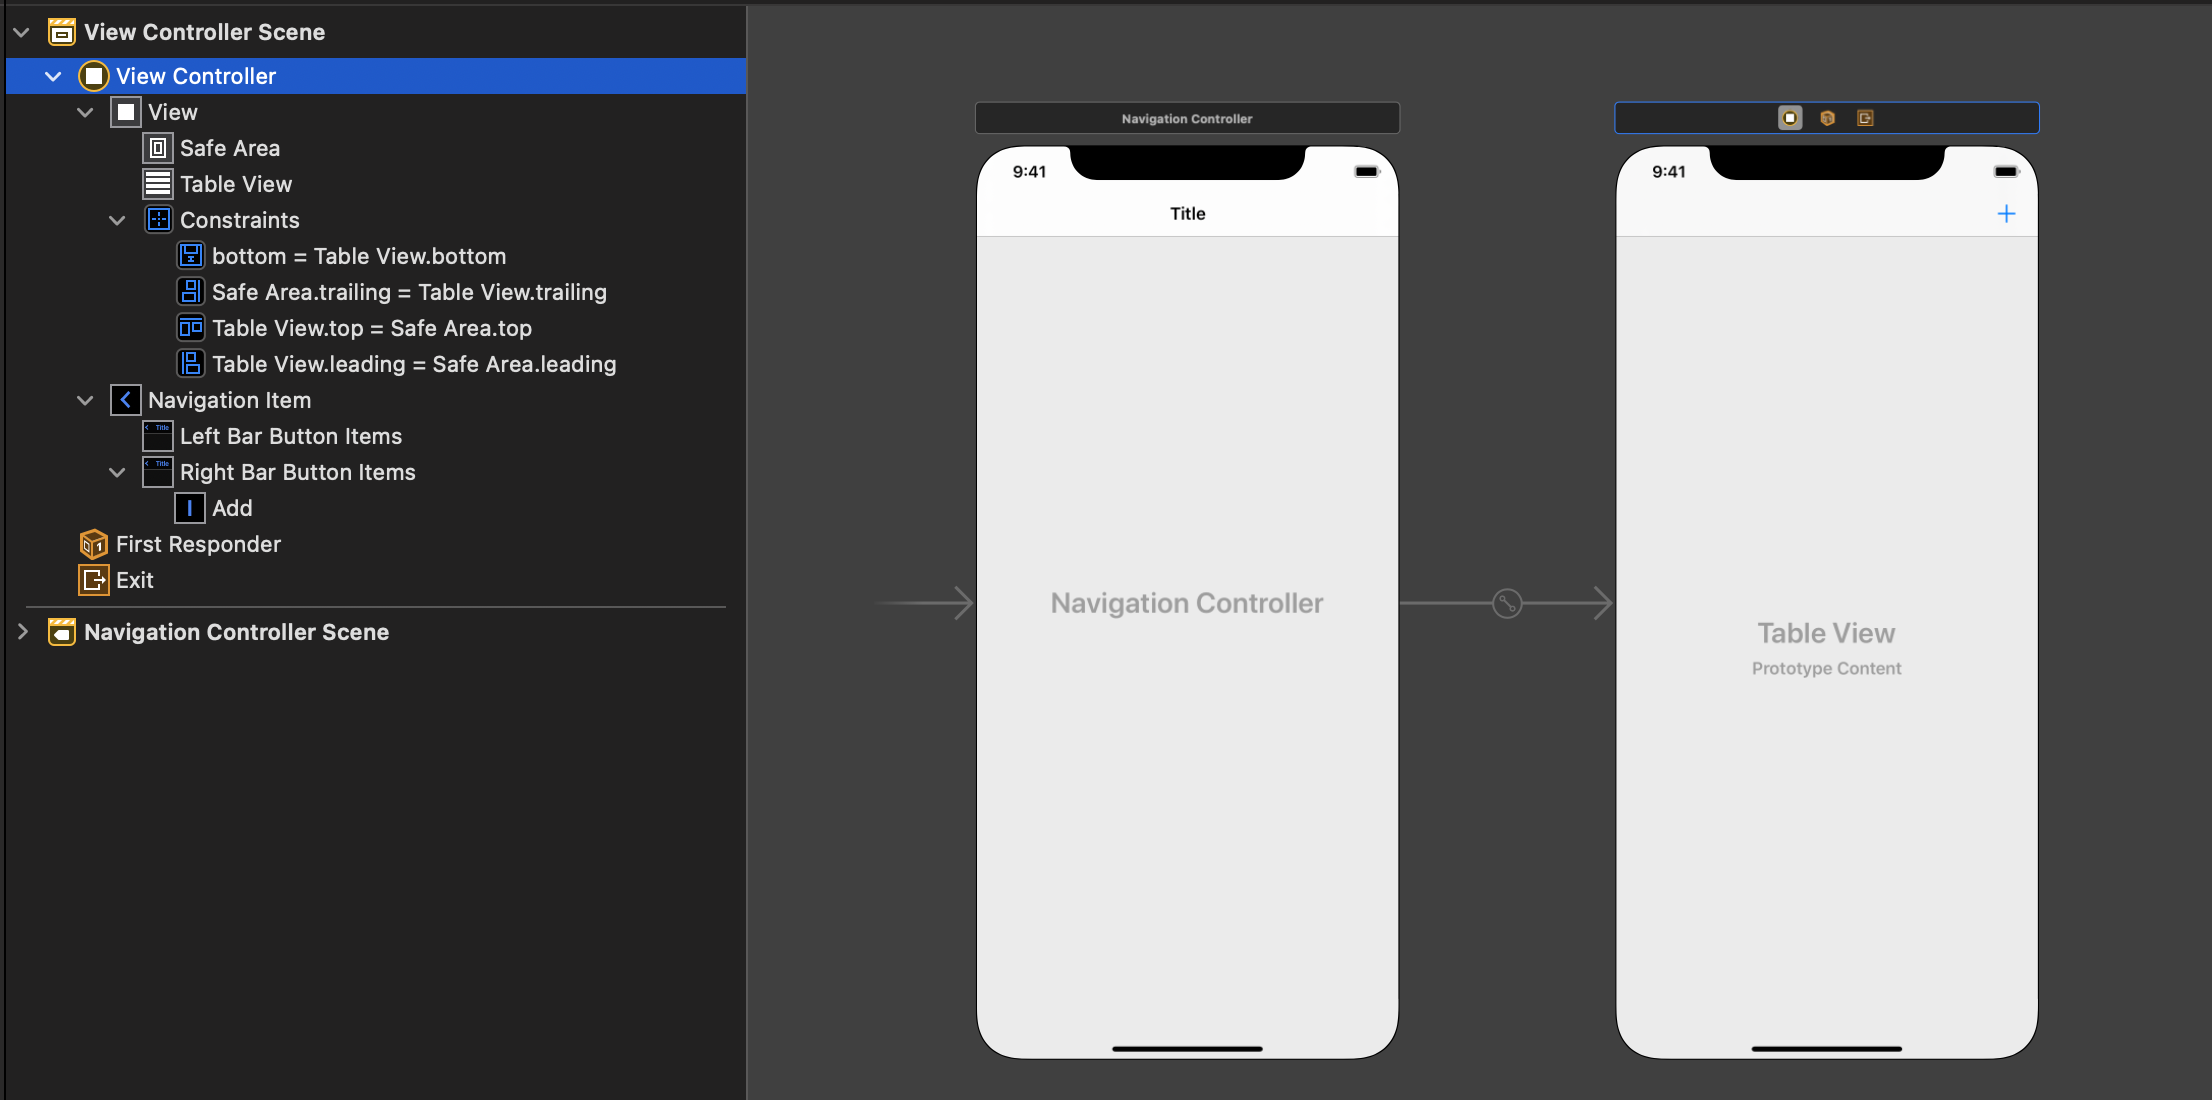
Main.storyboardこんな感じです:
以前は
UITableViewControllerを使ってましたが、今回はUIViewControllerにtable viewを設置しました。どちらでも大差ないと思います。
UIAlertController+Extensionテキストフィールド付きのアラートの扱いが少し面倒くさかったので少し便利なExtensionを実装してみました。
UIAlertController+Extension.swiftimport UIKit extension UIAlertController { static func makeAlertWithTextField(title: String?, message: String?, textFieldConfig: ((UITextField) -> Void)?) -> UIAlertController { let alert = UIAlertController(title: title, message: message, preferredStyle: .alert) alert.addTextField(configurationHandler: textFieldConfig) return alert } func addDefaultActionWithText(title: String?, textHandler: ((String) -> Void)?) -> UIAlertController { let action = UIAlertAction(title: title, style: .default) { [weak self] _ in guard let text = self?.textFields?.first?.text else { preconditionFailure("The Alert Controller has no text fields") } textHandler?(text) } addAction(action) return self } func addCancelAction() -> UIAlertController { addAction(UIAlertAction(title: "Cancel", style: .cancel, handler: nil)) return self } func present(from viewController: UIViewController) { viewController.present(self, animated: true, completion: nil) } }後にも登場しますが、こんな感じで使うことができます:
UIAlertController
    .makeAlertWithTextField(title: "Add Todo", message: nil, textFieldConfig: { $0.placeholder = "Title" })
    .addDefaultActionWithText(title: "OK") { [weak self] text in
        guard !text.isEmpty else { return }
        self?.add(todo: Todo(title: text, isDone: false))
}
.addCancelAction()
.present(from: self)
ViewController少し長いので分割します。
冒頭はこんな感じです:
ViewController.swiftimport UIKit final class ViewController: UIViewController { @IBOutlet private weak var tableView: UITableView! private var viewModel: ViewModel! private let reuseCellId = "TodoCell" override func viewDidLoad() { super.viewDidLoad() viewModel = ViewModel() tableView.delegate = self tableView.dataSource = self } @IBAction private func onAddButtonTapped(_ sender: Any) { UIAlertController .makeAlertWithTextField(title: "Add Todo", message: nil, textFieldConfig: { $0.placeholder = "Title" }) .addDefaultActionWithText(title: "OK") { [weak self] text in guard !text.isEmpty else { return } self?.add(todo: Todo(title: text, isDone: false)) } .addCancelAction() .present(from: self) } }次にviewレベルでの各種TODO操作のメソッドを実装します。
ViewController.swiftprivate extension ViewController { func todo(forRowAt indexPath: IndexPath) -> Todo { viewModel.currentTodos[indexPath.row] } func add(todo: Todo) { viewModel.add(todo: todo) tableView.reloadData() } func updateTodo(forRowAt indexPath: IndexPath, to newTodo: Todo) { viewModel.updateTodo(for: todo(forRowAt: indexPath).id, to: newTodo) tableView.reloadData() } func deleteTodo(forRowAt indexPath: IndexPath) { viewModel.deleteTodo(for: todo(forRowAt: indexPath).id) tableView.reloadData() } }余談ですが、僕はこのようにextensionを使ってグルーピングするのが大好きです。拡張してる感が良いですね。
次にtable viewのdelegateが来ます。チェックマークの切り替えやタイトルの編集は全てTODOオブジェクトを新たに作り直しています。
ViewController.swiftextension ViewController: UITableViewDelegate { func tableView(_ tableView: UITableView, didSelectRowAt indexPath: IndexPath) { let selectedTodo = todo(forRowAt: indexPath) let newTodo = Todo( id: selectedTodo.id, title: selectedTodo.title, isDone: !selectedTodo.isDone ) updateTodo(forRowAt: indexPath, to: newTodo) } func tableView(_ tableView: UITableView, leadingSwipeActionsConfigurationForRowAt indexPath: IndexPath) -> UISwipeActionsConfiguration? { let deleteAction = UIContextualAction( style: .destructive, title: "Delete" ) { [weak self] (_, _, _) in self?.deleteTodo(forRowAt: indexPath) } return .init(actions: [deleteAction]) } func tableView(_ tableView: UITableView, trailingSwipeActionsConfigurationForRowAt indexPath: IndexPath) -> UISwipeActionsConfiguration? { let oldTodo = todo(forRowAt: indexPath) let editAction = UIContextualAction(style: .normal, title: "Edit") { [weak self] (_, _, _) in guard let self = self else { return } UIAlertController .makeAlertWithTextField(title: "Edit Todo", message: nil, textFieldConfig: { $0.placeholder = "New Title" }) .addDefaultActionWithText(title: "OK") { [weak self] newTitle in guard !newTitle.isEmpty else { return } let newTodo = Todo(id: oldTodo.id, title: newTitle, isDone: oldTodo.isDone) self?.updateTodo(forRowAt: indexPath, to: newTodo) } .addCancelAction() .present(from: self) } editAction.backgroundColor = .systemGreen return .init(actions: [editAction]) } }最後にdata sourceです。
ViewController.swiftextension ViewController: UITableViewDataSource { func tableView(_ tableView: UITableView, numberOfRowsInSection section: Int) -> Int { viewModel.currentTodos.count } func tableView(_ tableView: UITableView, cellForRowAt indexPath: IndexPath) -> UITableViewCell { let cell = UITableViewCell(style: .default, reuseIdentifier: reuseCellId) cell.textLabel?.text = todo(forRowAt: indexPath).title cell.accessoryType = todo(forRowAt: indexPath).isDone ? .checkmark : .none return cell } }もし何かあれば遠慮なく指摘していただけると幸いです。
参考
- https://qiita.com/uhooi/items/429cac9b798b9c0937ae
- https://developer.apple.com/documentation/foundation/userdefaults/1414005-synchronize
- https://developer.apple.com/documentation/macos-release-notes/foundation-release-notes?preferredLanguage=occ
- https://developer.apple.com/design/human-interface-guidelines/ios/views/alerts/
- 投稿日:2020-07-31T07:57:42+09:00
initとは
ググったら一発でわかりやすい記事が出てくるswiftのinitについて。
Modelでファイル作ってプロパティ定義した後にいつもこいつがいる。
initっていうんだからとりあえず初期化してんだろーなーとは勘で考えますが、なんか気になったので書きます。
【イニシャライザ】
型(クラス、構造体、列挙体)のインスタンスを初期化(initialize)する特殊なメソッドのこと
class User {
    var id: String
    var fullName: String

    init(id: String, fullName: String) {
        self.id = id
        self.fullName = fullName
    }
}
init(){}の中括弧の中で、宣言した値を初期化してます。
- 投稿日:2020-07-31T03:49:19+09:00
「IPA processing failed」と表示されてipaの作成が出来ない場合の対処方法
概要
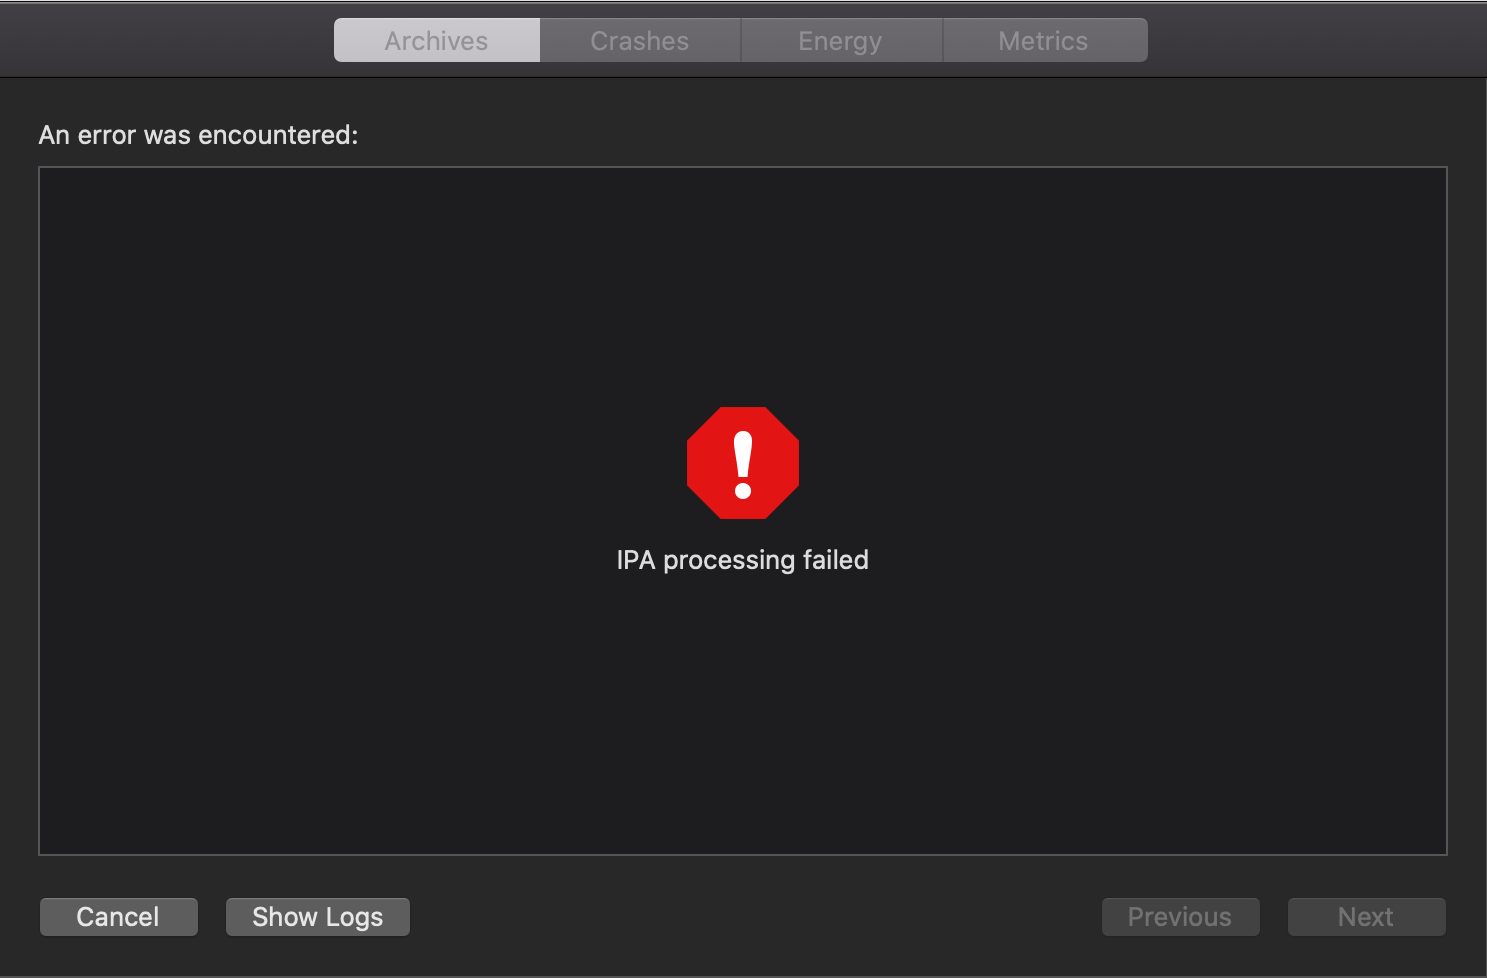
アーカイブしたプロジェクトから、ipaを作成しょうとすると、「IPA processing failed」と表示されて作成出来ない問題が発生しました。
いろいろ調べて解決方法が分かりました。
ネット上では間違った方法が多いので、同じ問題にぶち当たった方のために、解決方法をQiitaに残します。
XcodeのOrganizeから作成しようとした時の画面 ↓
CIサービス(Bitrise)でも、exportArchiveコマンド実行時にエラー
解決方法を先に言ってしまうと、Carthage の設定を見直せば、解決します。解決方法
Carthageの公式ページでは、導入手順がいつからか、xcfilelistを使うようになっていました。
公式ページ以外のCarthageのインストール手順を書いた記事では、ほとんどが、Input Filesに直接パスを指定する記事で、xcfilelistを使った記事を見かけなかったので、変わったことに気づいていませんでした。
Carthageの公式ではxcfilelistを使っているので、こっちの手順に切り替える必要があったのかもしれません。
Input/Output File Lists とは、Xcode10で追加された Input / Output Files に代わる、
xcfilelist をパスとして指定できる新たな枠組み以下の2つの作業を行うことで、解決できます。
- Carthageの設定をInput Filesから、xcfilelistに変更
- Embed Frameworks から、CarthageのFrameworkを削除
1. Carthageの設定をInput Filesから、xcfilelistに変更
Carthageの公式ページの手順の通りに、Input Filesから、xcfilelistに変更すればOKです。
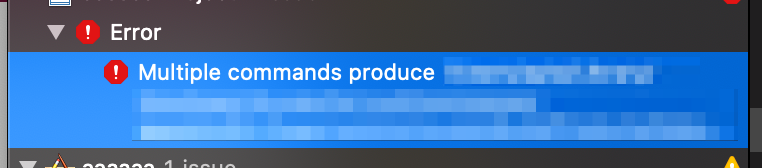
ただし、Input Filesから、xcfilelistに変更後、ビルド時に「Error: Multiple commands produce」と表示されてしまうことがあるので、それの場合、別途、対処が必要になります。
2. Embed Frameworks から、CarthageのFrameworkを削除
Xcode10から、デフォルトになった新しいビルドシステムは、フレームワークのコピーシステムが稼働するようで、それが重複してしまってエラーとなるようです。
具体的な対処方法としては、TARGETS → Build Phases → Embed Frameworks から、xcfilelist記載したCarthageのFrameworkを削除します。
最終的には、こういった形になるはずです。
上記のプロジェクトの場合の、xcfilelist
これで、ipaを作成できるようになります。経緯
このページにたどり着いた方のために、試行錯誤して解決方法にたどり着いた経緯を書いておきます。
シュミレーターと実機では、Xcodeから直接インストールすれば、どちらも問題なく起動していました。
その後、OTA配布しようと思って、CIでビルドしてアーカイブすると、エラーが出ることに気付き、Xcodeでも試したがダメでした。
いろいろ調べたところ、シュミレータアーキテクチャが含まれているとipaファイルを作成できないという記事を見たのでで、それを参考にしてアーキテクチャを削除しましたが、自分の環境ではダメでした。
シミュレータアーキテクチャを削除すると、シミュレータでアプリ起動ができなくなるそうなので、これは正しい解決方法ではないなと思って、いろいろ探してみたら、下記の記事を見つけ、その通りにしてみると、ipaの作成が出来るようになりました。
Carthage + Xcode の Archive で IPA processing failed が発生した場合の対処 - hd 5.0
シュミレータアーキテクチャを削除というのは、正しい対処方法ではないと思うので、まずは、Carthageを再設定してみてください。
その他
「IPA processing failed」のエラーログについて
XcodeのOrganizeのエラーが出た画面でShow Logsからフォルダを開くと、「IDEDistribution.standard.log」という名前のログがあります。
ここで、エラー内容を確認することができます。
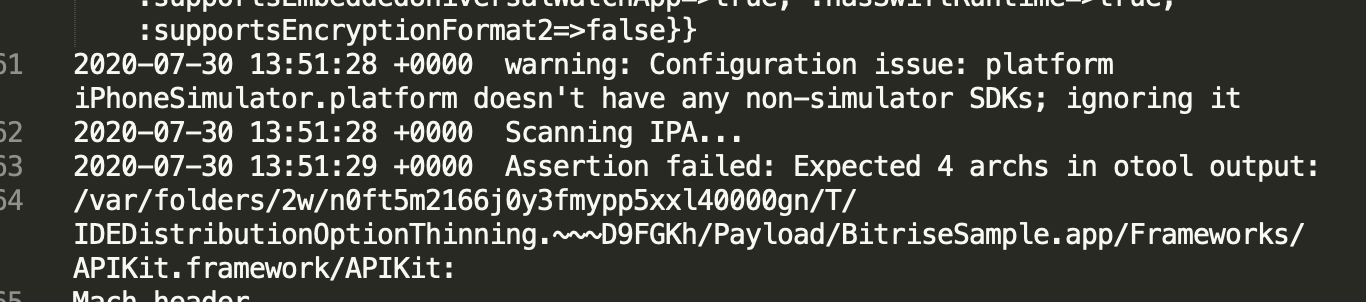
自分の場合は、Carthageでインストールしているライブラリ(このログでは、APIKit)でエラーが出ているので、Carthageが怪しそうだなというところまでは、気がつきました。シュミレータアーキテクチャを削除したときのCIのエラー
誰かの役に立つかもしれないので、シュミレータアーキテクチャを削除したときのCIのエラーも貼っておきます。
こちらは、「IPA processing failed」と表示されたあと、シュミレータアーキテクチャを削除してCIでビルドをしてみたときのエラーです。参考にしたサイト
- Carthage + Xcode の Archive で IPA processing failed が発生した場合の対処 - hd 5.0
- Carthage/Carthage: A simple, decentralized dependency manager for Cocoa
- Xcode10 Error: Multiple commands produceを解決する - Qiita
- CarthageでInput File Listsにxcfilelistを渡す利点と方法 - もちゅろぐ
調査段階で遭遇したサイト


- 投稿日:2020-07-31T03:49:19+09:00
ipa作成時に「IPA processing failed」と表示されて作成が出来ない場合の対処方法
概要
アーカイブしたプロジェクトから、ipaを作成しょうとすると、「IPA processing failed」と表示されて作成出来ない問題が発生しました。
いろいろ調べて解決方法が分かりました。
ネット上では間違った方法が多いので、同じ問題にぶち当たった方のために、解決方法をQiitaに残します。
XcodeのOrganizeから作成しようとした時の画面 ↓
CIサービス(Bitrise)でも、exportArchiveコマンド実行時にエラー
解決方法を先に言ってしまうと、Carthage の設定を見直せば、解決します。解決方法
Carthageの公式ページでは、導入手順がいつからか、xcfilelistを使うようになっていました。
公式ページ以外のCarthageのインストール手順を書いた記事では、ほとんどが、Input Filesに直接パスを指定する記事で、xcfilelistを使った記事を見かけなかったので、変わったことに気づいていませんでした。
Carthageの公式ではxcfilelistを使っているので、こっちの手順に切り替える必要があったのかもしれません。
Input/Output File Lists とは、Xcode10で追加された Input / Output Files に代わる、
xcfilelist をパスとして指定できる新たな枠組み以下の2つの作業を行うことで、解決できます。
- Carthageの設定をInput Filesから、xcfilelistに変更
- Embed Frameworks から、CarthageのFrameworkを削除
1. Carthageの設定をInput Filesから、xcfilelistに変更
Carthageの公式ページの手順の通りに、Input Filesから、xcfilelistに変更すればOKです。
ただし、Input Filesから、xcfilelistに変更後、ビルド時に「Error: Multiple commands produce」と表示されてしまうことがあるので、それの場合、別途、対処が必要になります。
2. Embed Frameworks から、CarthageのFrameworkを削除
Xcode10から、デフォルトになった新しいビルドシステムは、フレームワークのコピーシステムが稼働するようで、それが重複してしまってエラーとなるようです。
具体的な対処方法としては、TARGETS → Build Phases → Embed Frameworks から、xcfilelist記載したCarthageのFrameworkを削除します。
最終的には、こういった形になるはずです。
xcfilelist
これで、ipaを作成できるようになります。経緯
このページにたどり着いた方のために、試行錯誤して解決方法にたどり着いた経緯を書いておきます。
シュミレーターと実機では、Xcodeから直接インストールすれば、どちらも問題なく起動していました。
その後、OTA配布しようと思って、CIでビルドしてアーカイブすると、エラーが出ることに気付き、Xcodeでも試したがダメでした。
いろいろ調べたところ、シュミレータアーキテクチャが含まれているとipaファイルを作成できないという記事を見たのでで、それを参考にしてアーキテクチャを削除しましたが、自分の環境ではダメでした。
シミュレータアーキテクチャを削除すると、シミュレータでアプリ起動ができなくなるそうなので、これは正しい解決方法ではないなと思って、いろいろ探してみたら、下記の記事を見つけ、その通りにしてみると、ipaの作成が出来るようになりました。
Carthage + Xcode の Archive で IPA processing failed が発生した場合の対処 - hd 5.0
シュミレータアーキテクチャを削除というのは、正しい対処方法ではないと思うので、まずは、Carthageを再設定してみてください。
その他
「IPA processing failed」のエラーログについて
XcodeのOrganizeのエラーが出た画面でShow Logsからフォルダを開くと、「IDEDistribution.standard.log」という名前のログがあります。
ここで、エラー内容を確認することができます。
自分の場合は、Carthageでインストールしているライブラリ(このログでは、APIKit)でエラーが出ているので、Carthageが怪しそうだなというところまでは、気がつきました。シュミレータアーキテクチャを削除したときのCIのエラー
誰かの役に立つかもしれないので、シュミレータアーキテクチャを削除したときのCIのエラーも貼っておきます。
こちらは、「IPA processing failed」と表示されたあと、シュミレータアーキテクチャを削除してCIでビルドをしてみたときのエラーです。参考にしたサイト
- Carthage + Xcode の Archive で IPA processing failed が発生した場合の対処 - hd 5.0
- Carthage/Carthage: A simple, decentralized dependency manager for Cocoa
- Xcode10 Error: Multiple commands produceを解決する - Qiita
- CarthageでInput File Listsにxcfilelistを渡す利点と方法 - もちゅろぐ
調査段階で遭遇したサイト