- 投稿日:2020-07-04T20:07:41+09:00
Rails6+MySQL+Nginx+Unicorn+Docker環境構築メモ
この記事で書くこと
- Rails6+MySQL+Nginx+Unicorn+Dockerの構成での環境構築手順
対象者
- Rails6+MySQL+Nginx+Unicorn+Dockerの構成で環境構築したい人
注意
筆者も勉強中の身なので間違ったことを書いてる可能性があります。
ミスを見つけられた際は優しく教えていただけると幸いです。なぜやるか
勤め先ではDockerやDockerComposeを使用しておらず、このままだとヤバイと思ったので勉強のために。
環境構築してみてハマる場面も結構多かったので後続の人の参考になると嬉しいです。環境
docker dor macをインストール済み $ bundler -v Bundler version 2.1.4 $ ruby -v ruby 2.5.1p57 (2018-03-29 revision 63029) [x86_64-darwin18] $ rails -v Rails 6.0.3.2Gemfile.lockRUBY VERSION ruby 2.5.1p57 BUNDLED WITH 2.1.4環境構築手順
以下のステップで解説していきます。
- Railsプロジェクトの作成
- ディレクトリ構成
- unicornの導入,設定
- Dockerfileの構築
- Railsコンテナ用Dockerfileの構築
- Nginxコンテナ用Dockerfileの構築
- docker-compose.ymlの構築
- ビルド&コンテナ起動
Railsプロジェクトの作成
$ gem install rails //最新版のrailsをmacにインストールします。
$ rails new rails-sample //rails new コマンドでプロジェクトを新規作成します。
ディレクトリ構成
最終的なディレクトリ構成はこのようになります。
少し見辛いですが、ご了承ください。├── Gemfile //編集します ├── Gemfile.lock //bundle installで生成されます ├── README.md ├── Rakefile ├── app ├── babel.config.js ├── bin ├── config ├──unicorn.conf.rb //作ります └──database.yml //編集します ├── config.ru ├── db ├── docker └──nginx ├──Dockerfile //作ります └──nginx.conf //作ります └──rails └──Dockerfile //作ります ├── docker-compose.yml //作ります ├── lib ├── log ├── node_modules //yarn installで生成されます ├── package.json ├── postcss.config.js ├── public ├── storage ├── test ├── tmp ├── vendor └── yarn.lock //yarn installで生成されますunicornの設定
gem'unicorn'のインストール
rails-sample/Gemfile.gem 'unicorn'unicorn.conf.rbの構築
設定ファイルは色々な記事で書かれているものを流用してます。
一つ一つの設定はあともう少しで理解できそうなので次回別記事で書きたいと思います。今回大事なポイントは listenをtmp/sockets/.unicorn.sockに指定しているところです。
後述するnginxの設定ファイルのupstream unicornのパスと同じにする必要があります。rails-sample/config/unicorn.conf.rb$worker = 2 $timeout = 30 $app_dir = "/rails-sample" #自分のアプリケーションまでのpath $listen = File.expand_path 'tmp/sockets/.unicorn.sock', $app_dir $pid = File.expand_path 'tmp/pids/unicorn.pid', $app_dir $std_log = File.expand_path 'log/unicorn.log', $app_dir # set config worker_processes $worker working_directory $app_dir stderr_path $std_log stdout_path $std_log timeout $timeout listen $listen pid $pid # loading booster preload_app true # before starting processes before_fork do |server, worker| defined?(ActiveRecord::Base) and ActiveRecord::Base.connection.disconnect! old_pid = "#{server.config[:pid]}.oldbin" if old_pid != server.pid begin Process.kill "QUIT", File.read(old_pid).to_i rescue Errno::ENOENT, Errno::ESRCH end end end # after finishing processes after_fork do |server, worker| defined?(ActiveRecord::Base) and ActiveRecord::Base.establish_connection endDockerfileの構築
Rails用Dockerfileの構築
他の記事を見ていると本当にそれ必要?と思うものが多かったので今回はできる限り最小構成でDockerfileを作ります。
実際にビルドしたりコンテナを建てた時にエラーが起きたら都度追加していくことにしました。最終的なDockerfileはこの章の最後に乗っているので急ぎの方は飛ばして頂ければと思います。
今回ベースイメージはローカルのバージョンに合わせてruby:2.5.1を使用します。
bundlerもローカルと同じ2.1.4を使用したいので、環境変数"BUNDLER_VERSION"に2.1.4を指定しています。build-essentialは基本的に必須らしいので入れていますが、本当に必要かどうかは面倒なので確かめていません(お許しを)
wgetコマンドはdockerrizeをインストールするために追加しています。
dockerizeはdocker-composeでmysqlコンテナとrailsコンテナを同時に立ち上げる時に必要になるのでインストールしています。とりあえずのDockerfileがこちらになります。
FROM ruby:2.5.1

ENV DOCKERIZE_VERSION v0.6.1
ENV BUNDLER_VERSION 2.1.4

RUN apt update && apt install -y --no-install-recommends \
      build-essential \
      wget \

#dockerizeをインストール、解凍
RUN wget https://github.com/jwilder/dockerize/releases/download/$DOCKERIZE_VERSION/dockerize-linux-amd64-$DOCKERIZE_VERSION.tar.gz \
    && tar -C /usr/local/bin -xzf dockerize-linux-amd64-$DOCKERIZE_VERSION.tar.gz \
    && apt clean \
    && rm -rf /var/lib/apt/lists/*

COPY . /sample-app
WORKDIR /sample-app

RUN gem install bundler -v "2.1.4"
RUN bundle install
ここから実際にビルドしたりコンテナを立ち上げてエラーが出たら都度改修していくことにします。
では早速ビルドしてコンテナを立ち上げます。$ docker-compose build $ docker-compose up -drails-sample/log/unicorn.logI, [2020-07-04T01:25:44.679467 #12] INFO -- : Refreshing Gem list sh: 1: yarn: not found ======================================== Your Yarn packages are out of date! Please run `yarn install --check-files` to update. ======================================== To disable this check, please change `check_yarn_integrity` to `false` in your webpacker config file (config/webpacker.yml).ビルドに失敗しました。
sh: 1: yarn: not found と書いてあるのでyarnをインストールします。
yarnをインストールするためにDockerfileに以下を追加します。RUN curl -sS https://dl.yarnpkg.com/debian/pubkey.gpg | apt-key add - && \ echo "deb https://dl.yarnpkg.com/debian/ stable main" | tee /etc/apt/sources.list.d/yarn.list && \ apt update && apt install -y yarn再度ビルドします。
$ docker-compose buildStep 4/11 : RUN curl -sS https://dl.yarnpkg.com/debian/pubkey.gpg | apt-key add - && echo "deb https://dl.yarnpkg.com/debian/ stable main" | tee /etc/apt/sources.list.d/yarn.list && apt update && apt install -y yarn ---> Running in 407ad46184b0 Warning: apt-key output should not be parsed (stdout is not a terminal) OK deb https://dl.yarnpkg.com/debian/ stable main WARNING: apt does not have a stable CLI interface. Use with caution in scripts. Ign:1 http://deb.debian.org/debian stretch InRelease Get:2 http://security.debian.org/debian-security stretch/updates InRelease [94.3 kB] Get:3 http://deb.debian.org/debian stretch-updates InRelease [93.6 kB] Get:4 http://deb.debian.org/debian stretch Release [118 kB] Get:5 http://security.debian.org/debian-security stretch/updates/main amd64 Packages [529 kB] Get:6 http://deb.debian.org/debian stretch Release.gpg [2410 B] Get:7 http://deb.debian.org/debian stretch-updates/main amd64 Packages [28.2 kB] Get:8 http://deb.debian.org/debian stretch/main amd64 Packages [7083 kB] Fetched 7948 kB in 6s (1166 kB/s) Reading package lists... E: The method driver /usr/lib/apt/methods/https could not be found. E: Failed to fetch https://dl.yarnpkg.com/debian/dists/stable/InRelease E: Some index files failed to download. They have been ignored, or old ones used instead. ERROR: Service 'web' failed to build: The command '/bin/sh -c curl -sS https://dl.yarnpkg.com/debian/pubkey.gpg | apt-key add - && echo "deb https://dl.yarnpkg.com/debian/ stable main" | tee /etc/apt/sources.list.d/yarn.list && apt update && apt install -y yarn' returned a non-zero code: 100ググった結果、ココに書いてある通りコマンドを追加します。
RUN apt update && apt install apt-transport-https //追加追加して再度ビルド&コンテナを立ち上げます。
$ docker-compose build $ docker-compose up -drails-sample/log/unicorn.logI, [2020-07-04T01:39:01.693206 #13] INFO -- : Refreshing Gem list /usr/share/yarn/lib/cli.js:46099 let { ^ SyntaxError: Unexpected token { at exports.runInThisContext (vm.js:53:16) at Module._compile (module.js:373:25) at Object.Module._extensions..js (module.js:416:10) at Module.load (module.js:343:32) at Function.Module._load (module.js:300:12) at Module.require (module.js:353:17) at require (internal/module.js:12:17) at Object.<anonymous> (/usr/share/yarn/bin/yarn.js:24:13) at Module._compile (module.js:409:26) at Object.Module._extensions..js (module.js:416:10) ======================================== Your Yarn packages are out of date! Please run `yarn install --check-files` to update. ======================================== To disable this check, please change `check_yarn_integrity` to `false` in your webpacker config file (config/webpacker.yml).エラーに書いてある通りコンテナ内で"yarn install --check-files"を実行しましたが解決せず...
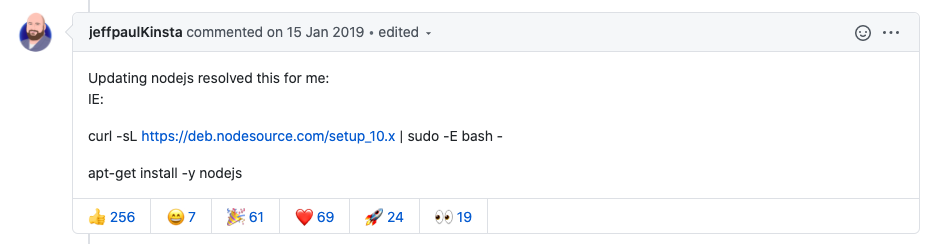
root@0b6243be00a2:/rails-sample# yarn install --check-files /usr/share/yarn/lib/cli.js:46099 let { ^ SyntaxError: Unexpected token { at exports.runInThisContext (vm.js:53:16) at Module._compile (module.js:373:25) at Object.Module._extensions..js (module.js:416:10) at Module.load (module.js:343:32) at Function.Module._load (module.js:300:12) at Module.require (module.js:353:17) at require (internal/module.js:12:17) at Object.<anonymous> (/usr/share/yarn/bin/yarn.js:24:13) at Module._compile (module.js:409:26) at Object.Module._extensions..js (module.js:416:10)ググってみるとこの記事を見つけました。
この人の回答を参考にしてDockerfileに下記を追加しました。
RUN curl -sL https://deb.nodesource.com/setup_10.x | bash - && apt-get install -y nodejs //追加再度ビルド&コンテナを立ち上げます。
するとエラー文は変わりましたが、またエラー...rails-sample/log/unicorn.logI, [2020-07-04T02:09:25.493307 #13] INFO -- : Refreshing Gem list warning Integrity check: System parameters don't match error Integrity check failed error Found 1 errors. ======================================== Your Yarn packages are out of date! Please run `yarn install --check-files` to update. ======================================== To disable this check, please change `check_yarn_integrity` to `false` in your webpacker config file (config/webpacker.yml). yarn check v1.22.4 info Visit https://yarnpkg.com/en/docs/cli/check for documentation about this command.言われた通り yarn install --check-files を実行しても解決せず。
yarn upgrade でパッケージのアップデートも試しましたが解決しませんでした。ここでハマりましたが、色々調べた結果 node_modulesディレクトリを削除してから yarn install 実行で解決しました。
正直原因は理解できていませんが、同じエラーでハマった人は試してみてください。中には config/webpacker.yml の check_yarn_integrity をfalseにして解決してる記事もありましたが邪道だと思われます。
ビルドする時に実行したいのでDockerfileにコマンドを追加します。
RUN yarn install //追加最終的なDockerfileはこのようになりました。
rails-sample/docker/rails/Dockerfile.FROM ruby:2.5.1 ENV DOCKERIZE_VERSION v0.6.1 ENV BUNDLER_VERSION 2.1.4 RUN apt update && apt install apt-transport-https RUN curl -sS https://dl.yarnpkg.com/debian/pubkey.gpg | apt-key add - && \ echo "deb https://dl.yarnpkg.com/debian/ stable main" | tee /etc/apt/sources.list.d/yarn.list && \ apt update && apt install -y yarn RUN curl -sL https://deb.nodesource.com/setup_10.x | bash - && apt-get install -y nodejs RUN apt update && apt install -y --no-install-recommends \ build-essential \ wget RUN wget https://github.com/jwilder/dockerize/releases/download/$DOCKERIZE_VERSION/dockerize-linux-amd64-$DOCKERIZE_VERSION.tar.gz \ && tar -C /usr/local/bin -xzf dockerize-linux-amd64-$DOCKERIZE_VERSION.tar.gz \ && apt clean \ && rm -rf /var/lib/apt/lists/* COPY . /rails-sample WORKDIR /rails-sample RUN yarn install RUN gem install bundler -v "2.1.4" RUN bundle installNginxコンテナ用Dockerfile & Nginx設定ファイル
rails-sample/docker/nginx/Dockerfile.FROM nginx:stable RUN rm -f /etc/nginx/conf.d/* COPY nginx.conf /etc/nginx/conf.d/rails-sample.conf CMD /usr/sbin/nginx -g 'daemon off;' -c /etc/nginx/nginx.confrails-sample/docker/nginx/nginx.confupstream unicorn { server unix:/rails-sample/tmp/sockets/.unicorn.sock fail_timeout=0; } server { listen 80 default; server_name localhost; access_log /var/log/nginx/access.log; error_log /var/log/nginx/error.log; root /rails-sample/public; client_max_body_size 100m; error_page 404 /404.html; error_page 505 502 503 504 /500.html; try_files $uri/index.html $uri @unicorn; keepalive_timeout 5; location @unicorn { proxy_set_header X-Real-IP $remote_addr; proxy_set_header X-Forwarded-For $proxy_add_x_forwarded_for; proxy_set_header Host $http_host; proxy_pass http://unicorn; } }docker-compose.ymlの構築
webとnginxでbuildディレクティブの書き方が違うところに疑問を持つ人もいると思います。私がそうでした。
最初はwebの方もnginxと同じように
build: context: ./docker/rails dockerfile: Dockerfileで書いていたのですが、dockerize -waitから始まるコマンドを実行できずエラーになってしまいました。
公式のcontextディレクティブの解説には「指定したディレクトリが構築コンテクストとなり、Docker デーモンに送信します。」と書かれていますが、いまいち分かりません。
このあたりももっと勉強して別記事を書きたいと思っています。
とりあえず以下の構成で動くので今回はこれで許してください。
rails-sample/docker-compose.ymlversion: '3' services: web: build: context: . dockerfile: ./docker/rails/Dockerfile command: dockerize -wait tcp://db:3306 -timeout 20s bundle exec unicorn -p 3000 -c /rails-sample/config/unicorn.conf.rb tty: true stdin_open: true depends_on: - db ports: - "3000:3000" volumes: - .:/rails-sample:cached - tmp-data:/rails-sample/tmp/sockets - public-data:/rails-sample/public db: image: mysql:5.7 command: mysqld --character-set-server=utf8 --collation-server=utf8_unicode_ci ports: - '4306:3306' environment: MYSQL_DATABASE: rails_sample_development MYSQL_ROOT_PASSWORD: password volumes: - mysql-data:/var/lib/mysql nginx: build: context: ./docker/nginx/Dockerfile ports: - 80:80 restart: always volumes: - tmp-data:/rails-sample/tmp/sockets - public-data:/rails-sample/public depends_on: - web volumes: public-data: tmp-data: mysql-data:ビルド&コンテナ起動
後は以下のコマンドを実行してコンテナを起動すればOKです。
$ docker-compose build $ docker-compose up -d$ docker-compose build $ docker-compose up -dコンテナを確認すると無事コンテナの起動に成功しました!
$ docker ps
CONTAINER ID        IMAGE                COMMAND                  CREATED             STATUS              PORTS                               NAMES
761147b1084d        rails-sample_nginx   "/bin/sh -c '/usr/sb…"   45 minutes ago      Up 45 minutes       0.0.0.0:80->80/tcp                  rails-sample_nginx_1
3c2021f8d455        rails-sample_web     "dockerize -wait tcp…"   45 minutes ago      Up 45 minutes       0.0.0.0:3000->3000/tcp              rails-sample_web_1
d0cc75d1e7bb        mysql:5.7            "docker-entrypoint.s…"   45 minutes ago      Up 45 minutes       33060/tcp, 0.0.0.0:4306->3306/tcp   rails-sample_db_1
後は好きなように開発を進めていけばOKです!
おわり
最後まで読んで頂きありがとうございました。
誰かのお役に立てれば幸いです。それでは~
- 投稿日:2020-07-04T17:57:20+09:00
Rails g コマンド実行時のLibrary not loaded: /usr/local/opt/mysql/lib/libmysqlclient.21.dylib (LoadError)のエラーの解決方法
現在、ポートフォリオを完成させた、ゆーた(@onoblog)です。
ポートフォリオを完成させて、転職活動の準備をしながら、webエンジニアに必須のlinuxとSQLを学習しています。そんな中で、過去のRailsの個人プロジェクトで、DBをいじろうとしたらLibrary not loaded: /usr/local/opt/mysql/lib/libmysqlclient.21.dylib (LoadError)が発生してしまいました。
恐る恐る他のプロジェクトのRailsプロジェクトを触ってみるとLibrary not loaded: /usr/local/opt/mysql/lib/libmysqlclient.21.dylib (LoadError)になっていまいました。
情報がバラバラで、はまってしまったので、メモしときます。
LoadError: dlopen(/Users/user/.rbenv/versions/2.5.1/lib/ruby/gems/2.5.0/gems/mysql2-0.5.3/lib/mysql2/mysql2.bundle, 9):
.
.
中略
.
.
Library not loaded: /usr/local/opt/mysql/lib/libmysqlclient.21.dylib
環境
- rails 5.2.3
- macOS 10.14.6
- MYSQL 5.6
対処法
①
$bundle doctorを実行をします。実行結果
The following gems are missing OS dependencies:
 * mysql2: /usr/local/opt/mysql/lib/libmysqlclient.21.dylib
②gemが入っているのに、mysqlがないと言われるので、mysqlをuninstallをします。そして、bundle installを実行します。
$ bundle exec gem uninstall mysql2
$ bundle installl

An error occurred while installing mysql2 (0.5.3), and Bundler cannot continue.
Make sure that `gem install mysql2 -v '0.5.3' --source 'https://rubygems.org/'` succeeds before bundling.
mysqlをアンインストールして、もう一度インストールしたら、mysqlがインストールができない状況になりました。
③gemのMysql 5.6を指定して、-lsslオプションを追加してインストールを実行します。
bundle config --local build.mysql2 --with-mysql-config=/usr/local/opt/mysql@5.6/bin/mysql_config --with-ldflags=-L/usr/local/opt/openssl/lib --with-cppflags=-I/usr/local/opt/openssl/include
④bundle installを実行し、mysqlにつながることを確認します。
原因
Mysql5.6とmysql8では、認証の仕様が異なり、互換性がありません。
scaffoldで、アプリを作成した時に、bundle installをスキップしなかったので、mysql8系が入ってしまったと考えています。
そして、アンインストールしたのにも関わらず、mysql8系のclientlibrary.21がmysqlのライブラリに残っていてmysql5系がmysql8系のライブラリにアクセスして、エラーを起こしていたようでした。http://tapestry.cs.ucl.ac.uk/tapestry/vendor/bundle/ruby/1.8/gems/mysql-2.9.1/README.txt
参考
- 投稿日:2020-07-04T15:13:43+09:00
Docker&LaravelでSQLSTATE[HY000] [2002] Connection refusedが出た時の対処法
はじめに
こんなエラーでた。
terminalSQLSTATE[HY000] [2002] Connection refused (SQL: select * from information_schema.tables where table_schema = laravel and table_name = migrations and table_type = 'BASE TABLE') at vendor/laravel/framework/src/Illuminate/Database/Connection.php:671 667| // If an exception occurs when attempting to run a query, we'll format the error 668| // message to include the bindings with SQL, which will make this exception a 669| // lot more helpful to the developer instead of just the database's errors. 670| catch (Exception $e) { > 671| throw new QueryException( 672| $query, $this->prepareBindings($bindings), $e 673| ); 674| } 675| +37 vendor frames 38 artisan:37 Illuminate\Foundation\Console\Kernel::handle(Object(Symfony\Component\Console\Input\ArgvInput), Object(Symfony\Component\Console\Output\ConsoleOutput))結論
configがしっかり反映されていなかったので、以下のコマンドでconfigに
.envの内容を反映させると解消された。terminal(Docker内)$ php artisan config:clear対処法
php artisan tinkerで.envの内容が反映されているか確かめるterminal(Docker内)$ php atisan tinker >> config('database') => [ "default" => "mysql", "connections" => [ "sqlite" => [ "driver" => "sqlite", "url" => null, "database" => "xxx", "prefix" => "", "foreign_key_constraints" => true, ], "mysql" => [ "driver" => "mysql", "url" => null, "host" => "mysql", // この辺に注目 "port" => "3306", "database" => "xxx", // この辺に注目 "username" => "xxx", // この辺に注目 "password" => "xxx", // この辺に注目 "unix_socket" => "", "charset" => "utf8mb4", "collation" => "utf8mb4_unicode_ci", "prefix" => "", "prefix_indexes" => true, "strict" => true, "engine" => null, "options" => [], ], # 以下省略configに、
.envの内容が反映されてなかったら結論で示したコマンドでどうにかなるかも(自分は解決した)
- 投稿日:2020-07-04T12:17:21+09:00
【RDS/Rails】Railsサーバ(AWS Cloud9で構築)とRDS(MySQL)間の接続を確立する
目標
Railsサーバ(AWS Cloud9によって構築)とRDS(MySQL)間の接続を確立する
はじめに
ほぼメモです。
Railsはデフォルトでsqlliteをデータベースとして利用する設定になっているので、
それをRDSで構築したMySQLを利用するよう設定変更しました。前提
・RailsサーバがCloud9によって構築済みであること(※)。
※以下記事の「Cloud9にチャレンジ!」までを実施する
[初心者向け]Cloud9で五分でできる、"Yay! You’re on Rails!"(Cloud9にチャレンジ!)作業の流れ
項番 タイトル 1 RDSを構築する 2 Railsサーバから接続する 手順
1.RDSを構築する
以下記事の「1.RDSを作成する」を実施します。
【RDS】EC2とRDS(MySQL)間の接続を確立する(1.RDSを作成する)
2.Railsサーバから接続する
①Railsの新規アプリケーション作成
$ rails new test_app作成後、アプリケーション配下へ移動します。
$ cd test_app②mysql-develをyumインストール
$ sudo yum install mysql-devel③Gemfile編集
デフォルトでsqlliteのgemをインストールする仕様となっているので、
mysqlをインストールするよう以下のように編集します。
gem 'sqlite3'⇒コメントアウト
gem 'mysql2'⇒追加ファイル名: Gemfile#gem 'sqlite3' gem 'mysql2'④MySQLのgemインストール(bundle install)
$ bundle install⑤database.yml編集
development環境にmysqlのデータベースを利用するようdatabase.ymlを編集(デフォルトのsqlliteへの接続定義は上書き削除)(※)※以下に関しては値を置換する必要があります。
<db_username>、<db_password>、<rds_endpoint>
⇒前手順「1.RDSを構築する」で構築したRDSの内容に従って書き換え
<db_name>
⇒任意の名前でOK。ファイル名: database.ymldefault: &default adapter: mysql2 encoding: utf8 pool: <%= ENV.fetch("RAILS_MAX_THREADS") { 5 } %> username: <db_username> password: <db_password> host: <rds_endpoint> database: <db_name> socket: /var/lib/mysql/mysql.sock development: <<: *default⑥データベース作成
$ rails db:create⑦アプリケーション起動
rails s⑧検証テーブル作成
$ rails generate model user name:string$ rails db:migrate⑨Mysql接続
mysql -h <rds_endpoint> -u <db_username> -p <db_name>$ mysql -h database-test.cgfjapta11py.ap-northeast-1.rds.amazonaws.com -u admin -p practice Enter password: Reading table information for completion of table and column names You can turn off this feature to get a quicker startup with -A Welcome to the MySQL monitor. Commands end with ; or \g. Your MySQL connection id is 24 Server version: 5.7.22-log Source distribution Copyright (c) 2000, 2018, Oracle and/or its affiliates. All rights reserved. Oracle is a registered trademark of Oracle Corporation and/or its affiliates. Other names may be trademarks of their respective owners. Type 'help;' or '\h' for help. Type '\c' to clear the current input statement. mysql>接続後、一応データベース及びテーブルが正常に作成されているか確認
show databases;
show tables;mysql> show databases; +--------------------+ | Database | +--------------------+ | information_schema | | innodb | | mysql | | performance_schema | | practice | | sys | | testdb | +--------------------+ 7 rows in set (0.00 sec) mysql> show tables; +----------------------+ | Tables_in_practice | +----------------------+ | ar_internal_metadata | | schema_migrations | | users | +----------------------+ 3 rows in set (0.00 sec)