- 投稿日:2020-06-30T23:33:32+09:00
Spring Boot + MySQL で CRUDアプリを作る
参考記事はこちら
では早速
1.MySQLの準備
$ mysql -u root -p
mysql> create database productdb;
mysql> use productdb;
mysql> CREATE TABLE `product` (
    ->   `id` int(11) NOT NULL AUTO_INCREMENT,
    ->   `name` varchar(45) NOT NULL,
    ->   `brand` varchar(45) NOT NULL,
    ->   `madein` varchar(45) NOT NULL,
    ->   `price` float NOT NULL,
    ->   PRIMARY KEY (`id`)
    -> ) ENGINE=InnoDB DEFAULT CHARSET=utf8;
ユーザーも追加
mysql> use mysql;
mysql> create user 'productuser'@'localhost' identified by 'productpass';
mysql> grant all on productdb.* to productuser@localhost;
mysql> exit
ユーザーの確認とデータの投入
$ mysql -u productuser -pproductpass
mysql> use productdb;
mysql> insert into product (name, brand, madein, price) values
    -> ('Glaxy S10 Plus', 'Samsung Corp', 'Korea', 901.0),
    -> ('MacBook Air', 'Apple', 'China', 1230.0),
    -> ('Mazda 3', 'Mazda', 'Japan', 27900.0);

mysql> select * from product;
+----+----------------+--------------+--------+-------+
| id | name           | brand        | madein | price |
+----+----------------+--------------+--------+-------+
|  1 | Glaxy S10 Plus | Samsung Corp | Korea  |   901 |
|  2 | MacBook Air    | Apple        | China  |  1230 |
|  3 | Mazda 3        | Mazda        | Japan  | 27900 |
+----+----------------+--------------+--------+-------+
3 rows in set (0.01 sec)

mysql> exit
2.プロジェクト作成
Spring Initializrにてプロジェクトを作成
[GENERATE ⌘ + ↩︎ ]で、ZIPファイルが生成される
ZIPファイルを解凍すると、プロジェクトが作成される3.データベースと接続する設定
src/main/resources/application.propertiesにデータベース接続の設定を記入
application.propertiesspring.jpa.database=MYSQL spring.datasource.platform=mysql spring.datasource.url=jdbc:mysql://localhost:3306/productdb?setAutoCommit=false&useSSL=false spring.datasource.username=productuser spring.datasource.password=productpass spring.jpa.hibernate.ddl-auto=none logging.level.root=WARN4.Entityの作成
Product.javapackage com.example.productmanager.entity; import javax.persistence.Entity; import javax.persistence.GeneratedValue; import javax.persistence.GenerationType; import javax.persistence.Id; import lombok.Data; @Data @Entity public class Product { private Long id; private String name; private String brand; private String madein; private float price; @Id @GeneratedValue(strategy = GenerationType.IDENTITY) public Long getId() { return id; } }5.Repositoryの作成
ProductRepository.javapackage com.example.productmanager.repository; import org.springframework.data.jpa.repository.JpaRepository; import com.example.productmanager.entity.Product; public interface ProductRepository extends JpaRepository<Product, Long> { }6.Serviceの作成
ProductService.javapackage com.example.productmanager.service; import java.util.List; import org.springframework.beans.factory.annotation.Autowired; import org.springframework.stereotype.Service; import org.springframework.transaction.annotation.Transactional; import com.example.productmanager.entity.Product; import com.example.productmanager.repository.ProductRepository; @Service @Transactional public class ProductService { @Autowired private ProductRepository repo; public List<Product> listAll() { return repo.findAll(); } public void save(Product product) { repo.save(product); } public Product get(long id) { return repo.findById(id).get(); } public void delete(long id) { repo.deleteById(id); } }7.Controllerの作成
AppController.javapackage com.example.productmanager.controller; import java.util.List; import org.springframework.beans.factory.annotation.Autowired; import org.springframework.stereotype.Controller; import org.springframework.ui.Model; import org.springframework.web.bind.annotation.ModelAttribute; import org.springframework.web.bind.annotation.PathVariable; import org.springframework.web.bind.annotation.RequestMapping; import org.springframework.web.bind.annotation.RequestMethod; import org.springframework.web.servlet.ModelAndView; import com.example.productmanager.entity.Product; import com.example.productmanager.service.ProductService; @Controller public class AppController { @Autowired private ProductService service; @RequestMapping("/") public String viewHomePage(Model model) { List<Product> listProducts = service.listAll(); model.addAttribute("listProducts", listProducts); return "index"; } @RequestMapping("/new") public String showNewProductPage(Model model) { Product product = new Product(); model.addAttribute("product", product); return "new_product"; } @RequestMapping(value = "/save", method = RequestMethod.POST) public String saveProduct(@ModelAttribute("product") Product product) { service.save(product); return "redirect:/"; } @RequestMapping("/edit/{id}") public ModelAndView showEditProductPage(@PathVariable(name = "id") int id) { ModelAndView mav = new ModelAndView("edit_product"); Product product = service.get(id); mav.addObject("product", product); return mav; } @RequestMapping("/delete/{id}") public String deleteProduct(@PathVariable(name = "id") int id) { service.delete(id); return "redirect:/"; } }8.Viewの作成
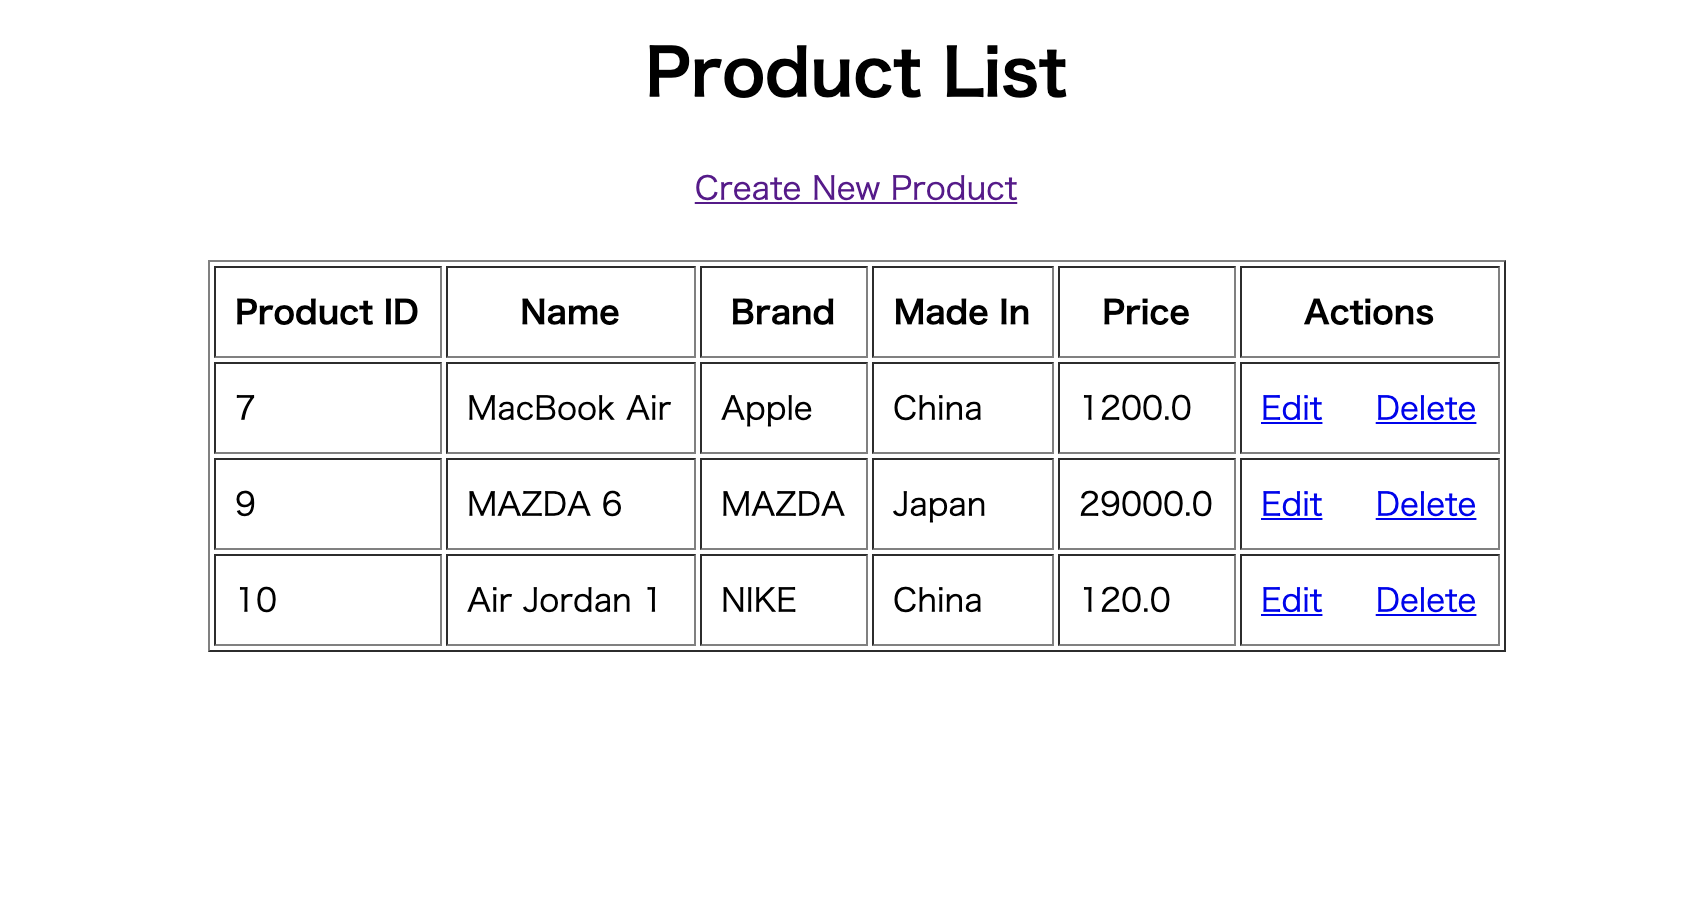
src/resources/templates/index.html
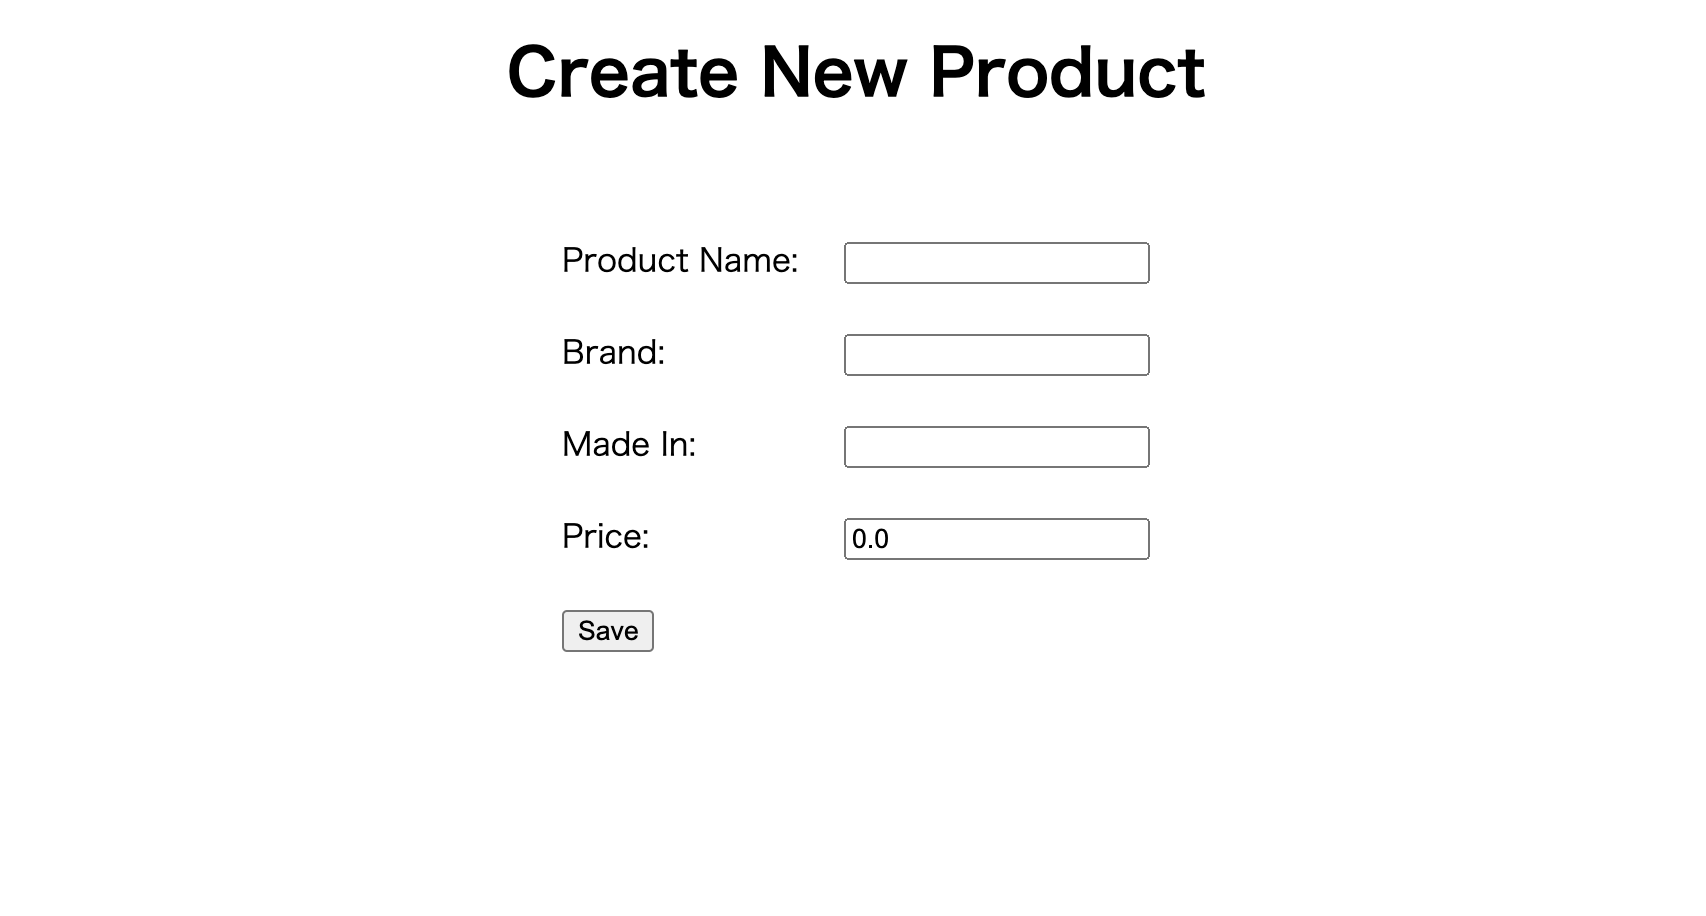
index.html<!DOCTYPE html> <html xmlns="http://www.w3.org/1999/xhtml" xmlns:th="http://www.thymeleaf.org"> <head> <meta charset="utf-8"/> <title>Product Manager</title> </head> <body> <div align="center"> <h1>Product List</h1> <a href="/new">Create New Product</a> <br/><br/> <table border="1" cellpadding="10"> <thead> <tr> <th>Product ID</th> <th>Name</th> <th>Brand</th> <th>Made In</th> <th>Price</th> <th>Actions</th> </tr> </thead> <tbody> <tr th:each="product : ${listProducts}"> <td th:text="${product.id}">Product ID</td> <td th:text="${product.name}">Name</td> <td th:text="${product.brand}">Brand</td> <td th:text="${product.madein}">Made in</td> <td th:text="${product.price}">Price</td> <td> <a th:href="@{'/edit/' + ${product.id}}">Edit</a> <a th:href="@{'/delete/' + ${product.id}}">Delete</a> </td> </tr> </tbody> </table> </div> </body> </html>src/resources/templates/new_product.html
new_product.html<!DOCTYPE html> <html xmlns="http://www.w3.org/1999/xhtml" xmlns:th="http://www.thymeleaf.org"> <head> <meta charset="utf-8" /> <title>Create New Product</title> </head> <body> <div align="center"> <h1>Create New Product</h1> <br /> <form action="#" th:action="@{/save}" th:object="${product}" method="post"> <table border="0" cellpadding="10"> <tr> <td>Product Name:</td> <td><input type="text" th:field="*{name}" /></td> </tr> <tr> <td>Brand:</td> <td><input type="text" th:field="*{brand}" /></td> </tr> <tr> <td>Made In:</td> <td><input type="text" th:field="*{madein}" /></td> </tr> <tr> <td>Price:</td> <td><input type="text" th:field="*{price}" /></td> </tr> <tr> <td colspan="2"><button type="submit">Save</button> </td> </tr> </table> </form> </div> </body> </html>src/resources/templates/edit_product.html
edit_product.html<!DOCTYPE html> <html xmlns="http://www.w3.org/1999/xhtml" xmlns:th="http://www.thymeleaf.org"> <head> <meta charset="utf-8" /> <title>Edit Product</title> </head> <body> <div align="center"> <h1>Edit Product</h1> <br /> <form action="#" th:action="@{/save}" th:object="${product}" method="post"> <table border="0" cellpadding="10"> <tr> <td>Product ID:</td> <td> <input type="text" th:field="*{id}" readonly="readonly" /> </td> </tr> <tr> <td>Product Name:</td> <td> <input type="text" th:field="*{name}" /> </td> </tr> <tr> <td>Brand:</td> <td><input type="text" th:field="*{brand}" /></td> </tr> <tr> <td>Made In:</td> <td><input type="text" th:field="*{madein}" /></td> </tr> <tr> <td>Price:</td> <td><input type="text" th:field="*{price}" /></td> </tr> <tr> <td colspan="2"><button type="submit">Save</button> </td> </tr> </table> </form> </div> </body> </html>9.Spring Boot アプリケーションの実行
Spring Boot アプリケーションの実行後、localhost:8080を確認
ありがとうございました


- 投稿日:2020-06-30T18:53:08+09:00
MySQLのchar,varcharは大文字小文字を区別しない
知ってる人には当たり前ですが、今更になってこれを知ったので書く。
とりあえず検証用MySQLを作成
dockerでやる
docker run --name test-mysql -e MYSQL_ROOT_PASSWORD=passwd -d mysql:8.0dockerコンテナに入る
docker exec -it test-mysql bashMySQLクライアントに接続する
mysql -u root -pデータベースを作る
mysql> create database if not exists test_db;
Query OK, 1 row affected (0.01 sec)

mysql> show databases;
+--------------------+
| Database           |
+--------------------+
| information_schema |
| mysql              |
| performance_schema |
| sys                |
| test_db            |
+--------------------+
5 rows in set (0.00 sec)

mysql> use test_db;
Database changed
とりあえずデフォルトの文字コードを確認する
mysql> select SCHEMA_NAME, DEFAULT_CHARACTER_SET_NAME, DEFAULT_COLLATION_NAME from INFORMATION_SCHEMA.SCHEMATA where SCHEMA_NAME='test_db';
+-------------+----------------------------+------------------------+
| SCHEMA_NAME | DEFAULT_CHARACTER_SET_NAME | DEFAULT_COLLATION_NAME |
+-------------+----------------------------+------------------------+
| test_db     | utf8mb4                    | utf8mb4_0900_ai_ci     |
+-------------+----------------------------+------------------------+
検証用テーブルを作る
varcharとvarbinary型のカラムを作る。
それぞれに
test,Test,TESTという文字列を入れました。mysql> create table test (txt_varchar varchar(255), txt_varbinary varbinary(255)); Query OK, 0 rows affected (0.04 sec) mysql> insert into test values ('test', 'test'), ('TEST', 'TEST'), ('Test', 'Test'); Query OK, 3 rows affected (0.01 sec) Records: 3 Duplicates: 0 Warnings: 0大文字小文字が区別されない例
txt_varcharカラムに対して
testで検索してみます。mysql> select * from test where txt_varchar = 'test'; +-------------+------------------------------+ | txt_varchar | txt_varbinary | +-------------+------------------------------+ | test | 0x74657374 | | TEST | 0x54455354 | | Test | 0x54657374 | +-------------+------------------------------+ 3 rows in set (0.01 sec)全部引っかかりました。
大文字小文字が区別される例
binary型で作成したtxt_varbinaryカラムに対して
testで検索してみます。mysql> select * from test where txt_varbinary = 'test'; +-------------+------------------------------+ | txt_varchar | txt_varbinary | +-------------+------------------------------+ | test | 0x74657374 | +-------------+------------------------------+ 1 row in set (0.01 sec)無事、完全一致の文字列が検索されました。
ちなみにこれは解決方法ではなく、デフォルトのchar, varcharでは大文字小文字は区別されない例としてあげただけです。解決方法
BINARY演算子を使う
varchar型に対して検索をする際にBINARY演算子をつけると大文字小文字を区別して検索してくれます。
mysql> select * from test where txt_varchar = binary 'test';
+-------------+------------------------------+
| txt_varchar | txt_varbinary                |
+-------------+------------------------------+
| test        | 0x74657374                   |
+-------------+------------------------------+
1 row in set (0.00 sec)
char, varcharに対してbinary属性をつける
binary属性を付与してみます。
mysql> alter table test modify txt_varchar varchar(255) binary;
Query OK, 0 rows affected, 1 warning (0.02 sec)
Records: 0  Duplicates: 0  Warnings: 1
大文字小文字が区別されました。
mysql> select * from test where txt_varchar = 'test';
+-------------+------------------------------+
| txt_varchar | txt_varbinary                |
+-------------+------------------------------+
| test        | 0x74657374                   |
+-------------+------------------------------+
1 row in set (0.00 sec)
- 投稿日:2020-06-30T16:55:13+09:00
MySQLの稼働が安定しない…Railsアプリが起動していない。
発生した背景
MySQLサービスがまたもやエラー。何回も発生すると、流石に時間の浪費に怯えてしまいます。以下エラー内容になります。
Can't connect to local MySQL server through socket '/tmp/mysql.sock'環境
項目 内容 OS.Catalina v10.15.4 Ruby v2.5.1 Ruby On Rails v5.2.4.3 MySQL v5.6 対応手順
【調査1】MySQLが起動しているか。
僕は「SequelPro」を使っているので、接続してみる。→接続エラープロセスの稼働状況を確認CMD>ps -ef | grep mysql 501 1287 1 0 11:45AM ?? 0:00.06 /bin/sh /usr/local/opt/mysql@5.6/bin/mysqld_safe --datadir=/usr/local/var/mysql 501 6400 1287 0 11:55AM ?? 0:00.51 /usr/local/opt/mysql@5.6/bin/mysqld --basedir=/usr/local/opt/mysql@5.6 --datadir=/usr/local/var/mysql --plugin-dir=/usr/local/opt/mysql@5.6/lib/plugin --log-error=ichikawadaisukenoMacBook-Air.local.err --pid-file=ichikawadaisukenoMacBook-Air.local.pid 501 6402 804 0 11:55AM ttys000 0:00.01 grep mysql!?稼働しているようには見える!?
【調査2】まずはエラー内容から。ソケットファイルがないと言われているので、以下のコマンドで対応してみました。
ソケットファイルを試しに作成してみる。CMD>cd アプリケーションフォルダ CMD>touch /tmp/mysql.sock→結果、改善せず。
【調査3】ログを確認してみる。
MySQLのログを確認CMD>more /usr/local/var/mysql/ichikawadaisukenoMacBook-Air.local.err (一部省略) mysqld_safe A mysqld process already exists※この後再起動するも、改善ならず。
対応
プロセスが多重起動している様子。既存の稼働中のプロセスを停止する。
プロセスの停止CMD>kill -9 対象のサービスプロセス今回はこれだけで改善しました。しかし、まだ以下のエラーメッセージが出力されたままです。
200616 16:04:42 mysqld_safe A mysqld process already exists対応は後日にしようと思います。
- 投稿日:2020-06-30T09:10:31+09:00
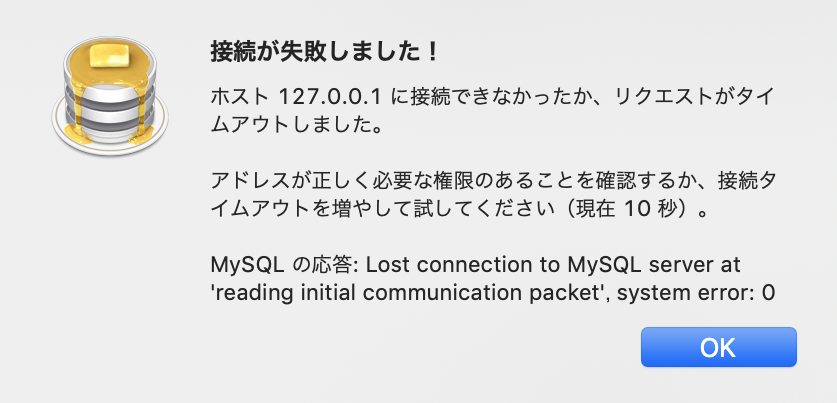
[mysql,docker,ESET]Lost connection to MySQL server at 'reading initial communication packet', system error: 0の解決例
どんなエラー?
接続者がデータベースに対して権限を持っていない状態で接続を試みると出るエラーのようです
何をしたら出た?
docker-compose upで予め用意したdocker-compose.ymlに沿って正しく立ち上げで、ローカルでの接続で権限をいじった記憶もないのに出現しました試行錯誤
この記事を見て関係ありそうな部分をすべて試すも空振りしました。
原因
会社のPCということもありセキュリティに厳しくしているようで
ESET Endpoint SecurityというファイアウォールをMacのデフォルト以外に取り入れており、そのセキュリティが、データベースへの直接の接続はローカルであっても妨げているようでした。(それだけ保存されたデータは取り扱い注意であるのだとわかりますね。)解決方法
ESETのパーソナルファイアーウォールをオフにすることで接続が可能になります
(手順は、画面左にある
保護の状態をクリック→画面中央にあるパーソナルファイアーウォールをクリック→画面中央のパーソナルファイアーウォールのオンオフスイッチをクリックしてオフにする)いくら取り扱い注意とはいえ、ローカルでSQL文の挙動の実験などをする必要がある場合がありますので、必要に応じて操作できる・できないの状態を変更できる方法を覚えておけるといいと思います。
- 投稿日:2020-06-30T04:28:42+09:00
Rustで直接SQLを書いてMySQLからデータを抽出する方法
はじめに
RustでMySQLを使う場合、事前に構造体を定義する方法が主流ですが、
直接SQLを書きたいケースも多いのではないでしょうか。
今回はDieselを使って直SQLでデータを抽出する方法を紹介します。用意したデータ
ソースはこちらから
https://github.com/tonio0720/rust_mysql
テーブル
monster
monster_id name type1_id type2_id 1 フシギダネ 5 8 2 フシギソウ 5 8 3 フシギバナ 5 8 4 ヒトカゲ 2 NULL 5 リザード 2 NULL 6 リザードン 2 10 7 ゼニガメ 3 NULL 8 カメール 3 NULL 9 カメックス 3 NULL type
type_id type_name 1 ノーマル 2 ほのお 3 みず 4 でんき 5 くさ 6 こおり 7 かくとう 8 どく 9 じめん 10 ひこう 11 エスパー 12 むし 13 いわ 14 ゴースト 15 ドラゴン 16 あく 17 はがね 18 フェアリー MySQLに接続
Dieselというライブラリを使用します。
https://github.com/diesel-rs/dieselcargo.toml[dependencies] diesel = { version = "*", features = ["mysql"] }DBに接続するための関数を作ります。
utils.rsuse diesel::mysql::MysqlConnection; use diesel::prelude::*; use dotenv::dotenv; pub fn establish_connection() -> MysqlConnection { let database_url = "mysql://[user]:[password]@host[:port][/database]"; MysqlConnection::establish(&database_url) .expect(&format!("Error connecting to {}", database_url)) }※mysql://[user]:[password]@host[:port][/database]には実際の接続情報を入力してください。
シンプルなSQLを書いてみる
use crate::utils::establish_connection;

use diesel::deserialize::QueryableByName;
use diesel::mysql::MysqlConnection;
use diesel::prelude::*;
use diesel::sql_query;

mod utils;

type DB = diesel::mysql::Mysql;

#[derive(Debug)]
pub struct Monster {
    monster_id: i32,
    name: String,
    type1_id: i32,
    type2_id: Option<i32>,
}

impl QueryableByName<DB> for Monster {
    fn build<R: diesel::row::NamedRow<diesel::mysql::Mysql>>(
        row: &R,
    ) -> diesel::deserialize::Result<Self> {
        Ok(Monster {
            monster_id: row.get("monster_id")?,
            name: row.get("name")?,
            type1_id: row.get("type1_id")?,
            type2_id: row.get("type2_id")?,
        })
    }
}

fn simple_sql() {
    let connection: MysqlConnection = establish_connection();
    let monsters: Vec<Monster> = sql_query(
        "
        SELECT
            monster_id,
            name,
            type1_id,
            type2_id
        FROM
            monster
        ",
    )
    .load(&connection)
    .unwrap();

    println!("{:?}", monsters)
}
直接SQLを使うには、
diesel::sql_queryを使います。
diesel::deserialize::QueryableByNameを使ってデータを受け取るための型を定義します。PreparedStatementっぽいこと
use diesel::sql_types::Text;
use diesel::sql_types::Integer;

fn prepared_statement_sql() {
    let connection: MysqlConnection = establish_connection();
    let monsters: Vec<Monster> = sql_query(
        "
        SELECT
            monster_id,
            name,
            type1_id,
            type2_id
        FROM
            monster
        WHERE
            monster_id = ?
            OR name = ?
        ",
    )
    .bind::<Integer, _>(4)
    .bind::<Text, _>("ヒトカゲ")
    .load(&connection)
    .unwrap();

    println!("{:?}", monsters[0])
}
SQLの中に
?を書いて、
.bind::<Integer, _>(4)や.bind::<Text, _>("ヒトカゲ")と書くことで安全にSQLの中に数値や文字列を挿入することができます。JOIN
#[derive(Debug)]
pub struct MonsterFull {
    monster_id: i32,
    name: String,
    type1_id: i32,
    type2_id: Option<i32>,
    type1_name: String,
    type2_name: Option<String>,
}

impl QueryableByName<DB> for MonsterFull {
    fn build<R: diesel::row::NamedRow<diesel::mysql::Mysql>>(
        row: &R,
    ) -> diesel::deserialize::Result<Self> {
        Ok(MonsterFull {
            monster_id: row.get("monster_id")?,
            name: row.get("name")?,
            type1_id: row.get("type1_id")?,
            type2_id: row.get("type2_id")?,
            type1_name: row.get("type1_name")?,
            type2_name: row.get("type2_name")?,
        })
    }
}

fn complex_sql() {
    let connection: MysqlConnection = establish_connection();
    let monsters: Vec<MonsterFull> = sql_query(
        "
        SELECT
            m.monster_id,
            m.name,
            m.type1_id,
            m.type2_id,
            t1.type_name AS type1_name,
            t2.type_name AS type2_name
        FROM
            monster m
        LEFT JOIN
            type t1
        ON
            m.type1_id = t1.type_id
        LEFT JOIN
            type t2
        ON
            m.type2_id = t2.type_id
        ",
    )
    .load(&connection)
    .unwrap();

    println!("{:?}", monsters);
}
JOINなどの複雑な操作も受け取るための型さえ用意すれば簡単にできます。
おわりに
この方法を使えば、Rustから直SQLを書いてデータを抽出することができました。
直接SQLを書きたい方は是非参考にしてもらえればと思います。