- 投稿日:2019-03-02T20:04:33+09:00
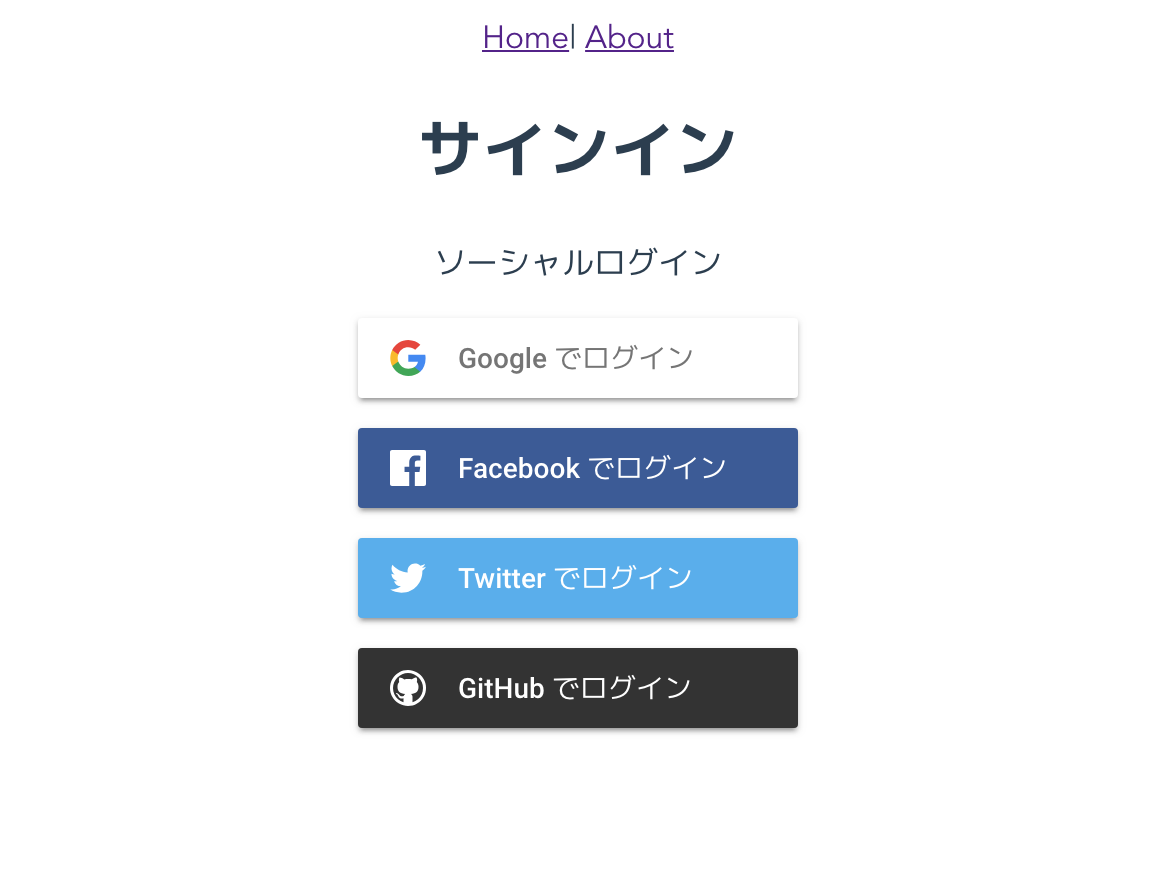
firebaseとvueでソーシャルログインを実装
タイトルままですが、firebaseとvueでソーシャルログインを実装しました。
各ルーター側の.vueに影響がないようにしました。
firebaseなのでここでホスティングもしてます。
実際にログインもできます。
https://authentication-sample-001.firebaseapp.com/
プロジェクトはこちら
- 投稿日:2019-03-02T20:04:33+09:00
FirebaseとVueでソーシャルログインを実装
タイトルままですが、FirebaseとVueでソーシャルログインを実装しました。
各ルーター側の.vueに影響がないようにしました。
Firebaseなのでここでホスティングもしてます。
実際にログインもできます。
https://authentication-sample-001.firebaseapp.com/
プロジェクトはこちら
- 投稿日:2019-03-02T18:40:49+09:00
【個人開発】何が何でも魚拓を見つけるChrome拡張を作った
デモ
↓2019/03/02
↓1998/11/11
特徴
- archive.is, archive.org, gyo.tc, googleのキャッシュ、と計四か所から魚拓のURLを探します!
- vue.js製(やってみたかった)
なぜ作ったか
ハテブで魚拓コメがトップだったりして、需要を感じた。
後普通に自分が使いたかった。
そして、Qiitaユーザーの皆さんも必要性を感じてくださっている事と思います^^。どう作ったか
Chorome拡張はHTML+CSS+javascriptの基本セットで作れます。
ファイル構成は以下のようになりました。
- manifest.json(どの拡張でも必須)
- popup.js
- popup.html
- popup.css
- jquery
- vue.js
- icons(フォルダ。配下にicon16.png, icon48.png, icon128.png)
詳しく見ていきましょう。
manifest.jsonは、Chrome拡張のまとめ役みたいな感じ。manifest.json{ "name": "FindGyotaku in Console", "version": "0.0.1", "manifest_version": 2,//2で固定する "permissions": ["tabs", "http://*/", "http://*/"],//tabsはアクティブなタブのURLを取得するため、http://*/,https://*/はChrome拡張からすべてのサイトへのアクセスを許可するために必要 "description": "Show all Gyotaku", "icons": { "16": "icons/icon16.png", "48": "icons/icon48.png", "128": "icons/icon16.png" }, "browser_action": { "default_popup": "popup.html"//ここでpopupのhtmlを指定 } }そして、popup.jsが今回の大事ポイントです。
popup.jslet vue; //https://gyo.tc/から function findGyotakuByUrl(url) { return new Promise(resolve => { console.log("findGyotakuByUrl Started"); $.get("https://gyo.tc/" + url, null, function (data) { console.log(data); let gyotakuList_ = new DOMParser() .parseFromString(data, "text/html") .querySelectorAll("[id^=fish]"); resolve(gyotakuList_) }, "html" ); }) } //https://archive.is/から function findInternetArchiveByUrl(url) { return new Promise(resolve => { $.get(`https://archive.is/${url}`, function (data) { let rowsList = new DOMParser() .parseFromString(data, "text/html") .querySelectorAll("[id^=row]"); let archivesList = []; rowsList.forEach(row => { archivesList.push( Array.from( row.querySelectorAll("[style^=text\\-decoration\\:none]") ) ) }); resolve(archivesList.flat()); console.log(`flatten archivesList is ${archivesList.flat()}`); }) }) } //googleのwebcacheから function findGoogleCache(url) { return new Promise(resolve => { $.get(`http://webcache.googleusercontent.com/search?q=cache:${url}`, function () { resolve(`http://webcache.googleusercontent.com/search?q=cache:${url}`); }) }) } //http://web.archive.orgから function findWaybackMachineLatest(url) { return new Promise(resolve => { //limit=-1で最新 $.get(`http://web.archive.org/cdx/search/cdx?limit=-1&fl=timestamp&url=${url}`, function (timestamp) { resolve(`https://web.archive.org/web/${timestamp}/${url}`); console.log(`waybackMachine response(latest) is ${timestamp}`); }) }) } //http://web.archive.orgから function findWaybackMachineOldest(url) { return new Promise(resolve => { //limit=1で最古 $.get(`http://web.archive.org/cdx/search/cdx?limit=1&fl=timestamp&url=${url}`, function (timestamp) { resolve(`https://web.archive.org/web/${timestamp}/${url}`); console.log(`waybackMachine response(latest) is ${timestamp}`); }) }) } console.log("popup.jsLoaded"); chrome.tabs.query({ active: true, currentWindow: true }, function (tabsArray) { console.log(`currentUrl is ${tabsArray[0].url}`); findGyotakuByUrl(tabsArray[0].url).then((gyotakuList) => { console.log(gyotakuList); gyotakuList.forEach(element => { vue.items.push(element) }); vue.isLoadingGyotaku = false }).catch((err) => { console.log(err); vue.isLoadingGyotaku = false }); findInternetArchiveByUrl(tabsArray[0].url).then((archivesList) => { console.log(archivesList); archivesList.forEach(element => { vue.items.push(element) }); vue.isLoadingArchives = false }).catch((err) => { console.log(err); vue.isLoadingArchives = false }); findGoogleCache(tabsArray[0].url).then((googleCacheUrl) => { console.log({ href: googleCacheUrl }); vue.items.push({ href: googleCacheUrl }); vue.isLoadingGoogleCache = false }).catch((err) => { console.log(err) }); findWaybackMachineLatest(tabsArray[0].url).then((waybackMachineUrl) => { console.log({ href: waybackMachineUrl }); vue.items.push({ href: waybackMachineUrl }); vue.isLoadingWaybackMachine = false }).catch((err) => { console.log(err) }); findWaybackMachineOldest(tabsArray[0].url).then((waybackMachineUrl) => { console.log({ href: waybackMachineUrl }); vue.items.push({ href: waybackMachineUrl }); vue.isLoadingWaybackMachine = false }).catch((err) => { console.log(err) }); }); $(function () { vue = new Vue({ el: '#example-1', data: { items: [], isLoadingGyotaku: true, isLoadingArchives: true, isLoadingGoogleCache: true, isLoadingWaybackMachine: true, } }) });分割して解説します。
function findGyotakuByUrl(url) {
    return new Promise(resolve => {
        $.get("https://gyo.tc/" + url, null,
            function (
                let gyotakuList_ = new DOMParser()
                    .parseFromString(data, "text/html")
                    .querySelectorAll("[id^=fish]");
                resolve(gyotakuList_)
            },
            "html"
        );
    })
}
↑要するにスクレイピングですね。javascriptではquerySelectorが便利です。
https://gyo.tc/ 以下にURLを投げると魚拓一覧が返るので、開発者ツールから頑張って解析しました。function findInternetArchiveByUrl(url) { return new Promise(resolve => { $.get(`https://archive.is/${url}`, function (data) { let rowsList = new DOMParser() .parseFromString(data, "text/html") .querySelectorAll("[id^=row]"); let archivesList = []; rowsList.forEach(row => { archivesList.push( Array.from( row.querySelectorAll("[style^=text\\-decoration\\:none]") ) ) }); resolve(archivesList.flat()); }) }) }↑こちらもhttps://archive.is/ 以下にURLを投げると魚拓一覧が返るので、こちらも開発者ツールから頑張って解析しました。
Array.flat()はMDNで分かるように実験的なヤツで、配列を好きな次元に均せる関数です。デフォルトで一次元なのでそのまま使用しました。function findGoogleCache(url) { return new Promise(resolve => { $.get(`http://webcache.googleusercontent.com/search?q=cache:${url}`, function () { resolve(`http://webcache.googleusercontent.com/search?q=cache:${url}`); }) }) }↑言うことなし。思ったより簡単。
function findWaybackMachineLatest(url) {
    return new Promise(resolve => {
        //limit=-1で最新
        $.get(`http://web.archive.org/cdx/search/cdx?limit=-1&fl=timestamp&url=${url}`, function (timestamp) {
            resolve(`https://web.archive.org/web/${timestamp}/${url}`);
        })
    })
}

function findWaybackMachineOldest(url) {
    return new Promise(resolve => {
        //limit=1で最古
        $.get(`http://web.archive.org/cdx/search/cdx?limit=1&fl=timestamp&url=${url}`, function (timestamp) {
            resolve(`https://web.archive.org/web/${timestamp}/${url}`);
            console.log(`waybackMachine response(latest) is ${timestamp}`);
        })
    })
}
↑apiが有って助かりました。
WaybackMachineのアーカイブは膨大なので最古&最新のみ取得しています。
limit=1で最古、limit=-1で最新を指定、fl=timestampでレスポンスをtimestampのみに限定します。
WaybackMachineはtimestampとURLを指定すると(珍しく)個別ページのURLが分かるので、timestampだけで十分なのです。$(function () { vue = new Vue({ el: '#example-1', data: { items: [],//以下デフォルト値を指定しています isLoadingGyotaku: true, isLoadingArchives: true, isLoadingGoogleCache: true, isLoadingWaybackMachine: true, } }) });index.html<p v-if="isLoadingGyotaku"> 魚拓から読み込んでいます </p>↑出ましたvue.js!読み込み中のメッセージを出しています。
vue.jsを使うと、HTMLとjs間でバインディングができます。
例えば、HTMLのv-if属性にisLoadingGyotakuを指定
↓
js側でvueインスタンス作成(vueのdata属性に、isLoadinGyotakuをメンバにしたオブジェクトを付けたもの)
↓
vue.isLoadingGyotakuにアクセスできるように&
vue.isLoadingGyotakuがv-if="isLoadingGyotaku"とバインドされるって感じ。
つまり、isLoadingGyotaku=trueならpタグが見えて、falseなら見えなくなる!
これは素晴らしいですね。本当に素晴らしい。
ほかにもいろいろな属性が有ります。だいたいv-が付く。<ul> <li v-for="item in items"> <a href="{{ item.href }}" target='_newtab'> {{ item.href }} </a> </li> </ul>↑v-forとか。見つかったURLを表示するために使っています。
{{}}はテンプレートリテラルみたいに使えます。
↓ラストchrome.tabs.query({ active: true, currentWindow: true }, function (tabsArray) { console.log(`currentUrl is ${tabsArray[0].url}`); findGyotakuByUrl(tabsArray[0].url).then((gyotakuList) => { console.log(gyotakuList); gyotakuList.forEach(element => { vue.items.push(element) }); vue.isLoadingGyotaku = false }).catch((err) => { console.log(err); vue.isLoadingGyotaku = false }); findInternetArchiveByUrl(tabsArray[0].url).then((archivesList) => { console.log(archivesList); archivesList.forEach(element => { vue.items.push(element) }); vue.isLoadingArchives = false }).catch((err) => { console.log(err); vue.isLoadingArchives = false }); findGoogleCache(tabsArray[0].url).then((googleCacheUrl) => { console.log({ href: googleCacheUrl }); vue.items.push({ href: googleCacheUrl }); vue.isLoadingGoogleCache = false }).catch((err) => { console.log(err); vue.isLoadingGoogleCache = false }); findWaybackMachineLatest(tabsArray[0].url).then((waybackMachineUrl) => { console.log({ href: waybackMachineUrl }); vue.items.push({ href: waybackMachineUrl }); vue.isLoadingWaybackMachine = false }).catch((err) => { console.log(err) vue.isLoadingWaybackMachine = false }); findWaybackMachineOldest(tabsArray[0].url).then((waybackMachineUrl) => { console.log({ href: waybackMachineUrl }); vue.items.push({ href: waybackMachineUrl }); vue.isLoadingWaybackMachine = false }).catch((err) => { console.log(err) vue.isLoadingWaybackMachine = false }); });↑async/awaitで見やすくなるのは分かってるんだけどね……面倒なのでそのまま。
chrome.tabs.queryで今見てるタブのURLを取得後、非同期×5を回しています。
chrome.系はChrome拡張の時しか使えないapiで、ほかにも色々便利です。はまったポイント
最初
let fuga = true
vue = new Vue({
        el: '#example-1',
        data: {
            isLoadingGyotaku: fuga,
        }
    })
fuga = false//バインドされてるはずなのに動かない!!!
って事が有って大変でしたね。本当は
vue = new Vue({
        el: '#example-1',
        data: {
            isLoadingGyotaku: true,
        }
    })
vue.isLoadingGyotaku = false//バインドされてて動く!!!
で良かったっていう。公式ドキュメントをちゃんと読みましょう。
後、動作確認にevent pagesを使ってしまって、popupのみで動くapiを動かせなかったりとか……
popupページで検証する方法を知らなかったとか……(左クリックでポップアップされたのを右クリ)計何時間使ったでしょうかね。今はどうでも良いけど。
最後に
2020/04に大学生になる(浪人しなければ!)ので、良かったらインターンに誘ってください。
github:https://github.com/negitorogithub
gmail:bakeratta35@gmail.comお読み頂きありがとうございました。 ~~旦⊂(・∀・ )


- 投稿日:2019-03-02T15:45:43+09:00
Rails5.2+Vue.jsのセットアップ手順 on Ubuntu 18.04
Keiです。
自分はこれまでデータ分析・数値シミュレーションや、Web開発でもサーバーサイドを中心に学んできたためフロントエンドの最新技術事情に疎い事を引け目に感じていました。とは言えしょぼくれていても何も始まらない。とりあえず動こう、ということで最近人気のJSフレームワークの中でも記述が直感的で比較的分かりやすいと評判のVue.jsを学んでみることにしました。
せっかくなので普段インターン先でも使っているRailsをバックエンドにVueを使いたいと思い少し調べていた所、今の自分にドンピシャハマる神記事に出くわしました↓
Vue.jsとRailsでTODOアプリのチュートリアルみたいなものを作ってみた
@naoki85 さん、ありがとうございます早速こちらの記事を参考にプロジェクトのセットアップを進めていったのですが、ちょいちょい謎のエラーに遭遇しましたのでその一部始終を共有したいと思います。なお開発環境は以下を前提としています。
- OS: Ubuntu 18.04LTS
- Ruby 2.5.1
- Rails 5.2
- gemの管理はbundler (Rails環境構築の詳細はこちら参照)
Railsプロジェクト作成
まずは上の記事にもあるようにRailsプロジェクトを--webpack=vueオプション付きで作成します。
$ bundle exec rails new vue_app --webpack=vueするとモダンJS開発環境構築初心者の自分の場合まず"yarn入ってねーぞ"系のエラーを食らいました。Installation | Yarn のDebian/Ubuntuの部分を参考にまずyarnを入れます。
$ curl -sS https://dl.yarnpkg.com/debian/pubkey.gpg | sudo apt-key add -
$ echo "deb https://dl.yarnpkg.com/debian/ stable main" | sudo tee /etc/apt/sources.list.d/yarn.list
$ sudo apt-get update && sudo apt-get install yarn
はい、Yarn入りましたので今度こそrails newします。
$ bundle exec rails new vue_app --webpack=vue今度は成功しました。
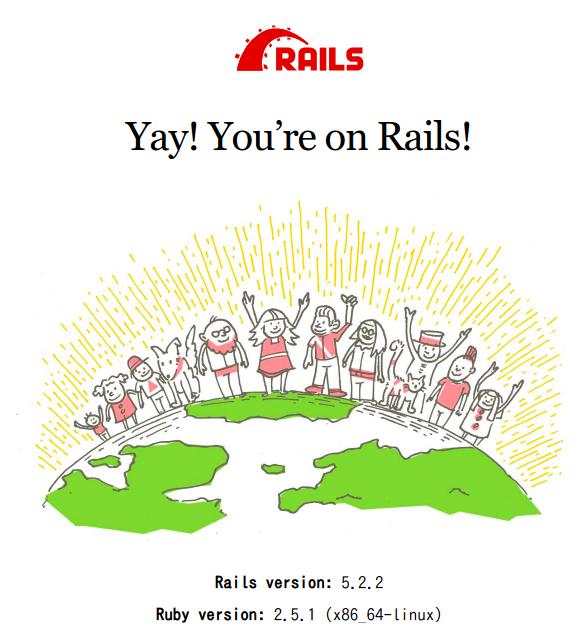
Railsサーバーの起動を確認
次にRailsサーバーの起動を確認します。Yay! You’re on Rails! されたいのですが、、、
$ bundle exec rails s

(鬼のようなエラー)
(鬼のようなエラー)
(鬼のようなエラー)
...
vue_app/vendor/bundle/ruby/2.5.0/gems/webpacker-3.5.5/lib/webpacker/configuration.rb:79:in `rescue in load': Webpacker configuration file not found
/home/user/Desktop/vue_app/config/webpacker.yml. Please run rails webpacker:install Error: No such file or directory @ rb_sysopen - /home/user/Desktop/vue_app/config/webpacker.yml (RuntimeError)
で怒られます。webpackerの設定ファイルがないということなので、言われるがままに
$ bundle exec rails webpacker:installします。inotifyからちょいちょいエラーが出ていましたが一応入りました。
Webpacker successfully installed ? ?プロジェクト内を見直すとconfig/webpack以下に4つのJSファイルが生成され、app/javascript/packs/application.jsという見慣れないファイルも作成されています。
Rails側のSQlite3のバージョン指定でエラー
さあいい加減準備できただろということで。
$ bundle exec rails s

#<LoadError: Error loading the 'sqlite3' Active Record adapter.
Missing a gem it depends on? can't activate sqlite3 (~> 1.3.6), already activated sqlite3-1.4.0. Make sure all dependencies are added to Gemfile.>
またか...しかもSQLiteからのエラーだと?
原因を調べてみたところRails側の指定しているsqlite3のversionが1.3.x代なのに対し
sqlite3の最新versionは1.4.x代ということで、 Gemfile中でgem 'sqlite3', '~> 1.3.6'とsqliteのバージョンをきちんと指定してあげないとダメな模様。
ついでにまだGemfile全体を載せていなかったので全部載せておきます。Gemfilesource 'https://rubygems.org' git_source(:github) { |repo| "https://github.com/#{repo}.git" } ruby '2.5.1' gem 'rails', '~> 5.2.0' gem 'sqlite3', '~> 1.3.6' gem 'puma', '~> 3.11' gem 'sass-rails', '~> 5.0' gem 'uglifier', '>= 1.3.0' gem 'webpacker' gem 'turbolinks', '~> 5' gem 'jbuilder', '~> 2.5' gem 'jquery-rails' gem 'materialize-sass' gem 'material_icons' gem 'bootsnap', '>= 1.1.0', require: false group :development, :test do gem 'byebug', platforms: [:mri, :mingw, :x64_mingw] end group :development do gem 'foreman' gem 'web-console', '>= 3.3.0' gem 'listen', '>= 3.0.5', '< 3.2' gem 'spring' gem 'spring-watcher-listen', '~> 2.0.0' end group :test do gem 'capybara', '>= 2.15', '< 4.0' gem 'selenium-webdriver' gem 'chromedriver-helper' end gem 'tzinfo-data', platforms: [:mingw, :mswin, :x64_mingw, :jruby]これで
$ bundle install --path vendor/bundleして解決。
inotifyで監視できるファイル数上限に到達しエラー
...と思うじゃないですか。実はもうひと踏ん張りあるんです(白目)。
$ bundle exec rails s FATAL: Listen error: unable to monitor directories for changes. Visit https://github.com/guard/listen/wiki/Increasing-the-amount-of-inotify-watchers for info on how to fix this. Exitingなんだこれ(n回目)。とりあえずエラーメッセージにGithubへのリンクが貼ってあるので飛んで確認します。
どうやらプロジェクト内のファイル数が増えすぎてLinuxのデフォルト設定ではこれ以上ファイルの変更を監視できないということだそうで(詳しくはこちら)。これはLinux系ではよくあるエラーらしく、ちゃんと解決策が用意されていました。自分のようにDebian/RedHat系を使用している方はターミナルで
$ echo fs.inotify.max_user_watches=524288 | sudo tee -a /etc/sysctl.conf && sudo sysctl -pを実行。ArchLinuxの場合は
$ echo fs.inotify.max_user_watches=524288 | sudo tee /etc/sysctl.d/40-max-user-watches.conf && sudo sysctl --systemで直ります。今度こそ。
$ bundle exec rails s
やれやれやっと全部直ったか...
さあこれで快適なRails+Vueライフを楽しむぞ!!
- 投稿日:2019-03-02T13:35:30+09:00
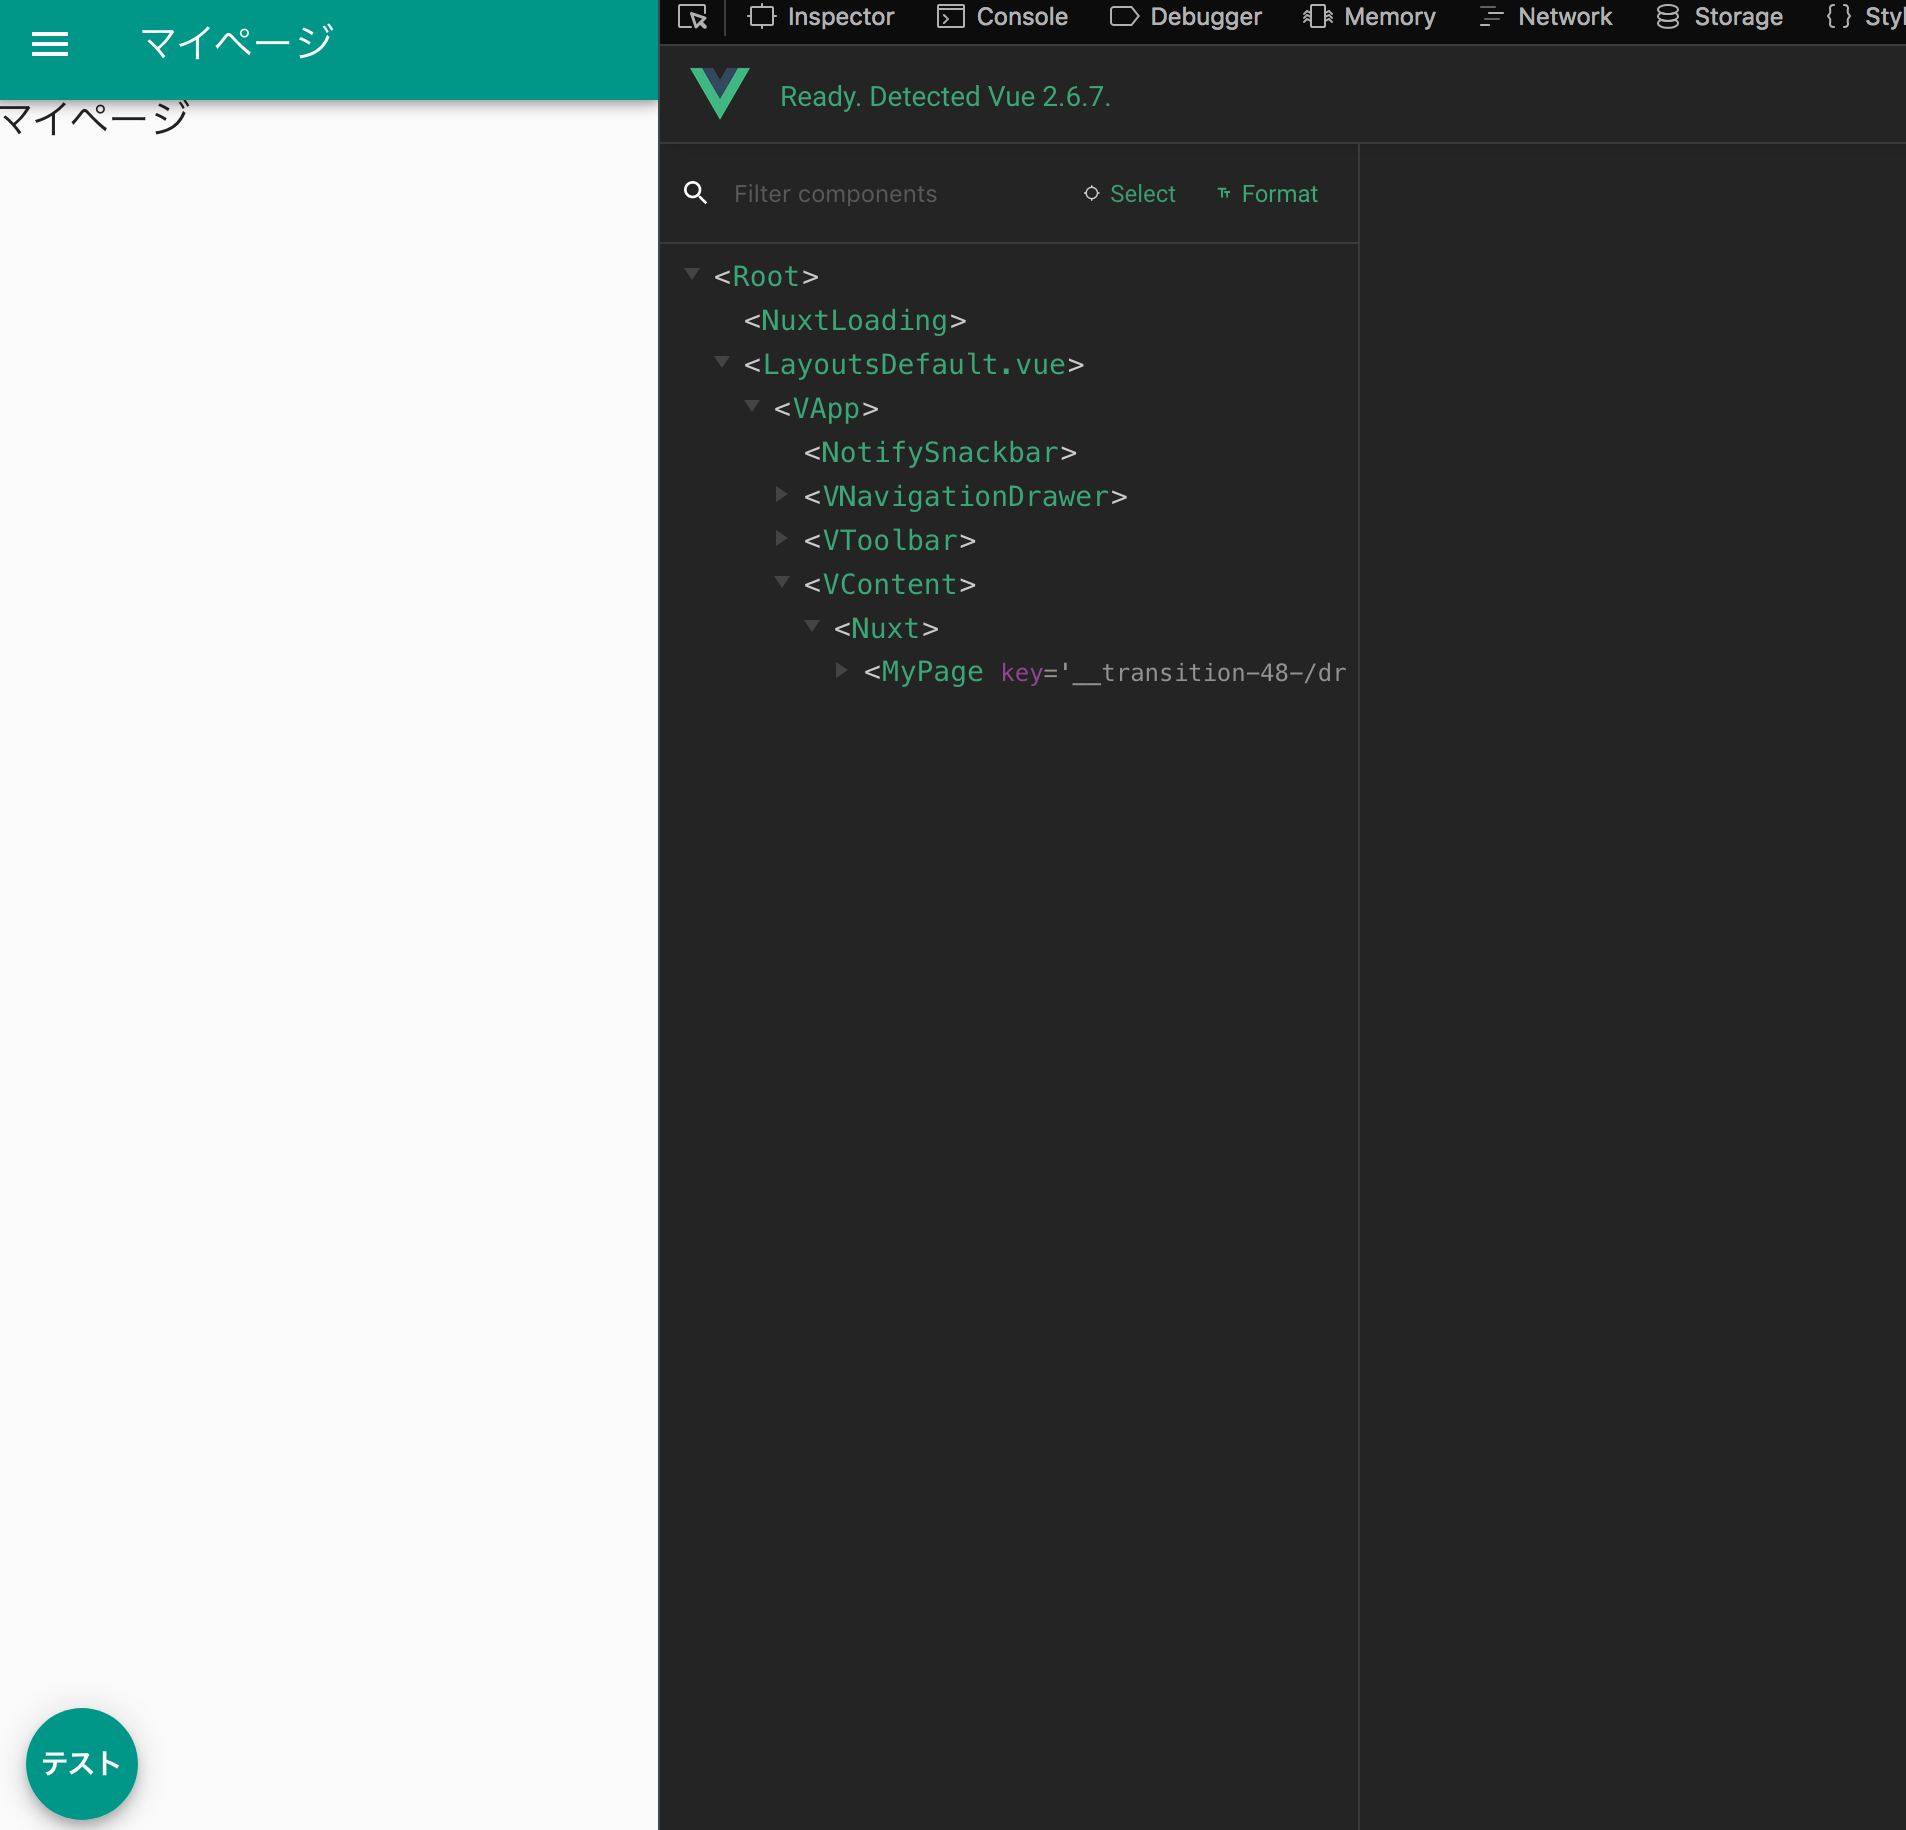
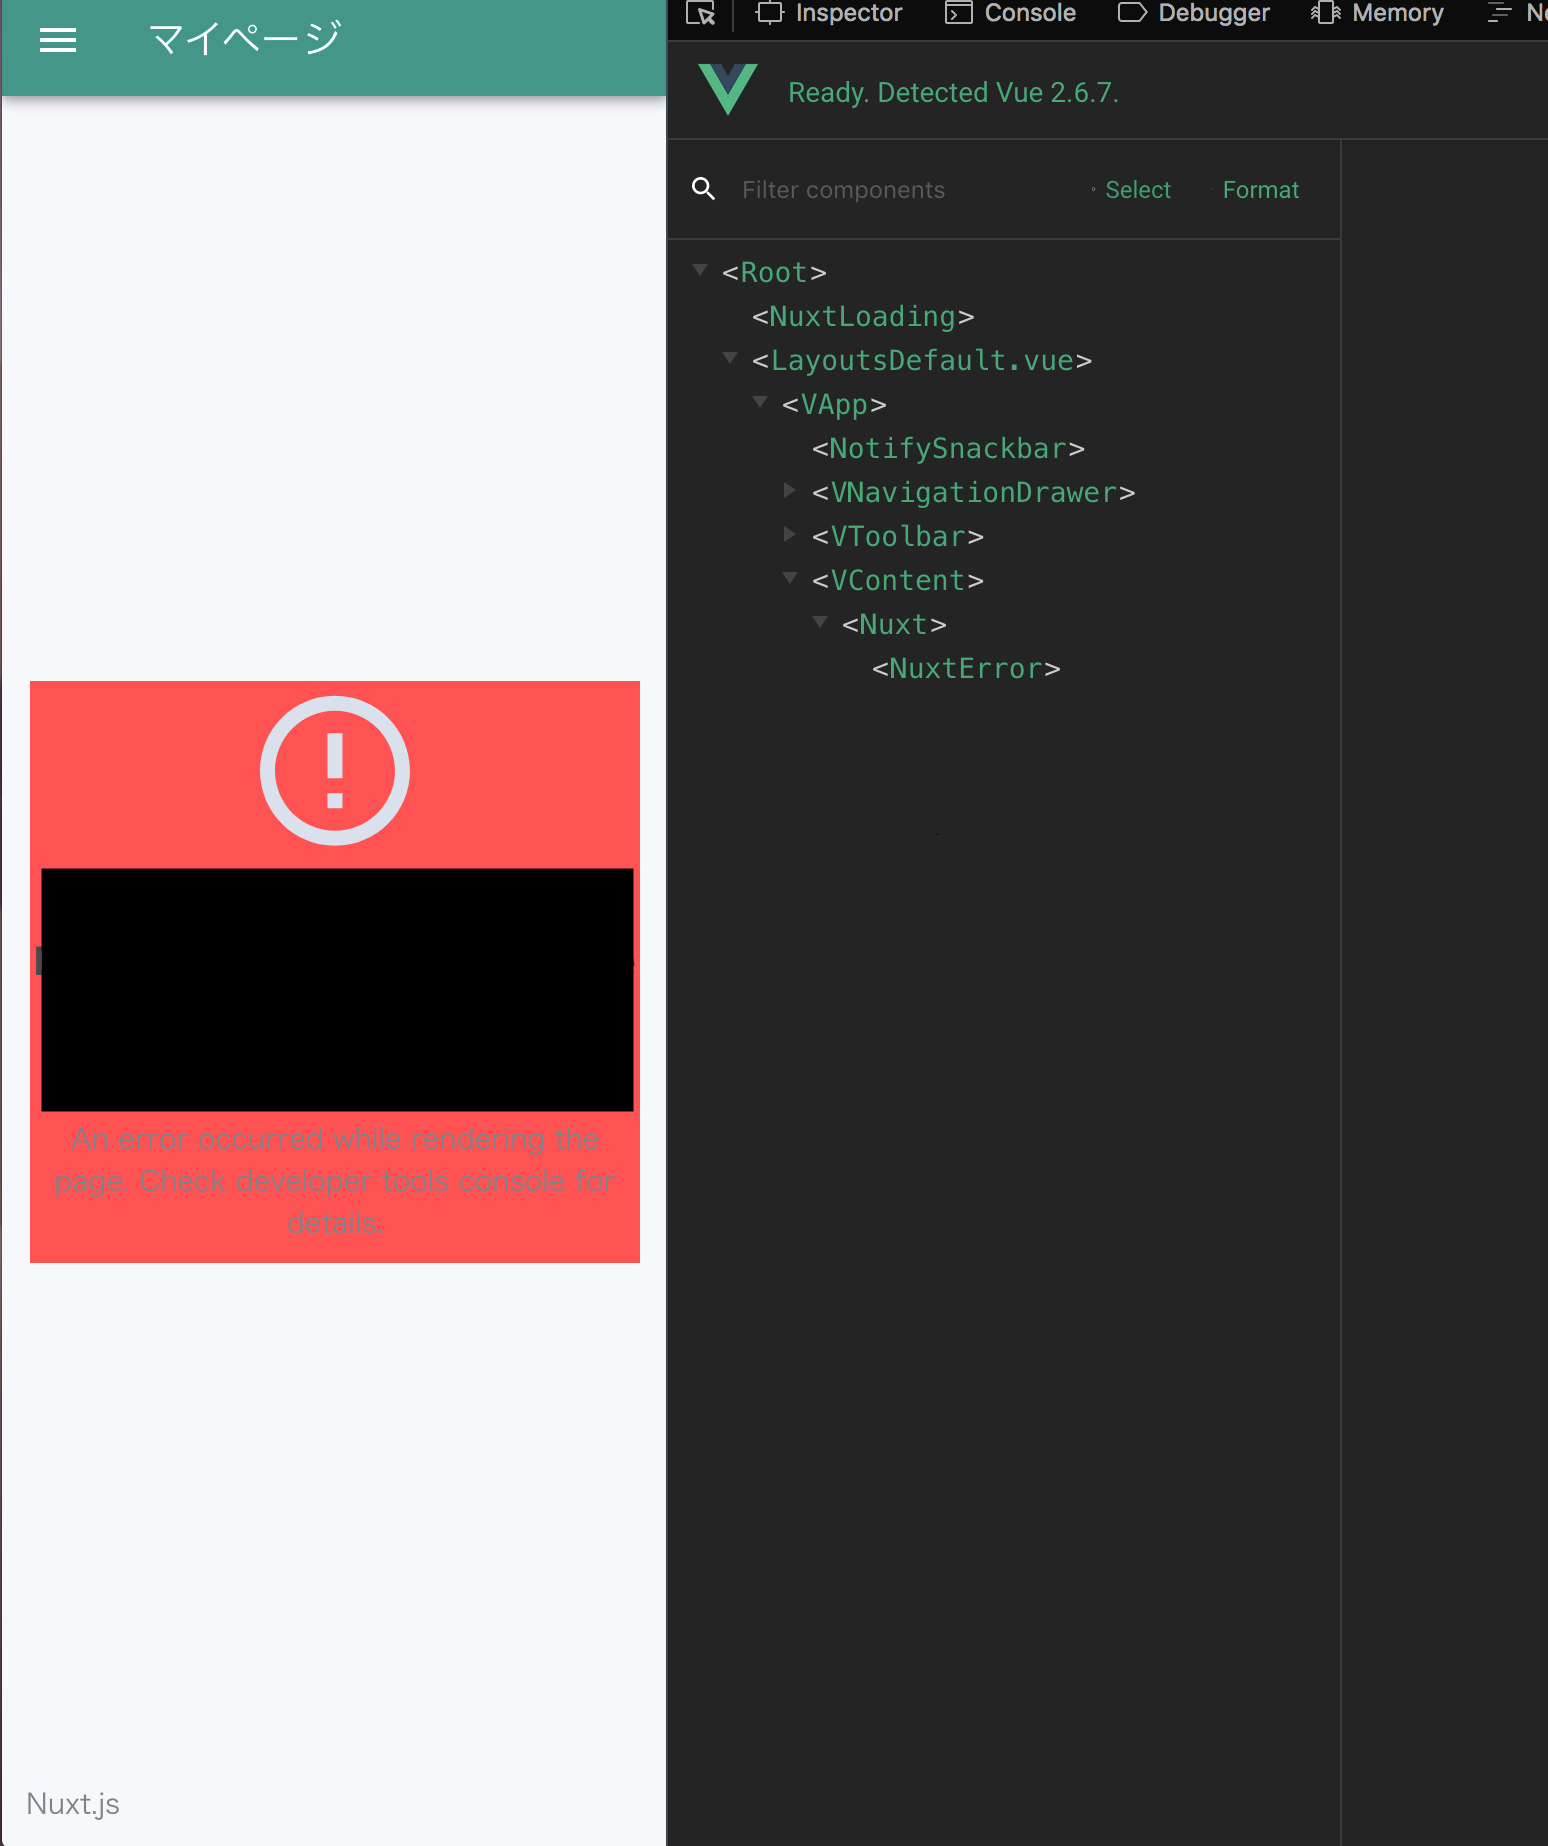
Nuxtでエラー発生時のcomponentの中身を調べる方法?
最近、nuxt.jsを触ることが多くなってきたが、生のvue.jsの時と比べて不満だったことは、 エラーが発生した際に自動的にerror.vueにredirectすること。
これが
こう
いや、本番ならいいんですよ。そうするべき。やけど開発時にerror.vueにredirectすると、redirectするためpageコンポーネントがerror.vueになってしまい、エラー発生時ののpageコンポーネント(MyPage.vue)の中身を vueのdevtoolで見れなくなってしまう(上記スクショの右側)。生のvueだとエラーが発生した時点でコンポーネントが固まるのでdevtoolsで見れていたので不便だなあと感じた。
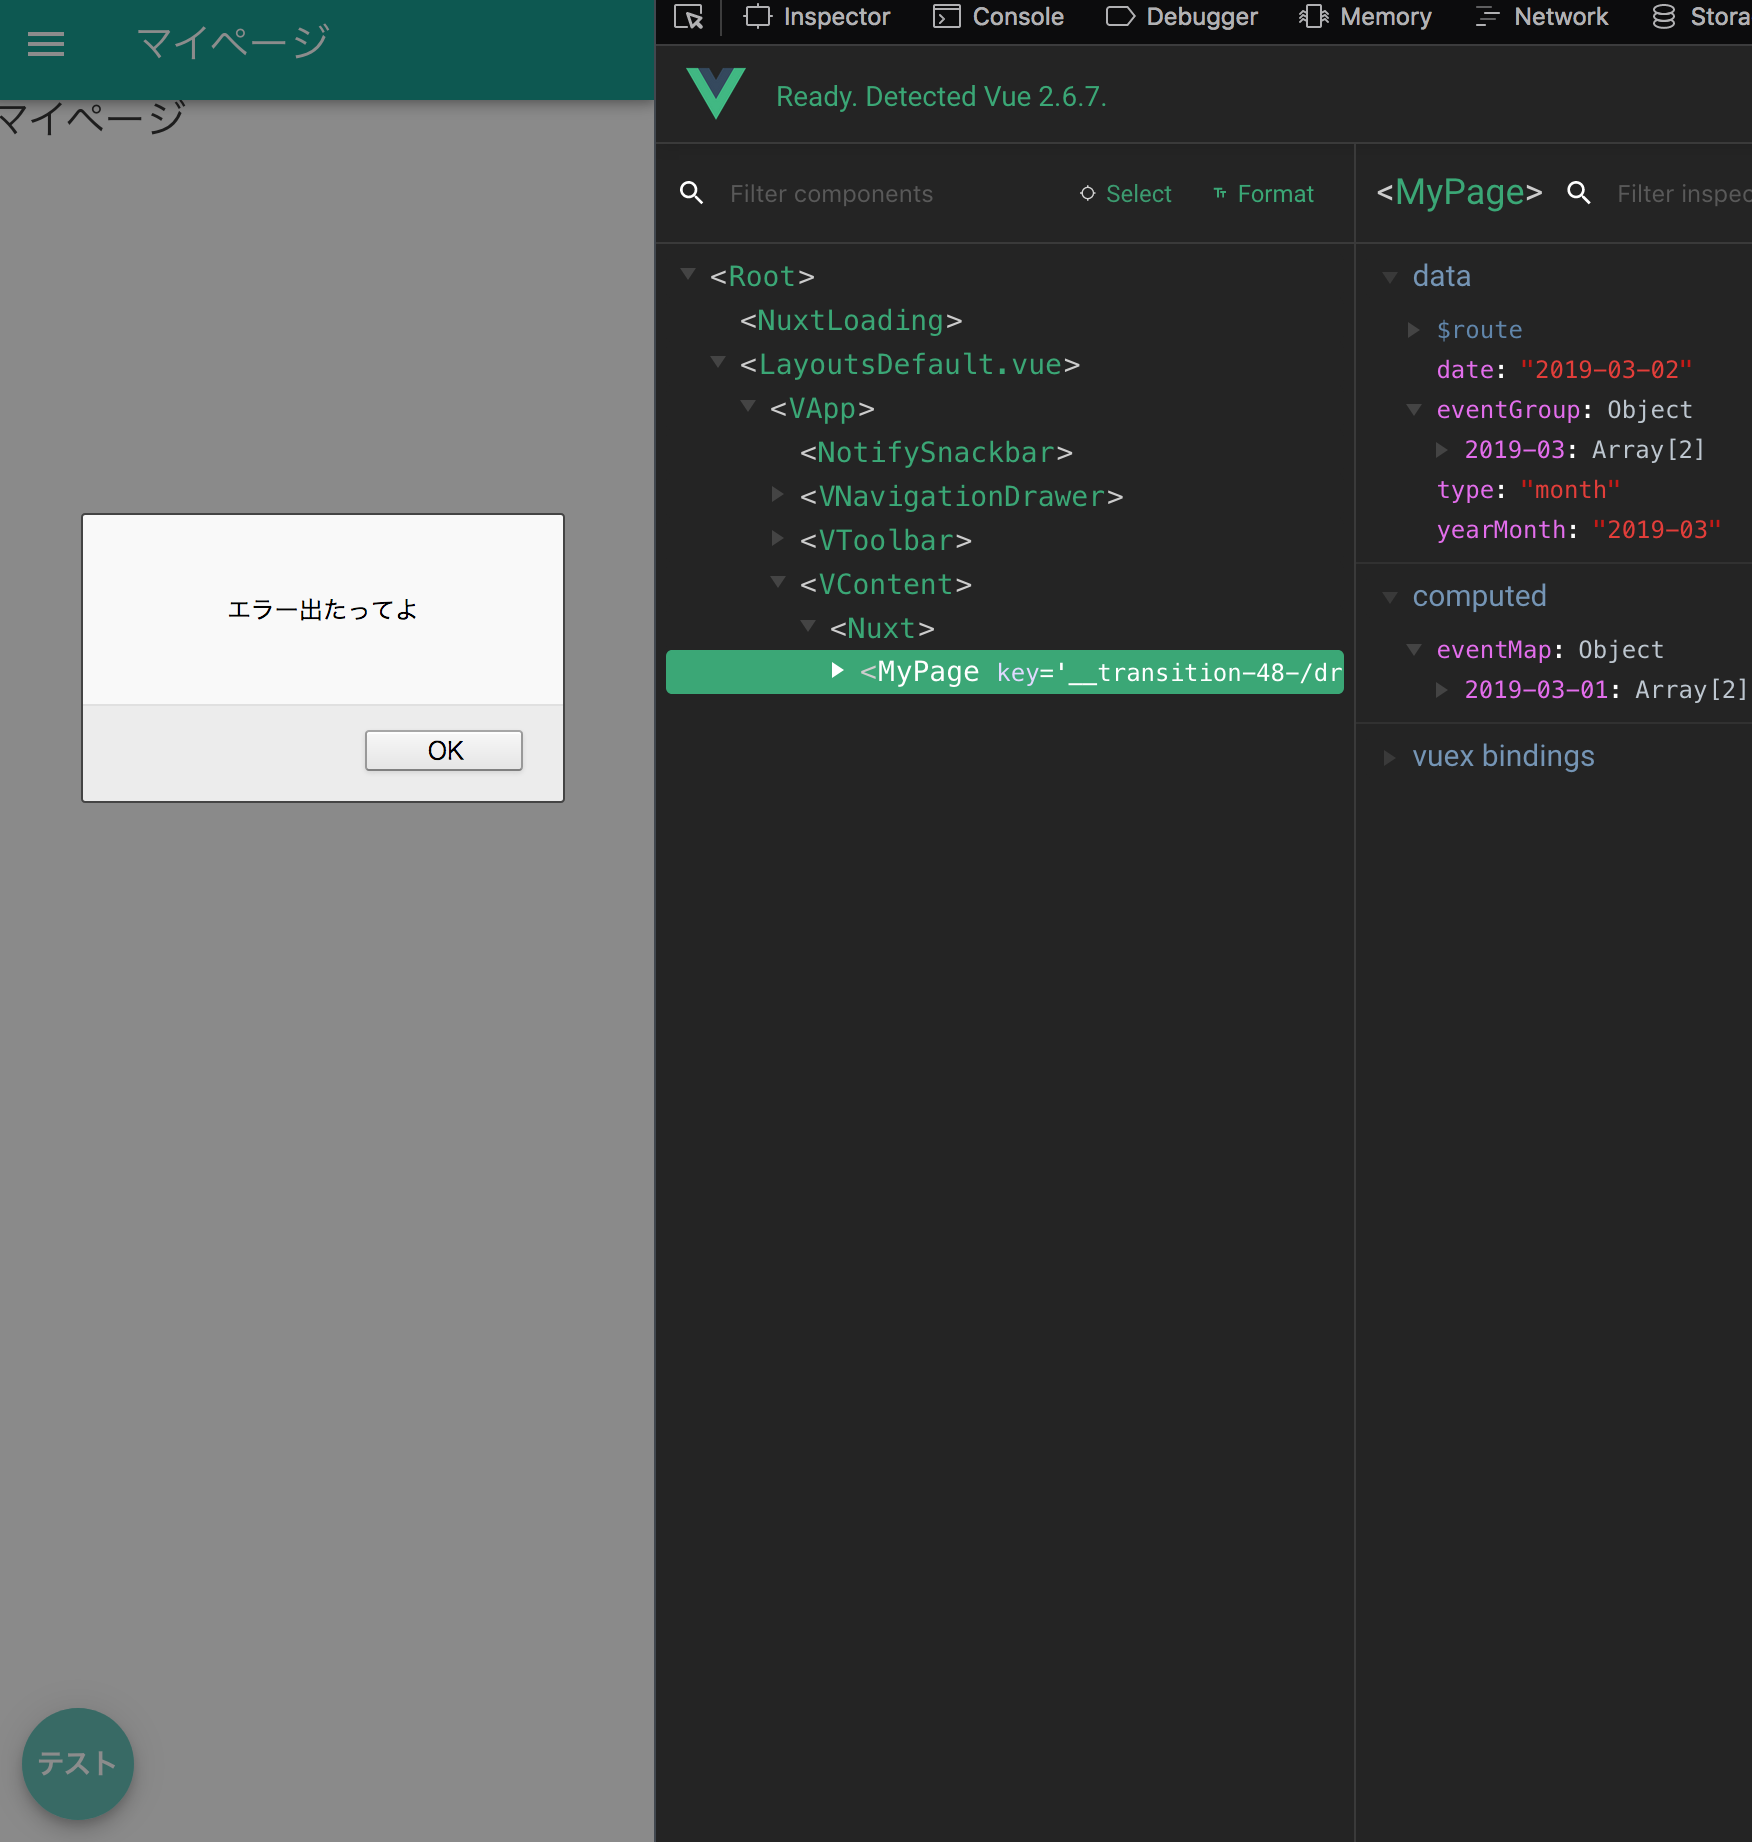
main.jsVue.config.errorHandler = (err, vm, info) => { console.error(err, vm, info) alert('エラー出たってよ') }
errorHandlerにalert()をぶっこむと、そこで画面が止まるのでdevtoolsでcomponentの中を調査できる?
多分もっといい方法あるんで教えてエロイ人
- 投稿日:2019-03-02T11:46:06+09:00
Laravel + SQLite + Vue.js + Pug + Stylusの環境構築をサクッと行う
やること
- LaravelでVue.js環境構築
- DBをSQLiteに設定(laradockとかだとMySQLとか使えばいいと思います。)
- Vue.jsをPugとStylusでかけるように設定する。
Laravelのインストール
まずLaravelの環境構築いつものやつ
❯ mkdir Laravel-test && cd Laravel-test
❯ composer create-project --prefer-dist laravel/laravel ./
❯ yarn install
SQLiteの設定
設定と起動のいらない
SQLiteでDB構築は簡単で、テスト環境に需要があると思いました。
.envを編集します。DB_CONNECTION=sqlite # DB_CONNECTION=mysql # DB_HOST=127.0.0.1 # DB_PORT=3306 # DB_DATABASE=homestead # DB_USERNAME=homestead # DB_PASSWORD=secret以下のコマンドを実行
❯ touch database/database.sqlite
❯ php artisan migrate
終了です。
Vue.jsの設定
とりあえず、
welcome.blade.phpにVue.jsで書いたモノが見える形になればゴールだと思います。
追記するものは、以下です。welcome.blade.php... <!-- <head>の中に追加 --> <meta name="csrf-token" content="{{ csrf_token() }}"> ... <link rel="stylesheet" href="{{ asset('/css/app.css') }}"> ... <!-- </body>の手前に追加 --> <div id="app"> <example-component></example-component> </div> <script src=" {{ asset('js/app.js') }} "></script> ...Vue.jsの準備が整いました。
サーバと自動ビルド(watch)を起動
テキストエディタ
VSCode使ってるんですけど
ターミナルを2つ使用して2つのコマンドを同時に起動させている状態にします。
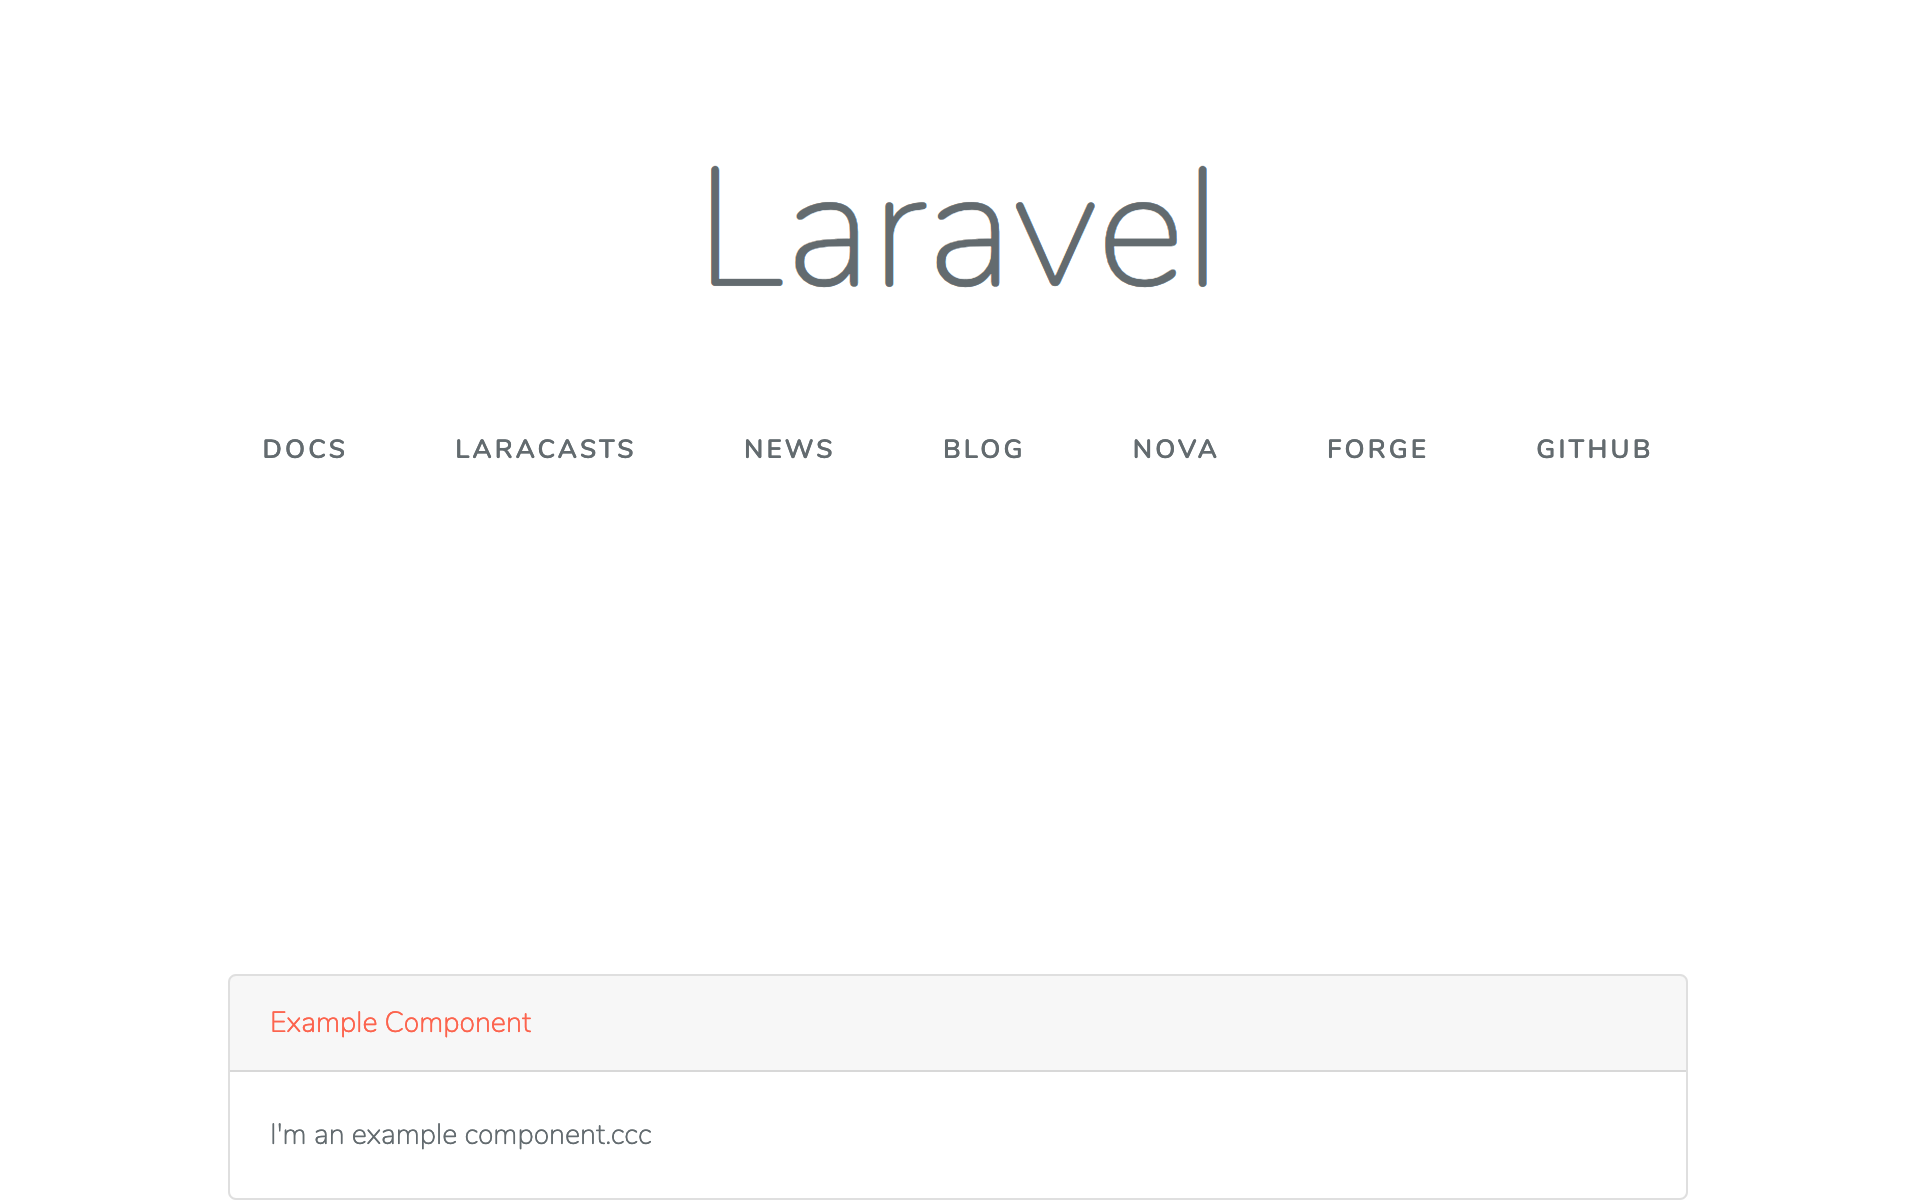
❯ php artisan serve❯ yarn watchあとはブラウザで
localhost:8000にアクセスして下にスクロールするとデフォルトのVue.jsの結果が見えるはずです。
※リロードは自分でしないといけなくてちょっと面倒。もっといい方法(hotを使うとか)は、あります。とりあえず、普通のVue.jsはここまでで完了です٩( 'ω' )و
お疲れ様です。Vue.jsにPugとStylusを導入
ここからは、番外編みたいな感じです。
Vue.jsのtemplateの中にPugとStylusを使えるようにします!PugとStylusインストール
❯ yarn add -D pug pug-plain-loader
❯ yarn add -D stylus stylus-loader
Webpackの設定変更
webpack.mix.jsmix.js('resources/js/app.js', 'public/js') .sass('resources/sass/app.scss', 'public/css') .webpackConfig({ module: { rules: [{ test: /\.pug$/, loader: 'pug-plain-loader' },{ test: /\.styl(us)?$/, loader: 'style-loader', }], } });終わりです。
Vue.jsのコード
ExampleComponent.vue<template lang="pug"> div.container div.row.justify-content-center div.col-md-8 div.card div.card-header Example Component div.card-body I'm an example component.ccc </template> <style lang="stylus"> .card-header color: tomato </style> <script> export default { mounted() { console.log('Component mounted.') } } </script>表示結果
ここまで本当にお疲れ様です。
たのしいLaravel + Vue.jsライフでフルスタックなエンジニア体感しちゃいましょう!
もっと頑張るぞー!٩(ˊᗜˋ*)وおまけ
他にもVue.jsに入れたいものがあれば[Vue.js公式の]にやり方のってます。
これをみたりググったりして追加していけばいいと思います。
Using Pre-Processors感想
LaravelがデフォルトでVue.jsをインストールする仕様になっているとは驚きました!
そしてVue.jsのtemplateをPugとStylusで書けるのもとても便利で驚きました!
(´⊙ω⊙`)
ちなみに
PugとStylusとExpress(Node.jsのシンプルなフレームワーク)は開発者が同じらしいです。めっちゃシンプルで最適化されたなモノが好きな人なんでしょうね。(とても共感します。)参考
この記事たちがなければやってこれませんでした!
おかげであまり時間かからなかったです。ありがとう(๑˃̵ᴗ˂̵)♪
- Vue.js + Pug + Stylus のサンプル開発環境
- LaravelからVue.jsを使う最短レシピ
- LaravelのDBをSQLiteに変更する
- Stylus入門したときのまとめ
- 投稿日:2019-03-02T00:26:29+09:00
VueとFirebase Authenticationを使用してGoogleログインを試す
1.Firebaseでプロジェクトを作成
- firebaseコンソールにログインしてプロジェクトを作成する
- 作成したプロジェクトのAuthentication->ユーザーを選択し、ログインを行うテストユーザーを作成する
- ログイン方法を選択し、メール/パスワードとGoogleのステータスを有効にする
- ウェブ設定を選択すると、コードが表示される(後で使用する)
2.ローカルに開発環境を作成
- 下記のコマンドを実行する
npm i vue -g
vue create <プロジェクト名>
? Please pick a preset: (Use arrow keys)
> default (babel, eslint)
cd <プロジェクト名>
vue add router
npm i vue bootstrap-vue -s
npm i firebase -s
3.ソースコード
- ライブラリとFirebaseの設定
プロジェクト名/src/main.jsimport Vue from 'vue' import VueHead from 'vue-head' import App from './App.vue' import BootstrapVue from 'bootstrap-vue' import 'bootstrap/dist/css/bootstrap.css' import 'bootstrap-vue/dist/bootstrap-vue.css' import firebase from 'firebase/app' import 'firebase/auth' import router from './router' Vue.use(BootstrapVue) Vue.use(VueHead) Vue.config.productionTip = false // 1.Firebase側の設定のウェブ設定で表示したコードをコピペする const firebaseConfig = { apiKey: "***", authDomain: "***", databaseURL: "***", projectId: "***", storageBucket: "***", messagingSenderId: "***" }; firebase.initializeApp(firebaseConfig); new Vue({ router, render: h => h(App) }).$mount('#app')
- ルーターを作成
プロジェクト名/src/router.jsimport Vue from 'vue' import Router from 'vue-router' import Login from './views/Login.vue' import Success from './views/Success.vue' import firebase from 'firebase/app' Vue.use(Router) const router = new Router({ mode: 'history', base: process.env.BASE_URL, routes: [ { path: '/', name: 'login', component: Login }, { path: '/success', name: 'success', component: Success }, { path: '*', name: 'login', component: Login } ] }) // 未認証の場合はログイン画面へ router.beforeResolve((to, from, next) => { console.log(to) if (to.path == '/') { next() } else { firebase.auth().onAuthStateChanged(user => { if (user) { console.log('認証中') next() } else { console.log('未認証') next({path: '/'}) } }) } }) export default router
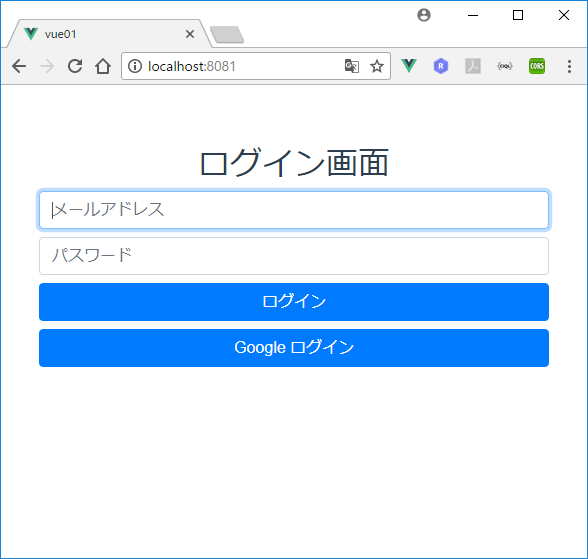
- ログイン画面の作成
プロジェクト名/src/views/Login.vue<template> <div class="container"> <div class="row"> <div class="col-md-12"> <h2>ログイン画面</h2> <div class="mt-2"><b-form-input v-model="email" type="text" placeholder="メールアドレス" /></div> <div class="mt-2"><b-form-input v-model="password" type="text" placeholder="パスワード" /></div> <div class="mt-2"><b-button block variant="primary" @click="emailLogin">ログイン</b-button></div> <div class="mt-2"><b-button block variant="primary" @click="googleLogin">Google ログイン</b-button></div> <div class="mt-2"><b-alert v-model="showError" dismissible variant="danger">{{ errorMessage }}</b-alert></div> </div> </div> </div> </template> <style> .mt-2 { margin-top: 2px; } </style> <script> import firebase from 'firebase/app' import router from '../router' export default { name: 'login', data() { return { email: '', password: '', errorMessage: '', showError: false } }, methods: { emailLogin() { firebase.auth().signInWithEmailAndPassword(this.email, this.password).then(result => { console.log(result) router.push('/success') }).catch(error => { console.log(error) this.errorMessage = error.message this.showError = true }) }, googleLogin() { const provider = new firebase.auth.GoogleAuthProvider() firebase.auth().signInWithPopup(provider).then(result => { console.log(result.user) router.push('/success') }).catch(error => { console.log(error) this.errorMessage = error.message this.showError = true }) } } } </script>
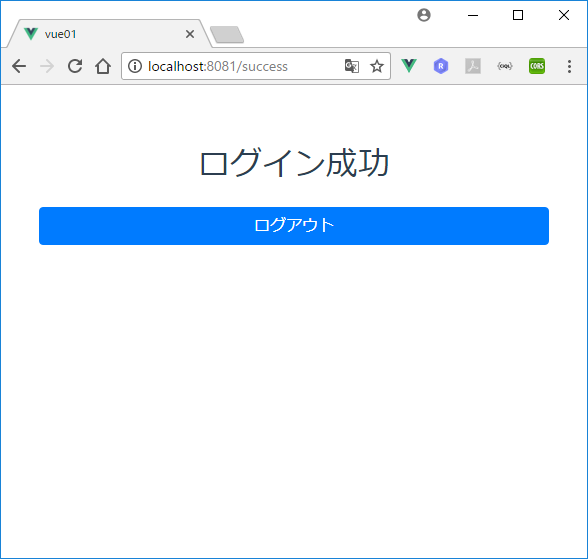
- ログイン成功画面の作成
プロジェクト名/src/views/Success.vue<template> <div class="container"> <div class="row"> <div class="col-md-12"> <h2>ログイン成功</h2> <div class="mt-4"><b-button block variant="primary" @click="logout">ログアウト</b-button></div> </div> </div> </div> </template> <style> .mt-4 { margin-top: 4px; } </style> <script> import firebase from 'firebase/app' import router from '../router' export default { name: 'success', methods: { logout() { firebase.auth().signOut().then(function() { router.push('/') }).catch(error => { console.log(error.message) router.push('/') }) } } } </script>4.ログイン画面の確認
- サーバを起動する
npm run serve
ログイン画面へアクセスし、メアド/パスかGoogleログインでログインを行う
ログインに成功するとログイン画面が表示される
ログインせずにアクセスしようとしても、ログイン画面に飛ばされる
5.Unexpected console statement (no-console)が発生した場合の対処
- rulesに["no-console": "off"]を追加する
プロジェクト名/package.json"eslintConfig": { "rules": { "no-console": "off" } },6.その他
Googleログインのリダイレクトも試したが、リダイレクトが終わる前に完了処理が実行されてしまう。。。
対処方法がわからないため、断念。。。
- 投稿日:2019-03-02T00:10:17+09:00
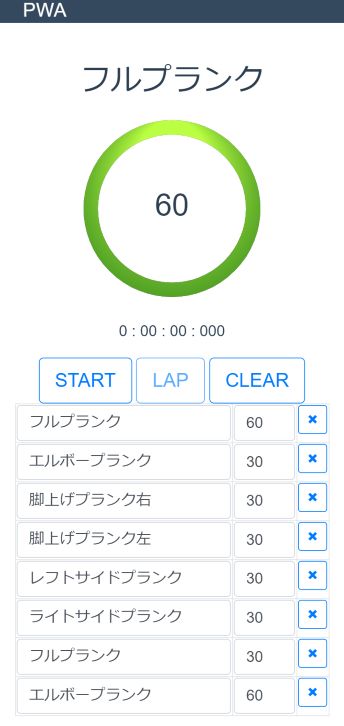
プランクトレーニングしようぜPWA
はじめに
こんな記事をみかけたのでトレーニングをはじめてみました。
体重落としたい、お腹周りスッキリさせたいって方に全力でおすすめするのが5分筋トレ!!
— 翠 (@sui_5a) 2019年2月11日
これ本当にめちゃくちゃしんどくて未だに私も全身プルプル震えながらやってます?
でも、1日1回5分で終わるから続けやすいしちゃんと続ければ効果も目に見えて実感出来るのでぜひ1度やってみてほしいです…!! pic.twitter.com/32jSGcEkDq最初はスマホのストップウォッチで5分を図っていた。
→ 使いにくい。次なにやるか覚えられない(←体幹より先に鍛えるとこあるん)
→ じゃあ作ろうじゃないか。
→ 使いやすいのはネイティブアプリかなぁ。
→ あ、PWAやってみたい。技術ワード
- Vue.js
- localforage
- PWA
- bootstrap
- github.io
解説
PWAは、参考URLを参照。
要望あれば書きます。できたもの
参考URL
nagasawaaaa/vue-simple-stopwatch: Vue.js を使ったシンプルなストップウォッチ
これが原型です。ありがとうございます。おわりに
- Qiita初投稿。
- 普段はPythonでWeb系はじめてなのでわからないこといっぱい。
- 変なとこあったら指摘お願いします。
- PWAおもしろい。
- ディスプレイ消えるのどうにかしたい。
- かっこいいデザインにしたい。
- もてたい。