- 投稿日:2021-02-13T23:28:32+09:00
Docker + Rails(Ruby)をバージョンアップ(アップグレード)したお話
Docker環境でRails(Ruby)アプリをアップグレードした記事がない!?
非Docker環境でRubyとRailsをアップグレードする方法はすぐに見つかりました。
伊藤さんが書かれてる下記の記事が本当にわかりやすいです。
ちなみに私は
Docker Rails アップデート、Docker Rails バージョンアップなどでググりましたが見つかりませんでした。ワードが違いますもんねw「じゃあDocker環境でRubyとRailsをアップグレードする記事もすぐ見つかるでしょ」
そう思ったのですが
- 思ったよりも見つからない
- Rubyのアップグレード方法がいくつかパターンがあるみたい
- rbenvを利用してアップグレードする方法(docker-composeによるrails5の開発環境構築時のエラーまとめ【公式通りはうまくいかない】 - よしゆきライフ)
- DockerfileのRubyのバージョンを変更してアップグレードする(個人開発アプリをDockerでコンテナ化してみた - アクトインディ開発者ブログ)
といういくつかのパターンがある印象を受けました。
それがこの投稿に至った理由です。
進め方、参考リンク
基本的には永久保存版!?伊藤さん式・Railsアプリのアップグレード手順 - Qiitaが全体のベースとして進めます。
後々同じことを繰り返さないために遭遇したWARNINGログやエラーログも書いていこうと思います。
読んで欲しい人
- Docker + Railsアプリ作れた人(RSpecでテスト書いてあったら最高!!)
- Docker + Ruby + Rails の環境をアップグレードしようとしている人
今回はRubyの公式からイメージを取得する方法で行なっています。
rbenvでRubyを設定、アップデートする方法は想定していません、ご了承ください(m_ _m)動作環境
version
(アップグレード前)version
(アップグレード後)MacOS Mojave Mojave Ruby 2.5.7 2.7.2 Rails 5.1.7 6.0.3.5 MySQL 5.7 5.7 注意点
あくまでアプリをアップグレードした私の備忘録です。完璧ではありません。
違う部分があればアドバイスいただけると助かります。現在はサンプルアプリのリンクはありませんが、後々作成する予定です。
本題
手順1. 現在使用しているgemを最新にする
RubyとRailsアップグレードを進める前にDockerコンテナ内のgemをアップデートしておきます。
おなじみのコマンドですね。shelldocker-compose run --rm web bundle update私の場合はここで下記のログが表示されました。
shellIgnoring bigdecimal-1.3.5 because its extensions are not built. Try: gem pristine bigdecimal --version 1.3.5 Ignoring bootsnap-1.5.1 because its extensions are not built. Try: gem pristine bootsnap --version 1.5.1 Ignoring mini_racer-0.3.1 because its extensions are not built. Try: gem pristine mini_racer --version 0.3.1 Ignoring msgpack-1.4.0 because its extensions are not built. Try: gem pristine msgpack --version 1.4.0 Ignoring msgpack-1.3.3 because its extensions are not built. Try: gem pristine msgpack --version 1.3.3 Ignoring puma-5.1.1 because its extensions are not built. Try: gem pristine puma --version 5.1.1 Ignoring websocket-driver-0.7.3 because its extensions are not built. Try: gem pristine websocket-driver --version 0.7.3 : :この後は通常の
bundle install、bundle updateと同じ表示がされていました。
これはリンクの通りに下記のコマンドを実行することでbundle installを実行しても上記のログも表示されなくなりました。shelldocker-compose run --rm web gem pristine --all手順2. 最新ではないgemを探して、できる限りバージョンアップする
docker-compose run --rm web bundle outdatedコマンドで最新バージョンを使っていないgemを確認できます。shell$ docker-compose run --rm web bundle outdated Creating app_for_job_change_web_run ... done Fetching https://github.com/thoughtbot/shoulda-matchers.git Fetching gem metadata from https://rubygems.org/......... Fetching gem metadata from https://rubygems.org/. Resolving dependencies................................................ Outdated gems included in the bundle: * actioncable (newest 6.1.1, installed 5.1.7) * actionmailer (newest 6.1.1, installed 5.1.7) * actionpack (newest 6.1.1, installed 5.1.7) * actionview (newest 6.1.1, installed 5.1.7) * activejob (newest 6.1.1, installed 5.1.7) * activemodel (newest 6.1.1, installed 5.1.7) * activerecord (newest 6.1.1, installed 5.1.7) * activesupport (newest 6.1.1, installed 5.1.7) * arel (newest 9.0.0, installed 8.0.0) * childprocess (newest 4.0.0, installed 3.0.0) * listen (newest 3.4.1, installed 3.1.5, requested >= 3.0.5, < 3.2) in groups "development" * polyamorous (newest 2.3.2, installed 2.3.0) * puma (newest 5.2.0, installed 3.12.6, requested ~> 3.7) in groups "default" * rails (newest 6.1.1, installed 5.1.7, requested ~> 5.1.7) in groups "default" * rails-i18n (newest 6.0.0, installed 5.1.3) in groups "default" * railties (newest 6.1.1, installed 5.1.7) * ransack (newest 2.4.2, installed 2.3.0) in groups "default" * shoulda-matchers (newest 4.5.1, installed 3.1.2 4b160bd) in groups "test" * tzinfo (newest 2.0.4, installed 1.2.9) * web-console (newest 4.1.0, installed 3.7.0) in groups "development" * webpacker (newest 5.2.1, installed 4.3.0) in groups "default" * websocket-driver (newest 0.7.3, installed 0.6.5)ちなみに伊藤さんの記事で紹介されている
bundle_outdated_formatterというgemを使うと下記のように表示されます(emsk/bundle_outdated_formatter: Formatter forbundle outdatedcommand)。
結果表示までの時間もgemを使用したやりかたの方が早かったです!!
it's so beautiful!!shell# ローカルにインストールする $ gem install bundle_outdated_formatter $ docker-compose run --rm web bundle outdated | bof Creating app_for_job_change_web_run ... done ┌──────────────────┬────────┬───────────┬─────────────────┬─────────────┐ │ gem │ newest │ installed │ requested │ groups │ ├──────────────────┼────────┼───────────┼─────────────────┼─────────────┤ │ actioncable │ 6.1.1 │ 5.1.7 │ │ │ │ actionmailer │ 6.1.1 │ 5.1.7 │ │ │ │ actionpack │ 6.1.1 │ 5.1.7 │ │ │ │ actionview │ 6.1.1 │ 5.1.7 │ │ │ │ activejob │ 6.1.1 │ 5.1.7 │ │ │ │ activemodel │ 6.1.1 │ 5.1.7 │ │ │ │ activerecord │ 6.1.1 │ 5.1.7 │ │ │ │ activesupport │ 6.1.1 │ 5.1.7 │ │ │ │ arel │ 9.0.0 │ 8.0.0 │ │ │ │ childprocess │ 4.0.0 │ 3.0.0 │ │ │ │ listen │ 3.4.1 │ 3.1.5 │ >= 3.0.5, < 3.2 │ development │ │ polyamorous │ 2.3.2 │ 2.3.0 │ │ │ │ puma │ 5.2.0 │ 3.12.6 │ ~> 3.7 │ default │ │ rails │ 6.1.1 │ 5.1.7 │ ~> 5.1.7 │ default │ │ rails-i18n │ 6.0.0 │ 5.1.3 │ │ default │ │ railties │ 6.1.1 │ 5.1.7 │ │ │ │ ransack │ 2.4.2 │ 2.3.0 │ │ default │ │ shoulda-matchers │ 4.5.1 │ 3.1.2 │ │ test │ │ tzinfo │ 2.0.4 │ 1.2.9 │ │ │ │ web-console │ 4.1.0 │ 3.7.0 │ │ development │ │ webpacker │ 5.2.1 │ 4.3.0 │ │ default │ │ websocket-driver │ 0.7.3 │ 0.6.5 │ │ │ └──────────────────┴────────┴───────────┴─────────────────┴─────────────┘めっちゃ表示されました...
アプリを作成してからバージョンアップをこまめにしてこなかったのが原因です(m_ _m)ここで表示されている中で特に注目していただきたいのは 現状のRailsと同じバージョン番号を表示、使用しているgem と バージョン番号の先頭の数字が変わっているgem です。
Railsと同じバージョン番号のgemは、Railsアプリを作成するときに必須のgemであり、Rails本体ををアップグレードすれば一緒にバージョン番号が上がると考えて問題ないと思います(
actioncable,railtiesなど)。次にバージョン番号の先頭の数字が変わっているgem(今回の場合は
webpackerやregexp_parserなど)についてですが、こちらは伊藤さんが対処法を書かれていますので、一読していただければわかります。
ひどい時はアプリが動かなくなる可能性もあるみたいです。もしgemのバージョン指定の意味がわからない場合はこちらの記事でわかると思います。
ちなみに私の場合は上記の表示されるgemの数が減りませんでした(m_ _m)
Railsのバージョンを上げていくにつれて表示される数が減っていったので、もし頑張っても数が減らないならRailsのバージョンをアップするのもありかもしれません。手順3. developmentとtestグループのgemをバージョンアップする
ここで本番環境に影響の出ないdevelopment環境とtest環境のgemをバージョンアップします。
その前にGemfileにとても大事な変更を行います。
それはgemのバージョン指定の記述を削除することです(Railsは対象外)。
下記のように全てのgemに対してバージョン指定を削除しましょうというお話です。Gemfile- gem 'mysql2', '>= 0.3.18', '< 0.6.0' - gem 'puma', '~> 3.7' + gem 'mysql2' + gem 'puma' gem 'rails', '~> 5.1.7' # Railsのgemのバージョン指定は削除しないこと!!Rails以外のバージョンアップするにはshellで下記のコマンドを実行します。
developmentとtest環境からアップグレードします。shell$ docker-compose run --rm web bundle update -g development -g testshell$ docker-compose run --rm web bundle update -g development -g test Creating app_for_job_change_web_run ... done Fetching https://github.com/thoughtbot/shoulda-matchers.git Fetching gem metadata from https://rubygems.org/......... Fetching gem metadata from https://rubygems.org/. Resolving dependencies......... : # gemのインストールなどは省略します : : Bundler attempted to update awesome_print but its version stayed the same Bundler attempted to update byebug but its version stayed the same Bundler attempted to update factory_bot_rails but its version stayed the same Bundler attempted to update faker but its version stayed the same Bundler attempted to update gimei but its version stayed the same Bundler attempted to update pry-byebug but its version stayed the same Bundler attempted to update pry-rails but its version stayed the same Bundler attempted to update rails-flog but its version stayed the same Bundler attempted to update rspec-rails but its version stayed the same Bundler attempted to update capybara but its version stayed the same Bundler attempted to update launchy but its version stayed the same Bundler attempted to update rspec_junit_formatter but its version stayed the same Bundler attempted to update selenium-webdriver but its version stayed the same Bundler attempted to update shoulda-matchers but its version stayed the same Bundler attempted to update simplecov but its version stayed the same Bundler attempted to update vcr but its version stayed the same Bundler attempted to update webdrivers but its version stayed the same Bundler attempted to update webmock but its version stayed the same同じようなWARNINGがたくさん表示されました。
Bundler attempted to update xxx but its version stayed the same
をそのままググるとリンクのようにこの警告が原因で、Rails自体がアップグレードできない場合もあるみたいです。私の場合は色々試みましたがこの時点では解決できなかったので、放置して次の手順へ進みました。
一応念のため、RSpecでテストを実行して動作的に問題がないことを確認してから次に進めています。
(ちなみにアプリのアップグレードが完了した後もdocker-compose run --rm web bundle update -g development -g testを実行すると同じようにログが出ます... 解消できない...)手順4. Rails以外ののgemを全てバージョンアップする
今度は本番環境を含むgemをバージョンアップしましょう
ここもRailsは対象外です。
やっていることは上とほぼ同じなので割愛しますが
docker-compose run --rm web bundle updateを実行するdocker-compose run --rm web rspecでテストを実行するという手順をふみます。
問題なくバージョンアップできていれば次に進みます。
例のごとくRSpecでテストを実行して動作的に問題がないことを確認します。さぁ、
これで準備できたから
Railsをアップグレードするぞ!!とはなりません。
手順5. Rubyを(できるだけ)バージョンアップする
※Rubyのバージョンが最新安定版であれば問題ありません。次のRailsをアップグレードする手順へ進んでください。
Rubyを段階的にアップグレードします(
2.6.6->2.7.2みたいな感じ)。
ちなみに2021年1月現在の最新安定版のRubyバージョンは 3.0.0 です(Rubyのトップページ)。理由としては下記が挙げられます。
- Rubyをアップグレードすると仕様が変わることがある(アプリが動かなくなる原因にも)
- セキュリティやパフォーマンスに悪い影響が出る可能性がある
なのでアップグレードは定期的にしましょう!!
そして個人的に重要だと思うのはアップグレードすることに対して十分な時間と心のゆとりをもつことです。
それさえあればなんとかなります(なると思います)。私の場合は記事投稿地点でのRubyのバージョンが
2.5.7です。
最新のRubyバージョンまでアップするためには
2.5.7~>2.6.6~>2.7.2~>3.0.0と
32回のアップグレードが必要になります。では実際にアップグレードしていきます。
まず
Dockerfileの記述を変更します。Dockerfile- ARG RUBY_VERSION=2.5.7 + ARG RUBY_VERSION=2.6.6 FROM ruby:$RUBY_VERSIONちなみにここで指定しているイメージの数値は必ずDockerHubのRuby公式イメージに存在する数値に書き換えてください!!(ruby - Docker Hub)
私は2.6.6にすべき値を2.6.0とDockerHubを確認せずに変更して、エラーの原因がそれだと気づかず数日を浪費しました。話を戻しますが、
私はDockerfileで定義命令としてARGを使っているので上記の書き方になりますが、使っていなければDockerfile- FROM ruby:2.5.7 + FROM ruby:2.6.6という書き方になります。
その後下記コマンドを順に実行していきます。
shelldocker-compose build --no-cache docker-compose run --rm web bundle install # mv Gemfile.lock tmp <- bundle install がうまくいかないときに実行 # docker-compose run --rm web bundle install <- mv Gemfile.lock tmp を実行したら再度bundle installする docker-compose run --rm web gem pristine --all # これを実行すると Ignoring <gem_name>-<version> because its extensions are not built. Try: gem pristine <gem_name> --version <version> という警告が表示されなくなる上記のコマンドの意味は下記に書いておきます。
docker-compose build --no-cache: cacheを使わずにイメージをビルドする。cacheが有効になっていると設定変更がうまくされない場合があります(docker-compose build | Docker ドキュメント)。今回はかなり大きめな変更なので--no-cacheオプションを付加します。mv Gemfile.lock tmp: Gemfile.lockが原因でうまくgemが入らない時があります。そんなときはGemfile.lockの中の記述を空にする方法がありますが、それと同じ効果があります。docker-compose run --rm web bundle install: Rubyのアップグレードを行ったのでgemの対応バージョンも変化する場合があるので実行します。docker-compose run --rm web gem pristine --all:詳細はこのリンクに委ねます。そしてここでRSpecでテストします。
問題なければ、DockerのRubyイメージがちゃんと変更した新しいバージョンかチェックしましょう。
チェックするには下記のコマンドを実行します。shell$ docker-compose run --rm web ruby -v Creating app_for_job_change_web_run ... done ruby 2.6.6p146 (2020-03-31 revision 67876) [x86_64-linux]Dockerfileで変更した数値と合致していれば成功です。
最後に隠しファイルである.ruby-versionを開いてみてください。
私の場合は後から気づいたのですが、基本的には自動でRailsアプリで使用しているRubyのバージョンに自動で切り替わるらしいのですが、私の場合は切り替わらなかったので自分で修正しました。.ruby-version- 2.5.7 + 2.6.6これでRubyのアップグレードは(とりあえず)完了です。
そしてやっと本題のRailsのアップグレードに取り掛かります。ちなみに
- Rubyのイメージのバージョンを変更して(
docker-compose build --no-cache)、bundle installも問題なくできた場合、それ以降で発生するエラーは通常のRailsで発生するエラーと同じはずです。 じっくり、こつこつと修正していきましょう^ ^- 試していてわかったのですが、Rubyの
3.0.0とRailsの5.2.4.4は現在互換性がありません(調べ方はこのリンクの過去も含めた複数バージョンへのサポートを提供しているgemというところに書いてある)。- Rubyの
3.0.0と互換性のあるRailsのバージョンは6.1.0以上のようです(アプリケーションをRuby3にあげるときにやること - Qiita)。- この記事ではとりあげていませんが、CircleCIを使用されている場合はCircleCI側のRubyのバージョンも変更する必要があるので注意してください。
自分の事例をそのままま書くと下記になります。
アップグレード Ruby ver Rails ver 可否 初期状態 2.5.7 5.1.7 OK 1回目 2.6.6 5.1.7 OK 2回目 2.7.2 5.1.7 OK 3回目 2.7.2 5.2.4.4 OK 4回目 2.7.2 6.0.3.4 OK 5回目 3.0.0 6.0.3.4 NG 4回目 2.7.2(ダウングレード) 6.0.3.4 OK 手順6. Railsをバージョンアップする
ようやく本題、Railsのアップグレードにとりかかります。
ここで注意しなければならないことは、当たり前かもしれませんが
RubyとRailsの互換性を確認すること です。
これが合っていないと作成したアプリが壊れてしまいかねませんのでご注意ください。
確認方法はRails アップグレードガイド - Railsガイドに互換性のあるRubyとRailsのバージョンが記載されています。
ちなみに下記リンクはRailsの全バージョン履歴です(Rubyの全バージョン履歴わかれば誰か教えてください)。私の作成当初の構成は
- Ruby:
2.5.7- Rails:
5.1.7だったので
Railsはまず5.2.4.4にまで上げることにしました。Railsのバージョンを上げるためには Gemfile の記述を下記のように変更します。
Gemfile- gem 'rails', '~> 5.1.7' + gem 'rails', '5.2.4.4'バージョンは最新のパッチバージョンでカッチリ固定してあげてください。
準備ができたらshellで下記コマンドを実行してRailsも含めたバージョンアップを行いますshelldocker-compose run --rm web bundle updateバージョンアップが完了したらRspecでテストをします。
テストがOKならば無事Railsのアップグレードがひとまず完了です。手順7. load_defaultsやnew_framework_defaults_x_x.rbを設定する
伊藤さんの記事へのリンクをそのまま貼らせていただいてますが、
アップグレードによってデフォルトの挙動が変わったりする時があります。
それを前のバージョンのと同じように動作させるための設定をする必要がある場合もあります。config.load_defaultsとnew_framework_defaults_x_x.rbの関係を詳しく調べてみた - Qiita
Ruby、Railsのアップグレードの流れは完了
これでDocker + Ruby + Rails アップグレードの流れは理解できたと思います。
バージョンが古い場合は大変な労力と時間がかかりますが、手順の5から7を繰り返せばアップグレードはできると思います!!警告一覧
HEADS UP! i18n 1.1 changed fallbacks to exclude default locale. But that may break your application.
docker-compose run --rm web bundle updateをした時にgemDeviseから表示されました。
ログとしては下記のように表示されました。terminalHEADS UP! i18n 1.1 changed fallbacks to exclude default locale. But that may break your application. Please check your Rails app for 'config.i18n.fallbacks = true'. If you're using I18n (>= 1.1.0) and Rails (< 5.2.2), this should be 'config.i18n.fallbacks = [I18n.default_locale]'. If not, fallbacks will be broken in your app by I18n 1.1.x. For more info see: https://github.com/svenfuchs/i18n/releases/tag/v1.1.0
If you're using I18n (>= 1.1.0) and Rails (< 5.2.2), this should be 'config.i18n.fallbacks = [I18n.default_locale]'.でググると出てくる、下記の4つのリンクを読めば解決方法や詳細がわかります。
- bundle install(rails new)すると”HEADS UP! i18n 1.1 changed fallbacks to exclude default locale."と言われる - 真夜中エンジニアリング
- HEADS UP! i18n 1.1 changed fallbacks to exclude default locale. But that may break your application. - Qiita
- config.i18n.fallbacks の BREAKING CHANGE について | deadwood
- config.i18n.fallbacksのメッセージについて - Qiita
Ignoring bigdecimal-1.3.5 because its extensions are not built. Try: gem pristine bigdecimal --version 1.3.5
docker-compose build --no-cacheを実行してbundle installを実行したときに表示されました。
docker-compose run --rm web gem pristine --allを実行すれば表示されなくなります。The dependency tzinfo-data (>= 0) will be unused by any of the platforms Bundler is installing for. Bundler is installing for ruby but the dependency is only for x86-mingw32, x86-mswin32, x64-mingw32, java. To add those platforms to the bundle, run
bundle lock --add-platform x86-mingw32 x86-mswin32 x64-mingw32 java.
bundle install、bundle update時に表示される。
基本的にWindows以外の開発環境では必要ないと思われるので、
削除する or コメントアウトする という対処法で問題ないと思われます。
下記リンクに詳細が書いてあります。Bundler attempted to update rails but its version stayed the same
Rubyが2.7.2、Railsが6.0.3.4の時に
bundle update railsを実行しようとして表示された警告です。。
使っていたBundlerのバージョンが1.17.3と古く、バージョンアップしてくださいという警告です。
[Ruby] bundler 2 へのアップグレード方法 | DevelopersIOを参考に進めていきます。terminal$ docker-compose run --rm web bundle update --bundler Creating app_for_job_change_web_run ... done Using rake 13.0.3 Using concurrent-ruby 1.1.8 Using i18n 1.8.8 Using minitest 5.14.3 : : : Warning: the lockfile is being updated to Bundler 2, after which you will be unable to return to Bundler 1.上記のコマンドを使用して私の場合はBundlerのバージョンが 1.17.4 -> 2.1.4 に無事バージョンアップができました。
DEPRECATION WARNING: Uniqueness validator will no longer enforce case sensitive comparison in Rails 6.1. To continue case sensitive comparison on the :name attribute in Foodcategory model, passcase_sensitive: trueoption explicitly to the uniqueness validator.Railsを 5.2系 から 6.0系 へバージョンアップしたときに表示されます。
解決法(?)は下記がわかりやすいですエラー一覧
Your Ruby version is x.x.x, but your Gemfile specified y.y.y
GemfileにRubyのバージョンを明記している場合にエラーが発生します。
指定を修正してあげるだけでエラーが解消できます。Gemfile- ruby 'y.y.y' + ruby 'x.x.xwarning: already initialized constant Shoulda::Matchers::ActiveModel::ValidateInclusionOfMatcher::ARBITRARY_OUTSIDE_STRING
terminal上では下記のように表示されていました。
(Railsは5.1系のまま、)Rubyを2.6.6から2.7.2に上げた時にRSpecのテストで発生したエラーです。terminalFailure/Error: require File.expand_path('../config/environment', __dir__) NoMethodError: undefined method `new' for BigDecimal:Class # /usr/local/bundle/bundler/gems/shoulda-matchers-4b160bd19ecc/lib/shoulda/matchers/active_model/validate_inclusion_of_matcher.rb:273:in `<class:ValidateInclusionOfMatcher>'私の場合はtest環境に追加されているgemの
shoulda-matchersのオプション(?)を削除することで問題なく動作するようになりました(rails5系でもオプションを指定する必要がいつのまにかなくなっていました)。Gemfile- gem 'shoulda-matchers', - git: 'https://github.com/thoughtbot/shoulda-matchers.git', - branch: 'rails-5' + gem 'shoulda-matchers',undefined method `operations' for #<ActionDispatch::MiddlewareStack
wrong number of arguments (given 3, expected 2) というパターンもありました。
(Railsは5.1系のまま)Rubyを2.7.2から3.0.0に上げた時にRSpecのテストで発生したエラーです。
原因はRubyとRailsの互換性にありました。
Ruby3.0.0に対応しているRailsのバージョンは6.1.0以上のようです。
Rubyを2.7.2に戻せばエラーは解消されます。terminal上でのログは下記の通りです。
terminaldocker-compose run --rm web rspec Creating app_for_job_change_web_run ... done /usr/local/bundle/gems/bundler-1.17.3/lib/bundler/shared_helpers.rb:29: warning: Pathname#untaint is deprecated and will be removed in Ruby 3.2. /usr/local/bundle/gems/bundler-1.17.3/lib/bundler/shared_helpers.rb:118: warning: Pathname#untaint is deprecated and will be removed in Ruby 3.2. /usr/local/bundle/gems/bundler-1.17.3/lib/bundler/shared_helpers.rb:118: warning: Pathname#untaint is deprecated and will be removed in Ruby 3.2. /usr/local/bundle/gems/bundler-1.17.3/lib/bundler/shared_helpers.rb:35: warning: Pathname#untaint is deprecated and will be removed in Ruby 3.2. /usr/local/bundle/gems/bundler-1.17.3/lib/bundler/shared_helpers.rb:35: warning: Pathname#untaint is deprecated and will be removed in Ruby 3.2. /usr/local/bundle/gems/bundler-1.17.3/lib/bundler/shared_helpers.rb:44: warning: Pathname#untaint is deprecated and will be removed in Ruby 3.2. /usr/local/bundle/gems/bundler-1.17.3/lib/bundler/shared_helpers.rb:118: warning: Pathname#untaint is deprecated and will be removed in Ruby 3.2. /usr/local/bundle/gems/bundler-1.17.3/lib/bundler/shared_helpers.rb:35: warning: Pathname#untaint is deprecated and will be removed in Ruby 3.2. An error occurred while loading ./spec/features/foodcategory_spec.rb. Failure/Error: require File.expand_path('../config/environment', __dir__) ArgumentError: wrong number of arguments (given 3, expected 2) # /usr/local/bundle/gems/actionpack-5.1.7/lib/action_dispatch/middleware/static.rb:109:in `initialize' # /usr/local/bundle/gems/actionpack-5.1.7/lib/action_dispatch/middleware/stack.rb:35:in `new' # /usr/local/bundle/gems/actionpack-5.1.7/lib/action_dispatch/middleware/stack.rb:35:in `build' # /usr/local/bundle/gems/actionpack-5.1.7/lib/action_dispatch/middleware/stack.rb:99:in `block in build' # /usr/local/bundle/gems/actionpack-5.1.7/lib/action_dispatch/middleware/stack.rb:99:in `each' # /usr/local/bundle/gems/actionpack-5.1.7/lib/action_dispatch/middleware/stack.rb:99:in `inject' # /usr/local/bundle/gems/actionpack-5.1.7/lib/action_dispatch/middleware/stack.rb:99:in `build' # /usr/local/bundle/gems/railties-5.1.7/lib/rails/engine.rb:508:in `block in app' # /usr/local/bundle/gems/railties-5.1.7/lib/rails/engine.rb:504:in `synchronize' # /usr/local/bundle/gems/railties-5.1.7/lib/rails/engine.rb:504:in `app' # /usr/local/bundle/gems/railties-5.1.7/lib/rails/application/finisher.rb:45:in `block in <module:Finisher>' # /usr/local/bundle/gems/railties-5.1.7/lib/rails/initializable.rb:30:in `instance_exec' # /usr/local/bundle/gems/railties-5.1.7/lib/rails/initializable.rb:30:in `run' # /usr/local/bundle/gems/railties-5.1.7/lib/rails/initializable.rb:59:in `block in run_initializers' # /usr/local/bundle/gems/railties-5.1.7/lib/rails/initializable.rb:58:in `run_initializers' # /usr/local/bundle/gems/railties-5.1.7/lib/rails/application.rb:353:in `initialize!' # ./config/environment.rb:5:in `<top (required)>' # ./spec/rails_helper.rb:3:in `<top (required)>' # ./spec/features/foodcategory_spec.rb:1:in `<top (required)>' An error occurred while loading ./spec/models/cuisine_spec.rb. Failure/Error: require File.expand_path('../config/environment', __dir__) NoMethodError: undefined method `operations' for #<ActionDispatch::MiddlewareStack:0x000055c6d7c7e388 @middlewares=[Rack::Sendfile, ActionDispatch::Static, ActionDispatch::Executor, ActiveSupport::Cache::Strategy::LocalCache::Middleware, Rack::Runtime, Rack::MethodOverride, ActionDispatch::RequestId, ActionDispatch::RemoteIp, Rails::Rack::Logger, ActionDispatch::ShowExceptions, ActionDispatch::DebugExceptions, ActionDispatch::Callbacks, ActionDispatch::Cookies, ActionDispatch::Session::CookieStore, ActionDispatch::Flash, Rack::Head, Rack::ConditionalGet, Rack::ETag, Warden::Manager]> # /usr/local/bundle/gems/railties-5.1.7/lib/rails/configuration.rb:76:in `+' # /usr/local/bundle/gems/railties-5.1.7/lib/rails/application.rb:525:in `build_middleware' # /usr/local/bundle/gems/railties-5.1.7/lib/rails/engine.rb:507:in `block in app' # /usr/local/bundle/gems/railties-5.1.7/lib/rails/engine.rb:504:in `synchronize' # /usr/local/bundle/gems/railties-5.1.7/lib/rails/engine.rb:504:in `app' # /usr/local/bundle/gems/railties-5.1.7/lib/rails/application/finisher.rb:45:in `block in <module:Finisher>' # /usr/local/bundle/gems/railties-5.1.7/lib/rails/initializable.rb:30:in `instance_exec' # /usr/local/bundle/gems/railties-5.1.7/lib/rails/initializable.rb:30:in `run' # /usr/local/bundle/gems/railties-5.1.7/lib/rails/initializable.rb:59:in `block in run_initializers' # /usr/local/bundle/gems/railties-5.1.7/lib/rails/initializable.rb:58:in `run_initializers' # /usr/local/bundle/gems/railties-5.1.7/lib/rails/application.rb:353:in `initialize!' # ./config/environment.rb:5:in `<top (required)>' # /usr/local/bundle/gems/activesupport-5.1.7/lib/active_support/dependencies.rb:292:in `require' # /usr/local/bundle/gems/activesupport-5.1.7/lib/active_support/dependencies.rb:292:in `block in require' # /usr/local/bundle/gems/activesupport-5.1.7/lib/active_support/dependencies.rb:258:in `load_dependency' # /usr/local/bundle/gems/activesupport-5.1.7/lib/active_support/dependencies.rb:292:in `require' # ./spec/rails_helper.rb:3:in `<top (required)>' # /usr/local/bundle/gems/activesupport-5.1.7/lib/active_support/dependencies.rb:292:in `require' # /usr/local/bundle/gems/activesupport-5.1.7/lib/active_support/dependencies.rb:292:in `block in require' # /usr/local/bundle/gems/activesupport-5.1.7/lib/active_support/dependencies.rb:258:in `load_dependency' # /usr/local/bundle/gems/activesupport-5.1.7/lib/active_support/dependencies.rb:292:in `require' # ./spec/models/cuisine_spec.rb:1:in `<top (required)>' # /usr/local/bundle/gems/activesupport-5.1.7/lib/active_support/dependencies.rb:286:in `load' # /usr/local/bundle/gems/activesupport-5.1.7/lib/active_support/dependencies.rb:286:in `block in load' # /usr/local/bundle/gems/activesupport-5.1.7/lib/active_support/dependencies.rb:258:in `load_dependency' # /usr/local/bundle/gems/activesupport-5.1.7/lib/active_support/dependencies.rb:286:in `load'/config/boot.rb:4:in `require': cannot load such file -- bootsnap/setup (LoadError)
Ruby2.7.2の状態でRailsを5.2.4.4にアップグレードしたあとの動作確認中に発生したエラー。
Rails5.2からbootsnapが導入されましたが、Gemfileに自動的にbootsnapが追記されず、自分で追記していなかったことが原因です。
Gemfileに下記のように追記することでエラーが解消しました。
導入されたことがわかるのはRailsDiffが、
bootsnapについてはbootsnapのせいでRails5.2とかが動かない人へ - Qiita
がわかりやすいです。Gemfilegem 'bootsnap', '>= 1.1.0', require: falseCan't resolve image into URL: undefined method `to_model'
Ruby2.7.2の状態でRailsを5.2.4.4にアップグレードしたあとの動作確認中に発生したエラー。
画像アップロード用のgemとしてcarrierwaveを使用しており、それに伴うエラーです。そのままググると全く同じ状況のエラー解決法があったので(ruby on rails - Carrierwave: Can't resolve image into URL: undefined method `to_model' - Stack Overflow)参考にしたところ解決しました。
ちなみにActiveStrageでも同じようなことが起こる場合があるみたいです(【Rails】ActiveStorageを用いた画像複数枚投稿のエラー - Qiita)
Migrations are pending. To resolve this issue, run: rails db:migrate RAILS_ENV=development
Ruby2.7.2のときに
Railsを 5.2.4.4から 6.0.3.4 にアップグレードした際に発生したエラーです。
このアップグレードにはどうやら標準で搭載されているActiveStrageに対してのDB設計の修正が行われており、
アップグレードした際にマイグレーションファイルが追加されています。
追加されたmigrationファイルをDBに反映させてあげればいいだけなので下記コマンドを実行することでエラーが解消されます。terminaldocker-compose run --rm web rails db:migrate最後に
Qiita初投稿のこの記事を書くのに何日費やしたのかわかりません(カウントしておけばよかった...)。
普段から引用して問題解決などしていますが、良記事を投稿している方の偉大さがとても身にしみました。参考リンクなどなど
- Ruby系のコマンドでits extensions are not built
- 個人開発アプリをDockerでコンテナ化してみた - アクトインディ開発者ブログ
- 永久保存版!?伊藤さん式・Railsアプリのアップグレード手順 - Qiita
- railsのバージョンを確認しただけなのにWarningがでた件 - helen's blog
- emsk/bundle_outdated_formatter: Formatter for
bundle outdatedcommand- RubyGem のバージョンを決める時は Semantic Versioning に従おう - yu8mada
- Ruby - Ruby on Railsがアップグレードされない|teratail
- ダウンロード(Ruby公式)
セマンティック・バージョニングと、Gemfileのバージョン指定方法 - Gemfileでよく見る
~>を使いこなす - Qiita
- 投稿日:2021-02-13T21:53:13+09:00
VS Code Remote ContainersとPylanceで快適Python環境を構築する方法
最近、チーム用のPython開発環境を構築する機会があり、VS Codeを使った環境構築がかなり便利だったので記事にしました。
はじめに
本記事では、VS CodeのRemote Containersを利用し、再現性が高く快適なPython環境を構築する方法を紹介します。
すでにあるRemote Containersの記事との違いは、Pythonを使ったチームでの開発を想定し、リンターや便利な拡張機能も環境構築に含めていることです。
今回紹介する内容を使えば、コードの自動フォーマットやコードの補完などが有効になる快適なPython開発が可能です。
Pythonの実装のコツやノウハウについては、同じチームの@sugulu_Ogawa_ISIDさんの記事が参考になります。
便利なこと
本記事で紹介する方法の便利なところは以下の2点です
- Pythonのバージョンや使用packageをチームで一元管理
- VS codeで使用するリンターや拡張機能をチームで統一
一つ目は、ほぼDockerのメリットになりますが、anacondaやpyenvやvenvのようなバージョン管理やpackage管理で悩まなくてすみます。そして、新しくチーム用の開発環境を作る際に、各々のローカル環境に左右されずDockerが使えさえすればOKとなるので、開発初期の環境構築作業が非常に楽になります。
二つ目は、コード規約や拡張機能の知見を共有できることです。私の周囲では、開発用エディタはVS Codeを利用していることが多く、エディタは統一されています。しかし、VS Codeの設定にはかなり個人差があります。VS Codeで提供されている機能を使いこなしているか否かで作業効率がかなり変わるので、できればVS Codeの環境自体も共有したいです。
今回紹介するRemote Containersでは、設定ファイルさえ渡せば上記2点が簡単にチームで共有できます。
Remote Containersを使った環境構築方法
必要なものはざっくり以下の5つです。
- Visual Studio Code
- Docker
- Remote Containers拡張機能
- devcontainer.json
- Dockerfile
VS CodeとDockerのインストール方法はここでは紹介しません。Remote ContainersはVS Codeの拡張機能からインストールできます。
Remote Containers機能を使うには作業フォルダ内に
.devcontainer/devcontainer.jsonが必要です。このdevcontainer.jsonがRemote Containers機能の設定ファイルに該当します。今回はテスト用に以下のようなプロジェクトを使います。
(公式のPythonテンプレートを参考にしています). ├── .devcontainer │ ├── Dockerfile │ └── devcontainer.json ├── .gitattributes ├── .gitignore ├── requirements.txt └── test.pyDockerfileの中身は以下になります。ほぼ公式のDockerfileのままです。
ARG VARIANT="3"
FROM mcr.microsoft.com/vscode/devcontainers/python:0-${VARIANT}

ENV PIP_TARGET=/usr/local/pip-global
ENV PYTHONPATH=${PIP_TARGET}:${PYTHONPATH}
ENV PATH=${PIP_TARGET}/bin:${PATH}
RUN if ! cat /etc/group | grep -e "^pip-global:" > /dev/null 2>&1; then groupadd -r pip-global; fi \
    && usermod -a -G pip-global vscode \
    && umask 0002 && mkdir -p ${PIP_TARGET} \
    && chown :pip-global ${PIP_TARGET} \
    && ( [ ! -f "/etc/profile.d/00-restore-env.sh" ] || sed -i -e "s/export PATH=/export PATH=\/usr\/local\/pip-global:/" /etc/profile.d/00-restore-env.sh )

COPY requirements.txt /tmp/pip-tmp/
RUN pip3 --disable-pip-version-check --no-cache-dir install -r /tmp/pip-tmp/requirements.txt \
    && rm -rf /tmp/pip-tmp
次は肝心の
devcontainer.jsonの中身です。こちらも基本的に公式のPythonテンプレートに倣ってます。{ "name": "Python 3", "build": { "dockerfile": "Dockerfile", "context": "..", // Update 'VARIANT' to pick a Python version: 3, 3.6, 3.7, 3.8 "args": { "VARIANT": "3" } }, "workspaceMount": "source=${localWorkspaceFolder},target=/workspaces,type=bind,consistency=delegated", "workspaceFolder": "/workspaces", "settings": { "terminal.integrated.shell.linux": "/bin/bash", "python.pythonPath": "/usr/local/bin/python", "python.linting.enabled": true, "python.linting.pylintEnabled": true, "python.formatting.autopep8Path": "/usr/local/py-utils/bin/autopep8", "python.formatting.blackPath": "/usr/local/py-utils/bin/black", "python.formatting.yapfPath": "/usr/local/py-utils/bin/yapf", "python.linting.banditPath": "/usr/local/py-utils/bin/bandit", "python.linting.flake8Path": "/usr/local/py-utils/bin/flake8", "python.linting.mypyPath": "/usr/local/py-utils/bin/mypy", "python.linting.pycodestylePath": "/usr/local/py-utils/bin/pycodestyle", "python.linting.pydocstylePath": "/usr/local/py-utils/bin/pydocstyle", "python.linting.pylintPath": "/usr/local/py-utils/bin/pylint", "python.analysis.typeCheckingMode": "basic", "python.analysis.completeFunctionParens": true }, "extensions": [ "ms-python.python", "ms-python.vscode-pylance", "ms-vsliveshare.vsliveshare", "njpwerner.autodocstring" ], "remoteUser": "vscode" }
workspaceMountでは、マウントしたいローカルフォルダとコンテナ内のマウント先を指定しています。${localWorkspaceFolder}で.devcontainer/devcontainer.jsonを含むフォルダのパスを指定できます。settingsの内容はRemote Containersで開いた時のVS Codeの設定です。
そして、extensionsに拡張機能を追加することで、Remote Containers内で指定した拡張機能がインストールされます。これにより、「2. リンターや拡張機能を簡単にチームで共有できる」を実現できます。
VS codeでPythonを開発するにあたりぜひ入れて欲しい拡張機能は
ms-python.python、ms-python.vscode-pylance、njpwerner.autodocstringです。(ms-python.vscode-pylanceを使うにはms-python.pythonが必須です)
ms-python.vscode-pylance(Pylance)は後述しますが、VS CodeでのPython開発を強力にサポートしてくれる拡張機能です。njpwerner.autodocstring(Python Docstring Generator)はDocstringを生成してくれる拡張機能です。Remote Containersの使い方
ここまでの設定が完了すればあとは起動するだけです。
起動するには、VS Codeの左下の緑のアイコンをクリックします。アイコンをクリックすると以下のような選択肢が出るので、
Remote-Containers: Open Folder in Containerを選択し、.devcontainerがあるフォルダを選択します。これで完了です。あとはローカルで開発するのと同じように作業できます。
Pylanceの使い方
続いて、拡張機能としてインストールしたPylanceについて紹介します。
Pylanceの提供する主な機能は以下になります。
- Docstrings
- Signature help, with type information
- Parameter suggestions
- Code completion
- Auto-imports (as well as add and remove import code actions)
- As-you-type reporting of code errors and warnings (diagnostics)
- Code outline
- Code navigation
- Type checking mode
- Native multi-root workspace support
- IntelliCode compatibility
- Jupyter Notebooks compatibility
- Semantic highlighting
いろいろ便利な機能が提供されていますが、特に便利なのはコードの補完、Docstrings表示と型チェックです。
本記事ではチーム開発で役立つDocstrings表示と型チェックを紹介します。まずはDocstringsについてです。
これはDocstringsで書かれた内容を該当コードにホバーすると以下のように表示される機能です。
(Docstringsとは、関数やクラスの説明を記述したものです。)この機能があると引数や返り値などについて確認する時間を短縮することが可能です。
Docstringsを書くのはちょっと面倒だったりするのですが、先ほどインストールしたPython Docstring Generatorを使えばDocstringsを書く手間を短縮できます。Macであれば、Docstringを挿入する場所で
cmd + shift + 2とすると、以下のようにテンプレートを作成してくれます。
Docstringのテンプレートは以下から選択できます。
(Python Docstring Generator)Google (default)
docBlockr
Numpy
Sphinx
PEP0257 (coming soon)次に型チェックです。
Pythonでは、変数の型が一致しなくても実行できてしまいます。そのため、本来期待していた型と異なる型で実装してしまうことがあります。型指定があるとこのような間違った型の実装を防ぐことができ、特に複数人かつ複雑な構成で開発する場合は便利です。
Pylanceの
Type checking modeを設定すると、以下のようにコードを書いている途中に型の間違いに気づくことができます。
Type checking modeではoff、basic、strictと型チェックの厳しさを選択できます。
strictにすると型の指定がないだけでもエラー判定されます。開発チーム次第ではありますが、基本的には
basicで問題ないと思います。
この設定は、devcontainer.jsonの"python.analysis.typeCheckingMode": "basic"で変更できます。終わりに
本記事では、VS CodeのRemote Containers機能を用いたPythonの開発環境構築方法を紹介しました。
ちなみに、本記事では紹介しませんでしたがJupyter Notebookもインストールするだけで今回の設定で使えます。
他にもsort importやimport文の自動追加や自動削除といった紹介しなかった便利機能もあります。また、拡張機能についても今回は必要最低限しか記載していませんが、他にも便利なものがたくさんありました。
こちらも今後まとまったら記事にしようと思います。参考
- 投稿日:2021-02-13T19:30:52+09:00
Docker+nginx+Laravel7環境構築メモ
DockerでLaravel環境構築
自作ツールの環境の理解を深めたく(というかネットからクローンしてきて理解してなさすぎたので)
環境構築し直したときの自分用メモです。環境構築
Laravel7
PHP/nginx/MySQL下記の記事を参考に構築。
https://qiita.com/A-Kira/items/1c55ef689c0f91420e81作業メモ// DBの準備 php artisan migrate // 認証機能の追加 https://readouble.com/laravel/7.x/ja/frontend.html composer require laravel/ui:^2.4 php artisan ui:auth // bootstrapの導入 php artisan ui bootstrap --auth // CSSの出力(package.jsonがあるところで実行) npm install && npm run dev詰まったメモ1:mysqlコマンドが実行できない
SQLSTATE[HY000] [1045] Access denied for user 'user名'@'172.-.-.-' (using password: YES)解決:キャッシュクリアコマンド実行
php artisan cache:clear php artisan config:cache参考:https://shiro-changelife.com/laravel-access-denied/
詰まったメモ2:CSS/js反映されない
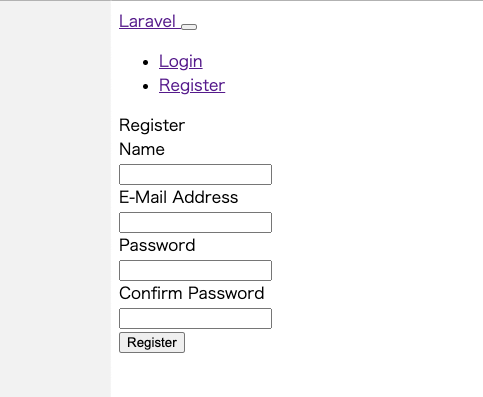
Laravelの表示画面はいい感じ(?)に表示されるが、ログイン/登録画面以降はCSSやらjsが反映されていない。
キャッシュはクリアしたし、css/jsはちゃんとpublic下にある。コンソールを見るとCSSとJSがNotFoundになっている
net::ERR_ABORTED 404 (Not Found)
解決:
nginx/default.confに記載しているrootの指定が誤っていたserver { listen 80; index index.php index.html; root /var/www/{サービス名}/public; ←ココは変えてたけど location / { root /var/www/{サービス名}/public; ←ココを変えてなかった index index.html index.php; try_files $uri $uri/ /index.php$query_string; }その他メモ
ブルーライトカットメガネ忘れて1日PCに向かったら目が死んだ。
自分のブルーライト耐性無くなってて引いた来月のデブキャンまでにはこのツール完成させたい。。。
- 投稿日:2021-02-13T19:29:35+09:00
laradock使い方手順
初めてlaradockを使い環境構築を行ったのでその手順をメモ
任意のディレクトリを作成しlaradockをクローンしてくる。
% git clone https://github.com/LaraDock/laradock.gitenvをコピー
% cp env-example .envコンテナの起動
% docker-compose up -d nginx mysql workspaceここでlocalhost上にサーバが立ち上がり、404エラーが表示されます。
workspaceに移動
docker-compose exec --user=laradock workspace bashlaravelをインストール(ここではVersion7を指定)
composer create-project --prefer-dist laravel/laravel laravel '7.*'laradockのenvのAPP_CODE_PATH_HOSTを上記で作成したフォルダ名に書き換える
APP_CODE_PATH_HOST=../laravel/dockerを再起動する
docker-compose stopdocker-compose up -d nginx mysql workspaceMySQLの設定をおこなう
laravelの.env内の環境変数を変更
DB_CONNECTION=mysql
DB_HOST=mysql
DB_PORT=3306
DB_DATABASE=default
DB_USERNAME=default
DB_PASSWORD=secret
マイグレーションを実行
docker-compose exec --user=laradock workspace bash のコマンドを打った/var/www# 上で行うことに要注意php artisan migrateマイグレーションができれば完了です。
- 投稿日:2021-02-13T19:29:35+09:00
Laradock使い方手順
初めてlaradockを使い環境構築を行ったのでその手順をメモ
任意のディレクトリを作成しlaradockをクローンしてくる。
% git clone https://github.com/LaraDock/laradock.gitenvをコピー
% cp env-example .envコンテナの起動
% docker-compose up -d nginx mysql workspaceここでlocalhost上にサーバが立ち上がり、404エラーが表示されます。
workspaceに移動
docker-compose exec --user=laradock workspace bashlaravelをインストール(ここではVersion7を指定)
composer create-project --prefer-dist laravel/laravel laravel '7.*'laradockのenvのAPP_CODE_PATH_HOSTを上記で作成したフォルダ名に書き換える
APP_CODE_PATH_HOST=../laravel/dockerを再起動する
docker-compose stopdocker-compose up -d nginx mysql workspaceMySQLの設定をおこなう
laravelの.env内の環境変数を変更
DB_CONNECTION=mysql
DB_HOST=mysql
DB_PORT=3306
DB_DATABASE=default
DB_USERNAME=default
DB_PASSWORD=secret
マイグレーションを実行
docker-compose exec --user=laradock workspace bash のコマンドを打った/var/www# 上で行うことに要注意php artisan migrateマイグレーションができれば完了です。
参考
https://reffect.co.jp/laravel/laradock-laravel-macos
https://qiita.com/tdkn/items/b8aa24cca0ba2904f8e7
- 投稿日:2021-02-13T19:25:45+09:00
dockerで形態素解析の環境構築(jupyter + mecab)
はじめに
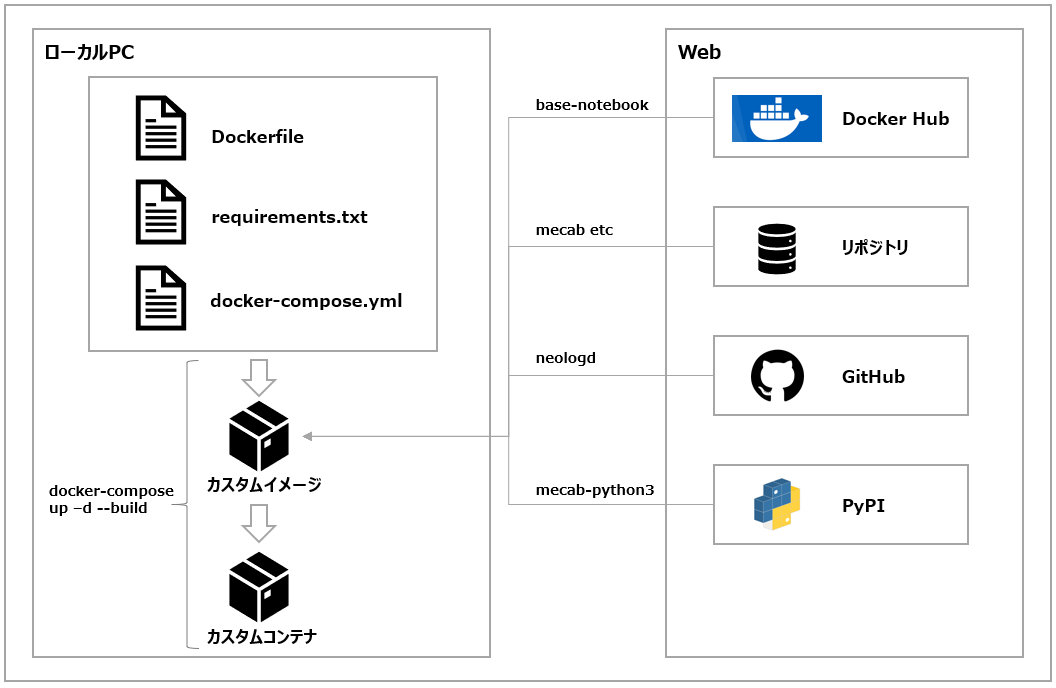
docker-composeを用いて、手軽に形態素解析の実行環境を構築する手順を整理した。(処理フローは下図。)
本手順のメリット
- コンテナによるポータブルな環境構築が可能である。
- 作成済のイメージでは把握しづらい内部処理を理解できる。
準備するもの
作業ディレクトリに、下記の3ファイルを作成する。
ローカルPC作業ディレクトリ ├─ Dockerfile ├─ requirements.txt └─ docker-compose.ymlDockerfileFROM jupyter/base-notebook USER root RUN apt-get update && apt-get install -y \ make \ curl \ file \ git \ libmecab-dev \ mecab \ mecab-ipadic-utf8 RUN git clone --depth 1 https://github.com/neologd/mecab-ipadic-neologd.git RUN mecab-ipadic-neologd/bin/install-mecab-ipadic-neologd -y COPY requirements.txt $PWD RUN pip install -r requirements.txtrequirements.txtmecab-python3docker-compose.ymlversion: "3.7" services: jupyter-notebook: image: mecab-base-notebook container_name: mecab-notebook build: context: . dockerfile: Dockerfile ports: - "889:8888" volumes: - ./work:/home/jovyan/work今回はbase-notebookを利用した。jupyterの公式で軽量のイメージになる。
また、mecab実行に必要なライブラリとPythonのPackageはDockerfileで管理する構成にしている。環境構築
下記の1コマンドで『Dockerイメージの作成&Dockerコンテナの作成・起動』を行う。
Creating mecab-notebook ... doneと標準出力されれば、環境構築に成功。
また、ローカルPCには「workフォルダ」が作成され、構築環境と同期されている。bash> docker-compose up -d --build構築環境にアクセス
構築環境(jupyter notebook)のURLは「http://localhost:889/tree/work」となる。
初回アクセス時は「Password or token」を要するため、稼働中のコンテナからtokenを取得する。bash> docker exec -it mecab-notebook jupyter notebook list http://0.0.0.0:8888/?token=xxxxxxxxxxx :: /home/jovyan形態素解析の動作確認
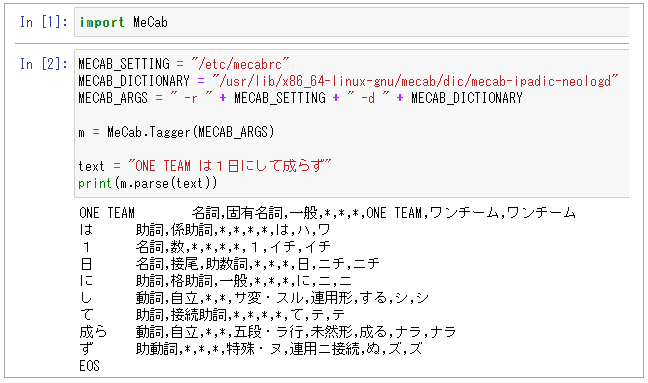
構築環境にアクセスし、形態素解析が問題なく実行されていることを確認。
mecab-ipadic-NEologdを利用するため、新語(ONE TEAM など)の形態素解析が可能となる。
コピー用import MeCab MECAB_SETTING = "/etc/mecabrc" MECAB_DICTIONARY = "/usr/lib/x86_64-linux-gnu/mecab/dic/mecab-ipadic-neologd" MECAB_ARGS = " -r " + MECAB_SETTING + " -d " + MECAB_DICTIONARY m = MeCab.Tagger(MECAB_ARGS) text = "ONE TEAMは1日にして成らず" print(m.parse(text))※neologdのパスは
docker exec -it mecab-notebook mecab-config --dicdirで確認可能。おわりに
自然言語処理などで利用される形態素解析の実行環境を構築した。
Dockerコンテナを作成済のため、以降はコンテナの起動・停止コマンドで、環境の起動・停止が可能となる。
- 投稿日:2021-02-13T19:12:34+09:00
ゼロからDockerでLaravel+Nuxt TypeScript+MySQLの環境構築をしてトップページを表示するまで【備忘録】
前提
ローカル環境
- macOS Catalina10.15.5
- Docker for mac 2.3.0.4
バージョン
- PHP...7.3
- Laravel...7.30.1
- Node.js 14.6
- nuxt/types 2.14
- MySQL 5.7
その他
- 最終的なディレクトリ構成
Terminal$ tree -a -L 2 . . ├── .env ├── .env.example ├── .gitignore ├── .idea │ ├── modules.xml │ ├── myapp.iml │ └── workspace.xml ├── docker │ ├── nginx │ ├── node │ └── php ├── docker-compose.yml ├── frontApp │ ├── .editorconfig │ ├── .git │ ├── .gitignore │ ├── .nuxt │ ├── .prettierrc │ ├── README.md │ ├── assets │ ├── components │ ├── layouts │ ├── middleware │ ├── node_modules │ ├── nuxt.config.js │ ├── package.json │ ├── pages │ ├── plugins │ ├── static │ ├── store │ ├── tsconfig.json │ └── yarn.lock └── laravel ├── .editorconfig ├── .env ├── .env.example ├── .gitattributes ├── .gitignore ├── .styleci.yml ├── README.md ├── app ├── artisan ├── bootstrap ├── composer.json ├── composer.lock ├── config ├── database ├── package.json ├── phpunit.xml ├── public ├── resources ├── routes ├── storage ├── tests ├── vendor └── webpack.mix.jsプロジェクト用ディレクトリを用意
Terminal$ mkdir -p ~/workspace/myapp $ cd ~/workspace/myapp $ mkdir -p laravel docker/{php,nginx,node} $ mkdir docker/nginx/{conf.d,logs}.envの準備
先に.env.exampleを編集してからコピーして.envをつくる
myapp$ touch .env.example .gitignore.env.exampleと.gitignoreを編集
.env.examplePROJECT_PATH=./laravel TZ=Asia/Tokyo WEB_PORT=10080 DB_PORT=13306 DB_TESTING_PORT=13307 DB_CONNECTION=mysql DB_NAME=myapp DB_USER=willrewrite DB_PASS=willrewrite DB_ROOT_PASS=willrewrite MAILHOG_PORT=18025 MAIL_HOST=mail MAIL_PORT=1025 COMPOSE_HTTP_TIMEOUT=70 FRONT_PORT=3000.gitignore.env .idea # その他個別に追加.env.exampleをコピー
myapp$ cp .env.example .envコピー後、個別のプロジェクトに合わせて.envの環境変数を上書きする
必要なファイルを作成
myapp$ touch docker-compose.yml \ docker/php/{php.ini,Dockerfile} \ docker/nginx/{conf.d/default.conf,Dockerfile} \ docker/node/Dockerfile各ファイルを編集
docker-compose.ymlversion: "3" services: web: build: context: . dockerfile: ./docker/nginx/Dockerfile args: - TZ=${TZ} volumes: - ./docker/nginx/logs:/etc/nginx/logs - ./docker/nginx/conf.d:/etc/nginx/conf.d - ${PROJECT_PATH}:/var/www/laravel ports: - ${WEB_PORT}:80 links: - app depends_on: - app app: build: context: . dockerfile: ./docker/php/Dockerfile args: - TZ=${TZ} volumes: - ${PROJECT_PATH}:/var/www/laravel links: - db_master environment: - DB_CONNECTION=${DB_CONNECTION} - DB_HOST=db_master - DB_DATABASE=${DB_NAME} - DB_USERNAME=${DB_USER} - DB_PASSWORD=${DB_PASS} - TZ=${TZ} - MAIL_HOST=${MAIL_HOST} - MAIL_PORT=${MAIL_PORT} db_master: image: mysql:5.7 environment: - MYSQL_DATABASE=${DB_NAME} - MYSQL_USER=${DB_USER} - MYSQL_PASSWORD=${DB_PASS} - MYSQL_ROOT_PASSWORD=${DB_ROOT_PASS} - TZ=${TZ} ports: - ${DB_PORT}:3306 front_app: build: context: . dockerfile: ./docker/node/Dockerfile args: - TZ=${TZ} volumes: - ./frontApp:/var/www/frontApp ports: - ${FRONT_PORT}:3000 links: - web depends_on: - webNginxの設定
docker/nginx/DockerfileFROM nginx:1.15.7-alpine # timezone ARG TZ COPY ./docker/nginx/conf.d/ /etc/nginx/conf.d/ COPY ./docker/nginx/logs/ /etc/nginx/logs/ COPY ./laravel/ /var/www/laravel/ RUN apk update && apk --update add tzdata && \ cp /usr/share/zoneinfo/${TZ} /etc/localtime && \ apk del tzdata && \ rm -rf /var/cache/apk/*docker/nginx/conf.d/default.confserver { listen 0.0.0.0:80; # server_nameで設定した名前をローカルマシンの/etc/hostsにも設定する server_name www.example.org example.org; charset utf-8; client_max_body_size 3M; root /var/www/laravel/public; index index.php; location / { access_log /etc/nginx/logs/access.log main; error_log /etc/nginx/logs/error.log; try_files $uri $uri/ /index.php$is_args$args; } location ~ \.php$ { fastcgi_pass app:9000; fastcgi_index index.php; fastcgi_param SCRIPT_FILENAME $document_root$fastcgi_script_name; include fastcgi_params; } }PHPの設定
docker/php/DockerfileFROM php:7.3.0RC6-fpm-alpine3.8 # timezone ARG TZ WORKDIR /var/www/laravel COPY ./docker/php/php.ini /usr/local/etc/php/ COPY ./laravel/ /var/www/laravel/ RUN apk upgrade --update && apk add --no-cache \ coreutils freetype-dev jpeg-dev libjpeg-turbo-dev libpng-dev libmcrypt-dev \ git vim unzip tzdata \ libltdl && \ docker-php-ext-install pdo_mysql mysqli mbstring && \ docker-php-ext-install -j$(nproc) iconv && \ docker-php-ext-configure gd \ --with-freetype-dir=/usr/include/ \ --with-jpeg-dir=/usr/include/ && \ docker-php-ext-install -j$(nproc) gd && \ cp /usr/share/zoneinfo/${TZ} /etc/localtime && \ apk del tzdata && \ rm -rf /var/cache/apk/* RUN curl -sS https://getcomposer.org/installer | php -- --install-dir=/usr/local/bin --filename=composerdocker/php/php.inilog_errors = on error_log = /var/log/php/php-error.log upload_max_filesize = 3M memory_limit = -1 post_max_size = 100M max_execution_time = 900 max_input_vars = 100000 default_charset = UTF-8 [Date] date.timezone = ${TZ} [mbstring] mbstring.internal_encoding = "UTF-8" mbstring.language = "Japanese"Nodeの設定
docker/node/DockerfileFROM node:14.6.0-alpine RUN mkdir -p /var/www/frontApp # timezone ARG TZ WORKDIR /var/www/frontApp COPY ./frontApp/ /var/www/frontApp/ RUN apk update && \ apk upgrade && \ apk add --no-cache make gcc g++ python && \ yarn install EXPOSE 3000 ENTRYPOINT ["yarn", "run", "dev"]nuxt-tsのプロジェクト作成
myapp$ yarn create nuxt-app frontApp yarn create v1.22.4 [1/4] ? Resolving packages... [2/4] ? Fetching packages... [3/4] ? Linking dependencies... [4/4] ? Building fresh packages... warning Your current version of Yarn is out of date. The latest version is "1.22.5", while you're on "1.22.4". info To upgrade, run the following command: $ curl --compressed -o- -L https://yarnpkg.com/install.sh | bash success Installed "create-nuxt-app@3.5.2" with binaries: - create-nuxt-app create-nuxt-app v3.5.2 ✨ Generating Nuxt.js project in frontApp ? Project name: frontApp ? Programming language: TypeScript ? Package manager: Yarn ? UI framework: None ? Nuxt.js modules: Axios - Promise based HTTP client ? Linting tools: Prettier ? Testing framework: None ? Rendering mode: Universal (SSR / SSG) ? Deployment target: Server (Node.js hosting) ? Development tools: (Press <space> to select, <a> to toggle all, <i> to invert selection) ? Continuous integration: None ? Version control system: Git一旦サーバを立ち上げ画面確認
myapp$ cd frontApp $ yarn run dev
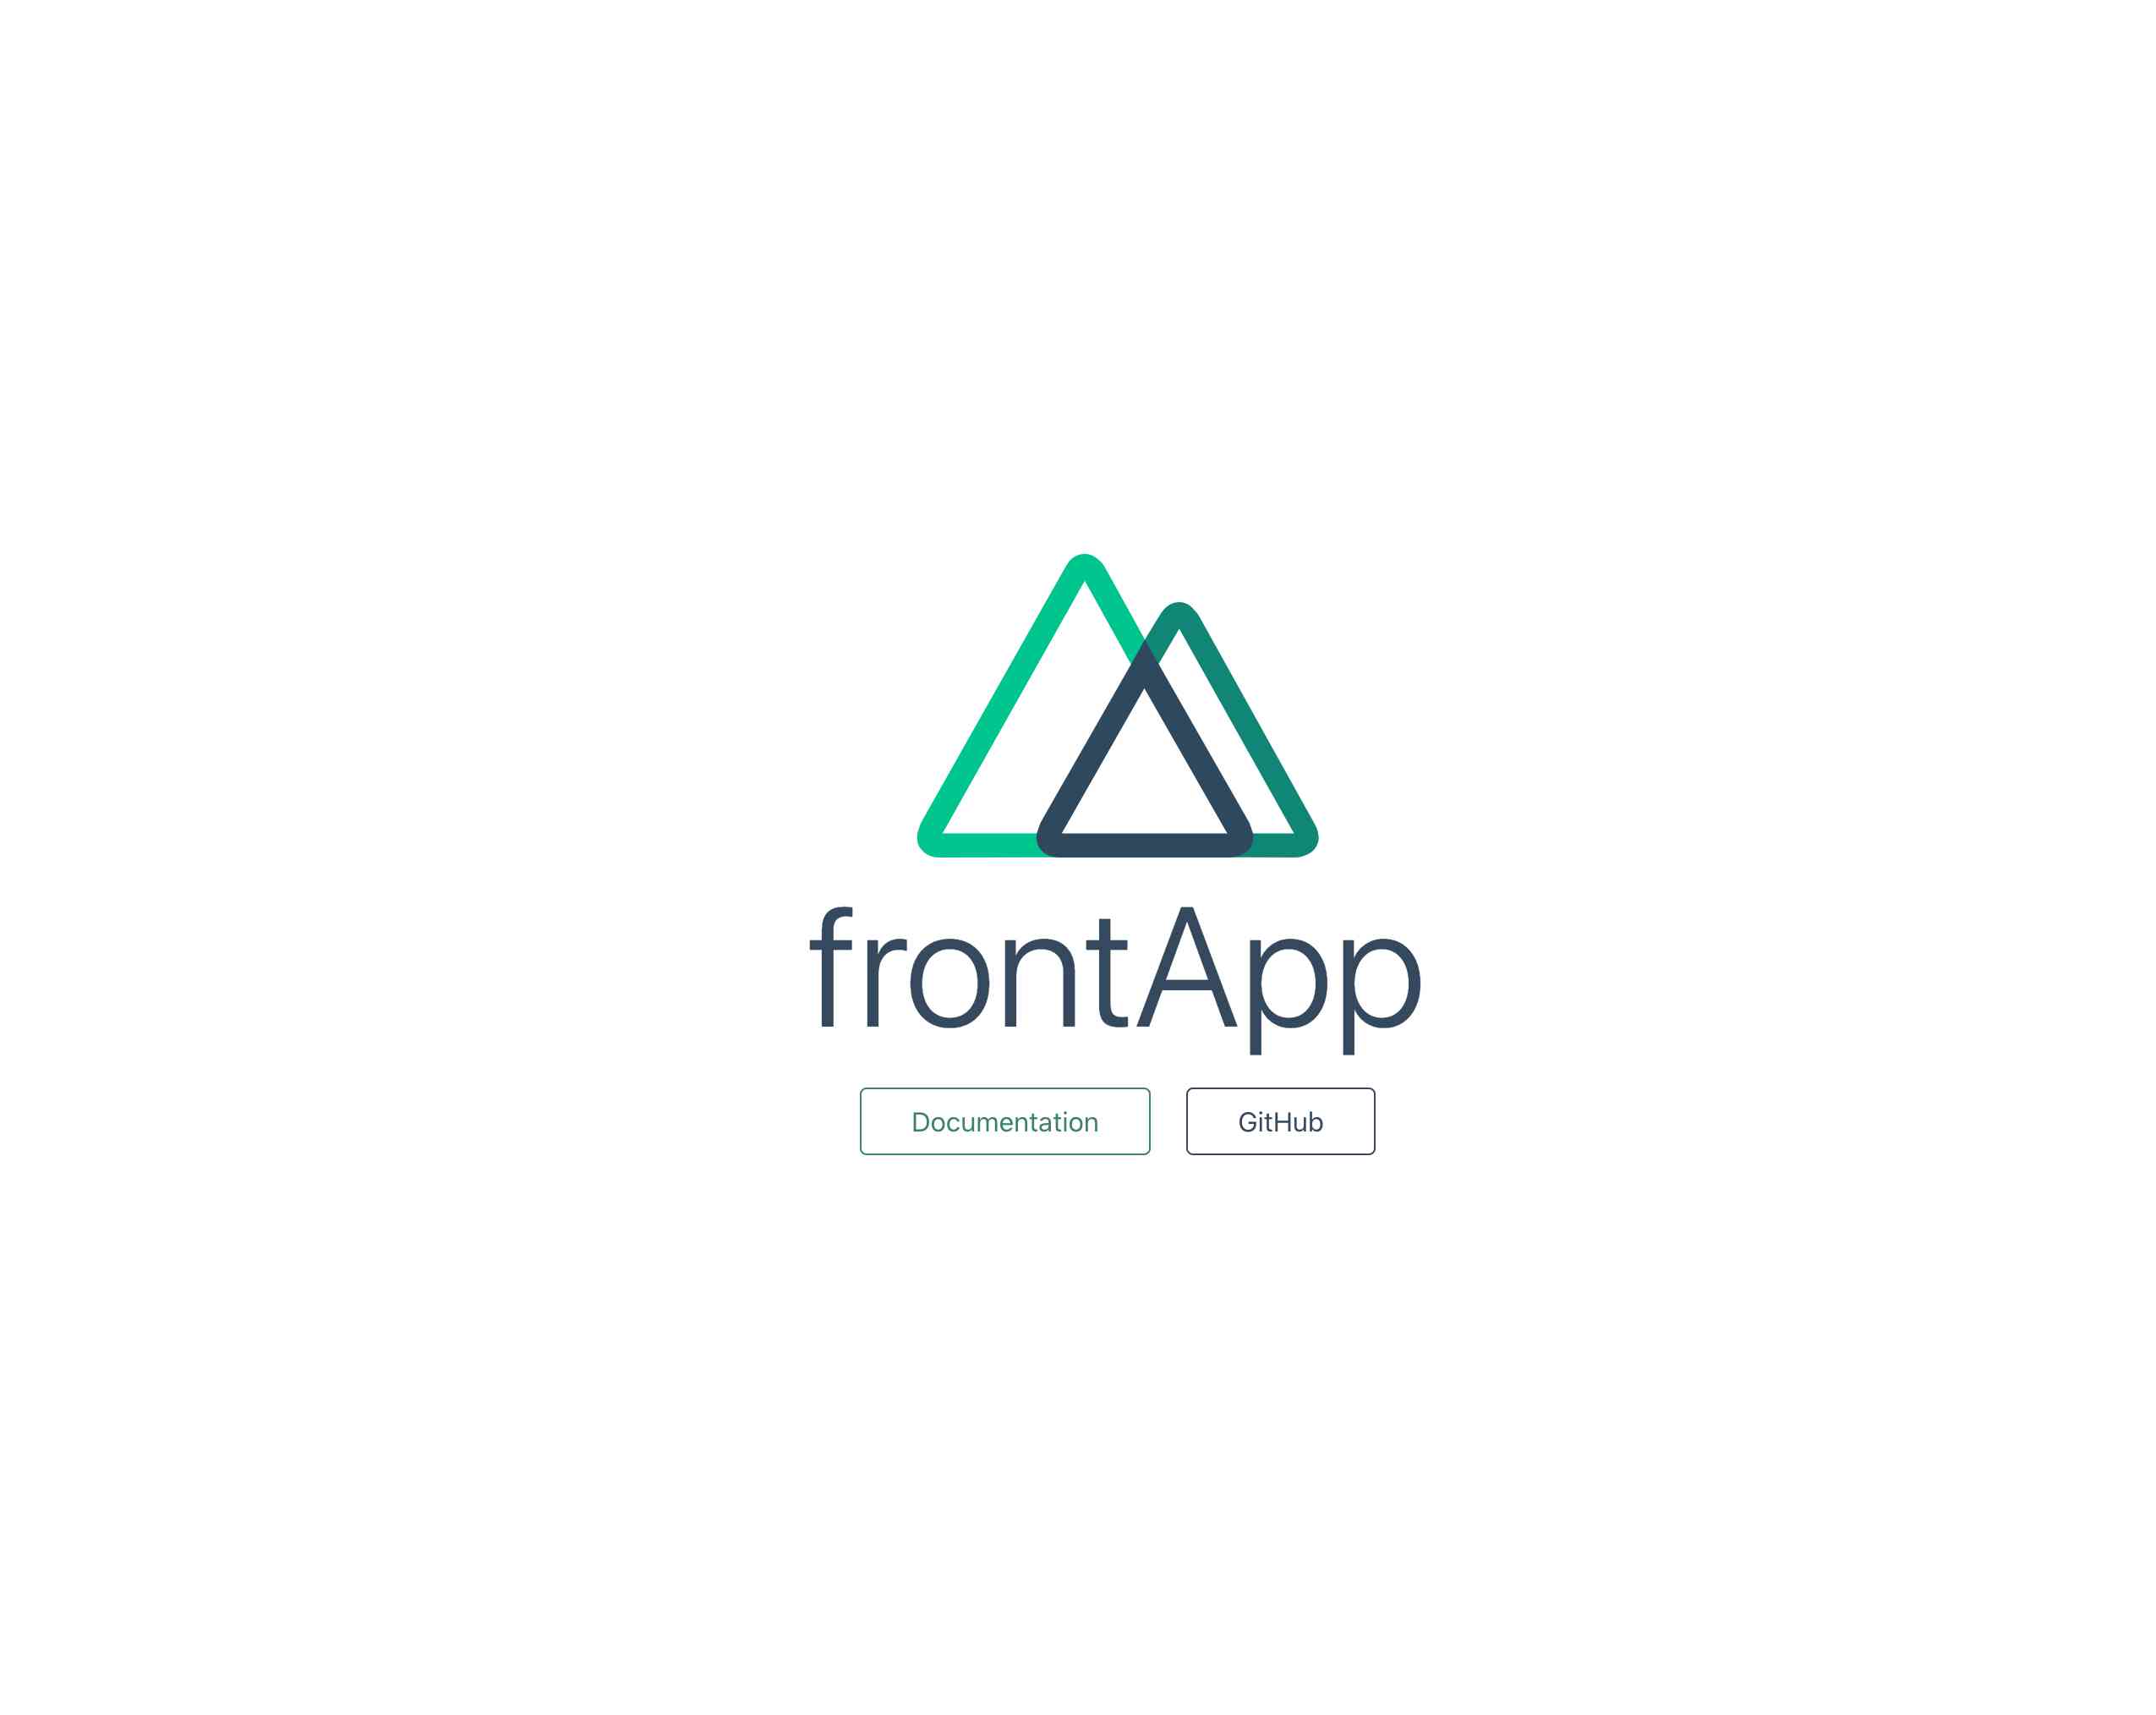
- localhost:3000にアクセスして下記の画面を確認したあと、command + Cでサーバストップ
- コンテナ起動時に備えpackage.jsonを修正
frontApp/package.json{ "name": "frontApp", "version": "1.0.0", "private": true, "scripts": { - "dev": "nuxt-ts", + "dev": "HOST=0.0.0.0 PORT=3000 nuxt-ts", "build": "nuxt-ts build", - "start": "nuxt-ts start", + "start": "HOST=0.0.0.0 PORT=3000 nuxt-ts start", "generate": "nuxt-ts generate" }, // 以下略 }laravelディレクトリ直下にLaravelのプロジェクト作成
myapp$ docker-compose run app composer create-project --prefer-dist laravel/laravel ../laravelディレクトリ以下が次のような構成になっていればOK
myapp$ tree -a -L 1 laravel laravel ├── .editorconfig ├── .env ├── .env.example ├── .gitattributes ├── .gitignore ├── .styleci.yml ├── README.md ├── app ├── artisan ├── bootstrap ├── composer.json ├── composer.lock ├── config ├── database ├── package.json ├── phpunit.xml ├── public ├── resources ├── routes ├── server.php ├── storage ├── tests ├── vendor └── webpack.mix.jsコンテナをバックグラウンドで起動
myapp$ docker-compose up -d --buildLaravelの設定ファイルをキャッシュ等
myapp$ docker-compose exec app ash $ php artisan -V // バージョンが表示されればOK $ php artisan config:cache $ php artisan migrate $ chmod -R a+rw storage/ bootstrap/cache $ exit画面確認
Nuxt、Laravel間での通信を確認
Laravel側の設定
laravel/routes/api.php<?php use Illuminate\Http\Request; use Illuminate\Support\Facades\Route; /* * 中略 */ + Route::get('/', function () { + return 'Hello'; + });Nuxt側の設定
myapp$ cd frontApp $ yarn add @nuxtjs/proxy @nuxtjs/dotenvfrontApp/nuxt.config.js+ const environment = process.env.NODE_ENV || 'development' + require('dotenv').config() export default { // (中略) modules: [ // https://go.nuxtjs.dev/axios '@nuxtjs/axios', + '@nuxtjs/proxy', + '@nuxtjs/dotenv', ], + proxy: { + '/api': + environment === 'development' + ? process.env.API_URL + : 'https://www.risk-exam.site', + }, + axios: { + baseURL: process.env.API_URL, + browserBaseURL: process.env.API_BROWSER_URL, + credentials: true, + }, }myapp/frontApp$ touch .envfrontApp/.envAPI_URL=http://web/api API_BROWSER_URL=http://localhost:10080/apifrontApp/pages/index.vue<template> <div class="container"> <div> <Logo /> <h1 class="title"> {{ greet }} // デフォルトの「frontApp」から変更 </h1> <div class="links"> <a href="https://nuxtjs.org/" target="_blank" rel="noopener noreferrer" class="button--green" > Documentation </a> <a href="https://github.com/nuxt/nuxt.js" target="_blank" rel="noopener noreferrer" class="button--grey" > GitHub </a> </div> </div> </div> </template> <script lang="ts"> import Vue from 'vue' export default Vue.extend({ async asyncData({ app }): Promise<object> { const greet: string = await app.$axios.$get('/').catch((err) => err) return { greet } } }) </script> // 以下略
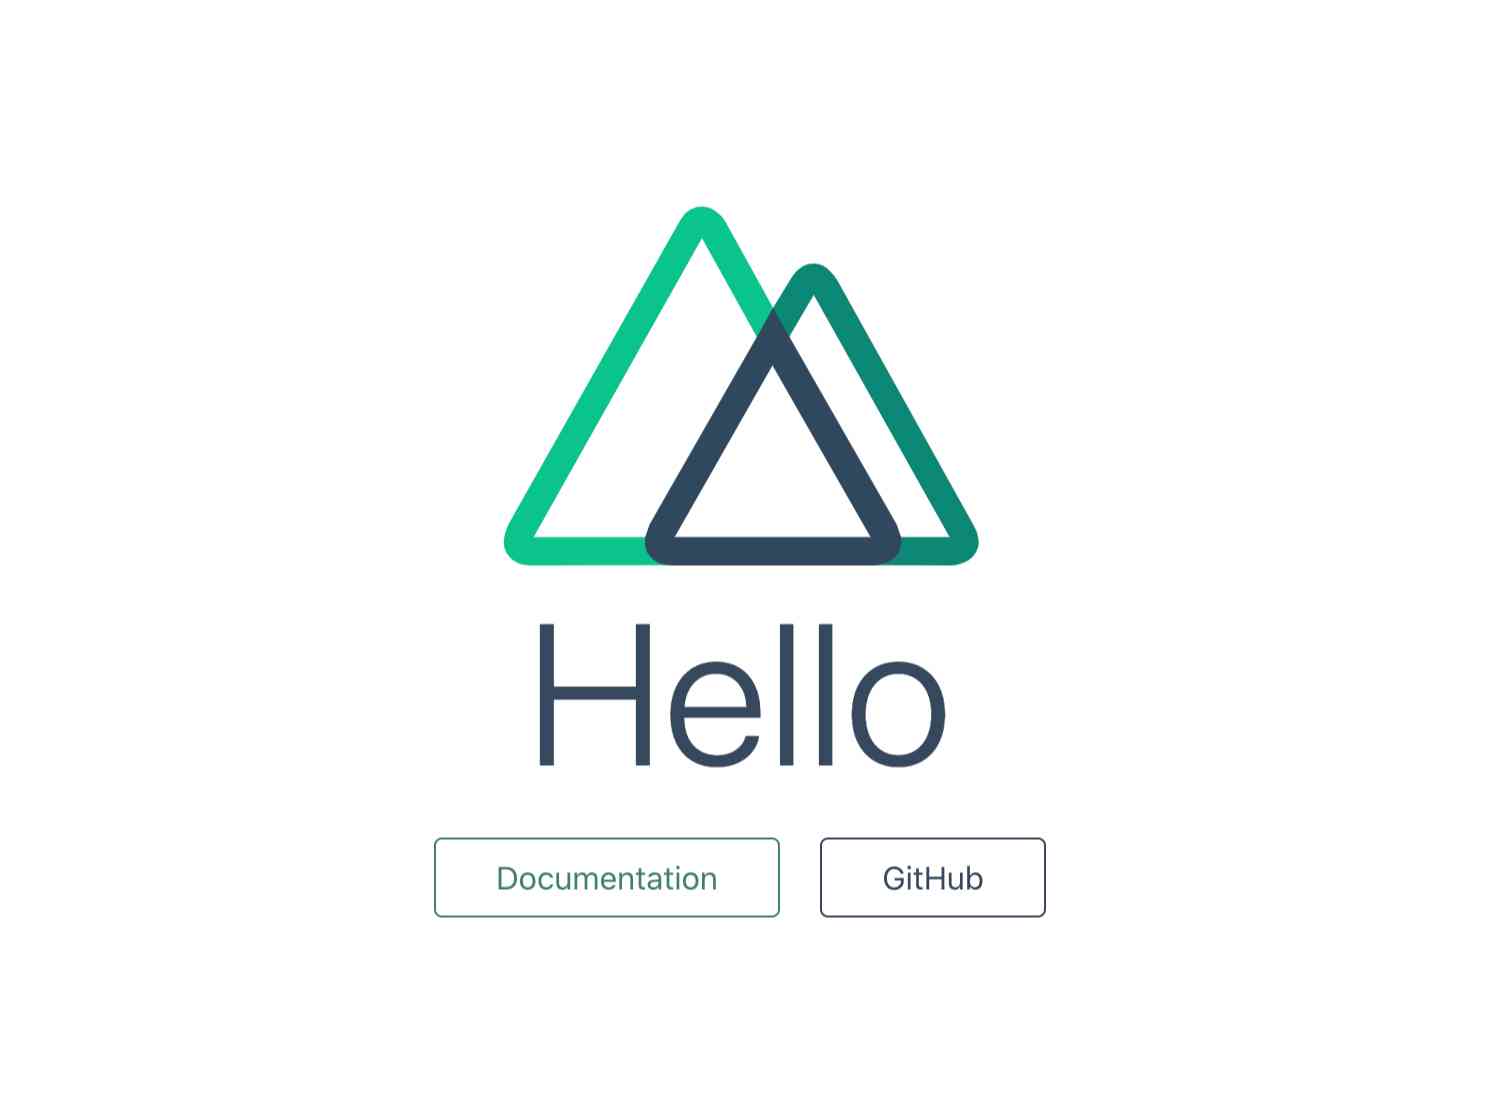
localhost:3000にアクセスして、タイトルがHelloに変わっていたらOK
- 投稿日:2021-02-13T16:51:28+09:00
ゼロからDockerでLaravel+Nuxt-ts+MySQLの環境構築をしてトップページを表示するまで【備忘録】
前提
ローカル環境
- macOS Catalina10.15.5
- Docker for mac 2.3.0.4
バージョン
- PHP...7.3
- Laravel...7.30.1
- Node.js 14.6
- nuxt/types 2.14
- MySQL 5.7
その他
- 最終的なディレクトリ構成
Terminal$ tree -a -L 2 . . ├── .env ├── .env.example ├── .gitignore ├── .idea │ ├── modules.xml │ ├── myapp.iml │ └── workspace.xml ├── docker │ ├── nginx │ ├── node │ └── php ├── docker-compose.yml ├── frontApp │ ├── .editorconfig │ ├── .git │ ├── .gitignore │ ├── .nuxt │ ├── .prettierrc │ ├── README.md │ ├── assets │ ├── components │ ├── layouts │ ├── middleware │ ├── node_modules │ ├── nuxt.config.js │ ├── package.json │ ├── pages │ ├── plugins │ ├── static │ ├── store │ ├── tsconfig.json │ └── yarn.lock └── laravel ├── .editorconfig ├── .env ├── .env.example ├── .gitattributes ├── .gitignore ├── .styleci.yml ├── README.md ├── app ├── artisan ├── bootstrap ├── composer.json ├── composer.lock ├── config ├── database ├── package.json ├── phpunit.xml ├── public ├── resources ├── routes ├── storage ├── tests ├── vendor └── webpack.mix.jsプロジェクト用ディレクトリを用意
Terminal$ mkdir -p ~/workspace/myapp $ cd ~/workspace/myapp $ mkdir -p laravel docker/{php,nginx,node} $ mkdir docker/nginx/{conf.d,logs}.envの準備
先に.env.exampleを編集してからコピーして.envをつくる
Terminal$ touch .env.example .gitignore.env.exampleと.gitignoreを編集
.env.examplePROJECT_PATH=./laravel TZ=Asia/Tokyo WEB_PORT=10080 DB_PORT=13306 DB_TESTING_PORT=13307 DB_CONNECTION=mysql DB_NAME=myapp DB_USER=willrewrite DB_PASS=willrewrite DB_ROOT_PASS=willrewrite MAILHOG_PORT=18025 MAIL_HOST=mail MAIL_PORT=1025 COMPOSE_HTTP_TIMEOUT=70 FRONT_PORT=3000.gitignore.env .idea # その他個別に追加.env.exampleをコピー
Terminal$ cp .env.example .envコピー後、個別のプロジェクトに合わせて.envの環境変数を上書きする
必要なファイルを作成
Terminal$ touch docker-compose.yml \ docker/php/{php.ini,Dockerfile} \ docker/nginx/{conf.d/default.conf,Dockerfile} \ docker/node/Dockerfile各ファイルを編集
docker-compose.ymlversion: "3" services: web: build: context: . dockerfile: ./docker/nginx/Dockerfile args: - TZ=${TZ} volumes: - ./docker/nginx/logs:/etc/nginx/logs - ./docker/nginx/conf.d:/etc/nginx/conf.d - ${PROJECT_PATH}:/var/www/laravel ports: - ${WEB_PORT}:80 links: - app depends_on: - app app: build: context: . dockerfile: ./docker/php/Dockerfile args: - TZ=${TZ} volumes: - ${PROJECT_PATH}:/var/www/laravel links: - db_master environment: - DB_CONNECTION=${DB_CONNECTION} - DB_HOST=db_master - DB_DATABASE=${DB_NAME} - DB_USERNAME=${DB_USER} - DB_PASSWORD=${DB_PASS} - TZ=${TZ} - MAIL_HOST=${MAIL_HOST} - MAIL_PORT=${MAIL_PORT} db_master: image: mysql:5.7 environment: - MYSQL_DATABASE=${DB_NAME} - MYSQL_USER=${DB_USER} - MYSQL_PASSWORD=${DB_PASS} - MYSQL_ROOT_PASSWORD=${DB_ROOT_PASS} - TZ=${TZ} ports: - ${DB_PORT}:3306 front_app: build: context: . dockerfile: ./docker/node/Dockerfile args: - TZ=${TZ} volumes: - ./frontApp:/var/www/frontApp ports: - ${FRONT_PORT}:3000 links: - web depends_on: - webNginxの設定
docker/nginx/DockerfileFROM nginx:1.15.7-alpine # timezone ARG TZ COPY ./docker/nginx/conf.d/ /etc/nginx/conf.d/ COPY ./docker/nginx/logs/ /etc/nginx/logs/ COPY ./laravel/ /var/www/laravel/ RUN apk update && apk --update add tzdata && \ cp /usr/share/zoneinfo/${TZ} /etc/localtime && \ apk del tzdata && \ rm -rf /var/cache/apk/*docker/nginx/conf.d/default.confserver { listen 0.0.0.0:80; # server_nameで設定した名前をローカルマシンの/etc/hostsにも設定する server_name www.example.org example.org; charset utf-8; client_max_body_size 3M; root /var/www/laravel/public; index index.php; location / { access_log /etc/nginx/logs/access.log main; error_log /etc/nginx/logs/error.log; try_files $uri $uri/ /index.php$is_args$args; } location ~ \.php$ { fastcgi_pass app:9000; fastcgi_index index.php; fastcgi_param SCRIPT_FILENAME $document_root$fastcgi_script_name; include fastcgi_params; } }PHPの設定
docker/php/DockerfileFROM php:7.3.0RC6-fpm-alpine3.8 # timezone ARG TZ WORKDIR /var/www/laravel COPY ./docker/php/php.ini /usr/local/etc/php/ COPY ./laravel/ /var/www/laravel/ RUN apk upgrade --update && apk add --no-cache \ coreutils freetype-dev jpeg-dev libjpeg-turbo-dev libpng-dev libmcrypt-dev \ git vim unzip tzdata \ libltdl && \ docker-php-ext-install pdo_mysql mysqli mbstring && \ docker-php-ext-install -j$(nproc) iconv && \ docker-php-ext-configure gd \ --with-freetype-dir=/usr/include/ \ --with-jpeg-dir=/usr/include/ && \ docker-php-ext-install -j$(nproc) gd && \ cp /usr/share/zoneinfo/${TZ} /etc/localtime && \ apk del tzdata && \ rm -rf /var/cache/apk/* RUN curl -sS https://getcomposer.org/installer | php -- --install-dir=/usr/local/bin --filename=composerdocker/php/php.inilog_errors = on error_log = /var/log/php/php-error.log upload_max_filesize = 3M memory_limit = -1 post_max_size = 100M max_execution_time = 900 max_input_vars = 100000 default_charset = UTF-8 [Date] date.timezone = ${TZ} [mbstring] mbstring.internal_encoding = "UTF-8" mbstring.language = "Japanese"Nodeの設定
docker/node/DockerfileFROM node:14.6.0-alpine RUN mkdir -p /var/www/frontApp # timezone ARG TZ WORKDIR /var/www/frontApp COPY ./frontApp/ /var/www/frontApp/ RUN apk update && \ apk upgrade && \ apk add --no-cache make gcc g++ python && \ yarn install EXPOSE 3000 ENTRYPOINT ["yarn", "run", "dev"]nuxt-tsのプロジェクト作成
Terminal$ yarn create nuxt-app frontApp yarn create v1.22.4 [1/4] ? Resolving packages... [2/4] ? Fetching packages... [3/4] ? Linking dependencies... [4/4] ? Building fresh packages... warning Your current version of Yarn is out of date. The latest version is "1.22.5", while you're on "1.22.4". info To upgrade, run the following command: $ curl --compressed -o- -L https://yarnpkg.com/install.sh | bash success Installed "create-nuxt-app@3.5.2" with binaries: - create-nuxt-app create-nuxt-app v3.5.2 ✨ Generating Nuxt.js project in frontApp ? Project name: frontApp ? Programming language: TypeScript ? Package manager: Yarn ? UI framework: None ? Nuxt.js modules: Axios - Promise based HTTP client ? Linting tools: Prettier ? Testing framework: None ? Rendering mode: Universal (SSR / SSG) ? Deployment target: Server (Node.js hosting) ? Development tools: (Press <space> to select, <a> to toggle all, <i> to invert selection) ? Continuous integration: None ? Version control system: Git一旦サーバを立ち上げ画面確認
Terminal$ cd frontApp $ yarn run dev
- localhost:3000にアクセスして下記の画面を確認したあと、command + Cでサーバストップ
- コンテナ起動時に備えpackage.jsonを修正
frontApp/package.json{ "name": "frontApp", "version": "1.0.0", "private": true, "scripts": { - "dev": "nuxt-ts", + "dev": "HOST=0.0.0.0 PORT=3000 nuxt-ts", "build": "nuxt-ts build", - "start": "nuxt-ts start", + "start": "HOST=0.0.0.0 PORT=3000 nuxt-ts start", "generate": "nuxt-ts generate" }, // 以下略 }laravelディレクトリ直下にLaravelのプロジェクト作成
Terminal$ docker-compose run app composer create-project --prefer-dist laravel/laravel ../laravelディレクトリ以下が次のような構成になっていればOK
$ tree -a -L 1 laravel
laravel
├── .editorconfig
├── .env
├── .env.example
├── .gitattributes
├── .gitignore
├── .styleci.yml
├── README.md
├── app
├── artisan
├── bootstrap
├── composer.json
├── composer.lock
├── config
├── database
├── package.json
├── phpunit.xml
├── public
├── resources
├── routes
├── server.php
├── storage
├── tests
├── vendor
└── webpack.mix.js
コンテナをバックグラウンドで起動
Terminal$ docker-compose up -d --buildLaravelの設定ファイルをキャッシュ等
Terminal$ docker-compose exec app ash $ php artisan -V // バージョンが表示されればOK $ php artisan config:cache $ php artisan migrate $ chmod -R a+rw storage/ bootstrap/cache $ exit画面確認
Nuxt、Laravel間での通信を確認
Laravel側の設定
laravel/routes/api.php<?php use Illuminate\Http\Request; use Illuminate\Support\Facades\Route; /* * 中略 */ + Route::get('/', function () { + return 'Hello'; + });Nuxt側の設定
Terminal$ cd frontApp $ yarn add @nuxtjs/proxy @nuxtjs/dotenvfrontApp/nuxt.config.js+ const environment = process.env.NODE_ENV || 'development' + require('dotenv').config() export default { // (中略) modules: [ // https://go.nuxtjs.dev/axios '@nuxtjs/axios', + '@nuxtjs/proxy', + '@nuxtjs/dotenv', ], + proxy: { + '/api': + environment === 'development' + ? process.env.API_URL + : 'https://www.risk-exam.site', + }, + axios: { + baseURL: process.env.API_URL, + browserBaseURL: process.env.API_BROWSER_URL, + credentials: true, + }, }Terminal$ touch .envfrontApp/.envAPI_URL=http://web/api API_BROWSER_URL=http://localhost:10080/apifrontApp/pages/index.vue<template> <div class="container"> <div> <Logo /> <h1 class="title"> {{ greet }} // デフォルトの「frontApp」から変更 </h1> <div class="links"> <a href="https://nuxtjs.org/" target="_blank" rel="noopener noreferrer" class="button--green" > Documentation </a> <a href="https://github.com/nuxt/nuxt.js" target="_blank" rel="noopener noreferrer" class="button--grey" > GitHub </a> </div> </div> </div> </template> <script lang="ts"> import Vue from 'vue' export default Vue.extend({ async asyncData({ app }): Promise<object> { const greet: string = await app.$axios.$get('/').catch((err) => err) return { greet } } }) </script> // 以下略
localhost:3000にアクセスして、タイトルがHelloに変わっていたらOK
- 投稿日:2021-02-13T16:51:28+09:00
ゼロからDockerでLaravel+Nuxt TypeScript+MySQLの環境構築をしてトップページを表示するまで【備忘録】
前提
ローカル環境
- macOS Catalina10.15.5
- Docker for mac 2.3.0.4
バージョン
- PHP...7.3
- Laravel...7.30.1
- Node.js 14.6
- nuxt/types 2.14
- MySQL 5.7
その他
- 最終的なディレクトリ構成
Terminal$ tree -a -L 2 . . ├── .env ├── .env.example ├── .gitignore ├── .idea │ ├── modules.xml │ ├── myapp.iml │ └── workspace.xml ├── docker │ ├── nginx │ ├── node │ └── php ├── docker-compose.yml ├── frontApp │ ├── .editorconfig │ ├── .git │ ├── .gitignore │ ├── .nuxt │ ├── .prettierrc │ ├── README.md │ ├── assets │ ├── components │ ├── layouts │ ├── middleware │ ├── node_modules │ ├── nuxt.config.js │ ├── package.json │ ├── pages │ ├── plugins │ ├── static │ ├── store │ ├── tsconfig.json │ └── yarn.lock └── laravel ├── .editorconfig ├── .env ├── .env.example ├── .gitattributes ├── .gitignore ├── .styleci.yml ├── README.md ├── app ├── artisan ├── bootstrap ├── composer.json ├── composer.lock ├── config ├── database ├── package.json ├── phpunit.xml ├── public ├── resources ├── routes ├── storage ├── tests ├── vendor └── webpack.mix.jsプロジェクト用ディレクトリを用意
Terminal$ mkdir -p ~/workspace/myapp $ cd ~/workspace/myapp $ mkdir -p laravel docker/{php,nginx,node} $ mkdir docker/nginx/{conf.d,logs}.envの準備
先に.env.exampleを編集してからコピーして.envをつくる
myapp$ touch .env.example .gitignore.env.exampleと.gitignoreを編集
.env.examplePROJECT_PATH=./laravel TZ=Asia/Tokyo WEB_PORT=10080 DB_PORT=13306 DB_TESTING_PORT=13307 DB_CONNECTION=mysql DB_NAME=myapp DB_USER=willrewrite DB_PASS=willrewrite DB_ROOT_PASS=willrewrite MAILHOG_PORT=18025 MAIL_HOST=mail MAIL_PORT=1025 COMPOSE_HTTP_TIMEOUT=70 FRONT_PORT=3000.gitignore.env .idea # その他個別に追加.env.exampleをコピー
myapp$ cp .env.example .envコピー後、個別のプロジェクトに合わせて.envの環境変数を上書きする
必要なファイルを作成
myapp$ touch docker-compose.yml \ docker/php/{php.ini,Dockerfile} \ docker/nginx/{conf.d/default.conf,Dockerfile} \ docker/node/Dockerfile各ファイルを編集
docker-compose.ymlversion: "3" services: web: build: context: . dockerfile: ./docker/nginx/Dockerfile args: - TZ=${TZ} volumes: - ./docker/nginx/logs:/etc/nginx/logs - ./docker/nginx/conf.d:/etc/nginx/conf.d - ${PROJECT_PATH}:/var/www/laravel ports: - ${WEB_PORT}:80 links: - app depends_on: - app app: build: context: . dockerfile: ./docker/php/Dockerfile args: - TZ=${TZ} volumes: - ${PROJECT_PATH}:/var/www/laravel links: - db_master environment: - DB_CONNECTION=${DB_CONNECTION} - DB_HOST=db_master - DB_DATABASE=${DB_NAME} - DB_USERNAME=${DB_USER} - DB_PASSWORD=${DB_PASS} - TZ=${TZ} - MAIL_HOST=${MAIL_HOST} - MAIL_PORT=${MAIL_PORT} db_master: image: mysql:5.7 environment: - MYSQL_DATABASE=${DB_NAME} - MYSQL_USER=${DB_USER} - MYSQL_PASSWORD=${DB_PASS} - MYSQL_ROOT_PASSWORD=${DB_ROOT_PASS} - TZ=${TZ} ports: - ${DB_PORT}:3306 front_app: build: context: . dockerfile: ./docker/node/Dockerfile args: - TZ=${TZ} volumes: - ./frontApp:/var/www/frontApp ports: - ${FRONT_PORT}:3000 links: - web depends_on: - webNginxの設定
docker/nginx/DockerfileFROM nginx:1.15.7-alpine # timezone ARG TZ COPY ./docker/nginx/conf.d/ /etc/nginx/conf.d/ COPY ./docker/nginx/logs/ /etc/nginx/logs/ COPY ./laravel/ /var/www/laravel/ RUN apk update && apk --update add tzdata && \ cp /usr/share/zoneinfo/${TZ} /etc/localtime && \ apk del tzdata && \ rm -rf /var/cache/apk/*docker/nginx/conf.d/default.confserver { listen 0.0.0.0:80; # server_nameで設定した名前をローカルマシンの/etc/hostsにも設定する server_name www.example.org example.org; charset utf-8; client_max_body_size 3M; root /var/www/laravel/public; index index.php; location / { access_log /etc/nginx/logs/access.log main; error_log /etc/nginx/logs/error.log; try_files $uri $uri/ /index.php$is_args$args; } location ~ \.php$ { fastcgi_pass app:9000; fastcgi_index index.php; fastcgi_param SCRIPT_FILENAME $document_root$fastcgi_script_name; include fastcgi_params; } }PHPの設定
docker/php/DockerfileFROM php:7.3.0RC6-fpm-alpine3.8 # timezone ARG TZ WORKDIR /var/www/laravel COPY ./docker/php/php.ini /usr/local/etc/php/ COPY ./laravel/ /var/www/laravel/ RUN apk upgrade --update && apk add --no-cache \ coreutils freetype-dev jpeg-dev libjpeg-turbo-dev libpng-dev libmcrypt-dev \ git vim unzip tzdata \ libltdl && \ docker-php-ext-install pdo_mysql mysqli mbstring && \ docker-php-ext-install -j$(nproc) iconv && \ docker-php-ext-configure gd \ --with-freetype-dir=/usr/include/ \ --with-jpeg-dir=/usr/include/ && \ docker-php-ext-install -j$(nproc) gd && \ cp /usr/share/zoneinfo/${TZ} /etc/localtime && \ apk del tzdata && \ rm -rf /var/cache/apk/* RUN curl -sS https://getcomposer.org/installer | php -- --install-dir=/usr/local/bin --filename=composerdocker/php/php.inilog_errors = on error_log = /var/log/php/php-error.log upload_max_filesize = 3M memory_limit = -1 post_max_size = 100M max_execution_time = 900 max_input_vars = 100000 default_charset = UTF-8 [Date] date.timezone = ${TZ} [mbstring] mbstring.internal_encoding = "UTF-8" mbstring.language = "Japanese"Nodeの設定
docker/node/DockerfileFROM node:14.6.0-alpine RUN mkdir -p /var/www/frontApp # timezone ARG TZ WORKDIR /var/www/frontApp COPY ./frontApp/ /var/www/frontApp/ RUN apk update && \ apk upgrade && \ apk add --no-cache make gcc g++ python && \ yarn install EXPOSE 3000 ENTRYPOINT ["yarn", "run", "dev"]nuxt-tsのプロジェクト作成
myapp$ yarn create nuxt-app frontApp yarn create v1.22.4 [1/4] ? Resolving packages... [2/4] ? Fetching packages... [3/4] ? Linking dependencies... [4/4] ? Building fresh packages... warning Your current version of Yarn is out of date. The latest version is "1.22.5", while you're on "1.22.4". info To upgrade, run the following command: $ curl --compressed -o- -L https://yarnpkg.com/install.sh | bash success Installed "create-nuxt-app@3.5.2" with binaries: - create-nuxt-app create-nuxt-app v3.5.2 ✨ Generating Nuxt.js project in frontApp ? Project name: frontApp ? Programming language: TypeScript ? Package manager: Yarn ? UI framework: None ? Nuxt.js modules: Axios - Promise based HTTP client ? Linting tools: Prettier ? Testing framework: None ? Rendering mode: Universal (SSR / SSG) ? Deployment target: Server (Node.js hosting) ? Development tools: (Press <space> to select, <a> to toggle all, <i> to invert selection) ? Continuous integration: None ? Version control system: Git一旦サーバを立ち上げ画面確認
myapp$ cd frontApp $ yarn run dev
- localhost:3000にアクセスして下記の画面を確認したあと、command + Cでサーバストップ
- コンテナ起動時に備えpackage.jsonを修正
frontApp/package.json{ "name": "frontApp", "version": "1.0.0", "private": true, "scripts": { - "dev": "nuxt-ts", + "dev": "HOST=0.0.0.0 PORT=3000 nuxt-ts", "build": "nuxt-ts build", - "start": "nuxt-ts start", + "start": "HOST=0.0.0.0 PORT=3000 nuxt-ts start", "generate": "nuxt-ts generate" }, // 以下略 }laravelディレクトリ直下にLaravelのプロジェクト作成
myapp$ docker-compose run app composer create-project --prefer-dist laravel/laravel ../laravelディレクトリ以下が次のような構成になっていればOK
myapp$ tree -a -L 1 laravel laravel ├── .editorconfig ├── .env ├── .env.example ├── .gitattributes ├── .gitignore ├── .styleci.yml ├── README.md ├── app ├── artisan ├── bootstrap ├── composer.json ├── composer.lock ├── config ├── database ├── package.json ├── phpunit.xml ├── public ├── resources ├── routes ├── server.php ├── storage ├── tests ├── vendor └── webpack.mix.jsコンテナをバックグラウンドで起動
myapp$ docker-compose up -d --buildLaravelの設定ファイルをキャッシュ等
myapp$ docker-compose exec app ash $ php artisan -V // バージョンが表示されればOK $ php artisan config:cache $ php artisan migrate $ chmod -R a+rw storage/ bootstrap/cache $ exit画面確認
Nuxt、Laravel間での通信を確認
Laravel側の設定
laravel/routes/api.php<?php use Illuminate\Http\Request; use Illuminate\Support\Facades\Route; /* * 中略 */ + Route::get('/', function () { + return 'Hello'; + });Nuxt側の設定
myapp$ cd frontApp $ yarn add @nuxtjs/proxy @nuxtjs/dotenvfrontApp/nuxt.config.js+ const environment = process.env.NODE_ENV || 'development' + require('dotenv').config() export default { // (中略) modules: [ // https://go.nuxtjs.dev/axios '@nuxtjs/axios', + '@nuxtjs/proxy', + '@nuxtjs/dotenv', ], + proxy: { + '/api': + environment === 'development' + ? process.env.API_URL + : 'https://www.risk-exam.site', + }, + axios: { + baseURL: process.env.API_URL, + browserBaseURL: process.env.API_BROWSER_URL, + credentials: true, + }, }myapp/frontApp$ touch .envfrontApp/.envAPI_URL=http://web/api API_BROWSER_URL=http://localhost:10080/apifrontApp/pages/index.vue<template> <div class="container"> <div> <Logo /> <h1 class="title"> {{ greet }} // デフォルトの「frontApp」から変更 </h1> <div class="links"> <a href="https://nuxtjs.org/" target="_blank" rel="noopener noreferrer" class="button--green" > Documentation </a> <a href="https://github.com/nuxt/nuxt.js" target="_blank" rel="noopener noreferrer" class="button--grey" > GitHub </a> </div> </div> </div> </template> <script lang="ts"> import Vue from 'vue' export default Vue.extend({ async asyncData({ app }): Promise<object> { const greet: string = await app.$axios.$get('/').catch((err) => err) return { greet } } }) </script> // 以下略
localhost:3000にアクセスして、タイトルがHelloに変わっていたらOK
- 投稿日:2021-02-13T15:32:18+09:00
Proxy配下のDocker_備忘録
はじめに
最近は全く設計や構築ができず、ストレスのたまる毎日です。
休みの日くらい自分の好きなことをしようと思い、基礎学習を兼ねて構築を。
とりあえず、思いついたProxyとDocker環境の構築をやりました。目的:ProxyとDockerの導入。Proxyを介した通信の確認。
Proxy
Proxyとは(Wikipedia抜粋)プロキシ(Proxy)とは「代理」の意味である。 インターネット関連で用いられる場合は、特に内部ネットワークからインターネット接続を 行う際、高速なアクセスや安全な通信などを確保するための中継サーバ「プロキシサーバ」を 指す。インターネットに直接接続させたくないサーバやPCのために、代わりに通信のやり取りします。
これによって、サーバ自身が直接外部アクセスすることがなくなり、セキュリティリスクを抑えることができます。
※Web業界には「リバースプロキシ」ってのも存在するらしいがここでは割愛Docker
Dockerとは(Wikipedia抜粋)コンテナ仮想化を用いてアプリケーションを開発・配置・実行するための オープンソースソフトウェアあるいはオープンプラットフォームであるこれだけ読んで理解できる人は相当頭が良い。。。。
とりあえず検索してみた。
Docker入門(第一回)~Dockerとは何か、何が良いのか~
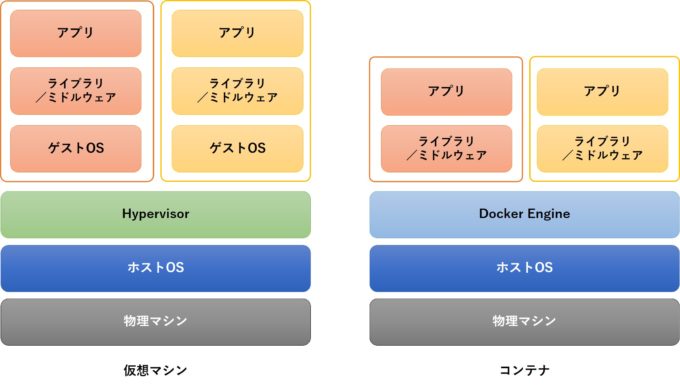
OS上に環境を準備し、その上にアプリが稼働するための環境を提供。
仮想マシンとの違いはゲストOS領域。コンテナではOS領域が無い分動作が軽いようです。とりあえずやってみた
環境をざっくりと整理
①3台のサーバを用意
②1台はVPN用に準備(今回は説明省略)
③1台はProxy用。この子は外部アクセスの役目を持つので外部ネットワークと、クライアント用の内部ネットワークを持たせる
④今回クライアントはDockerの役割を持つ※すべてCentOS8を採用。理由は単純、無償かつLinuxなので軽いし不要なリソース確保しなくすむ。
◆Proxy導入手順
いつもお世話になっているサイトから手順を拝借
Proxy/ロードバランサ [Squid : インストール]◆Docker導入手順
せっかくなので、Proxyを介して導入。もちろん手順はいつもの。
コンテナ基盤 [Docker : インストール]導入が終わったので、さっそくイメージデータをダウンロードしようとしたところ、トラブル発生しました。
エラーメッセージ1Using default tag: latest Error response from daemon: Get https://registry-1.docker.io/v2/: dial tcp: lookup registry-1.docker.io on [::1]:53: read udp [::1]:54586->[::1]:53: read: connection refused何てことはない。
Proxyのクライアント側の設定が間違っていたようです。(ネットワークアドレス間違い&設定リロード)
修正してリトライ。エラーメッセージ2Using default tag: latest Error response from daemon: Get https://registry-1.docker.io/v2/: proxyconnect tcp: tls: first record does not look like a TLS handshakeまだ駄目なようです。
調べてみると、どうやらDocker用のProxy設定が漏れていたようなので、下記を参考に設定します。
VagrantをProxy経由で利用する [Dcoker]無事イメージデータのダウンロード確認まで終わりました。
目的達成したので備忘録として残します。おわりに
相変わらずProyxは厄介だなと痛感。ファイアウォールと同等に深く考えたくない理由もわかります。
しかし、セキュリティを意識する上では重要だし、案外Proxyを介した通信のトラフィックを見るのも面白いものだと感じます。
次は、コンテナ環境で何か試してみようと思います。参考
https://www.server-world.info/query?os=CentOS_8&p=squid&f=1
https://www.server-world.info/query?os=CentOS_8&p=docker&f=1
https://qiita.com/daichannel/items/08e074a01e8ab41d52f7
https://cybersecurity-jp.com/security-measures/32171
https://knowledge.sakura.ad.jp/13265/
- 投稿日:2021-02-13T15:32:18+09:00
ProxyとDocker_備忘録
はじめに
最近は全く設計や構築ができず、ストレスのたまる毎日です。
休みの日くらい自分の好きなことをしようと思い、基礎学習を兼ねて構築を。
とりあえず、思いついたProxyとDocker環境の構築をやりました。目的:ProxyとDockerの導入。Proxyを介した通信の確認。
Proxy
Proxyとは(Wikipedia抜粋)プロキシ(Proxy)とは「代理」の意味である。 インターネット関連で用いられる場合は、特に内部ネットワークからインターネット接続を 行う際、高速なアクセスや安全な通信などを確保するための中継サーバ「プロキシサーバ」を 指す。インターネットに直接接続させたくないサーバやPCのために、代わりに通信のやり取りします。
これによって、サーバ自身が直接外部アクセスすることがなくなり、セキュリティリスクを抑えることができます。
※Web業界には「リバースプロキシ」ってのも存在するらしいがここでは割愛Docker
Dockerとは(Wikipedia抜粋)コンテナ仮想化を用いてアプリケーションを開発・配置・実行するための オープンソースソフトウェアあるいはオープンプラットフォームであるこれだけ読んで理解できる人は相当頭が良い。。。。
とりあえず検索してみた。
Docker入門(第一回)~Dockerとは何か、何が良いのか~
OS上に環境を準備し、その上にアプリが稼働するための環境を提供。
仮想マシンとの違いはゲストOS領域。コンテナではOS領域が無い分動作が軽いようです。とりあえずやってみた
環境をざっくりと整理
①3台のサーバを用意
②1台はVPN用に準備(今回は説明省略)
③1台はProxy用。この子は外部アクセスの役目を持つので外部ネットワークと、クライアント用の内部ネットワークを持たせる
④今回クライアントはDockerの役割を持つ※すべてCentOS8を採用。理由は単純、無償かつLinuxなので軽いし不要なリソース確保しなくすむ。
◆Proxy導入手順
いつもお世話になっているサイトから手順を拝借
Proxy/ロードバランサ [Squid : インストール]◆Docker導入手順
せっかくなので、Proxyを介して導入。もちろん手順はいつもの。
コンテナ基盤 [Docker : インストール]導入が終わったので、さっそくイメージデータをダウンロードしようとしたところ、トラブル発生しました。
エラーメッセージ1Using default tag: latest Error response from daemon: Get https://registry-1.docker.io/v2/: dial tcp: lookup registry-1.docker.io on [::1]:53: read udp [::1]:54586->[::1]:53: read: connection refused何てことはない。
Proxyのクライアント側の設定が間違っていたようです。(ネットワークアドレス間違い&設定リロード)
修正してリトライ。エラーメッセージ2Using default tag: latest Error response from daemon: Get https://registry-1.docker.io/v2/: proxyconnect tcp: tls: first record does not look like a TLS handshakeまだ駄目なようです。
調べてみると、どうやらDocker用のProxy設定が漏れていたようなので、下記を参考に設定します。
VagrantをProxy経由で利用する [Dcoker]無事イメージデータのダウンロード確認まで終わりました。
目的達成したので備忘録として残します。おわりに
相変わらずProyxは厄介だなと痛感。ファイアウォールと同等に深く考えたくない理由もわかります。
しかし、セキュリティを意識する上では重要だし、案外Proxyを介した通信のトラフィックを見るのも面白いものだと感じます。
次は、コンテナ環境で何か試してみようと思います。参考
https://www.server-world.info/query?os=CentOS_8&p=squid&f=1
https://www.server-world.info/query?os=CentOS_8&p=docker&f=1
https://qiita.com/daichannel/items/08e074a01e8ab41d52f7
https://cybersecurity-jp.com/security-measures/32171
https://knowledge.sakura.ad.jp/13265/
- 投稿日:2021-02-13T09:50:48+09:00
【Laravel初心者】一覧表示の実装
Laravel初学者です。
オリジナルアプリを作成しているのでその過程を記事にしています。理解が曖昧なところも多いため、ご指摘等ありましたらご連絡いただければ幸いです。
今回は一覧表示の実装について備忘録のため記録として残します。
環境
Version PHP 7.4.14 Laravel 8.24.0 mysql 8.0.23 docker 20.10.2 docker-compose 1.27.4 ルーティング
routes/web.phpRoute::get('/', [GameController::class, 'index']);私の場合は/(ルート)を一覧表示として実装したかったので上記のようなルーティングになります。
/(ルート)にアクセスがあった時にGameControllerのindexアクションが動きますという意味です。モデル
Models/Game.php<?php namespace App\Models; use Illuminate\Database\Eloquent\Factories\HasFactory; use Illuminate\Database\Eloquent\Model; class Game extends Model { use HasFactory; protected $table = "games"; protected $fillable = [ "id", "user_id", "name", "describe", "play_time", "players_minimum", "players_max", "image_path", "updated_at", "created_at", ]; public function user() { return $this->belongsTo(User::class); } }こちらは今回の一覧表示機能にだけ必要というものではないですが。
$fillableで指定して保存を許可します。
$fillableについてはこちらの記事が分かりやすかったです。
ありがとうございます。コントローラー
app/Http/Controllers/GameController.php<?php namespace App\Http\Controllers; use Illuminate\Http\Request; use App\Models\Game; use Illuminate\Support\Facades\Auth; use Storage; class GameController extends Controller { /** * Display a listing of the resource. * * @return \Illuminate\Http\Response */ //下記がindexアクション public function index() { $games = Game::all(); return view('game.index', compact('games')); } }
$gamesにGame::all();でGameモデルから全てのデータを取ってきて代入しています。全てとるので複数形の$gamesになってます。プログラミング学び始めのとき、複数形なのか単数形なのか分からなかったんですよね。
allで全てとる=複数のデータ=つまり複数形なので普通に考えれば簡単ですよね。その後
return viewでindexのviewを返す動きになってます。
compact('games')と記述することでview側で$gamesという変数が使えます。
逆にcompact書かないとエラーになりますので注意です。compactについてはこちらの記事が分かりやすかったです。
ありがとうございます。ビュー
resources/views/game/index.blade.php<section class="page-section bg-light" id="portfolio"> <div class="container"> <div class="text-center"> <h2 class="section-heading text-uppercase">新着ボードゲーム</h2> <h3 class="section-subheading text-muted">Lorem ipsum dolor sit amet consectetur.</h3> </div> <div class="row"> @foreach($games as $game) @if($game->image_path) <div class="col-lg-4 col-sm-6 mb-4"> <div class="portfolio-item" style="text-align:center"> <a class="portfolio-link" href="{{ route('game.show', $game->id) }}"> <img src="{{ $game->image_path }}" height="200" width="200"> </a> <div class="portfolio-caption" style="margin-top:10px"> <div class="portfolio-caption-heading">{{ $game->name }}</div> <div class="portfolio-caption-subheading text-muted">プレイ時間:{{ $game->play_time }}分</div> <div class="portfolio-caption-subheading text-muted">人数:{{ $game->players_minimum }}~{{ $game->players_max }}人</div> </div> </div> </div> @endif @endforeach </div> </div> </section>resources/views/game/index.blade.php@foreach($games as $game) //この中に処理を書く @endforeach上記のように
foreachで繰り返し処理をしています。
コントローラーがデータを$gamesに入れてviewに渡してくれているのでそれをforeachの中では$gameとして一つずつ取り出します。つまり一つずつ呼び出すためには
resources/views/game/index.blade.php{{ $game->name }}上記のように
$gameのnameというように記述します。こちらで一覧表示の実装は完了です。


