- 投稿日:2019-08-30T19:47:17+09:00
UICollectionViewでタブブラウザを作ってみた
タブが欲しい!!
WKWebKitを使用すると非常に簡単にブラウザを作ることができます。ええ。それはいいんですけども、タブがない。うーん、でもタブ欲しいよね。じゃあ、ライブラリはあるのかな。
ない!
...仕方ない。何かで擬似的に作るか。バージョンとか
Swift5.0
UICollectionViewでタブを擬似的に!
UICollectionViewならタブを生成してタブがどんどん増えてもスクロールすれば選択できるよね!というわけで、こんな感じに作った。
ViewController// // ViewController.swift // CollectionViewTest // // Created by Lily.Mameoka on 2019/08/18. // Copyright © 2019 Lily.Mameoka. All rights reserved. // import UIKit import WebKit let screenSize: CGSize = CGSize(width: UIScreen.main.bounds.size.width, height: UIScreen.main.bounds.size.height) class ViewController: UIViewController, UICollectionViewDelegate, UICollectionViewDataSource, WKUIDelegate, WKNavigationDelegate { var itemCount = 1 var selectedIndex: IndexPath = [0,0] var selectedNum = 0 var currentUrl = "https://www.google.com" var webView: WKWebView! var webTitle: String = "Google" var urlArray:[String] = ["https://www.google.com"] var webTitleArray: [String] = ["Google"] let collectionView: UICollectionView = { //セルのレイアウト設計 let layout: UICollectionViewFlowLayout = UICollectionViewFlowLayout() layout.scrollDirection = .horizontal layout.minimumInteritemSpacing = 0 layout.minimumLineSpacing = 0 let collectionView = UICollectionView(frame: CGRect(x: 0, y: 100, width: screenSize.width, height: 50), collectionViewLayout: layout) collectionView.backgroundColor = UIColor.white //セルの登録 collectionView.register(CollectionViewCell.self, forCellWithReuseIdentifier: "CollectionViewCell") return collectionView }() //追加ボタンの設定 func buttonUpDate(){ let addTabButton:UIButton = UIButton(frame: CGRect(x: 0, y: 50, width: 50, height: 50)) addTabButton.backgroundColor = .white addTabButton.setTitle("+", for: .normal) addTabButton.setTitleColor(UIColor(red: 22/225, green: 157/225, blue: 202/225, alpha:0.5), for: .normal) addTabButton.addTarget(self, action: #selector(pushAddTabButton), for: .touchUpInside) self.view.addSubview(addTabButton) } override func viewDidLoad() { super.viewDidLoad() collectionView.dataSource = self collectionView.delegate = self view.addSubview(collectionView) newWeb() webView.uiDelegate = self webView.navigationDelegate = self buttonUpDate() closeButtonUpDate() } func webView(_ webView: WKWebView, didFinish navigation: WKNavigation!) { if webView.title != nil { let webText = webView.title as! String print("\(webText)") webTitle = "\(webText)" webTitleArray[selectedNum] = webTitle collectionView.reloadData() } else { webTitle = webView.url!.absoluteString webTitleArray[selectedNum] = webTitle collectionView.reloadData() } } //削除ボタンの定義 func closeButtonUpDate(){ let tabCloseButton:UIButton = UIButton(frame: CGRect(x: 50, y: 50, width: 150, height: 50)) tabCloseButton.backgroundColor = .white tabCloseButton.setTitle("現在のタブを削除", for: .normal) tabCloseButton.setTitleColor(UIColor(red: 22/225, green: 157/225, blue: 202/225, alpha:0.5), for: .normal) tabCloseButton.addTarget(self, action: #selector(tapCloseButton), for: .touchUpInside) self.view.addSubview(tabCloseButton) } //cellの個数設定 func collectionView(_ collectionView: UICollectionView, numberOfItemsInSection section: Int) -> Int { return itemCount } func collectionView(_ collectionView: UICollectionView, cellForItemAt indexPath: IndexPath) -> UICollectionViewCell { let cell = collectionView.dequeueReusableCell(withReuseIdentifier: "CollectionViewCell", for: indexPath) as! CollectionViewCell let title = webTitleArray[indexPath.item] cell.setupContents(textName: title) return cell } //新規タブの処理 @objc func pushAddTabButton(sender: UIButton){ itemCount += 1//add tab collectionView.reloadData()//add tab currentUrl = self.webView.url!.absoluteString urlArray[selectedNum] = currentUrl if webView != nil { webView.removeFromSuperview()//delete old web } newWeb()//add new google urlArray += ["https://www.google.com"] webTitleArray += ["Google"] selectedNum = itemCount - 1 selectedIndex[1] = itemCount - 1 } //タブタップ時の処理 func collectionView(_ collectionView: UICollectionView, didSelectItemAt indexPath: IndexPath) { currentUrl = self.webView.url!.absoluteString urlArray[selectedNum] = currentUrl webTitleArray[selectedNum] = webTitle selectedIndex = indexPath selectedNum = indexPath[1] upDateWeb(index: selectedNum) collectionView.reloadData() } //タブ削除の処理 @objc func tapCloseButton(sender: UIButton){ if itemCount == 1 && selectedNum == 0 { //ラスト1つだけのタブを削除した時→リロード。googleの画面が0番目のタブにセットされる if webView != nil { webView.removeFromSuperview()//delete old web } urlArray = ["https://www.google.com"]//urlArrayは初期化 webTitleArray = ["Google"] newWeb() } else if selectedNum == 0 && itemCount != 1 { //0番目のタブを削除した時→1番目のタブに飛ぶ if webView != nil { webView.removeFromSuperview()//delete old web } itemCount -= 1 collectionView.deleteItems(at: [selectedIndex]) collectionView.reloadData() upDateWeb(index: 1) urlArray.remove(at: 0) webTitleArray.remove(at: 0) } else { itemCount -= 1 collectionView.deleteItems(at: [selectedIndex]) collectionView.reloadData() urlArray.remove(at: selectedNum)//selectされたIndexに対応するURLを削除 webTitleArray.remove(at: selectedNum) //一つ若いタブに格納されたurlでwebview selectedNum = selectedNum - 1 selectedIndex = [0, selectedNum - 1] upDateWeb(index: selectedNum) } } func newWeb(){ webView = WKWebView(frame: CGRect(x: 0, y: 150, width: screenSize.width, height: screenSize.height)) let urlString = "https://www.google.com" let encodedUrlString = urlString.addingPercentEncoding(withAllowedCharacters:NSCharacterSet.urlQueryAllowed) let url = NSURL(string: encodedUrlString!) let request = NSURLRequest(url: url! as URL) webView.load(request as URLRequest) self.view.bringSubviewToFront(webView) self.view.addSubview(webView) webView.uiDelegate = self webView.navigationDelegate = self } func upDateWeb(index: Int){ if webView != nil { webView.removeFromSuperview() } print(urlArray) print(index) webView = WKWebView(frame: CGRect(x: 0, y: 150, width: screenSize.width, height: screenSize.height)) let urlString = urlArray[index] let encodedUrlString = urlString.addingPercentEncoding(withAllowedCharacters:NSCharacterSet.urlQueryAllowed) let url = NSURL(string: encodedUrlString!) let request = NSURLRequest(url: url! as URL) webView.load(request as URLRequest) self.view.bringSubviewToFront(webView) self.view.addSubview(webView) webView.uiDelegate = self webView.navigationDelegate = self } } //cellのサイズの設定 extension ViewController: UICollectionViewDelegateFlowLayout { func collectionView(_ collectionView: UICollectionView, layout collectionViewLayout: UICollectionViewLayout, sizeForItemAt indexPath: IndexPath) -> CGSize { return CGSize(width: screenSize.width * 2 / 5, height: 50) } }CollectionViewCell// // CollectionViewCell.swift // CollectionViewTest // // Created by Lily.Mameoka on 2019/08/18. // Copyright © 2019 Lily.Mameoka. All rights reserved. // import UIKit class CollectionViewCell: UICollectionViewCell { let tabCellLabel: UILabel = { let tabCellLabel = UILabel() tabCellLabel.frame = CGRect(x: 0, y: 0, width: screenSize.width * 2 / 5, height: 50) tabCellLabel.textColor = UIColor(red: 225/225, green: 112/225, blue: 0/225, alpha:1.0) tabCellLabel.textAlignment = .center return tabCellLabel }() override init(frame: CGRect) { super.init(frame: frame) setup() } required init?(coder aDecoder: NSCoder) { fatalError("init(coder:) has not been implemented") } func setup() { layer.borderColor = UIColor.lightGray.cgColor layer.backgroundColor = UIColor(red: 22/225, green: 157/225, blue: 202/225, alpha:0.5).cgColor layer.borderWidth = 3.0 contentView.addSubview(tabCellLabel) contentView.bringSubviewToFront(tabCellLabel) } func setupContents(textName: String) { tabCellLabel.text = textName } }AppDelegate// // AppDelegate.swift // CollectionViewTest // // Created by Lily.Mameoka on 2019/08/18. // Copyright © 2019 Lily.Mameoka. All rights reserved. // import UIKit @UIApplicationMain class AppDelegate: UIResponder, UIApplicationDelegate{ var window: UIWindow? func application(_ application: UIApplication, didFinishLaunchingWithOptions launchOptions: [UIApplication.LaunchOptionsKey: Any]?) -> Bool { // Override point for customization after application launch. return true } func applicationWillResignActive(_ application: UIApplication) { // Sent when the application is about to move from active to inactive state. This can occur for certain types of temporary interruptions (such as an incoming phone call or SMS message) or when the user quits the application and it begins the transition to the background state. // Use this method to pause ongoing tasks, disable timers, and invalidate graphics rendering callbacks. Games should use this method to pause the game. } func applicationDidEnterBackground(_ application: UIApplication) { // Use this method to release shared resources, save user data, invalidate timers, and store enough application state information to restore your application to its current state in case it is terminated later. // If your application supports background execution, this method is called instead of applicationWillTerminate: when the user quits. } func applicationWillEnterForeground(_ application: UIApplication) { // Called as part of the transition from the background to the active state; here you can undo many of the changes made on entering the background. } func applicationDidBecomeActive(_ application: UIApplication) { // Restart any tasks that were paused (or not yet started) while the application was inactive. If the application was previously in the background, optionally refresh the user interface. } func applicationWillTerminate(_ application: UIApplication) { // Called when the application is about to terminate. Save data if appropriate. See also applicationDidEnterBackground:. } }プロジェクトはこちら
今後
正直、既存のタブブラウザより不便ではあるので後で改良版を作ります。
- 投稿日:2019-08-30T09:45:02+09:00
Macアプリ初心者:NSMenu について調べてみる1
今回は NSMenu について調べてみました。
前回作成したプロジェクトでも Cococa アプリを作るとデフォルトでメニューが用意されます。環境
- macOS Mojave:10.14.6
- Xcode:10.3
画面イメージ
Xcode
アプリ
それぞれの機能の解説
アプリ名のメニュー
- About NSTableViewSample:アプリ名やバージョンなどの情報を表示するWindowを表示

- Preferences...:環境設定(初期値では Disabled)
- Services:ActivityMonitor などの Development ツールの一覧が表示

- Hide NSTableViewSample:自アプリを非表示
- Hide Others:他のアプリを全て非表示
- Show All:「Hide」「Hide Others」で隠れたアプリを全て表示
- Quit NSTableViewSample:アプリを終了
File
* New:新規作成(初期値では Disabled)
* Open:ファイルを開く(初期値では Disabled)
* Open Recent:最近開いたファイル(初期値では Clear Menu のみ)
* Close:アプリを閉じる
* Save...:保存(初期値では Disabled)
* Save As...:名前をつけて保存(初期値では Disabled)
* Page Setup...:印刷用?のページの設定、余白など(初期値では Disabled)
* Print:印刷Edit
* Undo:元に戻す(サンプルアプリにテキストを入力する機能がないため要調査)
* Redo:やり直す(サンプルアプリにテキストを入力する機能がないため要調査)
* Cut:切り取り(サンプルアプリにテキストを入力する機能がないため要調査)
* Copy:コピー(サンプルアプリにテキストを入力する機能がないため要調査)
* Paste:貼り付け(サンプルアプリにテキストを入力する機能がないため要調査)
* Paste and Match Style:貼り付けてスタイルを合わせる(サンプルアプリにテキストを入力する機能がないため要調査)
* Delete:削除(サンプルアプリにテキストを入力する機能がないため要調査)
* Select All:全て選択(サンプルアプリにテキストを入力する機能がないため要調査)
* Find:検索(サンプルアプリにテキストを入力する機能がないため要調査)
* Spelling and Grammar:スペルと文法
* Substitutions:置換(サンプルアプリにテキストを入力する機能がないため要調査)
* Transformations:テキストを変換(サンプルアプリにテキストを入力する機能がないため要調査)
* Speech:テキストの読み上げ(サンプルアプリにテキストを入力する機能がないため要調査)
* Start Dictation...:音声入力
* Emoji & Simbols:絵文字バレット表示
Format
* Font:テキストのフォント(サンプルアプリにテキストを入力する機能がないため要調査)
* Text:テキストの属性(サンプルアプリにテキストを入力する機能がないため要調査)
View
* Show Tab Bar:タブバーを表示(初期値ではWindowラベルを表示)
* Show All Tabs:全てのタブを表示(初期値では Disabled)
* Show Toolbar:ツールバーを表示(初期値では Disabled)
* Customize Toolbar...:ツールバーをカスタマイズ(初期値では Disabled)
* Show Sidebar:サイドバーを表示(初期値では Disabled)
* Enter Full Screen:フルスクリーン表示Window
* Minimize:最小表示(Dockに格納)
* Zoom:全Window表示
* Show Previous Tab:前のタブを表示
* Show Next Tab:次のタブを表示
* Move Tab to New Window:新しいWindowでタブを開く
* Merge All Window:全てのWindowをタブで表示
* Bring All to Front:最前面に表示
* 開いているWindow一覧Help
* Search TextFiedlds:ヘルプを検索
* NSTableViewSample Help:ヘルプを表示デフォルトで作成されるメニューでも色々な機能が組み込まれていて便利そうです。
今後はメニューのアクションをどうやって作るかについて調べたいと思います。よろしければ いいね お願いします。
- 投稿日:2019-08-30T09:45:02+09:00
Macアプリ初心者:NSMenu について調べてみる
今回は NSMenu について調べてみました。
前回作成したプロジェクトでも Cococa アプリを作るとデフォルトでメニューが用意されます。環境
- macOS Mojave:10.14.6
- Xcode:10.3
画面イメージ
Xcode
アプリ
それぞれの機能の解説
アプリ名のメニュー
- About NSTableViewSample:アプリ名やバージョンなどの情報を表示するWindowを表示

- Preferences...:環境設定(初期値では Disabled)
- Services:ActivityMonitor などの Development ツールの一覧が表示

- Hide NSTableViewSample:自アプリを非表示
- Hide Others:他のアプリを全て非表示
- Show All:「Hide」「Hide Others」で隠れたアプリを全て表示
- Quit NSTableViewSample:アプリを終了
File
* New:新規作成(初期値では Disabled)
* Open:ファイルを開く(初期値では Disabled)
* Open Recent:最近開いたファイル(初期値では Clear Menu のみ)
* Close:アプリを閉じる
* Save...:保存(初期値では Disabled)
* Save As...:名前をつけて保存(初期値では Disabled)
* Page Setup...:印刷用?のページの設定、余白など(初期値では Disabled)
* Print:印刷Edit
* Undo:元に戻す(サンプルアプリにテキストを入力する機能がないため要調査)
* Redo:やり直す(サンプルアプリにテキストを入力する機能がないため要調査)
* Cut:切り取り(サンプルアプリにテキストを入力する機能がないため要調査)
* Copy:コピー(サンプルアプリにテキストを入力する機能がないため要調査)
* Paste:貼り付け(サンプルアプリにテキストを入力する機能がないため要調査)
* Paste and Match Style:貼り付けてスタイルを合わせる(サンプルアプリにテキストを入力する機能がないため要調査)
* Delete:削除(サンプルアプリにテキストを入力する機能がないため要調査)
* Select All:全て選択(サンプルアプリにテキストを入力する機能がないため要調査)
* Find:検索(サンプルアプリにテキストを入力する機能がないため要調査)
* Spelling and Grammar:スペルと文法
* Substitutions:置換(サンプルアプリにテキストを入力する機能がないため要調査)
* Transformations:テキストを変換(サンプルアプリにテキストを入力する機能がないため要調査)
* Speech:テキストの読み上げ(サンプルアプリにテキストを入力する機能がないため要調査)
* Start Dictation...:音声入力
* Emoji & Simbols:絵文字バレット表示
Format
* Font:テキストのフォント(サンプルアプリにテキストを入力する機能がないため要調査)
* Text:テキストの属性(サンプルアプリにテキストを入力する機能がないため要調査)
View
* Show Tab Bar:タブバーを表示(初期値ではWindowラベルを表示)
* Show All Tabs:全てのタブを表示(初期値では Disabled)
* Show Toolbar:ツールバーを表示(初期値では Disabled)
* Customize Toolbar...:ツールバーをカスタマイズ(初期値では Disabled)
* Show Sidebar:サイドバーを表示(初期値では Disabled)
* Enter Full Screen:フルスクリーン表示Window
* Minimize:最小表示(Dockに格納)
* Zoom:全Window表示
* Show Previous Tab:前のタブを表示
* Show Next Tab:次のタブを表示
* Move Tab to New Window:新しいWindowでタブを開く
* Merge All Window:全てのWindowをタブで表示
* Bring All to Front:最前面に表示
* 開いているWindow一覧Help
* Search TextFiedlds:ヘルプを検索
* NSTableViewSample Help:ヘルプを表示デフォルトで作成されるメニューでも色々な機能が組み込まれていて便利そうです。
今後はメニューのアクションをどうやって作るかについて調べたいと思います。よろしければ いいね お願いします。
- 投稿日:2019-08-30T07:47:38+09:00
failed assertion `For depth attachment, the render pipeline's pixelFormat (MTLPixelFormatInvalid) does not match the framebuffer's pixelFormat (MTLPixelFormatDepth32Float). の解決方法
failed assertion `For depth attachment, the render pipeline's pixelFormat (MTLPixelFormatInvalid) does not match the framebuffer's pixelFormat (MTLPixelFormatDepth32Float).
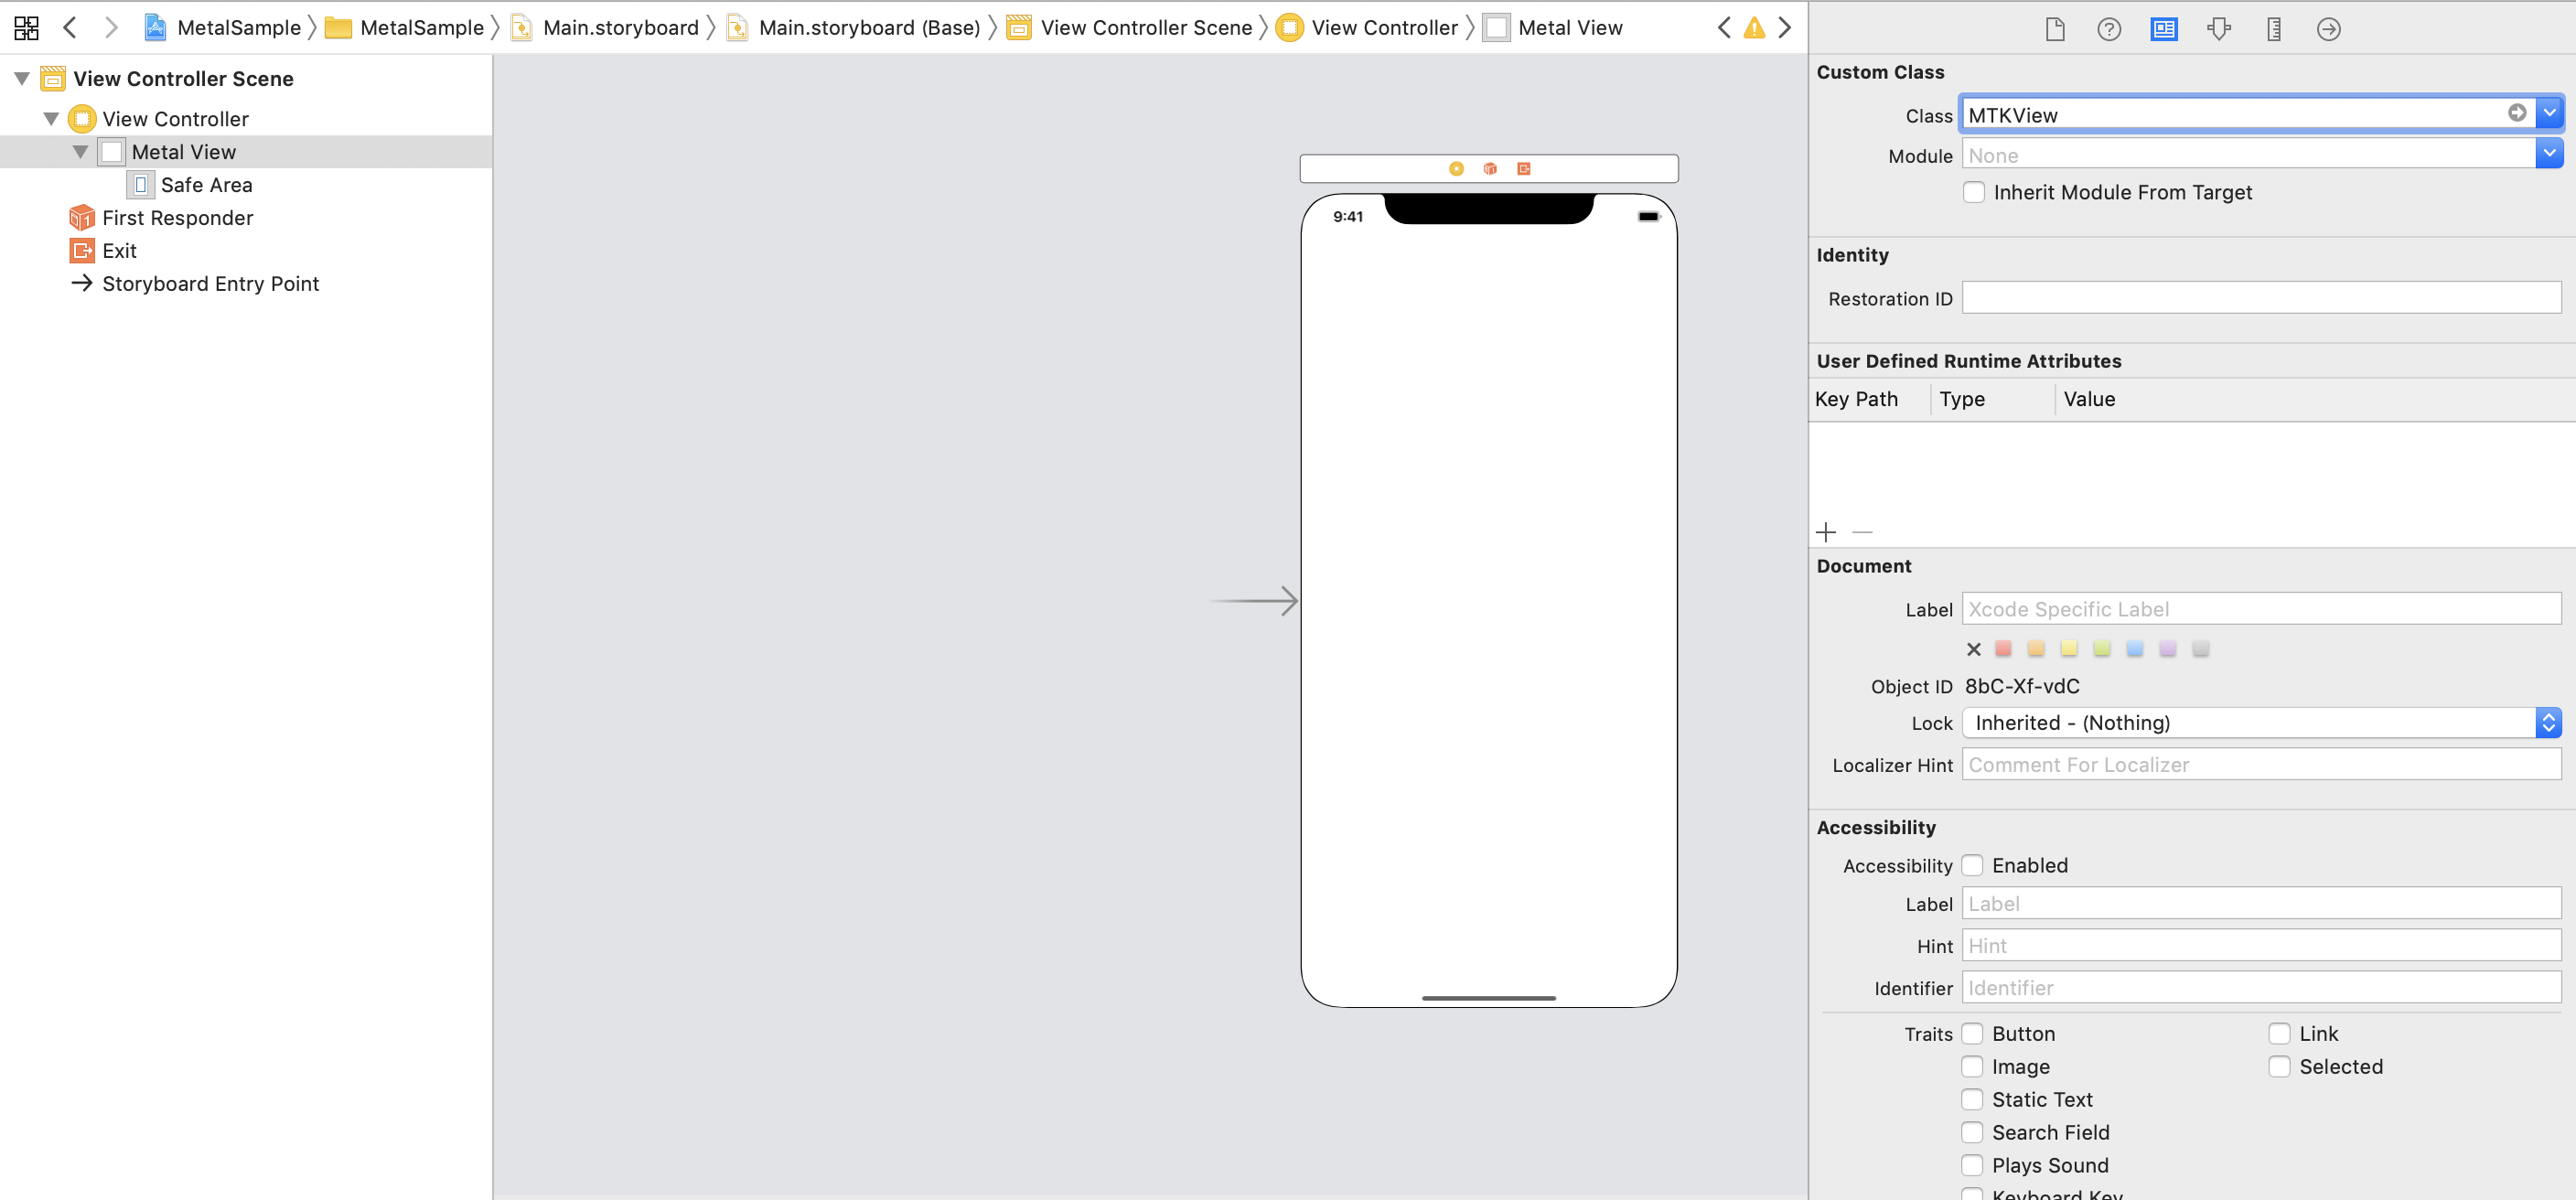
このエラーは、MetalViewをStoryboardで
@IBOutlet接続を行うときに、Object Library から新たにMetalViewを作成していると発生してしまうようです。以下、Apple Develper Forumsよりの引用です。(翻訳済み)
デフォルトでは、オブジェクトライブラリのMetalKitビューはMTKView.depthStencilPixelformatをMTLPixelFormatDepth32Floatに設定します。
なので、superViewであるViewのクラスを
MTKViewに設定します。
その後、@IBOutlet接続をsuperViewに対して行うとこのエラーは解消できました。参考までに。
- 投稿日:2019-08-30T07:19:20+09:00
NavigatioBarとViewControllerに同じ色を設定したのに同じ色にならない時の解決法
前提
self.view.backgroundColorとself.navigationController?.navigationBar.barTintColorに同じ色を設定してあげるがnavigationBarが思った色にならない原因
どうやらtranslucentという設定でNavigationBarが半透明になっているらしい
translucentとは
A Boolean value indicating whether the navigation bar is translucent (true) or not (false)
translucent(半透明)のそのままの意味でNavigationBarの半透明かどうかを表すProperty
・ナビゲーションバーにカスタムの背景画像がない場合、または背景画像のピクセルのアルファ値が1.0未満の場合、このプロパティのデフォルト値はtrueです。
・背景画像が完全に不透明な場合、このプロパティのデフォルト値はfalseです。・このプロパティをtrueに設定し、カスタム背景画像が完全に不透明な場合、UIKitは画像に1.0未満のシステム定義の不透明度を適用します。
・このプロパティをfalseに設定し、背景画像が不透明でない場合、UIKitは不透明な背景を追加します。Google翻訳より
自分の場合NavigationBarに背景画像を設定していなかったためtrueになってたみたいです
解決法
Xcode
Transclucentのチェックを外してあげる
Code
self.navigationController?.navigationBar.isTranslucent = falseflaseにしてあげる
まとめ
備忘録として
参考リンク
- 投稿日:2019-08-30T02:40:49+09:00
審査に出したiOSアプリが ITMS-90809 としてAppleから問題を指摘される話
"Your app has one more issues" という Apple からのメール
拝啓。皆様,iOS 開発はお楽しみでしょうか?
1日も立たないうちに,GitHub上の多くのRepositoryに対し,数々のissueが立てられました。これは何でしょうか?
これまで通り App Store Connect へアプリを提出していた開発者の元に,新たなメールが届くようになりました。
ITMS-90809: Deprecated API Usage - Apple will stop accepting submissions of apps that use UIWebView APIs . See https://developer.apple.com/documentation/uikit/uiwebview for more information.
ITMS-90809 について
急にこんなメールが来ると焦りますよね。結論は「今対応する必要はないけれどもうすぐ対応してね」です。
引用部の通りなのですが,こちらは UIWebView に関する API が deprecated になっており,Apple 側が近々これらを利用するアプリの許可しなくなるという旨のメールです。親切ですね。
UIWebView のドキュメントには iOS 12.0 の時点で deprecated とされており,iOS 8 以上からは WKWebView を利用するように促しています。
これらの経緯や重要性については deprecated となった当時に多く語られている都合,ここでは省略させていただきます。
なぜ我々のアプリに対して警告のメールが届いたのか
「UIWebView が deprecated? そんなの知っているし,既に対応済みだよ」
と思われたあなたにも届くかも知れません。何故なら,これらは未だ多くのライブラリに含まれているのだから......
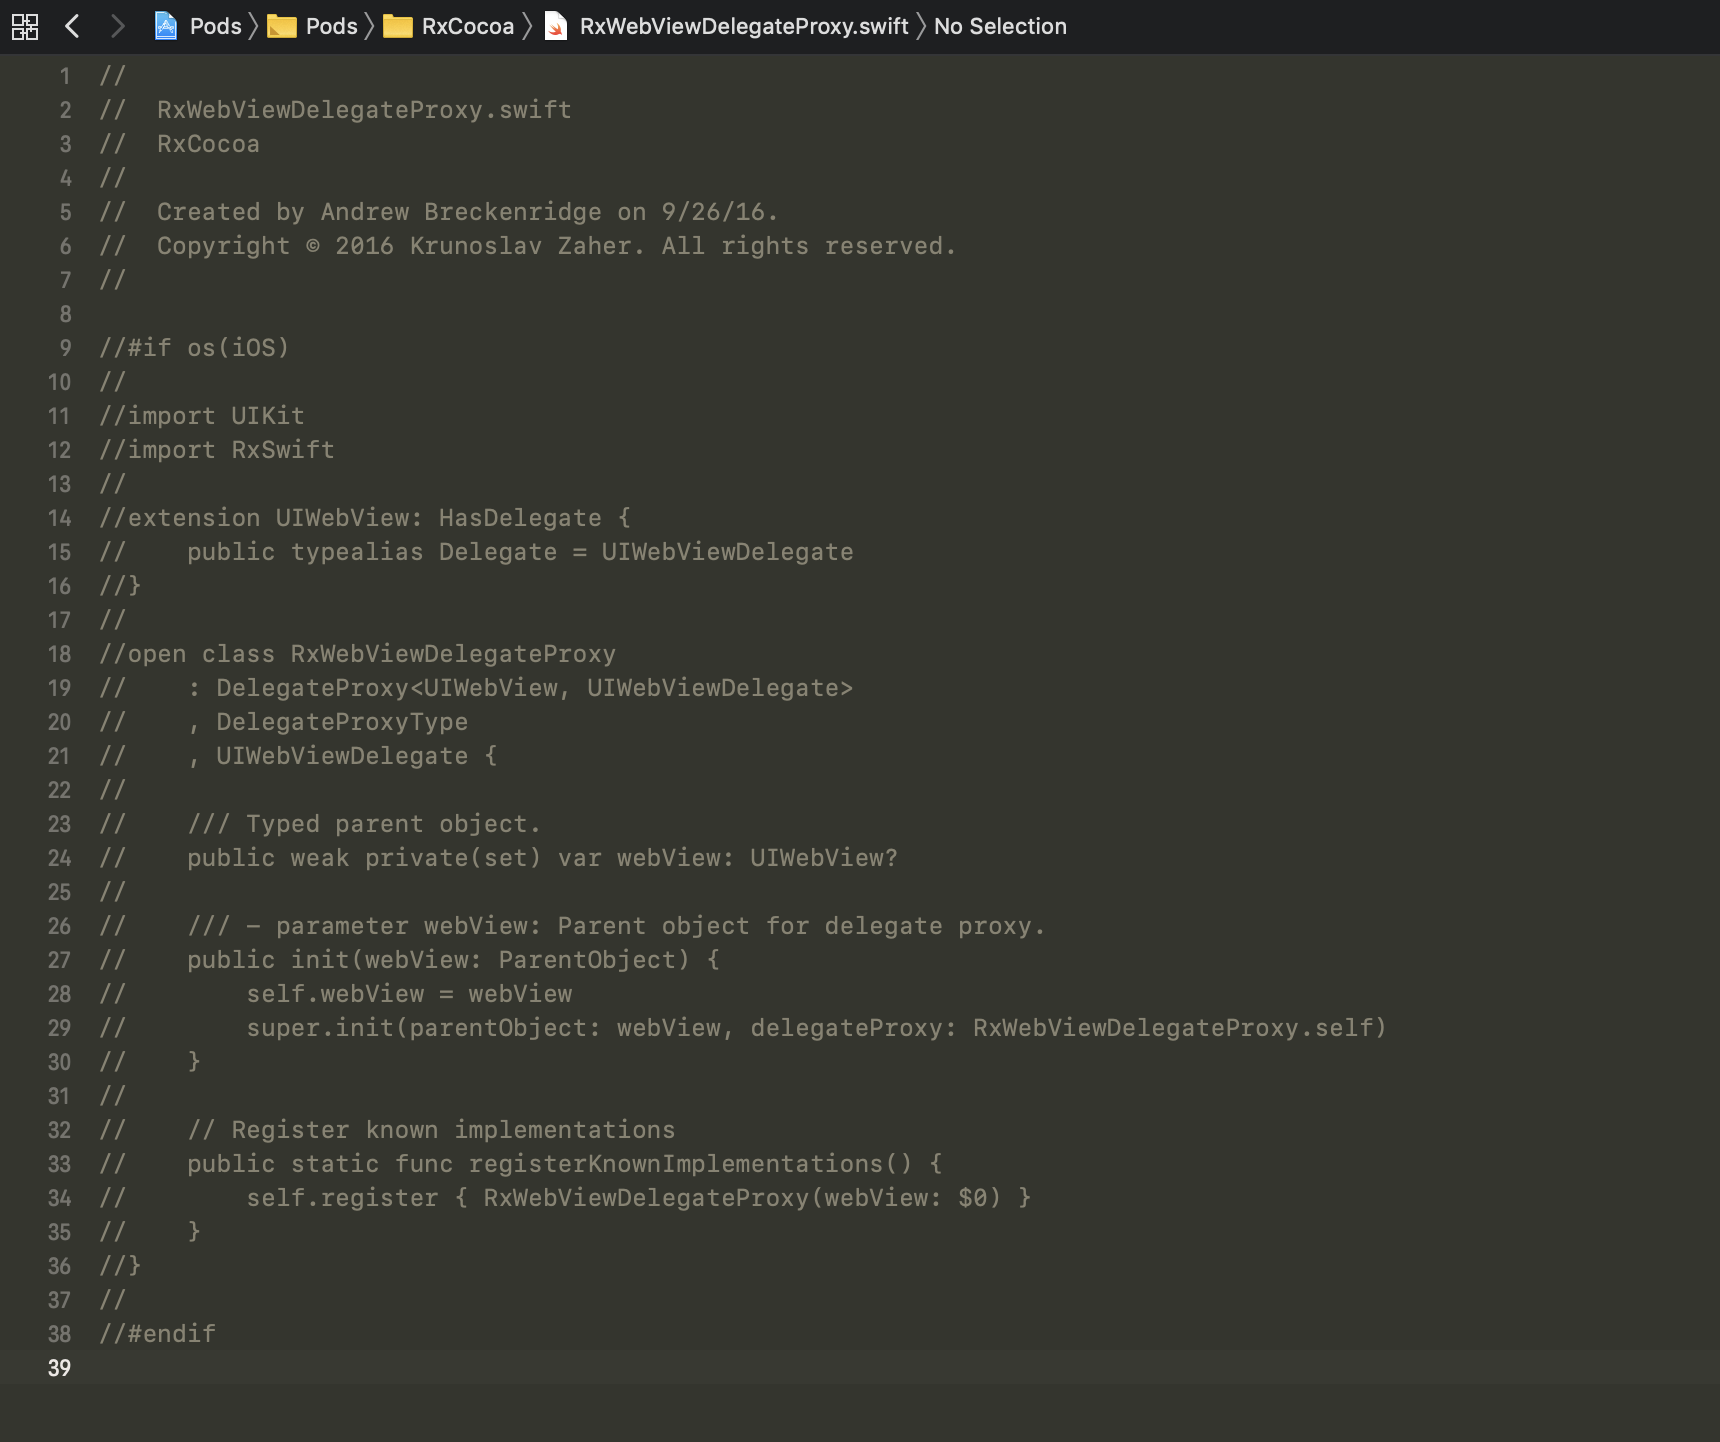
RxSwift (正確には RxCocoa) はもちろん,AFNetworking,flutter,react-native,facebook-swift-sdk,ionic など,アプリのコアとなるライブラリのほとんどから issue が挙げられている状況です。
現時点 (執筆時 8/30 AM 2:12 時点) では firebase-ios-sdk については既にマージされているようです。我々はどうすれば良いのか
メールが届いたから対応しなければならない,ということではないため,現時点での早急な対応は不要です。Pull request や issue を出したり眺めつつ待ちましょう。
一方で,このメールは審査に出していない状態でも,App Store Connect にアップロードする度に送信されます (問題が解決していない状態のバイナリに対して警告されるので妥当ですね)。
解決するには,該当のソースコードをコメントアウト等してから Archive しましょう。
終わりに
iOS エンジニアには苦悩が多いですね。今回もその1つに挙げられると思います。筆者は問題発生時 cocoaPods-binary を使用していたため,新規開発にも関わらずソースが見当たらず,問題に気がつくまでに多くの時間を費しました。皆様にはそのようなことがないよう,ここに書き留めておきます。


