- 投稿日:2019-05-03T21:35:50+09:00
kotlinでJUnitをやってみよう
kotlinでJunitをやってみました
Javaをやってたので抵抗はないんですが、Junitをやってバグに気づけたので、導入することをお勧めします。
なので、手順を残したいと思います。①プラグインの追加
Junitをやるためにプラグインを追加します。
AndroidStudioで開発しているんですが、もともと入っていたので、追加する必要がない人が多いかもしれません。build.gradle(Module:app)に下記を追加します。
build.gradledependencies { testImplementation 'junit:junit:4.12' }これでテストコードが書けるようになります。
②テストコードの記載
Junitに関しては、(test)フォルダーに格納します。
(androidTest)フォルダーにはEspresso等のUIテストを入れます。今回テスト対象コードは下記になります。
CalculateUtil.ktfun addCalculate(num1: Integer, num2: Integer): Integer? { var addNum = num1 + num2 return addNum }テスト用フォルダーにファイルを追加したら、テストコードを記載します。
@Test
fun DateUtilTest_OK_001() {
    var calUtil = CalculateUtil
    val addNum = calUtil.addCalculate(1,2)
    Assert.assertEquals(addNum, 3)
}
テストを実行するには下記2点を意識する必要があります。
①@Testをつけてテストケースだと認識させる
②テスト対象メソッドをテストで使えるようにする②に関してですが、クラスをインスタンス化して、対象のメソッドを呼び出し、引数に実際の値を入れて、戻り値が想定通りであることを確認するのが一通りの流れだと思います。
※今回は対象の実装がUtilでObjectにしているため初期化が上記になっています。これで、実行できるはずなので、テストクラスを指定して、Runします。
※AndroidStudioではテストケース右クリック→'Run 〇〇〇〇Test'を押すとできます。動作確認である程度の担保は取れますが、Junitを合わせることで、画面確認前にバグに気づけるのと、仕様の理解を深めることができるので、使ったほうがいいと感じました。
今後はMockも使ってみたいと思いました。
- 投稿日:2019-05-03T11:28:27+09:00
toolsを利用してRecyclerViewの表示を確認する
目的
RecyclerViewの表示を一々起動して確認するのは大変なので、toolsを利用してlayout editerで確認する時のメモ。
今回表示するitem
<?xml version="1.0" encoding="utf-8"?>
<androidx.constraintlayout.widget.ConstraintLayout xmlns:android="http://schemas.android.com/apk/res/android"
    xmlns:app="http://schemas.android.com/apk/res-auto"
    xmlns:tools="http://schemas.android.com/tools"
    android:layout_width="match_parent"
    android:layout_height="wrap_content"
    android:orientation="vertical">

    <TextView
        android:id="@+id/textView2"
        android:layout_width="match_parent"
        android:layout_height="wrap_content"
        android:layout_marginStart="8dp"
        android:layout_marginTop="8dp"
        android:textSize="20sp"
        app:layout_constraintStart_toStartOf="parent"
        app:layout_constraintTop_toTopOf="parent"
        tools:text="TODOその1" />

    <TextView
        android:id="@+id/textView"
        android:layout_width="match_parent"
        android:layout_height="wrap_content"
        android:layout_marginTop="16dp"
        android:layout_marginEnd="8dp"
        android:gravity="end"
        app:layout_constraintEnd_toEndOf="parent"
        app:layout_constraintStart_toStartOf="parent"
        app:layout_constraintTop_toBottomOf="@+id/textView2"
        tools:text="2019/5/3" />
</androidx.constraintlayout.widget.ConstraintLayout>
layout editerの表示
tools:listitem
tools:listitemでitemのレイアウトファイルを設定するとDesignタブでRecyclerViewの表示を確認できる。
    <androidx.recyclerview.widget.RecyclerView
        android:id="@+id/list"
        android:layout_width="match_parent"
        android:layout_height="match_parent"
        tools:listitem="@layout/item_todo"
        tools:orientation="vertical" />
layout editerの表示(RecyclerView)
表示はこんな感じ。
tools:itemCount, tools:layoutManager, tools:spanCount
tools:layoutManagerで表示するlayoutManagerを指定できる。
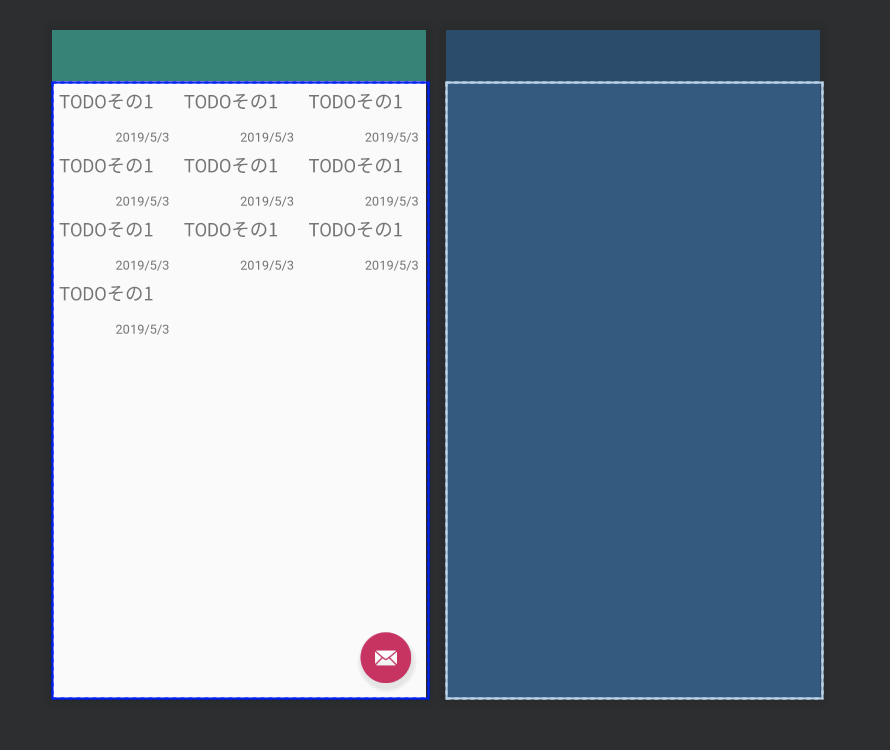
tools:itemCountで表示個数、tools:spanCountでGridLayoutにおける表示間隔を設定できる。<LinearLayout xmlns:android="http://schemas.android.com/apk/res/android" xmlns:app="http://schemas.android.com/apk/res-auto" xmlns:tools="http://schemas.android.com/tools" android:layout_width="match_parent" android:layout_height="match_parent" android:orientation="vertical" tools:context=".MainActivity"> <androidx.recyclerview.widget.RecyclerView android:id="@+id/list" android:layout_width="match_parent" android:layout_height="match_parent" tools:layoutManager="androidx.recyclerview.widget.GridLayoutManager" tools:spanCount="3" tools:itemCount="10" tools:listitem="@layout/item_todo" tools:orientation="vertical" /> </LinearLayout>layout editerの表示(RecyclerView)
itemCount = 10 , spanCount = 3 , layoutManager = GridLayoutManager
のとき、表示はこんな感じ。
備考
- 割とlayout editerで表示系は確認できる。
- ビルドしないとtools設定しても表示されない時がある。謎。
- ココにtools-attributesについて記載があるが、layoutManager等は記載されていない。。どこを見れば機能一覧があるのだろうか。。

- 投稿日:2019-05-03T11:28:27+09:00
toolsとsampledataを利用してRecyclerViewの表示を確認する
目的
RecyclerViewの表示を一々起動して確認するのは大変なので、toolsを利用してlayout editerで確認する時のメモ。
今回表示するitem
item_todo.xml<?xml version="1.0" encoding="utf-8"?> <androidx.constraintlayout.widget.ConstraintLayout xmlns:android="http://schemas.android.com/apk/res/android" xmlns:app="http://schemas.android.com/apk/res-auto" xmlns:tools="http://schemas.android.com/tools" android:layout_width="match_parent" android:layout_height="wrap_content" android:orientation="vertical"> <TextView android:id="@+id/textView2" android:layout_width="match_parent" android:layout_height="wrap_content" android:layout_marginStart="8dp" android:layout_marginTop="8dp" android:textSize="20sp" app:layout_constraintStart_toStartOf="parent" app:layout_constraintTop_toTopOf="parent" tools:text="TODOその1" /> <TextView android:id="@+id/textView" android:layout_width="match_parent" android:layout_height="wrap_content" android:layout_marginTop="16dp" android:layout_marginEnd="8dp" android:gravity="end" app:layout_constraintEnd_toEndOf="parent" app:layout_constraintStart_toStartOf="parent" app:layout_constraintTop_toBottomOf="@+id/textView2" tools:text="2019/5/3" /> </androidx.constraintlayout.widget.ConstraintLayout>layout editerの表示
tools:listitem
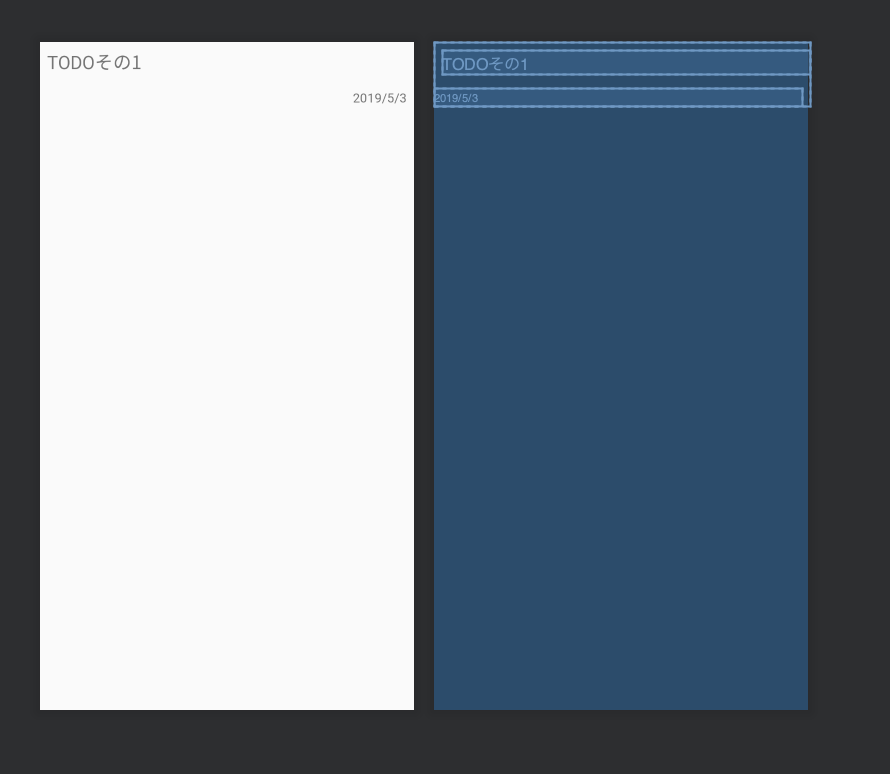
tools:listitemでitemのレイアウトファイルを設定するとDesignタブでRecyclerViewの表示を確認できる。
    <androidx.recyclerview.widget.RecyclerView
        android:id="@+id/list"
        android:layout_width="match_parent"
        android:layout_height="match_parent"
        tools:listitem="@layout/item_todo"
        tools:orientation="vertical" />
layout editerの表示(RecyclerView)
表示はこんな感じ。
tools:itemCount, tools:layoutManager, tools:spanCount
tools:layoutManagerで表示するlayoutManagerを指定できる。
tools:itemCountで表示個数、tools:spanCountでGridLayoutにおける表示間隔を設定できる。<LinearLayout xmlns:android="http://schemas.android.com/apk/res/android" xmlns:app="http://schemas.android.com/apk/res-auto" xmlns:tools="http://schemas.android.com/tools" android:layout_width="match_parent" android:layout_height="match_parent" android:orientation="vertical" tools:context=".MainActivity"> <androidx.recyclerview.widget.RecyclerView android:id="@+id/list" android:layout_width="match_parent" android:layout_height="match_parent" tools:layoutManager="androidx.recyclerview.widget.GridLayoutManager" tools:spanCount="3" tools:itemCount="10" tools:listitem="@layout/item_todo" tools:orientation="vertical" /> </LinearLayout>layout editerの表示(RecyclerView)
itemCount = 10 , spanCount = 3 , layoutManager = GridLayoutManager
のとき、表示はこんな感じ。
tools:text(
sampledata)AndroidStudioではsampledataフォルダにsampleデータを作成して表示することができる。
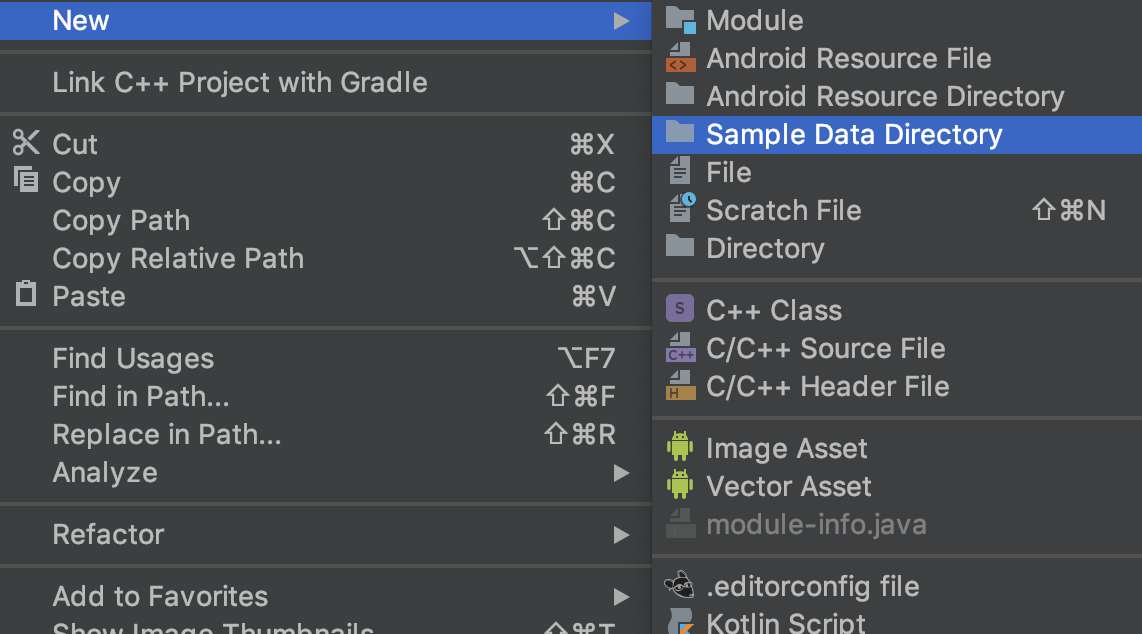
sampledataフォルダを作成
まずは右クリック->New->Sample Data Directory でフォルダを作成する。
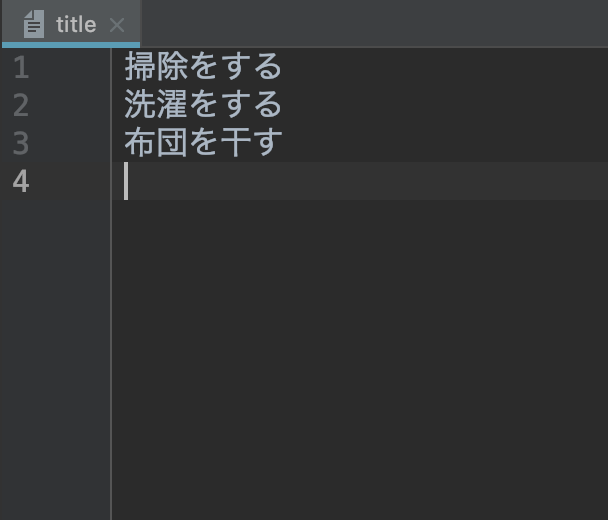
sampledataフォルダにプレーンテキストファイルを置く
以下のようなプレーンテキストファイルをsampledataフォルダに保存する
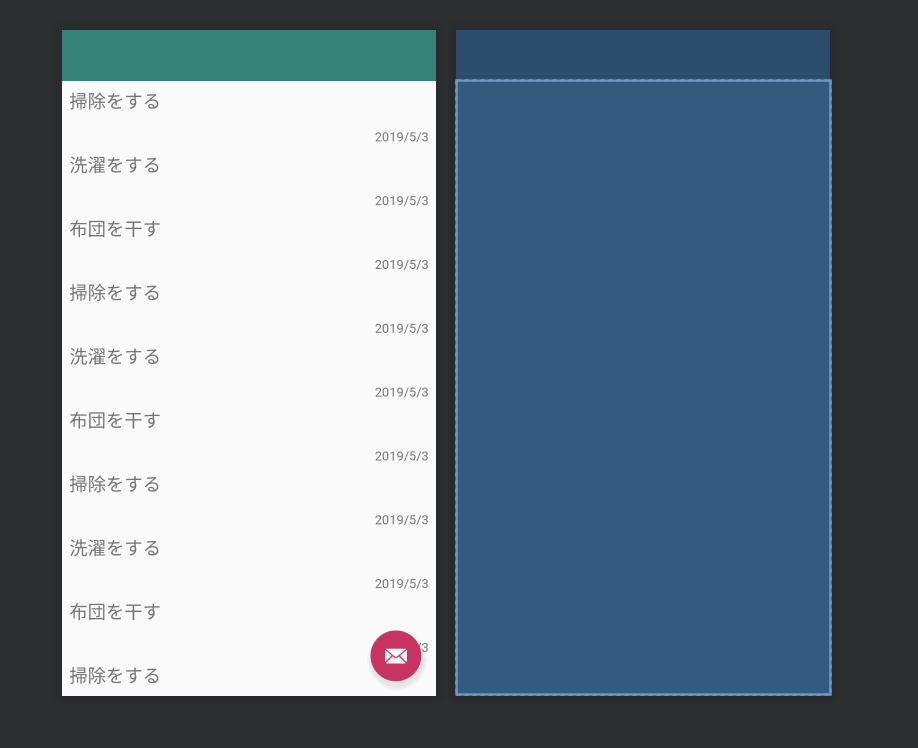
tools:textにsampledataのファイルを指定する
以下のようにtools:text="@sample/title"を追記する
item_todo.xml<TextView android:id="@+id/textView2" android:layout_width="match_parent" android:layout_height="wrap_content" android:layout_marginStart="8dp" android:layout_marginTop="8dp" android:textSize="20sp" app:layout_constraintStart_toStartOf="parent" app:layout_constraintTop_toTopOf="parent" tools:text="@sample/title" />これでlayout editerを確認すると記載したテキストファイルの内容が表示される。
備考
- 割とlayout editerで表示系は確認できる。
- ビルドしないとtools設定しても表示されない時がある。謎。
- ココにtools-attributesについて記載があるが、layoutManager等は記載されていない。。どこを見れば機能一覧があるのだろうか。。
- sampledataにjsonファイルを設定することもできるらしい。試してみたけど動作しなかったのでそのうち確認する。