20200804のUnityに関する記事は8件です。

Texture2Dが半透明ピクセルを持っているかどうか調べる

☆記事最後に追記あり

Twitterに書いたTextureが半透明ピクセルを持っているかどうか調べるコードを貼っておきます

いや、特に簡単に調べる方法は見つかっていないんだけれども…。
それでもまぁ再利用することを考えると、ピクセルを舐めるコードでも良いから記事化しておこうと思います。

TextureUtility.cs
using System.Collections.Generic;
using System.IO;
using UnityEngine;
using UnityEditor;

namespace ScreenPocket
{
    public static class TextureUtility
    {
        //Texture2Dに半透明ピクセルがあるかどうか調べる
        public static bool ExistsTransparentPixel(Texture2D texture)
        {
            var path = AssetDatabase.GetAssetPath(texture);
            var importer = AssetImporter.GetAtPath(path) as TextureImporter;
            if (importer == null)
            {
                Debug.LogError("Not Found TextureImporter! : " + path);
                return false;
            }

            bool isExist = false;
            //readableでないとGetPixels()出来ないので変更
            var keepReadable = importer.isReadable;
            importer.isReadable = true;
            importer.SaveAndReimport();
            var pixels = texture.GetPixels32();
            for (int i = 0, count = pixels.Length; i < count; ++i)
            {
                if (pixels[i].a != 0xff)
                {
                    isExist = true;
                    break;
                }
            }

            //readableを戻す
            importer.isReadable = keepReadable;
            importer.SaveAndReimport();
            AssetDatabase.Refresh();
            return isExist;
        }

        [MenuItem("Assets/ScreenPocket/Texture/ExistsTransparentPixel")]
        static void CheckExistsTransparentPixel()
        {
            var texture = Selection.activeObject as Texture2D;
            if (texture == null)
            {
                Debug.LogError("No Texture.");
                return;
            }

            if (ExistsTransparentPixel(texture))
            {
                Debug.Log("Transparency Texture!");
            }
            else
            {
                Debug.Log("Opaque Texture!");
            }
        }
    }
}

Projectツリーでテクスチャを右クリック > ScreenPocket > Texture > ExistsTransparentPixel で、
半透明ピクセルを持っているかどうかでLogが変わります。
もっとスマートな方法はないものか・・・。

☆追記


とのことで、ピクセルを舐めている部分をimporter.DoesSourceTextureHaveAlpha()に置き換えることで解決しました!
コレが欲しかったんや…!
修正後のコードはこちら↓
TextureUtility.cs
using System.Collections.Generic;
using System.IO;
using UnityEngine;
using UnityEditor;

namespace ScreenPocket
{
    public static class TextureUtility
    {
        //Texture2Dに半透明ピクセルがあるかどうか調べる
        public static bool ExistsTransparentPixel(Texture2D texture)
        {
            var path = AssetDatabase.GetAssetPath(texture);
            var importer = AssetImporter.GetAtPath(path) as TextureImporter;
            if (importer == null)
            {
                Debug.LogError("Not Found TextureImporter! : " + path);
                return false;
            }

            return importer.DoesSourceTextureHaveAlpha();
        }

        [MenuItem("Assets/ScreenPocket/Texture/ExistsTransparentPixel")]
        static void CheckExistsTransparentPixel()
        {
            var texture = Selection.activeObject as Texture2D;
            if (texture == null)
            {
                Debug.LogError("No Texture.");
                return;
            }

            if (ExistsTransparentPixel(texture))
            {
                Debug.Log("Transparency Texture!");
            }
            else
            {
                Debug.Log("Opaque Texture!");
            }
        }
    }
}
  • このエントリーをはてなブックマークに追加
  • Qiitaで続きを読む

【Unity】RawImageのTextureをPNGにエンコードする方法

uGUIでおなじみRawImageから取り出したTextureをPNGにエンコードする方法の備忘録です。

TextureをTexture2Dに変換してPNGにエンコード

RawImageからtextureプロパティでTextureを取得できます。

var texture = _rawImage.texture;

しかし、EncodeToPNGメソッドはTexture2Dクラスにしか実装されていないのでTextureからTexture2Dへの変換を試みます。1

RenderTextureに変換後Texture2Dへ

単純なキャストでは変換できません。

var tex = (Texture2D)texture;

以下のエラーが出ます。

InvalidCastException: Specified cast is not valid.

先人の方々はRenderTextureを一枚噛ませて変換しているようなので、それに従います。

var tex = _rawImage.texture;
var sw = tex.width;
var sh = tex.height;
var result = new Texture2D(sw, sh, TextureFormat.RGBA32, false);
var currentRT = RenderTexture.active;
var rt = new RenderTexture(sw, sh, 32);

// RawImageのTextureをRenderTextureにコピー
Graphics.Blit(tex, rt);
RenderTexture.active = rt;

// RenderTextureのピクセル情報をTexture2Dにコピー
result.ReadPixels(new Rect(0, 0, rt.width, rt.height), 0, 0);
result.Apply();
RenderTexture.active = currentRT;

// PNGにエンコード完了
var bytes = result.EncodeToPNG();

無事にTextureからPNGのバイト配列に変換できるました。

余談

フォーラムでも同様の議論がされていました。

https://answers.unity.com/questions/1470513/convert-texture-to-texture2d.html

以下のやり方が提案されていましたが、僕の環境では動きませんでした。

public static Texture2D ToTexture2D(Texture texture)
{
    return Texture2D.CreateExternalTexture(
        texture.width,
        texture.height,
        TextureFormat.RGB24,
        false, false,
        texture.GetNativeTexturePtr());
}

UnityEditor上でしか試していないけどエラーが出ました。

Unable to retrieve image reference

環境

  • Unity2019.4.4f1

参考


  1. Textureクラスを直接PNGにエンコード出来ればよいのですが、、、 

  • このエントリーをはてなブックマークに追加
  • Qiitaで続きを読む

[Unity] Prefabの編集をC#スクリプトで行う

概要

タイトルの通り、Prefabとして固めてあるものをスクリプトで開いて、編集して、保存するための方法を書き記します。

方法

const string PrefabPath = "Assets/Prefabs/Player.prefab";
GameObject player = PrefabUtility.LoadPrefabContents(PrefabPath);

/*
 * 読み込んだPrefabの内容を変更
 */

PrefabUtility.SaveAsPrefabAsset(player, PrefabPath);
PrefabUtility.UnloadPrefabContents(player);

注意点

  • Prefabのパスはプロジェクトフォルダをルートとして指定します
  • 拡張子の.prefabまで入れないと読み込まれません
  • SaveAsPrefabAsset()で保存しないと、変更した内容が反映されません
  • UnloadPrefabContents()でアンロードすることを忘れずに

読み込んだ後

GameObject player = PrefabUtility.LoadPrefabContents(PrefabPath);

int count = player.childCount;  // 子要素の数
for(int i=0; i<count; i++)
{
    GameObject obj = player.GetChild(i);    // 子要素はインデックスで持ってこられる

    // なにかコンポーネントを持ってくるときはGetComponent()で
    var cinemachine = path.GetComponent<Cinemachine.CinemachineSmoothPath>();
}

UnityEditor上で

  • Hierarchyで操作するものはGameObject
  • Inspectorで操作するものはComponent

です(ここらへん不安なので信用しないように)。

以上です。

参考リンク

  • このエントリーをはてなブックマークに追加
  • Qiitaで続きを読む

constant force 2Dの解説

今回はPhysics2Dの中にある機能の一つである
「Constant Force2D」について説明しようと思います。

Constant Force2Dとは?

Constant Force2Dとは、「一定の力を与え続ける機能」です。
簡単に言えば徐々に加速し続けるような感じです。
ちなみに、constant forceを和訳すると「一定の力」となります。

Constant Force2Dのそれぞれのパラメータ

constantForce2d_param.png
Constant Force2Dには「Force」、「Relative Force」、「Torque」という3つのパラメータ、更にforceとrelative forceには「X」と「Y」というパラメータがあります。
それを1つずつ解説していきます。

・Force

forceは、ワールド座標を基準にしています。
なので、物体が回ったとしても力が加わる方向は変わったりはしません
イメージとしては外部から一方向に押されている感じです。

X は右に押す力、Y は上に押す力です。
それぞれの力をマイナスの値にすると逆方向に力が加わります。
torokko_push_pig.pngForceのイメージ図

・Relative Force

forceとの違いはローカル座標を基準にしていることです。
なので、物体が回ると力が加わる方向が変わります
イメージとしてはロケットのエンジンのように物体からエネルギーが放たれて、その反作用で動いている感じです。
rocket_different_direction.pngRelative Forceのイメージ図

・Torque(トルク)

物体に回転力を加えます。
自転車を想像してください。自転車はペダルをこぐことによってタイヤに回転力が与えられ、前に進むという仕組みになっています。
1つ注意をしておくと、Torqueは反時計回りの方向が正の方向なので、そのまま「100」などの正の値を入れると左に転がって行ってしまいます。なので、右に行かせたい場合はTorqueに「-100」などの負の値を入れてください。

Torqueのイメージ図
pyoko05_fast.png

Constan Force2Dをスクリプト上で変更する

Constan Force2Dのパラメータをスクリプト上で変更するときの書き方

this.GetComponent<ConstantForce2D>().force = new Vector2(10, 0);
this.GetComponent<ConstantForce2D>().relativeForce = new Vector2(10, 0);
this.GetComponent<ConstantForce2D>().torque = -300;

終わりに

Constant Force2Dについて日本語でまとめられたものがUnityマニュアル以外見つからなかったのでこのブログを書いてみました。
これからいくつかPhisics2Dの各機能について書いてくつもりなのでよろしくお願いします。

画像:いらすとや

  • このエントリーをはてなブックマークに追加
  • Qiitaで続きを読む

【Xcode】ビルドエラー「Code Signing Error: Code signing is required for product type 'Application' in SDK 」の対処法

Unityで書き出したXcodeプロジェクトを実機ビルドした際に、以下のエラーで失敗してしまったため、その対処法備忘録です。

Code Signing Error: Code signing is required for product type 'Application' in SDK 'iOS 13.6'

Development Teamが空になっていた

XcodeのDevelopment Teamが空になっていたのが原因でした。
適切にTeamを設定してあげるとビルドは成功しました。

Unity側で予め設定しておく

もう1つの解決方法としてUnity側でTeamIDを設定しておく方法です。

PlayerSettingsのSigning TeamIDに予め入力しておけば書き出されたXcodeプロジェクトに反映されます。

確認方法は以下のページからMembershipから確認できます。
https://developer.apple.com/account/#/membership

環境

  • iPhone6s iOS 13.6
  • Unity2019.4.4f1
  • Xcode 11.6

参考

  • このエントリーをはてなブックマークに追加
  • Qiitaで続きを読む

【Unity】iOSのカメラ使用時にiOS実機ビルドでクラッシュする時の対処法

UnityでiOSのカメラを使う際は、WebCamTextureクラスを使います。
以下のショートコードでプラットフォームを越えてカメラ情報を取得することが出来るので本当にUnityは便利です。

WebCamTest.cs
[SerializeField] RawImage _rawImage;
void Start()
{
    var webCamTexture = new WebCamTexture();
    _rawImage.texture = webCamTexture;
    webCamTexture.Play();
}

UnityEditor上で実行する上では問題なく動くと思います。
しかし、XcodeでiOS端末で実行すると、Xcodeのコンソールで以下のエラーを吐いて落ちる時があります。

本記事はその対処法備忘録です。

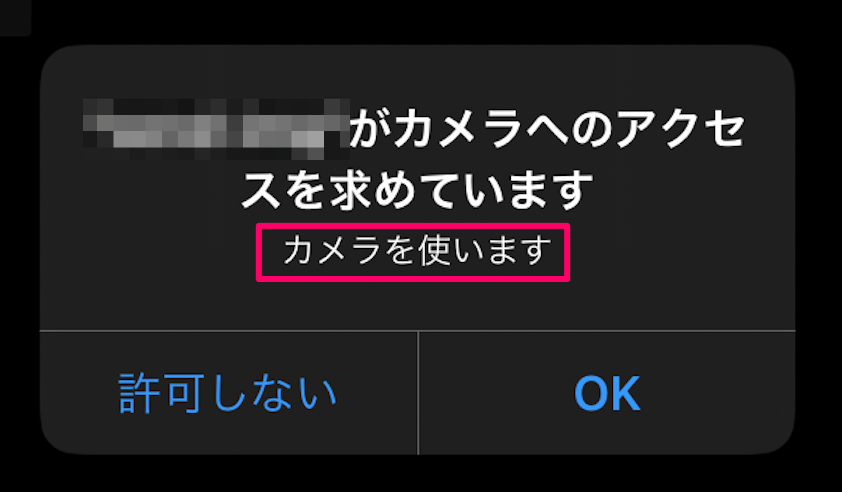
[access] This app has crashed because it attempted to access privacy-sensitive data without a usage description. The app's Info.plist must contain an NSCameraUsageDescription key with a string value explaining to the user how the app uses this data.

Camera Usage Descriptionへの入力必須

PlayerSettings > OtherSettings > Camera Usage Description
この項目に何かしらの文字列を入れる必要があります。

Xcodeのinfo.plistのPrivacy - Camera Usage Descriptionに追加される事になります。

Camera Usage Descriptionを設定してiOS実機ビルドするとクラッシュしなくなると思います。
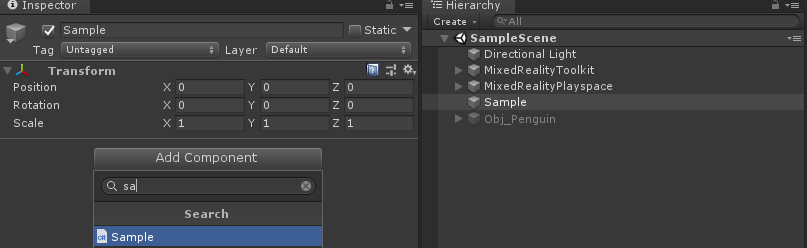
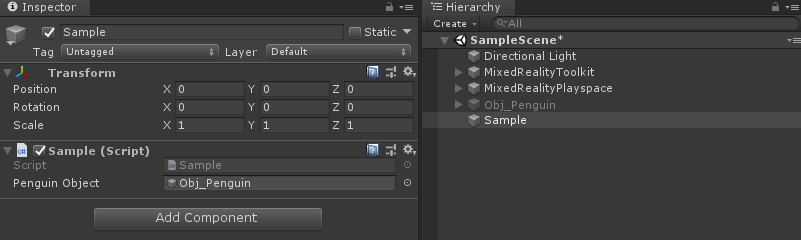

ちなみに、Camera Usage Descriptionはカメラ使用時の許可ダイアログ内の説明文で使用されます。

環境

  • iPhone6s iOS 13.6
  • Unity2019.4.4f1
  • Xcode 11.6
  • このエントリーをはてなブックマークに追加
  • Qiitaで続きを読む

Unity+Android で画像保存が出来ない。

Unity + Android で画像保存を確認しようとしたら
うまくいかなかった

外部保存には以下のものを使用
https://github.com/yasirkula/UnityNativeGallery

それでこの記事を見て解決。
どうやら、設定を何かしら変えないと保存できない模様。
細かいことは気にせず動いたので問題解決とする。
https://qiita.com/Katumadeyaruhiko/items/c2b9b4ccdfe51df4ad4a

public void SaveImage()
{
    Sprite backCameraOn = Resources.Load<Sprite>("適当な画像");
    Texture2D frontImage = createReadabeTexture2D( backCameraOn.texture );

    NativeGallery.SaveImageToGallery(
        frontImage,
        "album",
        "bodygramFront");
}

Texture2D createReadabeTexture2D(Texture2D texture2d)
{
    RenderTexture renderTexture = RenderTexture.GetTemporary(
                texture2d.width,
                texture2d.height,
                0,
                RenderTextureFormat.Default,
                RenderTextureReadWrite.Linear);

    Graphics.Blit(texture2d, renderTexture);
    RenderTexture previous = RenderTexture.active;
    RenderTexture.active = renderTexture;
    Texture2D readableTextur2D = new Texture2D(texture2d.width, texture2d.height);
    readableTextur2D.ReadPixels(new Rect(0, 0, renderTexture.width, renderTexture.height), 0, 0);
    readableTextur2D.Apply();
    RenderTexture.active = previous;
    RenderTexture.ReleaseTemporary(renderTexture);
    return readableTextur2D;
}

‘‘‘

  • このエントリーをはてなブックマークに追加
  • Qiitaで続きを読む

ボクもやりたい☆てのりカナヅチくん!!

概要

この記事は「マイスター・ギルド:暑中見舞!夏のアドベントカレンダー2020」2日目の記事です

とある日

(๑و•̀ω•́)و |Twitter|
(๑و•̀ω•́)و < て、てのりカナヅチくーん
(๑و•̀ω•́)و < ボクも!ボクも!

手乗りカナヅチと書いてあったので作ってみた

開発環境

項目 バージョン 備考
Unity 2019.2.21f1
MRTK 2.4

目標

右手にカナヅチくんを呼び出す
1. コードから右手のTransformを取得(Palm)
2. カナヅチくんを配置する

手順

  • スクリプトを作成
HandJoint.cs
using Microsoft.MixedReality.Toolkit.Input;
using Microsoft.MixedReality.Toolkit.Utilities;
using UnityEngine;

public class Sample : MonoBehaviour
{
    [SerializeField] GameObject _penguinObject = null;

    // Start is called before the first frame update
    void Start()
    {

    }

    // Update is called once per frame
    void Update()
    {
        if (HandJointUtils.TryGetJointPose(TrackedHandJoint.Palm, Handedness.Right, out MixedRealityPose pose))
        {
            _penguinObject.transform.position = pose.Position + -pose.Up * 0.022f;
            _penguinObject.transform.rotation = pose.Rotation * Quaternion.Euler(new Vector3(-180, 0, 0));

            var currentVec = pose.Position + -pose.Up;
            var baseVec = pose.Position + Vector3.up;
            var dot = Vector3.Dot(currentVec, baseVec);
            _penguinObject.SetActive(dot > 0.60f);
        }
        else
        {
            _penguinObject.SetActive(false);
        }
    }
}
  • 任意のゲームオブジェクト作成
    コメント 2020-07-30 165158.png

  • 上記スクリプトを貼り付けます
    コメント 2020-07-30 165120.png

  • インスペクタから表示したいオブジェクトを設定
    コメント 2020-07-30 165224.png

完成

f1e7389e-161e-4fb9-b245-487a67e0d435-960x898r.png

次回

マイスター・ギルド次回アドカレ! SkyWayによるビデオ・音声通話の技術概要 ロイックさんです。

  • このエントリーをはてなブックマークに追加
  • Qiitaで続きを読む