- 投稿日:2020-08-04T22:03:29+09:00
女子プロゴルファーの顔診断AIを作ってみた③
1. はじめに
前回学習モデルの作成まで行いました。
今回は、学習モデルを用いて実際のWebアプリケーションを作成してデプロイまで行います。
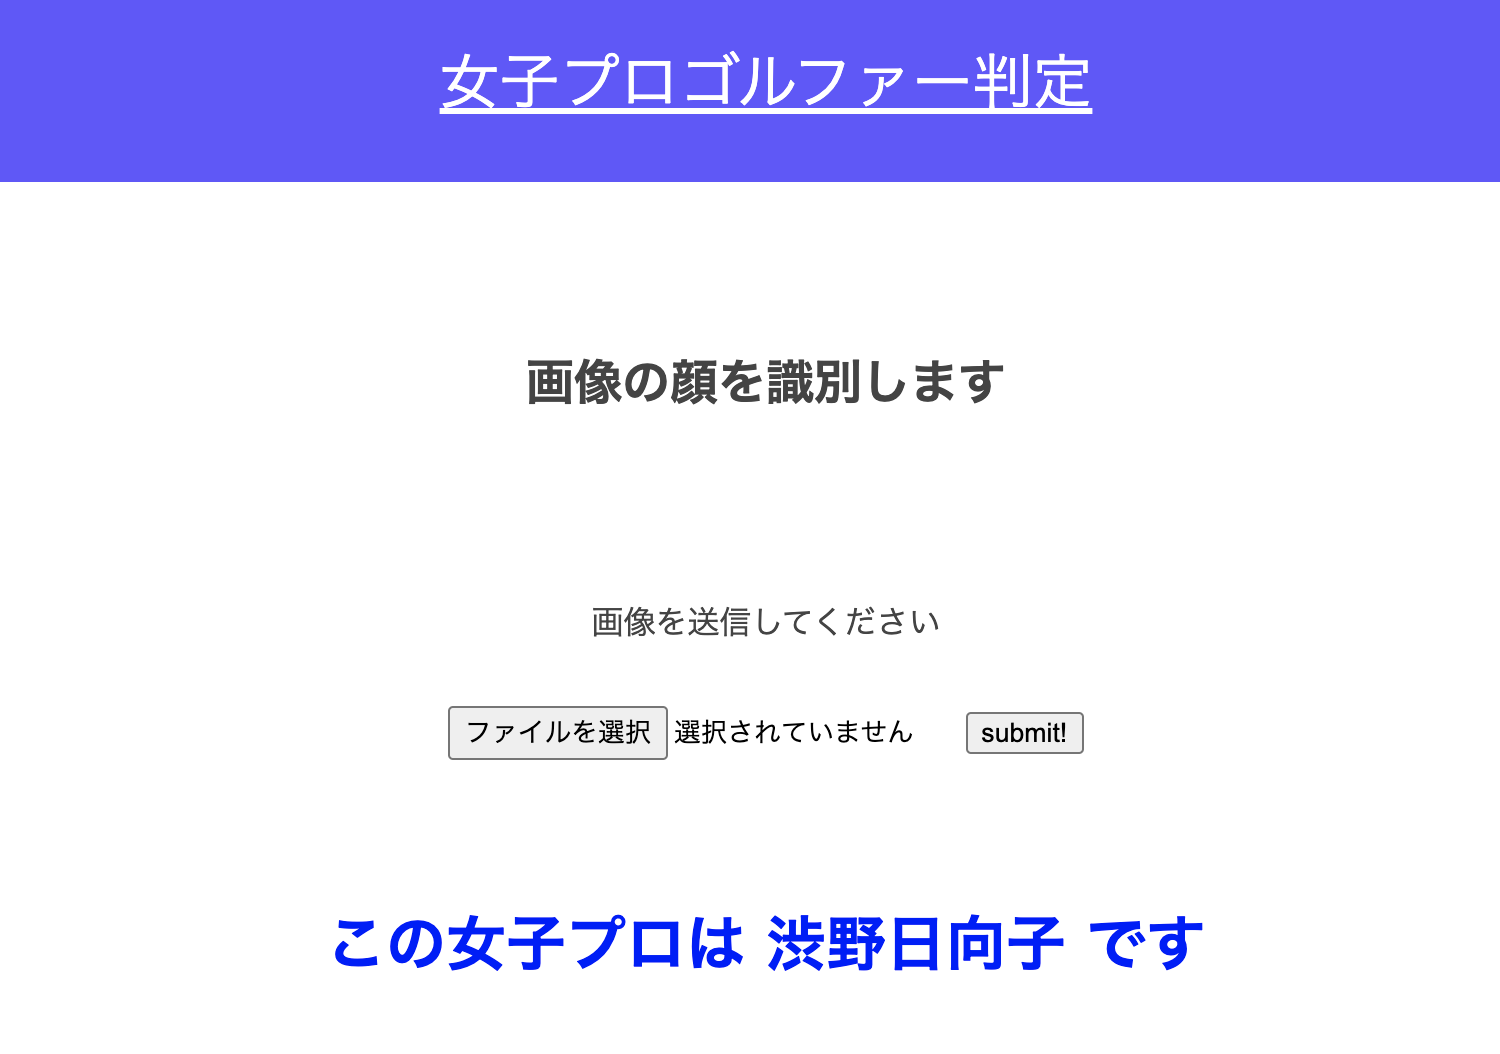
完成イメージはこんな感じ
2. Flaskを用いて作成
main.py# モジュールをインポートする import cv2 import os from flask import Flask, request, redirect, url_for, render_template, flash from werkzeug.utils import secure_filename from keras.models import Sequential, load_model from keras.preprocessing import image from PIL import Image import tensorflow as tf import numpy as np from datetime import datetime import face_recognition # 選手名 classes = ['渋野日向子', '小祝さくら', '原英莉花'] num_classes = len(classes) image_size = 64 # アップロードされた画像を保存するファイル UPLOAD_FOLDER = "uploads/" # アップロードを許可する拡張子を指定 ALLOWED_EXTENSIONS = set(['png', 'jpg', 'jpeg', 'gif']) # Flaskクラスのインスタンスを設定 app = Flask(__name__) # アップロードされたファイルの拡張子をチェックする関数を定義 def allowed_file(filename): # 1つ目の条件:変数filenameに'.'という文字が含まれているか。 # 2つ目の条件:変数filenameの.より後ろの文字列がALLOWED_EXTENSIONSのどれに該当するかどうか # rsplitは区切る順序が文字列の最後から’1’回区切る。lowerは文字列を小文字に変換 return '.' in filename and filename.rsplit('.', 1)[1].lower() in ALLOWED_EXTENSIONS # 顔を検出する(haarcascade) def detect_face(img_path): image = face_recognition.load_image_file(img_path) faces = face_recognition.face_locations(image) if len(faces)>0: face_max = [(abs(faces[i][0]-faces[i][2])) * (abs(faces[i][1]-faces[i][3])) for i in range(len(faces))] top, right, bottom, left = faces[face_max.index(max(face_max))]#1人しか写っていなのでこれで問題ない faceImage = image[top:bottom, left:right] final = Image.fromarray(faceImage) final = np.asarray(final.resize((image_size,image_size))) final = Image.fromarray(final) basename = datetime.now().strftime("%Y%m%d-%H%M%S") filepath = UPLOAD_FOLDER + basename+".png" final.save(filepath) return final else: return "顔画像を入力してください" #学習済みモデルをロードする model = load_model('./golfer.h5', compile=False) graph = tf.get_default_graph() # app.route()で関数に指定したURLを対応づける。/ http://127.0.0.1:5000/以降のURLを指定 @app.route('/', methods=['GET', 'POST']) def upload_file(): global graph # as_default()で対象となるグラフを指定 with graph.as_default(): # HTTPメソッドがPOSTであれば if request.method == 'POST': # POSTリクエストにファイルデータが含まれているか if 'file' not in request.files: flash('ファイルがありません') # redirectは引数のURLに移動する関数 return redirect(request.url) file = request.files['file'] if file.filename == '': flash('ファイルがありません') return redirect(request.url) # ファイルがあって許可された形式であれば if file and allowed_file(file.filename): # ファイル名に危険な文字列がある場合、無効化する。 filename = secure_filename(file.filename) # uploadsフォルダーに保存する file.save(os.path.join(UPLOAD_FOLDER, filename)) # ファイルパスを作成する filepath = os.path.join(UPLOAD_FOLDER, filename) # #受け取った画像を読み込み、np形式に変換 img = image.load_img(filepath, grayscale=False, target_size=(image_size,image_size)) # 顔部分を検出する img = detect_face(filepath) if type(img)!=str: img = image.img_to_array(img) data = np.array([img]) #変換したデータをモデルに渡して予測する result = model.predict(data)[0] predicted = result.argmax() pred_answer = "この女子プロは " + str(classes[predicted]) + " です" return render_template("index.html",answer=pred_answer) else: return render_template("index.html",answer=img) return render_template("index.html",answer="") # FlaskでWebアプリ開発中にCSSが反映されない問題を解決する @app.context_processor def override_url_for(): return dict(url_for=dated_url_for) def dated_url_for(endpoint, **values): if endpoint == 'static': filename = values.get('filename', None) if filename: file_path = os.path.join(app.root_path, endpoint, filename) values['q'] = int(os.stat(file_path).st_mtime) return url_for(endpoint, **values) if __name__ == "__main__": port = int(os.environ.get('PORT', 8080)) app.run(host ='0.0.0.0',port = port)3. index.htmlとstylesheet
index.html<!DOCTYPE html> <html lang="ja"> <head> <meta charset="UTF-8"> <meta name="viewport" content="width=device-width, initial-scale=1.0"> <meta http-equiv="X-UA-Compatible" content="ie=edge"> <title>女子プロゴルファー判定</title> <!-- <link rel="stylesheet" href="./static/stylesheet.css"> --> <link rel= "stylesheet" type= "text/css" href= "{{ url_for('static',filename='stylesheet.css') }}"> </head> <body> <header> <a class="header-logo" href="#">女子プロゴルファー判定</a> </header> <div class="main"> <h2>画像の顔を識別します</h2> <p>画像を送信してください</p> <form method="POST" enctype="multipart/form-data"> <input class="file_choose" type="file" name="file"> <input class="btn" value="submit!" type="submit"> </form> <div class="answer">{{answer}}</div> </div> <footer> </footer> </body> </html>stylesheet.cssheader { background-color: rgb(100, 81, 255); height: 100px; margin: -8px; display: flex; flex-direction: row-reverse; justify-content: space-between; } .header-logo { color: #fff; font-size: 30px; margin: auto; } .header_img { height: 25px; margin: 15px 25px; } .main { height: 370px; } h2 { color: #444444; margin: 90px 0px; text-align: center; } p { color: #444444; margin: 70px 0px 30px 0px; text-align: center; } .answer { margin: 70px 0px 30px 0px; text-align: center; font-size: 30px; color: blue; font-weight: bold; } form { text-align: center; } h2 { color: #444444; text-align: center; } footer { background-color: #F7F7F7; height: 110px; margin: -8px; position: relative; } .footer_img { height: 25px; margin: 15px 25px; } small { margin: 15px 25px; position: absolute; left: 0; bottom: 0; }4. ファイルの構成
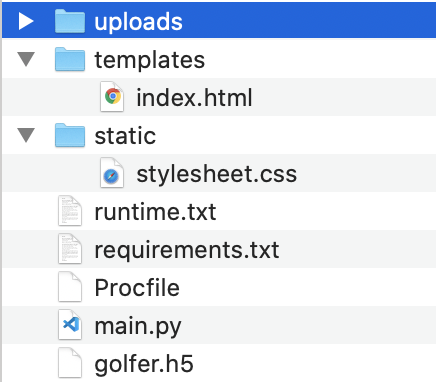
ファイルの構成は以下のようにする
templatesフォルダ内にindex.html
staticフォルダ内にstylesheet.css残りのファイルはこちらの記事を参考にしてください
【完全版】Flaskで作ったAPIをHerokuにデプロイする手順(備忘録)5. herokuへデプロイする
5-1. Herokuへ会員登録する
Herokuこちらより登録する
5-2. Herokuへログイン
$ heroku login5-3. 設定
Create New App ⇨ App nameを入力し、国をUnited Statesで登録。
アプリのページに遷移しSetteingsに移動、Add buildpackをクリックしてPythonを追加。5-4. 以下をターミナルより実行
git init※ 最初の1回だけ。2回やるとうまくデプロイできなくなります。
heroku git:remote -a (アプリ名)git add .git commit -m “(何を変更したかメッセージを書く)”git push heroku master以上でデプロイは完了です
6. webアプリの確認
下記コードにて確認する
heroku open以上で3回に渡った画像アプリの投稿を終了する。
- 投稿日:2020-08-04T17:30:04+09:00
KerasでGAN作ってみたので学習過程を動画にしてみた。
はじめに
以前の記事でGanによる手書き文字認識をKerasで実装しました。
その際にGanの学習過程がどのようになっているのか気になったので動画にしてみました。今回は比較も行いたかったため、GanとCGanの二つで行いました。
動画を見てみると、Ganがどのように手書き文字の特徴を捉えているのかが動画内で確認できます。
二つの動画を見比べてみるとGGanとGanでは学習の様子が全く違い、CGanは畳み込み層による特徴がしっかりとででいることがわかるかと思います
動画はYoutube上にアップしてあります。GAN : https://www.youtube.com/watch?v=ORVZVZqYYqU
CGAN : https://www.youtube.com/watch?v=ByicWghi-iwGanとCGanの違い
二つの違いはネットワークに用いている層の種類の違いだけです。
Ganは全結合層、CGanは畳み込み層でネットワークが構築されています。動画では層による学習の違いがよくみて取れます。
終わりに
ネットワークの学習過程を覗いてみるのもおもしろいなと感じました!
Gan動画
https://www.youtube.com/watch?v=ORVZVZqYYqU
CGan動画
- 投稿日:2020-08-04T02:29:12+09:00
StyleGAN2で未知のポケモンを生み出す[前編]
今回やること
何番煎じだという感じですが,ポケモンの自動生成モデルの学習をしようと思います.調べてみると最新のモデルのStyleGAN2ベースですでに試している方がいます.しかし実際のコードやデータセット,実装までは公開されていなかったのでこのへんを記事にまとめておきたいなと思っています.
StyleGAN2とは
StyleGAN2はNVIDIAが発表した画像生成モデルです.スタイル変換を用いることが特徴的な生成モデルで,現状では複数のタスクにおいてSOTAとなっている強力なモデルです.
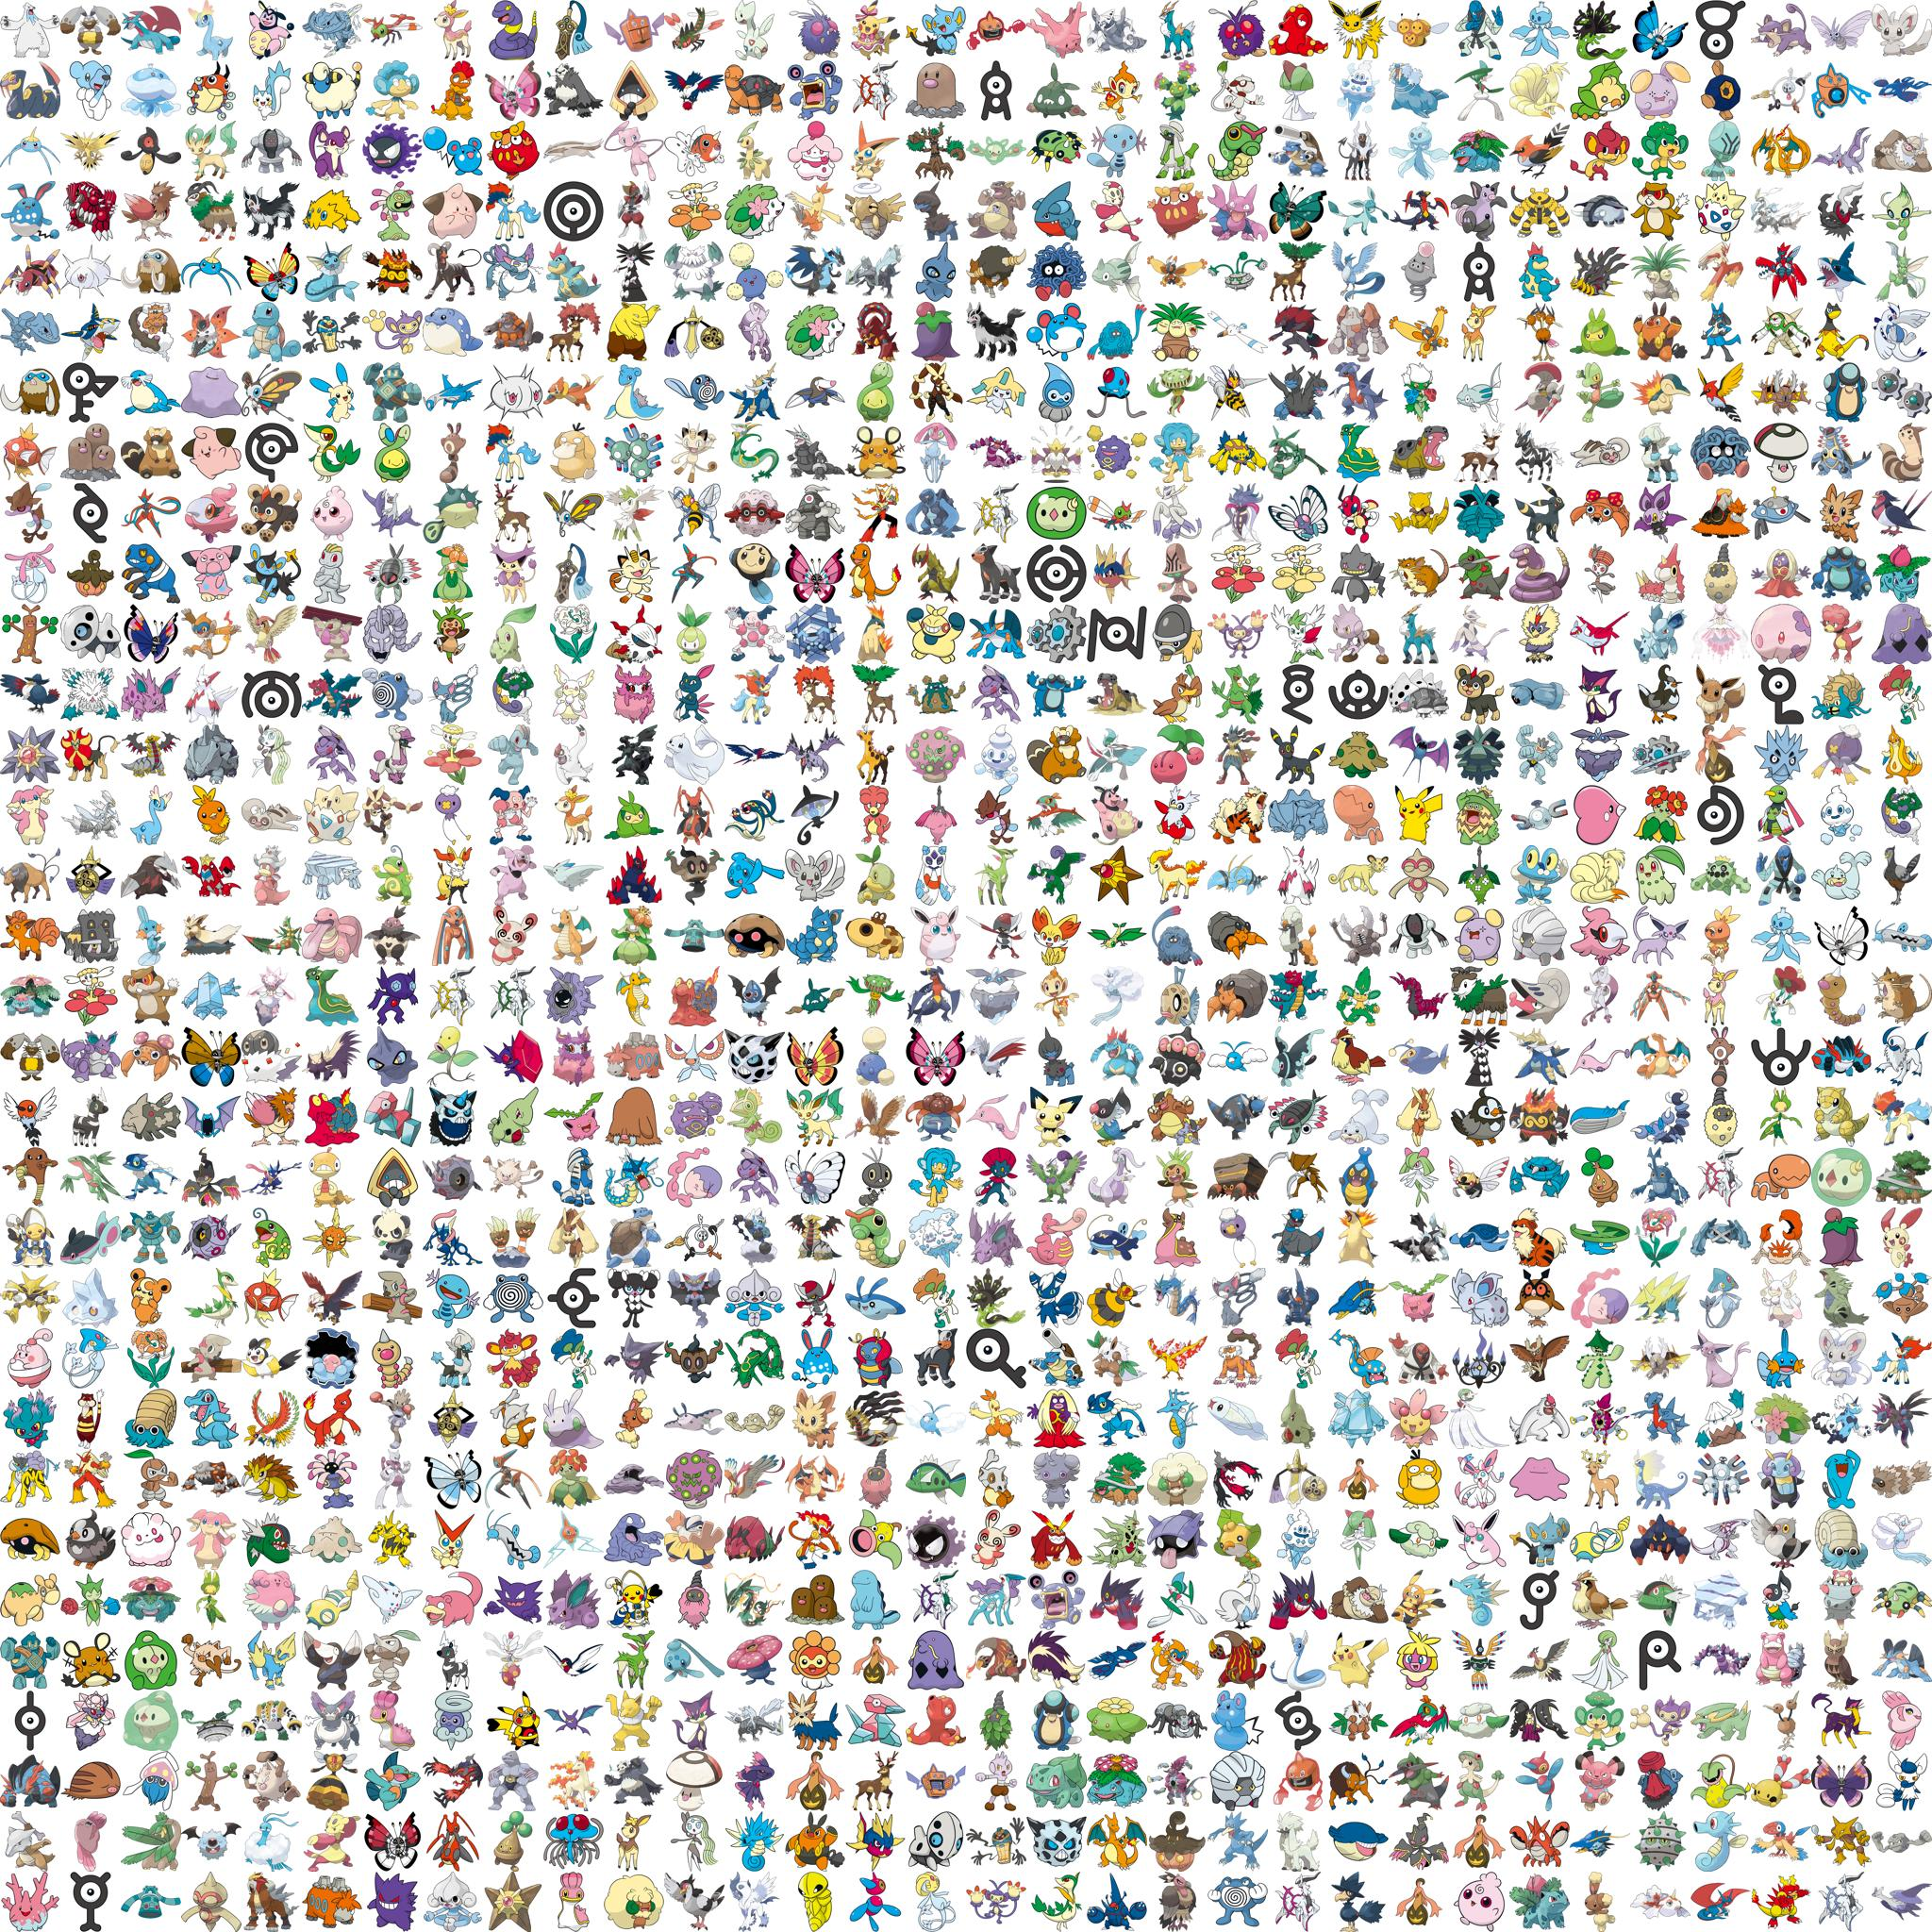
データセット
何か良いデータセットはないものかと調べていると,事前にデータを15000件収集して公開してくれている方がいたのでこちらを使わせていただきました.
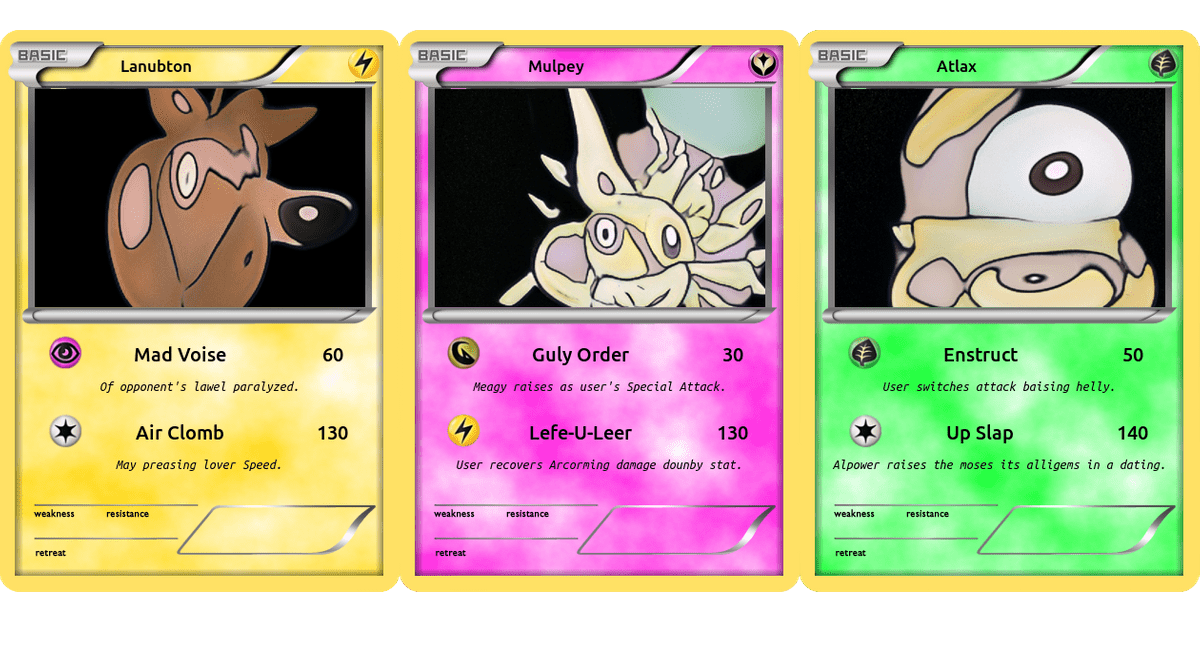
MonsterGANほかにもKaggleのPokemon-Image-DatasetやOne-Shot-Pokemon-Imagesなども候補に挙がります.One-Shot-Pokemon-Imagesにはポケモンカードのデータセットが含まれていて,そちらが非常にデータ量が多いためポケモンカード生成タスクに応用されているようです.
※コチラより引用先行事例
Michael Frieseという方が熱心にStyleGAN・StyleGAN2を用いたポケモン生成に挑戦していらっしゃるようです.
StyleGANでは既にかなりいい感じに結果を残されているようです.
※ コチラより引用猫や馬などの学習済みモデルから転移学習を行うと,学習自体がうまくいく上に生成画像に転移前のドメインの雰囲気が反映されるらしい.
すごくエモい.馬から転移
※ コチラから引用猫から転移
※ コチラから引用車から転移
※ コチラから引用StyleGAN2を用いた生成結果は途中までしか公開されていませんでした.540kimgまで学習した結果です.学習途中なので品質は置いておいて,かなりバリエーションが多く感じます.
※ コチラから引用自前で行った学習結果
まだ学習途中なのですが,StyleGAN2を使った学習の経過をお見せします.RTX1070で学習を行っているため,むちゃなモデルはメモリサイズの関係で不可能です.今回はデータセットをすべて64x64にリサイズして利用しました.
モデルの概要
G                           Params    OutputShape       WeightShape
---                         ---       ---               ---
latents_in                  -         (?, 512)          -
labels_in                   -         (?, 0)            -
lod                         -         ()                -
dlatent_avg                 -         (512,)            -
G_mapping/latents_in        -         (?, 512)          -
G_mapping/labels_in         -         (?, 0)            -
G_mapping/Normalize         -         (?, 512)          -
G_mapping/Dense0            262656    (?, 512)          (512, 512)
G_mapping/Dense1            262656    (?, 512)          (512, 512)
G_mapping/Dense2            262656    (?, 512)          (512, 512)
G_mapping/Dense3            262656    (?, 512)          (512, 512)
G_mapping/Dense4            262656    (?, 512)          (512, 512)
G_mapping/Dense5            262656    (?, 512)          (512, 512)
G_mapping/Dense6            262656    (?, 512)          (512, 512)
G_mapping/Dense7            262656    (?, 512)          (512, 512)
G_mapping/Broadcast         -         (?, 10, 512)      -
G_mapping/dlatents_out      -         (?, 10, 512)      -
Truncation/Lerp             -         (?, 10, 512)      -
G_synthesis/dlatents_in     -         (?, 10, 512)      -
G_synthesis/4x4/Const       8192      (?, 512, 4, 4)    (1, 512, 4, 4)
G_synthesis/4x4/Conv        2622465   (?, 512, 4, 4)    (3, 3, 512, 512)
G_synthesis/4x4/ToRGB       264195    (?, 3, 4, 4)      (1, 1, 512, 3)
G_synthesis/8x8/Conv0_up    2622465   (?, 512, 8, 8)    (3, 3, 512, 512)
G_synthesis/8x8/Conv1       2622465   (?, 512, 8, 8)    (3, 3, 512, 512)
G_synthesis/8x8/Upsample    -         (?, 3, 8, 8)      -
G_synthesis/8x8/ToRGB       264195    (?, 3, 8, 8)      (1, 1, 512, 3)
G_synthesis/16x16/Conv0_up  2622465   (?, 512, 16, 16)  (3, 3, 512, 512)
G_synthesis/16x16/Conv1     2622465   (?, 512, 16, 16)  (3, 3, 512, 512)
G_synthesis/16x16/Upsample  -         (?, 3, 16, 16)    -
G_synthesis/16x16/ToRGB     264195    (?, 3, 16, 16)    (1, 1, 512, 3)
G_synthesis/32x32/Conv0_up  2622465   (?, 512, 32, 32)  (3, 3, 512, 512)
G_synthesis/32x32/Conv1     2622465   (?, 512, 32, 32)  (3, 3, 512, 512)
G_synthesis/32x32/Upsample  -         (?, 3, 32, 32)    -
G_synthesis/32x32/ToRGB     264195    (?, 3, 32, 32)    (1, 1, 512, 3)
G_synthesis/64x64/Conv0_up  2622465   (?, 512, 64, 64)  (3, 3, 512, 512)
G_synthesis/64x64/Conv1     2622465   (?, 512, 64, 64)  (3, 3, 512, 512)
G_synthesis/64x64/Upsample  -         (?, 3, 64, 64)    -
G_synthesis/64x64/ToRGB     264195    (?, 3, 64, 64)    (1, 1, 512, 3)
G_synthesis/images_out      -         (?, 3, 64, 64)    -
G_synthesis/noise0          -         (1, 1, 4, 4)      -
G_synthesis/noise1          -         (1, 1, 8, 8)      -
G_synthesis/noise2          -         (1, 1, 8, 8)      -
G_synthesis/noise3          -         (1, 1, 16, 16)    -
G_synthesis/noise4          -         (1, 1, 16, 16)    -
G_synthesis/noise5          -         (1, 1, 32, 32)    -
G_synthesis/noise6          -         (1, 1, 32, 32)    -
G_synthesis/noise7          -         (1, 1, 64, 64)    -
G_synthesis/noise8          -         (1, 1, 64, 64)    -
images_out                  -         (?, 3, 64, 64)    -
---                         ---       ---               ---
Total                       27032600


D                    Params    OutputShape       WeightShape
---                  ---       ---               ---
images_in            -         (?, 3, 64, 64)    -
labels_in            -         (?, 0)            -
64x64/FromRGB        2048      (?, 512, 64, 64)  (1, 1, 3, 512)
64x64/Conv0          2359808   (?, 512, 64, 64)  (3, 3, 512, 512)
64x64/Conv1_down     2359808   (?, 512, 32, 32)  (3, 3, 512, 512)
64x64/Skip           262144    (?, 512, 32, 32)  (1, 1, 512, 512)
32x32/Conv0          2359808   (?, 512, 32, 32)  (3, 3, 512, 512)
32x32/Conv1_down     2359808   (?, 512, 16, 16)  (3, 3, 512, 512)
32x32/Skip           262144    (?, 512, 16, 16)  (1, 1, 512, 512)
16x16/Conv0          2359808   (?, 512, 16, 16)  (3, 3, 512, 512)
16x16/Conv1_down     2359808   (?, 512, 8, 8)    (3, 3, 512, 512)
16x16/Skip           262144    (?, 512, 8, 8)    (1, 1, 512, 512)
8x8/Conv0            2359808   (?, 512, 8, 8)    (3, 3, 512, 512)
8x8/Conv1_down       2359808   (?, 512, 4, 4)    (3, 3, 512, 512)
8x8/Skip             262144    (?, 512, 4, 4)    (1, 1, 512, 512)
4x4/MinibatchStddev  -         (?, 513, 4, 4)    -
4x4/Conv             2364416   (?, 512, 4, 4)    (3, 3, 513, 512)
4x4/Dense0           4194816   (?, 512)          (8192, 512)
Output               513       (?, 1)            (512, 1)
scores_out           -         (?, 1)            -
---                  ---       ---               ---
Total                26488833
snapshotのグリッドの設定の変更を忘れていてめちゃくちゃ画像みにくくすみません...学習が大変なのでやり直しはまだです.
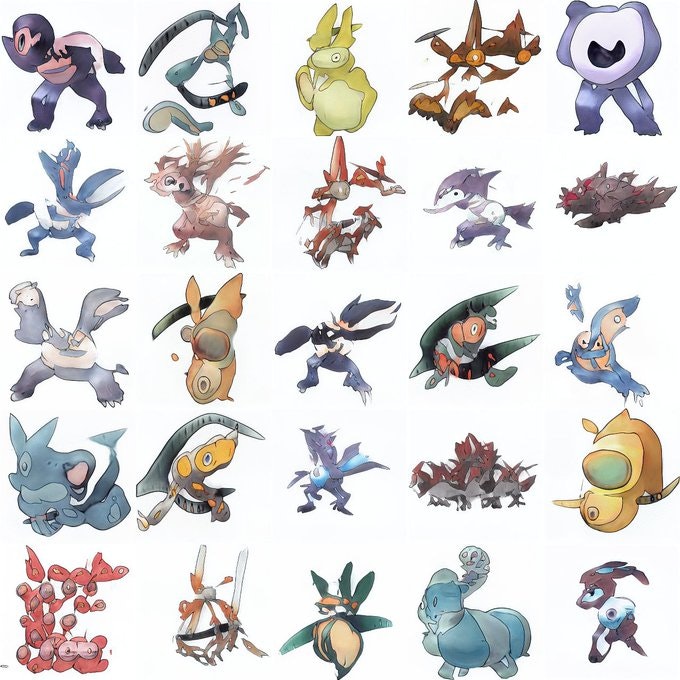
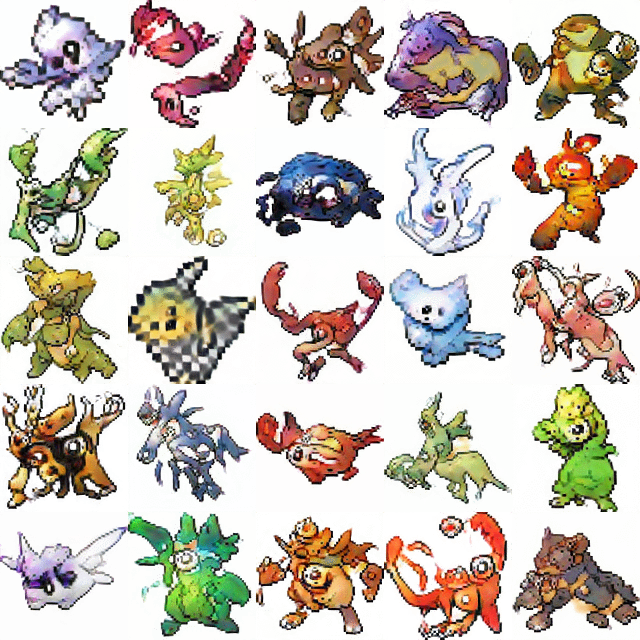
データセットの例(reals.png)
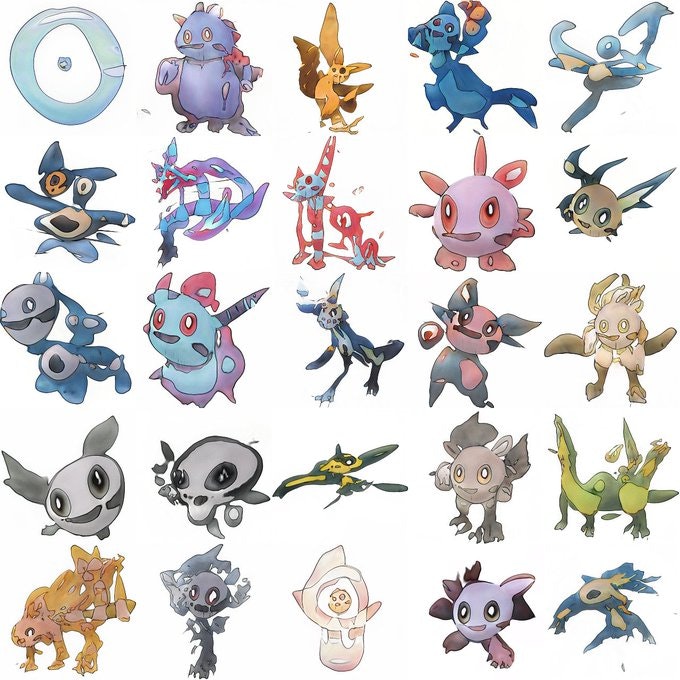
生成結果(288kimg: 19時間)
徐々に輪郭が形成されてきて,人型や動物型にも見えるポケモンの概形できてきました.学習がしっかり進んでいるかどうかFrechet Inception Distance(FID)を出力して監視しています.今のところ順調に進んでいます.公式のページにはFIDは一桁だと載っているのですが,さすがにそこまで学習するのにコストが高すぎるので自分の目視で生成画像がいい感じになったら学習を止めるつもりです.
network-snapshot-              time 19m 34s      fid50k 278.0748
network-snapshot-              time 19m 34s      fid50k 382.7474
network-snapshot-              time 19m 34s      fid50k 338.3625
network-snapshot-              time 19m 24s      fid50k 378.2344
network-snapshot-              time 19m 33s      fid50k 306.3552
network-snapshot-              time 19m 33s      fid50k 173.8370
network-snapshot-              time 19m 30s      fid50k 112.3612
network-snapshot-              time 19m 31s      fid50k 99.9480
network-snapshot-              time 19m 35s      fid50k 90.2591
network-snapshot-              time 19m 38s      fid50k 75.5776
network-snapshot-              time 19m 39s      fid50k 67.8876
network-snapshot-              time 19m 39s      fid50k 66.0221
network-snapshot-              time 19m 46s      fid50k 63.2856
network-snapshot-              time 19m 40s      fid50k 64.6719
network-snapshot-              time 19m 31s      fid50k 64.2135
network-snapshot-              time 19m 39s      fid50k 63.6304
network-snapshot-              time 19m 42s      fid50k 60.5562
network-snapshot-              time 19m 36s      fid50k 59.4038
network-snapshot-              time 19m 36s      fid50k 57.2236
まとめ
今回はデータセットと先行事例を調査して,実際に学習を進めてみたところまでを書いてみました.
自分の環境で動いたコードやもっと学習が進んだ後の生成結果などは後日の後編の記事としてまとめます.後編→ StyleGAN2で未知のポケモンを生み出す[後編]
追記: 学習過程の報告
640kimg 個性的でそれっぽいものが生まれ始めた
実は,ここまで学習が進んだところでCドライブで実行していたためデータ容量が足りなくなってしまいモデルが空保存されて消えてしまいました...
反省して読み出し速度を犠牲にして増設したHDD上に移して再実行します.辛すぎる...二日間の学習結果が....何も考えてなかった僕が悪いんですが,共感してくれる人はなぐさめて...
モデルの保存は容量を気にして最新のものだけを毎回上書き保存していたのですが,それが裏目に出ました.HDDにはこまめにモデルを保存していこうと思います.


- 投稿日:2020-08-04T02:04:27+09:00
StyleGAN2で未知のポケモンを生み出す[前編]
今回やること
何番煎じだという感じですが,ポケモンの自動生成モデルの学習をしようと思います.調べてみると最新のモデルのStyleGAN2ベースですでに試している方がいます.しかし実際のコードやデータセット,実装までは公開されていなかったのでこのへんを記事にまとめておきたいなと思っています.
StyleGAN2とは
StyleGAN2はNVIDIAが発表した画像生成モデルです.スタイル変換を用いることが特徴的な生成モデルで,現状では複数のタスクにおいてSOTAとなっている強力なモデルです.
データセット
何か良いデータセットはないものかと調べていると,事前にデータを15000件収集して公開してくれている方がいたのでこちらを使わせていただきました.
MonsterGANほかにもKaggleのPokemon-Image-DatasetやOne-Shot-Pokemon-Imagesなども候補に挙がります.One-Shot-Pokemon-Imagesにはポケモンカードのデータセットが含まれていて,そちらが非常にデータ量が多いためポケモンカード生成タスクに応用されているようです.
※コチラより引用先行事例
Michael Frieseという方が熱心にStyleGAN・StyleGAN2を用いたポケモン生成に挑戦していらっしゃるようです.
StyleGANでは既にかなりいい感じに結果を残されているようです.
※ コチラより引用猫や馬などの学習済みモデルから転移学習を行うと,学習自体がうまく上に生成画像に転移前のドメインの雰囲気が反映されるらしい.
すごくエモい.馬から転移
※ コチラから引用猫から転移
※ コチラから引用車から転移
※ コチラから引用StyleGAN2を用いた生成結果は途中までしか公開されていませんでした.540kimgまで学習した結果です.学習途中なので品質は置いておいて,かなりバリエーションが多く感じます.
※ コチラから引用自前で行った学習結果
まだ学習途中なのですが,StyleGAN2を使った学習の経過をお見せします.RTX1070で学習を行っているため,むちゃなモデルはメモリサイズの関係で不可能です.今回はデータセットをすべて64x64にリサイズして利用しました.
モデルの概要
G                           Params    OutputShape       WeightShape
---                         ---       ---               ---
latents_in                  -         (?, 512)          -
labels_in                   -         (?, 0)            -
lod                         -         ()                -
dlatent_avg                 -         (512,)            -
G_mapping/latents_in        -         (?, 512)          -
G_mapping/labels_in         -         (?, 0)            -
G_mapping/Normalize         -         (?, 512)          -
G_mapping/Dense0            262656    (?, 512)          (512, 512)
G_mapping/Dense1            262656    (?, 512)          (512, 512)
G_mapping/Dense2            262656    (?, 512)          (512, 512)
G_mapping/Dense3            262656    (?, 512)          (512, 512)
G_mapping/Dense4            262656    (?, 512)          (512, 512)
G_mapping/Dense5            262656    (?, 512)          (512, 512)
G_mapping/Dense6            262656    (?, 512)          (512, 512)
G_mapping/Dense7            262656    (?, 512)          (512, 512)
G_mapping/Broadcast         -         (?, 10, 512)      -
G_mapping/dlatents_out      -         (?, 10, 512)      -
Truncation/Lerp             -         (?, 10, 512)      -
G_synthesis/dlatents_in     -         (?, 10, 512)      -
G_synthesis/4x4/Const       8192      (?, 512, 4, 4)    (1, 512, 4, 4)
G_synthesis/4x4/Conv        2622465   (?, 512, 4, 4)    (3, 3, 512, 512)
G_synthesis/4x4/ToRGB       264195    (?, 3, 4, 4)      (1, 1, 512, 3)
G_synthesis/8x8/Conv0_up    2622465   (?, 512, 8, 8)    (3, 3, 512, 512)
G_synthesis/8x8/Conv1       2622465   (?, 512, 8, 8)    (3, 3, 512, 512)
G_synthesis/8x8/Upsample    -         (?, 3, 8, 8)      -
G_synthesis/8x8/ToRGB       264195    (?, 3, 8, 8)      (1, 1, 512, 3)
G_synthesis/16x16/Conv0_up  2622465   (?, 512, 16, 16)  (3, 3, 512, 512)
G_synthesis/16x16/Conv1     2622465   (?, 512, 16, 16)  (3, 3, 512, 512)
G_synthesis/16x16/Upsample  -         (?, 3, 16, 16)    -
G_synthesis/16x16/ToRGB     264195    (?, 3, 16, 16)    (1, 1, 512, 3)
G_synthesis/32x32/Conv0_up  2622465   (?, 512, 32, 32)  (3, 3, 512, 512)
G_synthesis/32x32/Conv1     2622465   (?, 512, 32, 32)  (3, 3, 512, 512)
G_synthesis/32x32/Upsample  -         (?, 3, 32, 32)    -
G_synthesis/32x32/ToRGB     264195    (?, 3, 32, 32)    (1, 1, 512, 3)
G_synthesis/64x64/Conv0_up  2622465   (?, 512, 64, 64)  (3, 3, 512, 512)
G_synthesis/64x64/Conv1     2622465   (?, 512, 64, 64)  (3, 3, 512, 512)
G_synthesis/64x64/Upsample  -         (?, 3, 64, 64)    -
G_synthesis/64x64/ToRGB     264195    (?, 3, 64, 64)    (1, 1, 512, 3)
G_synthesis/images_out      -         (?, 3, 64, 64)    -
G_synthesis/noise0          -         (1, 1, 4, 4)      -
G_synthesis/noise1          -         (1, 1, 8, 8)      -
G_synthesis/noise2          -         (1, 1, 8, 8)      -
G_synthesis/noise3          -         (1, 1, 16, 16)    -
G_synthesis/noise4          -         (1, 1, 16, 16)    -
G_synthesis/noise5          -         (1, 1, 32, 32)    -
G_synthesis/noise6          -         (1, 1, 32, 32)    -
G_synthesis/noise7          -         (1, 1, 64, 64)    -
G_synthesis/noise8          -         (1, 1, 64, 64)    -
images_out                  -         (?, 3, 64, 64)    -
---                         ---       ---               ---
Total                       27032600


D                    Params    OutputShape       WeightShape
---                  ---       ---               ---
images_in            -         (?, 3, 64, 64)    -
labels_in            -         (?, 0)            -
64x64/FromRGB        2048      (?, 512, 64, 64)  (1, 1, 3, 512)
64x64/Conv0          2359808   (?, 512, 64, 64)  (3, 3, 512, 512)
64x64/Conv1_down     2359808   (?, 512, 32, 32)  (3, 3, 512, 512)
64x64/Skip           262144    (?, 512, 32, 32)  (1, 1, 512, 512)
32x32/Conv0          2359808   (?, 512, 32, 32)  (3, 3, 512, 512)
32x32/Conv1_down     2359808   (?, 512, 16, 16)  (3, 3, 512, 512)
32x32/Skip           262144    (?, 512, 16, 16)  (1, 1, 512, 512)
16x16/Conv0          2359808   (?, 512, 16, 16)  (3, 3, 512, 512)
16x16/Conv1_down     2359808   (?, 512, 8, 8)    (3, 3, 512, 512)
16x16/Skip           262144    (?, 512, 8, 8)    (1, 1, 512, 512)
8x8/Conv0            2359808   (?, 512, 8, 8)    (3, 3, 512, 512)
8x8/Conv1_down       2359808   (?, 512, 4, 4)    (3, 3, 512, 512)
8x8/Skip             262144    (?, 512, 4, 4)    (1, 1, 512, 512)
4x4/MinibatchStddev  -         (?, 513, 4, 4)    -
4x4/Conv             2364416   (?, 512, 4, 4)    (3, 3, 513, 512)
4x4/Dense0           4194816   (?, 512)          (8192, 512)
Output               513       (?, 1)            (512, 1)
scores_out           -         (?, 1)            -
---                  ---       ---               ---
Total                26488833
snapshotのグリッドの設定の変更を忘れていてめちゃくちゃ画像みにくくすみません...学習が大変なのでやり直しはまだです.
データセットの例(reals.png)
生成結果(288kimg: 19時間)
徐々に輪郭が形成されてきて,人型や動物型にも見えるポケモンのが概形できてきました.学習がしっかり進んでいるかどうかFrechet Inception Distance(FID)を出力して監視しています.今のところ順調に進んでいます.公式のページにはFIDは一桁だと載っているのですが,さすがにそこまで学習するのにコストが高すぎるので自分の目視で生成画像がいい感じになったら学習を止めるつもりです.
network-snapshot-              time 19m 34s      fid50k 278.0748
network-snapshot-              time 19m 34s      fid50k 382.7474
network-snapshot-              time 19m 34s      fid50k 338.3625
network-snapshot-              time 19m 24s      fid50k 378.2344
network-snapshot-              time 19m 33s      fid50k 306.3552
network-snapshot-              time 19m 33s      fid50k 173.8370
network-snapshot-              time 19m 30s      fid50k 112.3612
network-snapshot-              time 19m 31s      fid50k 99.9480
network-snapshot-              time 19m 35s      fid50k 90.2591
network-snapshot-              time 19m 38s      fid50k 75.5776
network-snapshot-              time 19m 39s      fid50k 67.8876
network-snapshot-              time 19m 39s      fid50k 66.0221
network-snapshot-              time 19m 46s      fid50k 63.2856
network-snapshot-              time 19m 40s      fid50k 64.6719
network-snapshot-              time 19m 31s      fid50k 64.2135
network-snapshot-              time 19m 39s      fid50k 63.6304
network-snapshot-              time 19m 42s      fid50k 60.5562
network-snapshot-              time 19m 36s      fid50k 59.4038
network-snapshot-              time 19m 36s      fid50k 57.2236
まとめ
今回はデータセットと先行事例を調査して,実際に学習を進めてみたところまでを書いてみました.
自分の環境で動いたコードやもっと学習が進んだ後の生成結果などは後日の後編の記事としてまとめます.後半→学習がある程度すすんだら