- 投稿日:2020-08-04T23:41:26+09:00
日本人のための SwiftFormat【概要編】
SwiftFormatとは?
SwiftFormat は MacOS または Linux で Swift コードを再フォーマットするためにコマンドラインツールです。
なぜ使うのか?
プロジェクトをチームで行う際にコーディングスタイルを統一することで、コードの見やすさや・追いやす
さが向上しますが、これらを認識のあっていないチームで行うとコードのフォーマットの違いを指摘・修正
を手動でオペレーションすることにコストがかかります。これらの作業を SwiftFormat で自動化するこ
とで開発者はコードの動作に集中できるようになります。どうやって使うのか?
現在は下記の4通りの方法があるみたいです。
コマンドラインツールとして手動で実行するか他のツールチェインの一部として使用する
Source Editor Extension として Xcode の [Editor] > [SwiftFormat] メニューから呼び出す
Xcode プロジェクトのビルドフェーズ(Run Script?)として、
Cmd-RorCmd-Bを押すたびに
実行されるようにするGit のプリコミットフックとして、チェックインする前に変更したファイルで実行するようにする
【実装編】では
3.の RunScript での実装 + CocoaPods での導入を検討しているのでそれらについて少し触れます。Xcode ビルドフェーズで導入する
今回はチームで共有する際に最もシンプルで簡単な
Xcode ビルドフェーズで導入したいと思います。もし他の方法で実現したい場合は 公式のレポジトリ を確認してください。※ このスクリプトを追加すると、作業中のソースファイルが上書きされます。
スクリプトをメインターゲットではなくテストターゲットに追加すると、ユニットテストを実行する時にのみ
呼び出され、アプリをビルドするたびに呼び出されないようにすることができるようになるみたいです。または、通常のビルドの一部として lintモード
で SwiftFormat を実行し、手動でフォーマットパスを実行するか、頻度の低いビルドターゲット(テストなど)
の一部として実行することを検討した方がいいみたいです。
- SwiftFormat Lint モード
- SwiftFormat はリンターではなくフォーマッターとして設計されているため、どこが問題なのかを伝えるのではなくて、コードを実際に修正するように設計されている。実際にコードを変更することが望ましくない状況でコードがフォーマットされていることを確認したい時の場合に
lintモードが役立つ- SiwftFormat をリンターとして実行する時に、
--lintコマンドラインオプションを使用できるCocoaPods での導入
- SwiftFormat CLI を Podfile に追加する
次の行を Podfile に追加して
pod installで SwiftFormat のバイナリをプロジェクトディレク
トリに追加する。下記の実行によってビルド済みのコマンドラインアプリのみがインストールされて、SwiftFormat
の Framework のソースコードはインストールされなくなります。pod 'SwiftFormat/CLI'
アプリのターゲットにビルドフェーズを追加する
- ファイルリストでプロジェクトをクリックし、
TARGETSを選択して、Build Phasesタプをクリック する。- 新しい
Run Scriptを作り下記のコードをペーストする。"${PODS_ROOT}/SwiftFormat/CommandLineTool/swiftformat" "$SRCROOT"SwiftFormat の設定
SwiftFormat の設定は下記の2つに分かれています。
- Options
- オプションはルールの動作を制御する設定
- Rules
- ルールはコードに変更を適用する SwiftFormat ライブラリの関数
Options
SwiftFormat で使用可能なオプションは、
--optionsコマンドライン引数を設定して実行すると確認
することができます。(各オプションのデフォルト値は、ここに表示される)オプションを追加する方法は下記の2つ。
--[option_nam] [value]のようにコマンドライン引数に追加する。.swiftformatファイルを作成してプロジェクトディレクトリに配置する。特定のオプションが複数のルールに影響を与える場合がある。
--ruleinfo [rule_name]のようにコマンド
を使用して影響するオプションの詳細を確認するか、Rules.mdを参照して確認する必要もありそうです。Rules
SwiftFormat には50を超えるルールが含まれていて、新しいルールが随時追加されています。それらの
使用方法については Rules.md
を参照してください。次回はこの一覧に関する記事を書きたいと思います。参照
- 投稿日:2020-08-04T20:20:59+09:00
6行で UIView を UIImage に変換してサクッと画像を保存する
はじめに
今回は特定の View を UIImage に変換してフォトライブラリーに保存できるようにします
実装
プロパティを追加
UIView から image を取得するための ExtensionProperty を追加します。
extension UIView {
    var image: UIImage {
        UIGraphicsBeginImageContextWithOptions(bounds.size, false, 0.0)
        let context: CGContext = UIGraphicsGetCurrentContext()!
        layer.render(in: context)
        let capturedImage: UIImage = UIGraphicsGetImageFromCurrentImageContext()!
        UIGraphicsEndImageContext()
        return capturedImage
    }
}
画像をフォトライブリーに保存する
毎度おなじみの
UIImageWriteToSavedPhotosAlbum()で画像が保存できていれば完了です。func saveImage() { let image = view.image UIImageWriteToSavedPhotosAlbum(image, self, nil, nil) }
- 投稿日:2020-08-04T20:19:59+09:00
SwiftとFirebaseでSNSアプリを開発する!(第一回)
対象者
- プログラミング初心者の方
- SNSアプリの開発に興味のある方
- エンジニアを目指している方
簡単な自己紹介
プログラミングは1年ほど学んでおり、特にSwiftを扱ってきました。
それまでは、プログラミングの存在自体は知っていましたが、たまにHTMLやCSS、WordPressをかじる程度で本格的に勉強してはいませんでした。
そんな自分がiOSアプリを開発し、リリースしたので、開発過程のノウハウを共有していこうと思います。アプリ紹介
このアプリは、ニュース、音楽、スポーツ、漫画、、、などカテゴリーごとに話したいことを投稿できるようにしています。そしてその投稿に興味を持った人や同じ趣味の人同士が集まってトークするコミュニティアプリです。
コロナウイルスが世界的に流行している現在(2020年)に、多くの人々が外出自粛を余儀なくされており、この外出自粛の影響で精神的にも経済的にも疲弊してしまった人々は多いと聞きます。そして仮にコロナウイルスがおさまったとしても、この生活は続くことが考えられます。そのような状況に苦しむ人々のために、私ができることは何かと考えた結果、このような世界でも簡単に誰かとのつながりを感じられる新しいコミュニティ型のサービスを作ろうと思い、開発しました。開発環境
IDE: Xcode 11.5
Lang: Swift5
OS: MacOS(Mojave)さいごに
次回以降、実際に開発の方に入っていこうと思います!
もし、「こっちの処理の方が良さそう!」とか「このコードはどうかな?」などご指摘やアドバイスがございましたらその都度アドバイスをしていただけると嬉しいです!
- 投稿日:2020-08-04T20:19:59+09:00
SwiftとFirebaseでSNSアプリNomadを開発する!(第一回)
対象者
- プログラミング初心者の方
- SNSアプリの開発に興味のある方
- エンジニアを目指している方
簡単な自己紹介
プログラミングは1年ほど学んでおり、特にSwiftを扱ってきました。
それまでは、プログラミングの存在自体は知っていましたが、たまにHTMLやCSS、WordPressをかじる程度で本格的に勉強してはいませんでした。
そんな自分がiOSアプリを開発し、リリースしたので、開発過程のノウハウを共有していこうと思います。アプリ紹介
このアプリは、ニュース、音楽、スポーツ、漫画、、、などカテゴリーごとに話したいことを投稿できるようにしています。そしてその投稿に興味を持った人や同じ趣味の人同士が集まってトークするコミュニティアプリです。
コロナウイルスが世界的に流行している現在(2020年)に、多くの人々が外出自粛を余儀なくされており、この外出自粛の影響で精神的にも経済的にも疲弊してしまった人々は多いと聞きます。そして仮にコロナウイルスがおさまったとしても、この生活は続くことが考えられます。そのような状況に苦しむ人々のために、私ができることは何かと考えた結果、このような世界でも簡単に誰かとのつながりを感じられる新しいコミュニティ型のサービスを作ろうと思い、開発しました。開発環境
IDE: Xcode 11.5
Lang: Swift5
OS: MacOS(Mojave)さいごに
次回以降、実際に開発の方に入っていこうと思います!
もし、「こっちの処理の方が良さそう!」とか「このコードはどうかな?」などご指摘やアドバイスがございましたらその都度アドバイスをしていただけると嬉しいです!
- 投稿日:2020-08-04T19:32:26+09:00
MarketingCloudSDK iOSでシンプルなpush通知を送信する
環境
・xcode Version 11.3.1 (11C504)
・swift Version 5.1.3
・MarketingCloudSDK iOS (v7.2.1)
・Mac OS 10.14.6(Mojave)準備
・APNs用証明書(.p12)
・認証キー(.p8)
※2020/08/04段階では両方取得する必要がある。(多分そのうち.p8認証キーだけでいけるっぽい)
参考リンク
.p12
https://qiita.com/natsumo/items/d5cc1d0be427ca3af1cb
.p8
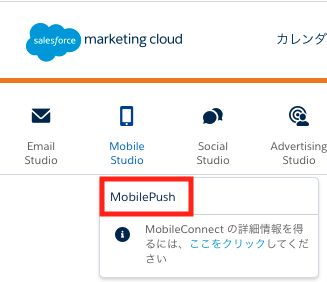
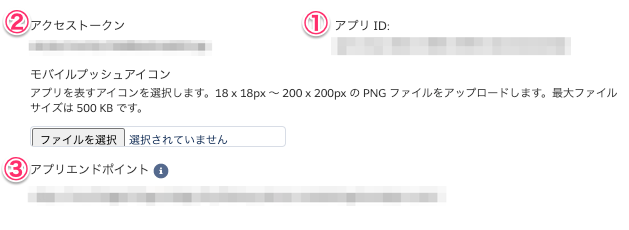
https://docs.repro.io/ja/dev/sdk/push-notification/setup-ios.html#app-idSMCのMobilePushでアプリを作成する
- mobilePushを選択する
2.管理を選択する
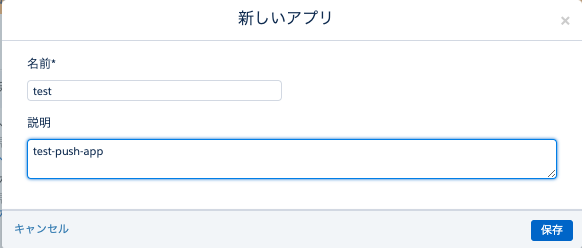
3.新しいアプリの作成を選択する
4.わかりやすい名前と説明を記載する
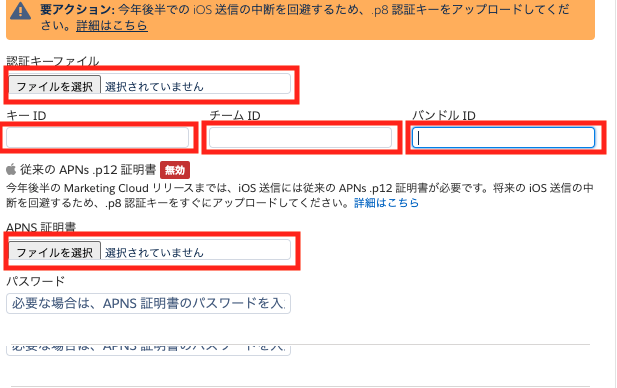
5.作成した認証キーファイル、APNS証明書を選択する
キーID:認証キー(.P8)をダウンロードする際に表示されるKey ID
チームID:Apple Developer ProgramのチームID
バンドルID:Apple Developer Programでアプリを登録する際に記述したBundle ID
6.保存後に有効になっているか確認
SDKを追加
CocoaPodsを利用してSDKを追加する
1.プロジェクト名.xcodeproj」と同じディレクトリにターミナル上で移動する
$cd [指定ディレクトリ]
2.CocoaPodsをインストールする
sudo gem install cocoapods
※すでにインストールしている場合
$ sudo gem update --system
3.セットアップする
pod setup
4.バージョンを確認する
$ pod --version
バージョンが表示されればインストールされている
5.Podfile(どのライブラリをインストールするか指定するファイル)を作成する
$ pod init
6.作成したpodfileに以下の内容を記述するPodfiletarget 'MyApp' do pod 'MarketingCloudSDK', '~> 7.2' end7.workspaceを作成する
$ pod install --no-repo-update
作成された「プロジェクト名.xcworkspace」をダブルクリックしてXcodeを開く
※.xcodeprojではなく.xcworkspaceを開くSDKの初期設定を記述
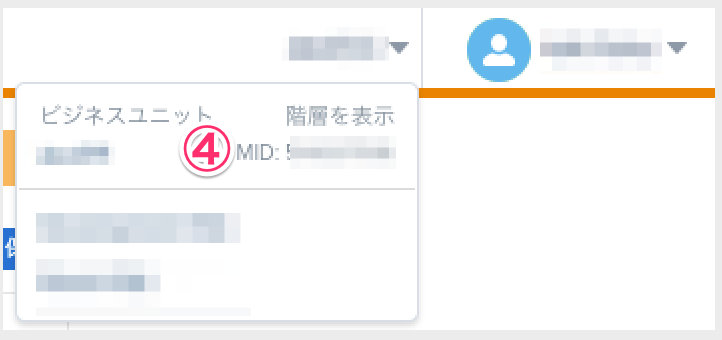
AppDelegate.swift// 導入したSDKをインポート import MarketingCloudSDK class AppDelegate: UIResponder, UIApplicationDelegate { var window: UIWindow? // MobilePush SDK: REQUIRED IMPLEMENTATION // The appID, accessToken and appEndpoint are required values for MobilePush SDK configuration and are obtained from your MobilePush app. // See https://salesforce-marketingcloud.github.io/MarketingCloudSDK-iOS/get-started/get-started-setupapps.html for more information. // Use the builder method to configure the SDK for usage. This gives you the maximum flexibility in SDK configuration. // The builder lets you configure the SDK parameters at runtime. #if DEBUG // 下記キャプチャ①参考 let appID = "[DEV-APNS App ID value from MobilePush app admin]" // 下記キャプチャ②参考 let accessToken = "[DEV-APNS Access Token value from MobilePush app admin]" // 下記キャプチャ③参考 let appEndpoint = "[DEV-APNS App Endpoint value from MobilePush app admin]" // 下記キャプチャ④参考 let mid = "[DEV-APNS account MID value from MobilePush app admin]" #else // 以下上と同じ let appId = "[PROD-APNS appId value from MobilePush app admin]" let accessToken = "[PROD-APNS accessToken value from MobilePush app admin]" let appEndpoint = "[PROD-APNS app endpoint value from MobilePush app admin]" let mid = "[PROD-APNS account MID value from MobilePush app admin]" #endif // Define features of MobilePush your app will use. // 必要に応じてtrueに変更する let inbox = false // 受信トレイ let location = false // 位置情報 let analytics = true // SMCの分析機能 // MobilePush SDK: REQUIRED IMPLEMENTATION @discardableResult func configureMarketingCloudSDK() -> Bool { // Use the builder method to configure the SDK for usage. This gives you the maximum flexibility in SDK configuration. // The builder lets you configure the SDK parameters at runtime. // パラメータをセット(コンタクトキーが設定されるまで登録を遅らせることが可能) let builder = MarketingCloudSDKConfigBuilder() .sfmc_setApplicationId(appID) .sfmc_setAccessToken(accessToken) .sfmc_setMarketingCloudServerUrl(appEndpoint) .sfmc_setMid(mid) .sfmc_setInboxEnabled(inbox as NSNumber) .sfmc_setLocationEnabled(location as NSNumber) .sfmc_setAnalyticsEnabled(analytics as NSNumber) .sfmc_build()! var success = false // Once you've created the builder, pass it to the sfmc_configure method. do { try MarketingCloudSDK.sharedInstance().sfmc_configure(with:builder) // ユーザ情報をSMCに登録できる MarketingCloudSDK.sharedInstance().sfmc_setContactKey("test12345") // ユーザの属性をSMCに登録できる MarketingCloudSDK.sharedInstance().sfmc_setAttributeNamed("test_id", value: "12345678") success = true } catch let error as NSError { // Errors returned from configuration will be in the NSError parameter and can be used to determine // if you've implemented the SDK correctly. let configErrorString = String(format: "MarketingCloudSDK sfmc_configure failed with error = %@", error) print(configErrorString) } if success == true { // The SDK has been fully configured and is ready for use! // Enable logging for debugging. Not recommended for production apps, as significant data // about MobilePush will be logged to the console. #if DEBUG // trueにしておくとxcodeのコンソール上でデバッグできる MarketingCloudSDK.sharedInstance().sfmc_setDebugLoggingEnabled(true) #endif // Set the MarketingCloudSDKURLHandlingDelegate to a class adhering to the protocol. // In this example, the AppDelegate class adheres to the protocol // and handles URLs passed back from the SDK. // For more information, see https://salesforce-marketingcloud.github.io/MarketingCloudSDK-iOS/sdk-implementation/implementation-urlhandling.html // opendirect機能に必要(Extensionでプロトコルを追加する必要あり) MarketingCloudSDK.sharedInstance().sfmc_setURLHandlingDelegate(self) // Make sure to dispatch this to the main thread, as UNUserNotificationCenter will present UI. DispatchQueue.main.async { if #available(iOS 10.0, *) { // Set the UNUserNotificationCenterDelegate to a class adhering to thie protocol. // In this exmple, the AppDelegate class adheres to the protocol (see below) // and handles Notification Center delegate methods from iOS. UNUserNotificationCenter.current().delegate = self // Request authorization from the user for push notification alerts. UNUserNotificationCenter.current().requestAuthorization(options: [.alert, .sound, .badge], completionHandler: {(_ granted: Bool, _ error: Error?) -> Void in if error == nil { if granted == true { // Your application may want to do something specific if the user has granted authorization // for the notification types specified; it would be done here. print(MarketingCloudSDK.sharedInstance().sfmc_deviceToken() ?? "error: no token - was UIApplication.shared.registerForRemoteNotifications() called?") } } }) } // In any case, your application should register for remote notifications *each time* your application // launches to ensure that the push token used by MobilePush (for silent push) is updated if necessary. // Registering in this manner does *not* mean that a user will see a notification - it only means // that the application will receive a unique push token from iOS // ここでデバイストークンをSMC側に渡すメソッドを呼ぶ UIApplication.shared.registerForRemoteNotifications() } } return success } // MobilePush SDK: REQUIRED IMPLEMENTATION func application(_ application: UIApplication, didFinishLaunchingWithOptions launchOptions: [UIApplication.LaunchOptionsKey: Any]?) -> Bool { return self.configureMarketingCloudSDK() } // MobilePush SDK: OPTIONAL IMPLEMENTATION (if using Data Protection) func applicationProtectedDataDidBecomeAvailable(_ application: UIApplication) { if(MarketingCloudSDK.sharedInstance().sfmc_isReady() == false) { self.configureMarketingCloudSDK() } } }mobilePush > 管理
Push通知実装
- xcodeのcapabilityからPush Notificationsを有効にする
2.push通知のために必要な
UIApplicationDelegateメソッドをAppDelegateクラスに追加(必要に応じて拡張する)AppDelegate.swift// MobilePush SDK: REQUIRED IMPLEMENTATION // アプリを最初にタップして、起動した時に呼ばれるメソッド func application(_ application: UIApplication, didFinishLaunchingWithOptions launchOptions: [UIApplication.LaunchOptionsKey: Any]?) -> Bool { return self.configureMarketingCloudSDK() } // MobilePush SDK: REQUIRED IMPLEMENTATION // registerForRemoteNotifications()が呼ばれると下記のメソッドが呼ばれ、引数としてデバイストークンをSDKに渡す。 func application(_ application: UIApplication, didRegisterForRemoteNotificationsWithDeviceToken deviceToken: Data) { MarketingCloudSDK.sharedInstance().sfmc_setDeviceToken(deviceToken) } // MobilePush SDK: REQUIRED IMPLEMENTATION func application(_ application: UIApplication, didFailToRegisterForRemoteNotificationsWithError error: Error) { print(error) } // MobilePush SDK: REQUIRED IMPLEMENTATION if this method is implemented. **/ // アプリ未起動時、バックグラウンド時に通知をタップすると呼び出される。フォアグラウンド時は通知表示はないが呼び出される。 func application(_ application: UIApplication, didReceiveRemoteNotification userInfo: [AnyHashable : Any], fetchCompletionHandler completionHandler: @escaping (UIBackgroundFetchResult) -> Void) { MarketingCloudSDK.sharedInstance().sfmc_setNotificationUserInfo(userInfo) completionHandler(.newData) }3.push通知のために必要な
UNUserNotificationCenterDelegateメソッドをAppDelegateクラスに追加AppDelegate.swift// MobilePush SDK: REQUIRED IMPLEMENTATION // The method will be called on the delegate when the user responded to the notification by opening the application, dismissing the notification or choosing a UNNotificationAction. The delegate must be set before the application returns from applicationDidFinishLaunching:. // このメソッドでSMCから受け取ったカスタムキーを取得したりする extension AppDelegate: UNUserNotificationCenterDelegate { @available(iOS 10.0, *) func userNotificationCenter(_ center: UNUserNotificationCenter, didReceive response: UNNotificationResponse, withCompletionHandler completionHandler: @escaping () -> Void) { // Required: tell the MarketingCloudSDK about the notification. This will collect MobilePush analytics // and process the notification on behalf of your application. MarketingCloudSDK.sharedInstance().sfmc_setNotificationRequest(response.notification.request) completionHandler() } // MobilePush SDK: REQUIRED IMPLEMENTATION // The method will be called on the delegate only if the application is in the foreground. If the method is not implemented or the handler is not called in a timely manner then the notification will not be presented. The application can choose to have the notification presented as a sound, badge, alert and/or in the notification list. This decision should be based on whether the information in the notification is otherwise visible to the user. @available(iOS 10.0, *) func userNotificationCenter(_ center: UNUserNotificationCenter, willPresent notification: UNNotification, withCompletionHandler completionHandler: @escaping (UNNotificationPresentationOptions) -> Void) { completionHandler(.alert) } }SMCからpush通知を送信する
アプリ起動時にpush通知を許可にし、無事とどけばOK
参考リンク(公式)
https://salesforce-marketingcloud.github.io/MarketingCloudSDK-iOS/


- 投稿日:2020-08-04T18:24:14+09:00
UIDocumentPickerViewControllerで選択ファイルを絞る & iOS14からのUTType
ユーザーの選択ファイルを限定したい
最近のプロジェクトで端末内の.m4a, .mp3ファイルだけ選択させたい用件があったのでUIDocumentPickerViewControllerでdocumentTypesを指定して実装しました。
その時にMobileCoreServiceの定数を使って処理していたのですが、非推奨の扱いになっていたので合わせてiOS14以降のUTTypeについて調べました。
ちなみに非推奨の実装でベータのiOS14のシュミレータで実行してみましたが、ワーニングが出るだけで動作はしていました。
iOS13までの実装
Xcode 11.5(11E608c)
import UIKit
// 1. MobileCoreServicesをインポート
import MobileCoreServices

class FileSearchViewController: UIViewController {

    // ~~~ 省略 ~~~

    private func showFilePicker() {
        // 2. documentTypesでkUTType~で選択して欲しいファイル形式を指定する
        // iOS14だと 'init(documentTypes:in:)' was deprecated in iOS 14.0と怒られる
        // ここでは選択できるファイルを.m4a, .mp3に限定する
        let picker = UIDocumentPickerViewController(
            documentTypes: [
                String(kUTTypeMPEG4Audio),
                String(kUTTypeMP3)
            ],
            in: .import)
        picker.delegate = self
        self.navigationController?.present(picker, animated: true, completion: nil)
    }
}

extension FileSearchViewController: UIDocumentPickerDelegate {

    func documentPicker(_ controller: UIDocumentPickerViewController, didPickDocumentsAt urls: [URL]) {
        // ファイル選択後に呼ばれる
        // urls.first?.pathExtensionで選択した拡張子が取得できる

        if let filePath = urls.first?.description {
            print("ファイルパス:\(filePath)")
        }
    }

    func documentPickerWasCancelled(_ controller: UIDocumentPickerViewController) {
        print("キャンセル")
    }
}
選択できるファイルはこちらのUTTypeのContentsから選べます。
Apple Document: MobileCoreServices/UTTypeiOS14以降の実装(ベータなので変更になるかもしれません)
主な変更は1と2のimportとUIDocumentPickerViewControllerの呼び出し方とUTTypeの指定です。
Xcode 12.0 beta 3 (12A8169g)
import UIKit
// 1. UniformTypeIdentifiersをインポート
import UniformTypeIdentifiers

class FileSearchViewController: UIViewController {

    // ~~~ 省略 ~~~

    private func showFilePicker() {
        // 2. forOpeningContentTypesでUTTypeで選択して欲しいファイル形式を指定する
        // ここでは選択できるファイルを.m4a, .mp3に限定する
        let picker = UIDocumentPickerViewController(
            forOpeningContentTypes: [
                UTType.mpeg4Audio,
                UTType.mp3
            ],
            asCopy: true)
        picker.delegate = self
        self.navigationController?.present(picker, animated: true, completion: nil)
    }
}

extension FileSearchViewController: UIDocumentPickerDelegate {

    func documentPicker(_ controller: UIDocumentPickerViewController, didPickDocumentsAt urls: [URL]) {
        // ファイル選択後に呼ばれる
        // urls.first?.pathExtensionで選択した拡張子が取得できる

        if let filePath = urls.first?.description {
            print("ファイルパス:\(filePath)")
        }
    }

    func documentPickerWasCancelled(_ controller: UIDocumentPickerViewController) {
        print("キャンセル")
    }
}
- 投稿日:2020-08-04T18:24:14+09:00
UIDocumentPickerViewControllerで選択ファイル絞る & iOS14からのUTType
ユーザーの選択ファイルを限定したい
最近のプロジェクトで端末内の.m4a, .mp3ファイルだけ選択させたい用件があったのでUIDocumentPickerViewControllerでdocumentTypesを指定して実装しました。
その時にMobileCoreServiceの定数を使って処理していたのですが、非推奨の扱いになっていたので合わせてiOS14以降のUTTypeについて調べました。
ちなみに非推奨の実装でベータのiOS14のシュミレータで実行してみましたが、ワーニングが出るだけで動作はしていました。
iOS13までの実装
Xcode 11.5(11E608c)
import UIKit
// 1. MobileCoreServicesをインポート
import MobileCoreServices

class FileSearchViewController: UIViewController {

    // ~~~ 省略 ~~~

    private func showFilePicker() {
        // 2. documentTypesでkUTType~で選択して欲しいファイル形式を指定する
        // iOS14だと 'init(documentTypes:in:)' was deprecated in iOS 14.0と怒られる
        // ここでは選択できるファイルを.m4a, .mp3に限定する
        let picker = UIDocumentPickerViewController(
            documentTypes: [
                String(kUTTypeMPEG4Audio),
                String(kUTTypeMP3)
            ],
            in: .import)
        picker.delegate = self
        self.navigationController?.present(picker, animated: true, completion: nil)
    }
}

extension FileSearchViewController: UIDocumentPickerDelegate {

    func documentPicker(_ controller: UIDocumentPickerViewController, didPickDocumentsAt urls: [URL]) {
        // ファイル選択後に呼ばれる
        // urls.first?.pathExtensionで選択した拡張子が取得できる

        if let filePath = urls.first?.description {
            print("ファイルパス:\(filePath)")
        }
    }

    func documentPickerWasCancelled(_ controller: UIDocumentPickerViewController) {
        print("キャンセル")
    }
}
選択できるファイルはこちらのUTTypeのContentsから選べます。
Apple Document: MobileCoreServices/UTTypeiOS14以降の実装(ベータなので変更になるかもしれません)
主な変更は1と2のimportとUIDocumentPickerViewControllerの呼び出し方とUTTypeの指定です。
Xcode 12.0 beta 3 (12A8169g)
import UIKit
// 1. UniformTypeIdentifiersをインポート
import UniformTypeIdentifiers

class FileSearchViewController: UIViewController {

    // ~~~ 省略 ~~~

    private func showFilePicker() {
        // 2. forOpeningContentTypesでUTTypeで選択して欲しいファイル形式を指定する
        // ここでは選択できるファイルを.m4a, .mp3に限定する
        let picker = UIDocumentPickerViewController(
            forOpeningContentTypes: [
                UTType.mpeg4Audio,
                UTType.mp3
            ],
            asCopy: true)
        picker.delegate = self
        self.navigationController?.present(picker, animated: true, completion: nil)
    }
}

extension FileSearchViewController: UIDocumentPickerDelegate {

    func documentPicker(_ controller: UIDocumentPickerViewController, didPickDocumentsAt urls: [URL]) {
        // ファイル選択後に呼ばれる
        // urls.first?.pathExtensionで選択した拡張子が取得できる

        if let filePath = urls.first?.description {
            print("ファイルパス:\(filePath)")
        }
    }

    func documentPickerWasCancelled(_ controller: UIDocumentPickerViewController) {
        print("キャンセル")
    }
}
- 投稿日:2020-08-04T17:24:52+09:00
AutoLayoutのViewに自作Viewを参照して描画する際、レイアウトが端末によって崩れる問題の解決方法
発生している問題点
AutoLayoutで配置せずにコードで自作したViewを
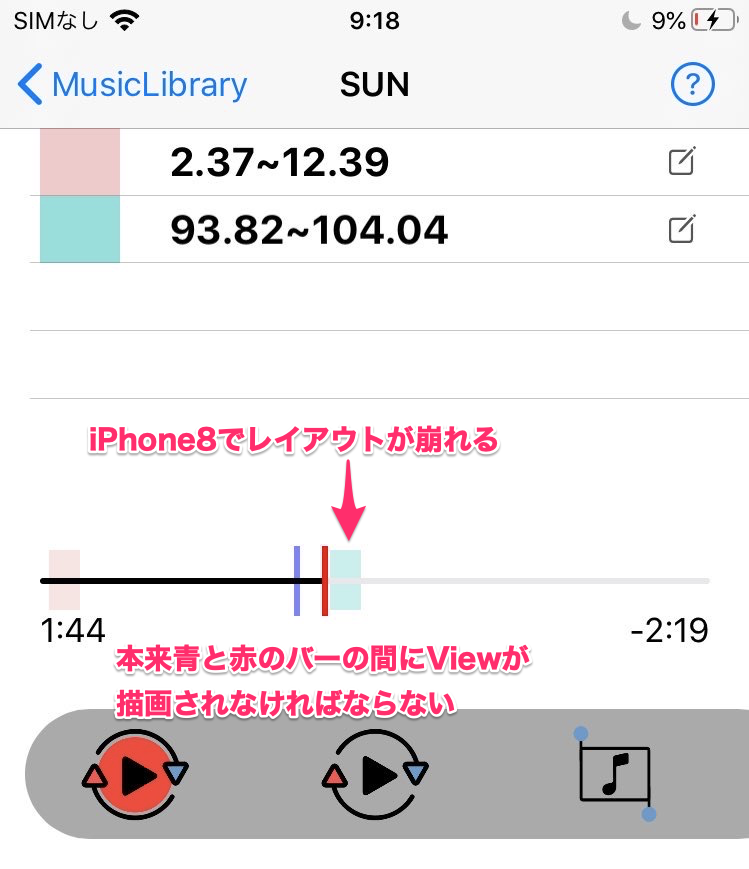
AutoLayoutを使用して配置したViewの位置を参照して描画する際,アプリを実行した時にレイアウトが崩れる問題具体的に言うとAutoLayoutで配置しているスライダーの位置を取得してそれの割合で自作のViewを描画するプログラムを書いた時に発生した問題
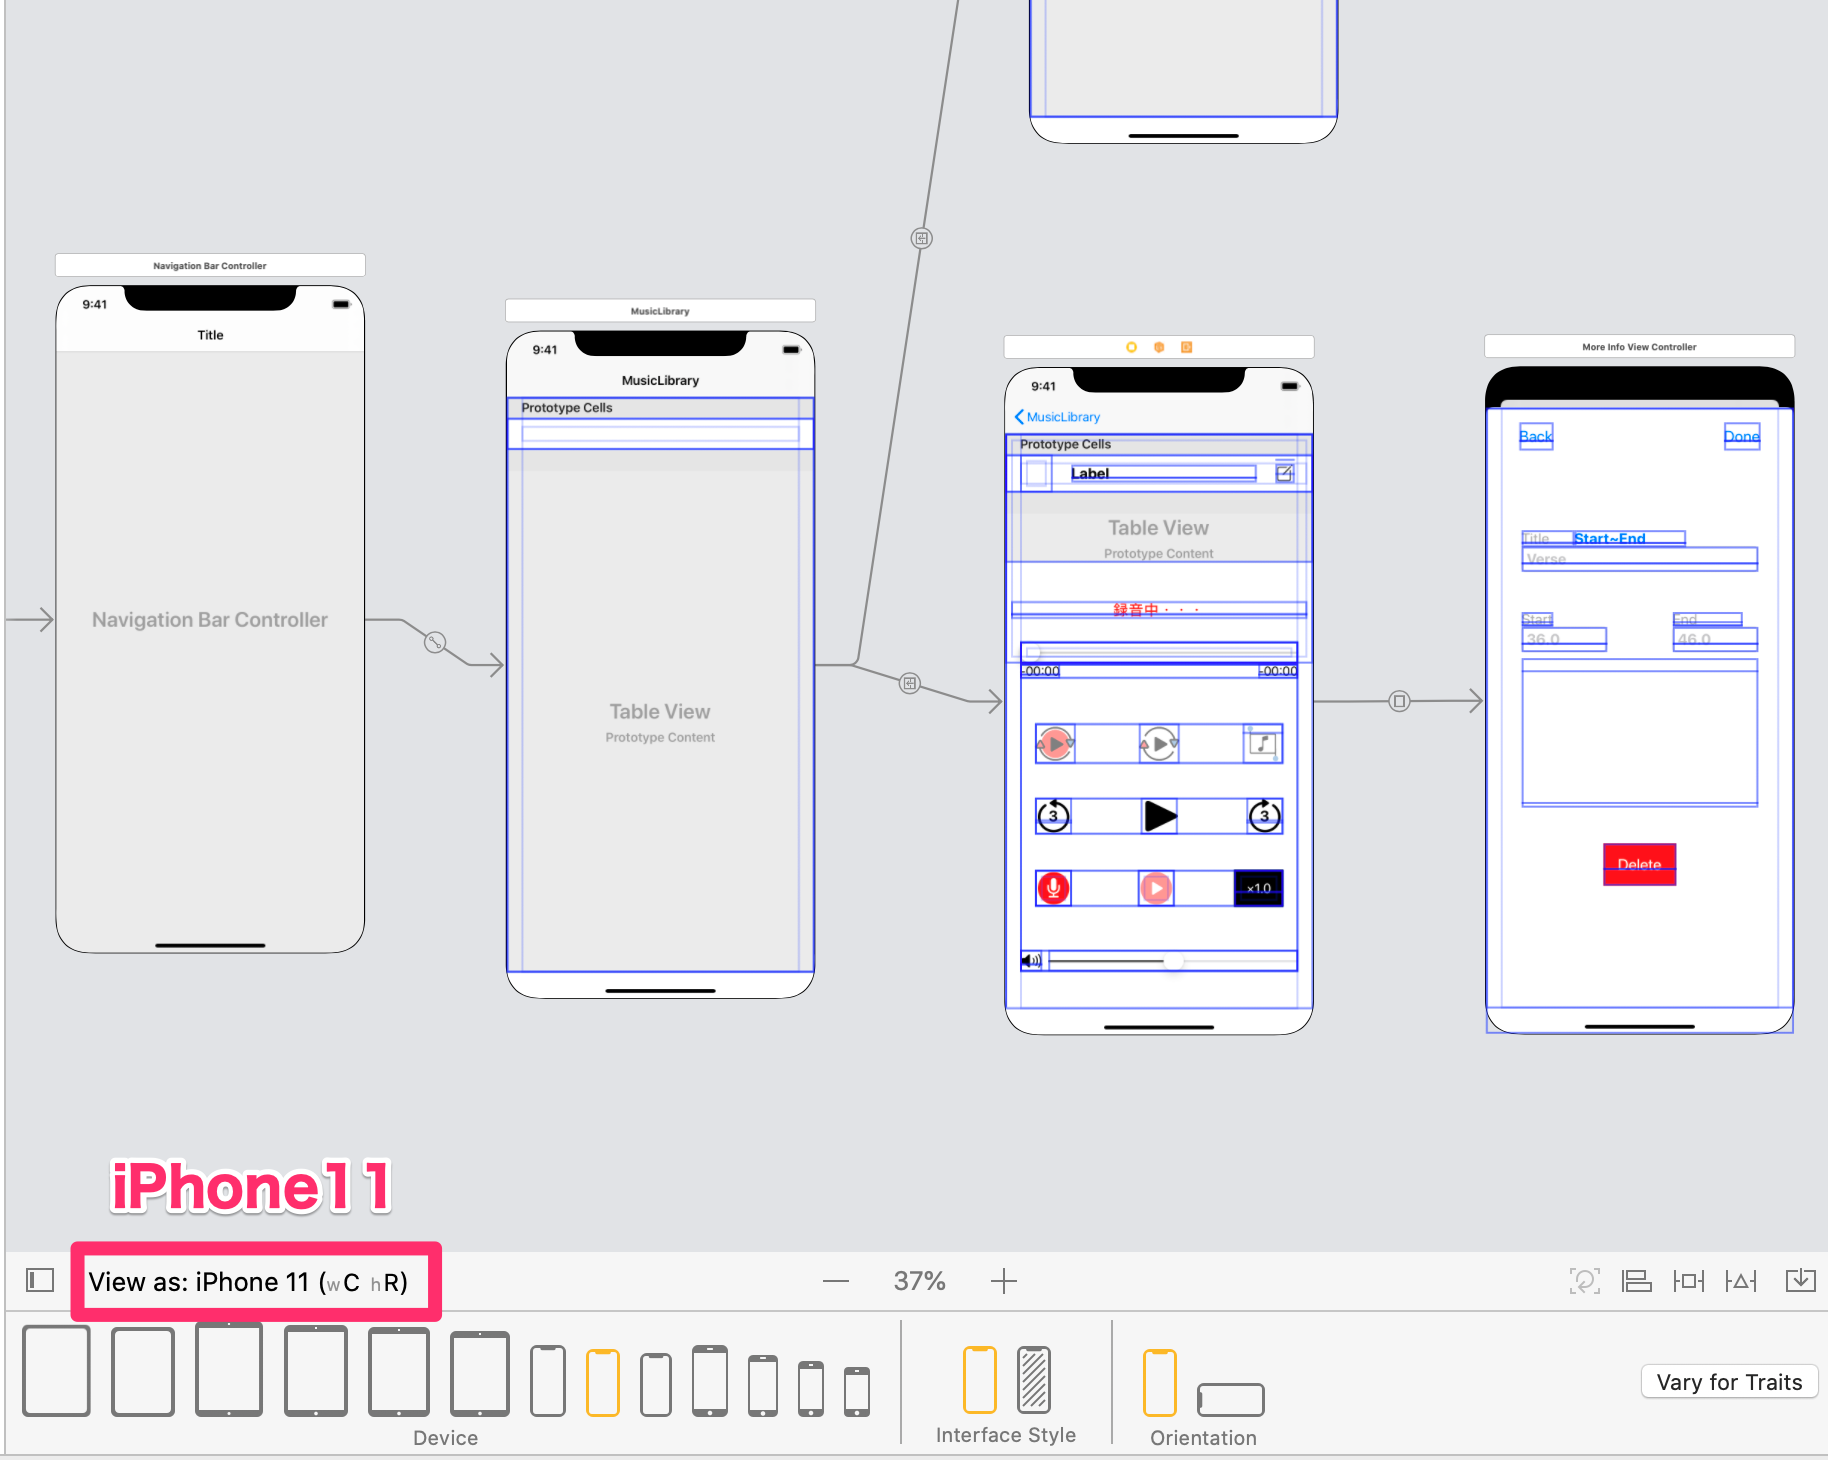
StoryBoardで設定しているiPhone11では正常に描画
Simulator→iPhone8でレイアウトが崩れる
なぜ起きたか?
結論→View描画のライフサイクル を理解していなかった。
- スライダーMaxPointを取得する際に現在設定しているのStoryBoardのポイントを取得
以下のコードは自作Viewを作成する際に使用したコード
イニシャライザにスライダーの最小値と最大値を渡しているclass MakeViewFactory{ init(slidermaxVal:Float,sliderminPoint:CGPoint,slidermaxPoint:CGPoint,width:CGFloat,height:CGFloat) { self.sliderMaxValue = slidermaxVal self.sliderMinPoint = sliderminPoint self.sliderMaxPoint = slidermaxPoint print(slidermaxPoint) //スライダーの最大値を出力 self.width = width self.height = height } ・・・中略・・・ }ここに値を渡すタイミングが悪かった...
機種別のスライダーの CGPoint
- iPhone11 (394.0, 383.0)
- iPhone8 (355.0, 278.5)
print(slidermaxPoint)でデバックしてみると、//StoryBoardでiPhone11を設定 (394.0, 383.0) //この値で描画が行われている //ここで何が行われているかが鍵 //ViewDidLoad()実行後→iPhone8にSliderViewが変更 (355.0, 278.5)変更される前にスライダーに値を渡していた。
解決策
ViewDidLoad後にクロージャーを用いて処理が終わった後にmakeViewを行なう- ViewControllerのライフサイクル を意識して適切なところで処理を入れる
ライフサイクルを理解してViewが読み込まれた後にViewを作成してあげると解決した。
ライフサイクル についての記事UIViewControllerのライフサイクルがとても分かりやすかった。
どこでViewが更新されているのか
viewwillLayoutSubviews以降の処理
それぞれのライフサイクル で調べてみた
viewDidLoad→(355.0, 278.5) viewwillAppear→(355.0, 278.5) 2020-07-18 11:34:13.851786+0900 S Player Plus[26679:11650844] Metal API Validation Enabled viewwillLayoutSubviews→(355.0, 278.5) viewwillLayoutSubviews→(355.0, 322.5) viewdidLayoutSubviews→(394.0, 383.0)上のコードをみるとviewwillLayoutSubviewsでViewが更新されている。
したがってここに自作Viewを作成してあげると問題が解決します。がviewwillLayoutSubviewsは複数回呼ばれるので注意が必要
//Viewのレイアウト処理 複数回呼ばれる
override func viewWillLayoutSubviews() {}
override func viewDidLayoutSubviews() {}
//レイアウト処理終了後
override func viewDidAppear(_ animated: Bool) {}
最後に
アプリ開発でviewDidLoad()などのメソッドはおまじないのように使っていましたが、今回の問題解決からライフサイクルを意識したコードを書くことができました。
Viewの描画がバグる時は参考にしてみてください!
参考文献
- 投稿日:2020-08-04T17:24:52+09:00
自作ViewをAutoLayoutのViewを参照する際レイアウトが端末によって崩れる問題の解決方法
発生している問題点
AutoLayoutで配置せずにコードで自作したViewを
AutoLayoutを使用して配置したViewの位置を参照して描画する際,アプリを実行した時にレイアウトが崩れる問題具体的に言うとAutoLayoutで配置しているスライダーの位置を取得してそれの割合で自作のViewを描画するプログラムを書いた時に発生した問題
StoryBoardで設定しているiPhone11では正常に描画
Simulator→iPhone8でレイアウトが崩れる
なぜ起きたか?
結論→View描画のライフサイクル を理解していなかった。
- スライダーMaxPointを取得する際に現在設定しているのStoryBoardのポイントを取得
以下のコードは自作Viewを作成する際に使用したコード
イニシャライザにスライダーの最小値と最大値を渡しているclass MakeViewFactory{ init(slidermaxVal:Float,sliderminPoint:CGPoint,slidermaxPoint:CGPoint,width:CGFloat,height:CGFloat) { self.sliderMaxValue = slidermaxVal self.sliderMinPoint = sliderminPoint self.sliderMaxPoint = slidermaxPoint print(slidermaxPoint) //スライダーの最大値を出力 self.width = width self.height = height } ・・・中略・・・ }ここに値を渡すタイミングが悪かった...
機種別のスライダーの CGPoint
- iPhone11 (394.0, 383.0)
- iPhone8 (355.0, 278.5)
print(slidermaxPoint)でデバックしてみると、//StoryBoardでiPhone11を設定 (394.0, 383.0) //この値で描画が行われている //ここで何が行われているかが鍵 //ViewDidLoad()実行後→iPhone8にSliderViewが変更 (355.0, 278.5)変更される前にスライダーに値を渡していた。
解決策
ViewDidLoad後にクロージャーを用いて処理が終わった後にmakeViewを行なう- ViewControllerのライフサイクル を意識して適切なところで処理を入れる
ライフサイクルを理解してViewが読み込まれた後にViewを作成してあげると解決した。
ライフサイクル についての記事UIViewControllerのライフサイクルがとても分かりやすかった。
どこでViewが更新されているのか
viewwillLayoutSubviews以降の処理
それぞれのライフサイクル で調べてみた
viewDidLoad→(355.0, 278.5) viewwillAppear→(355.0, 278.5) 2020-07-18 11:34:13.851786+0900 S Player Plus[26679:11650844] Metal API Validation Enabled viewwillLayoutSubviews→(355.0, 278.5) viewwillLayoutSubviews→(355.0, 322.5) viewdidLayoutSubviews→(394.0, 383.0)上のコードをみるとviewwillLayoutSubviewsでViewが更新されている。
したがってここに自作Viewを作成してあげると問題が解決します。がviewwillLayoutSubviewsは複数回呼ばれるので注意が必要
//Viewのレイアウト処理 複数回呼ばれる
override func viewWillLayoutSubviews() {}
override func viewDidLayoutSubviews() {}
//レイアウト処理終了後
override func viewDidAppear(_ animated: Bool) {}
最後に
アプリ開発でviewDidLoad()などのメソッドはおまじないのように使っていましたが、今回の問題解決からライフサイクルを意識したコードを書くことができました。
Viewの描画がバグる時は参考にしてみてください!
参考文献
- 投稿日:2020-08-04T17:17:03+09:00
[Swift] Swiftって何?
swiftとは?
iOS,MacなどのApple製品のアプリケーションを開発するためにAppleが作ったプログラミング言語です。
Swiftの特徴
-モダン
Ruby,Python,C#などのプログラミング言語を参考に設計されていて、そのような言語の使いやすい機能や文法などが取り入れられているのがSwiftです。-安全性
Swiftではプログラミングをする際に必ずと言っていいほど遭遇するバグが発生しにくくなる特徴があります。バグが出やすいコードがかけないようなルールになっています。-高速
Swiftは処理の高速性を目指して作られた言語で、Swiftでアプリを作った場合他の言語で作るよりも高速となることが多いです。最後に
Swiftはプログラム初心者にも触りやすい言語となっていると言われています。Appleのアプリ開発に興味がある方はぜひMacを買って始めましょう!(MacがないとSwiftでアプリが作れないんです)私もアウトプット学習としてQiitaでSwiftに関する記事を書いていくと思いますのでよろしくお願いします。
- 投稿日:2020-08-04T15:21:37+09:00
playgroundでRxSwiftを試す
何をやりたいか
RxSwiftの勉強を始めたばかりで、
とりあえずplaygroundでサンプルコードを実行したいと思いますが、
ライブラリのimportがうまくいかなかったので、メモとして残します。
少しでも役に立てれば幸いです。結論
playgroundでimportする前に、一回プロジェクトをビルドする必要があるかもしれないです。
やり方
新規プロジェクトの作成
iOSのSingle View APPを選択して、適当な名前をつけて作成します。
そしてプロジェクトを閉じて、ターミナルでライブラリの導入をやります。ライブラリの導入
導入するのによく使われているツールはCocoaPods、Carthage、Swift Package Managerがありますが、今回はCocoaPodsで入れます。
- CocoaPodsをインストール
- プロジェクトのルートディレクトリに移動し、
pod initでPodfileファイルを生成- Podfileファイルに必要なライブラリを記入
target 'LearnRxSwift' do
# Comment the next line if you don't want to use dynamic frameworks
use_frameworks!

# Pods for LearnRxSwift
pod 'RxSwift', '~> 5'
pod 'RxCocoa', '~> 5'

end
pod installでインストール開始(2回目以降はpod update)- エラーがなければこれでインストール完了
playgroundファイルの作成
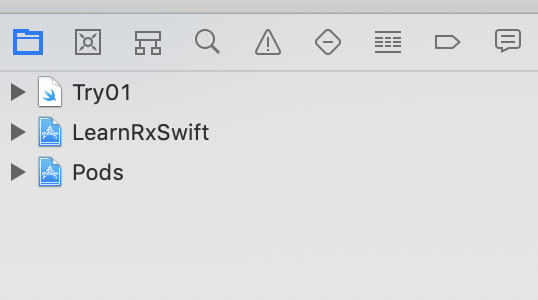
- CocoaPodsが作成してくれた
プロジェクト名.xcworkspaceワークスペースを開く- 一回ビルドします(デフォルトの設定でも良い)
- 図のようにルートにplaygroundを作りたいので、
commandキーを押しながら、選択中のものをクリックして、選択状態を解除します
- メニューバーから、
File > New > File... > iOSで一番下のBlankのplaygroundを選択して生成します。- これでimportができるようなる
参考リンク
How to import RxSwift in Playground of xcode?
Testing RxSwift code in Playgrounds using tappable buttons bound with RxCocoa
- 投稿日:2020-08-04T12:38:25+09:00
Imgur APIを使ったmacOSアプリを作成する
はじめに
- 下記の記事で
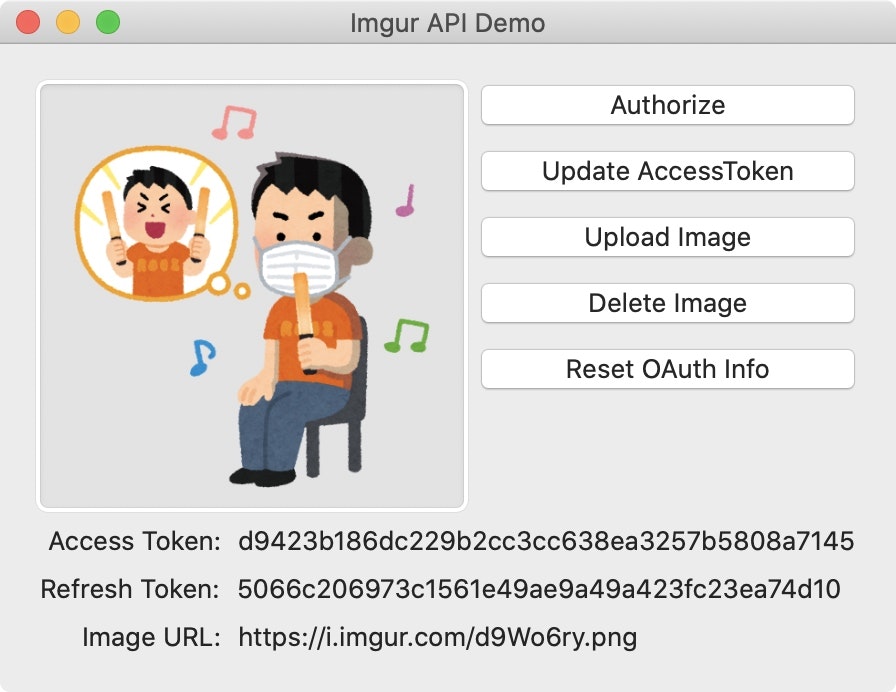
Imgur APIをターミナルから使用する方法を紹介しました。- これを
Swiftを使って、下記のようなmacOSアプリを実装したいと思います。
Imgur APIを使用する部分の実装はiOSでも共通ですので、iOSで実装したいという方も是非。
GitHub
概要
- 今回2つのプロジェクトを作りました。以下、実装1,実装2と呼びます。
- 前者は一つのクラスにつらつらと書きました。
- How to実装を示すためのものです。
- 後者は前者を参考に、クラス分けをしながらそれなりの形のmacOSアプリにしています。
- 最終的な成果物はこちらです。
- ※記事に
Client ID・Client Secretの直値を載せていますが、試す際は自身のものを使用してください。
- 載せているものは失効させているので使用できません。
実装1 - 基本的な実装の流れ
Imgur APIの設定
- WEB上で下記のパラメータの通り設定します。
項目 値 コールバックURL qiita-demo-2cdc3a06e7197c2://oauth-callback Client ID 2cdc3a06e7197c2 Client Secret fd2cd5bda2a673213a8db56d1a79eb4f74f9a0cf OAuth2.0認証 - ユーザ認証
CallbackURLの受け取り設定
- ユーザ認証用のURLを作成し、認証後CallbackURLをアプリで受け取るまでまずは実装します。
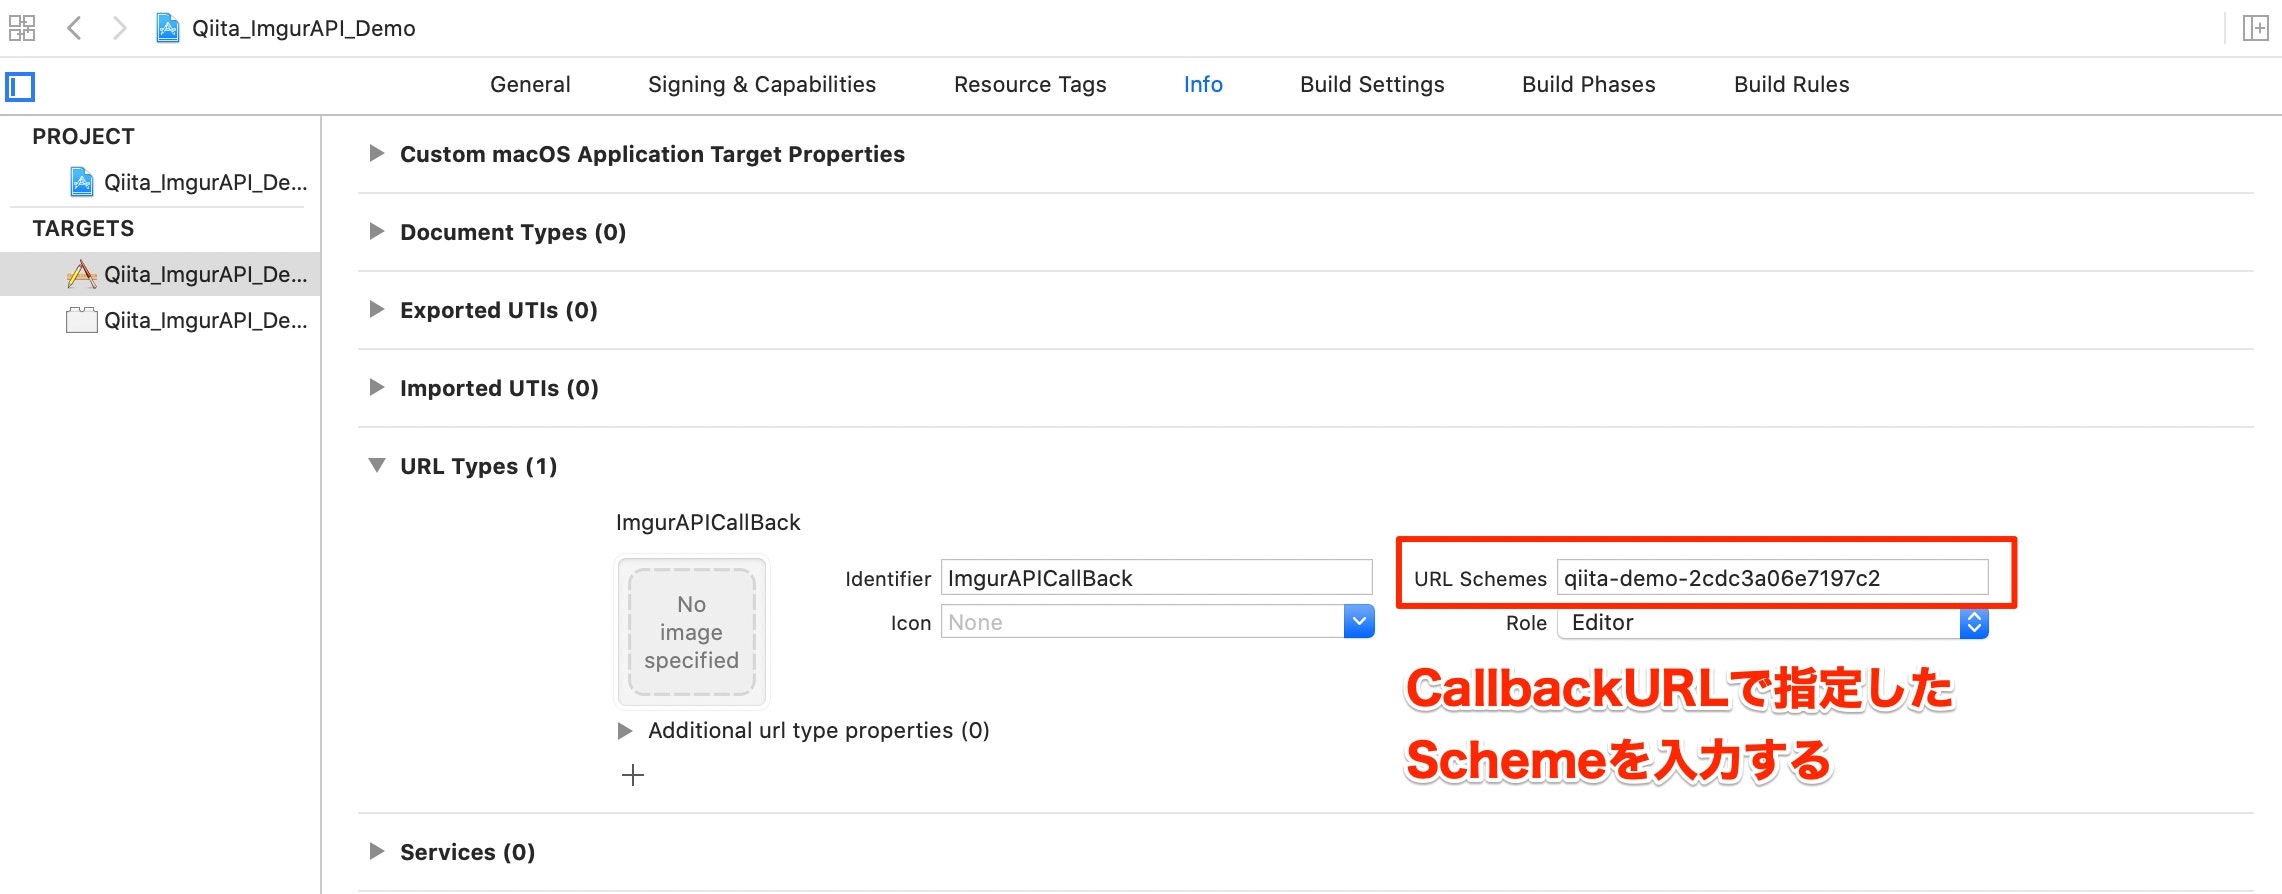
- CallbackURLによってアプリを開くために、
URL Typesにスキームを登録します。
AppDelegate.swiftに以下を記述します。
- setEventHandler(_:andSelector:forEventClass:andEventID:)
- コールバックURLを受け取る設定、およびその際の動作を実装します。
- 今回は
Notificationを使用してViewControllerにコールバックURLを伝えるようにします。func applicationDidFinishLaunching(_ aNotification: Notification) { NSAppleEventManager.shared().setEventHandler(self, andSelector:#selector(AppDelegate.handleGetURL(event:withReplyEvent:)), forEventClass: AEEventClass(kInternetEventClass), andEventID: AEEventID(kAEGetURL)) } @objc func handleGetURL(event: NSAppleEventDescriptor!, withReplyEvent: NSAppleEventDescriptor!) { if let urlString = event.paramDescriptor(forKeyword: AEKeyword(keyDirectObject))?.stringValue, let url = URL(string: urlString) { NotificationCenter.default.post(name: OAuthInfo.Imgur.callBackNotificationName, object: nil, userInfo: [OAuthInfo.Imgur.UserinfoKey.callbackURL: url]) } }
- なお利便性のため、定数はStructにまとめています。
public final class OAuthInfo {
    public struct Imgur {
        private enum UserDefaultsKey: String {
            case accessToken
            case expires
            case tokenType
            case refreshToken
            case accountUserName
            case accountID
        }

        static let clientID     = "2cdc3a06e7197c2"
        static let clientSecret = "fd2cd5bda2a673213a8db56d1a79eb4f74f9a0cf"
        static let callBackNotificationName = Notification.Name("ReceiveCallBackURLNotification")
        struct UserinfoKey {
            static let callbackURL = "callbackurl"
        }

       static var accessToken: String {
            get {
                return UserDefaults.standard.string(forKey: UserDefaultsKey.accessToken.rawValue) ?? ""
            }

            set(accessToken) {
                UserDefaults.standard.set(accessToken, forKey: UserDefaultsKey.accessToken.rawValue)
            }
        }
// (省略)
- では
ViewController側に書いていきます。- Notificationを受け取るように
addObserverを行います。
- 実際の処理
handleCallbackURL(_:)は後ほど実装します。NotificationCenter.default.addObserver(self, selector: #selector(handleCallbackURL(_:)), name: OAuthInfo.Imgur.callBackNotificationName, object: nil)認証用URLの作成
- 続いて認証用URLを作成します。
- 具体的なURLは下記の通りです。
- 参考:OAuth2.0認証
https://api.imgur.com/oauth2/authorize
?client_id=2cdc3a06e7197c2
&response_type=token
&state=hoge
- SwiftにはURLを扱うのに便利なクラス
URLComponentsやURLQueryItemが用意されているのでこちらを使用します。- 勿論
Stringでも実装可能ですが、後でクラス分けするときに使い勝手が悪いのでオススメはしません。- クエリ・フラグメントの知識は以下を参照。
- イメージとしては、
URLComponentsのオブジェクトに、クエリやフラグメント情報を渡して、最終的にURLを発行してもらう、という感じです。let baseURL = URL(string: "https://api.imgur.com")! let relativePath = "oauth2/authorize" let authenticationURL = baseURL.appendingPathComponent(relativePath) var components = URLComponents(url: authenticationURL , resolvingAgainstBaseURL: true) // URL構成要素を表現するクラス。URLも楽に書き出せて便利。 let queryItems: [URLQueryItem] = [URLQueryItem(name: "client_id", value: OAuthInfo.Imgur.clientID), URLQueryItem(name: "response_type", value: "token"), URLQueryItem(name: "state", value: "sample")] components?.queryItems = queryItems guard let openingURL = components?.url else { return } // ブラウザで認証ページを開く if !NSWorkspace.shared.open(openingURL) { fatalError() }
- 以上で認証URLを作成しブラウザに表示することができました。
CallbackURLの受け取り後の処理
- では残しておいた
Callback URL取得後の処理を実装します。Callback URLが例えば以下の通りに取得されます。imgur-e6d8ea34904ab93://oauth-callback?state=sample #access_token=37b3888f2801db013d35e4bec3a8f103b43344aa &expires_in=315360000 &token_type=bearer &refresh_token=ba2bb6ea7df5c0a3ecca48c5412b1d06e6135a3b &account_username=IKEH1024 &account_id=104356397
- フラグメントの情報取得をします。
- まず
callbackURL.fragmentを使って取り出し、一旦クエリに保存します。- その後
URLComponentsからクエリとして取り出します。- また実際には安全性のため
UserDefaultsではなくKeyChainに保存するべきですね。@objc func handleCallbackURL(_ notification: Notification) { NotificationCenter.default.removeObserver(self) guard let callbackURL = notification.userInfo?[OAuthInfo.Imgur.UserinfoKey.callbackURL] as? URL else { return } var components = URLComponents(url: callbackURL , resolvingAgainstBaseURL: true) // フラグメント部分は無視されるようです components?.query = callbackURL.fragment // フラグメントをクエリとして保存する guard let queryItems = components?.queryItems else { return } var oauthInfo = OAuthInfo.Imgur() for queryItem in queryItems { oauthInfo.update(for: queryItem) } }
URLQueryItemの情報を受け取って保存するメソッドを用意しておきます。public final class OAuthInfo { public struct Imgur { // (省略) mutating func update(for queryItem: URLQueryItem) { guard let queryValue = queryItem.value else { return } switch queryItem.name { case "access_token": Self.accessToken = queryValue case "expires_in": Self.expires = Int(queryValue) ?? 0 case "token_type": Self.tokenType = queryValue case "refresh_token": Self.refreshToken = queryValue case "account_username": Self.accountUserName = queryValue case "account_id": Self.accountID = queryValue default: break } } } }Access Tokenの更新
- 続いてAccess Tokenの更新処理を実装します。
- まず、
URLSessionで通信を行うために、下記にチェックをします。
- 以下の通り、Swiftで実装していきます。
- HTTPリクエストのbodyの設定方法
- How to make HTTP Post request with JSON body in Swift
- また上記回答のコメントにヘッダに関して言及があるので採用しています。(無いとAPIからレスポンスエラーが返ってくる)
func updateAccessToken() {
    let baseURL      = URL(string: "https://api.imgur.com")!
    let relativePath = "oauth2/token"
    let url          = baseURL.appendingPathComponent(relativePath)

    var urlRequest = URLRequest(url: url, timeoutInterval: Double.infinity)
    urlRequest.httpMethod = "POST"

    let bodyJSON = [
        "refresh_token" : OAuthInfo.Imgur.refreshToken,
        "client_id"     : OAuthInfo.Imgur.clientID,
        "client_secret" : OAuthInfo.Imgur.clientSecret,
        "grant_type"    : "refresh_token",
    ]

    guard let bodyData = try? JSONSerialization.data(withJSONObject: bodyJSON) else {
        return
    }
    urlRequest.httpBody = bodyData


    urlRequest.addValue("\(bodyData.count)", forHTTPHeaderField: "Content-Length")
    urlRequest.addValue("application/json",  forHTTPHeaderField: "Content-Type")

    let session = URLSession.shared
    let task = session.dataTask(with: urlRequest) { data, urlResponse, error in
        if let urlResponse = urlResponse as? HTTPURLResponse {
            if urlResponse.statusCode != 200 {
                print("アクセストークンのアップデートに失敗しました。")
                return
            }

            let dic = try? JSONSerialization.jsonObject(with: data ?? Data(), options: []) as? [String: Any]
            if let dic = dic {
                for (key, value) in dic {
                    print("\(key):\(value)")
                }

                if let accessToken = dic["access_token"] as? String {
                    OAuthInfo.Imgur.accessToken = accessToken
                }

                if let refreshToken =  dic["refresh_token"] as? String {
                    OAuthInfo.Imgur.refreshToken = refreshToken
                }
            }
        }
    }

    task.resume()
}
- 以上で
Access Tokenの更新の実装は完了です。認証の画像アップロード
Access Tokenの更新と同様の流れで、APIのドキュメントに沿って実装します。func uploadImage() { guard let image = readImageFromClipboard() else { return } guard let imageData = image.tiffRepresentation else { return } let baseURL = URL(string: "https://api.imgur.com")! let relativePath = "/3/image" let url = baseURL.appendingPathComponent(relativePath) var urlRequest = URLRequest(url: url, timeoutInterval: Double.infinity) urlRequest.httpMethod = "POST" let base64 = imageData.base64EncodedString() let bodyJSON = [ "image" : base64, ] guard let bodyData = try? JSONSerialization.data(withJSONObject: bodyJSON) else { return } urlRequest.httpBody = bodyData urlRequest.addValue("application/json", forHTTPHeaderField: "Content-Type") urlRequest.addValue("Bearer \(OAuthInfo.Imgur.accessToken)", forHTTPHeaderField: "Authorization") let session = URLSession.shared let task = session.dataTask(with: urlRequest) { data, urlResponse, error in if let urlResponse = urlResponse as? HTTPURLResponse { if urlResponse.statusCode != 200 { if let errorString = String(data: data ?? Data(), encoding: .utf8) { print(errorString) } print("画像のアップロードに失敗しました。") return } // アップロード結果の確認 let dic = try? JSONSerialization.jsonObject(with: data ?? Data(), options: []) as? [String: Any] if let dic = dic { for (key, value) in dic { print("\(key):\(value)") } } } } task.resume() }
- アップロードに成功すると以下のようなレスポンスが返ってきます。
data:{
    "account_id" = 104356397;
    (中略)
    datetime = 1596414978;
    deletehash = 60zvjsIbzBl8aHK;
    link = "https://i.imgur.com/yjU8yCh.png";
    type = "image/png";
}
status:200
success:1
- 以上で基本的な動作を
Swiftで実装することができました。実装2 - クラス分けとUnitTestsの実装
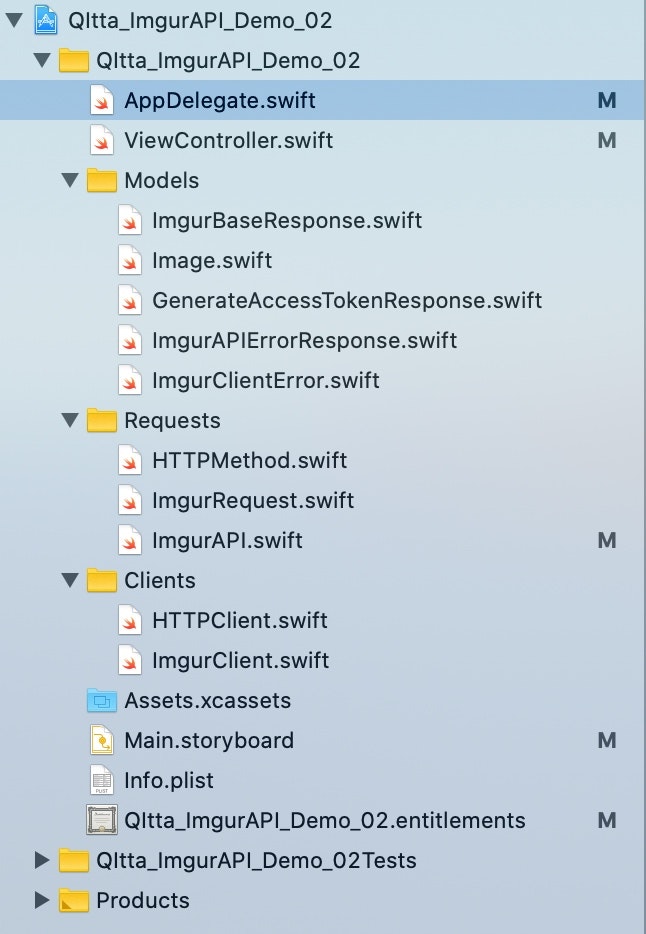
- 残りの作業として下記を行います。
- 重複している冗長な部分が多いので、通信部分やデータモデルへのクラス分けをします
- UnitTests・スタブの実装
- UI部分の実装
- 増補改訂第3版 Swift実践入門
- 「第18章 実践的なSwiftアプリケーション ── Web APIクライアントを作ろう」を主に参考にして実装しました。
- (複雑で難しい所ですね…。何日もかけてトライアンドエラーで実装しました。)
- 下記の通りクラス分けしています。
- 詳しくはGitHubを参照くださいませ。
- 実装の流れはほぼ本の通りです。
おわりに
- 以上SwiftによるOAuth2.0認証やAPI利用の実装方法でした。
- 「Swift実践入門」を参考に、Imgur APIを使って構造的にアプリの作成を行うことができました。

- 投稿日:2020-08-04T11:31:52+09:00
Firebaseを使ったiOSのPush通知に画像を添付する Notification Service Extension
iOSではPush通知に画像を添付するために一手間かけないといけません。
それがNotification Service Extensionの導入です。Firebaseを使いましたが、もちろんFirebaseを使わないPush通知にも応用可能なので、是非参考にしていただければと思います。
導入
Xcodeでの準備
- XcodeでProjectを開く
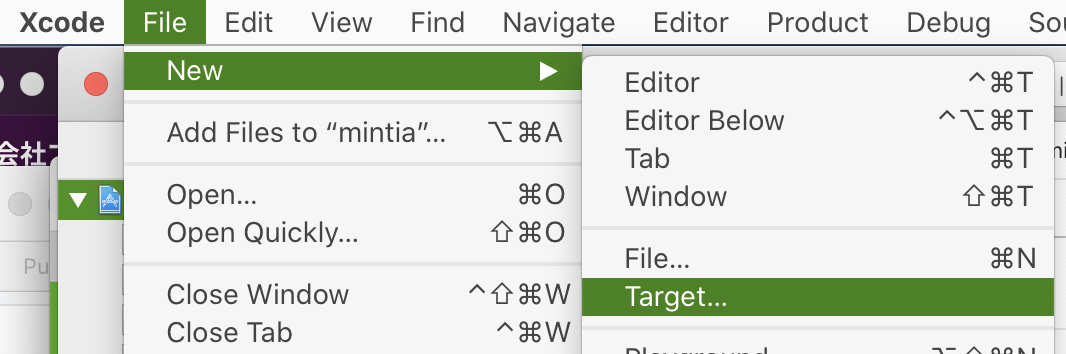
- メニューバーのFile->New->Targetを選択
- Notification Service Extensionを選択
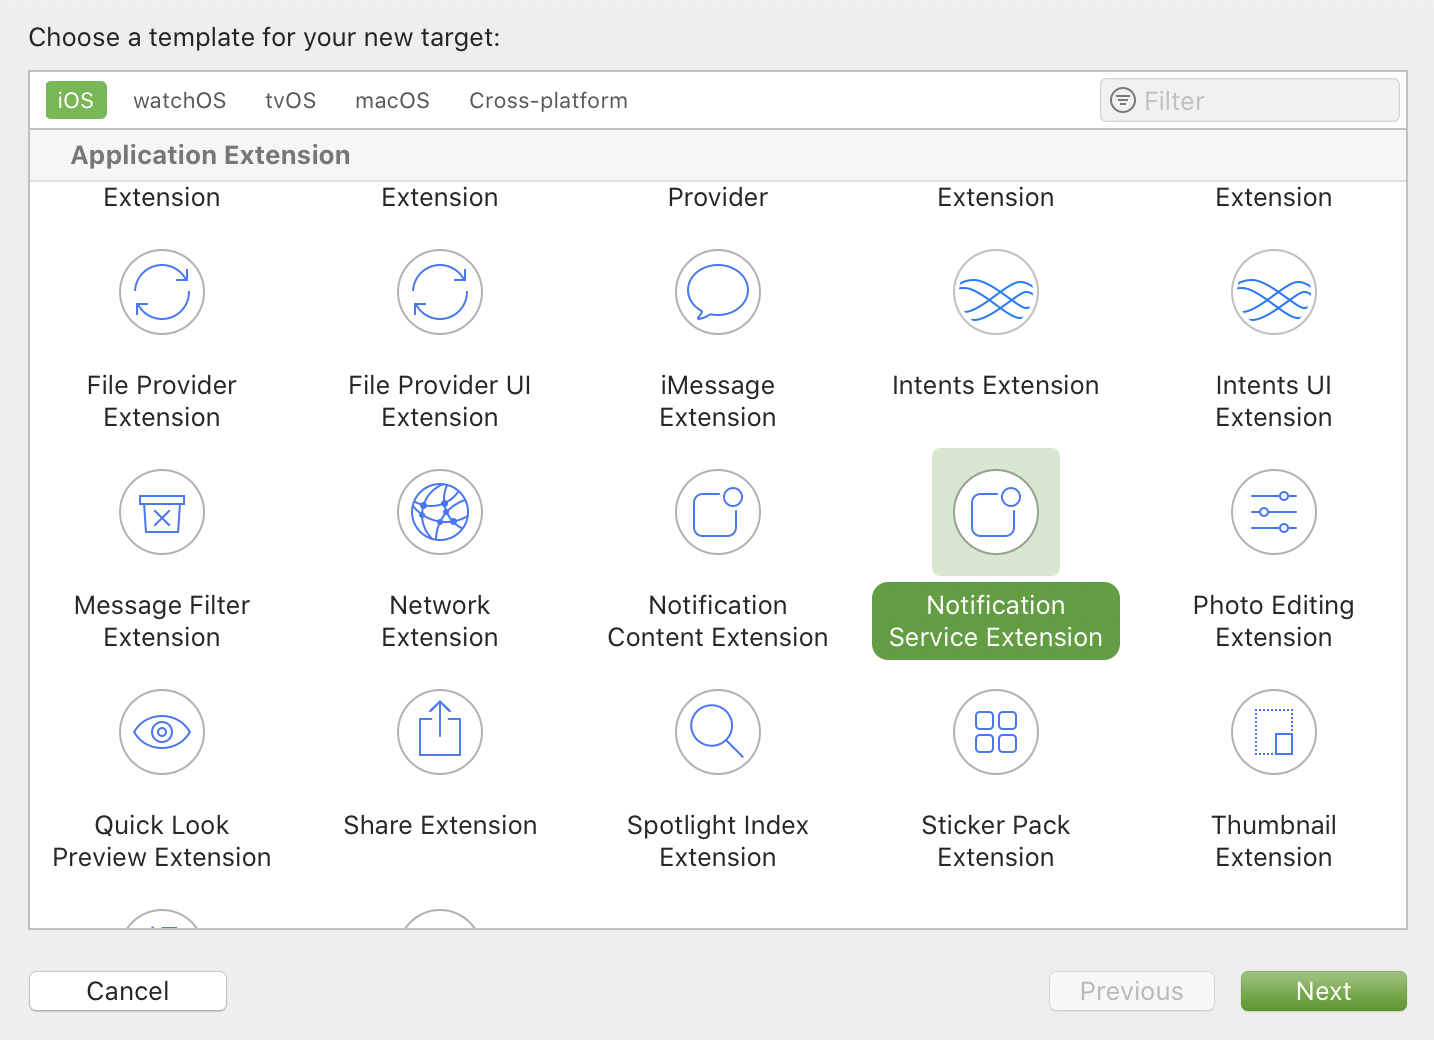
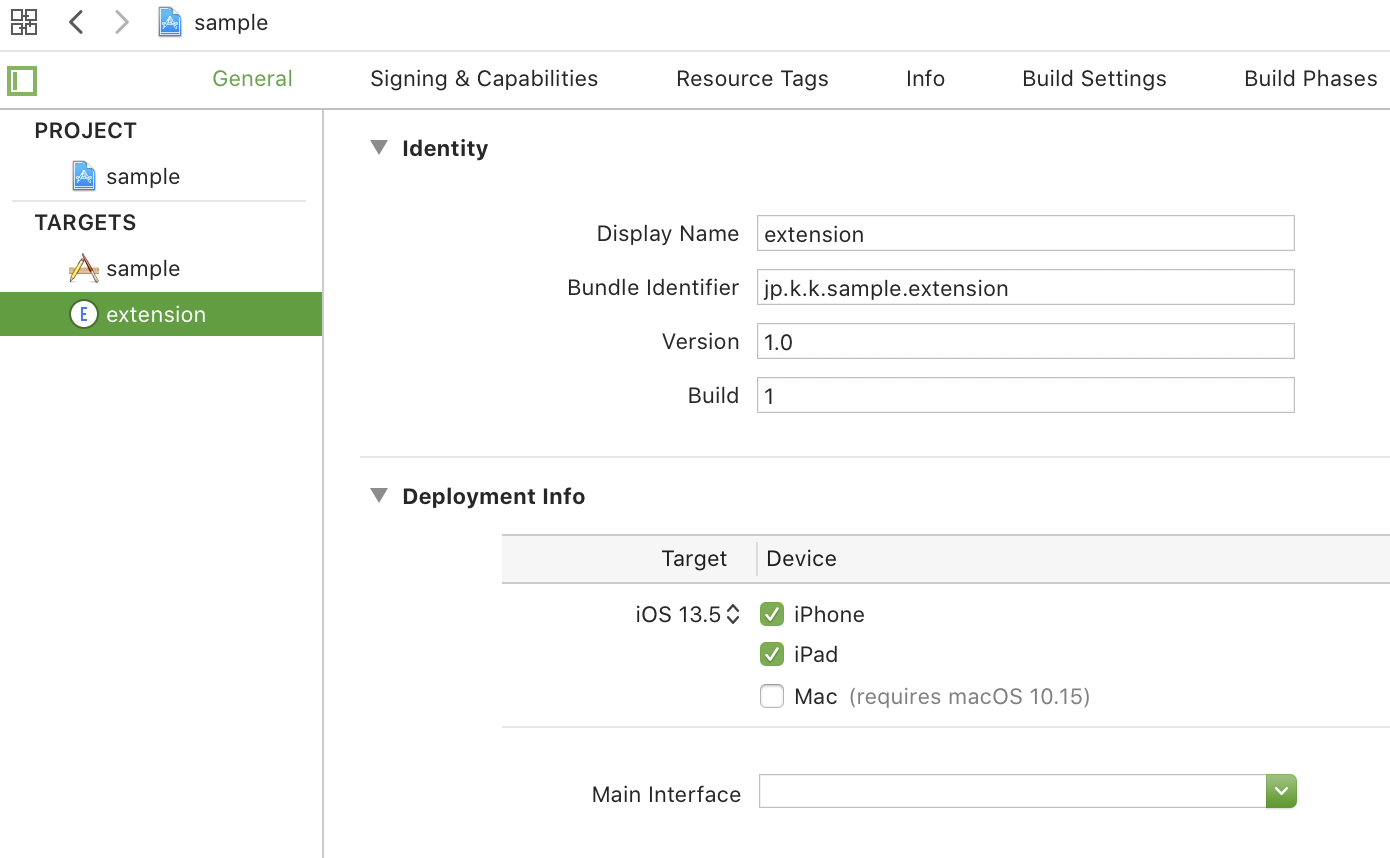
- Nameや導入するターゲットを選択してFinish
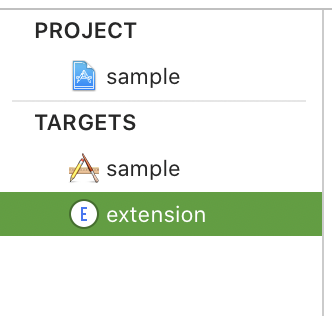
- Targetsの中にExtensionが入ります(ここでは名前をextensionという名前にしています)
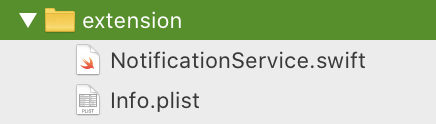
- Projectツリーの部分にもファイルが追加されています
Developerサイトでの準備
Notification Service Extensionを利用するにはこのターゲット用のApplication IDとProvisioning Profileが必要になります。
アプリ用のものとは別のものを用意しないといけません。
DeveloperサイトにてCertificates, Identifiers & ProfilesでApplication Identifierを追加
※ここで大事な点があります
例えばアプリ用に用意しているBundle Identifierが
com.sample.application
だったとするならば
NotificationExtension用のBundle Identifierは
com.sample.application.extension
のように上位部分を合わせてくださいProvisioning Profileを作成
アプリ用のものと全く同じような作成方法で問題ありませんFirebase側で気を付ける点
curl -X POST --header "Authorization: key=*******************" \
--Header "Content-Type: application/json" \
https://fcm.googleapis.com/fcm/send \
-d @- << EOF
{
    "registration_ids": [
"********************************"
    ],

    "notification": {
        "title": "タイトル",
        "imageUrl": "https://sample.*******.jpg"
    },
    "priority":10,
    "mutable_content":true
}
EOF
送信時のコマンドはこのような感じになります
注意点としては
"mutable_content":true
こちらの書き方です
Firebaseのサポートサイトでは
mutable-content:1のような記述がありますが、上記の方法で送信することによってiOSの通知に変換される時にはmutable-content:1がちゃんと入っています。
これが入っていないと全く動きません。コーディング
自動で生成されたNotificationService.swiftを編集します。
NotificationService.swiftvar contentHandler: ((UNNotificationContent) -> Void)? var bestAttemptContent: UNMutableNotificationContent? override func didReceive(_ request: UNNotificationRequest, withContentHandler contentHandler: @escaping (UNNotificationContent) -> Void) { self.contentHandler = contentHandler bestAttemptContent = (request.content.mutableCopy() as? UNMutableNotificationContent) if let urlString = request.content.userInfo["gcm.notification.imageUrl"] as? String, let fileURL = URL(string: urlString) { URLSession.shared.downloadTask(with: fileURL) { (location, response, error) in if let location = location { // メディアファイルをダウンロードしてtmpに保存 let tmpFile = "file://".appending(NSTemporaryDirectory()).appending(fileURL.lastPathComponent) let tmpUrl = URL(string: tmpFile)! try? FileManager.default.moveItem(at: location, to: tmpUrl) if let attachment = try? UNNotificationAttachment(identifier: "hoge", url: tmpUrl, options: nil) { // メディアを添付 self.bestAttemptContent?.attachments = [attachment] } } contentHandler(self.bestAttemptContent!) }.resume() } }上記を用意しておけばOKです。
処理の流れとしては
Push通知が届くとdidReceiveが走り、メッセージの中にある画像URLをダウンロードして通知内容に添付します。
Extensionという名のように、通知の内容を拡張して書き換える、といったイメージです。
画像URLのリンクが切れていたりダウンロードに失敗してもcontentHandlerを実行するまでの時間制限が存在するのでPush通知自体が全く発生しなくなるといった心配はありません。嵌りポイント
私が何度やってもどうしてもうまくいかなかった嵌りポイントだけ紹介させて下さい。
それが、Extension用Targetの対応OSバージョンをアプリターゲットのOSと合わせないといけない
ということでした。
最初からextensionを用意していればこんなことにはならなかったのですが、アプリ用ターゲットの作成からextension作成までの時期に半年程の差があったので作成時の初期設定されているバージョンがずれてしまっていたというのが原因でした。
終わりです
読んでいただきありがとうございました。
Brewus,Inc.
株式会社ブリューアス
https://brewus.co.jp
- 投稿日:2020-08-04T01:39:54+09:00
Swift:画面収録の許可が必要なアプリで許可の状態を確認してダメなら許可を促す
はじめに
macOS Catalinaから、アクセシビリティに関するセキュリティが向上し、画面をキャプチャするようなアプリ(画面共有やカラーピッカーなど)では画面収録の許可が必要になりました。しかし、許可に慣れていないユーザは初回起動時に出てきたポップアップに驚いて許可をしてくれない可能性があります。しかし、この許可のポップアップはデフォルトでは最初の一回目しか表示されないため、ユーザに許可を促す導線が必要となります。ここで、許可の状態を取得して、必要に応じて環境設定の画面収録許可のページを表示する機能が欲しくなります。
許可の状態を確認して、許可されていない時に許可を促す
func checkPermission() {
    if let _ = CGDisplayStream(display: CGMainDisplayID(),
                               outputWidth: 1,
                               outputHeight: 1,
                               pixelFormat: Int32(kCVPixelFormatType_32BGRA),
                               properties: nil,
                               handler: { _, _, _, _ in }) {
        print("has a permission")
        return
    }
    print("does not have a permission")

    let userInfo: [String: Any] = [
        NSLocalizedDescriptionKey: "This application does not have the screen capture permission.",
        NSLocalizedRecoverySuggestionErrorKey: "Please grant access to this application in Security & Privacy preferences, located in System Preferences."
    ]

    let error = NSError(domain: "ApplicationDomain", code: 0, userInfo: userInfo)
    let alert = NSAlert(error: error)
    alert.addButton(withTitle: "Deny")
    alert.addButton(withTitle: "Open System Preferences")
    let result = alert.runModal()

    if result == .alertSecondButtonReturn {
        let path = "x-apple.systempreferences:com.apple.preference.security?Privacy_ScreenCapture"
        NSWorkspace.shared.open(URL(string: path)!)
    }
}

viewDidLoad() { // どこか初期化のタイミングで
    if #available(macOS 10.15, *) {
        checkPermission()
    }
}
これが必要となるのはCatalina以降なので、Mojave以前をサポートしている場合はOSのバージョンで場合分けするのを忘れずに。
参考文献
- 投稿日:2020-08-04T01:07:00+09:00
Swift:NSErrorを使って楽にNSAlertを表示する。
はじめに
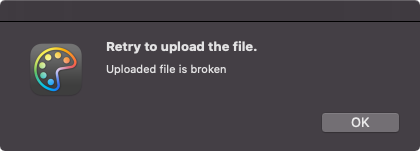
NSAlertを用いると警告のポップアップを出すことができますが、messageTextとinformativeTextを指定する方法だとアイコンが警告用になりません。let alert = NSAlert() alert.informativeText = "Uploaded file is broken" alert.messageText = "Retry to upload the file." alert.runModal()
そこで、
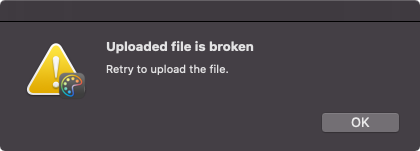
NSErrorを使うと楽に警告用のポップアップを表示できます。1. 普通に表示
let userInfo: [String: Any] = [
        NSLocalizedDescriptionKey:  "Uploaded file is broken",
        NSLocalizedRecoverySuggestionErrorKey: "Retry to upload the file."
]
let error = NSError(domain: "HogeDomain", code: 0, userInfo: userInfo)
let alert = NSAlert(error: error)
alert.runModal()
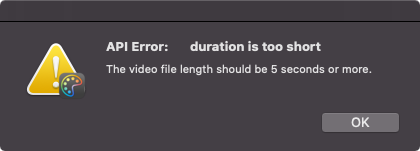
2. より詳細なエラー情報を付加して表示
let userInfo: [String: Any] = [
    NSLocalizedFailureErrorKey: "API Error:\t",
    NSLocalizedFailureReasonErrorKey: "duration is too short",
    NSLocalizedRecoverySuggestionErrorKey: "The video file length should be 5 seconds or more."
]
let error = NSError(domain: "HogeDomain", code: 0, userInfo: userInfo)
let alert = NSAlert(error: error)
alert.runModal()
3. さらにボタンを押した時の処理を追加する
let userInfo: [String: Any] = [
        NSLocalizedDescriptionKey:  "Uploaded file is broken",
        NSLocalizedRecoverySuggestionErrorKey: "Retry to upload the file."
]

let error = NSError(domain: "HogeDomain", code: 0, userInfo: userInfo)
let alert = NSAlert(error: error)
alert.addButton(withTitle: "Retry")
alert.addButton(withTitle: "Cancel")
let result = alert.runModal()

if result == .alertFirstButtonReturn {
    // Retry の処理
    print("Retry")
}

- 投稿日:2020-08-04T01:07:00+09:00
Swift:NSErrorを使って楽にNSAlertを表示する
はじめに
NSAlertを用いると警告のポップアップを出すことができますが、messageTextとinformativeTextを指定する方法だとアイコンが警告用になりません。let alert = NSAlert() alert.informativeText = "Uploaded file is broken" alert.messageText = "Retry to upload the file." alert.runModal()
そこで、
NSErrorを使うと楽に警告用のポップアップを表示できます。1. 普通に表示
let userInfo: [String: Any] = [
    NSLocalizedDescriptionKey:  "Uploaded file is broken",
    NSLocalizedRecoverySuggestionErrorKey: "Retry to upload the file."
]
let error = NSError(domain: "HogeDomain", code: 0, userInfo: userInfo)
let alert = NSAlert(error: error)
alert.runModal()
2. より詳細なエラー情報を付加して表示
let userInfo: [String: Any] = [
    NSLocalizedFailureErrorKey: "API Error:\t",
    NSLocalizedFailureReasonErrorKey: "duration is too short",
    NSLocalizedRecoverySuggestionErrorKey: "The video file length should be 5 seconds or more."
]
let error = NSError(domain: "HogeDomain", code: 0, userInfo: userInfo)
let alert = NSAlert(error: error)
alert.runModal()
3. さらにボタンを押した時の処理を追加する
let userInfo: [String: Any] = [
    NSLocalizedDescriptionKey:  "Uploaded file is broken",
    NSLocalizedRecoverySuggestionErrorKey: "Retry to upload the file."
]

let error = NSError(domain: "HogeDomain", code: 0, userInfo: userInfo)
let alert = NSAlert(error: error)
alert.addButton(withTitle: "Retry")
alert.addButton(withTitle: "Cancel")
let result = alert.runModal()

if result == .alertFirstButtonReturn {
    // Retry の処理
    print("Retry")
}
- 投稿日:2020-08-04T00:30:31+09:00
【SwiftUI】キーボードで文字が隠れないようにする制御
キーボード処理
TextFieldを選択し、文字を入力するときにキーボードで隠れてしまい入力箇所が見れない場合があります。
キーボードの高さだけビュー全体を上にあげることで解決することが常套手段で、それをSwiftUIでも実装してみたのが今回の話です。
ObservableObjectのクラスで実装を行います。実装
キーボードの制御を管理するファイルを作ってください。
KeyboardObserver.swiftimport SwiftUI import Combine class KeyboardObserver: ObservableObject { @Published var keyboardHeight: CGFloat = 0.0 // キーボードの監視開始 func addObserver() { NotificationCenter .default .addObserver( self, selector: #selector(self.keyboardWillChangeFrame), name: UIResponder.keyboardWillChangeFrameNotification, object: nil) } // キーボードの監視終了 func removeObserver() { NotificationCenter .default .removeObserver(self, name: UIResponder.keyboardWillChangeFrameNotification, object: nil) } // キーボードのフレーム検知処理 @objc func keyboardWillChangeFrame(_ notification: Notification) { if let endFrame = notification .userInfo?[UIResponder.keyboardFrameEndUserInfoKey] as? NSValue, let beginFrame = notification .userInfo?[UIResponder.keyboardFrameBeginUserInfoKey] as? NSValue { let endFrameMinY: CGFloat = endFrame.cgRectValue.minY let beginFrameMinY: CGFloat = beginFrame.cgRectValue.minY self.keyboardHeight = beginFrameMinY - endFrameMinY if self.keyboardHeight < 0 { self.keyboardHeight = 0 } } } }これで下準備は完了です。
利用例(全体適用)
Sample.swiftstruct HogeView: View { @State var inputText = "" @ObservedObject var keyboard = KeyboardObserver() var body: some View { VStack { TextField("入力1", text: $inputText) .onAppear{ self.keyboard.addObserver() }.onDisappear{ self.keyboard.removeObserver() }.padding(.bottom, keyboard.keyboardHeight) } } }onAppearとonDisappearでは、Viewが表示されたときにキーボードの高さを監視していて、Viewが非表示になった段階で監視を終わらせています。
※シュミレーターで表示させないとキーボードの挙動を確認できません利用例(個別適用)
Sample.swiftstruct HogeView: View { @State var inputText = "" @State var inputText_2 = "" @State var inputText_3 = "" @ObservedObject var keyboard = KeyboardObserver() var body: some View { VStack { //1 TextField("入力1", text: $inputText) //2 TextField("入力2", text: $inputText_2) //3(ここに適用) TextField("入力3", text: $inputText_3) } } }上記コードの三つ目のTextFieldにのみキーボードの操作を適用させたい場合は以下のように記述します。
Sample.swiftstruct HogeView: View { @State var inputText = "" @State var inputText_2 = "" @State var inputText_3 = "" @ObservedObject var keyboard = KeyboardObserver() var body: some View { VStack { //1 TextField("入力1", text: $inputText) //2 TextField("入力2", text: $inputText_2) //3(ここに適用) TextField("入力3", text: $inputText_3, onEditingChanged: { begin in if begin { self.keyboard.addObserver() } else { self.keyboard.removeObserver() } }) }.padding(.bottom, keyboard.keyboardHeight) } }TextFieldのonEditingChangedでBoolで管理します。三つ目のTextFieldに対して入力操作が始まったときにキーボードの監視を開始し、入力が終わったら終了するようにしています。
まとめ
備忘録的な要素が強く、抜けがあると思いますがご容赦ください。
TextFieldがいくつもある場合に、個別適用を用いることが多くなりそうです。参考記事