- 投稿日:2020-07-25T23:50:10+09:00
Laravelで認可(Gate)
認可
簡単に言うと
認証はアクセスしてきているユーザーが誰なのかを認識するもの
認可はアクセスしてきたユーザーに操作を許可するかどうかを判定するもの
ですGateを使った認可
簡単に言うと
真偽値を返す関数(Gate)を作っておき、それを簡単に呼び出せるようにしておくようなものです前提条件
eclipseでLaravel開発環境を構築する。デバッグでブレークポイントをつけて止める。(WindowsもVagrantもdockerも)
本記事は上記が完了している前提で書かれています
プロジェクトの作成もapacheの設定も上記で行っていますLaravelの認証(web画面)
本記事は上記記事でLaravelの認証が実装されている前提で書かれています認可に使うカラム追加
(1) マイグレーション作成
コマンドラインで
cd sample
php artisan make:migration add_rank_to_users --table=users
xdebugの設定をしているとeclipseが実行していいですかというプロンプトを出すのでOKを押します
eclipseプロジェクトを右クリック→リフレッシュ
/sample/database/migrations/xxxx_xx_xx_xxxxxx_add_rank_to_users.phpが現れますxxxx_xx_xx_xxxxxx_add_rank_to_users.php修正
xxxx_xx_xx_xxxxxx_add_rank_to_users.phpuse Illuminate\Database\Migrations\Migration; use Illuminate\Database\Schema\Blueprint; use Illuminate\Support\Facades\Schema; class AddRankToUsers extends Migration { public function up() { Schema::table('users', function (Blueprint $table) { $table->integer('rank')->default(1); }); } public function down() { Schema::table('users', function (Blueprint $table) { $table->dropColumn('rank'); }); } }usersテーブルにrankカラムを追加するマイグレーションです
今回はrankというカラムをつくり、その値によってGateを使った認可が行われるサンプルを作っていきます(2) マイグレーション実行
コマンドラインで
php artisan migrate
xdebugの設定をしているとeclipseが実行していいですかというプロンプトを出すのでOKを押します
usersテーブルにrankカラムが追加されます(3) Model修正
/sample/app/Models/User.php修正User.php‥‥ protected $fillable = [ 'name', 'email', 'password', 'rank', ]; ‥‥$fillableプロパティにrank追加
Gate作成
/sample/app/Gatesフォルダ作成
/sample/app/Gates/UserGate.php作成UserGate.php<?php namespace App\Gates; use App\Models\User; class UserGate { public function __construct() { } public function rank(User $user, int $rank){ if ($user->rank >= $rank) { return true; } return false; } }rankというメソッドをつくりました
Gateのメソッドの第一引数は必ず、ユーザーインスタンスになります
第二引数以降を定義するかどうかは任意です
第二引数が無くてもいいですし、第三引数、第四引数が定義されていてもいいですGateの登録
/sample/app/Providers/AuthServiceProvider.php修正
AuthServiceProvider.php‥‥ public function boot() { $this->registerPolicies(); Gate::define('UserGate-Rank', 'App\Gates\UserGate@rank'); } ‥‥Gate::define('UserGate-Rank', 'App\Gates\UserGate@rank');追記しました
これでLaravelアプリケーションの中でGateを簡単に呼び出せるようになりますController修正
(1) use文追記
use Illuminate\Support\Facades\Gate;
use App\Models\User;(2) /sample/app/Http/Controllers/SampleController.phpにgate1メソッド、gate2メソッドを追記
    public function gate1()
    {
        return view('sample.gate1');
    }

    public function gate2(Request $request)
    {
        $data = [];

        $rank = $request->input('rank');

        if (Gate::denies('UserGate-Rank', [$rank])) {
            return redirect('sample/gate1')->withInput();
        }

        $id1user = User::find(1);
        if(!is_null($id1user) && Gate::forUser($id1user)->allows('UserGate-Rank', [$rank])){
            $data['user1_allows'] = 'user1のランクは' . $rank . '以上';
        } else {
            $data['user1_allows'] = 'user1のランクは' . $rank . '以下';
        }

        return view('sample.gate2', $data);

    }
・AuthServiceProviderで登録したGateを使うには
Gate::allowsや、Gate::deniesで呼べます
第一引数にAuthServiceProviderのbootメソッドで実行したGate::defineの第一引数を与えます。すると、Gate::defineの第二引数に渡したクラス@メソッドが実行されます
Gate::allowsや、Gate::deniesに渡した第二引数の配列は展開されGateの第二引数、第三引数……となります
・Gate::allowsはGateが返す真偽値がそのまま戻り値になります。Gate::deniesはGateが返す真偽値が逆になります
・Gate::allowsはログインしていないユーザーの場合falseを返します。Gate::deniesはログインしていないユーザーの場合trueを返します。Gateの処理は関係なくなります。
もし、ログインしていないユーザーでもGateを実行したい場合は下記のようにGateに定義してメソッドの第一引数のタイプヒントにクエスチョンマークを付けてください
public function rank(?User $user, int $rank){
・Gate::allows、Gate::deniesの場合、Gateの第一引数はAuth::user()になります
・Gate::forUser()->allows、Gate::forUser()->deniesの場合、Gateの第一引数はGate::forUserに与えた引数になります実際にGateを使う場合は
MiddlewareでGate::deniesを呼び出し、結果によってredirectしたり、
Ruleクラスの中で呼び出すことが多いと思います(2) /sample/routes/web.phpに下記を追記
Route::get('sample/gate1', 'SampleController@gate1');
Route::get('sample/gate2', 'SampleController@gate2');viewの作成
(1) /sample/resources/views/sample/gate1.blade.phpファイル作成
gate1.blade.php<html> <head> <title>sample</title> </head> <body> <form action="{{ url('sample/gate2') }}" method="get"> <div>rank<input type="text" name="rank" value="{{ old('rank') }}"></div> <input type="submit" > </form> </body> </html>(2) /sample/resources/views/sample/gate2.blade.phpファイル作成
gate2.blade.php<html> <head> <title>sample</title> </head> <body> <div>{{$user1_allows}}</div> <div> @can('UserGate-Rank', [5]) ログインユーザーのランクは5以上 @elsecan('UserGate-Rank', [4]) ログインユーザーのランクは4以上 @else ログインユーザーのランクは3以下 @endcan </div> <div> @cannot('UserGate-Rank', [2]) ログインユーザーのランクは2未満 @elsecannot('UserGate-Rank', [3]) ログインユーザーのランクは3未満 @else ログインユーザーのランクは3以上 @endcannot </div> </body> </html>blade内でGateを使うにはcanやcannotで呼び出せます
@canはGate::allowsと同じです
@cannotはGate::deniesと同じです
@canや@cannotを使うことで、更新ボタンを特定のユーザーにだけ表示させたり、または、逆に非表示にしてりできます動作確認
usersテーブルのrankカラムの値を適当な値にupdateします
update users set rank = 4;ログインします
http://localhost/laravelSample/
右上のLOGINからログインします
http://localhost/laravelSample/sample/gate1
rankを4にupdateしてので
5以上の値を入力して送信ボタンをクリックするとgate1にリダイレクトされ先に進めないと思います
4以下の値を入力して送信ボタンをクリックするとgate2に遷移できます
今回はサンプルのため入力値のエラーチェックを一切行っていないので、gate1の入力欄には数値を入れてください。数値でない場合、制御されていない型エラーになります
実際にシステムを開発するときはちゃんとエラーチェックを入れましょう
エラーチェックの実装の仕方は下記に書いてあります
Laravelで入力値エラーチェック(validate)を実装する
- 投稿日:2020-07-25T19:45:48+09:00
問題集への解答
ID:2 フィボナッチ数列の生成
<?php
$t=[0,1];
$new=0;
$res=0;
for ($i=0; $new < 4000000; $i++) {
    $new=$t[0]+$t[1];
    if ($new%2==0) {
        $res+=$new;
    }
    //  print $new."\n";
    $t[0]=$t[1];
    $t[1]=$new;
}
  print $res."\n";
ID:3 素因数を求める
最初のコード
<?php
$start = microtime(true);


function findFactor($num)
{
    $count=0;
    for ($i=$num; $i >2 ; $i--) {
        if ($num%$i==0) {
            $count++;
        }
        if ($count==2) {
            return false;
        }
    }
    return true;
}

const NUM=600851475143;
  // const NUM=13195;

for ($i=NUM; $i >2 ; $i--) {
  // print $i."\n";
    if (NUM%$i==0 && findFactor($i)) {
        print $i."\n";
        break;
    }
}

$end = microtime(true);

print '処理時間 = ' . ($end - $start) . '秒'."\n" ;
何時まで立っても割らなかった。
Macもファンがガンガン回ってメモリ利用量が半端じゃなかった。改良
<?php
$start = microtime(true);
$num=600851475143;

for ($i=2; $i <=$num ; $i++) {
  // print $i."\n";
    if ($num%$i==0) {
      $count=0;
        while($num%$i==0){
          $num/=$i;
          $count++;
        }
        print $i." e ".$count."\n";
    }
}

$end = microtime(true);

print '処理時間 = ' . ($end - $start) . '秒'."\n" ;
1から数えていく方式をやめた。
ID:4 回文を作成
<?php
$start = microtime(true);
play();
$end = microtime(true);
print '処理時間 = ' . ($end - $start) . '秒'."\n" ;


function play()
{
    for ($i=999; $i >0 ; $i--) {
        for ($j=999; $j >0 ; $j--) {
            $num=$i*$j;
            // print $num."\n";
            if (checkPalindrome($num)) {
                $a[]=checkPalindrome($num);
            }
        }
    }
    print max($a);
}

function checkPalindrome($num)
{
    $num=(string)$num;

    if (strlen($num)%2==0 && strlen($num)>4) {
        if ($num[0]==$num[strlen($num)-1] && $num[1]==$num[strlen($num)-2] && $num[2]==$num[strlen($num)-3]) {
            return $num;
        }
    }
    return false;
}
checkPalindrome関数のif文が無理やり過ぎてもっといい方法がないものかと思った。
ID5 最小公倍数を求める
<?php
$start = microtime(true);
play();
$end = microtime(true);
print "\n".'処理時間 = ' . ($end - $start) . '秒'."\n" ;


function play()
{
    print check(20);
}


function check($num)
{
    $res=[];
    $anser=1;
    for ($i=2; $i <=$num ; $i++) {
        // print "[".$i."]\n";
        $tmp=$i;
        for ($j=2; $j <=$tmp ; $j++) {
            $count=0;
            if ($tmp%$j==0) {
                while ($tmp%$j==0) {
                    $tmp/=$j;
                    $count++;
                }
                print $j." e ".$count."\n";
                $res[$j]=$res[$j]<$count? $count:$res[$j];
            }
        }
    }
    print_r($res);
    foreach ($res as $key => $value) {
        $anser*=$key**$value;
    }
    return $anser;
}
配列のところでエラーが出るが今回は無視
ID:6足してから2乗の合計-2乗の合計
$start = microtime(true);
play();
$end = microtime(true);
print "\n".'処理時間 = ' . ($end - $start) . '秒'."\n" ;


function play()
{
  $sqSum=0;
  $sumSq=0;
    for ($i=1; $i <=100 ; $i++) {
      $sqSum+=$i**2;
      $sumSq+=$i;
    }

    print $sumSq**2-$sqSum;
}
ID7 10001番目の素数
<?php
$start = microtime(true);
play();
$end = microtime(true);
print "\n".'処理時間 = ' . ($end - $start) . '秒'."\n" ;


function play()
{
$res=[];
for ($i=2; $i <1000000 ; $i++) {
  if(checkPrime($i)){
    print $i."\n";
    $res[]=$i;
  }
  if(count($res)>10001)break;
}
print_r($res);
}

function checkPrime($num){
  // print "[".$num."]\n";
  $count=0;
  for ($i=2; $i <$num ; $i++) {
    // print "$i\n";
    if ($num%$i==0) {
      return false;
   }
  }
  return true;
}
処理には1分かかった。
- 投稿日:2020-07-25T16:54:37+09:00
複数の型を動的に変更しつつ静的型チェックしたい
arrayの型が全て保存される版のようなものが欲しい。
欲を言わなければ、ListかTupleでもいい。ということで作ってみる。
class Unit
{
    /** @var Unit */
    public static $unit;
}
Unit::$unit = new Unit;

/**
 * @template V
 * @template N
 */
class TypedList
{
    /** @var V */
    private $value;
    /** @var N */
    private $next;

    /**
     * @param V $value
     * @param N $next
     */
    private function __construct($value, $next)
    {
        $this->value = $value;
        $this->next = $next;
    }

    /**
     * @template V1
     * @param V1 $v1
     * @return TypedList<V1,Unit>
     */
    public static function list1($v1)
    {
        return new TypedList($v1, Unit::$unit);
    }


    /**
     * @template V1
     * @template V2
     * @param V1 $v1
     * @param V2 $v2
     * @return TypedList<V1,TypedList<V2,Unit>>
     */
    public static function list2($v1, $v2)
    {
        return new TypedList($v1, new TypedList($v2, Unit::$unit));
    }

    /**
     * @template V1
     * @template V2
     * @template V3
     * @param V1 $v1
     * @param V2 $v2
     * @param V3 $v3
     * @return TypedList<V1,TypedList<V2,TypedList<V3,Unit>>>
     */
    public static function list3($v1, $v2, $v3)
    {
        return new TypedList($v1, new TypedList($v2, new TypedList($v3, Unit::$unit)));
    }

    /**
     * @template N1
     * @param N1 $n1
     * @return TypedList<N1,TypedList<V,N>>
     */
    public function unshift($n1)
    {
        /** @var TypedList<N1,TypedList<V,N>> */
        $ret = new TypedList($n1, $this);
        return $ret;
    }

    /**
     * @template V1
     * @template V2
     * @template V3
     * @param V1 $v1
     * @param V2 $v2
     * @param V3 $v3
     * @return TypedList<V1,TypedList<V2,TypedList<V3,Unit>>>
     */
    public static function list3_2($v1, $v2, $v3)
    {
        $list2 = self::list2($v2, $v3);
        return $list2->unshift($v1);
    }
}
Haskellの
data List a = Nil | Cons a(List a)みたいな感じ。
TypedList::list3()で一気に生成しても良いし、unshiftで$list = $list ->unshift(3) ->unshift(4) ->unshift(new DateTime()) ->unshift(6) ->unshift(7) ->unshift(new DateTime());のように追加しても良い。
function testList(): void
{
    $list3 = TypedList::list3(1, new DateTime(), "foo");

    echo $list3->value();
    echo $list3->next()->value();
    echo $list3->next()->next()->value();
    echo $list3->next()->next()->next()->value();

    $list3_2 = TypedList::list3_2(1, new DateTime(), "foo");
    echo $list3_2->value();
    echo $list3_2->next()->value();
    echo $list3_2->next()->next()->value();

    $list = TypedList::list2(new DateTime(),2);
    $list = $list
          ->unshift(3)
          ->unshift(4)
          ->unshift(new DateTime())
          ->unshift(6)
          ->unshift(7)
          ->unshift(new DateTime());
    echo $list->next()->next()->value();
    echo $list->next()->next()->next()->value();
    echo $list->next()->next()->next()->next()->next()->next()->value();
    echo $list->next()->next()->next()->next()->next()->next()->value()->format('Y-m-d');
    $undef = $list->next()->next()->next()->next()->next()->next()->next()->next()->next();
}
------ ---------------------------------------------------------------- Line functions.php ------ ---------------------------------------------------------------- 152 Parameter #1 (DateTime) of echo cannot be converted to string. 154 Call to an undefined method Unit::value(). 158 Parameter #1 (DateTime) of echo cannot be converted to string. 170 Parameter #1 (DateTime) of echo cannot be converted to string. 171 Parameter #1 (DateTime) of echo cannot be converted to string. 173 Call to an undefined method Unit::next(). ------ ----------------------------------------------------------------phpstanでは期待通りエラーが出る。
ただし見栄えが良くない。処理速度も良くないし100件とか追加したくない。
(異なる型を追加するためのものなので、foreachで使ったりはしないが)Tupleも作ってみる。
/**
 * @template T1
 * @template T2
 * @template T3
 * @template T4
 * @template T5
 */
class Tuple
{
    /** @var T1 */
    public $v1;
    /** @var T2 */
    public $v2;
    /** @var T3 */
    public $v3;
    /** @var T4 */
    public $v4;
    /** @var T5 */
    public $v5;

    /**
     * @param T1 $v1
     * @param T2 $v2
     * @param T3 $v3
     * @param T4 $v4
     * @param T5 $v5
     */
    public function __construct(
        $v1, $v2, $v3, $v4, $v5
    ){
        $this->v1 = $v1;
        $this->v2 = $v2;
        $this->v3 = $v3;
        $this->v4 = $v4;
        $this->v5 = $v5;
    }

    /**
     * @template V1
     * @template V2
     * @param V1 $v1
     * @param V2 $v2
     * @return Tuple<V1,V2,Unit,Unit,Unit>
     */
    public static function tuple2($v1, $v2)
    {
        return new Tuple($v1, $v2, Unit::$unit, Unit::$unit, Unit::$unit);
    }

    /**
     * @template V1
     * @template V2
     * @template V3
     * @param V1 $v1
     * @param V2 $v2
     * @param V3 $v3
     * @return Tuple<V1,V2,V3,Unit,Unit>
     */
    public static function tuple3($v1, $v2, $v3)
    {
        return new Tuple($v1, $v2, $v3, Unit::$unit, Unit::$unit);
    }

    /**
     * @template V1
     * @template V2
     * @template V3
     * @template V4
     * @param V1 $v1
     * @param V2 $v2
     * @param V3 $v3
     * @param V4 $v4
     * @return Tuple<V1,V2,V3,V4,Unit>
     */
    public static function tuple4($v1, $v2, $v3, $v4)
    {
        return new Tuple($v1, $v2, $v3, $v4, Unit::$unit);
    }

    /**
     * @template V1
     * @template V2
     * @template V3
     * @template V4
     * @template V5
     * @param V1 $v1
     * @param V2 $v2
     * @param V3 $v3
     * @param V4 $v4
     * @param V5 $v5
     * @return Tuple<V1,V2,V3,V4,V5>
     */
    public static function tuple5($v1, $v2, $v3, $v4, $v5)
    {
        return new Tuple($v1, $v2, $v3, $v4, $v5);
    }

    /**
     * @template V3
     * @param V3 $v3
     * @return Tuple<T1,T2,V3,T4,T5>
     */
    public function set3($v3)
    {
        return new Tuple($this->v1, $this->v2, $v3, $this->v4, $this->v5);
    }

    /**
     * @template V1
     * @template V2
     * @template V3
     * @param V1 $v1
     * @param V2 $v2
     * @param V3 $v3
     * @return Tuple<V1,V2,V3,Unit,Unit>
     */
    public static function tuple3_2($v1, $v2, $v3)
    {
        $tuple2 = self::tuple2($v1, $v2);
        return $tuple2->set3($v3);
    }
}
tuple3のように一気に生成しても良いし、tuple3_2のように入れ替えても良い。
Unitをやめて、クラスを分けてTuple2、Tuple3、Tuple4のようにしても良い。function testTuple(): void { $t3 = Tuple::tuple3(1, "aaa", new DateTime()); echo $t3->v1; echo $t3->v2; echo $t3->v3; echo $t3->v4; $t3_2 = Tuple::tuple3_2(1, "aaa", new DateTime()); echo $t3_2->v1; echo $t3_2->v2; echo $t3_2->v3; echo $t3_2->v4; $t5 = Tuple::tuple5(1, "aaa", new DateTime(), [1 => "a"], true); echo $t5->v1; echo $t5->v2; echo $t5->v3; echo $t5->v4[1]; echo $t5->v5; $t5 = Tuple::tuple5(1,null,3,null,5); echo number_format($t5->v1); echo number_format($t5->v2); }------ --------------------------------------------------------------------------- Line functions.php ------ --------------------------------------------------------------------------- 305 Parameter #1 (DateTime) of echo cannot be converted to string. 306 Parameter #1 (Unit) of echo cannot be converted to string. 311 Parameter #1 (DateTime) of echo cannot be converted to string. 312 Parameter #1 (Unit) of echo cannot be converted to string. 318 Parameter #1 (DateTime) of echo cannot be converted to string. 324 Parameter #1 $number of function number_format expects float, null given. ------ ---------------------------------------------------------------------------こちらの方が単純で良いかもしれない。でも
TypedListのように無限に追加できたりはしない。
btreeのように自分でTupleにTupleを入れる構造にすると増やせるが…。アプリケーションプログラムで頑張らずにPHPStanの
DynamicMethodReturnTypeExtensionとの合わせ技でやるべきかもしれないな。結局何がやりたいかというと、このような良い感じの
Tupleクラスがあったとすると、同様に変換用のTupleを作る。
template 5個はしんどいのでとりあえず3個のTupleクラスがあるとする。/** * @template C1 * @template C2 * @template C3 * @extends DelegateTuple<class-string<C1>,class-string<C2>,class-string<C3>> */ class ColsTuple extends DelegateTuple { /** * @template U1 * @param class-string<U1> $v1 * @return self<U1,Unit,Unit> */ public static function tuple1($v1) { return new self($v1, Unit::class, Unit::class); } /** * @template U1 * @template U2 * @template U3 * @param class-string<U1> $v1 * @param class-string<U2> $v2 * @return self<U1,Unit,Unit> */ public static function tuple2($v1, $v2) { return new self($v1, $v2, Unit::class); } /** * @template U1 * @template U2 * @template U3 * @param class-string<U1> $v1 * @param class-string<U2> $v2 * @param class-string<U3> $v3 * @return self<U1,U2,U3> */ public static function tuple3($v1, $v2, $v3) { return new self($v1, $v2, $v3); } /** * @return DelegateTuple<C1,C2,C3> */ public function convert() { $ret = DelegateTuple::tuple3( new $this->v1, new $this->v2, new $this->v3 ); return $ret; } }それから、例えばDBに
staffテーブルがあったとして、それぞれのカラムに対応するクラスを作る。class staff_staff_id { /** @var int */ private $staff_id; /** @param int $v */ public function __construct($v) { $this->staff_id = $v; } public function staff_id(): int { return $this->staff_id; } } class staff_staff_name { /** @var string */ private $staff_name; /** @param string $v */ public function __construct($v) { $this->staff_name = $v; } public function staff_name(): string { return $this->staff_name; } } class staff_created_at { /** @var DateTimeInterface */ private $created_at; /** @param string|DateTimeInterface $v */ public function __construct($v) { if (is_string($v)) $v = new DateTimeImmutable($v); $this->created_at = $v; } public function created_at(): DateTimeInterface { return $this->created_at; } }それから、DBのクエリを何とかして良い感じに作る。
/**
 * @template T
 * @mixin T
 */
class Result
{
    /** @var T */
    private $cols;

    /** @param T $cols */
    public function __construct($cols)
    {
        $this->cols = $cols;
    }

    /**
     * @param string $name
     * @param mixed $args
     * @return mixed
     */
    public function __call($name, $args)
    {
        return $this->cols->$name(...$args);
    }
}

/**
 * @template T1
 * @template T2
 * @template T3
 * @param ColsTuple<T1,T2,T3> $cols
 * @return array<int,Result<DelegateTuple<T1,T2,T3>>>
 */
function selectStaff(ColsTuple $cols)
{
    $rows = [];

    // db query...

    $res = new Result($cols->convert());
    // set data ...

    $rows[] = $res;
    return $rows;
}
ここまで来て、やっと柔軟な
selectが出来る。function testDelegateTuple(): void { $cols = ColsTuple::tuple3( staff_staff_id::class , staff_staff_name::class , staff_created_at::class ); $rows = selectStaff($cols); foreach ($rows as $row){ echo $row->staff_id(); echo $row->staff_name(); echo $row->created_at(); echo $row->created_at()->format('Y-m-d'); } $cols = ColsTuple::tuple1( staff_staff_id::class ); $rows = selectStaff($cols); foreach ($rows as $row){ echo $row->staff_id(); echo $row->staff_name(); echo $row->created_at()->format('Y-m-d'); } }------ ---------------------------------------------------------------------------------------------- Line functions.php ------ ---------------------------------------------------------------------------------------------- 257 Parameter #1 (DateTimeInterface) of echo cannot be converted to string. 270 Call to an undefined method Result<DelegateTuple<staff_staff_id, Unit, Unit>>::staff_name(). 271 Call to an undefined method Result<DelegateTuple<staff_staff_id, Unit, Unit>>::created_at(). ------ ----------------------------------------------------------------------------------------------
selectStaffで指定した引数に対応したResultが返ってくる。$rowのメソッドが良い感じに自動設定されているのが分かるだろうか。最初の
echo $row->created_at()は型が合わないのでエラー。
二回目のecho $row->staff_name()とcreated_at()はselectしていないのでエラー。かなり夢が膨らみそう。
Doctrineとか全然見てないけど、こういう柔軟に型が変更できるルールはもう誰か作ってるかな?PHPStanのGenerics実装のさじ加減ひとつでバグるので、PHPでやるなよという気がしないでもないが。
- 投稿日:2020-07-25T14:07:16+09:00
LaradockでWordPressを動かしてMailHogを使う
Laradockはオールインワンで便利なので、PHP絡みでちょっとした開発のときは、マルチプロジェクト環境のLaradockから必要なコンテナを起ち上げて、ちょこちょこっと作っちゃうとかできて重宝しています。
そんなわけで非常にマニアックかと思いますがLaradockにて
- nginx
- MySQL
- MailHog
を起ち上げてWordPressを動かしたときの、MailHog設定について、ちょっと躓いたのでメモ。
mhsendmailのインストール
WordPressはメール送信に、php.iniに設定してあるsendmailを使うみたいで、Laradockのデフォルトの設定だとメール送信をMailHogがキャッチしてくれません。(エラーになる)
sendimailをMailHogにしてくれる
mailhog/mhsendmailをインストールします。laradock/php-fpm/Dockerfile########################################################################### # mhsendmail: ########################################################################### RUN curl -sSLO https://github.com/mailhog/mhsendmail/releases/download/v0.2.0/mhsendmail_linux_amd64 \ && chmod +x mhsendmail_linux_amd64 \ && mv mhsendmail_linux_amd64 /usr/local/bin/mhsendmailFinal Touch の上辺りに追加するとよいかも。
laradock/php-fpm/php***.ini; sendmail_path = sendmail_path = "/usr/local/bin/mhsendmail --smtp-addr=mailhog:1025"php***.ini は使うバージョンに合わせて適宜修正
Docker再構築
すでに起動済みの場合は再構築
$ docker-compose build --no-cache php-fpm以上で、PHPのsendmailからMailHogに接続できます。
これで、WordPressから送信されたメールをMailHogでキャッチすることができるようになります。WordPressでメール文字化け設定
WordPressからのメールをMailHogで受けられるようになりましたが、そのままだと文字化けしてしまうので、WP Multibyte Patchの設定をする。
wp-content/wpmp-config.php<?php $wpmp_conf['mail_mode'] = 'UTF-8';ファイルがない場合は作成する。
以上、Laradock環境でWordPressを動かしてMailHogでメールをキャッチする方法です。
そんな状況あまりないと思うけど備忘録として。参考
https://laradock.io/
https://github.com/mailhog/mhsendmail
https://www.tecking.org/archives/5868
https://ja.wordpress.org/plugins/wp-multibyte-patch/
https://qiita.com/Taichi-yzrh/items/4b281bc9934c6c2dcd90
- 投稿日:2020-07-25T13:11:55+09:00
ローカルのDockerにLAMP環境を構築
はじめに
ローカルのDockerにLAMP環境を構築する方法です。
以下の環境を構築します。
Windows10Proに構築します。
- CentOS7.4.1708
- PHP7.2
- Laravel5.5
- Apache
- MySQL5.7
- phpMyAdmin]
※予め出来ているDockerファイルを利用するため、Dockerファイルの作成方法などを記載するわけではありません。
Docker Desktopのインストール
以下のサイトからDocker Desktopをインストールします。
https://www.docker.com/get-startedDockerファイル群の配置
以下から、ApaLara.zipをDLし、任意の場所に配置します。
https://github.com/shinjinakatamari/LAMP配置フォルダの追加
DockerDeskTopを開き、のsetting>Resources>FILE SHARINGで設定フォルダを追加し、Apply&Restartをクリックする
コマンドの実施
コマンドプロンプトを起動し、以下のコマンドで、配置フォルダに移動する。
cd c:¥・・・以下のコマンドを実行し、Dockerの作成と立ち上げを行う。
docker-compose build
docker-compose up -d
起動確認
http://localhost/
上記にアクセスすると、Laravelのページが表示される。http://localhost:8080/
上記にアクセスすると、PHPMYAdminのページが表示される。
- 投稿日:2020-07-25T12:17:17+09:00
ぐるなびAPIを触ってみた。
今久しぶりにPHPを触っていて、APIが動いて感動したので書き留めます。
初歩的な内容です。。ぐるなびPHP
拾い物のPHPをちょっと修正して
ぐるなびAPIコードは登録すれば無料で使えます。xamppでapacheを起動させて、
仮のサーバーフォルダ?の中に入れて、ブラウザでlocalhost/php/guru.phpに移動すると動きます。guru.php// 定義 define("GURUNAVIAPI_ACCESS_KEY", "APIコードを入れてください。"); define("INTERNAL_ENC", "UTF-8"); define("ARR_CONTEXT_OPTIONS", null); // START function gurunavi_search_restlist_v3($hit_per_page=30, $offset_page=1, $freeword) { $ret = FALSE; $search_url = "https://api.gnavi.co.jp/RestSearchAPI/v3/?" . "keyid=" . GURUNAVIAPI_ACCESS_KEY . "&hit_per_page=" . $hit_per_page . "&offset_page=" . $offset_page . "&freeword=" . urlencode_rfc3986(mb_convert_encoding($freeword, "UTF-8")); $json = json_decode(mb_convert_encoding(@file_get_contents($search_url, false, ARR_CONTEXT_OPTIONS), "UTF-8", INTERNAL_ENC)); if ($json !== null) { $ret = array(); $n = 0; foreach ($json->rest as $shop) { // 中略 $ret[$n]['id'] = (string)$shop->id; $ret[$n]['name'] = (string)$shop->name; $ret[$n]['address'] = (string)$shop->address; $ret[$n]['shop_image1'] = (string)$shop->image_url->shop_image1; $ret[$n]['url'] = (string)$shop->url; $ret[$n]['line'] = (string)$shop->access->line; $ret[$n]['station'] = (string)$shop->access->station; $ret[$n]['station_exit'] = (string)$shop->access->station_exit; $ret[$n]['walk'] = (string)$shop->access->walk; // 中略 $n++; } if (count($ret) <= 0) { $ret = FALSE; } } return($ret); } // END //中略 $rests = gurunavi_search_restlist_v3(30, 1, "味噌汁"); foreach ($rests as $rest) { echo('<h2>' . $rest['name'] . '</h2>'); echo('<center>'); echo('<img src="' . $rest['shop_image1'] . '" alt="' . $rest['name'] . '" width="192">'); echo('</center>'); echo('<br />'); echo('<b><a href="' . $rest['url'] . '" target="_blank" rel="nofollow noopener">' . $rest['name'] . '</a></b> '); echo("<b>住所</b> " . $rest['address'] . "<br />"); echo("<b>アクセス</b> " . $rest['line'] . ' ' . $rest['station'] . ' ' . $rest['station_exit'] . " 徒歩" . $rest['walk'] . "分 " . "<br />"); } //文字をエンコードするための関数 function urlencode_rfc3986($str) { return str_replace('%7E', '~', rawurlencode($str)); }APIはURLにパラメーターをつけて送れば、答えが届きます。
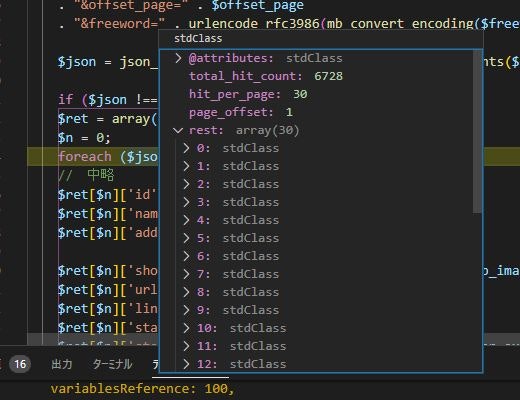
その答えを一つずつほぐして、表示させます。デバッグ
vscodeでxdebugでデバッグをすると意味がよくわかります。
デバッグ画像
jsonの中にある、rest達をshopに入れる
guru.php$json->rest as $shopそれを一つずつほぐす
guru.phpforeach($json->rest as $shop)用意した配列に、shopの内容を入れていく。
配列に shopのidを入れる。guru.phpif ($json !== null) { $ret = array(); $n = 0; foreach ($json->rest as $shop) { // 中略 $ret[$n]['id'] = (string)$shop->id;retの配列を中身を見ると、確かに入ってる。
自作関数は、ぐるなびの結果を、retの配列を返り値として返します。
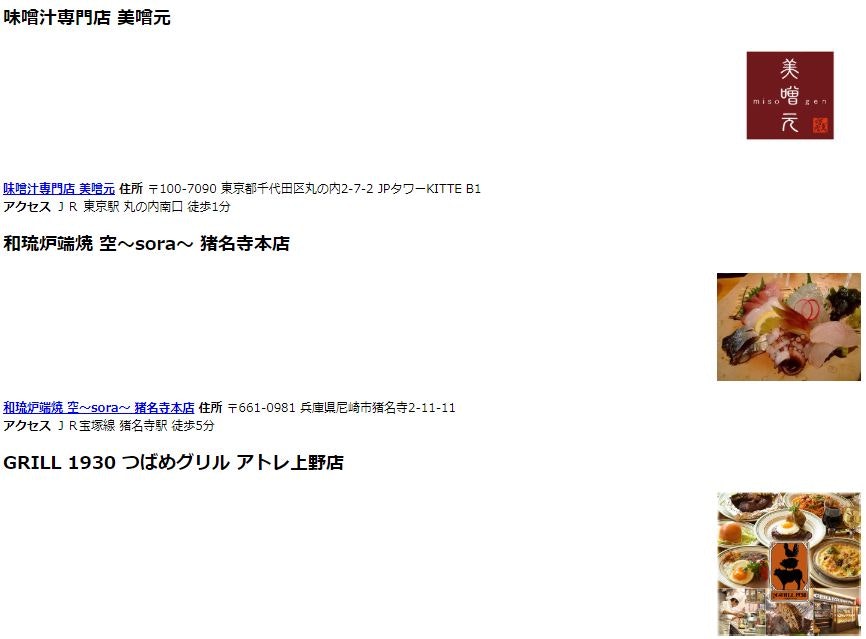
その配列を、一つずつほぐして今後は出力guru.phpfunction gurunavi_search_restlist_v3($hit_per_page=30, $offset_page=1, $freeword) { } // 中略 return($ret); } $rests = gurunavi_search_restlist_v3(30, 1, "味噌汁"); foreach ($rests as $rest) { echo('<h2>' . $rest['name'] . '</h2>'); echo('<center>'); echo('<img src="' . $rest['shop_image1'] . '" alt="' . $rest['name'] . '" width="192">'); echo('</center>'); echo('<br />'); echo('<b><a href="' . $rest['url'] . '" target="_blank" rel="nofollow noopener">' .出力結果
フリーワードで「味噌汁」で引っかかるお店一覧が出てきました。感動。

- 投稿日:2020-07-25T12:17:17+09:00
ぐるなびAPIと占いAPIに触れてみた。
今久しぶりにPHPを触っていて、APIが動いて感動したので書き留めます。
初歩的な内容です。。ぐるなびPHP
拾い物のPHPをちょっと修正して
ぐるなびAPIコードは登録すれば無料で使えます。xamppでapacheを起動させて、
仮のサーバーフォルダ?の中に入れて、ブラウザでlocalhost/php/guru.phpに移動すると動きます。guru.php// 定義 define("GURUNAVIAPI_ACCESS_KEY", "APIコードを入れてください。"); define("INTERNAL_ENC", "UTF-8"); define("ARR_CONTEXT_OPTIONS", null); // START function gurunavi_search_restlist_v3($hit_per_page=30, $offset_page=1, $freeword) { $ret = FALSE; $search_url = "https://api.gnavi.co.jp/RestSearchAPI/v3/?" . "keyid=" . GURUNAVIAPI_ACCESS_KEY . "&hit_per_page=" . $hit_per_page . "&offset_page=" . $offset_page . "&freeword=" . urlencode_rfc3986(mb_convert_encoding($freeword, "UTF-8")); $json = json_decode(mb_convert_encoding(@file_get_contents($search_url, false, ARR_CONTEXT_OPTIONS), "UTF-8", INTERNAL_ENC)); if ($json !== null) { $ret = array(); $n = 0; foreach ($json->rest as $shop) { // 中略 $ret[$n]['id'] = (string)$shop->id; $ret[$n]['name'] = (string)$shop->name; $ret[$n]['address'] = (string)$shop->address; $ret[$n]['shop_image1'] = (string)$shop->image_url->shop_image1; $ret[$n]['url'] = (string)$shop->url; $ret[$n]['line'] = (string)$shop->access->line; $ret[$n]['station'] = (string)$shop->access->station; $ret[$n]['station_exit'] = (string)$shop->access->station_exit; $ret[$n]['walk'] = (string)$shop->access->walk; // 中略 $n++; } if (count($ret) <= 0) { $ret = FALSE; } } return($ret); } // END //中略 $rests = gurunavi_search_restlist_v3(30, 1, "味噌汁"); foreach ($rests as $rest) { echo('<h2>' . $rest['name'] . '</h2>'); echo('<center>'); echo('<img src="' . $rest['shop_image1'] . '" alt="' . $rest['name'] . '" width="192">'); echo('</center>'); echo('<br />'); echo('<b><a href="' . $rest['url'] . '" target="_blank" rel="nofollow noopener">' . $rest['name'] . '</a></b> '); echo("<b>住所</b> " . $rest['address'] . "<br />"); echo("<b>アクセス</b> " . $rest['line'] . ' ' . $rest['station'] . ' ' . $rest['station_exit'] . " 徒歩" . $rest['walk'] . "分 " . "<br />"); } //文字をエンコードするための関数 function urlencode_rfc3986($str) { return str_replace('%7E', '~', rawurlencode($str)); }APIはURLにパラメーターをつけて送れば、答えが届きます。
その答えを一つずつほぐして、表示させます。デバッグ
vscodeでxdebugでデバッグをすると意味がよくわかります。
デバッグ画像
jsonの中にある、rest達をshopに入れる
guru.php$json->rest as $shopそれを一つずつほぐす
guru.phpforeach($json->rest as $shop)用意した配列に、shopの内容を入れていく。
配列に shopのidを入れる。guru.phpif ($json !== null) { $ret = array(); $n = 0; foreach ($json->rest as $shop) { // 中略 $ret[$n]['id'] = (string)$shop->id;retの配列を中身を見ると、確かに入ってる。
自作関数は、ぐるなびの結果を、retの配列を返り値として返します。
その配列を、一つずつほぐして今後は出力guru.phpfunction gurunavi_search_restlist_v3($hit_per_page=30, $offset_page=1, $freeword) { } // 中略 return($ret); } $rests = gurunavi_search_restlist_v3(30, 1, "味噌汁"); foreach ($rests as $rest) { echo('<h2>' . $rest['name'] . '</h2>'); echo('<center>'); echo('<img src="' . $rest['shop_image1'] . '" alt="' . $rest['name'] . '" width="192">'); echo('</center>'); echo('<br />'); echo('<b><a href="' . $rest['url'] . '" target="_blank" rel="nofollow noopener">' .出力結果
フリーワードで「味噌汁」で引っかかるお店一覧が出てきました。感動。
あとがき
コードを修正して、占いAPIも作ってみました。uranai.php<?php // START define("INTERNAL_ENC", "UTF-8"); define("ARR_CONTEXT_OPTIONS", null); //http://api.jugemkey.jp/api/horoscope/free/2020/07/01 // START function today_fortune($today) { $ret = FALSE; $search_url = "http://api.jugemkey.jp/api/horoscope/free/".$today; $json = json_decode(mb_convert_encoding(@file_get_contents($search_url, false, ARR_CONTEXT_OPTIONS), "UTF-8", INTERNAL_ENC)); if ($json !== null) { $ret = array(); $n = 0; foreach ($json->horoscope->$today as $result) { // 中略 $ret[$n]['content'] = (string)$result->content; $ret[$n]['item'] = (string)$result->item; $ret[$n]['money'] = (string)$result->money; $ret[$n]['total'] = (string)$result->total; $ret[$n]['job'] = (string)$result->job; $ret[$n]['color'] = (string)$result->color; $ret[$n]['love'] = (string)$result->love; $ret[$n]['rank'] = (string)$result->rank; $ret[$n]['sign'] = (string)$result->sign; // 中略 $n++; } if (count($ret) <= 0) { $ret = FALSE; } } return($ret); } // END //中略 $today = date('Y/m/d'); $rests = today_fortune($today); echo '今日の'.$today.'の運勢'; foreach ($rests as $rest) { echo('<center>'); echo('<h2>' . $rest['sign'] . '</h2>'); echo('<p>ランキング' . $rest['rank'] .'</p>'); echo('<p>総合点' . $rest['total'] .'</p>'); echo('<p>金運' . $rest['money'] .'</p>'); echo('<p>仕事運' . $rest['job'] .'</p>'); echo('<p>恋愛運' . $rest['love'] .'</p>'); echo('<p>コメント' . $rest['content'] .'</p>'); echo('<p>ラッキーアイテム' . $rest['item'] .'</p>'); } ?>powerd by JugemKey
【PR】原宿占い館 塔里木体裁は適当ですが、キレイにしたら占いコンテンツの出来上がりです。
- 投稿日:2020-07-25T10:45:51+09:00
【Laravel】Authを使ったログインとユーザー登録
Authでログイン機能とユーザー登録機能を用意する
composerでlaravel/uiをインストールし、artisanコマンドでスカフォールドを生成する。
composer require laravel/ui

php artisan ui bootstrap --auth
※uiではbootstrapの他に、vueやreactを用いることもできる。
uiの生成
これでログイン機能とユーザー登録機能は用意できたが、このままではデザインがないのでnpmをインストールし、run devでコンパイルしてデザインを付ける。npm install npm run devデータベースの作成
ユーザー情報を保存するためにデータベースを作成する。
今回はmysqlを使う。
mampのスタート画面のtoolsからphpmyadminを開く。
新規作成からデータベース名を埋めてデータベースを作成する。
laravelの.envファイルの内容を書きえる。DB_HOST=127.0.0.1 DB_PORT=3306 DB_DATABASE=laravel DB_USERNAME=root DB_PASSWORD= ↓↓↓↓↓↓↓↓↓↓↓↓↓↓↓↓↓↓↓ B_CONNECTION=mysql DB_HOST=127.0.0.1 DB_PORT=3306 DB_DATABASE=【mampで決めたデータベースの名前】 DB_USERNAME=root DB_PASSWORD=rootdatabase/migrationsにusers_tableのmigrationが作成されているので、あとはartisanコマンドでmigrationとすればusers_tableが作られてログインとユーザーの登録ができるようになる。
Authを使ってアクセスを制限
Authのログイン機能を使い、ログインしていればページが表示され、ログインしていなければログインページを表示する。
Route::get('sample', SampleContoroller@index})->middleware('auth')->name('sample.index');

#groupを使う場合
Route::group(['prefix' => 'sample', 'middleware' => 'auth'], function () {
    Route::get('/', 'SampleController@index')->name('sample.index');
    Route::get('edit', 'SampleController@edit')->name('sample.edit');
    Route::post('update', 'SampleController@update')->name('sample.update');
});
middlewareをつけることでログインしないとそのページにアクセスできないようにできる。
認証についてバージョン
php:7.3.11
Laravel:7.21.0
- 投稿日:2020-07-25T09:42:01+09:00
Heroku&Macで個人Webサービスをさくっと開発&リリースするまで
はじめに
最近では、HerokuやGithubが無料で使えるので、ある程度の知識があれば無料でWebサービス開発とリリースまで、企業と同様の手法でできてしまう。
ローカル開発環境 ⇔ Githubでソース管理 ⇔ HerokuでホスティングMacローカルでの開発環境構築
localhostで表示確認できるよう、サーバを動かす
Macローカル$ sudo apachectl starthttp://localhost/
にアクセス。
ファイルの実態は「/Library/WebServer/Documents/」
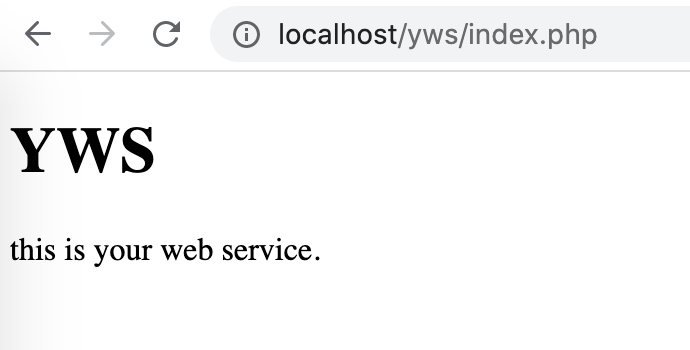
Macローカルでファイル作成
トップページの素のPHPファイルを作ってみる。
/Library/WebServer/Documents/yws/index.php<!doctype html> <html> <head> <title>a</title> <meta http-equiv="content-type" content="text/html; charset=utf-8"> <style type="text/css"><!-- --></style> <script type="text/javascript"><!-- --></script> </head> <body> <h1>YWS</h1> <p>this is your web service.</p> </body> </html>Githubにアップ
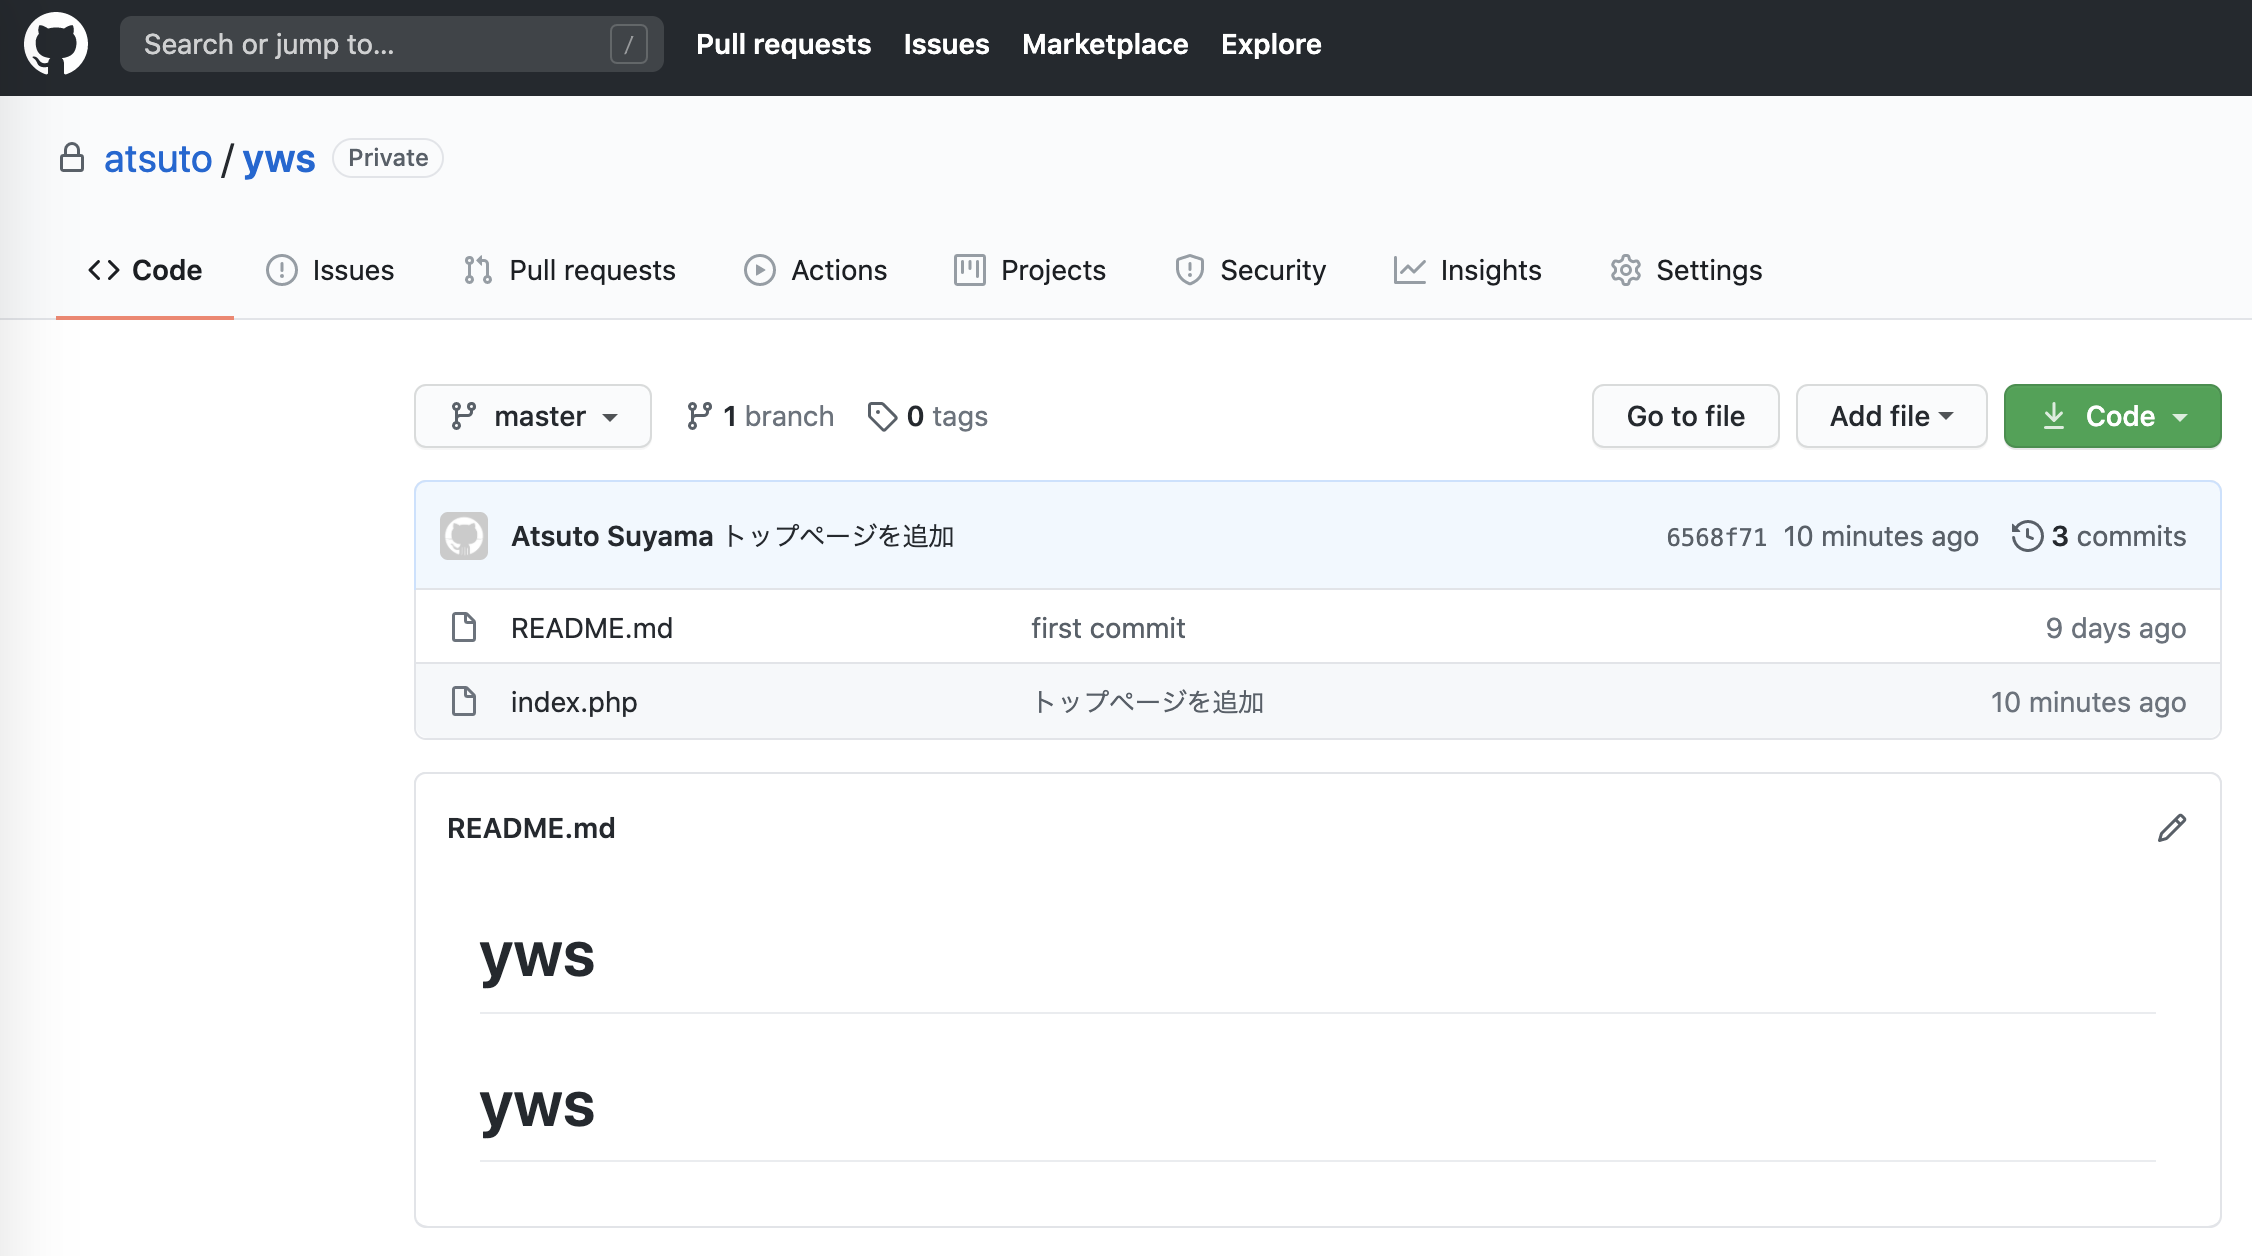
Github側で新しくリポジトリを作成し、Macローカルで作ったファイルのディレクトリをアップする。
Macローカル$ git remote add origin git@github.com:atsuto/yws.git $ git push -u origin master $ git add index.php $ git commit $ git pushこれでGithubで新しく作ったリポジトリにファイルが上がる。
https://github.com/atsuto/yws
Herokuで新規アプリを作成
Herokuにログインし、Create New Appから新しいアプリを作成する
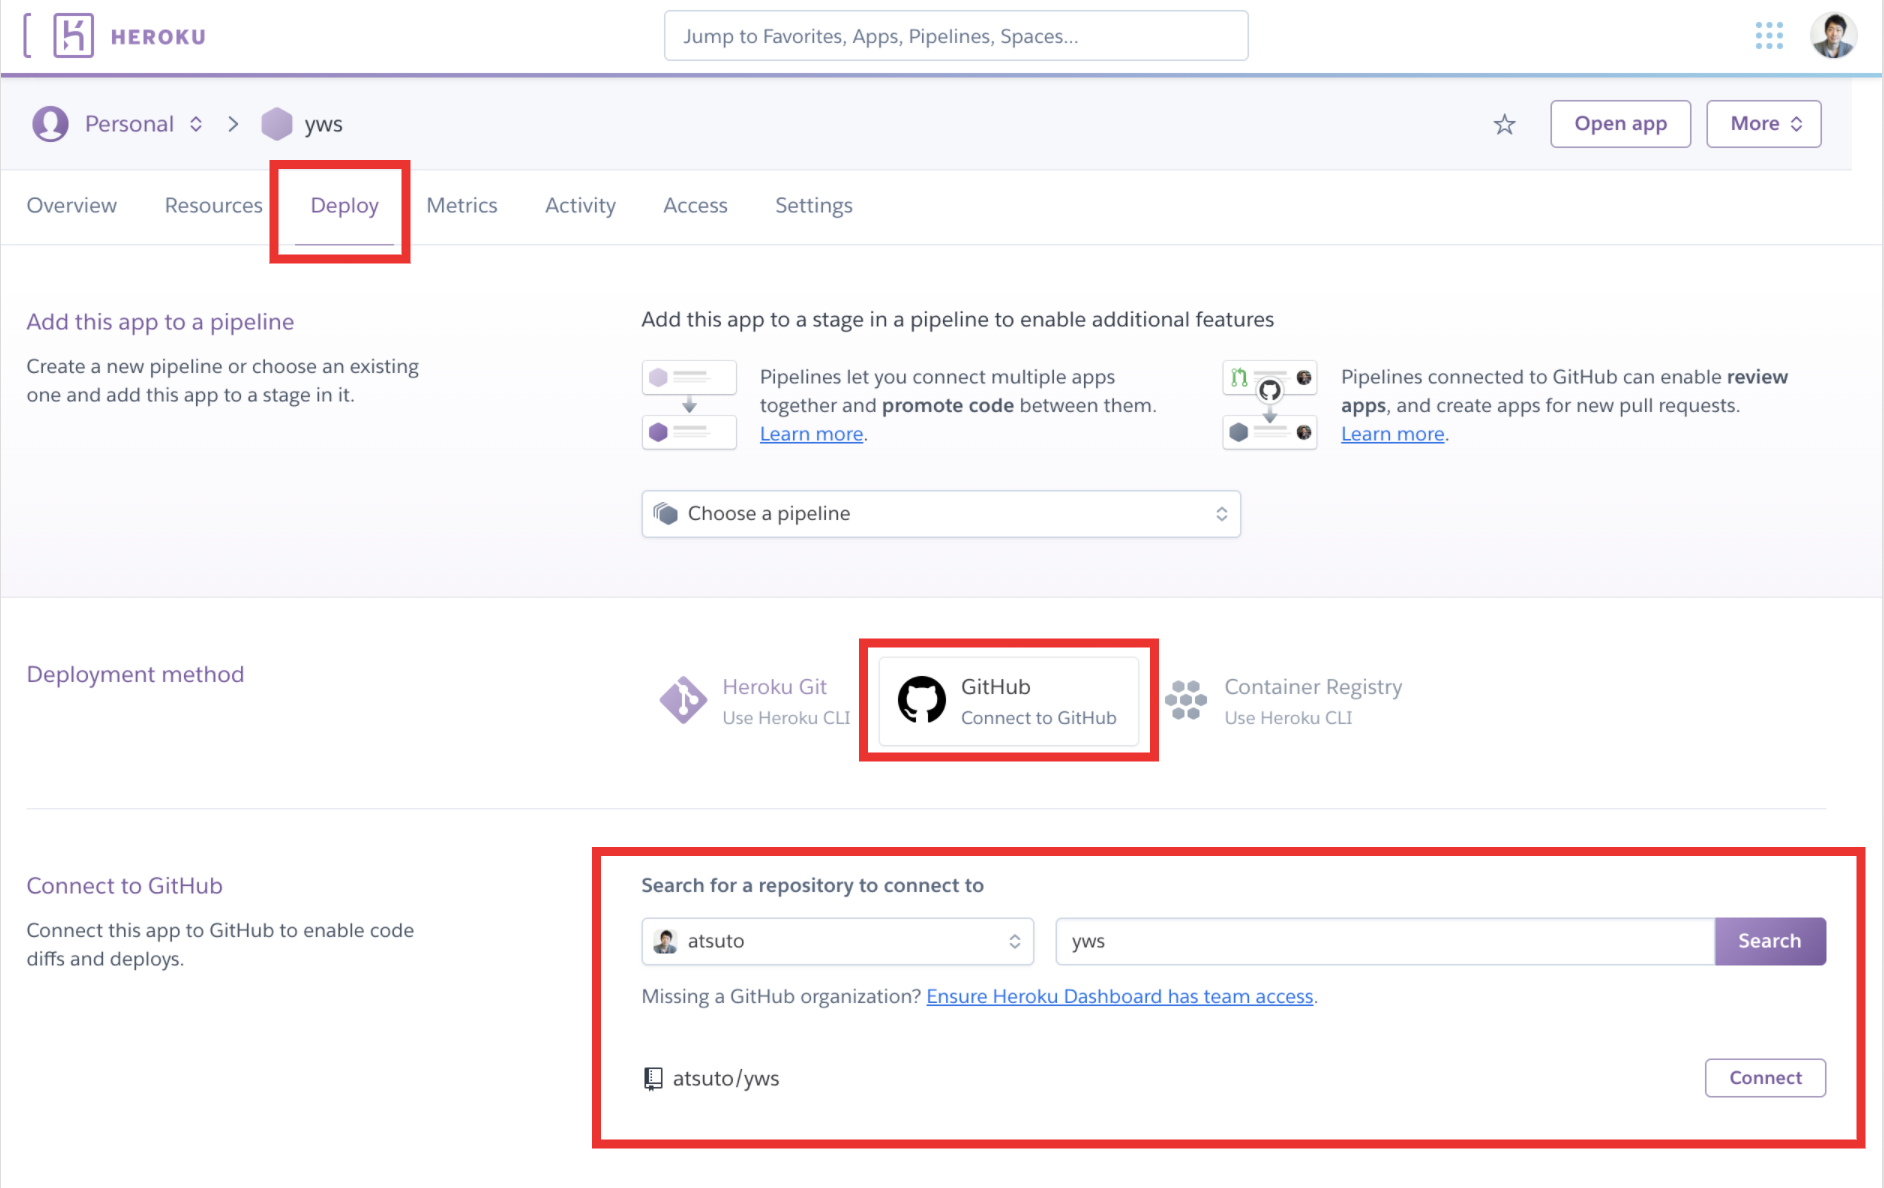
GithubとHerokuを連携
Deployメニューの、Githubを選択し、リポジトリ名で検索し、Connectする。
Herokuでデプロイ
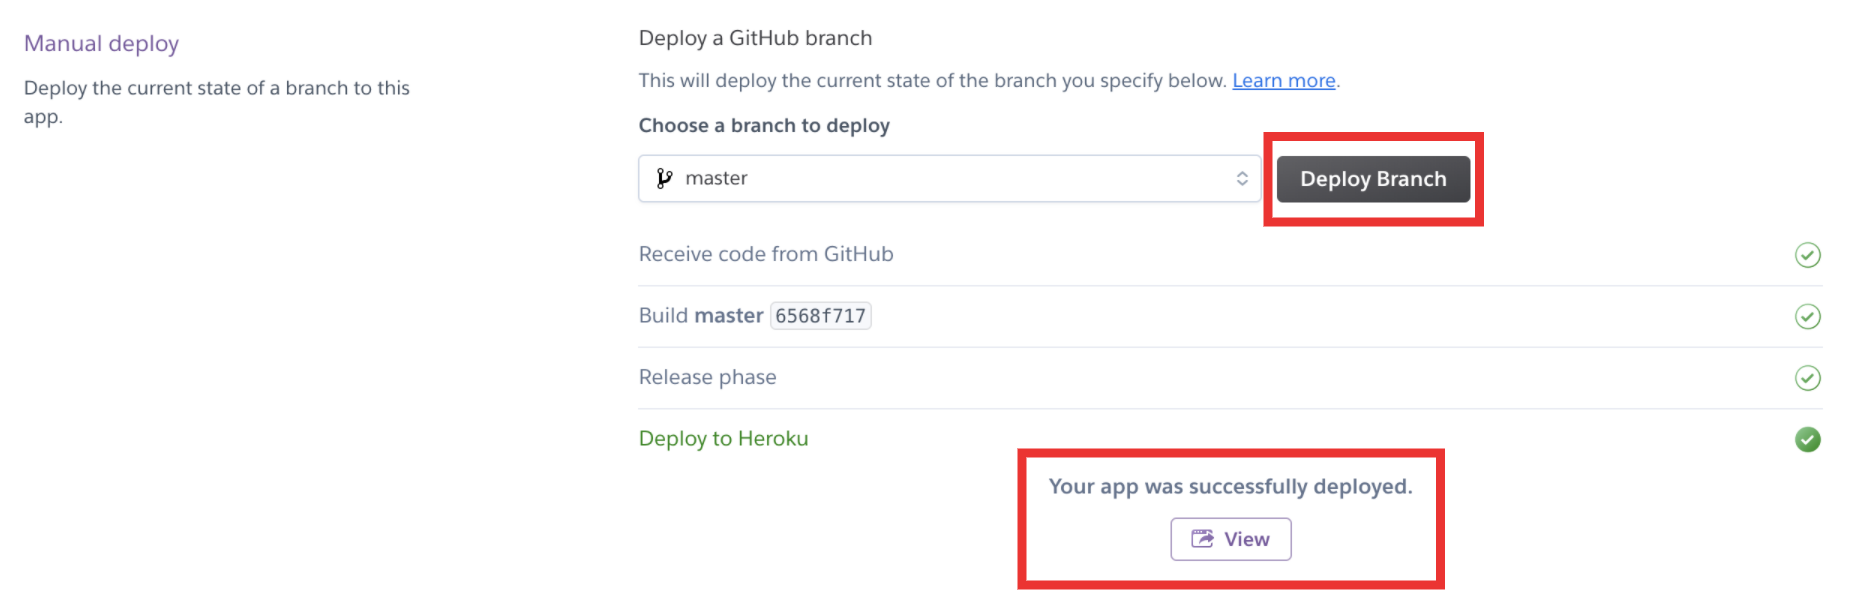
Manual Deployメニューの、Deploy Branchボタンを押す。
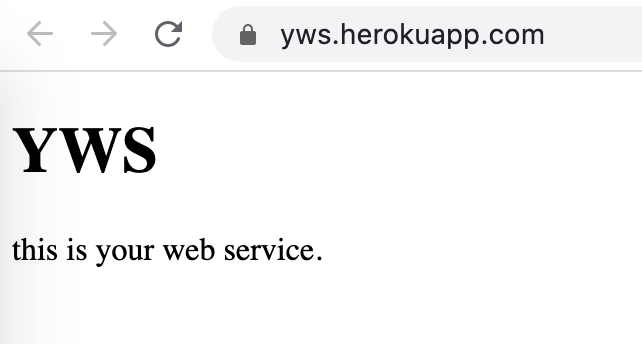
Viewボタンを押すと、Herokuでホスティングされたページが確認できる。
成功!
ここまでで、一通りの流れが完了。
以降は、よく使われる機能やライブラリを追加していきたいと思います。DBを動かす
HerokuのコンソールのResourcesメニュー、Add-onsからHeroku Postgresを追加する。
Settings > Database Credentials > View Credentials のHeroku CLIをコピーして実行する。
psqlのインストールが必要。▸ The local psql command could not be located. For help installing psql, see https://devcenter.heroku.com/articles/heroku-postgresql#local-setuphttps://devcenter.heroku.com/articles/heroku-postgresql#local-setup
React化
- 投稿日:2020-07-25T05:00:46+09:00
【PHP】composer require時にPHP Fatal error: Allowed memory size of XXX bytes exhaustedが表示されたら
環境
- PHP 7.4.5
- Composer 1.10.5
事象
composer requireしようとしたら、メモリ確保できやんでと怒られた。
https://getcomposer.org/doc/articles/troubleshooting.md#memory-limit-errors を見ろと言われているので、それに従う。$ composer require --dev nunomaduro/larastan Using version ^0.6.1 for nunomaduro/larastan ./composer.json has been updated Loading composer repositories with package information Updating dependencies (including require-dev) PHP Fatal error: Allowed memory size of 1610612736 bytes exhausted (tried to allocate 4096 bytes) in phar:///usr/local/bin/composer/src/Composer/DependencyResolver/Solver.php on line 223 Fatal error: Allowed memory size of 1610612736 bytes exhausted (tried to allocate 4096 bytes) in phar:///usr/local/bin/composer/src/Composer/DependencyResolver/Solver.php on line 223 Check https://getcomposer.org/doc/articles/troubleshooting.md#memory-limit-errors for more info on how to handle out of memory errors.手順
※下記の手順は、PHP全体のメモリ上限値を無制限に変更しています。
環境変数COMPOSER_MEMORY_LIMIT=-1を設定し、Composerのメモリ上限値のみ変更することを推奨いたします。
(詳細はこちらを参照してください)# memory_limitの設定値を確認 $ php -r "echo ini_get('memory_limit').PHP_EOL;" 128M # php.iniの場所を確認 $ php -i | grep php.ini Configuration File (php.ini) Path => /usr/local/etc/php/7.4 Loaded Configuration File => /usr/local/etc/php/7.4/php.ini # memory_limitの設定値を更新 $ vi /usr/local/etc/php/7.4/php.ini memory_limit = 128M ↓ memory_limit = -1 # memory_limitの設定値を確認 $ php -r "echo ini_get('memory_limit').PHP_EOL;" -1composer requireをやり直す
うまくいきました:D
$ composer require --dev nunomaduro/larastan
Using version ^0.6.1 for nunomaduro/larastan
./composer.json has been updated
Loading composer repositories with package information
Updating dependencies (including require-dev)
略
Package manifest generated successfully.
44 packages you are using are looking for funding.
Use the `composer fund` command to find out more!
memory_limitの設定値を元に戻す
# memory_limitの設定値を確認
$ php -r "echo ini_get('memory_limit').PHP_EOL;"
-1

# memory_limitの設定値を更新
$ vi /usr/local/etc/php/7.4/php.ini
memory_limit = -1
↓
memory_limit = 128M

# memory_limitの設定値を確認
$ php -r "echo ini_get('memory_limit').PHP_EOL;"
128M
- 投稿日:2020-07-25T02:45:03+09:00
Woocommerceにプロダクトをphpから複数画像付きで追加する
はじめに
- wordpressフォルダに配置されることを想定しています。位置が変わる場合はrequire_onceのパスを変更してください。
- POSTでタイトルはtitle,説明はExplanation,画像(複数)はuploadで 受け取ります。使用方法により書き換えてください。
- SKUや価格等は今回使用しなかったため含まれていません。
- 元となったものでは動作確認をしていますが、編集後動作確認をしていません。
- 投稿用に編集しているので、不自然な箇所があるかもしれません。
全体
受け取る側
<?php
require_once("./wp-load.php");
require_once('./wp-admin/includes/media.php');
require_once('./wp-admin/includes/file.php');
require_once('./wp-admin/includes/image.php');
mb_internal_encoding("UTF-8");


$title = $_POST["title"];
$explanation = $_POST["Explanation"];
if(title){
$post_id = wp_insert_post( array(
    'post_title' => $title,
    'post_content' => "$explanation",
    'post_status' => 'publish',
    'post_type' => "product",
) );

$total = count($_FILES['upload']['name']);
$mediaarray = array();
for( $i=0 ; $i < $total ; $i++ ) {
    $attachment_id = uploadimg($i,$post_id);
    array_push($mediaarray,$attachment_id);
    }
$revarray = array_reverse($mediaarray);
setimg($post_id,$revarray);

function uploadimg($i,$post_id){
    $tmpFilePath = $_FILES['upload']['tmp_name'][$i];
    if ($tmpFilePath != ""){
    $upload = wp_upload_bits($_FILES["upload"]["name"][$i], null, file_get_contents($_FILES["upload"]["tmp_name"][$i]));
    if (!$upload_file['error']) {
    $filename = $upload['file'];
    chmod($filename, 0777);
    $wp_filetype = wp_check_filetype($filename, null);
    $attachment = array(
        'post_mime_type' => $wp_filetype['type'],
        'post_parent' => $post_id,
        'post_title' => sanitize_file_name($filename),
        'post_content' => '',
        'post_status' => 'inherit'
    );
    $attachment_id = wp_insert_attachment($attachment, $filename, $post_id);
    if (!is_wp_error($attachment_id)) {
        $attachment_data = wp_generate_attachment_metadata( $attachment_id, $filename);
        wp_update_attachment_metadata( $attachment_id,  $attachment_data );
        return $attachment_id;
    }
}
}
}

function setimg($post_id, $image_id_array) {
    set_post_thumbnail($post_id, $image_id_array[0]);
    if(sizeof($image_id_array) > 1) {
        array_shift($image_id_array);
        update_post_meta($post_id, '_product_image_gallery', implode(',',$image_id_array));
    }
}
?>
送る側
<form action="[パス]" enctype="multipart/form-data" method="post">
<input type="text" name="title">
<input type="text" name="Explanation">
<input type="file" multiple accept="image/*" name="upload[]">
</form>
解説は後で書きます
- 投稿日:2020-07-25T01:23:22+09:00
「どちらか一方は入力必須」のvalidationをCakePHP3.8で行う
今回のお題
CakePHP3.8を使って実装を進めた際に起きました。
調べてみても意外にヒットしなかったので、自分なりの対処方法を残しておきます。
環境
PHP: 5.6.40
CakePHP: 3.8
OS: CentOS7.2
DB: MySQL5.7.21今さらPHP5.6かよ、というのは置いておき。。
画面イメージ
よくあるこのような画面です。
今回は身長か体重のどちらかは入力必須(両方入力されていてもOK)というお話です。
CakePHP3実装
model
Usersモデルに以下のカラムがある、という前提で進めます。
身長: height
体重: weightsrc/Model/Table/UsersTable.phppublic function validationDefault(Validator $validator) { $validator ->notEmptyString('height', '身長か体重のいずれかを入力してください。', function ($context) { return (bool) (!$context['data']['height']) && (!$context['data']['weight']); }); return $validator; }カスタムバリデーションで
function($value, $context)を使いますが
$valueは当該の項目、$contextはリクエスト全体をそれぞれ定義します。
今回は$contextを使ってどちらの項目もチェックする、ということをしています。
view
src/Template/Users/edit.ctp<dt class="title">身長/体重<br>※いずれか必須<span class="must">必須</span></dt> <dd class="input"> <?= $this->Form->control('height', [ 'type' => 'text', 'label' => false, 'required' => false, ]) ?> cm <?= $this->Form->control('weight', [ 'type' => 'text', 'label' => false, 'required' => false, ]) ?> kg </dd>こちらでは特に変わったことはしていませんね。
結果イメージ
身長のエラーとして表示されることがわかります。
おまけ
さらに身長・体重にそれぞれバリデーションをかける場合も一緒に記載します。
前提条件
・身長・体重のどちらかは入力必須。
・どちらも半角数字での入力しか認めない。
modelにルールを追加
src/Model/Table/UsersTable.phppublic function validationDefault(Validator $validator) { $validator ->notEmptyString('height', '身長か体重のいずれかを入力してください。', function ($context) { return (bool) (!$context['data']['height']) && (!$context['data']['weight']); }) ->numeric('height', '身長は半角数字で入力してください。'); $validator ->allowEmptyString('weight', null) ->numeric('weight', '体重は半角数字で入力してください。'); return $validator; }heightにnumericのvalidationルールを
weightにはallowEmptyStringとnumericのルールを追加しました。
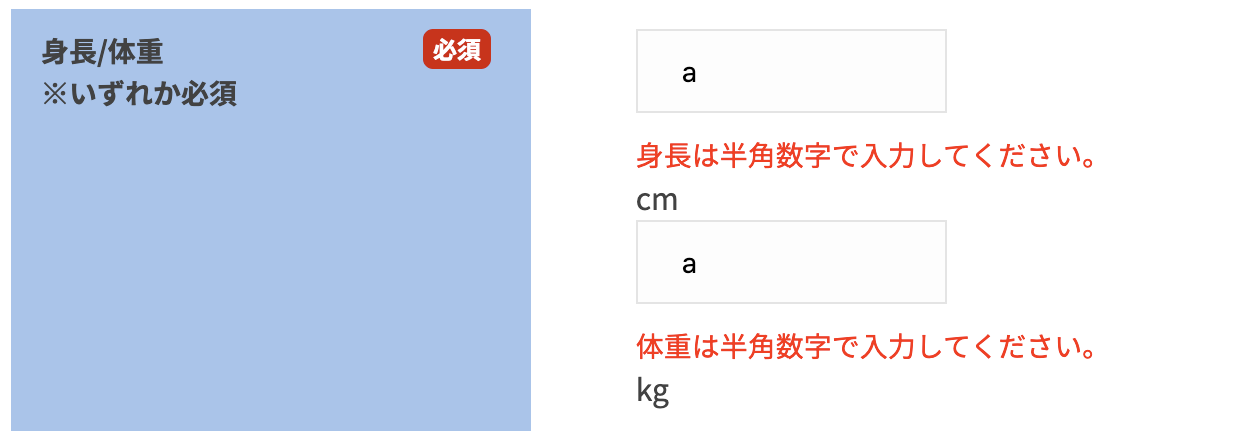
実行
先ほどのviewをそのまま使うと以下のようになってしまいます。
validationメッセージが表示されると、全体的にレイアウトが崩れてしまいました。
まあ、これはviewの書き方が悪い、とも言えますが。。。
対応策
viewを以下のように変更します。
src/Template/Users/edit.ctp<dt class="title">身長/体重<br>※いずれか必須<span class="must">必須</span></dt> <dd class="input"> <?= $this->Form->control('height', [ 'type' => 'text', 'label' => false, 'required' => false, 'error' => false, ]) ?> cm <?= $this->Form->control('weight', [ 'type' => 'text', 'label' => false, 'required' => false, 'error' => false, ]) ?> kg <?= $this->Form->error('height') ?> <?= $this->Form->error('weight') ?> </dd>フォームではエラー表示をオフにし、別のところでエラーを出すようにしました。
結果
崩れていたレイアウトもスッキリしましたね。
まだ需要があるかはわかりませんが、どなたかのお役に立てたのなら嬉しいです。


- 投稿日:2020-07-25T01:23:22+09:00
【画像あり】「どちらか一方は入力必須」のvalidationをCakePHP3.8で行う
今回のお題
CakePHP3.8を使って実装を進めた際に起きました。
調べてみても意外にヒットしなかったので、自分なりの対処方法を残しておきます。
環境
PHP: 5.6.40
CakePHP: 3.8
OS: CentOS7.2
DB: MySQL5.7.21今さらPHP5.6かよ、というのは置いておき。。
画面イメージ
よくあるこのような画面です。
今回は身長か体重のどちらかは入力必須(両方入力されていてもOK)というお話です。
CakePHP3実装
model
Usersモデルに以下のカラムがある、という前提で進めます。
身長: height
体重: weightsrc/Model/Table/UsersTable.phppublic function validationDefault(Validator $validator) { $validator ->notEmptyString('height', '身長か体重のいずれかを入力してください。', function ($context) { return (bool) (!$context['data']['height']) && (!$context['data']['weight']); }); return $validator; }カスタムバリデーションで
function($value, $context)を使いますが
$valueは当該の項目、$contextはリクエスト全体をそれぞれ定義します。
今回は$contextを使ってどちらの項目もチェックする、ということをしています。
view
src/Template/Users/edit.ctp<dt class="title">身長/体重<br>※いずれか必須<span class="must">必須</span></dt> <dd class="input"> <?= $this->Form->control('height', [ 'type' => 'text', 'label' => false, 'required' => false, ]) ?> cm <?= $this->Form->control('weight', [ 'type' => 'text', 'label' => false, 'required' => false, ]) ?> kg </dd>こちらでは特に変わったことはしていませんね。
結果イメージ
身長のエラーとして表示されることがわかります。
おまけ
さらに身長・体重にそれぞれバリデーションをかける場合も一緒に記載します。
前提条件
・身長・体重のどちらかは入力必須。
・どちらも半角数字での入力しか認めない。
modelにルールを追加
src/Model/Table/UsersTable.phppublic function validationDefault(Validator $validator) { $validator ->notEmptyString('height', '身長か体重のいずれかを入力してください。', function ($context) { return (bool) (!$context['data']['height']) && (!$context['data']['weight']); }) ->numeric('height', '身長は半角数字で入力してください。'); $validator ->allowEmptyString('weight', null) ->numeric('weight', '体重は半角数字で入力してください。'); return $validator; }heightにnumericのvalidationルールを
weightにはallowEmptyStringとnumericのルールを追加しました。
実行
先ほどのviewをそのまま使うと以下のようになってしまいます。
validationメッセージが表示されると、全体的にレイアウトが崩れてしまいました。
まあ、これはviewの書き方が悪い、とも言えますが。。。
対応策
viewを以下のように変更します。
src/Template/Users/edit.ctp<dt class="title">身長/体重<br>※いずれか必須<span class="must">必須</span></dt> <dd class="input"> <?= $this->Form->control('height', [ 'type' => 'text', 'label' => false, 'required' => false, 'error' => false, ]) ?> cm <?= $this->Form->control('weight', [ 'type' => 'text', 'label' => false, 'required' => false, 'error' => false, ]) ?> kg <?= $this->Form->error('height') ?> <?= $this->Form->error('weight') ?> </dd>フォームではエラー表示をオフにし、別のところでエラーを出すようにしました。
結果
崩れていたレイアウトもスッキリしましたね。
まだ需要があるかはわかりませんが、どなたかのお役に立てたのなら嬉しいです。