- 投稿日:2020-02-15T21:58:39+09:00
[Android]View の位置を取得する関数たち
はじめに
Android では View の位置を取得する関数が複数用意されています。それらの関数について調べ、どんな違いがあるのかまとめていきたいと思います。
TL;DR
- View.getLocationInWindow と View.getLocationOnScreen である View の座標を取得できる
- View.getLocationInWindow では Activity や Dialog の右端を原点とした座標を取得できる
- View.getLocationOnScreen では 端末のスクリーンの右端を原点とした座標を取得できる。
- どちらの関数も IntArray を渡すことで座標を取得できる、下記の関数を定義すると面倒なく座標を取得できる。
    fun View.getLocationPointInWindow(): Point {
        val array = IntArray(2)
        this.getLocationInWindow(array)
        return Point(array[0], array[1])
    }

    fun View.getLocationPointOnScreen(): Point {
        val array = IntArray(2)
        this.getLocationOnScreen(array)
        return Point(array[0], array[1])
    }
関数の種類
View の位置を取得する関数は 2種類あります。この2種類の関数の違いは画面のどこを原点とするかです。そのため画面のどこを基準にした位置情報が欲しいかで使い分けることになります。
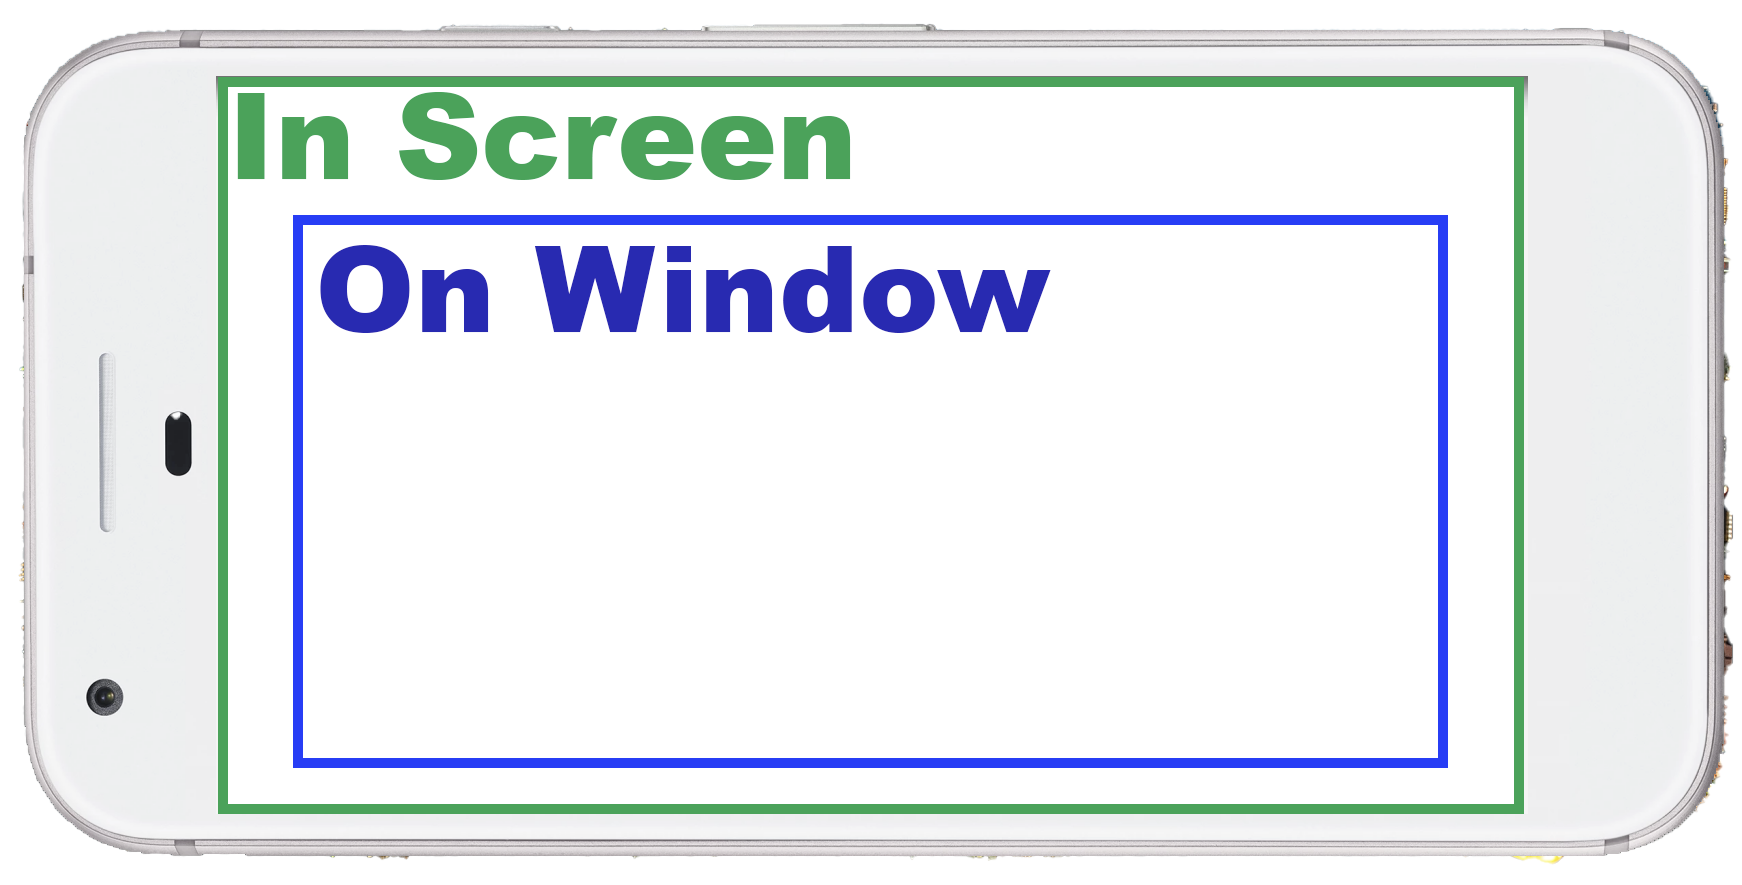
名称 説明 View.getLocationInWindow その View が Window のどこにあるか取得する。Window の左上が原点になります。 Window とは Activity や Dialog のことを指します。 View.getLocationOnScreen その View が Screen のどこにあるか取得する。Screen の左上が原点になります。Screenとは物理的な端末の画面のことです。 InScreenとOnWindowの関係は次のようになりますが、通常の Activity やFragmentの場合は InScreen == OnWindow となる場合が多いです。Dailogであると InScreen != OnWindow となるのでこの2つの関数は意識して使い分ける必要があります。
関数の利用
View.getLocationInWindow と View.getLocationOnScreen の使い方ですがちょっと面倒です。次のようにIntArrayを渡すと、1つめに X座標、 2つめに Y座標が格納されるようになっています。
    val textView = findViewById<TextView>(R.id.two)
    val array = IntArray(2)
    textView.getLocationOnScreen(array)
    Log.v("LOG", "X ${array[0]} Y ${array[1]}")
    textView.getLocationInWindow(array)
    Log.v("LOG", "X ${array[0]} Y ${array[1]}")
IntArray だと取り扱いがづらいので、次のような拡張関数を定義しましょう。拡張関数は Point を返すようにしているので IntArray を定義する必要が無くなるので取り扱いが楽になります。
    fun View.getLocationPointInWindow(): Point {
        val array = IntArray(2)
        this.getLocationInWindow(array)
        return Point(array[0], array[1])
    }

    fun View.getLocationPointOnScreen(): Point {
        val array = IntArray(2)
        this.getLocationOnScreen(array)
        return Point(array[0], array[1])
    }
2つの違いを検証してみる
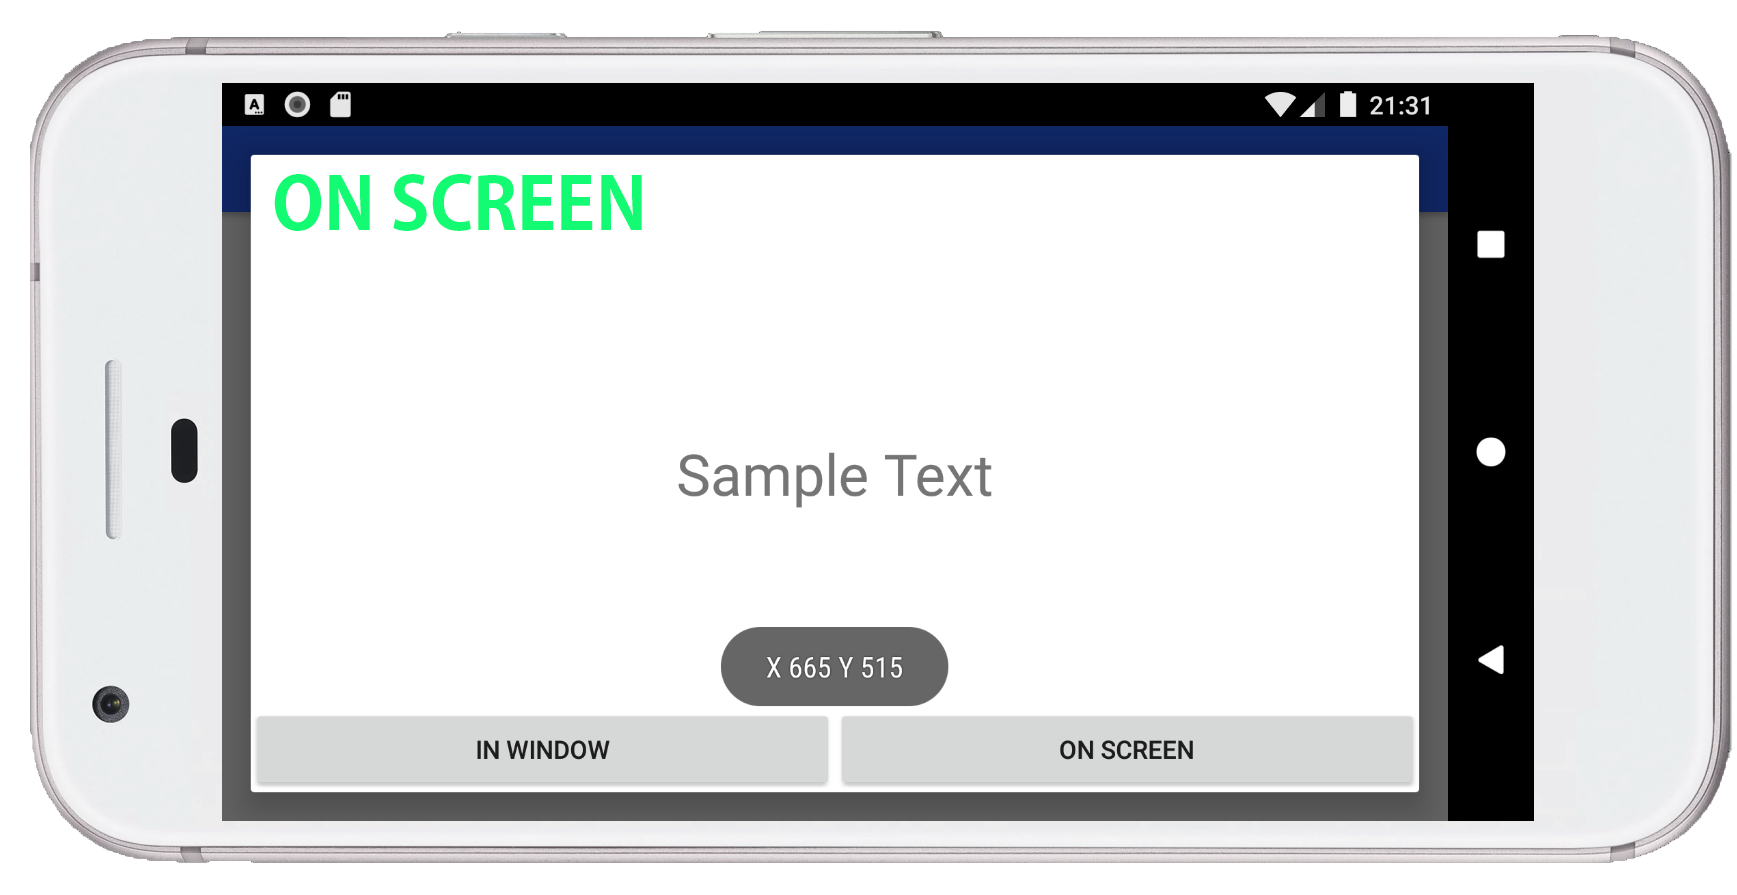
InWindowとOnScreenの違い検証してみたいと思います。ダイアログに表示したTextViewのLocationを取得して比べてみます。すると InWindowが X:665,Y:422、 OnScreenが X:665,Y 515 となりました。このように Screen か Window の右上を原点した座標のどちらかを取得できるようになっています。

ちなみに動作検証に利用したコードになります。
MainActivity.ktclass MainActivity : AppCompatActivity() { override fun onCreate(savedInstanceState: Bundle?) { super.onCreate(savedInstanceState) setContentView(R.layout.activity_main) Dialog(this).apply { setContentView(R.layout.activity_main) window?.setLayout( WindowManager.LayoutParams.MATCH_PARENT, WindowManager.LayoutParams.MATCH_PARENT ) show() val textView = findViewById<TextView>(R.id.text_view) val inWindowButton = findViewById<Button>( R.id.location_in_window_button ) val onScreenButton = findViewById<Button>( R.id.location_on_screen_button ) inWindowButton.setOnClickListener { toastLocationInWindow(textView) } onScreenButton.setOnClickListener { toastLocationOnScreen(textView) } } } private fun View.getLocationPointInWindow(): Point { val array = IntArray(2) this.getLocationInWindow(array) return Point(array[0], array[1]) } private fun View.getLocationPointOnScreen(): Point { val array = IntArray(2) this.getLocationOnScreen(array) return Point(array[0], array[1]) } private fun toastLocationInWindow(view: View) { val point = view.getLocationPointInWindow() Toast.makeText(applicationContext, "X ${point.x} Y ${point.y}", Toast.LENGTH_LONG).show() } private fun toastLocationOnScreen(view: View) { val point = view.getLocationPointOnScreen() Toast.makeText(applicationContext, "X ${point.x} Y ${point.y}", Toast.LENGTH_LONG).show() } }activity_main.xml<?xml version="1.0" encoding="utf-8"?> <FrameLayout xmlns:android="http://schemas.android.com/apk/res/android" xmlns:tools="http://schemas.android.com/tools" android:layout_width="match_parent" android:layout_height="match_parent" xmlns:app="http://schemas.android.com/apk/res-auto" tools:context=".MainActivity"> <TextView android:id="@+id/text_view" android:layout_width="wrap_content" android:layout_height="wrap_content" android:layout_gravity="center" android:text="Sample Text" android:textSize="32sp"/> <androidx.constraintlayout.widget.ConstraintLayout android:layout_width="match_parent" android:layout_height="wrap_content" android:layout_gravity="right|bottom"> <Button android:id="@+id/location_in_window_button" android:layout_width="0dp" android:layout_height="wrap_content" android:layout_gravity="right|bottom" android:text="IN WINDOW" app:layout_constraintStart_toStartOf="parent" app:layout_constraintEnd_toStartOf="@id/location_on_screen_button" app:layout_constraintTop_toTopOf="parent" app:layout_constraintBottom_toBottomOf="parent"/> <Button android:id="@+id/location_on_screen_button" android:layout_width="0dp" android:layout_height="wrap_content" android:text="ON SCREEN" app:layout_constraintStart_toEndOf="@id/location_in_window_button" app:layout_constraintEnd_toEndOf="parent" app:layout_constraintTop_toTopOf="parent" app:layout_constraintBottom_toBottomOf="parent"/> </androidx.constraintlayout.widget.ConstraintLayout> </FrameLayout>参考文献
- 投稿日:2020-02-15T20:30:05+09:00
アンドロイド・カーネル3をビルドする
概要
本文android kernelをbuildする手順をご紹介する。
ソフト バージョン ビルド対象kernel version 3.4 ビルド環境のOS ubuntu 14.04.6 gcc 4.8 ※注意
- OSのバージョンが重要である。
- 同じ手順は ubuntu 12.04.5 にもbuild成功
- 同じ手順はubuntu 18.04.4 はbuild失敗した
- kernelのバージョンが重要である
- 4系kernelはもっと便利な手順がある(はず)
準備
OS上のツールインストール
OSインストール後、以下のコマンドを実施
sudo apt-get update
sudo apt-get install build-essential
sudo apt-get install git
ソース取得
mkdir core
cd core
git clone https://android.googlesource.com/kernel/msm
cd msm
git checkout -b android-msm-flo-3.4-kitkat-mr2 origin/android-msm-flo-3.4-kitkat-mr2
toolchain取得
android専用のgccと関連ツールはここからダウンロード
mkdir toolchain
cd toolchain
tar xf arm-eabi-4.8-26e93f6af47f7bd3a9beb5c102a5f45e19bfa38a.tar.gz
ソース修正
以下のソースを修正が必要
-rw-r--r-- 1 20645 Feb 14 07:16 ./drivers/usb/gadget/f_qdss.c
-rw-r--r-- 1 19059 Feb 14 07:16 ./drivers/video/msm/mipi_novatek.c
-rw-r--r-- 1 34535 Feb 14 07:16 ./net/bluetooth/hci_conn.c
変更箇所はdiffで示す
diff ./drivers/usb/gadget/f_qdss.c ./drivers/usb/gadget/f_qdss.c.org
586c586
< if (!strncmp(name, ch->name, sizeof(*ch->name))) {
---
> if (!strncmp(name, ch->name, sizeof(ch->name))) {
740c740
< if (!strncmp(name, ch->name, sizeof(*ch->name))) {
---
> if (!strncmp(name, ch->name, sizeof(ch->name))) {
diff ./drivers/video/msm/mipi_novatek.c ./drivers/video/msm/mipi_novatek.c.org 683c683 < return snprintf((char *)buf, sizeof(*buf), "%u\n", barrier_mode); --- > return snprintf((char *)buf, sizeof(buf), "%u\n", barrier_mode);diff ./net/bluetooth/hci_conn.c ./net/bluetooth/hci_conn.c.org 396c396 < void hci_le_ltk_reply(struct hci_conn *conn, __u8 ltk[16]) --- > void hci_le_ltk_reply(struct hci_conn *conn, u8 ltk[16]) 406c406 < memcpy(cp.ltk, ltk, sizeof(*ltk)); --- > memcpy(cp.ltk, ltk, sizeof(ltk));ビルド実施
環境変数、必要に応じて修正
export CROSS_COMPILE="/mnt/disk2/toolchain/bin/arm-eabi-"
export ARCH=arm
export PATH=$PATH:/mnt/disk2/toolchain/bin
ビルド設定を指定する
make flo_defconfigビルド実施
makeうまくいけば、以下のようになる
... GZIP arch/arm/boot/compressed/piggy.gzip AS arch/arm/boot/compressed/piggy.gzip.o CC arch/arm/boot/compressed/misc.o CC arch/arm/boot/compressed/decompress.o CC arch/arm/boot/compressed/string.o SHIPPED arch/arm/boot/compressed/lib1funcs.S AS arch/arm/boot/compressed/lib1funcs.o SHIPPED arch/arm/boot/compressed/ashldi3.S AS arch/arm/boot/compressed/ashldi3.o LD arch/arm/boot/compressed/vmlinux OBJCOPY arch/arm/boot/zImage Kernel: arch/arm/boot/zImage is ready/mnt/disk2/core/msm$ ll arch/arm/boot/ total 21144 drwxr-xr-x 5 4096 Feb 15 13:37 ./ drwxr-xr-x 87 4096 Feb 14 07:16 ../ drwxr-xr-x 2 4096 Feb 14 07:16 bootp/ drwxr-xr-x 2 4096 Feb 15 13:37 compressed/ drwxr-xr-x 3 4096 Feb 14 07:16 dts/ -rw-r--r-- 1 46 Feb 14 07:16 .gitignore -rwxrwxr-x 1 15977284 Feb 15 13:37 Image* -rw-rw-r-- 1 123 Feb 15 13:37 .Image.cmd -rw-r--r-- 1 1274 Feb 14 07:16 install.sh -rw-r--r-- 1 3335 Feb 14 07:16 Makefile -rwxrwxr-x 1 6685688 Feb 15 13:37 zImage* -rw-rw-r-- 1 150 Feb 15 13:37 .zImage.cmdエラー対応
ビルドできるまで、いろんな罠に引っ掛かりました。以下にリストする。ご参考になったら嬉しい。
make時以下のエラー発生の場合。上に記載したソース修正を参考
  CC      drivers/usb/core/hcd-pci.o
  CC      drivers/usb/core/inode.o
  LD      drivers/usb/core/usbcore.o
  LD      drivers/usb/core/built-in.o
  CC      drivers/usb/gadget/udc-core.o
  CC      drivers/usb/gadget/ci13xxx_msm.o
  CC      drivers/usb/gadget/android.o
In file included from drivers/usb/gadget/android.c:48:0:
drivers/usb/gadget/f_qdss.c: In function 'qdss_bind_config':
drivers/usb/gadget/f_qdss.c:586:38: warning: argument to 'sizeof' in 'strncmp' call is the same expression as the second source; did you mean to provide an explicit length? [-Wsizeof-pointer-memaccess]
error, forbidden warning: f_qdss.c:586
make[3]: *** [drivers/usb/gadget/android.o] Error 1
make[2]: *** [drivers/usb/gadget] Error 2
make[1]: *** [drivers/usb] Error 2
make: *** [drivers] Error 2
make時以下のエラー発生の場合。上に記載したソース修正を参考
  CC      drivers/video/msm/mipi_dsi_host.o
  LD      drivers/video/msm/msm_mipi.o
  CC      drivers/video/msm/mipi_novatek.o
drivers/video/msm/mipi_novatek.c: In function 'mipi_dsi_3d_barrier_read':
drivers/video/msm/mipi_novatek.c:683:37: warning: argument to 'sizeof' in 'snprintf' call is the same expression as the destination; did you mean to provide an explicit length? [-Wsizeof-pointer-memaccess]
error, forbidden warning: mipi_novatek.c:683
make[3]: *** [drivers/video/msm/mipi_novatek.o] Error 1
make[2]: *** [drivers/video/msm] Error 2
make[1]: *** [drivers/video] Error 2
make: *** [drivers] Error 2
make時以下のエラー発生の場合。上に記載したソース修正を参考
  LD      net/802/built-in.o
  CC      net/bluetooth/af_bluetooth.o
  CC      net/bluetooth/hci_core.o
  CC      net/bluetooth/hci_conn.o
net/bluetooth/hci_conn.c: In function 'hci_le_ltk_reply':
net/bluetooth/hci_conn.c:406:28: warning: argument to 'sizeof' in 'memcpy' call is the same pointer type '__u8 *' as the destination; expected '__u8' or an explicit length [-Wsizeof-pointer-memaccess]
error, forbidden warning: hci_conn.c:406
make[2]: *** [net/bluetooth/hci_conn.o] Error 1
make[1]: *** [net/bluetooth] Error 2
make: *** [net] Error 2
make時以下のエラー発生の場合。上に記載したOSのバージョンを確認ください。Ubuntu 18.04.4 はこのエラー発生し、ここはOSのバージョンを変えると薦める。私も成功した実績がない。
  CC      kernel/exit.o
  CC      kernel/itimer.o
  TIMEC   kernel/timeconst.h
Can't use 'defined(@array)' (Maybe you should just omit the defined()?) at kernel/timeconst.pl line 373.
/home/zxd/core/msm/kernel/Makefile:129: recipe for target 'kernel/timeconst.h' failed
make[1]: *** [kernel/timeconst.h] Error 255
Makefile:949: recipe for target 'kernel' failed
make: *** [kernel] Error 2
make時以下のエラー発生の場合。PATHにtoolchain/arm-eabi/bin があるかどうかを確認。正しいPATH設定は toolchain/bin/ である、ここではない。
  CHK     include/linux/version.h
  CHK     include/generated/utsrelease.h
  HOSTCC  scripts/basic/fixdep
scripts/basic/fixdep.c:106:23: fatal error: sys/types.h: No such file or directory
 #include <sys/types.h>
                       ^
compilation terminated.
make[1]: *** [scripts/basic/fixdep] Error 1
make: *** [scripts_basic] Error 2
git 2.10.5が必要の時 ここ( https://github.com/git/git/releases?after=v2.15.1 ) からダウンロードして、以下の要点でコンパイルする。
unzip /tmp/git-2.10.5.zip
cd git-2.10.5/
sudo apt-get install build-essential libssl-dev libcurl4-gnutls-dev libexpat1-dev gettext unzip
make prefix=/usr/local all
sudo make prefix=/usr/local install
参考
- 手動でカーネルをビルド(https://source.android.com/setup/build/building-kernels-deprecated)
- ビルドのビデオ(https://www.youtube.com/watch?v=5q9Cn3ixRns)
- ソース修正の例(https://github.com/LiquidSmooth-Devices/android_kernel_motorola_msm8960dt-common/commit/a465d392c84869a22866317a277b6dc3c3b241f2)
- コンパイルにはUbuntu14が必要(https://www.linuxquestions.org/questions/linux-general-1/failing-to-build-an-older-kernel-on-a-newer-system-4175644095/)
- エラー対策議論(http://xdabloger.blogspot.com/2016/07/commit-aosp-justarchis-archidroid_49.html#)
- エラー対策議論(https://forum.xda-developers.com/showthread.php?t=2581659&page=12)
- 事前コンパイル済みのツール群(https://android.googlesource.com/platform/prebuilts/)
- AndroidカーネルはLinuxカーネル(https://source.android.com/devices/architecture/kernel)
- Androidカーネル構成(https://source.android.com/devices/architecture/kernel/android-common)
- Linuxカーネル(https://www.kernel.org/category/releases.html)
- NDK必要ないけど(https://developer.android.com/ndk/guides?hl=ja)
- 投稿日:2020-02-15T19:30:03+09:00
(Delphiで)Android用のスプラッシュ画面を用意する
はじめに
Androidアプリのスプラッシュ画面を作成するにあたって自分が躓いたポイント等の備忘録です。
Delphi 10.3 Community Editionで動作確認をしています。画像を用意しよう
Android のアプリケーション オプション スプラッシュ
エンバカデロのドキュメントにある様に、スプラッシュ画面用の画像としては、以下のサイズを用意すれば良いようです。
- 426x320px (小)
- 470x320px (標準)
- 640x480px (大)
- 960x720px (特大)
複数の解像度に対応する際は、ベクタ画像を作っておくのが便利です。
今回は、INKSCAPEを使った方法を紹介します。
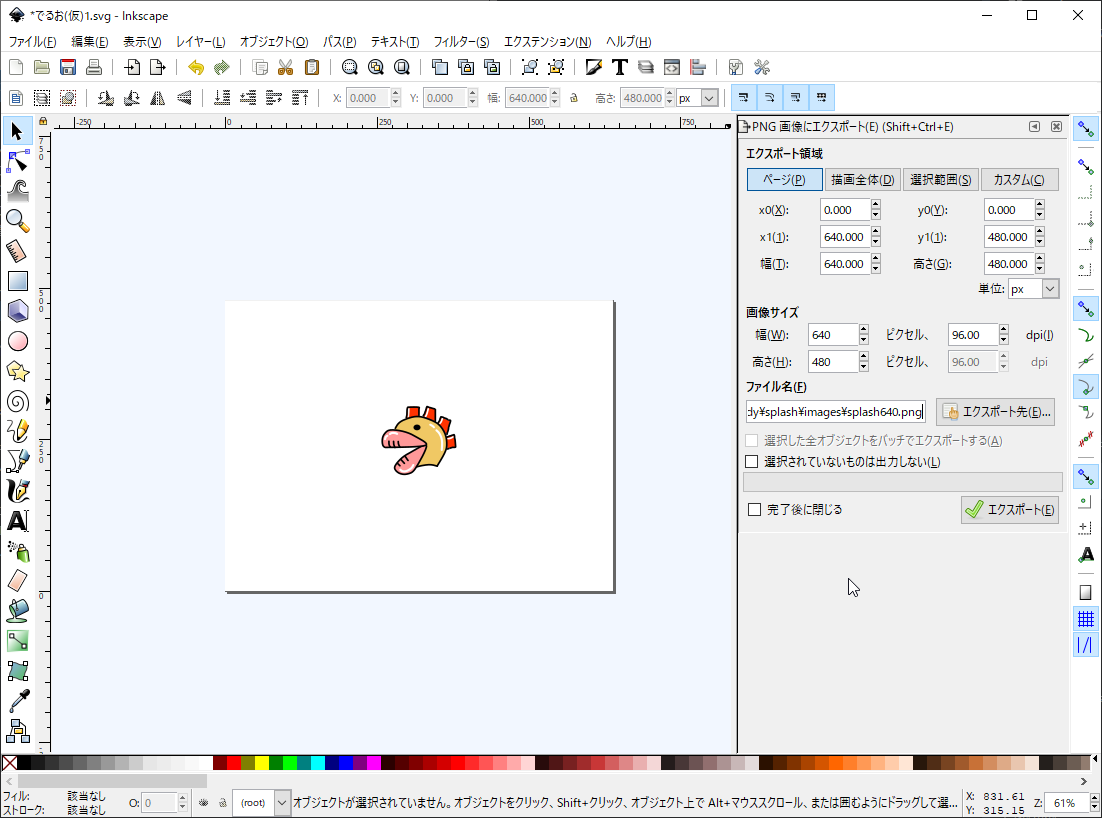
まず予めドキュメントのプロパティにて、キャンバスサイズを640x480、背景色を白以外の色に設定しておきます。でるお(仮)のデータをお借りして、以下のように絵を作成します(並べただけ)。
※INKSCAPEは標準で背景色が透明のため、白色の四角形を でるお の後ろに配置しています。そして、「PNG画像にエクスポート」機能にて、
- 領域:ページ
- 画像サイズ:幅640 高さ480
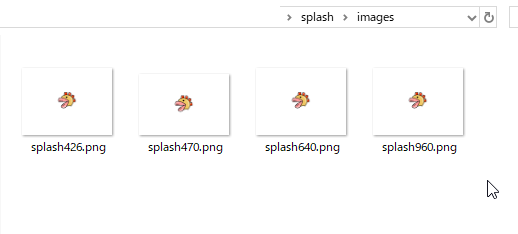
- ファイル名:(プロジェクトで使用するフォルダ)\splash640.png
として、エクスポートを実行します。
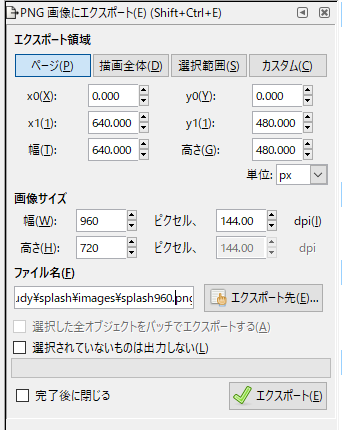
画像ファイルを確認したら、次は画像サイズを変更して、再度エクスポートします。
- 画像サイズ:幅960 高さ720
- ファイル名:(プロジェクトで使用するフォルダ)\splash960.png
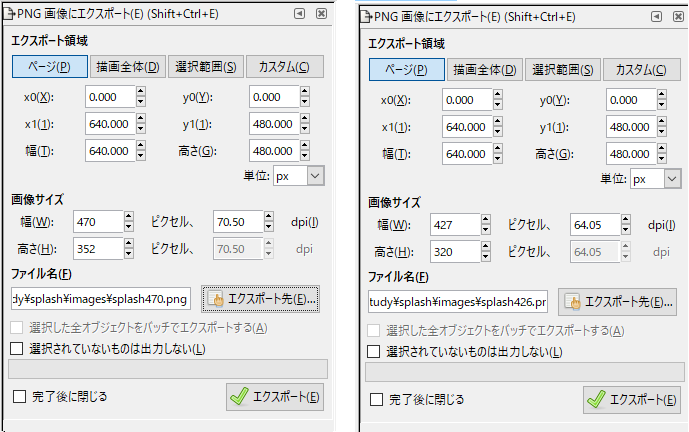
後は同様に、サイズ・名称を470、426と変えながら出力していくのですが、縦横の比率が一致していない為、ぴったりとしたサイズになりません。
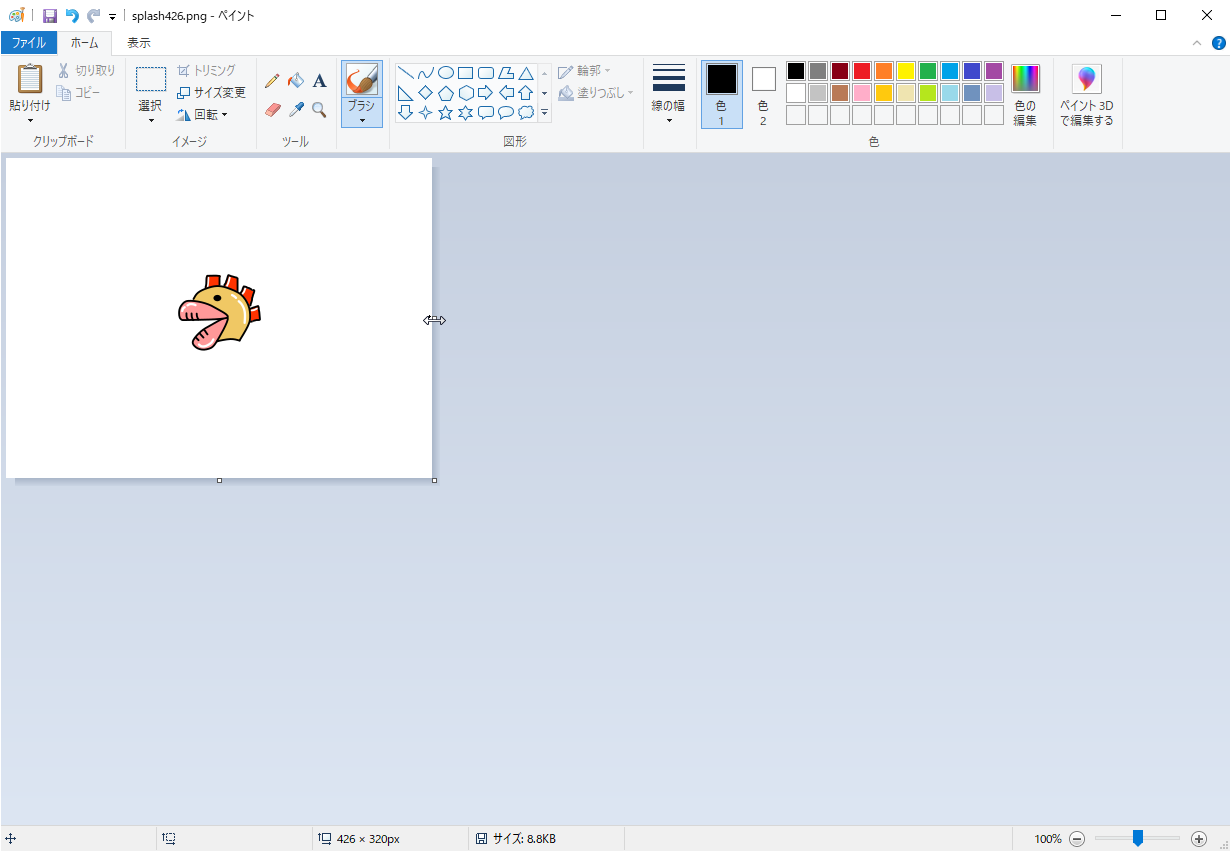
画像のような設定で出力し、後から画像加工ソフトでトリミングします(詳しい操作は割愛)。
(ペイントでもできます)画像が用意できたら、一つの場所にまとめておきます。
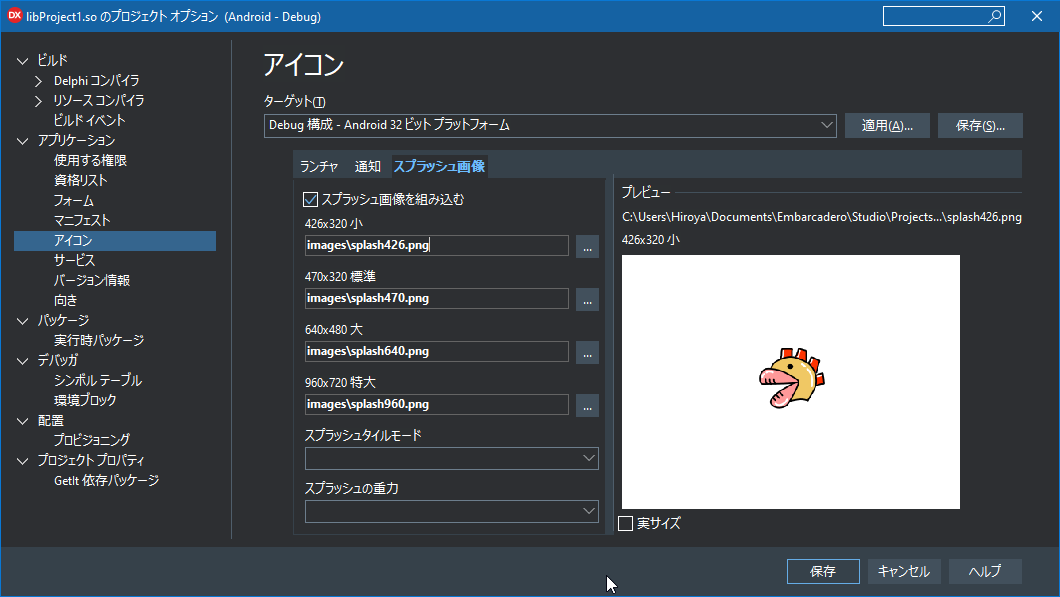
DelphiのIDEにて、プロジェクト→オプション→アプリケーション→アイコンを選択し、ターゲットをAndroidに変え、スプラッシュ画像を設定していきます。
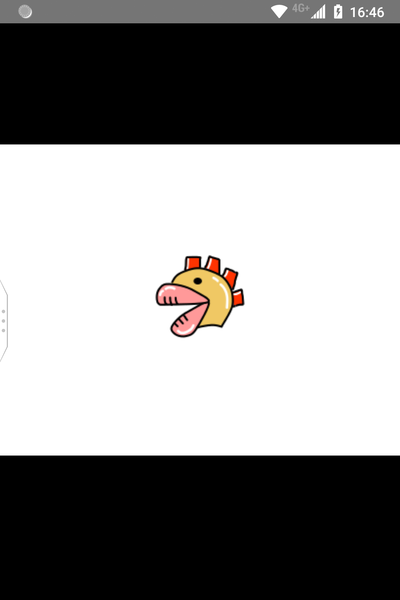
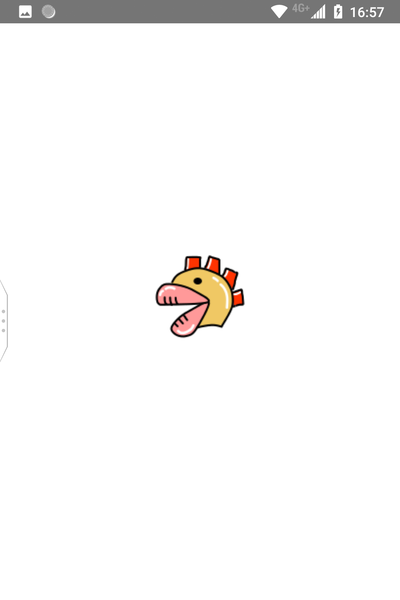
そして実機にてデバッグ実行します。
無事表示されました!が、上下の帯が気になりますね・・。
黒い帯をなんとかしたい
1つ目の方法として、9-Patchファイルを使用する方法があります。
Android での 9-patch 画像の使用でもDraw9Patchで加工するの手間なんじゃ・・。もっと楽な方法は無いんか・・?
ということで、別の方法を紹介します。先ほどデバッグ実行したことで、プロジェクトフォルダ内にAndroidフォルダができていると思います。
Android/Debug/splash_image_def.xmlを、プロジェクトフォルダの直下にコピーします。
テキストエディタで開くと、次のようになっています。splash_image_def.xml<?xml version="1.0" encoding="utf-8"?> <layer-list xmlns:android="http://schemas.android.com/apk/res/android" android:opacity="opaque"> <item android:drawable="@android:color/black" /> <item> <bitmap android:src="@drawable/splash_image" android:antialias="true" android:dither="true" android:filter="true" android:gravity="center" android:tileMode="disabled"/> </item> </layer-list>
@android:color/blackを@android:color/whiteに変えたらいけそうですね!変更して上書き保存します。
IDEに戻り、プロジェクト→配置を選択し、変更したsplash_image_def.xmlを追加します。
配置先をres\drawble\に変更し、自動生成される方のチェックを外しておきます。
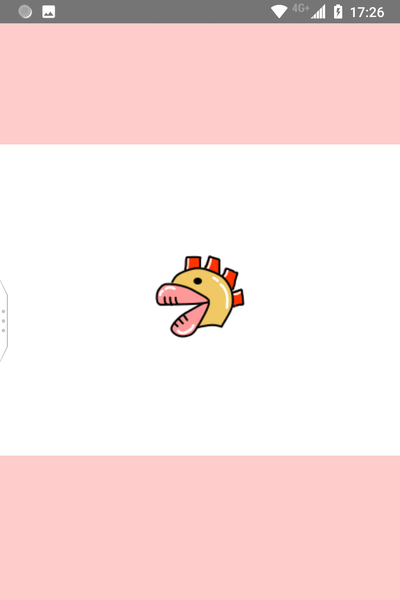
再度デバッグ実行すると・・うまくいきました!
他の背景色のときはどうするか
item android:drawable="@android:color/black"部分をshapeタグに置き換えます。splash_image_def.xml<?xml version="1.0" encoding="utf-8"?> <layer-list xmlns:android="http://schemas.android.com/apk/res/android" android:opacity="opaque"> <item> <shape android:shape="rectangle" > <solid android:color="#FFFFCCCC" /> </shape> </item> <item> <bitmap android:src="@drawable/splash_image" android:antialias="true" android:dither="true" android:filter="true" android:gravity="center" android:tileMode="disabled"/> </item> </layer-list>
できました。
splash_image_def.xmlを加工すれば色々できそうなことが見えてきます。が、これより先はAndroidに特化した話になってくるので・・(知識不足)。以上です!
\にじんどるで/

あれっ・・。
くっきりさせたい
各解像度の画像を用意した割に、低解像度用の画像が引き延ばし表示されている気がします・・。
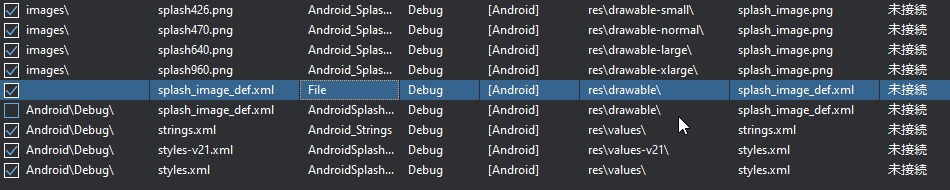
何故でしょうか。配置設定を見てみます。
アイコン類はdrawable-*dpiなのに、スプラッシュはdrawable-smallなどの配置先になっています。
これらは、画面の物理サイズに応じて選択されるようです。過去のAndroid側の仕様が画素の高密度化と合わなくなってきている感じでしょうか・・。
とりあえず、次のように設定を変えてみました。(splash426.png はそのままで、以降をmdpi、hdpi、xhdpiに変更。)
そうすると、変わった・・?
\くっきり/

やった! (おしまい)


- 投稿日:2020-02-15T15:10:42+09:00
Stetho realm 導入
はじめに
以前Stetho導入という記事を書いていて、その時はRealmに対応していなかったんですが、業務上導入する必要が出てきたので対応しました。
その時にエラーにハマってしまったのでその対応内容を残しておきます。どうやって導入するか
まずこちらがライブラリ。
Stethoとは別線です。
こちらのREADMEに従っていけばとりあえず導入は可能です。何でハマったか
アプリの起動はできるのですが、Realmを見ようとするとアプリがExceptionを吐いてしまうという現象が起きていました。悲しい。
その時の実装
App.ktのonCreate()で以下のように修正しました。(GithubのREADMEそのまま)
        Stetho.initialize(
                Stetho.newInitializerBuilder(this)
                        .enableDumpapp(Stetho.defaultDumperPluginsProvider(this))
                        .enableWebKitInspector(RealmInspectorModulesProvider.builder(this).build())
                        .build())
どう直したか
RealmInspectorModulesProviderをbuild()する際にオプションを追加する必要がありました。
また、build.gradleのrepositoriesに追加するURLがGithubのissueの中で違うものが挙がっていたのでそちらに変えました。allprojects { repositories { maven { url 'https://github.com/mak0t0san/stetho-realm/raw/master/maven-repo' } } } implementation 'com.uphyca:stetho_realm:2.3.0'Stetho.initialize( Stetho.newInitializerBuilder(this) .enableDumpapp(Stetho.defaultDumperPluginsProvider(this)) .enableWebKitInspector(RealmInspectorModulesProvider.builder(this).withDeleteIfMigrationNeeded(true).build()) .build())終わりに
今回とりあえずこれで動くようになりました。
しかしstetho_realmは2017年から更新がかかっていないようなので、別のライブラリなんかを探すか、あるいは自分で作るかしないといけなさそうですね。
また、小規模なDBであればよいのですが、数十万件のレコードがあるようなものの場合そもそも開けない、なんてこともあったりするので要注意です。
今のPJの場合数十万件のレコードを見たい、という状況だったのでないよりはマシ、くらいの状態になっていますし、仮に見れたとしても検索(select)ができないので探すのも一苦労です。
おとなしくRealmが出しているRealm Studioを購入(あるいは30日間の無料期間)で対応するか、Realm Browserを使うか、でしょうかね。
(一昔前はbrew cask install realm-browserでインストールできたようですが、今はbrew searchしても出てこないのでHomeBrew Caskからはなくなってしまったようです)参考
- 投稿日:2020-02-15T15:05:54+09:00
AndroidでOpenCVを使ってみる
TL;DR
Android StudioでOpenCV SDKを使ったアプリの作り方.
環境
- OpenCV 4.2.0
- Android Studio 3.5.3
- macOS Catalina 10.15.3
- kotlin
事前準備
新規プロジェクト作成
Android Studioで空のアプリを作成しておく.OpenCVのダウンロード
OpenCVのリリースサイト からandroid版のSDKをダウンロードし適当な場所に解凍しておく.
今回は opencv-4.2.0-android-sdk.zip を使用.実装
OpenCVの取り込み
- OpenCVを組み込みたいプロジェクトをAndroid Studioで開く.
- メニューの
File->New->Import Moduleを選択.- 事前に解凍して置いた OpenCV SDK の
sdkフォルダを指定してインポート. Module nameはデフォルトだとsdkになるのでopencv-sdkとかにしてもよいかも.モジュールの依存関係を追加
アプリ側の
build.gradleの dependencies に sdk を追加.build.gradledependencies { implementation project(path: ':sdk') ...カメラパーミッションを追加
アプリの
AndroidManifest.xmlにカメラパーミッションを追加.AndroidManifest.xml<uses-permission android:name="android.permission.CAMERA" /> <uses-feature android:name="android.hardware.camera" android:required="false" /> <uses-feature android:name="android.hardware.camera.autofocus" android:required="false" />
Activity/Fragmentにもパーミッション取得の処理を書いておく.画面レイアウト作成
ActivityのレイアウトXMLにカメラビューを追加.
activity_main.xml<?xml version="1.0" encoding="utf-8"?> <androidx.constraintlayout.widget.ConstraintLayout xmlns:android="http://schemas.android.com/apk/res/android" xmlns:app="http://schemas.android.com/apk/res-auto" xmlns:tools="http://schemas.android.com/tools" android:layout_width="match_parent" android:layout_height="match_parent" tools:context=".MainActivity"> <org.opencv.android.JavaCameraView android:id="@+id/camera_view" android:layout_width="0dp" android:layout_height="0dp" app:layout_constraintBottom_toBottomOf="parent" app:layout_constraintEnd_toEndOf="parent" app:layout_constraintStart_toStartOf="parent" app:layout_constraintTop_toTopOf="parent" app:show_fps="true" /> </androidx.constraintlayout.widget.ConstraintLayout>コードを書く
Activityにコードを追加.
setCameraPermissionGranted()を忘れないように注意.MainActivity.ktoverride fun onCreate(savedInstanceState: Bundle?) { super.onCreate(savedInstanceState) setContentView(R.layout.activity_main) OpenCVLoader.initDebug() // ← OpenCVライブラリ読込 initCamera() } fun initCamera() { // リスナ設定 camera_view.setCvCameraViewListener(object : CameraBridgeViewBase.CvCameraViewListener2 { override fun onCameraViewStarted(width: Int, height: Int) { } override fun onCameraViewStopped() { } override fun onCameraFrame(inputFrame: CameraBridgeViewBase.CvCameraViewFrame?): Mat { // このメソッド内で画像処理. 今回はポジネガ反転. val mat = requireNotNull(inputFrame).rgba() Core.bitwise_not(mat, mat) return mat } }) // プレビューを有効にする camera_view.setCameraPermissionGranted() camera_view.enableView() }実行結果
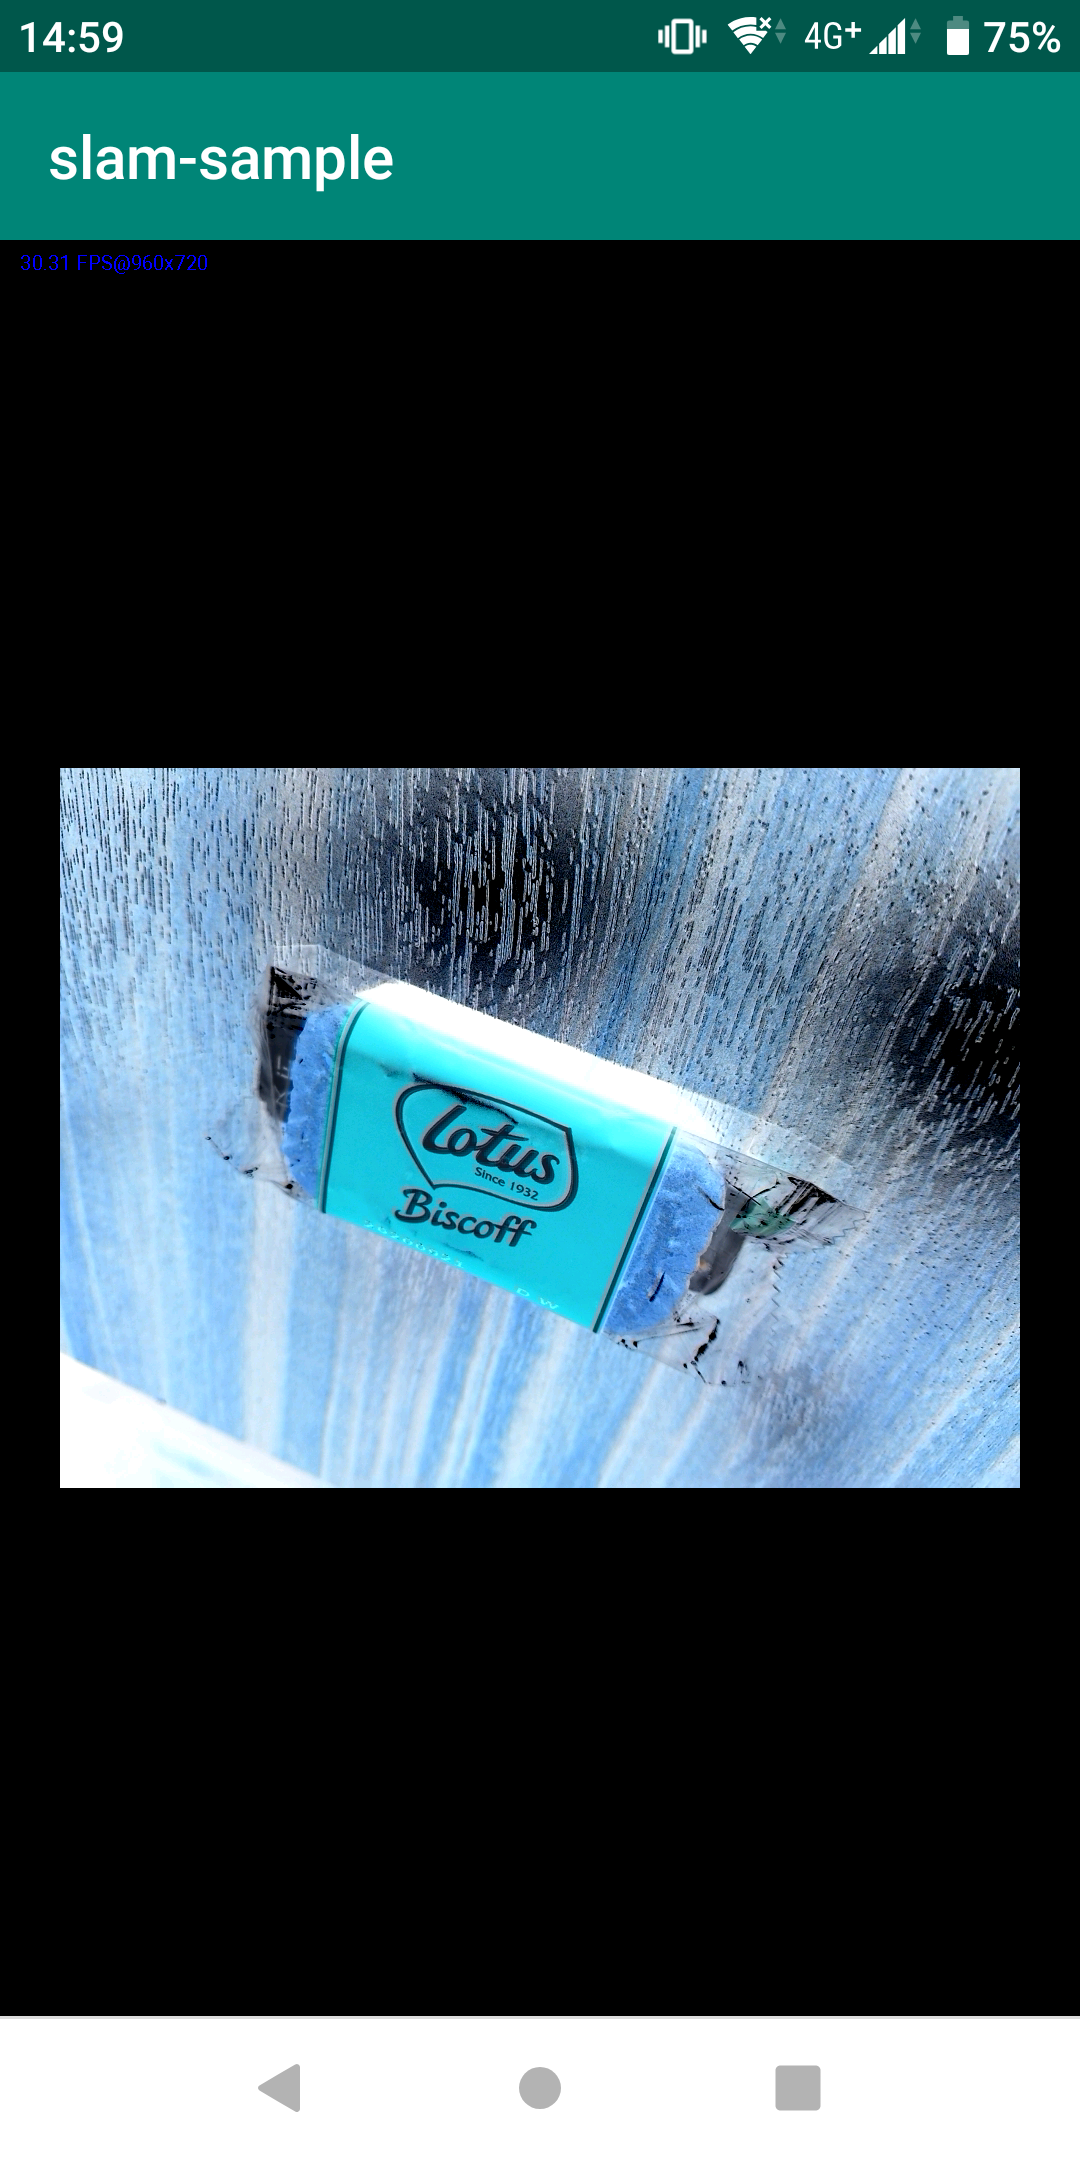
- 投稿日:2020-02-15T14:37:01+09:00
Flutter PlatformViewを利用した簡易WebViewプラグインの作り方
はじめに
Flutterの
PlatformView機能を利用したView系のプラグインの作り方について解説します。
解説用の題材として、TextViewとWebViewを用いました。
PlatformViewとは?
通常、FlutterはFlutterのフレームワークで用意されているウィジェットしか利用することが出来ません (ウィジェット一覧はWidget catalog) が、PlatformView機能を利用するとプラットフォーム (Android/iOS) 固有のViewをFlutterのウィジェットとして利用することが出来ます。
Flutterフレームワークは、この
PlatformView機能をAndroid, iOS向けに使い易いAPIにして機能を提供してくれています。それがそれぞれAndroidViewとUiKitViewです。基本的に開発者はこの機能を利用します。ソースコードはここです。ただし、表示を行うだけであれば上記を利用すればOKですが、Platform側とやりとりを行うには独自で通信部分を作成する必要があり、その時にメインで利用するのが
MethodChannelです。MethodChannelについてはFlutter MethodChannel APIの使い方を併せて参照してください。PlaftormViewの仕組み
OpenGLやVulkan等のグラフィックスの知識がある方は理解し易いかもしれませんが、プラットフォーム側で仮想画面 (サーフェス) に描画し、その描画データをFlutter側で取得し、Flutter側のレンダリングによりFlutter側の画面と合成し、最終的な画面を生成しています。
以下、Android版のPlatformViewのイメージ図です。
iOS側は実装を追いかけていませんが、Flutterの最後の秘宝、Platform Viewの実装を調べに行くが参考になると思います。おそらくiOSでもAndroidと同じようなことをやっていると思います。
基本的なプラグインの作成の流れ (View系の話に限定)
- 【プラットフォーム側】 PlatformViewを継承したプラグイン用のViewを作成
- 【プラットフォーム側】 PlatformViewFactoryを継承したクラスで上記のViewを生成
- 【プラットフォーム側】 FlutterPluginを継承したプラグイン登録クラス内でChannel登録
- 【プラットフォーム側】 MainActivityで上記プラグインクラスを登録
- 【Flutter側】 プラグイン対象Viewの独自ウィジェットを作成し、その中でAndroidViewウィジェットを生成
- 【Flutter側】 必要があれば、上記の独自ウィジェットの中でMethodChannelを利用して相互呼び出し
- 【Flutter側】 上記の独自ウィジェットを画面のレイアウトに組み込む
Flutter Framework内の実装的な部分では、System Channelsのplatform_viewを利用しています。リンク先にQiitaの記事を書いていますので、参考にしてください。
プラットフォーム (Android) 側のコード
プラットフォーム側について解説します。
1. Flutter用のWebViewプラグインView作成
io.flutter.plugin.platform.PlatformViewを継承したFlutterWebViewクラスを作成します。内部では
WebViewをインスタンスし、MethodChannelでイベントが発生した時にその引数のデータ (URL) を開くというシンプルなサンプルです。
WebViewはAndroidXを利用していますが、詳細はこちらを参照してください。同じくMethodChannelについてもこちらにまとめていますので、参照して下さい。MethodChannelの注意点としては、各PlatformView事にFlutter側からint側のidが振られるため、それを意識したチャンネル名を指定する必要があることです。
FlutterWebView.ktpackage com.example.flutter_platform_view_app import android.content.Context import android.view.View import android.webkit.WebView import io.flutter.plugin.common.BinaryMessenger import io.flutter.plugin.common.MethodCall import io.flutter.plugin.common.MethodChannel import io.flutter.plugin.common.MethodChannel.MethodCallHandler import io.flutter.plugin.platform.PlatformView class FlutterWebView internal constructor(context: Context?, messenger: BinaryMessenger?, id: Int) : PlatformView, MethodCallHandler { private val webView: WebView private val methodChannel: MethodChannel init { webView = WebView(context) webView.apply { settings.apply { // enable Javascript javaScriptEnabled = true setSupportZoom(true) builtInZoomControls = true displayZoomControls = false // no zoom button loadWithOverviewMode = true useWideViewPort = true domStorageEnabled = true } } methodChannel = MethodChannel(messenger, "plugins.kurun.views/webview_$id") methodChannel.setMethodCallHandler(this) } @Override override fun getView(): View { return webView } @Override override fun onMethodCall(methodCall: MethodCall, result: MethodChannel.Result) { when (methodCall.method) { "setUrl" -> setUrl(methodCall, result) else -> result.notImplemented() } } private fun setUrl(methodCall: MethodCall, result: MethodChannel.Result) { val url = methodCall.arguments as String webView.loadUrl(url) result.success(null) } @Override override fun dispose() { webView.destroy() } }2. PlatformViewFactoryクラスの作成
PlatformViewFactoryクラスを継承したWebVewFactoryクラスを用意します。
PlatformViewを利用する場合、必ずこのPlatformViewFactoryを用意する必要があります。この中で先ほど作成したFluterWebViewをインスタンスします。WebViewFactory.ktpackage com.example.flutter_platform_view_app import android.content.Context import io.flutter.plugin.common.BinaryMessenger import io.flutter.plugin.common.StandardMessageCodec import io.flutter.plugin.platform.PlatformView import io.flutter.plugin.platform.PlatformViewFactory class WebViewFactory(private val messenger: BinaryMessenger) : PlatformViewFactory(StandardMessageCodec.INSTANCE) { override fun create(context: Context, id: Int, o: Any?): PlatformView { return FlutterWebView(context, messenger, id) } }3. FlutterPluginクラスの作成
io.flutter.embedding.engine.plugins.FlutterPluginを継承したWebViewPluginクラスを用意します。このクラスを最終的にAndroidのTopからプラグインとして登録することになります。WebViewPlugin.ktpackage com.example.flutter_platform_view_app import androidx.annotation.NonNull import io.flutter.embedding.engine.plugins.FlutterPlugin class WebViewPlugin : FlutterPlugin { override fun onAttachedToEngine(@NonNull flutterPluginBinding: FlutterPlugin.FlutterPluginBinding) { flutterPluginBinding.platformViewRegistry .registerViewFactory( "plugins.kurun.views/webview", WebViewFactory(flutterPluginBinding.binaryMessenger) ) } override fun onDetachedFromEngine(binding: FlutterPlugin.FlutterPluginBinding) { } }4. 作成したプラグインの登録
最後にプラグインを登録して完了です。
今回はMainActivityからWebViewPluginを登録します。MainActivity.ktpackage com.example.flutter_platform_view_app import androidx.annotation.NonNull import io.flutter.embedding.android.FlutterActivity import io.flutter.embedding.engine.FlutterEngine import io.flutter.plugins.GeneratedPluginRegistrant class MainActivity: FlutterActivity() { override fun configureFlutterEngine(@NonNull flutterEngine: FlutterEngine) { GeneratedPluginRegistrant.registerWith(flutterEngine) flutterEngine.plugins.add(WebViewPlugin()) } }Flutter (Dart) 側のコード
次にFlutterのDart側の対応について解説します。
5. WebViewウィジェットの作成
WebViewクラスを作成します。ポイントはAndroidViewを利用して先ほど用意したプラットフォーム側のWebViewプラグイン名を指定する点です。
AndroidViewのソースコードはこちらサンプルコードを見ていただければ分かると思いますが、非常に簡単に利用が出来ます。
web_view.dartimport 'dart:async'; import 'package:flutter/foundation.dart'; import 'package:flutter/material.dart'; import 'package:flutter/services.dart'; typedef void WebViewCreatedCallback(WebViewController controller); class WebView extends StatefulWidget { const WebView({ Key key, this.onWebViewViewCreated, }) : super(key: key); final WebViewCreatedCallback onWebViewViewCreated; @override State<StatefulWidget> createState() => _WebViewState(); } class _WebViewState extends State<WebView> { @override Widget build(BuildContext context) { if (defaultTargetPlatform == TargetPlatform.android) { return AndroidView( viewType: 'plugins.kurun.views/webview', onPlatformViewCreated: _onPlatformViewCreated, ); } return Text( '$defaultTargetPlatform is not supported!'); } void _onPlatformViewCreated(int id) { if (widget.onWebViewViewCreated == null) return; widget.onWebViewViewCreated(new WebViewController._(id)); } }6. MethodChannelでのプラットフォーム側の呼び出し (データ送信)
サンプルコードは、
onPlatformViewCreatedのコールバックのタイミングでプラットフォーム側のWebViewプラグインのMethodChannelを作成し、main.dart側から任意のURLを送信し出来るようにしました。web_view.dartclass WebViewController { WebViewController._(int id) : _channel = new MethodChannel('plugins.kurun.views/webview_$id'); final MethodChannel _channel; Future<void> setUrl(String url) async { assert(url != null); return _channel.invokeMethod('setUrl', url); } }7. 画面の作成
先ほど作成したWebViewウィジェットを好きに配置すれば完成です!
簡単ですよね?※TextViewプラグインについては解説していませんが、以下のサンプルコードには出てきます…。基本的な作りはWebViewプラグインと同じです!
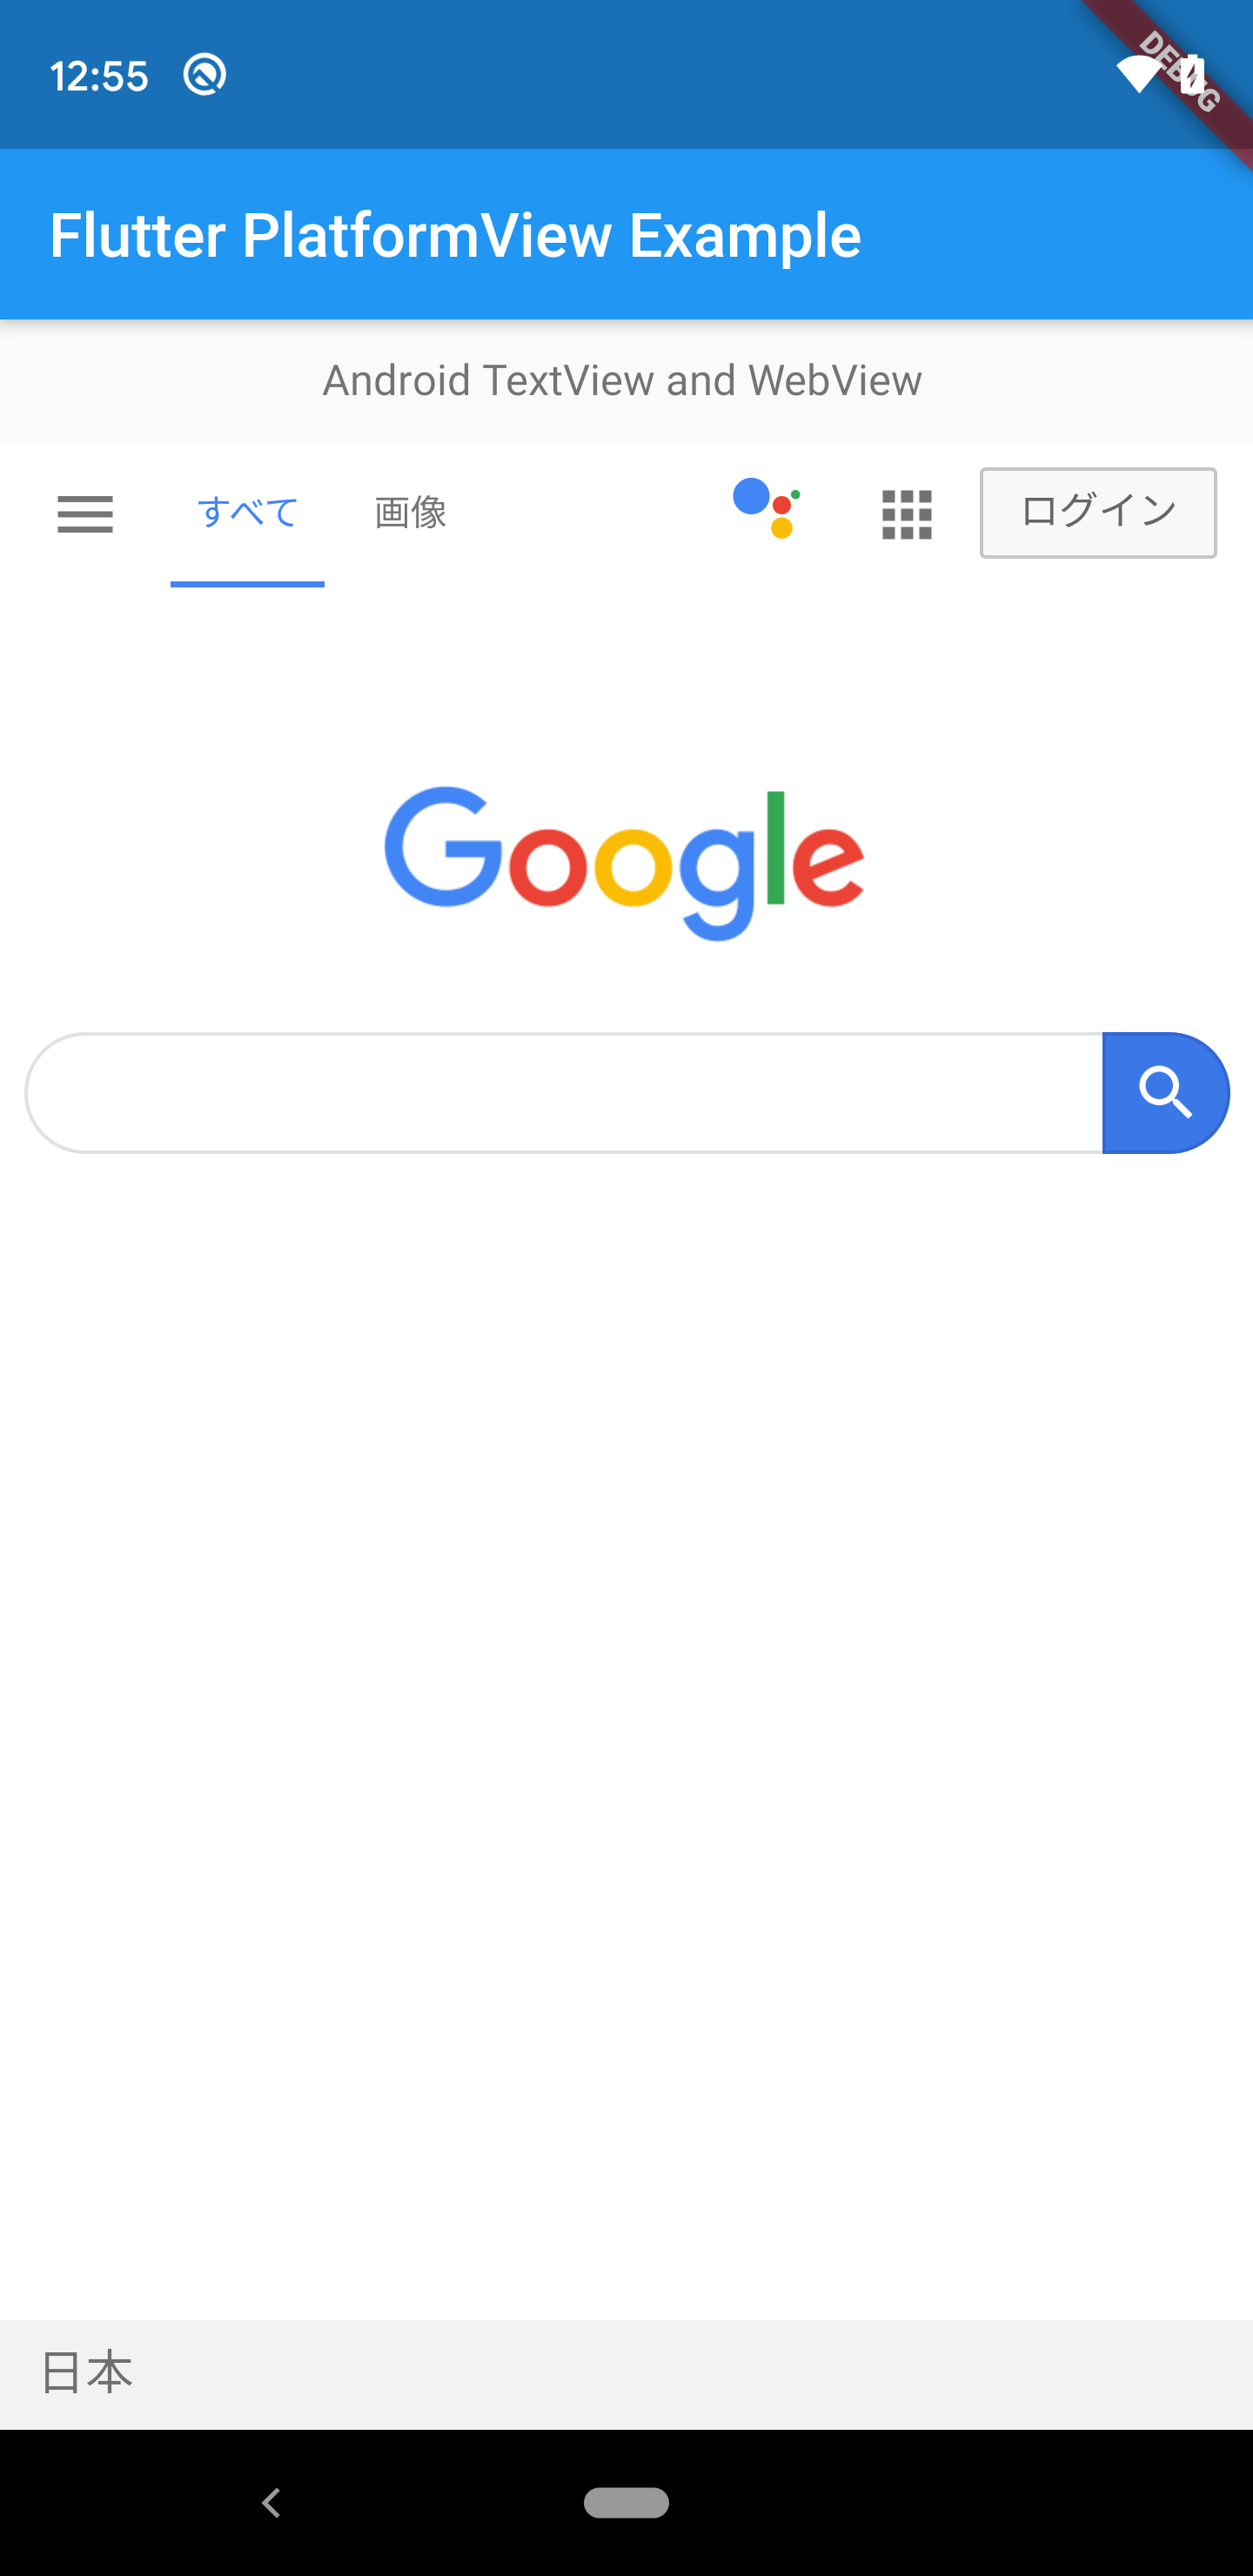
main.dartimport 'package:flutter/material.dart'; import 'package:flutter_platform_view_app/text_view.dart'; import 'package:flutter_platform_view_app/web_view.dart'; void main() => runApp(MyApp()); class MyApp extends StatelessWidget { @override Widget build(BuildContext context) { return MaterialApp( title: 'Flutter PlatformView API', theme: ThemeData( primarySwatch: Colors.blue, ), home: MyHomePage(title: 'Flutter PlatformView Example'), ); } } class MyHomePage extends StatefulWidget { MyHomePage({Key key, this.title}) : super(key: key); final String title; @override _MyHomePageState createState() => _MyHomePageState(); } class _MyHomePageState extends State<MyHomePage> { @override Widget build(BuildContext context) { return Scaffold( appBar: AppBar(title: Text(widget.title)), body: Column(children: [ Center( child: Container( padding: EdgeInsets.symmetric(vertical: 10.0), width: 200.0, height: 40.0, child: TextView( onTextViewCreated: _onTextViewCreated, ) ) ), Expanded( flex: 3, child: WebView( onWebViewViewCreated: _onWebViewCreated, ) ) ]) ); } void _onTextViewCreated(TextViewController controller) { controller.setText('Android TextView and WebView example.'); } void _onWebViewCreated(WebViewController controller) { controller.setUrl('https://www.google.co.jp/'); } }サンプルコード一式
上記で解説したソースコードのプロジェクトファイル一式を以下にUPしています。
Android環境であればそのまま動作するため、参考にしてください。
https://github.com/Kurun-pan/flutter-platformview-example参考文献