- 投稿日:2020-02-07T23:53:32+09:00
razzle start時にエラーログ出力させる
はじめに
SSRを実現するビルドツール: razzleは
razzle startでdevelopment modeで実行できるが、client/serverビルドに失敗しても、コンソールにログが表示されない。デバッグしやすくするために、エラーログを表示させる方法をまとめました。
対応方法。
まず、friendly-errors-webpack-plugin - npm をインストール。
yarn add friendly-errors-webpack-plugin -D
razzle.config.jsに以下を追記。エラーがあるファイルや内容を教えてくれるようになります。// filename: razzle.config.js 'use strict'; // ココ const FriendlyErrorsWebpackPlugin = require('friendly-errors-webpack-plugin'); module.exports = { plugins: [...], modify: (config, { target, dev }, webpack) => { // ココ config.plugins = [new FriendlyErrorsWebpackPlugin()]; return config; } };本音としては、デフォルトで出力されてほしい。。
関連情報
- 投稿日:2020-02-07T19:55:48+09:00
【React】Hooks + Typescript で始める Redux
概要
ひと月前ほどから React + Typescriptに入門し、最近Reduxを触っています。
始めた時期的にも Hooks を使用することがほとんどなのですが、今ではReactとReduxをつなぐreact-reduxもHooksで書け、案外ハードルは低いように感じました。
今回はそんな、最近 React + Typescriptに入門した人向けのRedux記事です。また今回はTypescriptのActionCreatorライブラリ、
typescript-fsa,typescript-fsa-reducersは使用しません。
一度一通り自分で実装してみてから楽しようと思います。基本的には、Reduxのチュートリアルをなぞっています。
Usage With TypeScript環境
- CentOS 7
- react 16.12.0
- react-redux 7.1.3
- redux 4.0.5
Redux について
Reduxの説明に関しては省略。Qiitaにもわかりやすい記事が多数あるのでリンクを。
準備
React + Typescriptの環境は設定済の状態からスタートします。
$ create-react-app . --typescriptで始めました。
Reduxを使用するのに必要なパッケージをインストール。$ yarn add redux react-redux $ yarn add --dev @types/react-reduxReduxを書くにあたって、ディレクトリ構成等もスタイルがあります。
今回は機能ごとにフォルダを分け、Action, ActionCreator, Reducerをまとめてしまう Ducksパターンで作成しました。
参考: Redux のファイル構成は『Ducks』がオススメ - Qiita. ├── README.md ├── package.json ├── public │ ├── favicon.ico... │ ├── src │ ├── App.test.tsx │ ├── App.tsx │ ├── components │ │ ├── Button.tsx │ │ ├── Counter.tsx │ │ ├── TodoForm.tsx │ │ └── TodoListItem.tsx │ ├── index.tsx │ ├── logo.svg │ ├── react-app-env.d.ts │ ├── serviceWorker.ts │ ├── setupTests.ts │ └── store │ ├── actionTypes.ts │ ├── counter │ │ ├── actions.ts │ │ ├── reducer.ts │ │ └── types.ts │ ├── index.ts │ └── todo │ ├── actions.ts │ ├── reducer.ts │ └── types.ts ├── tsconfig.json ├── yarn-error.log └── yarn.lockCounterを作成する
Actionを書く
今回はカウンターアプリとTODOアプリを作成します。
Reduxを書く場合、Actionの種類を考え、Typeを定義することから始めるとわかりやすいです。
Actionで発行されるtype はプロジェクトで一意である必要があるので、src/store/actionTypesの中の一つのオブジェクトとして管理することにしました。src/store/actionTypes.ts// * // * action types // * 一意となるキーを指定するので、Actionが増えるたびにここにキーを書く // * export const ActionTypes = { increment: "INCREMENT", // "INCREMENT"型 decrement: "DECREMENT", // "DECREMENT"型 countReset: "COUNT_RESET", // "COUNT_RESET"型 } as const;Typescript3.4から導入されたconst assertionを用いて、プロパティをストリングリテラル型にしておくことで
Actionの型をストリングリテラル型にでき、Actionに対して型推論も効きます。型定義を書く
次は、Actionの型を書いていきます。カウンターなので今回は値を引数に持たないパターンで実装します。
src/store/counter/types.tsimport { Action } from "redux"; import { ActionTypes } from "../actionTypes"; // * // * type of Actions // * // stateの型 export type Count = { value: number; }; // Actionの型 Actionを継承 interface IncrementAction extends Action { type: typeof ActionTypes.increment; // "INCREMENT"型 } interface DecrementAction extends Action { type: typeof ActionTypes.decrement; } interface ResetAction extends Action { type: typeof ActionTypes.countReset; } // exportするActionの型, Unionで結合 export type CounterActionTypes = IncrementAction | DecrementAction | ResetAction;Action Creatorを書く
Actionを発行するActionCreatorを書きます。
これらは、CounterActionTypesを返却する関数、すなわち{ type: "INCREMENT" }のようなオブジェクトを返す関数です。src/store/counter/actions.tsimport { ActionTypes } from "../actionTypes"; import { CounterActionTypes } from "./types"; // * // * action creators // * export const incrementAction = (): CounterActionTypes => { return { type: ActionTypes.increment, // "INCREMENT" }; }; export const decrementAction = (): CounterActionTypes => { return { type: ActionTypes.decrement, }; }; export const resetAction = (): CounterActionTypes => { return { type: ActionTypes.countReset, }; };Reducer を書く
Actionとstateを受け取り、更新後のstateを返す関数、Reducerを定義します。
Count型の初期値を指定し、それぞれのActionに対応した処理をします。
default部にはnever型の定数を定義します。
想定外のActionを受け取ってしまう場合、actionがnever型がアサインされエラーとなるのを防ぐためです。
参考: typescript-fsaに頼らないReact × Redux - ログミーTechsrc/store/counter/reducer.tsimport { ActionTypes } from "../actionTypes"; import { Count, CounterActionTypes } from "./types"; // * // * reducer // * const initialState: Count = { value: 0, }; export const countReducer = (state = initialState, action: CounterActionTypes): Count => { switch (action.type) { case ActionTypes.increment: // action.type === "INCREMENT" return { value: state.value + 1 }; // value に1足す case ActionTypes.decrement: // 0以下にはならない return { value: state.value === 0 ? 0 : state.value - 1 }; case ActionTypes.countReset: return { value: 0 }; default: const _: never = action; return state; } };storeを書く
最後にstoreを定義します。
src/store/index.tsにstoreを書き、./storeとしてインポートするようにします。src/store/index.tsimport { combineReducers, createStore } from 'redux'; import { countReducer } from './counter/reducer'; // * // * store 本体 // * // Reducerを増やすときは、ここに追加 const rootReducer = combineReducers({ counter: countReducer, }); // states type export type RootState = ReturnType<typeof rootReducer>; // ReturnType<typeof fn>は、fnの返り値の型 // store const store = createStore(rootReducer); export default store;Componentでstoreからstateを取得
一通りRedux周りは書けたので、コンポーネントでstoreを参照します。
Provider
storeを参照するために、
src/index.tsxにProviderを設定します。src/index.tsximport React from 'react'; import ReactDOM from 'react-dom'; import { Provider } from 'react-redux'; import App from './App'; import store from './store'; ReactDOM.render( <Provider store={store}> <App /> </Provider>, document.getElementById("root"), );useSelector
コンポーネントでstoreを参照するには、useSelector Hookを使用します。
useSelector関数の引数には、stateを引数にとり、使用するstateの値を返す関数を渡します。
一見よくわかりませんが、storeという大きなオブジェクトの中から必要な値を取得しているだけです。componentimport { useSelector } from 'react-redux'; import { RootState } from '../store'; export const Counter: React.FC = () => { // storeからstateを取得する // rootReducer.counterにcountReducerを指定したので、以下のようにする。 // currentCountはCount型のオブジェクト const currentCount = useSelector((state: RootState) => state.counter); return <div>{currentCount.value}</div>; };useDispatch
Actionを発行するDispatchは、useDispatch Hookを使用します。
dispatch(actionCreator())とすることでActionを発行します。
ButtonコンポーネントはlabelとonClickを受け取るコンポーネントです。componentimport React from 'react'; import { useDispatch } from 'react-redux'; import { decrementAction, incrementAction, resetAction } from '../store/counter/actions'; import { Button } from './Button'; export const Counter: React.FC = () => { const dispatch = useDispatch(); // action を発行する関数 // 引数にはaction creatorを渡す // 親のrenderごとに子のrenderが走るので、useCallbackを用いメモ化すべき。 const handleIncrement = () => dispatch(incrementAction()); const handleDecrement = () => dispatch(decrementAction()); const handleReset = () => dispatch(resetAction()); return ( <> <Button label="Up" onClick={handleIncrement} /> <Button label="Down" onClick={handleDecrement} /> <Button label="Reset" onClick={handleReset} /> </> ); };完成:Counter
以上を組み合わせ、Counterコンポーネントができました。
src/components/Counter.tsximport React from 'react'; import { useDispatch, useSelector } from 'react-redux'; import { RootState } from '../store'; import { decrementAction, incrementAction, resetAction } from '../store/counter/actions'; import { Button } from './Button'; export const Counter: React.FC = () => { const currentCount = useSelector((state: RootState) => state.counter); const dispatch = useDispatch(); const handleIncrement = () => dispatch(incrementAction()); const handleDecrement = () => dispatch(decrementAction()); const handleReset = () => dispatch(resetAction()); return ( <> <div>{currentCount.value}</div> <Button label="Up" onClick={handleIncrement} /> <Button label="Down" onClick={handleDecrement} /> <Button label="Reset" onClick={handleReset} /> </> ); };todoアプリを作る
先程はActionに引数が不要でしたが、現実ではいろんなオブジェクトを渡し、加工、変換、抽出などを行います。
Redux ExampleにもあるTodoアプリを作成してみます。カウンターと同じように、
src/storeにtodoディレクトリを作成し、そこに型定義とActionCreator、Reducerを作成します。
その前に、Actionの定義を追加します。Action定義
src/store/actionTypes.tsexport const ActionTypes = { increment: "INCREMENT", decrement: "DECREMENT", countReset: "COUNT_RESET", // 追加 addTodo: "ADD_TODO", deleteTodo: "DELETE_TODO", } as const;型定義
次に、型定義します。Todoは一つづつIDとtextを持ちます。
stateとして持つ型はTodoData[]、すなわちToDosです。Actionの型にもpayloadが追加されています。
Todoを追加するには本文、削除するには削除対象のidが必要です。src/store/todo/types.tsimport { Action } from 'redux'; import { ActionTypes } from '../actionTypes'; type TodoData = { id: number; text: string; }; export type ToDos = TodoData[]; interface AddTodoAction extends Action { type: typeof ActionTypes.addTodo; payload: { text: string }; } interface DeleteTodoAction extends Action { type: typeof ActionTypes.deleteTodo; payload: { id: number }; } export type TodoActionTypes = AddTodoAction | DeleteTodoAction;ActionCreator
先ほどの型定義の通り、returnするオブジェクトを書きます。
src/store/todo/actions.tsimport { ActionTypes } from '../actionTypes'; import { TodoActionTypes } from './types'; export const addTodoAction = (todoText: string): TodoActionTypes => { return { type: ActionTypes.addTodo, payload: { text: todoText, }, }; }; export const deleteTodoAction = (todoId: number): TodoActionTypes => { return { type: ActionTypes.deleteTodo, payload: { id: todoId, }, }; };Reducer
次にReducerの定義をします。
action.payloadに値が渡ってきます。
stateを操作し、値を返します。src/store/todo/reducer.tsimport { ActionTypes } from '../actionTypes'; import { TodoActionTypes, ToDos } from './types'; const initialState: ToDos = []; export const todoReducer = (state = initialState, action: TodoActionTypes) => { const latestId = state.length; switch (action.type) { case ActionTypes.addTodo: state.push({ id: latestId + 1, text: action.payload.text, }); return state; case ActionTypes.deleteTodo: return state.filter(data => data.id !== action.payload.id); default: const _: never = action; return state; } };store
最後に、Reducerを結合して完了です。
src/store/index.tsimport { combineReducers, createStore } from 'redux'; import { countReducer } from './counter/reducer'; import { todoReducer } from './todo/reducer'; const rootReducer = combineReducers({ counter: countReducer, // 追加 todo: todoReducer, }); export type RootState = ReturnType<typeof rootReducer>; const store = createStore(rootReducer); export default store;完成
これで簡単なtodoアプリの完成です。
src/components/TodoForm.tsximport React, { useCallback, useRef, useState } from 'react'; import { useDispatch, useSelector } from 'react-redux'; import { RootState } from '../store'; import { addTodoAction, deleteTodoAction } from '../store/todo/actions'; import { TodoListItem } from './TodoListItem'; export const TodoForm: React.FC = () => { const todoList = useSelector((state: RootState) => state.todo); const dispatch = useDispatch(); const inputForm = useRef<HTMLInputElement | null>(null); const [inputTodo, setInputTodo] = useState(""); const handleInput = useCallback((event: React.ChangeEvent<HTMLInputElement>): void => { setInputTodo(event.target.value); }, []); const clearInput = () => { if (inputForm.current !== null) { inputForm.current.value = ""; setInputTodo(""); } }; const handleAdd = () => { dispatch(addTodoAction(inputTodo)); clearInput(); }; return ( <> <h1>TODO</h1> <input ref={inputForm} onChange={handleInput}></input> <button onClick={handleAdd}>ADD</button> <ul> {todoList.map(item => ( <TodoListItem key={item.id} onClick={() => dispatch(deleteTodoAction(item.id))}> {item.text} </TodoListItem> ))} </ul> </> ); };src/components/TodoListItem.tsximport React from 'react'; import styled from 'styled-components'; type Props = { children?: React.ReactNode; onClick: (event: React.MouseEvent<HTMLSpanElement, MouseEvent>) => void; }; export const TodoListItem: React.FC<Props> = props => { return ( <li> {props.children} <DeleteButton onClick={props.onClick}>×</DeleteButton> </li> ); }; const DeleteButton = styled.span` font-size: 2rem; cursor: pointer; `;まとめ
Hooksを用いて、一度Action, ActionCreator, Reducer, Storeを作成してしまうと、案外わかりやすいですね。
Hooks登場後にReactに入門した身からすると、Hooksで大体のことは出来てしまうのですが、コンポーネントがどんどん肥大化してしまうのは気になっていました。
Reduxを使用し、Ducksパターンのディレクトリ構成にしていると、コンポーネントファイルの見通しが良く保守性もよさそうです。まだまだReactのパフォーマンス部分への理解が出来ておらず、メモ化を使用する部分があまり解っていないので、勉強する必要がありますね・・・。
- 投稿日:2020-02-07T18:29:42+09:00
【備忘録】コンソール君「ん?そのプロパティ未定義やぞ?」 俺「何言うとんねんワレェ!」【まぬけ注意】
※ご覧いただいてる方々に諸注意です。投稿主はプログラミング・環境構築含め独学のため、誤解している点や間違っている点が多くある場合があります。もし、私が間違った知識・情報をドヤ顔で記載していた場合、優しくご指摘いただくようよろしくお願いします。
Reactの技術本のソースコード模写中の話
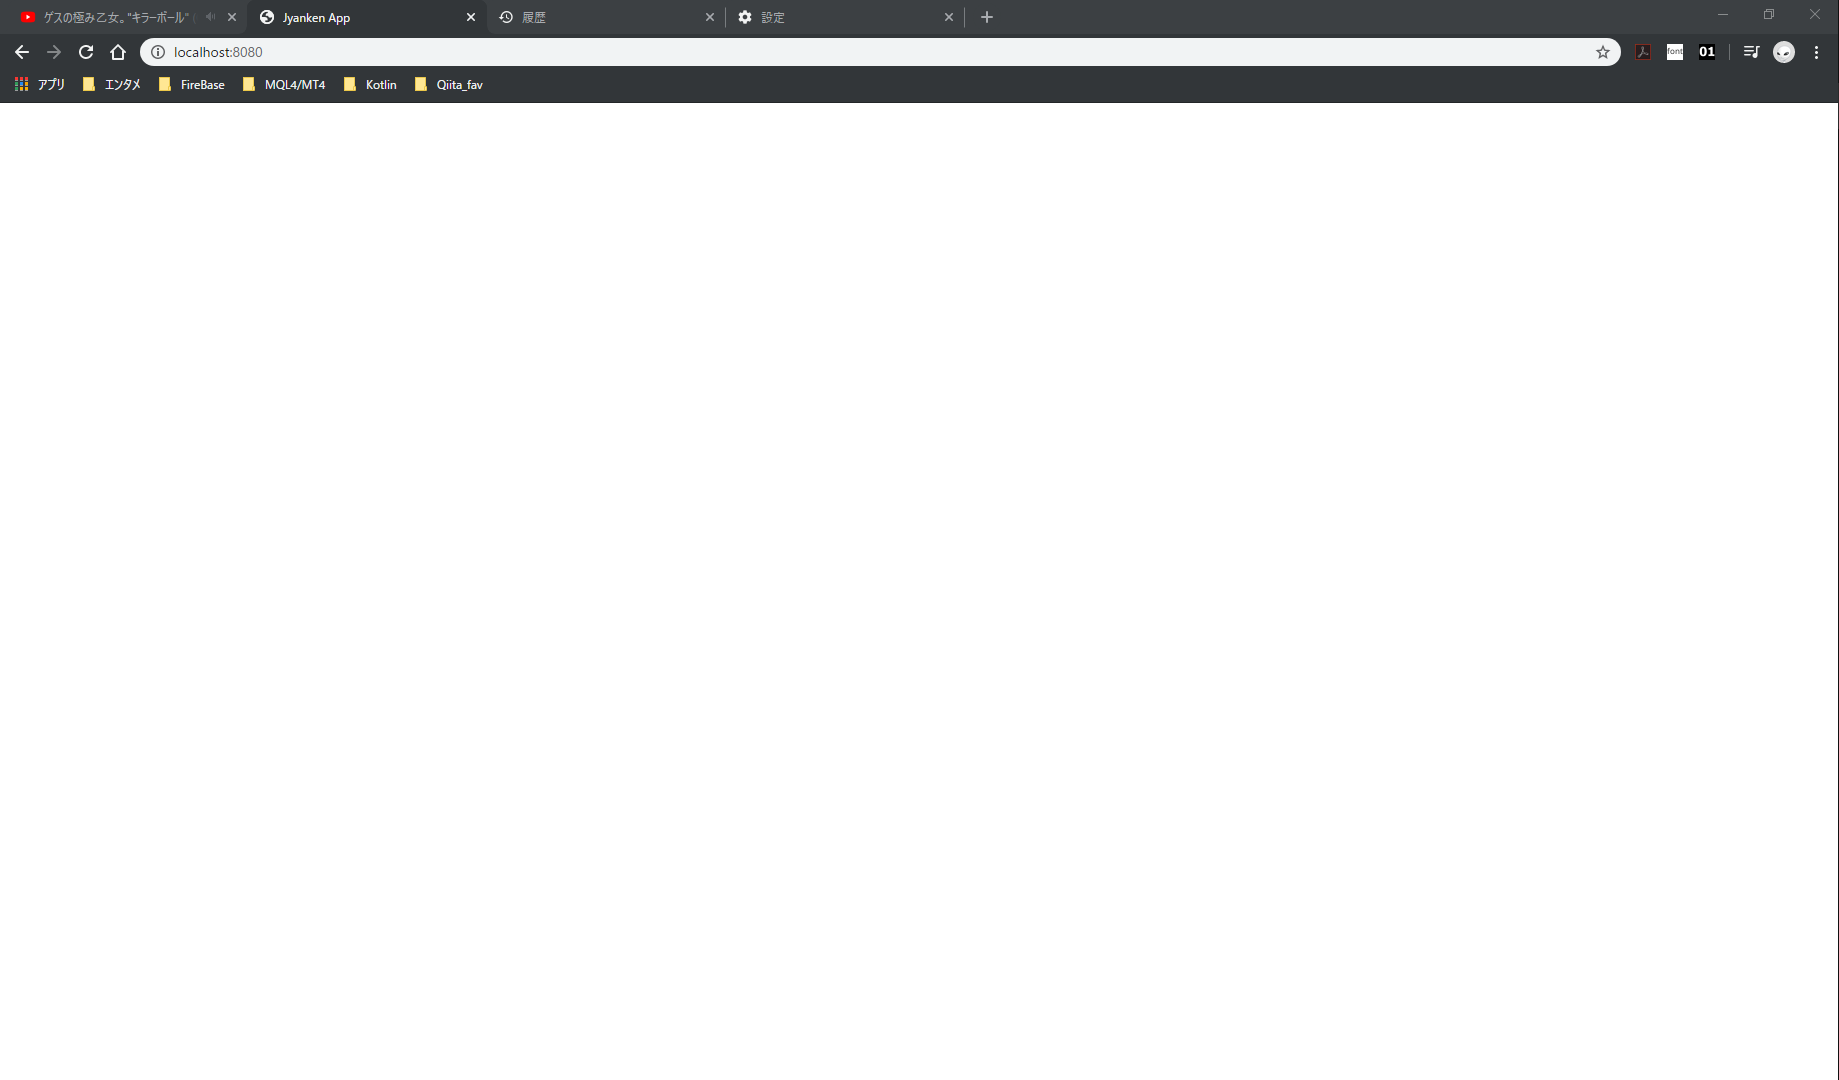
模写終了後ターミナルでサーバー起動を確認。
動かそうとするとlocalhostの接続はできるものの画面は何も表示されず…↓
ハテ・・・困りましたわ・・・
とりあえずchrome側のコンソールでエラーを確認しまっせ。↓
俺「うーんと、キャノットリードプロパティゲットスコアオブアンディフィネッドね。うんうんなるほど。」
getScoresプロパティが定義されてないよーということらしい。
今回のソースは、
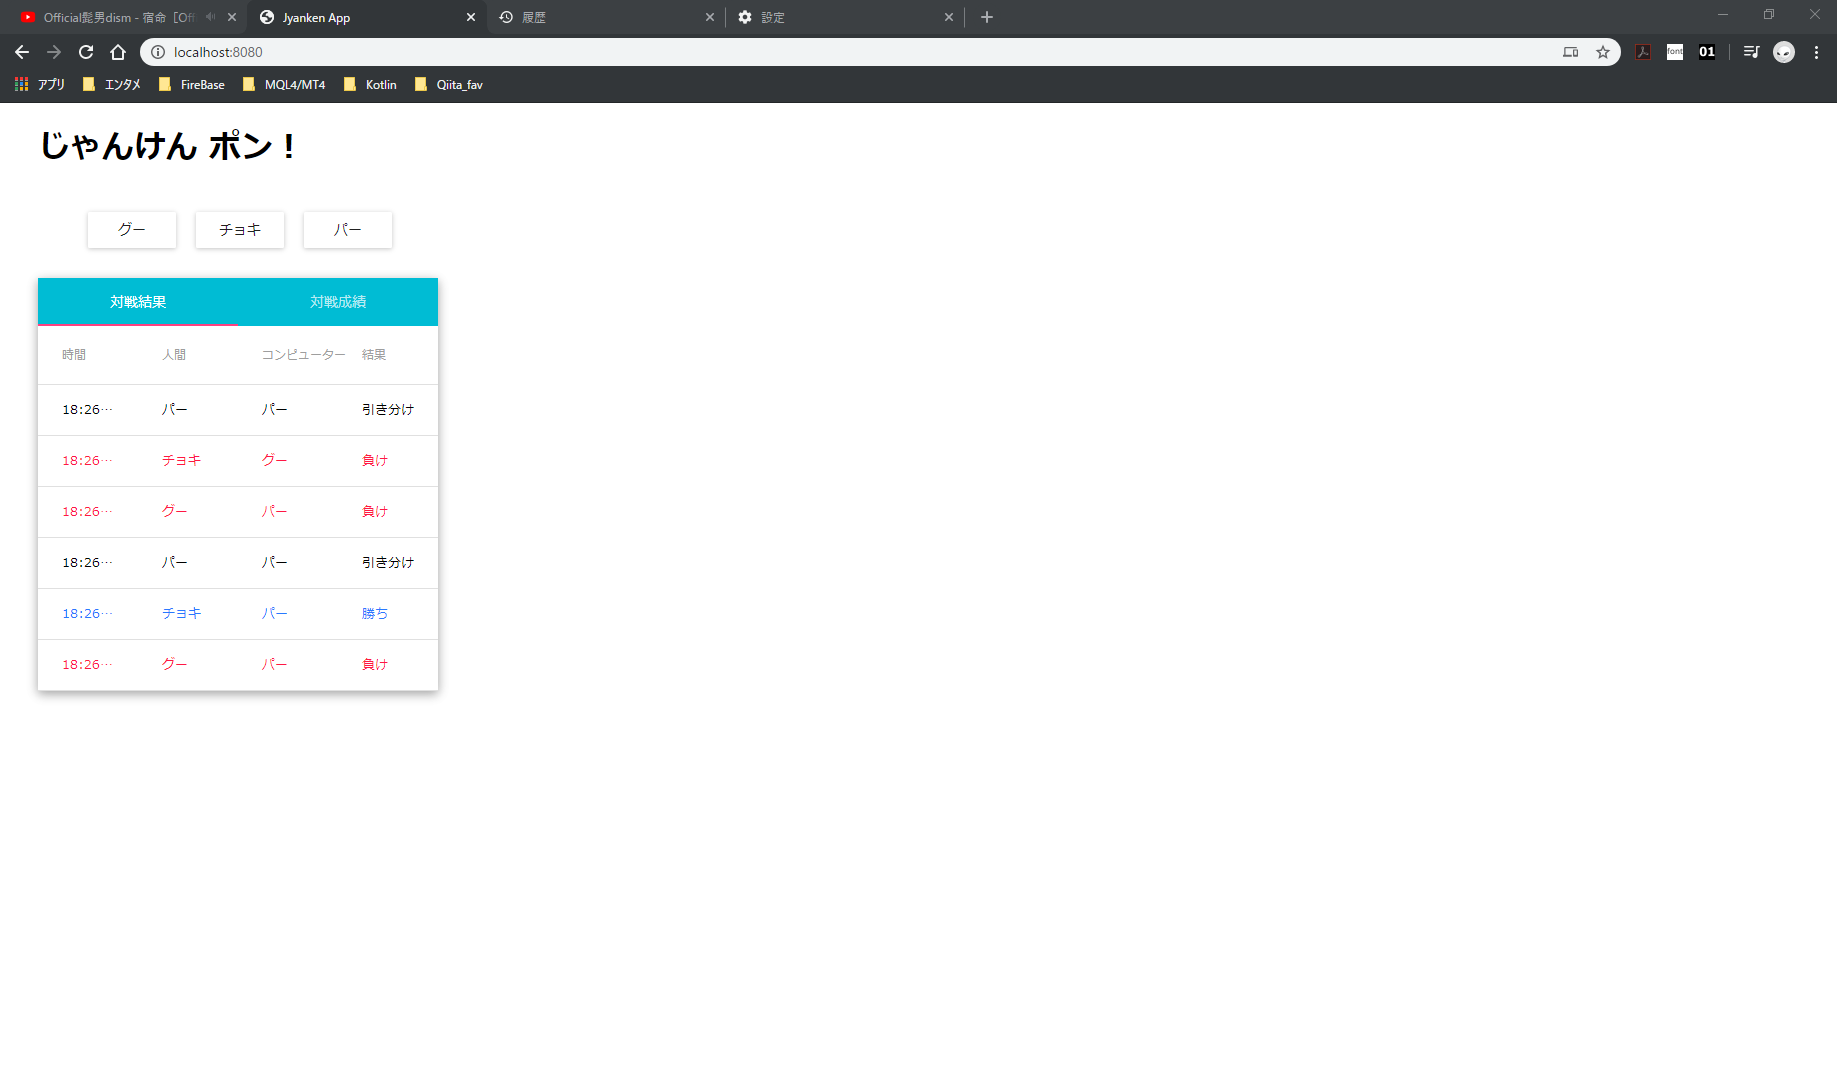
Material-uiを使ったジャンケンアプリ作成
↓
ジャンケンの判定や記録をするコードはJyanken.jsへ
メインのコードはindex.jsへという形で全体のソースは構成されている。つまりスコアを記録する役割を持つgetScoresプロパティはJyanken.jsに書かれていて、
index.jsにimportする形でアプリが動作するというわけなんですが、このJyanken.jsで定義されたgetScoresプロパティがなぜか未定義扱いになっているということらしい。やったこととしては↓
・import部分でミスってる?import周辺の確認。→問題なし
・定義部分と使用部分の誤字?確認するも…→問題なし
と凡ミスを探していると、ここで本日のMVPワイ、とんでもないことに気づく。
他にJyanken.jsのJyankenクラス自体が使えていないのを発見、getScoreプロパティどころかJyankenクラスが持っているプロパティ全部使えていませんでした。
index.jsのコンストラクター部分を確認。やっぱり・・・
クラスの機能を使うためのコンストラクターに設定してたのはコンストラクター部分this.Jyanken = new Jyanken()使用部分this.setState({scores: this.jyanken.getScores()})また沼プレイしてしまいましたわ・・・
コード触り始めてから随分と立ってるのにこんなことばっかしとるんです私。コンストラクター部分修正this.jyanken = new Jyanken()ささっと修正して、動作確認。無事動きました。
本日の学び
大文字と小文字はきちんと分けて使いましょう。
いつになったらコーダー初心者抜けれるのでしょうか。
現場からは以上です~~~(^_^)ノシ(激萎えしながら)

- 投稿日:2020-02-07T16:52:48+09:00
propsにobjectを使用するとReact.memoがメモ化できない
propsにobjectを渡すとメモ化してくれない
import React, { useState, memo } from "react";
import ReactDOM from "react-dom";

function App() {
  const [cnt, setCnt] = useState(1);
  const obj = { hoge: "hoge" };
  return (
    <div className="App">
      {cnt}
      <button onClick={() => setCnt(cnt + 1)}>button</button>
      <Test arr={obj} />
    </div>
  );
}

const Test = memo(props => {
  console.log("test", props.arr);
  return <div>test</div>;
});

const rootElement = document.getElementById("root");
ReactDOM.render(<App />, rootElement);
上記の例で行くと、buttonを押下したときに
testは表示して欲しくない。
けど、実際にはボタンを押すたびにtestが表示されるのでメモ化できていないということになる。
{hoge: "hoge"}を毎回渡しているのでpropsは変化していないにも関わらず。React.memoのshallowEqual
React.memoは第二引数に比較用の関数を渡さなければshallowEqualが実行される。
shallowEqual、、名前だけ聞くとオブジェクトの一階層の値が同じであれば同じobjectと判断してくれそうに感じる。
が、上にあげた例の通り実際には違うobjectと判断する。shallowEqualはReactが用意した関数なので、中身をのぞいてみる。
https://github.com/facebook/react/blob/cbbc2b6c4d0d8519145560bd8183ecde55168b12/packages/shared/shallowEqual.jsオブジェクトの比較は以下でやってそうである。
const keysA = Object.keys(objA);
const keysB = Object.keys(objB);

if (keysA.length !== keysB.length) {
  return false;
}


// Test for A's keys different from B.
for (let i = 0; i < keysA.length; i++) {
  if (
    !hasOwnProperty.call(objB, keysA[i]) ||
    !is(objA[keysA[i]], objB[keysA[i]])
  ) {
    return false;
  }
}
なるほど、やっぱりオブジェクトの中身まで見てくれてるじゃん。
と、思ったがよく見るとそうではなかった。
props = {arr: {hoge: 'hoge'}};のObject.keys(props)の結果は['arr']である。
なので、!is(objA[keysA[i]], objB[keysA[i]]が必ずfalseとなるのです
ちなみに、isは同じファイルの中に書いてある比較用関数。今回のケースでは===でobject同士が比較されてfalseとなる。const hoge = {hoge: 'hoge'}; const fuga = {hoge: 'hoge'}; hoge === fuga; // false結果、shallowEqualはfalseを返し、React.memoが思った様に動作してくれないのでした。
useMemoで回避
上記例でいうと、
const objのあたりをuseMemoでメモ化した値を使う様にすることでReact.memoは思った通りに動作してくれる様になる。備考
ちなみに、React.memoを使わずにuseMemoだけで行けると思って試した下記はダメだった。
import React, { useState, memo, useMemo } from "react";
import ReactDOM from "react-dom";

function App() {
  const [cnt, setCnt] = useState(1);
  const obj = { hoge: "hoge" };
  console.log("app");
  return (
    <div className="App">
      {cnt}
      <button onClick={() => setCnt(cnt + 1)}>button</button>
      <Test arr={obj} />
    </div>
  );
}

const Test = props => {
  return useMemo(() => { // ここだけ変えた
    console.log("test", props.arr);
    return <div>test</div>;
  }, [props.arr]);
};

const rootElement = document.getElementById("root");
ReactDOM.render(<App />, rootElement);
ボタンを押下するたびにApp()が実行されて、objが毎回生成されるのでprops.arrに詰めるobjの参照が毎回違うためです。
さらに備考
下記は同じ様に見えて違う
function App() {

.....~~
.....~~

return (
    <div className="App">
      {cnt}
      <button onClick={() => setCnt(cnt + 1)}>button</button>
      <Test arr={obj} ccc={obj2} /> {/* 渡すのはどちらもuseMemoでメモ化したもの */}
    </div>
  );
}


// memoされる
const Test = memo(({ arr, ...rest }) => {
  console.log("test", arr, rest);
  return <div>test</div>;
});

// memoされない
const Test = ({ arr, ...rest }) => {
  return useMemo(() => {
    console.log("test", arr, rest);
    return <div>test</div>;
  }, [arr, rest]);
};
React.memoの方は
propsとpropsで比較を行う。
だから、rest parametersを使用していようがいまいが関係ない。
useMemoの方はarrとarr、restとrestを比較する。
arrの比較は同じと判断されるが、restはTestが実行されるたびに毎回作成されるので参照先が違う。参照: https://aloerina01.github.io/blog/2018-10-25-1
メモ
useMemoの比較は以下でやっているっぽい。
https://github.com/facebook/react/blob/901d76bc5c8dcd0fa15bb32d1dfe05709aa5d273/packages/react-reconciler/src/ReactFiberHooks.js#L299Object.isのpolyfillを自分で用意して
===で比較しテイるぽい。
shallowEqualは使用していなさそうだけど、結局やってることは全く同じに見える。
- 投稿日:2020-02-07T07:13:37+09:00
[超簡単] Reactからfirestoreにアクセスするデモ!
firebase初心者のアクマちゃん(@akumachanit)デモ!
firebaseめちゃくちゃ簡単で楽しいからみんなもやってみるデモ!
今日はReactからfirestoreにアクセスする手順を説明するデモ〜〜〜!今回やること
- firebaseをReactアプリにインストールする
- firebaseプロジェクトを作成する
- データベースを作成する
- 接続用コンポーネントを作成する
- データを出し入れしてみる
1と2はすでにやってある人は飛ばしていいデモよ!
firebaseをReactアプリにインストールする
Reactアプリのディレクトリで
npm installするデモnpm install firebase@latestfirebaseプロジェクトを作成する
説明しなくてもわかると思うけど、コンソール入ってプロジェクトを追加!
あとは適当に名前をつけて続行すれば大丈夫デモ(適当)データベースを作成する
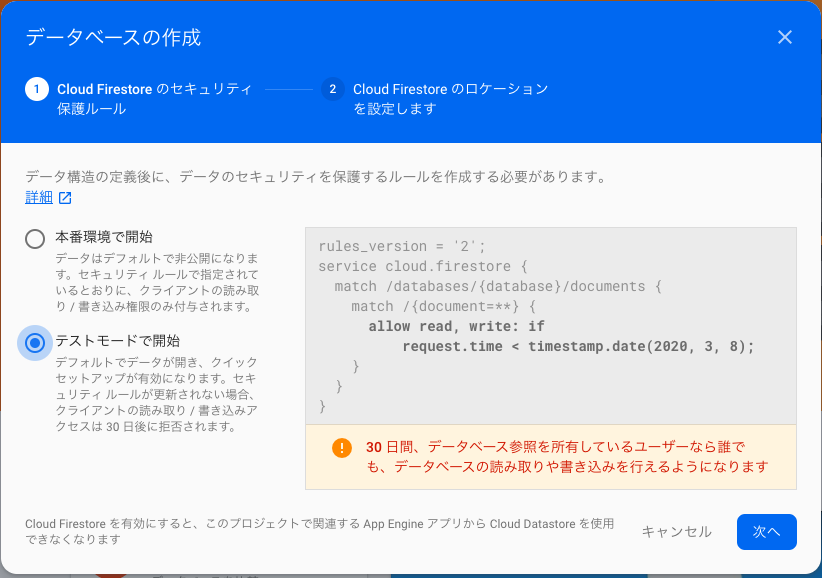
サイドバーからDatabaseを選択するとデータベースの作成ボタンが現れるのでクリックデモ!
「本番環境で開始」「テスト環境で開始」があるデモ。
「本番環境で開始」を選ぶとルールで設定したクライアントからしかアクセスできなくなるデモ。
「テスト環境で開始」を選ぶとどこからでもアクセスできるデモ。今回はテスト環境を選択するデモ。
これはリリースするまでに本番環境に設定し直す必要があるんだけど、30日後に自動的に本番環境に移行してくれるみたいデモ。
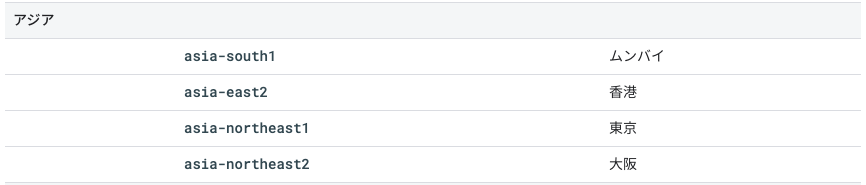
開発中にいきなりアクセスできなくなるので、はやめに本番環境用に設定しておいた方が良いデモね。(今回はやらないけど)リージョンはasia-northeast1(東京)にとりあえず設定。
アジアリージョンのロケーションはこんな感じ接続用コンポーネントを作成する
サイドバーから
Overview→</>アイコン(わかりづらい)
アプリ名を登録(プロジェクト名じゃなくてアプリ名デモ。複数のクライアントから呼ぶ予定がある場合はReactAppとかWebAppとか適当につけたらいいと思うデモ)したら次に埋め込むためのコードが表示されるデモ。
設定があらかじめ埋め込んであるデモ。<!-- The core Firebase JS SDK is always required and must be listed first --> <script src="https://www.gstatic.com/firebasejs/7.8.0/firebase-app.js"></script> <!-- TODO: Add SDKs for Firebase products that you want to use https://firebase.google.com/docs/web/setup#available-libraries --> <script src="https://www.gstatic.com/firebasejs/7.8.0/firebase-analytics.js"></script> <script> // Your web app's Firebase configuration var firebaseConfig = { apiKey: "xxxxxxxxxxxxxxxxxxxxxxxxxxxxxxx", authDomain: "xxxxxxxxxxxxxxx.firebaseapp.com", databaseURL: "https://xxxxxxxxxxxxxxx.firebaseio.com", projectId: "xxxxxxxxxxxxxxx", storageBucket: "xxxxxxxxxxxxxxx.appspot.com", messagingSenderId: "xxxxxxxxxxxxxxx", appId: "?????????????????????????????????????", measurementId: "xxxxxxxxxxxxxxx" }; // Initialize Firebase firebase.initializeApp(firebaseConfig); firebase.analytics(); </script>このうち今回使うのは
// Your web app's Firebase configuration以下だけデモ。適当な名前(firebase.jsとか)でこんな感じでコンポーネントを作成するデモ。
import firebase from 'firebase';
// Your web app's Firebase configuration
var firebaseConfig = {
  apiKey: "xxxxxxxxxxxxxxxxxxxxxxxxxxxxxxx",
  authDomain: "xxxxxxxxxxxxxxx.firebaseapp.com",
  databaseURL: "https://xxxxxxxxxxxxxxx.firebaseio.com",
  projectId: "xxxxxxxxxxxxxxx",
  storageBucket: "xxxxxxxxxxxxxxx.appspot.com",
  messagingSenderId: "xxxxxxxxxxxxxxx",
  appId: "?????????????????????????????????????",
  measurementId: "xxxxxxxxxxxxxxx"
};
// Initialize Firebase
firebase.initializeApp(firebaseConfig);
firebase.analytics();

export default firebase;
export default firebaseを忘れずにデータを出し入れしてみる
入れ
import './さっき作ったfirebase.jsのパス'

firebase.firestore().collection('test').add({id: 'testid', name: 'test'})
  .then(function (docRef) {
    console.log("Document written with ID: ", docRef.id);
  })
  .catch(function (error) {
    console.error("Error adding document: ", error);
  });
出し
firebase.firestore().collection('test').get().then((querySnapshot) => {
  querySnapshot.forEach((doc) => {
      console.log(doc.data());
  });
});;
出し入れっていうけど入れてから出すもんだよね...
まとめ
簡単!!!!
Twitterやってるデモ!仲良くしてくださいデモ!@akumachanit