- 投稿日:2019-05-29T23:44:21+09:00
C#のリストで、条件に一致するインデックスを取得する方法
こんにちは、ブログ「学生ブロックチェーンエンジニアのブログ」を運営しているアカネヤ(@ToshioAkaneya)です。
C#のリストで、条件に一致するインデックスを取得する方法
この目的には
FindIndexが使えます。例
sampleListから、idが3の要素のインデックスを取得するには次のようにします。var index = sampleList.FindIndex(sample => sample.id == 3);その他の方法についてコメントもお待ちしております。
この記事が参考になれば幸いです。はてなブックマーク・Pocketはこちらから
- 投稿日:2019-05-29T23:07:59+09:00
【Unity】UnityでAndroidアプリ64bit対応する方法
環境メモ
⭐️Mac OS Mojave バージョン10.14
⭐️Unity 2018.2.15f1Google Playより以下メールが届いたので、対応する
[ご対応をお願いいたします]: 2019 年 8 月 1 日以降、アプリの 64 ビット版をご用意ください
2019 年 8 月 1 日より、ネイティブ コードを使用するすべてのアプリにおいて、アップデートを公開するには 32 ビット版に加えて 64 ビット版を提供することが必須となります。本年 1 月にもお知らせいたしましたとおり、今後は 64 ビット用コードのみをサポートする Android デバイスへの移行が進むと予想されており、今回の 64 ビット必須化はこうしたイノベーションに対応するための措置となります。 弊社にて状況を確認しましたところ、お客様のアプリで 64 ビット版がまだ提供されていないものが見つかりました。期限が近づいておりますので、ご確認のうえご対応をお願いいたします。
UnityでAndroidアプリ64bit対応する
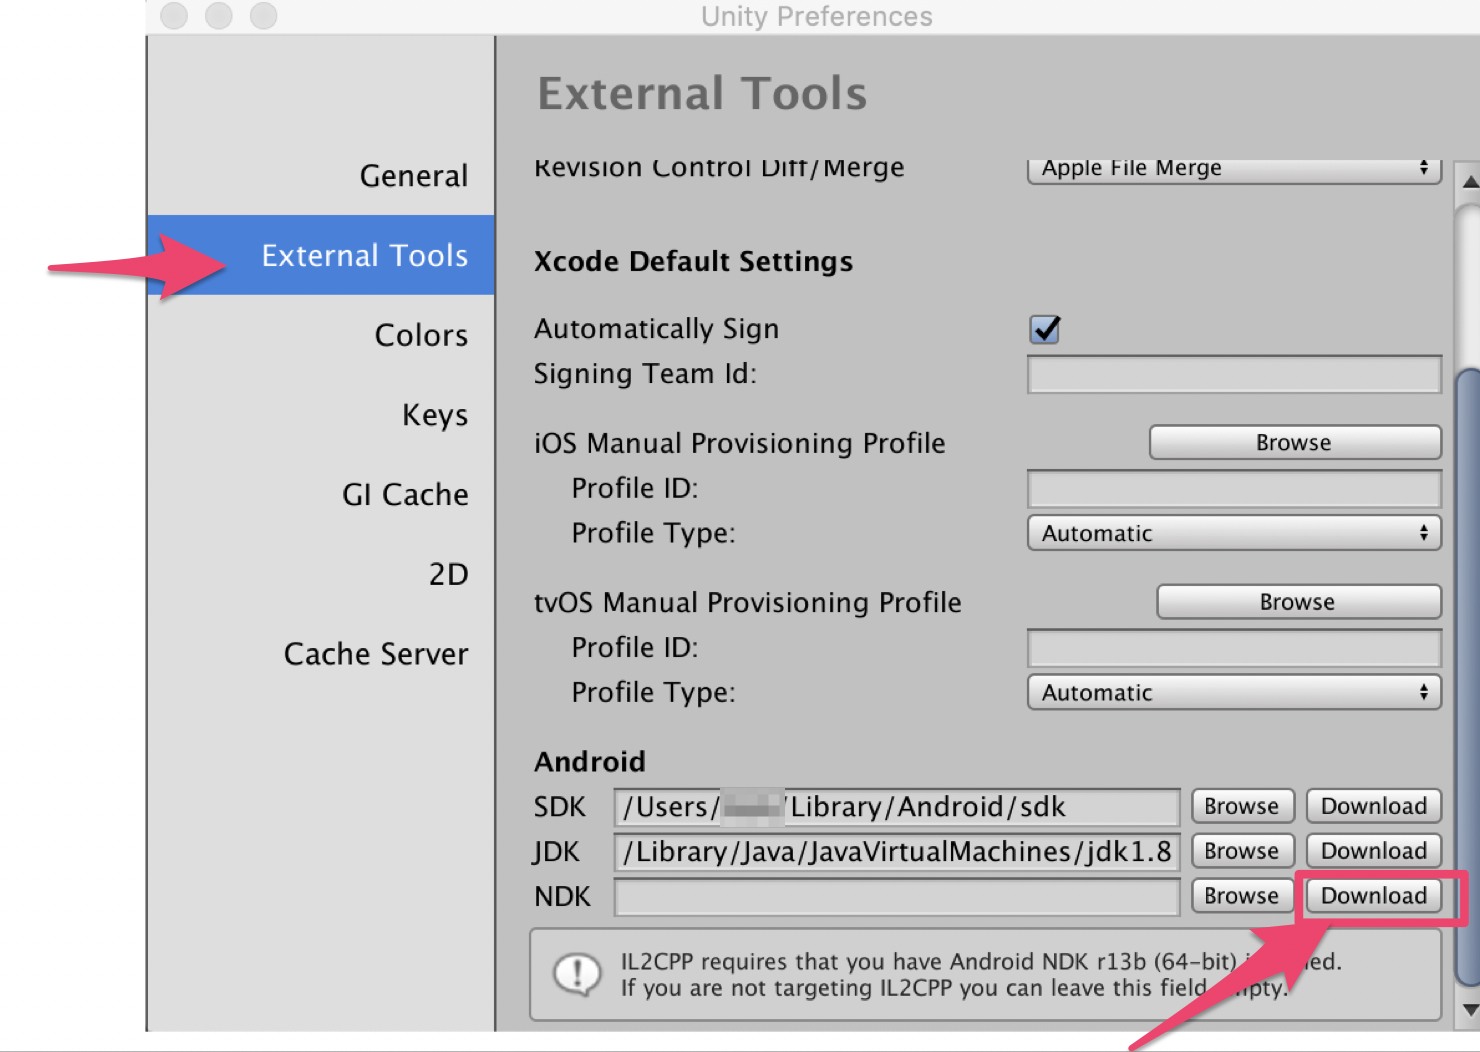
1.「Unity」ー「Preference」を選択する
2.「External Tools」NDK箇所のダウンロードボタンを押し、NDKをダウンロードする
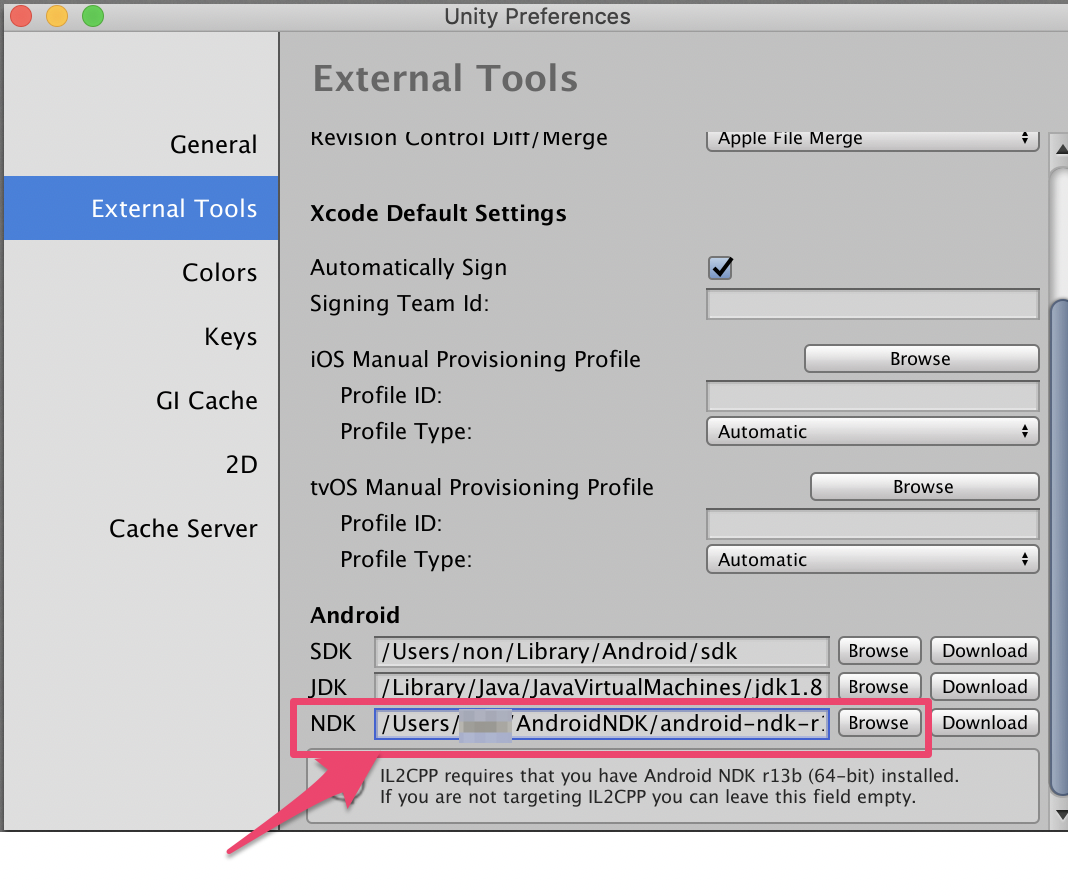
3.ダウンロードしたNDKファイルを解凍し(普通に、ダブルクリックで解答できました)
NDK箇所に、解答したフォルダを指定する
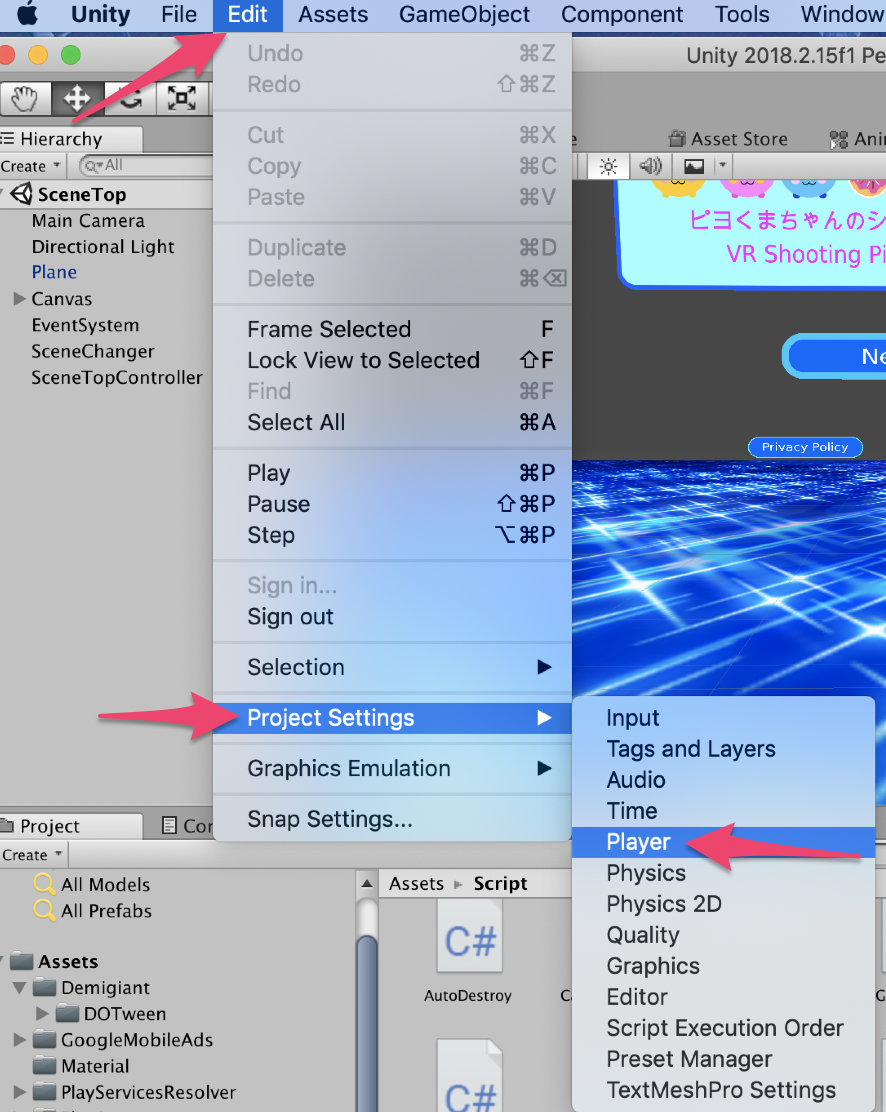
4.「Eidt」ー「Project Settings」ー「Player」を開く
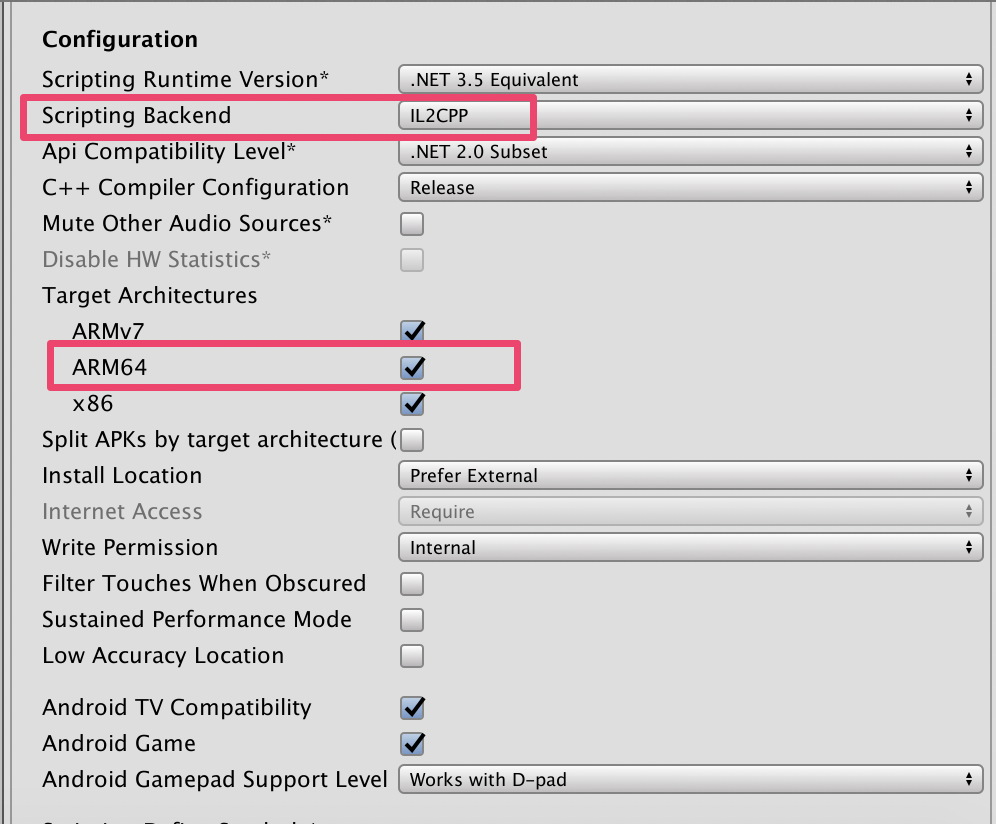
5.「Configuration」の
Scriptiong Backendを「IL2CPP」を選択し、
ARM64をチェックONする
これで、ビルドして、APKを作成すればOK。完了です。
↓↓Google Play 無料Free
VR ピヨくまちゃんのシューティング〜VR Shooting Piyo-Kuma-Chan
?【VR】Androidアプリ?リリース
— non (@nonnonkapibara) May 13, 2019
?ピヨくまちゃん?シューティングVRゲームリリースしました。?VRゴーグルであそびます。?
?とっても?キレイで?楽しいです?
↓↓Google Play 無料Freehttps://t.co/DmkV8ltaCD#Piyo_Kuma_chan_Shooting_VR_game #VR #Unity3d pic.twitter.com/fFVADdAiDV↓↓Google Play 無料Free
CherryCocktailGlassチェリーカクテルグラス〜無料簡単ミニゲームFree games
⭐️Androidアプリ⭐️リリース
— non (@nonnonkapibara) April 26, 2019
?CherryCocktailGlass?
Blenderで絵を描いてUnityで作成したミニゲームリリースしました?
?カクテル?グラス?に
?チェリー?をのせるシンプルなゲームです。
✨(●^o^●)✨
【Android】
Google Play 無料Freehttps://t.co/I70R9QEDuq#CherryCocktailGlass pic.twitter.com/g8kCM9QVhL


- 投稿日:2019-05-29T21:56:16+09:00
UnityでOculusQuestの開発環境構築
はじめに
最近OculusQuestを入手できたので、Unityで開発環境を構築しました。
開発環境
Unity Hub 2.0.0
Unity 2018.4.0f2
Oculus Integration (UnityのAsset)参考にしたページ
Oculus Quest に Unity で開発したアプリをいれる方法(Mac/Win)
まずは、こちらの手順通りで実機で起動できることまで確認しました。【VR】Oculus Quest+Unity開発
こちらに内容を参考に、視点の移動とTouchコントローラの表示ができるところまでできました。Oculus Quest Development Guide
こちらは公式ドキュメントです。そのほか
・Unity 2019.1.2f1, Unity 2019.1.4f1では、ビルドはできるのですが、実機上ではすぐ終了してしまい動作できませんでした。こうすれば動作できるなど情報いただけると助かります。原因がわからないため、当面、2018.4.0f2を使い続けることになりそうです。
@Horukasuさんの記事にあった通り、OtherSettings のGraphicsAPI をVulkan からAutoGraphicsAPIに変えたところ、2019.1.4f1でも実機上で動作できるようになりました!
QuestへのビルドがUnity2019.1.4f1で通らなかったお話(解決)
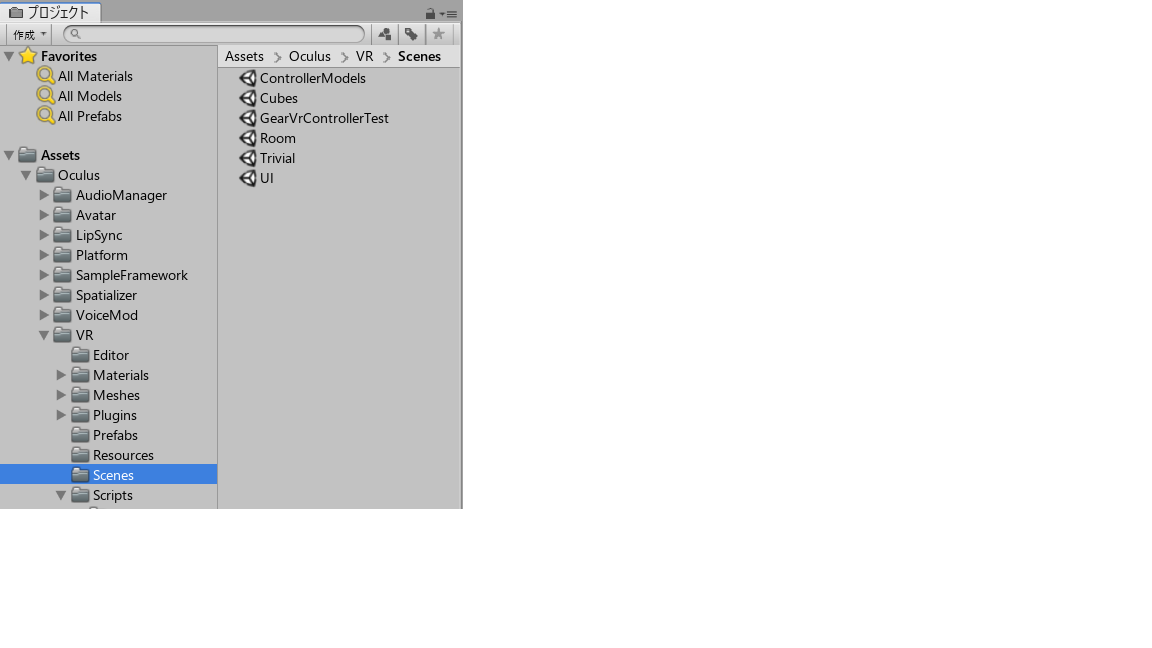
・Oculus Integrationのインストール中、OVRPluginのUpdateをするか聞いてくるのですが、自分の環境では、Yesを押した場合、後でビルド実行時にファイルの競合(OVRPlugin.dllとOVRPlugin.aar)が発生しましたので、Noにしたほうがよさそうです。なお、ファイルの競合が発生したときは、リネームすることでとりあえずは回避できました。Oculus Integration
Oculus Integrationに含まれているサンプルのシーンをいくつか動かしてみました。
・ControllerModels
箱だらけの部屋の中、Totchコントローラが普通に表示されます
・Room
箱だらけの部屋の中、Totchコントローラが箱で表示されます
WiFi経由でADB接続
ビルドする度にUSBケーブルを接続するのが面倒なので、WiFi経由でADB接続を試してみました。
手順は、
1. OculusQuestと開発PCをUSBで接続
2. "adb shell ifconfig"を実行してOculusQuestのIPアドレスを調べます
3. "adb tcpip 5555"のあと"adb connect IPアドレス:5555"を実行してWiFi接続
4. USBを外します
この後は、unityからビルドして実行で、WiFi経由で書き込みできます。
しかし、OculusQuestがスリープ状態にはいると接続が切れて1.からやり直しになるので
いまいち便利ではなかったです。
と思っていたのですが、OculusQuestがスリープから復帰した後(USB接続無しで)"adb connect IPアドレス:5555"を実行すると、再度WiFi接続できました。
- 投稿日:2019-05-29T21:33:37+09:00
Mac で Unity と Go 使って gRPC のサンプルを試してみた
はじめに
Unity で gRPC といえば MagicOnion だと思うのですが、
自分でも Unity で gRPC 環境構築して開発出来るようになるために、
試しにサーバ側を Go で クライアント側を Unity でサンプルを動かしてみました。gRPC の環境構築
homebrew を使用して gRPC をインストールします。
brew tap grpc/grpc
brew install grpc
次に Protocol Buffers をインストールします。
brew install protobufまた Protocol Buffers のファイル (.proto) から Go のソースコードを出力出来るようにするため Go 用の Protocol Buffers の gRPC プラグインをインストールします。
go get -u -v github.com/golang/protobuf/protoc-gen-gogRPC 用の proto ファイルを生成することが出来る環境が整いました。
gRPC のサンプルを動かすための準備
今回はサーバ側を Go で検証進めていくため、
Go の gRPC プロジェクトを git clone してきます。git clone git@github.com:grpc/grpc-go.gitサーバ側には git clone したプロジェクトの
grpc-go/examples/helloworld/greeter_server/main.goを使用します。grpc-go/examples/helloworld/greeter_server/main.go/* * * Copyright 2015 gRPC authors. * * Licensed under the Apache License, Version 2.0 (the "License"); * you may not use this file except in compliance with the License. * You may obtain a copy of the License at * * http://www.apache.org/licenses/LICENSE-2.0 * * Unless required by applicable law or agreed to in writing, software * distributed under the License is distributed on an "AS IS" BASIS, * WITHOUT WARRANTIES OR CONDITIONS OF ANY KIND, either express or implied. * See the License for the specific language governing permissions and * limitations under the License. * */ //go:generate protoc -I ../helloworld --go_out=plugins=grpc:../helloworld ../helloworld/helloworld.proto // Package main implements a server for Greeter service. package main import ( "context" "log" "net" "google.golang.org/grpc" pb "google.golang.org/grpc/examples/helloworld/helloworld" ) const ( port = ":50051" ) // server is used to implement helloworld.GreeterServer. type server struct{} // SayHello implements helloworld.GreeterServer func (s *server) SayHello(ctx context.Context, in *pb.HelloRequest) (*pb.HelloReply, error) { log.Printf("Received: %v", in.Name) // 5. gRPC サーバに SayHello の実行要求が来たら // Message に in.Name の先頭に Hello を付けて // helloworld.proto で定義した HelloReply を返却する return &pb.HelloReply{Message: "Hello " + in.Name}, nil } func main() { // 1. 50051 ポートの TCP リスナーを作成する lis, err := net.Listen("tcp", port) if err != nil { log.Fatalf("failed to listen: %v", err) } // 2. gRPC サーバを起動する s := grpc.NewServer() // 3. helloworld.proto ファイルで定義したメソッドを gRPC サーバに関連付ける pb.RegisterGreeterServer(s, &server{}) // 4. gRPC サーバの待受を 1. で作成した TCP リスナーで行う if err := s.Serve(lis); err != nil { log.Fatalf("failed to serve: %v", err) } }クライアント側は Unity の公式サンプルプロジェクトを改修して動作検証します。
そのため、まずは gRPC プロジェクトを git clone します。git clone git@github.com:grpc/grpc.gitUnity のサンプルプロジェクトは git clone したプロジェクトの
grpc/examples/csharp/HelloworldUnityに存在します。Unity のサンプルプロジェクトのセットアップ
Unity のサンプルプロジェクトはそのままでは動かすことが出来ないため、
公式に記載されている手順に従って、gRPC プラグインのセットアップを行います。
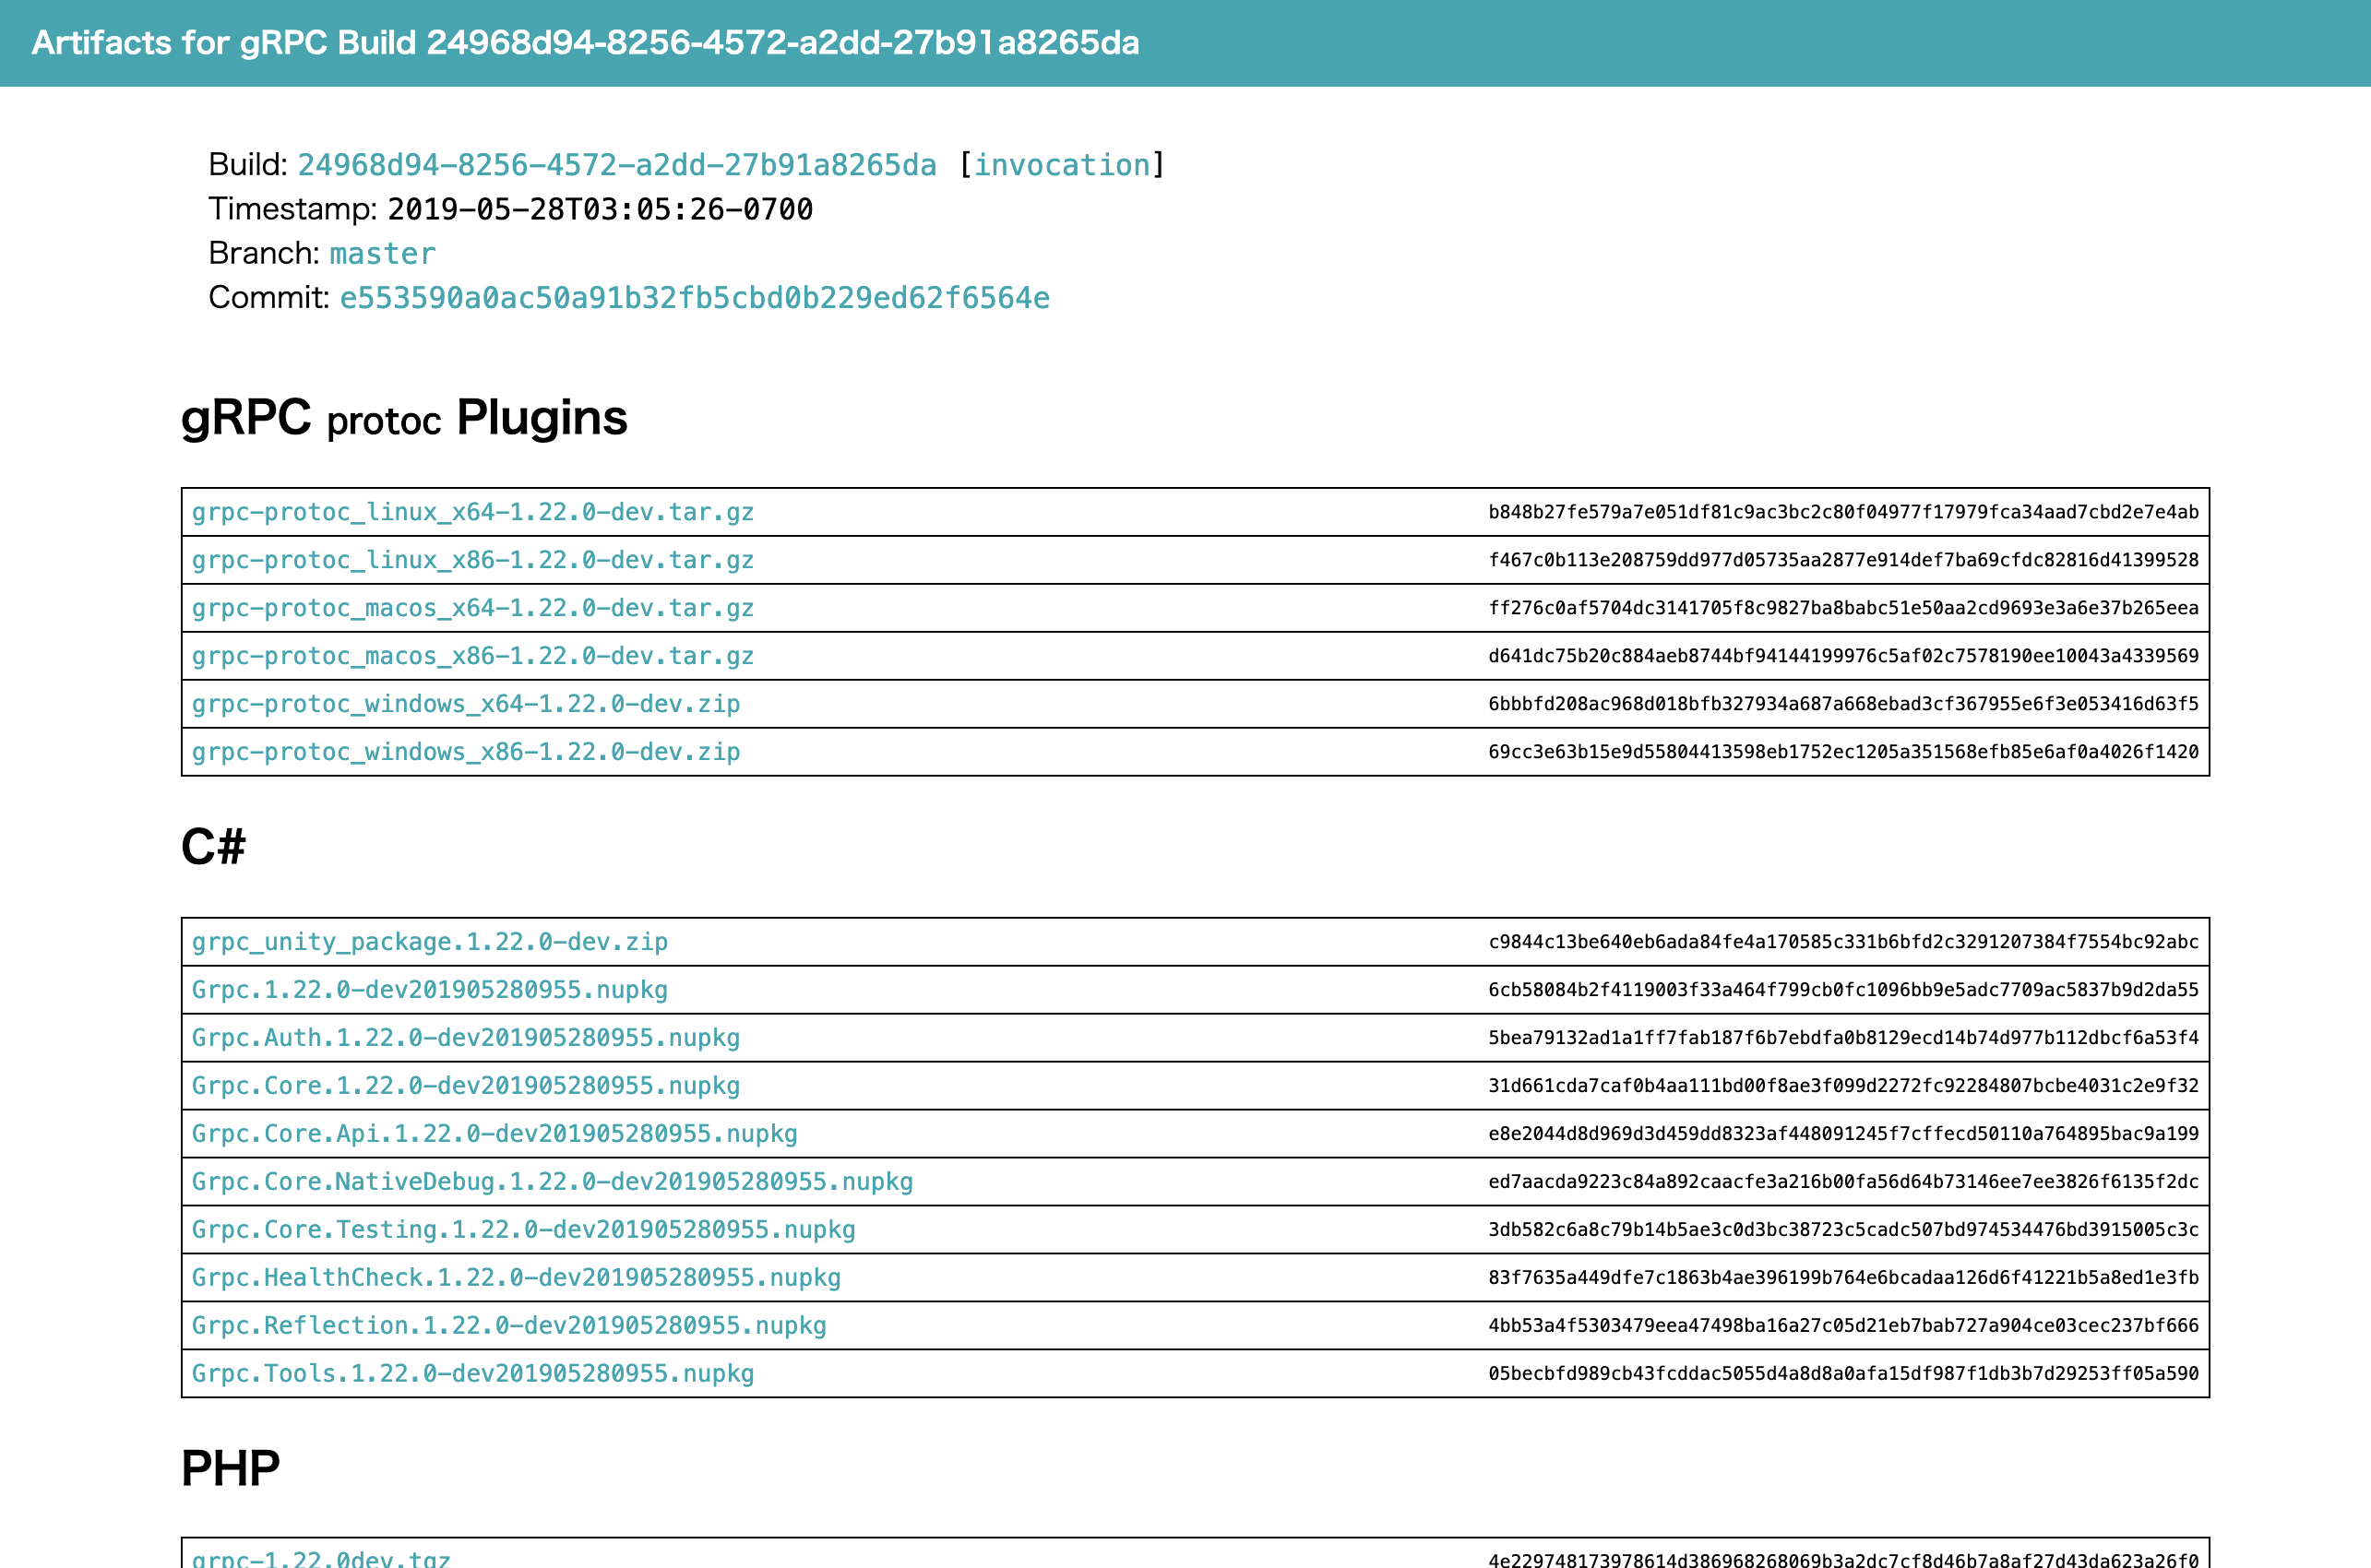
https://github.com/grpc/grpc/tree/master/examples/csharp/HelloworldUnity#buildまずは gRPC のプラグインのダウンロードを行います。
https://packages.grpc.io/ に遷移した後、画面下部にBuild IDという欄が出てくるので、一番上にあるリンクをクリックします。
(添付画像で言うと 24968d94-8256-4572-a2dd-27b91a8265da というリンクです)
すると画面遷移して gRPC の unity プラグインが zip でダウンロード出来るリンクが出現するのでクリックしてダウンロードします。
(添付画像でいうと grpc_unity_package.1.22.0-dev.zip というリンクです)
ダウンロード完了後、zip を解凍すると Plugins フォルダが出てきます。
それを Unity サンプルプロジェクトの Asset フォルダ配下に設置します。
grpc/examples/csharp/HelloworldUnity/Assetsの下です。これで
grpc/examples/csharp/HelloworldUnityが Unity で正常に開けるようになっているはずです。サーバとクライアントで gRPC 通信を行う
まずはサーバ側の Go を動かします。
grpc-go/examples/helloworld/greeter_serverで下記コマンドを実行して、Go の gRPC サーバを起動します。go run main.goUnity 側では
Scripts/HelloWorldTest.csを少し変更します。
デフォルトのサンプルでは Unity 側でもサーバとして動作するようになっているため、
Unity 側でサーバとして振る舞わないよう関連コードをコメントアウトしています。grpc/examples/csharp/HelloworldUnity/Scripts/HelloWorldTest.cs#region Copyright notice and license // Copyright 2019 The gRPC Authors // // Licensed under the Apache License, Version 2.0 (the "License"); // you may not use this file except in compliance with the License. // You may obtain a copy of the License at // // http://www.apache.org/licenses/LICENSE-2.0 // // Unless required by applicable law or agreed to in writing, software // distributed under the License is distributed on an "AS IS" BASIS, // WITHOUT WARRANTIES OR CONDITIONS OF ANY KIND, either express or implied. // See the License for the specific language governing permissions and // limitations under the License. #endregion using UnityEngine; using System.Threading.Tasks; using System; using Grpc.Core; using Helloworld; class HelloWorldTest { // Can be run from commandline. // Example command: // "/Applications/Unity/Unity.app/Contents/MacOS/Unity -quit -batchmode -nographics -executeMethod HelloWorldTest.RunHelloWorld -logfile" public static void RunHelloWorld() { Application.SetStackTraceLogType(LogType.Log, StackTraceLogType.None); Debug.Log("=============================================================="); Debug.Log("Starting tests"); Debug.Log("=============================================================="); Debug.Log("Application.platform: " + Application.platform); Debug.Log("Environment.OSVersion: " + Environment.OSVersion); var reply = Greet("Unity"); Debug.Log("Greeting: " + reply.Message); Debug.Log("=============================================================="); Debug.Log("Tests finished successfully."); Debug.Log("=============================================================="); } public static HelloReply Greet(string greeting) { const int Port = 50051; //MEMO: gRPC クライアントとして振る舞わせるためコメントアウト //Server server = new Server //{ // Services = { Greeter.BindService(new GreeterImpl()) }, // Ports = { new ServerPort("localhost", Port, ServerCredentials.Insecure) } //}; //server.Start(); // 1. 127.0.0.1:50051 への gRPC チャネルを確立する // (Go 側の gRPC サーバへリクエストを行うため) Channel channel = new Channel("127.0.0.1:50051", ChannelCredentials.Insecure); // 2. helloworld.proto 内の Greeter 内で定義したメソッドを関連付ける var client = new Greeter.GreeterClient(channel); // 3. gRPC で SayHello メソッドを実行する。 // メソッド変数には helloworld.proto で定義した HelloRequest を使用する // SayHello メソッドは引数で指定した文字列の接頭字に Hello を付けて // そのまま文字列として返却する var reply = client.SayHello(new HelloRequest { Name = greeting }); // 4. gRPCチャネルを閉じる channel.ShutdownAsync().Wait(); //server.ShutdownAsync().Wait(); return reply; } class GreeterImpl : Greeter.GreeterBase { // Server side handler of the SayHello RPC public override Task<HelloReply> SayHello(HelloRequest request, ServerCallContext context) { return Task.FromResult(new HelloReply { Message = "Hello " + request.Name }); } } }
Scripts/HelloWorldTest.cs内の Greet メソッドはScripts/HelloWorldScript.csから使用されています。Scripts/HelloWorldScript.cs#region Copyright notice and license // Copyright 2019 The gRPC Authors // // Licensed under the Apache License, Version 2.0 (the "License"); // you may not use this file except in compliance with the License. // You may obtain a copy of the License at // // http://www.apache.org/licenses/LICENSE-2.0 // // Unless required by applicable law or agreed to in writing, software // distributed under the License is distributed on an "AS IS" BASIS, // WITHOUT WARRANTIES OR CONDITIONS OF ANY KIND, either express or implied. // See the License for the specific language governing permissions and // limitations under the License. #endregion using UnityEngine; using UnityEngine.UI; public class HelloWorldScript : MonoBehaviour { int counter = 1; // Use this for initialization void Start () { HelloWorldTest.RunHelloWorld(); } // Update is called once per frame void Update() {} // Ran when button is clicked // 1. Run したときに画面中央に表示されるボタンがクリックされる度に呼び出される public void RunHelloWorld(Text text) { // 2. HelloWorldTest 内の Greet メソッドを呼び出し gRPC サーバに // SayHello メソッドの実行を要求し、レスポンス内容を受け取る var reply = HelloWorldTest.Greet("Unity " + counter); // 3. 受け取ったレスポンス内容の Message をボタンの表記に設定する text.text = "Greeting: " + reply.Message; // 4. ボタンをクリックする度に counter を増やし SayHello メソッドの変数の内容を変更する counter++; } }この状態で Unity プロジェクトを Editor 上で Run すると画面上に
Hello gRPC!!!ボタンが表示されるのでクリックしてみます。そうすると Go で動かしている gRPC サーバ側の標準出力に Unity 側から送信されてきた文字列が表示されます。go run greeter_server/main.go 2019/05/29 01:49:51 Received: Unity 1 2019/05/29 01:49:51 Received: Unity 2また Unity 側の画面では、ボタンを 2回クリックしていれば、ボタンの文字表記が
Greeting: Hello Unity 2になっているはずです。
これでサーバ及びクライアント側の通信は確認出来ました。
次回は gRPC サーバ経由で Unity 同士相互に通信を行う仕組みを作ってみる予定です。参考リンク
https://budougumi0617.github.io/2018/01/01/hello-grpc-go/
https://blog.fenrir-inc.com/jp/2016/10/grpc-go.html
https://qiita.com/shiena/items/6c3b34a8d8f1bb938470
https://qiita.com/muroon/items/2115c2c72be8b0c3f5f6


- 投稿日:2019-05-29T17:11:04+09:00
Awakeってインスタンス化直後に呼ばれるものじゃないの……?
前置き
- Awake=インスタンス生成時処理だと思って実装してきた
- そしたら違かった
- 親子関係含めてどういう挙動なのか再確認したくなった
結論
- Awakeはインスタンス化後、初めてActiveになったタイミングで実行される。
環境
- Unity 2018.4.1f1
実験スクリプト
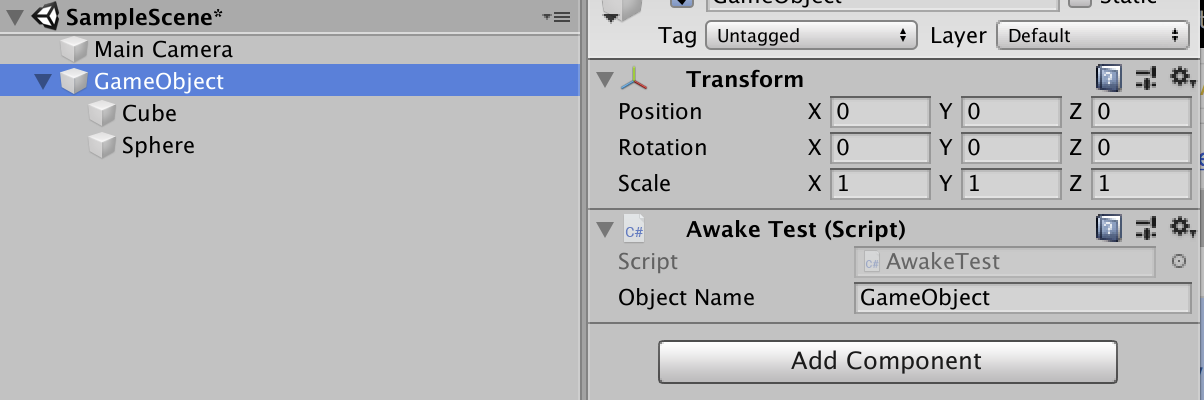
AwakeTest.csusing UnityEngine; public class AwakeTest : MonoBehaviour { public string objectName = null; void Awake() { Debug.Log("Awake!" + objectName); } }objectNameはどのオブジェクトかを判別するために使用。
挙動確認
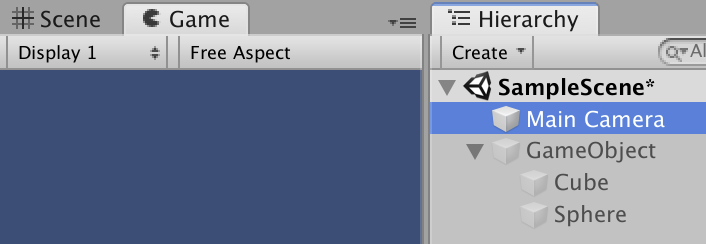
0. 前提
こんな感じでGameObject/Cube/Sphereに上記のスクリプトをアタッチして、ObjectNameにはオブジェクト名をそのまま設定しておく。
GameObject/Cube/Sphereのactive状態を切り替えての実験。
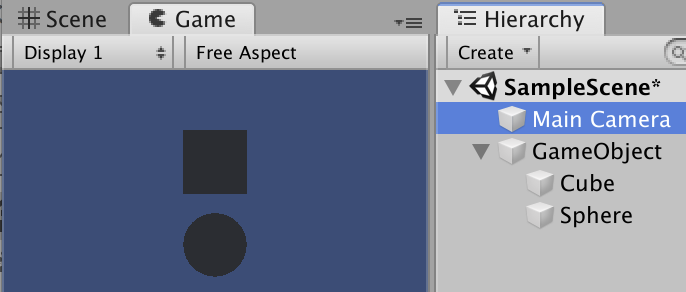
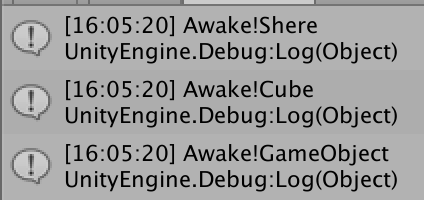
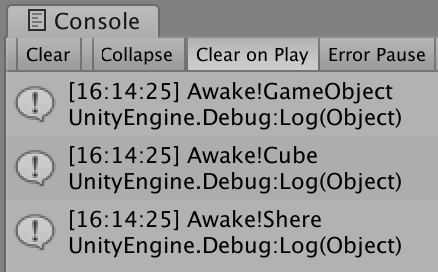
1.初めからActive
実行前のactive状態
実行時log
生成と同時にActive状態なので、実行後すぐ呼び出される!
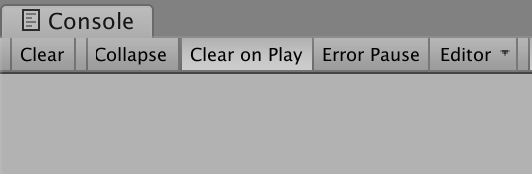
2.初めはDeactive
実行前のactive状態
実行時log
何もでない!
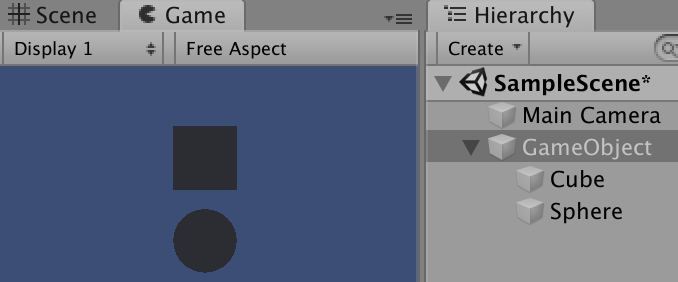
手動でGameObjectをActive
Active後のlog
インスタンス生成後、はじめにActiveになったタイミングでの実行は本当だった。
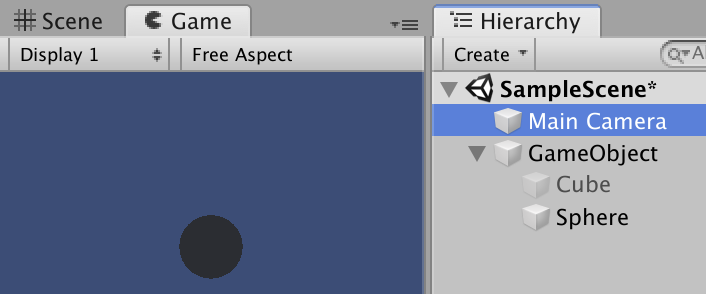
3.子要素だけ一部Deactive
実行前のactive状態(CubeだけDeactive)
実行時log
Cubeだけ出ない!
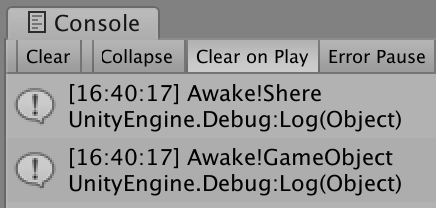
→CubeをActiveにすると、logもちゃんと出た。4.それでも僕はインスタンス化直後に処理を書きたいんだ!
スクリプトの修正
コンストラクタ定義してみるは?
AwakeTest.csusing UnityEngine; public class AwakeTest : MonoBehaviour { public string objectName = null; public AwakeTest() { Debug.Log("Init!" + objectName); } void Awake() { Debug.Log("Awake!" + objectName); } }実験
3.子要素だけ一部Deactiveに該当する条件で、実行後に
Init!Cubeって出力されれば勝ち!
- 実行時log
?...
基本MonoBehaviour継承するケースではイベント関数使いましょうということですね。(newするのもダメだし)
それでもどうしても……!という場合は、Prefab定義してInstantiateして生成直後に専用の処理呼び出すとか、やり方によってはできそうな雰囲気。再度結論
- Awakeはインスタンス化後、初めてActiveになったタイミングで実行される。
- Unity使う以上、Unityの鉄則に従おう。
参考
- 投稿日:2019-05-29T14:53:41+09:00
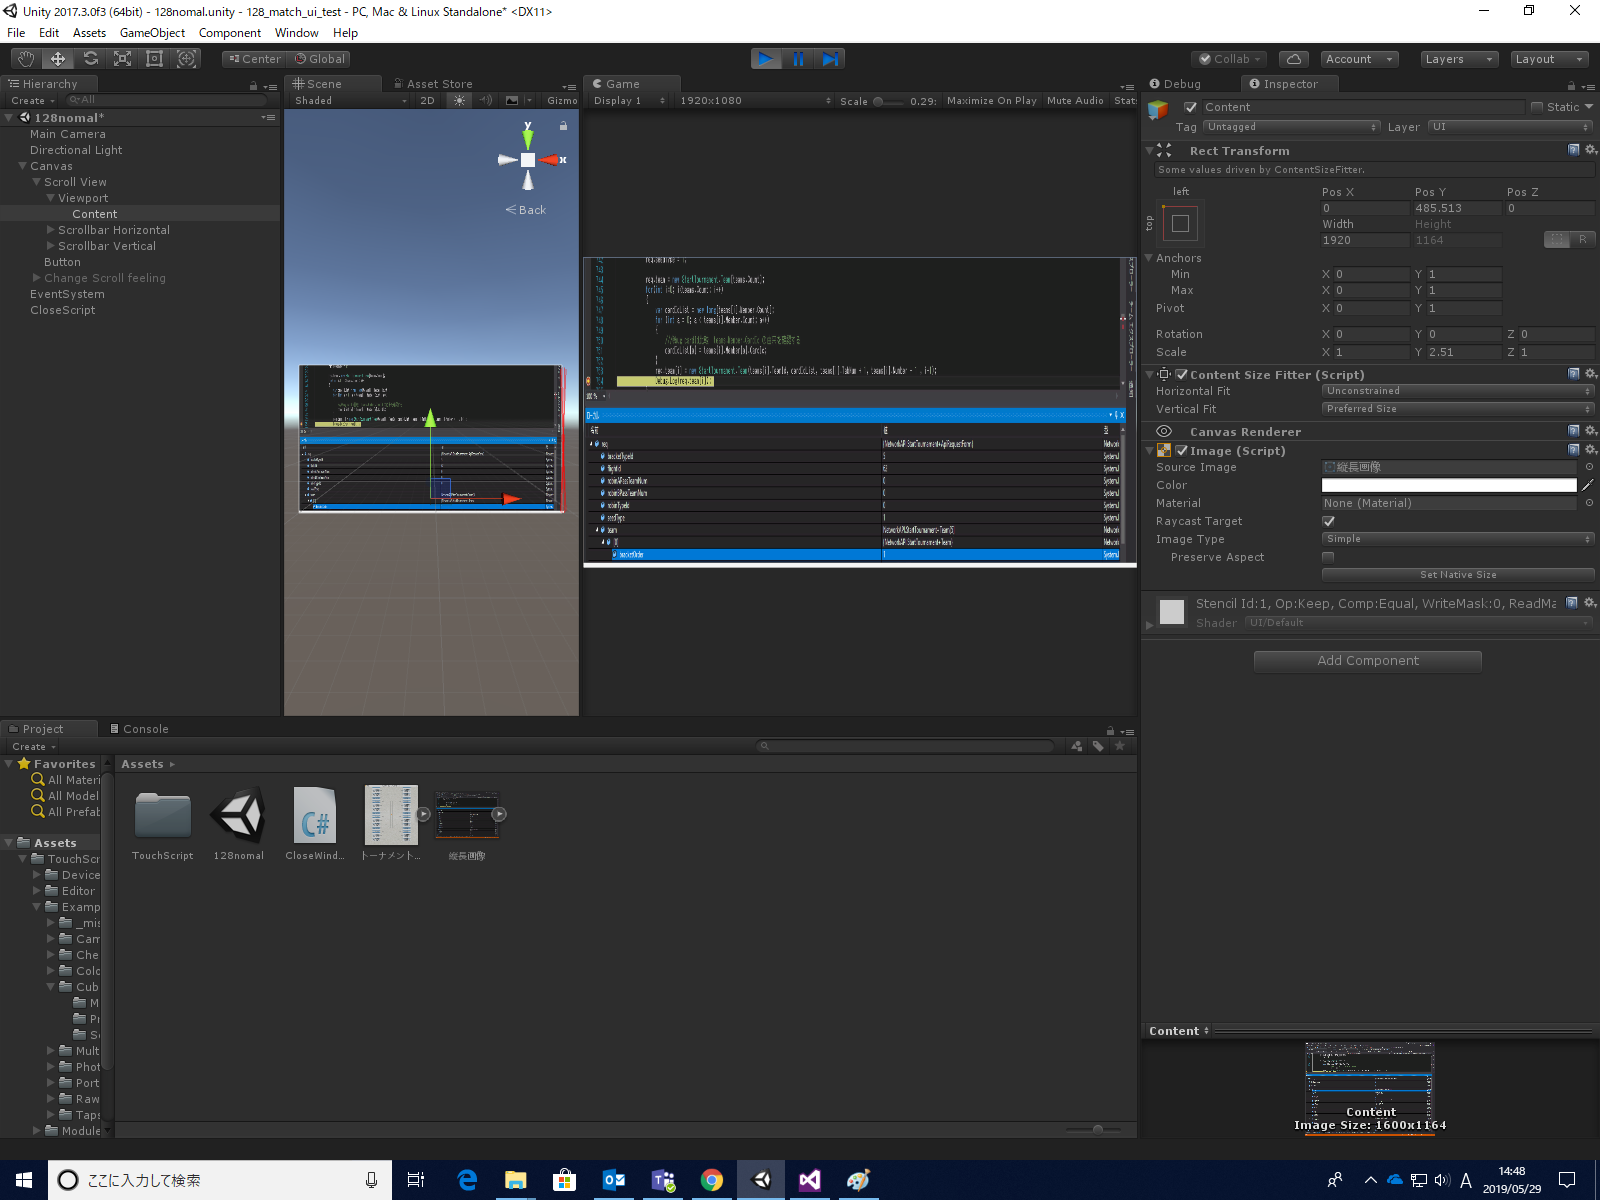
Unityでただ大きい画像をスクロールして見るのを作る
scrollviewのcontentに画像を張る
ScrollRectのMovementTypeをclampedなりにする
contentの中身は作らない
以上!
- 投稿日:2019-05-29T13:13:09+09:00
【Unity】強化学習のチュートリアルをやってみた(ML-Agents v0.8,1)
はじめに
この記事は、
ml-agents/Learning-Environment-Create-New.md at master · Unity-Technologies/ml-agents · GitHub
に従って実際に強化学習のチュートリアルをやってみた、というだけのものです。実行環境
- macOS Mojave 10.14.5
- Unity 2019.1.4f1
- ML-Agents Beta 0.8.1
ML-Agentsの導入
以下のリンクのどちらかを参考にしてML-Agentsを導入してください。
プロジェクトの準備
- Unityで
RollerBallという名前のプロジェクトを作成します。- ProjectSetting -> Player -> Configuration でScripting Runtime Versionが .NET 4.x Equivalentになっていることを確認します。
ml-agents-masterフォルダをコピーしてRollerBall/Assets/にペーストします。環境の作成
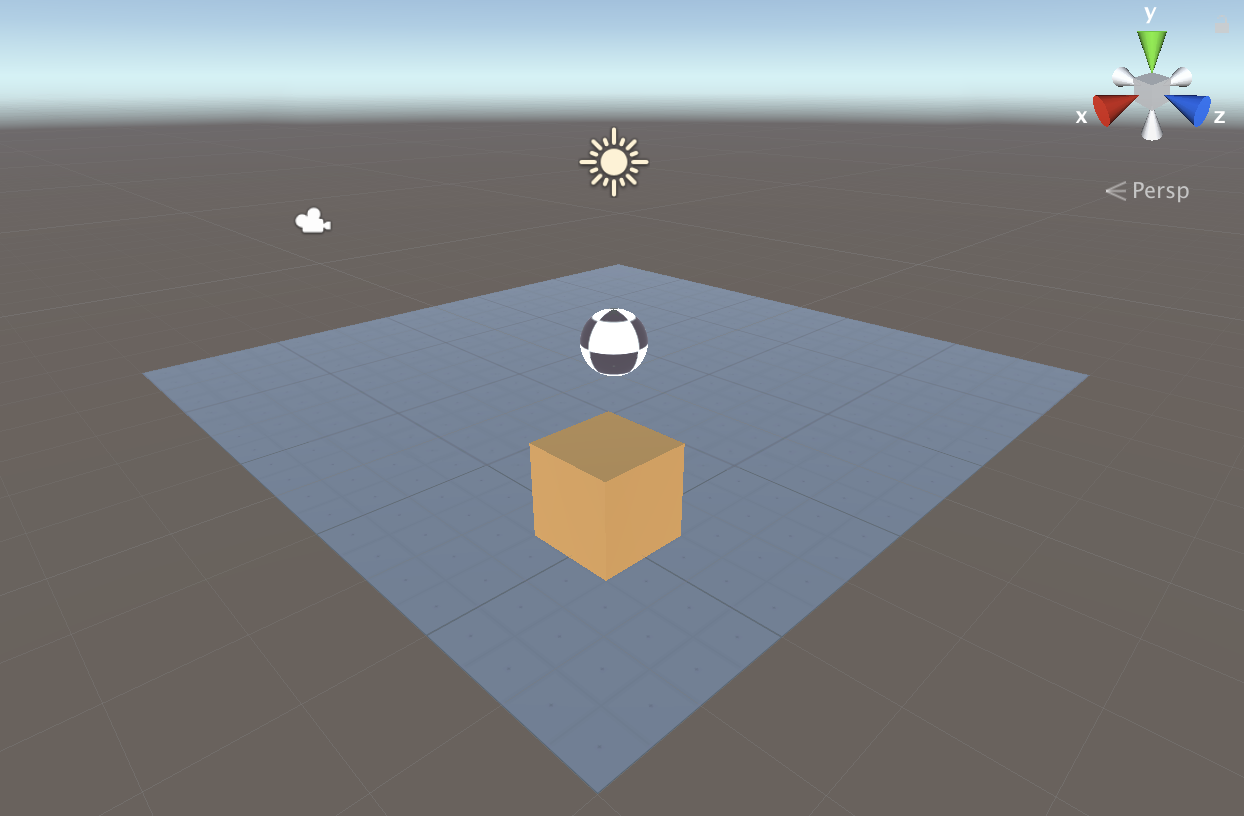
Floorの作成
- Planeの3D Objectを作成し、
Floorという名前を付けます。FloorのTransformをPosition = (0, 0, 0),Rotation = (0, 0, 0),Scale = (1, 1, 1)にします。FloorのMesh RendererでMaterialをLightGridFloorSquareに変更します。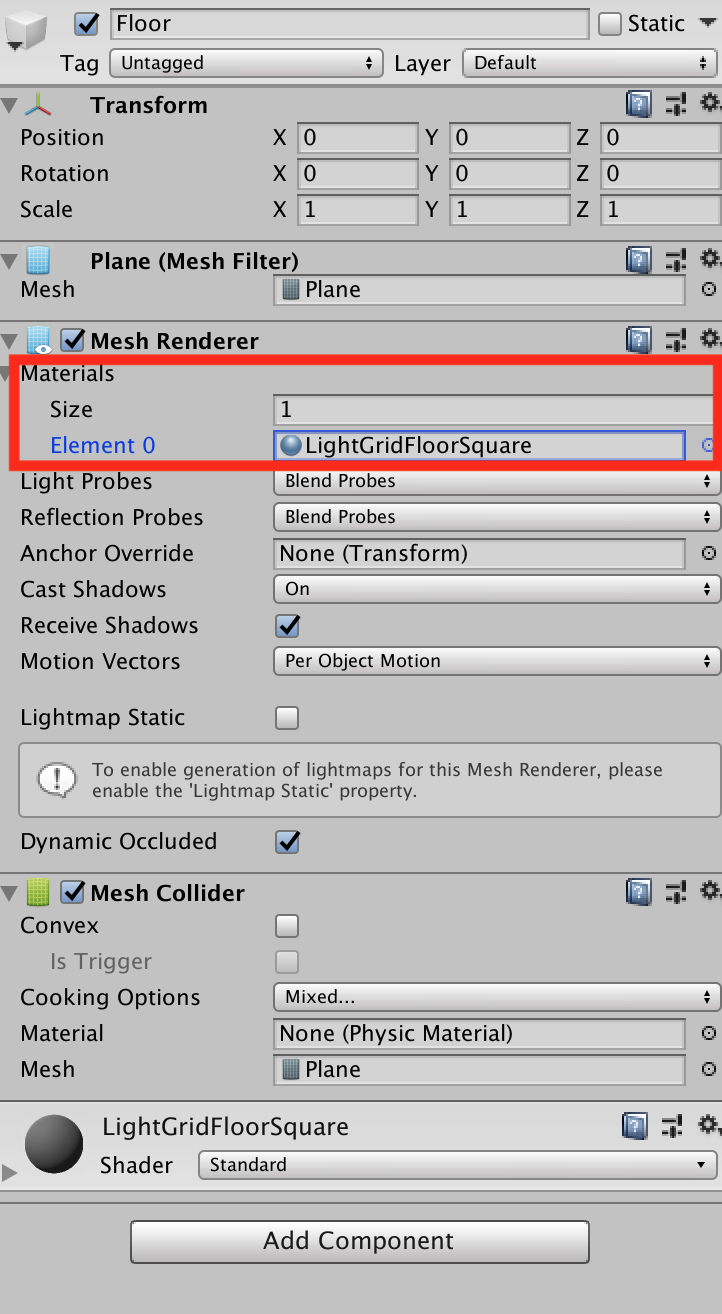
Targetの作成
- Cubeの3D Objectを作成し、
Targetという名前を付けます。TargetのTransformをPosition = (3, 0.5, 3),Rotation = (0, 0, 0),Scale = (1, 1, 1)にします。Floorと同様にTargetのMaterialをBlockに変更します。Agentの作成
- Sphereの3D Objectを作成し、
RollerAgentという名前を付けます。RollerAgentのTransformをPosition = (0, 0.5, 0),Rotation = (0, 0, 0),Scale = (1, 1, 1)にします。- これまでと同様に
RollerAgentのMaterialをCheckerSquareに変更します。RigidbodyをRollerAgentにAdd Componentします。
Academyの作成
Create Emptyで空のGameObjectを作成し、
Academyという名前を付けます。Academyの実装
- Create -> C# Scriptで
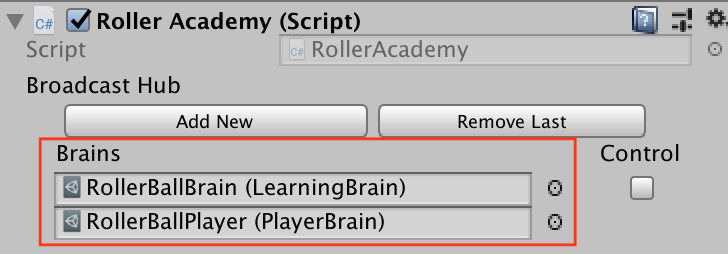
RollerAcademy.csを作成します。RollerAcademy.csをAcademyにAdd Componentします。RollerAcademy.csを次のように編集します。using MLAgents; public class RollerAcademy : Academy { }Brainの追加
- Assets -> Create -> ML-Agents で
Learning Brainを作成し、RollerBallBrainと名前を付けます。- 同様にAssets -> Create -> ML-Agentsで
Player Brainを作成し、RollerBallPlayerと名前を付けます。Agentの実装
- Create -> C# Scriptで
RollerAgent.csを作成し、RollerAgentにAdd Componentします。RollerAgent.csを次のように編集します。using MLAgents; public class RollerAgent : Agent { }今回の簡単な状況では
Academyは使用せずに、Agentにのみ処理を担当させます。Agentの実装(続き)
RollerAgent.csを次のように編集します。using UnityEngine; using MLAgents; public class RollerAgent : Agent { Rigidbody rBody; void Start () { rBody = GetComponent<Rigidbody>(); } public Transform Target; public override void AgentReset() { if (this.transform.position.y < 0) { // If the Agent fell, zero its momentum this.rBody.angularVelocity = Vector3.zero; this.rBody.velocity = Vector3.zero; this.transform.position = new Vector3( 0, 0.5f, 0); } // Move the target to a new spot Target.position = new Vector3(Random.value * 8 - 4, 0.5f, Random.value * 8 - 4); } }インスペクタ のTargetに
Targetオブジェクトを代入します。ここでは次のことを行なうための処理を書いています。
RollerAgentがTargetに到着した時、Done()を呼び出し、そのターン(エピソード)を終了させる。RollerAgentがTargetに到着した時、Targetをランダムな場所に移動させる。RollerAgentがFloorから落ちた時、そのRollerAgentをFloorの上に戻す。観測
今回、
RollerAgentが集めてRollerBallBrainに送る情報は次のものになります。
Targetの位置
AddVectorObs(Target.position);RollerAgentの位置
AddVectorObs(this.transform.position);RollerAgentの速度(RollerAgentがTargetを通り越したり、Floorから落ちないようにするために必要です)
AddVectorObs(rBody.velocity.x);
AddVectorObs(rBody.velocity.z);よって情報を集めて
RollerBallBrainへ送る処理を担当する、CollectObservations()メソッドは次のようになります。public override void CollectObservations() { // Target and Agent positions AddVectorObs(Target.position); AddVectorObs(this.transform.position); // Agent velocity AddVectorObs(rBody.velocity.x); AddVectorObs(rBody.velocity.z); }この
CollectObservation()メソッドをRollerAgent.csに追加します。using UnityEngine; using MLAgents; public class RollerAgent : Agent { Rigidbody rBody; void Start() { rBody = GetComponent<Rigidbody>(); } public Transform Target; public override void AgentReset() { if (this.transform.position.y < 0) { // If the Agent fell, zero its momentum this.rBody.angularVelocity = Vector3.zero; this.rBody.velocity = Vector3.zero; this.transform.position = new Vector3(0, 0.5f, 0); } // Move the target to a new spot Target.position = new Vector3(Random.value * 8 - 4, 0.5f, Random.value * 8 - 4); } public override void CollectObservations() { // Target and Agent positions AddVectorObs(Target.position); AddVectorObs(this.transform.position); // Agent velocity AddVectorObs(rBody.velocity.x); AddVectorObs(rBody.velocity.z); } }報酬
RollerAgentがTargetに到着した時、RollerAgentにSetReward()メソッドを使って1.0の報酬を与え、Done()メソッドを実行して終了します。float distanceToTarget = Vector3.Distance(this.transform.position, Target.position); // Reached target if (distanceToTarget < 1.42f) { SetReward(1.0f); Done(); }
Floorから落ちた場合もDone()メソッドを実行して終了します。// Fell off platform if (this.transform.position.y < 0) { Done(); }AgentAction()メソッドの作成
以上より、
AgentAction()メソッドは次のようになります。public float speed = 10; public override void AgentAction(float[] vectorAction, string textAction) { // Actions, size = 2 Vector3 controlSignal = Vector3.zero; controlSignal.x = vectorAction[0]; controlSignal.z = vectorAction[1]; rBody.AddForce(controlSignal * speed); // Rewards float distanceToTarget = Vector3.Distance(this.transform.position, Target.position); // Reached target if (distanceToTarget < 1.42f) { SetReward(1.0f); Done(); } // Fell off platform if (this.transform.position.y < 0) { Done(); } }したがって、最終的に
RollerAgent.csは次のようになります。using UnityEngine; using MLAgents; public class RollerAgent : Agent { Rigidbody rBody; public float speed = 10; void Start() { rBody = GetComponent<Rigidbody>(); } public Transform Target; public override void AgentReset() { if (this.transform.position.y < 0) { // If the Agent fell, zero its momentum this.rBody.angularVelocity = Vector3.zero; this.rBody.velocity = Vector3.zero; this.transform.position = new Vector3(0, 0.5f, 0); } // Move the target to a new spot Target.position = new Vector3(Random.value * 8 - 4, 0.5f, Random.value * 8 - 4); } public override void CollectObservations() { // Target and Agent positions AddVectorObs(Target.position); AddVectorObs(this.transform.position); // Agent velocity AddVectorObs(rBody.velocity.x); AddVectorObs(rBody.velocity.z); } public override void AgentAction(float[] vectorAction, string textAction) { // Actions, size = 2 Vector3 controlSignal = Vector3.zero; controlSignal.x = vectorAction[0]; controlSignal.z = vectorAction[1]; rBody.AddForce(controlSignal * speed); // Rewards float distanceToTarget = Vector3.Distance(this.transform.position, Target.position); // Reached target if (distanceToTarget < 1.42f) { SetReward(1.0f); Done(); } // Fell off platform if (this.transform.position.y < 0) { Done(); } } }Unityエディタ側の設定
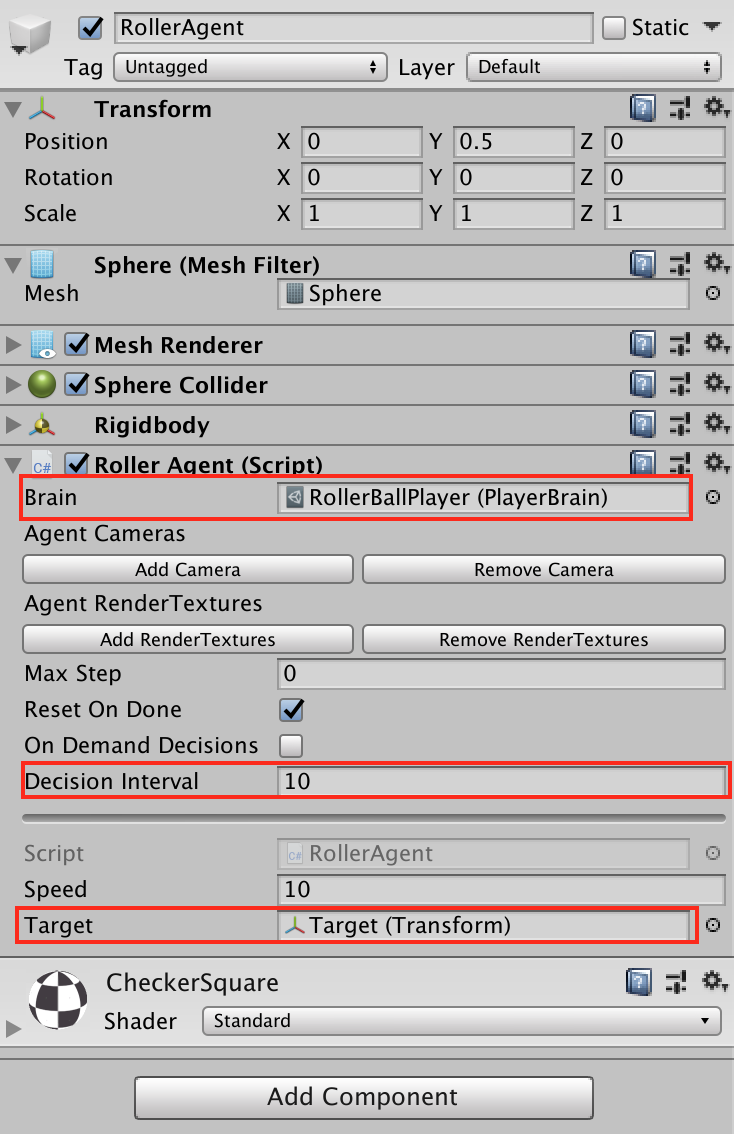
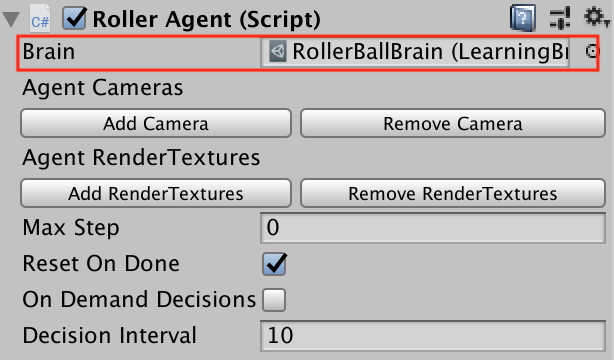
AcademyのインスペクターのBroadcast HubにRollerBallBrainとRollerBallPlayerを追加します。RollerBallPlayerをRollerAgentのBrainに代入します。- Decision Intervalを1から10に変更します。
TargetGameObjectをTargetに代入します。
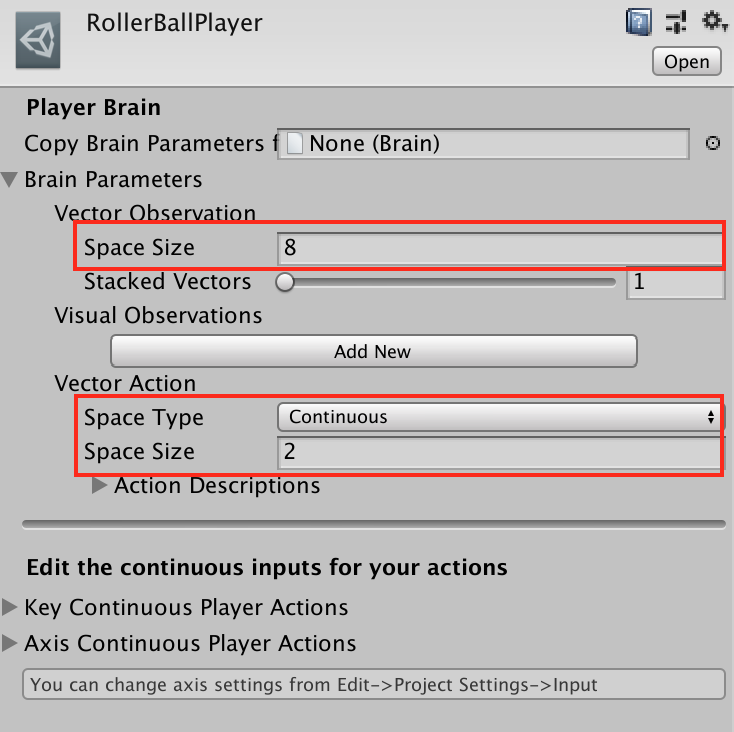
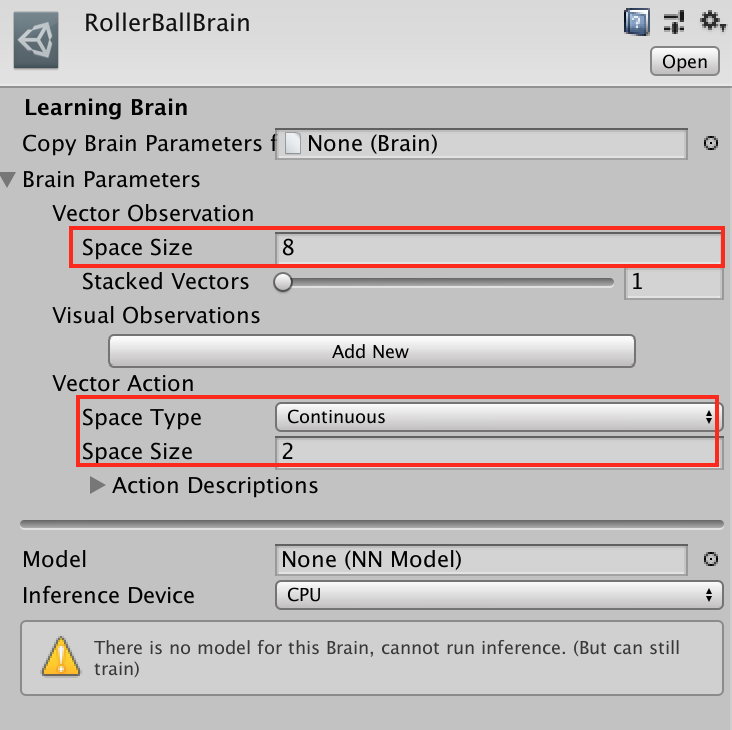
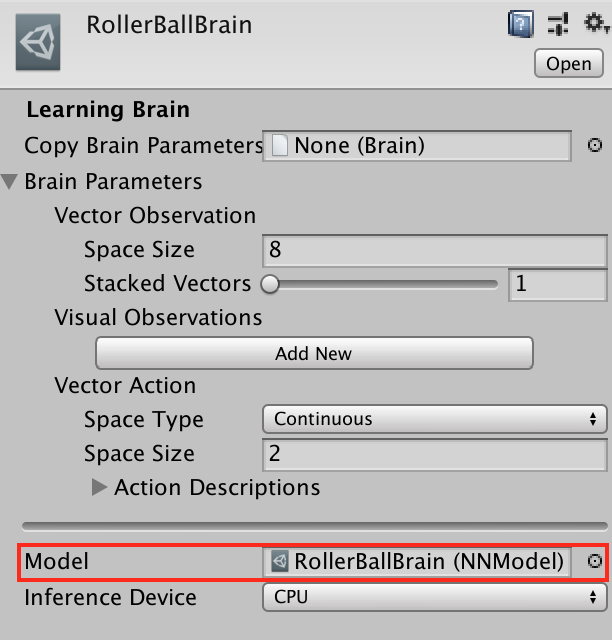
RollerBallPlayerとRollerBallBrainのSpace Size(Vector Observation)、Space Type、Space Size(Vector Action)をそれぞれ次のように変更します。
テスト
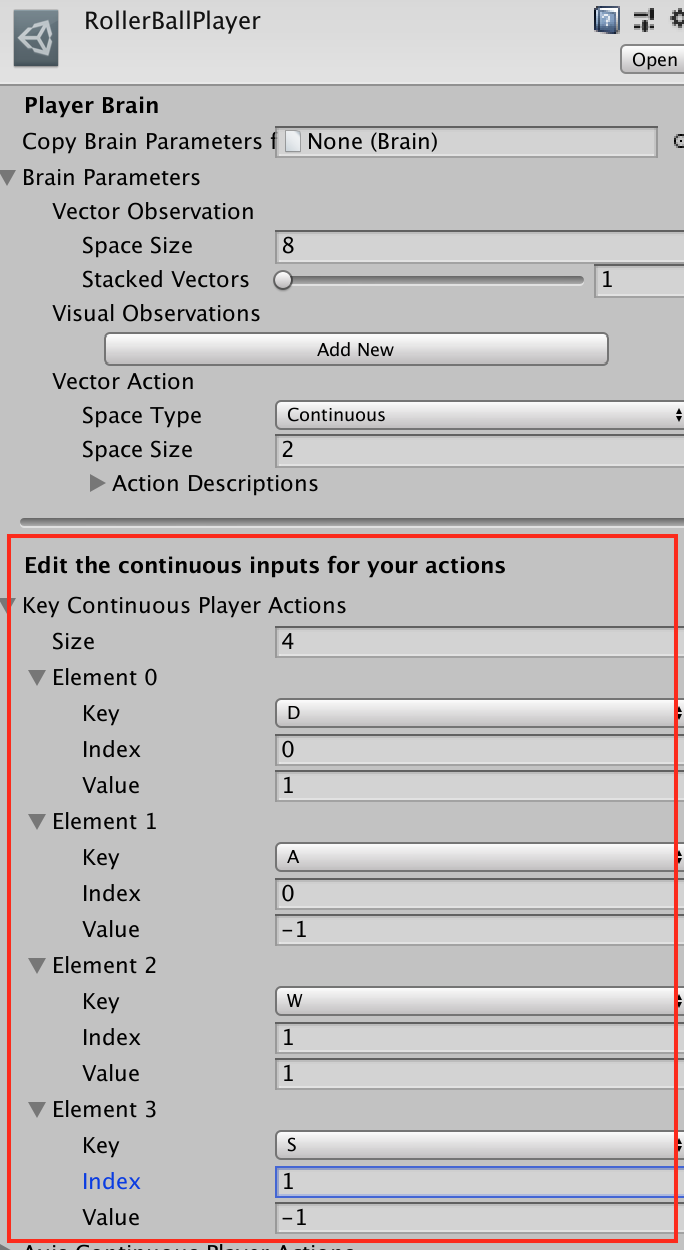
RollerBallPlayerのKey Continuous Player Actionsのサイズを4にして、Element0からElement3までを次のように設定します。
Element Key Index Value Element 0 D 0 1 Element 1 A 0 -1 Element 2 W 1 1 Element 3 S 1 -1
Indexは、
AgentAction()メソッドに渡されるaction配列のindexに対応しています。 Keyを押すとaction[index]にValueが代入されます。これでPlayするとWASDキーで
RollerAgentを私達の手で操作できます。
RollerAgentがTargetに近づくとTargetの位置がランダムな位置に移ることも、RollerAgentがFloorから落ちると中心の位置に戻ることも確認できます。
学習
RollerAgentのBrainをRollerBallPlayerからRollerBallBrainに切り替えます。
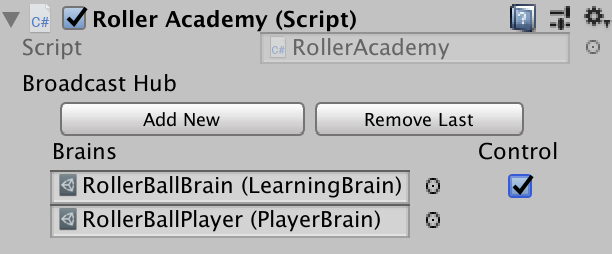
AcademyにアタッチされているRollerAcademyで、Controlにチェックをします。
ターミナルで
RollerBall/Assets/に移動して、$ mlagents-learn ml-agents-master/config/trainer_config.yaml --run-id=RollerBall-1 --trainを実行します。
次のように表示されたらUnityエディタでPlayボタンを押します。
INFO:mlagents.envs:Start training by pressing the Play button in the Unity Editor.次のように表示されたら無事に学習が開始したことになります。(今回は50000steps学習させます)
INFO:mlagents.envs:
'Academy' started successfully!
Unity Academy name: Academy
        Number of Brains: 2
        Number of Training Brains : 1
        Reset Parameters :

Unity brain name: RollerBallBrain
        Number of Visual Observations (per agent): 0
        Vector Observation space size (per agent): 8
        Number of stacked Vector Observation: 1
        Vector Action space type: continuous
        Vector Action space size (per agent): [2]
        Vector Action descriptions: ,
Unity brain name: RollerBallPlayer
        Number of Visual Observations (per agent): 0
        Vector Observation space size (per agent): 8
        Number of stacked Vector Observation: 1
        Vector Action space type: continuous
        Vector Action space size (per agent): [2]
        Vector Action descriptions: ,
2019-05-29 12:13:39.143382: I tensorflow/core/platform/cpu_feature_guard.cc:140] Your CPU supports instructions that this TensorFlow binary was not compiled to use: AVX2 FMA
INFO:mlagents.envs:Hyperparameters for the PPO Trainer of brain RollerBallBrain:
    batch_size: 1024
    beta:   0.005
    buffer_size:    10240
    epsilon:    0.2
    gamma:  0.99
    hidden_units:   128
    lambd:  0.95
    learning_rate:  0.0003
    max_steps:  5.0e4
    normalize:  False
    num_epoch:  3
    num_layers: 2
    time_horizon:   64
    sequence_length:    64
    summary_freq:   1000
    use_recurrent:  False
    summary_path:   ./summaries/RollerBall-1-0_RollerBallBrain
    memory_size:    256
    use_curiosity:  False
    curiosity_strength: 0.01
    curiosity_enc_size: 128
    model_path: ./models/RollerBall-1-0/RollerBallBrain
INFO:mlagents.trainers: RollerBall-1-0: RollerBallBrain: Step: 1000. Time Elapsed: 11.076 s Mean Reward: 0.178. Std of Reward: 0.382. Training.
学習が終わると、推論モデルである
RollerBallBrain.nnファイルがAssets/models/RollerBall-1-0/に生成されるので、これをRollerBallBrainのModelにセットします。
また、
RollerAcademyのControlのチェックを外します。これでUnityのエディタでPlayボタンを押すと、
RollerAgentが自発的に動きます。あまり賢いとは言えませんが、
Targetに向かっていこうとする意思は感じられます。
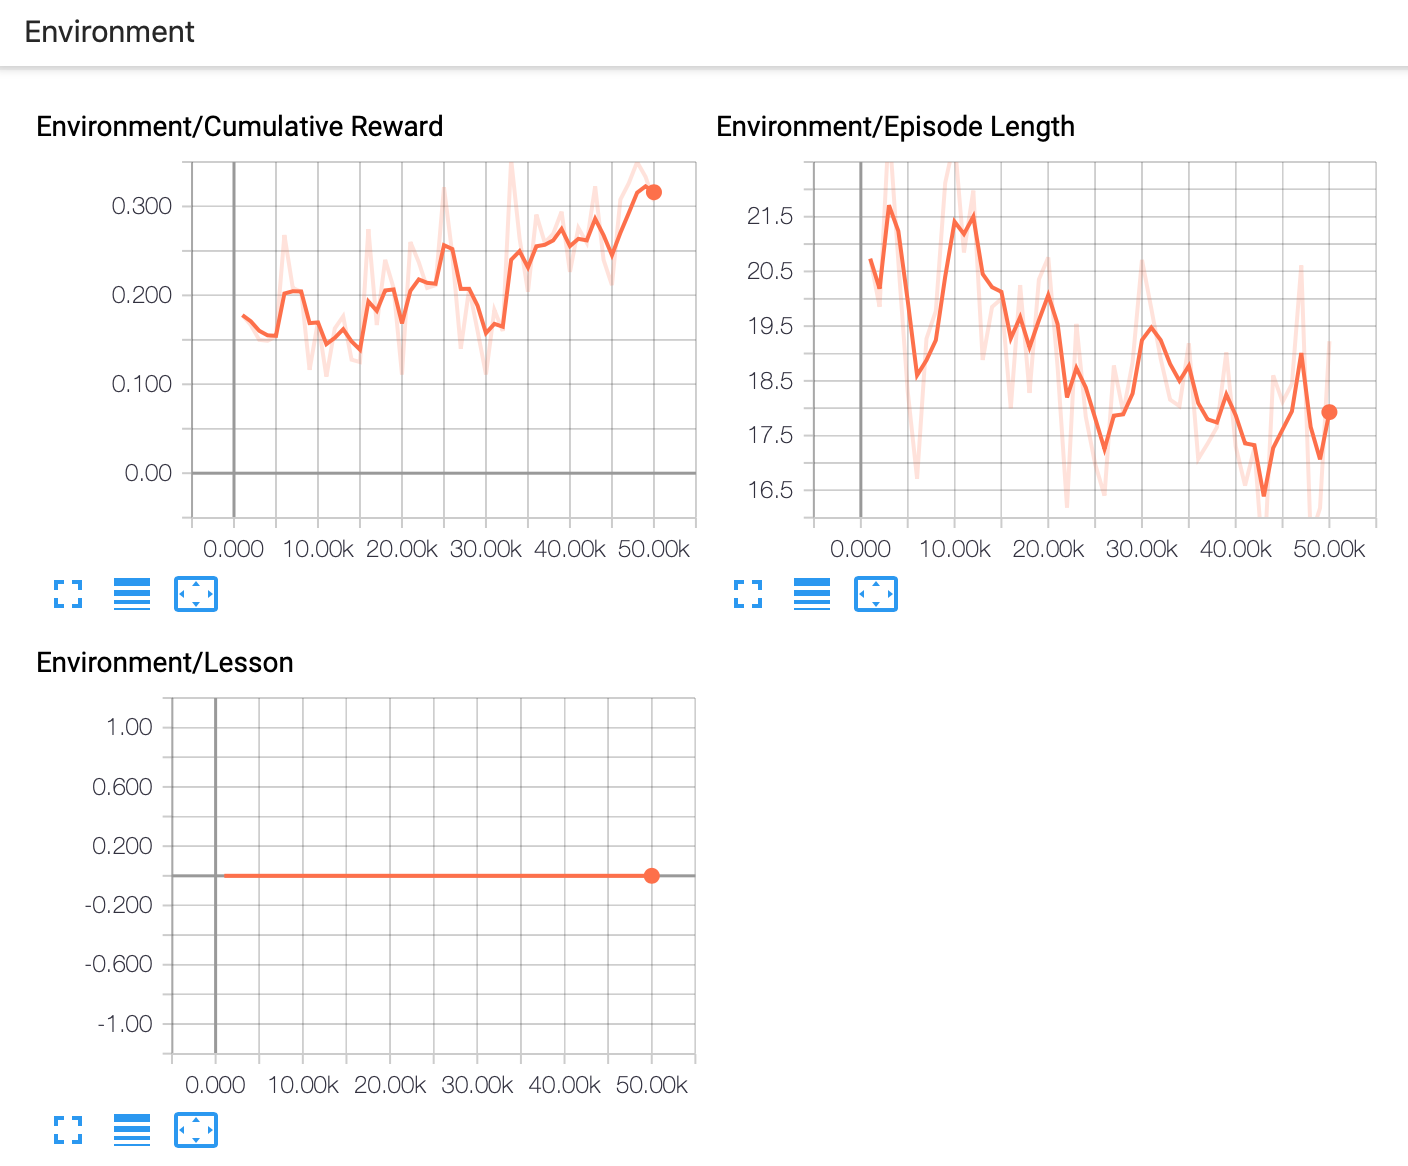
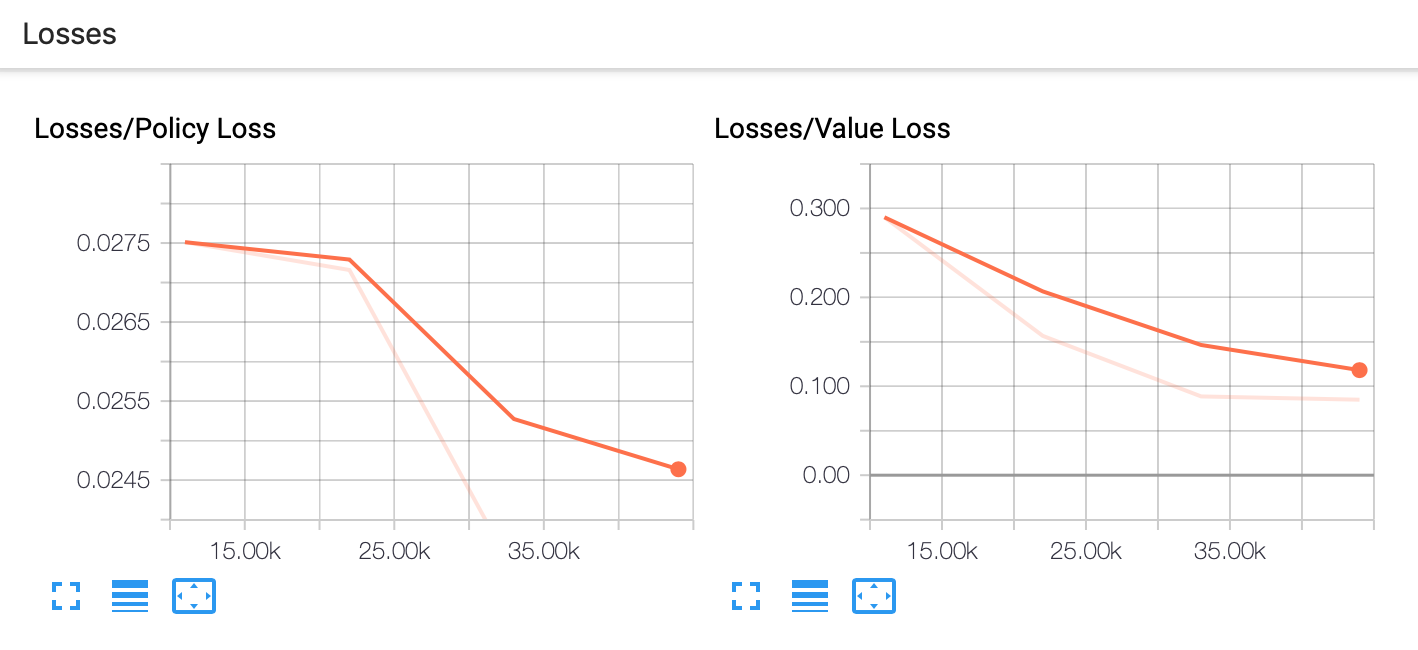
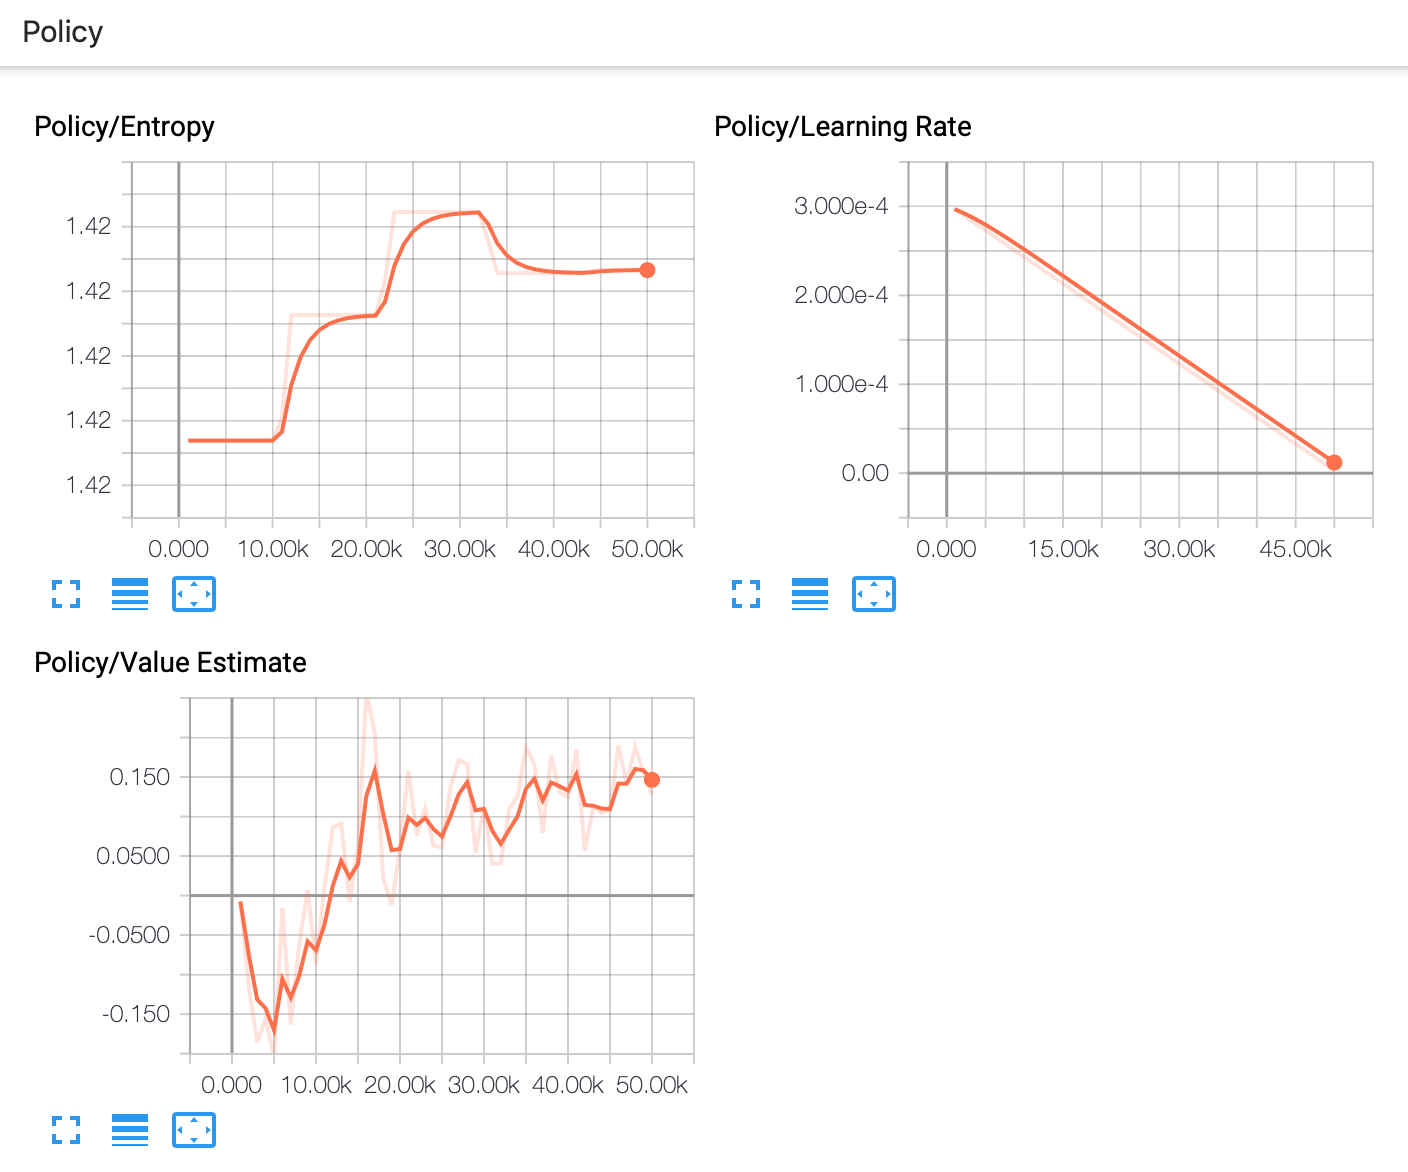
ターミナルで
$ tensorboard --logdir=summariesを実行して、http://localhost:6006 をブラウザで開くと、今回の学習状況を詳細に調べることができます。
参考


- 投稿日:2019-05-29T13:13:09+09:00
【Unity】強化学習のチュートリアルをやってみた
はじめに
この記事は、
ml-agents/Learning-Environment-Create-New.md at master · Unity-Technologies/ml-agents · GitHub
に従って実際に強化学習のチュートリアルをやってみた、というだけのものです。実行環境
- macOS Mojave 10.14.5
- Unity 2019.1.4f1
- ML-Agents Beta 0.8.1
ML-Agentsの導入
以下のリンクのどちらかを参考にしてML-Agentsを導入してください。
プロジェクトの準備
- Unityで
RollerBallという名前のプロジェクトを作成します。- ProjectSetting -> Player -> Configuration でScripting Runtime Versionが .NET 4.x Equivalentになっていることを確認します。
ml-agents-masterフォルダをコピーしてRollerBall/Assets/にペーストします。環境の作成
Floorの作成
- Planeの3D Objectを作成し、
Floorという名前を付けます。FloorのTransformをPosition = (0, 0, 0),Rotation = (0, 0, 0),Scale = (1, 1, 1)にします。FloorのMesh RendererでMaterialをLightGridFloorSquareに変更します。Targetの作成
- Cubeの3D Objectを作成し、
Targetという名前を付けます。TargetのTransformをPosition = (3, 0.5, 3),Rotation = (0, 0, 0),Scale = (1, 1, 1)にします。Floorと同様にTargetのMaterialをBlockに変更します。Agentの作成
- Sphereの3D Objectを作成し、
RollerAgentという名前を付けます。RollerAgentのTransformをPosition = (0, 0.5, 0),Rotation = (0, 0, 0),Scale = (1, 1, 1)にします。- これまでと同様に
RollerAgentのMaterialをCheckerSquareに変更します。RigidbodyをRollerAgentにAdd Componentします。
Academyの作成
Create Emptyで空のGameObjectを作成し、
Academyという名前を付けます。Academyの実装
- Create -> C# Scriptで
RollerAcademy.csを作成します。RollerAcademy.csをAcademyにAdd Componentします。RollerAcademy.csを次のように編集します。using MLAgents; public class RollerAcademy : Academy { }Brainの追加
- Assets -> Create -> ML-Agents で
Learning Brainを作成し、RollerBallBrainと名前を付けます。- 同様にAssets -> Create -> ML-Agentsで
Player Brainを作成し、RollerBallPlayerと名前を付けます。Agentの実装
- Create -> C# Scriptで
RollerAgent.csを作成し、RollerAgentにAdd Componentします。RollerAgent.csを次のように編集します。using MLAgents; public class RollerAgent : Agent { }今回の簡単な状況では
Academyは使用せずに、Agentにのみ処理を担当させます。Agentの実装(続き)
RollerAgent.csを次のように編集します。using UnityEngine; using MLAgents; public class RollerAgent : Agent { Rigidbody rBody; void Start () { rBody = GetComponent<Rigidbody>(); } public Transform Target; public override void AgentReset() { if (this.transform.position.y < 0) { // If the Agent fell, zero its momentum this.rBody.angularVelocity = Vector3.zero; this.rBody.velocity = Vector3.zero; this.transform.position = new Vector3( 0, 0.5f, 0); } // Move the target to a new spot Target.position = new Vector3(Random.value * 8 - 4, 0.5f, Random.value * 8 - 4); } }インスペクタ のTargetに
Targetオブジェクトを代入します。ここでは次のことを行なうための処理を書いています。
RollerAgentがTargetに到着した時、Done()を呼び出し、そのターン(エピソード)を終了させる。RollerAgentがTargetに到着した時、Targetをランダムな場所に移動させる。RollerAgentがFloorから落ちた時、そのRollerAgentをFloorの上に戻す。観測
今回、
RollerAgentが集めてRollerBallBrainに送る情報は次のものになります。
Targetの位置
AddVectorObs(Target.position);RollerAgentの位置
AddVectorObs(this.transform.position);RollerAgentの速度(RollerAgentがTargetを通り越したり、Floorから落ちないようにするために必要です)
AddVectorObs(rBody.velocity.x);
AddVectorObs(rBody.velocity.z);よって情報を集めて
RollerBallBrainへ送る処理を担当する、CollectObservations()メソッドは次のようになります。public override void CollectObservations() { // Target and Agent positions AddVectorObs(Target.position); AddVectorObs(this.transform.position); // Agent velocity AddVectorObs(rBody.velocity.x); AddVectorObs(rBody.velocity.z); }この
CollectObservation()メソッドをRollerAgent.csに追加します。using UnityEngine; using MLAgents; public class RollerAgent : Agent { Rigidbody rBody; void Start() { rBody = GetComponent<Rigidbody>(); } public Transform Target; public override void AgentReset() { if (this.transform.position.y < 0) { // If the Agent fell, zero its momentum this.rBody.angularVelocity = Vector3.zero; this.rBody.velocity = Vector3.zero; this.transform.position = new Vector3(0, 0.5f, 0); } // Move the target to a new spot Target.position = new Vector3(Random.value * 8 - 4, 0.5f, Random.value * 8 - 4); } public override void CollectObservations() { // Target and Agent positions AddVectorObs(Target.position); AddVectorObs(this.transform.position); // Agent velocity AddVectorObs(rBody.velocity.x); AddVectorObs(rBody.velocity.z); } }報酬
RollerAgentがTargetに到着した時、RollerAgentにSetReward()メソッドを使って1.0の報酬を与え、Done()メソッドを実行して終了します。float distanceToTarget = Vector3.Distance(this.transform.position, Target.position); // Reached target if (distanceToTarget < 1.42f) { SetReward(1.0f); Done(); }
Floorから落ちた場合もDone()メソッドを実行して終了します。// Fell off platform if (this.transform.position.y < 0) { Done(); }AgentAction()メソッドの作成
以上より、
AgentAction()メソッドは次のようになります。public float speed = 10; public override void AgentAction(float[] vectorAction, string textAction) { // Actions, size = 2 Vector3 controlSignal = Vector3.zero; controlSignal.x = vectorAction[0]; controlSignal.z = vectorAction[1]; rBody.AddForce(controlSignal * speed); // Rewards float distanceToTarget = Vector3.Distance(this.transform.position, Target.position); // Reached target if (distanceToTarget < 1.42f) { SetReward(1.0f); Done(); } // Fell off platform if (this.transform.position.y < 0) { Done(); } }したがって、最終的に
RollerAgent.csは次のようになります。using UnityEngine; using MLAgents; public class RollerAgent : Agent { Rigidbody rBody; public float speed = 10; void Start() { rBody = GetComponent<Rigidbody>(); } public Transform Target; public override void AgentReset() { if (this.transform.position.y < 0) { // If the Agent fell, zero its momentum this.rBody.angularVelocity = Vector3.zero; this.rBody.velocity = Vector3.zero; this.transform.position = new Vector3(0, 0.5f, 0); } // Move the target to a new spot Target.position = new Vector3(Random.value * 8 - 4, 0.5f, Random.value * 8 - 4); } public override void CollectObservations() { // Target and Agent positions AddVectorObs(Target.position); AddVectorObs(this.transform.position); // Agent velocity AddVectorObs(rBody.velocity.x); AddVectorObs(rBody.velocity.z); } public override void AgentAction(float[] vectorAction, string textAction) { // Actions, size = 2 Vector3 controlSignal = Vector3.zero; controlSignal.x = vectorAction[0]; controlSignal.z = vectorAction[1]; rBody.AddForce(controlSignal * speed); // Rewards float distanceToTarget = Vector3.Distance(this.transform.position, Target.position); // Reached target if (distanceToTarget < 1.42f) { SetReward(1.0f); Done(); } // Fell off platform if (this.transform.position.y < 0) { Done(); } } }Unityエディタ側の設定
AcademyのインスペクターのBroadcast HubにRollerBallBrainとRollerBallPlayerを追加します。RollerBallPlayerをRollerAgentのBrainに代入します。- Decision Intervalを1から10に変更します。
TargetGameObjectをTargetに代入します。
RollerBallPlayerとRollerBallBrainのSpace Size(Vector Observation)、Space Type、Space Size(Vector Action)をそれぞれ次のように変更します。
テスト
RollerBallPlayerのKey Continuous Player Actionsのサイズを4にして、Element0からElement3までを次のように設定します。
Element Key Index Value Element 0 D 0 1 Element 1 A 0 -1 Element 2 W 1 1 Element 3 S 1 -1
Indexは、
AgentAction()メソッドに渡されるaction配列のindexに対応しています。 Keyを押すとaction[index]にValueが代入されます。これでPlayするとWASDキーで
RollerAgentを私達の手で操作できます。
RollerAgentがTargetに近づくとTargetの位置がランダムな位置に移ることも、RollerAgentがFloorから落ちると中心の位置に戻ることも確認できます。
学習
RollerAgentのBrainをRollerBallPlayerからRollerBallBrainに切り替えます。
AcademyにアタッチされているRollerAcademyで、Controlにチェックをします。
ターミナルで
RollerBall/Assets/に移動して、$ mlagents-learn ml-agents-master/config/trainer_config.yaml --run-id=RollerBall-1 --trainを実行します。
次のように表示されたらUnityエディタでPlayボタンを押します。
INFO:mlagents.envs:Start training by pressing the Play button in the Unity Editor.次のように表示されたら無事に学習が開始したことになります。(今回は50000steps学習させます)
INFO:mlagents.envs:
'Academy' started successfully!
Unity Academy name: Academy
        Number of Brains: 2
        Number of Training Brains : 1
        Reset Parameters :

Unity brain name: RollerBallBrain
        Number of Visual Observations (per agent): 0
        Vector Observation space size (per agent): 8
        Number of stacked Vector Observation: 1
        Vector Action space type: continuous
        Vector Action space size (per agent): [2]
        Vector Action descriptions: ,
Unity brain name: RollerBallPlayer
        Number of Visual Observations (per agent): 0
        Vector Observation space size (per agent): 8
        Number of stacked Vector Observation: 1
        Vector Action space type: continuous
        Vector Action space size (per agent): [2]
        Vector Action descriptions: ,
2019-05-29 12:13:39.143382: I tensorflow/core/platform/cpu_feature_guard.cc:140] Your CPU supports instructions that this TensorFlow binary was not compiled to use: AVX2 FMA
INFO:mlagents.envs:Hyperparameters for the PPO Trainer of brain RollerBallBrain:
    batch_size: 1024
    beta:   0.005
    buffer_size:    10240
    epsilon:    0.2
    gamma:  0.99
    hidden_units:   128
    lambd:  0.95
    learning_rate:  0.0003
    max_steps:  5.0e4
    normalize:  False
    num_epoch:  3
    num_layers: 2
    time_horizon:   64
    sequence_length:    64
    summary_freq:   1000
    use_recurrent:  False
    summary_path:   ./summaries/RollerBall-1-0_RollerBallBrain
    memory_size:    256
    use_curiosity:  False
    curiosity_strength: 0.01
    curiosity_enc_size: 128
    model_path: ./models/RollerBall-1-0/RollerBallBrain
INFO:mlagents.trainers: RollerBall-1-0: RollerBallBrain: Step: 1000. Time Elapsed: 11.076 s Mean Reward: 0.178. Std of Reward: 0.382. Training.
学習が終わると、推論モデルである
RollerBallBrain.nnファイルがAssets/models/RollerBall-1-0/に生成されるので、これをRollerBallBrainのModelにセットします。
また、
RollerAcademyのControlのチェックを外します。これでUnityのエディタでPlayボタンを押すと、
RollerAgentが自発的に動きます。あまり賢いとは言えませんが、
Targetに向かっていこうとする意思は感じられます。
ターミナルで
$ tensorboard --logdir=summariesを実行して、http://localhost:6006 をブラウザで開くと、今回の学習状況を詳細に調べることができます。
参考
- 投稿日:2019-05-29T12:51:17+09:00
僕のプロフィール
簡単な経歴
1998年生まれ
Geeksalon(プログラミングスクール)Unity編卒業生。
プログラミングSPARTCAMP Swift編、Python編卒業生。
現在はIT企業にて受託案件に携わる。主な作品
Swiftを用いた開発
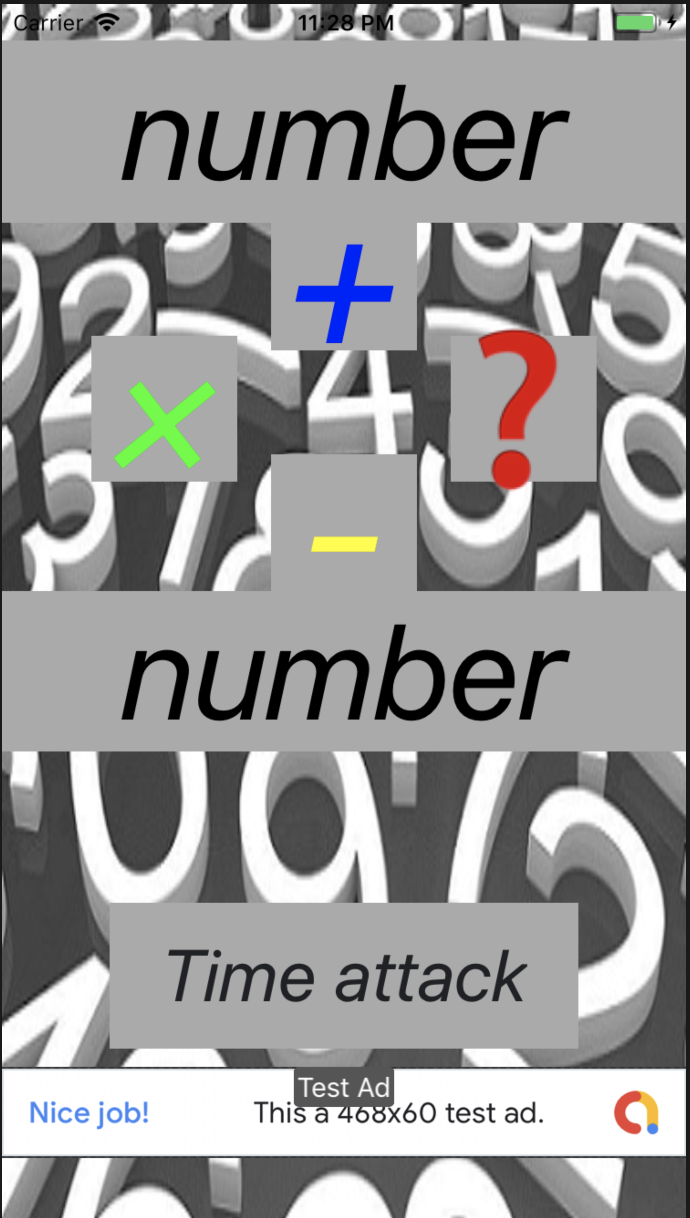
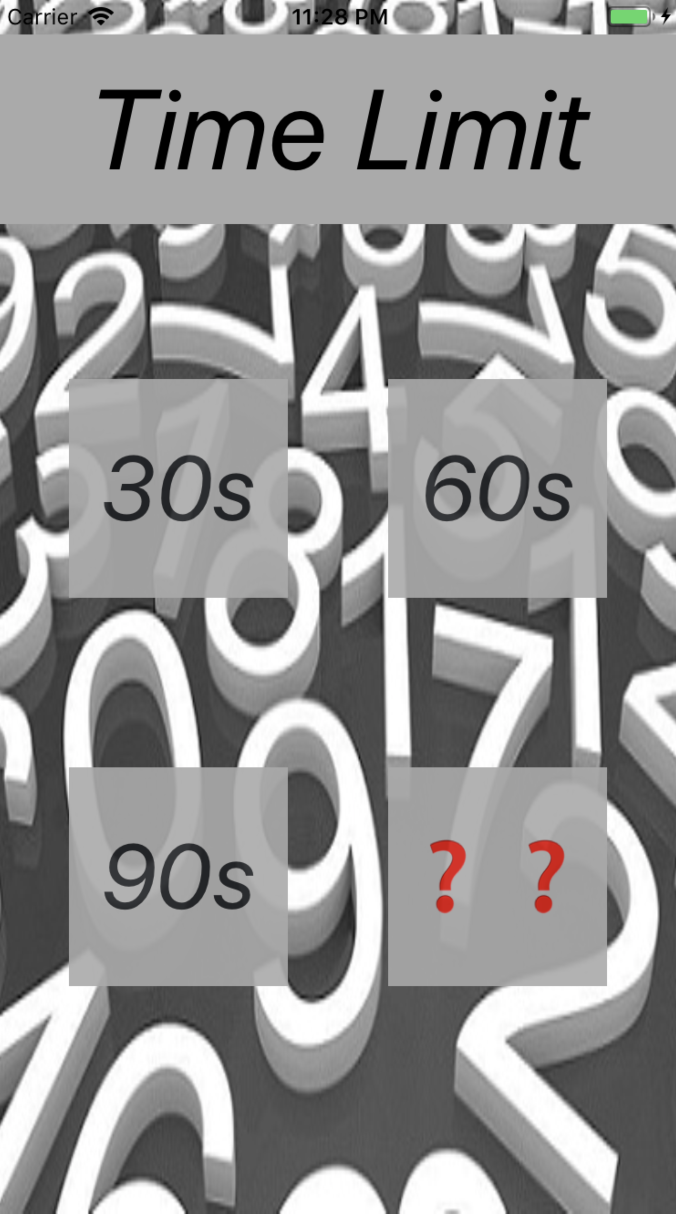
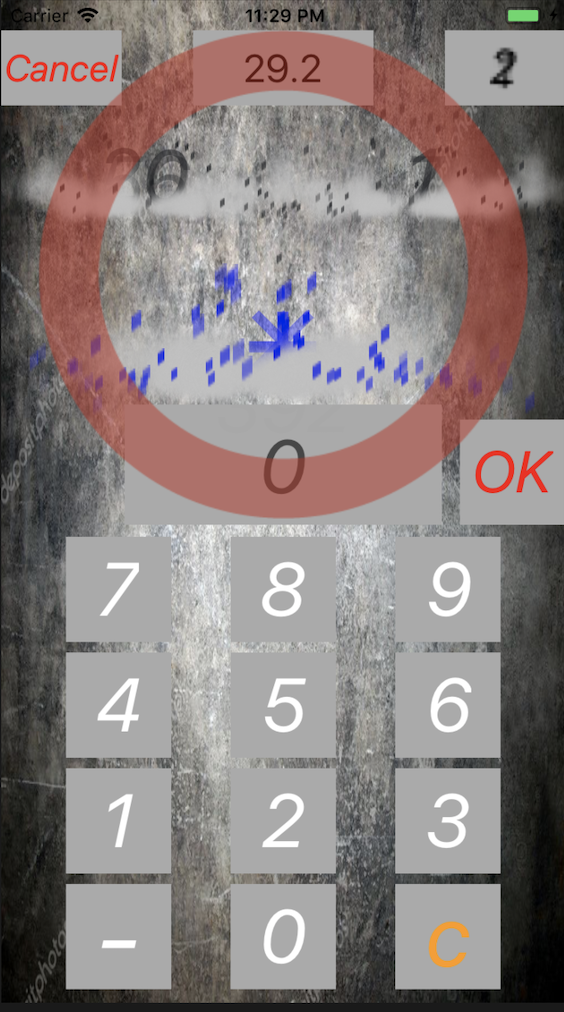
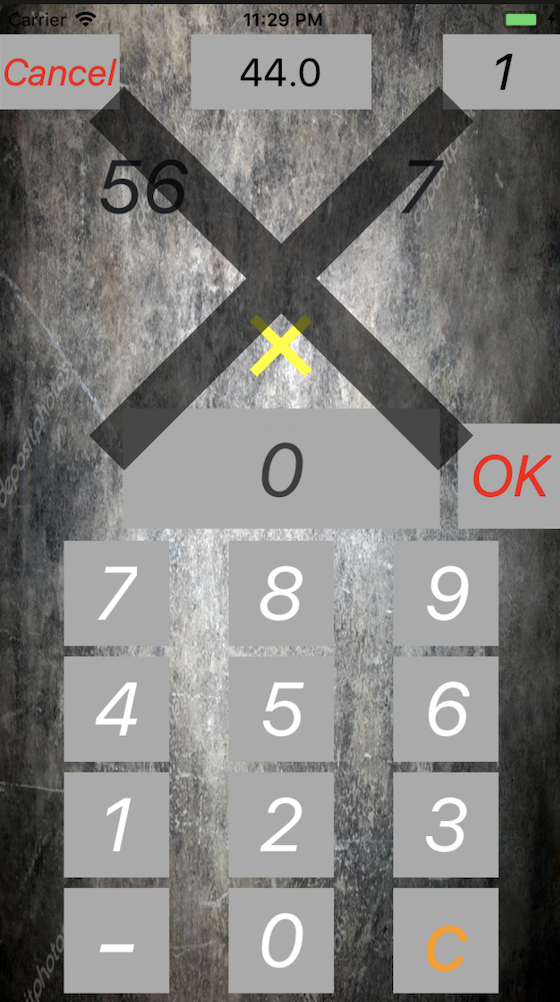
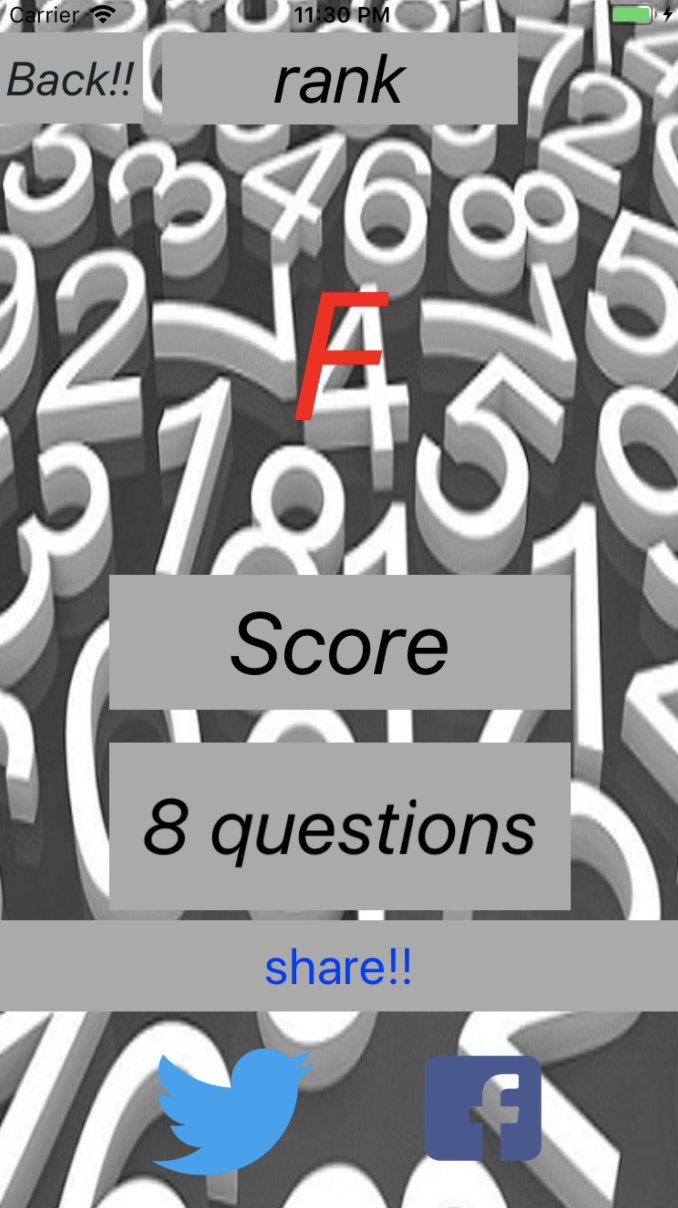
タイトル NumberNumber
https://itunes.apple.com/us/app/numbernumber/id1444835578?l=ja&ls=1&mt=8
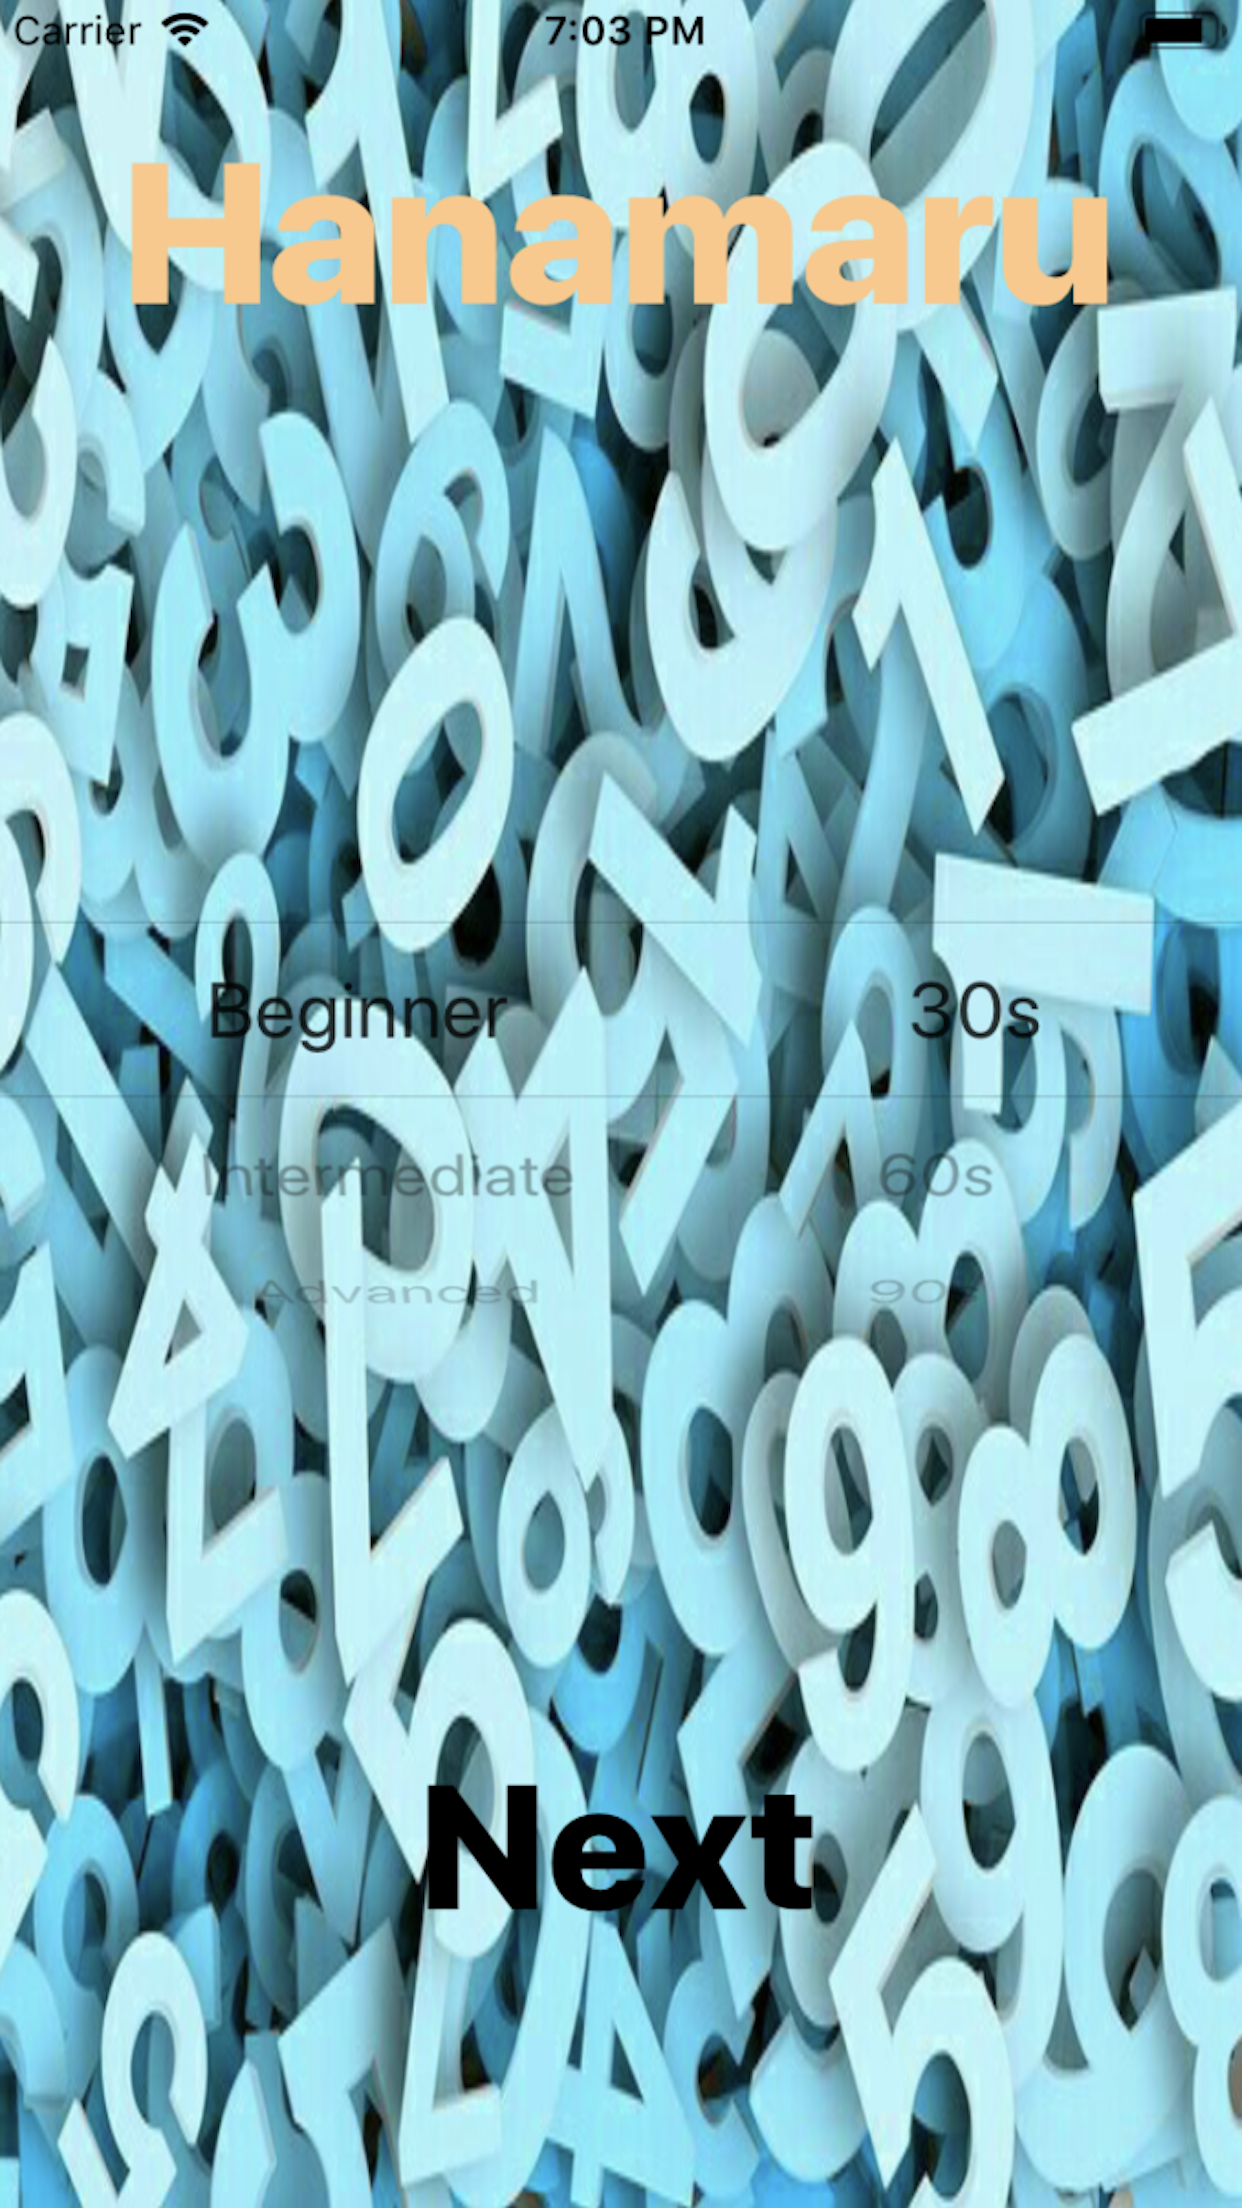
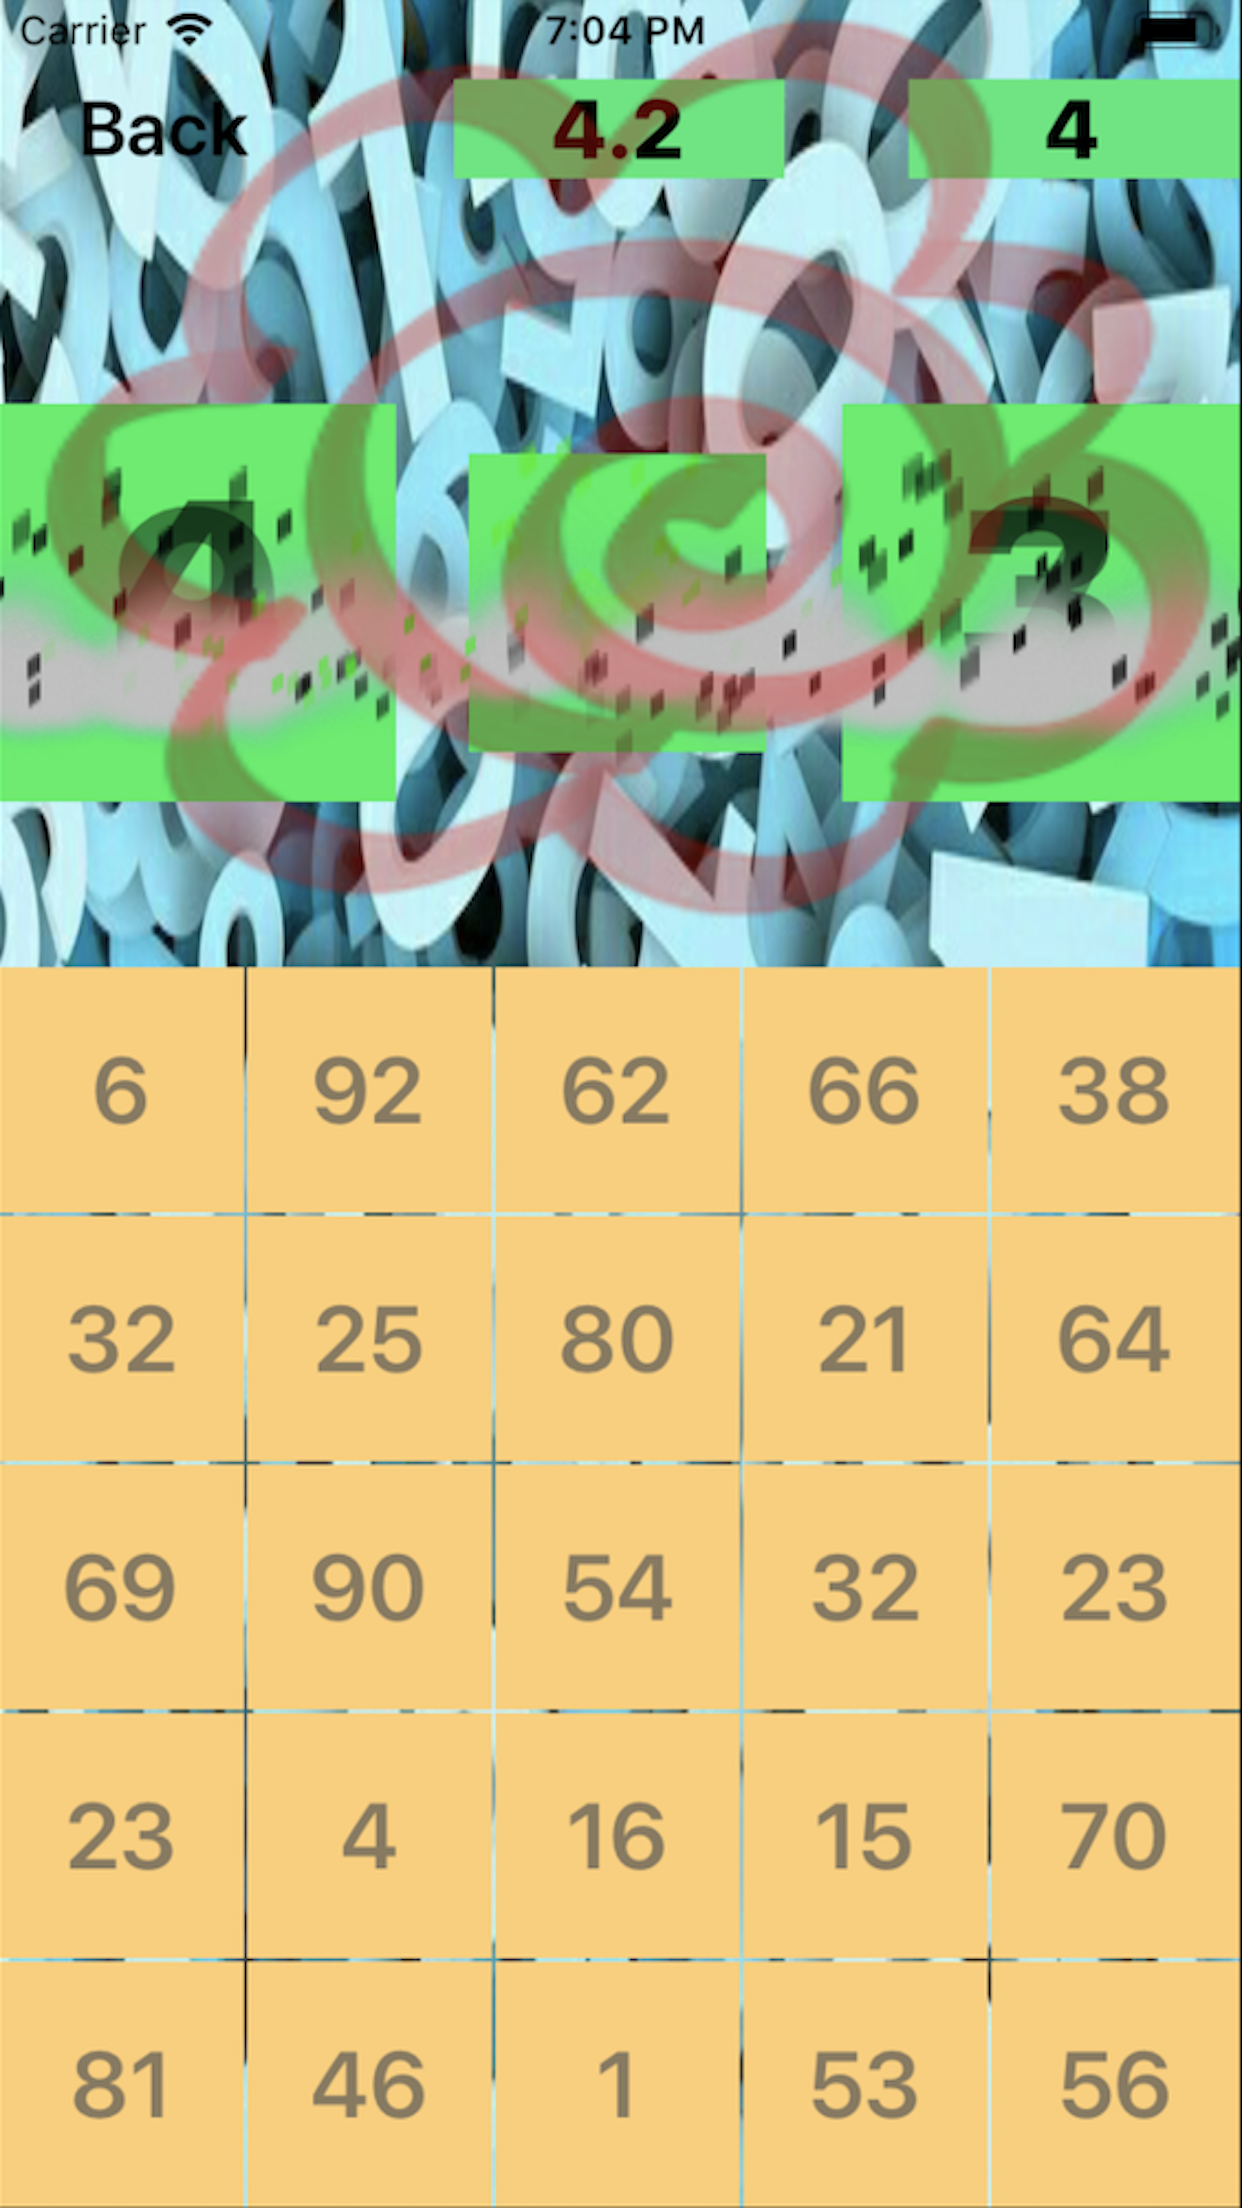
様々なアニメーションをを使い、ランダムで出てくる数字に迫力をだし、他の数字ゲームとの差別化を図りました。またUIにもこだわりうユーザーが飽きないようなイタリックでおしゃれな大人でも使えるようなアプリになったと思います。Hanamaru
https://github.com/matushinn/Hanamaru
insta
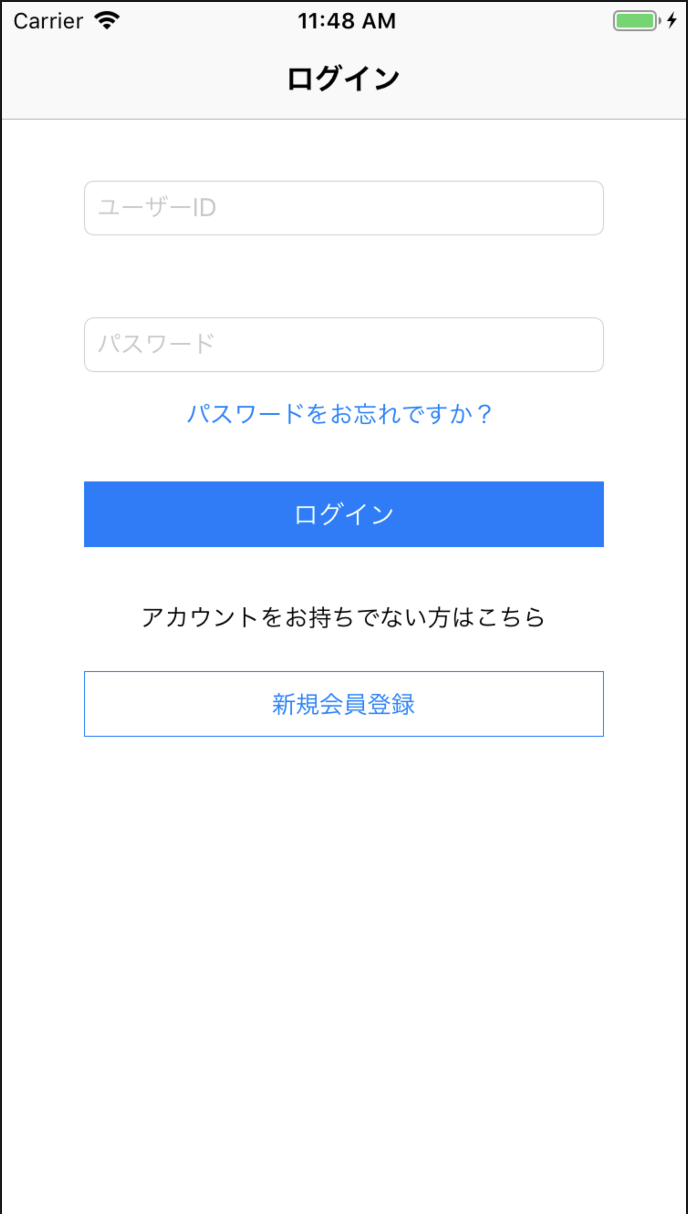
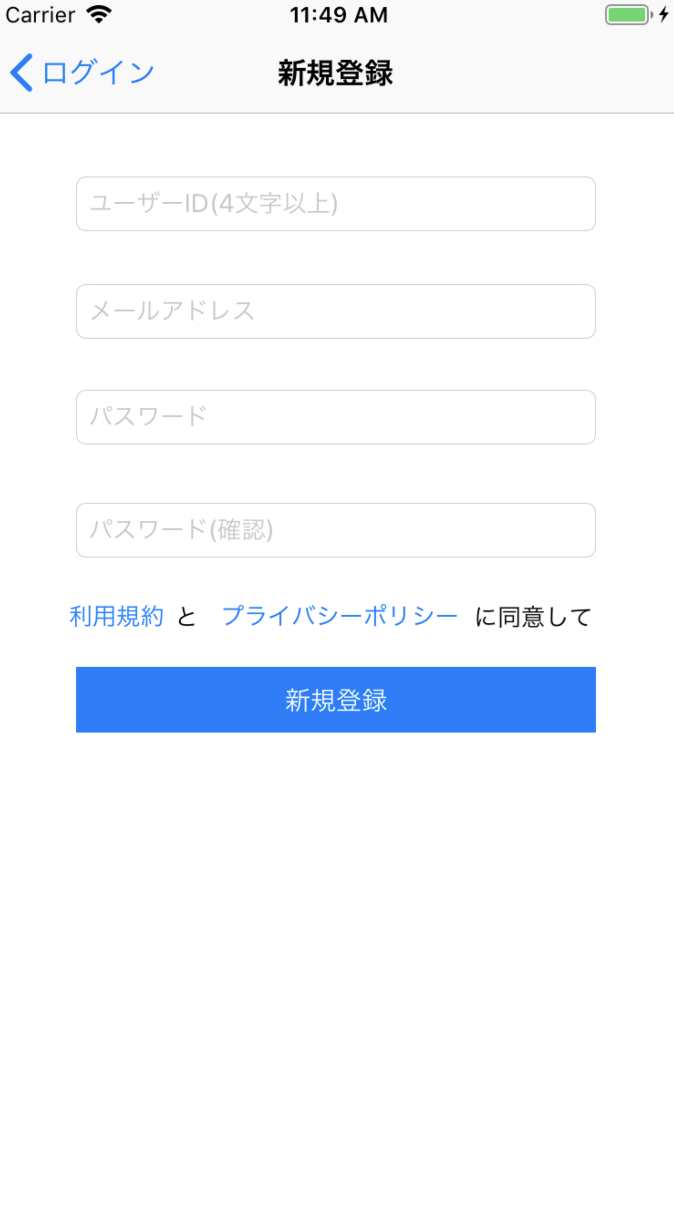
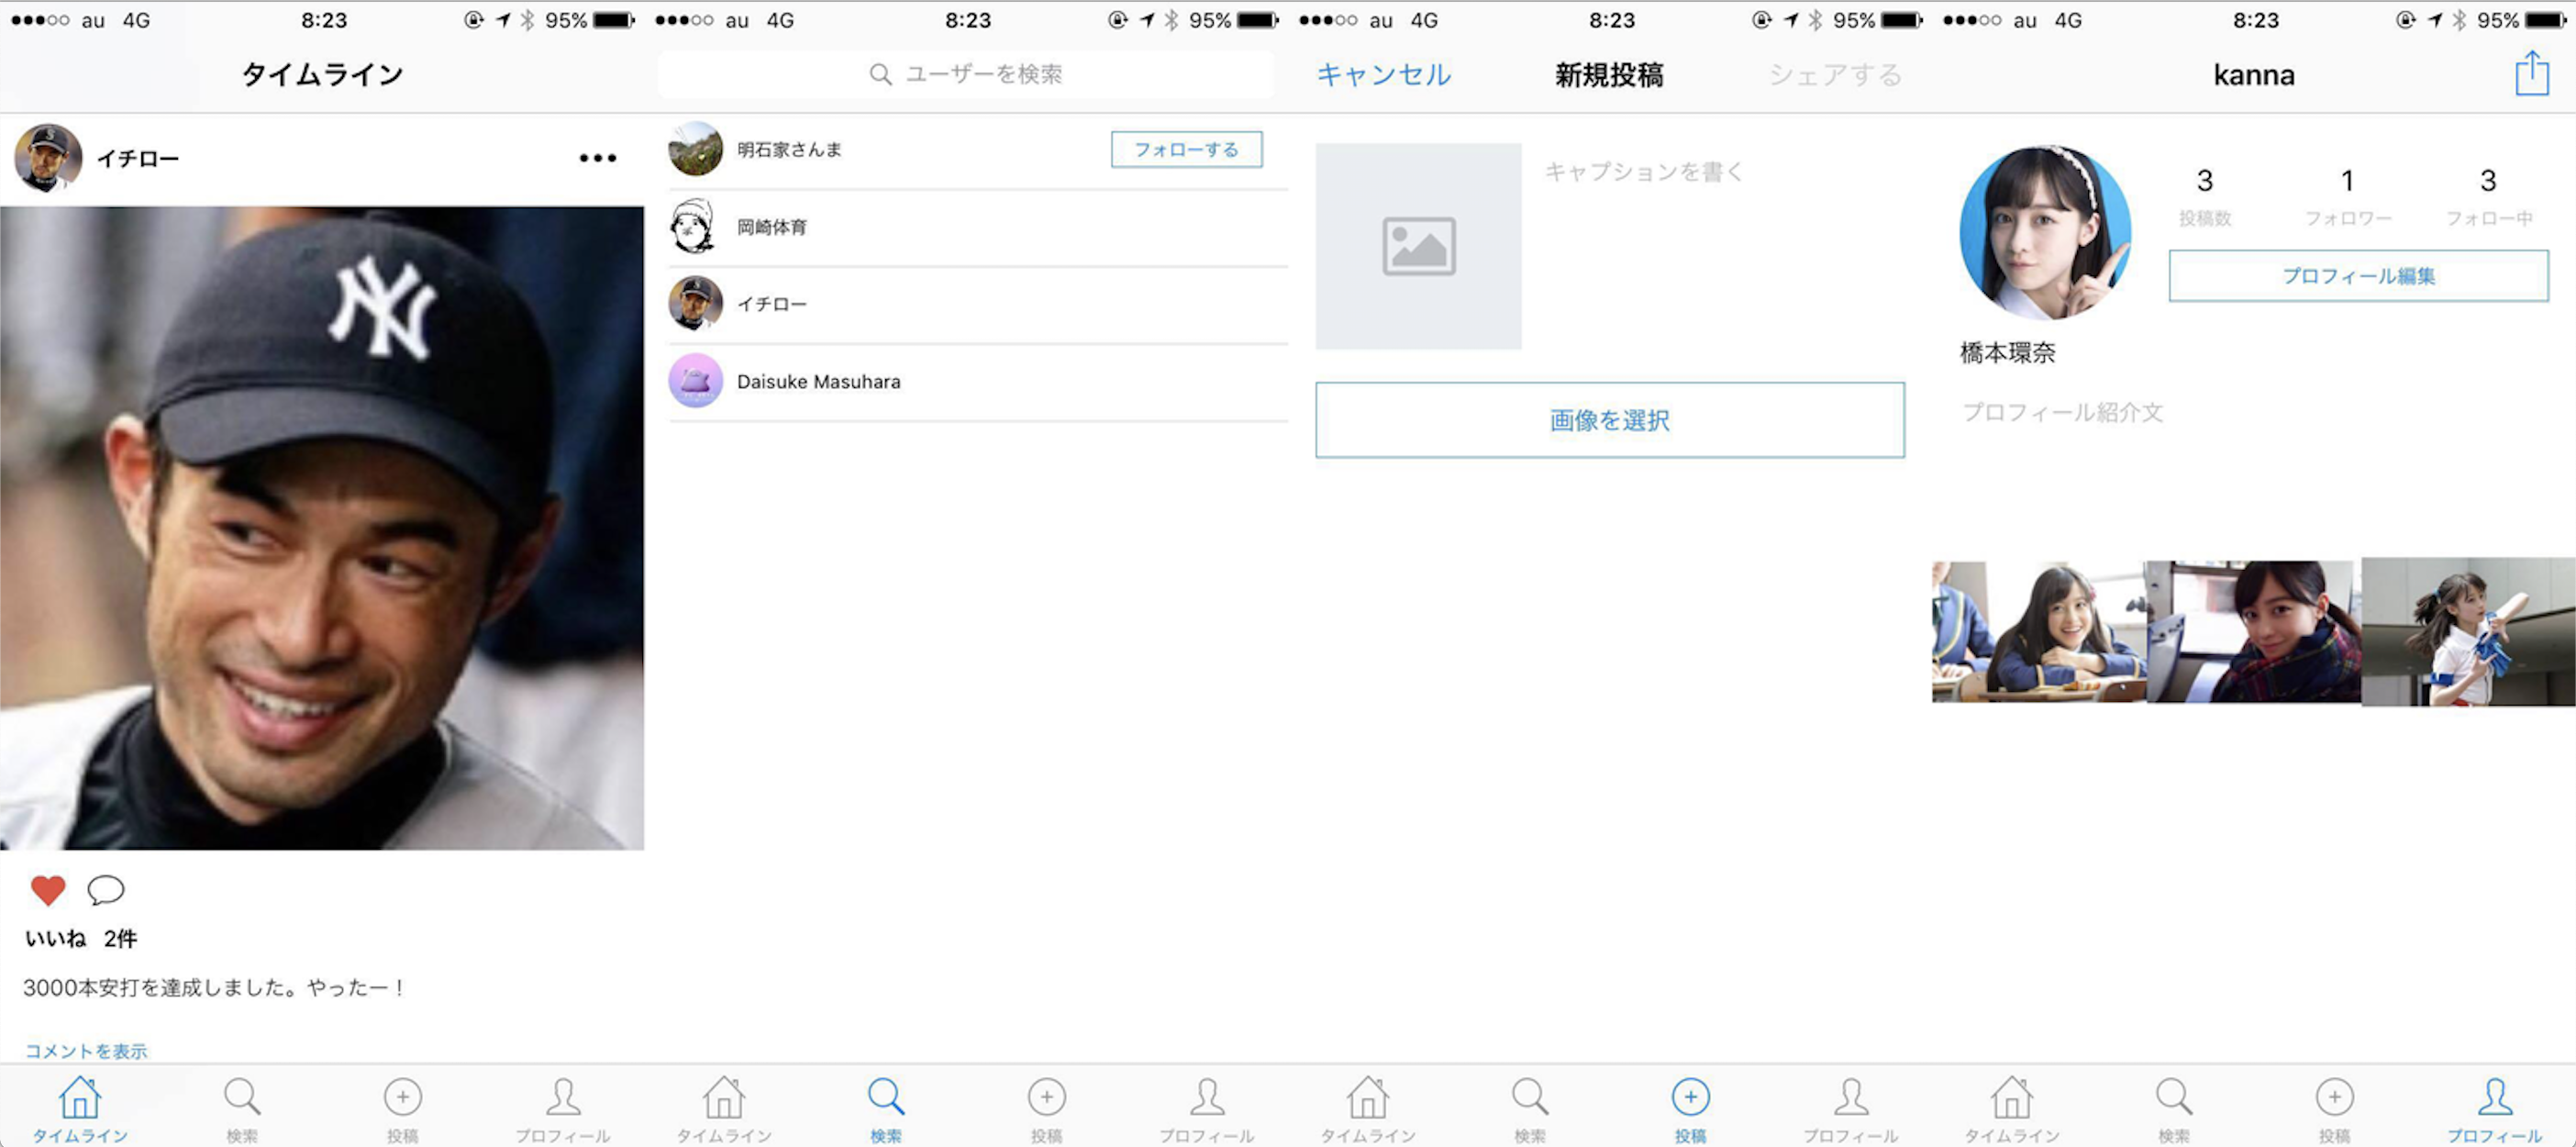
https://github.com/matushinn/InstaApp
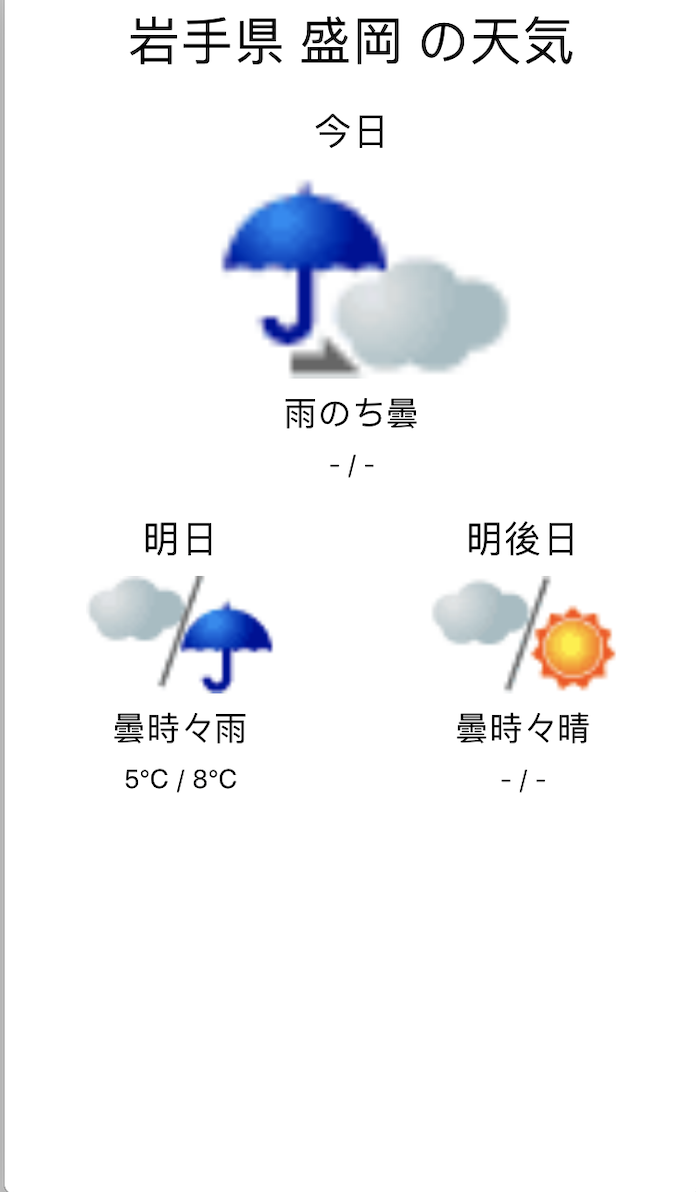
Weather
https://github.com/matushinn/WeatherApp
Unityを用いた開発
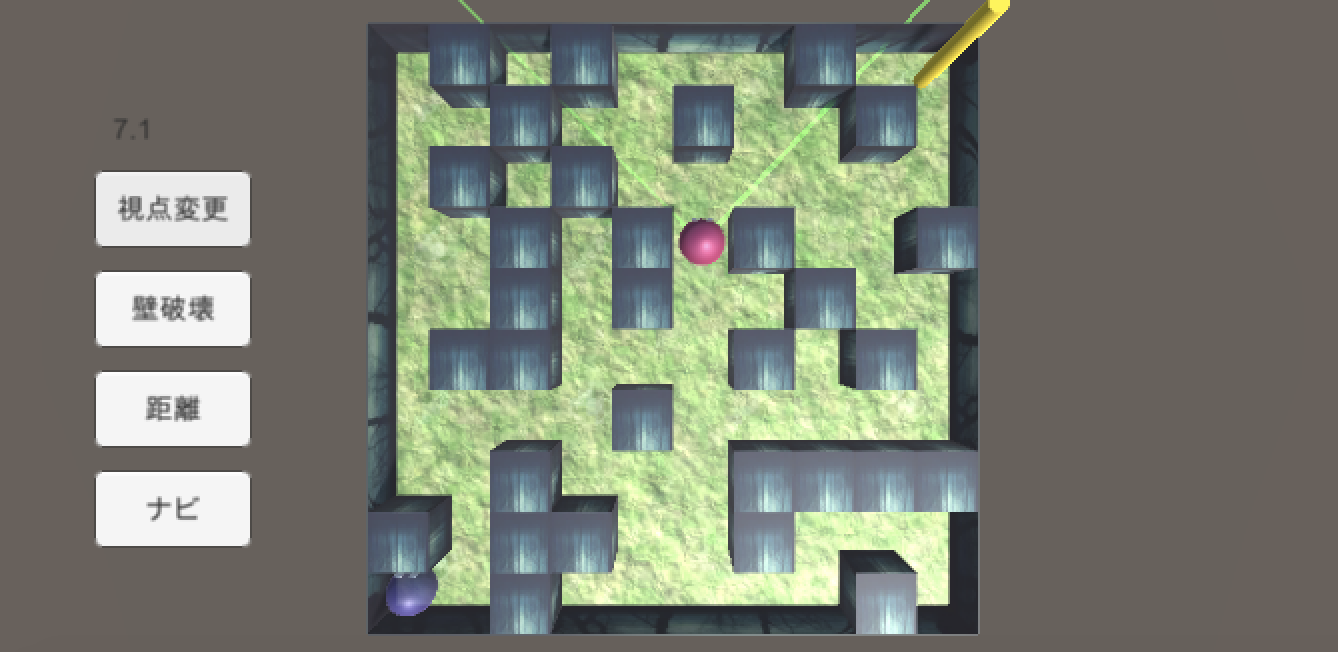
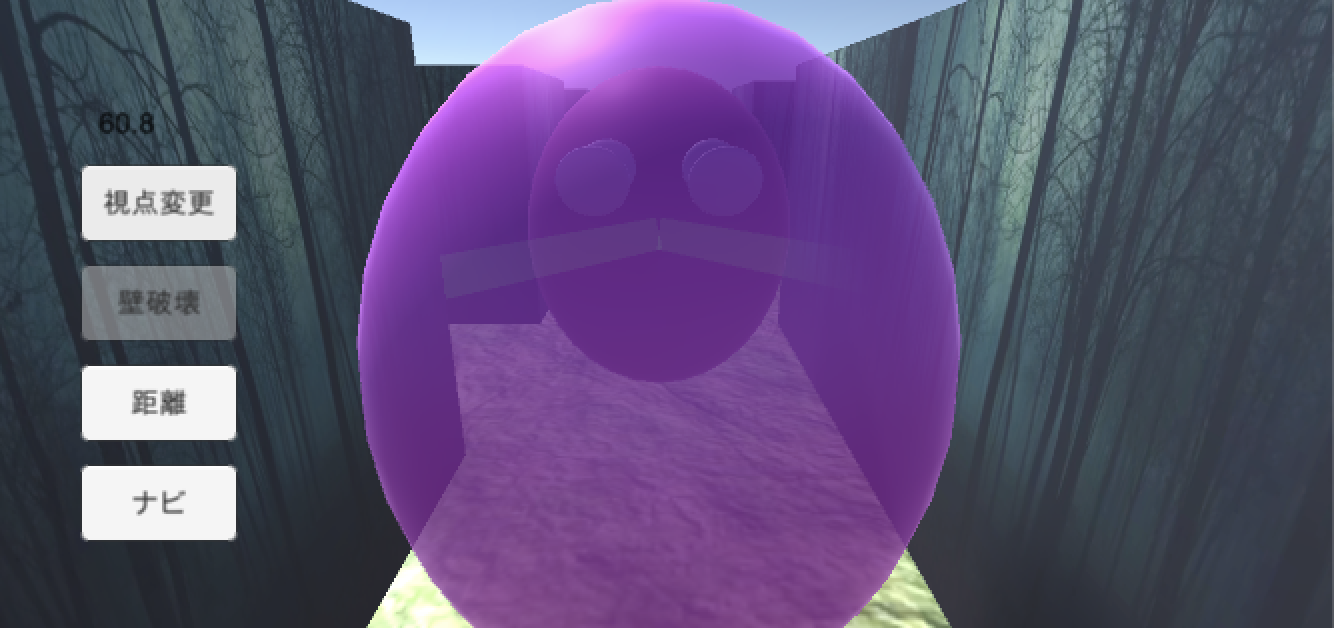
MazeMazeMaze
https://github.com/matushinn/OriginalMaze
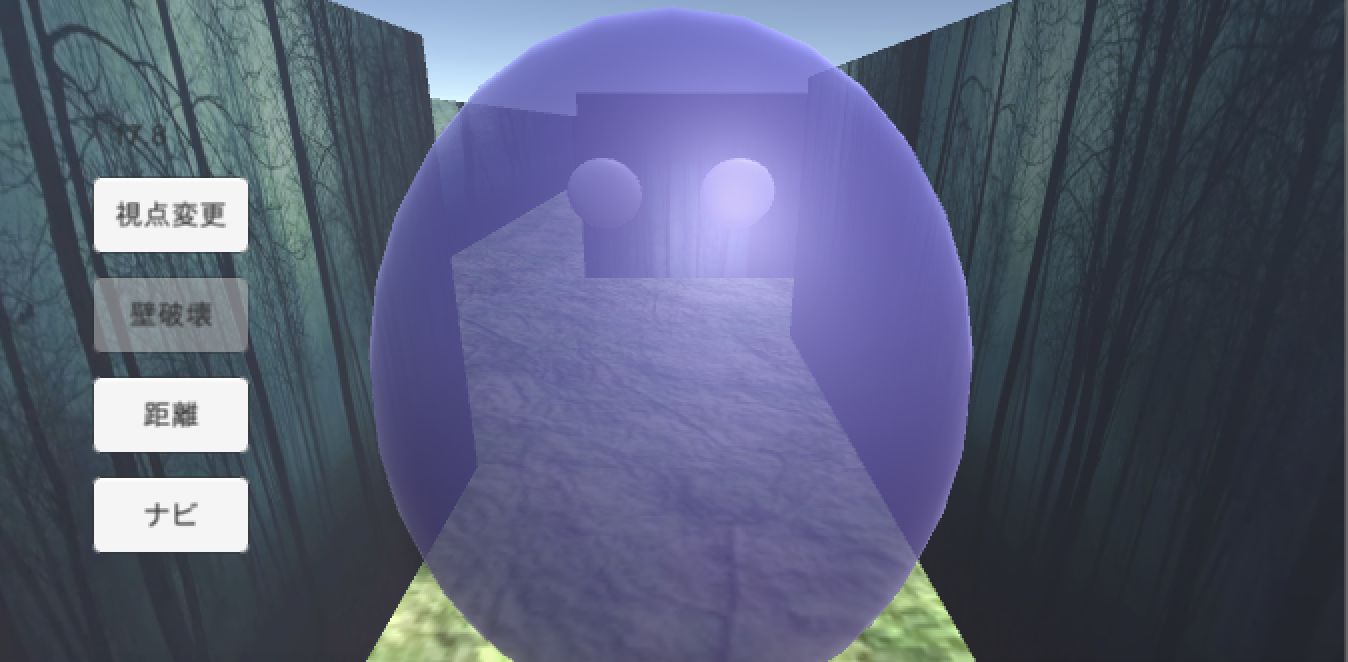
ただの迷路ゲームには収まらず、ユーザーが迷路の中にいる相手に見つかったら、かなりのスピードをあげ追いかけてくる機能をつけました。その機能はダイクストラ方という方法を用いました。また実際に森の中で冒険しているような画面に意識して作りました。大富豪
https://github.com/matushinn/Daifugo
旗揚げ
https://github.com/matushinn/IntroClass
クラスの理解にこれを真似して作ってみるのは勉強になっていいと思います。パズルゲーム
https://github.com/matushinn/2DPiece
これ以外にも様々なiOS,Androidアプリを開発しました。
仕事の依頼は
shoooe97@gmail.com
までお願いします。


- 投稿日:2019-05-29T11:46:33+09:00
docker unity
dockerでunityを動かしたく調べ始める。
UnityEditorのバージョン管理をしたい
https://qiita.com/Sashimimochi/items/06c136487b8150e35ed0最近流行りのDockerを使ってUnityを動かせないかと思いました。結論から言うとおすすめしません。それでも、供養の意味も込めて検討記録ということで長くはなりますが、それでもいいよという心優しい方はお付き合いください。
nenadg/docker-unity3d
https://github.com/nenadg/docker-unity3d条件
Unityをhostに導入するのは嫌。
dockerの外でcompileするのは嫌。
dockerの中でcompileするのはOK.例
gableroux/unity3d
https://hub.docker.com/r/gableroux/unity3d/unity3d
https://gitlab.com/gableroux/unity3d$ docker run -it --rm -v "$(pwd):/root/project" gableroux/unity3d:latest xvfb-run --auto-servernum --server-args='-screen 0 640x480x24' /opt/Unity/Editor/Unity -projectPath /root/project Unable to find image 'gableroux/unity3d:latest' locally latest: Pulling from gableroux/unity3d 6abc03819f3e: Pulling fs layer 05731e63f211: Pulling fs layer 0bd67c50d6be: Pulling fs layer e59bcdf9f569: Waiting b71d75459548: Waiting ea0a10bb716a: Waiting docker: error pulling image configuration: Get https://production.cloudflare.docker.com/registry-v2/docker/registry/v2/blobs/sha256/44/44cfb41a0d6ce87f3bf9019a7ed4b40aa20c23d390f0515756c8d07200623b5a/data?verify=1559100714-PcoiRlJ4gKyKppTu7hxHitXjGqs%3D: Service Unavailable. See 'docker run --help'.「-v "$(pwd):/root/project"」 を外すと作業を始めた。意味があるかどうかは後で検討。
$ docker run -it --rm    gableroux/unity3d:latest   xvfb-run --auto-servernum --server-args='-screen 0 640x480x24'   /opt/Unity/Editor/Unity -projectPath /root/project
Unable to find image 'gableroux/unity3d:latest' locally
latest: Pulling from gableroux/unity3d
6abc03819f3e: Pull complete
05731e63f211: Pull complete
0bd67c50d6be: Pull complete
e59bcdf9f569: Pull complete
b71d75459548: Pull complete
ea0a10bb716a: Pull complete
Digest: sha256:b84f59091450b89314591dd9e1f51f6aceaf34994b82a7f282b32612b4c36837
Status: Downloaded newer image for gableroux/unity3d:latest
ここでプロンプトが出ずに止まった。
/bin/bashの指定がないため当たり前かも。-vの意味を調べる。
やる前に調べろって? ごめんなさい。 DoCAP。
Dockerのすべてが5分でわかるまとめ!(コマンド一覧付き)
https://paiza.hatenablog.com/entry/docker_introhttps://docs.docker.com/engine/reference/commandline/run/
--volume , -v Bind mount a volume
$ docker ps
CONTAINER ID        IMAGE                      COMMAND                  CREATED             STATUS              PORTS               NAMES
1f80fb69bfa2        gableroux/unity3d:latest   "xvfb-run --auto-ser…"   7 minutes ago       Up 7 minutes                            priceless_ramanujan
2e7d55f97935        kaizenjapan/100pon         "/usr/bin/tini -- /b…"   4 months ago        Up 4 months                             mystifying_roentgen
KM-S10:~ administrator$ docker stop 1f80fb69bfa2
1f80fb69bfa2
$ docker run -it --rm -v "/root/project" gableroux/unity3d:latest xvfb-run --auto-servernum --server-args='-screen 0 640x480x24' /opt/Unity/Editor/Unity -projectPath /root/project$ docker ps CONTAINER ID IMAGE COMMAND CREATED STATUS PORTS NAMES 54aa8c924989 gableroux/unity3d:latest "xvfb-run --auto-ser…" About a minute ago Up About a minute sleepy_rosalind 2e7d55f97935 kaizenjapan/100pon "/usr/bin/tini -- /b…" 4 months ago Up 4 months mystifying_roentgen
- 投稿日:2019-05-29T07:23:36+09:00
Unityでマイクの音を任意の時間だけファイルに書き出しながら録音する
やりたいこと
- Unityでマイクからの入力を録音したい。
- 好きなタイミングで録音を開始して、好きなタイミングで録音を停止したい。
- wavファイルにしたい。
Unity標準の録音機能だとあらかじめ録音時間を指定した固定長でしか録音できません。途中で録音を止めると残り時間に無音データを詰め込まれたものが出てきます。
普通の用途ならこのやり方で必要な長さのAudioClipを作ってUnityWav1で変換をかければ十分だと思います。自分の場合は以下の条件が追加されたので一捻りする必要がありました。
- 録音時間が不明、長時間も予想される
Unity標準APIでの録音は60分が限界- メモリがキツキツ
音声データをメモリに保持しておけないので随時書き出す必要があるコードと使い方
コード
MicRecorder.csusing System; using System.Collections; using System.IO; using UnityEngine; namespace NekomimiDaimao { /// https://gist.github.com/nekomimi-daimao/a14301d7008d0a1c7e55977d6d9e2cc1 public class MicRecorder : MonoBehaviour { private const int Frequency = 44100; private const int MaxLengthSec = 600; private const int HeaderLength = 44; private const int RescaleFactor = 32767; private FileStream _fileStream; private AudioClip _audioClip; private string _micName = null; private Coroutine _recordingCoroutine; public bool IsRecording { get; private set; } = false; public void StartRecord() { if (IsRecording || _recordingCoroutine != null) { return; } IsRecording = true; _recordingCoroutine = StartCoroutine(StartRecordCoroutine()); } /// <summary> /// yield return StartCoroutine(MicRecorder.StopRecord()); /// </summary> public IEnumerator StopRecord() { IsRecording = false; yield return _recordingCoroutine; _recordingCoroutine = null; } private IEnumerator StartRecordCoroutine(string defaultPath = null) { try { var path = defaultPath ?? $"{Application.temporaryCachePath}/record/{DateTime.Now:MMddHHmmss}.wav"; _fileStream = new FileStream(path, FileMode.Create); const byte emptyByte = new byte(); for (var count = 0; count < HeaderLength; count++) { _fileStream.WriteByte(emptyByte); } if (Microphone.devices.Length == 0) { yield break; } _micName = Microphone.devices[0]; _audioClip = Microphone.Start(_micName, true, MaxLengthSec, Frequency); var buffer = new float[MaxLengthSec * Frequency]; var head = 0; int pos; do { pos = Microphone.GetPosition(_micName); if (pos >= 0 && pos != head) { _audioClip.GetData(buffer, 0); var writeBuffer = CreateWriteBuffer(pos, head, buffer); ConvertAndWrite(writeBuffer); head = pos; } yield return null; } while (IsRecording); pos = Microphone.GetPosition(_micName); if (pos >= 0 && pos != head) { _audioClip.GetData(buffer, 0); var writeBuffer = CreateWriteBuffer(pos, head, buffer); ConvertAndWrite(writeBuffer); } Microphone.End(_micName); WriteWavHeader(_fileStream, _audioClip.channels, Frequency); } finally { _fileStream?.Dispose(); _fileStream = null; AudioClip.Destroy(_audioClip); _audioClip = null; _micName = null; } } private static float[] CreateWriteBuffer(int pos, int head, float[] buffer) { float[] writeBuffer; if (head < pos) { writeBuffer = new float[pos - head]; Array.Copy(buffer, head, writeBuffer, 0, writeBuffer.Length); } else { writeBuffer = new float[(buffer.Length - head) + pos]; Array.Copy(buffer, head, writeBuffer, 0, (buffer.Length - head)); Array.Copy(buffer, 0, writeBuffer, (buffer.Length - head), pos); } return writeBuffer; } private void ConvertAndWrite(float[] dataSource) { Int16[] intData = new Int16[dataSource.Length]; var bytesData = new byte[dataSource.Length * 2]; for (int i = 0; i < dataSource.Length; i++) { intData[i] = (short) (dataSource[i] * RescaleFactor); var byteArr = new byte[2]; byteArr = BitConverter.GetBytes(intData[i]); byteArr.CopyTo(bytesData, i * 2); } _fileStream.Write(bytesData, 0, bytesData.Length); } private void WriteWavHeader(FileStream fileStream, int channels, int samplingFrequency) { var samples = ((int) fileStream.Length - HeaderLength) / 2; fileStream.Flush(); fileStream.Seek(0, SeekOrigin.Begin); Byte[] riff = System.Text.Encoding.UTF8.GetBytes("RIFF"); fileStream.Write(riff, 0, 4); Byte[] chunkSize = BitConverter.GetBytes(fileStream.Length - 8); fileStream.Write(chunkSize, 0, 4); Byte[] wave = System.Text.Encoding.UTF8.GetBytes("WAVE"); fileStream.Write(wave, 0, 4); Byte[] fmt = System.Text.Encoding.UTF8.GetBytes("fmt "); fileStream.Write(fmt, 0, 4); Byte[] subChunk1 = BitConverter.GetBytes(16); fileStream.Write(subChunk1, 0, 4); //UInt16 _two = 2; UInt16 _one = 1; Byte[] audioFormat = BitConverter.GetBytes(_one); fileStream.Write(audioFormat, 0, 2); Byte[] numChannels = BitConverter.GetBytes(channels); fileStream.Write(numChannels, 0, 2); Byte[] sampleRate = BitConverter.GetBytes(samplingFrequency); fileStream.Write(sampleRate, 0, 4); Byte[] byteRate = BitConverter.GetBytes(samplingFrequency * channels * 2); fileStream.Write(byteRate, 0, 4); UInt16 blockAlign = (ushort) (channels * 2); fileStream.Write(BitConverter.GetBytes(blockAlign), 0, 2); UInt16 bps = 16; Byte[] bitsPerSample = BitConverter.GetBytes(bps); fileStream.Write(bitsPerSample, 0, 2); Byte[] datastring = System.Text.Encoding.UTF8.GetBytes("data"); fileStream.Write(datastring, 0, 4); Byte[] subChunk2 = BitConverter.GetBytes(samples * channels * 2); fileStream.Write(subChunk2, 0, 4); fileStream.Flush(); fileStream.Close(); } } }使い方
// 特に依存しているComponentはないです
[SerializeField] private MicRecorder _micRecorder;


// 録音開始。これは別にCoroutineではない
_micRecorder.StartRecord();

// 録音停止するときは処理をぜんぶ終える必要があるため、Coroutineの終了を待機してあげる
yield return StartCoroutine(_micRecorder.StopRecord());

// 録音中フラグだがMicRecorder.StopRecordを実行してから
// 完全に終了するまでの間もfalseなのであんま信用してはいけない
Debug.Log($"Are you listening? {_micRecorder.IsRecording}");
解説と注意事項
探すと理屈を解説した記事は見つかるのですが、何故かコピペしてそのまま使えるやつはなかったので、いろんなところからコピペして切り貼りしました。なんかめっちゃかけ算? してるな? ぐらいの理解度だ!
特にCreateWriteBufferでバッファを使い切って最初からになったときの処理。
(バッファのヘッドから最後まで) + (バッファの最初から現在のポジションまで)
ですがちょっとくらい取りこぼしててもバレへんやろの精神です。Enumerable.Range()とかで配列作れば確認できますがめんどくせえのでしてません。
Frequencyは44100でしか確認してないので他のサンプリングレートで動くかは未確認。
MaxLengthSecは600なので結局10分もメモリを確保してます。状況に合わせて削ってください。理屈の上では10もあれば動くはずです。セルフレビュー
using()使ってない
微妙に使い方がまだよくわかってないやつ。
この手のリソースを自動で閉じておいてくれる記法としてはJavaのtry-with-resourcesがいちばん優れてるような気がするんですが、どこも導入してくれなくてつらい。成否がわからない
途中で録音に失敗してもなんらかのゴミファイルは作成されてしまう。なので成否のコールバックが必要だが……。
StopRecordをTaskに置き換えて成否のboolを返すとか。
IsRecordingを外部に公開している
内部処理用のフラグと外部公開用のフラグは分割するべき。
MonoBehaviourを継承している
コルーチンがなければ継承の必要がない。のでできればTaskにしたい。が、UnityのApiはメインスレッドからしか実行できないのでTaskにすると管理がめんどくせえ!メインスレッドでファイルを書き込みしてる
せめてバッファ変換・ファイル書き込みをワーカースレッドに逃したい。別にそんな処理重くないっぽいけど一応。こんなコードが上がってきたらコードレビューで撥ねますが、まあ動いてるしいいかなって思いました。
おしまい。
参考
【Unity】長時間のマイク録音を実現する方法
【Unity】AudioListerを録音してwavにする
UnityのMicrophoneで正確な録音時間を取得する方法
なんか適当なパスにファイル保存しちゃうのなんで? ↩
- 投稿日:2019-05-29T02:25:07+09:00
ジョーカースクリプトでanimタグ使用時に反転状態が反映されないのを解決した話
※ 2016年の自分の記事を移転しました。
課題について
ジョーカースクリプトにはデフォルトで反転させる機能はありません。
対処方法について
chara_newタグのscale_xにマイナスの値をマイナスにすると反転させられます。
移動スクリプト側ですが、AbstractObject.csのanimPositionメソッドが移動させる処理となっています。
iTweenのScaleToを使って大きさの移動を行っています。
ですが、このままですと、マイナスの状態だった場合に強制的にプラスの値にされてしまいます。(その為、反転がもとに戻るんですね。)改修内容について
AbstractObject.cs// 向きを実際に合わせる int scale_x = (0 < this.rootObject.transform.localScale.x) ? 1 : -1; int scale_y = (0 < this.rootObject.transform.localScale.y) ? 1 : -1; iTween.ScaleTo(this.rootObject,iTween.Hash( "x",scale * scale_x, "y",scale * scale_y, "time",time ));※ 一部抜粋
- 投稿日:2019-05-29T02:19:47+09:00
Unityでアニメーション・エフェクトを外部プラグインで自作する方法
※ 2016年の自分の記事を移転しました。
サークルメンバーがエフェクトを作成できる便利なツールを見つけてくれました。
Effekseerは簡単に綺麗なパーティクルエフェクトを制作できるツールです。
(そのまま引用)私は
めんどくさかった全く余裕がないため、ツールを発見してくれたメンバーにツールを使ってもらっています。Unity側ではプラグインをインポートして、作成してもらったエフェクトデータを決められたところに置くだけ。
とっても楽ちん!!!なんだこれ!!!!!
エフェクトのサンプルもあるので、なんとなく作成できると思います。
ちなみに私は以下のようにしてUnityで実行しています。
string name = "<ほげほげ>";
Vector3 postion = <再生したいポジション>;
Vector3 scale = <再生時の大きさ>;
// ハンドル作成
EffekseerHandle handle = EffekseerSystem.PlayEffect(name, postion);
// 再生位置を調整
handle.SetTargetLocation(postion);
// 大きさを調整
handle.SetScale(scale);
うーん。こんな形でいいのかな。。多分あってる。かなり簡単にエフェクトを作成・再生することができるので、とても便利でオススメです。
- 投稿日:2019-05-29T02:10:27+09:00
【Unity5】ジョーカースクリプトでキーボード操作したメモ
※ 2016年の自分の記事を移転しました。
課題について
ジョーカースクリプトはマウスのみにしか対応していない?ようでした。
そのため、キーボード操作がメインのゲームにはユーザビリティ的に欠点です。
(サポート掲示板には質問は投稿されていますが、返信なし。。。)ということなので、改修して実装してしまいましょう。
改修内容
やったことは単純で、SeneInit.csのUpdateにキーボードが押下されたか判断させただけです。
(ソースをななめ読みしたので、これが正しいのかはわかりません。間違ってたら指摘してください。)ロジックは以下のような感じです。
1. スペースキーとエンターキーで次へ進める。
2. コントロールキーでスキップ開始。
3. それぞれにスキップ停止処理を加える。SeneInit.csvoid Update () { if (Input.GetMouseButtonUp (0)) { StartCoroutine("ClickButton"); } // シナリオをすすめる if (Input.GetKey(KeyCode.Space) || Input.GetKey(KeyCode.Return) || Input.GetKey(KeyCode.KeypadEnter)) { //skip中にクリックされた場合、Skipを止める if (StatusManager.FlagSkiiping) { StatusManager.FlagSkiiping = false; } gameManager.clickNextOrder(); } // スキップ開始 if (Input.GetKey(KeyCode.LeftControl) || Input.GetKey(KeyCode.RightControl)) { //skip中にクリックされた場合、Skipを止める if (StatusManager.FlagSkiiping) { StatusManager.FlagSkiiping = false; } else { StartCoroutine("startSkip"); } } }調査方法のメモ
- スキップがマウス操作のみということは、マウスイベントを取得している箇所を探すと見つかるのでは。
- 「GetMouseButtonUp」で探す。
- 見つかりました。
- 投稿日:2019-05-29T02:10:27+09:00
ジョーカースクリプトでキーボード操作したメモ
※ 2016年の自分の記事を移転しました。
課題について
ジョーカースクリプトはマウスのみにしか対応していない?ようでした。
そのため、キーボード操作がメインのゲームにはユーザビリティ的に欠点です。
(サポート掲示板には質問は投稿されていますが、返信なし。。。)ということなので、改修して実装してしまいましょう。
改修内容
やったことは単純で、SeneInit.csのUpdateにキーボードが押下されたか判断させただけです。
(ソースをななめ読みしたので、これが正しいのかはわかりません。間違ってたら指摘してください。)ロジックは以下のような感じです。
1. スペースキーとエンターキーで次へ進める。
2. コントロールキーでスキップ開始。
3. それぞれにスキップ停止処理を加える。SeneInit.csvoid Update () { if (Input.GetMouseButtonUp (0)) { StartCoroutine("ClickButton"); } // シナリオをすすめる if (Input.GetKey(KeyCode.Space) || Input.GetKey(KeyCode.Return) || Input.GetKey(KeyCode.KeypadEnter)) { //skip中にクリックされた場合、Skipを止める if (StatusManager.FlagSkiiping) { StatusManager.FlagSkiiping = false; } gameManager.clickNextOrder(); } // スキップ開始 if (Input.GetKey(KeyCode.LeftControl) || Input.GetKey(KeyCode.RightControl)) { //skip中にクリックされた場合、Skipを止める if (StatusManager.FlagSkiiping) { StatusManager.FlagSkiiping = false; } else { StartCoroutine("startSkip"); } } }調査方法のメモ
- スキップがマウス操作のみということは、マウスイベントを取得している箇所を探すと見つかるのでは。
- 「GetMouseButtonUp」で探す。
- 見つかりました。