- 投稿日:2020-04-14T23:47:38+09:00
[第3章:Layoutコンポーネントを使ってみよう 編] Gatsby公式ドキュメントを翻訳してみた。
はじめに
このシリーズでは、英語ソースばかりで「Gatsby使ってみたいけど、よくわからない...」という方々のために、公式Docを翻訳(ところどころざっくり要約)していきます。
実際の公式ドキュメントはこちら
(この章では、GatsbyでTypography.jsを使用するためのプラグインをインストールして、サイトの全体を形作るLayoutコンポーネントを作成できるようになることがゴールです)
〜〜 以下、翻訳となります 〜〜
3. Layoutコンポーネントを使ってみよう
この章では、Gatsbyプラグインの使い方やLayoutコンポーネントの作り方を学んでいきましょう。
Gatsbyプラグインは、Gatsbyのサイトに機能を付け足すことができるJavaScriptパッケージです。使用することで、Gatsbyサイトの機能を拡張したり、使いやすいように修正することができます。
Layoutコンポーネントは、複数のページで重複して使われるようなヘッダーやフッター等のまとめて用意しておくためのコンポーネントです。
それでは、第3章に突入です。
プラグインを使ってみる
プラグインという言葉は、皆さん聞いたことがあるのではないでしょうか。Wordpressなどを始めとするCMS(コンテンツマネジメントシステム)やその他多くのシステムで、機能を追加したり修正するような役割をもつものです。Gatsbyでも、基本的には同じです。
Gatsbyコミュニティの一員(あなたも含まれますよ!)として、プラグインを作成して共有することもできます。
すでに、何百ものプラグインが作成されています!
使ってみたい方は、こちらへ。ぜひ、プラグインをインストールして使えるようになってください。Gatsbyのサイトを作る場合はほとんどプラグインを使用することになると思います。実際に、残りのチュートリアルを通して、あなたは何度も何度もプラグインをインストールして使用することになるでしょう。
それでは、最初のプラグインとして
Typography.jsを使えるようにするプラグインを実装してみましょう。Typography.jsとは、サイトのタイポグラフィー(デザインにおける活字の構成および表現)を生成してくれるJavaScriptのライブラリです。これをプラグインを導入することで、Gatsbyサイトで使用できるようにします。
新しいサイトを作成しよう
2章の時と同様、今開いているターミナルのウィンドウやファイルは閉じて、
tutorial-part-threeという新しいGatsbyサイトを以下の手順で作成しましょう。作成したら、cdでそのディレクトリに移動します。gatsby new tutorial-part-three https://github.com/gatsbyjs/gatsby-starter-hello-world cd tutorial-part-three
gatsby-plugin-typographyというプラグインを導入しようプラグインを使用するためには、「インストール」と「設定」という2つの手順が必要となります。
1 .
gatsby-plugin-typographyというnpmパッケージをインストールします。npm install --save gatsby-plugin-typography react-typography typography typography-theme-fairy-gates2 . ディレクトリの最上層にある
gatsby-config.jsというファイルを以下のように編集します。module.exports = { plugins: [ { resolve: `gatsby-plugin-typography`, options: { pathToConfigModule: `src/utils/typography`, }, }, ], }2 . 次に、
Typography.jsのための新しい設定ファイルを作成します。src/の中にutilsというディレクトリを作り、以下のコードを記述したtypography.jsというファイルを作成します。import Typography from "typography" import fairyGateTheme from "typography-theme-fairy-gates" const typography = new Typography(fairyGateTheme) export const { scale, rhythm, options } = typography export default typography4 . 開発サーバーを立ち上げましょう。
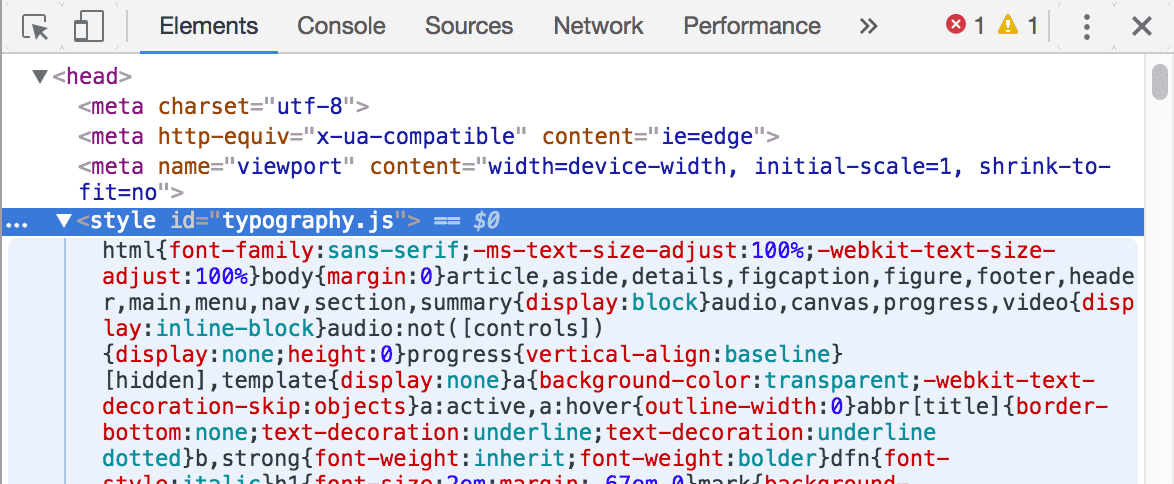
gatsby developサイトを開いてデベロッパーツールで検証してみると、
<head>タグの中に<style>という自動生成されたCSSが入っているはずです。どう変化するのか見てみよう
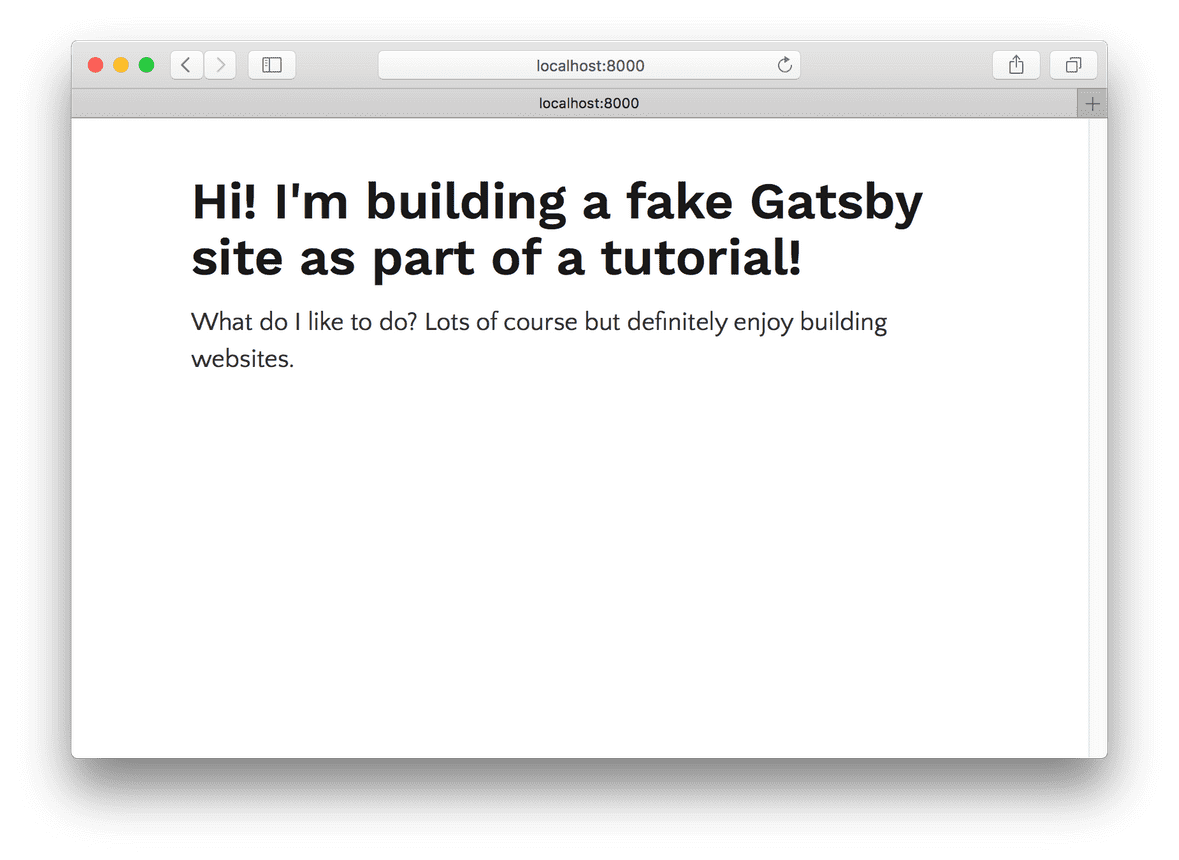
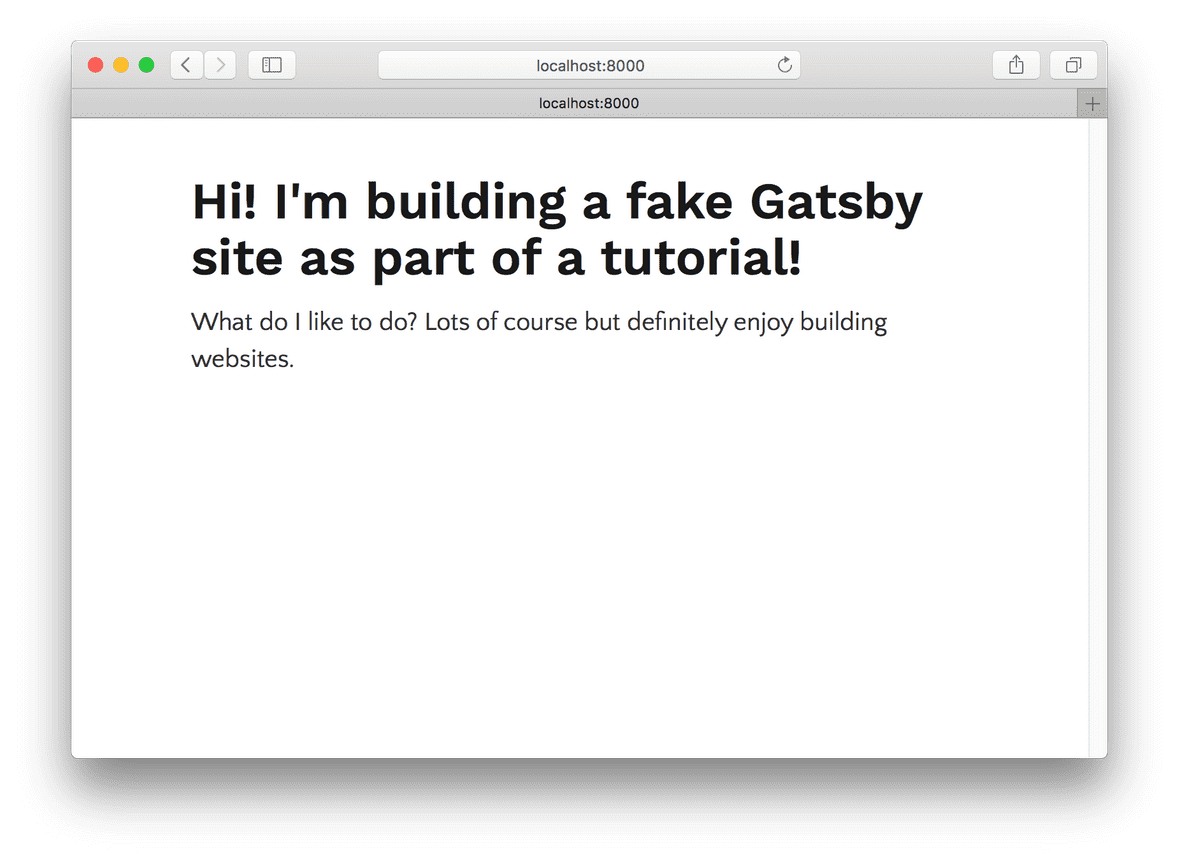
Typography.jsによる変化を知るために、以下のコードをsrc/pages/index.jsに記述してみよう。import React from "react" export default () => ( <div> <h1>Hi! I'm building a fake Gatsby site as part of a tutorial!</h1> <p> What do I like to do? Lots of course but definitely enjoy building websites. </p> </div> )すると、こんな風になっているはずです。
もう少し、見た目を整えてみましょう。
中のテキストを真ん中に寄せるために、src/pages/index.jsに以下のコードを記述してください。import React from "react" export default () => ( <div style={{ margin: `3rem auto`, maxWidth: 600 }}> <h1>Hi! I'm building a fake Gatsby site as part of a tutorial!</h1> <p> What do I like to do? Lots of course but definitely enjoy building websites. </p> </div> )良い感じになりましたね!!
layoutコンポーネントについて
次に、lauoutコンポーネントを学んでいきましょう。
src/pages/に、以下のaboutページとcontactページを作成してください。src/pages/about.js
import React from "react"

export default () => (
  <div>
    <h1>About me</h1>
    <p>I’m good enough, I’m smart enough, and gosh darn it, people like me!</p>
  </div>
)
src/pages/contact.js
import React from "react"

export default () => (
  <div>
    <h1>I'd love to talk! Email me at the address below</h1>
    <p>
      <a href="mailto:me@example.com">me@example.com</a>
    </p>
  </div>
)
新しい
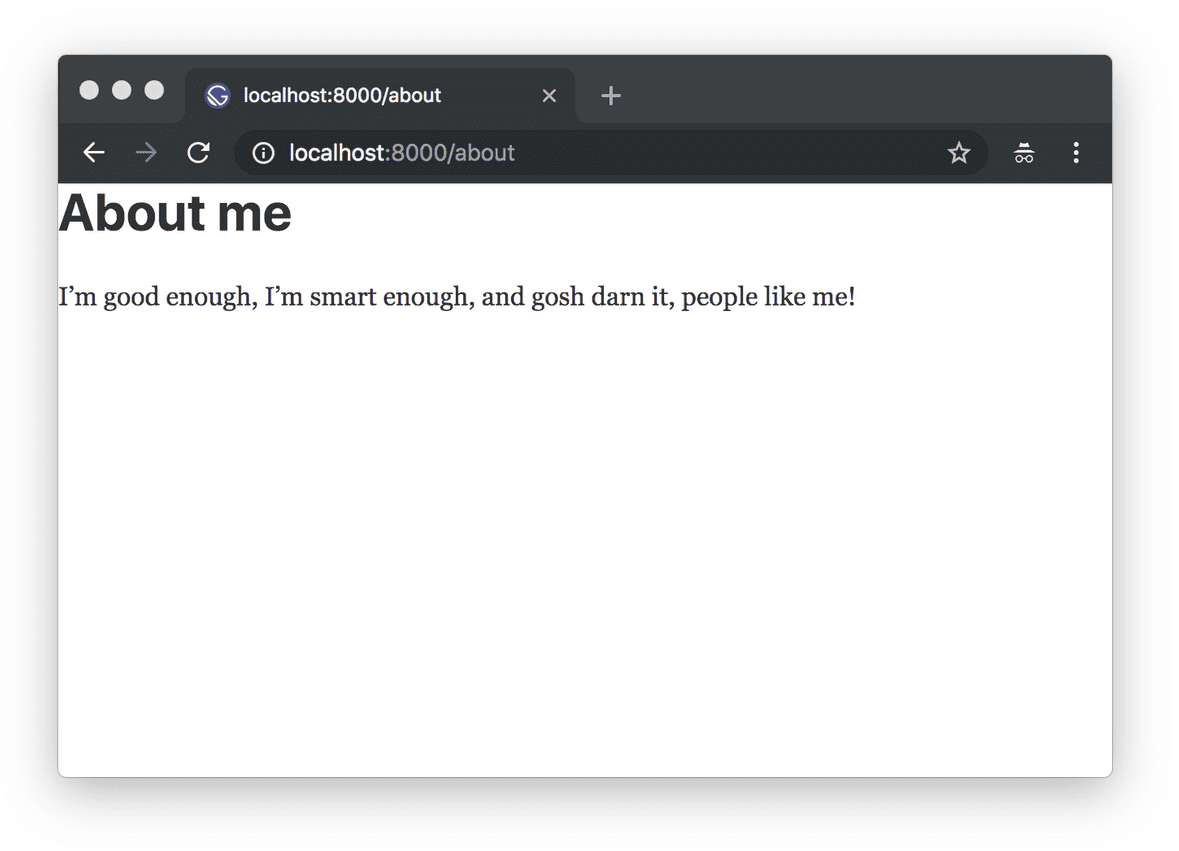
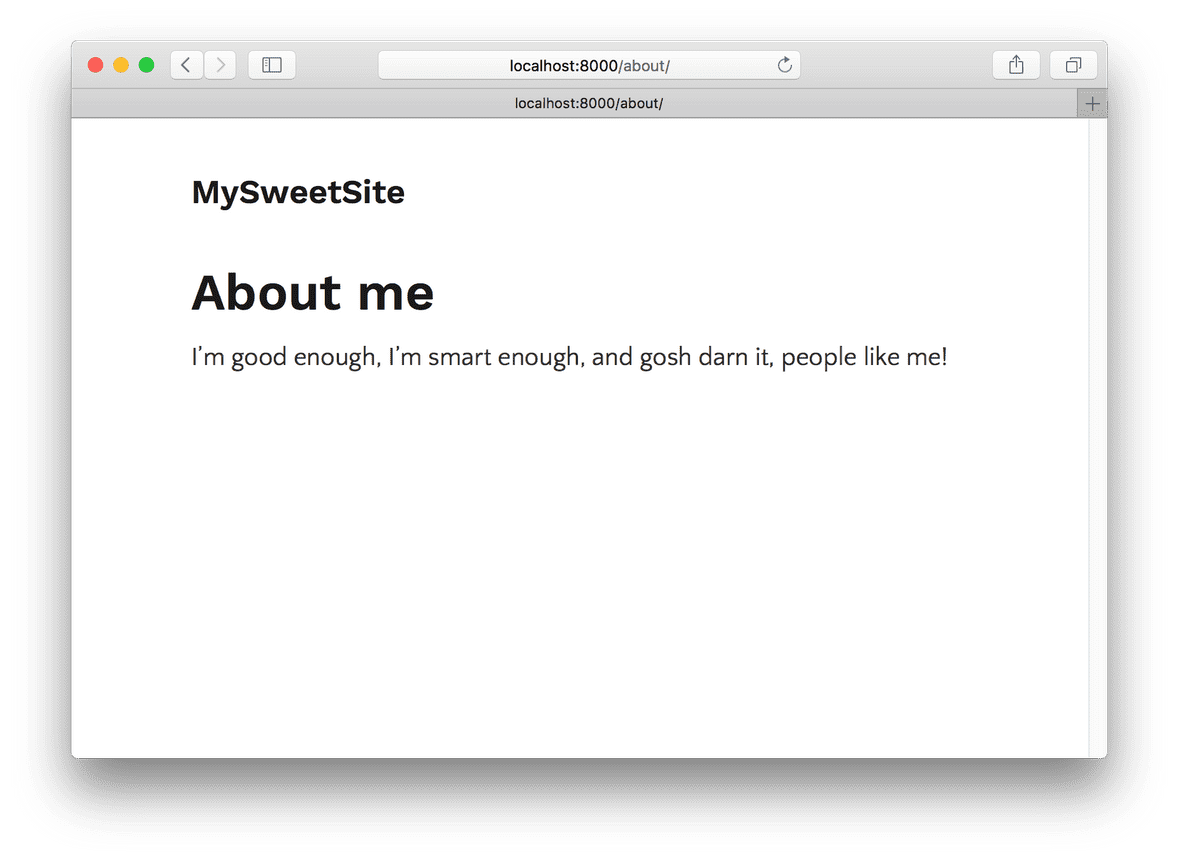
aboutページは、このようになっていますね。んー。
index.jsのように、中のテキストがもう少し内側に寄っていて、さらに右上にナビゲーションメニューのようなものがあれば、もっと良くなりそうですね。それでは、layoutコンポーネントを作成することで解決しましょう!
実際にlayoutコンポーネントを作成しよう
1 .
src/componentsというディレクトリを作成します。2 . その
src/components/の中に、layout.jsというファイルを作成します。import React from "react" export default ({ children }) => ( <div style={{ margin: `3rem auto`, maxWidth: 650, padding: `0 1rem` }}> {children} </div> )3 . 作成したlayoutコンポーネントを
src/pages/index.jsの中で読み込ませましょう。import React from "react" import Layout from "../components/layout" export default () => ( <Layout> <h1>Hi! I'm building a fake Gatsby site as part of a tutorial!</h1> <p> What do I like to do? Lots of course but definitely enjoy building websites. </p> </Layout> )layoutコンポーネントは機能しているようです。中の
index.jsのテキストは中央に寄っていますね!しかし、
/aboutや/contactのページを見てみると、内側には寄っていません。4 . layoutコンポーネントを
about.jsやcontact.jsでも読み込ませてみましょう。そうすれば、1つのlayoutコンポーネントを使うだけで、3つ全てのページの中身が中央揃えにすることができたはずです!
サイトのタイトルを表示させよう
1 . layoutコンポーネントに以下のような記述をしてみます。
import React from "react"

export default ({ children }) => (
  <div style={{ margin: `3rem auto`, maxWidth: 650, padding: `0 1rem` }}>
    <h3>MySweetSite</h3>
    {children}
  </div>
)
3つ全てのページにおいて、以下のようなタイトルが表示されるようになったはずです。
ナビゲーションメニューを追加しよう
1 . 以下のようなコードをlayoutコンポーネントの中に記述します。
import React from "react"
import { Link } from "gatsby"
const ListLink = props => (
  <li style={{ display: `inline-block`, marginRight: `1rem` }}>
    <Link to={props.to}>{props.children}</Link>
  </li>
)

export default ({ children }) => (
  <div style={{ margin: `3rem auto`, maxWidth: 650, padding: `0 1rem` }}>
    <header style={{ marginBottom: `1.5rem` }}>
      <Link to="/" style={{ textShadow: `none`, backgroundImage: `none` }}>
        <h3 style={{ display: `inline` }}>MySweetSite</h3>
      </Link>
      <ul style={{ listStyle: `none`, float: `right` }}>
        <ListLink to="/">Home</ListLink>
        <ListLink to="/about/">About</ListLink>
        <ListLink to="/contact/">Contact</ListLink>
      </ul>
    </header>
    {children}
  </div>
)
簡単ですね!!
このように、簡単にタイトルやナビゲーションメニューを追加できました。練習として、フッターやサイドバーなど、お好きなものをlayoutコンポーネントで追加してみるといいですね。
お疲れさまでした!
参考文献:Gatsby公式ドキュメント
次の章のテーマは、
「Gatsbyにおけるデータの扱い方を学ぼう」です。お楽しみに!!
[第0章:環境構築編] Gatsby公式ドキュメントを翻訳してみた。
- 投稿日:2020-04-14T22:55:30+09:00
【34日目】React(Redux) 学習メモ
Reduxの基礎
- index.js
- dispatchを含む大枠
- reducer.js
- reducerの分岐
index.jsimport {createStore} from "redux"; {/*reduxをインポートしstoreを作る*/} import reducer from "./reducer.js" {/*reducer.jsからreducerをインポート*/} const store = createStore(reducer); {/*storeにreducerを渡す*/} store.subscribe(()=>{ {/*stateが変更された場合実行する*/} console.log(store.getState()); }); store.dispatch({type:"PULS" ,payload:{num:1}}); {/*actionの中身typeとpayloadを与える*/}reducer.jsconst reducer = (state=0,action)=>{ {/*reducerの定義 stateとactionを持たせる*/} switch(action.type){ {/*actionのtypeによって分岐させる*/} case 'PULS': {/*actionのタイプがPULSの場合、*/} return state + action.payload.num; {/*actionのpayloadの数値を足す*/} default: {/*違う場合は*/} return state; {/*そのまま返す*/} } } export default reducer;
- 投稿日:2020-04-14T18:27:26+09:00
useDispatchでredux-thunkを使ったらthenができない件の解決法 (Typescript)
redux-thunkのthen
たとえばTodo listに一つアイテムを追加・編集・削除した後、
改めてサーバーにRetrieve Listをしたい場合ありますよね。
redux-thunkはこういう感じができます:const createActionCreator = (item) => { return dispatch => { return axios .post('api/todo', item) .then(response => {...}) // 割愛します } } const retrieveActionCreator = () => { return dispatch => { return axios .get('api/todo') .then(response => {...}) // 割愛します } } // どこかで dispatch(createActionCreator(newItem)) .then(() => { dispatch(retrieveActionCreator()) }) // ちなみに dispatch(createActionCreator(newItem)) dispatch(retrieveActionCreator()) // こういう風に書くと、両者ともAsync Callなのでどれが先に完成するのかは保証できませんので。 // 上みたいにthenを使う必要はあります。useDispatchのdispatchを使うとできなくなる
言語:Typescript
JSだと多分エラー出ないですね。import { useDispatch } from 'react-redux'; const dispatch = useDispatch() dispatch(createActionCreator(newItem)) .then(() => { // このthenでエラーが出ます dispatch(retrieveActionCreator()) })
Property 'then' does not exist on type '...'みたいなエラーが出ますね。
typeはactionCreatorのreturn typeなので人によっては違いますが。解決法
多分react-reduxがredux-thunkの
dispatchの型を知らないので、type checkが通ってない気がします。storeHelper.ts
import { ThunkDispatch } from 'redux-thunk';
import { Action } from 'redux';
import { useDispatch } from 'react-redux';

import { SystemState } from 'features/systemState';
// このSystemStateは自分で定義したReduxのStore構成、詳細は割愛します
// Todo Listだと { items: {name: string ,finished: boolean}[] } みたいな

export type ReduxDispatch = ThunkDispatch<SystemState, any, Action>;
export function useReduxDispatch(): ReduxDispatch {
  return useDispatch<ReduxDispatch>();
}
元のファイルで:
import { useReduxDispatch } from './storeHelper'

const dispatch = useReduxDispatch()
dispatch(createActionCreator(newItem))
  .then(() => { // できました
    dispatch(retrieveActionCreator())
  })
終わりに
ご指摘がございましたら、コメントを頂けるとありがたいです。
もしお役に立ちましたらいいねを貰えると嬉しいです。
- 投稿日:2020-04-14T16:54:02+09:00
最初に一回だけ動くuseEffect(componentDidMount的な)
componentDidMountと同じことがしたい。
第二引数に空の配列を渡す。
const [count, setCount] = useState(0);
useEffect(() => {
  console.log(count);
  setCount(count + 1);
}, []);
こうなる。
ハッピー。
- 投稿日:2020-04-14T15:29:56+09:00
React DnD が React hook で簡単に書けるようになっていた
React で好きなように Drop & Drag の実装を書ける React DnD の API が解りにくかった (以前の API の把握は react-dnd これだけ抑えておけばおk がわかり易い)のだけど、最近のバージョンアップにより useDrag / useDrop 等の React hook が提供されていて(以前の API も Legacy Decorator API として残っている)、それらを使って簡単に書けるようになっていた。
例えばよくある List を Drag して、Drop 先の要素と swap する、の最小限の実装はこんな感じ。わりと型もちゃんと書ける。
import React, { useState, useCallback, useRef, FC } from "react"
import { useDrag, useDrop, DndProvider } from "react-dnd"
import Backend from "react-dnd-html5-backend"

const DND_GROUP = "list"

interface DragItem {
  type: string
  index: number
}

interface ListProps {
  index: number
  text: string
  swapList: (sourceIndex: number, targetIndex: number) => void
}

const List: FC<ListProps> = ({ index, text, swapList }) => {
  const ref = useRef<HTMLLIElement>(null)
  const [, drop] = useDrop({
    accept: DND_GROUP,
    drop(item: DragItem) {
      if (!ref.current || item.index === index) {
        return
      }
      swapList(item.index, index)
    }
  })
  const [, drag] = useDrag({
    item: { type: DND_GROUP, index }
  })
  drag(drop(ref))
  return <li ref={ref}>{text}</li>
}

const ListView = () => {
  const [list, setList] = useState(["foo", "bar", "baz", "hoge", "huga"])
  const swapList = useCallback(
    (sourceIndex: number, targetIndex: number) => {
      [list[targetIndex], list[sourceIndex]] = [list[sourceIndex], list[targetIndex]]
      setList(list.splice(0))
    },
    [list]
  )
  return (
    <ul>
      {list.map((text, index) => (
        <List key={index} text={text} index={index} swapList={swapList} />
      ))}
    </ul>
  )
}

const App: FC = () => {
  return (
    <DndProvider backend={Backend}>
      <ListView />
    </DndProvider>
  )
}
React DnD、チュートリアルで一通り学べるのだけど、題材がチェスの実装になっていて、どんな感じで Drag & Drop が実装できるのだろう、というところにたどり着くまでが長い…。
- 投稿日:2020-04-14T15:18:57+09:00
React.js & Next.js超入門のチャプター6を改変:Firestore使用するようにした③
React.js & Next.js超入門のチャプター6を改変:Firestore使用するようにした③
はなかなか良い本なのだが、最後のチャプター6「Firebaseでデータベースを使おう」でFirestoreでなくRealtime Databaseを使ってる。なので買うのを躊躇した人いるかもと思ってFirestoreを使用するコードに変えてみた。
React.js & Next.js超入門のチャプター6を改変:Firestore使用するようにした②からのつづき、
セクション6-3以降メッセージ機能付きアドレスブックのサンプルアプリだが、オリジナルを確認してないので正解かどうかわからない。いちおう動く。備忘録として煩雑になっているコメントもそのまま残す。
データベース作成
addressコレクションを作るだけ.ドキュメントもウィザード途中で作らされるのでサンプルデータ的なものをいれておけばよい。
アプリ設計~
プロジェクト作成
P383からの説明通りだが、新規プロジェクトを作成の場合は
pages/_app.js,lib/redux-store.js,static/Style.jsを作っておくことを忘れずに。コード編集
▼リスト6-14 store.js
Firebase接続情報を.config.jsファイルに逃がすので以下のように変更
import { createStore, applyMiddleware } from 'redux'
import thunkMiddleware from 'redux-thunk'
import firebase from "firebase";
import "firebase/firestore"; // Firestore用に改変追加
import { firebaseConfig } from './.config';

// Firebase設定 ← .config.jsに分離
// Firebase初期化
var fireapp;
try {
    fireapp = firebase.initializeApp(firebaseConfig);
} catch (error) {
  console.log(error.message);
}
export default fireapp;
const db = firebase.firestore(); // Firestore用に追加
export { db }; // Firestore用に追加

// ステート初期値
const initial = {
  login:false,
  username:'(click here!)',
  email:'',
  data:[],
  items:[]
}

// レデューサー
function fireReducer(state = intitial, action) {
  switch (action.type) {
    // ダミー
    case 'UPDATE_USER':
      return action.value;
    // デフォルト
    default:
      return state;
  }
}

// initStore関数
export function initStore(state = initial) {
  return createStore(fireReducer, state,
    applyMiddleware(thunkMiddleware))
}
store.jsと同じプロジェクトルートに
.config.jsを作成、以下のように。export const firebaseConfig = { apiKey: "", authDomain: "", databaseURL: "", projectId: "", storageBucket: "", messagingSenderId: "", appId: "" };▼リスト6-15 Account.js
本の通り
▼リスト6-16
本の通り
▼リスト6-17 Address.js
getFireData()とgetItem(data)を以下のように変更import React, {Component} from 'react'; import { connect } from 'react-redux'; import Router from 'next/router'; // import firebase from "firebase"; import Lib from '../static/address_lib'; import Account from '../components/Account'; import {db} from "../store"; // Firestore用に追加 class Address extends Component { style = { fontSize:"12pt", padding:"5px 10px" } constructor(props) { super(props); this.logined = this.logined.bind(this); } // login,logout処理 logined(){ this.getFireData(); } logouted(){ Router.push('/address'); } // Firebaseからデータを取得 getFireData(){ if (this.props.email == undefined || this.props.email == ''){ return; } // let email = Lib.encodeEmail(this.props.email); FirestoreではドットOK /* /// Firestore用に改変 /// let db = firebase.database(); let ref = db.ref('address/'); let self = this; ref.orderByKey() .equalTo(email) .on('value', (snapshot)=>{ let d = Lib.deepcopy(snapshot.val()); this.props.dispatch({ type:'UPDATE_USER', value:{ login:this.props.login, username: this.props.username, email: this.props.email, data:d, items:self.getItem(d) } }); }); */ db.collection('address') .get() .then(querySnapshot => { const addresses = querySnapshot.docs.map(doc => doc.data()); let d = Lib.deepcopy(addresses); let self = this; this.props.dispatch({ type:'UPDATE_USER', value:{ login:this.props.login, username: this.props.username, email: this.props.email, data:d, items:self.getItem(d) } }); }) } // dataを元に表示項目を作成 /* /// 二重ループにする必要ないので改変 /// getItem(data){ if (data == undefined){ return; } let res = []; for (let i in data){ for(let j in data[i]){ let email = Lib.decodeEmail(j); let s = data[i][j]['name']; res.push(<li key={j} data-tag={email} onClick={this.go.bind(null, email)}> {data[i][j]['check'] == true ? <b>✓</b> : ''}{s} ({email}) </li>); } break; } return res; } */ // dataを元に表示項目を作成 getItem(data){ if (data == undefined){ return; } console.log('■getItemデータ'+JSON.stringify(data)); let res = []; for (let i in data){ let email = data[i]['email'] // 個人データのemail情報 let s = data[i]['name']; console.log(i+'番目の人の■email:'+email+'name'+s); res.push(<li key={i} data-tag={email} onClick={this.go.bind(null, email)}> {data[i]['check'] == true ? <b>✓</b> : ''}{s} ({email}) </li>); } return res; } // データ表示ページの移動 go(email){ Router.push('/address_show?email=' + email); // emailはクリックした個人のemail情報 } // レンダリング render(){ return ( <div> <Account onLogined={this.logined} onLogouted={this.logouted} /> <ul> {this.props.items == [] ? <li key="0">no item.</li> : this.props.items } </ul> </div> ) } } Address = connect((state)=> state)(Address); export default Address;▼リスト6-18 address_add.js
ほぼ本と同じ
import Link from 'next/link';
import Layout from '../components/Layout';

import AddressAdd from '../components/AddressAdd';
//import firebase from "firebase";

export default () =>(
  <Layout header="Address" title="address create.">
    <AddressAdd />
    <hr />
    <div>
      <Link href="/address">
        <button>back</button>
      </Link>
    </div>
  </Layout>
);
▼リスト6-19 Address.js
doAction(e)を変更。なおFirestoreではドキュメント名にドット(.)を受け付けるのでaddress_lib.jsを使用してない。import React, {Component} from 'react'; import { connect } from 'react-redux'; import Router from 'next/router'; //import firebase from "firebase"; //import Lib from '../static/address_lib'; import Account from '../components/Account'; import {db} from "../store"; // Firestore用に追加 class AddressAdd extends Component { style = { fontSize:"12pt", padding:"5px 10px" } constructor(props) { super(props); if (this.props.login == false){ Router.push('/address'); } this.state = { name:'', email:'', tel:'', memo:'', message:'データを入力して下さい。' } this.logined = this.logined.bind(this); this.onChangeName = this.onChangeName.bind(this); this.onChangeEmail = this.onChangeEmail.bind(this); this.onChangeTel = this.onChangeTel.bind(this); this.onChangeMemo = this.onChangeMemo.bind(this); this.doAction = this.doAction.bind(this); } // login,logout処理 logined(){ console.log('logined.'); } logouted(){ Router.push('/address'); } // フィールド入力処理 onChangeName(e){ this.setState({name:e.target.value}); } onChangeEmail(e){ this.setState({email:e.target.value}); } onChangeTel(e){ this.setState({tel:e.target.value}); } onChangeMemo(e){ this.setState({memo:e.target.value}); } // データの登録処理 doAction(e){ let key = this.state.email; let data = { check:false, // 追加. これないとFirestoreにcheckフィールドできない name:this.state.name, email:this.state.email, // Firestore用に追加 tel:this.state.tel, memo:this.state.memo } /* let db = firebase.database(); let ref = db.ref('address/' + Lib.encodeEmail(this.props.email) + '/' + Lib.encodeEmail(this.state.email)); console.log(ref); ref.set(data); */ // Firestore用に改変↓ const ref = db.collection('address').doc(this.props.email); console.log(ref); ref.set(data); this.setState({ name:'', email:'', tel:'', memo:'', message:'※登録しました。' }) } // レンダリング render(){ return ( <div> <Account self={this} onLogined={this.logined} onLogouted={this.logouted} /> <hr/> <p>{this.state.message}</p> {this.props.login ? <table> <tbody> <tr> <th>name:</th> <td><input type="text" size="30" value={this.state.name} onChange={this.onChangeName}/></td> </tr> <tr> <th>email:</th> <td><input type="text" size="30" value={this.state.email} onChange={this.onChangeEmail} /></td> </tr> <tr> <th>tel:</th> <td><input type="text" size="30" value={this.state.tel} onChange={this.onChangeTel} /></td> </tr> <tr> <th>memo:</th> <td><input type="text" size="30" value={this.state.memo} onChange={this.onChangeMemo} /></td> </tr> <tr> <th></th> <td><button onClick={this.doAction}> Add</button></td> </tr> </tbody> </table> : <p>please login...</p> } </div> ); } } AddressAdd = connect((state)=> state)(AddressAdd); export default AddressAdd;▼リスト6-20 address_show.js
本の通り
▼リスト6-21 AddressShow.js
いちばん難関なのだが
getAddress(email)とdoAction()を主に変更。
レンダリングのJSONデータから値をとってくる部分も変更。
Firestoreではフィールド名にはドット(.)が使えないのでその部分はaddress_lib.jsを使ってエンコードして保存した。import React, {Component} from 'react' import { connect } from 'react-redux' //import firebase from "firebase"; import {db} from "../store"; // Firestore用に追加 import Lib from '../static/address_lib'; import Account from '../components/Account'; import Router from 'next/router'; class AddressShow extends Component { style = { fontSize:"12pt", padding:"5px 10px" } constructor(props) { super(props); if (this.props.login == false){ Router.push('/address'); } this.state = { last:-1, input:'', email:Router.query.email, address:null, // state.address.docId.messages.送信者(from).timestamp.インプット内容、が実際に受信したメッセージ message:Router.query.email + 'のデータ' // ただ上部に表示するメッセージ } this.logined = this.logined.bind(this); this.doChange = this.doChange.bind(this); this.doAction = this.doAction.bind(this); } // login,logout処理 logined(){ console.log('logined'); } logouted(){ Router.push('/address'); } // アドレスデータの検索 /* オリジナルコード getAddress(email){ let db = firebase.database(); let ref0 = db.ref('address/' + Lib.encodeEmail(this.props.email) + '/' + Lib.encodeEmail(email) + '/check'); ref0.set(false); let ref = db.ref('address/' + Lib.encodeEmail(this.props.email)); let self = this; ref.orderByKey() .equalTo(Lib.encodeEmail(email)) .on('value', (snapshot)=>{ for(let i in snapshot.val()){ let d = Lib.deepcopy(snapshot.val()[i]); self.setState({ address:d }); break; } }); } Firestore向けに書き換え↓*/ getAddress(email){ db.collection('address') .doc(this.props.email) // 自分自身のcheckをfalseにする .update({check: false}) let datas = []; db.collection('address') .where('email','==',email) .get() .then(querySnapshot => { const datas = querySnapshot.docs.map(doc => doc.data()); let d = Lib.deepcopy(datas); console.log('■d ' + JSON.stringify(d)); let self = this; self.setState({ 'address': d //address = クリックした人の個人データ詳細 }); console.log('■ステートのaddress ' + JSON.stringify(this.state.address)); console.log('■ステートのaddress.name ' + JSON.stringify(this.state.address[0].name)); // console.log('■ステートのaddress.messages ' + JSON.stringify(this.state.address[0]['atyahara@gmail_com'].messages)); }); } // フィールド入力 doChange(e){ this.setState({ input:e.target.value }); } // メッセージ送信処理 doAction(){ let from = this.props.email; // 自分自身のDocId let to = this.state.email; // 相手のemailを仮代入 let d = new Date().getTime(); let input = this.state.input; /* let ref = db.ref('address/' + from + '/' + to + '/messages/' + d); ref.set('to: ' + this.state.input); let ref2 = db.ref('address/' + to + '/' + from + '/messages/' + d); ref2.set('from: ' + this.state.input); let ref3 = db.ref('address/' + to + '/' + from + '/check/'); ref3.set(true); Firestore向けに書き換え↓*/ db.collection('address').where('email','==',to) // to = 送信相手のemail .get() .then((querySnapshot) => { querySnapshot.forEach((doc) => { const ref = db.collection('address').doc(from); // 自分Doc const ref2 = db.collection('address').doc(doc.id); // 相手Doc. Snapshotからdoc.idでdocIdが取得できる console.log('◆自分のdoc.id '+ from) console.log('◆相手のdoc.id '+ doc.id); console.log('◆state.inputは'+ input); // 直でthis.state.inputとするとなぜかカラ. to = Lib.encodeEmail(doc.id); // 相手のDocIdをエンコード from = Lib.encodeEmail(from); // 自分のDocIdをエンコード let me = this.props.username; console.log('▲' + me); // me = 自分のGoogleアカウント名 ref.update({ [`${to}.messages.${d}`] : me + ' wrote :' + input // 自分Doc配下に“messages/エンコード化相手アドレス/timestamp: メッセージ内容” で保存 }) ref2.update({ [`${from}.messages.${d}`] : me + ' wrote :' + input, // 相手Doc配下に“messages/エンコード化自分アドレス/timestamp: メッセージ内容” で保存 check: true }); }) }) this.setState({ input:''}) } // レンダリング render(){ if (this.state.address == null){ //address = クリックした人の個人データ詳細 this.getAddress(Router.query.email); } let items = []; if (this.state.address != null){ let from = Lib.encodeEmail(this.props.email); console.log('◆◆fromは '+ from); if (this.state.address[0][from]['messages'] != null) { console.log('◆◆state.address.messagesちゃん '+ JSON.stringify(this.state.address[0][from]['messages'])) let JSONobj = this.state.address[0][from]['messages']; console.log('◆◆JSONobj '+ JSONobj) console.log('◆◆Json長さ ' + Object.keys(JSONobj).length); for(let item in JSONobj){ //クリックした人とのやりとりメール一覧 console.log('◆◆'+ item + ': ' + JSONobj[item]) items.unshift(<li key={item}> {JSONobj[item]} </li>); } } else { return; } } return ( <div> <Account onLogined={this.logined} onLogouted={this.logouted} /> <p>{this.state.message}</p> <hr/> {this.state.address != null ? <table> <tbody> <tr> <th>NAME</th> <td>{this.state.address[0].name}</td> </tr> <tr> <th>MAIL</th> <td>{this.state.email}</td> </tr> <tr> <th>TEL</th> <td>{this.state.address[0].tel}</td> </tr> <tr> <th>MEMO</th> <td>{this.state.address[0].memo}</td> </tr> </tbody> </table> : <p>no-address</p> } <hr /> <fieldset> <p>Message:</p> <input type="text" size="40" value={this.state.input} onChange={this.doChange} /> <button onClick={this.doAction}>send</button> </fieldset> {this.state.address != null // && // this.state.address[0][Lib.encodeEmail(this.props.email)]['messages'] != null ? <div> <p>※{this.state.address[0].name}さんとのメッセージ</p> <ul>{items}</ul> </div> : <p>※メッセージはありません。</p> } </div> ); } } AddressShow = connect((state)=> state)(AddressShow); export default AddressShow;▼リスト6-22 address_lib.js
Firestoreのフィールド名にはドットもアスタリスク(*)も使えない。なのでアンダーバーにした。
class Lib{
  /*
  Firestoreではドット(.)の入力がOKなのでemailのエンコード・デコードいらない
  */
    static deepcopy(val){
      return JSON.parse(JSON.stringify(val));
    }
  /*
  ただ各個人のmessages配下にemailアドレスをネストするとき
  [`messages.${to}.${d}`]のようにドットで区切るのでemailのドットが邪魔になる.
  例えば,atom@yah.co.jpだとatom@yah / co / jp のようにネストされてしまう.
  そしてアスタリスク*はフィールド値に使えないときた.
 なのでアンダーバー_に変えた.
  */
    static encodeEmail(val){
      return val.split(".").join("_");
    }
    static decodeEmail(val){
      return val.split("_").join(".");
    }
}

export default Lib;
▼リスト6-23 Style.js
本の通り
データベースアクセスの設定
以下のように。
rules_version = '2';
service cloud.firestore {
  match /databases/{database}/documents {
    match /{document=**} {
      allow read, write: if request.auth.uid != null;
    }
  }
}
ユーザー認証の設定
本の通り
スモークテスト
これでいちおう動くが…
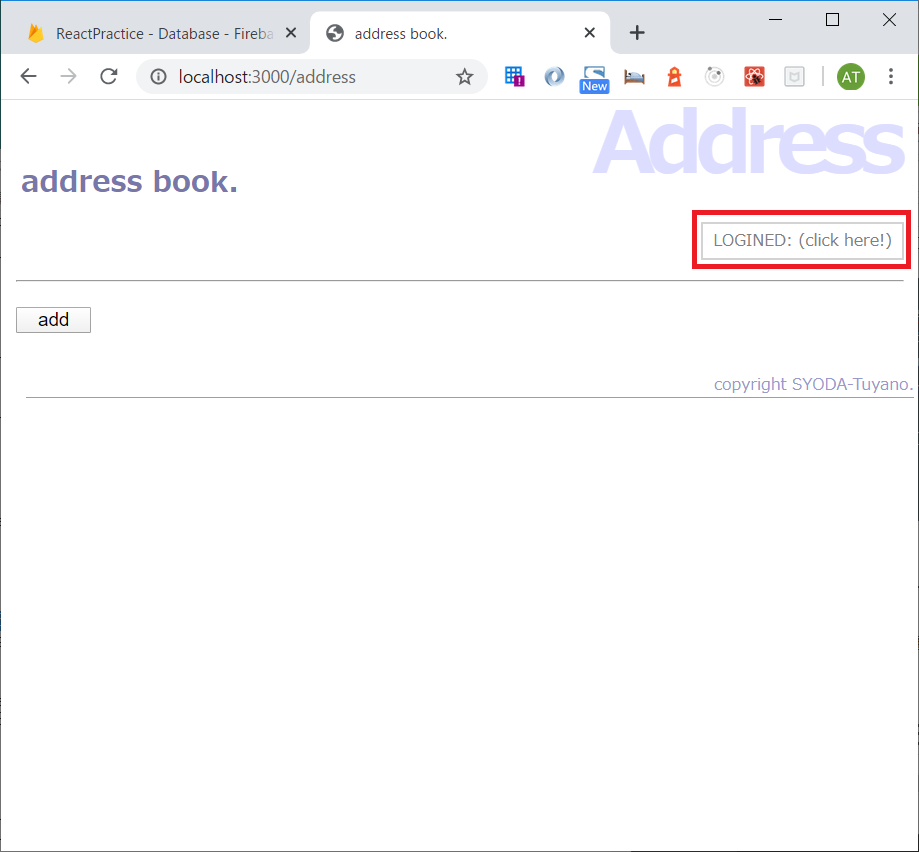
他人(ここではアトム)をクリック
1回バックしてから再度このページに戻るとメッセージが追加されている(なぜかリアルタイムにデータを更新しない)
自分自身をクリックするとエラーなど、JSONオブジェクトの扱いで苦心。
まあこのへんで。
Firestoreデータベース構成
最終的にここまでなんとなく作り終えてやっと理解できたのだが以下のようなデータの配置にしたかったのだ、とわかった。本の通りだが、RDBだけの経験だとイメージしにくかった。
以上
- 投稿日:2020-04-14T11:50:15+09:00
React.js & Next.js超入門のチャプター6を改変:Firestore使用するようにした②
React.js & Next.js超入門のチャプター6を改変:Firestore使用するようにした②
はなかなか良い本なのだが、最後のチャプター6「Firebaseでデータベースを使おう」でFirestoreでなくRealtime Databaseを使ってる。なので買うのを躊躇した人いるかもと思ってFirestoreを使用するコードに変えてみた。
React.js & Next.js超入門のチャプター6を改変:Firestore使用するようにした①からのつづき、
セクション6-2▼リスト6-6 store.js
Firebaseへの接続情報を
.config.jsに逃がすので以下のように変更(理由は.gitignoreに.config.jsを記述したいため)import { createStore, applyMiddleware } from 'redux' import thunkMiddleware from 'redux-thunk' import firebase from "firebase"; import "firebase/firestore"; import { firebaseConfig } from './.config'; // Firebaseの設定. initializeApp()は一度だけ実行させたいので、一度だけ呼ばれるstore.jsに記述する. try { firebase.initializeApp(firebaseConfig); } catch (error) { console.log(error.message); } const db = firebase.firestore(); export { db }; //// 以下はRedux処理.あくまで参考でここでは使用していない. // ステート初期値 const initial = { } // レデューサー(ダミー) function fireReducer(state = intitial, action) { switch (action.type) { // ダミー case 'TESTACTION': return state; // デフォルト default: return state; } } // initStore関数 export function initStore(state = initial) { return createStore(fireReducer, state, applyMiddleware(thunkMiddleware)) }プロジェクトルートに
.config.jsファイルを作成し以下のように。export const firebaseConfig = { apiKey: " APIキー ", authDomain: "プロジェクト.firebaseapp.com", databaseURL: "https://プロジェクト.firebaseio.com", projectId: "プロジェクト", storageBucket: "プロジェクト.appspot.com", messagingSenderId: " ID番号 ", appId: "" };▼リスト6-7 fire.js
本の通り
▼リスト6-8 fire_find.js
本の通り
▼リスト6-9 FireFind.js
以下の通り。import~の部分と、// 検索の実行コードを変更
import React, {Component} from 'react'
import {db} from "../store";

class Firefind extends Component {
    style = {
      borderBottom:"1px solid gray"
    }

    // 初期化。ステートとイベント用メソッドの設定
    constructor(props) {
      super(props);
      this.state = {
        input:'',
        data:[]
      }
      this.doChange = this.doChange.bind(this);
      this.doAction = this.doAction.bind(this);
    }

    // 入力フィールドに入力時の処理
    doChange(e){
      this.setState({
        input:e.target.value
      })
    }

    // ボタンクリック時の処理
    doAction(e){
      this.findFireData(this.state.input);
    }

    // 検索の実行
    findFireData(s){
        db
          .collection("sample")
          .where("ID", "==", s)
          .get()
          .then(querySnapshot => {
              const items = querySnapshot.docs.map(doc => doc.data());
              this.setState({ data: items })
          });
    }

    // テーブルの内容の作成
    getTableData(){
      let result = [];
      if (this.state.data == null || this.state.data.length == 0){
        return [<tr key="0"><th>NO DATA.</th></tr>];
      }
      for(let i in this.state.data){
        result.push(<tr key={i}>
          <th>{this.state.data[i].ID}</th>
          <th>{this.state.data[i].name}</th>
          <td>{this.state.data[i].message}</td>
        </tr>);
      }
      return result;
    }

    // レンダリング
    render(){
      return (<div>
        <input type="text" onChange={this.doChange}
          style={this.style} value={this.state.input} />
        <button onClick={this.doAction}>Find</button>
        <hr />
        <table><tbody>
          {this.getTableData()}
        </tbody></table>
      </div>)
    }
  }

    export default Firefind;
▼リスト6-10 fire_add.js
本の通り
▼リスト6-11 Fireadd.js
import~と、// 最後のIDを取得、および// データを追加する のコードを変更
import React, {Component} from 'react'
import {db} from "../store";
import Router from 'next/router';

class Fireadd extends Component {
    style = {
      fontSize:"12pt",
      padding:"5px 10px"
    }

    // 初期化処理
    constructor(props) {
      super(props);
      this.state = {
        name_str:'',
        msg_str:'',
        lastID:-1,
        data:[]
      }
      this.getLastID(); // 最後のIDのチェック
      this.doChangeName = this.doChangeName.bind(this);
      this.doChangeMsg = this.doChangeMsg.bind(this);
      this.doAction = this.doAction.bind(this);
    }

    doChangeName(e){
      this.setState({
        name_str:e.target.value
      })
    }
    doChangeMsg(e){
      this.setState({
        msg_str:e.target.value
      })
    }
    doAction(e){
      this.addFireData();
      Router.push('/fire');
    }

    // 最後のIDを取得
    getLastID(){
        db
          .collection("sample")
          .orderBy('ID')
          .limitToLast(1)
          .get()
          .then(querySnapshot => {
              const items = querySnapshot.docs.map(doc => doc.data());
              console.log('itemsは■' + JSON.stringify(items));
              const itemID = items[0].ID; // 配列構造のJSONデータitemsからID部分だけをとりだす
              console.log('itemIDは■' + itemID);
                this.setState({
                    lastID:itemID
                  });
          });
    }

    // データを追加する
    addFireData(){
        if (this.state.lastID == -1){
            return;
        }
        let id = this.state.lastID * 1 + 1; //ここで * 1 + 1の処理をしたことでidは数値型になった。
        console.log('idは■' + id);
        let stringed_id = String(id); // ここでString型にしないとFunction CollectionReference.doc() requires its first argument to be of type non-empty string, but it was:... エラー
        console.log('stringed_idは■' + stringed_id);
        const docRef = db.collection("sample").doc(stringed_id);
        docRef
          .set({
            ID: stringed_id,
            message: this.state.msg_str,
            name: this.state.name_str
          });
    }

    // レンダリング
    render(){
      if (this.state.lastID == -1){
        this.getLastID();
      }
      return (<div>
        {(this.state.lastID == -1)
        ?
        <p>please wait...</p>
        :
        <table>
        <tbody>
          <tr>
            <th className="label">name</th>
            <td><input type="text" placeholder="your name."
              onChange={this.doChangeName}
              value={this.state.name_str} /></td>
          </tr>
          <tr>
            <th className="label">message</th>
            <td><input type="text" size="40"
              placeholder="type message..."
              onChange={this.doChangeMsg}
              value={this.state.msg_str} /></td>
          </tr>
          <tr><th></th><td>
          <button onClick={this.doAction}>Add</button>
          </td></tr>
        </tbody>
        </table>
        }
      </div>)
    }
  }

  export default Fireadd;
▼リスト6-12 fire_del.js
本の通り
▼リスト6-13 Firedelete.js
import~と、// 項目の削除 のコードを変更
import React, {Component} from 'react'
import Router from 'next/router';
import {db} from "../store";

class Firedelete extends Component {
  style = {
    fontSize:"12pt",
    padding:"5px 10px"
  }

  // 初期化処理
  constructor(props) {
    super(props);
    this.state = {
      id_str:'',
    }
    this.doChange = this.doChange.bind(this);
    this.doAction = this.doAction.bind(this);
  }

  doChange(e){
    console.log('doChangeの中' + e.target.value);
    this.setState({
      id_str:e.target.value
    })
  }

  doAction(){
    this.deleteFireData();
    Router.push('/fire');
  }

  // 項目の削除
  deleteFireData(){
    let id = this.state.id_str;
    console.log('■id: ' + id);
    db
    .doc("sample/" + id)
    .delete()
    .then(() => {
        console.log('削除しました')
    })
  }

  // レンダリング
  render(){
    return (<div>
      <table>
      <tbody>
        <tr>
          <th className="label">ID:</th>
          <td><input type="text" placeholder="delete ID:"
            onChange={this.doChange}
            value={this.state.id_str} /></td>
        </tr>
        <tr><th></th><td>
        <button onClick={this.doAction}>Delete</button>
        </td></tr>
      </tbody>
      </table>
    </div>)
  }
}

export default Firedelete;
以上。
- 投稿日:2020-04-14T00:02:08+09:00
ReactでLIFFアプリケーションをつくる 〜その1 VSCode+Docker+Reactの環境構築する〜
はじめに
最初に、今回は環境構築なので、LIFFは登場しません
LINEってワードをよく聞くし、キャッシュレスの流れも強めなので、
「LINE連携したアプリケーション(MessagingAPI、LIFF、LINE Pay)を作れたら結構強い人なんじゃないか?」
と最近思い始めました。
(LINE Payって個人利用できたりするのだろうか?)Messaging APIは少し触ったので、今回はReactでLIFFアプリケーションを作ります。
この記事では、VSCode+Docer+Reactの環境構築〜HelloWorldまでやります。※ちなみに、LIFFとは以下のことです
https://developers.line.biz/ja/docs/liff/overview/VSCode
Install
https://azure.microsoft.com/ja-jp/products/visual-studio-code/
からダウンロード&インストールしてください。Macユーザで、
Homebrew導入済であれば、以下コマンドでインストールできます。brew cask install visual-studio-codeSetting : 設定
setting.json
editorやら、formatやらの設定ファイルです。
以下サイトを参考にとりあえず設定してみました。
- IntelliSense in Visual Studio Code
- VSCodeで爆速コーディング環境を構築する(主にReactJS向け設定)
- Visual Studio Code の初期設定と最低限必要な拡張機能 - フロントエンド向け -
Command + ,で設定を開き、右上にあるアイコン(↓のようなアイコンがあります)を押すとsettings.jsonを編集できます。
そして、内容は以下のように設定しました。
settings.json{ // see. Customizing IntelliSense // The contents described below have been copied // https://code.visualstudio.com/docs/editor/intellisense#_customizing-intellisense // from here // Controls if quick suggestions should show up while typing "editor.quickSuggestions": { "other": true, "comments": false, "strings": false }, // Controls whether suggestions should be accepted on commit characters. For example, in JavaScript, the semi-colon (`;`) can be a commit character that accepts a suggestion and types that character. "editor.acceptSuggestionOnCommitCharacter": true, // Controls if suggestions should be accepted on 'Enter' - in addition to 'Tab'. Helps to avoid ambiguity between inserting new lines or accepting suggestions. The value 'smart' means only accept a suggestion with Enter when it makes a textual change "editor.acceptSuggestionOnEnter": "on", // Controls the delay in ms after which quick suggestions will show up. "editor.quickSuggestionsDelay": 10, // Controls if suggestions should automatically show up when typing trigger characters "editor.suggestOnTriggerCharacters": true, // Controls if pressing tab inserts the best suggestion and if tab cycles through other suggestions // タブでサジェクト内容の切替できるようにする "editor.tabCompletion": "on", // Controls whether sorting favours words that appear close to the cursor "editor.suggest.localityBonus": true, // Controls how suggestions are pre-selected when showing the suggest list // 直近利用したワードが一番最初に選択されるようにサジェクトされる "editor.suggestSelection": "recentlyUsed", // Enable word based suggestions "editor.wordBasedSuggestions": true, // Enable parameter hints "editor.parameterHints.enabled": true, // to here "diffEditor.renderSideBySide": false, "editor.colorDecorators": false, // see. // [VSCodeで爆速コーディング環境を構築する(主にReactJS向け設定)](https://qiita.com/teradonburi/items/c4cbd7dd5b4810e1a3a9) // [Visual Studio Code の初期設定と最低限必要な拡張機能 - フロントエンド向け -](https://qiita.com/hi85/items/eaede5ebb509f21f27f5) // format "editor.formatOnPaste": true, "editor.formatOnSave": true, "html.format.extraLiners": "", "html.format.unformatted": null, "html.format.wrapLineLength": 0, // editor "editor.minimap.enabled": false, "editor.multiCursorModifier": "ctrlCmd", "editor.renderControlCharacters": true, "editor.renderLineHighlight": "all", "editor.tabSize": 2, "editor.wordWrap": "on", // emmet "emmet.showSuggestionsAsSnippets": true, "emmet.triggerExpansionOnTab": true, "emmet.variables": { "lang": "ja" }, // confirm when deleting files. "explorer.confirmDelete": true, // files "files.exclude": { "**/.git": true, "**/.DS_Store": true, "**/node_modules": true }, "files.insertFinalNewline": true, "files.trimFinalNewlines": true, "files.trimTrailingWhitespace": true, "search.exclude": { "**/.git": true, "**/node_modules": true // @TODO: List files to exclude from search. } }keybinding.json
キーバインドの設定です。
Command + k -> Command + sで設定を表示し、また右上にある以下アイコンを押すとkeybindings.jsonを開けます。設定値は本家の内容をまるパクリしました。
keybinding.json// Place your key bindings in this file to override the defaults [ // see Key bindings // https://code.visualstudio.com/docs/editor/intellisense#_key-bindings { "key": "ctrl+space", "command": "editor.action.triggerSuggest", "when": "editorHasCompletionItemProvider && editorTextFocus && !editorReadonly" }, { "key": "ctrl+space", "command": "toggleSuggestionDetails", "when": "editorTextFocus && suggestWidgetVisible" }, { "key": "ctrl+alt+space", "command": "toggleSuggestionFocus", "when": "editorTextFocus && suggestWidgetVisible" } ]Extension
プラグインの導入です。
以下サイトを参考にインストールさせていただきました。
- インストールするだけでVSCodeをカッコよくする拡張4つ - Qiita
- VSCodeのオススメ拡張機能 24 選 (とTipsをいくつか)
- VSCode intellisense
- React Tutorial 2: ローカル開発環境
install-extension.bash## see ## [インストールするだけでVSCodeをカッコよくする拡張4つ - Qiita](https://qiita.com/ksakiyama134/items/8ca98295897dc1280644) ## Bracket Pair Colorizer ## see. https://marketplace.visualstudio.com/items?itemName=CoenraadS.bracket-pair-colorizer code --install-extension CoenraadS.bracket-pair-colorizer ## Dracula Theme ## see. https://draculatheme.com code --install-extension gerane.Theme-Dracula ## Indent Rainbow ## see. https://marketplace.visualstudio.com/items?itemName=oderwat.indent-rainbow code --install-extension oderwat.indent-rainbow ## Material Icon Theme ## see. https://marketplace.visualstudio.com/items?itemName=PKief.material-icon-theme code --install-extension PKief.material-icon-theme ## see ## [VSCodeのオススメ拡張機能 24 選 (とTipsをいくつか)](https://qiita.com/sensuikan1973/items/74cf5383c02dbcd82234) ## GitLens ## see. https://marketplace.visualstudio.com/items?itemName=eamodio.gitlens ## REST CLIENT ## see. https://marketplace.visualstudio.com/items?itemName=humao.rest-client code --install-extension humao.rest-client ## Partial Diff ## see. https://marketplace.visualstudio.com/items?itemName=ryu1kn.partial-diff code --install-extension ryu1kn.partial-diff ## React snippets code --install-extension dsznajder.es7-react-js-snippets ## Babel JavaScript code --install-extension mgmcdermott.vscode-language-babel ## Marp for VSCode ## see. https://marketplace.visualstudio.com/items?itemName=marp-team.marp-vscode code --install-extension marp-team.marp-vscodeconfirm installed extension : インストール済の確認
インストールしたExtensionは
code -list-extensionsで確認できますちなみに
設定ファイル類はこちらにコミットしましたがなんだか見辛かったので、それぞれ記載しました。
https://github.com/ken-araki/env/tree/master/vscodenode
Install
まずはnodeをインストールするのですが、今回はdockerを利用します。
なので、作業ディレクトリに以下ファイルを作成してください。(dockerについてはあまり触れません)docker-compose.yml
docker-compose.ymlversion: "3" services: node: build: ./docker/node volumes: - ./:/home/node ports: - "3000:3000"その後、以下コマンドでDockerイメージを作成しておきます。
docker-compose builddocker/node/Dockerfile
docker/node/DockerfileFROM node:13.12.0-slim WORKDIR /home/nodeReact
基本的に、React Tutorial 2: ローカル開発環境に沿って進めます。
Node.jsのインストールが終わっているので、「2. Create React App のインストールガイドに従って新しいプロジェクトを作成する。」から始めます。
2. Reactアプリケーションの作成
以下コマンドでDocker containerで
npx create-react-app my-appを実行します。
(my-app部分はよしなに変更してください)docker-compose run --rm node sh -c "npx create-react-app app"3~6. srcの改修
チュートリアルにしたがって、src配下に
index.jsとindex.cssを作成してください。
(と言ってもコピペ)Reactアプリケーションの開始
以下コマンドでDocker containerで
npm startを実行します。docker-compose run --rm --service-ports node sh -c "cd app; npm start"その後http://localhost:3000にアクセスすると空の三目並べの盤面が表示されます。
コード
コードはこちらにコミットしています
https://github.com/ken-araki/line-liffおわりに
まずは、これでいい感じにコーディングできるか試してみようと思います。
Reactチュートリアルやりながら、イケていない部分を少しずつ直していきます。
「もっとこうした方がいいよ!」があったら教えてもらえると嬉しいです!次は、チュートリアル終わらせつつ、LIFFアプリケーション登録までやろうと思います。
そのあと、kotlin-reactも触ってみたいのですが、業務で使う機会なさそうだな、とも思ったり。。。
どうなんですかね?と言うので、今回は終わりです。
