- 投稿日:2020-03-01T16:31:07+09:00
Rails+Reactアプリを1つのdynoでデプロイする
railsAPIモードとReactで記事投稿アプリを作りました。API側とクライアント側を別々にHerokuにデプロイすると、SPAとは思えないほどアプリの動きが重くなったので、1つのdynoでデプロイし直した時のことをメモします。
参考になった記事
A Rock Solid, Modern Web Stack—Rails 5 API + ActiveAdmin + Create React App on Heroku | Heroku
ReactJS + Ruby on Rails API + Heroku App - Medium
React + RailsのアプリをHerokuで動かす方法 - Qiitaはじめに
ディレクトリ構成
project
      ┝ app
      ┝ bin
      ┝ config
      ┝ db
      ┝ front <--reactのディレクトリ
    ┝ lib
      ┝ log
      ┝ public
      ┝ storage
      ┝ test
      ┝ tmp
      ┗ vendor
アプリ名をprojectとしています
ディレクトリ構成はrailsアプリの中にreactアプリがあるという状態です
アプリのルートディレクトリにGemfileがないと後々buildpackを用いてデプロイする時にエラーが出るのでこのような構成にしました
参考:Heroku:Buildpackエラーでハマった.envファイル生成
開発環境でのAPI側のURLを.envファイルに書きます
frontディレクトリ下で.envファイルを作成し、以下を記述しますproject/front/.envREACT_APP_SERVER_URL=http://localhost:3001URLを取得する時は
process.env.REACT_APP_SERVER_URLで取得できます
axiosでHTTP通信する場合は以下のように書けますproject/front/Component/UserIndex.jsaxios .get(`${process.env.REACT_APP_SERVER_URL}/api/users`, headers)Foremanの導入
Foremanは複数のプロセスをまとめて管理できるツールです
APIとクライアント側を一つのコマンドで動かせるので便利です
Gemfileに以下を記述し、bundle install --path vendor/bundleしますproject/Gemfilegem 'foreman'次にProcfile.devを作成し、以下を記述します
project/Procfile.devfrontend: exec /usr/bin/env PORT=3000 sh -c 'cd front && yarn start' backend: exec /usr/bin/env PORT=3001 sh -c 'bundle exec rails s'ここで
foreman start -f Procfile.devを実行し、http://localhost:3000にアクセスすると確認できますただ、
lib/tasks下にstart.rakeファイルを作成し、以下を記述すると、rake startとコマンドに打つだけでブラウザで確認できますproject/lib/tasks/start.rakenamespace :start do desc 'Start dev server' task :development do exec 'foreman start -f Procfile.dev' end desc 'Start production server' task :production do exec 'NPM_CONFIG_PRODUCTION=true yarn heroku-postbuild && foreman start' end end task :start => 'start:development'また、
rake start:productionコマンドでデプロイ前にローカルで簡単に本番環境のテストを行うことができるように記述していますHerokuにデプロイ
package.json作成
まず、projectディレクトリ下にpackage.jsonファイルを
npm initコマンドで作成しますproject/package.json{ "name": "project", "version": "1.0.0", "description": "You can post articles using this application.", "main": "index.js", "scripts": { "build": "cd front && npm install && npm run build && cd ..", "deploy": "cp -a front/build/. public/", "heroku-postbuild": "npm run build && npm run deploy && echo 'Client built!'" } }Herokuは
heroku-postbuildに定義されていることを実行します。ここでは、frontディレクトリでnpm install, npm run buildを実行し、front/buildの内容をpublic/にコピーしますHerokuアプリ作成
heroku create アプリ名でHerokuアプリを生成します
そして、Herokuのbuildpackを追加します$ heroku buildpacks:add heroku/nodejs --index 1 $ heroku buildpacks:add heroku/ruby --index 2
heroku buildpacksで確認して、以下のような順番になっていればOKです=== project Buildpack URLs 1. heroku/nodejs 2. heroku/rubyProcfile作成
次にProcfileを作成し、Herokuがrailsアプリを起動するためのコマンドを記述します
project/Procfileweb: bundle exec rails sProcfileを作成したため、ここで
rake start:productionコマンドによりローカルで本番環境のテストを行うことができます本番環境用のエンドポイント設定
Reactアプリが本番環境でのAPI側のURLを参照できるように.env.productionファイルを作成します
project/front/.env.productionREACT_APP_SERVER_URL=https://project.herokuapp.comまた、クライアント側からのアクセスを許可するため、cors.rbのoriginに追記します
project/config/initializers/cors.rborigins 'http://localhost:3000', 'https://project.herokuapp.com/api'本番環境では、APIは
https://project.herokuapp.com/api/で、クライアント側はhttps://project.herokuapp.com/で起動するようになっています.gitignoreに追記
次に.gitignoreに以下を追記します
project/.gitignore/public /vendor/bundlePostgre.SQLを使用するための設定
本番環境のDBにPostgre.SQLを使用するための設定を行います
Gemfileに以下を追記し、bundle install --without productionを実行しますproject/Gemfilegroup :production do gem 'pg', '>= 0.18', '< 2.0' end次にdatabase.ymlを以下のように書き換えます
project/config/database.ymlproduction: adapter: postgresql encoding: unicode pool: 5 database: project_production username: project password: <%= ENV['PROJECT_DATABASE_PASSWORD'] %>デプロイ
これでデプロイする準備が整いました
Herokuにpushしてくださいgit add . git commit -m 'ready for first push to heroku' git push heroku master
heroku run rails db:migrateして終了ですReact Routerを使っている場合
React Routerを機能させるために以下の設定をします
fallback_index_htmlメソッド定義
ApplicationControllerにfallback_index_htmlメソッドを追加します
project/app/controllers/application_controller.rbclass ApplicationController < ActionController::Base def fallback_index_html render :file => 'public/index.html' end endApplicationControllerがActionController::APIを継承している場合はhtmlファイルを返すことができないため、以下のように追記します
project/app/controllers/application_controller.rbclass ApplicationController < ActionController::API include ActionController::MimeResponds def fallback_index_html respond_to do |format| format.html { render body: Rails.root.join('public/index.html').read } end end endroute.rbでfallback_index_html
そして、routes.rbにも以下を追記します
railsのルーティングについて書いている部分より下に追記してください
ここでfallback_index_htmlメソッドによりpublic/index.htmlが返されるため、React Routerを参照することができますproject/config/routes.rbRails.application.routes.draw do get '*path', to: "application#fallback_index_html", constraints: ->(request) do !request.xhr? && request.format.html? end endこれでpushすると、React Routerによるルーティングが反映されると思います
Herokuにデプロイするまでの手順は以上です最後に
参考にしたサイトを見ながらでも結構エラーで詰まるところがあり、デプロイするまでに時間がかかりました。しかし、APIとクライアントを別々でデプロイするよりもアプリの動きは軽くなったのでよかったです。
この記事について間違っているとこなどあればご指摘いただけると嬉しいです。
- 投稿日:2020-03-01T15:16:17+09:00
Reactを初めて触ってみる。(ついでにFirebaseHostingにデプロイしてみる)
普段は業務でAngularばっかり使ってますが、社内のアプリ開発コンテストでReactを使うことになりました。
徐々に勉強していこうと思いますが、まずは環境構築について書いてみます。Getting Started
公式で色々書いてありますが、ローカル環境の構築方法は以下に書いてありました。
https://ja.reactjs.org/tutorial/tutorial.html#setup-option-2-local-development-environmentプロジェクトの作成
npx create-react-app my-apppackage.json{ "name": "my-app", "version": "0.1.0", "private": true, "dependencies": { "@testing-library/jest-dom": "^4.2.4", "@testing-library/react": "^9.4.1", "@testing-library/user-event": "^7.2.1", "react": "^16.13.0", "react-dom": "^16.13.0", "react-scripts": "3.4.0" }, "scripts": { "start": "react-scripts start", "build": "react-scripts build", "test": "react-scripts test", "eject": "react-scripts eject" }, "eslintConfig": { "extends": "react-app" }, "browserslist": { "production": [ ">0.2%", "not dead", "not op_mini all" ], "development": [ "last 1 chrome version", "last 1 firefox version", "last 1 safari version" ] } }プロジェクトの起動
npm startで起動しますnpm start
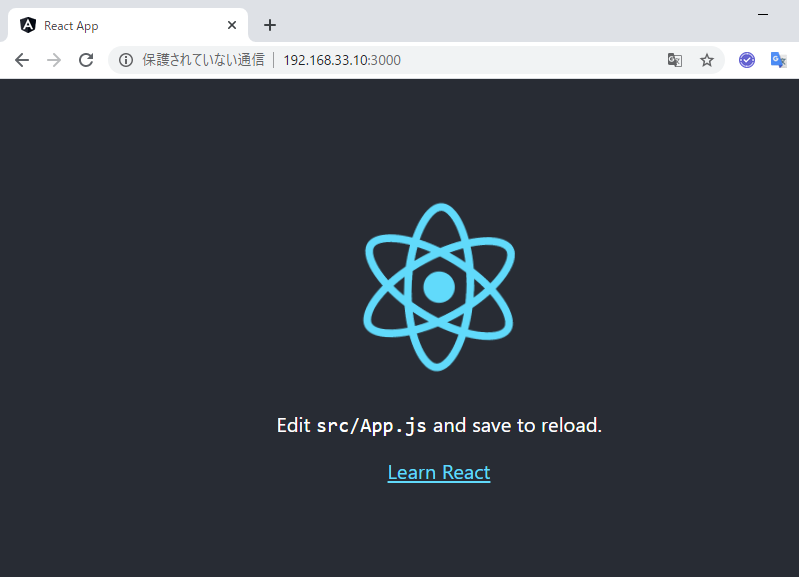
- 起動に成功すると、以下のような表示が出ます
Compiled successfully!

You can now view my-app in the browser.

  Local:            http://localhost:3000
  On Your Network:  http://10.0.2.15:3000

Note that the development build is not optimized.
To create a production build, use npm run build.
→ Productionビルドしたかったら
npm run build叩いてねって書いてありますね。
- ブラウザでアクセスします。
※VM(192.168.33.10)上で動かしています
テンプレートプロジェクトの構成について
- プロジェクトルート
[vagrant@localhost /samba/my-app (master)]$ ll
合計 628
-rw-r--r--.    1 vagrant docker   2891  2月 26 22:39 README.md
drwxr-xr-x. 1022 vagrant docker  32768  2月 26 22:42 node_modules
-rw-r--r--.    1 vagrant docker 581143  2月 26 22:40 package-lock.json
-rw-r--r--.    1 vagrant docker    742  2月 26 22:40 package.json
drwxr-xr-x.    2 vagrant docker    120  2月 26 22:39 public
drwxr-xr-x.    2 vagrant docker    148  2月 26 22:39 src
- public ディレクトリ ・・・ 静的ファイル置き場
[vagrant@localhost /samba/my-app (master)]$ ll public
合計 36
-rw-r--r--. 1 vagrant docker 3150  2月 26 22:39 favicon.ico
-rw-r--r--. 1 vagrant docker 1721  2月 26 22:39 index.html
-rw-r--r--. 1 vagrant docker 5347  2月 26 22:39 logo192.png
-rw-r--r--. 1 vagrant docker 9664  2月 26 22:39 logo512.png
-rw-r--r--. 1 vagrant docker  492  2月 26 22:39 manifest.json
-rw-r--r--. 1 vagrant docker   67  2月 26 22:39 robots.txt
- srcディレクトリ ・・・ コード置き場
[vagrant@localhost /samba/my-app (master)]$ ll src
合計 36
-rw-r--r--. 1 vagrant docker  564  2月 26 22:39 App.css
-rw-r--r--. 1 vagrant docker  555  2月 26 22:39 App.js
-rw-r--r--. 1 vagrant docker  280  2月 26 22:39 App.test.js
-rw-r--r--. 1 vagrant docker  366  2月 26 22:39 index.css
-rw-r--r--. 1 vagrant docker  452  2月 26 22:39 index.js
-rw-r--r--. 1 vagrant docker 2671  2月 26 22:39 logo.svg
-rw-r--r--. 1 vagrant docker 5085  2月 26 22:39 serviceWorker.js
-rw-r--r--. 1 vagrant docker  255  2月 26 22:39 setupTests.js
修正してみる
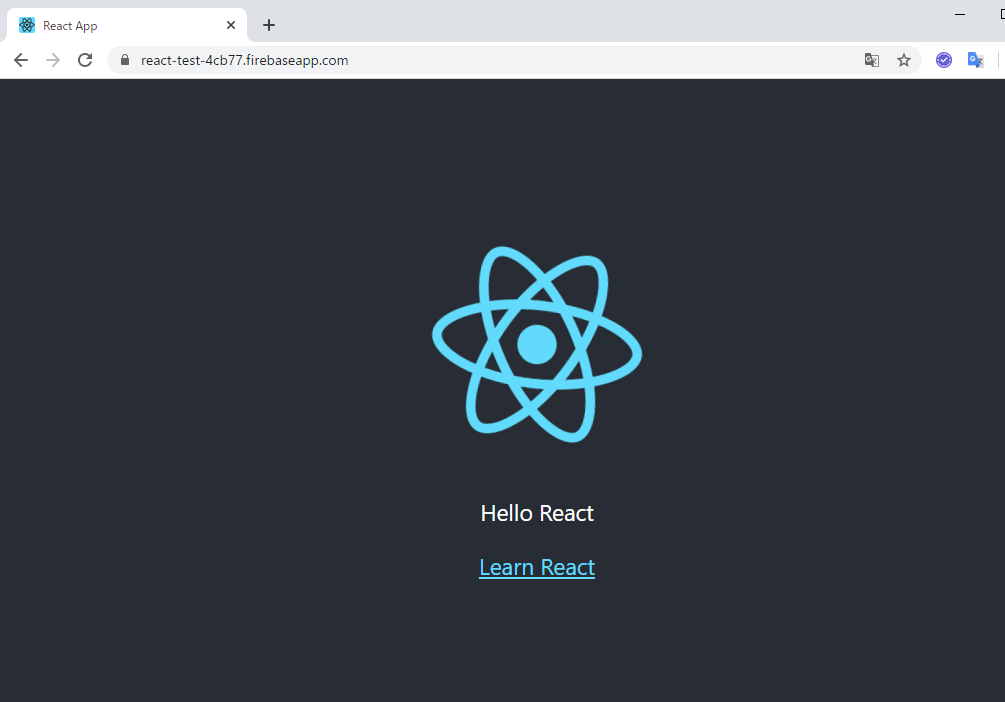
App.jsの文章を
Hello Reactに変えてみますsrc/App.jsimport React from 'react'; import logo from './logo.svg'; import './App.css'; function App() { return ( <div className="App"> <header className="App-header"> <img src={logo} className="App-logo" alt="logo" /> <p> Hello React </p> <a className="App-link" href="https://reactjs.org" target="_blank" rel="noopener noreferrer" > Learn React </a> </header> </div> ); } export default App;↓ 保存すると即座にリロードされます
Firebaseを使って公開してみる
基本的には以前に執筆したAngularのホスティングと同じなので、異なる点だけ書いておきます。
ReactプロジェクトをProductionビルド
npm startした際に表示される通り、npm run buildだけでproductionビルドとなりますnpm run build↓
[vagrant@localhost /samba/my-app (master *)]$ npm run build

> my-app@0.1.0 build /samba/my-app
> react-scripts build

Creating an optimized production build...
Compiled successfully.

File sizes after gzip:

  39.38 KB  build/static/js/2.bc5b117a.chunk.js
  771 B     build/static/js/runtime-main.aaf88d20.js
  605 B     build/static/js/main.63c75bea.chunk.js
  556 B     build/static/css/main.d1b05096.chunk.css

The project was built assuming it is hosted at /.
You can control this with the homepage field in your package.json.

The build folder is ready to be deployed.
You may serve it with a static server:

  npm install -g serve
  serve -s build

Find out more about deployment here:

  bit.ly/CRA-deploy
buildディレクトリに出力されました。
Firebase Hostingへのデプロイ
- 公開するディレクトリは
buildに変更します? What do you want to use as your public directory? (public) build
- SPAの設定は
yを選びます? Configure as a single-page app (rewrite all urls to /index.html)? (y/N) y
- index.htmlは上書きしません
? File build/index.html already exists. Overwrite? (y/N) Nデプロイ
firebase deployアクセスしてみる
最後に
Reactについては全然わかってないですが、とりあえず環境の構築とFirebaseでの公開はできました。
SPAは簡単に公開できて良いですね。徐々にReactについても勉強していこうと思います。

- 投稿日:2020-03-01T10:57:15+09:00
[React]動的にコンポーネントを表示する
URL の変更に合わせてコンポーネントを切り替えたくて、あれこれやってみたのでメモ。
react: 16.13.0
react-router-dom: 5.1.2
Route
// url から Component を決めて表示したいので slug を設定
<Route path='/:slug' component={MyComponent} />
Component
import React, { FC } from 'react';
import { useParams } from 'react-router-dom';
import ComponentA from './ComponentA';
import ComponentB from './ComponentB';
import NotFound from './NotFound';

const MyComponent: FC = () => {
  // Route で設定したパラメータを取得
  const { slug } = useParams();

  // URL に合わせてコンポーネントを設定。マッチしなかった場合用に NotFound を用意。
  const components: { [key: string]: FC } = {
    'component-a': ComponentA,
    'component-b': ComponentB,
    'not-found': NotFound,
  };

  // slug が存在してマッチすれば上で指定した Component を、そうでなければ NotFound をセット。
  const ComponentName = (slug && components[slug]) || components['not-found'];

  return <ComponentName />;
};

export default MyComponent;
これで、 URL に対して
componentsで対応させたコンポーネントが表示される。これよりもこっちの方がいいよ!とかあれば教えてもらえると嬉しいです!
- 投稿日:2020-03-01T10:56:23+09:00
Reactの最強状態管理ツールreact-queryがメジャーリリースされたぞ!
react-query とは?
react-queryとは 2 月 18 日にメジャーリリースされたばかりの React プロジェクトにおける状態管理用のモジュールです。
ネット上に情報がまだ少ないため、一部抜粋しながら使い方と魅力についてまとめていきます。時間があるときに追加していくのでまだ準備中が多いです。
READMEがめちゃくちゃ分かりやすいのでそちらを見たほうが断然早いです。tannerlinsley/react-query
https://github.com/tannerlinsley/react-query基本的な機能としては、Hooksを用いた
- データの取得(サーバの実装は REST でも GraphQL でも何でも ok)
- 自動キャッシュ
- 自動再取得
- データの反映 → データの再取得
- ページネーションにも対応
- リクエストキャンセル
です。
基本的にクエリに任意のqueryKeyを与え、取得したデータをqueryKeyごとにglobal stateに自動でキャッシュしてくれます。僕が考えるこのモジュールの最大のメリットは、データの取得の API を叩くロジックを一定のルールに沿ってラッピングするため、コードの可読性が上がるという点にあると思います。また、
Suspenceを用いた再取得がとてもわかりやすく書けるので最高です。以下は
todoId = 1のtodoを取得する例ですが、API を叩く関数では promise を返し、使う側はkeyとtodoIdをqueryKeyとして配列で渡すだけで、loading,error,successの状態やerrorが発生しているかどうかのbooleanを簡単に取得できます。const todoId = 1; const { status, data, error } = useQuery(["todos", "todoId"], fetchTodoList); const fetchTodoList = (key, todoId) => { return axios.get(`/todos/${todoId}`).then(res => res.data); };react-query のインストール
以下のコマンドで追加できます。
yarn add react-queryDefinitelyTyped が公開されていますが、現在(2020/3/1)はまだ古いバージョンのため、typescriptで利用するのは厳しいようです。
For now, no. I'm sorry I can't give you any TS hugs today.
— Tanner Linsley (@tannerlinsley) February 26, 2020
I did a TS migration on v0.x, and it went really well, but then I needed to write v1 (which was more than a refactor) and ended up chucking it all out.
I'll change some day. But not today.yarn add @types/react-querytannerlinsley/react-query
https://github.com/tannerlinsley/react-queryqueryKey とは
queryKeyはこのモジュールの最重要ポイントです。stringもしくはstring,numberの値とそれらを含むobjectのarrayで示されます。
キャッシュの管理を行うために必須な値であり、雰囲気としてはGraphQLのqueryに似ています。
このモジュールの強みはqueryKeyが以下のように柔軟に設定できることにあります。String-Only Query Keys
文字列一つを
queryKeyとするときはこのように書きます。useQuery('todos', ...) // queryKey === ['todos']右側のコメントがモジュール内で利用される
queryKeyで、配列型に変換されるようになっています。Array Keys
もし、その他の情報や
queryFunction(第 2 引数に渡す fetch する関数)がパラメータによって一意に決まる場合は以下のような書き方になります。useQuery(['todos', { status: 'done' }], ...] // queryKey === ['todos', { status: 'done' } const todoId = 5 useQuery(['todos', todoId], ...] // queryKey === ['todos', 5] useQuery(['todos', todoId, { preview: true }], ...] // queryKey === ['todos, 5, { preview: 'true' } ]このとき
queryFunctionの引数はuseQueryの第一引数と対応しています。// 例の3つ目 // useQuery(['todos', todoId, { preview: true }], ...] // queryKey === ['todos, 5, { preview: 'true' } ] const fetchTodoList = (key, todoId, { preview }) => { ... }queryKey の並び順による影響
queryKeyの並び順は
- object 内は考慮されない
- array 内は考慮される
です。
// 以下は全て同じ扱い
useQuery(['todos', { status, page }], ...)
useQuery(['todos', { page, status }], ...)
useQuery(['todos', { page, status, other: undefined }], ...)

// 以下は全て異なる扱い
useQuery(['todos', status, page], ...)
useQuery(['todos', page, status], ...)
useQuery(['todos', undefined, page, status], ...)
複数クエリがある場合の挙動
同一ページで複数のクエリを叩くパターンとして、
- 並列クエリ...複数のクエリを同時に叩く
- 直列クエリ...あるクエリの結果を元にクエリを叩く
があります。
並列クエリの場合にはクエリを複数の書くだけで簡単に実装できます。
後者の場合はこれまではメソッドチェーンやコールバック、Suspenceを駆使して実装していたでしょう。
しかし、react-query ではとても簡潔に書くことができます。ここでは、以下の例をについて見ていきましょう。
idからユーザに紐づくprojects一覧を取得する従来だとこのような感じでしょうか
cosnt fetchProjects = async () => {
  const user = await getUserByEmail(email)
  const projects = await getProjectsByUser(user.id)
  setProjects(projects)
}

useEffect(() => {
  fetchProjects()
}, [])
パターン 1: queryKey に falsy な値を渡す
1 つ目のパターンは
queryKeyにfalsyな値を渡すパターンです。// react-queryを用いる際はdataを別の変数名で定義します。 const { data: user } = useQuery(["user", { email }], getUserByEmail); const { data: projects } = useQuery( // userがnullでなくなったらqueryFunctionが実行されます user && ["projects", { userId: user.id }], getProjectsByUser );とても簡単で見やすいですね!
パターン 2: queryKey の Item に falsy な値を渡す
パターン 1 では
queryKey自体がfalsyでしたが、queryItemがfalsyな場合でも同様の効果が得られます。
これによって、複数の依存があるクエリの場合でもネストが無いためとても読みやすいですね!const { data: user } = useQuery(["user", { email }]); const { data: projects } = useQuery( ["projects", user && user.id], getProjectsByUser );また、コンパイラが対応している場合にはOptional Chainingで書くことも可能です!
const { data: projects } = useQuery(["projects", user?.id], getProjectsByUser);パターン3: queryFunctionでの例外検知
const { data: user } = useQuery(['user', { email }])

const { data: projects } = useQuery(
  () => ['projects', { userId: user.id }]
)
queryKeyにFunctionを渡すこともできます。
上記のコードでは、userがnullのときにuser.idへアクセスしようとすると例外が発生します。
このような場合、例外が発生しなくなるまで再取得を試みてくれます。
一番Suspenceを使うときに近いですね。API
useQuery
準備中...
usePaginatedQuery
準備中...
useInfiniteQuery
準備中...
useMutation
準備中...
queryCache
準備中...
queryCache.prefetchQuery
準備中...
queryCache.getQueryData
準備中...
queryCache.setQueryData
準備中...
queryCache.refetchQueries
準備中...
queryCache.removeQueries
準備中...
queryCache.getQuery
準備中...
queryCache.subscribe
準備中...
queryCache.clear
準備中...
useIsFetching
準備中...
ReactQueryConfigProvider
準備中...
setConsole
準備中...
おわりに
サーバが
REST APIで実装されている場合、これを使うことですごく書きやすくなりそうな雰囲気を感じます。
GraphQLにも対応はしていますが、Apollo Clientの方が純粋に特化しているのでそちらを使ったほうが良さそうですね。コード部分も含め全部書き写しているので、間違いやタイポがあったら感想でご指摘、修正依頼等お願いします。
- 投稿日:2020-03-01T02:53:02+09:00
Material UIのoutlined inputのstyleをwithStylesで変更する
Material UI のInputのデザインを編集するための情報がいまいちわかり辛かったのでここにメモする。
Material UIでもともと定義されているTextFieldのデザインを変更して汎用的なコンポーネントを作りたいときの方法。
withStyles()を使ってTextFieldに必要なスタイル情報を渡せばいい。
ただし、TextFieldのpropsに初期値を設定したい場合(すべてのTextFieldにvariant="outlined"を指定する場合など)には、WithStyles型を継承した自前のpropsの型を定義する必要がある。
withStylesで作った関数型コンポーネントには二つ目のカッコに入っているコンポーネントが受け取ることができる任意のpropsを渡すことができ,そのコンポーネントと同様の挙動をとる。
要するにwithStylesを使うと、style要素以外の属性がすべてもとのコンポーネントと共通のコンポーネントを作ることができる(?)。path/to/styles.tsxexport const OutlinedInputStyle = { root: { // defaultのpaddingとmarginを無効にする margin: 0, padding: 0, // defaultのpaddingとmarginを無効にするとplaceholderのlabelがずれることがあるので調整する '& label':{ transform: 'translate(16px, 16px) scale(1)' }, '& label.Mui-focused': { color: YourFavoriteColor, }, '& .MuiInput-underline:after': { borderBottomColor: YourFavoriteColor, }, '& .MuiOutlinedInput-root': { '& fieldset': { borderColor: YourFavoriteColor, }, '&:hover fieldset': { borderColor: YourFavoriteColor, }, '&.Mui-focused fieldset': { borderColor: YourFavoriteColor, }, }, '& .MuiOutlinedInput-input': { padding: 12, } }, }冒頭でimportしているMediumやTextInputPropsは別ファイルで独自に定義している
import React from 'react'; import {Medium} from "./Fonts" import { createStyles, } from '@material-ui/core/styles'; import { TextField, InputAdornment, withStyles,WithStyles, InputProps} from '@material-ui/core'; import { TextInputProps, } from '../../models'; import { OutlinedInputProps } from '@material-ui/core/OutlinedInput'; import {OutlinedInputStyle} from "./Styles" const formStyles = createStyles(OutlinedInputStyle); //TextFieldの一部のプロパティだけに初期値を与えたい場合、たとえばvariant="outlined"だけ設定したいときに //WithStyles<typeof formStyles>型を継承してpropsを作る interface CustomTextInputProps extends WithStyles<typeof formStyles>{ inputClassName?: string, inputName?: string, onChange?:(event: React.ChangeEvent<HTMLInputElement>) => void, onFocus?: (event: React.FocusEvent<HTMLInputElement>) => void, onBlur?: (event: React.FocusEvent<HTMLInputElement>) => void value?: string placeholder?: string, type?: string, fullWidth?:boolean, InputProps?:InputProps } //ひな型となるTextInputを作る. propsは自前で定義したCustomTextInputProps型 export const TextInput: React.FC<CustomTextInputProps> = (props) => { return( <TextField variant={"outlined"} {...props} /> ) } //propsに初期値を設定しない場合は、withStypes(formStyles)(TextField)と書く //ひな型にスタイルを付与したStyledTextInputを作る export const StyledTextInput = withStyles(formStyles)(TextInput);path/to/somewhere.tsx//... 省略 return( <StyledTextInput // add props here // example: // inputProps={ // here are input props // } // ! TextFieldのpropsがすべて使える /> )
- 投稿日:2020-03-01T00:05:53+09:00
React公式の「state とライフサイクル」のclassをhooksを使って関数に書き換えしてみた
概要
classで書かれているcomponentDidMountとcomponentWillUnmountを useEffect を使って関数にしてみます。stateはuseStateを使って管理します。
実行される内容はタイマーで時間を動的に刻まれていくものです。React公式
https://ja.reactjs.org/docs/state-and-lifecycle.html公式からソースを抜粋
class Clock extends React.Component {
    constructor(props) {
    super(props);
    this.state = {date: new Date()};
  }

  componentDidMount() {
    this.timerID = setInterval(
      () => this.tick(),
      1000
    );
  }

  componentWillUnmount() {
    clearInterval(this.timerID);
  }

  tick() {
    this.setState({
      date: new Date()
    });
  }

  render() {
    return (
      <div>
        <h1>Hello, world!</h1>
        <h2>It is {this.state.date.toLocaleTimeString()}.</h2>
      </div>
    );
  }
}

ReactDOM.render(
  <Clock />,
  document.getElementById('root')
);
こちらを関数に書き換えます。
const Clock: React.FC = () => {
  let [state, setState] = React.useState({ date: new Date() });
  const dateObj = { date: new Date() };
  let timerID: any;

  useEffect(() => {
    timerID = setInterval(() => tick(), 1000);
    return () => {
      clearInterval(timerID);
    };
  });

  function tick() {
    setState({ date: new Date() });
  }

  return (
    <div className="App">
      <h1>Hello, world!</h1>
      <h2>It is {dateObj.date.toLocaleTimeString()}</h2>
    </div>
  );
};
useEffectがcomponentDidMountとcomponentWillUnmountの役割を果たしています。
詳しくは「副作用フックの利用法」読むと良いです。
https://ja.reactjs.org/docs/hooks-effect.html