- 投稿日:2020-01-07T21:50:16+09:00
Windows10 Homeクリーンインストール ~Docker事始め~
はじめに
環境構築のメモ。
Windowsクリーンインストール~Docker-composeまで。環境
- Windows10 Home 64bit
準備
このサイトからMediaCreationToolをダウンロードしてUSBメモリ等に焼く。
SDカードでも可。セットアップ
HDDの領域をすべて削除して統合する。
ユーザフォルダ名を指定したいので、ローカルアカウントを作成する。
Windows Insider ProgramをSlowに設定する。(2020/1/7現在 OSビルド19041.1)Chocolately
アプリケーションを一括管理したいのでChocolatelyを使用する。
- Chocolatelyのインストール
PowerShellSet-ExecutionPolicy Bypass -Scope Process -Force; iex ((New-Object System.Net.WebClient).DownloadString('https://chocolatey.org/install.ps1'))
- アプリケーションの一括インストール
PowerShellcinst -y vscode adobereader chrome-remote-desktop-chrome sakuraeditor musicbee steam spotify itunes discord skype git mp3tag winmerge mpc-be eacWSL2
- WSLの有効化
PowerShellEnable-WindowsOptionalFeature -Online -FeatureName Microsoft-Windows-Subsystem-Linux
Ubuntu 18.04 LTSインストール
WSL→WSL2への変換
PowerShellwsl --set-version Ubuntu 2 wsl --set-default-version 2 wsl -l -v NAME STATE VERSION * Ubuntu Running 2DockerCE
- 依存関係のパッケージをインストール
Ubuntu$ sudo apt-get update $ sudo apt-get install -y apt-transport-https ca-certificates curl gnupg-agent software-properties-common
- GPGキーのダウンロード
Ubuntu$ curl -fsSL https://download.docker.com/linux/ubuntu/gpg | sudo apt-key add -
- Repositoryの設定
Ubuntu$ sudo add-apt-repository "deb [arch=amd64] https://download.docker.com/linux/ubuntu $(lsb_release -cs) stable"
- DockerCEのインストール
Ubuntu$ sudo apt-get update $ sudo apt-get install -y docker-ce docker-ce-cli containerd.io
- Dockerの起動
Ubuntu$ sudo service docker start $ sudo docker run hello-world Hello from Docker! This message shows that your installation appears to be working correctly. . . . For more examples and ideas, visit: https://docs.docker.com/get-started/Docker-composeのインストール
Ubuntu$ sudo curl -L "https://github.com/docker/compose/releases/download/1.25.1/docker-compose-$(uname -s)-$(uname -m)" -o /usr/local/bin/docker-compose $ sudo chmod +x /usr/local/bin/docker-compose $ docker-compose --version docker-compose version 1.25.1, build a82fef07
- 投稿日:2020-01-07T21:17:20+09:00
Dockerでalpineイメージ使用時に発生したstandard_init_linux.go:211: exec user process caused "no such file or directory" を解決
alpineイメージ使用時に発生するstandard_init_linux.go:211: exec user process caused "no such file or directory" を解決
Docker X Rails6 X MySQL8で環境構築する際に、初めてalpineイメージを使用するとエラーに出会いました。
alpineはLinuxディストリビューションの1つで、CentOSやUbuntuよりも軽量なためDockerイメージのサイズを小さくすることができます。各種設定
DockerfileFROM ruby:2.7.0-alpine ENV LANG C.UTF-8 RUN mkdir /myapp WORKDIR /myapp COPY Gemfile /myapp/Gemfile COPY Gemfile.lock /myapp/Gemfile.lock RUN apk update -qq && apk add --no-cache yarn build-base tzdata libxml2-dev mariadb-dev libxslt-dev alpine-sdk mysql-dev nodejs vim g++ RUN bundle install run yarn install COPY . /myapp # Add a script to be executed every time the container starts. COPY entrypoint.sh /usr/bin/ RUN chmod +x /usr/bin/entrypoint.sh ENTRYPOINT ["entrypoint.sh"] EXPOSE 3000 # Start the main process. CMD ["rails", "server", "-b", "0.0.0.0"]docker-copose.yml~~省略 web: build: . command: bash -c "rm -f tmp/pids/server.pid && bundle exec rails s -p 3000 -b '0.0.0.0'" volumes: - .:/myapp ports: - "3000:3000" ~~省略entrypoint.sh#!/bin/bash set -e # Remove a potentially pre-existing server.pid for Rails. rm -f /myapp/tmp/pids/server.pid # Then exec the container's main process (what's set as CMD in the Dockerfile). exec "$@"(他,
Gemfile,Gemfile.lock)エラー発生
$ docker-compose run web rails new .を実行すると
standard_init_linux.go:211: exec user process caused "no such file or directoryというエラーが発生し、
rails newは実行できませんでした。原因
alpineのシェルは
bashではなくashだった。解決
docker-compose.ymlとentrypoint.shを編集します。docker-compose.ymlweb: build: . # bash → ashに変更 command: ash -c "rm -f tmp/pids/server.pid && bundle exec rails s -p 3000 -b '0.0.0.0'" volumes: - .:/myapp ports: - "3000:3000"entrypoint.sh#!/bin/sh ←bashからshへ set -e # Remove a potentially pre-existing server.pid for Rails. rm -f /myapp/tmp/pids/server.pid # Then exec the container's main process (what's set as CMD in the Dockerfile). exec "$@"編集後、再度
$ docker-compose run web rails new .すれば実行できました。
参考
- 投稿日:2020-01-07T21:17:20+09:00
alpineイメージ使用時に発生するstandard_init_linux.go:211: exec user process caused "no such file or directory" を解決
alpineイメージ使用時に発生するstandard_init_linux.go:211: exec user process caused "no such file or directory" を解決
Docker X Rails6 X MySQL8で環境構築する際に、初めてalpineイメージを使用するとエラーに出会いました。
alpineはLinuxディストリビューションの1つで、CentOSやUbuntuよりも軽量なためDockerイメージのサイズを小さくすることができます。各種設定
DockerfileFROM ruby:2.7.0-alpine ENV LANG C.UTF-8 RUN mkdir /myapp WORKDIR /myapp COPY Gemfile /myapp/Gemfile COPY Gemfile.lock /myapp/Gemfile.lock RUN apk update -qq && apk add --no-cache yarn build-base tzdata libxml2-dev mariadb-dev libxslt-dev alpine-sdk mysql-dev nodejs vim g++ RUN bundle install run yarn install COPY . /myapp # Add a script to be executed every time the container starts. COPY entrypoint.sh /usr/bin/ RUN chmod +x /usr/bin/entrypoint.sh ENTRYPOINT ["entrypoint.sh"] EXPOSE 3000 # Start the main process. CMD ["rails", "server", "-b", "0.0.0.0"]docker-copose.yml~~省略 web: build: . command: bash -c "rm -f tmp/pids/server.pid && bundle exec rails s -p 3000 -b '0.0.0.0'" volumes: - .:/myapp ports: - "3000:3000" ~~省略entrypoint.sh#!/bin/bash set -e # Remove a potentially pre-existing server.pid for Rails. rm -f /myapp/tmp/pids/server.pid # Then exec the container's main process (what's set as CMD in the Dockerfile). exec "$@"(他,
Gemfile,Gemfile.lock)エラー発生
$ docker-compose run web rails new .を実行すると
standard_init_linux.go:211: exec user process caused "no such file or directoryというエラーが発生し、
rails newは実行できませんでした。原因
alpineのシェルは
bashではなくashだった。解決
docker-compose.ymlとentrypoint.shを編集します。docker-compose.ymlweb: build: . # bash → ashに変更 command: ash -c "rm -f tmp/pids/server.pid && bundle exec rails s -p 3000 -b '0.0.0.0'" volumes: - .:/myapp ports: - "3000:3000"entrypoint.sh#!/bin/sh ←bashからshへ set -e # Remove a potentially pre-existing server.pid for Rails. rm -f /myapp/tmp/pids/server.pid # Then exec the container's main process (what's set as CMD in the Dockerfile). exec "$@"編集後、再度
$ docker-compose run web rails new .すれば実行できました。
参考
- 投稿日:2020-01-07T21:17:20+09:00
Dockerでalpineイメージ使用時に発生するstandard_init_linux.go:211: exec user process caused "no such file or directory" を解決
alpineイメージ使用時に発生するstandard_init_linux.go:211: exec user process caused "no such file or directory" を解決
Docker X Rails6 X MySQL8で環境構築する際に、初めてalpineイメージを使用するとエラーに出会いました。
alpineはLinuxディストリビューションの1つで、CentOSやUbuntuよりも軽量なためDockerイメージのサイズを小さくすることができます。各種設定
DockerfileFROM ruby:2.7.0-alpine ENV LANG C.UTF-8 RUN mkdir /myapp WORKDIR /myapp COPY Gemfile /myapp/Gemfile COPY Gemfile.lock /myapp/Gemfile.lock RUN apk update -qq && apk add --no-cache yarn build-base tzdata libxml2-dev mariadb-dev libxslt-dev alpine-sdk mysql-dev nodejs vim g++ RUN bundle install run yarn install COPY . /myapp # Add a script to be executed every time the container starts. COPY entrypoint.sh /usr/bin/ RUN chmod +x /usr/bin/entrypoint.sh ENTRYPOINT ["entrypoint.sh"] EXPOSE 3000 # Start the main process. CMD ["rails", "server", "-b", "0.0.0.0"]docker-copose.yml~~省略 web: build: . command: bash -c "rm -f tmp/pids/server.pid && bundle exec rails s -p 3000 -b '0.0.0.0'" volumes: - .:/myapp ports: - "3000:3000" ~~省略entrypoint.sh#!/bin/bash set -e # Remove a potentially pre-existing server.pid for Rails. rm -f /myapp/tmp/pids/server.pid # Then exec the container's main process (what's set as CMD in the Dockerfile). exec "$@"(他,
Gemfile,Gemfile.lock)エラー発生
$ docker-compose run web rails new .を実行すると
standard_init_linux.go:211: exec user process caused "no such file or directoryというエラーが発生し、
rails newは実行できませんでした。原因
alpineのシェルは
bashではなくashだった。解決
docker-compose.ymlとentrypoint.shを編集します。docker-compose.ymlweb: build: . # bash → ashに変更 command: ash -c "rm -f tmp/pids/server.pid && bundle exec rails s -p 3000 -b '0.0.0.0'" volumes: - .:/myapp ports: - "3000:3000"entrypoint.sh#!/bin/sh ←bashからshへ set -e # Remove a potentially pre-existing server.pid for Rails. rm -f /myapp/tmp/pids/server.pid # Then exec the container's main process (what's set as CMD in the Dockerfile). exec "$@"編集後、再度
$ docker-compose run web rails new .すれば実行できました。
参考
- 投稿日:2020-01-07T19:34:20+09:00
GitLab-CIとCypressを連携してみた(公式dockerイメージ編)
背景
WebアプリケーションのGUI自動テストを実施することになった。
自動テストのフレームワークはCypressを導入する。
せっかくテストを自動化するのに、手動トリガではカッコ悪いし非効率なので、トリガも自動で発動するようにしたい。既にオンプレミスのGitLab環境でGitLab-CIを活用していたので、GitLab-CIからCypressによる自動試験を実行する手法を調査。
前回の記事では自前で環境を構築したが、今回は公式のdockerイメージを使ってみた。
前回自力で頑張ったのがアホらしいくらいに簡単に導入できてしまった。また、今回は複数テストを実行したり、実行条件を変えながら実行したりするケースも考慮して
.gitlab-ci.ymlを書いてみた。環境
- CentOS 7.5.1804
- gitlab-runner v12.6.0
- Cypress v3.7.0
docker版の
gitlab-runnerを起動docker run -d \ --name gitlab-runner-docker \ --restart always \ -v /srv/gitlab-runner-docker/config:/etc/gitlab-runner \ -v /var/run/docker.sock:/var/run/docker.sock \ gitlab/gitlab-runner:v12.6.0GitLabにrunnerを登録
コンテナにログインしてから登録する場合
私はこちらの方法で実施。
docker exec -it gitlab-runner-docker bash
gitlab-runner register \
    --url {your_gitlab_url} \
    --registration-token {your_gitlab_runner_token} \
    --name "gitlab-runner-docker" \
    --tag-list "autotest-server,docker" \
    --executor "docker" \
    --docker-image "alpine:latest"
コンテナにログインせずに登録する場合
未検証。
多分↓のコマンドで実行できるはず。docker exec gitlab-runner-docker gitlab-runner register \ --url {your_gitlab_url} \ --registration-token {your_gitlab_runner_token} \ --name "gitlab-runner-docker" \ --tag-list "autotest-server,docker" \ --executor "docker" \ --docker-image "alpine:latest"
.gitlab-ci.ymlを作成.gitlab-ci.ymlstages: - cypress variables: AUTO_TEST_SERVER: "192.168.1.10" AUTO_TEST_SERVER_PORT: "3000" GIT_CLEAN_FLAGS: -fdx --exclude node_modules/ --exclude build/ .gui_test: stage: cypress image: name: cypress/included:3.7.0 entrypoint: [""] variables: CY_SPEC: "**/*.spec.js" CY_BASE_URL: https://$AUTO_TEST_SERVER:$AUTO_TEST_SERVER_PORT CY_VIEWPORT_HEIGHT: 1080 CY_VIEWPORT_WIDTH: 1920 script: - cypress run --spec $CY_SPEC --config baseUrl=$CY_BASE_URL,viewportHeight=$CY_VIEWPORT_HEIGHT,viewportWidth=$CY_VIEWPORT_WIDTH artifacts: # エビデンスをGitLabのGUIから参照するための設定 expire_in: 1 week when: always paths: - cypress/screenshots - cypress/videos tags: - autotest-server - docker test1: extends: .gui_test variables: CY_SPEC: cypress/integration/test/sample1.spec.js test2: extends: .gui_test variables: CY_SPEC: cypress/integration/test/sample2.spec.js test3: extends: .gui_test variables: CY_SPEC: cypress/integration/test/sample2.spec.js CY_VIEWPORT_HEIGHT: 1136 CY_VIEWPORT_WIDTH: 640ベースのイメージは
cypress/includedとし、エントリーポイントを上書きして使用している。GitLab-CIとの連携方法で調べると、
cypress/base:10を使用している例ばかりヒットする。
今回、これに従っていないのは、cypress/base:10を使用すると、ジョブ実行のたびにコンテナ内でCypressや関連パッケージのインストール処理が走り、これが非常に長く非効率なため。
cypress/includedであれば、Cypressや関連パッケージがインストール済みなので、今回はこちらを採用した。また、今回は複数のテストを実行することを考慮し
.gui_testというテンプレートジョブを作成。
各テスト実行ジョブは.gui_testを継承するようにしている。
継承する場合でも、一部の定義を上書きできるので、この例のように「同じテストを画面サイズを変更しながらテストする」といった使い方が可能になる。こうしておくと、実行対象が大量にあっても、同じような定義を書いてメンテナンスしづらくなるということはない。
なお、Cypressは複数のテストを一度の実行でまとめて実行する機能がある。
この場合は、cypress run --spec "sample1.spec.js,sample2.spec.js"のように指定すれば良い。本来はこの機能を使用し、複数のテストを1つのジョブにまとめてしまいたいが、未解決のCypress側のIssueの影響で、2個目以降のテストがタイムアウトして実行されない。(現時点の最新版
3.8.1でも未解決)
このため、今回は苦肉の策で、テストの実行ジョブを、テストファイルごとに分けた、という背景もある。GitLab-CIを本番実行
GitLabのGUI上からCIを手動実行する。
正常に動くことが確認できれば、あとはトリガーなどを適切に設定し、いよいよ本番運用開始!!!エビデンスはGitLabのGUIから参照可能
GitLabのGUIでジョブの実行結果ページを参照すると、
.gitlab-ci.ymlでartifactsに登録したパスのファイルが参照できるようになっている。
当然ダウンロードも可能だが、ダウンロードせずにGitLabのGUI上からスナップショットや動画を直接確認できるので、とっても便利。
- 投稿日:2020-01-07T17:45:51+09:00
Kubernetes 入門 & Ubuntu Server 18.04 *4 で Kubernetes クラスタを建てる
コンテナが増えてきてコンテナ間ネットワークが複雑になり、本番環境と開発環境が乱立するようになってくると Docker では管理が大変になってきます。そこで
コンテナオーケストレーションツールを使いましょう。今回はコンテナオーケストレーションツールのデファクトスタンダードであるKubernetesのクラスタを構築します。今回の環境
- VMware ESXi 上の仮想マシン (Ubuntu Serer 18.04) *4
- Master&etcd *1 + Worker *3 の4台構成
- Kubeadm による構築
- Docker v18.06.2-ce
- Kubernetes v1.17.0
- その他ツール類は 2020/01/06 現在の最新バージョン
Name IP Hostname Master 10.0.0.100 master Worker01 10.0.0.101 worker01 Worker02 10.0.0.102 worker02 Worker03 10.0.0.103 worker03 $ sudo sh -c "echo \"master 10.0.0.100\" >> /etc/hosts" $ sudo sh -c "echo \"worker01 10.0.0.101\" >> /etc/hosts" $ sudo sh -c "echo \"worker02 10.0.0.102\" >> /etc/hosts" $ sudo sh -c "echo \"worker03 10.0.0.103\" >> /etc/hosts"Master の構築
まずは Docker の構築
4台に行います。
$ sudo sed -i 's|/swap|#/swap|' /etc/fstab
$ sudo sed -i 's|GRUB_CMDLINE_LINUX=""|GRUB_CMDLINE_LINUX="cgroup_enable=memory swapaccount=1"|' /etc/default/grub
$ curl -fsSL https://download.docker.com/linux/ubuntu/gpg | sudo apt-key add -
$ sudo add-apt-repository -y "deb [arch=amd64] https://download.docker.com/linux/ubuntu $(lsb_release -cs) stable"
$ sudo apt update
$ sudo apt install -y docker-ce=18.06.2~ce~3-0~ubuntu
$ sudo sh -c "echo '{\"exec-opts\":[\"native.cgroupdriver=systemd\"],\"log-driver\":\"json-file\",\"log-opts\":{\"max-size\":\"100m\"},\"storage-driver\":\"overlay2\"}' > /etc/docker/daemon.json"
$ sudo mkdir -p /etc/systemd/system/docker.service.d
$ sudo usermod -aG docker $USER
$ sudo systemctl daemon-reload
$ sudo systemctl enable docker
$ sudo systemctl restart docker
Kubernetes の構築
4台に行います。
$ curl -fsSL https://packages.cloud.google.com/apt/doc/apt-key.gpg | sudo apt-key add -
$ sudo add-apt-repository -y ppa:projectatomic/ppa
$ sudo sh -c "echo 'deb http://apt.kubernetes.io/ kubernetes-xenial main' > /etc/apt/sources.list.d/kubernetes.list"
$ sudo apt update
$ sudo apt install -y kubelet kubeadm kubectl libseccomp2 software-properties-common
$ sudo modprobe overlay
$ sudo modprobe br_netfilter
$ sudo sh -c 'echo "net.bridge.bridge-nf-call-iptables = 1\nnet.ipv4.ip_forward = 1\nnet.bridge.bridge-nf-call-ip6tables = 1" > /etc/sysctl.d/99-kubernetes-cri.conf'
$ sudo sysctl --system
$ sudo systemctl daemon-reload
$ sudo systemctl enable kubelet
$ sudo systemctl restart kubelet
ここで一度再起動します。
$ sudo rebootクラスタの構築
Master の構築
$ sudo kubeadm init

Your Kubernetes control-plane has initialized successfully!

To start using your cluster, you need to run the following as a regular user:

  mkdir -p $HOME/.kube
  sudo cp -i /etc/kubernetes/admin.conf $HOME/.kube/config
  sudo chown $(id -u):$(id -g) $HOME/.kube/config

You should now deploy a pod network to the cluster.
Run "kubectl apply -f [podnetwork].yaml" with one of the options listed at:
  https://kubernetes.io/docs/concepts/cluster-administration/addons/

Then you can join any number of worker nodes by running the following on each as root:

kubeadm join 10.0.0.100:6443 --token pk20xj.mcasr444m8g4zlq3 \
    --discovery-token-ca-cert-hash sha256:5379d0a290c07bd18d0ba1c9da52aa1a3225fc9f6a1add38ba8c1aa5f3bc78d7
join用のコマンドが出力されたら完了です。
kubectlコマンドが実行できるように認証情報をコピーします。$ mkdir -p $HOME/.kube $ sudo cp -i /etc/kubernetes/admin.conf $HOME/.kube/config $ sudo chown $(id -u):$(id -g) $HOME/.kube/configWorker の構築
先程出力された
joinコマンドを使います。$ sudo kubeadm join 10.0.0.100:6443 --token pk20xj.mcasr444m8g4zlq3 \ --discovery-token-ca-cert-hash sha256:5379d0a290c07bd18d0ba1c9da52aa1a3225fc9f6a1add38ba8c1aa5f3bc78d7 This node has joined the cluster: * Certificate signing request was sent to apiserver and a response was received. * The Kubelet was informed of the new secure connection details. Run 'kubectl get nodes' on the control-plane to see this node join the cluster.
Run ~が出力されたら成功です。確認
Master で行います。
$ kubectl get node
NAME       STATUS     ROLES    AGE     VERSION
master     NotReady   master   5m50s   v1.17.0
worker01   NotReady   <none>   2m7s    v1.17.0
worker02   NotReady   <none>   2m7s    v1.17.0
worker03   NotReady   <none>   2m7s    v1.17.0
まだ CNI を入れていないため
NotReadyですが問題ありません。CNI
Kubernetes 本体ではネットワーク機能を提供していないため、ノード間通信のためのネットワークを作る必要があります。
Flannel, Weave, Calico 等がありますが、今回は Weave を使用します。
Master で行います。$ kubectl apply -f "https://cloud.weave.works/k8s/net?k8s-version=$(kubectl version | base64 | tr -d '\n')" serviceaccount/weave-net created clusterrole.rbac.authorization.k8s.io/weave-net created clusterrolebinding.rbac.authorization.k8s.io/weave-net created role.rbac.authorization.k8s.io/weave-net created rolebinding.rbac.authorization.k8s.io/weave-net created daemonset.apps/weave-net created先程
NotReadyでしたが、 CNI をインストールしたのでもう一度確認してみましょう。$ kubectl get node NAME STATUS ROLES AGE VERSION master Ready master 28m v1.17.0 worker01 Ready <none> 24m v1.17.0 worker02 Ready <none> 24m v1.17.0 worker03 Ready <none> 24m v1.17.0無事に
Readyになりました。
以上で Kubernetes クラスタの構築は終了です。kubectl とは?
Kubernetesのコマンドラインツールであるkubectlを使用して、Kubernetesクラスターに対してコマンドを実行することができます。kubectlによってアプリケーションのデプロイや、クラスターのリソース管理および検査を行うことができます。
https://kubernetes.io/ja/docs/tasks/tools/install-kubectl/公式からの引用ですがこういうものです。
各コマンドの詳しい説明はkubectl helpで確認してください。
getapplydeleteedit等々 Kubernetes を操作する上で必須となるツールです。今後の記事では
kubectlをメインに他のツールも使いながら Kubernetes を使っていきたいと思います。
- 投稿日:2020-01-07T17:00:06+09:00
ConoHaVPSのCentOS7.4にDocker/Docker-composeをインストールした【備忘録】
概要
今さらながらConoHaVPSにDockerとdocker-compose入れて運用したくなったので色々調べつつインストールした。
備忘録以外の何物でもないです。現状の確認
古いdockerが入っているか確認
$ sudo yum list installed | grep docker
Repodata is over 2 weeks old. Install yum-cron? Or run: yum makecache fast
docker.x86_64                      2:1.13.1-63.git94f4240.el7.centos @extras
docker-client.x86_64               2:1.13.1-63.git94f4240.el7.centos @extras
docker-common.x86_64               2:1.13.1-63.git94f4240.el7.centos @extras
入っていたのでアンインストール
入れた記憶ないけど入ってたので削除する。
$ sudo yum remove docker docker-client docker-commonDocker CEのインストール
リポジトリを使ってインストール
# 必要なパッケージのインストール
$ sudo yum install -y yum-utils device-mapper-persistent-data lvm2

# stable (安定版)リポジトリをセットアップ
$ sudo yum-config-manager --add-repo https://download.docker.com/linux/centos/docker-ce.repo
インストール可能なバージョンの確認
$ yum list docker-ce --showduplicates | sort -rインストール
$ sudo yum install -y docker-ce docker-ce-cli containerd.ioDockerの起動
# サービス起動
$ sudo systemctl start docker

# サービス登録
$ sudo systemctl enable docker

# 起動確認
$ docker info
docker-composeのインストール
最新バージョンはこちらで確認。
インストール/permission変更
$ sudo curl -L https://github.com/docker/compose/releases/download/1.25.0/docker-compose-`uname -s`-`uname -m` -o /usr/local/bin/docker-compose

$ sudo chmod +x /usr/local/bin/docker-compose
バージョン確認
$ docker-compose --version
sudoなしでdockerコマンドを使えるように# dockerグループ作成 $ sudo groupadd docker # ログインユーザーをグループに追加 $ sudo gpasswd -a $USER docker # リスタート $ sudo systemctl restart docker # 再ログインで反映
- 投稿日:2020-01-07T16:46:13+09:00
nginxのdocker imageに設定されているdefault.conf
nginxのdefault.confを見たい瞬間があるので記録。
参照したimageは
nginx:stable
https://hub.docker.com/_/nginx# cat /etc/nginx/conf.d/default.conf server { listen 80; server_name localhost; #charset koi8-r; #access_log /var/log/nginx/host.access.log main; location / { root /usr/share/nginx/html; index index.html index.htm; } #error_page 404 /404.html; # redirect server error pages to the static page /50x.html # error_page 500 502 503 504 /50x.html; location = /50x.html { root /usr/share/nginx/html; } # proxy the PHP scripts to Apache listening on 127.0.0.1:80 # #location ~ \.php$ { # proxy_pass http://127.0.0.1; #} # pass the PHP scripts to FastCGI server listening on 127.0.0.1:9000 # #location ~ \.php$ { # root html; # fastcgi_pass 127.0.0.1:9000; # fastcgi_index index.php; # fastcgi_param SCRIPT_FILENAME /scripts$fastcgi_script_name; # include fastcgi_params; #} # deny access to .htaccess files, if Apache's document root # concurs with nginx's one # #location ~ /\.ht { # deny all; #} }
- 投稿日:2020-01-07T16:46:13+09:00
nginxのdocker imageに設定されているnginx.conf
参照したimageは
nginx:stable
https://hub.docker.com/_/nginxnginxのコンテナを起動
$ docker run -it nginx:stable bashnginxの設定を確認
# nginx -t
nginx: the configuration file /etc/nginx/nginx.conf syntax is ok
nginx: configuration file /etc/nginx/nginx.conf test is successful
confを参照
# cat /etc/nginx/nginx.conf

user  nginx;
worker_processes  1;

error_log  /var/log/nginx/error.log warn;
pid        /var/run/nginx.pid;


events {
    worker_connections  1024;
}


http {
    include       /etc/nginx/mime.types;
    default_type  application/octet-stream;

    log_format  main  '$remote_addr - $remote_user [$time_local] "$request" '
                      '$status $body_bytes_sent "$http_referer" '
                      '"$http_user_agent" "$http_x_forwarded_for"';

    access_log  /var/log/nginx/access.log  main;

    sendfile        on;
    #tcp_nopush     on;

    keepalive_timeout  65;

    #gzip  on;

    include /etc/nginx/conf.d/*.conf;
}
- 投稿日:2020-01-07T16:41:25+09:00
ゴミのように溜まったDockerイメージを一括削除するには
以下のようにすればいい
$ docker images | grep none | awk '{print $3}' | xargs docker rmi解説
イメージのリビルドを繰り返して以下のように
<none>となったイメージを一括削除したい$ docker images REPOSITORY TAG IMAGE ID CREATED SIZE rails6mysql_web latest e15aac16592a 39 minutes ago 949MB <none> <none> 16b17b901c2c 54 minutes ago 949MB <none> <none> 72637ae4b155 About an hour ago 949MB <none> <none> 1311ff40521a About an hour ago 791MB <none> <none> 2950365d3727 2 hours ago 767MB <none> <none> a065e3343191 2 hours ago 566MB <none> <none> fb1e4481b7ee 2 hours ago 566MB <none> <none> 7a8f553d442d 2 hours ago 566MB <none> <none> adb679d80383 4 hours ago 566MB <none> <none> 485abdefc669 4 hours ago 565MB docker-rails6-mysql_web latest f2b8555fb528 5 days ago : :
noneを含む行をgrep して$ docker images | grep none <none> <none> 16b17b901c2c About an hour ago 949MB <none> <none> 72637ae4b155 About an hour ago 949MB <none> <none> 1311ff40521a 2 hours ago 791MB <none> <none> 2950365d3727 2 hours ago 767MB <none> <none> a065e3343191 2 hours ago 566MB <none> <none> fb1e4481b7ee 2 hours ago 566MB <none> <none> 7a8f553d442d 2 hours ago 566MB <none> <none> adb679d80383 4 hours ago 566MB <none> <none> 485abdefc669 5 hours ago 565MB
IMAGE IDのフィールド(3カラム目)を切り出して$ docker images | grep none | awk '{print $3}' 16b17b901c2c 72637ae4b155 1311ff40521a 2950365d3727 a065e3343191 fb1e4481b7ee 7a8f553d442d adb679d80383 485abdefc669
docker rmiに渡せばOK$ docker images | grep none | awk '{print $3}' | xargs docker rmi # 冒頭のコマンドと同じ Deleted: sha256:16b17b901c2c6f442b332e51fc992eaf9fe59b0fdc24b90c4adb384c9038b1f0 Deleted: sha256:707a7817183178340989e8b3ee54150be5d2893da4aa35f5c9be7faffa4c061a Deleted: sha256:d8172c458aca769930f471a77d765e3e34e5b649b3fd5b8539fbf9f5efda6fb0 Deleted: sha256:8e4328145205c20cf53331cb85e2c4f354750f57550aa5dc5ce857ed9a64981a Deleted: sha256:4c96b7934405ee88f12c2d8aa2c0ed9099dc4232d23fc93ad9aedd3d592d8a01 Deleted: sha256:9a0446b898565c758c4436cb447bce90d8ad5d0ce8a46263dc0adf3db747c802 Deleted: sha256:0f860452980e7f18ae0441001bc6d2cb61cf20b732c36a907dd9d8f52b35ac5f Deleted: sha256:5c4a8f3efdaf62678bcb4614539e7353f76b82c40102846d985ead5ee44aed01 Deleted: sha256:d63d652b511adf53ebe2a2f4972ba7c5e5ac3b2749a95de88b217050f44a15a0 Deleted: sha256:812f8de3922484f7ced929898e3c7a358aa552d9d6ea5c7a0bdc5920deff8bd4 Deleted: sha256:98791ec771a8493002324d63e3e81b134770b0067c6d3927e4a55efe93655667 Deleted: sha256:763bdc8df9d91fbf4f86b1252b31358aefdf1f0b77d5c0800102e1cae6b40bd3 : :
- 投稿日:2020-01-07T16:16:06+09:00
Dockerfile内におけるGitの秘密鍵のこと
背景
開発環境での作業時、Docker使ってプライベートリポジトリcloneした時に、秘密鍵見れちゃうのがとても気になって。とりあえず色々調べてみたのでその結果を書いてみる。
参考サイト
やったこと
以下の2つの対応をしてみた。
1. マルチステージビルド
何故?
docker history で不要なステージが表示されないようにするため
やり方、方法
as で中間成果物を保存して、最後にそこからコピーすることで、中間成果物の内容が見れない模様
# syntax = docker/dockerfile:experimental
FROM ruby:2.5 as intermediate

# 処理諸々
[・・・]

# マルチステージビルド
FROM ruby:2.5
COPY --from=intermediate / /
注意点
COPY前までに行った作業(ex. bundle install)で何かしらディレクトリに変更があった場合、対象ディレクトリをしっかりCOPYする必要がある。
↓
最初、/root /root のみを対象にしていたのだが、bundle install で /usr/local/bundle にインストールされるので、COPY対象外で、gemがないよと怒られた。確認
2. BuildKitの利用
何故?
~/.ssh/id_rsaなどの秘密鍵をコンテナ内に残さないようにするためやり方、方法
--mount=type=secret,id=ssh,target=/root/.ssh/id_rsa git cloneオプションをつけてgit cloneする# Git ARG SSH_PRIVATE_KEY RUN mkdir /root/.ssh/ RUN touch /root/.ssh/id_rsa RUN echo "${SSH_PRIVATE_KEY}" > /root/.ssh/id_rsa RUN touch /root/.ssh/known_hosts RUN ssh-keyscan -t rsa github.com >> /root/.ssh/known_hosts RUN chmod 600 /root/.ssh/* # プロジェクトclone WORKDIR /root/ RUN --mount=type=secret,id=ssh,target=/root/.ssh/id_rsa RUN git clone [プロジェクト] RUN rm /root/.ssh/id_rsa #→ rm しないと残ったままっぽい ↓ $ docker build -t yaga0429/ruby-chromedriver --build-arg SSH_PRIVATE_KEY="$(cat ~/.ssh/id_rsa)" --no-cache
- 確認

まとめ
ECRとかでimageをプライベートに管理してたりすると、あんま気にならないのかな。
その辺はいまいちわからんけど、なんとなくスッキリしたのでオーケー。
まぁやってみたので忘れないうちに。

- 投稿日:2020-01-07T16:00:38+09:00
ecs-cliでHelloWorldしてみた
背景
あるバッチ処理をクラウド上で定期実行させたかった。
色々調べてた所、ECS-Fargateで定期実行が出来るみたい。
とりあえず雰囲気掴むためにHelloWorldしてみた。チュートリアル
公式チュートリアル: Amazon ECS CLI を使用して Fargate タスクのクラスターを作成する
手順
1. config編集
$ ecs-cli configure --cluster hello-world --default-launch-type FARGATE --region ap-northeast-1 --config-name hello-world

$ cat ~/.ecs/config
version: v1
default: ecs-cli-test-config
clusters:
 hello-world:
   cluster: hello-world
   region: ap-northeast-1
   default_launch_type: FARGATE
2. credential編集
$ export AWS_ACCESS_KEY_ID=xxxxxxxxx
$ export AWS_SECRET_ACCESS_KEY=xxxxxx
上記を実行した状態で、
$ ecs-cli configure profile --profile-name ecs-profile --access-key $AWS_ACCESS_KEY_ID --secret-key $AWS_SECRET_ACCESS_KEY

$ cat ~/.ecs/credentials
version: v1
default: ecs-profile
ecs_profiles:
 ecs-profile:
   aws_access_key_id: 【AWS_ACCESS_KEY】
   aws_secret_access_key: 【AWS_SECRET_KEY】
3. クラスター作成
$ ecs-cli up --cluster-config hello-world --ecs-profile ecs-profile --force

INFO[0001] Created cluster                               cluster=hello-world region=ap-northeast-1
INFO[0002] Waiting for your cluster resources to be created...
INFO[0003] Cloudformation stack status                   stackStatus=CREATE_IN_PROGRESS
INFO[0064] Cloudformation stack status                   stackStatus=ROLLBACK_FAILED
INFO[0125] Cloudformation stack status                   stackStatus=ROLLBACK_FAILED
INFO[0186] Cloudformation stack status                   stackStatus=ROLLBACK_FAILED
→ CloudFormationの作成途中で止まっている模様
AWSコンソール上、
CloudFormation > スタック > amazon-ecs-cli-setup-hello-world
にてエラー内容を確認イベントで各種権限が足りないよとのエラーが表示
ex. CloudFormationでのエラーの一部
↓
IAM編集(権限追加)ec2:DeleteVpc ec2:DescribeVpcs ec2:CreateInternetGateway ec2:DescribeInternetGateways ec2:ModifyVpcAttribute ec2:DeleteInternetGateway ec2:DescribeAvailabilityZones ec2:DescribeAccountAttributes ec2:DescribeSubnets ec2:CreateRouteTable ec2:CreateSubnet ec2:AttachInternetGateway ec2:DeleteSubnet ec2:DeleteRouteTable ec2:DetachInternetGateway ec2:CreateRoute ec2:AssociateRouteTable ec2:DeleteRoute cloudformation:DescribeStackResources↓
$ ecs-cli up --cluster-config hello-world --ecs-profile ecs-profile --force

INFO[0001] Created cluster                               cluster=hello-world region=ap-northeast-1
INFO[0002] Waiting for your CloudFormation stack resources to be deleted...
INFO[0002] Cloudformation stack status                   stackStatus=DELETE_IN_PROGRESS
INFO[0034] Waiting for your cluster resources to be created...
INFO[0035] Cloudformation stack status                   stackStatus=CREATE_IN_PROGRESS
INFO[0096] Cloudformation stack status                   stackStatus=CREATE_IN_PROGRESS
VPC created: 【VPC_ID】
Subnet created: 【SUBNET_ID_A】
Subnet created: 【SUBNET_ID_B】
Cluster creation succeeded.
4. 作成したVPCのセキュリティグループIDを取得
$ aws2 ec2 describe-security-groups --filters Name=vpc-id,Values=【VPC_ID】 --region ap-northeast-1

An error occurred (UnauthorizedOperation) when calling the DescribeSecurityGroups operation: You are not authorized to perform this operation.
権限(ec2:DescribeSecurityGroups)が必要なので注意
5. docker-compose.yml/ecs-params.yml を用意する
ecs-params.ymlversion: 1 task_definition: task_execution_role: ecsTaskExecutionRole ecs_network_mode: awsvpc task_size: mem_limit: 0.5GB cpu_limit: 256 run_params: network_configuration: awsvpc_configuration: subnets: "【SUBNET_ID_A】" "【SUBNET_ID_B】" security_groups: "【SECURITY_GROUP_ID】" assign_public_ip: ENABLEDdocker-compose.ymlhello_world: cpu_shares: 135 mem_limit: 131072000 image: hello-world log_driver: awslogs log_opt: awslogs-group: "tutorial" awslogs-region: "ap-northeast-1" awslogs-stream-prefix: "hello-world"6. 5で作成したファイルを元にデプロイ
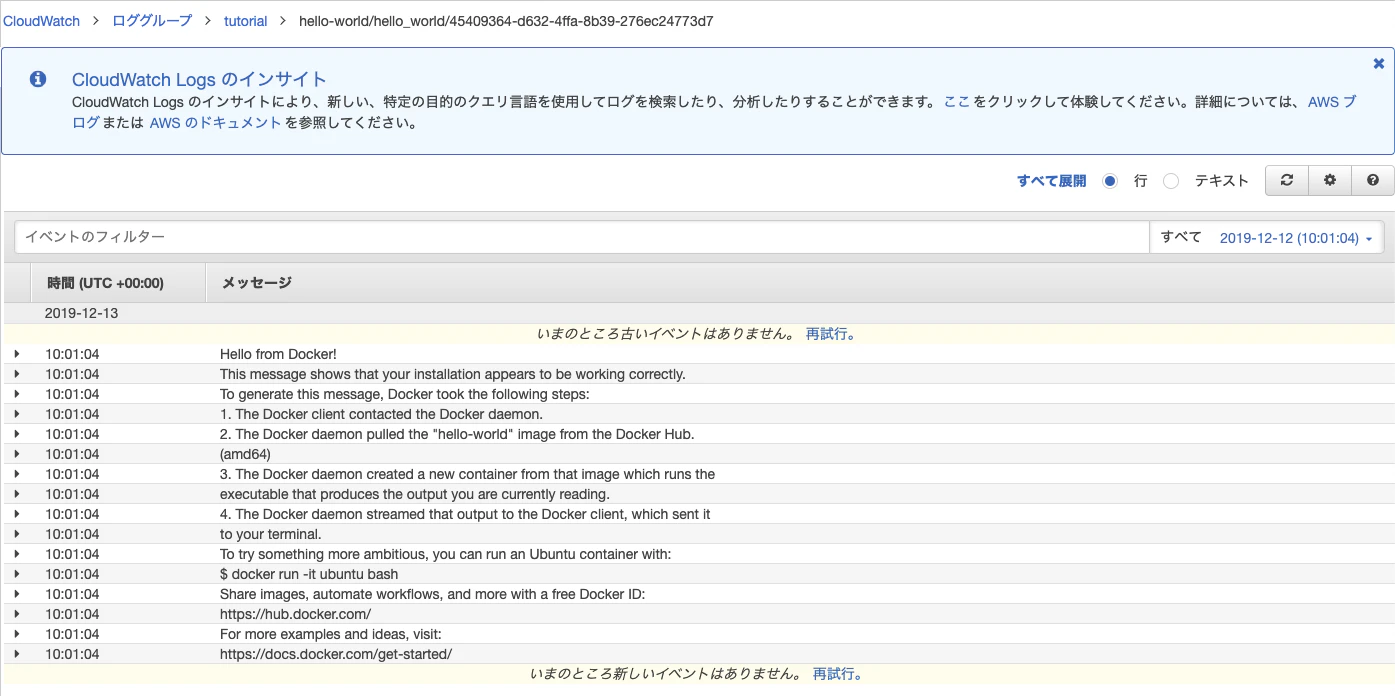
# カレントディレクトリにあるファイルを自動で参照
$ ecs-cli compose up

# ファイルを指定する場合
$ ecs-cli compose -f docker-compose.yml --ecs-params ecs-params.yml up
7. CloudWatchLogsを確認
docker-compose.ymlにlogの設定をawslogsに設定しているので、CloudWatchLogsにログが流れているはず。
AWSコンソール上で、
CloudWatch > ロググループ > tutorial > hello-world/hello_world/45409364-d632-4ffa-8b39-276ec24773d7
よしよし、想定通り!!
まとめ
あとは、ECRに実行したいバッチ処理のイメージ載せて、タスク定義とタスク作って、スケジュール組むだけ。
割とすんなりいく印象。もう少しいじってみたいと思います。

- 投稿日:2020-01-07T12:49:22+09:00
Re:VIEWの環境構築で「docker: Cannot connect to the Docker daemon ~」エラーで困った話
何の話か?
技術書展8にて初めて同人誌を作成するのですが、印刷会社への入稿データとしてPDFが必要になります。まだ書籍の内容はできていませんが、環境は整備する必要があるので、そろそろ準備せねばということで、Re:VIEWをDockerのイメージから構築しようとしてハマった話です。同じことで悩む方の助けとなれば幸いです。
前提の内容
Re:VIEWの環境構築方法は、ネットを探すといろいろヒットするのですが、私が試した方法は、Windows10の環境で、Windows Subsystem for Linux(WSL)を有効にし、Microsoft StoreからUbuntu16.04をインストールし、そこにDockerをインストールした上で、Re:VIEW4.0のイメージを実行する方法です。一番依存関係が少なくて簡単に作れそうでしたので・・・(でもハマった)
私は、こちらの記事を参考に環境を構築しています。
Re:VIEW環境をWindows10上で簡単に構築してPDFを出力するまで
ハマったポイント1
Windows環境で、Dockerを利用するために、Ubuntu16.04LTSをインストールして、Dockerも手順通りにインストールしました(そのつもり)。上記の図では、③の部分です。Dockerのインストール確認で、「sudo docker run hello-world」を実行すると、「docker: Cannot connect to the Docker daemon at unix:///var/run/docker.sock. Is the docker daemon running?.」が表示されハマりました。
この現象は、dockerのサービスが上手く起動できてない場合に発生することが調べて分かってきました。dockerをサービスとして登録するためのコマンドで、「sudo service docker start」を実行すると、[OK]と右側に表示されるのですが、実はこれに騙されました。
下記のキャプチャーは、2回連続で「sudo service docker start」を実行し、その直後に「sudo service docker stop」を実行した結果です。
本来であれば、以下のように動作すべきです。
1回目の起動では、OKが表示され、2回目は表示されず、Stopは正常に終了する。
これは、サービスが上手く起動できないことによるものと考えることができます。
※起動できたのかもしれないが、すぐに終了してしまう状況が発生している。(と考えられる)ハマったポイント1の解決方法
「sudo service docker start」を実行する際は、必ずubuntu16.04を管理者権限として起動します。
1.ubuntu16.04のアプリを右クリックし「管理者として実行」を選択します。
2.ユーザアカウント制御の画面で「はい」を選択します。※Windowsの設定で表示されない場合もあります。
3.コンソールで、「sudo servie docker start」を実行します。
-> * Starting Docker: docker [OK] が表示される。4.コンソールで、「docker ps」を実行して、下記の内容が表示されれば大丈夫です。
ハマったポイント2
ハマったポイント1では、「docker:Cannot connect to the Docker daemon at ~」のエラーメッセージでしたが、hello-worldを実施した際に、それとは別のメッセージがでるPCがありました。
「docker: Error response from daemon: OCI runtime create failed: container_linux.go:345: starting container process caused "process_linux.go:303: getting the final child's pid from pipe caused \"EOR\"": unknown.」
こちらについては、上手い解決方法が見つかりませんでしたが、DockerのVersionを下げることで動作させることができました。
ハマったポイント2の解決方法
デフォルトでは、Docker 18.09.7 build 2d0083dがインストールされました。(2020/01/06時点)
そこで、それよりも古いVersionのDocker 17.12.1~ce-0~ubuntuをインストールしたところ現象が発生しませんでした。下記の記事を参考にし、最後のVersion指定のコマンドを「sudo apt-get install docker-ce=17.12.1~ce-0~ubuntu」で実行します。
ubuntu 16.04.2 (ec2) に docker をバージョン指定で新規インストールまとめ
これは、私自身のまとめになるのですが、こんな感じで順番にコマンドを打てば、ひとまず上記のハマりポイント2つを避けて環境が作れました。
最初から、Docker 17.12.1~ce-0~ubuntuを使う前提で環境を構築します。管理者権限でubuntuを起動
sudo apt update
sudo apt upgrade
sudo apt-get install apt-transport-https ca-certificates curl software-properties-common
curl -fsSL https://download.docker.com/linux/ubuntu/gpg | sudo apt-key add -
sudo apt-key fingerprint 0EBFCD88
sudo add-apt-repository "deb [arch=amd64] https://download.docker.com/linux/ubuntu xenial stable"
sudo apt-get update
apt-cache madison docker-ce
sudo apt-get install docker-ce=17.12.1~ce-0~ubuntu
sudo cgroupfs-mount
sudo usermod -aG docker $USER
exit
管理者権限でubuntuを起動(上記と続けてでも良いが・・・)
sudo service docker start
sudo service docker stop
sudo service docker start
sudo docker ps
exit
普通にubuntuを起動
sudo docker run hello-worldその後は、
Re:VIEW環境をWindows10上で簡単に構築してPDFを出力するまで
にあるように Re:VIEW image for Dockerの取得の章から、開始すればOKだが、私の場合は、Re:VIEW4.0を使うのでこれ。sudo docker pull vvakame/review:4.0参考サイト
Re:VIEW環境をWindows10上で簡単に構築してPDFを出力するまで
ubuntu 16.04.2 (ec2) に docker をバージョン指定で新規インストール
Dockerを使ってRe:VIEWで本が書きたい!~ステップ1:Docker for Windowsを入れよう~
Dockerイメージとコンテナの削除方法


- 投稿日:2020-01-07T11:18:00+09:00
[docker-compose] ローカルから踏み台経由で外部DBにアクセスする
はじめに
docker-composeでローカルで開発するとして、DBだけは外部(例えばクラウドに置いてあるDBなど)を使いたい…というときありますよね?
SSHトンネルを踏み台に張れば実現できるのですが、docker-composeを使っているならSSHトンネルもコンテナを使って掘りましょう!
いちいちトンネルを掘ったり埋めたりしなくて済むので地味に便利です。やり方
使うのはkingsquareさんのdocker-tunnelです。
kingsquare/docker-tunnel: a (simple) dockerized ssh tunnel3つほど手順を踏む必要があります。
1.
ssh (踏み台ホスト名)で踏み台ホストにログインできるようにする$HOME/.ssh/configにログイン用の情報を書きます。
$HOME/.ssh/configHost (踏み台ホストログイン用任意の名前) HostName (踏み台ホストのIPアドレスもしくはホスト名) Port (踏み台ホストのSSH用ポート) User (踏み台ホストのSSH用ユーザ) ServerAliveInterval 20 IdentityFile (踏み台ホストのSSH用秘密鍵のパス)この時点で
ssh (踏み台ホストログイン用任意の名前)というコマンドで踏み台ホストにログインできるようになります。2. docker-composeの設定
docker-compose.ymlにdocker-tunnelの設定を書きます。
ここでは仮にdb-tunnelと名前をつけます。ポイントはホストマシン(ローカル)の.sshとdocker-tunnelコンテナの.sshをバインドマウントするところです。
これによりdocker-tunnelはホストマシンのSSH設定、秘密鍵を使うことができます。docker-compose.ymldb-tunnel: container_name: db-tunnel image: kingsquare/tunnel ports: - "(ローカルで使うDBポート番号):(外部DBで使っているDBポート)" volumes: - ${HOME}/.ssh:/root/.ssh - ${SSH_AUTH_SOCK}:/ssh-agent environment: - SSH_AUTH_SOCK=/ssh-agent command: "*:(ローカルで使うDBポート番号):(外部DBのIPアドレスもしくはホスト名):(外部DBで使っているDBポート) (踏み台ホストログイン用任意の名前)"
docker-compose upなどでdocker-tunnelを立ち上げておきます。3. 利用時の設定
DBの接続先に以下の設定を入れるとDBに接続できます。
ホスト名: db-tunnel
ポート番号: (ローカルで使うDBポート番号)
参考までにLaravelの場合は次のようにします。
DB_HOST='db-tunnel:(ローカルで使うDBポート番号)'以上
- 投稿日:2020-01-07T08:55:49+09:00
[Redash] Redashの別AWS VPC環境への移行手順
[Redash] Redashの別AWS VPC環境への移行手順
目的
AWS VPC上に本家AMIから構築したRedashを別VPC上に移行する手順の共有、および移行時発生したトラブルについての対処法の記録
背景
AWS上に本家のAMIから構築したRedashだが、都合により別VPC上へリプレイスする必要がでた。
参照するデータソースについても新VPC上のものへ変更になるが、そこらへんは後から何とでもなるだろうと考え、
巷に溢れるバックアップ/レストア手順を元に移行作業を実施した。しかし、移行後RedashのUIへアクセスすると既存のデータソースを参照できないどころか、新規データソースも作成できない問題が発生した。
環境/名称
- Redash
Redash Version: 8.0.0+b32245 (a16f551e)
Redash AMI: ami-060741a96307668be
- 移行元環境名称
Item Name VPC src_vpc Redash Instance i-src-redash DataSource DB Host srcdb.example.ap-northeast-1.rds.amazonaws.com DataSource DB migration_db_a DataSource DB migration_db_b
- 移行先環境名称
Item Name VPC dst_vpc Redash Instance i-dst-redash DataSource DB Host dstdb.example.ap-northeast-1.rds.amazonaws.com DataSource DB migration_db_a DataSource DB migration_db_b 移行手順
移行データの取得
RedashのDBのdump
何はともあれ移行データの取得
$ cid=$(sudo docker ps -qf "name=redash_postgres_1")
$ docker exec -t ${cid} pg_dumpall -c -U postgres | gzip > redash_dump.sql.gz
dumpのS3 upload
移行先インスタンスからデータを取得できるようにS3にデータアップロード
移行データ受け渡し用のS3 bucketを用意
AWS Web Consoleからredash-migrationという名でS3 bucketを用意しておく
i-src-redashに対しIAM RoleのS3 Full Accessを付与
AWSのWeb Consoleを利用して権限を付与する
i-src-redashへaws cliのインストール
python-pipではなくpython3-pip$ sudo apt install python3-pip $ sudo pip3 install awscli動作確認でS3 bucket(redash-migration)が参照できることを確認
$ aws s3 ls移行データのS3アップロード
$ aws s3 cp redash_dump.sql.gz s3://redash-migration/ $ aws s3 ls s3://redash-migration/ →ファイルがアップロードされたことを確認新規Redashサーバ(i-dst-redash)の構築
@hujuu さんの AWSにRedashを設置 を参考に本家AMIを利用してRedashを立ち上げ。
移行データのレストア
dst_vpc上のi-dst-redashにsrc_vpc上のi-src-redashから取得した移行用データをレストアする
移行データをS3からダウンロード
i-dst-redashに対しIAM RoleのS3 Full Accessを付与(Read Only Accessのみでもよい)
AWSのWeb Consoleを利用して権限を付与する
i-dst-redashへaws cliのインストール
$ sudo apt install python3-pip
$ sudo pip3 install awscli
動作確認でS3 bucket(redash-migration)が参照できることを確認
$ aws s3 ls移行データをS3からダウンロード
$ aws s3 cp s3://redash-migration/redash_dump.sql.gz ./
$ ls -l
→ファイルがダウンロードされたことを確認
移行データのレストア
起動しているredashコンテナの停止
$ sudo docker-compose --file /opt/redash/docker-compose.yml down --remove-orphansPostgreSQLコンテナのみ起動
$ sudo docker-compose --file /opt/redash/docker-compose.yml up --detach postgres
$ cid=$(sudo docker ps -qf "name=redash_postgres_1")
- 移行データをPostgreSQLコンテナへ展開
$ sudo docker container cp redash_dump.sql.gz ${cid}:/usr/local/redash_dump.sql.gz
$ sudo docker container exec ${cid} /bin/bash -c 'psql -c "drop database if exists postgres" -U postgres template1'
$ sudo docker container exec ${cid} /bin/bash -c 'psql -c "create database postgres" -U postgres template1'
$ sudo docker container exec ${cid} /bin/bash -c 'zcat /usr/local/redash_dump.sql.gz | psql -U postgres -d postgres'
- PostgreSQLコンテナを停止し、Redash全体を起動
$ sudo docker-compose --file /opt/redash/docker-compose.yml down --remove-orphans
$ sudo docker-compose --file /opt/redash/docker-compose.yml up --detach
Redashへの接続確認
i-dst-redashのPublic IPを確認しブラウザでアクセスすると、Redashのログイン画面が表示されるので、i-src-redashで利用していたアカウントとパスワードでログインできることを確認する。
正常動作が確認できない場合は以下を再度確認する。
- AWS上のセキュリティグループ
- AWS上のネットワークACL
- AWS上のルーティングテーブル(インターネットGWへのルートは適切か)
ログインすると、Dashboardのデータなどが表示されるが、ドリルダウンしてもデータは参照できない。
なぜなら、データソースのDataSource DB Hostが変更になっているため。また、ここでデータソースを変更しようとSettings > Data Sources へアクセスしても、以下のエラーが出力され新規データソースの追加もできない状態となる
Sorry, we couldn't find anything.データソースの復旧
一旦、既存のデータソース情報をDBから削除すると新規にデータソースを追加できるようになる。
そのため、以下の流れでデータソースを復旧させる。(1). 既存データソース情報の確認
(2). データソース削除
(3). Web/UIからデータソースの作成
(4). 新規データソースとqueryが参照するデータソースの紐づけ
既存データソース情報の確認
PostgreSQLへpsqlを利用しログイン
$ cid=$(sudo docker ps -qf "name=redash_postgres_1")
$ sudo docker container exec -it ${cid} /bin/bash
→PostgreSQLコンテナへログインしたことを確認
# psql -U postgres postgres
既存の data_sources, data_source_groups テーブルのデータを確認
data_sources の id が query テーブルで参照されている。
「(4).新規データソースとqueryが参照するデータソースの紐づけ」作業で必要となるので必ずメモっておく# select * from data_sources; id | org_id | name | type | encrypted_options | queue_name | scheduled_queue_name | created_at ----+--------+----------------+-----------+---------------------+------------+----------------------+------------------------------- 1 | 1 | migration_db_a | rds_mysql | \x67413d3d(snippet) | queries | scheduled_queries | 2019-11-27 02:20:13.635035+00 2 | 1 | migration_db_b | rds_mysql | \x67415f42(snippet) | queries | scheduled_queries | 2019-11-28 04:07:50.333332+00 (2 rows) postgres=# select * from data_source_groups; id | data_source_id | group_id | view_only ----+----------------+----------+----------- 1 | 1 | 2 | t 2 | 1 | 1 | f 3 | 2 | 2 | f 4 | 2 | 1 | f (4 rows)データソース削除
data_sourcesのレコードは他のテーブルのレコードと依存関係(FOREIGN KEY CONSTRAINT)があるので、そのまま削除するとエラーになる。
一旦、DISABLE TRIGGERで依存を切ってから削除する。
DISABLEした依存関係の復旧は「(4). 新規データソースとqueryが参照するデータソースの紐づけ」の中で実施する。# delete from data_source_groups; DELETE 4 # delete from data_sources; ERROR: update or delete on table "data_sources" violates foreign key constraint "queries_data_source_id_fkey" on table "queries" # ALTER TABLE data_sources DISABLE TRIGGER ALL; ALTER TABLE # delete from data_sources; DELETE 2Web/UIからデータソースの作成
i-src-redashに設定したときと同様にRedashのWeb/UIから
dstdb.example.ap-northeast-1.rds.amazonaws.com上のmigration_db_a,migration_db_bをデータソースとして登録する。正常にデータソースにconnectできない場合は以下を確認する
- AWS上のセキュリティグループ
- AWS上のネットワークACL
- AWS上のルーティングテーブル
- DBのアカウント設定(特にアクセス元ホストのIPが変更になっているのでその点をチェック)
新規データソースとqueryが参照するデータソースの紐づけ
新規データソースの data_sources, data_source_group テーブル上のレコードを確認
# select * from data_sources;
 id | org_id |      name      |   type    |  encrypted_options  | queue_name | scheduled_queue_name |          created_at
----+--------+----------------+-----------+---------------------+------------+----------------------+-------------------------------
  3 |      1 | migration_db_a | rds_mysql | \x67413d3d(snippet) | queries    | scheduled_queries    | 2020-01-06 07:31:34.455437+00
  4 |      1 | migration_db_b | rds_mysql | \x67415f42(snippet) | queries    | scheduled_queries    | 2020-01-06 07:33:56.520092+00
(2 rows)

# select * from data_source_groups;
 id | data_source_id | group_id | view_only
----+----------------+----------+-----------
  5 |              3 |        2 | f
  6 |              4 |        2 | f
data_sourcesのidと、data_source_groupsのid, data_source_idを修正する
「(1). 既存データソース情報の確認」で確認したものに合わせるよう、修正する
# update data_sources set id = 1  where id = 3;
UPDATE 1
# update data_sources set id = 2  where id = 4;
UPDATE 1
# select * from data_sources;
 id | org_id |      name      |   type    |  encrypted_options  | queue_name | scheduled_queue_name |          created_at
----+--------+----------------+-----------+---------------------+------------+----------------------+-------------------------------
  1 |      1 | migration_db_a | rds_mysql | \x67413d3d(snippet) | queries    | scheduled_queries    | 2020-01-06 07:31:34.455437+00
  2 |      1 | migration_db_b | rds_mysql | \x67415f42(snippet) | queries    | scheduled_queries    | 2020-01-06 07:33:56.520092+00
(2 rows)

# update data_source_groups set id = 1, data_source_id = 1 where id = 5;
UPDATE 1
# update data_source_groups set id = 3, data_source_id = 2 where id = 6;
UPDATE 1
# select * from data_source_groups;
 id | data_source_id | group_id | view_only
----+----------------+----------+-----------
  1 |              1 |        2 | f
  3 |              2 |        2 | f
(2 rows)

# insert into data_source_groups (id, data_source_id, group_id, view_only) values (2, 1, 1, true);
INSERT 0 1
# insert into data_source_groups (id, data_source_id, group_id, view_only) values (4, 2, 1, true);
INSERT 0 1
# select * from data_source_groups;
 id | data_source_id | group_id | view_only
----+----------------+----------+-----------
  1 |              1 |        2 | f
  3 |              2 |        2 | f
  2 |              1 |        1 | t
  4 |              2 |        1 | t
(4 rows)
DISABLEしたdata_sourcesテーブルの依存関係を復元する
# ALTER TABLE data_sources ENABLE TRIGGER ALL;
ALTER TABLE
Redashの動作確認
データソースが参照できるようになり、queryの結果が確認できることをRedashのWeb/UIから確認する
- 投稿日:2020-01-07T07:54:03+09:00
コンテナ型仮想化技術 Study09 / Helm
はじめに
今回はHelmです。
関連記事
コンテナ型仮想化技術 Study01 / Docker基礎
コンテナ型仮想化技術 Study02 / Docker レジストリ
コンテナ型仮想化技術 Study03 / Docker Compose
コンテナ型仮想化技術 Study04 / Minikube & kubectl簡易操作
コンテナ型仮想化技術 Study05 / Pod操作
コンテナ型仮想化技術 Study06 / ReplicaSet, Deployment, Service
コンテナ型仮想化技術 Study06' / Kubernetesネットワーク問題判別
コンテナ型仮想化技術 Study07 / ストレージ
コンテナ型仮想化技術 Study08 / Statefulset, Ingress
コンテナ型仮想化技術 Study09 / Helm参考情報
Helmの概要とChart(チャート)の作り方
Helm Documentation(V3)
Helm Documentation(V2)
Helm 3.0 のお試しレポート
Get Started with Kubernetes using Minikube
chartを作りながらhelmの概要を理解するHelm Templateについて色々説明してみる
[Helm入門] Templateで使える関数の実行例 ~ 文字列操作編 ~※Helmの全体像を理解するには、上の一番目の記事が秀逸で分かりやすい。
HelmはGo言語で実装されているらしく、Helm ChartのテンプレートもGo言語の作法に準拠している所があるようです。Go言語にはあまり馴染みがないせいか、出来合いのHelm Chart見ても、結構直感的に分かりにくい! Helm Chartを読んで理解するためには、公式ドキュメントの以下の章を一通り目を通すべし。
The Chart Template Developer’s Guide用語の整理
- Chart(Helm Chart): Kubernetesクラスター上に作成する一連のリソース定義のテンプレートをパッケージングしたもの
- Repository: Helm Chartを管理する場所/サービス (Dockerイメージを管理するDockerレジストリとは全く別物)
- Release: Kubernetesクラスター上にデプロイされたHelm Charのインスタンス
※Helmのリポジトリは必ずしも必要では無いようです。Helm Chartは最終的にはテンプレート等のファイル群を.tgzとしてまとめたアーカイブファイルとして作成されることになりますが、そのファイルを直接指定してkubernetesクラスターに適用させることも可能ですし、アーカイブ前のディレクトリを指定することも可能です。限定的な利用とかテスト中はこれで充分な場合もありそうです。
Helmセットアップ
参考: Installing Helm
直近でHelmV3がリリースされたようですが、結構変更が入っていそうなのと情報が少ないので、一旦Helm V2.16.1を使うことにします。
Kubernetesクラスターとしては、Windows VirtualBox上のUbuntu上にあるminikubeを使います。
kubectlが実行できる環境にHelm本体(クライアント)をインストールし、Kubernetesクラスター側にはhelmからの指示を受けて各種操作を行うサーバー側のモジュール(Tiller)をセットアップすることになります。(ちなみにHelm V3ではTillerのセットアップは不要らしい)
ここではminikubeが乗っているUbuntu上にインストールします。Helm本体のインストール
以下からV2.16.1のLinux amd64版のバイナリを入手します。
https://github.com/helm/helm/releasesvagrant@minikube:~/helm$ wget https://get.helm.sh/helm-v2.16.1-linux-amd64.tar.gz --2019-11-30 23:45:56-- https://get.helm.sh/helm-v2.16.1-linux-amd64.tar.gz Resolving get.helm.sh (get.helm.sh)... 152.199.39.108, 2606:2800:247:1cb7:261b:1f9c:2074:3c Connecting to get.helm.sh (get.helm.sh)|152.199.39.108|:443... connected. HTTP request sent, awaiting response... 200 OK Length: 25262108 (24M) [application/x-tar] Saving to: ‘helm-v2.16.1-linux-amd64.tar.gz’ helm-v2.16.1-linux-amd64.tar.gz 100%[============================================================================>] 24.09M 4.65MB/s in 5.3s 2019-11-30 23:46:01 (4.55 MB/s) - ‘helm-v2.16.1-linux-amd64.tar.gz’ saved [25262108/25262108]解凍してhelmのモジュールをPATHが通っているディレクトリ(/usr/local/bin/)に配置
vagrant@minikube:~/helm$ tar -zxvf helm-v2.16.1-linux-amd64.tar.gz
linux-amd64/
linux-amd64/helm
linux-amd64/LICENSE
linux-amd64/tiller
linux-amd64/README.md

vagrant@minikube:~/helm$ ls -l linux-amd64/
total 79692
-rwxr-xr-x 1 vagrant vagrant 40460288 Nov 12 18:35 helm
-rw-r--r-- 1 vagrant vagrant    11343 Nov 12 18:37 LICENSE
-rw-r--r-- 1 vagrant vagrant     3444 Nov 12 18:37 README.md
-rwxr-xr-x 1 vagrant vagrant 41127936 Nov 12 18:37 tiller

vagrant@minikube:~/helm$ sudo mv linux-amd64/helm /usr/local/bin/
これでhelmコマンドが使えるようになりました。
vagrant@minikube:~$ helm version
Client: &version.Version{SemVer:"v2.16.1", GitCommit:"bbdfe5e7803a12bbdf97e94cd847859890cf4050", GitTreeState:"clean"}
Error: could not find tiller
Tillerセットアップ
※Helm V3だとこのステップが不要になっている!
次に、Kubernetesクラスター側にTillerというサーバーサイドのモジュールをセットアップしますが、これはHelmをインストールしたノード(=kubectlが入っているノード)からhelm initコマンドで実施します。vagrant@minikube:~$ helm init Creating /home/vagrant/.helm Creating /home/vagrant/.helm/repository Creating /home/vagrant/.helm/repository/cache Creating /home/vagrant/.helm/repository/local Creating /home/vagrant/.helm/plugins Creating /home/vagrant/.helm/starters Creating /home/vagrant/.helm/cache/archive Creating /home/vagrant/.helm/repository/repositories.yaml Adding stable repo with URL: https://kubernetes-charts.storage.googleapis.com Adding local repo with URL: http://127.0.0.1:8879/charts $HELM_HOME has been configured at /home/vagrant/.helm. Tiller (the Helm server-side component) has been installed into your Kubernetes Cluster. Please note: by default, Tiller is deployed with an insecure 'allow unauthenticated users' policy. To prevent this, run `helm init` with the --tiller-tls-verify flag. For more information on securing your installation see: https://docs.helm.sh/using_helm/#securing-your-helm-installation
helm initでは、デフォルトで、その環境のkubectlのデフォルトの接続先kubenetesに対してkube-systemネームスペースに必要なリソースを定義してくれるようです。確認
むむ??
helm versionコマンドがエラーになる。vagrant@minikube:~$ helm version Client: &version.Version{SemVer:"v2.16.1", GitCommit:"bbdfe5e7803a12bbdf97e94cd847859890cf4050", GitTreeState:"clean"} E1201 00:06:00.424955 7038 portforward.go:400] an error occurred forwarding 32784 -> 44134: error forwarding port 44134 to pod 335e7345d4361233ebb592cff534be3c9adb2317e436260cbe1917f76a2478a9, uid : unable to do port forwarding: socat not found E1201 00:06:01.428787 7038 portforward.go:400] an error occurred forwarding 32784 -> 44134: error forwarding port 44134 to pod 335e7345d4361233ebb592cff534be3c9adb2317e436260cbe1917f76a2478a9, uid : unable to do port forwarding: socat not found E1201 00:06:03.291790 7038 portforward.go:400] an error occurred forwarding 32784 -> 44134: error forwarding port 44134 to pod 335e7345d4361233ebb592cff534be3c9adb2317e436260cbe1917f76a2478a9, uid : unable to do port forwarding: socat not found E1201 00:06:36.327123 7038 portforward.go:340] error creating error stream for port 32784 -> 44134: Timeout occured E1201 00:07:00.058581 7038 portforward.go:362] error creating forwarding stream for port 32784 -> 44134: Timeout occured E1201 00:07:27.722853 7038 portforward.go:362] error creating forwarding stream for port 32784 -> 44134: Timeout occured E1201 00:07:58.293685 7038 portforward.go:340] error creating error stream for port 32784 -> 44134: Timeout occured E1201 00:08:37.563451 7038 portforward.go:362] error creating forwarding stream for port 32784 -> 44134: Timeout occured E1201 00:09:27.977955 7038 portforward.go:362] error creating forwarding stream for port 32784 -> 44134: Timeout occured E1201 00:10:40.394108 7038 portforward.go:340] error creating error stream for port 32784 -> 44134: Timeout occured Error: cannot connect to Tillerちょっと古いが以下のようなIssueがあったので、これを参考に
sudo apt install socatで socatパッケージをインストールしたら上のエラーは解消しました。
参考: https://github.com/helm/helm/issues/1371vagrant@minikube:~$ helm version Client: &version.Version{SemVer:"v2.16.1", GitCommit:"bbdfe5e7803a12bbdf97e94cd847859890cf4050", GitTreeState:"clean"} Server: &version.Version{SemVer:"v2.16.1", GitCommit:"bbdfe5e7803a12bbdf97e94cd847859890cf4050", GitTreeState:"clean"}Helm操作例
Helmチャートを使ったインストール例 / redis
参考: Get Started with Kubernetes using Minikube - Step 5: Install an application using a Helm Chart
リポジトリ確認
helm chartを管理するリポジトリ情報を事前に設定しておく必要があります。デフォルトでは以下のリポジトリが設定されています。今回は、この公式のリポジトリ使うので、このままでOK。
vagrant@minikube:~$ helm repo list
NAME    URL
stable  https://kubernetes-charts.storage.googleapis.com
local   http://127.0.0.1:8879/charts
インストール
使用するHelm Chartはこちら。
Kubeapps Hub - Redisvagrant@minikube:~$ helm install stable/redis NAME: truculent-buffalo LAST DEPLOYED: Sun Dec 1 01:21:06 2019 NAMESPACE: default STATUS: DEPLOYED RESOURCES: ==> v1/ConfigMap NAME AGE truculent-buffalo-redis 1s truculent-buffalo-redis-health 1s ==> v1/Pod(related) NAME AGE truculent-buffalo-redis-master-0 0s truculent-buffalo-redis-slave-0 0s ==> v1/Secret NAME AGE truculent-buffalo-redis 1s ==> v1/Service NAME AGE truculent-buffalo-redis-headless 1s truculent-buffalo-redis-master 0s truculent-buffalo-redis-slave 0s ==> v1/StatefulSet NAME AGE truculent-buffalo-redis-master 0s truculent-buffalo-redis-slave 0s NOTES: ** Please be patient while the chart is being deployed ** Redis can be accessed via port 6379 on the following DNS names from within your cluster: truculent-buffalo-redis-master.default.svc.cluster.local for read/write operations truculent-buffalo-redis-slave.default.svc.cluster.local for read-only operations To get your password run: export REDIS_PASSWORD=$(kubectl get secret --namespace default truculent-buffalo-redis -o jsonpath="{.data.redis-password}" | base64 --decode) To connect to your Redis server: 1. Run a Redis pod that you can use as a client: kubectl run --namespace default truculent-buffalo-redis-client --rm --tty -i --restart='Never' \ --env REDIS_PASSWORD=$REDIS_PASSWORD \ --image docker.io/bitnami/redis:5.0.7-debian-9-r0 -- bash 2. Connect using the Redis CLI: redis-cli -h truculent-buffalo-redis-master -a $REDIS_PASSWORD redis-cli -h truculent-buffalo-redis-slave -a $REDIS_PASSWORD To connect to your database from outside the cluster execute the following commands: kubectl port-forward --namespace default svc/truculent-buffalo-redis-master 6379:6379 & redis-cli -h 127.0.0.1 -p 6379 -a $REDIS_PASSWORDredis関連のpod, service, statefulsetが作成されました!
確認
kubectlで作成されたリソースを確認
vagrant@minikube:~$ kubectl get all -o wide | grep redis
pod/truculent-buffalo-redis-master-0   1/1     Running   0          20m     172.17.0.11   minikube   <none>           <none>
pod/truculent-buffalo-redis-slave-0    1/1     Running   0          20m     172.17.0.10   minikube   <none>           <none>
pod/truculent-buffalo-redis-slave-1    1/1     Running   0          19m     172.17.0.12   minikube   <none>           <none>

service/truculent-buffalo-redis-headless   ClusterIP   None           <none>        6379/TCP   20m   app=redis,release=truculent-buffalo
service/truculent-buffalo-redis-master     ClusterIP   10.97.52.153   <none>        6379/TCP   20m   app=redis,release=truculent-buffalo,role=master
service/truculent-buffalo-redis-slave      ClusterIP   10.102.26.9    <none>        6379/TCP   20m   app=redis,release=truculent-buffalo,role=slave

statefulset.apps/truculent-buffalo-redis-master   1/1     20m   truculent-buffalo-redis   docker.io/bitnami/redis:5.0.7-debian-9-r0
statefulset.apps/truculent-buffalo-redis-slave    2/2     20m   truculent-buffalo-redis   docker.io/bitnami/redis:5.0.7-debian-9-r0
helmコマンドでの状態確認
vagrant@minikube:~$ helm ls
NAME                    REVISION        UPDATED                         STATUS          CHART           APP VERSION     NAMESPACE
truculent-buffalo       1               Sun Dec  1 01:21:06 2019        DEPLOYED        redis-10.1.0    5.0.7           default
削除
vagrant@minikube:~$ helm delete truculent-buffalo
release "truculent-buffalo" deleted
リソース一式削除されます。
vagrant@minikube:~$ helm ls

vagrant@minikube:~$ kubectl get all -o wide | grep redis
Helm Chartを作成してみる
参考: The Chart Template Developer’s Guide
雛形作成
helm createコマンドで、helmチャートとして必要なディレクトリ構造の雛形が出来上がります。vagrant@minikube:~/helmchart$ helm create mychar01 Creating mychar01 vagrant@minikube:~/helmchart$ tree . . `-- mychar01 |-- Chart.yaml |-- charts |-- templates | |-- NOTES.txt | |-- _helpers.tpl | |-- deployment.yaml | |-- ingress.yaml | |-- service.yaml | |-- serviceaccount.yaml | `-- tests | `-- test-connection.yaml `-- values.yaml 4 directories, 9 filesSimple Chart / Deployment
templatesディレクトリ下に、雛形となるサンプルファイルが各種できあがっていますが、これらは使わないので一旦削除します。
vagrant@minikube:~/helmchart/mychar01$ rm -rf templates/*templatesディレクトリ下に、kubernetesクラスタに定義したいマニフェストファイルを配置します。※本当は"テンプレート"なのでマニフェストの中身に変数とか埋め込めますが、まずは単純なケースを試すため、出来合いのマニフェストを配置して試します。
Deploymentのテストで使用した、以下のマニフェストファイルを、上のtemplatesディレクトリ下にそのまま配置します。
https://github.com/takara9/codes_for_lessons/blob/master/step08/deployment1.ymlvagrant@minikube:~/helmchart/mychar01$ tree . . |-- Chart.yaml |-- charts |-- templates | `-- deployment1.yml `-- values.yaml 2 directories, 3 files
helm lintコマンドで、Chartの文法チェックを行うことができるようです。vagrant@minikube:~/helmchart$ helm lint mychar01/ ==> Linting mychar01/ [INFO] Chart.yaml: icon is recommended 1 chart(s) linted, no failuresOKっぽいので、このChartを適用してみます。リポジトリに登録する場合は、
helm packageでパッケージングすることになると思いますが、このままでも適用はできるのでそのままやってみます。
helm installでインストールしますが、この時、--debug --dry-runで、デプロイ前に確認できます。まぁ今回は変数とか使ってないのであまり関係無いですが。vagrant@minikube:~/helmchart$ helm install --debug --dry-run --namespace test ./mychar01 [debug] Created tunnel using local port: '44871' [debug] SERVER: "127.0.0.1:44871" [debug] Original chart version: "" [debug] CHART PATH: /home/vagrant/helmchart/mychar01 NAME: foppish-uakari REVISION: 1 RELEASED: Tue Dec 3 05:19:10 2019 CHART: mychar01-0.1.0 USER-SUPPLIED VALUES: {} COMPUTED VALUES: affinity: {} fullnameOverride: "" image: pullPolicy: IfNotPresent repository: nginx tag: stable imagePullSecrets: [] ingress: annotations: {} enabled: false hosts: - host: chart-example.local paths: [] tls: [] nameOverride: "" nodeSelector: {} podSecurityContext: {} replicaCount: 1 resources: {} securityContext: {} service: port: 80 type: ClusterIP serviceAccount: create: true name: null tolerations: [] HOOKS: MANIFEST: --- # Source: mychar01/templates/deployment1.yml apiVersion: apps/v1 kind: Deployment metadata: name: web-deploy spec: replicas: 3 selector: matchLabels: app: web template: metadata: labels: app: web spec: containers: - name: nginx image: nginx:1.16では適用してみます。
vagrant@minikube:~/helmchart$ helm install --namespace test ./mychar01
NAME:   queenly-pig
LAST DEPLOYED: Tue Dec  3 05:21:49 2019
NAMESPACE: test
STATUS: DEPLOYED

RESOURCES:
==> v1/Deployment
NAME        AGE
web-deploy  0s

==> v1/Pod(related)
NAME                         AGE
web-deploy-866f97c649-55vnj  0s
web-deploy-866f97c649-7tv9n  0s
web-deploy-866f97c649-kmjhz  0s
ステータスを確認してみます。
vagrant@minikube:~/helmchart$ helm list
NAME            REVISION        UPDATED                         STATUS          CHART           APP VERSION     NAMESPACE
queenly-pig     1               Tue Dec  3 05:21:49 2019        DEPLOYED        mychar01-0.1.0  1.0             test


vagrant@minikube:~/helmchart$ kubectl -n test get all -o wide
NAME                              READY   STATUS    RESTARTS   AGE   IP            NODE       NOMINATED NODE   READINESS GATES
pod/web-deploy-866f97c649-55vnj   1/1     Running   0          62s   172.17.0.10   minikube   <none>           <none>
pod/web-deploy-866f97c649-7tv9n   1/1     Running   0          62s   172.17.0.12   minikube   <none>           <none>
pod/web-deploy-866f97c649-kmjhz   1/1     Running   0          62s   172.17.0.11   minikube   <none>           <none>

NAME                         READY   UP-TO-DATE   AVAILABLE   AGE   CONTAINERS   IMAGES       SELECTOR
deployment.apps/web-deploy   3/3     3            3           62s   nginx        nginx:1.16   app=web

NAME                                    DESIRED   CURRENT   READY   AGE   CONTAINERS   IMAGES       SELECTOR
replicaset.apps/web-deploy-866f97c649   3         3         3       62s   nginx        nginx:1.16   app=web,pod-template-hash=866f97c649
namespace "test"に、Deployment関連リソース(deployment, replicaset, pod)が意図した通りに作成されました!
削除するには、作成されたhelmリリース名を指定してhelm deleteコマンドを実行します。
vagrant@minikube:~/helmchart$ helm delete queenly-pig
release "queenly-pig" deleted
これで、作成されたリソース一式が削除されます。
memo
https://v2.helm.sh/docs/chart_template_guide/#accessing-files-inside-templates
It is okay to add extra files to your Helm chart. These files will be bundled and sent to Tiller. Be careful, though. Charts must be smaller than 1M because of the storage limitations of Kubernetes objects.