- 投稿日:2020-01-01T16:35:29+09:00
CentOS, UbuntuのDockerイメージ with SSH & SFTP
はじめに
明けましておめでとうございます。
無事に年も明けてやっと少し落ち着きました。今回は新年早々、自作Dockerイメージを公開してみます。
令和初元旦の記念投稿です。公開イメージ
Dockerの各種ベースイメージにSSHとSFTPの接続機能を追加したイメージです。
簡単な使い方も付けています。
CentOS 7, 8
https://hub.docker.com/r/takeyamajp/centos-sshdUbuntu 16.04, 18.04
https://hub.docker.com/r/takeyamajp/ubuntu-sshdコメントやDocker Hubで星を付けて頂けると励みになります。すごく。
経緯
作成の経緯として、Dockerでの柔軟なビルドや調査にはベースイメージにsshdを追加したものが必須であるにも関わらず、世界中で各自が同じようなイメージを自作しているのが現状でした。
すでに誰かによって公開されているイメージを使うにしても、どこか動作が変だったりして結局は自分で調査して改良する事になります。そのような不毛な車輪の再発明を終わらせるべく、これまでシンプルかつ信頼性の高いイメージの作成に取り組んで参りました。なんちゃって。
要するに、せっかく作ったので役に立つなら使ってください的な投稿です。
試しビルドの削減はもちろん、アイデア次第で色々と便利な使い方ができると思います。簡単な使い方 (Ubuntuの例)
- イメージの概要
FROM ubuntu:18.04

ENV TZ Asia/Tokyo
ENV ROOT_PASSWORD root

EXPOSE 22
- コンテナの起動例
起動後は、使い慣れたSSHターミナルやSFTPクライアントからアクセスすることが出来ます。
初期設定は root/root でログイン出来ます。
アプリやツールをインストールして、ファイルの存在や設定ファイルの内容を確認してみて下さい。docker run -d --name ubuntu-sshd \ -e TZ=Asia/Tokyo \ -e ROOT_PASSWORD=root \ -p 8022:22 \ takeyamajp/ubuntu-sshd必要に応じて、公開するポートやボリュームを追加することが出来ます。
docker run -d --name ubuntu-sshd \
       -e TZ=Asia/Tokyo \
       -e ROOT_PASSWORD=root \
       -p 8022:22 \
       -p 8080:80 \
       -v /my/own/datadir:/var/www/html \
       takeyamajp/ubuntu-sshd
この例では、WEBサーバー関係を調査するために、追加でポート80とDocumentRootのディレクトリを公開しています。
例えば、コンテナ内でapache2をインストールして/usr/sbin/apache2 -DFOREGROUNDのようなコマンドを実行すれば、実際にブラウザーからアクセス可能なWEBサーバーとして機能させる事が出来ます。
そのようにして、様々なアプリの動作をDockerfileを書いてビルドする前に、このコンテナで確認する事が出来ます。
- タイムゾーンには、Linuxで設定できるタイムゾーンをそのまま指定することが出来ます。
海外在住な人も心配ご無用です。タイムゾーンの一覧
https://www.unicode.org/cldr/charts/latest/verify/zones/en.html
- ログは「docker logs」に出力します。
このコンテナへのSSH接続開始、認証、切断などの情報が出力されます。次のコマンドでリアルタイムにログを参照する事が出来ます。
docker logs -f ubuntu-sshd以上です。
それでは今年も良いDockerライフを!
- 投稿日:2020-01-01T06:17:15+09:00
Docker(docker-compose)でCentOS8のコンテナを利用する(ERROR: No container found forの解消)
はじめに
dockerdocker-composecentos8などのキーワードを利用して、Google先生に尋ねると、大体出てくる記事はCentOSにdockerとかdocker-composeをインストールする方法が出てくる。CentOS8からはyumではなくdnfコマンドによってパッケージ管理を行う仕組みが導入されているのだとか。
そんな話しを2020年になるまで知らなかった。。。(正確には知っていても試してみなかった。。。)なので、せっかくdockerを少しずつ勉強しているので、お手軽にCentOS8の環境を用意して試してみようと思ったところで、いきなり少しつまずいたので、その部分も踏まえて新年(2020年)一発目のQiita記事としてまとめました。
最小の設定でCentOS8を起動して試してみる
ディレクトリ構成と各設定内容
最小の設定とはいえ、後々
yum -y updateみたいなものと同じであろうdnf -y updateみたいなこともDockerfile内で指定しようと思っているので、Dockerfileは作成する。ディレクトリ構成. ├── Dockerfile └── docker-compose.ymldocker-compose.ymlversion: '3' services: centos8: container_name: "centos8" build: ./DockerfileFROM centos:8動作検証
とりあえずBuild
$ docker-compose build --no-cacheup
$ docker-compose up -dコンテナにアクセスしてみる
$ docker-compose exec centos8 bash
ERROR: No container found for centos8_1
・・・ん?
エラーが出てしまい、コンテナにアクセスできない状況となっている。
ログを確認してみる。$ docker-compose logs Attaching to centos8ログにはエラーが出ていないように見える。
プロセスを確認してみる。$ docker-compose ps Name Command State Ports ------------------------------------ centos8 /bin/bash Exit 0正常に終了しています。みたいなステータスになっている。
どうやらdocker-compose.ymlファイルのオプションにttyをtrueで設定を追加する必要があるようです。docker-compose up したコンテナを起動させ続ける方法の記事を参考にしました。
docker-compose.ymlversion: '3' services: centos8: container_name: "centos8" build: ./ tty: true # ← 追記再度コンテナを起動し直して、コンテナにアクセスしなおしてみる。
$ docker-compose down
$ docker-compose up -d
$ docker-compose exec centos8 bash
$ docker-compose exec centos8 bash
[root@ac4fc975a84d /]# cat /etc/redhat-release
CentOS Linux release 8.0.1905 (Core)
確認できました。
とりあえず、これでCentOS8の確認ができる準備が整ったので、yumが使えなくなっているのかぐらいは検証してみようと思います。yumは使えないのか?
# yum -y update
Failed to set locale, defaulting to C
CentOS-8 - AppStream                                                        1.3 MB/s | 6.3 MB     00:04
CentOS-8 - Base                                                             2.8 MB/s | 7.9 MB     00:02
CentOS-8 - Extras                                                           515  B/s | 2.1 kB     00:04
Dependencies resolved.
============================================================================================================
 Package                    Arch             Version                              Repository           Size
============================================================================================================
Upgrading:
 bash                       x86_64           4.4.19-8.el8_0                       BaseOS              1.5 M
 bind-export-libs           x86_64           32:9.11.4-17.P2.el8_0.1              BaseOS              1.1 M
 dracut                     x86_64           049-10.git20190115.el8_0.1           BaseOS              361 k
 dracut-network             x86_64           049-10.git20190115.el8_0.1           BaseOS               96 k
 dracut-squash              x86_64           049-10.git20190115.el8_0.1           BaseOS               52 k
.......
Installed:
  libxkbcommon-0.8.2-1.el8.x86_64        diffutils-3.6-5.el8.x86_64        hardlink-1:1.3-6.el8.x86_64
  kbd-2.0.4-8.el8.x86_64                 kpartx-0.7.8-7.el8_0.2.x86_64     pigz-2.4-2.el8.x86_64
  xkeyboard-config-2.24-3.el8.noarch     kbd-legacy-2.0.4-8.el8.noarch     kbd-misc-2.0.4-8.el8.noarch

Complete!
yumは使えるみたいですね。
どうやらyumが使えるのはdnfへのシンボリックリンクになっているため、CentOS8でも使えるんだとか。
本当にそうなのか念のため確認してみようと思います。# which yum bash: which: command not found今度は
whichコマンドが無い。。。さすがDocker
無駄なものを省いた最小構成のイメージだけはある。
whichコマンドをyumでインストールしてから確認してみると、確かにyum -> dnf-3となっていて、シンボリックリンクになっていることが分かります。# yum -y install which Failed to set locale, defaulting to C Last metadata expiration check: 0:09:38 ago on Tue Dec 31 20:35:39 2019. Dependencies resolved. .... # which yum /usr/bin/yum # ls -la | grep yum lrwxrwxrwx 1 root root 5 May 13 2019 yum -> dnf-3と、ここで
yum -y install ...コマンドの実行直後の行にFailed to set locale, defaulting to Cが出ているのに気付きました。これは日本語の言語パッケージがインストールされていないことが原因とのこと。
https://qiita.com/takizawafw6o2o/items/d6a15b5ae05d85ae1f41#%E5%8E%9F%E5%9B%A0なので同じようにインストールしてみる。
もうここまででyumがdnfのシンボリックリンクであることがわかったため、今後慣れていくためにもdnfコマンドを利用するようにします。# dnf -y install langpacks-ja ... Installed: langpacks-ja-1.0-12.el8.noarch glibc-langpack-ja-2.28-42.el8.1.x86_64 Complete!言語パッケージをインストールしたので
yum listでFailed to set locale, defaulting to Cが出ないことを確認する。あ、dnf listですね。# dnf list Failed to set locale, defaulting to Cなおらない。
http://tihiro.hatenablog.com/entry/2017/10/12/075555
この記事を参考にLC_ALLを設定してみます。# export LC_ALL=C # dnf listこれで出なくなるみたいです。
- 投稿日:2020-01-01T04:14:48+09:00
Ubuntu 19.10 (Eoan)にDocker環境構築
概要
Ubuntu 19.10 (Eoan)にDocker環境を構築します。
手順
1. リポジトリの追加
基本的には下記オフィシャルのドキュメントの通りに進めます。パッケージからではなくてリポジトリからインストールする方法を取ります。
Get Docker Engine - Community for Ubuntu
https://docs.docker.com/install/linux/docker-ce/ubuntu/#install-using-the-repository古いバージョンの削除
$ sudo apt-get remove docker docker-engine docker.io containerd runc必要なパッケージとGPGキーのインストール
$ sudo apt-get update
$ sudo apt-get install \
    apt-transport-https \
    ca-certificates \
    curl \
    gnupg-agent \
    software-properties-common
$ curl -fsSL https://download.docker.com/linux/ubuntu/gpg | sudo apt-key add -
verifyは省略します。
本来ならば次に
$ sudo add-apt-repository \
   "deb [arch=amd64] https://download.docker.com/linux/ubuntu \
   $(lsb_release -cs) \
   stable"
でリポジトリを追加するのですが、Ubuntu 19.10 (Eoan)用のリポジトリが存在せずにエラーになります。
https://github.com/docker/for-linux/issues/833
仕方がないのでUbuntu 19.04(Disco Dingo)用のリポジトリを追加して、オフィシャルドキュメントの続きを実行します。$ sudo bash -c 'echo "deb [arch=amd64] https://download.docker.com/linux/ubuntu disco stable" > /etc/apt/sources.list.d/docker-ce.list'2. Docke engineのインストール
$ sudo apt-get update
$ sudo apt-get install docker-ce docker-ce-cli containerd.io
sudoなしでdockerを実行できるようにする
$ sudo usermod -aG docker $(whoami)一旦再起動します。
3. 動作確認
$ docker info4. docker-composeのインストール
バージョンはここで確認します。
https://github.com/docker/compose/releases$ sudo curl -L https://github.com/docker/compose/releases/download/1.25.0/docker-compose-`uname -s`-`uname -m` -o /usr/local/bin/docker-compose $ sudo chmod +x /usr/local/bin/docker-compose
- 投稿日:2020-01-01T03:45:54+09:00
DockerでReactの環境を作成してみた
はじめに
この記事ではJavaScriptのライブラリであるReactの環境をDockerを使用して構築したいと思います。
目次
- Dockerfileの用意
- Dockerfileをビルド
- コンテナの起動
- Reactアプリケーションの作成
- Reactアプリケーションの起動
- ブラウザで確認
- まとめ
1. Dockerfileの用意
今回はcreate-react-appを使用してReactの環境を構築していきます。
ディレクトリ構成は以下です。ディレクトリ構成. ├── app # Reactアプリケーションのフォルダ └── Dockerfile # React環境のDockerfileDockerfile# nodeのverを指定してDockerのイメージをpull FROM node:13.5.0 # Reactアプリケーション作成時に最低限の環境を提供してくれるライブラリをインストール RUN yarn global add create-react-app # コンテナ接続時のディレクトリを指定 WORKDIR /home # アプリケーションの起動時にコンテナで開放するポートを指定 EXPOSE 30002. Dockerfileをビルド
DockerfileからDockerイメージを作成します。
イメージ名はreact-tutorialにします。
以下のコマンドをDockerfileが存在するディレクトリで実行してください。Dockerイメージのビルド$ docker build --rm -f "react-tutorial/Dockerfile" -t react-tutorial:latest "react-tutorial"3. コンテナの起動
起動すると以下のようになると思います。
これで、Reactアプリケーションが作成できる環境のコンテナに接続できたことになります。Dockerコンテナの起動$ docker run --rm -it -v ${PWD}/app:/home/react-tutorial -p 3000:3000/tcp react-tutorial:latest /bin/bash root@03887209ce2d:/home#4. Reactアプリケーションの作成
それでは、Reactアプリケーションの作成をしてきます。
作成にはcreate-react-appを使用します。Reactアプリケーションの作成root@03887209ce2d:/home# create-react-app react-tutorial
コマンド実行中の表示(長いので畳んでおきます)
Creating a new React app in /home/react-tutorial. Installing packages. This might take a couple of minutes. Installing react, react-dom, and react-scripts with cra-template... yarn add v1.21.1 [1/4] Resolving packages... [2/4] Fetching packages... warning sha.js@2.4.11: Invalid bin entry for "sha.js" (in "sha.js"). info fsevents@1.2.9: The platform "linux" is incompatible with this module. info "fsevents@1.2.9" is an optional dependency and failed compatibility check. Excluding it from installation. info fsevents@2.1.2: The platform "linux" is incompatible with this module. info "fsevents@2.1.2" is an optional dependency and failed compatibility check. Excluding it from installation. [3/4] Linking dependencies... warning "react-scripts > @typescript-eslint/eslint-plugin > tsutils@3.17.1" has unmet peer dependency "typescript@>=2.8.0 || >= 3.2.0-dev || >= 3.3.0-dev || >= 3.4.0-dev || >= 3.5.0-dev || >= 3.6.0-dev || >= 3.6.0-beta || >= 3.7.0-dev || >= 3.7.0-beta". [4/4] Building fresh packages... success Saved lockfile. success Saved 35 new dependencies. info Direct dependencies ├─ cra-template@1.0.0 ├─ react-dom@16.12.0 ├─ react-scripts@3.3.0 └─ react@16.12.0 info All dependencies ├─ @babel/plugin-proposal-class-properties@7.7.4 ├─ @babel/plugin-proposal-decorators@7.7.4 ├─ @babel/plugin-proposal-nullish-coalescing-operator@7.7.4 ├─ @babel/plugin-proposal-numeric-separator@7.7.4 ├─ @babel/plugin-proposal-optional-chaining@7.7.4 ├─ @babel/plugin-syntax-decorators@7.7.4 ├─ @babel/plugin-syntax-flow@7.7.4 ├─ @babel/plugin-syntax-nullish-coalescing-operator@7.7.4 ├─ @babel/plugin-syntax-numeric-separator@7.7.4 ├─ @babel/plugin-syntax-optional-chaining@7.7.4 ├─ @babel/plugin-transform-flow-strip-types@7.7.4 ├─ @babel/plugin-transform-runtime@7.7.4 ├─ @babel/plugin-transform-typescript@7.7.4 ├─ @babel/preset-typescript@7.7.4 ├─ @types/parse-json@4.0.0 ├─ babel-plugin-macros@2.7.1 ├─ babel-plugin-named-asset-import@0.3.5 ├─ babel-preset-react-app@9.1.0 ├─ core-js@3.6.1 ├─ cra-template@1.0.0 ├─ eslint-config-react-app@5.1.0 ├─ fork-ts-checker-webpack-plugin@3.1.0 ├─ lines-and-columns@1.1.6 ├─ open@7.0.0 ├─ promise@8.0.3 ├─ raf@3.4.1 ├─ react-app-polyfill@1.0.5 ├─ react-dev-utils@10.0.0 ├─ react-dom@16.12.0 ├─ react-error-overlay@6.0.4 ├─ react-scripts@3.3.0 ├─ react@16.12.0 ├─ scheduler@0.18.0 ├─ whatwg-fetch@3.0.0 └─ yaml@1.7.2 Done in 36.57s. Installing template dependencies using yarnpkg... yarn add v1.21.1 [1/4] Resolving packages... [2/4] Fetching packages... info fsevents@2.1.2: The platform "linux" is incompatible with this module. info "fsevents@2.1.2" is an optional dependency and failed compatibility check. Excluding it from installation. info fsevents@1.2.9: The platform "linux" is incompatible with this module. info "fsevents@1.2.9" is an optional dependency and failed compatibility check. Excluding it from installation. [3/4] Linking dependencies... warning "react-scripts > @typescript-eslint/eslint-plugin > tsutils@3.17.1" has unmet peer dependency "typescript@>=2.8.0 || >= 3.2.0-dev || >= 3.3.0-dev || >= 3.4.0-dev || >= 3.5.0-dev || >= 3.6.0-dev || >= 3.6.0-beta || >= 3.7.0-dev || >= 3.7.0-beta". warning " > @testing-library/user-event@7.2.1" has unmet peer dependency "@testing-library/dom@>=5". [4/4] Building fresh packages... success Saved lockfile. success Saved 18 new dependencies. info Direct dependencies ├─ @testing-library/jest-dom@4.2.4 ├─ @testing-library/react@9.4.0 ├─ @testing-library/user-event@7.2.1 ├─ react-dom@16.12.0 └─ react@16.12.0 info All dependencies ├─ @sheerun/mutationobserver-shim@0.3.2 ├─ @testing-library/dom@6.11.0 ├─ @testing-library/jest-dom@4.2.4 ├─ @testing-library/react@9.4.0 ├─ @testing-library/user-event@7.2.1 ├─ @types/prop-types@15.7.3 ├─ @types/react-dom@16.9.4 ├─ @types/react@16.9.17 ├─ @types/testing-library__dom@6.11.0 ├─ @types/testing-library__react@9.1.2 ├─ css.escape@1.5.1 ├─ csstype@2.6.8 ├─ min-indent@1.0.0 ├─ react-dom@16.12.0 ├─ react@16.12.0 ├─ redent@3.0.0 ├─ strip-indent@3.0.0 └─ wait-for-expect@3.0.1 Done in 9.58s. Removing template package using yarnpkg... yarn remove v1.21.1 [1/2] Removing module cra-template... [2/2] Regenerating lockfile and installing missing dependencies... info fsevents@2.1.2: The platform "linux" is incompatible with this module. info "fsevents@2.1.2" is an optional dependency and failed compatibility check. Excluding it from installation. info fsevents@1.2.9: The platform "linux" is incompatible with this module. info "fsevents@1.2.9" is an optional dependency and failed compatibility check. Excluding it from installation. warning " > @testing-library/user-event@7.2.1" has unmet peer dependency "@testing-library/dom@>=5". warning "react-scripts > @typescript-eslint/eslint-plugin > tsutils@3.17.1" has unmet peer dependency "typescript@>=2.8.0 || >= 3.2.0-dev || >= 3.3.0-dev || >= 3.4.0-dev || >= 3.5.0-dev || >= 3.6.0-dev || >= 3.6.0-beta || >= 3.7.0-dev || >= 3.7.0-beta". success Uninstalled packages. Done in 7.62s. Success! Created react-tutorial at /home/react-tutorial Inside that directory, you can run several commands: yarn start Starts the development server. yarn build Bundles the app into static files for production. yarn test Starts the test runner. yarn eject Removes this tool and copies build dependencies, configuration files and scripts into the app directory. If you do this, you can’t go back! We suggest that you begin by typing: cd react-tutorial yarn start Happy hacking!5. Reactアプリケーションの起動
Reactアプリケーションが作成されたので、実際に起動します。
Reactアプリケーションの起動# ディレクトリ確認 root@03887209ce2d:/home# ls node react-tutorial root@03887209ce2d:/home# cd react-tutorial/ # Reactアプリケーションの起動 root@03887209ce2d:/home/react-tutorial# yarn start6. ブラウザで確認
yarn startを実行すると以下のように出力されます。Reactアプリケーションの起動後Compiled successfully! You can now view react-tutorial in the browser. Local: http://localhost:3000/ On Your Network: http://172.17.0.3:3000/ Note that the development build is not optimized. To create a production build, use yarn build.あとは、ブラウザから
http://localhost:3000/にアクセスしてみましょう。
以下のような表示がされれば完了です。
7. まとめ
Dockerを使用してReactの環境をお手軽に作成できました。
ホストマシンの環境をいじらずにお試しで環境を構築できるのはめっちゃ便利ですよね!!
あとは、appフォルダ配下のファイルを編集してアプリケーションを作成していくのみです!!
指摘や質問があれば大歓迎なので、是非よろしくお願いします。
以上です。ありがとうございました!
- 投稿日:2020-01-01T03:45:54+09:00
DockerでReactの環境を作成してみた。
はじめに
この記事ではJavaScriptのライブラリであるReactの環境をDockerを使用して構築したいと思います。
目次
- Dockerfileの用意
- Dockerfileをビルド
- コンテナの起動
- Reactアプリケーションの作成
- Reactアプリケーションの起動
- ブラウザで確認
- まとめ
1. Dockerfileの用意
今回はcreate-react-appを使用してReactの環境を構築していきます。
# nodeのverを指定してDockerのイメージをpull
FROM node:13.5.0

# Reactアプリケーション作成時に最低限の環境を提供してくれるライブラリをインストール
RUN yarn global add create-react-app

# コンテナ接続時のディレクトリを指定
WORKDIR /home

# アプリケーションの起動時にコンテナで開放するポートを指定
EXPOSE 3000
2. Dockerfileをビルド
DockerfileからDockerイメージを作成します。
イメージ名はreact-tutorialにします。
以下のコマンドをDockerfileが存在するディレクトリで実行してください。$ docker build --rm -f "react-tutorial/Dockerfile" -t react-tutorial:latest "react-tutorial"3. コンテナの起動
$ docker run --rm -it -p 3000:3000/tcp react-tutorial:latest /bin/bash起動すると以下のようになると思います。
これで、Reactアプリケーションが作成できる環境のコンテナに接続できたことになります。$ docker run --rm -it -v ${PWD}/src:/home/react-tutorial -p 3000:3000/tcp react-tutorial:latest /bin/bash root@03887209ce2d:/home#4. Reactアプリケーションの作成
それでは、Reactアプリケーションの作成をしてきます。
root@03887209ce2d:/home# create-react-app react-tutorial
コマンド実行中の表示(長いので畳んでおきます)
Creating a new React app in /home/react-tutorial.

Installing packages. This might take a couple of minutes.
Installing react, react-dom, and react-scripts with cra-template...

yarn add v1.21.1
[1/4] Resolving packages...
[2/4] Fetching packages...
warning sha.js@2.4.11: Invalid bin entry for "sha.js" (in "sha.js").
info fsevents@1.2.9: The platform "linux" is incompatible with this module.
info "fsevents@1.2.9" is an optional dependency and failed compatibility check. Excluding it from installation.
info fsevents@2.1.2: The platform "linux" is incompatible with this module.
info "fsevents@2.1.2" is an optional dependency and failed compatibility check. Excluding it from installation.
[3/4] Linking dependencies...
warning "react-scripts > @typescript-eslint/eslint-plugin > tsutils@3.17.1" has unmet peer dependency "typescript@>=2.8.0 || >= 3.2.0-dev || >= 3.3.0-dev || >= 3.4.0-dev || >= 3.5.0-dev || >= 3.6.0-dev || >= 3.6.0-beta || >= 3.7.0-dev || >= 3.7.0-beta".
[4/4] Building fresh packages...
success Saved lockfile.
success Saved 35 new dependencies.
info Direct dependencies
├─ cra-template@1.0.0
├─ react-dom@16.12.0
├─ react-scripts@3.3.0
└─ react@16.12.0
info All dependencies
├─ @babel/plugin-proposal-class-properties@7.7.4
├─ @babel/plugin-proposal-decorators@7.7.4
├─ @babel/plugin-proposal-nullish-coalescing-operator@7.7.4
├─ @babel/plugin-proposal-numeric-separator@7.7.4
├─ @babel/plugin-proposal-optional-chaining@7.7.4
├─ @babel/plugin-syntax-decorators@7.7.4
├─ @babel/plugin-syntax-flow@7.7.4
├─ @babel/plugin-syntax-nullish-coalescing-operator@7.7.4
├─ @babel/plugin-syntax-numeric-separator@7.7.4
├─ @babel/plugin-syntax-optional-chaining@7.7.4
├─ @babel/plugin-transform-flow-strip-types@7.7.4
├─ @babel/plugin-transform-runtime@7.7.4
├─ @babel/plugin-transform-typescript@7.7.4
├─ @babel/preset-typescript@7.7.4
├─ @types/parse-json@4.0.0
├─ babel-plugin-macros@2.7.1
├─ babel-plugin-named-asset-import@0.3.5
├─ babel-preset-react-app@9.1.0
├─ core-js@3.6.1
├─ cra-template@1.0.0
├─ eslint-config-react-app@5.1.0
├─ fork-ts-checker-webpack-plugin@3.1.0
├─ lines-and-columns@1.1.6
├─ open@7.0.0
├─ promise@8.0.3
├─ raf@3.4.1
├─ react-app-polyfill@1.0.5
├─ react-dev-utils@10.0.0
├─ react-dom@16.12.0
├─ react-error-overlay@6.0.4
├─ react-scripts@3.3.0
├─ react@16.12.0
├─ scheduler@0.18.0
├─ whatwg-fetch@3.0.0
└─ yaml@1.7.2
Done in 36.57s.

Installing template dependencies using yarnpkg...
yarn add v1.21.1
[1/4] Resolving packages...
[2/4] Fetching packages...
info fsevents@2.1.2: The platform "linux" is incompatible with this module.
info "fsevents@2.1.2" is an optional dependency and failed compatibility check. Excluding it from installation.
info fsevents@1.2.9: The platform "linux" is incompatible with this module.
info "fsevents@1.2.9" is an optional dependency and failed compatibility check. Excluding it from installation.
[3/4] Linking dependencies...
warning "react-scripts > @typescript-eslint/eslint-plugin > tsutils@3.17.1" has unmet peer dependency "typescript@>=2.8.0 || >= 3.2.0-dev || >= 3.3.0-dev || >= 3.4.0-dev || >= 3.5.0-dev || >= 3.6.0-dev || >= 3.6.0-beta || >= 3.7.0-dev || >= 3.7.0-beta".
warning " > @testing-library/user-event@7.2.1" has unmet peer dependency "@testing-library/dom@>=5".
[4/4] Building fresh packages...
success Saved lockfile.
success Saved 18 new dependencies.
info Direct dependencies
├─ @testing-library/jest-dom@4.2.4
├─ @testing-library/react@9.4.0
├─ @testing-library/user-event@7.2.1
├─ react-dom@16.12.0
└─ react@16.12.0
info All dependencies
├─ @sheerun/mutationobserver-shim@0.3.2
├─ @testing-library/dom@6.11.0
├─ @testing-library/jest-dom@4.2.4
├─ @testing-library/react@9.4.0
├─ @testing-library/user-event@7.2.1
├─ @types/prop-types@15.7.3
├─ @types/react-dom@16.9.4
├─ @types/react@16.9.17
├─ @types/testing-library__dom@6.11.0
├─ @types/testing-library__react@9.1.2
├─ css.escape@1.5.1
├─ csstype@2.6.8
├─ min-indent@1.0.0
├─ react-dom@16.12.0
├─ react@16.12.0
├─ redent@3.0.0
├─ strip-indent@3.0.0
└─ wait-for-expect@3.0.1
Done in 9.58s.
Removing template package using yarnpkg...

yarn remove v1.21.1
[1/2] Removing module cra-template...
[2/2] Regenerating lockfile and installing missing dependencies...
info fsevents@2.1.2: The platform "linux" is incompatible with this module.
info "fsevents@2.1.2" is an optional dependency and failed compatibility check. Excluding it from installation.
info fsevents@1.2.9: The platform "linux" is incompatible with this module.
info "fsevents@1.2.9" is an optional dependency and failed compatibility check. Excluding it from installation.
warning " > @testing-library/user-event@7.2.1" has unmet peer dependency "@testing-library/dom@>=5".
warning "react-scripts > @typescript-eslint/eslint-plugin > tsutils@3.17.1" has unmet peer dependency "typescript@>=2.8.0 || >= 3.2.0-dev || >= 3.3.0-dev || >= 3.4.0-dev || >= 3.5.0-dev || >= 3.6.0-dev || >= 3.6.0-beta || >= 3.7.0-dev || >= 3.7.0-beta".
success Uninstalled packages.
Done in 7.62s.

Success! Created react-tutorial at /home/react-tutorial
Inside that directory, you can run several commands:

  yarn start
    Starts the development server.

  yarn build
    Bundles the app into static files for production.

  yarn test
    Starts the test runner.

  yarn eject
    Removes this tool and copies build dependencies, configuration files
    and scripts into the app directory. If you do this, you can’t go back!

We suggest that you begin by typing:

  cd react-tutorial
  yarn start

Happy hacking!
5. Reactアプリケーションの起動
Reactアプリケーションが作成されたので、実際に起動します。
# ディレクトリ確認
root@03887209ce2d:/home# ls
node  react-tutorial
root@03887209ce2d:/home# cd react-tutorial/
# Reactアプリケーションの起動
root@03887209ce2d:/home/react-tutorial# yarn start
6. ブラウザで確認
yarn startを実行すると以下のように出力されます。Compiled successfully! You can now view react-tutorial in the browser. Local: http://localhost:3000/ On Your Network: http://172.17.0.3:3000/ Note that the development build is not optimized. To create a production build, use yarn build.あとは、ブラウザから
http://localhost:3000/にアクセスしてみましょう。
以下のような表示がされれば完了です。
7. まとめ
Dockerを使用してReactの環境をお手軽に作成できました。
ホストマシンの環境をいじらずにお試しで環境を構築できるのはめっちゃ便利ですよね!!
あとは、srcフォルダ配下のファイルを編集してアプリケーションを作成していくのみです!!
指摘や質問があれば大歓迎なので、是非よろしくお願いします。
以上です。ありがとうございました!
- 投稿日:2020-01-01T02:45:58+09:00
code-server オンライン環境篇 (6) 自動化してみよう
これは、2019年 code-server に Advent Calender の 第16日目の記事です。
目次
ローカル環境篇 1日目
オンライン環境篇 1日目 作業環境を整備するオンライン環境篇 3日目 Boto3 で EC2 インスタンスを立ち上げる
オンライン環境篇 4日目 Code-Serverをクラウドで動かしてみる
オンライン環境篇 5日目 Docker 上で、code-server を立ち上げる
オンライン篇 7日目 簡単な起動アプリを作成してみよう(オンライン上に)
...
オンライン篇 .. Coomposeファイルで構築オンライン篇 .. K8Sを試してみる
...
魔改造篇
はじめに
前回までで、Docker を利用して、EC Instance 上に Code-Serverを立ち上げてみました。
今回は、この作業を自動化してみます。EC2 Instance を作る
前回のつづきから
$ git clone https://github.com/kyorohiro/advent-2019-code-server.git
$ cd advent-2019-code-server/remote_cs04/
$ docker-compose build
$ docker-compose up -d
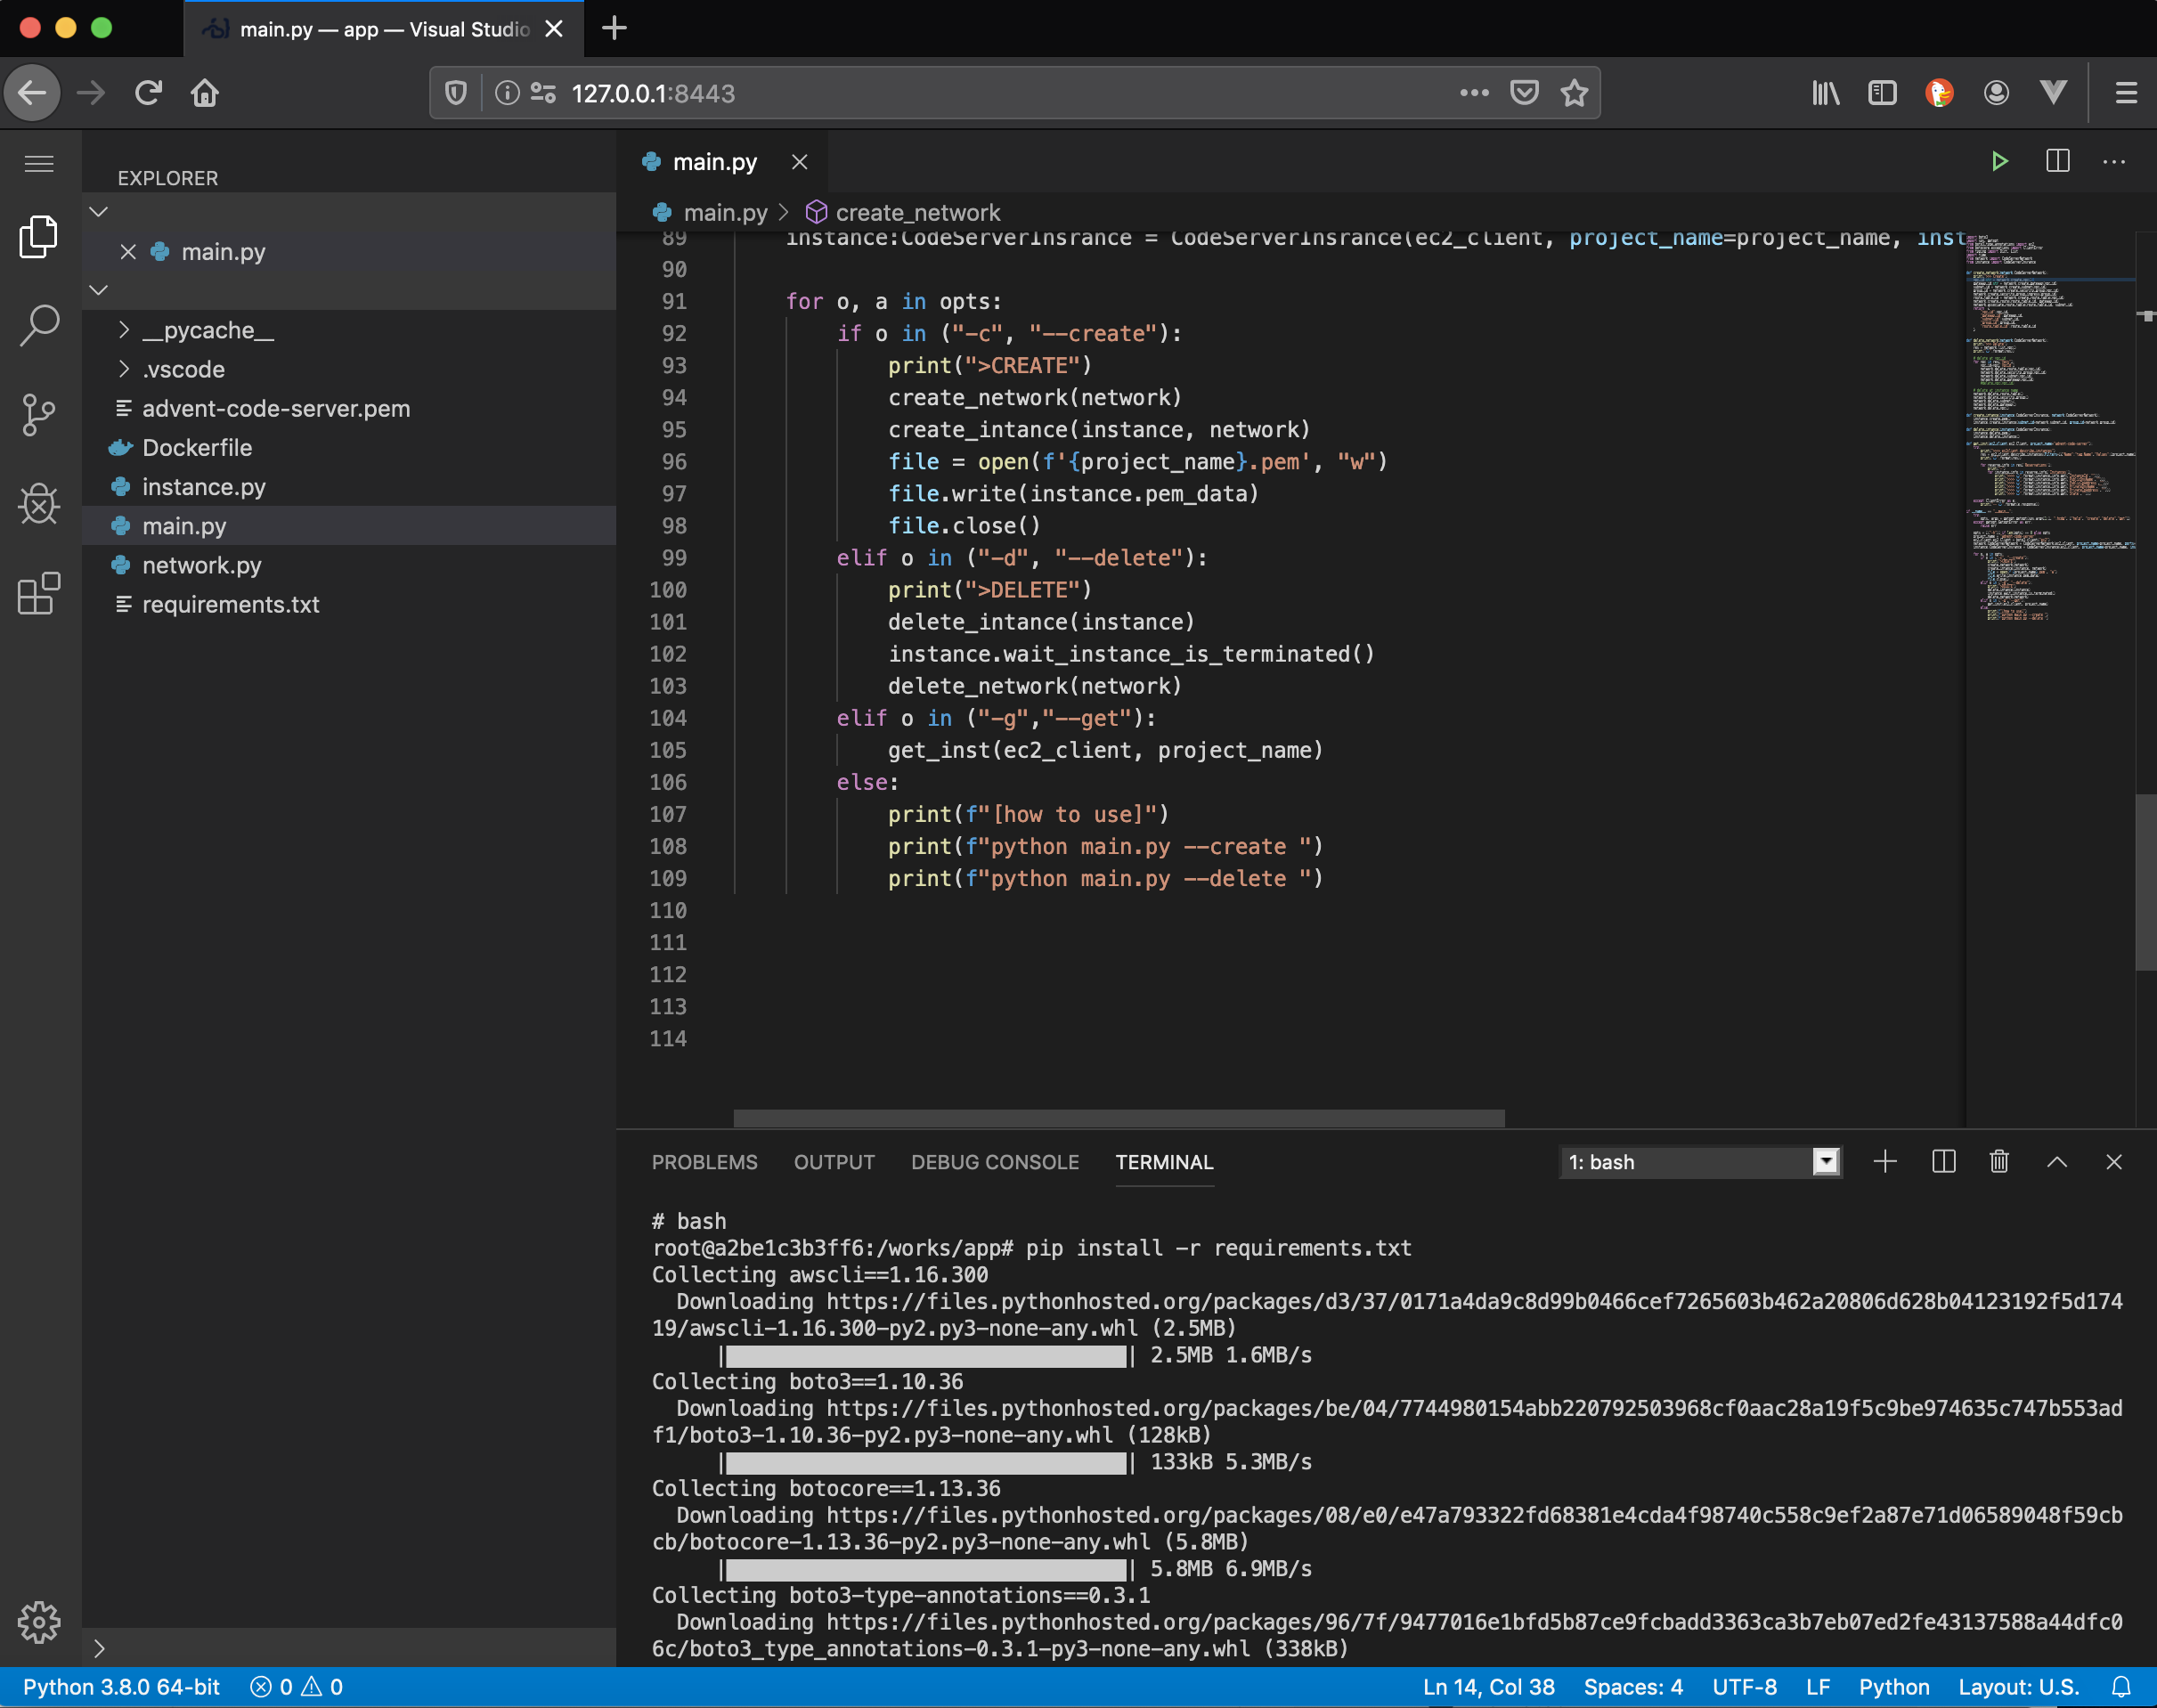
ブラウザで、
http://127.0.0.1:8443/を開く。Terminal 上で
Terminal$ pip install -r requirements.txt $ aws configure .. ..EC2Instance を 作成
$ python main.py --createEC2 情報を取得
$ python main.py --get
>>>> i-0d1e7775a07bbb326
>>>>
>>>> 3.112.18.33
>>>> ip-10-1-0-228.ap-northeast-1.compute.internal
>>>> 10.1.0.228
>>>> {'Code': 16, 'Name': 'running'}
SSHで中に入る
initialize.pyimport paramiko def run_script(ip:str, rsa_key_path:str): rsa_key: paramiko.rsakey.RSAKey = paramiko.rsakey.RSAKey.from_private_key_file(rsa_key_path) client: paramiko.SSHClient = paramiko.SSHClient() client.set_missing_host_key_policy(paramiko.AutoAddPolicy()) client.connect(ip, username="ubuntu", pkey=rsa_key) stdin, stdout, stderr = client.exec_command("ls /") d = stdout.read().decode('utf-8') print(f"{d}") client.close() run_script("18.177.154.240", "/works/app/advent-code-server.pem")Docker を install
Docker 環境を作成していきます
EC2上で
initialize.pyimport paramiko def run_command(client: paramiko.SSHClient, command: str): print(f"run>{command}\n") stdin, stdout, stderr = client.exec_command(command) d = stdout.read().decode('utf-8') print(f"stdout>\n{d}") d = stderr.read().decode('utf-8') print(f"stderr>\n{d}") return stdin def run_script(ip:str, rsa_key_path:str): rsa_key: paramiko.rsakey.RSAKey = paramiko.rsakey.RSAKey.from_private_key_file(rsa_key_path) client: paramiko.SSHClient = paramiko.SSHClient() client.set_missing_host_key_policy(paramiko.AutoAddPolicy()) client.connect(ip, username="ubuntu", pkey=rsa_key) run_command(client, "sudo apt-get update") run_command(client, "sudo apt-get install -y docker.io") client.close() run_script("18.177.154.240", "/works/app/advent-code-server.pem")Docker の Hello World
initialize.pyimport paramiko def run_command(client: paramiko.SSHClient, command: str): print(f"run>{command}\n") stdin, stdout, stderr = client.exec_command(command) d = stdout.read().decode('utf-8') print(f"stdout>\n{d}") d = stderr.read().decode('utf-8') print(f"stderr>\n{d}") return stdin def run_script(ip:str, rsa_key_path:str): rsa_key: paramiko.rsakey.RSAKey = paramiko.rsakey.RSAKey.from_private_key_file(rsa_key_path) client: paramiko.SSHClient = paramiko.SSHClient() client.set_missing_host_key_policy(paramiko.AutoAddPolicy()) client.connect(ip, username="ubuntu", pkey=rsa_key) run_command(client, "sudo apt-get update") run_command(client, "sudo apt-get install -y docker.io") run_command(client, "sudo docker run hello-world") client.close() run_script("18.177.154.240", "/works/app/advent-code-server.pem")atest: Pulling from library/hello-world 1b930d010525: Pull complete Digest: sha256:4fe721ccc2e8dc7362278a29dc660d833570ec2682f4e4194f4ee23e415e1064 Status: Downloaded newer image for hello-world:latest Hello from Docker! This message shows that your installation appears to be working correctly.Code-Server を 起動してみよう
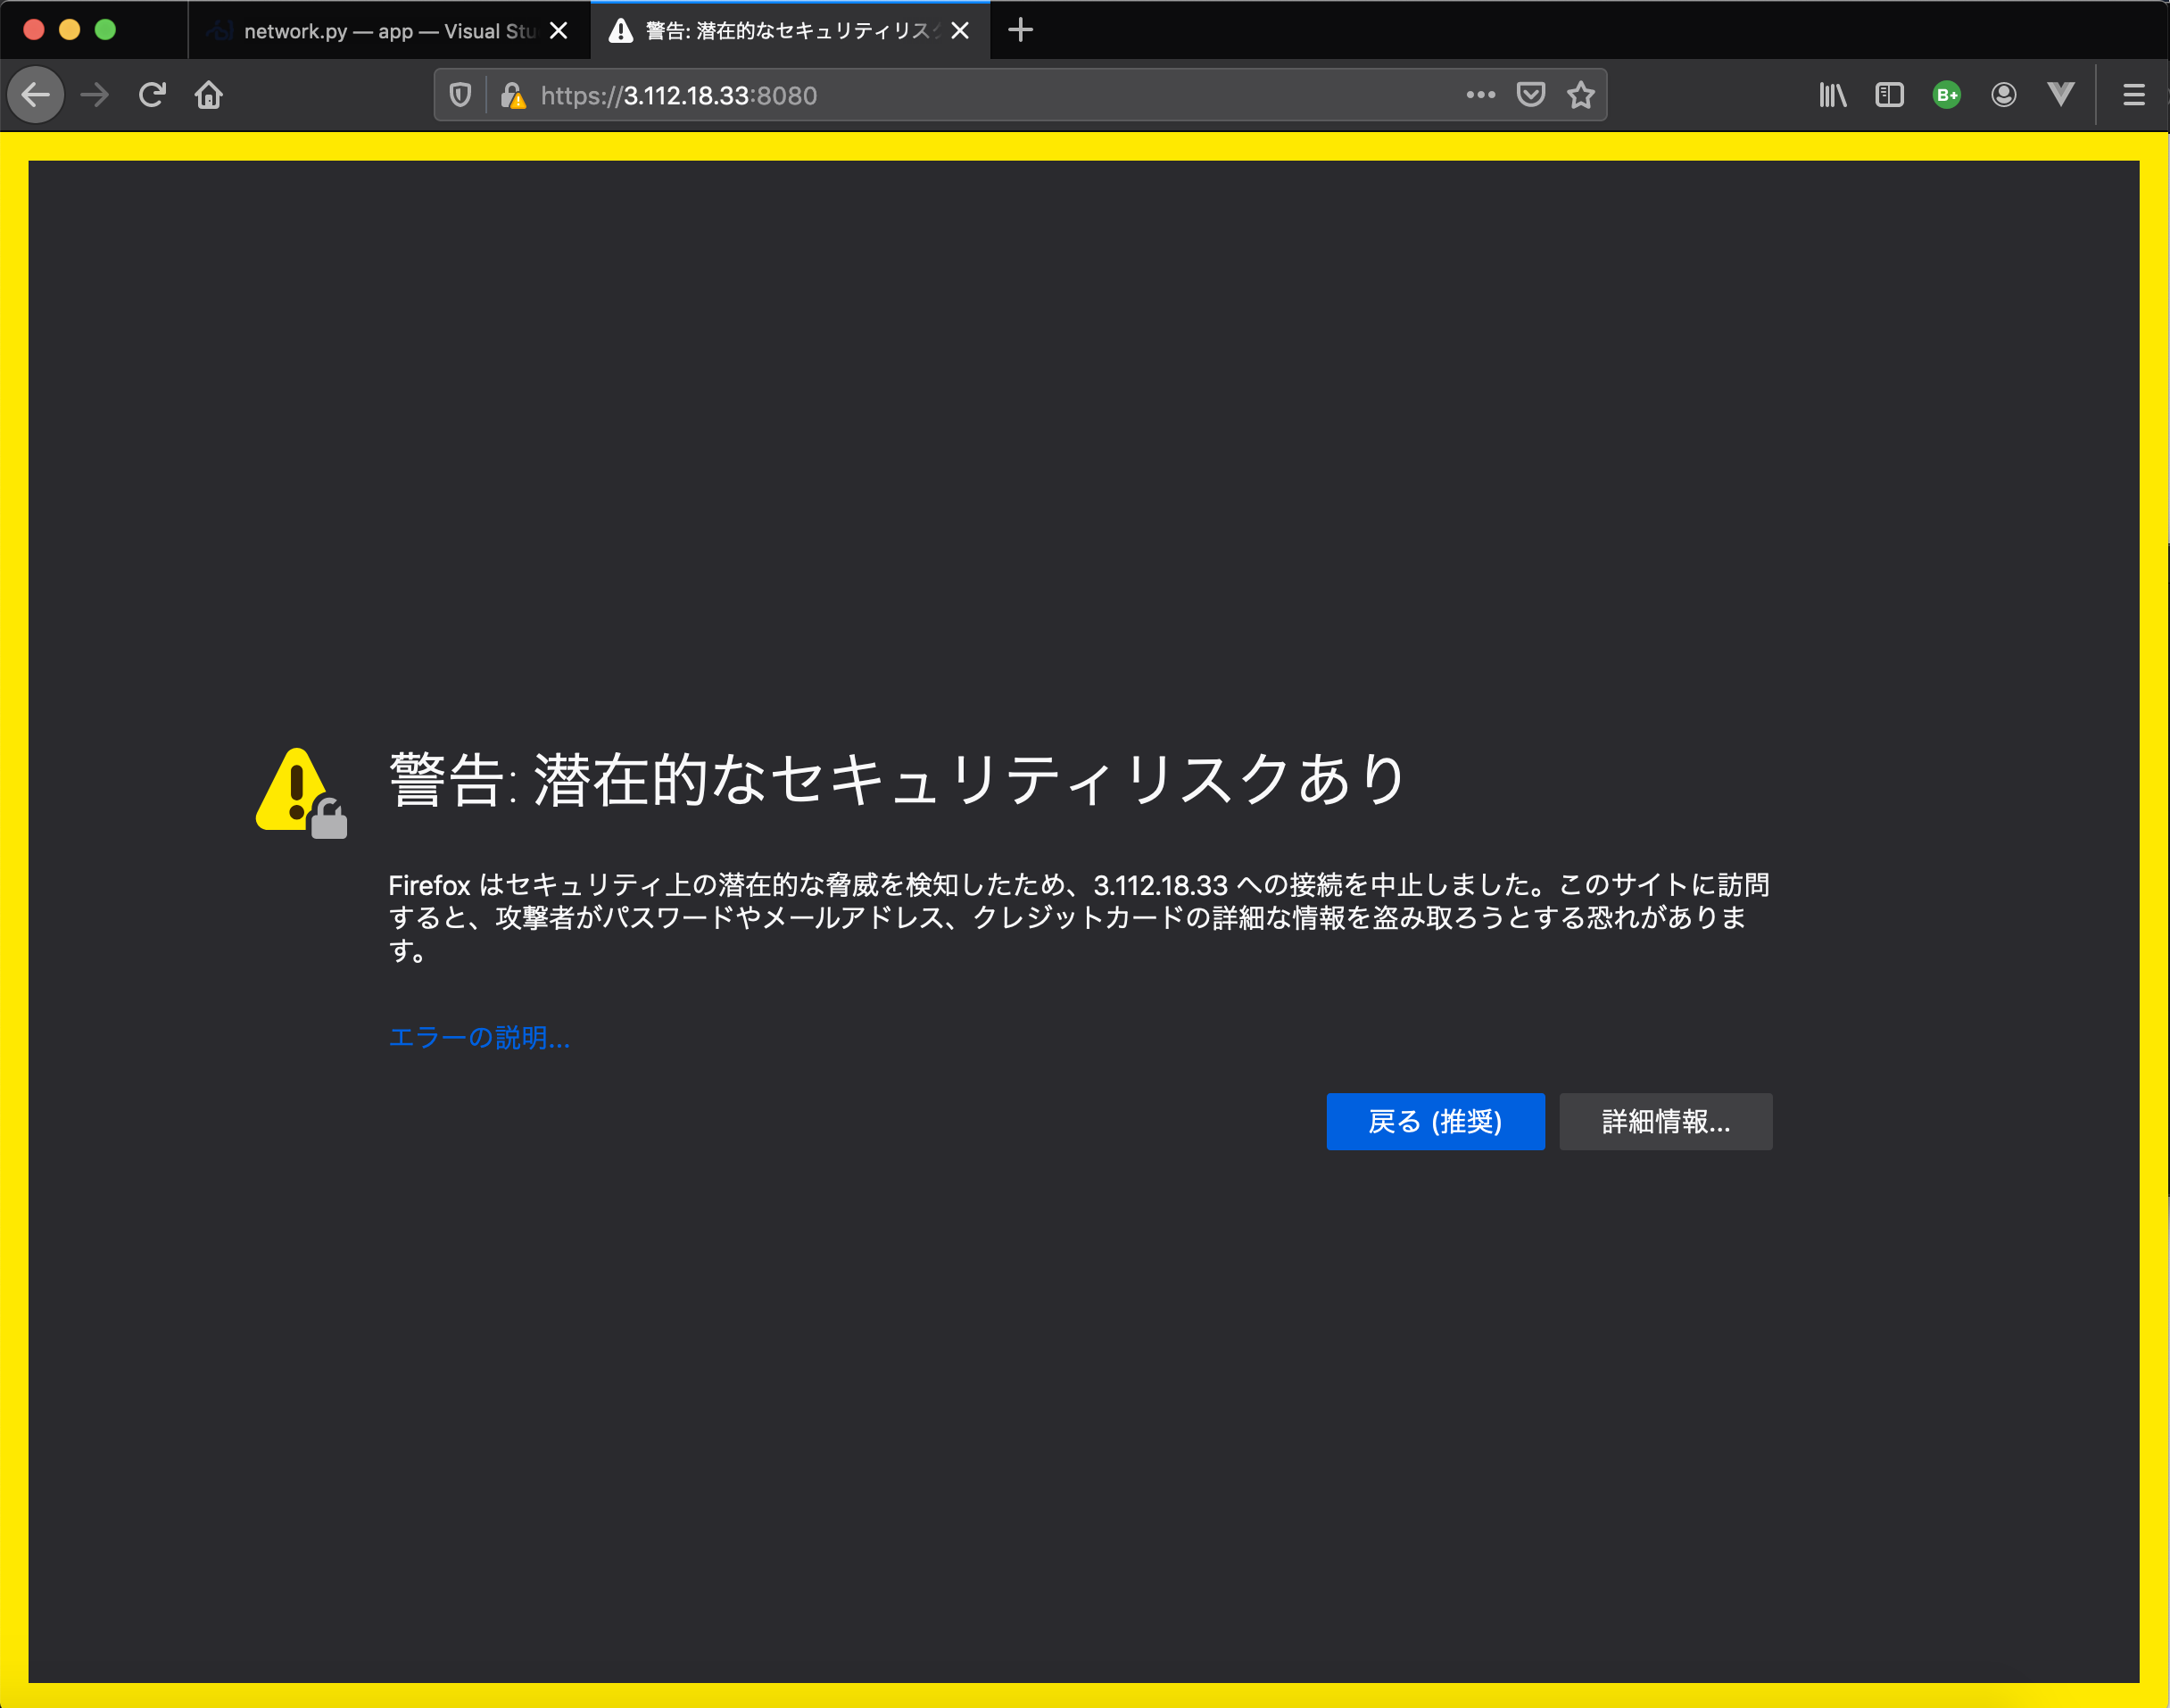
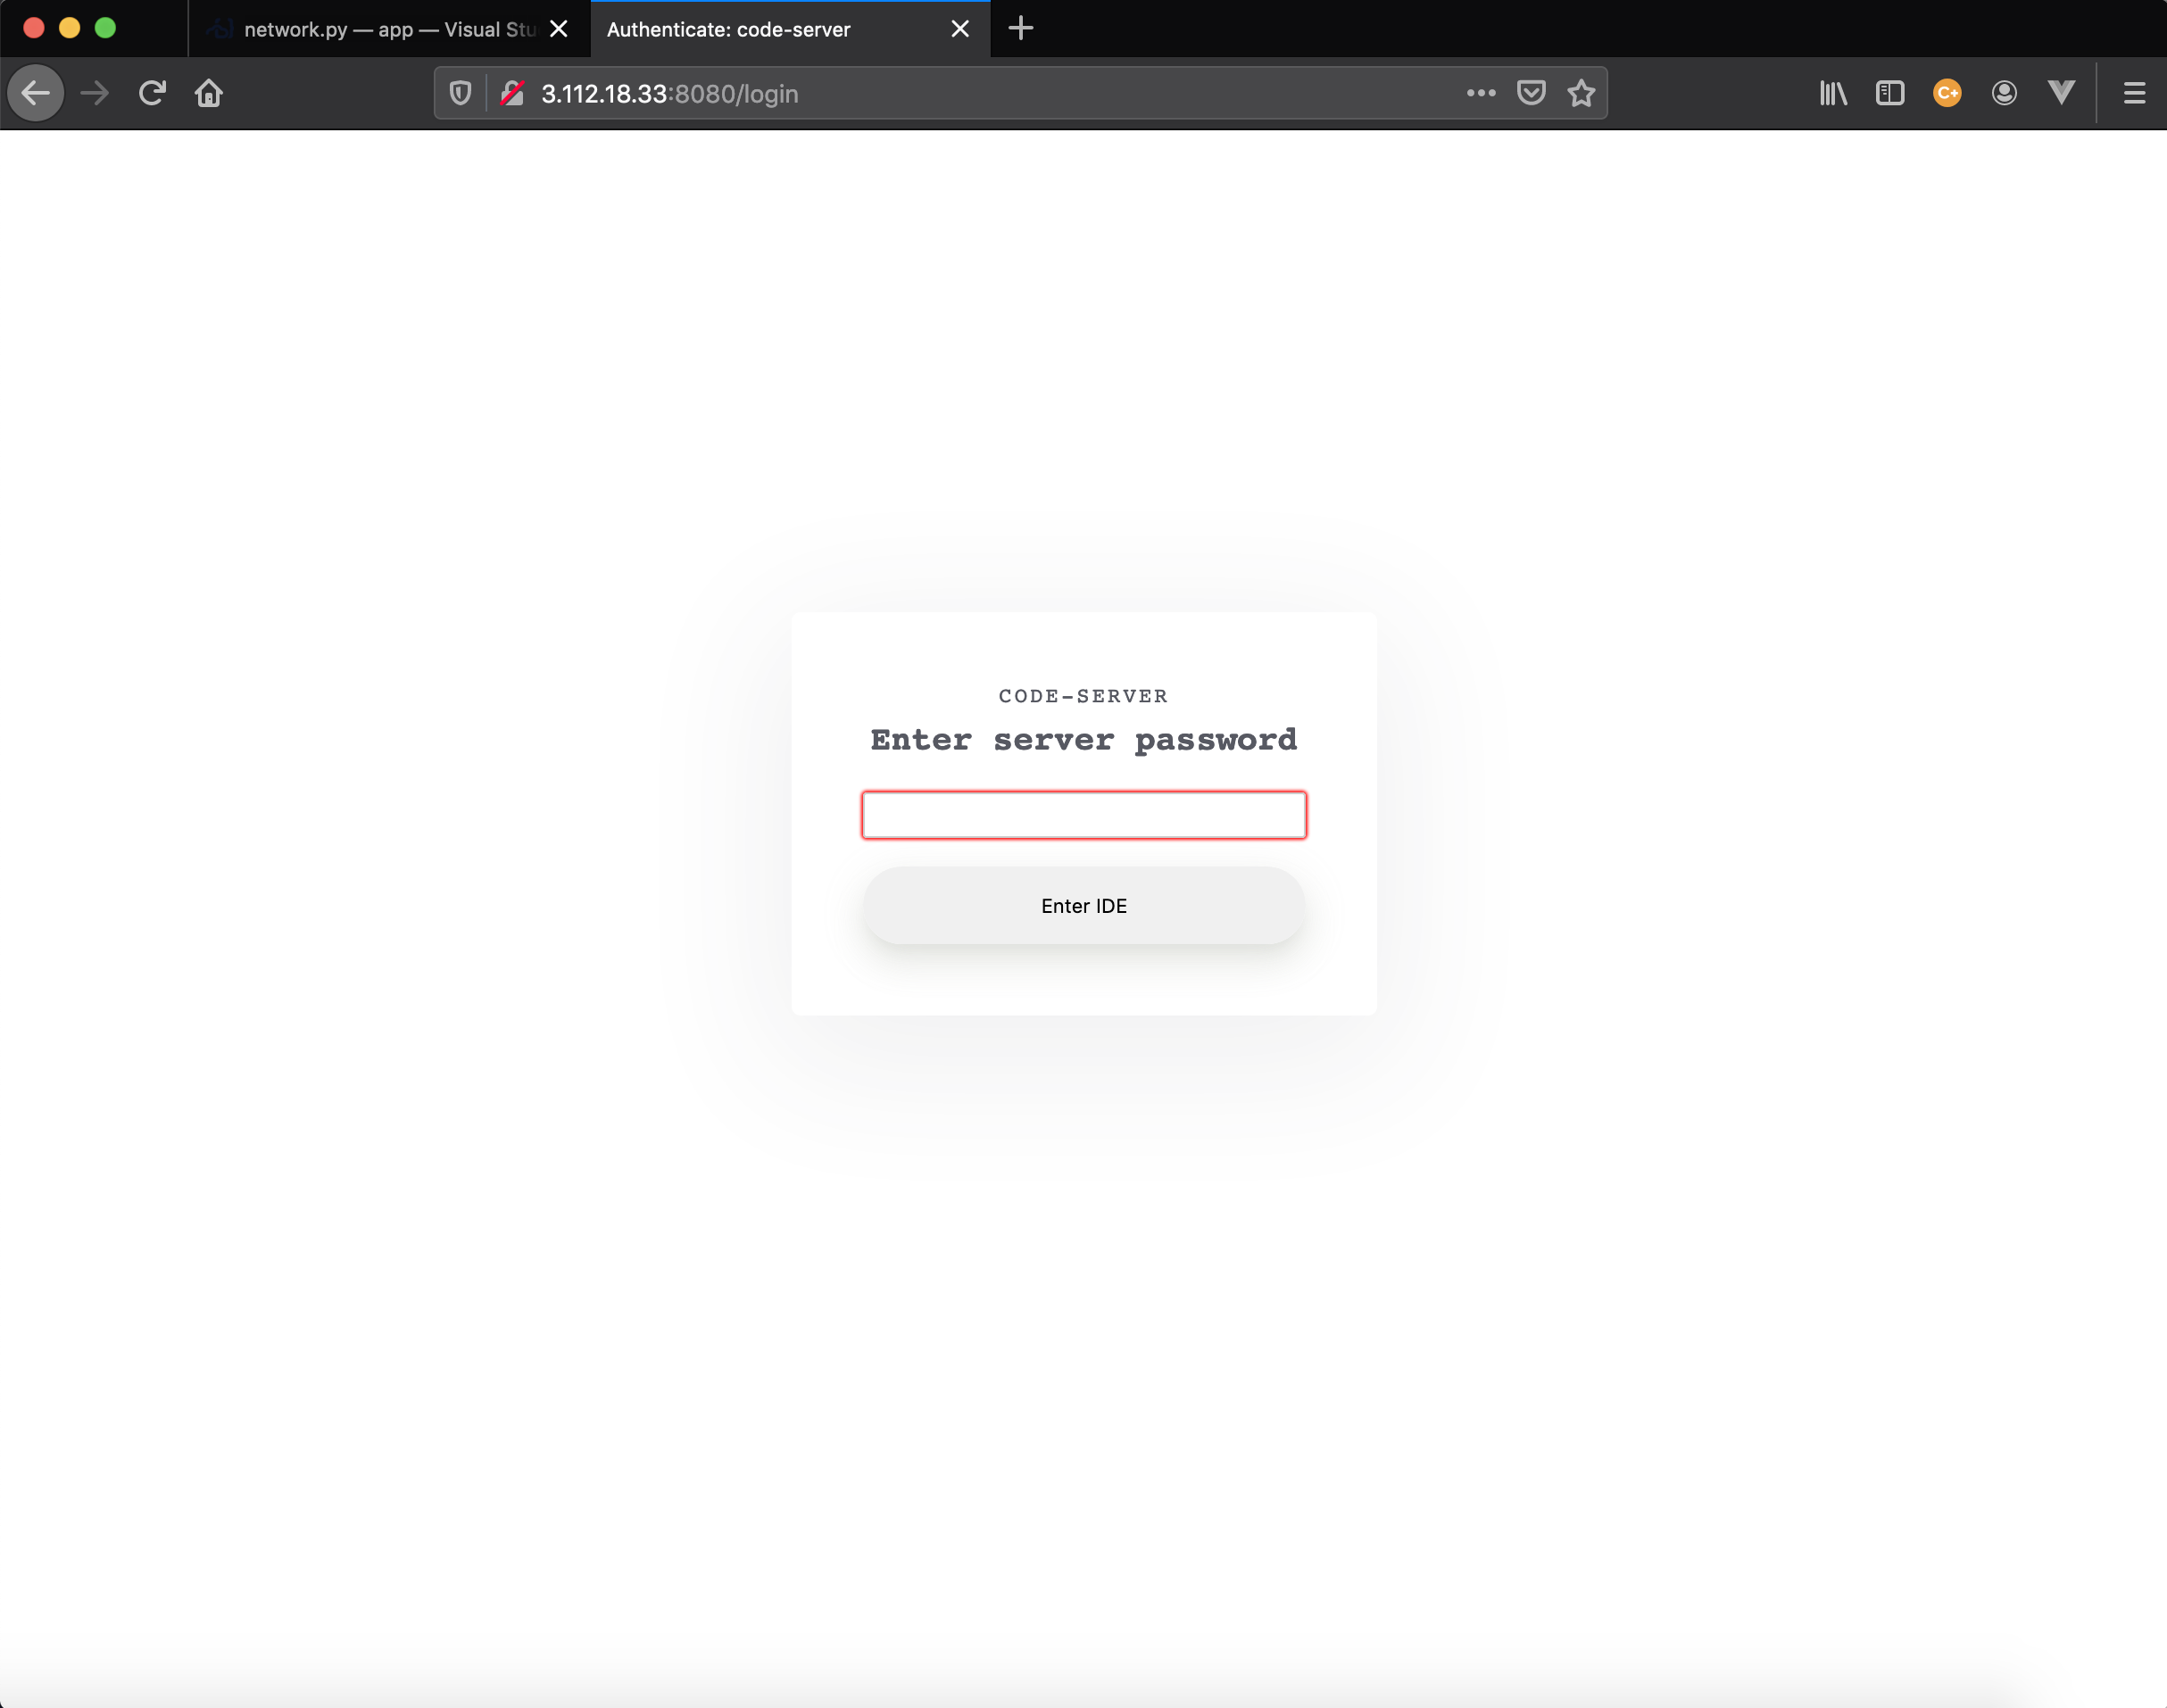
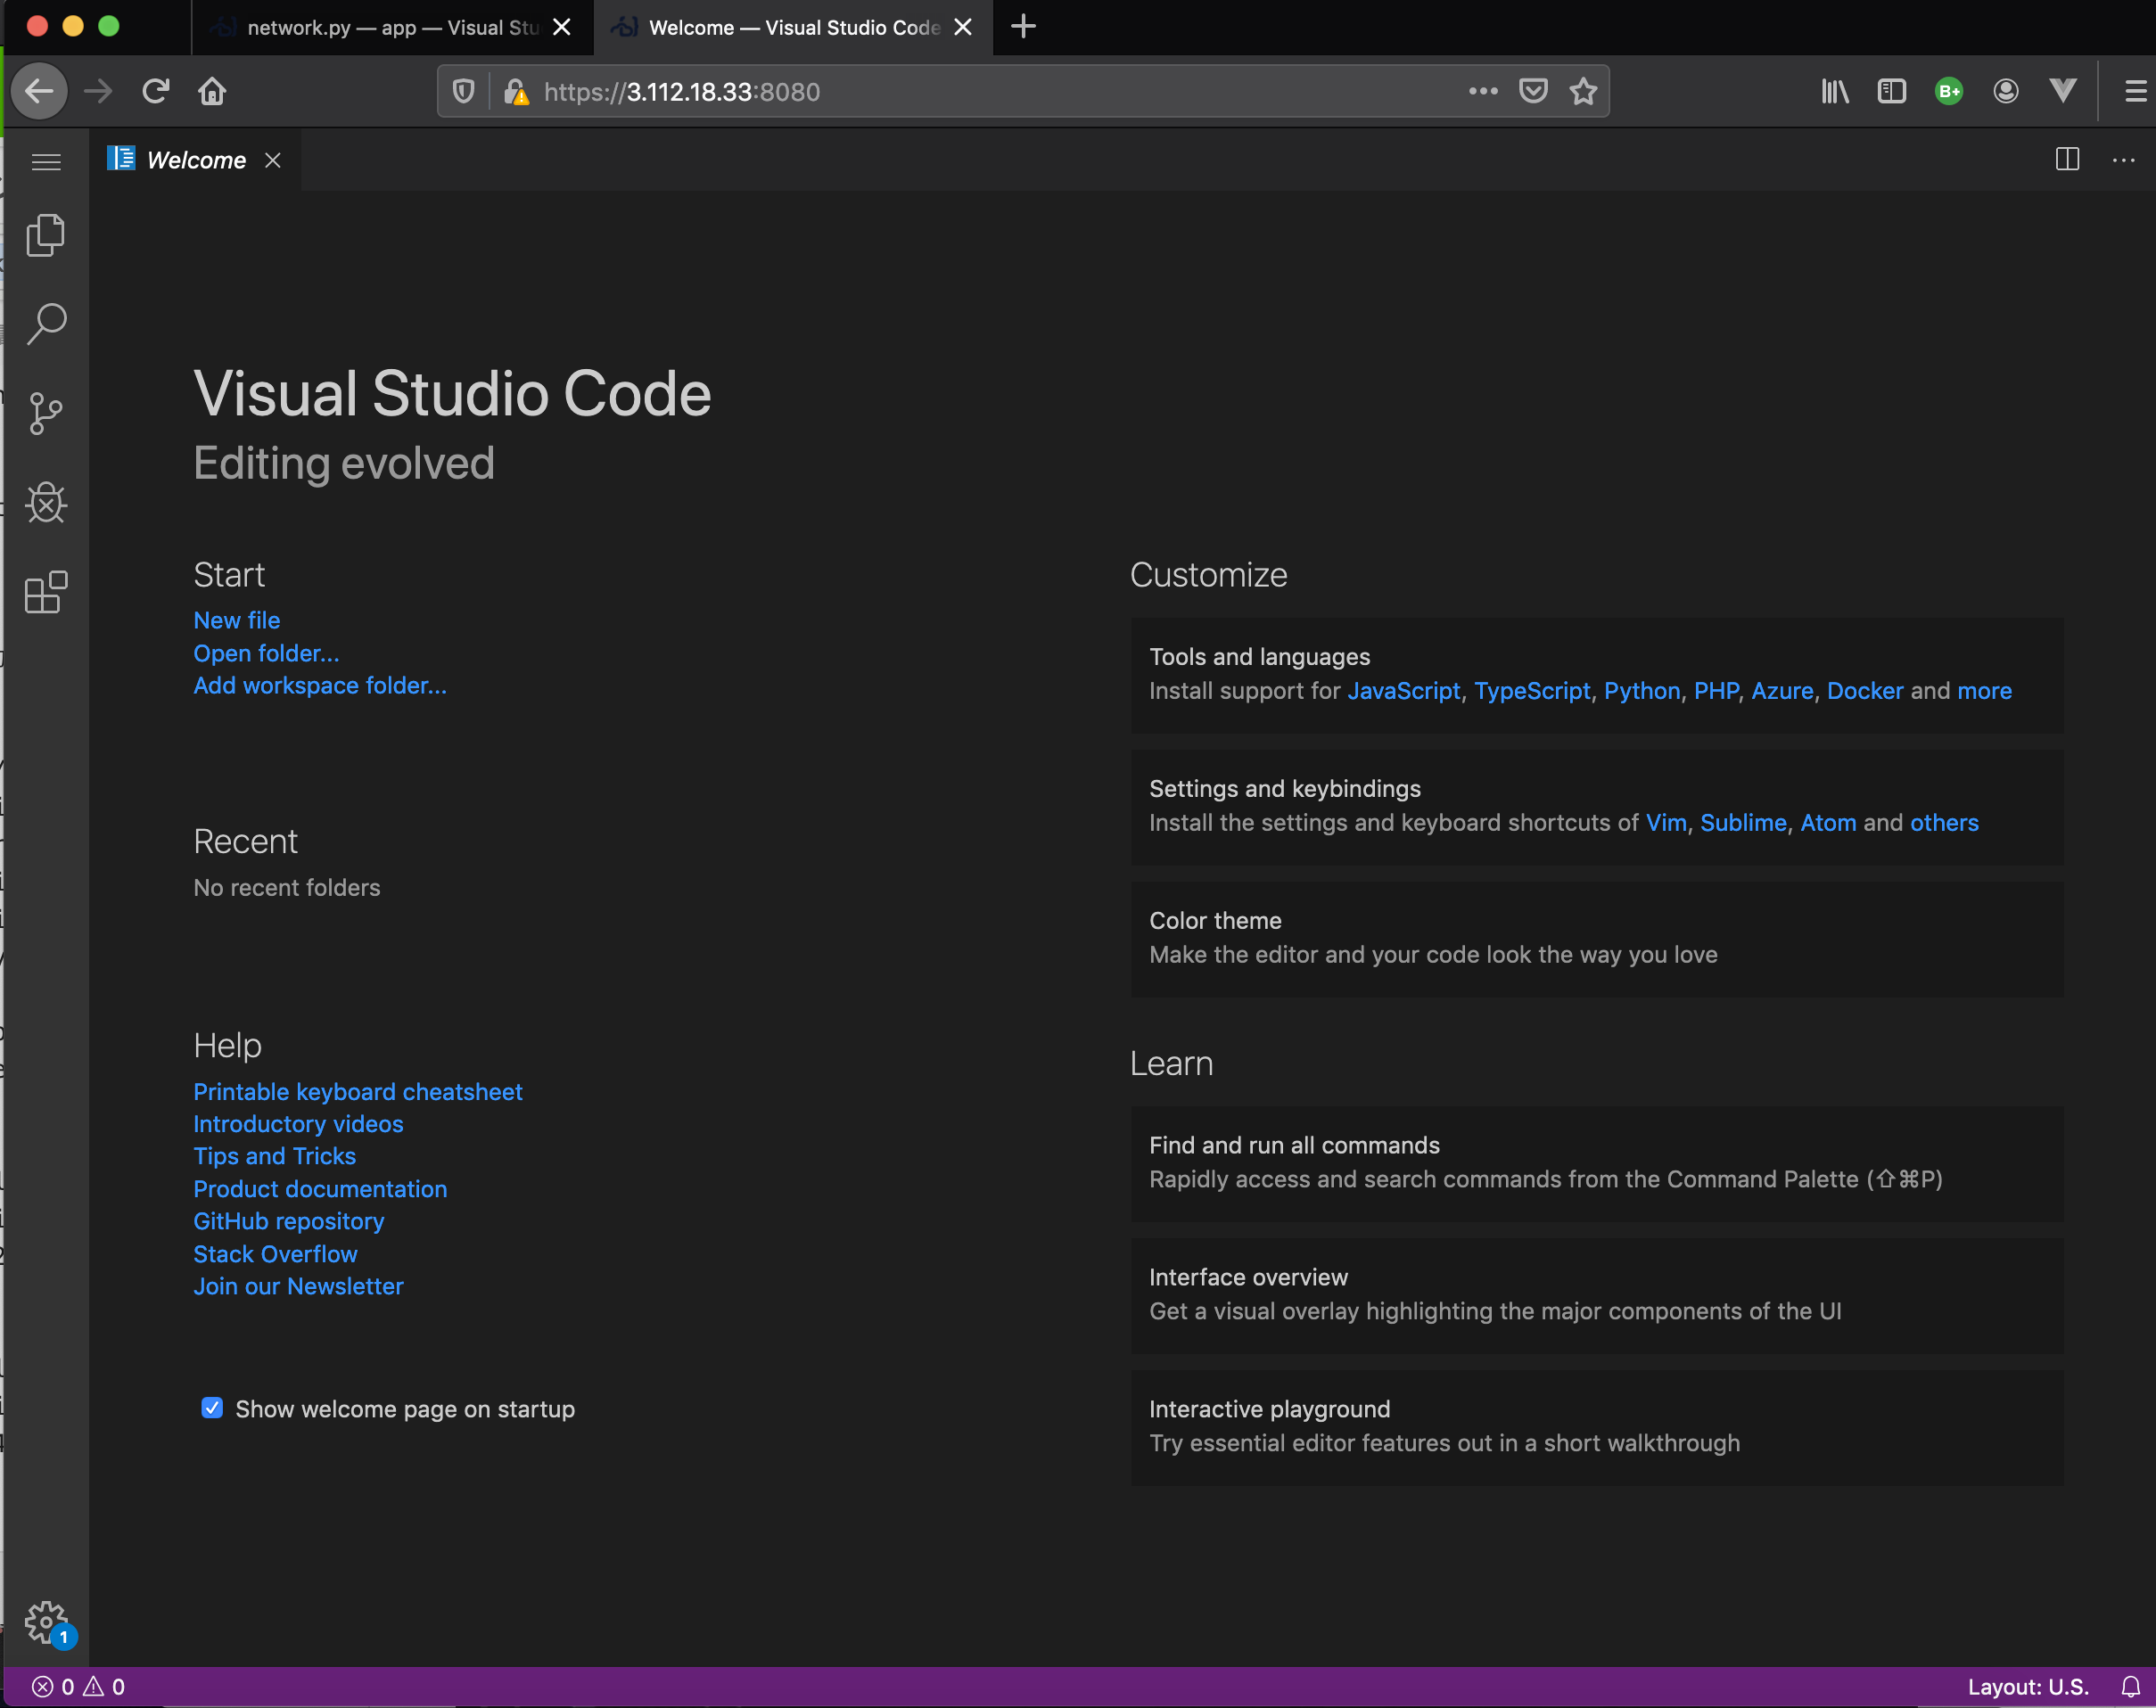
initialize.pyimport paramiko def run_command(client: paramiko.SSHClient, command: str): print(f"run>{command}\n") stdin, stdout, stderr = client.exec_command(command) d = stdout.read().decode('utf-8') print(f"stdout>\n{d}") d = stderr.read().decode('utf-8') print(f"stderr>\n{d}") return stdin def run_script(ip:str, rsa_key_path:str): rsa_key: paramiko.rsakey.RSAKey = paramiko.rsakey.RSAKey.from_private_key_file(rsa_key_path) client: paramiko.SSHClient = paramiko.SSHClient() client.set_missing_host_key_policy(paramiko.AutoAddPolicy()) client.connect(ip, username="ubuntu", pkey=rsa_key) run_command(client, "sudo apt-get update") run_command(client, "sudo apt-get install -y docker.io") # run_command(client, "mkdir -p ${HOME}/.local/share/code-server/extensions") run_command(client, "sudo docker run -p 0.0.0.0:8080:8080 -p0.0.0.0:8443:8443 codercom/code-server:v2 --cert") client.close() run_script("18.177.154.240", "/works/app/advent-code-server.pem").. .. info Server listening on https://0.0.0.0:8080 info - Password is 86821ed9f02ef11d83e980da info - To use your own password, set the PASSWORD environment variable info - To disable use `--auth none` info - Using generated certificate and key for HTTPSできました!!
削除しよう
# ec2 instance から logout
$ exit

# local の code-server 上で
$ python main.py --delete
なんども使い回したいならば、 ec2 instance を停止するようにしてください
※ 次回か次次回
次回
Webアプリ化して、指定した Docker Image を、立ち上げる機能を作成してみましょう!!
そろそろ、EC2 Instance 編、これで、終わりです。自作してみましたが、AWS や GCP では、ありものが使えますので、
それを利用して行きます。コード
https://github.com/kyorohiro/advent-2019-code-server/tree/master/remote_cs06
- 投稿日:2020-01-01T01:34:32+09:00
Windows10のDockerToolBoxをアップデートする
WindowsでDockerを利用するには Docker For Windows がありますが、Windows10 Pro ではなかったり、既存のプロジェクトが Vagrantを利用している等で Docker For Windows を利用できないため DockerToolBox を利用している方もいると思います。
これを利用している時に、Dockerのバージョンを上げようと思いアップデートしようと思いましたがアップデートするための方法が見つからなかったため方法をメモします。
結論だけ書くと検索しても方法がなかなかでてきませんが、再インストールするだけで可能なようです。
既存のDockerをアンインストールする
既存の登録されているイメージ等は全て削除されますので必要に応じて、docker save 等のコマンドでバックアップを取っておきます。
(※ 怖い場合は復元ポイントとか用意しておくとよいかも)Windowsの場合は コントロールパネル → プログラム → プログラムのアンインストール から Docker をアンインストールします。
念のため再起動します。
Dockerをインストールする
Install Docker Toolbox on Windows を参考に 公式の Github から最新の .exe をダウンロードしてインストールします。
結果
コマンドでDockerのバージョンを確認します。
$ docker version                                                                                                        Client:
 Version:           19.03.1
 API version:       1.40
 Go version:        go1.12.7
 Git commit:        74b1e89e8a
 Built:             Wed Jul 31 15:18:18 2019
 OS/Arch:           windows/amd64
 Experimental:      false

Server: Docker Engine - Community
 Engine:
  Version:          19.03.5
  API version:      1.40 (minimum version 1.12)
  Go version:       go1.12.12
  Git commit:       633a0ea838
  Built:            Wed Nov 13 07:28:45 2019
  OS/Arch:          linux/amd64
  Experimental:     false
 containerd:
  Version:          v1.2.10
  GitCommit:        b34a5c8af56e510852c35414db4c1f4fa6172339
 runc:
  Version:          1.0.0-rc8+dev
  GitCommit:        3e425f80a8c931f88e6d94a8c831b9d5aa481657
 docker-init:
  Version:          0.18.0
  GitCommit:        fec3683
バージョンが 2019-12-31 時点での最新になっていますのでこれで完了です。
- 投稿日:2020-01-01T00:55:12+09:00
【小ネタ】Windows10HomeでDocker環境を作ろうとしたら少しハマった話
はじめに
Windows10HomeでもDocker環境を作ることができるらしいので試してみたらほんの少しハマったので備忘録として記事を残そうと思った次第です。
環境
- OS:Windows10Home
- ノートPC:HP Envy x360
- CPU:Ryzen7
環境を作る手順
参考記事
基本的に以下の記事にインストールにおける全てが記載されています。
- https://qiita.com/idani/items/fb7681d79eeb48c05144
- https://docs.docker.com/toolbox/toolbox_install_windows/
Docker-ToolBoxのインストール基本的にwindows10Proの場合は
Docker Desktop for Windowsで環境を立てれるのですが、Homeの場合はProに搭載されているHyper-Vが無いため単体でDockerを動かすことができないようです。
そのため、Oracle Virtual Boxを使ってDockerを扱えるようにします。
そこで、Docker-ToolBoxで必要なものをインストールしますインストールページ:https://github.com/docker/toolbox/releases
バージョンが色々ありますが、自分は最新版をインストールしました
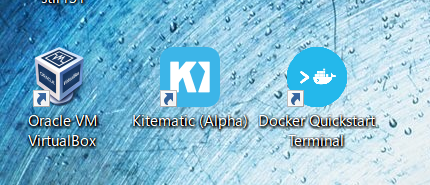
これが過ちになるとも知らずに…インストールするとデスクトップにアイコンが3つ追加されます
上の画像の一番右のアイコンのDocker Quickstart Terminalを起動してdockerコマンドが使えるかを確認します問題発生
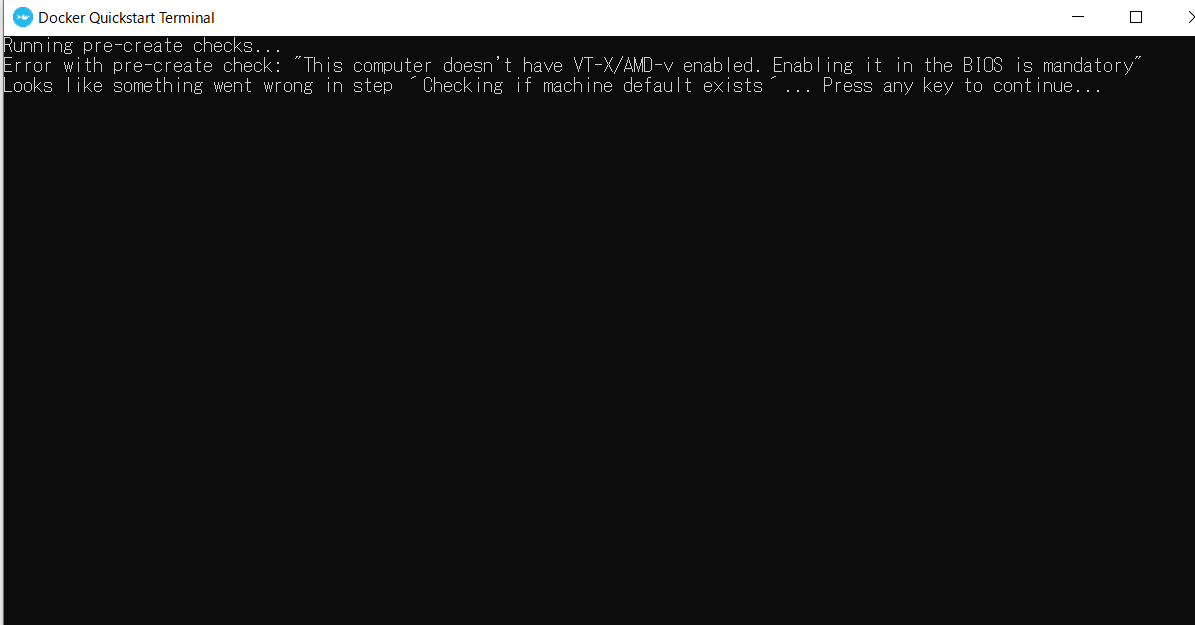
Docker Terminal上でエラーを吐かれました
エラーの内容を調べてみると、VT-X/AMD-vが有効化されていないけど?らしい。
そこでタスクマネージャーを確認してみると…
仮想化が有効化になっている…!問題解決
もう少しGoogle先生で知らべてみると、以下の記事がすべてを解決してくれました。
https://hepokon365.hatenablog.com/entry/2019/07/28/012617
端的に言えばバージョンを下げれば動くらしい...
そこでバージョンをv18.03.0-ceに変更し、先ほどと同様に作業を進めていきます。
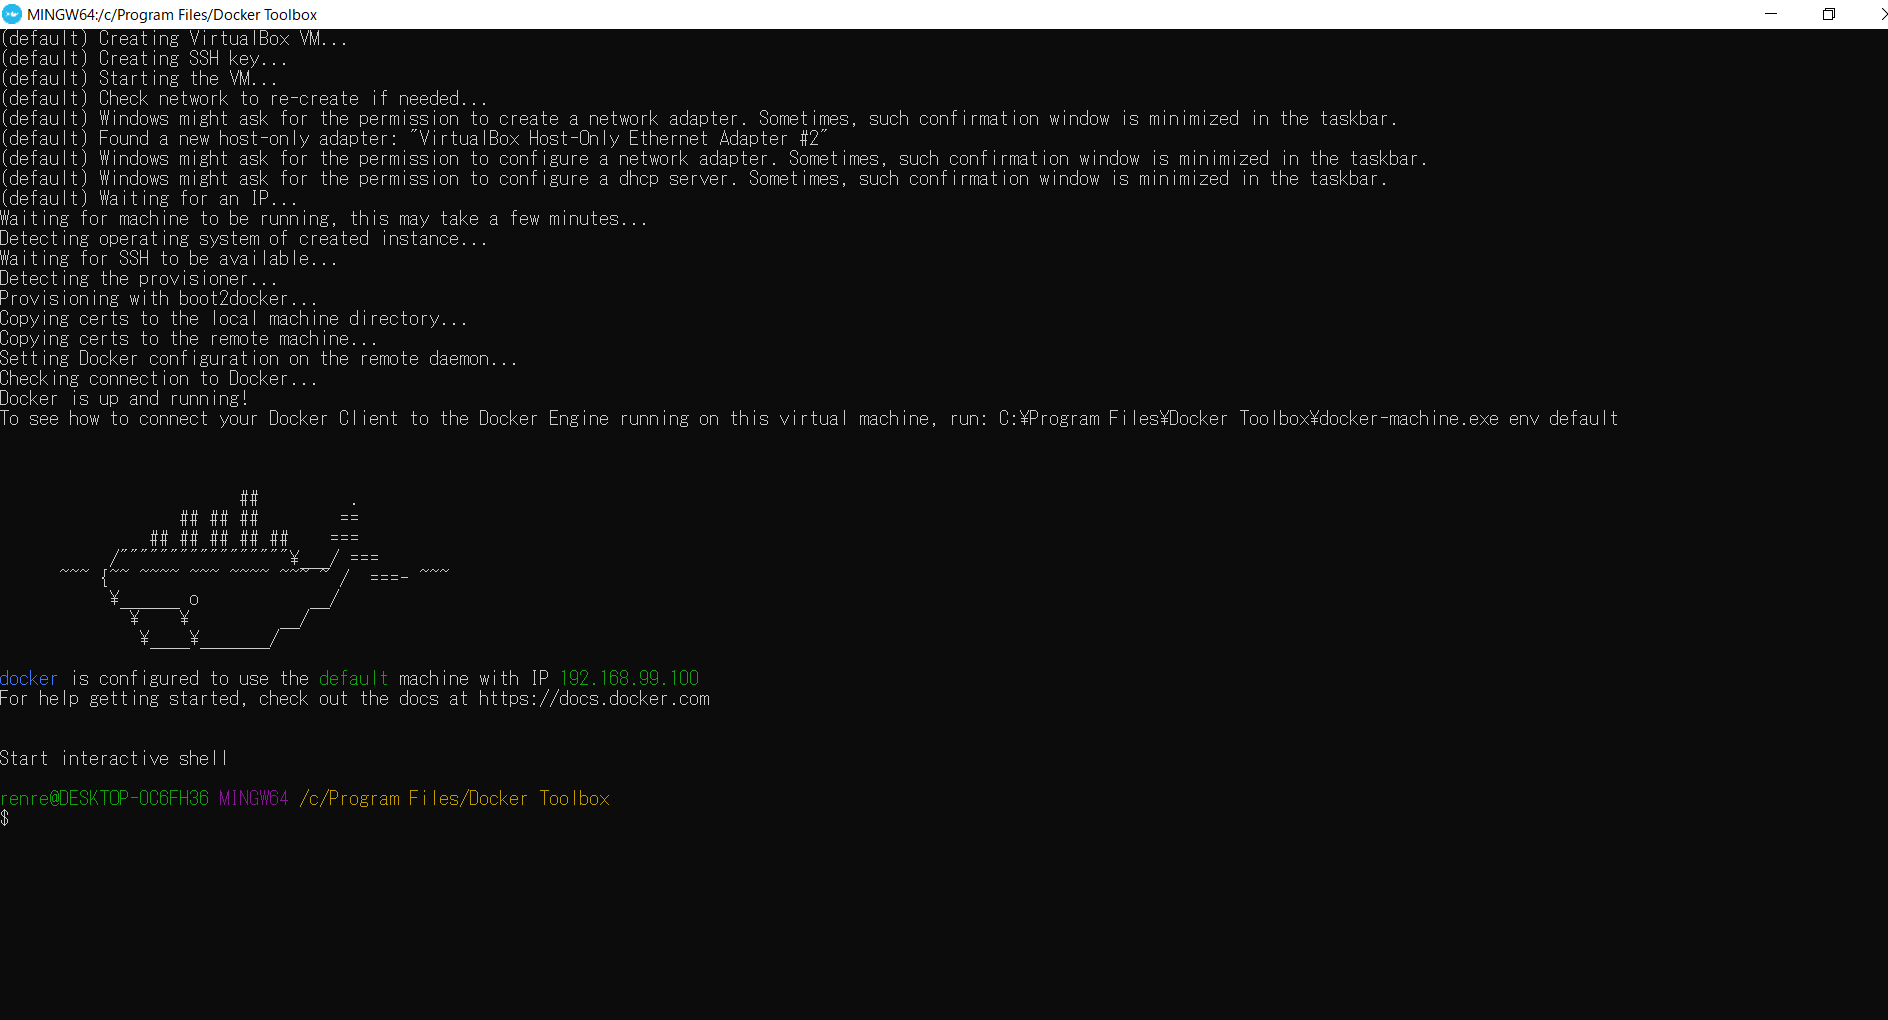
改めてDocker Terminalを起動してみると...
クジラ出たー‼‼
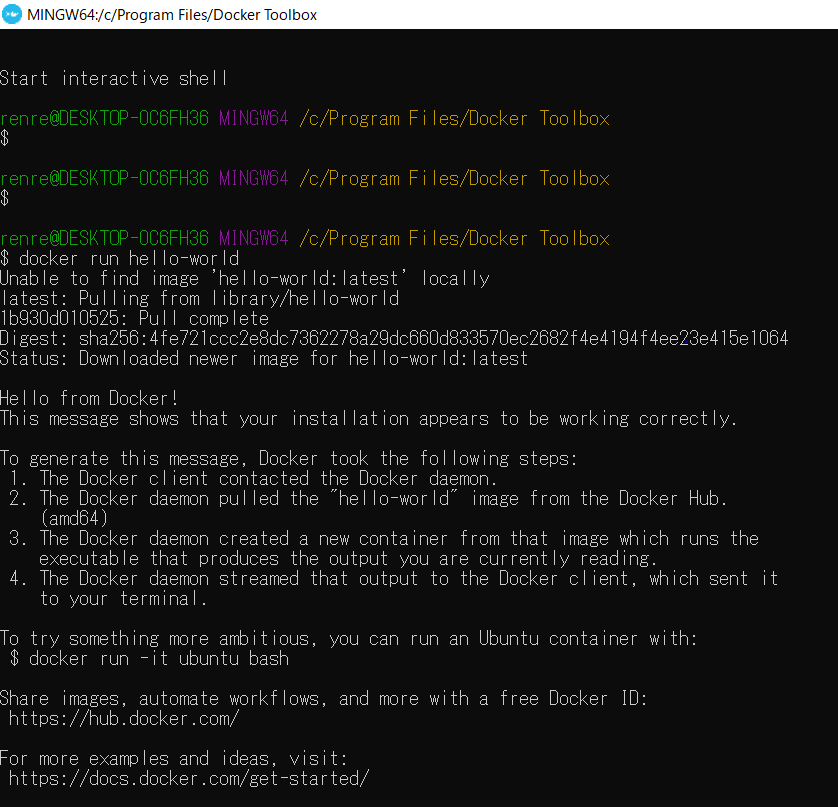
一応dockerコマンドが動くかどうかを確認します
docker run hello-worldを実行
動いてる‼まとめ
以上、windows10homeでdocker環境を作ろうとしてハマった話でした

