- 投稿日:2019-12-18T23:25:33+09:00
ラズベリーパイでのVPNサーバー構築
こんにちは。Ryoです。
今回はRaspberry Pi 3を使用してVPNサーバーを構築します。なぜやるのか
先日、上海に行きました。その際に香港SIMを使用してネットサーフィンをしていたのですが、一部の国内サイトよりアクセスを弾かれてしまいました。(*ローソンIDのログインページにアクセスできませんでした。)
次回渡航時にアクセスできるように、自宅にVPNサーバーを構築します。環境
Raspberry Pi 3
Raspbian GNU/Linux 9.6 (stretch)
MacBook Pro 13インチ 2015
ソフトバンク光 BBユニット
Buffalo WCR-1166DS ルーター
Pixel 3a via ソフトバンク4G補足
RasbianとSSHの導入は割愛します。
1.SoftEtherの導入
SoftEtherのファイルをダウンロードします。
Raspberry PiのIPアドレスをルーターで確認し、SCPコマンドでDLしたファイルを転送します
terminalscp softether-vpnserver-v4.31-9727-beta-2019.11.18-linux-arm_eabi-32bit.tar.gz pi@"ラズパイのIPアドレス":~転送したファイルをRaspberry Pi上で解凍します。
Rasbianpi@raspberrypi:~ $ tar xf softether-vpnserver-v4.31-9727-beta-2019.11.18-linux-arm_eabi-32bit.tar.gz解凍したディレクトリに入り、更に展開します。
Rasbianpi@raspberrypi:~ $ cd vpnserver pi@raspberrypi:~/vpnserver $ makemakeコマンドを打つといくつか質問を受けるので全て1を選択します。
展開が終わったらvpnserverディレクトリをusr/localに移動します。
rootユーザーでログインしていないため、sudoコマンドを使用します。Rasbianpi@raspberrypi:~ $ sudo mv vpnserver /usr/local移動先に行き、パーミッションを設定します。
Rasbianpi@raspberrypi:/usr/local/vpnserver $ chmod 600 * pi@raspberrypi:/usr/local/vpnserver $ chmod 700 vpncmd vpnserver権限設定ができたかどうかチェックします。
Rasbianpi@raspberrypi:/usr/local/vpnserver $ ls -laまた、vpnserverがインストールできたか動作確認します。
Rasbianpi@raspberrypi:/usr/local/vpnserver $ /usr/local/vpnserver/vpncmd以下の3択を迫られるので3を選びます。
RasbianBy using vpncmd program, the following can be achieved. 1. Management of VPN Server or VPN Bridge 2. Management of VPN Client 3. Use of VPN Tools (certificate creation and Network Traffic Speed Test Tool) Select 1, 2 or 3: 3checkコマンドを打ちます。
VPN Tools>check以下のように、全てPassしていればインストールは上手くいっています。
If this operation environment check tool is run on a system and that system passes, it is most likely that SoftEther VPN software can operate on that system. This check may take a while. Please wait...

Checking 'Kernel System'...
              Pass
Checking 'Memory Operation System'...
              Pass
Checking 'ANSI / Unicode string processing system'...
              Pass
Checking 'File system'...
              Pass
Checking 'Thread processing system'...
              Pass
Checking 'Network system'...
              Pass

All checks passed. It is most likely that SoftEther VPN Server / Bridge can operate normally on this system.

The command completed successfully.
ctrl + cでVPN Toolsを終了します。
vpnserverの自動起動設定をします。
作成ディレクトリ
/etc/systemd/system/
ファイル名
vpnserver.serviceスクリプトを作成します。
Rasbianpi@raspberrypi:/usr/local/vpnserver $ sudo nano /etc/systemd/system/vpnserver.servicevpnserver.service[Unit] Description=SoftEther VPN Server After=network.target network-online.target [Service] User=root ExecStart=/usr/local/vpnserver/vpnserver start ExecStop=/usr/local/vpnserver/vpnserver stop Type=forking RestartSec=3s WorkingDirectory=/usr/local/vpnserver/ ExecStartPre=/sbin/ip link set dev eth0 promisc on [Install] WantedBy=multi-user.targetサービスを起動し、動作確認します。
Rasbianpi@raspberrypi:/usr/local/vpnserver $ sudo systemctl start vpnserver pi@raspberrypi:/usr/local/vpnserver $ systemctl status vpnserver.serviceactiveと表示されれば、動作しています。
RasbianActive: active (running) since Wed 2019-12-18 03:13:34 JST; 19s agoサービスを自動起動します。
Rasbianpi@raspberrypi:/usr/local/vpnserver $ sudo systemctl enable vpnserver.serviceサービスが起動しているか確認。
Rasbianpi@raspberrypi:~ $ systemctl status vpnserver.service Active: active (running)2.VPN Server Managerの設定
VPN Server ManagerをMacに導入し、VPN Serverの設定をします。
SoftEther VPN Server Managerを起動します。
New Settingをクリック。
administratorのパスワードを作成します。
Bridge Easy Setupで
Remote Access VPN Serverにチェックを入れNextをクリック。
VPN Server、VPN Bridgeの設定を初期化していいか聞かれるが、はいをクリック。
Virtual Hub Nameに任意の名前を入れ、OKをクリック。
IPsec L2TPサーバーセッティングで、Enable L2TP Server Function(L2TP over IPsec)にチェック。
IPsec Common SettingsのIPsec Pre-Shared Keyに任意のパスワードを入れる。
この時に、10文字以上のパスワードを設定するとAndroid端末でエラーの発生ありと警告を受けるので、9文字以下のパスワードを設定する。
Azureの設定はDisable。
Userを作成する。
User Name、Password、Confirm Passwordに任意のものを設定する。
Local Bridge Settingをします。
Vitual Hubに仮想HUB名に任意の名前を記入します。
Bridge with New Tap Deviceにチェックを入れます。
LANアダプターはeth0を選択します。
New Tap Device Nameは任意の名前を記入します。
以上でVPN Server Managerの設定は終了。
ターミナルでraspberry piにSSHで接続し、ifconfigを叩く。
tap_ + New Tap Device Nameで設定した名前があればOK。Rasbiantap_softether: flags=4163<UP,BROADCAST,RUNNING,MULTICAST> mtu 15003.ローカルブリッジの設定
Raspberry Piでローカルブリッジの設定をする。
Rasbianpi@raspberrypi:~ $ sudo apt install -y bridge-utilsRaspberry Piのネットワーク構成を編集します。
Rasbianpi@raspberrypi:~ $ sudo nano /etc/network/interfacesinterfacesauto eth0 iface eth0 inet manual # SoftEther VPN auto br0 iface br0 inet static address 192.168.11.64 netmask 255.255.255.0 gateway 192.168.11.1 bridge_ports eth0 tap_softether bridge_maxwait 10Rasbpberry Piを再起動します。
以上で、ローカルブリッジの設定は終了です。残りのルーターとクライアント(Pixel 3a)の設定は検証が終わり次第、加筆します。
参考URL
Raspberry Piで作るSoftEther VPNの環境
Raspberry PiでのVPNサーバ構築
RaspberryPiとsoftetherでVPN


- 投稿日:2019-12-18T21:57:04+09:00
NHK番組表APIの使い方
はじめに
ちょっとマイナーなAPIを使ってみたい...ということで、NHKの番組表APIを利用した時のメモ書きをまとめてみました。
登録があれこれ面倒ではないかと心配したのですが、意外と簡単に登録→利用まで進めることができました。ユーザーの登録
- NHK番組表APIのページにアクセスします。

- [ユーザー登録がお済でない方はこちら]をクリックして、ユーザー登録画面に入ります。
- [アカウントの作成]タブを選択して、以下の事項を記入して[アカウントの作成]をクリックします。
- ユーザー名
- メールアドレス:このアドレス宛に登録確認のメールが送信されます。
- 利用規約に同意します:チェックを忘れずに...

- 上記のメールアドレスに5分程度で仮登録完了のメールが届きます。
- 確認のメールが届くまで少しタイムラグがあるので、メールアドレスの指定を間違えたかと思ったほどです。
- メールに記載されたURLに遷移して、パスワードを変更(設定)すれば登録完了となります。
アプリの登録
以下の手順は、NHK番組表APIのページにログインしていることが前提となります。
- NHK番組表APIのページにアクセスして、[登録済みアプリはこちら]をクリックします。
- [My Apps]タブを選択して、[新規アプリ登録]をクリックします。
- 以下の事項を記入して、[Create App]をクリックしてアプリを登録します。
- App Name:アプリ名を記入します。
- アプリのURL:任意入力項目です。
- プロダクト:デフォルト値の[NHK Program Guide API]しか選べません...
APIキーの取得
以下の手順は、NHK番組表APIのページにログインしていることが前提となります。
- NHK番組表APIのページにアクセスして、[登録済みアプリはこちら]をクリックします。
- [My Apps]タブを選択して、先程に登録したアプリ名をクリックします。
- 遷移した先のページで、[キー]タブを選択するとAPIキーを取得できます。
APIの利用例
curlコマンドで「現在提供している番組」のJSONファイルを取得して、その結果をjqコマンドで解析して表示しています。
curlコマンドとjqコマンドについては、こちらの記事もご覧ください。- JSON中の文字列はダブルクォートで囲まれているため、
sedコマンドを使って不要なダブルクォートを除去しています。nhk_api.sh#!/bin/bash json=$(curl -s http://api.nhk.or.jp/v2/pg/now/130/g1.json?key={あなたのAPIキー}) echo '[現在放送中の番組]' echo 'チャンネル:'$(echo ${json} | jq '.nowonair_list.g1.present.service.name' | sed 's/\"//g') echo '番組名:'$(echo ${json} | jq '.nowonair_list.g1.present.title' | sed 's/\"//g') echo 'サブタイトル:'$(echo ${json} | jq '.nowonair_list.g1.present.subtitle' | sed 's/\"//g')出力結果[現在放送中の番組] チャンネル:NHK総合1 番組名:ニュースウオッチ9▽かんぽ生命 不適切販売1万2800件余 その実態は… サブタイトル:▽通知表が年明けに?全国53自治体でシステム障害▽ジャパンライフ債権者集会 首相に説明求める声明▽ガンダム・富野監督 若者へのメッセージ▽羽生・紀平 全日本へ注意点
- 画面上では複数の「アプリ」を登録できそうな雰囲気ですが、「アプリ」は「APIキー」と不可分な存在となっています。
- そのため、「アプリ」を既に登録した状態で[新規アプリ登録]をクリックすると、以下のようにエラーとなってしまいます。

- 投稿日:2019-12-18T20:52:39+09:00
.xsession-errorsのF86AudioLowerVolume failed! を黙らせる。
xfceの謎のエラーを止める方法になります。
xfce4-volumed1196エラー** (xfce4-volumed:1196): WARNING **: 20:46:51.720: Binding 'XF86AudioLowerVolume' failed!解決コマンドamixer -D pulse set Master Playback Switch toggle
- 投稿日:2019-12-18T16:52:05+09:00
vfatの形式のデバイス(ドライブ)ラベルを変更する。
fat32と同じ方法でいけました。なぜかvfatのラベル変更について書かれているサイトは15分ぐらい探しましたが見つかりませんでした。
vfatのラベルを変更sudo mlabel -i /dev/ドライブ名 ::ラベル名
- 投稿日:2019-12-18T15:40:39+09:00
Linux初心者がWindowsタブレットにLinuxを入れた話
Qiita初投稿です。拙い文章ですがお付き合いいただけると助かります。
Windowsタブレットは動作が重い(主語がでかい)
2018年の10月頃に購入したASUSのTransbook R106HA(といっても中身はT102HAらしいのですが)というWindowsタブレットを使っているのですが、メモリ4GBだとやはりWindows10には厳しく動作が重い状況でした。Windowsを使うなら普段から使っているラップトップのノートPCでいいやと思って、2019年の6月ほどまで放置してました。
再利用しようと思ったきっかけ
その普段から使っているノートPCのバッテリーが消耗して、講義が3限分連続だと一度充電を挟まないと途中で切れてしまう状況に陥ってしまいました。そこでさきほど挙げたタブレットをどうにか改良して使えないかと思った結果、Linuxを入れようと思い立ったのでした、まる。
Linux化にするにあたって
という前振りをして、Linuxを入れたいと思います。一応スペック紹介を。
ASUS Transbook T102HA(R106HA) CPU Intel Atom x5-Z8350 ストレージ eMMC:64GB RAM 4GB あと地味にキーボードドック着けても1kgいかないの良い。
そして入れるディストリビューションですが、今回はXubuntu 18.04 LTS版を選択しています。理由はCPUの負担が比較的少ないため。導入の手順に関してはこちらを参考に。
インストール完了までは順調に進みました。
トラブルの発生
使ってみるといくつかトラブルが生じたため、備忘録のついでに書いておきます。
- 画面関係のトラブル
さきほど参考にした記事のとおり、このタブレットはデフォルトだと本体を縦にした状態がデフォルトになってしまいます。
画面を右に90度回転すると本体を横にした際の正常な向きになるため、ターミナル上で
xrandr -o rightもしくは画面設定から向きを右向きに設定してあげます。しかし、タッチしたときの座標は移動しないため、同じくタッチパネルのキャリブレーションを行う必要があります。
xinuput listを打つと、マウスやキーボードなどの入力デバイスの一覧が出力されます。そこで、タッチパネルの名前を取得します。
そして、コマンドxinput set-prop 'dev-name' 'Coordinate Transformation Matrix' 0 1 0 -1 0 1 0 0 1を入力するとキャリブレーションが行われます。('dev-name'はidでも代用可能ですが、強制終了などをした際に変わってしまうのでオススメしません)入力デバイス名の取得や原理はこちらを参考にしました。
ここよりCoordinate Transformation Matrixは\begin{matrix} \cos\theta & \sin\theta & 0 \\ -\sin\theta & \cos\theta & 0 \\ 0 & 0 & 1 \end{matrix}となっています。それぞれ0度(通常)、90度(タッチ座標をを右に補正する場合)は、
\theta = 0 \\
\begin{matrix}
1 & 0 & 0 \\
0 & 1 & 0 \\
0 & 0 & 1
\end{matrix} \\
\theta = 90 \\
\begin{matrix}
0 & 1 & 0 \\
-1 & 0 & 0 \\
0 & 0 & 1 \\
\end{matrix}
になります。覚えていても結局0度か90度のときしか使わないとは思いますが…
私は
~/.profileに記述しました。多分別の場所に記述したほうがよさげだと思います。(ログイン画面上で適応されない)
- Bluetoothが勝手に起動する
何故かインストール直後は起動時にデフォルトでBluetoothがonになってしまう状態でした。
最初はプロファイルかコンフィグかどちらかに入っていると思い、linux bluetooth 自動接続という頭の悪いキーワードで検索したところ、ここの記事にたどり着きました。[policy] AutoEnable == trueと変更を加えて再起動します。しかし失敗。割と焦っていろいろ見てみた結果、自動開始アプリケーションの中にBlueman Bluetooth Managerが入っていたのが原因で、それを切ってあげれば自動でonにならないようにできました。
整備が終わって
あらかた使っていく上で不便と感じる原因は解決できました。今後の課題としてはせっかくのタブレットPCであるため、画面回転を検出して自動で画面の向きを切り替えができるようにしたいなと思っています。あと余談で、Xubuntuを入れる前はLinux Mint MATEを入れていたのですが、バッテリーの持ちがすごく悪い(1時間程度しか持たない)という理由でXubuntuに変更しています。ディストロの違いをこのような形で体感ができたのは素直に良い経験になりました。
というか画面の輝度が変更できないLinux Mintさん側にも問題がある
- 投稿日:2019-12-18T15:29:41+09:00
xinetdのサービスのport番号を知る方法
とあるサービスのport番号がわからなくて、xinetdで起動してることは知ってたので /etc/xinetd を見てもportぽいものがなにもない。
xinetd の service という項目を見る
xinetdのconfは service 名で書くこともできるとのこと。
試しに time というサービスの例。
# cat /etc/xinetd.d/time-stream
service time               <--------------- ここでport番号が実は定義されている
{
   ...
port番号は
/etc/servicesに書いてあるport番号は /etc/services でわかる
# cat /etc/services  | grep time | head -5
daytime         13/tcp
daytime         13/udp
time            37/tcp          timserver              <---------- あった!
time            37/udp          timserver              <---------- あった!
utime           519/tcp         unixtime
いつも
/etc/servicesを忘れてしまうおまけ listenしてるポートを知る方法
netstat -nltpa# netstat -nltpa Proto Recv-Q Send-Q Local Address Foreign Address State PID/Program name ... tcp6 0 0 :::21 :::* LISTEN 3247/xinetd <------- このポートはxinetdだなーがわかる tcp6 0 0 :::873 :::* LISTEN 3247/xinetdおわりに
*この記事のコマンド結果はすべて捏造したので信用しないでね
- 投稿日:2019-12-18T15:20:04+09:00
ppa:jonathonf/python-3.6 が非公開になった
ppa:jonathonf/python-3.6 が非公開になった
ubuntu16.04などでpython3.6を入れるときに
ppa:jonathonf/python-3.6
のppaを使っていたんですが、非公開になってしまってちょっと困ったのでメモ変更前
sudo add-apt-repository ppa:jonathonf/python-3.6
sudo apt update
sudo apt install python3.6
apt update時のログ
W: The repository 'http://ppa.launchpad.net/jonathonf/python-3.6/ubuntu xenial Release' does not have a Release file.
N: Data from such a repository can't be authenticated and is therefore potentially dangerous to use.
N: See apt-secure(8) manpage for repository creation and user configuration details.
E: Failed to fetch http://ppa.launchpad.net/jonathonf/python-3.6/ubuntu/dists/xenial/main/binary-amd64/Packages  403  Forbidden [IP: 91.189.95.83 80]
E: Some index files failed to download. They have been ignored, or old ones used instead.
ppaを以下に変更
ppa:deadsnakes/ppa変更後
sudo add-apt-repository ppa:deadsnakes/ppa
sudo apt update
sudo apt install python3.6
こっちだと入れられる
- 投稿日:2019-12-18T03:12:17+09:00
Linuxのrtmutexを調査してみる
これはLinux Advent Calendar 2019の17日目が空いてしまったので代打で投稿する記事です。
一言でまとめると
Linuxのrtmutexは、
- mutexとほぼ同じように使える
- ロック待ちが優先度付きになる
- SCHED_DEADLINE、SCHED_FIFO, SCHED_RRなどのときだけ優先度付きになる
- タスク間で優先度の継承をする
- 「これを使えばすべて解決」するような万能機能ではないはじめに
LinuxにはCONFIG_RT_MUTEXESが有効のときに使えるrtmutexがある。これは、mutexロック待ちをするタスクがSCHED_DEADLINE, SCHED_FIFO, SCHED_RRなどのリアルタイムスケジューリングのときに意味を持ち、ロック待ちが優先度付きになり、リアルタイムスケジューリングのタスクが先にロックを取れるようになる。また、リアルタイムのタスクがロック待ちをすると、ロックを持つタスクが優先度の継承を受けて優先度がブーストする。
対比されるのは普通のmutexで、こっちはロック待ちはFirst In First Outの先に来たもの順になる。
下記ではLinux-5.4くらいとglibc-2.30くらいを見ています。
Documentation
普通のmutexについてはここ、
- kernel/Documentation/locking/mutex-design.rst
rtmutexの基本的なコンセプトについてはここ、
- kernel/Documentation/locking/rt-mutex.rst
rtmutexの詳細実装についてはここ、
- kernel/Documentation/locking/rt-mutex-design.rst
rtmutexをfutexへ適用する話についてはここ、
- kernel/Documentation/pi-futex.txt
またLWN.netにまとまった記事があるので同様に紹介しておく。
- Priority inheritance in the kernel [LWN.net]良い子のみんなは、以下の私の文章は当てにせずに、ちゃんと上記ドキュメントを読みましょうね。
コードを確認してみる
本当に優先度継承しているのかをコードを見て確認しておく。...
コードのコピペが長いので念のため折りたたんでおく
rt_mutex_waiter_less()あたりを見てみると、
kernel/kernel/locking/rtmutex.cstatic inline int rt_mutex_waiter_less(struct rt_mutex_waiter *left, struct rt_mutex_waiter *right) { if (left->prio < right->prio) return 1; /* * If both waiters have dl_prio(), we check the deadlines of the * associated tasks. * If left waiter has a dl_prio(), and we didn't return 1 above, * then right waiter has a dl_prio() too. */ if (dl_prio(left->prio)) return dl_time_before(left->deadline, right->deadline); return 0; }kernel/kernel/locking/rtmutex.cstatic inline int rt_mutex_waiter_equal(struct rt_mutex_waiter *left, struct rt_mutex_waiter *right) { if (left->prio != right->prio) return 0; /* * If both waiters have dl_prio(), we check the deadlines of the * associated tasks. * If left waiter has a dl_prio(), and we didn't return 0 above, * then right waiter has a dl_prio() too. */ if (dl_prio(left->prio)) return left->deadline == right->deadline; return 1; }となっていて、リアルタイムタスクの優先度で並び替えをしている様子がわかる。詳細は省略するけど、これらの比較関数を使ってrbtreeで優先度順にタスクを並び替えるように実装している。そいやちょうどrbtreeの説明記事がったので紹介しておこう。
- 赤黒木の本質 - Qiitaドキュメントにも登場しているrt_mutex_adjust_prio_chain()あたりは、長いのを承知で全部載せると、
kernel/kernel/locking/rtmutex.c/* * Adjust the priority chain. Also used for deadlock detection. * Decreases task's usage by one - may thus free the task. * * @task: the task owning the mutex (owner) for which a chain walk is * probably needed * @chwalk: do we have to carry out deadlock detection? * @orig_lock: the mutex (can be NULL if we are walking the chain to recheck * things for a task that has just got its priority adjusted, and * is waiting on a mutex) * @next_lock: the mutex on which the owner of @orig_lock was blocked before * we dropped its pi_lock. Is never dereferenced, only used for * comparison to detect lock chain changes. * @orig_waiter: rt_mutex_waiter struct for the task that has just donated * its priority to the mutex owner (can be NULL in the case * depicted above or if the top waiter is gone away and we are * actually deboosting the owner) * @top_task: the current top waiter * * Returns 0 or -EDEADLK. * * Chain walk basics and protection scope * * [R] refcount on task * [P] task->pi_lock held * [L] rtmutex->wait_lock held * * Step Description Protected by * function arguments: * @task [R] * @orig_lock if != NULL @top_task is blocked on it * @next_lock Unprotected. Cannot be * dereferenced. Only used for * comparison. * @orig_waiter if != NULL @top_task is blocked on it * @top_task current, or in case of proxy * locking protected by calling * code * again: * loop_sanity_check(); * retry: * [1] lock(task->pi_lock); [R] acquire [P] * [2] waiter = task->pi_blocked_on; [P] * [3] check_exit_conditions_1(); [P] * [4] lock = waiter->lock; [P] * [5] if (!try_lock(lock->wait_lock)) { [P] try to acquire [L] * unlock(task->pi_lock); release [P] * goto retry; * } * [6] check_exit_conditions_2(); [P] + [L] * [7] requeue_lock_waiter(lock, waiter); [P] + [L] * [8] unlock(task->pi_lock); release [P] * put_task_struct(task); release [R] * [9] check_exit_conditions_3(); [L] * [10] task = owner(lock); [L] * get_task_struct(task); [L] acquire [R] * lock(task->pi_lock); [L] acquire [P] * [11] requeue_pi_waiter(tsk, waiters(lock));[P] + [L] * [12] check_exit_conditions_4(); [P] + [L] * [13] unlock(task->pi_lock); release [P] * unlock(lock->wait_lock); release [L] * goto again; */ static int rt_mutex_adjust_prio_chain(struct task_struct *task, enum rtmutex_chainwalk chwalk, struct rt_mutex *orig_lock, struct rt_mutex *next_lock, struct rt_mutex_waiter *orig_waiter, struct task_struct *top_task) { struct rt_mutex_waiter *waiter, *top_waiter = orig_waiter; struct rt_mutex_waiter *prerequeue_top_waiter; int ret = 0, depth = 0; struct rt_mutex *lock; bool detect_deadlock; bool requeue = true; detect_deadlock = rt_mutex_cond_detect_deadlock(orig_waiter, chwalk); /* * The (de)boosting is a step by step approach with a lot of * pitfalls. We want this to be preemptible and we want hold a * maximum of two locks per step. So we have to check * carefully whether things change under us. */ again: /* * We limit the lock chain length for each invocation. */ if (++depth > max_lock_depth) { static int prev_max; /* * Print this only once. If the admin changes the limit, * print a new message when reaching the limit again. */ if (prev_max != max_lock_depth) { prev_max = max_lock_depth; printk(KERN_WARNING "Maximum lock depth %d reached " "task: %s (%d)\n", max_lock_depth, top_task->comm, task_pid_nr(top_task)); } put_task_struct(task); return -EDEADLK; } /* * We are fully preemptible here and only hold the refcount on * @task. So everything can have changed under us since the * caller or our own code below (goto retry/again) dropped all * locks. */ retry: /* * [1] Task cannot go away as we did a get_task() before ! */ raw_spin_lock_irq(&task->pi_lock); /* * [2] Get the waiter on which @task is blocked on. */ waiter = task->pi_blocked_on; /* * [3] check_exit_conditions_1() protected by task->pi_lock. */ /* * Check whether the end of the boosting chain has been * reached or the state of the chain has changed while we * dropped the locks. */ if (!waiter) goto out_unlock_pi; /* * Check the orig_waiter state. After we dropped the locks, * the previous owner of the lock might have released the lock. */ if (orig_waiter && !rt_mutex_owner(orig_lock)) goto out_unlock_pi; /* * We dropped all locks after taking a refcount on @task, so * the task might have moved on in the lock chain or even left * the chain completely and blocks now on an unrelated lock or * on @orig_lock. * * We stored the lock on which @task was blocked in @next_lock, * so we can detect the chain change. */ if (next_lock != waiter->lock) goto out_unlock_pi; /* * Drop out, when the task has no waiters. Note, * top_waiter can be NULL, when we are in the deboosting * mode! */ if (top_waiter) { if (!task_has_pi_waiters(task)) goto out_unlock_pi; /* * If deadlock detection is off, we stop here if we * are not the top pi waiter of the task. If deadlock * detection is enabled we continue, but stop the * requeueing in the chain walk. */ if (top_waiter != task_top_pi_waiter(task)) { if (!detect_deadlock) goto out_unlock_pi; else requeue = false; } } /* * If the waiter priority is the same as the task priority * then there is no further priority adjustment necessary. If * deadlock detection is off, we stop the chain walk. If its * enabled we continue, but stop the requeueing in the chain * walk. */ if (rt_mutex_waiter_equal(waiter, task_to_waiter(task))) { if (!detect_deadlock) goto out_unlock_pi; else requeue = false; } /* * [4] Get the next lock */ lock = waiter->lock; /* * [5] We need to trylock here as we are holding task->pi_lock, * which is the reverse lock order versus the other rtmutex * operations. */ if (!raw_spin_trylock(&lock->wait_lock)) { raw_spin_unlock_irq(&task->pi_lock); cpu_relax(); goto retry; } /* * [6] check_exit_conditions_2() protected by task->pi_lock and * lock->wait_lock. * * Deadlock detection. If the lock is the same as the original * lock which caused us to walk the lock chain or if the * current lock is owned by the task which initiated the chain * walk, we detected a deadlock. */ if (lock == orig_lock || rt_mutex_owner(lock) == top_task) { debug_rt_mutex_deadlock(chwalk, orig_waiter, lock); raw_spin_unlock(&lock->wait_lock); ret = -EDEADLK; goto out_unlock_pi; } /* * If we just follow the lock chain for deadlock detection, no * need to do all the requeue operations. To avoid a truckload * of conditionals around the various places below, just do the * minimum chain walk checks. */ if (!requeue) { /* * No requeue[7] here. Just release @task [8] */ raw_spin_unlock(&task->pi_lock); put_task_struct(task); /* * [9] check_exit_conditions_3 protected by lock->wait_lock. * If there is no owner of the lock, end of chain. */ if (!rt_mutex_owner(lock)) { raw_spin_unlock_irq(&lock->wait_lock); return 0; } /* [10] Grab the next task, i.e. owner of @lock */ task = get_task_struct(rt_mutex_owner(lock)); raw_spin_lock(&task->pi_lock); /* * No requeue [11] here. We just do deadlock detection. * * [12] Store whether owner is blocked * itself. Decision is made after dropping the locks */ next_lock = task_blocked_on_lock(task); /* * Get the top waiter for the next iteration */ top_waiter = rt_mutex_top_waiter(lock); /* [13] Drop locks */ raw_spin_unlock(&task->pi_lock); raw_spin_unlock_irq(&lock->wait_lock); /* If owner is not blocked, end of chain. */ if (!next_lock) goto out_put_task; goto again; } /* * Store the current top waiter before doing the requeue * operation on @lock. We need it for the boost/deboost * decision below. */ prerequeue_top_waiter = rt_mutex_top_waiter(lock); /* [7] Requeue the waiter in the lock waiter tree. */ rt_mutex_dequeue(lock, waiter); /* * Update the waiter prio fields now that we're dequeued. * * These values can have changed through either: * * sys_sched_set_scheduler() / sys_sched_setattr() * * or * * DL CBS enforcement advancing the effective deadline. * * Even though pi_waiters also uses these fields, and that tree is only * updated in [11], we can do this here, since we hold [L], which * serializes all pi_waiters access and rb_erase() does not care about * the values of the node being removed. */ waiter->prio = task->prio; waiter->deadline = task->dl.deadline; rt_mutex_enqueue(lock, waiter); /* [8] Release the task */ raw_spin_unlock(&task->pi_lock); put_task_struct(task); /* * [9] check_exit_conditions_3 protected by lock->wait_lock. * * We must abort the chain walk if there is no lock owner even * in the dead lock detection case, as we have nothing to * follow here. This is the end of the chain we are walking. */ if (!rt_mutex_owner(lock)) { /* * If the requeue [7] above changed the top waiter, * then we need to wake the new top waiter up to try * to get the lock. */ if (prerequeue_top_waiter != rt_mutex_top_waiter(lock)) wake_up_process(rt_mutex_top_waiter(lock)->task); raw_spin_unlock_irq(&lock->wait_lock); return 0; } /* [10] Grab the next task, i.e. the owner of @lock */ task = get_task_struct(rt_mutex_owner(lock)); raw_spin_lock(&task->pi_lock); /* [11] requeue the pi waiters if necessary */ if (waiter == rt_mutex_top_waiter(lock)) { /* * The waiter became the new top (highest priority) * waiter on the lock. Replace the previous top waiter * in the owner tasks pi waiters tree with this waiter * and adjust the priority of the owner. */ rt_mutex_dequeue_pi(task, prerequeue_top_waiter); rt_mutex_enqueue_pi(task, waiter); rt_mutex_adjust_prio(task); } else if (prerequeue_top_waiter == waiter) { /* * The waiter was the top waiter on the lock, but is * no longer the top prority waiter. Replace waiter in * the owner tasks pi waiters tree with the new top * (highest priority) waiter and adjust the priority * of the owner. * The new top waiter is stored in @waiter so that * @waiter == @top_waiter evaluates to true below and * we continue to deboost the rest of the chain. */ rt_mutex_dequeue_pi(task, waiter); waiter = rt_mutex_top_waiter(lock); rt_mutex_enqueue_pi(task, waiter); rt_mutex_adjust_prio(task); } else { /* * Nothing changed. No need to do any priority * adjustment. */ } /* * [12] check_exit_conditions_4() protected by task->pi_lock * and lock->wait_lock. The actual decisions are made after we * dropped the locks. * * Check whether the task which owns the current lock is pi * blocked itself. If yes we store a pointer to the lock for * the lock chain change detection above. After we dropped * task->pi_lock next_lock cannot be dereferenced anymore. */ next_lock = task_blocked_on_lock(task); /* * Store the top waiter of @lock for the end of chain walk * decision below. */ top_waiter = rt_mutex_top_waiter(lock); /* [13] Drop the locks */ raw_spin_unlock(&task->pi_lock); raw_spin_unlock_irq(&lock->wait_lock); /* * Make the actual exit decisions [12], based on the stored * values. * * We reached the end of the lock chain. Stop right here. No * point to go back just to figure that out. */ if (!next_lock) goto out_put_task; /* * If the current waiter is not the top waiter on the lock, * then we can stop the chain walk here if we are not in full * deadlock detection mode. */ if (!detect_deadlock && waiter != top_waiter) goto out_put_task; goto again; out_unlock_pi: raw_spin_unlock_irq(&task->pi_lock); out_put_task: put_task_struct(task); return ret; }となっていて、優先度の継承をいろんな条件を網羅しながら苦労して実装している様子がわかる。またrt_mutex_setprio()は、CONFIG_RT_MUTEXESが有効な場合に実装が分かれていて、これも長いけど同様に全部載せると、
kernel/sched/core.c#ifdef CONFIG_RT_MUTEXES static inline int __rt_effective_prio(struct task_struct *pi_task, int prio) { if (pi_task) prio = min(prio, pi_task->prio); return prio; } static inline int rt_effective_prio(struct task_struct *p, int prio) { struct task_struct *pi_task = rt_mutex_get_top_task(p); return __rt_effective_prio(pi_task, prio); } /* * rt_mutex_setprio - set the current priority of a task * @p: task to boost * @pi_task: donor task * * This function changes the 'effective' priority of a task. It does * not touch ->normal_prio like __setscheduler(). * * Used by the rt_mutex code to implement priority inheritance * logic. Call site only calls if the priority of the task changed. */ void rt_mutex_setprio(struct task_struct *p, struct task_struct *pi_task) { int prio, oldprio, queued, running, queue_flag = DEQUEUE_SAVE | DEQUEUE_MOVE | DEQUEUE_NOCLOCK; const struct sched_class *prev_class; struct rq_flags rf; struct rq *rq; /* XXX used to be waiter->prio, not waiter->task->prio */ prio = __rt_effective_prio(pi_task, p->normal_prio); /* * If nothing changed; bail early. */ if (p->pi_top_task == pi_task && prio == p->prio && !dl_prio(prio)) return; rq = __task_rq_lock(p, &rf); update_rq_clock(rq); /* * Set under pi_lock && rq->lock, such that the value can be used under * either lock. * * Note that there is loads of tricky to make this pointer cache work * right. rt_mutex_slowunlock()+rt_mutex_postunlock() work together to * ensure a task is de-boosted (pi_task is set to NULL) before the * task is allowed to run again (and can exit). This ensures the pointer * points to a blocked task -- which guaratees the task is present. */ p->pi_top_task = pi_task; /* * For FIFO/RR we only need to set prio, if that matches we're done. */ if (prio == p->prio && !dl_prio(prio)) goto out_unlock; /* * Idle task boosting is a nono in general. There is one * exception, when PREEMPT_RT and NOHZ is active: * * The idle task calls get_next_timer_interrupt() and holds * the timer wheel base->lock on the CPU and another CPU wants * to access the timer (probably to cancel it). We can safely * ignore the boosting request, as the idle CPU runs this code * with interrupts disabled and will complete the lock * protected section without being interrupted. So there is no * real need to boost. */ if (unlikely(p == rq->idle)) { WARN_ON(p != rq->curr); WARN_ON(p->pi_blocked_on); goto out_unlock; } trace_sched_pi_setprio(p, pi_task); oldprio = p->prio; if (oldprio == prio) queue_flag &= ~DEQUEUE_MOVE; prev_class = p->sched_class; queued = task_on_rq_queued(p); running = task_current(rq, p); if (queued) dequeue_task(rq, p, queue_flag); if (running) put_prev_task(rq, p); /* * Boosting condition are: * 1. -rt task is running and holds mutex A * --> -dl task blocks on mutex A * * 2. -dl task is running and holds mutex A * --> -dl task blocks on mutex A and could preempt the * running task */ if (dl_prio(prio)) { if (!dl_prio(p->normal_prio) || (pi_task && dl_entity_preempt(&pi_task->dl, &p->dl))) { p->dl.dl_boosted = 1; queue_flag |= ENQUEUE_REPLENISH; } else p->dl.dl_boosted = 0; p->sched_class = &dl_sched_class; } else if (rt_prio(prio)) { if (dl_prio(oldprio)) p->dl.dl_boosted = 0; if (oldprio < prio) queue_flag |= ENQUEUE_HEAD; p->sched_class = &rt_sched_class; } else { if (dl_prio(oldprio)) p->dl.dl_boosted = 0; if (rt_prio(oldprio)) p->rt.timeout = 0; p->sched_class = &fair_sched_class; } p->prio = prio; if (queued) enqueue_task(rq, p, queue_flag); if (running) set_next_task(rq, p); check_class_changed(rq, p, prev_class, oldprio); out_unlock: /* Avoid rq from going away on us: */ preempt_disable(); __task_rq_unlock(rq, &rf); balance_callback(rq); preempt_enable(); }。となっていて、実際にタスクの優先度を変更してリスケしている様子がわかる。
FUTEX_PI
Linux-v4.14からCONFIG_FUTEX_PIというのが登場していて、優先度継承のユーザランドへの開放は4.14から...と思っていたらそうではなく、これはこのcommitによりLinux-2.6.18くらいからすでに入っているようだった。CONFIG_FUTEX_PIは、すでに実装された機能をdisableにできるようにするため導入されたようだ。
もう少し具体的にコードを見ていく。kernel/kernel/futex.cのdo_futex()より
kernel/kernel/futex.cswitch (cmd) { case FUTEX_WAIT: val3 = FUTEX_BITSET_MATCH_ANY; /* fall through */ case FUTEX_WAIT_BITSET: return futex_wait(uaddr, flags, val, timeout, val3); case FUTEX_WAKE: val3 = FUTEX_BITSET_MATCH_ANY; /* fall through */ case FUTEX_WAKE_BITSET: return futex_wake(uaddr, flags, val, val3); case FUTEX_REQUEUE: return futex_requeue(uaddr, flags, uaddr2, val, val2, NULL, 0); case FUTEX_CMP_REQUEUE: return futex_requeue(uaddr, flags, uaddr2, val, val2, &val3, 0); case FUTEX_WAKE_OP: return futex_wake_op(uaddr, flags, uaddr2, val, val2, val3); case FUTEX_LOCK_PI: return futex_lock_pi(uaddr, flags, timeout, 0); case FUTEX_UNLOCK_PI: return futex_unlock_pi(uaddr, flags); case FUTEX_TRYLOCK_PI: return futex_lock_pi(uaddr, flags, NULL, 1); case FUTEX_WAIT_REQUEUE_PI: val3 = FUTEX_BITSET_MATCH_ANY; return futex_wait_requeue_pi(uaddr, flags, val, timeout, val3, uaddr2); case FUTEX_CMP_REQUEUE_PI: return futex_requeue(uaddr, flags, uaddr2, val, val2, &val3, 1); }となっていて、HOGEHOGE_PI(例えばFUTEX_LOCK_PI)をつけてfutexシステムコールするとfutex_piなコードへつながる。細かくは省略するけど、hogehoge_pi()な関数は中でrt_mutex()を使っている。
肝心のFUTEX_LOCK_PIを使っているユーザランドのコードはというと、glibc/nptl/pthread_mutex_lock.cの__pthread_mutex_lock_full()より、
glibc/nptl/pthread_mutex_lock.ccase PTHREAD_MUTEX_PI_RECURSIVE_NP: case PTHREAD_MUTEX_PI_ERRORCHECK_NP: case PTHREAD_MUTEX_PI_NORMAL_NP: case PTHREAD_MUTEX_PI_ADAPTIVE_NP: case PTHREAD_MUTEX_PI_ROBUST_RECURSIVE_NP: case PTHREAD_MUTEX_PI_ROBUST_ERRORCHECK_NP: case PTHREAD_MUTEX_PI_ROBUST_NORMAL_NP: case PTHREAD_MUTEX_PI_ROBUST_ADAPTIVE_NP:glibc/nptl/pthread_mutex_lock.cif (oldval != 0) { /* The mutex is locked. The kernel will now take care of everything. */ int private = (robust ? PTHREAD_ROBUST_MUTEX_PSHARED (mutex) : PTHREAD_MUTEX_PSHARED (mutex)); INTERNAL_SYSCALL_DECL (__err); int e = INTERNAL_SYSCALL (futex, __err, 4, &mutex->__data.__lock, __lll_private_flag (FUTEX_LOCK_PI, private), 1, 0);となっていて、PTHREAD_MUTEX_PI_NORMAL_NPなどのタイプの時に使われる。PTHREAD_MUTEX_PI_NORMAL_NPは、glibc/nptl/pthreadP.hより、
glibc/nptl/pthreadP.henum { PTHREAD_MUTEX_KIND_MASK_NP = 3, PTHREAD_MUTEX_ELISION_NP = 256, PTHREAD_MUTEX_NO_ELISION_NP = 512, PTHREAD_MUTEX_ROBUST_NORMAL_NP = 16, PTHREAD_MUTEX_ROBUST_RECURSIVE_NP = PTHREAD_MUTEX_ROBUST_NORMAL_NP | PTHREAD_MUTEX_RECURSIVE_NP, PTHREAD_MUTEX_ROBUST_ERRORCHECK_NP = PTHREAD_MUTEX_ROBUST_NORMAL_NP | PTHREAD_MUTEX_ERRORCHECK_NP, PTHREAD_MUTEX_ROBUST_ADAPTIVE_NP = PTHREAD_MUTEX_ROBUST_NORMAL_NP | PTHREAD_MUTEX_ADAPTIVE_NP, PTHREAD_MUTEX_PRIO_INHERIT_NP = 32, PTHREAD_MUTEX_PI_NORMAL_NP = PTHREAD_MUTEX_PRIO_INHERIT_NP | PTHREAD_MUTEX_NORMAL, PTHREAD_MUTEX_PI_RECURSIVE_NP = PTHREAD_MUTEX_PRIO_INHERIT_NP | PTHREAD_MUTEX_RECURSIVE_NP, PTHREAD_MUTEX_PI_ERRORCHECK_NP = PTHREAD_MUTEX_PRIO_INHERIT_NP | PTHREAD_MUTEX_ERRORCHECK_NP, PTHREAD_MUTEX_PI_ADAPTIVE_NP = PTHREAD_MUTEX_PRIO_INHERIT_NP | PTHREAD_MUTEX_ADAPTIVE_NP, PTHREAD_MUTEX_PI_ROBUST_NORMAL_NP = PTHREAD_MUTEX_PRIO_INHERIT_NP | PTHREAD_MUTEX_ROBUST_NORMAL_NP, PTHREAD_MUTEX_PI_ROBUST_RECURSIVE_NP = PTHREAD_MUTEX_PRIO_INHERIT_NP | PTHREAD_MUTEX_ROBUST_RECURSIVE_NP, PTHREAD_MUTEX_PI_ROBUST_ERRORCHECK_NP = PTHREAD_MUTEX_PRIO_INHERIT_NP | PTHREAD_MUTEX_ROBUST_ERRORCHECK_NP, PTHREAD_MUTEX_PI_ROBUST_ADAPTIVE_NP = PTHREAD_MUTEX_PRIO_INHERIT_NP | PTHREAD_MUTEX_ROBUST_ADAPTIVE_NP, PTHREAD_MUTEX_PRIO_PROTECT_NP = 64, PTHREAD_MUTEX_PP_NORMAL_NP = PTHREAD_MUTEX_PRIO_PROTECT_NP | PTHREAD_MUTEX_NORMAL, PTHREAD_MUTEX_PP_RECURSIVE_NP = PTHREAD_MUTEX_PRIO_PROTECT_NP | PTHREAD_MUTEX_RECURSIVE_NP, PTHREAD_MUTEX_PP_ERRORCHECK_NP = PTHREAD_MUTEX_PRIO_PROTECT_NP | PTHREAD_MUTEX_ERRORCHECK_NP, PTHREAD_MUTEX_PP_ADAPTIVE_NP = PTHREAD_MUTEX_PRIO_PROTECT_NP | PTHREAD_MUTEX_ADAPTIVE_NP, PTHREAD_MUTEX_ELISION_FLAGS_NP = PTHREAD_MUTEX_ELISION_NP | PTHREAD_MUTEX_NO_ELISION_NP, PTHREAD_MUTEX_TIMED_ELISION_NP = PTHREAD_MUTEX_TIMED_NP | PTHREAD_MUTEX_ELISION_NP, PTHREAD_MUTEX_TIMED_NO_ELISION_NP = PTHREAD_MUTEX_TIMED_NP | PTHREAD_MUTEX_NO_ELISION_NP, }; #define PTHREAD_MUTEX_PSHARED_BIT 128となっていて、ちょっとわかりにくいけど、端的には、PTHREAD_MUTEX_PRIO_INHERIT_NPつきのmutexかどうかで決まる。PTHREAD_MUTEX_PRIO_INHERIT_NPについては、man pthread_mutexattr_setprotocol(3)に詳しく書かれている。要点だけを書くと、
- PTHREAD_PRIO_NONEは、なにもしない(デフォルトで選ばれる)
- PTHREAD_PRIO_INHERITは、優先度継承する。
- PTHREAD_PRIO_PROTECTは、あらかじめシーリングした値までlock取るタイミングで優先度が上がる。
シーリング値の設定はpthread_mutexattr_setprioceiling(3)で行う。
というわけで、pthread_mutexattr_tを適切に使うことで、Linuxのrtmutexによる優先度継承をユーザランドでも利用できることがわかった。
ポエム: Linuxにおけるリアルタイムシステムとは(その2)
まずは2017年4月頃に書いた以前のポエムをどうぞ。
Linuxのkernel内ではrtmutexではないふつうのmutexが非常に多いので、原則論でいくなら、リアルタイムのタスクがkernelを動き回るだけでアウトとなる。とはいえ、一部のmutexを除いて、それほど長時間保持されるものでもないので、CPU使用率常に高い状態とかでもない限りは、そこまで足を引っ張るわけではないんじゃないかと思う。
CONFIG_IRQ_FORCED_THREADINGが有効の場合、cmdlineにthreadirqsを足すことで、割り込み登録したエントリ関数がSCHED_FIFOの50の割り込みスレッドで駆動するようになる。割り込みより優先したいタスクがある場合にprio順で扱えるようになる。ただ、オーバヘッドは増えるので、これを使わなくても済むような設計がよいのは言うまでもない。
Linux-4.4からMLOCK_ONFAULTが登場し、mlock2(2)やmlockall(2)がちょっと便利になった。依存するライブラリや関数をコントロールしきれない場合の足しになるかもしれない。ただ、不必要なライブラリや関数を減らして、mlock()すべき領域を精査したほうが良いのは言うまでもない。
今回はrtmutexを紹介しているわけだけど、mutexの待ち時間や待ち行列が気になる時点でふつうはリアルタイム処理がすでに破綻していることがほとんどだと思う。rtmutexに頼ろうとしている時点でもはや設計しなおしが必要なほど手遅れなんだと思っておいたほうが良い。
私が関わり始めた*年前は「Linuxなんかでリアルタイム処理なんてできるわけがない」などとよく言われたものだけど、そこそこのレベルでよければ、Linuxの機能強化とともに、上記のような対応をすることでリアルタイム志向のシステム構築がしやすくなってきたかと思う。
一方で、ALSAやgstreamerなど、本来ならリアルタイム処理が必要なものが、重層なライブラリとたくさんのスレッドのもとで富豪的に動かされているというのが現在の実装の現実だったりもする。「最低256MBはほしい」みたいな話もあり、大規模組み込みLinuxをやってきた立場からは違和感みたいなのを感じつつも、ラズパイみたいなSoCも最近は安いし、下手するとDRAM/eMMCのほうが高かったりするし、安いハードを使って富豪的プログラミングしラピッド開発するというのが一つの時代の流れなのかもしれない。
あとがき
調べるきっかけになったとある案件では、結果的にrtmutexで救われるようなケースだったので助かったけど、一般的には「rtmutexを使えば解決!」というケースは少ないんじゃないかと思う。独自ドライバで独自タスク管理を行うようなケースくらいじゃないだろうか。また、FUTEX_PIを使えばユーザランドのpthread_mutexでも優先度継承ができるとはいえ、やはりそれに頼るというのもなにか間違っている気がする。
最近はじっくり設計するような機会がめっきり減ったので、こういう小手先で問題をごまかすようなやり方に手を染めつつあって、違和感を覚えつつもやもやするおっさんがお届けしました。
参考サイト
- 投稿日:2019-12-18T01:34:36+09:00
expdpで指定するディレクトリの権限ではまった話(初心者向け)
こんにちは。hrkii123と申します。
このエントリはJPOUGアドベントカレンダー2019の18日目の記事です。
Qiita初投稿がJPOUGアドベントカレンダー2019となりました。
JPOUGアドベントカレンダー2019
https://adventar.org/calendars/4154はじめに
今回はdatapumpのexpdpユーティリティではまったお話です。
とある日のこと。開発チームごとにOSユーザ、DBユーザ、OSディレクトリ等を分け、チーム間で互いにデータを参照できないようにするという要件のなかDB周りの設計を行っていました。
その中で、datapumpでエクスポートするOSディレクトリもチームごとに用意し、お互いのダンプファイルを参照できないようにしてほしいと注文が入りました。私はそんなのOSディレクトリのパーミッションで簡単に制御できるじゃーんって思ってました。
(そう簡単にはいかなかった。)で、いろいろ試した検証内容をまとめました。
概要図
datapumpでuser_Aスキーマを/var/work/Adirへエクスポートします。
エクスポート後、Aadminユーザのみ/var/work/Adir配下のダンプファイルへアクセス可能で、Badminユーザはアクセスできないようにします。
アクセスの可否はOSディレクトリのパーミッション設定で行います。また、図では記載していませんが、DBは12.1のRAC環境を使いました。(たまたま仮想マシンがあったので..)
検証用にDBユーザ”user_A”とディレクトリオブジェクト”dirA”を作成しておきます。
DBユーザ”user_A”には必要な権限を付与しておきます。create user user_A identified by welcome1; CREATE DIRECTORY dirA AS '/var/work/Adir'; grant create session,resource,unlimited tablespace to user_A; grant read, write on directory dirA to user_A;さて、この状態でexpdpを実行できるでしょうか。
/u01/app/oracle/product/12.1.0/dbhome_1/bin/expdp user_A/welcome1@testdb directory=dirA dumpfile=expdp_A.log schemas=user_A下記出力の通り、エラーとなりました。
ORA-39002: invalid operation
ORA-39070: Unable to open the log file.
ORA-29283: invalid file operation
ORA-06512: at "SYS.UTL_FILE", line 536
ORA-29283: invalid file operation
上記のエラーはOSディレクトリのパーミッションが適切ではないときに出力されます。
ディレクトリオブジェクトで指定しているOSディレクトリは所有者Aadmin、所有グループAadminとなっております。datapumpの仕様でエクスポートされるダンプファイルは所有者oracle、所有グループasmadminとなります。つまりdatapumpの実行ではoracleユーザとasmadminグループからのアクセスが許可できている必要があります。OSディレクトリのパーミッションが777であれば何も気にする必要はないですが、今回の場合ではoracleユーザはAadminグループに属していないため、OSディレクトリへのアクセスができません。
対処として、今回はoracleユーザとgridユーザのセカンダリグループにAadminを追加することにします。
id oracle
uid=54321(oracle) gid=54321(oinstall)groups=54321(oinstall),54322(dba),1101(oper),1102(backupdba),1103(dgdba),1104(kmdba),1201(asmdba),54323(Aadmin)

id grid
uid=1100(grid) gid=54321(oinstall)groups=54321(oinstall),1200(asmadmin),1201(asmdba),1202(asmoper),54323(Aadmin)
今度は成功するでしょうか。
ORA-39002: invalid operation
ORA-39070: Unable to open the log file.
ORA-29283: invalid file operation
ORA-06512: at "SYS.UTL_FILE", line 536
ORA-29283: invalid file operation
また出ました。このエラー!!
OSディレクトリへのアクセスはできるはずなのに、、ちなみにOSディレクトリのパーミッションを777に変更すると、正常に動作します。
$ /u01/app/oracle/product/12.1.0/dbhome_1/bin/expdp user_A/welcome1@testdb directory=dirA
dumpfile=expdp_A.log schemas=user_A

Export: Release 12.1.0.2.0 - Production on Sun Dec 15 03:53:01 2019

Copyright (c) 1982, 2014, Oracle and/or its affiliates.  All rights reserved.

Connected to: Oracle Database 12c Enterprise Edition Release 12.1.0.2.0 - 64bit Production
With the Partitioning, Real Application Clusters, Automatic Storage Management, OLAP,
Advanced Analytics and Real Application Testing options
Starting "USER_A"."SYS_EXPORT_SCHEMA_01":  user_A/********@testdb directory=dirA dumpfile=expdp_A.log schemas=user_A
Estimate in progress using BLOCKS method...
Processing object type SCHEMA_EXPORT/TABLE/TABLE_DATA
Total estimation using BLOCKS method: 0 KB
Processing object type SCHEMA_EXPORT/PRE_SCHEMA/PROCACT_SCHEMA
Processing object type SCHEMA_EXPORT/TABLE/TABLE
Processing object type SCHEMA_EXPORT/TABLE/COMMENT
Processing object type SCHEMA_EXPORT/TABLE/INDEX/INDEX
Processing object type SCHEMA_EXPORT/TABLE/CONSTRAINT/CONSTRAINT
Processing object type SCHEMA_EXPORT/TABLE/INDEX/STATISTICS/INDEX_STATISTICS
Processing object type SCHEMA_EXPORT/TABLE/STATISTICS/TABLE_STATISTICS
Processing object type SCHEMA_EXPORT/STATISTICS/MARKER
Master table "USER_A"."SYS_EXPORT_SCHEMA_01" successfully loaded/unloaded
******************************************************************************
Dump file set for USER_A.SYS_EXPORT_SCHEMA_01 is:
  /var/work/Adir/expdp_A.log
Job "USER_A"."SYS_EXPORT_SCHEMA_01" successfully completed at Sun Dec 15 03:53:42 2019 elapsed 0 00:00:38

[oracle@node1 ~]$
結局どうやったか
RAC環境でoracle,gridユーザのセカンダリグループを追加する際にはクラスタウェアへ認識させる必要があります!グループ追加後にクラスタウェアを再起動することで認識されます。
pmonのプロセスを確認することでユーザのグループが追加されたことをクラスタウェアが認識しているかを確認することができます。CRS再起動後
ps -ef | grep pmon
    grid     14417     1  0 05:37 ?        00:00:00 asm_pmon_+ASM1
    oracle   15136     1  0 05:37 ?        00:00:00 ora_pmon_ctestdb1
    grid     15143     1  0 05:37 ?        00:00:00 mdb_pmon_-MGMTDB
    oracle   30528 27106  0 06:06 pts/1    00:00:00 grep pmon

cat /proc/14417/status |grep Groups

    Groups: 1200 1201 1202 54321 54323 ★54323(Aadmin)が認識されている

cat /proc/15136/status |grep Groups

  Groups: 1101 1102 1103 1104 1201 54321 54322 54323 ★54323(Aadmin)が認識されている
これでようやくexpdpが可能となりました。
$ /u01/app/oracle/product/12.1.0/dbhome_1/bin/expdp user_A/welcome1@testdb directory=dirA dumpfile=expdp_A.log schemas=user_A

Export: Release 12.1.0.2.0 - Production on Sun Dec 15 05:58:12 2019

Copyright (c) 1982, 2014, Oracle and/or its affiliates.  All rights reserved.

Connected to: Oracle Database 12c Enterprise Edition Release 12.1.0.2.0 - 64bit Production
With the Partitioning, Real Application Clusters, Automatic Storage Management, OLAP,
Advanced Analytics and Real Application Testing options
Starting "USER_A"."SYS_EXPORT_SCHEMA_01":  user_A/********@testdb directory=dirA dumpfile=expdp_A.log schemas=user_A
Estimate in progress using BLOCKS method...
Processing object type SCHEMA_EXPORT/TABLE/TABLE_DATA
Total estimation using BLOCKS method: 0 KB
Processing object type SCHEMA_EXPORT/PRE_SCHEMA/PROCACT_SCHEMA
Processing object type SCHEMA_EXPORT/TABLE/TABLE
Processing object type SCHEMA_EXPORT/TABLE/COMMENT
Processing object type SCHEMA_EXPORT/TABLE/INDEX/INDEX
Processing object type SCHEMA_EXPORT/TABLE/CONSTRAINT/CONSTRAINT
Processing object type SCHEMA_EXPORT/TABLE/INDEX/STATISTICS/INDEX_STATISTICS
Processing object type SCHEMA_EXPORT/TABLE/STATISTICS/TABLE_STATISTICS
Processing object type SCHEMA_EXPORT/STATISTICS/MARKER
Master table "USER_A"."SYS_EXPORT_SCHEMA_01" successfully loaded/unloaded
******************************************************************************
Dump file set for USER_A.SYS_EXPORT_SCHEMA_01 is:
  /var/work/Adir/expdp_A.log
Job "USER_A"."SYS_EXPORT_SCHEMA_01" successfully completed at Sun Dec 15 05:58:36 2019 elapsed 0 00:00:23
実現したかったアクセス制御もできております。
$ id
uid=54323(Badmin) gid=54324(Badmin) groups=54324(Badmin)
$ cd /var/work/Adir/
-bash: cd: /var/work/Adir/: Permission denied
$ ls -l /var/work/Adir/
ls: cannot open directory /var/work/Adir/: Permission denied
以上になります。
JPOUGアドベントカレンダー2019の19日目の記事もお楽しみに~

- 投稿日:2019-12-18T01:34:36+09:00
expdpで指定するディレクトリの権限でちょっとはまった話(初心者向け)
こんにちは。hrkii123と申します。
このエントリはJPOUGアドベントカレンダー2019の18日目の記事です。
Qiita初投稿がJPOUGアドベントカレンダー2019となりました。
JPOUGアドベントカレンダー2019
https://adventar.org/calendars/4154はじめに
今回はdatapumpのexpdpユーティリティではまったお話です。
とある日のこと。開発チームごとにOSユーザ、DBユーザ、OSディレクトリ等を分け、チーム間で互いにデータを参照できないようにするという要件のなかDB周りの設計を行っていました。
その中で、datapumpでエクスポートするOSディレクトリもチームごとに用意し、お互いのダンプファイルを参照できないようにしてほしいと注文が入りました。私はそんなのOSディレクトリのパーミッションで簡単に制御できるじゃーんって思ってました。
(そう簡単にはいかなかった。)で、いろいろ試した検証内容をまとめました。
概要図
datapumpでuser_Aスキーマを/var/work/Adirへエクスポートします。
エクスポート後、Aadminユーザのみ/var/work/Adir配下のダンプファイルへアクセス可能で、Badminユーザはアクセスできないようにします。
アクセスの可否はOSディレクトリのパーミッション設定で行います。また、図では記載していませんが、DBは12.1のRAC環境を使いました。(たまたま仮想マシンがあったので..)
検証用にDBユーザ”user_A”とディレクトリオブジェクト”dirA”を作成しておきます。
DBユーザ”user_A”には必要な権限を付与しておきます。create user user_A identified by welcome1; CREATE DIRECTORY dirA AS '/var/work/Adir'; grant create session,resource,unlimited tablespace to user_A; grant read, write on directory dirA to user_A;さて、この状態でexpdpを実行できるでしょうか。
/u01/app/oracle/product/12.1.0/dbhome_1/bin/expdp user_A/welcome1@testdb directory=dirA dumpfile=expdp_A.log schemas=user_A下記出力の通り、エラーとなりました。
ORA-39002: invalid operation
ORA-39070: Unable to open the log file.
ORA-29283: invalid file operation
ORA-06512: at "SYS.UTL_FILE", line 536
ORA-29283: invalid file operation
上記のエラーはOSディレクトリのパーミッションが適切ではないときに出力されます。
ディレクトリオブジェクトで指定しているOSディレクトリは所有者Aadmin、所有グループAadminとなっております。datapumpの仕様でエクスポートされるダンプファイルは所有者oracle、所有グループasmadminとなります。つまりdatapumpの実行ではoracleユーザとasmadminグループからのアクセスが許可できている必要があります。OSディレクトリのパーミッションが777であれば何も気にする必要はないですが、今回の場合ではoracleユーザはAadminグループに属していないため、OSディレクトリへのアクセスができません。
対処として、今回はoracleユーザとgridユーザのセカンダリグループにAadminを追加することにします。
id oracle
uid=54321(oracle) gid=54321(oinstall)groups=54321(oinstall),54322(dba),1101(oper),1102(backupdba),1103(dgdba),1104(kmdba),1201(asmdba),54323(Aadmin)

id grid
uid=1100(grid) gid=54321(oinstall)groups=54321(oinstall),1200(asmadmin),1201(asmdba),1202(asmoper),54323(Aadmin)
今度は成功するでしょうか。
ORA-39002: invalid operation
ORA-39070: Unable to open the log file.
ORA-29283: invalid file operation
ORA-06512: at "SYS.UTL_FILE", line 536
ORA-29283: invalid file operation
また出ました。このエラー!!
OSディレクトリへのアクセスはできるはずなのに、、ちなみにOSディレクトリのパーミッションを777に変更すると、正常に動作します。
$ /u01/app/oracle/product/12.1.0/dbhome_1/bin/expdp user_A/welcome1@testdb directory=dirA
dumpfile=expdp_A.log schemas=user_A

Export: Release 12.1.0.2.0 - Production on Sun Dec 15 03:53:01 2019

Copyright (c) 1982, 2014, Oracle and/or its affiliates.  All rights reserved.

Connected to: Oracle Database 12c Enterprise Edition Release 12.1.0.2.0 - 64bit Production
With the Partitioning, Real Application Clusters, Automatic Storage Management, OLAP,
Advanced Analytics and Real Application Testing options
Starting "USER_A"."SYS_EXPORT_SCHEMA_01":  user_A/********@testdb directory=dirA dumpfile=expdp_A.log schemas=user_A
Estimate in progress using BLOCKS method...
Processing object type SCHEMA_EXPORT/TABLE/TABLE_DATA
Total estimation using BLOCKS method: 0 KB
Processing object type SCHEMA_EXPORT/PRE_SCHEMA/PROCACT_SCHEMA
Processing object type SCHEMA_EXPORT/TABLE/TABLE
Processing object type SCHEMA_EXPORT/TABLE/COMMENT
Processing object type SCHEMA_EXPORT/TABLE/INDEX/INDEX
Processing object type SCHEMA_EXPORT/TABLE/CONSTRAINT/CONSTRAINT
Processing object type SCHEMA_EXPORT/TABLE/INDEX/STATISTICS/INDEX_STATISTICS
Processing object type SCHEMA_EXPORT/TABLE/STATISTICS/TABLE_STATISTICS
Processing object type SCHEMA_EXPORT/STATISTICS/MARKER
Master table "USER_A"."SYS_EXPORT_SCHEMA_01" successfully loaded/unloaded
******************************************************************************
Dump file set for USER_A.SYS_EXPORT_SCHEMA_01 is:
  /var/work/Adir/expdp_A.log
Job "USER_A"."SYS_EXPORT_SCHEMA_01" successfully completed at Sun Dec 15 03:53:42 2019 elapsed 0 00:00:38

[oracle@node1 ~]$
結局どうやったか
RAC環境でoracle,gridユーザのセカンダリグループを追加する際にはクラスタウェアへ認識させる必要があります!グループ追加後にクラスタウェアを再起動することで認識されます。
pmonのプロセスを確認することでユーザのグループが追加されたことをクラスタウェアが認識しているかを確認することができます。CRS再起動後
ps -ef | grep pmon
    grid     14417     1  0 05:37 ?        00:00:00 asm_pmon_+ASM1
    oracle   15136     1  0 05:37 ?        00:00:00 ora_pmon_ctestdb1
    grid     15143     1  0 05:37 ?        00:00:00 mdb_pmon_-MGMTDB
    oracle   30528 27106  0 06:06 pts/1    00:00:00 grep pmon

cat /proc/14417/status |grep Groups

    Groups: 1200 1201 1202 54321 54323 ★54323(Aadmin)が認識されている

cat /proc/15136/status |grep Groups

  Groups: 1101 1102 1103 1104 1201 54321 54322 54323 ★54323(Aadmin)が認識されている
これでようやくexpdpが可能となりました。
$ /u01/app/oracle/product/12.1.0/dbhome_1/bin/expdp user_A/welcome1@testdb directory=dirA dumpfile=expdp_A.log schemas=user_A

Export: Release 12.1.0.2.0 - Production on Sun Dec 15 05:58:12 2019

Copyright (c) 1982, 2014, Oracle and/or its affiliates.  All rights reserved.

Connected to: Oracle Database 12c Enterprise Edition Release 12.1.0.2.0 - 64bit Production
With the Partitioning, Real Application Clusters, Automatic Storage Management, OLAP,
Advanced Analytics and Real Application Testing options
Starting "USER_A"."SYS_EXPORT_SCHEMA_01":  user_A/********@testdb directory=dirA dumpfile=expdp_A.log schemas=user_A
Estimate in progress using BLOCKS method...
Processing object type SCHEMA_EXPORT/TABLE/TABLE_DATA
Total estimation using BLOCKS method: 0 KB
Processing object type SCHEMA_EXPORT/PRE_SCHEMA/PROCACT_SCHEMA
Processing object type SCHEMA_EXPORT/TABLE/TABLE
Processing object type SCHEMA_EXPORT/TABLE/COMMENT
Processing object type SCHEMA_EXPORT/TABLE/INDEX/INDEX
Processing object type SCHEMA_EXPORT/TABLE/CONSTRAINT/CONSTRAINT
Processing object type SCHEMA_EXPORT/TABLE/INDEX/STATISTICS/INDEX_STATISTICS
Processing object type SCHEMA_EXPORT/TABLE/STATISTICS/TABLE_STATISTICS
Processing object type SCHEMA_EXPORT/STATISTICS/MARKER
Master table "USER_A"."SYS_EXPORT_SCHEMA_01" successfully loaded/unloaded
******************************************************************************
Dump file set for USER_A.SYS_EXPORT_SCHEMA_01 is:
  /var/work/Adir/expdp_A.log
Job "USER_A"."SYS_EXPORT_SCHEMA_01" successfully completed at Sun Dec 15 05:58:36 2019 elapsed 0 00:00:23
実現したかったアクセス制御もできております。
$ id
uid=54323(Badmin) gid=54324(Badmin) groups=54324(Badmin)
$ cd /var/work/Adir/
-bash: cd: /var/work/Adir/: Permission denied
$ ls -l /var/work/Adir/
ls: cannot open directory /var/work/Adir/: Permission denied
以上になります。
JPOUGアドベントカレンダー2019の19日目の記事もお楽しみに~
- 投稿日:2019-12-18T01:21:17+09:00
RaspberryPi4にOpenMediaVault5をインストールする
概要
RaspberryPi4を買ってきたので、OpenMediaVaultでNASを作ろうと、なった訳だけど
すごい昔にやったのとだいぶ違って
もうOpenMediaVaultがインストールされたOSをSDカードに書いてハイ終わり
というわけではなさそうだ。本稿では拙い英語力と偉大なるGoogle様のお力を借りて、なんとかOpenMediaVault5系(以下OMV)をRaspberryPi4にインストールしてみる。
用意
ソースのpdfにも書いてあるし、このページを読んでいる諸兄等には不要な情報かもしれないが、今回揃えたものを紹介。
- RaspberryPi4
- 言わずもがな今回の主役
- SSD : Intel p660 2TB
- 今回のある意味主役、奮発してM.2
- USB3.0がボトルネックだって?そんなの気にしたら負けだよ!!
- SDカード : サンディスクの32GB
- 安くなったなぁ、おい
- M.2を装着するカード : WINGONEER X870
- レビューが乏しいけどちゃんと動くよ
- その他ネジとかスペーサー、ケース、ヒートシンク、各種ケーブルとかもろもろ
- 必ずしも全部はいらないよ
全部ドッキングするとこんな感じ(かっこいい!!)
WINGONEER X870の使い方は本来逆向きらしいんだけど、このほうが冷えると思うよね?
(見栄えの問題で配線はしてないけど、結線はちゃんとやろうね)あとは、インストールメディアを焼くためのPC。
WinでもMacでも大丈夫だけど、今回はWinでやっていきます。本題
さて、ではメディアを作っていくために、まずはraspbianを落としてくる。
https://www.raspberrypi.org/downloads/raspbian/
↑ここにアクセスして、Raspbian Buster Liteをダウンロードするのが、OMV様的にはgoodらしいが、
私はNASからそのまま動画とかも再生したいし、Raspbian Buster with desktopを今回はチョイス。ダウンロードしたzipWindows標準のアレで普通に解凍。
こんな感じになればOK次はisoファイルをSDカードに焼きます。
おすすめはこのソフトですが、何でもいいです。
https://www.balena.io/etcher/
とりあえず画面を写しながら、起動。
するとしばらくインストールが走るので、落ち着くまで待つ。
お気に入りの初期設定があるなら、いつやるのか?今でしょ。ただ、必ずやらないと行けないのは以下
(デスクトップ版のせいなのか、sshは初期で起動していない)sudo apt update sudo apt dist-upgrade sudo systemctl start ssh sudo systemctl enable ssh sudo reboot上記を実施したら別マシンからSSHできるか確認。
(事前にRaspberryPiの中でIP調べておこう!)ssh pi@xxx.xxx.xxx.xxxそしてやっとOMV5をインストール
※必ずpiユーザーでやること!!!wget -O - https://github.com/OpenMediaVault-Plugin-Developers/installScript/raw/master/install | sudo bashドキュメントによると30分かかることもあるらしいが、自分がやったときには15分くらいでできた。
終わったらもういっちょ再起動
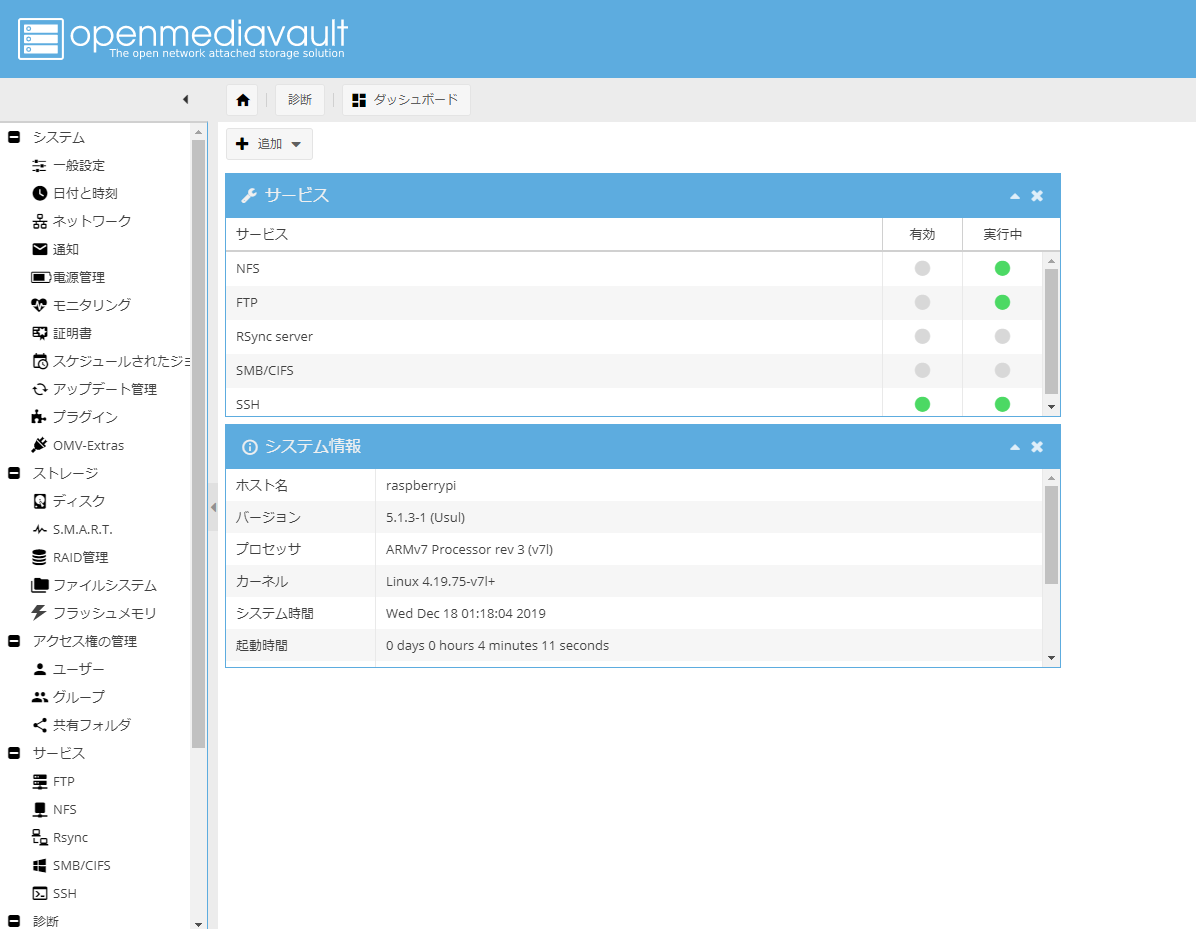
sudo reboot再起動から復帰したあと、今までのインストール作業がうまく行っていればブラウザからのアクセスでログインできるはず!
初期ユーザー名:admin
初期パスワード:openmediavaultこんな画面が出たら成功!
お疲れさまでしたー
WebUIでの設定は他のブログや解説ページのほうがわかりやすのでそちらを参考にどうぞー←