- 投稿日:2019-10-12T16:50:15+09:00
Slack, Twitterのアイコンを定期更新して同僚・フォロワーに今の天気を通知する
僕はずっといらすとやさんのグラサン太陽アイコンを使っているのですが、その時の天気に合わせて動的にアイコンを変えたら簡易天気速報みたいになって面白いんじゃないかとふと思い、AWSとGo(特に非同期処理)の勉強にもなりそうだったので実装してみました。
ざっくりとした処理の流れ
以下の処理を行うスクリプトをGoで書き、Lambda上で定期実行
- まず気象情報APIから現在の天気情報を取得
- 取得した天気情報を元にS3の画像を選択
- 選択した画像をSlack API/setPhoto, Twitter APIに投げてアイコンをアップデート
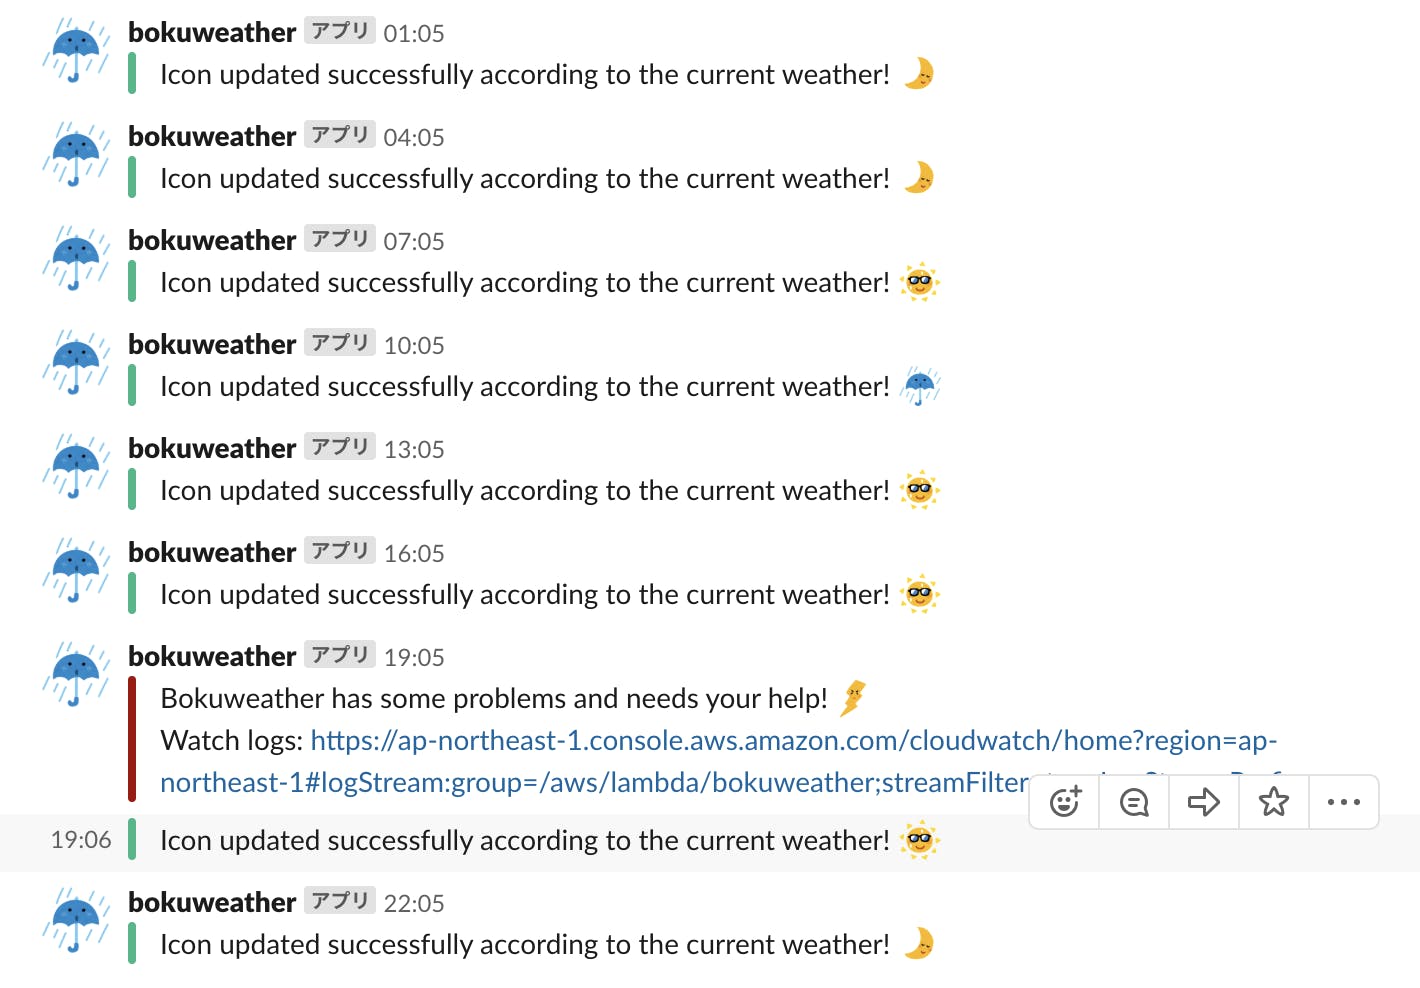
- Slack api/postMessageでアップデートの成功/失敗を会社ワークスペースの自分宛DMに通知
使用技術
- Go v1.12
- AWS Lambda
- AWS S3
- AWS SDK for GO
- Slack API
- Twitter API
下準備
Lambda
AWS上で、バイナリ実行環境であるLambdaとアイコン置き場であるS3をセットアップします。LambdaはRuntimeをGoに設定し、Cloudwatch Eventsで3時間ごとにkickされるようにします。
S3
S3にはいらすとやから貰った画像を適当な名前をつけてアップロード
IAM
今回AWS SDK for goを用いてコード内でS3のオブジェクトを取得するので、IAMで有効なセッションを作成します。コンソールからユーザーを作成しAccess key IDとSecret access keyを控えておきます。
コードを書く
Goでコードを書いていきます。
気象情報APIの情報を元にS3上の画像名を取得
Open Weather Map APIにリクエストを飛ばして現在の気象情報を取得します。tokenはLambda側に環境変数としておきます。(以下SlackやTwitterのAPI tokenも同様です。)どこかで処理が失敗した場合は
notifyAPIResultToSlackを呼び出してSlackに通知を送ります。(詳細は後述)type weatherAPIResponse struct { Weather []struct { ID int `json:"id"` Main string `json:"main"` } } func fetchCurrentWeatherID() int { log.Println("[INFO] Start fetching current weather info from weather api") city := "Tokyo" token := os.Getenv("WEATHER_API_TOKEN") apiURL := "https://api.openweathermap.org/data/2.5/weather?q=" + city + "&appid=" + token log.Printf("[INFO] Weather api token: %s", token) resp, _ := http.Get(apiURL) body, err := ioutil.ReadAll(resp.Body) if err != nil { notifyAPIResultToSlack(false) log.Fatalf("[ERROR] Fail to read weather api response body: %s", err.Error()) } defer resp.Body.Close() var respJSON weatherAPIResponse if err = json.Unmarshal(body, &respJSON); err != nil { notifyAPIResultToSlack(false) log.Fatalf("[ERROR] Fail to unmarshal weather api response json: %s", err.Error()) } log.Printf("[INFO] Current weather: %s", respJSON.Weather[0].Main) return respJSON.Weather[0].ID }APIからのレスポンスを元に画像名を選択
func getImageName() string {
    currentWeatherID := fetchCurrentWeatherID()

    var imageName string
    // ref: https://openweathermap.org/weather-conditions
    switch {
    case 200 <= currentWeatherID && currentWeatherID < 300:
        imageName = "bokuthunder"
    case currentWeatherID < 600:
        imageName = "bokurainy"
    case currentWeatherID < 700:
        imageName = "bokusnowy"
    default:
        imageName = "bokusunny"
    }

    // 夜は天気に関係なくbokumoonに上書き
    location, _ := time.LoadLocation("Asia/Tokyo")
    if h := time.Now().In(location).Hour(); h <= 5 || 22 <= h {
        imageName = "bokumoon"
    }

    return imageName
}
選択した画像名をキーとしてS3から画像データを取得
IAM作成時に控えたAccess key IDとSecret access keyでクライアントを認証し、S3から先ほど取得した画像名をキーにアイコンのオブジェクトを取得します。
func fetchS3ImageObjByName(imageName string) *s3.GetObjectOutput {
    AWSSessionID := os.Getenv("AWS_SESSION_ID")
    AWSSecretAccessKey := os.Getenv("AWS_SECRET")

    log.Println("[INFO] Start fetching image obj from S3.")
    log.Printf("[INFO] AWS session id: %s", AWSSessionID)
    log.Printf("[INFO] AWS secret access key: %s", AWSSecretAccessKey)

    sess := session.Must(session.NewSession())
    creds := credentials.NewStaticCredentials(AWSSessionID, AWSSecretAccessKey, "")

    svc := s3.New(sess, &aws.Config{
        Region:      aws.String(endpoints.ApNortheast1RegionID),
        Credentials: creds,
    })

    obj, err := svc.GetObject(&s3.GetObjectInput{
        Bucket: aws.String("bokuweather"),
        Key:    aws.String(imageName + ".png"),
    })
    if err != nil {
        notifyAPIResultToSlack(false)
        log.Fatalf("[ERROR] Fail to get image object: %s", err.Error())
    }

    return obj
}
Slack API/Twitter APIでアイコンをアップデート
画像をSlack API, Twitter APIに投げます。ここではgo routineを用いて非同期処理にしました。
    imgByte, err := ioutil.ReadAll(obj.Body)
    if err != nil {
        notifyAPIResultToSlack(false)
        log.Fatalf("[Error] Fail to read the image object: %s", err.Error())
    }
    defer obj.Body.Close()

    c := make(chan apiResult, 1)

    go updateSlackIcon(imgByte, c)
    go updateTwitterIcon(imgByte, c)

    result1, result2 := <-c, <-c
    if result1.StatusCode != 200 || result2.StatusCode != 200 {
        notifyAPIResultToSlack(false)
        log.Fatalf("[ERROR] Something went wrong with updateImage func.")
    }
Slack APIのドキュメントを参考にリクエストを飛ばす関数を作ります。最後に結果をチャネルを介して大元のゴールーチンに渡します。
type slackAPIResponse struct {
    Ok    bool   `json:"ok"`
    Error string `json:"error"`
}

func updateSlackIcon(imgByte []byte, c chan apiResult) {
    imgBuffer := bytes.NewBuffer(imgByte)

    reqBody := &bytes.Buffer{}
    w := multipart.NewWriter(reqBody)
    part, err := w.CreateFormFile("image", "main.go")
    if _, err := io.Copy(part, imgBuffer); err != nil {
        notifyAPIResultToSlack(false)
        log.Fatalf("[Error] Fail to copy the image: %s", err.Error())
    }
    w.Close()

    req, _ := http.NewRequest(
        "POST",
        // "https://httpbin.org/post", // httpテスト用
        "https://slack.com/api/users.setPhoto",
        reqBody,
    )

    token := os.Getenv("SLACK_TOKEN")
    log.Printf("[INFO] Slack token: %s", token)

    req.Header.Set("Content-type", w.FormDataContentType())
    req.Header.Set("Authorization", "Bearer "+token)

    log.Println("[INFO] Send request to update slack icon!")
    client := &http.Client{}
    resp, err := client.Do(req)

    if err != nil {
        notifyAPIResultToSlack(false)
        log.Fatalf("[Error] Something went wrong with the slack setPhoto request : %s", err.Error())
    }
    log.Printf("[INFO] SetPhoto response status: %s", resp.Status)

    defer resp.Body.Close()
    body, err := ioutil.ReadAll(resp.Body)
    if err != nil {
        notifyAPIResultToSlack(false)
        log.Fatalf("[Error] Fail to read the response: %s", err.Error())
    }

    var respJSON slackAPIResponse
    if err = json.Unmarshal(body, &respJSON); err != nil {
        notifyAPIResultToSlack(false)
        log.Fatalf("[Error] Fail to unmarshal the response: %s", err.Error())
    }

    if !respJSON.Ok {
        notifyAPIResultToSlack(false)
        log.Fatalf("[ERROR] Something went wrong with setPhoto request: %s", respJSON.Error)
    }

    c <- apiResult{"slack", resp.StatusCode}
}
Twitter APIも同様にドキュメントを参考にリクエストを飛ばす関数を作ります。OAuthは便利なライブラリがあったのでそちらを用いました。途中突然リクエストが401 Unauthorizedを返してきてハマりましたが、URL Queryの予約語をエスケープすることで解決しました。
func updateTwitterIcon(imgByte []byte, c chan apiResult) {
    oauthAPIKey := os.Getenv("OAUTH_CONSUMER_API_KEY")
    oauthAPIKeySecret := os.Getenv("OAUTH_CONSUMER_SECRET_KEY")
    oauthAccessToken := os.Getenv("OAUTH_ACCESS_TOKEN")
    oauthAccessTokenSecret := os.Getenv("OAUTH_ACCESS_TOKEN_SECRET")

    log.Printf("[INFO] Twitter API Key: %s", oauthAPIKey)
    log.Printf("[INFO] Twitter API Secret Key: %s", oauthAPIKeySecret)
    log.Printf("[INFO] Twitter Access Token: %s", oauthAccessToken)
    log.Printf("[INFO] Twitter Secret Access Token: %s", oauthAccessTokenSecret)

    config := oauth1.NewConfig(oauthAPIKey, oauthAPIKeySecret)
    token := oauth1.NewToken(oauthAccessToken, oauthAccessTokenSecret)

    httpClient := config.Client(oauth1.NoContext, token)

    encodedImg := base64.StdEncoding.EncodeToString(imgByte)
    encodedImg = url.QueryEscape(encodedImg) // replace URL encoding reserved characters
    log.Printf("Encoded icon: %s", encodedImg)

    twitterAPIRootURL := "https://api.twitter.com"
    twitterAPIMethod := "/1.1/account/update_profile_image.json"
    URLParams := "?image=" + encodedImg

    req, _ := http.NewRequest(
        "POST",
        twitterAPIRootURL+twitterAPIMethod+URLParams,
        nil,
    )

    log.Println("[INFO] Send request to update twitter icon!")
    resp, err := httpClient.Do(req)
    if err != nil {
        notifyAPIResultToSlack(false)
        log.Fatalf("[Error] Something went wrong with the twitter request : %s", err.Error())
    }
    defer resp.Body.Close()

    log.Printf("[INFO] Twitter updateImage response status: %s", resp.Status)

    c <- apiResult{"twitter", resp.StatusCode}
}
結果の通知
両方のAPIからレスポンスが帰って来次第Slackの自分宛DMに結果を送信します。ここでは chat.postMessageを使います。
func notifyAPIResultToSlack(isSuccess bool) slackAPIResponse {
    channel := os.Getenv("SLACK_NOTIFY_CHANNEL_ID")
    attatchmentsColor := "good"
    imageName := getImageName()
    attatchmentsText := "Icon updated successfully according to the current weather! :" + imageName + ":"
    iconEmoji := ":bokurainy:"
    username := "bokuweather"

    if !isSuccess {
        lambdaCloudWatchURL := "https://ap-northeast-1.console.aws.amazon.com/cloudwatch/home?region=ap-northeast-1#logStream:group=/aws/lambda/bokuweather;streamFilter=typeLogStreamPrefix"
        attatchmentsColor = "danger"
        attatchmentsText = "Bokuweather has some problems and needs your help!:bokuthunder:\nWatch logs: " + lambdaCloudWatchURL
    }

    jsonStr := `{"channel":"` + channel + `","as_user":false,"attachments":[{"color":"` + attatchmentsColor + `","text":"` + attatchmentsText + `"}],"icon_emoji":"` + iconEmoji + `","username":"` + username + `"}`
    req, _ := http.NewRequest("POST", "https://slack.com/api/chat.postMessage", bytes.NewBuffer([]byte(jsonStr)))

    req.Header.Set("Authorization", "Bearer "+os.Getenv("SLACK_TOKEN"))
    req.Header.Set("Content-Type", "application/json")

    log.Printf("[INFO] Send request to notify outcome. isSuccess?: %t", isSuccess)
    client := &http.Client{}
    resp, err := client.Do(req)
    if err != nil {
        log.Fatalf("[Error] Something went wrong with the postMessage reqest : %s", err.Error())
    }
    log.Printf("[INFO] PostMessage response states: %s", resp.Status)

    defer resp.Body.Close()
    body, err := ioutil.ReadAll(resp.Body)
    if err != nil {
        log.Fatalf("[Error] Fail to read the response: %s", err.Error())
    }

    var respJSON slackAPIResponse
    if err = json.Unmarshal(body, &respJSON); err != nil {
        log.Fatalf("[Error] Fail to unmarshal the response: %s", err.Error())
    }

    return respJSON
}
成功した場合どの画像にアップデートされたかを、失敗した場合Cloudwatch Logsへのリンクを通知します。
コードのアップロード
$ GOOS=linux go build main.go
$ zip main.zip main # これでzipされたファイルをLambdaにアップロード
感想
AWSとGo(特に非同期処理周り)の入門としてこのアプリを作ってみようと思ったのですが、実際に何かを作りながら勉強するとやっぱり楽しいし書籍とにらめっこするより効率がいいと思いました。
また、各種APIやSDKなど本来意図していなかった分野の技術についても理解が深まって有意義でした。
まだまだ初心者なのでおかしい部分などあれば指摘大歓迎です!ソースコード


- 投稿日:2019-10-12T16:50:15+09:00
Slack, Twitterのアイコンを定期更新して同僚とフォロワーに今の天気を通知する
僕はずっといらすとやさんのグラサン太陽アイコンを使っているのですが、その時の天気に合わせて動的にアイコンを変えたら簡易天気速報みたいになって面白いんじゃないかとふと思い、AWSとGo(特に非同期処理)の勉強にもなりそうだったので実装してみました。
ざっくりとした処理の流れ
以下の処理を行うスクリプトをGoで書き、Lambda上で定期実行
- まず気象情報APIから現在の天気情報を取得
- 取得した天気情報を元にS3の画像を選択
- 選択した画像をSlack API/setPhoto, Twitter APIに投げてアイコンをアップデート
- Slack api/postMessageでアップデートの成功/失敗を会社ワークスペースの自分宛DMに通知
使用技術
- Go v1.12
- AWS Lambda
- AWS S3
- AWS SDK for GO
- Slack API
- Twitter API
下準備
Lambda
AWS上で、バイナリ実行環境であるLambdaとアイコン置き場であるS3をセットアップします。LambdaはRuntimeをGoに設定し、Cloudwatch Eventsで3時間ごとにkickされるようにします。
S3
S3にはいらすとやから貰った画像を適当な名前をつけてアップロード
IAM
今回AWS SDK for goを用いてコード内でS3のオブジェクトを取得するので、IAMで有効なセッションを作成します。コンソールからユーザーを作成しAccess key IDとSecret access keyを控えておきます。
コードを書く
Goでコードを書いていきます。
気象情報APIの情報を元にS3上の画像名を取得
Open Weather Map APIにリクエストを飛ばして現在の気象情報を取得します。tokenはLambda側に環境変数としておきます。(以下SlackやTwitterのAPI tokenも同様です。)どこかで処理が失敗した場合は
notifyAPIResultToSlackを呼び出してSlackに通知を送ります。(詳細は後述)type weatherAPIResponse struct { Weather []struct { ID int `json:"id"` Main string `json:"main"` } } func fetchCurrentWeatherID() int { log.Println("[INFO] Start fetching current weather info from weather api") city := "Tokyo" token := os.Getenv("WEATHER_API_TOKEN") apiURL := "https://api.openweathermap.org/data/2.5/weather?q=" + city + "&appid=" + token log.Printf("[INFO] Weather api token: %s", token) resp, _ := http.Get(apiURL) body, err := ioutil.ReadAll(resp.Body) if err != nil { notifyAPIResultToSlack(false) log.Fatalf("[ERROR] Fail to read weather api response body: %s", err.Error()) } defer resp.Body.Close() var respJSON weatherAPIResponse if err = json.Unmarshal(body, &respJSON); err != nil { notifyAPIResultToSlack(false) log.Fatalf("[ERROR] Fail to unmarshal weather api response json: %s", err.Error()) } log.Printf("[INFO] Current weather: %s", respJSON.Weather[0].Main) return respJSON.Weather[0].ID }APIからのレスポンスを元に画像名を選択
func getImageName() string {
    currentWeatherID := fetchCurrentWeatherID()

    var imageName string
    // ref: https://openweathermap.org/weather-conditions
    switch {
    case 200 <= currentWeatherID && currentWeatherID < 300:
        imageName = "bokuthunder"
    case currentWeatherID < 600:
        imageName = "bokurainy"
    case currentWeatherID < 700:
        imageName = "bokusnowy"
    default:
        imageName = "bokusunny"
    }

    // 夜は天気に関係なくbokumoonに上書き
    location, _ := time.LoadLocation("Asia/Tokyo")
    if h := time.Now().In(location).Hour(); h <= 5 || 22 <= h {
        imageName = "bokumoon"
    }

    return imageName
}
選択した画像名をキーとしてS3から画像データを取得
IAM作成時に控えたAccess key IDとSecret access keyでクライアントを認証し、S3から先ほど取得した画像名をキーにアイコンのオブジェクトを取得します。
func fetchS3ImageObjByName(imageName string) *s3.GetObjectOutput {
    AWSSessionID := os.Getenv("AWS_SESSION_ID")
    AWSSecretAccessKey := os.Getenv("AWS_SECRET")

    log.Println("[INFO] Start fetching image obj from S3.")
    log.Printf("[INFO] AWS session id: %s", AWSSessionID)
    log.Printf("[INFO] AWS secret access key: %s", AWSSecretAccessKey)

    sess := session.Must(session.NewSession())
    creds := credentials.NewStaticCredentials(AWSSessionID, AWSSecretAccessKey, "")

    svc := s3.New(sess, &aws.Config{
        Region:      aws.String(endpoints.ApNortheast1RegionID),
        Credentials: creds,
    })

    obj, err := svc.GetObject(&s3.GetObjectInput{
        Bucket: aws.String("bokuweather"),
        Key:    aws.String(imageName + ".png"),
    })
    if err != nil {
        notifyAPIResultToSlack(false)
        log.Fatalf("[ERROR] Fail to get image object: %s", err.Error())
    }

    return obj
}
Slack API/Twitter APIでアイコンをアップデート
画像をSlack API, Twitter APIに投げます。ここではgo routineを用いて非同期処理にしました。
    imgByte, err := ioutil.ReadAll(obj.Body)
    if err != nil {
        notifyAPIResultToSlack(false)
        log.Fatalf("[Error] Fail to read the image object: %s", err.Error())
    }
    defer obj.Body.Close()

    c := make(chan apiResult, 1)

    go updateSlackIcon(imgByte, c)
    go updateTwitterIcon(imgByte, c)

    result1, result2 := <-c, <-c
    if result1.StatusCode != 200 || result2.StatusCode != 200 {
        notifyAPIResultToSlack(false)
        log.Fatalf("[ERROR] Something went wrong with updateImage func.")
    }
Slack APIのドキュメントを参考にリクエストを飛ばす関数を作ります。最後に結果をチャネルを介して大元のゴールーチンに渡します。
type slackAPIResponse struct {
    Ok    bool   `json:"ok"`
    Error string `json:"error"`
}

func updateSlackIcon(imgByte []byte, c chan apiResult) {
    imgBuffer := bytes.NewBuffer(imgByte)

    reqBody := &bytes.Buffer{}
    w := multipart.NewWriter(reqBody)
    part, err := w.CreateFormFile("image", "main.go")
    if _, err := io.Copy(part, imgBuffer); err != nil {
        notifyAPIResultToSlack(false)
        log.Fatalf("[Error] Fail to copy the image: %s", err.Error())
    }
    w.Close()

    req, _ := http.NewRequest(
        "POST",
        // "https://httpbin.org/post", // httpテスト用
        "https://slack.com/api/users.setPhoto",
        reqBody,
    )

    token := os.Getenv("SLACK_TOKEN")
    log.Printf("[INFO] Slack token: %s", token)

    req.Header.Set("Content-type", w.FormDataContentType())
    req.Header.Set("Authorization", "Bearer "+token)

    log.Println("[INFO] Send request to update slack icon!")
    client := &http.Client{}
    resp, err := client.Do(req)

    if err != nil {
        notifyAPIResultToSlack(false)
        log.Fatalf("[Error] Something went wrong with the slack setPhoto request : %s", err.Error())
    }
    log.Printf("[INFO] SetPhoto response status: %s", resp.Status)

    defer resp.Body.Close()
    body, err := ioutil.ReadAll(resp.Body)
    if err != nil {
        notifyAPIResultToSlack(false)
        log.Fatalf("[Error] Fail to read the response: %s", err.Error())
    }

    var respJSON slackAPIResponse
    if err = json.Unmarshal(body, &respJSON); err != nil {
        notifyAPIResultToSlack(false)
        log.Fatalf("[Error] Fail to unmarshal the response: %s", err.Error())
    }

    if !respJSON.Ok {
        notifyAPIResultToSlack(false)
        log.Fatalf("[ERROR] Something went wrong with setPhoto request: %s", respJSON.Error)
    }

    c <- apiResult{"slack", resp.StatusCode}
}
Twitter APIも同様にドキュメントを参考にリクエストを飛ばす関数を作ります。OAuthは便利なライブラリがあったのでそちらを用いました。途中突然リクエストが401 Unauthorizedを返してきてハマりましたが、URL Queryの予約語をエスケープすることで解決しました。
func updateTwitterIcon(imgByte []byte, c chan apiResult) {
    oauthAPIKey := os.Getenv("OAUTH_CONSUMER_API_KEY")
    oauthAPIKeySecret := os.Getenv("OAUTH_CONSUMER_SECRET_KEY")
    oauthAccessToken := os.Getenv("OAUTH_ACCESS_TOKEN")
    oauthAccessTokenSecret := os.Getenv("OAUTH_ACCESS_TOKEN_SECRET")

    log.Printf("[INFO] Twitter API Key: %s", oauthAPIKey)
    log.Printf("[INFO] Twitter API Secret Key: %s", oauthAPIKeySecret)
    log.Printf("[INFO] Twitter Access Token: %s", oauthAccessToken)
    log.Printf("[INFO] Twitter Secret Access Token: %s", oauthAccessTokenSecret)

    config := oauth1.NewConfig(oauthAPIKey, oauthAPIKeySecret)
    token := oauth1.NewToken(oauthAccessToken, oauthAccessTokenSecret)

    httpClient := config.Client(oauth1.NoContext, token)

    encodedImg := base64.StdEncoding.EncodeToString(imgByte)
    encodedImg = url.QueryEscape(encodedImg) // replace URL encoding reserved characters
    log.Printf("Encoded icon: %s", encodedImg)

    twitterAPIRootURL := "https://api.twitter.com"
    twitterAPIMethod := "/1.1/account/update_profile_image.json"
    URLParams := "?image=" + encodedImg

    req, _ := http.NewRequest(
        "POST",
        twitterAPIRootURL+twitterAPIMethod+URLParams,
        nil,
    )

    log.Println("[INFO] Send request to update twitter icon!")
    resp, err := httpClient.Do(req)
    if err != nil {
        notifyAPIResultToSlack(false)
        log.Fatalf("[Error] Something went wrong with the twitter request : %s", err.Error())
    }
    defer resp.Body.Close()

    log.Printf("[INFO] Twitter updateImage response status: %s", resp.Status)

    c <- apiResult{"twitter", resp.StatusCode}
}
結果の通知
両方のAPIからレスポンスが帰って来次第Slackの自分宛DMに結果を送信します。ここでは chat.postMessageを使います。
func notifyAPIResultToSlack(isSuccess bool) slackAPIResponse {
    channel := os.Getenv("SLACK_NOTIFY_CHANNEL_ID")
    attatchmentsColor := "good"
    imageName := getImageName()
    attatchmentsText := "Icon updated successfully according to the current weather! :" + imageName + ":"
    iconEmoji := ":bokurainy:"
    username := "bokuweather"

    if !isSuccess {
        lambdaCloudWatchURL := "https://ap-northeast-1.console.aws.amazon.com/cloudwatch/home?region=ap-northeast-1#logStream:group=/aws/lambda/bokuweather;streamFilter=typeLogStreamPrefix"
        attatchmentsColor = "danger"
        attatchmentsText = "Bokuweather has some problems and needs your help!:bokuthunder:\nWatch logs: " + lambdaCloudWatchURL
    }

    jsonStr := `{"channel":"` + channel + `","as_user":false,"attachments":[{"color":"` + attatchmentsColor + `","text":"` + attatchmentsText + `"}],"icon_emoji":"` + iconEmoji + `","username":"` + username + `"}`
    req, _ := http.NewRequest("POST", "https://slack.com/api/chat.postMessage", bytes.NewBuffer([]byte(jsonStr)))

    req.Header.Set("Authorization", "Bearer "+os.Getenv("SLACK_TOKEN"))
    req.Header.Set("Content-Type", "application/json")

    log.Printf("[INFO] Send request to notify outcome. isSuccess?: %t", isSuccess)
    client := &http.Client{}
    resp, err := client.Do(req)
    if err != nil {
        log.Fatalf("[Error] Something went wrong with the postMessage reqest : %s", err.Error())
    }
    log.Printf("[INFO] PostMessage response states: %s", resp.Status)

    defer resp.Body.Close()
    body, err := ioutil.ReadAll(resp.Body)
    if err != nil {
        log.Fatalf("[Error] Fail to read the response: %s", err.Error())
    }

    var respJSON slackAPIResponse
    if err = json.Unmarshal(body, &respJSON); err != nil {
        log.Fatalf("[Error] Fail to unmarshal the response: %s", err.Error())
    }

    return respJSON
}
成功した場合どの画像にアップデートされたかを、失敗した場合Cloudwatch Logsへのリンクを通知します。
コードのアップロード
$ GOOS=linux go build main.go
$ zip main.zip main # これでzipされたファイルをLambdaにアップロード
感想
AWSとGo(特に非同期処理周り)の入門としてこのアプリを作ってみようと思ったのですが、実際に何かを作りながら勉強するとやっぱり楽しいし書籍とにらめっこするより効率がいいと思いました。
また、各種APIやSDKなど本来意図していなかった分野の技術についても理解が深まって有意義でした。
まだまだ初心者なのでおかしい部分などあれば指摘大歓迎です!ソースコード
- 投稿日:2019-10-12T16:11:28+09:00
たった2行のGoでファイルサーバを立てる
※2019/10/13追記
1行で書くことも可能なようですが、拡張性がなくなるので2行としています。
間違っていたら教えていただけると幸いです。本題
net/httpパッケージのhttp.FileServerを使う。main.gopackage main import "net/http" func main() { http.Handle("/", http.FileServer(http.Dir("./img"))) http.ListenAndServe("localhost:8080", nil) }以下のディレクトリ構造で実行した。
ディレクトリ構造. ├── img │ └── rabbit.jpg └── main.go実行結果
ディレクトリ構造が複雑な場合
- ディレクトリ構造が複雑な場合
- URLのPATHを変えたい場合
などは
http.StripPrefixで対応できる。main.gopackage main import "net/http" func main() { http.Handle("/resources/", http.StripPrefix("/resources", http.FileServer(http.Dir("./files/hoge/fuga/img")))) http.ListenAndServe("localhost:8080", nil) }ディレクトリ構造. ├── files │ └── hoge │ └── fuga │ └── img │ └── rabbit.jpg └── main.go実行結果

- 投稿日:2019-10-12T15:47:51+09:00
[Golang]Paiza等で標準入力する際の、受け取り方と前処理のサンプルコード
はじめに
Paizaや競技プログラミンで、大抵一番初めに必要な処理として、標準入力を受け取ることと、下処理をすることがあります。
備忘録的にまとめておきましたので、共有させて頂きます。標準入力を受け取る方法
1行を丸ごと取得する
reader := bufio.NewReader(os.Stdin)
s, _ := reader.ReadString('\n')
続けて、もう一度
reader.ReadString('\n')
とすれば、二行目の標準入力が取得できる。
入力される行数だけ繰り返せば、順番に全て取得できる。受け取った文字列の下処理
改行を除外する
s = strings.TrimSpace(s)邪魔な改行キーは、先に処理しちゃいましょう。
文字列を数値に変換する
n, _ := strconv.Atoi(s)かけたり、足したりする場合、数値にキャストしておく必要があります。
その場合は、このように処理します。空白で区切ってスライスにする
t := strings.Split(s, " ")まとめて取得した値を、空白で区切って、それぞれをスライスに格納します。
さいごに
簡単ではございますが、今回は以上です。
本家が無料で後悔している内容から、抜粋しておりますので、コンプライアンス的には問題がないかと思いますが、何か問題等があれば、コメントを頂けると嬉しいです。最後までありがとうございました。
- 投稿日:2019-10-12T11:05:10+09:00
nilとの付き合い方(panic: runtime error: invalid memory address or nil pointer dereference)
はじめに
Golangをメインにサーバーサイドエンジニアをやってます。
Twitterはこちらnilと上手に付き合えていますか?
最近、nilのことを理解することでやっと関係が良くなってきました。nilとうまく付き合えていないと発生するエラー
panic: runtime error: invalid memory address or nil pointer dereference本記事では、こいつはどうやったら解決するか解説したいと思います。
なんで発生するのか?
nilに何かしらのデータを渡すような処理を書いていると発生します。
これはアドレスとポインタの概念を理解していないとハマりやすいエラーだと思います。解説すると、
nilは何もないという意味です。アドレス(コンピュータのメモリ上の住所)を持ちません。本当に存在していないという意味です。
実体もなく「無」であるものにデータを渡すと「無」に何かを入れようとしているということになります。
もちろんそんなことはできないですよね。
なのでエラーが発生します。できれば使いたくない、、、、、、、、
でも!!
単純にORマッパーなどのライブラリがポインタを使うので使わざるを得ない
こんなときありますよね!!
具体的にはこんなユースケースが思い浮かびます。
渡ってくるデータが
nilかどうかで条件分岐したい引数かメソッドの返り値にポインタが設定されていて、それが
nilかどうかで処理を変えたいときってあると思います。
そんな状況を再現してみました。GoPlaylandにデモを作ったのでリンク先で実行してみてください
package main

import (
    "fmt"
)

func main() {
    var n *int // 宣言だけで値(データ)は何も入っていないので nil

    if n == nil {
        *n = 0
    }

    fmt.Println(n) // nil だったら数字を入れてnを使いたい
}
[実行結果] panic: runtime error: invalid memory address or nil pointer dereferenceどうやって解決したらいいのか?
nilがきてますよってエラーを返すと親切です。パニックもおこりません。
Invalid parameterとかがエラーメッセージとしてはいいかな。package main import ( "fmt" ) func main() { var n *int // 宣言だけで値(データ)は何も入っていないので nil if n == nil { fmt.Println("n = nil, Invalid Error") } }
nilに数字を代入して処理を続けましょう。nilが渡ってきてもエラーを返すのではなくて、0として扱って処理を続けたいという場合もあると思います。
そんなときは下記の書き方を参考にしてください。ちなみに、なぜわざわざ
変数 mを作成しているでしょうか。
それは数字を直接渡せないからです。
数字はアドレス(コンピュータのメモリ上のアドレス)をもっていません。めんどくさいと思った人もいるでしょう。
でも、そのめんどくさく冗長的に書かなければならないからGolangは安全だと言われます。
なんでもかんでも変数に代入できるJavascriptにTypeScriptがでてきて流行っている理由はを考えればわかると思います。GoPlaylandにデモを作ったのでリンク先で実行してみてください
package main

import (
    "fmt"
)

func main() {
    var n *int // 宣言だけなのでもちろん中身はnil, 宣言はしているのでアドレスはもっている

    m := 0

    if n == nil {
        // ポインタのnにmのアドレスを渡す
        n = &m
    }

    fmt.Println(*n) // ポインタをつけて値(変数の中身のデータ)を出力
    fmt.Println(n) // これだとmのアドレスが返ってくる
}
さいごに
ORMを触っていると本記事のような状況に遭遇することが増えると思います。
でも、ポインタやアドレスのおかげでGolangは安全で柔軟な処理を実現することができます。nilとかポインタとか嫌いでしたが、今ではそのメリットが理解できて好きになりました。もう怖くないです。
最後まで読んでくださりありがとうございました。
- 投稿日:2019-10-12T00:16:35+09:00
go言語でprometheusのラベル付きexporterのテンプレ
はじめに
この記事ではgo言語を使ってprometheus用のexporterのテンプレを紹介します.
最終的なコードはここ参考
https://github.com/prometheus/client_golang/blob/master/examples/random/main.go
環境
OS: Ubuntu 18.04.3
Go: 1.10.4 linux/amd64下準備
$ go get github.com/prometheus/client_golang/prometheusコード全容
package main

import (
    "flag"
    "log"
    "net/http"
    "time"

    "github.com/prometheus/client_golang/prometheus"
    "github.com/prometheus/client_golang/prometheus/promhttp"
)

var (
    addr = flag.String("listen-address", ":8080", "The address to listen on for HTTP requests.")
)

const (
    namespace = "testExporter"
)

var (
    testMetric = prometheus.NewGaugeVec(
        prometheus.GaugeOpts{
            Namespace: namespace,
            Name:      "testMetric",
            Help:      "This is testMetric.",
        },
        []string{"testFlag"},
    )
)

func init() {
    prometheus.MustRegister(testMetric)
}

func main() {
    flag.Parse()
    go func() {
        for {
            testMetric.WithLabelValues("HogeHoge").Set(99.0)
            time.Sleep(60 * time.Second)
        }
    }()
    http.Handle("/metrics", promhttp.Handler())
    log.Fatal(http.ListenAndServe(*addr, nil))
}
コード解説
パッケージインポートまで
package main

import (
    "flag"
    "log"
    "net/http"
    "time"

    "github.com/prometheus/client_golang/prometheus"
    "github.com/prometheus/client_golang/prometheus/promhttp"
)
必要なパッケージ群をインポートしておく.
リッスンするポートの設定
var (
    addr = flag.String("listen-address", ":8080", "The address to listen on for HTTP requests.")
)
flagを使ってコマンドライン引数からポートを指定している.実行時に,
$ go run main.go -listen-address :8888のように
-listen-address :<ポート>とすることで任意のポートを指定できる.
何も指定しなければ,flag.Stringの第2引数に指定したポートをリッスンする.namespace定義
const (
    namespace = "testExporter"
)
exporterの名前を定義する.
この名前はmetric名の一部になる.この例では,#<namespace>_<metric_name(後述)>{フラグ(後述)} 値 testExporter_testMetric{testFlag="HogeHoge"} 99のようになる.
metric定義
var (
        testMetric = prometheus.NewGaugeVec(
        prometheus.GaugeOpts{
            Namespace: namespace,
            Name:      "testMetric",
            Help:      "This is testMetric.",
        },
        []string{"testFlag"},
    )

/*      <metric_name> = prometheus.NewGaugeVec(
        prometheus.GaugeOpts{
            Namespace: <どのnamecpaceに属するか>,
            Name:      "<metric_name>",
            Help:      "<metricの説明>",
        },
        []string{"<flag名>"},
    )
*/
)
ここで取得したいmetricの定義を行う.
今回はGauge型のmetricを定義している.
定義の仕方はコメントの通り.
metricにflagをつけない場合はprometheus.NewGaugeだが,
metricにflagをつける場合はprometheus.NewGaugeVecを用いる.metricの登録
func init() {
    prometheus.MustRegister(testMetric)
    //prometheus.MustRegister(<metric_name>)
}
先程定義したmetricを登録する.
複数metricある場合はすべて登録する.
登録しないと:8080/metricsにアクセスしても表示されない.main関数
func main() {
    //コマンドライン引数をパース
    flag.Parse()
    go func() {
        for {
            testMetric.WithLabelValues("HogeHoge").Set(99.0)
            time.Sleep(60 * time.Second)
        }
    }()
    http.Handle("/metrics", promhttp.Handler())
    log.Fatal(http.ListenAndServe(*addr, nil))
}
先程定義したmetricに実際に値を入れる部分はこの行.
//<metric_name>.WithLabelValues("<セットしたいフラグ>").Set(値)
testMetric.WithLabelValues("HogeHoge").Set(99.0)
実際は目的の値をセットすることとなる.
最後の2行で指定されたポートでリッスンしている.
実際の出力
では,実際に実行してアクセスしてみる.
$ go run main.go &
$ curl localhost:8080/metrics
# HELP go_gc_duration_seconds A summary of the GC invocation durations. # TYPE go_gc_duration_seconds summary go_gc_duration_seconds{quantile="0"} 0 go_gc_duration_seconds{quantile="0.25"} 0 <一部省略> # HELP testExporter_testMetric This is testMetric. # TYPE testExporter_testMetric gauge testExporter_testMetric{testFlag="HogeHoge"} 99無事にさっき設定したラベルと値が出力されている.
ラベルの異なる値を追加してみる.
main関数の中の以下の部分を書き換える.
 go func() {
        for {
            testMetric.WithLabelValues("HogeHoge").Set(99.0)
            testMetric.WithLabelValues("FugaFuga").Set(33.4)

            time.Sleep(60 * time.Second)
        }
    }()
その後,再度実行してアクセスしてみる.
<前略>
# HELP testExporter_testMetric This is testMetric.
# TYPE testExporter_testMetric gauge
testExporter_testMetric{testFlag="FugaFuga"} 33.4
testExporter_testMetric{testFlag="HogeHoge"} 99
ちゃんとラベルの異なる2つのmetricが確認できる.
ラベルの数を増やしてみる.
metric定義の部分でラベルを増やす.
var (
    testMetric = prometheus.NewGaugeVec(
        prometheus.GaugeOpts{
            Namespace: namespace,
            Name:      "testMetric",
            Help:      "This is testMetric.",
        },
        []string{"testFlag", "testFlag2"},
    )
)
main関数も変更
go func() {
        for {
            testMetric.WithLabelValues("HogeHoge", "AAAA").Set(99.0)
            testMetric.WithLabelValues("FugaFuga", "BBBB").Set(33.4)
            time.Sleep(60 * time.Second)
        }
    }()
アクセスしてみる.
# HELP testExporter_testMetric This is testMetric.
# TYPE testExporter_testMetric gauge
testExporter_testMetric{testFlag="FugaFuga",testFlag2="BBBB"} 33.4
testExporter_testMetric{testFlag="HogeHoge",testFlag2="AAAA"} 99
ラベルが追加できている.
最後に
ラベル付きでexporterを記述する記事があまりなかったのですが,やってみるとかなりかんたんなことが分かりますね.