- 投稿日:2019-07-09T23:51:00+09:00
[iOS]StoryBoardで画面の見た目を作る流れ
説明の前提
XCode 10.2基準。
XCodeでiOSのプロジェクトは作れるが、StoryBoardで画面の見た目の作り方が分からない人向けの記事。
Debug Area(XCodeの下側), Inspector Area(XCodeの右側)は表示させている前提。
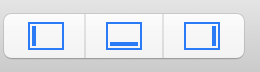
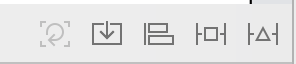
画面右上に、Areaの表示/非表示を切り替えるボタン(下図)があるのでそれで表示するように設定しておく。
1. Viewを置く(Buttonを例に説明)
- StoryBoardを開く
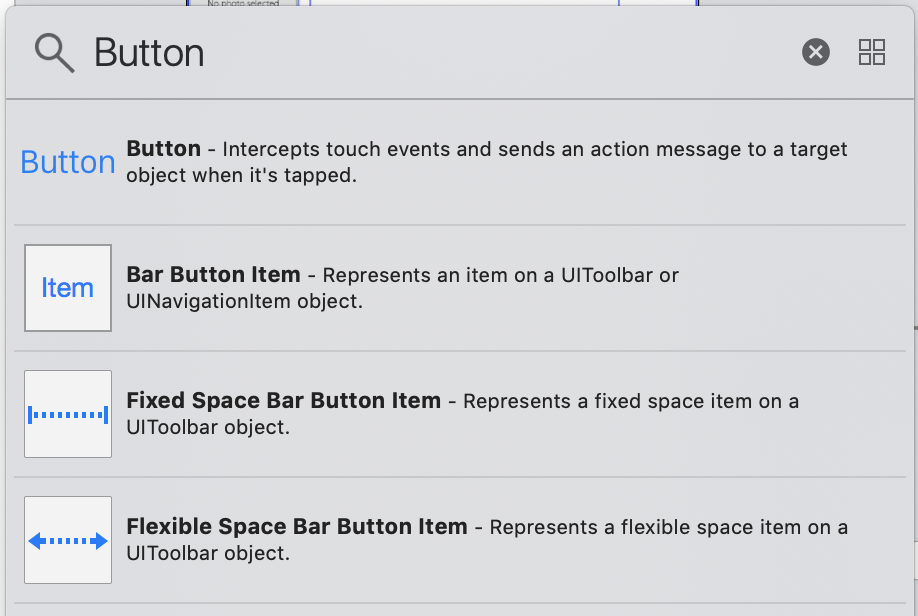
XCodeの右上の方に、以下のようなボタンがあるので押す。
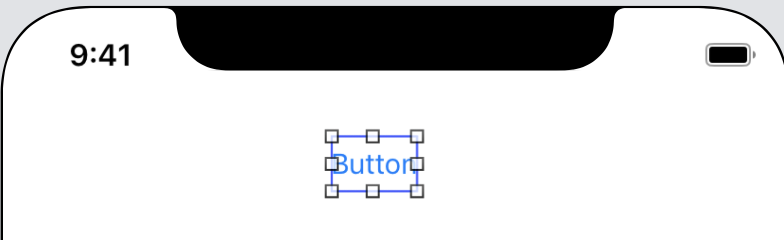
置きたいViewの名前で検索する(ここでは"Button"で検索)
上記の画面の検索結果の"Button"をDrag&DropでStoryBoardに置く
2. ViewのConstraint(表示位置のルールのこと)を指定する
ほとんどの場合、Viewの位置を明示的に指定したくなるはず。
たとえば、画面の中央に置きたいとか、画面の左端から8pxの位置に置きたいとか。
その場合はViewに対して、Constraint(日本語で制約)を設定する。制約の設定の仕方を以下に示す。
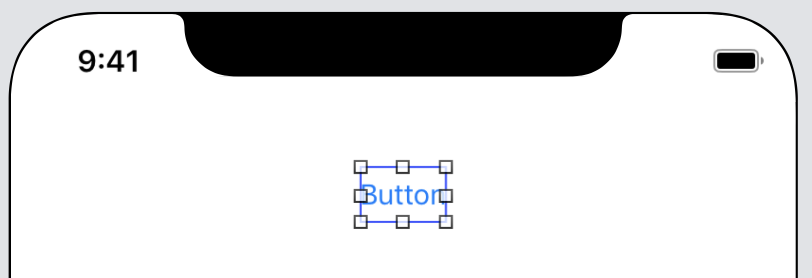
Constraintを指定したいUI要素をクリックして選択(下の画像はButtonを選択した時のもの)
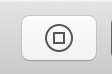
Add New Constraintsボタンを押す(下画像の右から2番目のボタン)
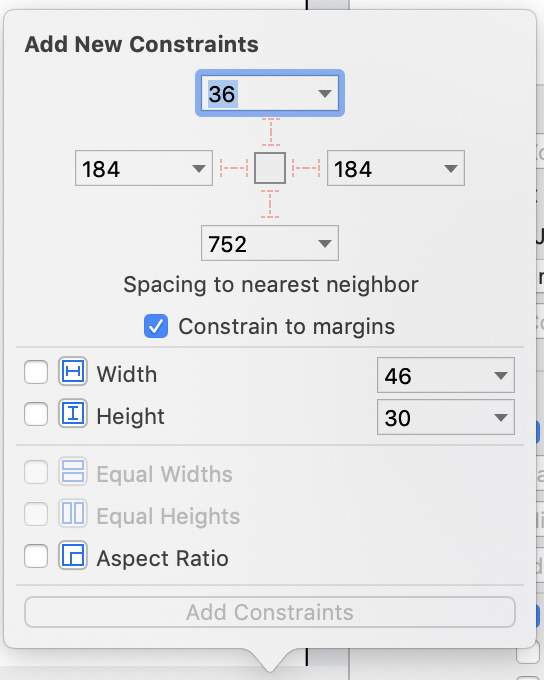
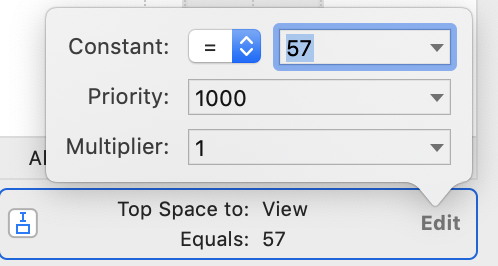
Constraintを設定
ここまでの操作で、こんなポップアップが出ているはず。
このポップアップは3つの領域に分かれる。
一番上は、一番近いViewに対する位置を指定する領域。
真ん中(Width/Height)は、読んで字の如く、幅と高さを指定する領域。
下は、Viewのアスペクト比を指定する領域。後は、ポップアップ上でConstraintを設定して、「Add Constarints」を押せば、Constarintの設定は完了。
設定の仕方によっては、Missing Constraintsという警告が発生することがある(ViewをStoryBoardで選択したとき、選択枠が赤くなる状態)。
その原因と対処方法はこちらを参照。
https://qiita.com/zigenin/items/b158439e6c4bd4c48d75一番近いView以外のViewとのConstraintを指定する
ここまでに書いた方法だと、一番近いViewにしかConstraintを指定できない。
一番近いView以外にConstraintを設定する方法もある。
View AとView Bの間の垂直方向の余白を8pxに設定するケースを例に、手順を説明する。
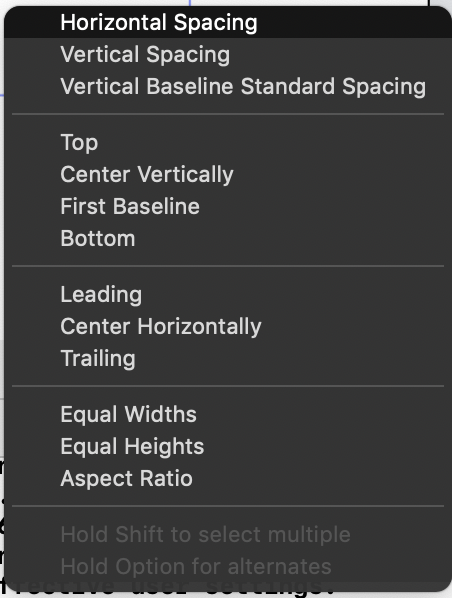
Controlキーを押しながらView AをView Bにドラッグ&ドロップする
Constarintの種類を選択するポップアップが出るので、Vertical Spacingを選択。
Size Inspectorを開く(下図の右から2つ目のボタンを選択。XCodeの右上の方にある)
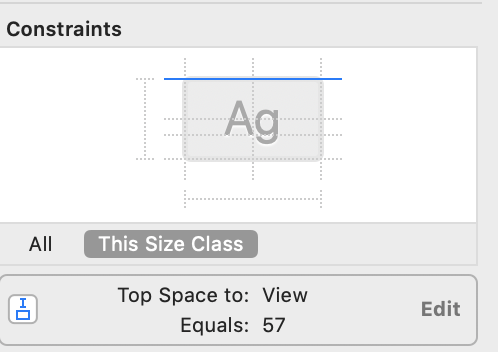
Constarintの値を修正する
Size Inspector(右側)を見ると、選択中のViewのConstraintの一覧が表示されているはず(下図)。
この一覧の内、先程設定したConstraintのEditボタンを押すと、Constarintの値を入力するポップアップが出る。
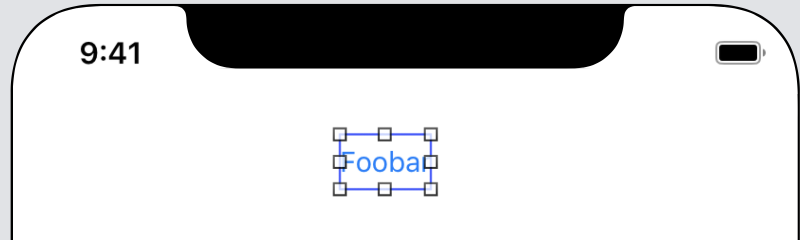
ポップアップのConstantの値に"8"を入力してEnterを押せば、View AとView Bの垂直余白を"8"に設定できたことになる。3. ViewのAttribute(Buttonの文言などの見た目のこと)を指定する
Buttonの文言を指定するケースを例に説明。
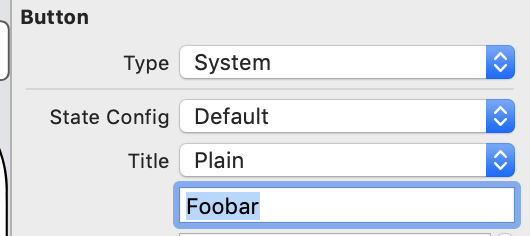
ButtonをStoryBoard上で選択
Attribute Inspectorを開く(下図、右から3番目のボタンを押す)
ButtonのTitleというAttributeがあるので、それを変更する(ここでは"Foobar")。
変更後にEnterを押すとStoryboardの表示が更新されるはず。
最後に
1~3を繰り返すだけでStoryBoardで画面の見た目は十分に作れる。
細かい所にこだわらなければ。


- 投稿日:2019-07-09T22:59:46+09:00
XcodeプロジェクトをSwiftUIを使って起動するように変更する
手順
AppDelegate.swiftに以下を追加// MARK: UISceneSession Lifecycle func application(_ application: UIApplication, configurationForConnecting connectingSceneSession: UISceneSession, options: UIScene.ConnectionOptions) -> UISceneConfiguration { // Called when a new scene session is being created. // Use this method to select a configuration to create the new scene with. return UISceneConfiguration(name: "Default Configuration", sessionRole: connectingSceneSession.role) } func application(_ application: UIApplication, didDiscardSceneSessions sceneSessions: Set<UISceneSession>) { // Called when the user discards a scene session. // If any sessions were discarded while the application was not running, this will be called shortly after application:didFinishLaunchingWithOptions. // Use this method to release any resources that were specific to the discarded scenes, as they will not return. }
SceneDelegate.swiftを作成import UIKit import SwiftUI class SceneDelegate: UIResponder, UIWindowSceneDelegate { var window: UIWindow? func scene(_ scene: UIScene, willConnectTo session: UISceneSession, options connectionOptions: UIScene.ConnectionOptions) { // Use this method to optionally configure and attach the UIWindow `window` to the provided UIWindowScene `scene`. // If using a storyboard, the `window` property will automatically be initialized and attached to the scene. // This delegate does not imply the connecting scene or session are new (see `application:configurationForConnectingSceneSession` instead). // Use a UIHostingController as window root view controller if let windowScene = scene as? UIWindowScene { let window = UIWindow(windowScene: windowScene) window.rootViewController = UIHostingController(rootView: ContentView()) self.window = window window.makeKeyAndVisible() } } func sceneDidDisconnect(_ scene: UIScene) { // Called as the scene is being released by the system. // This occurs shortly after the scene enters the background, or when its session is discarded. // Release any resources associated with this scene that can be re-created the next time the scene connects. // The scene may re-connect later, as its session was not neccessarily discarded (see `application:didDiscardSceneSessions` instead). } func sceneDidBecomeActive(_ scene: UIScene) { // Called when the scene has moved from an inactive state to an active state. // Use this method to restart any tasks that were paused (or not yet started) when the scene was inactive. } func sceneWillResignActive(_ scene: UIScene) { // Called when the scene will move from an active state to an inactive state. // This may occur due to temporary interruptions (ex. an incoming phone call). } func sceneWillEnterForeground(_ scene: UIScene) { // Called as the scene transitions from the background to the foreground. // Use this method to undo the changes made on entering the background. } func sceneDidEnterBackground(_ scene: UIScene) { // Called as the scene transitions from the foreground to the background. // Use this method to save data, release shared resources, and store enough scene-specific state information // to restore the scene back to its current state. } }起動画面となる
ContentView.swiftを作成import SwiftUI struct ContentView : View { var body: some View { Text("Hello World!") } } #if DEBUG struct ContentView_Previews : PreviewProvider { static var previews: some View { ContentView() } } #endif
Info.plistに以下を追加<key>UIApplicationSceneManifest</key> <dict> <key>UIApplicationSupportsMultipleScenes</key> <false/> <key>UISceneConfigurations</key> <dict> <key>UIWindowSceneSessionRoleApplication</key> <array> <dict> <key>UILaunchStoryboardName</key> <string>LaunchScreen</string> <key>UISceneConfigurationName</key> <string>Default Configuration</string> <key>UISceneDelegateClassName</key> <string>$(PRODUCT_MODULE_NAME).SceneDelegate</string> </dict> </array> </dict> </dict>環境
Xcode 11 beta 3
参考
- 投稿日:2019-07-09T22:59:46+09:00
XcodeプロジェクトをSwiftUIを使って起動するようにマイグレーション
手順
AppDelegate.swiftに以下を追加// MARK: UISceneSession Lifecycle func application(_ application: UIApplication, configurationForConnecting connectingSceneSession: UISceneSession, options: UIScene.ConnectionOptions) -> UISceneConfiguration { // Called when a new scene session is being created. // Use this method to select a configuration to create the new scene with. return UISceneConfiguration(name: "Default Configuration", sessionRole: connectingSceneSession.role) } func application(_ application: UIApplication, didDiscardSceneSessions sceneSessions: Set<UISceneSession>) { // Called when the user discards a scene session. // If any sessions were discarded while the application was not running, this will be called shortly after application:didFinishLaunchingWithOptions. // Use this method to release any resources that were specific to the discarded scenes, as they will not return. }
SceneDelegate.swiftを作成import UIKit import SwiftUI class SceneDelegate: UIResponder, UIWindowSceneDelegate { var window: UIWindow? func scene(_ scene: UIScene, willConnectTo session: UISceneSession, options connectionOptions: UIScene.ConnectionOptions) { // Use this method to optionally configure and attach the UIWindow `window` to the provided UIWindowScene `scene`. // If using a storyboard, the `window` property will automatically be initialized and attached to the scene. // This delegate does not imply the connecting scene or session are new (see `application:configurationForConnectingSceneSession` instead). // Use a UIHostingController as window root view controller if let windowScene = scene as? UIWindowScene { let window = UIWindow(windowScene: windowScene) window.rootViewController = UIHostingController(rootView: ContentView()) self.window = window window.makeKeyAndVisible() } } func sceneDidDisconnect(_ scene: UIScene) { // Called as the scene is being released by the system. // This occurs shortly after the scene enters the background, or when its session is discarded. // Release any resources associated with this scene that can be re-created the next time the scene connects. // The scene may re-connect later, as its session was not neccessarily discarded (see `application:didDiscardSceneSessions` instead). } func sceneDidBecomeActive(_ scene: UIScene) { // Called when the scene has moved from an inactive state to an active state. // Use this method to restart any tasks that were paused (or not yet started) when the scene was inactive. } func sceneWillResignActive(_ scene: UIScene) { // Called when the scene will move from an active state to an inactive state. // This may occur due to temporary interruptions (ex. an incoming phone call). } func sceneWillEnterForeground(_ scene: UIScene) { // Called as the scene transitions from the background to the foreground. // Use this method to undo the changes made on entering the background. } func sceneDidEnterBackground(_ scene: UIScene) { // Called as the scene transitions from the foreground to the background. // Use this method to save data, release shared resources, and store enough scene-specific state information // to restore the scene back to its current state. } }起動画面となる
ContentView.swiftを作成import SwiftUI struct ContentView : View { var body: some View { Text("Hello World!") } } #if DEBUG struct ContentView_Previews : PreviewProvider { static var previews: some View { ContentView() } } #endif
Info.plistに以下を追加<key>UIApplicationSceneManifest</key> <dict> <key>UIApplicationSupportsMultipleScenes</key> <false/> <key>UISceneConfigurations</key> <dict> <key>UIWindowSceneSessionRoleApplication</key> <array> <dict> <key>UILaunchStoryboardName</key> <string>LaunchScreen</string> <key>UISceneConfigurationName</key> <string>Default Configuration</string> <key>UISceneDelegateClassName</key> <string>$(PRODUCT_MODULE_NAME).SceneDelegate</string> </dict> </array> </dict> </dict>環境
Xcode 11 beta 3
参考
- 投稿日:2019-07-09T22:17:28+09:00
[Swift 5]TabBarのボタン(TabBarItem)をタップで画面をModal表示する簡単な方法
TabBarControllerで実装したボトムタブを選択すると、通常は画面が切り替わります。
今回は、特殊なボタンとして画面をModal(下から上へ出現)表示させたい時の実装です。(真ん中のボタンが丸く縁取られているアプリに多いと思います)
Modalで開きたい画面クラスが
TargetViewControllerと仮定して解説していきます。ソースコード
TabBarController.swiftimport UIKit final class TabBarController: UITabBarController { override func viewDidLoad() { super.viewDidLoad() delegate = self // UITabBarControllerDelegate } } // MARK: - UITabBarControllerDelegateに適合 extension TabBarController: UITabBarControllerDelegate { // TabBarItemが選択された時に呼ばれる func tabBarController(_ tabBarController: UITabBarController, shouldSelect viewController: UIViewController) -> Bool { // TabBarItemタップでModal表示をする画面を指定して実装 if viewController is TargetViewController { if let newVC = UIStoryboard(name: "Target", bundle: nil).instantiateInitialViewController() { tabBarController.present(newVC, animated: true, completion: nil) return false } } return true } }実装手順
delegate = selfを書くのを忘れないextentionでUITabBarControllerDelegateに適合するtabBarController(_:shouldSelect:)->Boolメソッドを実装- 開かれるViewControllerが対象のものだったら、という条件でif分岐
- あとは、ViewControllerをインスタンス化し、
present(_:animated:completion)メソッドで画面をModal表示させればOKです!NavigationControllerを使用している場合
TargetViewControllerでNavigationItemを使いたい等の理由でNavigationControllerを使用する場合
TabBarController.swiftif viewController.children.first is TargetViewController {というようにすればNavigationControllerが間にあっても判定可能です。
もし、もっと簡単な方法があればぜひ教えてください。
- 投稿日:2019-07-09T19:51:44+09:00
[Swift][iOS]TableViewのセル再利用の罠
はじめに
iOSアプリでGUIを作る際にはTableviewを使うことが非常に多いと思います。
このTableview、デフォルトだとセルのクラスはUITableViewCellで、表示出来るUIが事前に定められています(テキスト、サブテキスト等)。
たとえば画像を表示したかったり、ボタンを表示したかったり、実装したいUIによってはデフォルトのクラスを継承したカスタムクラスを作ってやる必要があります。
そんな際にバグってしまったセルの取扱いについてまとめておきます。バグった実装
例によってカスタムクラスをつくって、内部にはUITextFieldを設置して、ユーザーの入力を受け付けるようにすると、以下のようなバグが発生しました。
①1行目のセルのTextfieldに文字列を入力すると
②下にスクロールすると7行目くらいのセルに文字列が入力されてしまっている
バグの内容
実装したUIはセルの数が一定ではなく、ユーザーの入力によりセルが増減するものになります(初期状態はセルはひとつ)。セルを増やした際、1番目のセルに文字列を入力すると、それが「画面外の7番目くらいの別のセルにも反映されてしまう」バグに遭遇しました。
原因
ぐぐったら以下のQiitaの記事に辿りつきました。
UITableViewのあるセルに設定した値が、他のセルにも反映されてしまう
https://qiita.com/shikatani/items/88dff6ecf9684027862e要は画面外にあるセルは内部的には描写されておらず、必要に応じて描写されるようになっているようです。
画面外から画面内に入ってくるセルは、画面内から画面外に出ていくセルを再利用しているのです。対策
セルに登載されるデータはcellForRowAtで指定する訳ですが、事前にデータが固定されていないと実装が複雑になる感があります。今回の件は動的に登載されるべきデータが変更されることから、単純な実装ではうまくいかなかった訳です。上記のQiita記事では、バグは発生しているものの登載されるべきデータは静的に事前に指定されているので、セルを初期化すれば解決しています(∵画像の読み込み先URLは事前に決定されているから)。しかしながら本件のようなユーザーの入力にデータが依存するケースだと、入力されるデータを逐次保存しておかないと対応出来ないと思います。すなわち、予めセルに登載するデータ(=配列)を指定しておき、その配列の中身が更新される、という実装が必要になるかと。
終わりに
具体的な解決策は提示出来てませんが、Tableviewのセルに登載するデータは事前に指定してあげないと予期せぬ動作をするという事と、ググれば何でも出てくるという事を伝えたかった。
- 投稿日:2019-07-09T16:25:18+09:00
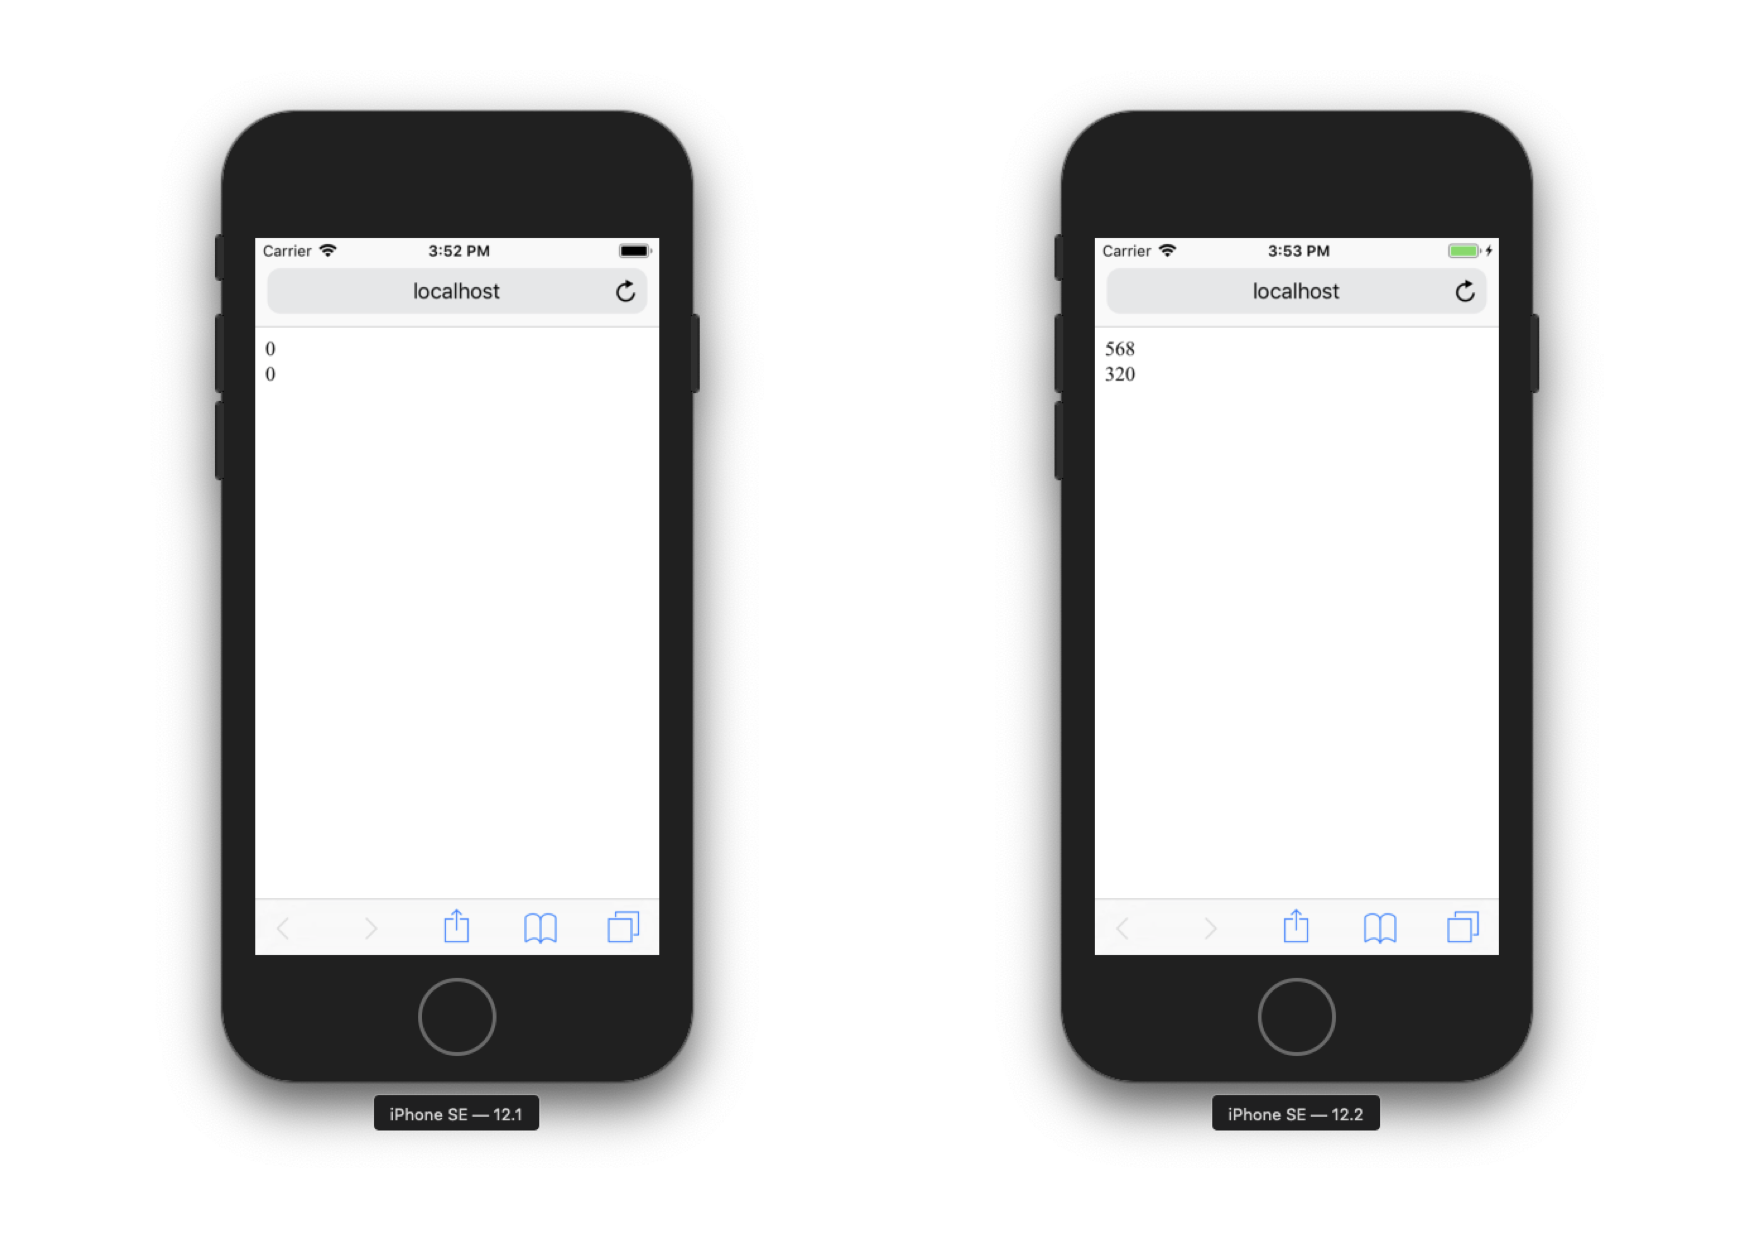
iOS SafariのouterHeight, outerWidthが知らないうちに使えるようになっていた
前まで、iOS Safariで
outerHeightやouterWidthを取ると0になる、という現象があったのですが、新しめのシミュレーターで確認したところとれました。どうやらiOS12.2あたりから使えるようです。iOS Simulator での確認結果
確認用HTML
<!DOCTYPE html>
<html lang="en">
<head>
    <meta charset="UTF-8">
    <meta name="viewport" content="width=device-width, initial-scale=1.0">
    <meta http-equiv="X-UA-Compatible" content="ie=edge">
    <title>Document</title>
</head>
<body>
</body>
<script>
    var h = document.createElement("div");
    var w = document.createElement("div");
    h.innerHTML = outerHeight;
    w.innerHTML = outerWidth;

    document.body.appendChild(h);
    document.body.appendChild(w);
</script>
</html>
- 投稿日:2019-07-09T11:18:24+09:00
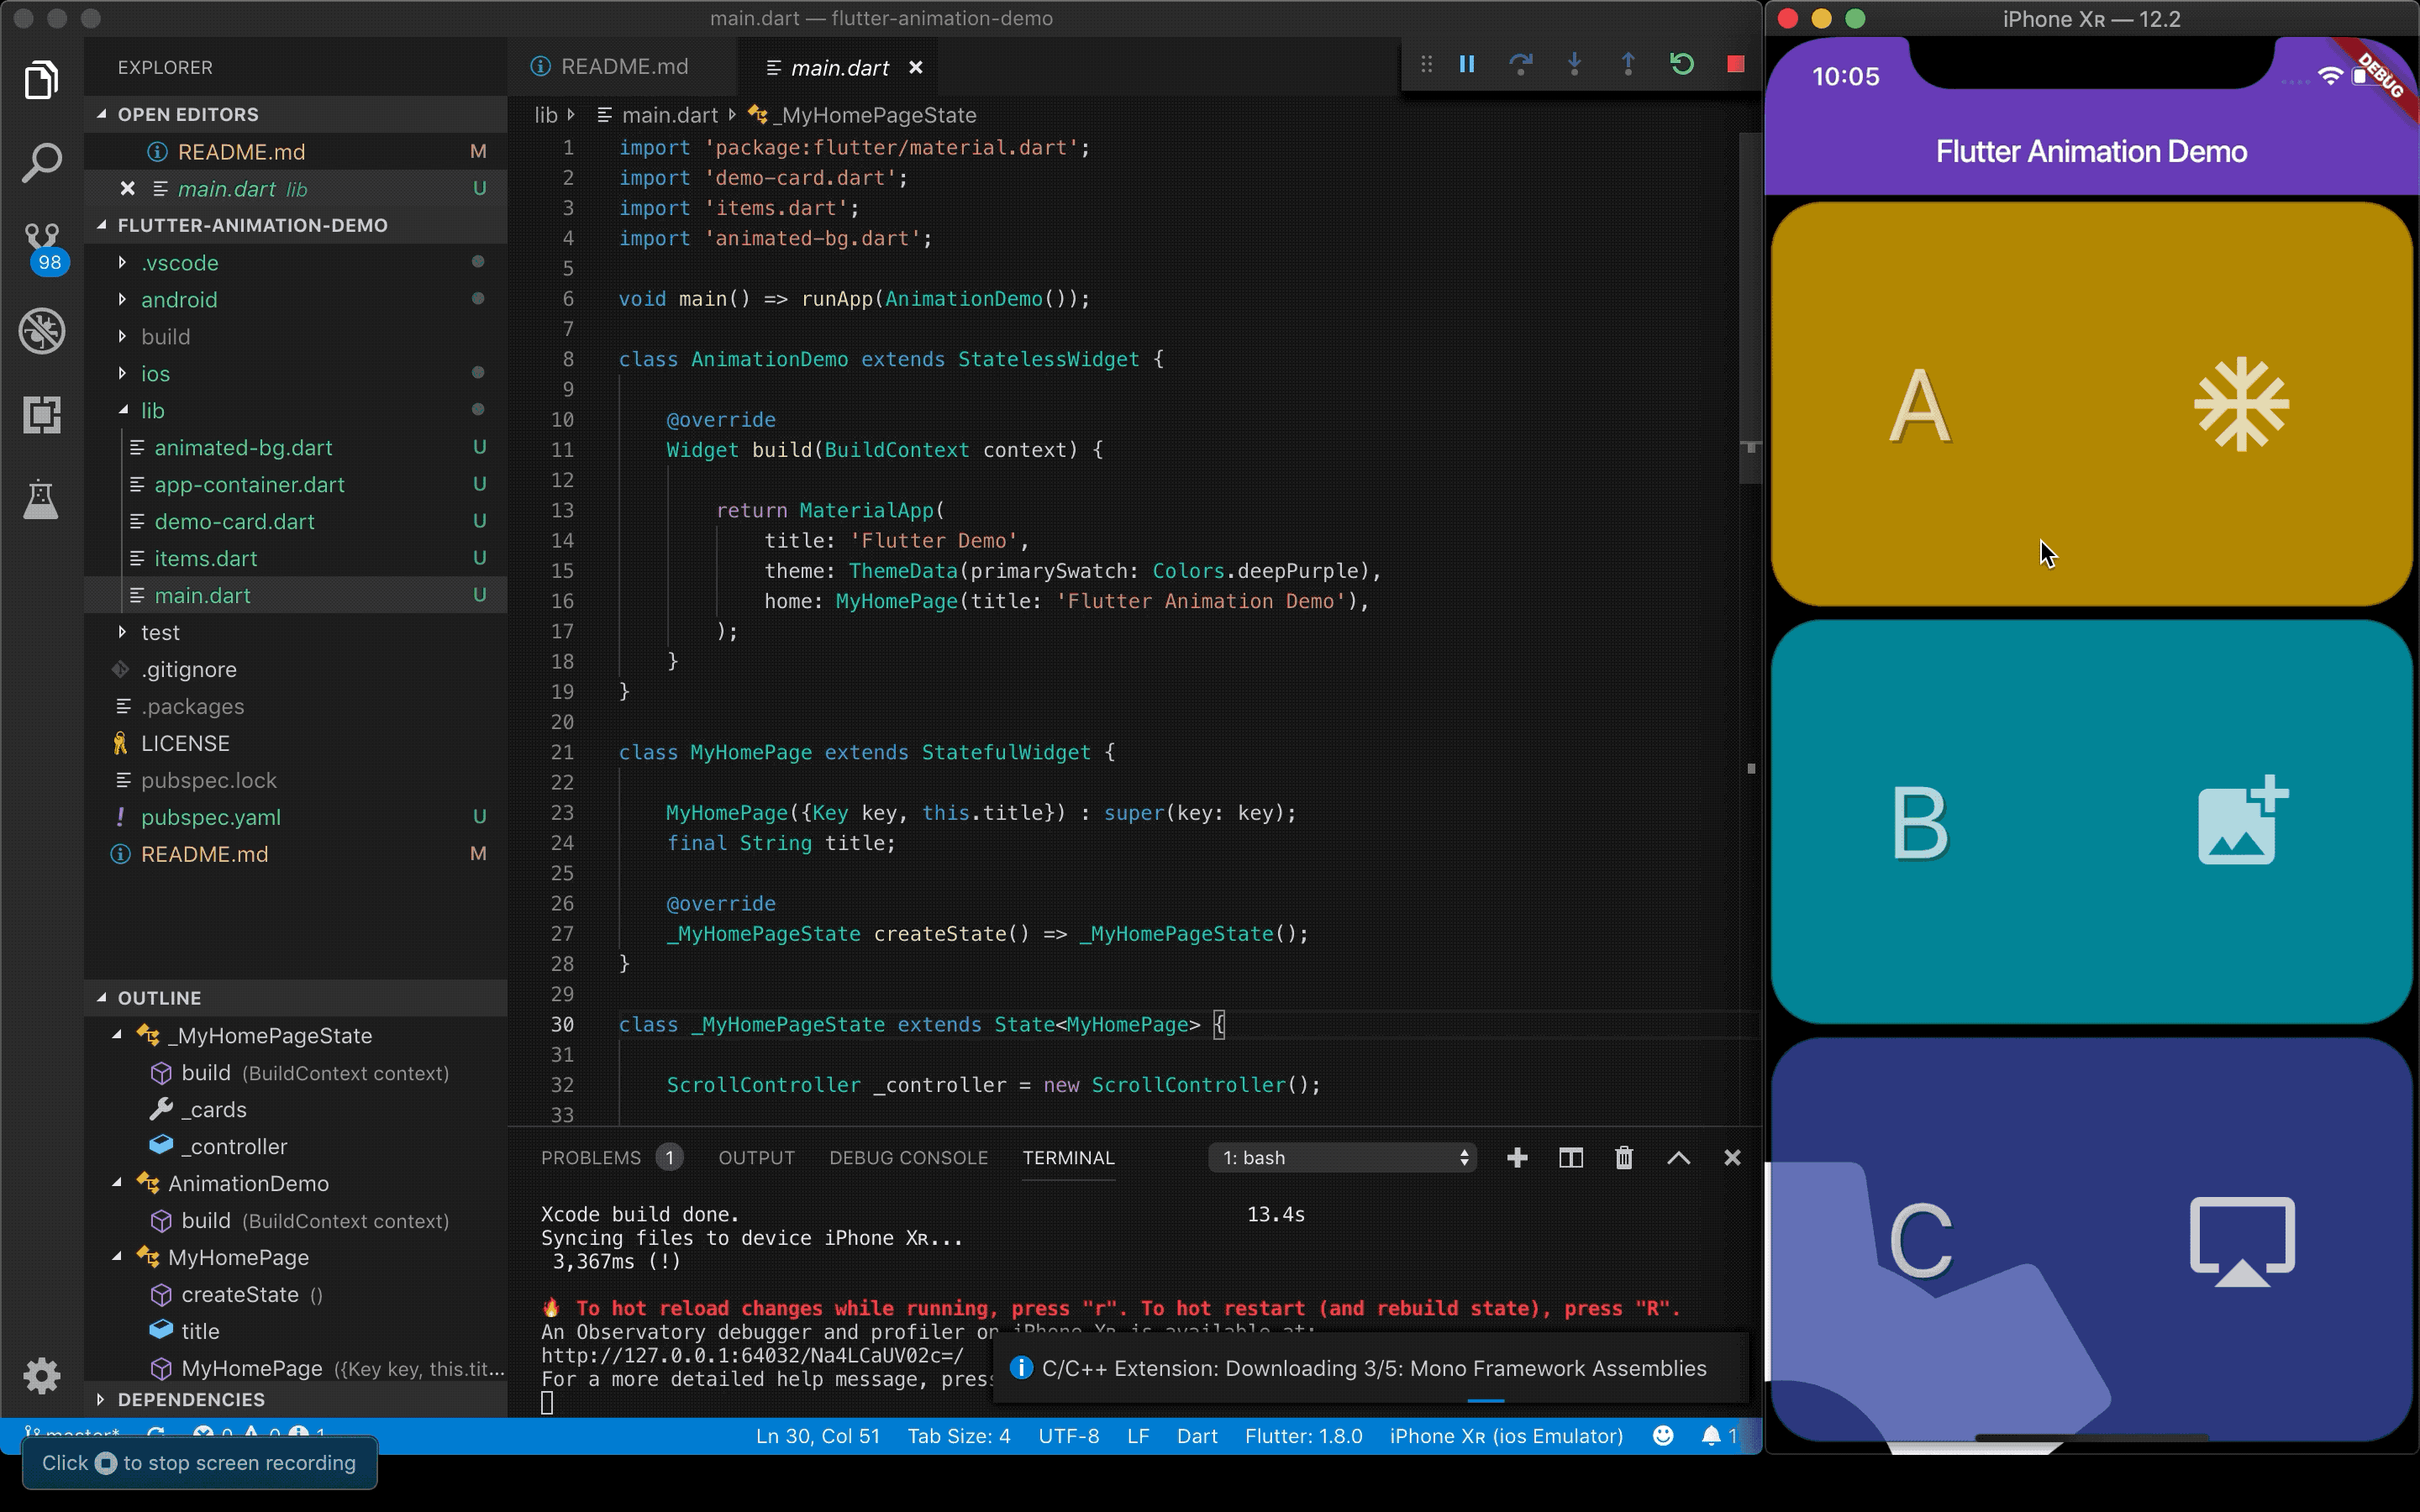
Flutterウィークリー #66
Flutterウィークリーとは?
FlutterファンによるFlutterファンのためのニュースレター
https://flutterweekly.net/この記事は#66の日本語訳です
https://mailchi.mp/flutterweekly/flutter-weekly-66※Google翻訳を使って自動翻訳を行っています。翻訳に問題がある箇所を発見しましたら編集リクエストを送っていただければ幸いです。
読み物&チュートリアル
#Hack19 - インターナショナルFlutterハッカソン結果
これで、 Flutter Hackathon Webサイトのすべての参加者を確認できます。また、参加した場合は、証明書を取り戻すことができます。FlutterとGoogle Cloud Platformが「学習」問題を解決するためにどのように連携したか
Tapas Adhikaryが彼女の娘がFlutterとGoogleクラウドを使用してライティングスキルを向上させるのに役立った経緯。Flutterスクロールアニメーションを作成する
https://itnext.io/creating-scroll-animations-in-flutter-74eb340627d9
Kenneth Reillyによるチュートリアルで、リストスクロールによるアニメーションの調整がいかに簡単かを示しています。プロバイダを使用した下部ナビゲーションバー
https://medium.com/flutterdevs/bottom-navigation-bar-using-provider-flutter-8b607beb2e5a
Ashish Rawatが、BottomNavigationBarでFlutter Providerパッケージを使用する方法を説明します。カスタムクリッパー:ウェーブカーブ - パート2
https://medium.com/@bhoomiharkhani22/custom-clipper-wave-curve-part-2-26cd54dc30f
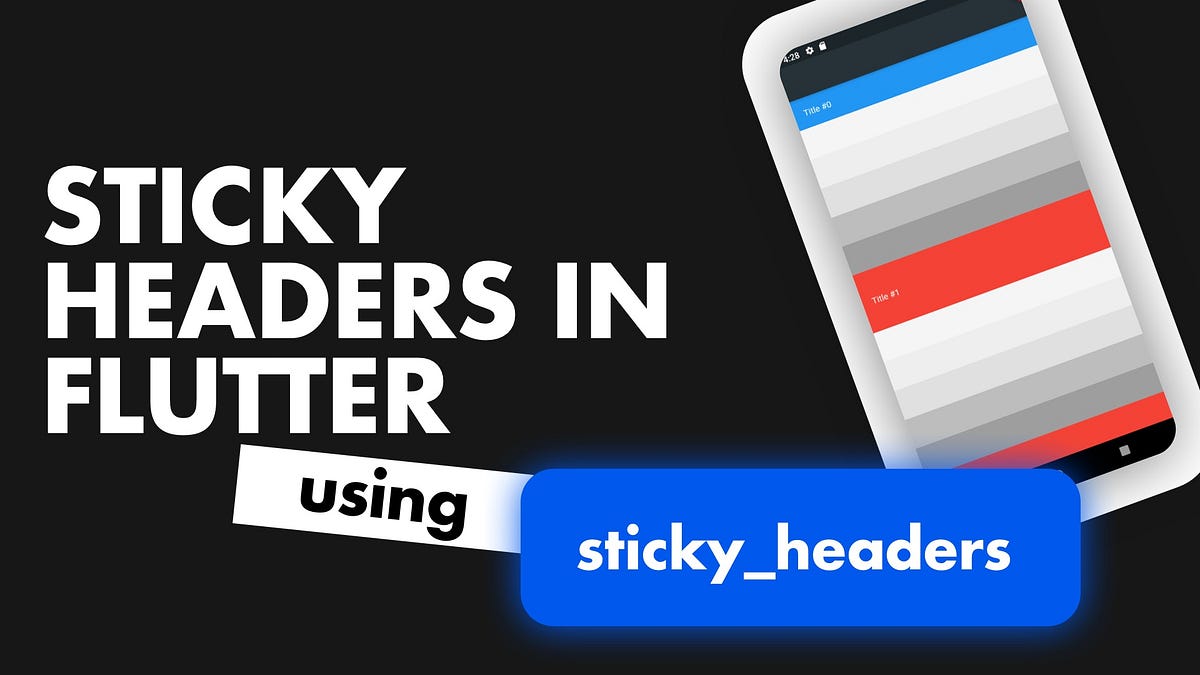
Bhoomika HarkhaniはFlutter使ってクレイジーカーブを作り続けていますFlutterカスタムスティッキヘッダ
https://medium.com/flutter-community/custom-sticky-headers-in-flutter-248d3c26863
Dane Mackierのこの記事でスティッキヘッダーを使用する方法を学んでください。ディープリンクとFlutterアプリケーションそれらを適切に処理する方法。
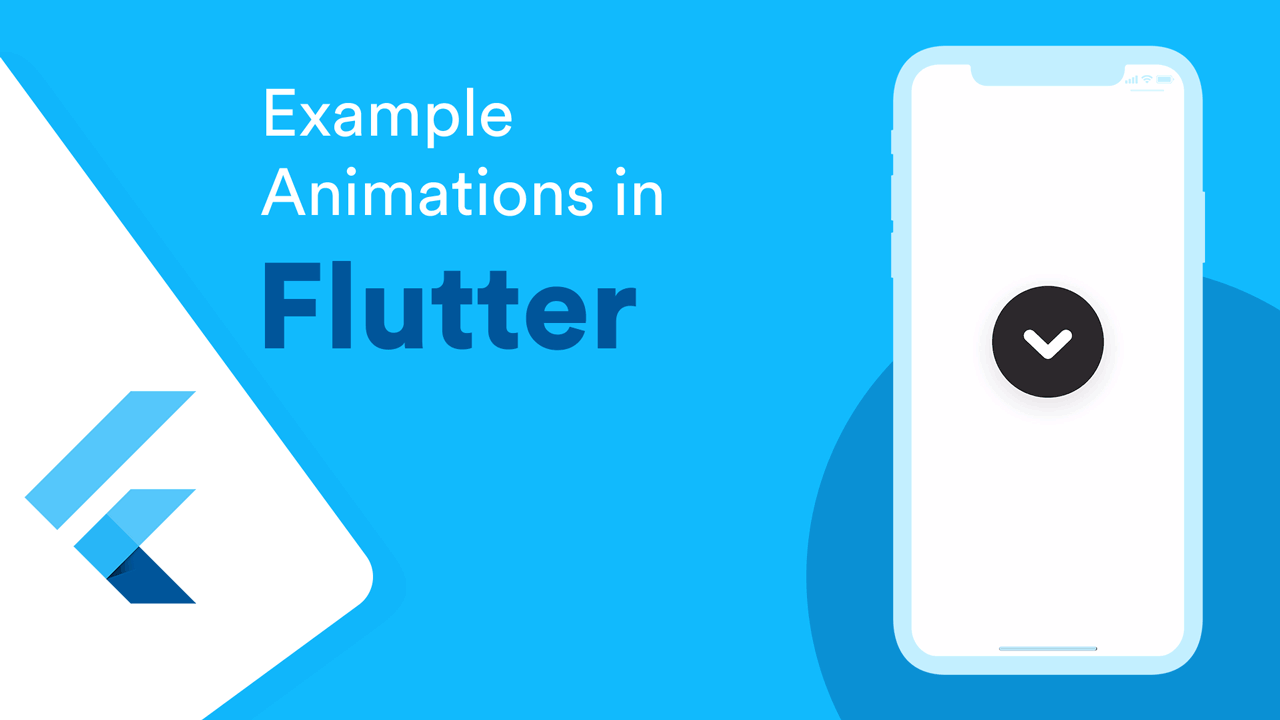
Aleksandr Denisovが、 Flutter AndroidとiOSからのディープリンクを処理する方法についてこのチュートリアルを書きました。Flutterアニメーション例 - #2
https://medium.com/flutterdevs/example-animations-in-flutter-2-1034a52f795b
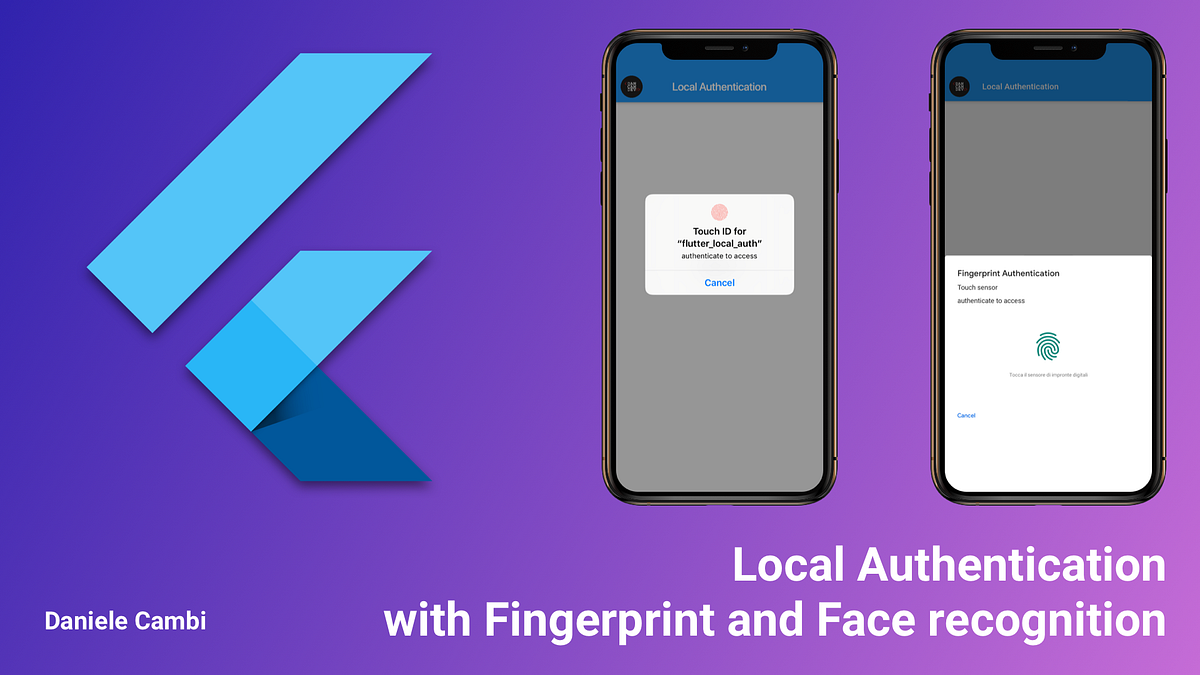
これらの基本的なアニメーションの例を使って、Mohak Guptaによるアニメーションの学習を続けてください。指紋と顔認識によるローカル認証
Daniele Cambiによるこのチュートリアルでは、データを保護するために指紋と顔認識を使用する方法を学びます。Flutter + MobX +チョッパー
https://medium.com/@rishabhv1509/flutter-mobx-chopper-8a1b0d7954a5
Rishabh Vermaによるアプリケーションで、Chopper(残りのクライアントライブラリ)とMobX(状態管理ライブラリ)を一緒に使用する。Flutter学習パス
https://medium.com/@kingwu/flutter-learning-path-d6b3b0235799
Wu Chun WaはFlutterための彼の学習経路を共有しています。Flutter :ステートフルウィジェットとステートレスウィジェット
https://medium.com/flutter-community/flutter-stateful-vs-stateless-db325309deae
Souvik Biswasは、ステートフルウィジェットとステートレスウィジェットの違いを説明します。Flutter :開発における自己署名SSL証明書の使用
Reme Le Haneは、 FlutterカスタムSSL証明書を使用する際に問題がありました。Flutter Proのようにネットワーク通話を処理する
https://medium.com/@xsahil03x/handling-network-calls-like-a-pro-in-flutter-31bd30c86be1
Sahil Kumarによる、すべてのネットワーク通話を処理するためのアプリの構成方法に関する素晴らしい記事。Flutterペイントする方法
https://medium.com/@studymongolian/how-to-paint-in-flutter-d18c6c26df10
Flutterのカスタムペインターの紹介。Flutter開発時間を毎日10%節約するにはどうすればいいですか?
自動テストでCI / CDを使用することで、どのように時間が短縮され、より良い品質が得られるかを学ぶための数字をご覧ください。RouteObserverを使ってFlutter画面遷移を追跡する方法
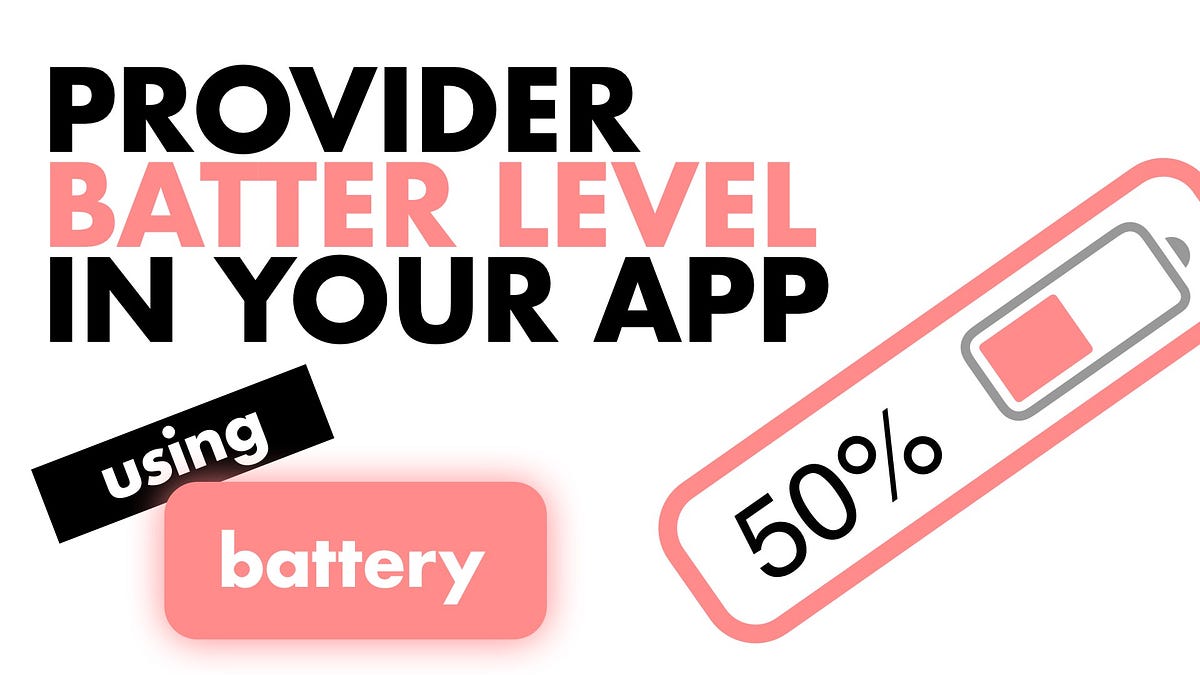
David AnayaがFlutter RouteObserverとRouteAwareを使って自動的に画面遷移を追跡する方法を説明します。Flutter電池残量を確認する
https://medium.com/flutter-community/provide-battery-level-in-flutter-1b69fc4e6b2d
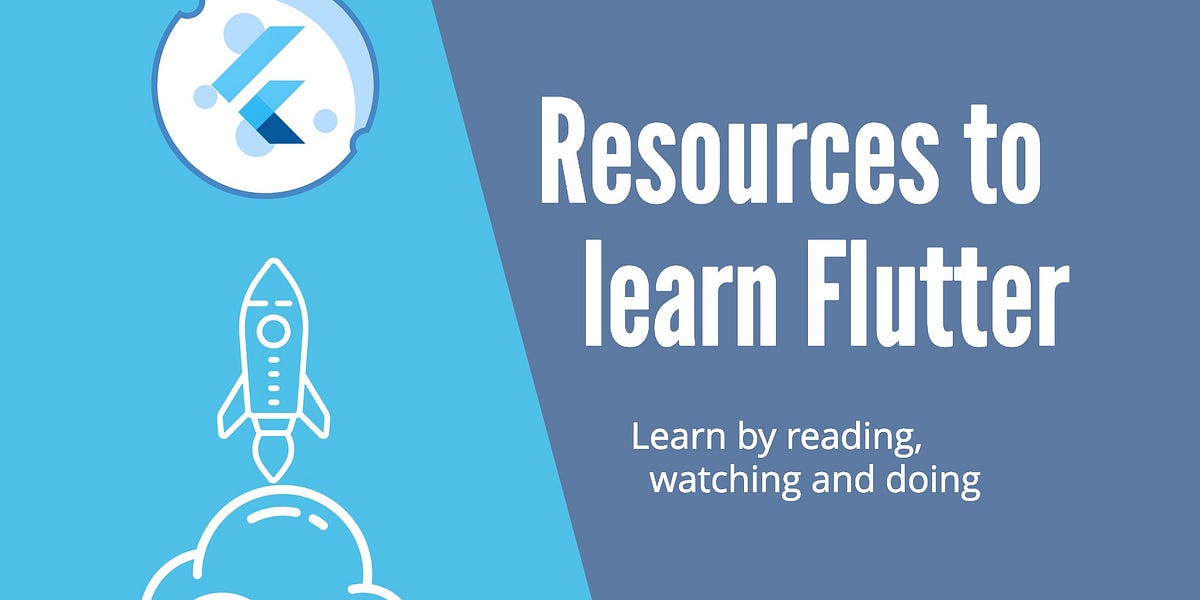
Dane Mackierは、バッテリーパーセンテージ値のストリームを提供するDeviceInformationSerivceを構築します。Flutterを学ぶためのリソース
https://medium.com/flutter-community/resources-to-learn-flutter-2ade7aa73305
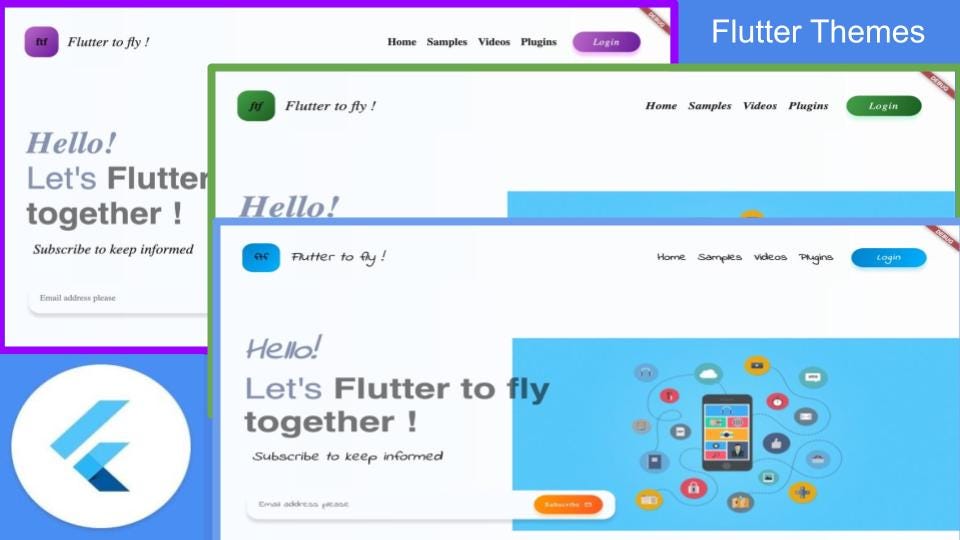
LaraMartínは、 Flutterを学ぶのに最適なリソースのリストをまとめました。クロスプラットフォームのランディングページでのFlutterテーマの使用(Web、Android、iOS)
Priyanka Tyagiによるこの記事でコードの一部を変更するだけで、ランディングページの外観やテーマをすばやく変更する方法を学びましょう。ビデオ&メディア
Flutterカスタムリストビューカードを作成する方法
https://www.youtube.com/watch?v=1Y6o1DOUJcU
このビデオでは、カード用のカスタムウィジェットを作成し、それをカードのリストに使用する方法を紹介します。Dartストリーム - フォーカスのFlutter
このビデオでは、 Flutterストリームを使用したリアクティブコーディングの基本について説明します。Flutter Flare Basics - GiphyのNavメニューを作ろう
https://www.youtube.com/watch?v=hwBUU9CP4qI&feature=youtu.be
Giphyモバイルアプリから素晴らしいナビゲーションメニューを再作成することで、 Flutter Flare 2Dでベクトルアニメーションの基本をマスターしましょう。プレースホルダー(今週のFlutterウィジェット)
https://www.youtube.com/watch?v=LPe56fezmoo
作曲が終わっていないウィジェットの代わりになるものが必要ですか。プレースホルダーはここにあります。プロバイダを用いた実用的な状態管理(The Boring Flutter Development Show、Ep。25)
https://www.youtube.com/watch?v=HrBiNHEqSYU&feature=youtu.be&linkId=69927151
このエピソードでは、FilipとMattがProviderパッケージをFlutterます。これは、 Flutterアプリで状態を管理するための簡単な方法です。ライブラリ&コード
AmitJoki /エニグマ
https://github.com/AmitJoki/Enigma
Flutter完全に開発された本格的な一対一のチャットアプリ。
codemissions /フラッタービデオストリーミングアプリ
https://github.com/codemissions/flutter-video-streaming-app
flutterでビデオストリーミングアプリを構築する方法を示すチュートリアルのコードJideGuru / Flutterトラベル
https://github.com/JideGuru/FlutterTravel
UpLabsからの旅行アプリのコンセプトのFlutter表現。leisim / logger
https://github.com/leisim/logger#log-console
美しいログを印刷する小型で使いやすく拡張可能なロガー。nickwu241 / instagroot
https://github.com/nickwu241/instagroot
グルートのためのInstagramのクローンを使用して作成したFlutter !