- 投稿日:2019-03-10T23:15:01+09:00
リンクのみタップ&選択可能な UITextView
UITextView中の、リンクのタップ可と、テキストの選択不可を両立させる方法です!
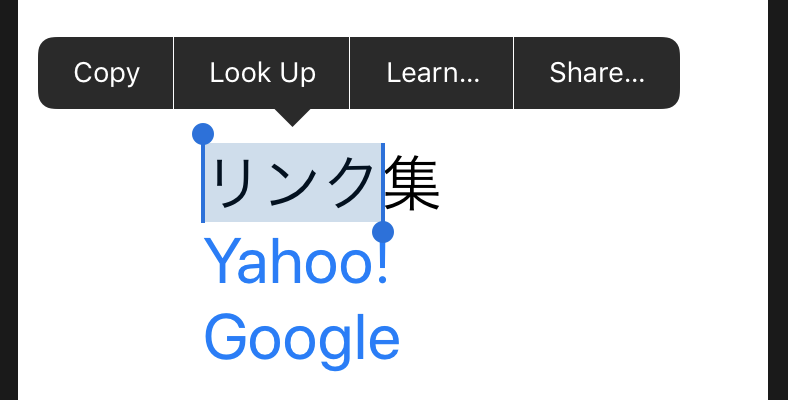
UITextViewにタップ可能なリンクを挿入すると…
リンクをタップできる
UITextViewのサンプルコード (タップで開く)リンクをタップできるUITextViewimport UIKit class LinkTextViewController: UIViewController { let textView: UITextView = { let textView = UITextView(frame: CGRect(x: 0, y: 0, width: 200, height: 200)) textView.isSelectable = true textView.isEditable = false let text = "リンク集\nYahoo!\nGoogle" let attributedString = NSMutableAttributedString(string: text) attributedString.addAttribute(.font, value: UIFont.systemFont(ofSize: 32), range: NSRange.init(location: 0, length: attributedString.length)) attributedString.addAttribute(.link, value: "https://www.yahoo.co.jp/", range: NSString(string: text).range(of: "Yahoo!")) attributedString.addAttribute(.link, value: "https://www.google.com/", range: NSString(string: text).range(of: "Google")) textView.attributedText = attributedString return textView }() override func viewDidLoad() { super.viewDidLoad() view.backgroundColor = .white view.addSubview(textView) textView.center = view.center } } extension UIViewController: UITextViewDelegate { public func textView(_ textView: UITextView, shouldInteractWith URL: URL, in characterRange: NSRange, interaction: UITextItemInteraction) -> Bool { UIApplication.shared.open(URL) return false } }リンクをタップ可能にしたい場合には、
isSelectable = trueとする必要があるのですが、
そうするとテキストが選択可能になってしまう
リンクのみタップ&選択可能にする
下記のように、
.link属性しかタップおよび選択できないようにし、
さらに、.link属性が選択されたとしても、メニューを出さないようにすることで、
リンクだけがタップ可能な (他のテキストは選択できない)UITextViewとすることができます リンクがタップでき、テキストは選択できないUITextViewclass MyTextView: UITextView { // NOTE: リンクテキストしかタップおよび選択できないようにする override func point(inside point: CGPoint, with event: UIEvent?) -> Bool { guard let position = closestPosition(to: point), let range = tokenizer.rangeEnclosingPosition(position, with: .character, inDirection: UITextLayoutDirection.left.rawValue) else { return false } let startIndex = offset(from: beginningOfDocument, to: range.start) return attributedText.attribute(.link, at: startIndex, effectiveRange: nil) != nil } // NOTE: テキストが選択された場合に、コピーなどのメニューを出さないようにする override func becomeFirstResponder() -> Bool { return false } }
リンクのみタップ&選択できる
UITextViewのサンプルコード (タップで開く)import UIKit class LinkTextViewController: UIViewController { class MyTextView: UITextView { // NOTE: リンクテキストしかタップおよび選択できないようにする override func point(inside point: CGPoint, with event: UIEvent?) -> Bool { guard let position = closestPosition(to: point), let range = tokenizer.rangeEnclosingPosition(position, with: .character, inDirection: UITextLayoutDirection.left.rawValue) else { return false } let startIndex = offset(from: beginningOfDocument, to: range.start) return attributedText.attribute(.link, at: startIndex, effectiveRange: nil) != nil } // NOTE: テキストが選択された場合に、コピーなどのメニューを出さないようにする override func becomeFirstResponder() -> Bool { return false } } let textView: MyTextView = { let textView = MyTextView(frame: CGRect(x: 0, y: 0, width: 200, height: 200)) textView.isSelectable = true textView.isEditable = false let text = "リンク集\nYahoo!\nGoogle" let attributedString = NSMutableAttributedString(string: text) attributedString.addAttribute(.font, value: UIFont.systemFont(ofSize: 32), range: NSRange.init(location: 0, length: attributedString.length)) attributedString.addAttribute(.link, value: "https://www.yahoo.co.jp/", range: NSString(string: text).range(of: "Yahoo!")) attributedString.addAttribute(.link, value: "https://www.google.com/", range: NSString(string: text).range(of: "Google")) textView.attributedText = attributedString return textView }() override func viewDidLoad() { super.viewDidLoad() view.backgroundColor = .white view.addSubview(textView) textView.center = view.center } } extension UIViewController: UITextViewDelegate { public func textView(_ textView: UITextView, shouldInteractWith URL: URL, in characterRange: NSRange, interaction: UITextItemInteraction) -> Bool { UIApplication.shared.open(URL) return false } }どや!テキスト選択できまい!
余談
別に選択できても良いとは思うけれども、
リンクがあるところのテキストだけ選択可能になっていると、ちょっとね…。参考

- 投稿日:2019-03-10T20:23:02+09:00
Pinterest風にジェスチャで画面遷移するサンプル
iOS版Pinterestのような画面を引き下げて前の画面に遷移するジェスチャーとアニメーションを再現してみました。
サンプルコードはこちらにあります。
GitHub - PinterestLikePullToPop概略
UINavigationControllerスタック上のview controllerの遷移になります。まずは対象のUIScrollViewにUIPanGestureRecognizerをあらたに付加してスクロールと連動。そしてキャプチャした複数のviewをwindow上に重ねてアニメーションを再現。前の画面に戻るときにUIViewControllerAnimatedTransitioningを使って後始末をしています。ここで使われているアニメーションの一部はこちらの記事に抜き出しています。
Panジェスチャ後のvelocityを利用した放物線アニメーション
- 投稿日:2019-03-10T18:25:31+09:00
無料でiOSでシンプルなWebアプリを作ってアイコンをホーム画面に設置する方法
はじめに
iOSでシンプルなWebアプリを作って、アイコンをホーム画面に設置する方法です。HTMLとCSS、JavaScriptを使用してアプリを作ることができます。簡単なツールなどであればこれで十分です。
ちなみに、Swiftを使ってアプリ開発をする場合でも、実機テストは無料ですることができます(ただし有効期限は1週間で、1週間ごとに延長が必要)。
誰でも無料でiPhoneの実機を使ってiOSアプリ開発する方法 - Qiita などを参照。テンプレート
data:text/html;charset=utf-8,
<meta name="apple-mobile-web-app-capable" content="yes">
<meta name="viewport" content="width=device-width,initial-scale=1.0,minimum-scale=1.0,maximum-scale=1.0,user-scalable=no">
<link rel="apple-touch-icon" href="アイコンのURL">
<title>アプリのタイトル</title>
<style>*{-webkit-tap-highlight-color: rgba(0, 0, 0, 0); -webkit-touch-callout: none; -webkit-user-select: none;}</style>
-webkit-tap-highlight-color: rgba(0, 0, 0, 0);: リンクタップ時のグレーの影をOFF
-webkit-touch-callout: none;: 長押しでのメニュー呼び出しの無効化
-webkit-user-select: none;: テキスト選択の無効化ステータスバーの色
白
<meta name="apple-mobile-web-app-status-bar-style" content="default">黒
<meta name="apple-mobile-web-app-status-bar-style" content="black">透明
<meta name="apple-mobile-web-app-status-bar-style" content="black-translucent">追加する方法
- この作成した長いテキストをSafariで開く(Macの場合はHandoffでコピーするのが便利)
- Safariの画面下の共有ボタンから、
ホーム画面に追加を選ぶ注意点
デスクトップ版ChromeやFirefoxで動作確認する場合は、すべての
#を%23に置換してください。でないと正常に表示されません。
参考:https://qiita.com/shge/items/325b3c4fc95b9190c9cd参考文献
ウェブページをできる限りネイティブアプリっぽく魅せるテクニックまとめ 〜アップルにリジェクトされつづけるなら、ウェブアプリとストアをつくって自前で配信してしまおうという企み〜 - KAYAC engineers' blog
https://techblog.kayac.com/2016/12/12/090000
- 投稿日:2019-03-10T15:27:53+09:00
appiumとCodeceptJS(node.js)を使ってAndroid & iOSのE2Eテストの実行環境構築
なぜこの文章を書いたか
前回のQiitaで「Vagrant + Selenium + node.js(CodeceptJS)でIE, Chrome, FirefoxのマルチブラウザE2Eテスト」について書いたのですが「どうせならスマホのE2Eテストも出来るようになりたい」と考え追加ポスト。
環境
OS : macOS Mojave (10.14.3)
VirtualBox : 6.0.4
Vagrant : v2.2.3
node.js : 10.15.1 (ndenvでインストール済み)
Android Studio, Xcode などはインストール済みインストール
appium, appium-doctor のインストール
$ npm install -g appium
$ npm install -g appium-doctor
$ ndenv rehash
appium-doctor の実行
まず実行して自分の環境に何が足りないか、設定が間違っていないかなどを確認
$ appium-doctor --ios --android足りないものをインストール
色々と足りないのでインストール & 設定
carthage のインストール
$ brew install carthageopencv4nodejs のインストール
$ brew install opencv@3
$ brew link opencv@3 --force
$ vi ~/.bash_profile
.bash_profileに以下を追加
export PKG_CONFIG_PATH="$PKG_CONFIG_PATH:/usr/local/Cellar/openssl/1.0.2q/lib/pkgconfig/"
export PATH="/usr/local/opt/opencv@3/bin:$PATH"
export LDFLAGS="$LDFLAGS -L/usr/local/opt/opencv@3/lib"
export CPPFLAGS="$CPPFLAGS -I/usr/local/opt/opencv@3/include"
$ exec $SHELL -l $ OPENCV4NODEJS_DISABLE_AUTOBUILD=1 npm install -g opencv4nodejsffmpeg のインストール
$ brew install ffmpegfbsimctl のインストール
$ brew tap facebook/fb
$ brew install fbsimctl --HEAD
applesimutils のインストール
$ brew tap wix/brew
$ brew install applesimutils --HEAD
idevicelocation のインストール
$ brew install usbmuxd libplist libimobiledevice libzip openssl make automake autoconf libtool pkg-config
$ brew list openssl
(省略)
/usr/local/Cellar/openssl/1.0.2q/lib/pkgconfig/ (3 files)
(省略)
$ vi ~/.bash_profile
.bash_profileに以下を追加
export PKG_CONFIG_PATH="$PKG_CONFIG_PATH:/usr/local/opt/openssl/lib/pkgconfig/"$ exec $SHELL -l $ git clone https://github.com/JonGabilondoAngulo/idevicelocation.git $ cd idevicelocation $ ./autogen.sh $ make $ sudo make installios-deploy のインストール
$ npm install -g ios-deployios-webkit-debug-proxy のインストール
$ brew install ios-webkit-debug-proxyJAVA_HOMEの設定
$ vi ~/.bash_profile.bash_profileに以下を追加
export JAVA_HOME=`/usr/libexec/java_home -v 10`
export PATH="$PATH:$JAVA_HOME/bin/"
$ exec $SHELL -lbundletool.jar のインストール
$ mkdir ~/bin/
$ cd ~/bin/
$ wget https://github.com/google/bundletool/releases/download/0.8.0/bundletool-all-0.8.0.jar
$ ln -s bundletool-all-0.8.0.jar bundletool.jar
$ chmod a+x bundletool-all-0.8.0.jar
$ vi ~/.bash_profile
.bash_profileに以下を追加
export PATH="$PATH:$HOME/bin/"$ exec $SHELL -l再度 appium-doctor の実行
$ appium-doctor --ios --android
(前略)
info AppiumDoctor
info AppiumDoctor Everything looks good, bye!
info AppiumDoctor
Everything looks good, bye!と出ていれば問題無しChromeDriver のインストール
AndroidのChromeを動作させるためにChromeDriverをインストールする
Android 9.0のChromeのバージョンに合わせて、ここではChromeDriverのバージョンをv2.44としています詳細:
https://github.com/appium/appium/blob/master/docs/en/writing-running-appium/web/chromedriver.md
http://chromedriver.chromium.org/downloads$ wget https://chromedriver.storage.googleapis.com/2.44/chromedriver_mac64.zip $ unzip chromedriver_mac64.zip $ mv chromedriver ~/bin/chromedriver_v2_44npmを使ってテスト環境の構築
普通にディレクトリを作ってテスト環境を構築する
npm init 他
$ mkdir sptest
$ cd sptest
$ npm init -y
$ npm install codeceptjs --save-dev
codecept.jsの初期化
$ npx codeceptjs init

  Welcome to CodeceptJS initialization tool
  It will prepare and configure a test environment for you

Installing to /Users/xxxx/sptest
? Where are your tests located? ./*_test.js
? What helpers do you want to use? Appium
? Where should logs, screenshots, and reports to be stored? ./output
? Would you like to extend I object with custom steps? Yes
? Do you want to choose localization for tests? ja-JP
? Where would you like to place custom steps? ./steps_file.js
Configure helpers...
? [Appium] Application package. Path to file or url http://localhost
? [Appium] Mobile Platform iOS
? [Appium] Device to run tests on emulator
Steps file created at /Users/xxxx/sptest/steps_file.js
Config created at /Users/xxxx/sptest/codecept.conf.js
Directory for temporary output files created at `_output`
Almost done! Create your first test by executing `codeceptjs gt` (generate test) command

--
Please install dependent packages locally: npm install --save-dev webdriverio@^5.2.2
$ npm install --save-dev webdriverio@^5.2.2
実際のテスト
appiumの起動
$ appium --chromedriver-executable ~/bin/chromedriver_v2_44テストの記述
前回と同じ、github.comに行って、"GitHub"という文字列があるかどうかをチェックするだけのコードを書きます。
github_test.js
Feature('Github');

Scenario('test something', (I) => {
  I.amOnPage('https://github.com');
  I.see('GitHub');
});
iOS用の設定ファイルを作成
自動で作成されてますが、それを以下のようにいじります。
codecept.ios.conf.js
exports.config = {
  tests: './*_test.js',
  output: './output',
  helpers: {
    Appium: {
      platform: "IOS",
      desiredCapabilities: {
        "platformName": "iOS",
        "platformVersion": "12.1",
        "deviceName": "iPhone 7",
        "automationName": "XCUITest",
        "browserName": "Safari"
      }
    },
  },
  include: {
    I: './steps_file.js'
  },
  bootstrap: null,
  mocha: {},
  name: 'test',
  translation: 'ja-JP'
}
Android用の設定ファイルを作成
同様にAndroid用も
exports.config = {
  tests: './*_test.js',
  output: './output',
  helpers: {
    Appium: {
      platform: "Android",
      desiredCapabilities: {
        automationName: "Appium",
        deviceName: "Nexus 5x API 28 for appium",
        platformVersion: "9",
        browserName: "Chrome"
      }
    },
  },
  include: {
    I: './steps_file.js'
  },
  bootstrap: null,
  mocha: {},
  name: 'test',
  translation: 'ja-JP'
}
テスト実行
iOSにしろAndroidにしろ、問題があればappiumを起動しているターミナルに何かしらエラーが出ているので解読して下さい
iOS
以下のコマンドを実行すると、初回時に必要な設定を自動でしてくれた上でSafariが起動してテストが実行されます
$ npx codeceptjs run --steps --config=./codecept.ios.conf.jsAndroid
以下のコマンド実行の前にAndroid StudioからAndroidエミュレータを立ち上げておきます
Name : Nexus 5x API 28 for appium
OS : Pi (Android 9.0)$ npx codeceptjs run --steps --config=./codecept.android.conf.jsnpm runで実行できるように package.json を修正
package.json
{
  "name": "sptest",
  "version": "1.0.0",
  "description": "",
  "main": "index.js",
  "scripts": {
    "test": "npm run test:ios; npm run test:android",
    "test:ios": "codeceptjs run --steps --config=./codecept.ios.conf.js",
    "test:android": "codeceptjs run --steps --config=./codecept.android.conf.js"

  },
  "keywords": [],
  "author": "",
  "license": "ISC",
  "devDependencies": {
    "codeceptjs": "^2.0.7",
    "webdriverio": "^5.7.1"
  }
}
iOS
$ npm run test:iosAndroid
$ npm run test:androidiOSとAndroidの逐次実行
$ npm run test終わりに
これで前回のSelleniumと合わせて、ブラウザテストが一通り出来るようになったので、これを使ってガリガリE2Eテスト書いていきます
- 投稿日:2019-03-10T15:10:42+09:00
牢破り
牢破り12
自分用にメモとして
もくじ
バージョン確認
牢破りできるSHSHが発行中
Futurerestore(iRestore)
uncOver
JBApp
バージョン確認
iOS12.1.2(16C104)
2019/3/10 現在、牢破りできる最新バージョンiOS11.4.1
iOS11の最終バージョンiOS10.3.3
32bitアプリ対応の最終バージョンiOS9.3.5
A5/A6デバイスの最終バージョン
牢破りできるSHSHが発行中
12.1.1beta3のSHSHが発行中
2019/3/6頃に発行されなくなりました。
12.1.1beta3のSHSHがランダムに発行中
2019/3/9頃から、全てのデバイスではないがSHSHが発行されてるデバイスがある。
タイミングが合えば12.1.1b3に復元も可能。
Futurerestore(iRestore)
保存しておいたSHSHを使ってダウングレードするには現在SHSH発行中のバージョンのファームウェアからSEPファイル等を抜き出して使います。
認証中のバージョンのipswから抜き出すファイル
- BuildManifest.plist
- xxx-y.yy.yy.Relase.bbfw
(x、yの部分は機種によって異なる)- sep-firmware.xxx.RELEASE.im4p
(xの部分は機種によって異なる)復元したいバージョンのSHSHファイル
- 保存しておいたSHSHの中の
noapnonceの中のshsh2ファイルファームウェアのダウンロード
認証中のバージョンの確認もできるサイト
IPSW Downloadsベータ版のipswをダウンロードできるサイト
Beta Firmware/iPhone/12.x - The iPhone Wikiunc0ver
iOSの牢破りツールとして最初にリリースされました。
パソコンを使う方法は作者のGitHubからダウンロードしてCydia Impactorでデバイスにインストールします。
次のサイトからデバイス単体でもインストールできます。
JBApp
Filza File Manager
定番のファイラーApple File Conduit "2" (arm64/KPPLess)
iFunBoxなどからルートファイル操作Activator 1.9.13~beta3
ジェスチャーで操作
repo:http://rpetri.ch/repo/Marina 1.0.7
dockのアイコンを5~10個に
- 投稿日:2019-03-10T15:10:42+09:00
牢破り12
牢破り12
iOSデバイスのJailBreakのことを日本語で牢破りといいますが、通常の使用方法ではできないことができたりAppStoreにないアプリを使うことができて楽しく便利な反面、アプリの相性などで何が起こるかわかりませんし、何が起きてもどうなってAppleは助けてくれません。
最悪の場合、初期化することになるかもしれないので再構築に備えてメモを残すことにしました。
もくじ
バージョン確認
牢破りできるSHSHが発行中
Futurerestore(iRestore)
uncOver
JBApp
バージョン確認
iOS12.1.2(16C104)
2019/3/10 現在、牢破りできる最新バージョンiOS11.4.1
iOS11の最終バージョンiOS10.3.3
32bitアプリ対応の最終バージョンiOS9.3.5
A5/A6デバイスの最終バージョンOTAアップデートをブロック
AppleTV以外のデバイスにtvOS beta profileをインストールすると、アップデータを探索する際にtvOSのサーバーを探索しますが、そこにはそのデバイス用の最新版があるわけがないので「このソフトウェアは最新です。」となるとそうです。
牢破りできるSHSHが発行中
12.1.1beta3のSHSHが発行中
2019/3/6頃に発行されなくなりました。
12.1.1beta3のSHSHがランダムに発行中
2019/3/9頃から、全てのデバイスではないがSHSHが発行されてるデバイスがある。
タイミングが合えば12.1.1b3に復元も可能。
Futurerestore(iRestore)
保存しておいたSHSHを使ってダウングレードするには現在SHSH発行中のバージョンのファームウェアからSEPファイル等を抜き出して使います。
futurerestoreはCUIなのでコマンドプロンプトやターミナルでコマンド入力で操作しますが、僕はコマンド入力に慣れてないのでGUIのiRestoreを使いました。
認証中のバージョンのipswから抜き出すファイル
- BuildManifest.plist
- xxx-y.yy.yy.Relase.bbfw
(x、yの部分は機種によって異なる)- sep-firmware.xxx.RELEASE.im4p
(xの部分は機種によって異なる)復元したいバージョンのSHSHファイル
- 保存しておいたSHSHの中の
noapnonceの中のshsh2ファイルファームウェアのダウンロード
認証中のバージョンの確認もできるサイト
IPSW Downloadsベータ版のipswをダウンロードできるサイト
Beta Firmware/iPhone/12.x - The iPhone WikiNonceをセット
デバイスにNonceをセットします。
- 復元したいバージョンのSHSHをplistエディタやテキストエディタで開き[Generator]を検索すると
0xで始まる16桁の16進数の0xを含めた18文字がNonceになります。- unc0verの[Settings]>[Boot Nonce]にセットして[JailBreak]します。
unc0ver
iOSの牢破りツールとして最初にリリースされました。
パソコンを使う方法は作者のGitHubからダウンロードしてCydia Impactorでデバイスにインストールします。
次のサイトからデバイス単体でもインストールできます。
JBApp
Filza File Manager
定番のファイラーApple File Conduit "2" (arm64/KPPLess)
iFunBoxなどからルートファイル操作Activator 1.9.13~beta3
ジェスチャーで操作
http://rpetri.ch/repo/Marina 1.0.7
dockのアイコンを5~10個にVolFlash 1.5.0-1+debug
ボリュームボタン同時押しでライトを点けたり消したり。
http://cemresuler.github.io/
- 投稿日:2019-03-10T15:01:08+09:00
React NativeでURL をパースする
経緯
React Naviveを使ったアプリで、Deep LinkやPush通知のペイロードに格納されたURLを解析したいのですが、有効な方法が見つからないのでiOS/Androidデバイスのライブラリを使いそれらをパースするコードを実装しました。
覚えているうちに記事にします。
もっと簡単な方法があれば誰か教えて下さい・・・(非同期は何気に扱いにくいし)方針
iOS, AndroidともにURLを解析するAPIがあるので単純にそれらを呼び出します。
ネイティブコードを呼び出すので、この機能の戻り値はPromiseにしています(callbackよりは使いやすいと思うので)。
APIはクエリーパラメータについては、&で結合された文字列だけが戻ってくるので、JSでテキスト処理しています。
例外処理やエラー処理は適当です(参考実装ということで)。完全なコード
こちらにあります。
https://github.com/flipfrog/react-native-url-parseAPI
こんな感じで使用します。
import URLParse from './URLParse'; : async componentDidMount(): void { const url = await URLParse.parse(this.state.urlSpec); this.setState({ protocol: url.protocol, // httpsとかのプロトコルスキーマ host: url.host, // ホスト名 port: url.port, // ポート番号 path: url.path, // パス query: url.query, // クエリーパラメータ ref: url.ref, // インデックス queryMap: url.queryMap, // クエリーパラメータのマップオブジェクト }); }URLParse.jsimport {NativeModules} from 'react-native'; export default class URLParse { static async parse(urlSpec: string) { const url = await NativeModules.RNURLParseModule.parse(urlSpec); if (url && url.query) { const expressions = url.query.split('&'); const queryMap = {}; for (let expression of expressions) { const values = expression.split('='); queryMap[values[0]] = (values[1] ? values[1] : null); } url['queryMap'] = queryMap; } return url; } }iOS
iOSは、.hと.mファイル(Objective-Cを使いました)を作成するだけです。
RNURLParseModule.h#if __has_include(<React/RCTBridgeModule.h>) #import <React/RCTBridgeModule.h> #else #import "RCTBridgeModule.h" #endif @interface RNURLParseModule : NSObject <RCTBridgeModule> @endRNURLParseModule.m#import "RNURLParseModule.h" #if __has_include("RCTUtils.h") #import "RCTUtils.h" #else #import <React/RCTUtils.h> #endif #import <Foundation/Foundation.h> @implementation RNURLParseModule { } RCT_EXPORT_MODULE(); RCT_EXPORT_METHOD(parse:(NSString *)urlSpec parseWithResolver:(RCTPromiseResolveBlock)resolve rejecter:(RCTPromiseRejectBlock)reject) { NSURL *url = [NSURL URLWithString:urlSpec]; if (url == NULL) { NSDictionary *errorDic = @{ NSLocalizedDescriptionKey:@"Parse error", NSLocalizedRecoverySuggestionErrorKey:@"Confirm parameter urlSpec." }; NSError *error = [[NSError alloc] initWithDomain:@"org.reactjs.native.example.URLParseSample.parse" code:-1 userInfo:errorDic]; reject(@"Parse error", @"Parse error", error); } else { NSDictionary *info = @{ @"protocol": [url scheme], @"host": [url host], @"port": [url port], @"path": [url path], @"query": [url query], @"ref": [url fragment] }; resolve(info); } } @endAndroid
Androidは、モジュールとパッケージ定義を作成して、MainApplication.javaでインスタンス化したパッケージを返すようにします。
RNURLParseModule,javapackage com.urlparsesample.extension; import java.net.URL; import com.facebook.react.bridge.Promise; import com.facebook.react.bridge.Arguments; import com.facebook.react.bridge.ReactApplicationContext; import com.facebook.react.bridge.ReactContextBaseJavaModule; import com.facebook.react.bridge.ReactMethod; import com.facebook.react.bridge.WritableMap; import java.util.HashMap; import java.util.Map; // package private class class RNURLParseModule extends ReactContextBaseJavaModule { private static final String E_URL_PARSE_ERROR = "URL Parse error"; RNURLParseModule(ReactApplicationContext context) { super(context); } @Override public String getName() { return "RNURLParseModule"; } @Override public Map<String, Object> getConstants() { final Map<String, Object> constants = new HashMap<>(); constants.put("IsAndroid", true); return constants; } @ReactMethod public void parse(final String urlSpec, Promise promise) { WritableMap info = Arguments.createMap(); try { URL url = new URL(urlSpec); info.putString("protocol", url.getProtocol()); info.putString("host", url.getHost()); info.putString("path", url.getPath()); info.putInt("port", url.getPort()); info.putString("query", url.getQuery()); info.putString("ref", url.getRef()); promise.resolve(info); } catch (Exception e) { promise.reject(E_URL_PARSE_ERROR, e); } } }RNURLParsePackage.javapackage com.urlparsesample.extension; import java.util.ArrayList; import java.util.Collections; import java.util.List; import com.facebook.react.ReactPackage; import com.facebook.react.bridge.NativeModule; import com.facebook.react.bridge.JavaScriptModule; import com.facebook.react.bridge.ReactApplicationContext; import com.facebook.react.uimanager.ViewManager; public class RNURLParsePackage implements ReactPackage { @Override public List<NativeModule> createNativeModules (ReactApplicationContext context) { List<NativeModule> modules = new ArrayList<>(); modules.add(new RNURLParseModule(context)); return modules; } // Deprecated RN 0.47 // @Override public List<Class<? extends JavaScriptModule>> createJSModules() { return Collections.emptyList(); } @Override public List<ViewManager> createViewManagers(ReactApplicationContext context) { return Collections.emptyList(); } }MainApplication.java(抜粋)@Override protected List<ReactPackage> getPackages() { return Arrays.<ReactPackage>asList( new MainReactPackage(), new RNURLParsePackage() // ここに追加します ); }実行結果
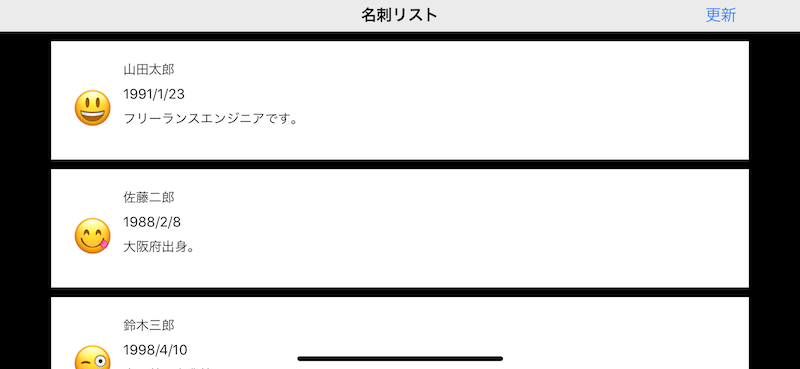
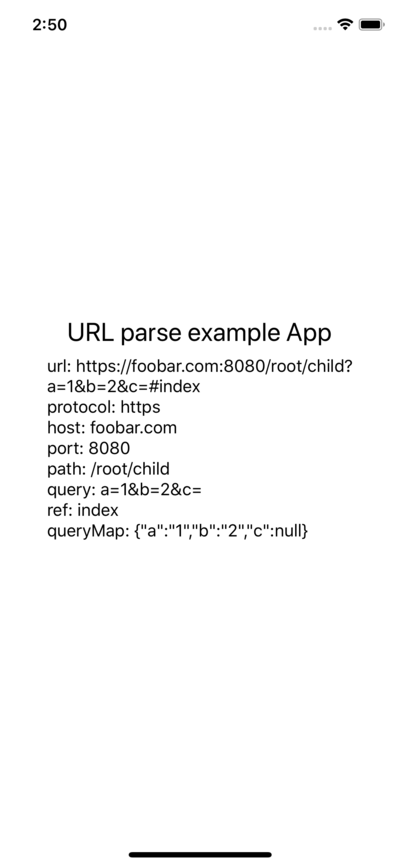
先に記載したGitHubのコードを実行すると下記のように結果を表示します。
- 投稿日:2019-03-10T05:43:28+09:00
【Swift】CollectionViewを再理解する
経緯
WWDC2018の中でCollectionViewに関するセッションがあり
今回はそれに関してまとめてみることで
改めてCollectionViewの動きに関して見直しをしてみました。
https://developer.apple.com/videos/play/wwdc2018/225/※実は昨年これに関して発表する予定でしたが、
風邪で倒れて発表できなかった経緯もあります
https://speakerdeck.com/shiz/06203つの主要コンセプト
CollectionViewを構成する要素として主に下記の3つがあります。
- Layout
- Datasource
- Delegate
UICollectionViewLayout
どこにコンテンツをどのように配置するのかを示します。
データなどは関わりません。https://developer.apple.com/documentation/uikit/uicollectionviewlayout
UICollectionViewDataSource
CollectionViewの内容を提供します。
セクションやアイテムの数なども管理します。https://developer.apple.com/documentation/uikit/uicollectionviewdatasource
UICollectionViewDelegate
オプショナルなプロトコルです。
CollectionViewに対するユーザのアクションに対応します。https://developer.apple.com/documentation/uikit/uicollectionviewdelegate
実装を通して理解を深める
以下ではFlowLayoutの実装を見ながら
ColletionViewの動きを見ていきたいと思います。UICollectionViewFlowLayout
UICollectionViewLayoutのサブクラスです。
UICollectionViewのデフォルトのレイアウトとはこれが指定されています。
縦や横に均等に並べるようなLine-Basedのデザインはこれでカバーできます。https://developer.apple.com/documentation/uikit/uicollectionviewflowlayout
UICollectionViewFlowLayoutのカスタマイズ(実装)
prepareメソッドをoverrideすることで簡単にカスタマイズすることができます。
prepareメソッド
https://developer.apple.com/documentation/uikit/uicollectionviewlayout/1617752-prepare
class ColumnFlowLayout: UICollectionViewFlowLayout {

    // After invalidateLayouts
    override func prepare() {
        super.prepare()

        guard let cv = collectionView else { return }
        self.itemSize = CGSize(width: cv.bounds.inset(by: cv.layoutMargins).size.width, height: 120.0)

        self.sectionInset = UIEdgeInsets(top: self.minimumInteritemSpacing, left: 0.0, bottom: 0.0, right: 0.0)
        self.sectionInsetReference = .fromSafeArea
    }
}
このメソッドはinvalidLayout発生する度に呼ばれます。
itemSizeの指定やsectionInsetsの指定をします。WWDCの発表の中では、
また、CollectionViewは横向きにした場合、
左右に対するsafeAreaの制約が効いていないように見え、self.sectionInsetReference = .fromSafeAreaを設定すると解消されると紹介されていましたが
実際試してみると
あってもなくても特に挙動が変わりませんでした
ドキュメントにも何も記載がないので謎です。itemsizeを可変にしてみる
https://developer.apple.com/documentation/uikit/uicollectionviewflowlayout/1617711-itemsize
FlowaLayoutは
できる限り同じ行に列を詰めようとする性質があり
これを活用することでLandscape時のレイアウトを変更することができます。上記のprepareメソッドの場合は下記のようになりますが、
これを下記のようにitemSizeを設定することで
レイアウトが変わります。class ColumnFlowLayout: UICollectionViewFlowLayout { // After invalidateLayouts override func prepare() { super.prepare() guard let cv = collectionView else { return } // 一行で利用できる幅 let availableWidth = cv.bounds.inset(by: cv.layoutMargins).size.width // セルの最小幅を設定 let minColumnWidth = CGFloat(300.0) // 表示可能なカラム数を決定 let maxNumColumns = Int(availableWidth / minColumnWidth) // 1個1個のセルの幅を決定 let cellWidth = (availableWidth / CGFloat(maxNumColumns)).rounded(.down) self.itemSize = CGSize(width: cellWidth, height: 120.0) self.sectionInset = UIEdgeInsets(top: self.minimumInteritemSpacing, left: 0.0, bottom: 0.0, right: 0.0) self.sectionInsetReference = .fromSafeArea } }すると下記のようになります。
FlowLayoutには
できる限り同じ行にカラムを詰め込もうとする性質もあり
これを活用しています。UICollectionViewLayoutの継承
LineBaseのFlowLayoutでは対応仕切れないLayoutが必要な場合
UICollectionViewLayoutを継承します。基本的なメソッド
1つは上記でも出てきたprepareメソッドで
この中でUICollectionViewLayoutAttributesをメモリ上に保存したり
collectionViewContentSizeの計算を行います。collectionViewContentSize
// CollectionView全体のサイズ
override var collectionViewContentSize: CGSize
これはUIScrollView.contentSizeに設定され
スクロールの量を知るために必要です。layoutAttributesForItem
// IndexPathのアイテムのAttributesを返す override func layoutAttributesForItem(at indexPath: IndexPath) -> UICollectionViewLayoutAttributes?layoutAttributesForElements
// rectの範囲内に存在するアイテムのAttributesを返す override func layoutAttributesForElements(in rect: CGRect) -> [UICollectionViewLayoutAttributes]?shouldInvalidateLayout
shouldInvalidateLayoutはサイズや位置の変更があった場合に呼ばれ、
処理を加えることができます。結果としてtrueを返すとInvalidateLayoutが呼ばれ
レイアウトの再描画が起きます。
これはスクロール中もずっと呼ばれます。override func shouldInvalidateLayout(forBoundsChange newBounds: CGRect) -> Bool { guard let cv = collectionView else { return false } return !newBounds.size.equalTo(cv.bounds.size) }MosaicLayoutの例
UICollectionViewLayoutの継承の例として
簡単なモザイクアートのようなレイアウトを作成します。final class MosaicLayout: UICollectionViewLayout { var columns = MosaicColumns() // 全体のサイズ var contentBounds = CGRect.zero // 各セルの属性情報を保持 var cachedAttributes = [IndexPath: UICollectionViewLayoutAttributes]() // 今回は3カラム/行に限定 var numberOfColumns = 3 var rowHeight: CGFloat = 0.0 private var contentWidth: CGFloat { get { let insets = collectionView!.contentInset return collectionView!.bounds.width - (insets.left + insets.right) } } override var collectionViewContentSize: CGSize { get { let height = columns.smallestColumn.columnHeight return CGSize(width: contentWidth, height: height) } } override func shouldInvalidateLayout(forBoundsChange newBounds: CGRect) -> Bool { guard let cv = collectionView else { return false } return !newBounds.size.equalTo(cv.bounds.size) } override func layoutAttributesForItem(at indexPath: IndexPath) -> UICollectionViewLayoutAttributes? { return cachedAttributes[indexPath] } override func layoutAttributesForElements(in rect: CGRect) -> [UICollectionViewLayoutAttributes]? { return cachedAttributes.values.filter { (attributes) -> Bool in return rect.intersects(attributes.frame) } } override func prepare() { super.prepare() guard let _ = collectionView else { return } reset() createAttributes() } }layoutAttributesForElementsのパフォーマンス問題
さらに、WWDCの発表ではlayoutAttributesForElementsの検索処理の効率が悪いということで
バイナリー検索を用いてより高速に動くようにしています。minYの小さい順に属性の配列を並べることで、
最初にヒットした位置から横続きにどんどん調べていけば
欲しいデータが見つかるという考えです。サンプルなどがありませんでしたので
仮で実装してみました
(実装がシンプルなの今回はあまり違いは感じられませんでした)override func layoutAttributesForElements(in rect: CGRect) -> [UICollectionViewLayoutAttributes]? { var attributesArray = [UICollectionViewLayoutAttributes]() guard let firstMatchIndex = binarySearchAttributes(range: 0...cachedAttributes.endIndex, rect: rect) else { return attributesArray } for attributes in cachedAttributes[..<firstMatchIndex.item].reversed() { guard attributes.frame.maxY >= rect.minY else { break } attributesArray.append(attributes) } for attributes in cachedAttributes[firstMatchIndex.item...] { guard attributes.frame.minY <= rect.maxY else { break } attributesArray.append(attributes) } return attributesArray } private func binarySearchAttributes(range: ClosedRange<Int>, rect: CGRect) -> IndexPath? { var lower = range.lowerBound var upper = range.upperBound while (true) { let current = (lower + upper) / 2 let indexPath = IndexPath(item: current, section: 0) guard cachedAttributes.count > indexPath.item else { return nil } let attributes = cachedAttributes[indexPath.item] if rect.intersects(attributes.frame) { return indexPath } else if lower > upper { return nil } else { if attributes.frame.maxY < rect.minY { lower = current + 1 } else { upper = current - 1 } } } }アニメーション
最後にアニメーションについて考えていきます。
アニメーションに加えてセルの部分更新にも関わってくるので
一緒にみていきたいと思います。performBatchUpdates
https://developer.apple.com/documentation/uikit/uicollectionview/1618045-performbatchupdates
複数のアニメーションを同時に行う際は
performBatchUpdatesを使います。
これはアニメーションのアップデートを一律で行ってくれます。DataSourceの更新と
CollectionViewの更新を
updatesクロージャの中で定義します。collectionView.performBatchUpdates({ let movedPerson = people[3] people.remove(at: 3) people.remove(at: 2) people.insert(movedPerson, at: 0) collectionView.reloadItems(at: [IndexPath(item: 3, section: 0)]) collectionView.deleteItems(at: [IndexPath(item: 2, section: 0)]) collectionView.moveItem(at: IndexPath(item: 3, section: 0), to: IndexPath(item: 0, section: 0)) })これを実行するときれいに...エラーになります。
reason: 'attempt to delete and reload the same index path (<NSIndexPath: 0x6000015c82c0> {length = 2, path = 0 - 3})'エラーを見てみると
削除とリロードを同じIndexPath(item: 3, section: 0)に行おうとしていると書かれてあります。しかし
IndexPath(item: 3, section: 0)に対して削除を行っているつもりはありませんでした。
どこで何が起こっているのでしょうか?performBatchUpdatesの性質
performBatchUpdatesには以下の特徴があります。
CollectionViewの更新は順序が関係ない(メソッド内で決まっている)
つまり
deleteItemsを先に書こうが
insertItemsを先に書こうが
実行される順番としてはdelete->insertになります。下記は各アクションの一覧です。
アクション 特徴 IndexPathの参照タイミング Delete 降順にIndexPathを扱う バッチ更新前 Insert 昇順にIndexPathを扱う バッチ更新前 Move 移動前: バッチ更新前 移動後: バッチ更新後 Reload DeleteとInsertを合わせたもの バッチ更新前 Deleteは
更新が走る前のIndexPathを元に降順
にセルを削除し、Insertは
削除が実行されたあとのIndexPathを元に昇順に
セルの挿入を行うということのようです。さらにReloadに関してはDeleteとInsertを合わせたものになります。
主要なエラーの原因4つ
上記のアクションを踏まえた上で
performBatchUpdatesのエラーと考えられる原因として
以下の4つがあげられます。
- 移動させる対象アイテムのIndexPathと削除するIndexPathに一致するものがある
- 移動させる対象アイテムのIndexPathと追加するIndexPathに一致するものがある
- 同じ位置に2つ以上のアイテムを移動させようとしている
- 不正なIndexPathを参照している
今回の場合は
reloadItemsとmoveItemで同じIndexPathを参照していることが原因で
これがエラーの元になっています。解決策
reloadItemsの更新を別にすれば解決します。
UIView.performWithoutAnimation {

    // リロードは別の更新で行う
    collectionView.performBatchUpdates({
        collectionView.reloadItems(at: [IndexPath(item: 3, section: 0)])
    })
}

collectionView.performBatchUpdates({

    collectionView.deleteItems(at: [IndexPath(item: 2, section: 0)])
    collectionView.moveItem(at: IndexPath(item: 3, section: 0), to: IndexPath(item: 0, section: 0))
})
DataSourceの更新の問題点と注意点
先ほど、CollectionViewの更新は順序が関係ないと記載しましたが、DataSourceは逆に更新の順番が影響します。順番を間違えるとCollectionViewとデータの不整合が生じるなどエラーの原因になります。
そのため、DataSourceの更新は下記のルールに従って行うべきです。
DataSource Updatesの鉄則
・MoveはDelete+Insertに分解する
・全てのDeleteとInsertは一緒に更新する
・Deleteを最初に降順で行う
・Insertは最後に昇順で行う
先ほどの更新の場合だと下記のようになります。
UIView.performWithoutAnimation {
    collectionView.performBatchUpdates({
        collectionView.reloadItems(at: [IndexPath(item: 3, section: 0)])
    })
}

collectionView.performBatchUpdates({

    // 2 updates
    // index2の削除
    // index3のアイテムをindex0に移動する

    // delete item at index2
    // delete item at index3
    // insert item from index3 at index 0

    let movedPerson = people[3]

    // 降順で削除
    people.remove(at: 3)
    people.remove(at: 2)

    // 昇順で挿入
    people.insert(movedPerson, at: 0)

    collectionView.deleteItems(at: [IndexPath(item: 2, section: 0)])
    collectionView.moveItem(at: IndexPath(item: 3, section: 0), to: IndexPath(item: 0, section: 0))
})
Reload Dataは?
確かにあらゆる問題は解決できますが
アニメーションも何も起きず
かなり乱暴なやり方になりますので使わないのが得策です。今回はperformBatchUpdatesでしたが
他の同じような性質を持ったメソッドに関しても同様のことが言えると思いますので
ぜひドキュメントなどで各アクションが
いつどのタイミングで、何を参照してアクションを起こしているのか
確認してみると良いかもしれません。まとめ
UICollectionViewは頻繁に使われるViewですが
意外と知らなかったことがあるのではないかとWWDC2018の動画を見て感じました。ドキュメントやWWDCの動画を改めて見返すと
今まで意識していなかった箇所や発見があり
理解を深めることができるので良いなと思いましたもし何か間違いなどございましたら
ご指摘頂けますと幸いです