- 投稿日:2019-03-10T22:49:05+09:00
CheerioライブラリとNodejsでデータクロール
チェリオとは何ですか?
これはデータクロール用の非常に強力なJavaScriptライブラリです。このライブラリはjQuery Selector とよく似たCheerio Selectorを提供するため、関数の使用はjQuery Selectorの使用と似ています。簡単に言うと、jQueryを使用するときは、htmlコードを取得するためhtml()の関数を使って、要素プロパティを取得するためattr(name、value)を使うことなどで、jqueryライブラリとおなじみの関数を使用します。このライブラリのしくみについて詳しくは、こちらを参照してください。
新しいストーリーの章があるときに自動的に通知するデモアプリケーションを書く
私たちのステップは次のよう:
- ステップ1:物語の最新章のリストを取得する。
- ステップ2:新たな章があるかどうかを知るために、JSONのファイルに格納されている章とこの章を比較して新たな章があるかどうかを知る。そのJSONのファイルがない場合は、作成する。
- ステップ3:新しい章がある場合はストーリーを取得して、メールで通知を送る。
じゃ、始めましょう。
cheerioとrequestというライブラリのインストールする。(クロールしたいデータがあるウエブサイトをコールする)
npm install cheerio --save

npm install request --save

npm install nodemailer --save
必要なライブラリの宣言をする
const cheerio = require('cheerio');

const request = require('request');

const fs = require('fs');

const nodemailer =  require('nodemailer');
次に、ストーリーページから最新の章を取得するためのクローラ関数を作成して、jsonファイルと比較する。
//   ウエブサイトからデータを取得する関数
function Crawler()
{
    // ウエブサイトへリクエストを送る
    request('http://truyencv.com/pham-nhan-tu-tien-chi-tien-gioi-thien/', function (err, res, body)
    {
        //  cheerio.load関数でデータを取得する
        var $ = cheerio.load(body);
        // 最新のストーリーの章を取得する
        var newestChap = $('.list-overview .item .item-value a').text();
        var obj = {
            'newestChap' : newestChap
        }
        var json = JSON.stringify(obj);
        //  newchap.jsonファイルをあるかどうかチェクする
        if (!fs.existsSync('newchap.json')) {
            //  ない場合は作成する
            fs.writeFile('newchap.json', json, '', (err)=>{
                if (err) throw err;
                console.log('newchap.jsonを作成することができました!');
            });
            return;
        }
        // プロジェクトの中にnewchap.jsonファイルの内容を読む
        fs.readFile('newchap.json', function readFileCallback(err, data)
        {
            if (err)
            {
                console.log('newchap.jsonファイルを読むことができません!');
                return;
            }
            else
            {
                // JSONファイルから最新の章を取得する
                obj = JSON.parse(data);
                var dbChap = obj.newestChap;
                //  2つの章を比較して違うばあい新章がある
                if(newestChap !== dbChap)
                {
                    // newchap.jsonファイルに新章を保存する
                    fs.writeFile('newchap.json', json, '', (err)=>{
                        if (err) throw err;
                        console.log('新章がある!');
                        console.log('newchap.jsonファイルを編集しました!');
                    });
                    // 新章のリンクを取得する
                    var detailUrl = $('.list-overview .item .item-value a').attr('href');
                    //  新章の情報を取得するためリクエストを作成する
                    request(detailUrl, (err, res, body)=>{
                        let cheerioDetail = cheerio.load(body);
                        let contentDetail = cheerioDetail('.truyencv-read-content .content').text();
                        // メールで通信する
                        sendEmail(newestChap,contentDetail);

                    });
                }
                else{
                    console.log('新章がありません!');
                }
            }
        });
    })
}
次のように送信するためにnodemailerライブラリを使用してsendEmail関数を追加します。
function sendEmail(subject, content)
{
    var transporter = nodemailer.createTransport({
        service : 'gmail',
        auth: {
            user : 'yourmail@gmail.com',
            pass : 'yourpassword'
        }
    });
    var mailOptions= {
        from : 'yourmail@gmail.com',
        to: 'yourmail@gmail.com',
        subject : 'ストーリーの名前は新章が創刊する' + subject,
        text : content
    }
    transporter.sendMail(mailOptions, function(err, info){
        if(err)
        {
            console.log('メールでエーラが発生しました: ', err);
        }
        else
        {
            console.log('メールを送りました:', info.response);
        }
    });
}
最後に、このCrawler操作を3秒ごとに繰り返すための関数をもう1つ書く。
var timer = setInterval(function() {
    return Crawler();
}, 5000);
次に、コマンドウィンドウでserver.jsを実行し、メールが送信されるのを待ちます。
そこで、cheerioとnodejsを使ってクロールデモの簡単なデモを行う方法を説明しました。
読んでくれてありがとうございました。
- 投稿日:2019-03-10T20:01:00+09:00
TypeError: Cannot assign to read only property 'Symbol(Symbol.toStringTag)' of object '#<process>'
TypeError: Cannot assign to read only property 'Symbol(Symbol.toStringTag)' of object '#<process>'Node v11.11.0を使うとjestで上記エラーが発生する。
いくつか解決策があり、1つはjestのバージョンを上げること。
該当PRは以下。
https://github.com/facebook/jest/issues/8069
https://github.com/facebook/jest/pull/8050jestのバージョンがあげられない場合は、nodeのバージョンを下げること。
node v11.10.0を使えばエラーは発生しない。
node側の該当PRは以下
https://github.com/nodejs/node/pull/26488PRを見ると、
SymbolのtoStringTagがwritable: falseに設定されたために発生したエラーの模様。
jest側の対処はわりと暫定的なので、node側の修正を期待したい。- newProcess[Symbol.toStringTag] = 'process'; + try { + // This fails on Node 12, but it's already set to 'process' + newProcess[Symbol.toStringTag] = 'process'; + } catch (e) { + // Make sure it's actually set instead of potentially ignoring errors + if (newProcess[Symbol.toStringTag] !== 'process') { + e.message = + 'Unable to set toStringTag on process. Please open up an issue at https://github.com/facebook/jest\n\n' + + e.message; + + throw e; + } + }https://github.com/facebook/jest/pull/8050/files?utf8=%E2%9C%93&diff=unified
- 投稿日:2019-03-10T18:57:23+09:00
dokku上でPuppeteerを動かすと"Error: Failed to launch chrome!"というエラーになる時の対処法
概要
- dokkuでpuppeteerを動かしたい。
- ローカルでは動くが、本番サーバーではエラーが出て動作しない。
- 詰んで数日2~3日も無駄にしてしまった。後続者のためにメモ。
エラー内容
2019-03-08T17:17:35.658980463Z app[web.1]: Error: Failed to launch chrome!
2019-03-08T17:17:35.658991689Z app[web.1]: /app/node_modules/puppeteer/.local-chromium/linux-624492/chrome-linux/chrome: error while loading shared libraries: libX11-xcb.so.1: cannot open shared object file: No such file or directory
2019-03-08T17:17:35.658994915Z app[web.1]:
2019-03-08T17:17:35.658997085Z app[web.1]:
2019-03-08T17:17:35.658999215Z app[web.1]: TROUBLESHOOTING: https://github.com/GoogleChrome/puppeteer/blob/master/docs/troubleshooting.md
2019-03-08T17:17:35.659001950Z app[web.1]:
2019-03-08T17:17:35.659004031Z app[web.1]:     at onClose (/app/node_modules/puppeteer/lib/Launcher.js:360:14)
2019-03-08T17:17:35.659006156Z app[web.1]:     at Interface.helper.addEventListener (/app/node_modules/puppeteer/lib/Launcher.js:349:50)
2019-03-08T17:17:35.659014821Z app[web.1]:     at Interface.emit (events.js:194:15)
2019-03-08T17:17:35.659017113Z app[web.1]:     at Interface.close (readline.js:397:8)
2019-03-08T17:17:35.659019221Z app[web.1]:     at Socket.onend (readline.js:173:10)
2019-03-08T17:17:35.659021409Z app[web.1]:     at Socket.emit (events.js:194:15)
2019-03-08T17:17:35.659023631Z app[web.1]:     at endReadableNT (_stream_readable.js:1107:12)
2019-03-08T17:17:35.659026145Z app[web.1]:     at process.internalTickCallback (internal/process/next_tick.js:72:19)
動作環境
- Ubuntu 16.04
- Dokku 0.14.5
- Puppeteer 1.13.0
原因
- puppeteerに必要なChromeヘッドレスは、デフォルトの状態のDokkuでは機能しない。
- インストールする必要があるが、その方法がわからなくて2~3日詰んでいた
解決策
dokku-aptプラグインで必要なパッケージをインストールする
- 【前提】dokkuインストール、gitのリモートリポジトリの追加は済ませた状態
- dokku-aptのインストール(SSH接続した状態)を実行
//dokku version0.4.0以上の場合(たいていはこっち)
sudo dokku plugin:install https://github.com/F4-Group/dokku-apt

//dokku version0.4.0未満の場合
git clone https://github.com/F4-Group/dokku-apt -b 0.3.0 /var/lib/dokku/plugins/dokku-apt
dokku plugins-install
- 開発中のプロジェクトのルートフォルダに
apt-packages(拡張子なし)を作成
- ↑勘違いして、サーバー上の
home/dokku/<app_name>に配置してしまっていて詰んでた??- ファイルの内容は以下の通り
- 改行区切りでインストールしたいパッケージを記述
- 公式サイトからUbuntuで動かすためのパッケージ一覧をコピペしただけなので不要なのもあるかも
gconf-service
libasound2
libatk1.0-0
libatk-bridge2.0-0
libc6
libcairo2
libcups2
libdbus-1-3
libexpat1
libfontconfig1
libgcc1
libgconf-2-4
libgdk-pixbuf2.0-0
libglib2.0-0
libgtk-3-0
libnspr4
libpango-1.0-0
libpangocairo-1.0-0
libstdc++6
libx11-6
libx11-xcb1
libxcb1
libxcomposite1
libxcursor1
libxdamage1
libxext6
libxfixes3
libxi6
libxrandr2
libxrender1
libxss1
libxtst6
ca-certificates
fonts-liberation
libappindicator1
libnss3
lsb-release
xdg-utils
wget
git add .→git commit -m"add apt-packages→git push dokku masterなどでpush- dokkuがデプロイするときに自動的に
apt-packagesの内容をインストールしてくれる参考
- An example app with Node.js, Express.js, Puppeteer and Chrome Headless
- Inject deb packages into dokku based on files in project
- 投稿日:2019-03-10T18:12:06+09:00
ConoHa で VPS を借りて Node.js で HTTPS サーバを建てるまでのメモ(1/2)
ねらい
本記事は、以下の目的で行った一連の遊びに関する、自分自身のためのメモです。
- VPS (Virtual Private Server) の勉強
- Linux (CentOS 7) の勉強
- パーソナル認証局でのお遊びからの卒業
今回(1/2)は、ConoHa で VPS を借りて、CentOS 7 の各種設定をして、SSH、SCP、VNC によるセキュアなリモート接続環境を構築したうえで、Web サーバ(Apache)を動かすところまでです。
次回(2/2)は、オリジナルのドメインを取得し、DNS に登録し、Let's Encrypt を使って SSL (HTTPS) に対応した Web サイトに仕立てたうえで、Node.js でも HTTPS サーバを建てます(予定)。
ローカルの環境
ハードウェア
- 端末
- PC: Lenovo YOGA720 12IKB
- 仕様: Core i5-7200U, 8GB RAM, 256GB SSD
- OS: Windows 10 Home 1809 64bit
- インターネット回線
- au ひかり(マンションタイプ)
ソフトウェア
- Web ブラウザ: Chrome 72.0.3626.121
- VPS の契約とコントロールパネル操作に用いるだけなので、なんでもよい
- ターミナルソフトウェア: RLogin 2.24.1
- 好み次第で TeraTerm などでもよい
- VNC クライアント: VNC Viewer 6.18.907 (r38355)
- 好み次第で Ultra VNC などでもよい
- SCP クライアント: WinSCP 5.13.8 (build 9278)
ConoHa VPS を借りる
申し込み
- ConoHa VPS のページで「お申し込み」をクリックして、個人情報を入力するだけ
- 今回はたまたま 700 円分のクーポンがもらえた
- すぐに「お申込みありがとうございます」というタイトルのメールが送られてくる(コントロールパネルやスタートアップガイドの URL が書かれている)
コントロールパネルでインスタンスを作る
- 「サーバー追加」から所望のプランのサーバのインスタンスを作る
- 今回作ったインスタンスの仕様は以下
- CPU: 2コア
- メモリ: 1GB
- SSD: 50GB
- リージョン: 東京
- 料金: 900円/月
- OS は CentOS 7.6 (64bit) を選択(本文を書いている時点の最新バージョン)
- 他に何のスクリプト(テンプレート)も選択しないシンプルな構成でスタート
- なお、初期設定の「接続許可ポート」は、「全て許可」で構わない
- ここで許可しても、firewall-cmd でポートを開けない限り開放にはならないので心配ない
- 逆に、firewall-cmd でポートを開けても、ここで許可していないと、開放にはならない
- SSH Key (*.pem) を作ってローカルマシンにダウンロードしておく
- サーバの IPv4 アドレスを控えておく
CentOS 7 をもろもろ設定する
以下、SSH コンソールのプロンプトの表記は…
- # : root または su で root に昇格した場合
- $ : 一般ユーザ
SSH でリモートアクセスして初期設定
RLogin の設定と接続
- RLogin の「サーバに接続」から「新規」で…
- ホスト名: サーバの IPv4 アドレス
- ログインユーザ名: root
- パスワード欄は空白にしておく
- 「SSH 鍵認証」をクリック -> ダウンロードしておいた *.pem を選択
パッケージの更新
ログインしたらなにより初めに、パッケージを更新する。
# yum updateメモ: yum = Yellowdog Updater Modified; 「ヤム」と読む
パッケージ更新の自動化
自動的にパッケージを更新してくれる yum-cron をインストールする。インストールすればあとは自動的に起動して、自動的に更新してくれる。
# yum install yum-cron一般ユーザの追加
- 原則今後は root ではログインや作業をしないように、一般ユーザ(例:hoge)を作成する
# useradd hoge
# passwd hoge
ユーザを sudoers に入れる
- ユーザを wheel グループに登録して、sudo が使えるようにする
# usermod -G wheel hoge鍵交換方式による SSH 認証の設定
パスワード認証を使わないように設定する。
- RLogin で上記で追加したユーザ(hoge)用のエントリを作る
- ひとまずパスワード認証で接続する
秘密鍵と公開鍵を作る
- ssh-keygen で秘密鍵と公開鍵を作る
$ ssh-keygen

  保存場所を聞かれるので、そのまま Enter することで、以下に秘密鍵と公開鍵ができる
    秘密鍵 /home/hoge/.ssh/id_rsa
    公開鍵 /home/hoge/.ssh/id_rsa.pub

  パスワードを聞かれるので、ログインパスワードとは違う任意のパスワードを2回入力
- 公開鍵の内容を authorized_keys ファイルに移す
- .ssh ディレクトリ内に authorized_keys というファイルを作成
- authorized_keys ファイルのパーミッションを 600 に設定
- 公開鍵(id_rsa.pub)の内容を authorized_keys に追記
$ touch .ssh/authorized_keys
$ chmod 600 .ssh/authorized_keys
$ cat .ssh/id_rsa.pub >> .ssh/authorized_keys
秘密鍵と公開鍵をローカルに持ってくる
- WinSCP で hoge ユーザとして接続(ここではとりあえずパスワード認証で)
- home ディレクトリ内の隠しファイル(フォルダ)を表示させるために Ctrl + Alt + H
- あるいは「オプション」->「環境設定」->「パネル」->「一般」->「隠しファイルを表示する」にチェック
- .ssh 内の id_rsa(秘密鍵)と id_rsa.pub(公開鍵)をローカルマシンにダウンロード
- これらサーバ上の id_rsa(秘密鍵)と id_rsa.pub(秘密鍵)は後から削除するが、鍵交換方式による接続を確認するまではサーバ上に残しておく
鍵交換方式で SSH 接続してみる
- RLogin の接続をいったん切る
- exit あるいは logout コマンド
- hoge ユーザのエントリを「編集」
- 「サーバ」->「ホスト設定」にある「SSH 認証鍵」ボタンをクリック
- さきほどローカルにダウンロードした id_rsa(秘密鍵)を選択
- 「OK」ボタン
- 接続する
- 秘密鍵と公開鍵を作ったときに入力したパスワードを入力
- 接続できることを確認
サーバ上の秘密鍵と公開鍵を削除する
- WinSCP で、.ssh 内の id_rsa(秘密鍵)と id_rsa.pub(公開鍵)を削除
パスワード認証できないようにする
- root 権限で /etc/ssh/sshd_config を編集(例えば nano エディタで)
$ su
# nano /etc/ssh/sshd_config
- 79 行目の「PasswordAuthentication」を yes から no に変更
/etc/ssh/sshd_configPasswordAuthentication yes ↓ PasswordAuthentication no
- ファイルを保存
- SSH サービスを再起動する
# systemctl restart sshd.serviceroot でのログインを不可にする
- root 権限で /etc/ssh/sshd_config を編集(例えば nano エディタで)
$ su
# nano /etc/ssh/sshd_config
- 38 行目の「PermitRootLogin」のコメントアウトを外して、値を no に設定
/etc/ssh/sshd_config# PermitRootLogin yes ↓ PermitRootLogin no
- ファイルを保存
- SSH サービスを再起動する
# systemctl restart sshd.serviceSCP も鍵交換方式にする
- WinSCP を起動すると出てくる「ログイン」ウィンドウにて
- 「ツール ▼」から「PuTTYgen を実行」を選択
- 「PuTTY Key Generator」ウィンドウにて
- 「Load」ボタンをクリック -> id_rsa(秘密鍵)を選択
- 「Save private key」ボタンをクリック -> id_rsa.ppk という名前で保存
- 終えたらウィンドウを閉じる(右上の×)
- 再び「ログイン」ウィンドウにて
- 自分のセッションを選択して「編集」ボタンをクリック
- 「設定 ▼」ボタンをクリック
- 「SSH」の「認証」の「認証条件」にて
- エージェントの転送を許可する
- 「秘密鍵」欄で、id_rsa.ppk を選択
- 「OK」ボタンで抜ける
- 「保存」ボタンで設定を保存
- 「ログイン ▼」ボタンで接続
- 秘密鍵のパスフレーズを聞かれるので、入力して、「OK」
VNC でも接続できるようにする
VNC 接続は必要というわけではないが、GUI があるとちょっと安心できるので、VNC でも接続できるようにしておく。
デスクトップ環境 GNOME のインストール
- SSH (RLogin) で hoge ユーザでログインした状態で以下を実行
$ su
# yum groupinstall "GNOME Desktop"
- 終わるまでのんびり待つ
- 終わったら、デフォルトで起動するのが CUI か GUI かを確認
# systemctl get-default
    graphical.target と出たら、GUI で起動する設定になっている
    multu-user.target と出たら、CUI で起動する設定になっている
- もし graphical.target(GUI で起動)になっていたら、CUI で起動するように設定する
# systemctl set-default multi-user.targettigervnc-server のインストールと設定
- VNC サーバの tigervnc-server をインストールする
# yum install tigervnc-server
- VNC 用のポート 5901/tcp を開ける
- 5901 = VNC は 5900 番台を使い、末尾がディスプレイ番号
# firewall-cmd --add-port=5901/tcp --permanent
# firewall-cmd --reload
# firewall-cmd --list-all
- ユーザ hoge に戻る(su で root に昇格していた場合は exit する)
- VNC 接続用のパスワードを設定する
$ vncpasswd

view-only password? という質問には n と答える(VNC 経由で操作もできるように)
- 一時的に VNC サーバを起動して接続できることを確認
- まずは vncserver のディスプレイ番号1を起動
$ vncserver :1
$ vncserver -list
Windows の VNC Viewer で接続確認
- サーバの IPv4 アドレス:5901 で接続
- 例:118.99.10.1:5901
- 接続できて GUI が見られたら、一旦接続を切る
一時的に起動した VNC サーバを切る
$ vncserver kill :1
$ vncserver -list
- VNC サーバが自動で起動するように設定する
- 再び su で root 権限を得て
- 自動起動のテンプレート vncserver@.service をコピーして vncserver@:1.service ファイルを作る
- vncserver@:1.service ファイルの内容を編集する(例えば nano エディタで)
- 具体的には <USER> と書かれている部分を実際のユーザ名(今回の場合「hoge」)に書き換えるだけ(2箇所)
su # cp -p /lib/systemd/system/vncserver@.service /etc/systemd/system/vncserver@:1.service # nano /etc/systemd/system/vncserver@:1.servicevncserver@:1.service[Unit] Description=Remote desktop service (VNC) After=syslog.target network.target [Service] Type=forking ExecStartPre=/bin/sh -c '/usr/bin/vncserver -kill %i > /dev/null 2>&1 || :' ExecStart=/usr/sbin/runuser -l hoge -c "/usr/bin/vncserver %i" # この行にあった <USER> を hoge に PIDFile=/home/hoge/.vnc/%H%i.pid # この行にあった <USER> を hoge に ExecStop=/bin/sh -c '/usr/bin/vncserver -kill %i > /dev/null 2>&1 || :' [Install] WantedBy=multi-user.target
- VNC サービスを自動起動させる
- 設定ファイルをリロード
- vncserver@:1.service をスタート
- vncserver@:1.service の自動起動を有効化
# systemctl daemon-reload
# systemctl start vncserver@:1.service
# systemctl enable vncserver@:1.service
- VNC Viewer で接続できることを確認する
SSH トンネル経由で VNC 接続するようにする
せっかく SSH を鍵交換方式にするなど念入りに設定したのに、VNC が 暗号化されないのでは意味がないため、SSH トンネル経由で接続するように設定する。VNC Viewer をローカルの特定のポート(例えば、127.0.0.1::1234)に接続させ、RLogin がそのポートへの通信を捉えて SSH に乗せて(ポートフォワードして)サーバとやりとりする。
RLogin 側の設定(ローカルの特定ポートへの通信をフォワードする設定)
- RLogin のサーバのエントリで、hoge ユーザのエントリを選択して「編集」ボタン
- 「サーバー」の「プロトコル」の「SSH」にて「ポートフォワード」ボタン
- 「SSH2 ポートフォワード」ウィンドウにて「新規」ボタン
- 上段「Listened」で
- [o] Local を選択
- 「Host Name」欄に「127.0.0.1」(つまりローカルマシン自身)
- 「Port」欄に「1234」(任意の番号だが例えば)
- 下段「Connect」で
- 「Host Name」欄にサーバの IPv4 アドレス
- 「Port」欄に「5901」
- 「OK」で抜ける
- 「OK」で抜ける
VNC Viewer 側の設定(ローカルの特定ポートに接続する設定)
- 「FIle」->「New Connection」で新しい接続を作成
- 「VNC Server」欄に「127.0.0.1::1234」(上記で RLogin の「Listened」に設定した Host Name と Port)
- IP アドレスとポート番号を区切るコロン(:)が2個あることに注意
SSH トンネルでの VNC 接続
- RLogin で通常通りサーバに接続したうえで
- VNC Viewer で 127.0.0.1::1234 を開く
- RLogin の接続を切ると、VNC Viewer の接続も切れる(トンネルがなくなるから)
Apache を設定する
Web サーバを動かし、VPS を借りた意義を味わいます。
Apache のインストール
- root 権限にて、yum で関連するパッケージをインストール
- epel-release: EPEL (Extra Packages for Enterprise Linux) レポジトリ
- httpd: Apache Web サーバ本体
- mod_perl: Apache の API を Perl から利用するもの
- mod_ssl: Apache に SSL (HTTPS) 接続機能を追加するもの
$ su
# yum install epel-release
# yum install httpd mod_perl mod_ssl
- この後、各種設定を勧める情報源が多いが、とりあえず手短に確認するだけなら、特に設定しなくても大丈夫
- Web サーバを起動させる
- systemctl start で起動
- systemctl enable で自動起動化
# systemctl start httpd.service
# systemctl enable httpd.service
- VNC にて サーバに接続し、Firefox にて「localhost」で Apache のテストページにアクセスできることを確認
http と https のポートを開ける
- 外部からもアクセスできるようにポートを開ける
- http のポート(80)を開ける -> firewall-cmd --add-service=http
- https のポート(443)を開ける -> firewall-cmd --add-service=https
- 設定のリロード
- 設定の確認
# firewall-cmd --add-service=http --zone=public --permanent
# firewall-cmd --add-service=https --zone=public --permanent
# firewall-cmd --reload
# firewall-cmd --list-all
- ローカルマシンやスマホの Web ブラウザにて、URL 欄にサーバの IPv4 アドレスを入力して、Apache のテストページにアクセスできることを確認
- 例:118.99.10.1
- 同様に「https://」をつけてアクセスしてみる
- 例:https://118.99.10.1
- ブラウザに「安全な接続ではありません」と表示されるが、例外的にアクセスはできて、しかしながら URL 欄に×印などがつくことを確認する
- 電子証明書が信頼できる認証局により発行されたものではないことを示している
- 次回、Let's Encrypt を使ってこれを克服し、ちゃんとした HTTPS サイトにする
小まとめ
ひとまず、ConoHa で VPS を借りて、CentOS 7 の各種設定をして、SSH、SCP、VNC によるセキュアなリモート接続環境を構築したうえで、Web サーバ(Apache)を動かすところまでのメモでした。主に下記の参考書籍に沿って進めましたが、とても勉強になり、VPS 遊びが楽しくなってきました。参考書籍からアレンジしている部分もあり、それなりにオリジナルな勉強ができたと思います。
なお、ConoHa の VPS に落ち着く前には、さくらの VPS 、カゴヤの VPS も試しました。下記の参考書籍では、さくらの VPS を使った事例もあるため、さくら VPS にしようかとも思ったのですが…。初期費用がかからず、ほぼ同じ料金で SSD の容量が大きい ConoHa にしました。ちなみに、カゴヤの VPS は、CentOS 7 なのに、firewalld ではなく iptables を使う仕様でした。はじめそれに気づかず、ハマったため、やめました。
参考
- 福田和宏 (2018). 実践!CentOS7 サーバー徹底構築 改訂第二版 CentOS7(1708)対応, ソーテック社.
- ConoHa. VPSスタートアップガイド, https://support.conoha.jp/vps/guide/vpsstartup/ (最終閲覧:2019年3月10日).
- 投稿日:2019-03-10T15:27:53+09:00
appiumとCodeceptJS(node.js)を使ってAndroid & iOSのE2Eテストの実行環境構築
なぜこの文章を書いたか
前回のQiitaで「Vagrant + Selenium + node.js(CodeceptJS)でIE, Chrome, FirefoxのマルチブラウザE2Eテスト」について書いたのですが「どうせならスマホのE2Eテストも出来るようになりたい」と考え追加ポスト。
環境
OS : macOS Mojave (10.14.3)
VirtualBox : 6.0.4
Vagrant : v2.2.3
node.js : 10.15.1 (ndenvでインストール済み)
Android Studio, Xcode などはインストール済みインストール
appium, appium-doctor のインストール
$ npm install -g appium
$ npm install -g appium-doctor
$ ndenv rehash
appium-doctor の実行
まず実行して自分の環境に何が足りないか、設定が間違っていないかなどを確認
$ appium-doctor --ios --android足りないものをインストール
色々と足りないのでインストール & 設定
carthage のインストール
$ brew install carthageopencv4nodejs のインストール
$ brew install opencv@3
$ brew link opencv@3 --force
$ vi ~/.bash_profile
.bash_profileに以下を追加
export PKG_CONFIG_PATH="$PKG_CONFIG_PATH:/usr/local/Cellar/openssl/1.0.2q/lib/pkgconfig/"
export PATH="/usr/local/opt/opencv@3/bin:$PATH"
export LDFLAGS="$LDFLAGS -L/usr/local/opt/opencv@3/lib"
export CPPFLAGS="$CPPFLAGS -I/usr/local/opt/opencv@3/include"
$ exec $SHELL -l $ OPENCV4NODEJS_DISABLE_AUTOBUILD=1 npm install -g opencv4nodejsffmpeg のインストール
$ brew install ffmpegfbsimctl のインストール
$ brew tap facebook/fb
$ brew install fbsimctl --HEAD
applesimutils のインストール
$ brew tap wix/brew
$ brew install applesimutils --HEAD
idevicelocation のインストール
$ brew install usbmuxd libplist libimobiledevice libzip openssl make automake autoconf libtool pkg-config
$ brew list openssl
(省略)
/usr/local/Cellar/openssl/1.0.2q/lib/pkgconfig/ (3 files)
(省略)
$ vi ~/.bash_profile
.bash_profileに以下を追加
export PKG_CONFIG_PATH="$PKG_CONFIG_PATH:/usr/local/opt/openssl/lib/pkgconfig/"$ exec $SHELL -l $ git clone https://github.com/JonGabilondoAngulo/idevicelocation.git $ cd idevicelocation $ ./autogen.sh $ make $ sudo make installios-deploy のインストール
$ npm install -g ios-deployios-webkit-debug-proxy のインストール
$ brew install ios-webkit-debug-proxyJAVA_HOMEの設定
$ vi ~/.bash_profile.bash_profileに以下を追加
export JAVA_HOME=`/usr/libexec/java_home -v 10`
export PATH="$PATH:$JAVA_HOME/bin/"
$ exec $SHELL -lbundletool.jar のインストール
$ mkdir ~/bin/
$ cd ~/bin/
$ wget https://github.com/google/bundletool/releases/download/0.8.0/bundletool-all-0.8.0.jar
$ ln -s bundletool-all-0.8.0.jar bundletool.jar
$ chmod a+x bundletool-all-0.8.0.jar
$ vi ~/.bash_profile
.bash_profileに以下を追加
export PATH="$PATH:$HOME/bin/"$ exec $SHELL -l再度 appium-doctor の実行
$ appium-doctor --ios --android
(前略)
info AppiumDoctor
info AppiumDoctor Everything looks good, bye!
info AppiumDoctor
Everything looks good, bye!と出ていれば問題無しChromeDriver のインストール
AndroidのChromeを動作させるためにChromeDriverをインストールする
Android 9.0のChromeのバージョンに合わせて、ここではChromeDriverのバージョンをv2.44としています詳細:
https://github.com/appium/appium/blob/master/docs/en/writing-running-appium/web/chromedriver.md
http://chromedriver.chromium.org/downloads$ wget https://chromedriver.storage.googleapis.com/2.44/chromedriver_mac64.zip $ unzip chromedriver_mac64.zip $ mv chromedriver ~/bin/chromedriver_v2_44npmを使ってテスト環境の構築
普通にディレクトリを作ってテスト環境を構築する
npm init 他
$ mkdir sptest
$ cd sptest
$ npm init -y
$ npm install codeceptjs --save-dev
codecept.jsの初期化
$ npx codeceptjs init

  Welcome to CodeceptJS initialization tool
  It will prepare and configure a test environment for you

Installing to /Users/xxxx/sptest
? Where are your tests located? ./*_test.js
? What helpers do you want to use? Appium
? Where should logs, screenshots, and reports to be stored? ./output
? Would you like to extend I object with custom steps? Yes
? Do you want to choose localization for tests? ja-JP
? Where would you like to place custom steps? ./steps_file.js
Configure helpers...
? [Appium] Application package. Path to file or url http://localhost
? [Appium] Mobile Platform iOS
? [Appium] Device to run tests on emulator
Steps file created at /Users/xxxx/sptest/steps_file.js
Config created at /Users/xxxx/sptest/codecept.conf.js
Directory for temporary output files created at `_output`
Almost done! Create your first test by executing `codeceptjs gt` (generate test) command

--
Please install dependent packages locally: npm install --save-dev webdriverio@^5.2.2
$ npm install --save-dev webdriverio@^5.2.2
実際のテスト
appiumの起動
$ appium --chromedriver-executable ~/bin/chromedriver_v2_44テストの記述
前回と同じ、github.comに行って、"GitHub"という文字列があるかどうかをチェックするだけのコードを書きます。
github_test.js
Feature('Github');

Scenario('test something', (I) => {
  I.amOnPage('https://github.com');
  I.see('GitHub');
});
iOS用の設定ファイルを作成
自動で作成されてますが、それを以下のようにいじります。
codecept.ios.conf.js
exports.config = {
  tests: './*_test.js',
  output: './output',
  helpers: {
    Appium: {
      platform: "IOS",
      desiredCapabilities: {
        "platformName": "iOS",
        "platformVersion": "12.1",
        "deviceName": "iPhone 7",
        "automationName": "XCUITest",
        "browserName": "Safari"
      }
    },
  },
  include: {
    I: './steps_file.js'
  },
  bootstrap: null,
  mocha: {},
  name: 'test',
  translation: 'ja-JP'
}
Android用の設定ファイルを作成
同様にAndroid用も
exports.config = {
  tests: './*_test.js',
  output: './output',
  helpers: {
    Appium: {
      platform: "Android",
      desiredCapabilities: {
        automationName: "Appium",
        deviceName: "Nexus 5x API 28 for appium",
        platformVersion: "9",
        browserName: "Chrome"
      }
    },
  },
  include: {
    I: './steps_file.js'
  },
  bootstrap: null,
  mocha: {},
  name: 'test',
  translation: 'ja-JP'
}
テスト実行
iOSにしろAndroidにしろ、問題があればappiumを起動しているターミナルに何かしらエラーが出ているので解読して下さい
iOS
以下のコマンドを実行すると、初回時に必要な設定を自動でしてくれた上でSafariが起動してテストが実行されます
$ npx codeceptjs run --steps --config=./codecept.ios.conf.jsAndroid
以下のコマンド実行の前にAndroid StudioからAndroidエミュレータを立ち上げておきます
Name : Nexus 5x API 28 for appium
OS : Pi (Android 9.0)$ npx codeceptjs run --steps --config=./codecept.android.conf.jsnpm runで実行できるように package.json を修正
package.json
{
  "name": "sptest",
  "version": "1.0.0",
  "description": "",
  "main": "index.js",
  "scripts": {
    "test": "npm run test:ios; npm run test:android",
    "test:ios": "codeceptjs run --steps --config=./codecept.ios.conf.js",
    "test:android": "codeceptjs run --steps --config=./codecept.android.conf.js"

  },
  "keywords": [],
  "author": "",
  "license": "ISC",
  "devDependencies": {
    "codeceptjs": "^2.0.7",
    "webdriverio": "^5.7.1"
  }
}
iOS
$ npm run test:iosAndroid
$ npm run test:androidiOSとAndroidの逐次実行
$ npm run test終わりに
これで前回のSelleniumと合わせて、ブラウザテストが一通り出来るようになったので、これを使ってガリガリE2Eテスト書いていきます
- 投稿日:2019-03-10T12:57:52+09:00
設定不要で簡単にNode.jsアプリケーション構築できるZero Serverを試してみた
Zero Serverについて公式ページを読んで試したみたという内容です。
詳しく知りたい方は公式を参照するようお願いします。
間違いなどありましたらご指摘お願いいたします。Zero Server とは
※githubのreadmeの説明の部分をgoogle翻訳↓
Zeroは現代のWeb開発を単純化するためのWebフレームワークです。 パッケージ管理やルーティングを気にせずにアプリケーションを構築できます。 Node.js、React、HTML、MDX、および静的ファイルを組み合わせてコードを記述し、それらをすべてフォルダーに入れるのと同じくらい簡単です。 ゼロはそれらすべてに役立つでしょう。 作業を簡単にするために、ルーティング、バンドル、およびトランスパイルのための通常のプロジェクト構成がゼロで抽象化されています。
自分でいろいろ設定しなくても、
require('moment')と書けば、Zero Serverが自動でmomentをインストールして、解決してくれます。Installation
bashnpm i zeroHello World
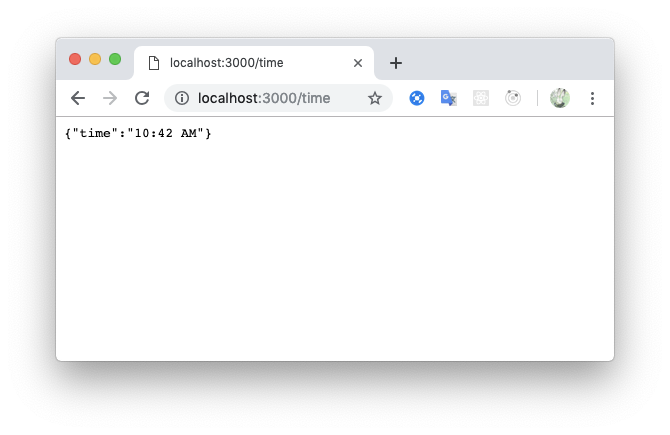
時刻を教えてくれるアプリケーションを作成する
time.jsconst moment = require("moment") module.exports = (req, res) => { var time = moment().format('LT'); // 11:51 AM res.send({time: time }) }bashnpx zerohttp://localhost:3000/time にアクセスすると、
time.jsで作成しましたので、localhost:3000/time にアクセスすると内容を表示してくれます。
momentを自動でインストールして使えているのが確認できました。
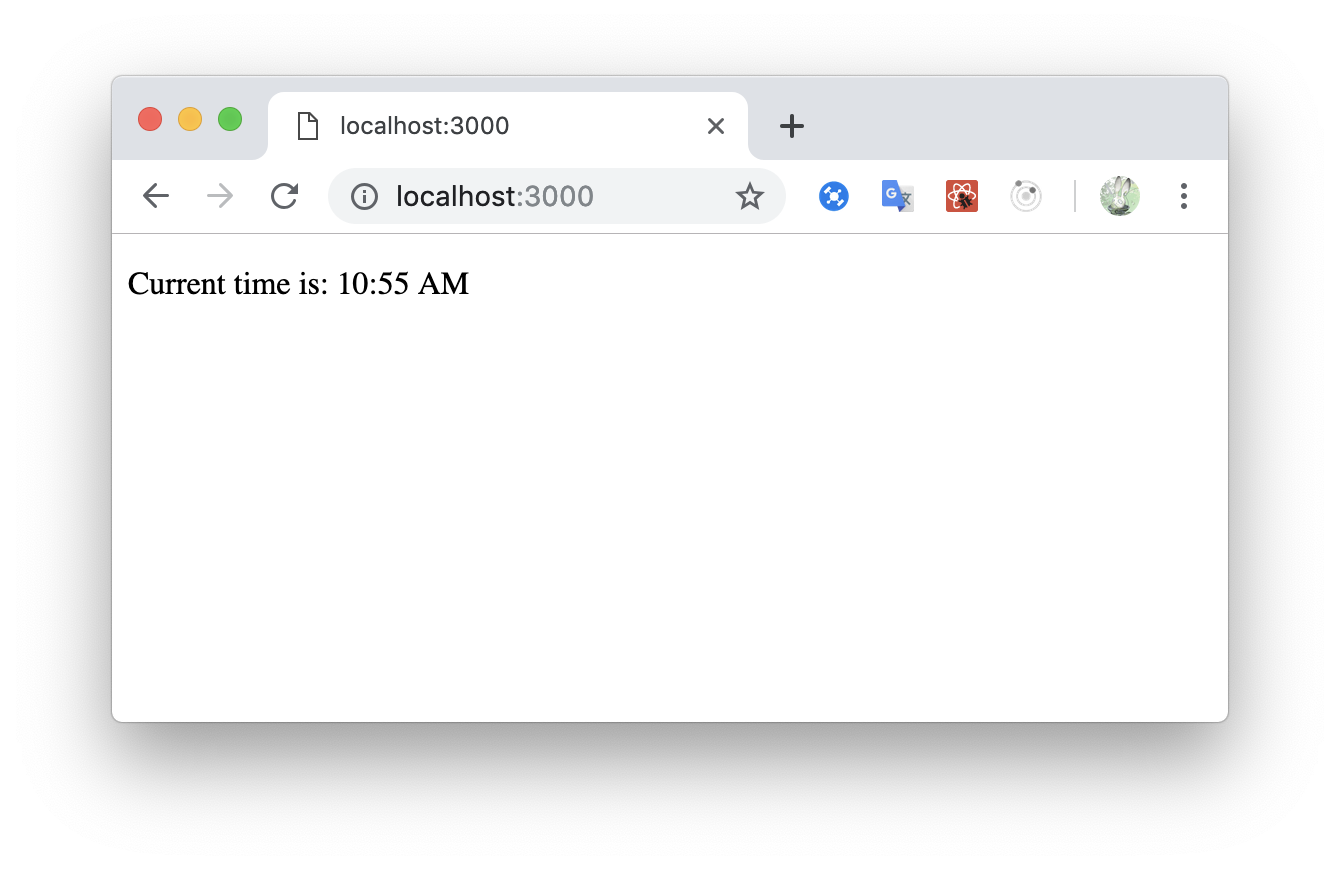
サーバーを稼働し続けた状態で、
index.jsxを作成する。index.jsximport React,{ Component } from 'react' export default class extends Component { static async getInitialProps(){ const { time } = await fetch("/time").then((resp) => resp.json()) return { time } } render() { return <p>Current time is: {this.props.time}</p> } }
先ほどの
/timeからjsonを受け取り、jsxも正しく動作しているのが確認できました。webpackなどの設定をいじる必要がなく、簡単にアプリケーション構築できました!
Static Files
https://github.com/remoteinterview/zero/tree/master/docs/static
画像やテキストファイルなどの扱いについて
.js, .ts, .jsx, .tsx, .htm, .html, .md, .mdx以外の場合は、プロジェクトディレクトリにファイルを置けばそのまま表示してくれるようでした。
※プロジェクト直下のディレクトリに
nihon-amagaeru.jpgを置いた場合
Node.js (.js, .ts)
https://github.com/remoteinterview/zero/tree/master/docs/nodejs
hello.jsmodule.exports = function(req, res) { res.send("Hello"); }Zero はExpress.jsを使用しているようなので、req, resのリクエスト・レスポンスのオブジェクトはExpressのものと同じ。
./api/login.jsとファイルを設置した場合はhttp://localhost:3000/api/loginでアクセスできる/api/logion.jsmodule.exports = function(req, res) { res.send("Login Api"); }
パラメータの取得
param-test.jsmodule.exports = function(req, res) { console.log(req.body) res.send({body: req.body}) }POST, PUT, PATCH, DELETE でパラメータを問題なく受け取れるようでした。
bash$ curl http://localhost:3000/param-test -X POST -H "Content-Type: application/x-www-form-urlencoded" -d "category=1&sort=asc" {"body":{"category":"1","sort":"asc"}} $ curl http://localhost:3000/param-test -X POST -H "Content-Type: application/json" -d '{"category":1, "sort":"asc"}' {"body":{"category":1,"sort":"asc"}} $ curl http://localhost:3000/param-test -X DELETE -H "Content-Type: application/json" -d '{"category":1, "sort":"asc"}' {"body":{"category":1,"sort":"asc"}}Route Rewrites
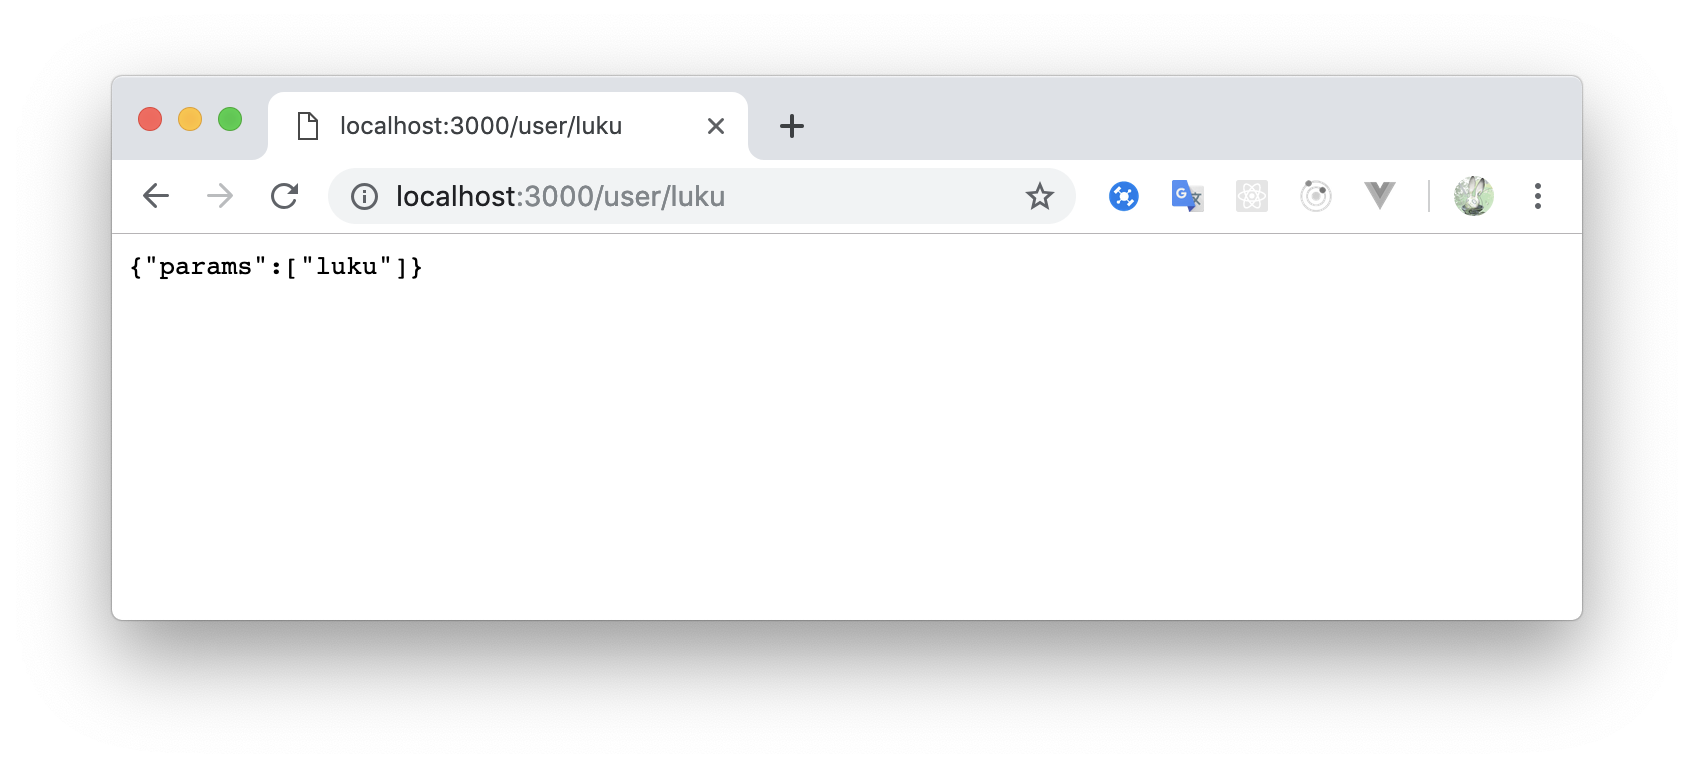
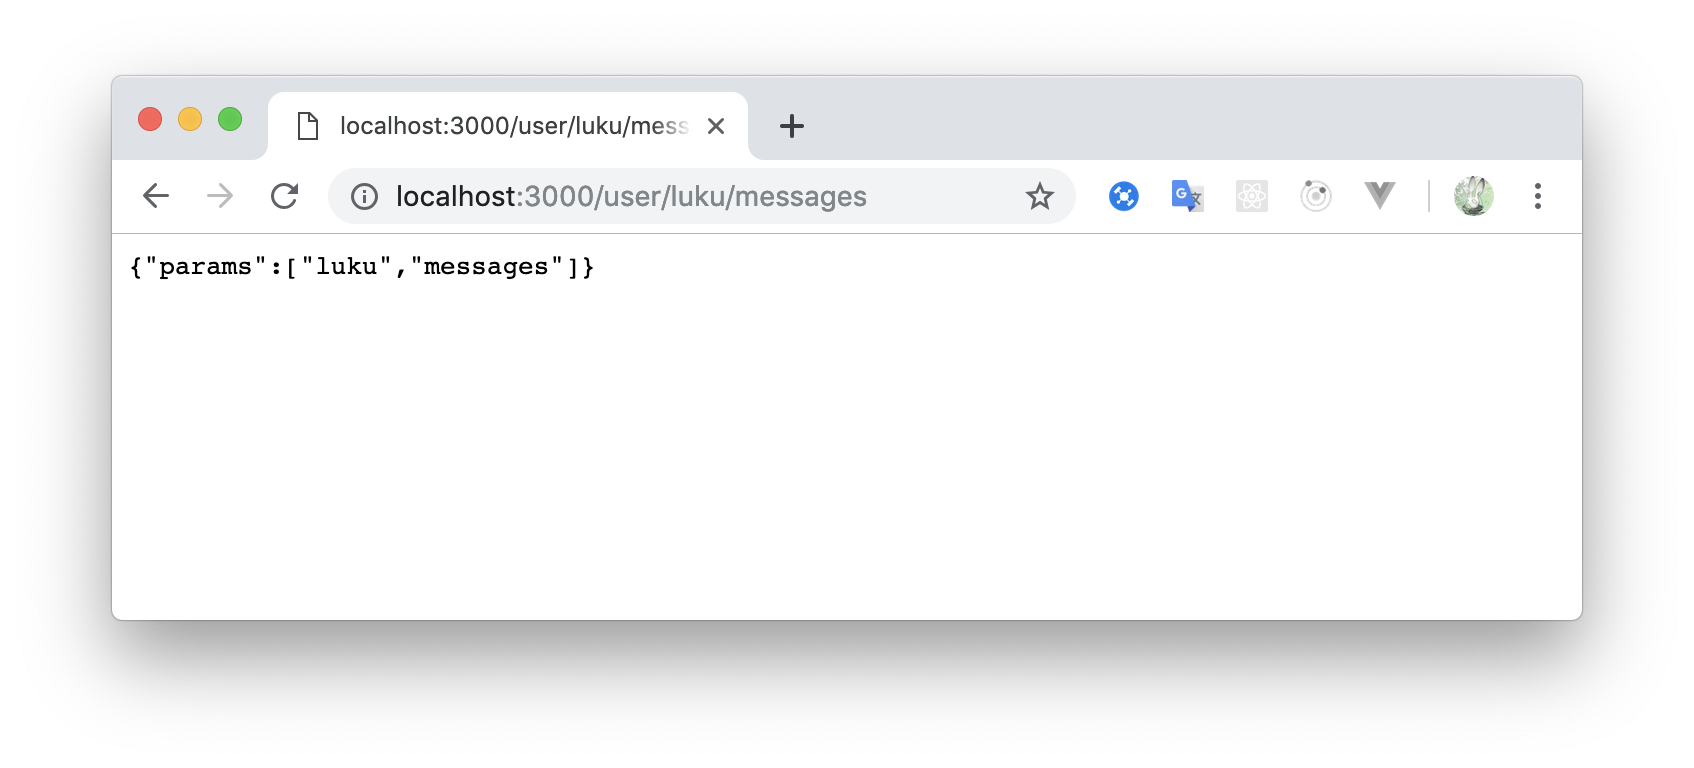
user.jsmodule.exports = function(req, res) { console.log(req.params) res.send({params: req.params}) }
/user/lukeにアクセスした時に、./user/luke.jsがなかった場合、req.paramsに['luku']と設定してくれます。
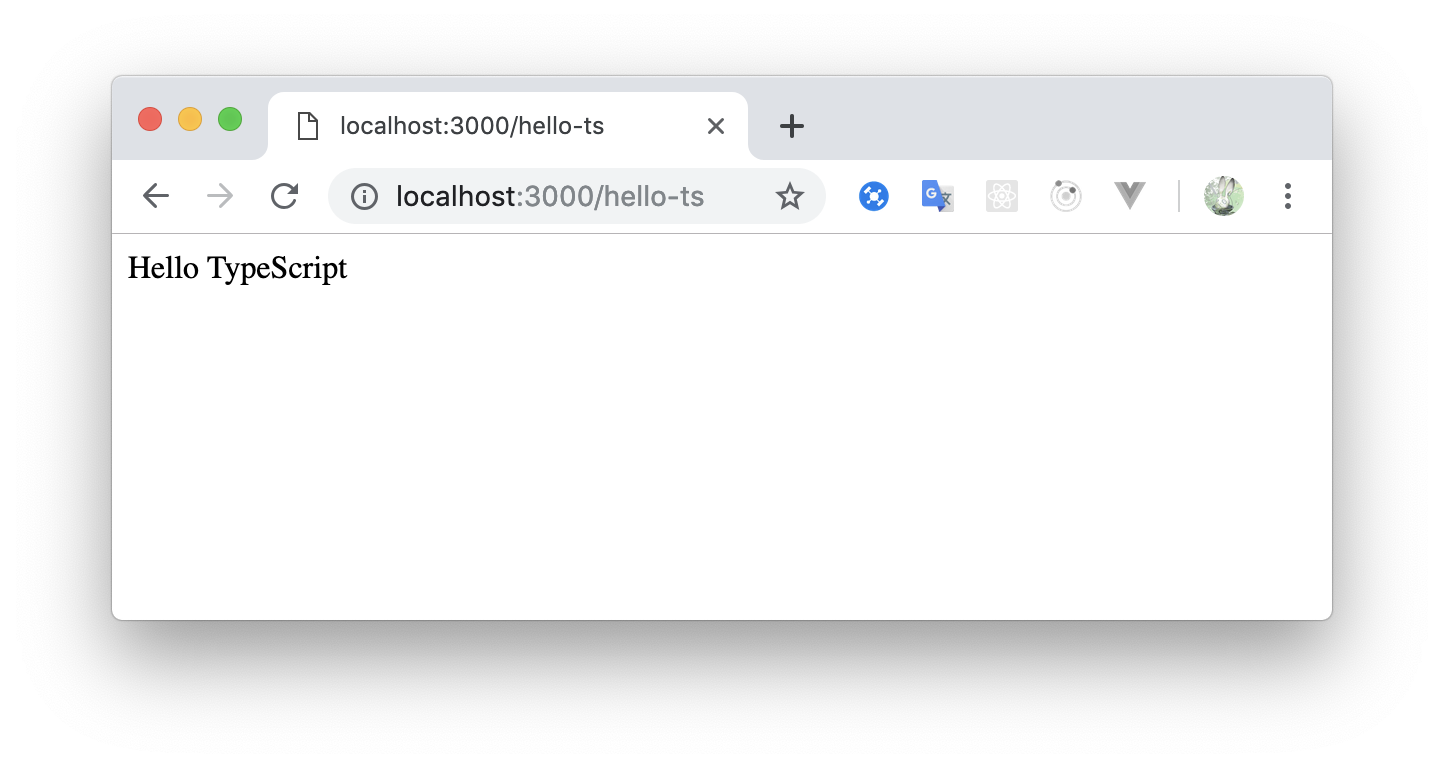
TypeScript
.tsファイルにすると、TypeScriptとして動作させることができるhello-ts.tsimport * as express from "express"; function handler(req: express.Request, res: express.Response) { res.send("Hello TypeScript") } export default handler
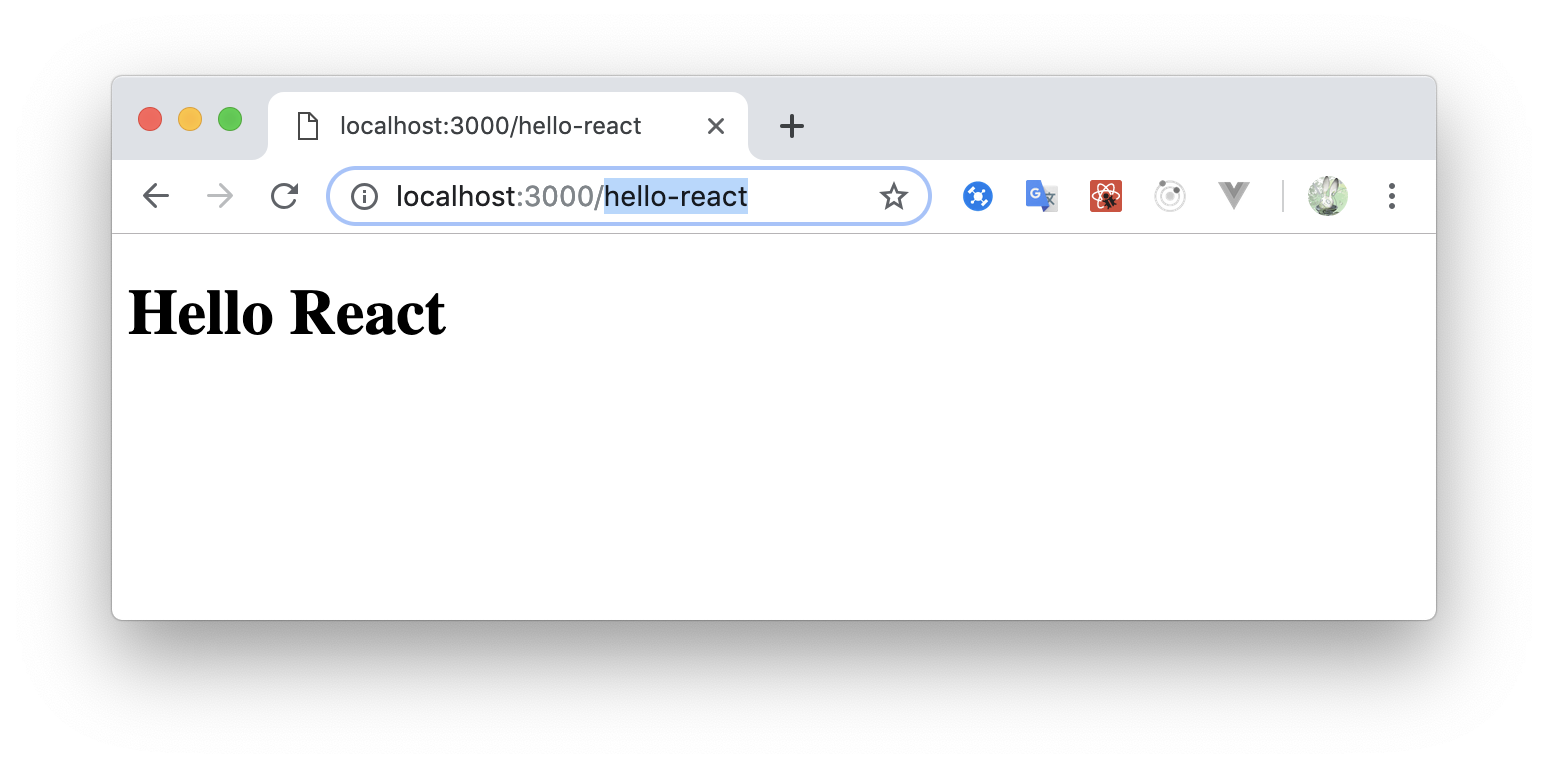
React
https://github.com/remoteinterview/zero/tree/master/docs/react
hello-react.jsxexport default () => <h1>Hello React</h1>
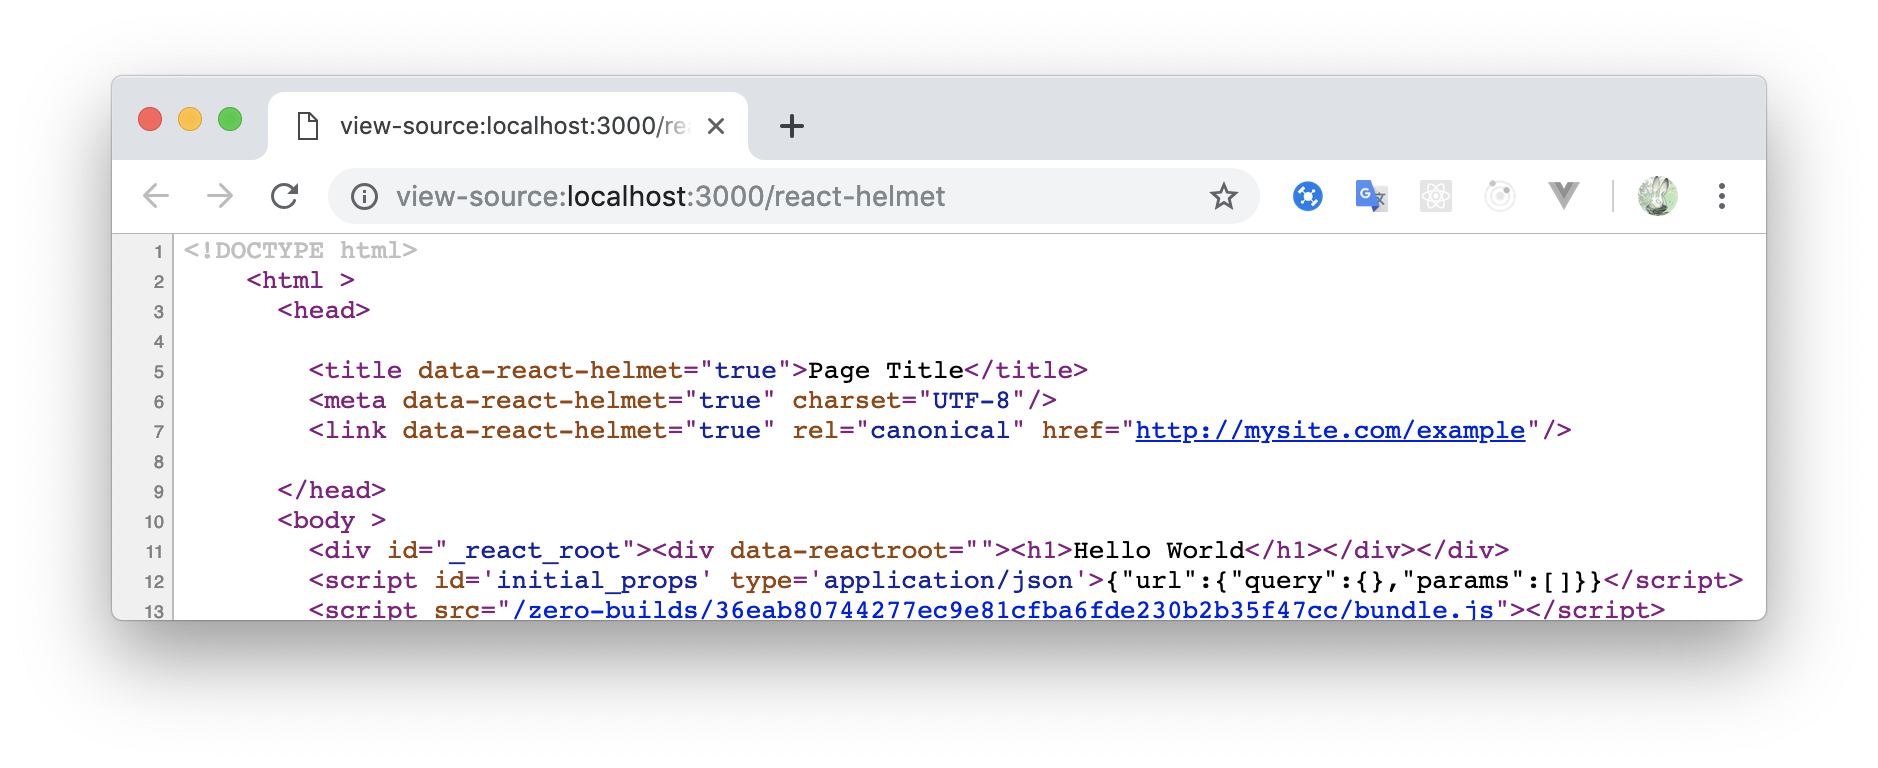
Populating
<head>react-helmet.jsximport {Helmet} from "react-helmet"; module.exports = () => ( <div> <Helmet> <meta charset="UTF-8" /> <title>Page Title</title> <link rel="canonical" href="http://mysite.com/example" /> </Helmet> <h1>Hello World</h1> </div> )
react-helmetが使えるので、metaタグなどの扱いも簡単です
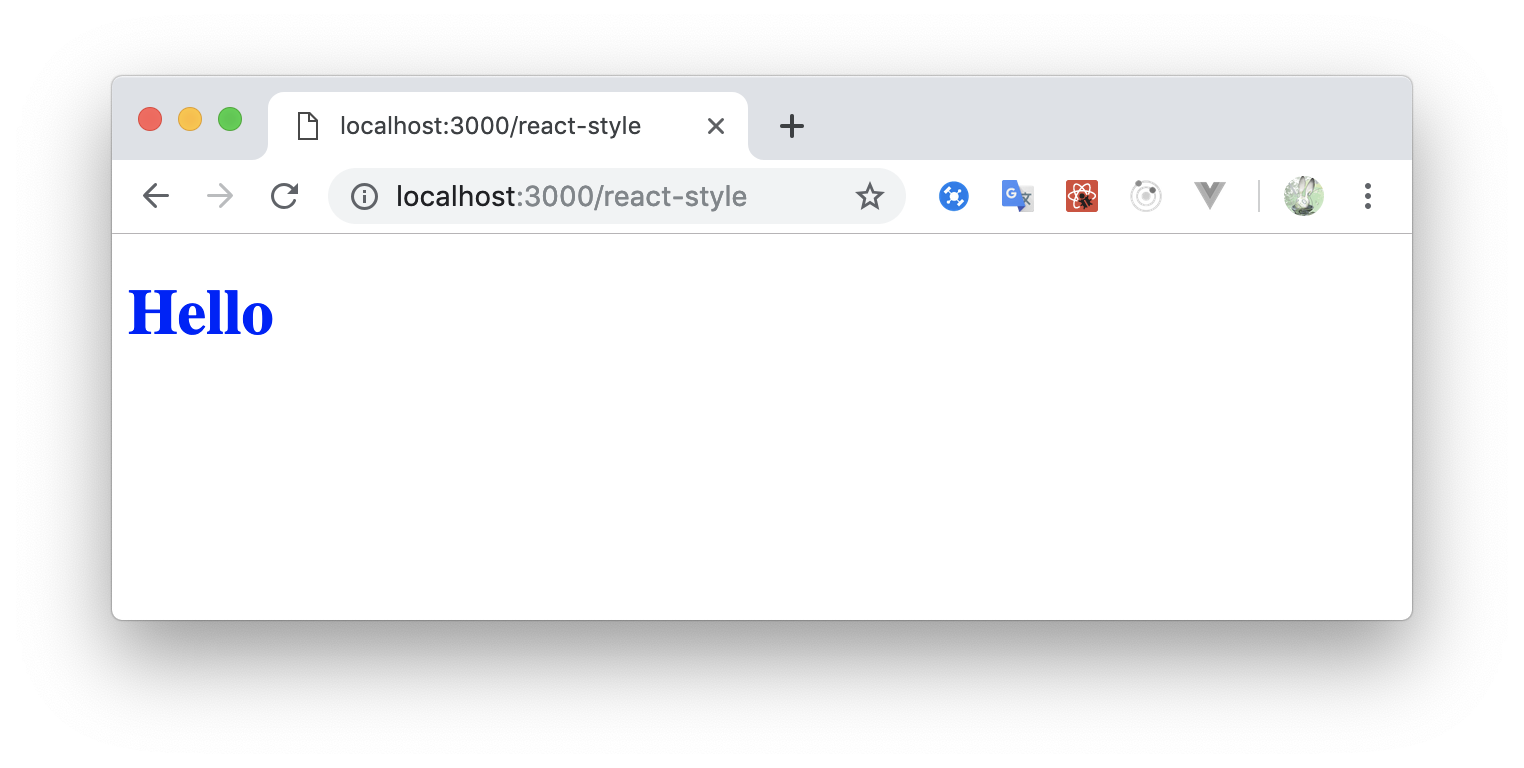
Importing CSS/Sass
cssとscssがサポートされているようです。
react-styleimport "./style.scss" module.exports = ({name}) => ( <h1>Hello {name}</h1> )style.scssbody { h1 { color: blue; } }
TypeScript
.tsxとするとことで使用することができました。react-ts.tsximport * as React from "react"; export default class HelloWorld extends React.Component<{}, {}> { render() { return (<b>Hello TypeScript</b>); } }HTML (.htm, .html)
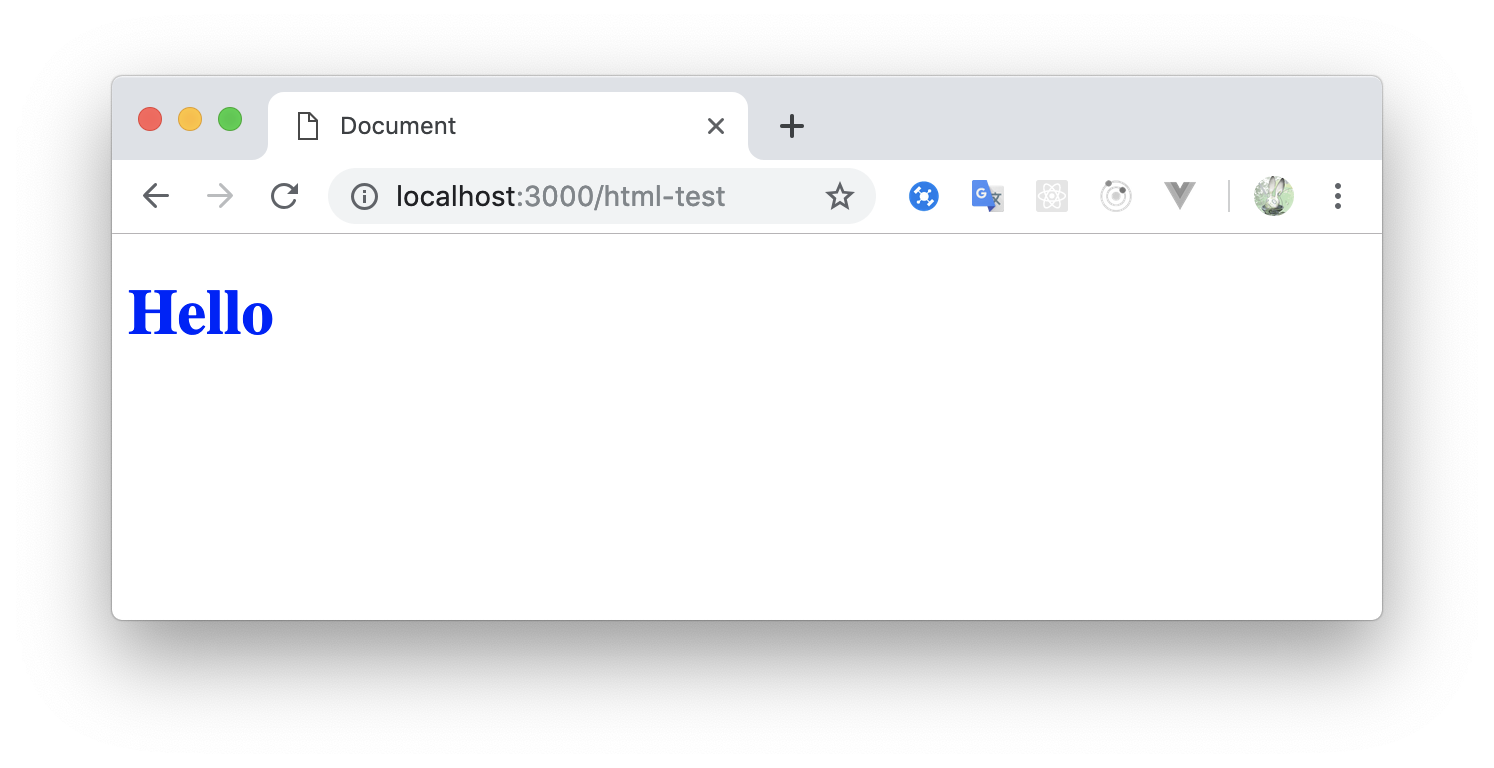
バンドラーはparcelが使われているとのことです。なので
<script>タグのsrcから自動で解析してくれました。html-test.html<!DOCTYPE html> <html lang="en"> <head> <meta charset="UTF-8"> <meta name="viewport" content="width=device-width, initial-scale=1.0"> <meta http-equiv="X-UA-Compatible" content="ie=edge"> <script src="./style.js"></script> <title>Document</title> </head> <body> <h1>Hello</h1> </body> </html>style.jsimport "./style.scss";style.scssbody { h1 { color: blue; } }
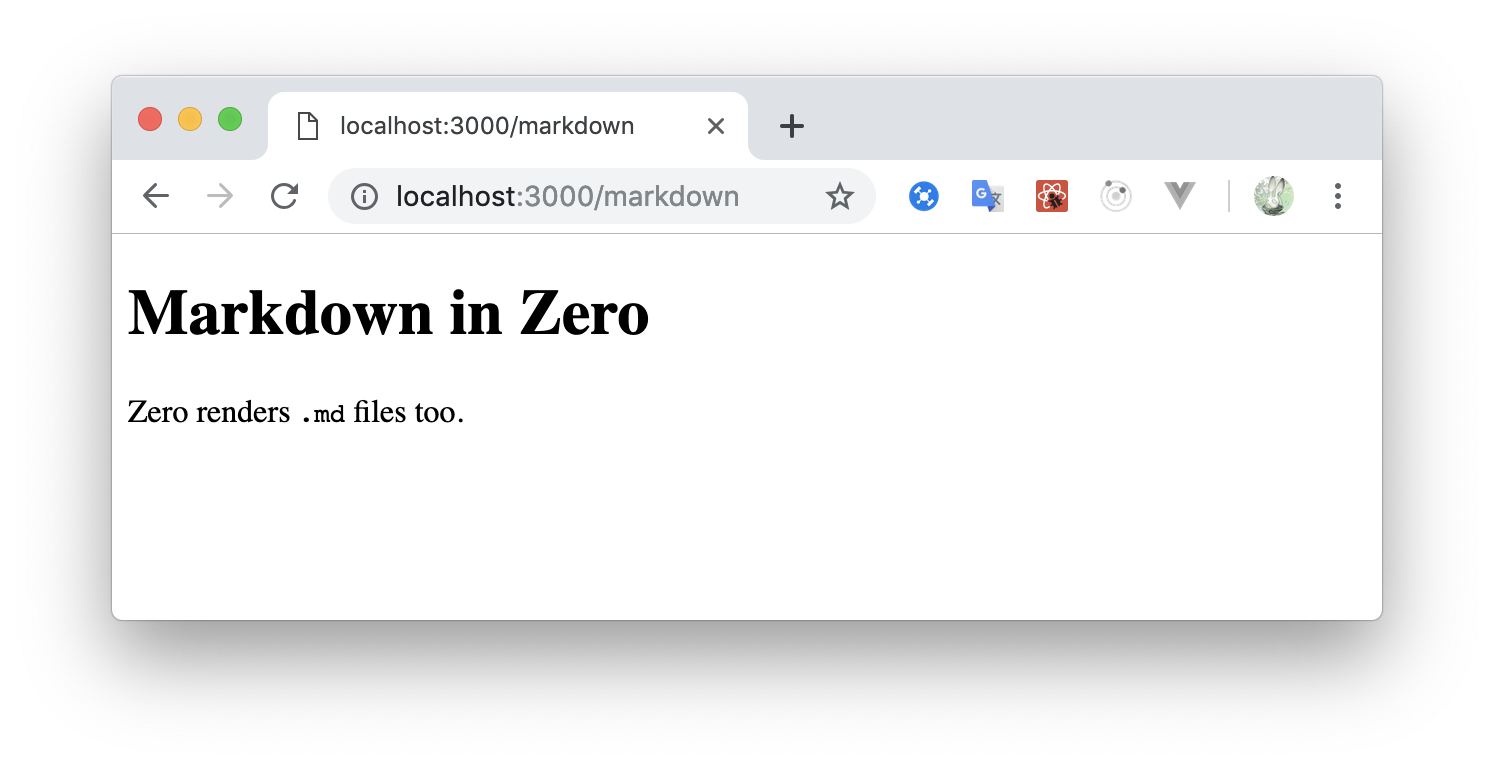
Markdown / MDX (.md, .mdx)
自動で
.mdファイルをhtmlに変換してくれるmarkdown.md# Markdown in Zero Zero renders `.md` files too.
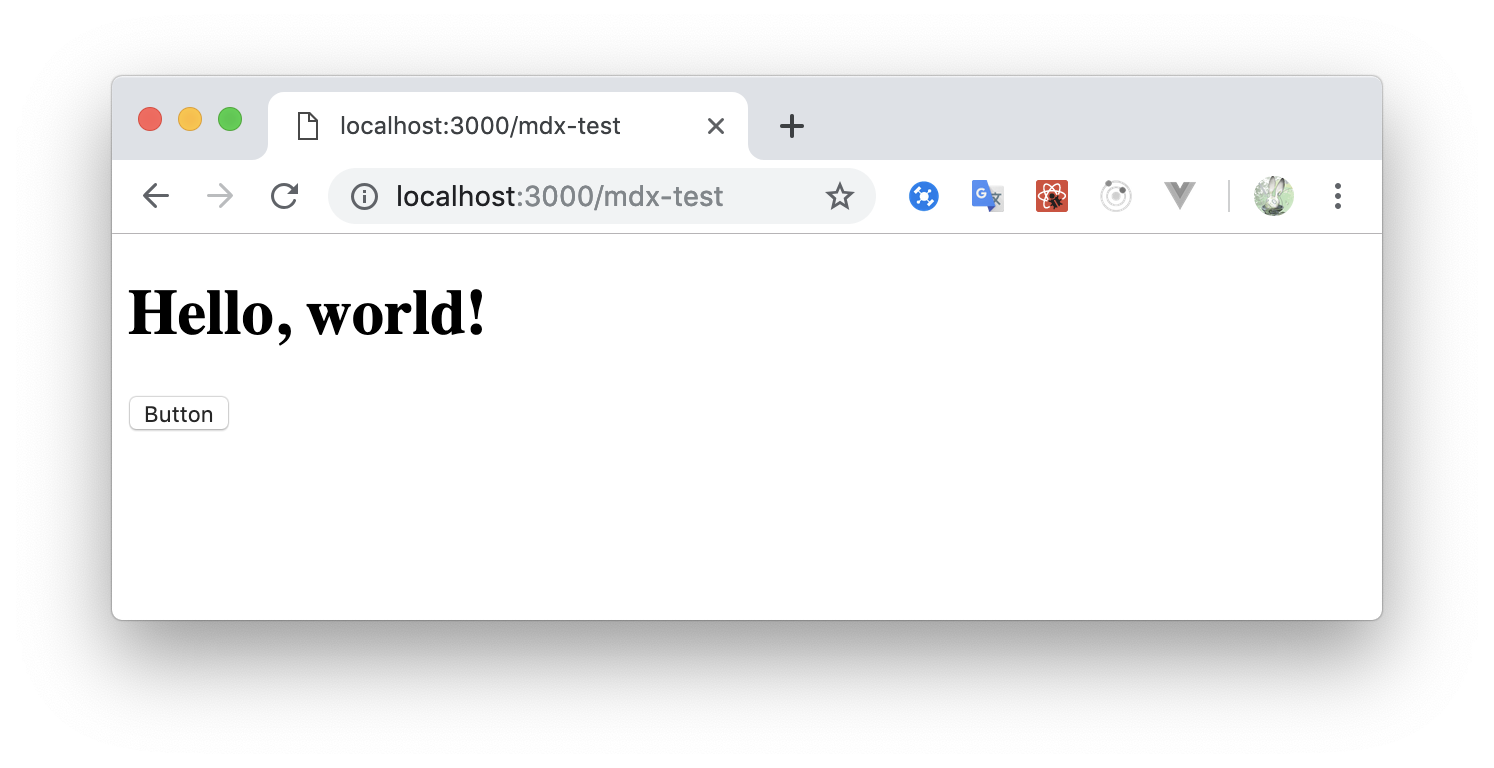
mdx-test.mdximport Btn from "./component/btn" # Hello, world! <Btn />
最後まで読んでいただいてありがとうございましたm(_ _)m
- 投稿日:2019-03-10T12:43:10+09:00
Firebase Hosting でCloud Functions for Firebase を使用するとCookieが使用できない件の対応
Cloud Functions for Firebase をFirebase Hosting 経由で使っていて Cookieをつかおうとしたら、Cloud Functions による動的コンテンツの配信 この制約に引っかかるようで、Cookieを下ろしてくれないみたい。
うーん、とりあえず下記のとおり
response.setHeader('Cache-Control', 'private')で解決できるぽいので、備忘メモ。index.tsimport * as functions from 'firebase-functions' import * as cookie from 'cookie' export const addCookie = functions.https.onRequest((request, response) => { response.setHeader('Cache-Control', 'private') // Hosting経由だと、これがないとset cookieが削除される _addCookie(response, 'key', 'value') response.send('Hello from Firebase!') }) export const getCookie = functions.https.onRequest((request, response) => { // response.setHeader('Cache-Control', 'private') const cookies = cookie.parse(request.headers.cookie || '') const sessionState = cookies.state response.send(sessionState) }) function _addCookie (res, key, value) { const expiresIn = 60 * 60 * 24 const options = { maxAge: expiresIn, httpOnly: true } // const options = { maxAge: expiresIn, httpOnly: true, secure: true } res.setHeader('Set-Cookie', cookie.serialize(key, value, options)) }$ curl http://localhost:5000/addCookie -i HTTP/1.1 200 OK x-powered-by: Express cache-control: private pragma: no-cache expires: 0 set-cookie: key=value; Max-Age=86400; HttpOnly ← ちゃんとおろしてる content-type: text/html; charset=utf-8 content-length: 20 etag: W/"14-z3iZXchEt5DVWZKsMncy8Wl4KSQ" date: Sun, 10 Mar 2019 02:18:40 GMT connection: close vary: Accept-Encoding, Authorization, Cookie Hello from Firebase! $ curl http://localhost:5000/getCookie -H 'Cookie: state=6; state1=7' 6 // サーバ上での取得も問題なし $サーバからのCookieの受領も、サーバへのCookieのアップも問題なさそうですね。
この事象と「ブラウザはアクセスURLが localhost だと、下ろしてくる set-cookieを無視する?」事象が合わさって、ずいぶんトラブルシューティングに時間がかかりましたorz。localhost問題の方は結局 /etc/hosts で client.example.com などホスト名をつけて対応。
$ cat /etc/hosts
##
# Host Database
#
# localhost is used to configure the loopback interface
# when the system is booting.  Do not change this entry.
##
127.0.0.1       localhost
255.255.255.255 broadcasthost
::1             localhost
127.0.0.1 client.example.com
$
おつかれさまでした。
- 投稿日:2019-03-10T11:39:27+09:00
passport localでmongodbのユーザーコレクションを認証
はじめに
http://www.passportjs.org/でのpassport-localの解説が個人的にわかりにくいように感じたのでできる限りシンプルなログインおよびログイン状態の維持、未ログイン時に任意のルートへのアクセスをリダイレクトする方法を載せようと思いました。
前提知識
passport.jsを使おうと思う人がこれらを全く知らないことはないと思いますが、以下の知識は最低限あると仮定して書きます。
- node
- express
- mongoose
npmパッケージ
今回のサンプルに使用するnpmパッケージは以下の通りです。
package.json"dependencies": { "body-parser": "^1.18.3", "cookie-parser": "^1.4.4", "express": "^4.16.4", "express-session": "^1.15.6", "mongoose": "^5.4.15", "passport": "^0.4.0", "passport-local": "^1.0.0" }基礎的なルーティング
とりあえずルートを設定します。
index.htmlには/adminへのパスがありますが、後でログイン状態でなければルートへ戻されるようにします。server.jsconst express = require('express'); const path = require('path'); const bodyParser = require('body-parser'); const passport = require('passport'); const { Strategy } = require('passport-local'); const mongoose = require('mongoose'); const session = require('express-session'); const cookieParser = require('cookie-parser'); const server = express(); const port = process.env.PORT || 8080; server.get('/', (req, res) => { res.sendFile(path.join(__dirname + '/index.html/'); }); server.listen(port);index.html<!DOCTYPE html> <html> <body> <form action="/admin" method="POST"> <input type="text" name="username" placeholder="user name"> <input type="password" name="password" placeholder="password"> <button>login</button> </form> </body> </html>ユーザーデータベースの作成
user.json{ "username": "test", "password": "test" }シンプルに済ませたいので上記のドキュメントを"database"というデータベース、"users"コレクションに作成します。
今回はテストですので、リスクも気にせずログインのためのURIはハードコードすることにします。
データベースURIの例uri.txtmongodb://<dbuser>:<dbpassword>@ds00000.mlab.com:61335/sampleパスポートとセッションの設定
ログインのための認証ストラテジーと、ログイン状態維持のためのセッションの設定をしていきます。
以下をserver.jsに追加します。server.jsmongoose.connect(YOUR_DATABASE_URI,{useNewUrlParser: true}); const db = mongoose.connection; const Schema = mongoose.Schema; const userSchema = new Schema({ username: String, password: String }); db.on('error', console.error.bind(console, 'connection error:')); server.use(bodyParser.urlencoded({extended: true})); //body-parserはrequest streamをまるまる抽出してreq.bodyとして扱えるようにするミドルウェア。 //後でindex.htmlのformから受け取った値を認証するための関数に渡すために必要。 server.use(cookieParser());//cookieをparse server.use(session({ resave: false, saveUninitialized:false, secret: 'something quite long and nonsense', cookie: { secure: false, maxAge: 3600000 } }));//expressアプリケーションにおいてセッションを用いることの宣言。 //これは下記のpassport.sessionより上位になければ正常に動作しない。 //secretは長くてあなたのオリジナルであればなんでもいい。 server.use(passport.initialize());//passport初期化のためのミドルウェア server.use(passport.session());//cookieによるセッション維持を可能にするためのミドルウェア passport.use(new Strategy //認証のための関数の宣言 (async (username, password, done) => { try{ await db.model('database', userSchema, 'users') .findOne({username: username}, (err, user) => { if(err){ return done(err); } if(!user){ return done(null, false); } if(user.toObject().password != password){ return done(null, false); } return done(null, user); }) } catch(err) { console.log(err); } } ));done()とは認証の終了後に呼び出されるコールバックです。
認証が成功した際にはドキュメントのオブジェクトを返し、失敗した際にはfalseを返すのがいいでしょう。
またそもそも認証以前にエラーがあった際の分岐も入れておくのが推奨されます。これで認証するためのひな型ができました。
それでは実際に認証を通して/adminへ行くこと、認証に失敗すればルートへリダイレクトされること、および認証されていない状態ではadminからはリダイレクトされる処理へ進みましょう。認証
server.jsserver.post('/admin', passport.authenticate('local', {failureRedirect:'/' }), (req, res) => { res.send('Success!'); } ); server.get('/admin',(req, res) => { if(!req.user){//下記のデシリアライズ処理でユーザー情報がreq streamにあるか判断する res.redirect('/'); } else{ res.send('still logged in!') } }); passport.serializeUser( (user, cb) => { cb(null, user); });//認証に成功しセッションが確立されたら //ブラウザのcookieに保存させるため情報をバイトコードに変換する処理 passport.deserializeUser( async (id, cb) => { try{ await db.model('database', userSchema, 'users').findById(id, (err, user) => { cb(err, user); }) } catch(err) { console.log(err); } }); //passportミドルウェアより必要に応じてユーザー情報を最並列化して返す処理 //req.userでリクエストから情報を受け渡せるようになるserver.jsの最終的な全体
server.jsconst express = require('express'); const path = require('path'); const bodyParser = require('body-parser'); const passport = require('passport'); const { Strategy } = require('passport-local'); const mongoose = require('mongoose'); const session = require('express-session'); const cookieParser = require('cookie-parser'); const server = express(); const port = process.env.PORT || 8080; mongoose.connect(YOUR_DATABASE_URI,{useNewUrlParser: true}); const db = mongoose.connection; const Schema = mongoose.Schema; const userSchema = new Schema({ username: String, password: String }); db.on('error', console.error.bind(console, 'connection error:')); server.use(bodyParser.urlencoded({extended: true})); server.use(cookieParser()); server.use(session({ resave: false, saveUninitialized:false, secret: 'something quite long and nonsense', cookie: { secure: false, maxAge: 3600000 } })); server.use(passport.initialize()); server.use(passport.session()); passport.use(new Strategy (async (username, password, done) => { try{ await db.model('database', userSchema, 'users') .findOne({username: username}, (err, user) => { if(err){ return done(err); } if(!user){ return done(null, false); } if(user.toObject().password != password){ return done(null, false); } return done(null, user); }) } catch(err) { console.log(err); } } )); server.get('/', (req, res) => { res.sendFile(path.join(__dirname + '/index.html/'); }); server.post('/admin', passport.authenticate('local', {failureRedirect:'/' }), (req, res) => { res.send('Success!'); } ); server.get('/admin',(req, res) => { if(!req.user){ res.redirect('/'); } else{ res.send('still logged in!') } }); passport.serializeUser( (user, cb) => { cb(null, user); }); passport.deserializeUser( async (id, cb) => { try{ await db.model('database', userSchema, 'users').findById(id, (err, user) => { cb(err, user); }) } catch(err) { console.log(err); } }); server.listen(port);最後に
passport-localによるログインは成功してみればとても簡単なのですが、どの言語やどのフレームワークでもそうかもしれませんが、慣れるまではずっと仕様書をたらいまわしにされている気分で目が回りますし理解できない自分がみじめになるものです。
一度でも自分の手で動作させることに成功してから読むほうがずっとわかりやすくなってより深い興味と理解につながると思います。
これからpassport-localを触ってみる人の助けに少しでもなればうれしいです。
- 投稿日:2019-03-10T03:50:21+09:00
Discordに画像を投稿するBOT #1準備編
以前Weakened Fun Timeで作っていたスクリーンショットをDiscordに投稿するボットは、大分前にメンテナンスを放棄してしまった。というのも、以前のバージョンはコマンドライン上で動かすので使い勝手が悪く、かといってElectronで作るのも大変だしメモリを食うし微妙になってしまったためだ。
なので最近のWebアプリ風に、ブラウザから設定できるようにしようと思う。こうすれば、スマホやタブレット上で操作できるようになり、ゲーム中でも操作できるようになる。
やろうとしてること
- スクリーンショットフォルダに追加された画像をDiscordに投稿する
- 画像はPNG→JPGに変換する(FullHDだと5MBくらいなのでDiscordのレートリミットにすぐ引っかかる)
- 投稿先のサーバ・チャネルを設定できる
- 投稿のON/OFFを切り替えられる
- ゲーム中でも設定できる(スマホやタブレットから設定できる)
準備
最初に空のプロジェクトを立ち上げることから始める。設定画面を作るAngularのプロジェクトを
clientに作成し、設定画面をブラウザに送るサNestJSサーバのプロジェクトをserverに作成する。npm install -g @angular/cli ng new client npm install -g @nestjs/cli nest new serverブラウザでAngularの画面を表示する
まず、クライアント側の設定を変更する。
client/angular.jsonのoutputPathを変更し、Angularプロジェクトのビルド結果を、server/public以下に置くように設定変更する。これをサーバで表示できるように、
server/main.tsで静的ファイルのパスを設定する。server/main.tsimport { NestFactory } from '@nestjs/core'; import { AppModule } from './app.module'; import { join } from 'path'; async function bootstrap() { const app = await NestFactory.create( AppModule ); app.useStaticAssets( join( __dirname, '..', 'public') ); // server/public にバンドルしたファイルを置く await app.listen( 3000 ); // TODO: コマンドライン引数でポートを変えられるようにする } bootstrap();この変更後、以下コマンドでサーバを立ち上げる。
npm run start
または
npm run start:dev
そして自PCから
localhost:3000を開くか、LAN内のPCから<IP>:3000を開くかすると、以下のような画面が現れるはずである。これで、基本的な準備が完了する。
ブラウザからDiscordのBOTを操作する
試しに、DiscordのBotを操作する簡単なREST APIを設けてみる。ここまでに用意したAngular画面にボタンやテキストボックスを配置し、そこからNestJSで用意したREST APIを操作できるようにしてみる。
バックエンド抜粋: コントローラ
とりあえず簡易REST APIで操作できるよう、
serverとmessageという2つのエンドポイントを用意する。serverでは、リクエストボディのactiveプロパティの値(trueかfalse)で、接続・切断を切り替えられるようにする。messageでは、messageプロパティの値をそのままDiscordのボットに送信する。ボットや送信先のチャネルはconfig.ts内で定義してある。(GitHubには入れていない)コントローラimport { Controller, Get, Body, Res, Post, Patch } from '@nestjs/common'; import { ApiModelProperty, ApiResponse } from '@nestjs/swagger'; import { DiscordBotService } from './service' export class MessageDto { @ApiModelProperty( { required: true } ) message: string; } export class ServerStatusDto { @ApiModelProperty( { required: true } ) active: boolean; } @Controller() export class DiscordBotController { constructor( private bot$: DiscordBotService ) {} @Post('message') async message( @Body() message: MessageDto ) { await this.bot$.send( message.message ); } @Patch('server') async connect( @Body() serverStatus: ServerStatusDto ) { if( serverStatus.active ) { await this.bot$.connect(); } else { await this.bot$.disconnect(); } } }フロントエンド抜粋:操作画面
上記のバックエンドの2つのエンドポイントを操作するメソッドを用意し、簡易画面から操作できるようにする。
Angularコンポーネントimport { Component } from '@angular/core'; import { HttpClient } from '@angular/common/http'; @Component( { selector: 'app-root', templateUrl: './app.component.html', styleUrls: ['./app.component.scss'] } ) export class AppComponent { message: string = ''; constructor( private http$: HttpClient ) {} async connect() { await this.http$.patch( '/server', { "active": true } ).toPromise(); } async disconnect() { await this.http$.patch( '/server', { "active": false } ).toPromise(); } async send() { await this.http$.post( '/message', { "message": this.message } ).toPromise(); this.message = ''; } }動作イメージ
コード: https://github.com/WeakenedPlayer/botty/releases/tag/0.0.3


