- 投稿日:2019-03-05T17:30:26+09:00
Vue CLI 3.0 でCordovaを導入したら割とハマった
はじめに
Vue CLI 3.0にCordovaを導入してみたところいくつかハマりポイントがあったのでメモしておきます
利用したのは以下のライブラリです
https://github.com/m0dch3n/vue-cli-plugin-cordova環境
"cordova-ios": "^4.5.5"
ビルド先のフォルダを変更する
distじゃなくてsrc-cordova/wwwに出力されるようする
package.json{ "scripts": { "build": "vue-cli-service build --dest src-cordova/www", } }XCodeの設定
XCodeで
src-cordova/platforms/ios/アプリ名.xcodeprojを開くGeneral タブ > Signing > Automatically manage signing にチェックが入っていることを確認する
General タブ > Team を選択する
※もちろんこれ以外の方法もたくさんあるので、ご参考までmetaタグを修正する
細かい内容はよく分かってないですが、
http-equiv="Content-Security-Policy"が大事らしいですindex.html<meta http-equiv="Content-Security-Policy" content="default-src * data: gap: https://ssl.gstatic.com; style-src * 'unsafe-inline'; script-src * 'unsafe-inline' 'unsafe-eval' blob:" />cordova.jsを読み込む
publicフォルダにダミーのcordova.jsを置いておこう
public/index.html<body> <script src="cordova.js"></script> </body>多分何かの設定ファイルをいじればCordovaでビルドした時にこの行を差し込むことができるんだと思いますが
調べる気力がなかったので直接書きました
本番ではplatforms/ios/CordovaLib/cordova.jsが使われてる。。はずdevicereadyの発火を待つ
この発火前だとcordova変数は使えない
App.vue<template> <div id="app"> <div v-if="deviceready"> <router-view /> </div> </div> </template> <script> export default { data() { return { deviceready: false }; }, mounted: function() { document.addEventListener("deviceready", this.onDeviceReady, false); }, methods: { onDeviceReady() { this.deviceready = true; } } }; </script>hashモードになっていることを確認する
自動的になっているはずですが、自分の場合ちょっとバグってたので念の為確認しよう
router.jsexport default new Router({ mode: 'hash' })Cordovaライブラリのインストールはsrc-cordovaフォルダ配下で!
自分はここでだいぶハマってしまいました。。
プロジェクトルートじゃなくてsrc-cordova配下でインストールする必要があるんですね。テスト
ここまで完了してれば以下のコマンドでテストできるはずです。
自分の環境起因な気もしますが、普通にビルドするとエラーになったので
--buildFlag='-UseModernBuildSystem=0'を付けましたnpm run build cd src-cordova/ cordova build ios --buildFlag='-UseModernBuildSystem=0' cordova run ios cd ..おわりに
かなり調べたので多分上のどれかで大概の問題は解決するはずです。
それでは良きVue&Cordovaライフを〜
- 投稿日:2019-03-05T17:07:02+09:00
なんとなくVue.jsのUIフレームワークを紹介する
概要
僕が今まで使ってきたVue.jsのUIフレームワークを紹介していきたいと思います。
Vuetify
難易度 ★★★☆☆ ドキュメントの読みやすさ ★★☆☆☆ コンポーネントの数 ★★★★★ 汎用性 ★★★★★ おすすめ度 ★★★★☆ 感想
コンポーネントも多いし、デザインも綺麗なのでおすすめのフレームワークです。
でもドキュメントがすごく読みにくいです、何度読んでもVuetifyのグリッドレイアウトはよく分かりません。Bootstrap-vue
難易度 ★☆☆☆☆ ドキュメントの読みやすさ ★★★★★ コンポーネントの数 ★★☆☆☆ 汎用性 ★★★☆☆ おすすめ度 ★★★★★ 感想
Bootstrap4というCSSフレームワークをVue.js向けに拡張したフレームワークになります。
Bootstrap-vueは初めてUIフレームワークに触る人におすすめです。
ドキュメントも比較的読みやすいし、何よりBootstrapのクラス(マージンとかパディングとか)をそのまま流用できるのがいいです。
何でもできるというタイプのフレームワークではないのですが、絶妙なシンプルさが気に入っています。Buefy
難易度 ★★☆☆☆ ドキュメントの読みやすさ ★★★★★ コンポーネントの数 ★★☆☆☆ 汎用性 ★★☆☆☆ おすすめ度 ★★★★☆ 感想
BulmaというCSSフレームワークをVue.js向けに拡張したフレームワークになります。
BuefyとBootstrap-vueは結構似たUIフレームワークだと思っています
このフレームワークでよく躓くのはBulmaの仕様の方なので最終的にBulmaのドキュメントばっかり見るようになります。
なんとなくBootstrap-vueのほうが使いやすかったです。Quasar Framework
難易度 ★★★★★ ドキュメントの読みやすさ ★★★☆☆ コンポーネントの数 ★★★★★ 汎用性 ★★★★★ おすすめ度 ★★★☆☆ 感想
一番何でもできるUIフレームワークだと思います。
コンポーネントの数も多いしドキュメントも充実していますが、使いこなすには時間がかかると思います。
難易度が高いのでおすすめ度は低いです。Onsen UI 2
難易度 ★★☆☆☆ ドキュメントの読みやすさ ★★☆☆☆ コンポーネントの数 ★☆☆☆☆ 汎用性 ★☆☆☆☆ おすすめ度 ★☆☆☆☆ 感想
モバイルアプリケーション(cordovaやmonaca)向けのUIフレームワークですね。
個人的にはおすすめはしません。
AngularやReactにも対応させているせいか、なんか無理やりな感じのするフレームワークワークですね。
ドキュメントも読みにくいし、コンポーネントも器用貧乏でかゆいところに手がとどかない感じです。Framework7
難易度 ★★☆☆☆ ドキュメントの読みやすさ ★★☆☆☆ コンポーネントの数 ★★★☆☆ 汎用性 ★★☆☆☆ おすすめ度 ★★☆☆☆ 感想
こちらもモバイルアプリケーション向けのUIフレームワークですね。
Onsen UI 2よりは多少マシです。
このフレームワークもAngularやReactにも対応させているせいか、なんか無理やりな感じがします。
ドキュメントは頑張れば読めます。
あとルーティングがVue-Routerが使えません、その点でマイナスです。Element
難易度 ★☆☆☆☆ ドキュメントの読みやすさ ★★★★☆ コンポーネントの数 ★★★☆☆ 汎用性 ★★☆☆☆ おすすめ度 ★★★☆☆ 感想
Elementは昔からあるUIフレームワークですね。
ですがモバイル対応が微妙とのことですぐに使うのやめちゃいました。
ドキュメントも読みやすいし、デザインも綺麗なのでまた使ってみたいですね。総評
如何だったでしょうか?
てめぇその評価はおかしぃだろうがYO!
みたいな意見もあるでしょうが多めに見てください〜。今回紹介したもの以外もVue materialやMint UIなどなどたくさんありますので使う機会があったら更新したいと思います。

- 投稿日:2019-03-05T16:12:23+09:00
Vue.js とCloud Functions for Firebase をFirebase Hostingへデプロイするための環境構築手順
前置き
Qiitaに Vue.js や Firebase や Cloud Functions for Firebase などの記事を書いてて、ツールのセットアップや環境構築を都度継ぎ足してきたのですが、一度に構築する方法が整理できてなかったので、メモっておきます。
本記事で説明が足りないところは、適宜下記の記事を見ていただくとよいかもしれません。
- FirebaseとGoogle Cloud Platform をさわれる環境を構築する おもに firebase-tools まわり
- Vue.js の主要な機能をざっくりとつかってみたときのメモ Vue.jsのとっかかりはこちら
- Cloud Functions for Firebase をつかってみる。 Functionsまわり
コレをやったらできること
- Vue.jsのコマンドラインツールとFirebaseのコマンドラインツールがインストールできます
- Vue.jsのプロジェクトをローカルのWEBサーバで動かせます(npm run dev 上で)
- Vue.jsのプロジェクトをFirebaseのローカルWEBサーバで動かせます
- Cloud FunctionsをFirebaseのローカルWEBサーバで動かせます
- Vue.jsのプロジェクトをFirebase Hostingにデプロイできます
- Cloud FunctionsをFirebaseへデプロイできます
- Cloud FunctionsをHostingのドメインで呼び出す事ができます
前提環境
$ sw_vers
ProductName:    Mac OS X
ProductVersion: 10.14.3
BuildVersion:   18D42

$ node --version
v10.14.2    <-ホントはFunctionsとかのバージョンに合わせるべきなんだけどいったん気にしない :-)
準備
コマンドラインツール達のインストールと、Firebaseへのログインなど。あ、Firebaseはサインアップ済みってことで、、、。
vue コマンドラインツールのインストール
vue-cli というVue.jsのテンプレを生成してくれるコマンドラインツールをインストールします。
$ npm install -g vue-cli
$ source ~/.bash_profile
$ vue --version
2.9.6
よさそうですね。
firebase-toolsのインストール
firebaseのコマンドラインツール。
$ npm install -g firebase-tools
$ source ~/.bash_profile
$ firebase --version
6.3.0
Firebaseにログイン
$ firebase login
? Allow Firebase to collect anonymous CLI usage and error reporting information?
 No

Visit this URL on any device to log in:
https://accounts.google.com/o/oauth2/auth?client_id=...   // OAuthでアクセスの認可まち

Waiting for authentication...

✔  Success! Logged in as masatomix@example.com
やってみる
まずは プロジェクト全体の作成
メインとなるプロジェクトは Vue.jsのコマンドラインツールで作成します。
$ vue init webpack fb_vue_template

↓とりあえずすべて Yes

? Project name fb_vue_template
? Project description A Vue.js project
? Author Masatomi KINO <kino@example.com>
? Vue build standalone
? Install vue-router? Yes
? Use ESLint to lint your code? Yes
? Pick an ESLint preset Standard
? Set up unit tests Yes
? Pick a test runner jest
? Setup e2e tests with Nightwatch? Yes
? Should we run `npm install` for you after the project has been created? (recom
mended) npm

   vue-cli · Generated "fb_vue_template".

# Installing project dependencies ...
# ========================
...

# Project initialization finished!
# ========================

To get started:

  cd fb_vue_template
  npm run dev

Documentation can be found at https://vuejs-templates.github.io/webpack
完了しました。
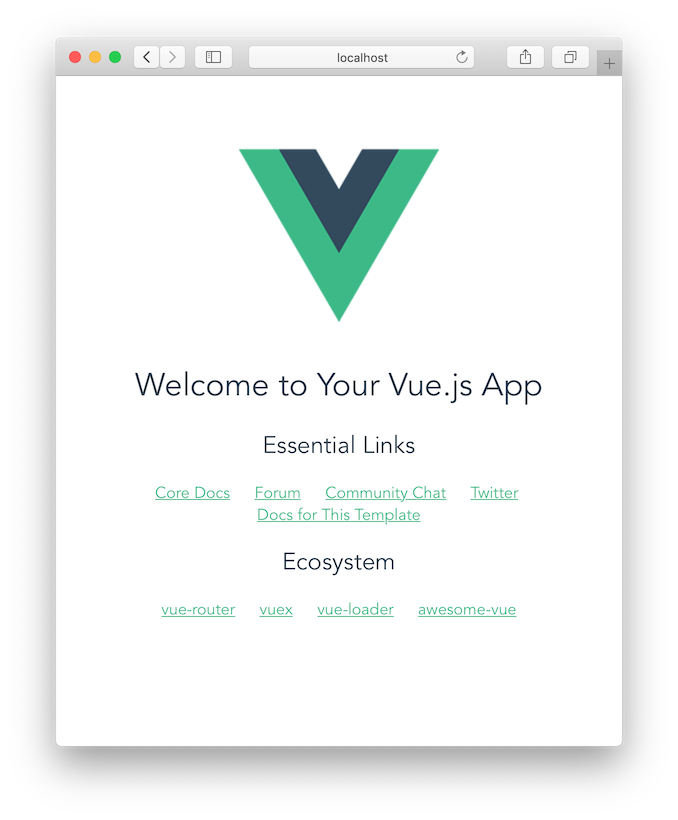
Vue.jsの Hello World を表示
最後に
cd fb_vue_template,npm run devとでてましたので、その通りに。。$ cd fb_vue_template $ npm run dev ... DONE Compiled successfully in 7650ms 15:42:24 I Your application is running here: http://localhost:8080さて、メッセージ通りにブラウザで http://localhost:8080 をひらいてみます。
よさそうですね。。問題なければ、プロンプトは Ctrl-c で終了ておきましょう。
Firebase関連情報を設定
さて Firebase関連です。
Firebase Hosting設定
まずはこの Vue.js プロジェクトをサーバへデプロイするためのHosting設定を行います。
$ pwd
/xxx/xxxx/fb_vue_template
$ firebase init hosting

     ######## #### ########  ######## ########     ###     ######  ########
     ##        ##  ##     ## ##       ##     ##  ##   ##  ##       ##
     ######    ##  ########  ######   ########  #########  ######  ######
     ##        ##  ##    ##  ##       ##     ## ##     ##       ## ##
     ##       #### ##     ## ######## ########  ##     ##  ######  ########

You're about to initialize a Firebase project in this directory:

  /xxx/xxxx/fb_vue_template


=== Project Setup

First, let's associate this project directory with a Firebase project.
You can create multiple project aliases by running firebase use --add,
but for now we'll just set up a default project.

? Select a default Firebase project for this directory: hoge-xxxx (hoge)
i  Using project hoge-xxxx (hoge)

↑ デプロイしたい先のプロジェクトを選びます


=== Hosting Setup

Your public directory is the folder (relative to your project directory) that
will contain Hosting assets to be uploaded with firebase deploy. If you
have a build process for your assets, use your build's output directory.

? What do you want to use as your public directory? dist

↑ public?って聞いてきますが、vue.jsのプロジェクトが出力する先「dist」を選択します。


? Configure as a single-page app (rewrite all urls to /index.html)? Yes
✔  Wrote dist/index.html

SPAで作成するので、Yesを選択します。
サーバにデプロイした際、どのURLを叩いてもindex.html を表示するよっていう設定になります。

i  Writing configuration info to firebase.json...
i  Writing project information to .firebaserc...

✔  Firebase initialization complete!
$

$ cat firebase.json
{
  "hosting": {
    "public": "dist",
    "ignore": [
      "firebase.json",
      "**/.*",
      "**/node_modules/**"
    ],
    "rewrites": [
      {
        "source": "**",
        "destination": "/index.html"
        # サーバにデプロイした際、どのURLを叩いてもindex.html を
        # 表示するよっていう設定。
      }
    ]
  }
}
$
サーバにデプロイするための設定が追加されました。
Cloud Functions 設定
つづいてバックエンド機能となる、Cloud Functions の設定を行います。
$ pwd
/xxx/xxxx/fb_vue_template
$ firebase init functions

     ######## #### ########  ######## ########     ###     ######  ########
     ##        ##  ##     ## ##       ##     ##  ##   ##  ##       ##
     ######    ##  ########  ######   ########  #########  ######  ######
     ##        ##  ##    ##  ##       ##     ## ##     ##       ## ##
     ##       #### ##     ## ######## ########  ##     ##  ######  ########

You're about to initialize a Firebase project in this directory:
  /xxx/xxxx/fb_vue_template
=== Project Setup

First, let's associate this project directory with a Firebase project.
You can create multiple project aliases by running firebase use --add,
but for now we'll just set up a default project.


? Select a default Firebase project for this directory: hoge-xxxx (hoge) ← 使用するプロジェクト選択
? What language would you like to use to write Cloud Functions? TypeScript   ← TypeScriptをえらんでみた
? Do you want to use TSLint to catch probable bugs and enforce style? Yes    ← Yesをえらぶ
? Do you want to install dependencies with npm now? Yes

✔  Firebase initialization complete!
$
$ cat firebase.json { "hosting": { "public": "dist", "ignore": [ "firebase.json", "**/.*", "**/node_modules/**" ], "rewrites": [ { "source": "**", "destination": "/index.html" } ] }, "functions": { "predeploy": [ "npm --prefix \"$RESOURCE_DIR\" run lint", "npm --prefix \"$RESOURCE_DIR\" run build" ] } }Functionsの設定が追加されましたね。よさそうです。
最終的に、ディレクトリ構成は以下のようになりました。
$ tree -a
.
├── README.md
├── firebase.json
├── index.html
├── package-lock.json
├── package.json
├── src
│   ├── App.vue
│   ├── components
│   │   └── HelloWorld.vue
│   ├── main.js
│   └── router
│       └── index.js
├── .babelrc
├── .editorconfig
├── .eslintignore
├── .eslintrc.js
├── .firebaserc
├── .gitignore
├── .postcssrc.js
│
├── functions
│   ├── .gitignore
│   ├── package-lock.json
│   ├── package.json
│   ├── src
│   │   └── index.ts
│   ├── tsconfig.json
│   └── tslint.json
├── build
│   └── 割愛
├── config
│   ├── dev.env.js
│   ├── index.js
│   ├── prod.env.js
│   └── test.env.js
├── static
│   └── .gitkeep
└── test
    ├── e2e
    │   └── 割愛
    └── unit
        └── 割愛
(適度に整形)
ビルド
初回のセットアップである程度ビルドや 外部ライブラリのインストールなどは済んでるんですが、一応 ライブラリのインストールとビルドまでの手順を書きます。
Firebase Hosting 側
$ pwd
/xxx/xxxx/fb_vue_template
$ npm install    ← こちらは外部ライブラリを再度入れるときだけ実施
$ npm run build  ← こちらはVue.js側のコードをいじったら毎回実施
$ ls -lrt dist
total 8
-rw-r--r--  1 xx  staff  517  3  5 13:34 index.html
drwxr-xr-x  4 xx  staff  128  3  5 13:34 static
distディレクトリに ビルドされたファイル群ができました。
Cloud Functions 側
$ pwd
/xxx/xxxx/fb_vue_template
$ cd functions
ビルドするとき、プロジェクト初期状態の index.ts だと、関数がないためにエラーとなってしまうので、下記の通りコメントを外しておきます。
$ cat src/index.ts
import * as functions from 'firebase-functions';

// // Start writing Firebase Functions
// // https://firebase.google.com/docs/functions/typescript
//
export const helloWorld = functions.https.onRequest((request, response) => {
 response.send("Hello from Firebase!");
});

$ npm install    ← こちらは外部ライブラリを再度入れるときだけ実施
$ npm run build  ← こちらはfunctionsのtsコードをいじったら毎回実施
$ ls -lrt lib/
total 16
-rw-r--r--  1 xxx  staff  296  3  5 13:39 index.js.map
-rw-r--r--  1 xxx  staff  380  3  5 13:39 index.js
$
$ cd ../
こちらは「lib」のディレクトリに ビルドされたファイル群ができました。
ローカルのWEBサーバ起動
以下のコマンドで、ローカルのWEBサーバ上で起動します。
$ pwd /xxx/xxxx/fb_vue_template $ firebase serve --only hosting,functions === Serving from '/xxx/xxxx/fb_vue_template'... i functions: Preparing to emulate functions. i hosting: Serving hosting files from: dist ✔ hosting: Local server: http://localhost:5000 Warning: You're using Node.js v10.14.2 but Google Cloud Functions only supports v6.11.5. ✔ functions: helloWorld: http://localhost:5001/hoge-xxxx/us-central1/helloWorldブラウザで、http://localhost:5000 へアクセスすると、先ほどのVue.jsの画面が表示されると思います。またcurlで
curl http://localhost:5001/hoge-xxxx/us-central1/helloWorldとアクセスしてfunctionsを呼び出してみましょう。$ curl http://localhost:5001/hoge-xxxx/us-central1/helloWorld Hello from Firebase! $OKそうですね。。Ctrl-c で終了しておきましょう
Functionsの関数達を Hosting のドメイン経由で処理できるようにする
サーバにデプロイしたときのFirebase Hostingのドメイン(URL)と、Cloud Functions が使用するドメインは異なっています。具体的には、
Firebase Hosting: https://hoge-xxxx.firebaseapp.com/
Cloud Functions: https://us-central1-hoge-xxxx.cloudfunctions.net/とかになったりします。HostingしたWEBアプリからCloud Functions の関数を呼び出すときにドメインが異なっていると、CORSの考慮やURLをフルパス指定しないといけないなど何かとメンドウなので、HostingのURLでアクセス出来るようHostingのリバースプロキシを有効にします。
具体的には以下の通り firebase.json に設定を追加します。
firebase.json{ "hosting": { "public": "dist", "ignore": [ "firebase.json", "**/.*", "**/node_modules/**" ], "rewrites": [ { "source": "/hello", # /hello にきたら、 "function": "helloWorld" #functionsの helloWorld 関数へ転送 }, { "source": "**", "destination": "/index.html" } ] }, "functions": { "predeploy": [ "npm --prefix \"$RESOURCE_DIR\" run lint", "npm --prefix \"$RESOURCE_DIR\" run build" ] } }rewrites にリバースプロキシの設定を追加しました。
"source":"**"の設定よりも先に書いてるのがポイントです(後に書くと、**が優先されちゃう)。さて、ローカルのWEBサーバをもいちど起動します。
$ firebase serve --only hosting,functions疎通します。
$ curl  http://localhost:5000/hello
Hello from Firebase
$
これでHostingとCloud Functionsがおなじドメインとなりました。
"source": "/hello"の箇所は"source": "/hello/**"などとかけるので、必要なパラメタに応じて適宜工夫するのがよさそうです。サーバにデプロイする
ココまでできていれば、サーバへのデプロイも簡単です
$ pwd
/xxx/xxxx/fb_vue_template
$ firebase deploy --only hosting,functions

... 割愛

✔  functions[helloWorld(us-central1)]: Successful create operation.
Function URL (helloWorld): https://us-central1-hoge-xxxx.cloudfunctions.net/helloWorld
i  hosting[hoge-xxxx]: finalizing version...
✔  hosting[hoge-xxxx]: version finalized
i  hosting[hoge-xxxx]: releasing new version...
✔  hosting[hoge-xxxx]: release complete

✔  Deploy complete!

Please note that it can take up to 30 seconds for your updated functions to propagate.
Project Console: https://console.firebase.google.com/project/hoge-xxxx/overview
Hosting URL: https://hoge-xxxx.firebaseapp.com
$
表示されたサーバに アクセスしてみましょう。
ブラウザで: https://hoge-xxxx.firebaseapp.com
curlで: https://us-central1-hoge-xxxx.cloudfunctions.net/helloWorld
curlで: https://hoge-xxxx.firebaseapp.com/helloいままでおなじ結果が得られればOKです。
ビルド手順まとめ
$ pwd
/xxx/xxxx/fb_vue_template
プロジェクトがココに展開されている想定で、コマンドを整理しておきます。
Hosting側(Vue.jsのWEBアプリ)
ビルド
$ cd /xxx/xxxx/fb_vue_template
$ npm run build
ローカルWEBサーバ起動(事前にビルド要)
$ cd /xxx/xxxx/fb_vue_template
$ firebase serve --only hosting
カンマ区切りで、functionsもならべられる
デプロイ(事前にビルド要)
$ cd /xxx/xxxx/fb_vue_template
$ firebase deploy --only hosting
カンマ区切りで、functionsもならべられる
Cloud Functions
ビルド
$ cd /xxx/xxxx/fb_vue_template
$ cd functions && npm run build && cd ../
ローカルWEBサーバ起動(事前にビルド要)
$ cd /xxx/xxxx/fb_vue_template
$ firebase serve --only functions
デプロイ
$ cd /xxx/xxxx/fb_vue_template
$ firebase deploy --only functions
ちなみにfunctionsは、再ビルドが走るので、事前にビルドは不要
おつかれさまでした。
関連リンク
公式
いままで書いたVue.js/Firebase関連記事
- FirebaseとGoogle Cloud Platform をさわれる環境を構築する おもに firebase-tools まわり
- Vue.js の主要な機能をざっくりとつかってみたときのメモ Vue.jsのとっかかりはこちら
Cloud Functions for Firebase をつかってみる。 Functionsまわり
Cloud Functions で構築したREST APIをFirebase認証で保護する。そして自前RESTサーバのAPIにもFirebase認証を適用する。
- 投稿日:2019-03-05T15:55:06+09:00
Nuxt.jsでグローバルSass変数を使いたいんじゃ
概要
Nuxt.js使ってるときにsassのグローバル変数を使う方法を紹介します。
@nuxtjs/style-resourcesを使う
@nuxtjs/style-resourcesを使うと簡単です。
npm
npm i @nuxtjs/style-resources

yarn
yarn add @nuxtjs/style-resources
nuxt.config.jsを編集します。今回はsassなのでこんな感じ
export default {
  modules: [
    '@nuxtjs/style-resources',
  ],

  styleResources: {
    scss: ['@/assets/style/_variables.scss']
  }
}
scssファイル内にグローバル変数を書いていきます。
assets/style/_variables.scss$primary: #3f51b5; $secondary: #b0bec5; $accent: #8c9eff; $error: #b71c1c;コンポーネント内で使います
<style lang="scss" scoped>
.button {
  color: $primary;
}
</style>
いいゾ~これ
- 投稿日:2019-03-05T15:55:06+09:00
Nuxt.jsでグローバルSass変数を使いたい
概要
Nuxt.jsでUIフレームワークを使ってるときにフレームワークの標準のカラーテーマを上書きして、上書きした値をSass変数にしてコンポーネント内で使いたい、なんてことありませんか?
今回はbootstrap-vueとbuefyを例にその方法を紹介したいと思います。
bootstrap-vue
bootstrap-vueが既にインストールされている前提で話します。
まだインストールしていない人はcreate-nuxt-appでbootstrap-vueを選ぶか、公式ドキュメントでインストール方法を調べましょう。まずSassが使えるようにします。
npm i node-sass sass-loader次にassets内にbootstrap-vue内の変数上書き用のSassファイルを作ります。上書きするためにここでbootstrapとbootstrap-vueのscssファイルをインポートします。
assets/style/_override.scss$primary: red; @import 'bootstrap/scss/bootstrap.scss'; @import 'bootstrap-vue/src/index.scss';次にNuxt.jsを以下のように
nuxt.config.jsexport default { css: ['@/assets/style/_override.scss'], modules: [ 'bootstrap-vue/nuxt', ], // _override.scssで既に読み込んでいるのでここはfalseにする bootstrapVue: { bootstrapCSS: false, // or `css` bootstrapVueCSS: false // or `bvCSS` }, }これでbootstrap-vue内の$primaryがredになります。
variantプロップスでprimaryを選んだ場合も赤になります。しかしこれではコンポーネント内のstyleブロックで$primaryを呼んだらエラーになります。
$primaryをグローバルにするためにもうひと工夫します。
先日書いたNuxt.jsでグローバルSass変数を使いたいんじゃを使うとうまくいきます。とりあえず@nuxtjs/style-resourcesをインストールします。
npm
npm i @nuxtjs/style-resources
次にグローバルにしたいSass変数を記入します
assets/style/_variables.scss$primary: red;最終的にNuxt.config.jsが以下のようになります。
nuxt.config.jsexport default { css: ['@/assets/style/_override.scss'], modules: [ 'bootstrap-vue/nuxt', '@nuxtjs/style-resources' ], // _override.scssで既に読み込んでいるのでここはfalseにする bootstrapVue: { bootstrapCSS: false, // or `css` bootstrapVueCSS: false // or `bvCSS` }, styleResources: { scss: ['@/assets/style/_variables.scss'] }, }