- 投稿日:2019-02-28T22:47:02+09:00
LaravelのElopuentでリレーション関係の子データを取得して、そのデータをVue.jsで使用するときに困った
はじめての記事なのでうまく伝わるかわかりませんが、
joinを使わないやり方で調べてもなかなか出てこなかったので備忘録。DBの構成
Employee(社員)テーブル
+---------+--------+---------------+
| id      | name   | department_id |
+---------+--------+---------------+
|       1 | 田中    | 1             |
|       2 | 鈴木    | 2             |
|       3 | 佐藤    | 3             |
|       4 | 吉田    | 1             |
+---------+--------+---------------+
Department(部署)テーブル
Department(部署)テーブル
+---------+-----------+
| id      | name      |
+---------+-----------+
|       1 | 営業部     |
|       2 | 経理部     |
|       3 | 技術部     |
+---------+-----------+
このとき、EmployeeテーブルとDepartmentテーブルのリレーションは多対1になります。
リレーションの簡単な説明(前置き)
このテーブルを使って、社員の一覧を表示する。
その際に、社員それぞれの部署名も一緒に表示させたい。こういう風な一覧を作りたい
+---------+--------+------------+
| id      | name   | department |
+---------+--------+------------+
|       1 | 田中    | 営業部    |
|       2 | 鈴木    | 経理部      |
|       3 | 佐藤    | 技術部      |
|       4 | 吉田    | 営業部      |
+---------+--------+------------+
Laravelでは、リレーションを張ることで、簡単に表示させることができるようです。
リレーションに関するドキュメント
https://readouble.com/laravel/5.7/ja/eloquent-relationships.htmlそれぞれのModelクラスを作り、Employee.phpを以下のように記述
Employee.php<?php namespace App; use Illuminate\Database\Eloquent\Model; class Employee extends Model { /** * この社員が持っているdepartment_idと一致するレコードを部署テーブルから取得 */ public function department() { return $this->belongsTo('App\Department'); } }belongsTo関数を第1引数しか使わない場合は、関数名はテーブル名にしないといけないようです。
関数名_id と belongsTo() の第1引数で指定したモデルが持つidを結びつけるとのこと。idとして使うカラムの名前が違う場合は、第2、第3引数で変更できるみたいです。
そして、あとは社員テーブルの一覧を普通に取得するだけ
Employee.phppublic function get() { $results = Employee::all(); return $results; }これだけで勝手にDepartmentテーブルのデータと結合してくれます。
phpで使うなら$result->department->nameで部署名が取れます。
真ん中のdepartmentはテーブルじゃなく関数名っぽいです。
1対1だったり、この例題と逆の参照でやる場合とかはドキュメントに乗ってたり
他の人が書いてくれているのでそちらを参考にここからが本題
本題
これをAPIを使ってVue.jsで受け取ったあと
Vue.js{{ result.department.name }}こんな感じで表示させようとしたときにエラーがでました。
Error in render: "TypeError: Cannot read property 'name' of undefined"console.logとかで見てもあるやん!としかならなくて困りました。
多分、レスポンスを返すときにresponse()->json()でjsonにしていたつもりが
departmentの中までは正しく変換されていなかった感じだと思います。
(よくわかんないので詳しい方解説してくれれば嬉しいです...)そういう雰囲気で検索かけたら、stackoverflowに質問していた方がいて、
さらに回答してくれている方がいました!解決策
https://stackoverflow.com/questions/37289274/convert-eloquent-relationship-into-vue-js-code
社員一覧を取得するときに、こう書けよということみたいです
Employee.phppublic function get() { // $results = Employee::all(); $results = Employee::with('department')->all(); return $results; }withの中はbelongsToを使っている関数名っぽいです
Modelクラスのつもりなんでそのままリターンしてますが、
クライアントに返すときはちゃんとJsonにして返すといいと思います。指摘があれば教えて下さい。
同じ境遇の人の助けになると嬉しいですm(_ _)m
- 投稿日:2019-02-28T22:47:02+09:00
LaravelのEloquentでリレーション関係の子データを取得して、そのデータをVue.jsで使用するときに困った
はじめての記事なのでうまく伝わるかわかりませんが、
joinを使わないやり方で調べてもなかなか出てこなかったので備忘録。DBの構成
Employee(社員)テーブル
+---------+--------+---------------+
| id      | name   | department_id |
+---------+--------+---------------+
|       1 | 田中    | 1             |
|       2 | 鈴木    | 2             |
|       3 | 佐藤    | 3             |
|       4 | 吉田    | 1             |
+---------+--------+---------------+
Department(部署)テーブル
Department(部署)テーブル
+---------+-----------+
| id      | name      |
+---------+-----------+
|       1 | 営業部     |
|       2 | 経理部     |
|       3 | 技術部     |
+---------+-----------+
このとき、EmployeeテーブルとDepartmentテーブルのリレーションは多対1になります。
リレーションの簡単な説明(前置き)
このテーブルを使って、社員の一覧を表示する。
その際に、社員それぞれの部署名も一緒に表示させたい。こういう風な一覧を作りたい
+---------+--------+------------+
| id      | name   | department |
+---------+--------+------------+
|       1 | 田中    | 営業部    |
|       2 | 鈴木    | 経理部      |
|       3 | 佐藤    | 技術部      |
|       4 | 吉田    | 営業部      |
+---------+--------+------------+
Laravelでは、リレーションを張ることで、簡単に表示させることができるようです。
リレーションに関するドキュメント
https://readouble.com/laravel/5.7/ja/eloquent-relationships.htmlそれぞれのModelクラスを作り、Employee.phpを以下のように記述
Employee.php<?php namespace App; use Illuminate\Database\Eloquent\Model; class Employee extends Model { /** * この社員が持っているdepartment_idと一致するレコードを部署テーブルから取得 */ public function department() { return $this->belongsTo('App\Department'); } }belongsTo関数を第1引数しか使わない場合は、関数名はテーブル名にしないといけないようです。
関数名_id と belongsTo() の第1引数で指定したモデルが持つidを結びつけるとのこと。idとして使うカラムの名前が違う場合は、第2、第3引数で変更できるみたいです。
そして、あとは社員テーブルの一覧を普通に取得するだけ
Employee.phppublic function get() { $results = Employee::all(); return $results; }これだけで勝手にDepartmentテーブルのデータと結合してくれます。
phpで使うなら$result->department->nameで部署名が取れます。
真ん中のdepartmentはテーブルじゃなく関数名っぽいです。
1対1だったり、この例題と逆の参照でやる場合とかはドキュメントに乗ってたり
他の人が書いてくれているのでそちらを参考にここからが本題
本題
これをAPIを使ってVue.jsで受け取ったあと
Vue.js{{ result.department.name }}こんな感じで表示させようとしたときにエラーがでました。
Error in render: "TypeError: Cannot read property 'name' of undefined"console.logとかで見てもあるやん!としかならなくて困りました。
多分、レスポンスを返すときにresponse()->json()でjsonにしていたつもりが
departmentの中までは正しく変換されていなかった感じだと思います。
(よくわかんないので詳しい方解説してくれれば嬉しいです...)そういう雰囲気で検索かけたら、stackoverflowに質問していた方がいて、
さらに回答してくれている方がいました!解決策
https://stackoverflow.com/questions/37289274/convert-eloquent-relationship-into-vue-js-code
社員一覧を取得するときに、こう書けよということみたいです
Employee.phppublic function get() { // $results = Employee::all(); $results = Employee::with('department')->all(); return $results; }withの中はbelongsToを使っている関数名っぽいです
Modelクラスのつもりなんでそのままリターンしてますが、
クライアントに返すときはちゃんとJsonにして返すといいと思います。指摘があれば教えて下さい。
同じ境遇の人の助けになると嬉しいですm(_ _)m
- 投稿日:2019-02-28T16:03:35+09:00
LaravelアプリケーションをAWS上のDockerで動かす
概要
LaravelのアプリケーションをAWS上のDockerで動かすための環境を構築します。
具体的には、以下を行います。
- コンテナを構築するためのDockerfileを作成する
- ECRリポジトリの作成 → AWS CLIで作成
- 1.で作成したDockerイメージをECRにをpushする
- ECSの環境構築 → マネジメントコンソールから作成
前提条件
- AWS CLIがインストールがインストールされていること
コンテナを構築
phpとnginxの2つのコンテナを構築します。Dockerfileは、それぞれ下記の通りです。phpコンテナのDockerfile
必要なソースコードをコンテナ内にコピーし、依存ライブラリのインストールを行なっています。
FROM php:7.2.10-fpm-alpine

COPY . .
WORKDIR /var/www/html

RUN set -x && \
  apk update && \
  apk add --no-cache libxml2 libxml2-dev curl curl-dev autoconf $PHPIZE_DEPS && \
  docker-php-ext-install opcache mysqli pdo pdo_mysql xml mbstring curl session tokenizer json && \
  curl -sS https://getcomposer.org/installer | php -- --install-dir=/usr/bin --filename=composer && \
  composer global require hirak/prestissimo && \
  composer install && \
  chmod -R a+w storage/ bootstrap/cache

COPY ./docker/php/config/php.ini /usr/local/etc/php/php.ini
COPY ./docker/php/config/docker-php-ext-opcache.ini /usr/local/etc/php/conf.d/docker-php-ext-opcache.ini
nginxのDockerfile
default.confの設定を行なっています。
publicディレクトリ配下は、nginxコンテナに配置しています。FROM nginx:1.15.5-alpine ADD ./docker/nginx/config/default.conf /etc/nginx/conf.d/default.conf RUN mkdir -p /var/www/html/public ADD ./public/ /var/www/html/public
.dockerignoreの追加Dockerのイメージを小さくするために、
.dockerignoreを追加します。
node_modulesのような容量が大きいものは追加しておく方がいいと思います。
.dockerignoreについては、下記の記事に詳しく説明されていますので載せておきます。
.dockerignore アンチパターンECRにDockerイメージをpushする
ECRとは
ECR(Amazon Elastic Container Registry)は、Dockerのコンテナイメージを保存しておくためのレジストリサービスです。ECRに保存したコンテナイメージは、Amazon ECSへのデプロイが可能であったり、他の AWS サービスと簡単に連携することができます。
事前準備
AWS CLIを使用して、ECR用のプロファイルを作成します。
$ aws configure --profile ecrリポジトリ作成
phpとeginxの2つのリポジトリを作成します。$ aws ecr create-repository --repository-name php --profile ecr $ aws ecr create-repository --repository-name nginx --profile ecrマネジメントコンソールで作成する場合は、以下の通りです。
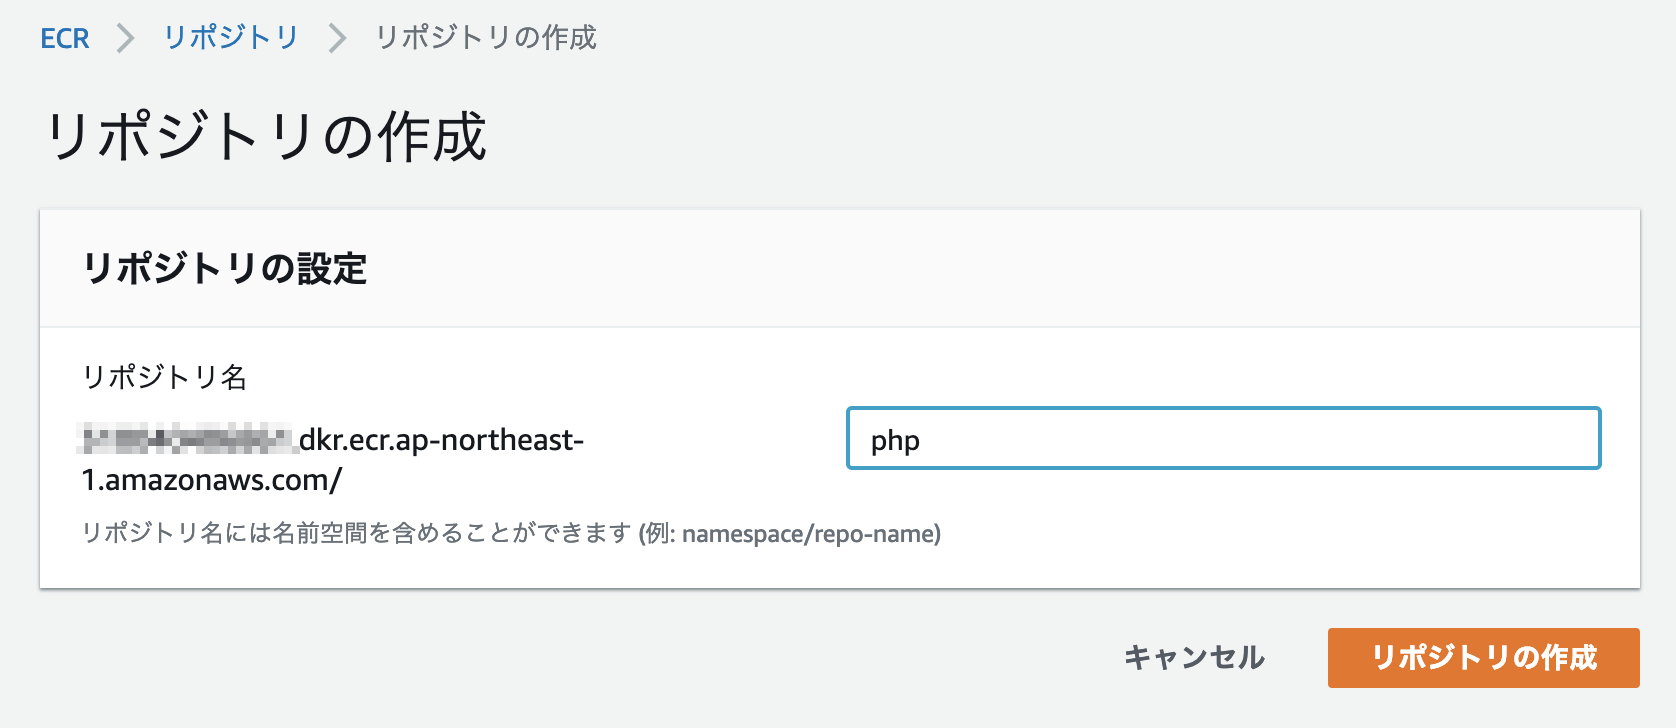
Amazon ECR>Repositoriesを選択し、リポジトリの作成をクリックします。
リポジトリ名を入力し、
リポジトリの作成をクリックして、リポジトリを作成します。
nginx/phpコンテナのビルド
上記で作成したリポジトリ名と同じになるように、dockerイメージ名を指定しビルドします。
タグにはlatestとしていますが、必要に応じて変更してください。$ docker build -t {AWS_ACCOUNT_ID}.dkr.ecr.ap-northeast-1.amazonaws.com/php:latest -f docker/php/Dockerfile . $ docker build -t {AWS_ACCOUNT_ID}.dkr.ecr.ap-northeast-1.amazonaws.com/nginx:latest -f docker/nginx/Dockerfile .以下の通りDockerイメージが作成されているはずです。
$ docker image ls
REPOSITORY                                                TAG                 IMAGE ID            CREATED             SIZE
************.dkr.ecr.ap-northeast-1.amazonaws.com/php     latest              e7cc55e81372        23 seconds ago      376MB
************.dkr.ecr.ap-northeast-1.amazonaws.com/nginx   latest              c9bfc2840cbc        3 minutes ago       18.2MB
ECRにログイン
ECRにログインする為のパスワードを取得します。
$ aws ecr get-login --region ap-northeast-1 --no-include-email --profile ecr以下のコマンドが表示されるので、全てコピペし、
docker loginでログインします。docker login -u AWS -p password https://{AWS_ACCOUNT_ID}.dkr.ecr.ap-northeast-1.amazonaws.com
Login Succeededと表示されればログイン成功です。
~/.docker/config.jsonを確認するとauthsに追加されていることが確認できます。~/.docker/config.json"auths": { "{AWS_ACCOUNT_ID}.dkr.ecr.ap-northeast-1.amazonaws.com": {} },ECRへDockerイメージをpush
上記で作成したリポジトリにDockerイメージをpushします。
$ docker push {AWS_ACCOUNT_ID}.dkr.ecr.ap-northeast-1.amazonaws.com/php:latest
$ docker push {AWS_ACCOUNT_ID}.dkr.ecr.ap-northeast-1.amazonaws.com/nginx:latest
ECSの環境構築
セキュリティグループの作成
ECSを構築する前に、以下を実現するためのセキュリティグループを2つ作成します。
- インターネットからALBの 443/tcp に対するアクセス許可
- ALBからphpコンテナの 80/tcp に対するアクセス許可
ALBのセキュリティグループ
- 外部から 443/tcp へのアクセス許可
以降の手順で作成するALBを割り当てます。
ECSサービスのセキュリティグループ
- ALBのセキュリティグループから 80/tcp へのアクセス許可
ECSサービスのセキュリティグループとしてますが、実際にはECSでクラスターを作成する際にEC2インスタンスに割り当てるセキュリティグループです。
ALBを作成する
通常のALB作成手順に従ってください。
セキュリティグループは、上記で作成したALBのセキュリティグループを割り当てます。ALBを利用せずにECSをPublicサブネットに配置する場合は、作成する必要はありません。
これ以降、ECSの構築を行なっていきます。
タスクを定義する
コンテナの起動方法をタスクの定義として登録します。
phpコンテナとnginxコンテナの組み合わせを定義していきます。
Amazon ECS>タスク定義から、新しいタスク定義の作成を選択します。
起動タイプは、EC2を選択します。タスクとコンテナの定義の設定
項目 値 タスク定義名 sample-api タスクロール なし ネットワークモード default 補足:
タスクロールは、コンテナ内から他のサービスにアクセスするためのロール設定です。
ネットワークモードについては、下記の記事にわかりやすくまとめられていましたので、掲載します。
ECSでEC2インスタンスを利用する際のネットワークモードについて調べてみた | DevelopersIO次に、コンテナの定義で、phpコンテナとnginxコンテナを追加します。
phpコンテナを追加
項目 値 コンテナ名 php イメージ {AWS_ACCOUNT_ID}.dkr.ecr.ap-northeast-1.amazonaws.com/php:latest 作業ディレクトリ /var/www/html メモリ制限(MB) ハード制限 300(MB) nginxコンテナを追加
項目 値 コンテナ名 nginx イメージ {AWS_ACCOUNT_ID}.dkr.ecr.ap-northeast-1.amazonaws.com/nginx:latest メモリ制限(MB) ハード制限 300(MB) リンク php ポートマッピング tcp 80:80 以上で設定は完了です。
作成を押下して、タスクの定義を作成します。ECSクラスタを作成する
Amazon ECS>クラスターから、クラスターの作成を選択します。
クラスターテンプレートの選択は、EC2 Linux + ネットワーキングを使用します。インスタンスの設定
項目 値 クラスター名 sample-api-cluster EC2 インスタンスタイプ t2.micro プロビジョニングモデル スポット スポットインスタンスの配分戦略 最低価格 インスタンス数 1 Maximum bid price (per instance/hour) 10($) 補足:
スポットインスタンスは中断される可能性があります。中断できないアプリケーションに対しては、スポットインスタンスを使用しないことをお勧めします。
クラスターの作成 - Amazon Elastic Container Servicesshログインを可能とする場合、キーペアを指定している必要があります。
この場合、セキュリティグループで22番ポートも解放してください。ネットワーキング
VPCは、ALB作成で指定したVPC指定。
セキュリティグループは、作成済みのECSサービスのセキュリティグループを指定。コンテナインスタンス IAM ロール
デフォルトで選択されているecsInstanceRoleを指定。スポット群 IAM ロール
デフォルトで選択されているecsSpotFleetRoleを指定。以上で設定は完了です。
作成を押下して、クラスタを作成します。
クラスタが作成されると、コンテナが起動するEC2インスタンスが作成されます。サービスを作成する
Amazon ECS>クラスター>サービスタブから、作成を選択します。
項目 値 起動タイプ EC2 タスク定義 sample-api クラスタ sample-api-cluster サービス名 sample-api サービスタイプ REPLICA タスクの数 1 Elastic Load Balancing(オプション)
項目 値 ELB タイプ Application Load Balancer サービス用の IAM ロールの選択 デフォルトで選択されているecsServiceRoleを選択 ELB 名 作成したALBを選択 負荷分散用のコンテナ
nginx:80:80を指定し、ELBへの追加を選択。
ターゲットグループ名に、作成したALBに紐づくターゲットグループを選択を選択。以上で、ECSの環境構築は完了です。
動作確認
作成したALBの
DNS名にアクセスし、動作確認を行います。Fargateに移行
この記事で作成した環境をFargateに変更する手順を簡単にまとめました。
ECSのバックエンドをEC2からFargateに変更参考記事
下記を参考にさせていただきました。
【AWS】初めてのECR
LaravelアプリケーションをローカルでもAWSでもDockerで動かす

- 投稿日:2019-02-28T15:24:39+09:00
Laravel 5.8 アップデートメモ
全く追いかけていなかったので、Upgradeやらを見ながらメモ書き。
Laravel 5.8 Release おめでとうございます。
というわけで、新機能と、5.7 → 5.8 のアップデートメモ
皆に影響がある部分として、下記の4つがあるそうです。
- Cache TTL Change
- Cache Lock Safety Improvements
- MarkDown File Directory Change
- Nexmo / Slack Notification Channels
PHP DotEnv 3.0
複数行の値が使えるようになった。
DOT_ENV_KEY="DOT
ENV
VALUE"
Carbon v2.0
Carbon V2 にアップデートされます。
see: Carbon Update Coming Laravel 5.8
Cache TTL Change
Cacheを使っている時に有効時間(分)をしていたのを、明確に期限切れを指定する形になります。
<?php

# ~5.7
\Cache::reminder('active-posts', 5, function(){ return Post::active()->get(); });

# 5.8~
\Cache::reminder('active-posts', now()->addMinute(5), function(){ return Post::active()->get(); });
see: Cache TTL Change Coming to Laravel 5.8
Deprecates String and Array Helpers
関数で存在していた
array_add($array, $key, $value)が非推奨になります。代わりにArr::add($array, $key, $value)を使ってください。
Illuminate/Support/helpers.phpに@deprecated <method> ~~と書かれているので、それを参考にしながら変えていくのがいいと思います。see: Laravel 5.8 Deprecates String and Array Helpers
Automatic Policy Resolution is Coming to Laravel 5.8
今まで
AuthServicePoviderにprotected $policy = [ 'Model' => 'Policy' ]と書いていた部分が、動的に変えられるようになったっぽい。see: Automatic Policy Resolution is Coming to Laravel 5.8
Blade Template File Path
Blade を使っていると、ファイル名がハッシュ値になりどのテンプレでエラーが起きたのかわかりにくかったです。
このバージョンから Blade のコンパイルしたテンプレートファイルの先頭行に、テンプレートのファイルパスが PHP のコメントアウトして記述されます。
Mexmo / Slack Notification Change
Mexmo / Slack の Notification がパッケージ分離されました。
使用している場合は別途インストールが必要です。
(何で分離されたんだろ?)
composer require laravel/nexmo-notification-channel
composer require laravel/slack-notification-channel
see: Upgrade notification
MarkDown File Directory Name Change
Markdown ファイルは
/resources/views/vendor/mail/markdownでしたが、このバージョンからは/resources/views/vendor/mail/textになりました。see: Markdown File Directory Change
Testing
PHPUnit 8 が使われるようになりました。これに伴い、
setUp()およびtearDown()に返り型を指定する事が必須になりました。具体的にはこんな感じ
<?php

protected function setUp(): void
{
    ...
}

protected function tearDown(): void
{
    ...
}
- 投稿日:2019-02-28T13:46:06+09:00
PhpStorm(IntelliJ IDEA)でLaravelプロジェクトの新規作成からローカルデバッグ環境構築まで
動作環境
Windows 7
IntelliJ IDEA 2018.3.4
PHP 7.3.2
Xdebug v2.7.0RC2
Laravel Framework 5.8.2前提条件
- IntelliJ IDEAにPHPプラグインがインストールされていること
背景
普段Unity+Riderで開発をしています
デバッグ時にはデバッグボタン押すだけでブレークポイントが有効になりステップ実行が可能になります
効率的にデバッグをこなす上でブレークポイントの有効可は必須なので今回の環境構築を行いました
1クリックでローカルサーバの起動→デバッグ開始できるようにしますPHPのインストール
PHP download
- Cドライブ直下に展開 (C:\php-7.3.2)
- php.ini-developmentをコピーしてphp.iniにリネーム
- php.iniないの下記設定のコメントアウトを解除;extension_dir = "ext" ;extension=openssl ;extension=mbstring ;extension=pdo_mysqlXdebugのインストール
php --infoで出力される情報をコピーして上記サイトに貼り付けAnalyse my phpinfo() outputをクリック- 環境に合わせたxdebugのダウンロードリンクが出てくるのでダウンロード(自分の環境ではphp_xdebug-2.7.0RC2-7.3-vc15-x86_64.dll)
- C:\php-7.3.2\ext配下にコピー
php.iniに
zend_extension = php_xdebug-2.7.0RC2-7.3-vc15-x86_64.dllを追記ext\php_xdebug~にするとデバッグ時にエラーが出たのでextは抜きました
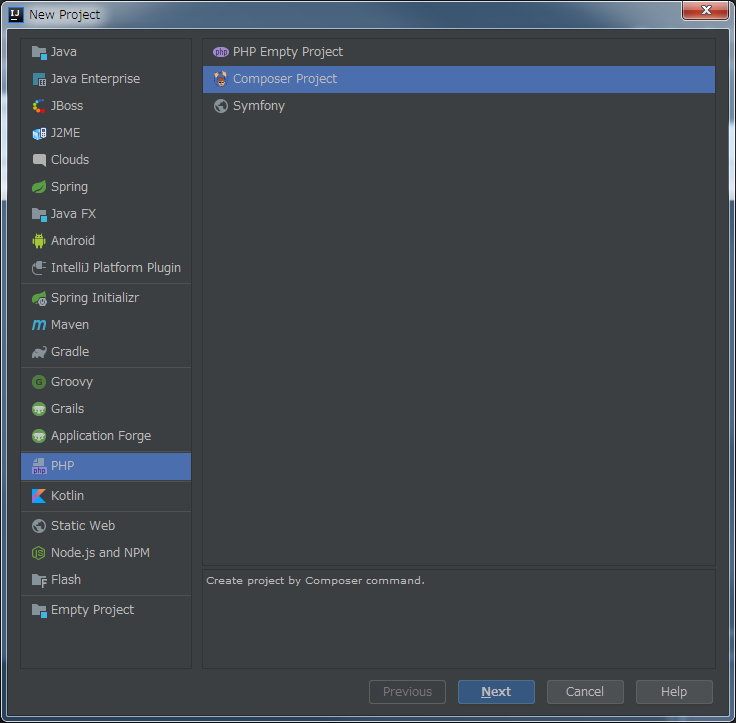
PhpStorm(IntelliJ IDEA)でLaravelプロジェクトの新規作成
Create New Project -> PHP Composer Project
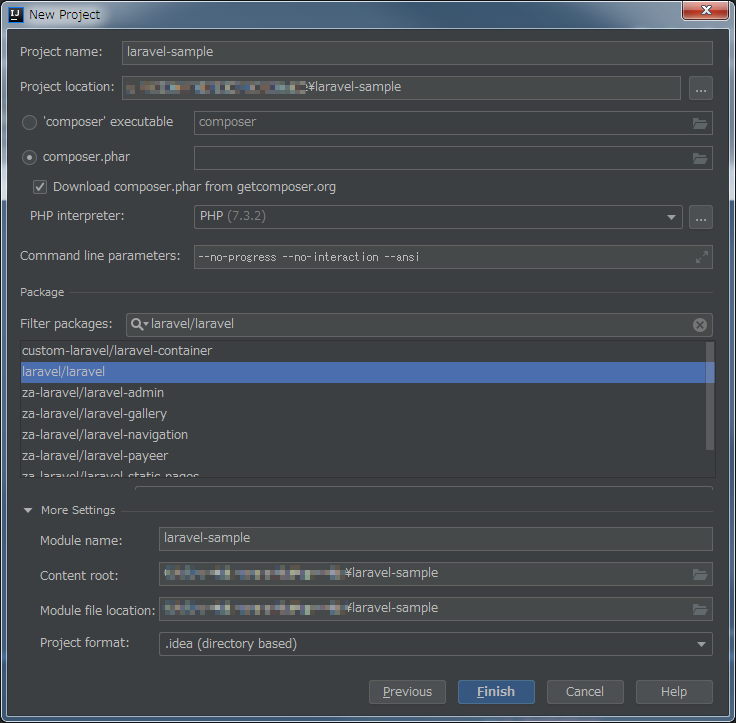
Project name: laravel-sample
composer.pharにチェック
Download composer.pharにチェック
PHP Interpriter: PHP(7.3.2)を選択
Filter package: laravel/laravelを入力して一覧から選択してFinish
起動確認
php artisan key:generate # APP_KEYの生成 php artisan serveでローカルサーバを起動しlocalhost:8000にアクセスして起動できることを確認します。
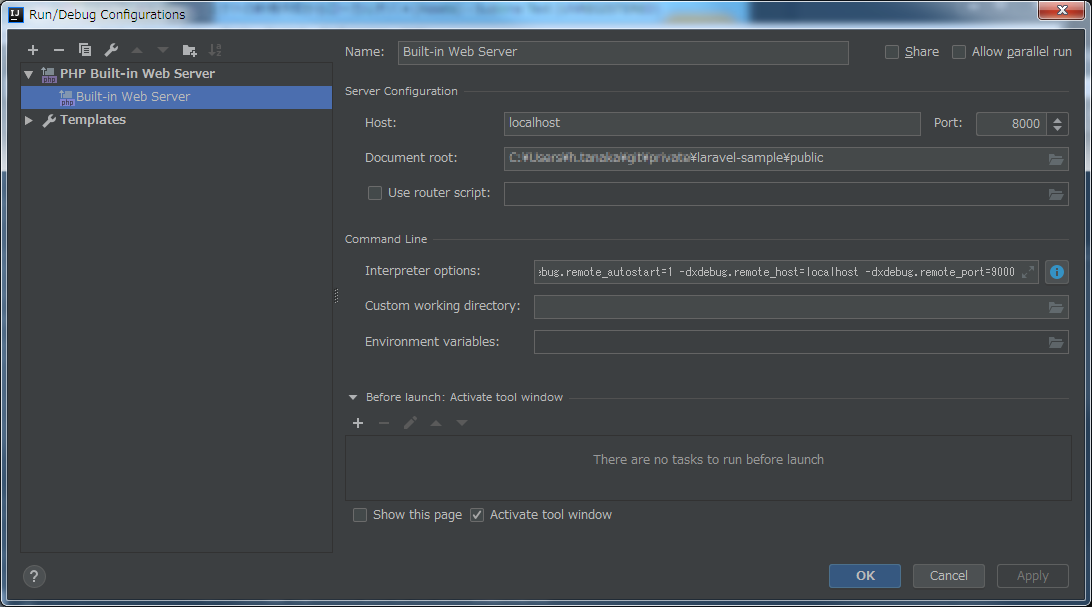
Built-in Web Serverの設定
php artisan serveでローカルサーバ起動しましたがXdebugを使ってデバッグでするためPhpStormで設定を行います
- Run -> Edit Configurations...
- PHP Built-in Web Serverを追加 - Name: Build-in Web Server - Host: localhost - Port: 8000 - Document root:<プロジェクトのディレクトリ>/public - Interpreter options: -dxdebug.remote_enable=1 -dxdebug.remote_autostart=1 -dxdebug.remote_host=localhost -dxdebug.remote_port=9000
xdebugの設定
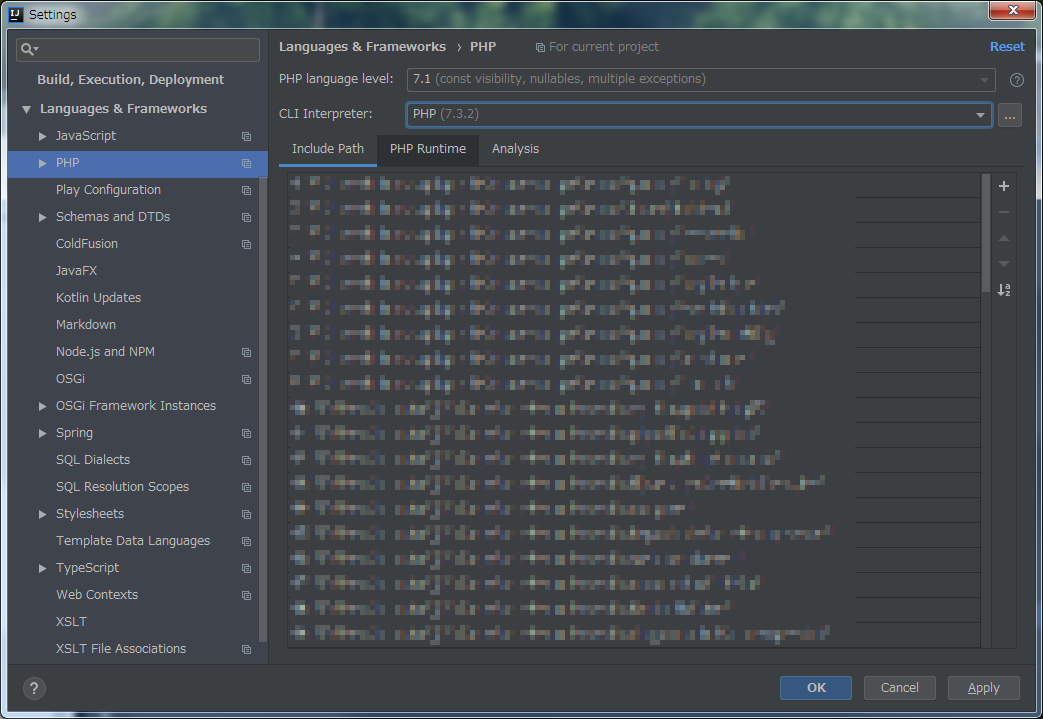
File -> Settings -> PHP
- CLI Interpriter: PHP(7.3.2)

File -> Settings -> PHP -> Debug -> Xdegug
- Debug port: 9000
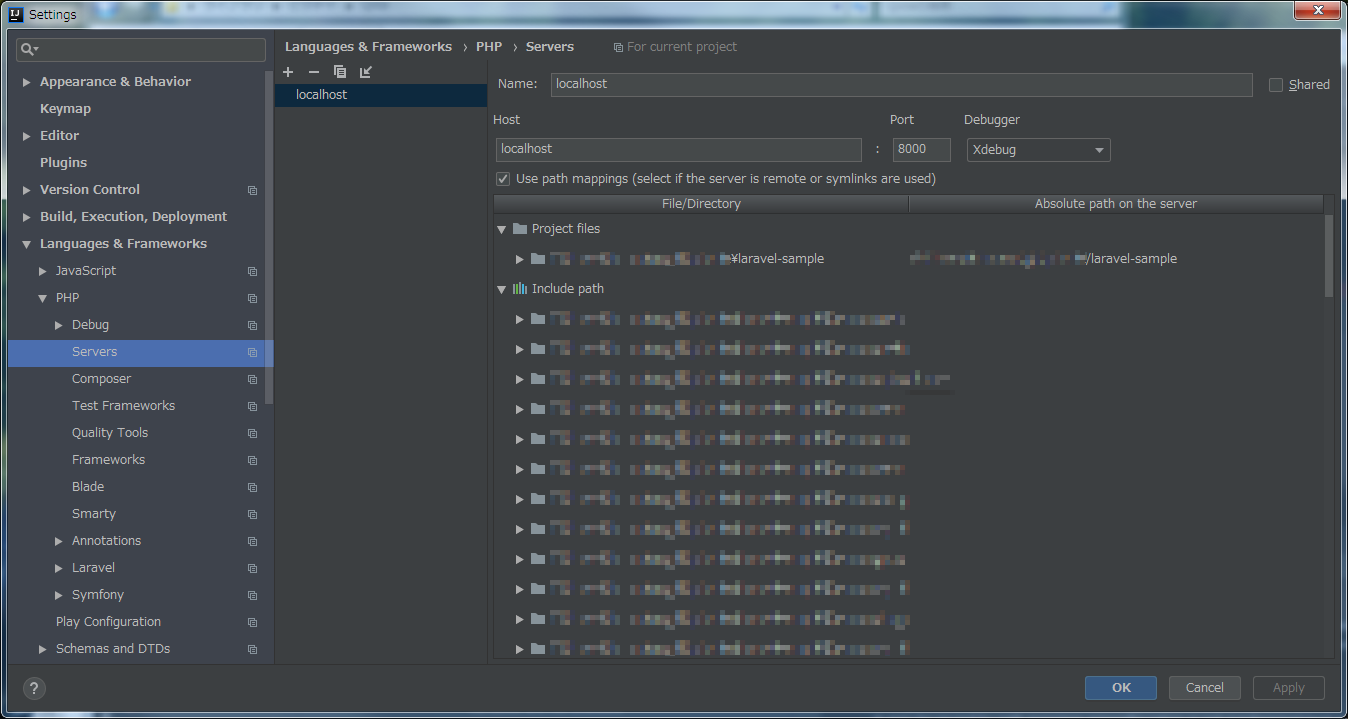
File -> Settings -> PHP -> Servers
- 「+」ボタンでServer追加
- Name: localhost
- Host: localhost
- Port: 8000
- Debugger: xdebug
- Use path mappingsにチェック
- 作成したプロジェクトのルートディレクトリのAbsolute path on the Serverに同じパスを入力

デバッグ実行
- Run -> RunでBuilt-in Web Serverで設定したサーバを選択して実行
または
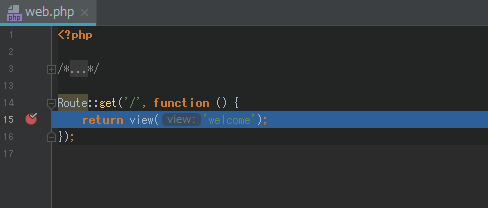
- 赤枠のマークをクリックして実行

ブレークポイントを仕掛けてhttp://localhost:8000にアクセスすると下の画像のようにステップ実行が可能となっているはずです
受話器のマークが赤枠のようになっていないことに気をつけてください
良いデバッグライフを(๑•̀ㅂ•́)و✧


- 投稿日:2019-02-28T13:20:25+09:00
【laravel5.7】MultiAuthにパスワードリセットを追加する
MultiAuthにパスワードリセットを追加する実装メモ
【laravel5.7】 MultiAuthログインの続きとして書きます。やりたいこと
User/Adminそれぞれにパスワードリセットを実装したい
環境
MacOS 10.14.3
VisualStudio
laravel 5.7Admin側の設定
auth.php
リセット用のtokenを保存するテーブルが必要なので、auth.phpで設定します。
config/auth.php'passwords' => [ 'users' => [ 'provider' => 'users', 'table' => 'password_resets', 'expire' => 60, ], + 'admins' => [ + 'provider' => 'admins', + 'table' => 'password_resets', + 'expire' => 60, + ], ],Controller
ForgotPasswordController.php
app/Http/Controllers/Admin/Auth/ForgetPasswordController.php<?php +namespace App\Http\Controllers\Admin\Auth; use App\Http\Controllers\Controller; use Illuminate\Foundation\Auth\SendsPasswordResetEmails; class ForgotPasswordController extends Controller { /* |-------------------------------------------------------------------------- | Password Reset Controller |-------------------------------------------------------------------------- | | This controller is responsible for handling password reset emails and | includes a trait which assists in sending these notifications from | your application to your users. Feel free to explore this trait. | */ use SendsPasswordResetEmails; /** * Create a new controller instance. * * @return void */ public function __construct() { + $this->middleware('guest:admin'); } + public function showLinkRequestForm() + { + return view('admin.auth.passwords.email'); + } + protected function guard() + { + return \Auth::guard('admin'); + } + public function broker() + { + return \Password::broker('admins'); + } }ResetPasswordController.php
app/Http/Controllers/Admin/Auth/ResetPasswordController.php<?php +namespace App\Http\Controllers\Admin\Auth; use App\Http\Controllers\Controller; use Illuminate\Foundation\Auth\ResetsPasswords; +use Illuminate\Http\Request; class ResetPasswordController extends Controller { /* |-------------------------------------------------------------------------- | Password Reset Controller |-------------------------------------------------------------------------- | | This controller is responsible for handling password reset requests | and uses a simple trait to include this behavior. You're free to | explore this trait and override any methods you wish to tweak. | */ use ResetsPasswords; /** * Where to redirect users after resetting their password. * * @var string */ + protected $redirectTo = '/admin/home'; /** * Create a new controller instance. * * @return void */ public function __construct() { + $this->middleware('guest:admin'); } + public function showResetForm(Request $request, $token = null) + { + return view('admin.auth.passwords.reset')->with(['token' => $token,'email' => $request->email]); + } + protected function guard() + { + return \Auth::guard('admin'); + } + public function broker() + { + return \Password::broker('admins'); + } }Views
email.blade.php
resources/views/admin/auth/passwords/email.blade.php+@extends('layouts.admin.auth') @section('auth') <div class="container"> <div class="row justify-content-center"> <div class="col-md-6"> <div class="card mx-4"> <div class="card-body p-4"> <h2>{{ __('Reset Password') }}</h2> <p class="text-muted">リセットURLを送信します。</p> @if (session('status')) <div class="alert alert-success" role="alert"> {{ session('status') }} </div> @endif + <form method="POST" action="{{ route('admin.password.email') }}"> @csrf <div class="col-auto"> <div class="input-group mb-3"> <div class="input-group-prepend"> <div class="input-group-text">@</div> </div> <input id="email" type="email" class="form-control{{ $errors->has('email') ? ' is-invalid' : '' }}" name="email" value="{{ old('email') }}" required> </div> @if ($errors->has('email')) <span class="invalid-feedback" role="alert"> <strong>{{ $errors->first('email') }}</strong> </span> @endif <button type="submit" class="btn btn-primary"> {{ __('Send Password Reset Link') }} </button> </div> </form> </div> </div> </div> </div> </div> @endsectionreset.blade.php
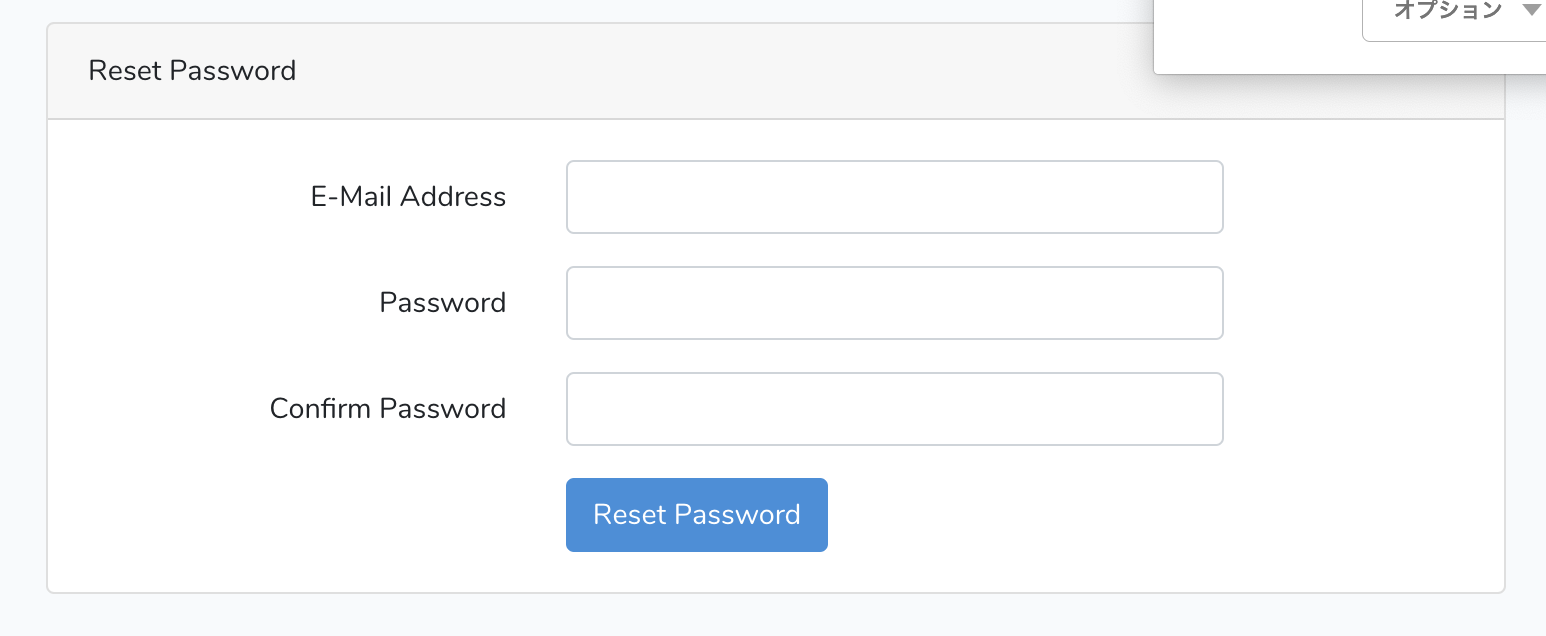
resources/views/admin/auth/passwords/reset.blade.php+@extends('layouts.admin.auth') @section('auth') <div class="container"> <div class="row justify-content-center"> <div class="col-md-6"> <div class="card mx-4"> <div class="card-body p-4"> <h2>{{ __('Reset Password') }}</h2> {{-- <div class="card-body"> --}} + <form method="POST" action="{{ route('admin.password.update') }}"> @csrf <input type="hidden" name="token" value="{{ $token }}"> <div class="col-auto"> <div class="input-group mb-3"> <div class="input-group-prepend"> <div class="input-group-text">Email</div> </div> <input id="email" type="email" class="form-control{{ $errors->has('email') ? ' is-invalid' : '' }}" name="email" value="{{ $email ?? old('email') }}" required autofocus> </div> @if ($errors->has('email')) <span class="invalid-feedback" role="alert"> <strong>{{ $errors->first('email') }}</strong> </span> @endif </div> <div class="col-auto"> <div class="input-group mb-3"> <div class="input-group-prepend"> <div class="input-group-text"><i class="fas fa-key"></i></div> </div> <input id="password" type="password" class="form-control{{ $errors->has('password') ? ' is-invalid' : '' }}" name="password" required> @if ($errors->has('password')) <span class="invalid-feedback" role="alert"> <strong>{{ $errors->first('password') }}</strong> </span> @endif </div> </div> <div class="col-auto"> <div class="input-group mb-3"> <div class="input-group-prepend"> <div class="input-group-text"><i class="fas fa-key"></i></div> </div> <input id="password-confirm" type="password" class="form-control" name="password_confirmation" required> </div> </div> <div class="form-group row mb-0"> <div class="col-md-6 offset-md-4"> <button type="submit" class="btn btn-primary"> {{ __('Reset Password') }} </button> </div> </div> </form> {{-- </div> --}} </div> </div> </div> </div> </div> </div> @endsectionルーティング
web.php
routes/web.php// Admin Route::group(['namespace' => 'Admin','prefix'=>'admin'],function(){ // home Route::get('home','HomeController@index')->name('admin.home'); // login logout Route::get('login','Auth\LoginController@showLoginForm')->name('admin.login'); Route::post('login','Auth\LoginController@login')->name('admin.login'); Route::post('logout','Auth\LoginController@logout')->name('admin.logout'); // register Route::get('register','Auth\RegisterController@showRegisterForm')->name('admin.register'); Route::post('register','Auth\RegisterController@register')->name('admin.register'); + // password resets + Route::post('password/email','Auth\ForgotPasswordController@sendResetLinkEmail')->name('admin.password.email'); + Route::post('password/reset','Auth\ResetPasswordController@reset')->name('admin.password.request'); + Route::get('password/reset','Auth\ForgotPasswordController@showLinkRequestForm')->name('admin.password.update'); + Route::get('password/reset/{token}','Auth\ResetPasswordController@showResetForm')->name('admin.password.reset'); });送信機能のオーバーライド
AdminPasswordResetNotification.phpを作ります。
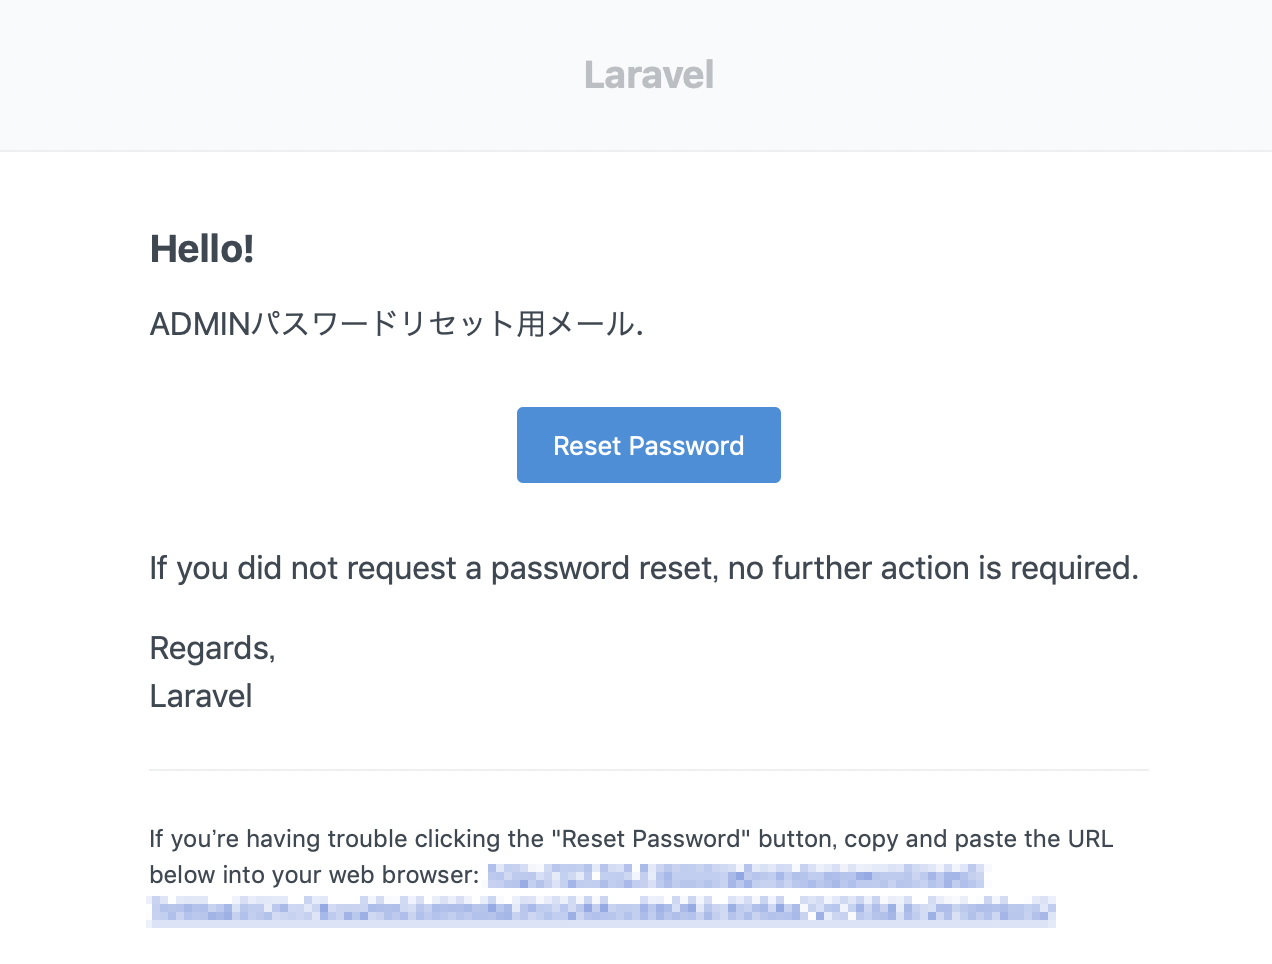
terminalphp artisan make:notification AdminPasswordResetNotificationapp/Notifications/AdminPasswordResetNotification.php<?php namespace App\Notifications; use Illuminate\Auth\Notifications\ResetPassword as ResetPasswordNotification; use Illuminate\Notifications\Messages\MailMessage; class AdminPasswordResetNotification extends ResetPasswordNotification { public function toMail($notifiable) { return (new MailMessage) ->line('ADMINパスワードリセット用メール.') ->action('Reset Password', url(config('url').route('admin.password.reset', $this->token, false))) ->line('If you did not request a password reset, no further action is required.'); } }Admin.phpの変更
AdminPasswordResetNotificationがメールで送信されるようにModelに設定します。
app/Admin.php<?php namespace App; use Illuminate\Notifications\Notifiable; use Illuminate\Database\Eloquent\Model; use Illuminate\Contracts\Auth\MustVerifyEmail; use Illuminate\Foundation\Auth\User as Authenticatable; +use App\Notifications\AdminPasswordResetNotification; class Admin extends Authenticatable { use Notifiable; /** * The attributes that are mass assignable. * * @var array */ protected $fillable = [ 'name', 'email', 'password','api_token' ]; /** * The attributes that should be hidden for arrays. * * @var array */ protected $hidden = [ 'password', 'remember_token', ]; + public function sendPasswordResetNotification($token) + { + $this->notify(new AdminPasswordResetNotification($token)); + } }動作確認
http://127.0.0.1:8000/admin/login
web
入力したメールアドレス
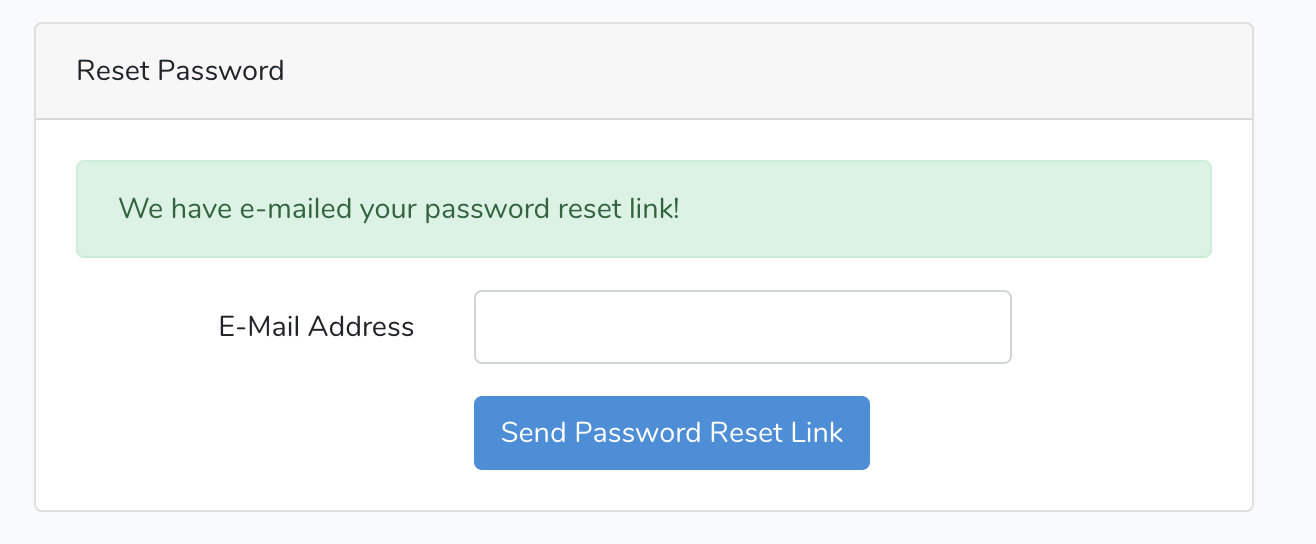
Reset Passwordボタンをクリック
こんな感じで動けばOK
User側の設定
Adminとやることは変わりません
Controller
ForgotPasswordController.php
app/Http/Controllers/User/Auth/ForgetPasswordController.php<?php +namespace App\Http\Controllers\User\Auth; use App\Http\Controllers\Controller; use Illuminate\Foundation\Auth\SendsPasswordResetEmails; class ForgotPasswordController extends Controller { /* |-------------------------------------------------------------------------- | Password Reset Controller |-------------------------------------------------------------------------- | | This controller is responsible for handling password reset emails and | includes a trait which assists in sending these notifications from | your application to your users. Feel free to explore this trait. | */ use SendsPasswordResetEmails; /** * Create a new controller instance. * * @return void */ public function __construct() { + $this->middleware('guest:user'); } + public function showLinkRequestForm() + { + return view('user.auth.passwords.email'); + } + protected function guard() + { + return \Auth::guard('user'); + } + public function broker() + { + return \Password::broker('users'); + } }ResetPasswordController.php
app/Http/Controllers/User/Auth/ResetPasswordController.php<?php +namespace App\Http\Controllers\User\Auth; use App\Http\Controllers\Controller; use Illuminate\Foundation\Auth\ResetsPasswords; +use Illuminate\Http\Request; class ResetPasswordController extends Controller { /* |-------------------------------------------------------------------------- | Password Reset Controller |-------------------------------------------------------------------------- | | This controller is responsible for handling password reset requests | and uses a simple trait to include this behavior. You're free to | explore this trait and override any methods you wish to tweak. | */ use ResetsPasswords; /** * Where to redirect users after resetting their password. * * @var string */ + protected $redirectTo = '/user/home'; /** * Create a new controller instance. * * @return void */ public function __construct() { + $this->middleware('guest:user'); } + public function showResetForm(Request $request, $token = null) + { + return view('user.auth.passwords.reset')->with(['token' => $token,'email' => $request->email]); + } + protected function guard() + { + return \Auth::guard('user'); + } + public function broker() + { + return \Password::broker('users'); + } }Views
email.blade.php
resources/views/user/auth/passwords/email.blade.php+@extends('layouts.user.app') @section('content') <div class="container"> <div class="row justify-content-center"> <div class="col-md-8"> <div class="card"> <div class="card-header">{{ __('Reset Password') }}</div> <div class="card-body"> @if (session('status')) <div class="alert alert-success" role="alert"> {{ session('status') }} </div> @endif + <form method="POST" action="{{ route('user.password.email') }}"> @csrf <div class="form-group row"> <label for="email" class="col-md-4 col-form-label text-md-right">{{ __('E-Mail Address') }}</label> <div class="col-md-6"> <input id="email" type="email" class="form-control{{ $errors->has('email') ? ' is-invalid' : '' }}" name="email" value="{{ old('email') }}" required> @if ($errors->has('email')) <span class="invalid-feedback" role="alert"> <strong>{{ $errors->first('email') }}</strong> </span> @endif </div> </div> <div class="form-group row mb-0"> <div class="col-md-6 offset-md-4"> <button type="submit" class="btn btn-primary"> {{ __('Send Password Reset Link') }} </button> </div> </div> </form> </div> </div> </div> </div> </div> @endsectionreset.blade.php
resources/views/user/auth/passwords/reset.blade.php+@extends('layouts.user.app') @section('content') <div class="container"> <div class="row justify-content-center"> <div class="col-md-8"> <div class="card"> <div class="card-header">{{ __('Reset Password') }}</div> <div class="card-body"> + <form method="POST" action="{{ route('user.password.update') }}"> @csrf <input type="hidden" name="token" value="{{ $token }}"> <div class="form-group row"> <label for="email" class="col-md-4 col-form-label text-md-right">{{ __('E-Mail Address') }}</label> <div class="col-md-6"> <input id="email" type="email" class="form-control{{ $errors->has('email') ? ' is-invalid' : '' }}" name="email" value="{{ $email ?? old('email') }}" required autofocus> @if ($errors->has('email')) <span class="invalid-feedback" role="alert"> <strong>{{ $errors->first('email') }}</strong> </span> @endif </div> </div> <div class="form-group row"> <label for="password" class="col-md-4 col-form-label text-md-right">{{ __('Password') }}</label> <div class="col-md-6"> <input id="password" type="password" class="form-control{{ $errors->has('password') ? ' is-invalid' : '' }}" name="password" required> @if ($errors->has('password')) <span class="invalid-feedback" role="alert"> <strong>{{ $errors->first('password') }}</strong> </span> @endif </div> </div> <div class="form-group row"> <label for="password-confirm" class="col-md-4 col-form-label text-md-right">{{ __('Confirm Password') }}</label> <div class="col-md-6"> <input id="password-confirm" type="password" class="form-control" name="password_confirmation" required> </div> </div> <div class="form-group row mb-0"> <div class="col-md-6 offset-md-4"> <button type="submit" class="btn btn-primary"> {{ __('Reset Password') }} </button> </div> </div> </form> </div> </div> </div> </div> </div> @endsectionルーティング
web.php
routes/web.php// User Route::group(['namespace' => 'User','prefix'=>'user'],function(){ Route::get('/',function(){ return redirect()->to('user/home'); })->name('user'); // home Route::get('home','HomeController@index')->name('user.home'); // login lgoout Route::get('login','Auth\LoginController@showLoginForm')->name('user.login'); Route::post('login','Auth\LoginController@login')->name('user.login'); Route::post('logout','Auth\LoginController@logout')->name('user.logout'); // register Route::get('register','Auth\RegisterController@showRegisterForm')->name('user.register'); Route::post('register','Auth\RegisterController@register')->name('user.register'); // emailverify Route::middleware('throttle:6,1')->get('email/resend','Auth\VerificationController@resend')->name('user.verification.resend'); Route::middleware('throttle:6,1')->get('email/verify','Auth\VerificationController@show')->name('user.verification.notice'); Route::middleware('signed')->get('email/verify/{id}','Auth\VerificationController@verify')->name('user.verification.verify'); + // password reset + Route::post('password/email','Auth\ForgotPasswordController@sendResetLinkEmail')->name('user.password.email'); + Route::post('password/reset','Auth\ResetPasswordController@reset')->name('user.password.request'); + Route::get('password/reset','Auth\ForgotPasswordController@showLinkRequestForm')->name('user.password.update'); + Route::get('password/reset/{token}','Auth\ResetPasswordController@showResetForm')->name('user.password.reset'); });送信機能のオーバーライド
UserPasswordResetNotification.phpを作ります。
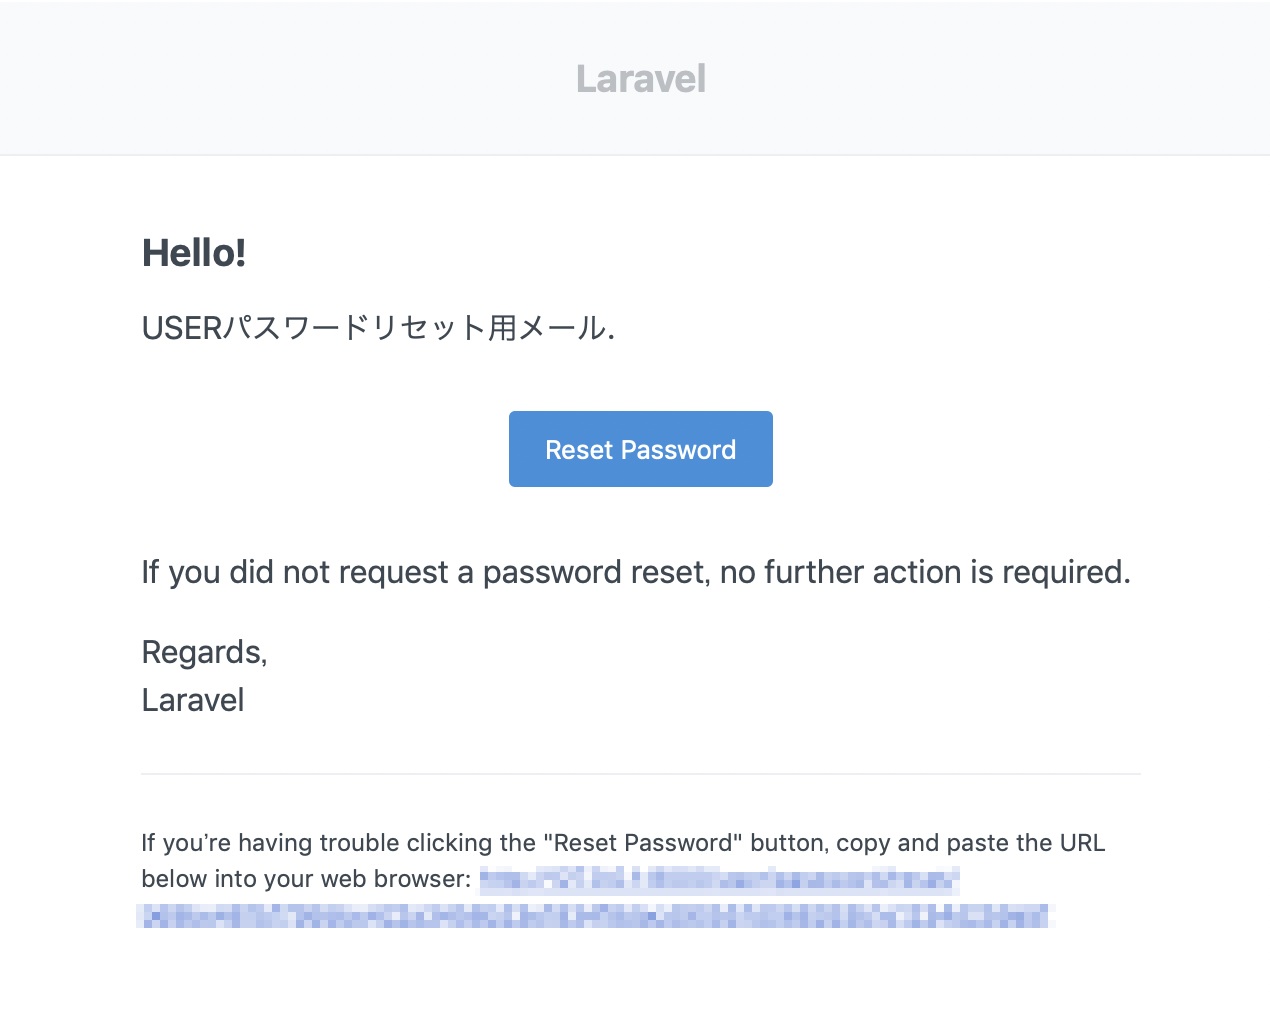
terminalphp artisan make:notification UserPasswordResetNotificationapp/Notifications/UserPasswordResetNotification.php<?php namespace App\Notifications; use Illuminate\Auth\Notifications\ResetPassword as ResetPasswordNotification; use Illuminate\Notifications\Messages\MailMessage; class UserPasswordResetNotification extends ResetPasswordNotification { public function toMail($notifiable) { return (new MailMessage) ->line('USERパスワードリセット用メール.') ->action('Reset Password', url(config('url').route('user.password.reset', $this->token, false))) ->line('If you did not request a password reset, no further action is required.'); } }User.phpの変更
UserPasswordResetNotificationがメールで送信されるようにModelに設定します。
app/User.php<?php namespace App; use Illuminate\Notifications\Notifiable; use Illuminate\Contracts\Auth\MustVerifyEmail; use Illuminate\Foundation\Auth\User as Authenticatable; +use App\Notifications\UserPasswordResetNotification; class User extends Authenticatable implements MustVerifyEmail { use Notifiable; /** * The attributes that are mass assignable. * * @var array */ protected $fillable = [ 'name', 'email', 'password', ]; /** * The attributes that should be hidden for arrays. * * @var array */ protected $hidden = [ 'password', 'remember_token', ]; + public function sendPasswordResetNotification($token) + { + $this->notify(new UserPasswordResetNotification($token)); + } }動作確認
http://127.0.0.1:8000/user/login
Adminと同じように動けばOKです。
メール内容
以上です。
- 投稿日:2019-02-28T12:06:13+09:00
【laravel5.7】 MultiAuthにEmailVerification
MultiAuthにEmailVerificationを対応させる実装メモ。
【laravel5.7】 MultiAuthログインの続きとして書きます。MultiAuthなしの実装メモは別記事で書いているので、参考になれば、、、
【laravel5.7】 Email Verificationの使い方やりたいこと
MultiAuth(Admin/User)のUserのみにEmail Verificationを対応させたい。
環境
MacOS 10.14.3
VisualStudio
laravel 5.7Email Verificationを使えるようにする
MustVerifyEmailの追加
app/User.php<?php namespace App; use Illuminate\Notifications\Notifiable; use Illuminate\Contracts\Auth\MustVerifyEmail; use Illuminate\Foundation\Auth\User as Authenticatable; +class User extends Authenticatable implements MustVerifyEmail {ルーティング設定
routes/web.php<?php /* |-------------------------------------------------------------------------- | Web Routes |-------------------------------------------------------------------------- | | Here is where you can register web routes for your application. These | routes are loaded by the RouteServiceProvider within a group which | contains the "web" middleware group. Now create something great! | */ use Illuminate\Http\Request; Route::get('/', function () { return view('welcome'); }); Auth::routes(); Route::get('/home', 'HomeController@index')->name('home'); // User Route::group(['namespace' => 'User','prefix'=>'user'],function(){ + Route::get('/',function(){ + return redirect()->to('user/home'); + })->name('user'); // home Route::get('home','HomeController@index')->name('user.home'); // login lgoout Route::get('login','Auth\LoginController@showLoginForm')->name('user.login'); Route::post('login','Auth\LoginController@login')->name('user.login'); Route::post('logout','Auth\LoginController@logout')->name('user.logout'); // register Route::get('register','Auth\RegisterController@showRegisterForm')->name('user.register'); Route::post('register','Auth\RegisterController@register')->name('user.register'); + // emailverify + Route::middleware('throttle:6,1')->get('email/resend','Auth\VerificationController@resend')->name('user.verification.resend'); + Route::middleware('throttle:6,1')->get('email/verify','Auth\VerificationController@show')->name('user.verification.notice'); + Route::middleware('signed')->get('email/verify/{id}','Auth\VerificationController@verify')->name('user.verification.verify'); }); // Admin 以下省略単体ログインのEmailVerificationの
Auth:routes(['verify'=>true]);を
MultiAuthでは上の(//emailverify以下の部分)のように一つずつ書いていきます。VerificationController.php
app/Http/Controllers/User/Auth/VerificationController.php<?php +namespace App\Http\Controllers\User\Auth; use App\Http\Controllers\Controller; use Illuminate\Foundation\Auth\VerifiesEmails; +use Illuminate\Http\Request; class VerificationController extends Controller { /* |-------------------------------------------------------------------------- | Email Verification Controller |-------------------------------------------------------------------------- | | This controller is responsible for handling email verification for any | user that recently registered with the application. Emails may also | be re-sent if the user didn't receive the original email message. | */ use VerifiesEmails; /** * Where to redirect users after verification. * * @var string */ + protected $redirectTo = '/user/home'; /** * Create a new controller instance. * * @return void */ public function __construct() { + $this->middleware('auth:user'); $this->middleware('signed')->only('verify'); $this->middleware('throttle:6,1')->only('verify', 'resend'); } + public function show(Request $request) + { + return $request->user()->hasVerifiedEmail() + ? redirect($this->redirectPath()) + : view('user.auth.verify'); + } }HomeController.php
app/Http/Controllers/User/HomeController.phppublic function __construct() { $this->middleware('auth:user'); + $this->middleware('allVerified'); }Middleware
AllEnsureEmailIsVerified.phpを作成します
terminalphp artisan make:middleware AllEnsureEmailIsVerifiedapp/Http/Middleware/AllEnsureEmailIsVerified.php<?php namespace App\Http\Middleware; use Closure; use Illuminate\Support\Facades\Redirect; use Illuminate\Contracts\Auth\MustVerifyEmail; use Illuminate\Support\Facades\Auth; class AllEnsureEmailIsVerified { /** * Handle an incoming request. * * @param \Illuminate\Http\Request $request * @param \Closure $next * @return mixed */ public function handle($request, Closure $next) { $guards = array_keys(config('auth.guards')); foreach($guards as $guard) { if($guard == 'user') { if (Auth::guard($guard)->check()) { if (! Auth::guard($guard)->user() || (Auth::guard($guard)->user() instanceof MustVerifyEmail && ! Auth::guard($guard)->user()->hasVerifiedEmail())) { // dd('ddd'); return $request->expectsJson() ? abort(403, 'Your email address is not verified.') : Redirect::route('user.verification.notice'); } } } } return $next($request); } }Kernel.php
app/Http/Kernel.phpprotected $routeMiddleware = [ 'auth' => \App\Http\Middleware\Authenticate::class, 'auth.basic' => \Illuminate\Auth\Middleware\AuthenticateWithBasicAuth::class, 'bindings' => \Illuminate\Routing\Middleware\SubstituteBindings::class, 'cache.headers' => \Illuminate\Http\Middleware\SetCacheHeaders::class, 'can' => \Illuminate\Auth\Middleware\Authorize::class, 'guest' => \App\Http\Middleware\RedirectIfAuthenticated::class, 'signed' => \Illuminate\Routing\Middleware\ValidateSignature::class, 'throttle' => \Illuminate\Routing\Middleware\ThrottleRequests::class, 'verified' => \Illuminate\Auth\Middleware\EnsureEmailIsVerified::class, + 'allVerified' => \App\Http\Middleware\AllEnsureEmailIsVerified::class, ];メール内容をカスタマイズ
Notificationsの作成
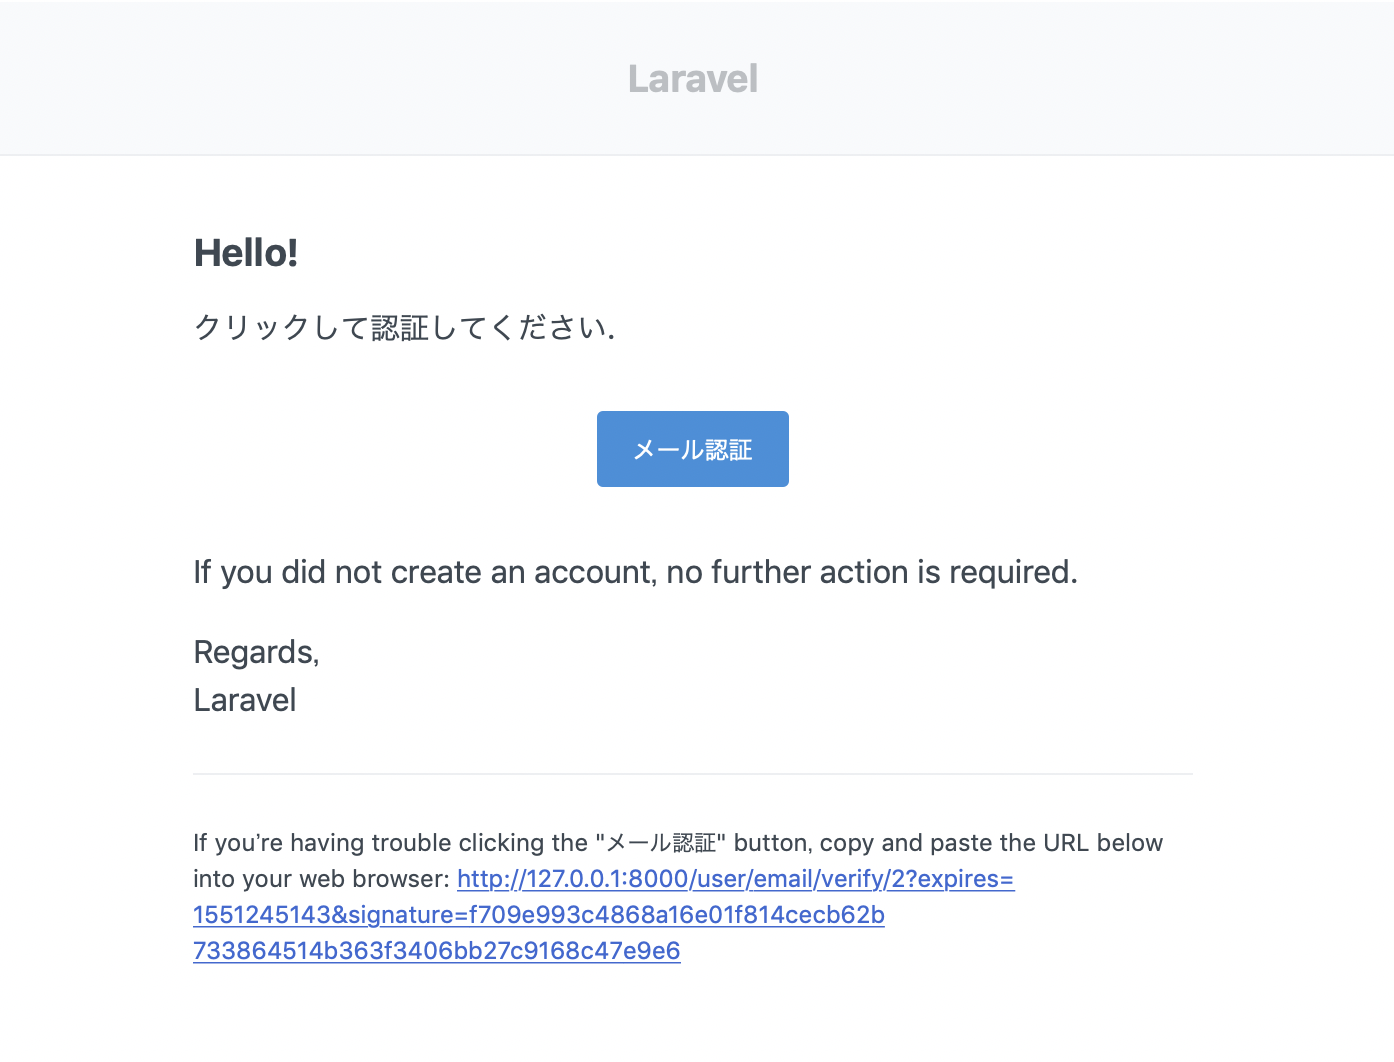
terminalphp artisan make:notification UserVerifyEmailNotificationapp/Notifications/UserVerifyEmailNotification.php<?php namespace App\Notifications; use Illuminate\Auth\Notifications\VerifyEmail as VerifyEmailNotification; use Illuminate\Notifications\Messages\MailMessage; use Illuminate\Support\Carbon; use Illuminate\Support\Facades\URL; use Illuminate\Support\Facades\Lang; class UserVerifyEmailNotification extends VerifyEmailNotification { public function toMail($notifiable) { if (static::$toMailCallback) { return call_user_func(static::$toMailCallback, $notifiable); } return (new MailMessage) ->subject(Lang::getFromJson('USERメール確認')) ->line(Lang::getFromJson('クリックして認証してください.')) ->action( Lang::getFromJson('メール認証'), $this->verificationUrl($notifiable) ) ->line(Lang::getFromJson('もしこのメールに覚えが無い場合は破棄してください。')); } protected function verificationUrl($notifiable) { return URL::temporarySignedRoute( 'user.verification.verify', Carbon::now()->addMinutes(60), ['id' => $notifiable->getKey()] ); } }User.php
UserVerifyEmailNotificationがメールで送信されるようにModelに設定します。
app/User.php<?php namespace App; use Illuminate\Notifications\Notifiable; use Illuminate\Contracts\Auth\MustVerifyEmail; use Illuminate\Foundation\Auth\User as Authenticatable; +use App\Notifications\UserVerifyEmailNotification; class User extends Authenticatable implements MustVerifyEmail { use Notifiable; /** * The attributes that are mass assignable. * * @var array */ protected $fillable = [ 'name', 'email', 'password', ]; /** * The attributes that should be hidden for arrays. * * @var array */ protected $hidden = [ 'password', 'remember_token', ]; + public function sendEmailVerificationNotification() + { + $this->notify(new UserVerifyEmailNotification); + } }動作確認
User
http://127.0.0.1:8000/user/register から新しくアカウントを登録します。web上
登録したメールアドレス
メール認証ボタンクリックすると、
こうなれば成功です。
まだ英語の部分があるので、その辺の設定は後々設定しようと思います。Adminでも実装したい場合はこれと同様に編集すればOK。
とりあえず以上です。
- 投稿日:2019-02-28T12:06:13+09:00
【laravel5.7】 MultiAuthにEmailVerificationを対応させる
MultiAuthにEmailVerificationを対応させる実装メモ。
【laravel5.7】 MultiAuthログインの続きとして書きます。MultiAuthなしの実装メモは別記事で書いているので、参考になれば、、、
【laravel5.7】 Email Verificationの使い方やりたいこと
MultiAuth(Admin/User)のUserのみにEmail Verificationを対応させたい。
環境
MacOS 10.14.3
VisualStudio
laravel 5.7Email Verificationを使えるようにする
MustVerifyEmailの追加
app/User.php<?php namespace App; use Illuminate\Notifications\Notifiable; use Illuminate\Contracts\Auth\MustVerifyEmail; use Illuminate\Foundation\Auth\User as Authenticatable; +class User extends Authenticatable implements MustVerifyEmail {ルーティング設定
routes/web.php<?php /* |-------------------------------------------------------------------------- | Web Routes |-------------------------------------------------------------------------- | | Here is where you can register web routes for your application. These | routes are loaded by the RouteServiceProvider within a group which | contains the "web" middleware group. Now create something great! | */ use Illuminate\Http\Request; Route::get('/', function () { return view('welcome'); }); Auth::routes(); Route::get('/home', 'HomeController@index')->name('home'); // User Route::group(['namespace' => 'User','prefix'=>'user'],function(){ + Route::get('/',function(){ + return redirect()->to('user/home'); + })->name('user'); // home Route::get('home','HomeController@index')->name('user.home'); // login lgoout Route::get('login','Auth\LoginController@showLoginForm')->name('user.login'); Route::post('login','Auth\LoginController@login')->name('user.login'); Route::post('logout','Auth\LoginController@logout')->name('user.logout'); // register Route::get('register','Auth\RegisterController@showRegisterForm')->name('user.register'); Route::post('register','Auth\RegisterController@register')->name('user.register'); + // emailverify + Route::middleware('throttle:6,1')->get('email/resend','Auth\VerificationController@resend')->name('user.verification.resend'); + Route::middleware('throttle:6,1')->get('email/verify','Auth\VerificationController@show')->name('user.verification.notice'); + Route::middleware('signed')->get('email/verify/{id}','Auth\VerificationController@verify')->name('user.verification.verify'); }); // Admin 以下省略単体ログインのEmailVerificationの
Auth:routes(['verify'=>true]);を
MultiAuthでは上の(//emailverify以下の部分)のように一つずつ書いていきます。VerificationController.php
app/Http/Controllers/User/Auth/VerificationController.php<?php +namespace App\Http\Controllers\User\Auth; use App\Http\Controllers\Controller; use Illuminate\Foundation\Auth\VerifiesEmails; +use Illuminate\Http\Request; class VerificationController extends Controller { /* |-------------------------------------------------------------------------- | Email Verification Controller |-------------------------------------------------------------------------- | | This controller is responsible for handling email verification for any | user that recently registered with the application. Emails may also | be re-sent if the user didn't receive the original email message. | */ use VerifiesEmails; /** * Where to redirect users after verification. * * @var string */ + protected $redirectTo = '/user/home'; /** * Create a new controller instance. * * @return void */ public function __construct() { + $this->middleware('auth:user'); $this->middleware('signed')->only('verify'); $this->middleware('throttle:6,1')->only('verify', 'resend'); } + public function show(Request $request) + { + return $request->user()->hasVerifiedEmail() + ? redirect($this->redirectPath()) + : view('user.auth.verify'); + } }HomeController.php
app/Http/Controllers/User/HomeController.phppublic function __construct() { $this->middleware('auth:user'); + $this->middleware('allVerified'); }Middleware
AllEnsureEmailIsVerified.phpを作成します
terminalphp artisan make:middleware AllEnsureEmailIsVerifiedapp/Http/Middleware/AllEnsureEmailIsVerified.php<?php namespace App\Http\Middleware; use Closure; use Illuminate\Support\Facades\Redirect; use Illuminate\Contracts\Auth\MustVerifyEmail; use Illuminate\Support\Facades\Auth; class AllEnsureEmailIsVerified { /** * Handle an incoming request. * * @param \Illuminate\Http\Request $request * @param \Closure $next * @return mixed */ public function handle($request, Closure $next) { $guards = array_keys(config('auth.guards')); foreach($guards as $guard) { if($guard == 'user') { if (Auth::guard($guard)->check()) { if (! Auth::guard($guard)->user() || (Auth::guard($guard)->user() instanceof MustVerifyEmail && ! Auth::guard($guard)->user()->hasVerifiedEmail())) { // dd('ddd'); return $request->expectsJson() ? abort(403, 'Your email address is not verified.') : Redirect::route('user.verification.notice'); } } } } return $next($request); } }Kernel.php
app/Http/Kernel.phpprotected $routeMiddleware = [ 'auth' => \App\Http\Middleware\Authenticate::class, 'auth.basic' => \Illuminate\Auth\Middleware\AuthenticateWithBasicAuth::class, 'bindings' => \Illuminate\Routing\Middleware\SubstituteBindings::class, 'cache.headers' => \Illuminate\Http\Middleware\SetCacheHeaders::class, 'can' => \Illuminate\Auth\Middleware\Authorize::class, 'guest' => \App\Http\Middleware\RedirectIfAuthenticated::class, 'signed' => \Illuminate\Routing\Middleware\ValidateSignature::class, 'throttle' => \Illuminate\Routing\Middleware\ThrottleRequests::class, 'verified' => \Illuminate\Auth\Middleware\EnsureEmailIsVerified::class, + 'allVerified' => \App\Http\Middleware\AllEnsureEmailIsVerified::class, ];verify.blade.php
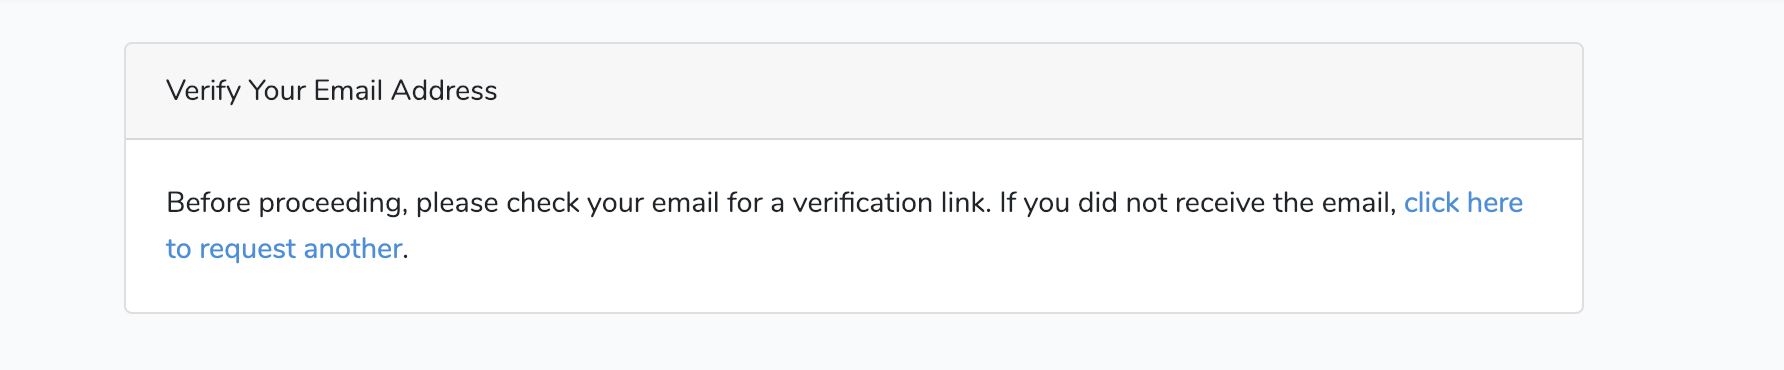
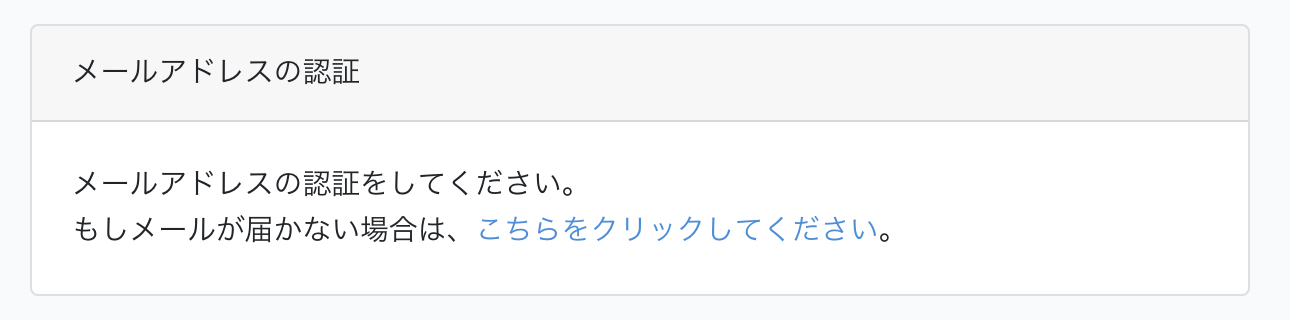
views/user/auth/verify.blade.php+@extends('layouts.user.app') @section('content') <div class="container"> <div class="row justify-content-center"> <div class="col-md-8"> <div class="card"> <div class="card-header">{{ __('メールアドレスの認証') }}</div> <div class="card-body"> @if (session('resent')) <div class="alert alert-success" role="alert"> {{ __('認証メールを再送信しました。') }} </div> @endif {{ __('メールアドレスの認証をしてください。') }} + {{ __('もしメールを受け取ってないなら、<a href="{{ route('user.verification.resend') }}">ここをクリックしてください</a>。') }} </div> </div> </div> </div> </div> @endsectionメール内容をカスタマイズ
Notificationsの作成
terminalphp artisan make:notification UserVerifyEmailNotificationapp/Notifications/UserVerifyEmailNotification.php<?php namespace App\Notifications; use Illuminate\Auth\Notifications\VerifyEmail as VerifyEmailNotification; use Illuminate\Notifications\Messages\MailMessage; use Illuminate\Support\Carbon; use Illuminate\Support\Facades\URL; use Illuminate\Support\Facades\Lang; class UserVerifyEmailNotification extends VerifyEmailNotification { public function toMail($notifiable) { if (static::$toMailCallback) { return call_user_func(static::$toMailCallback, $notifiable); } return (new MailMessage) ->subject(Lang::getFromJson('USERメール確認')) ->line(Lang::getFromJson('クリックして認証してください.')) ->action( Lang::getFromJson('メール認証'), $this->verificationUrl($notifiable) ) ->line(Lang::getFromJson('もしこのメールに覚えが無い場合は破棄してください。')); } protected function verificationUrl($notifiable) { return URL::temporarySignedRoute( 'user.verification.verify', Carbon::now()->addMinutes(60), ['id' => $notifiable->getKey()] ); } }User.php
UserVerifyEmailNotificationがメールで送信されるようにModelに設定します。
app/User.php<?php namespace App; use Illuminate\Notifications\Notifiable; use Illuminate\Contracts\Auth\MustVerifyEmail; use Illuminate\Foundation\Auth\User as Authenticatable; +use App\Notifications\UserVerifyEmailNotification; class User extends Authenticatable implements MustVerifyEmail { use Notifiable; /** * The attributes that are mass assignable. * * @var array */ protected $fillable = [ 'name', 'email', 'password', ]; /** * The attributes that should be hidden for arrays. * * @var array */ protected $hidden = [ 'password', 'remember_token', ]; + public function sendEmailVerificationNotification() + { + $this->notify(new UserVerifyEmailNotification); + } }動作確認
User
http://127.0.0.1:8000/user/register から新しくアカウントを登録します。web
登録したメールアドレス
メール認証ボタンクリックすると、
こうなれば成功です。
まだ英語の部分があるので、その辺の設定は後々設定しようと思います。Adminでも実装したい場合はこれと同様に編集すればOK。
とりあえず以上です。

- 投稿日:2019-02-28T11:41:51+09:00
【php/Laravel】Carbon使って「来月の今日」を求めたいのです
Carbonとは
まず公式をお読みください。
https://carbon.nesbot.com/よくわからん、という場合はこの記事自体読む必要ないと思いますけど、ググって実際の利用ケースを参照してもらうと良いと思います。
何が便利なのか
phpの組み込み関数だけで日付計算しようとすると、結構煩雑な記述になって、後から見た時何しようとしてんのかわからん、っていうのが一番の問題ですよね。
たとえば、1836年1月3日に生まれた坂本龍馬が今生きてたら何歳かな?とか計算しようとしたら・・・誕生日の計算$birthday = "1836-01-03"; // なんかデータベースにでも入ってると仮定して : : $now = date('Ymd'); $bd = date('Ymd', strtotime($birthday)); $age = floor(($now-$bd)/10000); # [結果] # => 183.0のようになります。
特にこの、floor(($now-$bd)/10000)とかの計算部分がよくわからんですね。
こんなもん標準の関数で用意しとけ、て思うくらいの定型文。
なので、これをCarbon使ってやるとCarbonで誕生日から年齢計算use Carbon\Carbon; : $birthday = "1836-01-03"; : $age = Carbon::parse($birthday)->age; # [結果] # => 183なんと、日付から生成したオブジェクトのageプロパティにアクセスしたら、自動的に年齢が取れてしまいました。
こういう細かく行き届いた機能が山のように用意されています。
便利ですね!これまで(個人的に)問題だったこと
実務でlaravelを使ってシステム組んでいて、日付計算にcarbonを使うようになってずいぶんコード量もバグも減ったと思うのですが、1個だけどうしても解決できない面倒な記述があったのです。
それは 来月 の日付取得。
普通に考えれば、「来月の今日」をもってこようと思ったら
来月の今日$raigetu = Carbon::addMonth()->toDateString();みたいな感じでいい気がしますか?
では1月31日にこうやって日付取り出したらどうなりますか?
やってみてください。うるう年かどうかによりますが、3月2日か3日が返ってきますね。
全然来月じゃない。
こんなロジックで請求書なんか出すシステム組んだ日にはえらいこっちゃですね。
通常、運用的にはこういう場合は翌月の最終日を返してほしいのです。私は通常
来月の今日(2)raigetu = date('Y-m-', strtotime('+1 month', strtotime(date('Y-m-01')))) . date('d');みたいなややこしい書き方をしてました。Carbonのソースコード読むまでは。
このへんは人によっていろんなやり方があると思いますけど、月末で計算するから日数によって月またいだりいろいろしちゃうのであって、1日で計算したら問題ないでしょ?っていうやりかたです。
自分的には定型文ですが、他の人が見たら「なんじゃこりゃ」ってなりかねません。でもCarbonのドキュメント読んでいてもそれっぽい機能が見当たらない。
で、仕方ないのでソースコード詠みこんでみたんですが、なんだかあっさりそれっぽいのが見つかりました。
その名も
addMonthNoOverflowaddMonthNoOverflow の使い方
って程の事はないです。
Carbon// 今日が 1/31だと仮定して、翌月の今日を求めたい場合 $raigetu = Carbon::now()->addMonthNoOverflow()->toDateString(); # [結果] # => "2019-02-28" $raigetu = Carbon::parse("2019-03-31")->addMonthNoOverflow()->toDateString(); #[結果] # => "2019-04-30" // 1か月以上加算したいときは // Carbon::addMonthsNoOverflow(int) // をつかいます。 $hantosi = Carbon::parse("2019-03-31")->addMonthsNoOverflow(6)->toDateString(); #[結果] # => "2019-09-30"あらまぁ・・・便利ですわね、奥さん!
ロジック的には、普通にaddMonthしてから、元の「日」と計算後の「日」が違ったら計算後の日付の「前月の最終日」を返す、っていう組み方みたいです。
速度的なロスを考えると、なんとか1行で書いてしまおうとしている私のやり方よりも賢いかもしれません。何より読みやすいし。というわけで、ますます Carbon万歳 っていう流れになりましたね。
というところで、また次回!
- 投稿日:2019-02-28T10:04:14+09:00
Laravel で外部キー制約の onDelete / onUpdate をマイグレーション後に設定する + 論理削除でハマったこと
やりたいこと
CompanyとEmployeeのように親子関係にあるテーブルを作成employeeテーブルにcompany_idという外部キーを設定- その後、
onDeleteonUpdateに対する挙動を設定し忘れたことに気づいたので後から設定をしたいマイグレーションファイル
- companies
timestamp_create_companies_table.phpclass CreateCompanyTable extends Migration { /** * Run the migrations. * * @return void */ public function up() { Schema::create('companies', function (Blueprint $table) { $table->increments('id'); $table->string('name'); $table->timestamps(); $table->softDeletes(); }); } /** * Reverse the migrations. * * @return void */ public function down() { Schema::dropIfExists('company'); } }
- employee
timestamp_create_employee_table.phpclass CreateEmployeeTable extends Migration { /** * Run the migrations. * * @return void */ public function up() { Schema::create('employee', function (Blueprint $table) { $table->increments('id'); $table->string('name')->nullable(); $table->integer('company_id')->unsigned(); $table->foreign('company_id')->references('id')->on('companies'); $table->timestamps(); $table->softDeletes(); }); } /** * Reverse the migrations. * * @return void */ public function down() { Schema::dropIfExists('employee'); } }マイグレーションは問題なくて、その後も色々なテーブルを追加していった後、onDelete / onUpdate の設定ができていないことに気づいて、「全部ロールバックするのも気が重いし、一部分だけ弄れないかな…」と逡巡して以下の方法を取った。
やったこと
あまりお行儀がよくないかもしれないが、
employeeテーブルのcompany_idだけを drop するマイグレーションファイルを作り、php artisan migrateを実行。
その後外部キー制約を再設定するマイグレーションファイルを作って、同様にphp artisan migrate。
- 外部キーを一旦Drop
timestamp_drop_foreign_key_from_employee.phpclass DropForeignKeyFromEmployee extends Migration { /** * Run the migrations. * * @return void */ public function up() { //外部キー制約を引き剥がす時は dropForeign('テーブル名'_'外部キー名'_foreign); Schema::table('employee', function (Blueprint $table) { $table->dropForeign('employee_company_id_foreign'); }); } }timestamp_reset_foreign_key_to_employee.phppublic function up() { //子テーブルに対象レコードがある場合、親テーブルのレコード削除を禁止 ->onDelete('restrict'); //親テーブルのレコード更新は許可 ->onUpdate('cascade'); Schema::table('employee', function (Blueprint $table) { $table->index('company_id'); $table->foreign('company_id')->references('id')->on('companies') ->onDelete('restrict') ->onUpdate('cascade'); }); } /** * Reverse the migrations. * * @return void */ public function down() { Schema::table('employee', function (Blueprint $table) { $table->dropForeign('employee_company_id_foreign'); }); }問題点
このやり方だとロールバックした時に
DropForeignKeyFromEmployeeエラーで怒られる。なので、最初からなるべくテーブル作成時に onDelete / onUpdate の条件は慎重に考えて設定した方がいい。うまく後付けで設定できる方法があればコメントで教えていただきたいです。個人的に思いつくのがMySQLのコマンドで直接テーブルを書き換える手段だけなので…その他ハマったこと
onDelete('restrict')を設定したあと、Laravel アプリケーションからCompany::destroyで実際に削除を試してみたところ、なんと制約に引っかからず普通に削除できてしまった…
どうやらuse SoftDeleteで論理削除をさせている場合、物理削除と違ってdeleted_atにタイムスタンプを書き込むだけなので制約をすり抜けてしまうらしい…。早めに知っておきたかった。
- 投稿日:2019-02-28T08:35:26+09:00
Laravel の tinker で日本語が入力できなくて困ったけどなんとかなった話
TL;DR
手元(?) の Amazon Linux 2 や CentOS 7 でのこと。
Laravel の tinker 1 含む psysh 2 や PHP の対話シェル 3 などで日本語入力ができなかった。
libedit を新しいものに差し替えて解消した。
おわり

環境
環境1(CentOS7)$ cat /etc/redhat-release CentOS Linux release 7.6.1810 (Core) $ php -v PHP 7.2.10 (cli) (built: Sep 11 2018 11:22:20) ( NTS ) Copyright (c) 1997-2018 The PHP Group Zend Engine v3.2.0, Copyright (c) 1998-2018 Zend Technologies with Zend OPcache v7.2.10, Copyright (c) 1999-2018, by Zend Technologies $ php artisan --version Laravel Framework 5.5.44環境2(AmazonLinux2)$ cat /etc/system-release Amazon Linux release 2 (Karoo) $ php -v PHP 7.2.15 (cli) (built: Feb 7 2019 20:10:03) ( NTS ) Copyright (c) 1997-2018 The PHP Group Zend Engine v3.2.0, Copyright (c) 1998-2018 Zend Technologies with Zend OPcache v7.2.15, Copyright (c) 1999-2018, by Zend Technologies $ php artisan --version Laravel Framework 5.5.44発生事象
echo '日清どん兵衛';を実行したいが、
入力しても、コピー&ペーストしても日本語文字列が消えてしまう。対話シェル$ php -a Interactive shell php > echo '';psysh$ php artisan tinker Psy Shell v0.9.9 (PHP 7.2.14 — cli) by Justin Hileman >>> echo '';タブ補完やヒストリは機能する。
ターミナルや php.ini の設定を疑ったが、特段問題はなかった。
調査
$ php artisan tinker --quiet
>>> readline_info();
=> [
     "line_buffer" => "readline_info();\n",
     "point" => 0,
     "end" => 0,
     "library_version" => "EditLine wrapper",
     "readline_name" => "",
     "attempted_completion_over" => 0,
   ]
$ yum info -q libedit.x86_64 # 略 $ ldd `which php` | perl -nwlE'/(.*libedit\.so.\d+)/&&say$1' libedit.so.0 => /lib64/libedit.so.0 $ file /lib64/libedit.so.0 /lib64/libedit.so.0: symbolic link to `libedit.so.0.0.42'(´・ω・`)
libedit 更新
もしもインストールしていなければ、先に
gccやncurses-devel4 を導入する。$ sudo yum install -y gcc.x86_64 $ sudo yum install -y ncurses-devel.x86_64Editline Library (libedit) からソースコードを入手し、コンパイルする。
$ wget https://www.thrysoee.dk/editline/libedit-20181209-3.1.tar.gz $ tar zxvf libedit-20181209-3.1.tar.gz $ cd libedit-20181209-3.1/ $ ./configure $ make $ sudo cp -i ./src/.libs/libedit.so.0.0.59 /lib64/rootで作業(雑)# cd /lib64/ # unlink libedit.so.0 # ln -s libedit.so.0.0.59 libedit.so.0確認
対話シェル$ php -a Interactive shell php > echo '日清どん兵衛'; 日清どん兵衛psysh$ php artisan tinker -q >>> echo '日清どん兵衛'; 日清どん兵衛⏎(๑•̀ㅂ•́)و✧
完走した感想
Google 先生に訊いても同様の事象で困っている人はいないし、
古いバージョンの PHP や、 mbstring や readline が無いといったもの、Windows での話や ターミナルの設定の話などが沢山ヒットし、正解にたどり着けずに困りました。
参考と注釈