- 投稿日:2020-10-22T23:34:07+09:00
Goでローカルサーバーを立てた~ファイルダウンロード~
初めに
Androidアプリからリクエストを投げて、GoでWebServerを立てたローカルサーバー上のファイルをダウンロードする
環境
PC Windows10
Android Studio 4.0
Kotlin 1.3.72
Android端末 Emulator(API Level 29)
Go 1.11.1構成図
Androidアプリからファイル名を指定して、サーバー側にリクエスト、サーバー側に保存されているファイルとステータスコードを返却実装
ローカルサーバー
Server.gopackage controllers import ( "fmt" "io/ioutil" "net/http" "os" "strconv" "strings" ) func apiSampleHandler(w http.ResponseWriter, r *http.Request) { switch r.Method { case "POST": fmt.Println("POST") case "GET": // GETのリクエストでファイルDL fmt.Println("GET") name := fmt.Sprint(r.URL) // 「/ファイル名」を取得 fileName := strings.SplitAfter(name, "/")[1] // 「ファイル名」を取得 // ファイルがサーバー側に存在するかのチェック if fileinfo, err := os.Stat("./" + fileName); os.IsNotExist(err) || fileinfo.IsDir() { fmt.Println("file is not exist") w.WriteHeader(http.StatusNotFound) return } buf, err := ioutil.ReadFile("./" + fileName) // ファイル読み出し if err != nil { fmt.Println("file could not be read") w.WriteHeader(http.StatusInternalServerError) return } w.Write(buf) // レスポンスに書き込む } w.WriteHeader(http.StatusOK) } // main.goから呼び出してサーバーを起動 func StartWebServer() error { http.HandleFunc("/", apiSampleHandler) return http.ListenAndServe(":8080", nil) }main.goを実行し、サーバーを起動
http://localhost:8080 にアクセスして、サーバーが起動していることを確認ファイルを準備
ダウンロードする用のファイルをmain.goと同じディレクトリに配置Android アプリ
1.Androidmanifest.xml
インターネットにアクセスするためのPermissionを定義
AndroidManifest.xml<uses-permission android:name="android.permission.INTERNET" />Android 9.0からhttpの通信の設定がOFFになるので
usesCleartextTraficをtrueに設定AndroidManifest.xml<application 省略 android:usesCleartextTraffic="true"> <activity android:name=".MainActivity"> 省略 </activity> </application>2.サーバーアクセス
http通信でサーバーにGETでアクセスする
Net.ktfun requestFileDownload(context: Context, requestUrl: String, fileName: String): Int { val url = URL("$requestUrl/$fileName.txt") // URLオブジェクト生成 // UrlConnectionオブジェクト生成 val urlConnection = url.openConnection() as HttpURLConnection var result = "" var responseCode = 0 try { urlConnection.requestMethod = "GET" // POST, GETなど urlConnection.doInput = true // レスポンスボディの受信 urlConnection.useCaches = false // キャッシュの利用 urlConnection.connect() // コネクションを確立 responseCode = urlConnection.responseCode // レスポンスコードを取得 when (responseCode) { HttpURLConnection.HTTP_OK -> { // レスポンスコードが200:OKの時だけ処理 val path = context.filesDir.toString() + "/" + fileName + FILE_EXPAND // レスポンスの内容を読み出す DataInputStream(urlConnection.inputStream).use { fileInputStream -> // ファイルを作成し書き込む DataOutputStream(BufferedOutputStream(FileOutputStream(path))).use { val buffer = ByteArray(BUFFER_SIZE) var byteRead: Int do { byteRead = fileInputStream.read(buffer) if (byteRead == -1) { break } it.write(buffer, 0, byteRead) } while (true) } } } } } catch (e: Exception) { Log.e("Net", "#startConnection$e") } finally { urlConnection.disconnect() } return responseCode } }3.IPアドレスの確認
アクセスしたいサーバー(PC)のIPアドレスをcommand promptで以下を実行し確認
>ipconfig4.PCとAndroid端末を同一のネットワーク環境に接続
5.Androidにて接続
Net#requestFileDownloadのrequestUrlにhttp://{確認したIPアドレス}:8080を設定
Net#requestFileDownloadのfileNameにダウンロードするファイル名を設定し実行ファイルのダウンロードを確認
アプリ固有領域(
/data/data/{package_name}/files配下)にファイルが生成されていることを確認
Device File Explorer でデバイス上のファイルを表示する最後に
全体ソースはこちら
アクセス先やRequestMethod、ファイル名はアプリで動的に変更できるようにしています。サーバーへのファイルアップロードはこちら
参考文献
Goサーバー側
Package http
Go言語 (golang) ファイル・ディレクトリの存在チェック
[Golang] ファイル読み込みサンプルAndroidアプリ側


- 投稿日:2020-10-22T23:12:22+09:00
MediaCodecのencode
- 投稿日:2020-10-22T21:25:31+09:00
#14 Kotlin Koans Conventions/In range 解説
1 はじめに
Kotlin公式リファレンスのKotlin Koans/In rangeの解説記事です。
Kotlin Koansを通してKotlinを学習される人の参考になれば幸いです。
ただし、リファレンスを自力で読む力を養いたい方は、
すぐにこの記事に目を通さないで下さい!一度各自で挑戦してから、お目通し頂ければと思います
2 contains()関数
a in bとういう表現でb.contains(a)のように使用します。3 Conventions/In rangeの解説
Kotlin Koans Conventions/In rangeの解説です。
随時本サイトの内容を引用させていただきます。右側の本文を見てみましょう。
In Kotlin in checks are translated to the corresponding contains calls:
val list = listOf("a", "b")
"a" in list  // list.contains("a")
"a" !in list // !list.contains("a")
Read about ranges. Add a method fun contains(d: MyDate) to the class DateRange to allow in checks with a range of dates.
左側のコードとMyDate.ktファイルのコードを見てみましょう。
In_rangeclass DateRange(val start: MyDate, val endInclusive: MyDate)/* TODO */ fun checkInRange(date: MyDate, first: MyDate, last: MyDate): Boolean { return date in DateRange(first, last) }MyDate.ktdata class MyDate(val year: Int, val month: Int, val dayOfMonth: Int) : Comparable<MyDate> { override fun compareTo(other:MyDate) = when{ year != other.year -> year - other.year month != other.month -> month - other.month else -> dayOfMonth - other.dayOfMonth } }checkInRange()関数を呼び出す際に、MyDate型のインスタンスを3個渡し、
dateがfirstとlastの間の日付であることを確認するようコードを実装しましょう。return date in DateRange(first, last)DateRange(first,last)の部分で、
プロパティstartにfirstが、endInclusiveにlastが代入された
DateRange型のインスタンスが生成されています。
(start/first/endInclusive/lastはすべてMyDate型)DateRange(first,last)はcontains()を呼び出す際に、引数としてdateを渡します。
なので、TODOの部分の実装は、
first <= date <= lastの大小関係を表現すればよいです。
したがって、TODOの箇所を実装した解答は
contains()関数を利用した以下のようになります。In_rangeclass DateRange(val start: MyDate, val endInclusive: MyDate){ operator fun contains(item: MyDate): Boolean = start <= item && item <= endInclusive } fun checkInRange(date: MyDate, first: MyDate, last: MyDate): Boolean { return date in DateRange(first, last) }4 最後に
次回はKotlin Koans Conventions/Range toの解説をします
- 投稿日:2020-10-22T20:38:04+09:00
#14 Kotlin Koans Conventions/In range 解説
1 はじめに
Kotlin公式リファレンスのKotlin Koans/In rangeの解説記事です。
Kotlin Koansを通してKotlinを学習される人の参考になれば幸いです。
ただし、リファレンスを自力で読む力を養いたい方は、
すぐにこの記事に目を通さないで下さい!一度各自で挑戦してから、お目通し頂ければと思います
2 rangeTo()関数とcontains()関数
Operator overloading
いずれもoperator修飾子がついた関数です。
a .. bという表現でa.rangeTo(b)のように使用します。
a in bとういう表現でb.contains(a)のように使用します。3 Conventions/In rangeの解説
Kotlin Koans Conventions/In rangeの解説です。
随時本サイトの内容を引用させていただきます。右側の本文を見てみましょう。
Implement the function MyDate.rangeTo(). This allows you to create a range of dates using the following syntax:
MyDate(2015, 5, 11)..MyDate(2015, 5, 12)Note that now the class DateRange implements the standard ClosedRange interface and inherits contains method implementation.
左側のコードとMyDate.ktファイルのコードを見てみましょう。
Range_tooperator fun MyDate.rangeTo(other: MyDate) = TODO() class DateRange(override val start: MyDate, override val endInclusive: MyDate): ClosedRange<MyDate> fun checkInRange(date: MyDate, first: MyDate, last: MyDate): Boolean { return date in first..last }MyDate.ktoperator fun MyDate.rangeTo(other: MyDate) = TODO() class DateRange(override val start: MyDate, override val endInclusive: MyDate): ClosedRange<MyDate> fun checkInRange(date: MyDate, first: MyDate, last: MyDate): Boolean { return date in first..last }MyDate.ktファイルのcheckInRange()にMyDate型のインスタンス3個を引数として渡して、
dateがfirstとlastの間の日付であるか確認できるよう実装しましょう。MyDate型の引数3個を渡して、checkInRange()関数を呼び出すと、以下の戻り値が返ってきます。
return date in first..last
first .. lastはfirst.rangeTo(last)を意味するので、この部分にrangeTo()の戻り値が返ってきます。なので、
return date in (rangeTo()の戻り値)といった状況になります。
date in (rangeTo()の戻り値)は(rangeTO()の戻り値).contains(date)を意味します。contains()関数は特にoverrideして自身で実装する必要がないので公式リファレンスのものをそのまま利用します(ClosedRange)。
公式リファレンスによると、呼び出し元のインスタンスが、引数の範囲にあるかに応じて真偽値を返すとあります。
つまり、dateが(rangeTo()の戻り値)の範囲内かどうかを判定します。
ですので(rangeTo()の戻り値)はMyDate型の範囲のはずです。
MyDate型の範囲を表現するのに、2つのプロパティがそれぞれMyDate型のDateRangeインスタンスを利用します。
したがって、TODOの部分の実装した解答は
Range_tooperator fun MyDate.rangeTo(other: MyDate) = DateRange(this,other) class DateRange(override val start: MyDate, override val endInclusive: MyDate): ClosedRange<MyDate> fun checkInRange(date: MyDate, first: MyDate, last: MyDate): Boolean { return date in first..last }のようになります。
(※)thisはrangeTO()関数を呼び出したインスタンス(この問題の場合、first)を意味しています。
4 最後に
次回はKotlin Koans Conventions/Range toの解説をします
- 投稿日:2020-10-22T20:38:04+09:00
#15 Kotlin Koans Conventions/Range to 解説
1 はじめに
Kotlin公式リファレンスのKotlin Koans/Rnage toの解説記事です。
Kotlin Koansを通してKotlinを学習される人の参考になれば幸いです。
ただし、リファレンスを自力で読む力を養いたい方は、
すぐにこの記事に目を通さないで下さい!一度各自で挑戦してから、お目通し頂ければと思います
2 rangeTo()関数とcontains()関数
Operator overloading
いずれもoperator修飾子がついた関数です。
a .. bという表現でa.rangeTo(b)のように使用します。
a in bとういう表現でb.contains(a)のように使用します。3 Conventions/Range toの解説
Kotlin Koans Conventions/Range toの解説です。
随時本サイトの内容を引用させていただきます。右側の本文を見てみましょう。
Implement the function MyDate.rangeTo(). This allows you to create a range of dates using the following syntax:
MyDate(2015, 5, 11)..MyDate(2015, 5, 12)Note that now the class DateRange implements the standard ClosedRange interface and inherits contains method implementation.
左側のコードとMyDate.ktファイルのコードを見てみましょう。
Range_tooperator fun MyDate.rangeTo(other: MyDate) = TODO() class DateRange(override val start: MyDate, override val endInclusive: MyDate): ClosedRange<MyDate> fun checkInRange(date: MyDate, first: MyDate, last: MyDate): Boolean { return date in first..last }MyDate.ktdata class MyDate(val year: Int, val month: Int, val dayOfMonth: Int) : Comparable<MyDate> { override fun compareTo(other:MyDate) = when{ year != other.year -> year - other.year month != other.month -> month - other.month else -> dayOfMonth - other.dayOfMonth } }MyDate.ktファイルのcheckInRange()にMyDate型のインスタンス3個を引数として渡して、
dateがfirstとlastの間の日付であるか確認できるよう実装しましょう。MyDate型の引数3個を渡して、checkInRange()関数を呼び出すと、以下の戻り値が返ってきます。
return date in first..last
first .. lastはfirst.rangeTo(last)を意味するので、この部分にrangeTo()の戻り値が返ってきます。なので、
return date in (rangeTo()の戻り値)といった状況になります。
date in (rangeTo()の戻り値)は(rangeTO()の戻り値).contains(date)を意味します。contains()関数は特にoverrideして自身で実装する必要がないので公式リファレンスのものをそのまま利用します(ClosedRange)。
公式リファレンスによると、呼び出し元のインスタンスが、引数の範囲にあるかに応じて真偽値を返すとあります。
つまり、dateが(rangeTo()の戻り値)の範囲内かどうかを判定します。
ですので(rangeTo()の戻り値)はMyDate型の範囲のはずです。
MyDate型の範囲を表現するのに、2つのプロパティがそれぞれMyDate型のDateRangeインスタンスを利用します。
したがって、TODOの部分の実装した解答は
Range_tooperator fun MyDate.rangeTo(other: MyDate) = DateRange(this,other) class DateRange(override val start: MyDate, override val endInclusive: MyDate): ClosedRange<MyDate> fun checkInRange(date: MyDate, first: MyDate, last: MyDate): Boolean { return date in first..last }のようになります。
(※)thisはrangeTO()関数を呼び出したインスタンス(この問題の場合、first)を意味しています。
4 最後に
次回はKotlin Koans Conventions/For loopの解説をします
- 投稿日:2020-10-22T19:29:17+09:00
Android Expand Horizontallyはみだしちゃう
Codelabs for Android Developer Fundamentals 1.2 Part B: The layout editor
を進めていて、あれうまくいかない言われた通りにやってるんだけどな〜 たぶん
これはConstraintLayoutに関するものです。
問題点
期待する結果
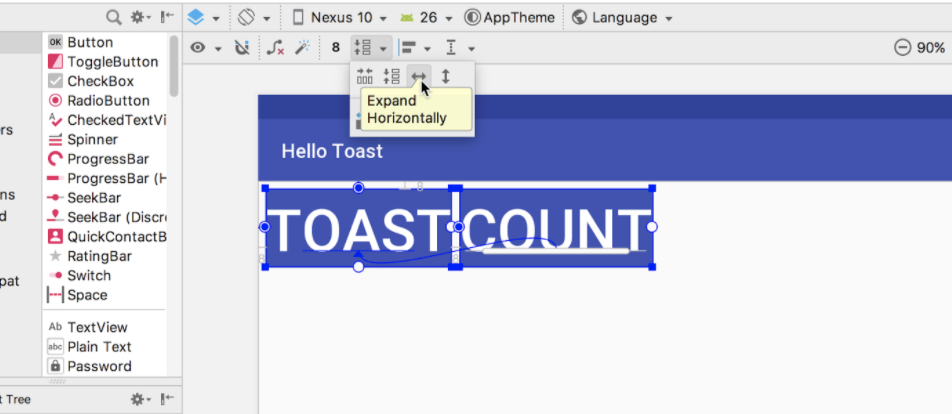
2つのButtonを選択した状態でツールバーのExpand Horizontallyをクリックすると
均等に配置されるよ。と言うもの
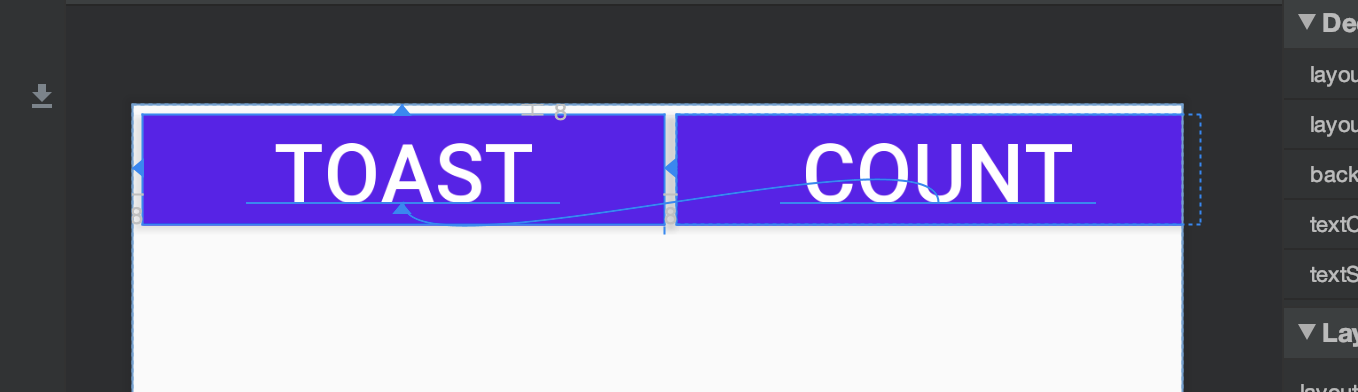
現状
COUNTボタンがはみ出ちゃう..
Expand HorizontallyをクリックすることでXMLファイルはどのように変化しているのか
クリック前
activity_main.xml<Button android:id="@+id/button_toast" android:layout_width="wrap_content" android:layout_height="wrap_content" android:layout_marginStart="8dp" android:layout_marginLeft="8dp" android:layout_marginTop="8dp" android:background="@color/colorPrimary" android:onClick="showToast" android:text="@string/button_label_toast" android:textColor="@android:color/white" android:textSize="60sp" app:layout_constraintStart_toStartOf="parent" app:layout_constraintTop_toTopOf="parent" /> <Button android:id="@+id/button_count" android:layout_width="wrap_content" android:layout_height="wrap_content" android:layout_marginStart="8dp" android:layout_marginLeft="8dp" android:background="@color/colorPrimary" android:onClick="countUp" android:text="@string/button_label_count" android:textColor="@android:color/white" android:textSize="60sp" app:layout_constraintBaseline_toBaselineOf="@+id/button_toast" app:layout_constraintStart_toEndOf="@+id/button_toast" />クリック後
activity_main.xml<Button android:id="@+id/button_toast" android:layout_width="382dp" android:layout_height="wrap_content" android:layout_marginStart="8dp" android:layout_marginLeft="8dp" android:layout_marginTop="8dp" android:background="@color/colorPrimary" android:onClick="showToast" android:text="@string/button_label_toast" android:textColor="@android:color/white" android:textSize="60sp" app:layout_constraintStart_toStartOf="parent" app:layout_constraintTop_toTopOf="parent" /> <Button android:id="@+id/button_count" android:layout_width="383dp" android:layout_height="wrap_content" android:layout_marginStart="8dp" android:layout_marginLeft="8dp" android:background="@color/colorPrimary" android:onClick="countUp" android:text="@string/button_label_count" android:textColor="@android:color/white" android:textSize="60sp" app:layout_constraintBaseline_toBaselineOf="@+id/button_toast" app:layout_constraintStart_toEndOf="@+id/button_toast" />デカデカと書いたけど、要するに、
layout_widthに値が入っただけ です
特に新しい行は増えてないみたい。行っていうか制約かな。
しかも382dp と 383dp で同じサイズでも無い解決策
とりあえず
Expand Horizontallyをクリックすることをやめる以下の記事を参考にしました。
[Android] ConstraintLayout レイアウト逆引きまとめ
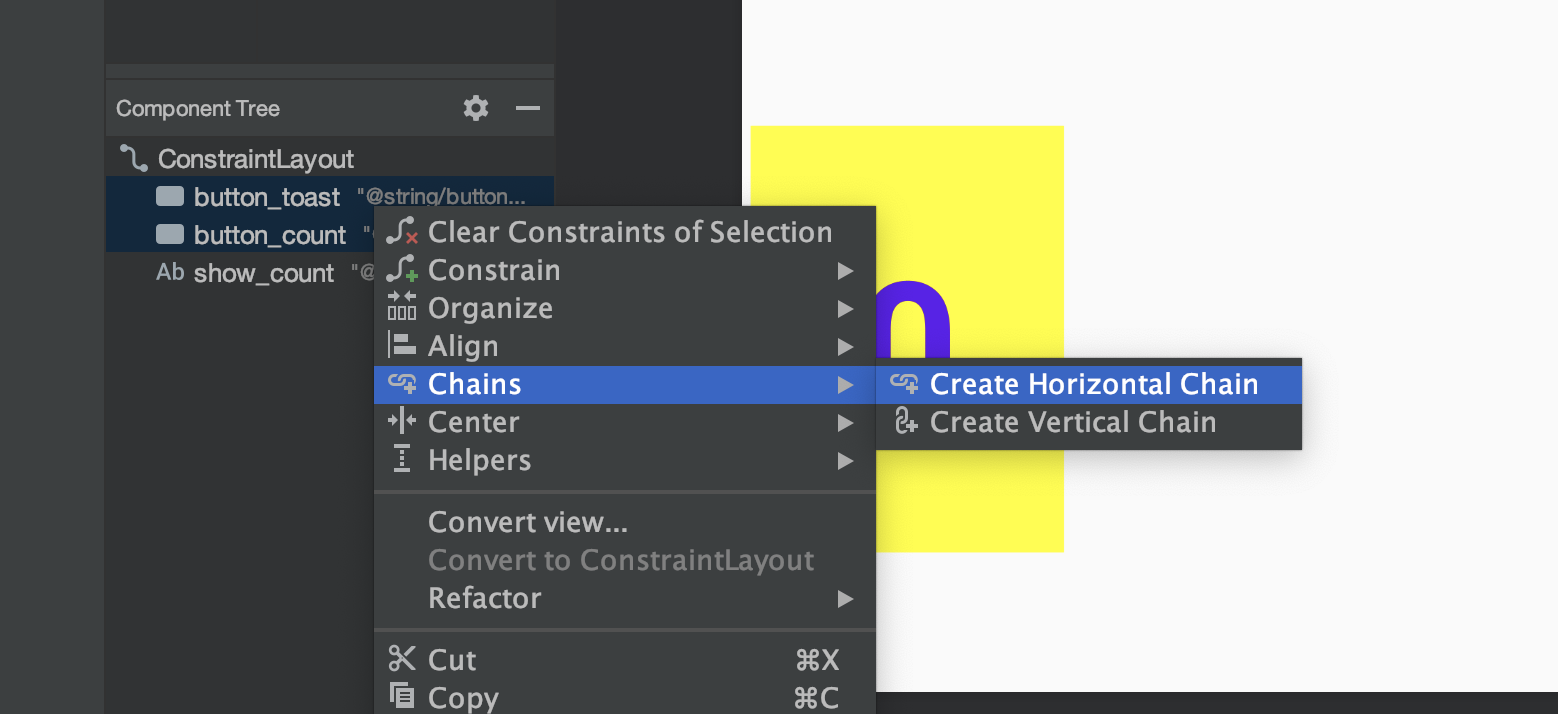
初めてのConstraintLayoutでChainStyleを利用してみたつまるところChainを使うといいみたい
(1) ふたつのButtonを選択して、Create Horizontal Chain
(2) ふたつのButtonのXMLを
android:layout_width="0dp"に変更片方のButtonのXMLに
app:layout_constraintHorizontal_chainStyle="spread"を指定するactivity_main.xml<Button android:id="@+id/button_toast" android:layout_width="0dp" android:layout_height="wrap_content" android:layout_marginStart="8dp" android:layout_marginLeft="8dp" android:layout_marginTop="8dp" android:background="@color/colorPrimary" android:onClick="showToast" android:text="@string/button_label_toast" android:textColor="@android:color/white" android:textSize="60sp" app:layout_constraintStart_toStartOf="parent" app:layout_constraintTop_toTopOf="parent" app:layout_constraintHorizontal_chainStyle="spread"/> <Button android:id="@+id/button_count" android:layout_width="0dp" android:layout_height="wrap_content" android:layout_marginStart="8dp" android:layout_marginLeft="8dp" android:background="@color/colorPrimary" android:onClick="countUp" android:text="@string/button_label_count" android:textColor="@android:color/white" android:textSize="60sp" app:layout_constraintBaseline_toBaselineOf="@+id/button_toast" app:layout_constraintStart_toEndOf="@+id/button_toast" />すると、
惜しい!!!!
あとはCOUNTボタンに
android:layout_marginEnd="8dp"
android:layout_marginRight="8dp"
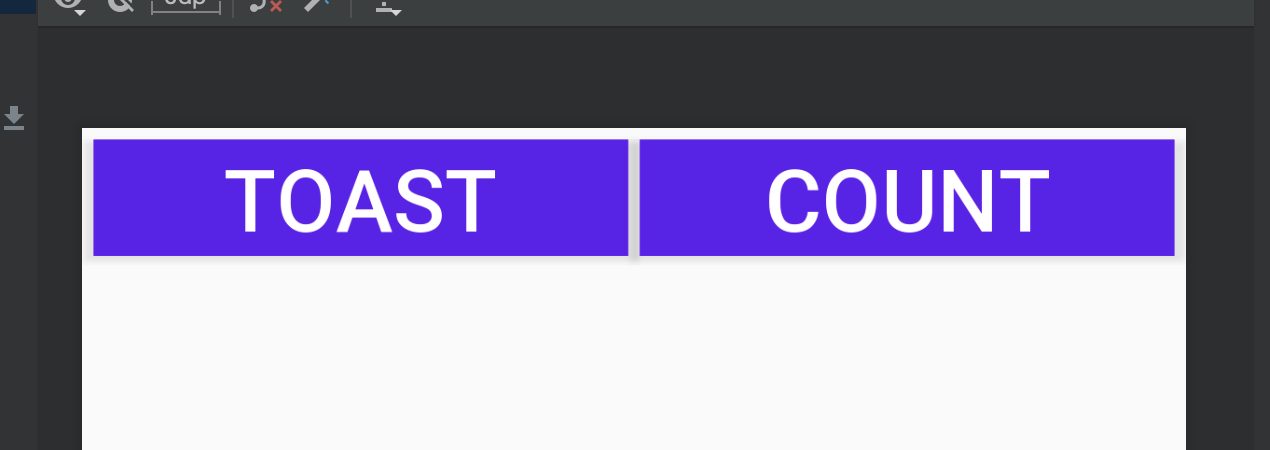
の制約をつけてあげると、
うまいこといきました
やっぱりXMLでいじるのが大事ですねー


- 投稿日:2020-10-22T19:21:52+09:00
#13 Kotlin Koans Conventions/Comparison 解説
1 はじめに
Kotlin公式リファレンスのKotlin Koans/Comparisonの解説記事です。
Kotlin Koansを通してKotlinを学習される人の参考になれば幸いです。
ただし、リファレンスを自力で読む力を養いたい方は、
すぐにこの記事に目を通さないで下さい!一度各自で挑戦してから、お目通し頂ければと思います
2 Operator overloading
まずは、公式リファレンスの例から見てみましょう。
data class Point(val x: Int, val y: Int)

operator fun Point.unaryMinus() = Point(-x, -y)

val point = Point(10, 20)

fun main() {
   println(-point)
}
実行結果は、
Print(x = -10,y = -20)となります。順を追って説明していきます。
まず、3行目の変数pointに
x = 10、y = 20のプロパティを持ったPointインスタンスが代入されます。次にmain()関数内の
-pointが実行されます。-pointはpoint.unaryMinus()を意味します。operator修飾子がついたunaryMinus()が呼び出され、
x = -10、y = -20のプロパティを持ったPointインスタンスが呼び出しもとに返ってきます。戻り値のインスタンスを
println()で表示するとPoint(x = -10,y = -20)となります。
(インスタンスの情報(プロパティの内容)が人間が見てわかるように表示されているのは、Pointクラスにdata修飾子がついているからです。詳しくは#6 Kotlin Koans Introduction/Data classes 解説の参考を御覧ください。)
要点は、
-pointはpoint.unaryMinus()を意味します。の箇所です。
-a(aは任意のインスタンス)という表現はa.unaryMinus()を意味します。ただこれを成立させるには、operator修飾子を関数名の前に置く必要があります。
これにはどういったメリットがあるのでしょうか??
それは、上記の例のように関数unaryMinus()の内容を自由に実装できる点にあります。
今回は
operator fun Point.unaryMinus() = Point(-x, -y)のように実装しましたが、仮にPointインスタンスがx,yに加えz(Int型)というプロパティを持っていれば、
operator fun Point.unaryMinus() = Point(-x, -y, -z)のように実装することも可能です。
Operator overloadingには様々なバリエーションが存在するので、是非Operator overloadingを参考に調べて見てください。
3 Conventions/Comparisonの解説
Kotlin Koans Conventions/Comparisonの解説です。
随時本サイトの内容を引用させていただきます。右側の本文を見てみましょう。
Read about operator overloading to learn how different conventions for operations like ==, <, + work in Kotlin. Add the function compareTo to the class MyDate to make it comparable. After that the code below date1 < date2 will start to compile.
In Kotlin when you override a member, the modifier override is mandatory.
左側のkotlinのコード見てみましょう。
data class MyDate(val year: Int, val month: Int, val dayOfMonth: Int) : Comparable<MyDate> {
    /* TODO */
}

fun compare(date1: MyDate, date2: MyDate) = date1 < date2
MyDateクラスはComparableクラスを継承しているので、
compareTo()関数をoverrideできます。compareTo()関数は、
abstract operator fun compareTo(other: T): Intこのように
operator修飾子がついて定義されています。また、Operator overloadingにあるように、
a < bがa.compareTo(b) < 0を意味します。
a < bがこの問題ではdate1 < date2に相当します。つまりcompare()関数を呼び出す際、引数にMyDate型のインスタンスを2個渡します。
MyDateクラスのcompareTo()関数内で2個のMyDate型のインスタンスの大きさを比較した結果がcompare()関数に返って来ます。
その結果が0以下ならばfalse、0より大きければtrueをcompare()関数の呼び出しもとに返します。最後にcompareTo()の戻り値の実装を考えましょう。
2個のMyDate型インスタンスのプロパティyear/month/dayOfMonthを順に比較して、異なればその時点で差をcompare()関数に返すようにしましょう。
compareTo()の戻り値の実装は以下のようになります。
override fun compareTo(other:MyDate) = when{
        //yearの比較。yearの値が異なれば、その差をcompare()に返す。
        year != other.year -> year - other.year
     //monthの比較。monthの値が異なれば、その差をcompare()に返す。
        month != other.month -> month - other.month
        //dayOfMonthの差をcompare()に返す。
        else -> dayOfMonth - other.dayOfMonth
}
4 最後に
次回はKotlin Koans Conventions/In rangeの解説をします
- 投稿日:2020-10-22T19:13:59+09:00
HMSアプリ開発コンテストでHMSを理解しよう
HMSアプリ開発コンテスト
最近HMSアプリ開発は勢いを増しています。現在すでに170ヶ国以上HMSが利用できるようになり、6万個以上のアプリがHMSを利用しており、140万人のHMS開発者がいます。
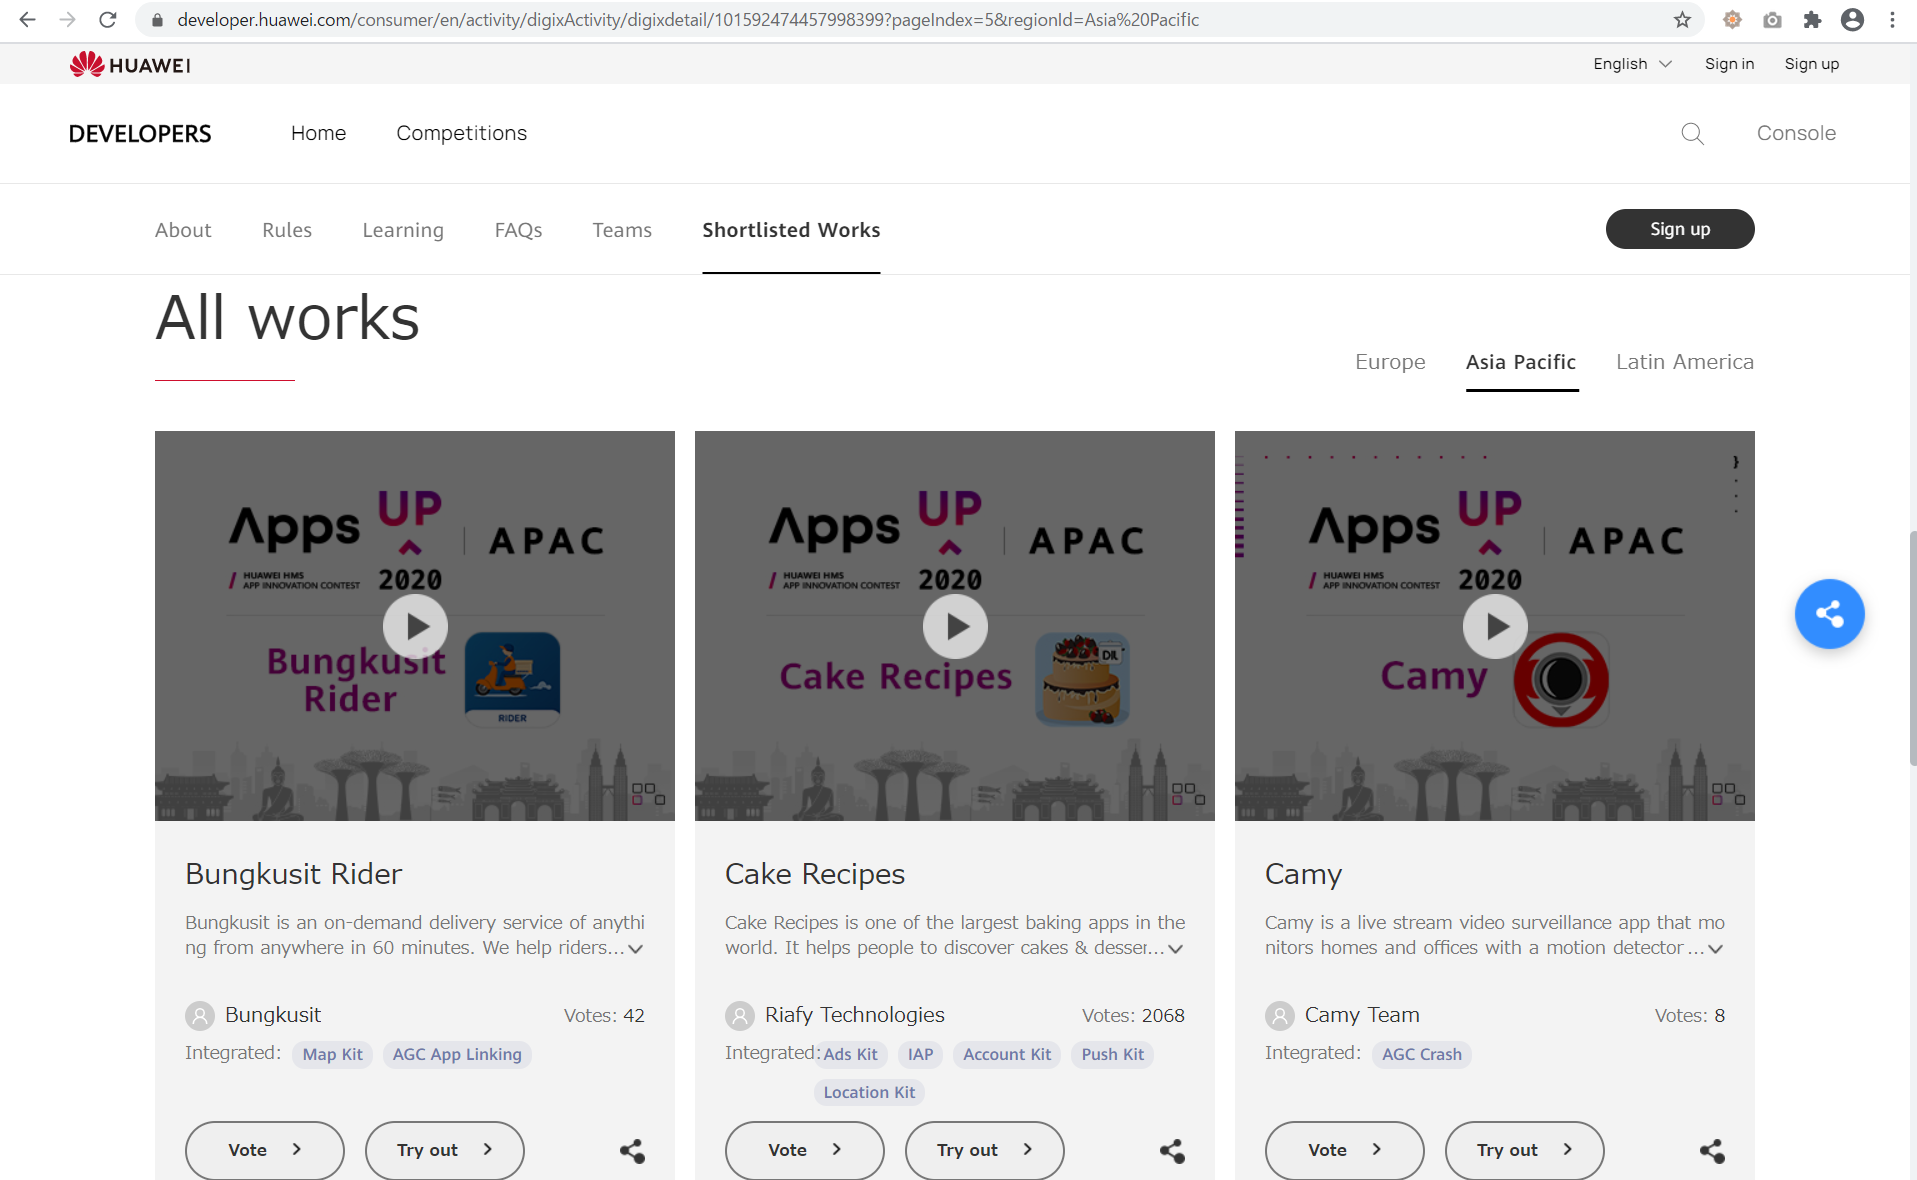
また、つい最近ファーウェイはHuawei HMS App Innovation Contestを開催しました。多くの開発者がこのHMSアプリ開発コンテストに参加しました。現在、HMSアプリの受付がすでに締め切られましたが、アプリ公開と公開投票フェーズに入りました。
このコンテストでは二つうれしいことがあります。一つはHMSのポテンシャルを知ることです。もう一つは投票に参加すれば、アマゾンギフト券がもらえる可能性があることです。
Huawei HMS App Innovation Contest:https://developer.huawei.com/consumer/en/activity/digixActivity/digixdetail/101592474457998399?pageIndex=5®ionId=Asia%20Pacific
1.HMSアプリの学習
HMSアプリの開発において、GMSを使わずにHMSのみ使う場合、開発がどこまでできるか、その品質がどうなるかと考える開発者は少なくないでしょう。
もしHMSのオフィシャルサイトをお読みになれば、まず次のことがわかると思います。
- GoogleアカウントはHMS Account Kitで代用できる
- Google MapはHMS Map Kitで代用できる
- Google LocationはHMS Location Kitで代用できる
- Googleアプリ内購入はHMS In-App Purchasesで代用できる
- Google FirebaseはAppGallery ConnectやAnalytics Kitで代用できる
- Google広告はHMS Ads Kitで代用できる
- GoogleのFirebase Cloud MessagingはHMS Push Kitで代用できる
- GoogleのFirebase ML KitはHMS ML Kitで代用できる
- などなど
自分で手を動かしてHMSキットを使ってみて、HMSのポテンシャルを体験するのがベストですが、時間がない方なら、すでにあるHMSアプリを体験したほうが、HMSのポテンシャルを直感的に理解できると思います。今回のHuawei HMS App Innovation Contestはまさによいチャンスです。
赤い枠はそのアプリが使っているHMSキットです。Try outボタンを押してアプリをHMS端末にインストールして体験してみてください。
2.ラッキーくじでアマゾンギフト券をゲット
期間限定になりますが、2020年11月5日までHMSアプリの投票が開催されます。投票すれば、USD$25のアマゾンギフト券が抽選で当たります。
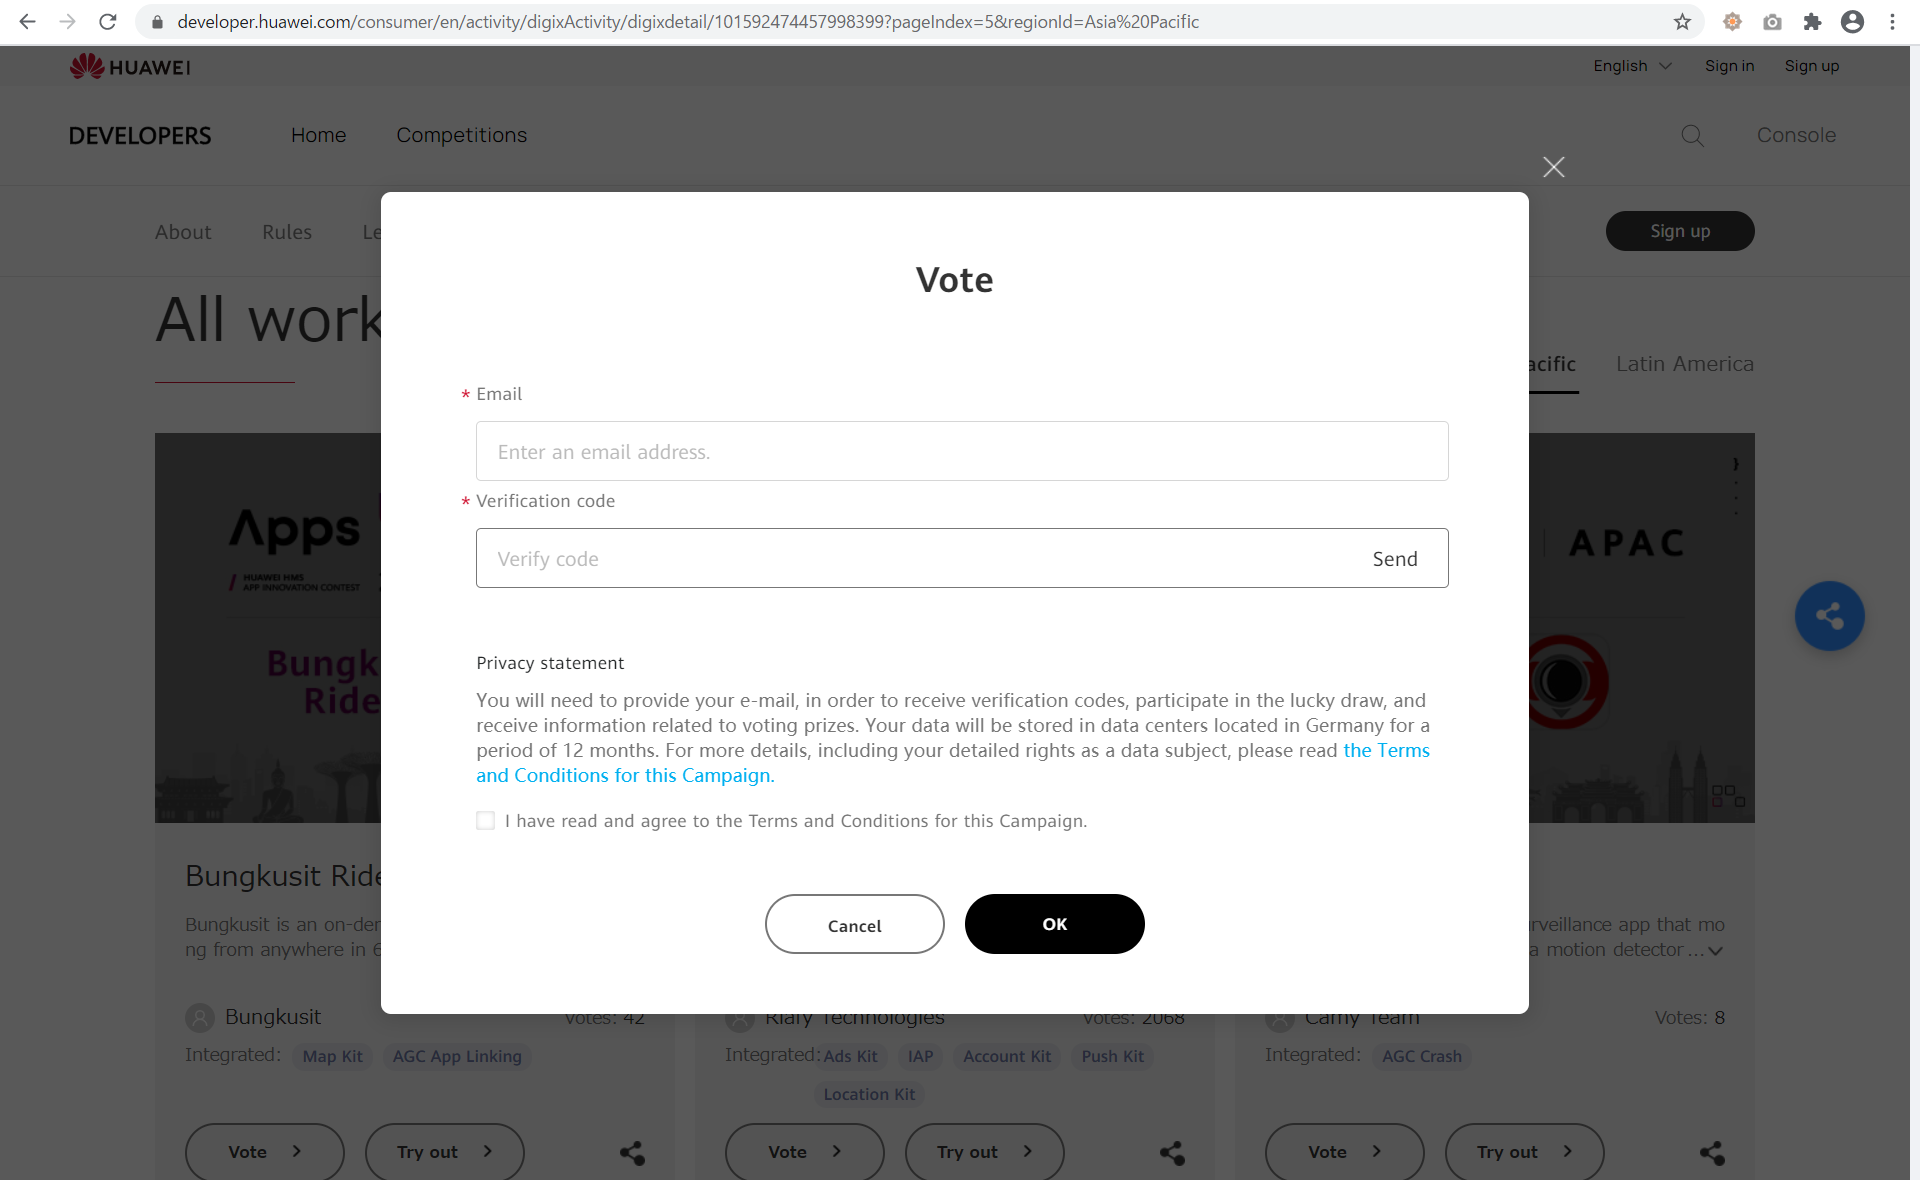
まずターゲットアプリのVoteボタンを押します。
次はメールアドレスを入れて、Sendボタンを押します。Verification codeが載っているメールが送られます。そのコードをVerification codeに入れて、チェックボックスをチェックして、OKボタンを押します。
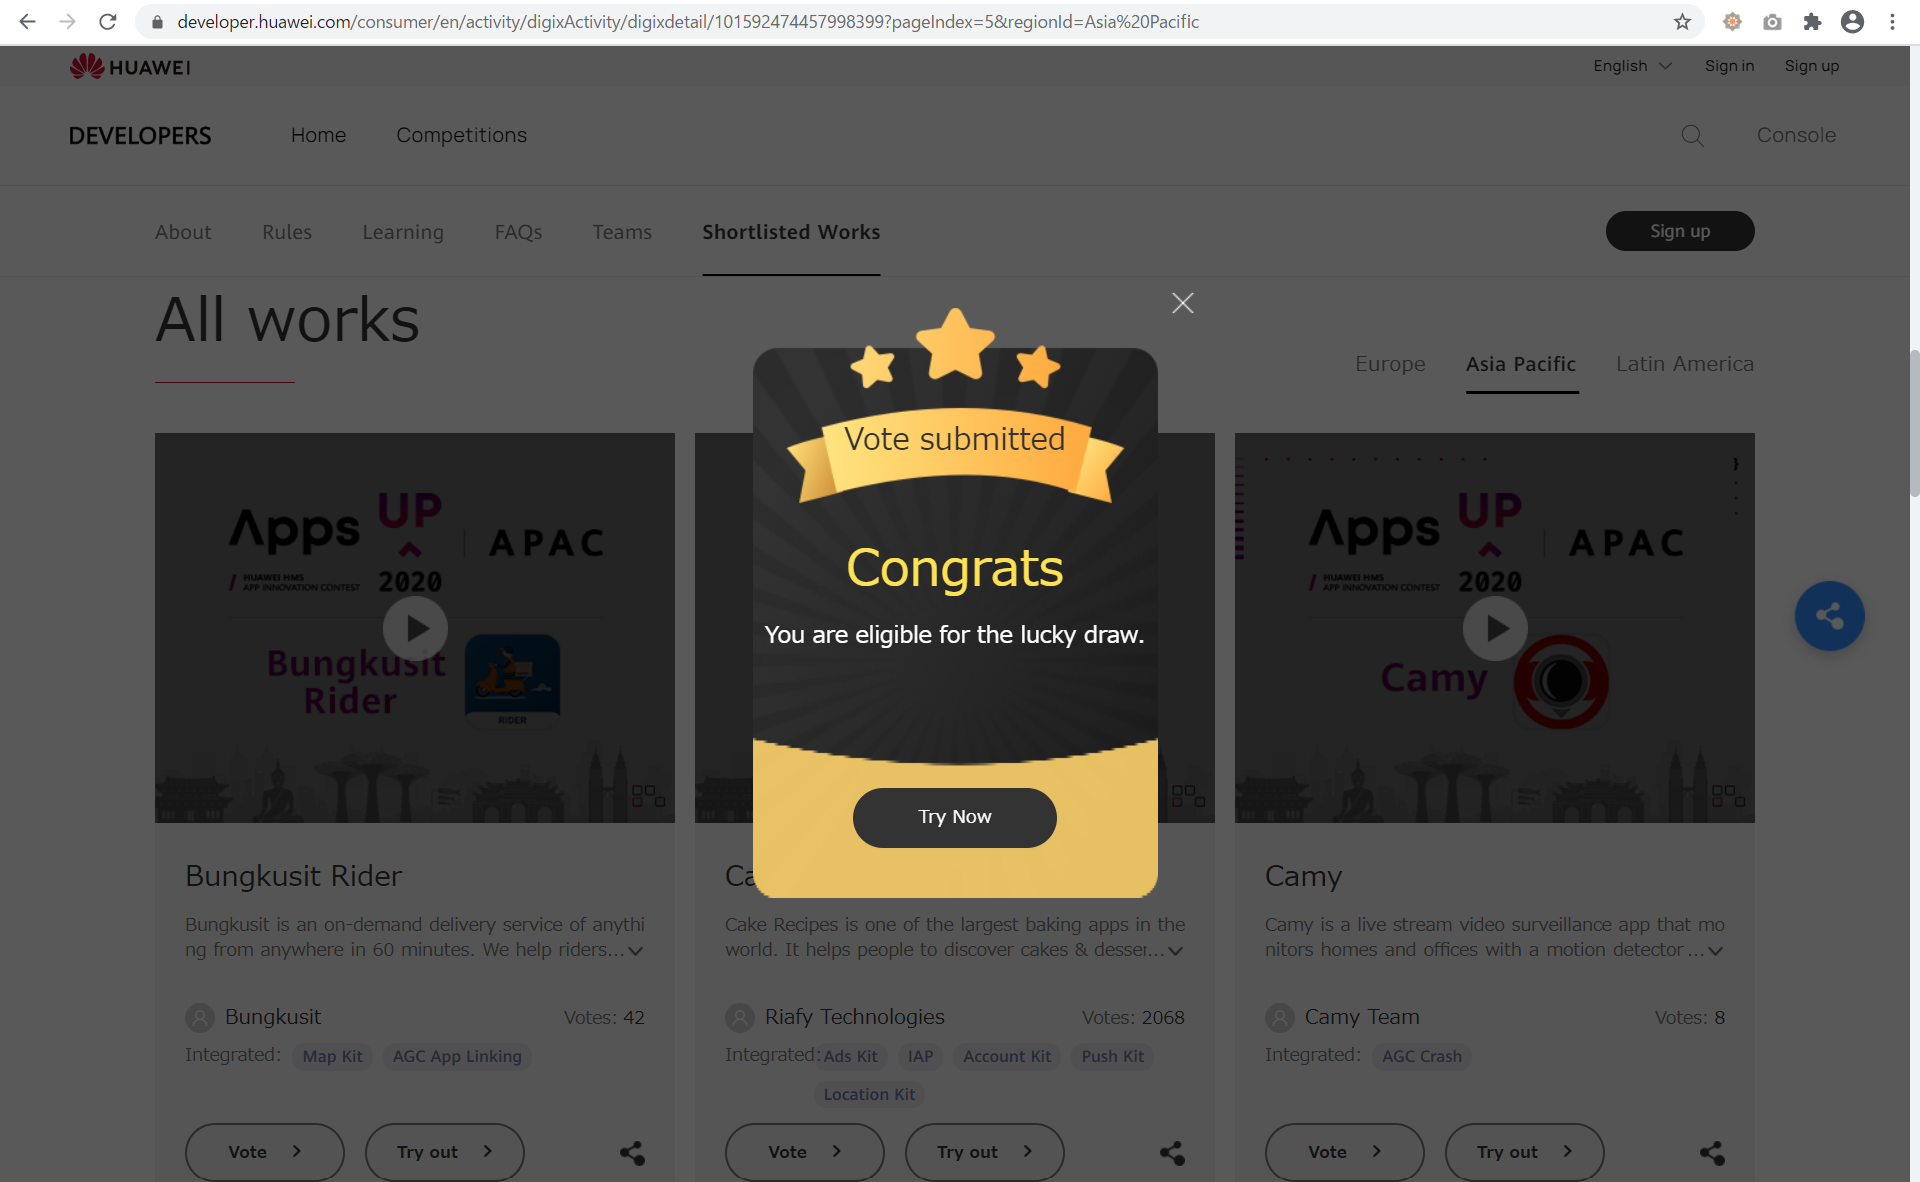
そうしたら、ラッキーくじが出てきます。ここで運試しです。当たった場合はファーウェイから別途連絡が来ます。ぜひご参加ください。
サイトはこちらです。
Huawei HMS App Innovation Contest:https://developer.huawei.com/consumer/en/activity/digixActivity/digixdetail/101592474457998399?pageIndex=5®ionId=Asia%20Pacific参考
- HMS:https://developer.huawei.com/consumer/jp/
- Huawei Developers:https://forums.developer.huawei.com/forumPortal/en/home
- Facebook Huawei Developersグループ:https://www.facebook.com/Huaweidevs/

- 投稿日:2020-10-22T18:56:32+09:00
kotlinx.serializationでCustomSerializerを作り、ライブラリクラス・sealed classのdeserializeを行う
はじめに
kotlinx.serializationの1.0.0(stable)が出ましたね!
以前からRetrofitと組み合わせて通信レスポンスのマッピングに利用していたのですが、CustomSerializerを作りたくなって調べて試したのでそのメモです。
※あくまで自分の理解なので、足りていない部分やパフォーマンスが良くない実装があるかもしれません。
Serializerについてのメモなので、serializationの導入などは省きます。利用バージョンorg.jetbrains.kotlinx:kotlinx-serialization-json:1.0.01. あるJsonオブジェクトをライブラリのクラスにパースして使いたい
あまり遭遇するケースでは無いかもしれませんが、Serializerの手始めとして。
パースしたい通信レスポンス{ id: "00", name: "プリン", price: { min: 200, max: 500 } }ライブラリクラスclass Price( val priceMin: Int, val priceMax: Int )レスポンスのデータクラス@Serializable data class Sweets( val id: String, val name: String, val price: Price )このとき、レスポンスをSweetsにデシリアライズしたいが、Priceがライブラリクラスなので
@Serializableを付けられません。
しかも、jsonとPriceクラスで変数名も異なっています。
これを解決するには、KSerializerを継承したカスタムSerializerを実装します。PriceSerializer.kt@Serializer(forClass = Price::class) object PriceSerializer : KSerializer<Price> { override fun deserialize(decoder: Decoder): Price { require(decoder is JsonDecoder) val element = decoder.decodeJsonElement() require(element is JsonObject) val min = requireNotNull(element["min"]).jsonPrimitive.int val max = requireNotNull(element["max"]).jsonPrimitive.int return Price(min, max) } override fun serialize(encoder: Encoder, value: Price) { // Serialization is not supported } }
decoder.decodeJsonElementをJsonObjectにcastできるので、それでSweetsのpriceのjsonを持ってこれます。
priceが根っこなので、elementに対して入っているjsonキーを指定すれば値を取ってくることができます。
※取ってきたい型がstringの場合は、contentで取れます(toStringだとダブルクォートで括られてしまった)serializeについては今回利用しないので空実装ですが、定義を書かないと
Serializable class must have single primary constructorとコンパイルエラーになるので定義は必要でした。
(requireなどは無理やりなので、もっといい形を考えてもいいかもしれません)利用側@Serializable data class Sweets( val id: String, val name: String, @Serializable(with = PriceSerializer::class) val price: Price )作ったSerializerをdata classの対象フィールドに
withを利用して定義すれば、デシリアライズすることができます。
これで、通信レスポンスをパースすることができます。2. sealed classのdeserializeをしたい
レスポンスオブジェクトにtypeが入っていて、そのtypeのsealed classにパースしたい場合です。
SweetsをHotとColdのsealed classにする場合を例にします。
前項のPriceは引き続き利用します。想定クラスsealed class Sweets { abstract val id: String abstract val name: String abstract val price: Price data class Cold( override val id: String, override val name: String, override val price: Price, // Coldは保存温度を持つ val storageTemperature: Int ) : Sweets() data class Hot( override val id: String, override val name: String, override val price: Price, // Hotは温め時間を持つ val warmingTime: Long ) : Sweets() }通信レスポンス(Cold){ id: "00", name: "プリン", price: { min: 200, max: 500 }, type: "cold", storageTemperature: 10 }通信レスポンス(Hot){ id: "01", name: "あんまん", price: { min: 300, max: 600 }, type: "hot", warmingTime: 300 }レスポンスは、Coldなら保存温度(Int)、Hotなら温め時間(Long)が返ってくるものとします。
レスポンスのクラスとしてはSweetsを受け取りたいが、typeによってCold/Hotにパースしたいですね。このようなSerializerで実現できます。
SweetsSerializer@Serializer(forClass = Sweets::class) object SweetsSerializer : KSerializer<Sweets> { override fun deserialize(decoder: Decoder): Sweets { require(decoder is JsonDecoder) val element = decoder.decodeJsonElement() require(element is JsonObject) val serializer = when (val type = element["type"]?.jsonPrimitive?.content) { "cold" -> Sweets.Cold.serializer() "hot" -> Sweets.Hot.serializer() else -> throw IllegalStateException("Sweets type is not match $type") } return decoder.json.decodeFromJsonElement(serializer, element) } override fun serialize(encoder: Encoder, value: Sweets) { // Serialization is not supported } }前項と同じ様に、JsonObjectから"type"が取れるので、それを元にSerializerを分けています。
一度decodeしてからserializerを用いる場合は、
decoder.json.decodeFromJsonElement(serializer, element)
を用いることで変換できるようです。
sealedの具象クラスのserializer()は、具象クラスに@Serializableをつけることで利用できます。(全体のSweetsクラスは後述)(一度decodeしたものを
decoder.decodeSerializableValue(serializer())で変換できるかと思いきや、再利用はできない仕様でした。JsonParser.ktのreadObjectでreaderをnextしていて、一度使うと最後が参照されている模様)Sweetsでは上記Serializerを利用します。
Sweets@Serializable(with = SweetsSerializer::class) sealed class Sweets { abstract val id: String abstract val name: String abstract val price: Price @Serializable data class Cold( override val id: String, override val name: String, @Serializable(with = PriceSerializer::class) override val price: Price, // Coldは保存温度を持つ val storageTemperature: Int ) : Sweets() @Serializable data class Hot( override val id: String, override val name: String, @Serializable(with = PriceSerializer::class) override val price: Price, // Hotは温め時間を持つ val warmingTime: Long ) : Sweets() }sealed classに
@Serializable(with = SweetsSerializer::class)をつけるだけです。
中にCustomSerializer(PriceSerializer)が入っていても、無事パースすることができました。蛇足
decorderからjsonObjectを見られるので、sealed classを筋肉で解決することもできます(運用観点で良くない実装かと)
MuscleSweetsSerializer@Serializer(forClass = Sweets::class) object MuscleSweetsSerializer : KSerializer<Sweets> { override fun deserialize(decoder: Decoder): Sweets { require(decoder is JsonDecoder) val element = decoder.decodeJsonElement() require(element is JsonObject) val id = element["id"]!!.jsonPrimitive.content val name = element["name"]!!.jsonPrimitive.content val priceMin = element["price"]!!.jsonObject["min"]!!.jsonPrimitive.int val priceMax = element["price"]!!.jsonObject["max"]!!.jsonPrimitive.int return when (val type = element["type"]?.jsonPrimitive?.content) { "cold" -> { val storageTemperature = element["storageTemperature"]!!.jsonPrimitive.int Sweets.Cold(id, name, Price(priceMin, priceMax), storageTemperature) } "hot" -> { val warmingTime = element["warmingTime"]!!.jsonPrimitive.long Sweets.Hot(id, name, Price(priceMin, priceMax), warmingTime) } else -> throw IllegalStateException("Sweets type is not match $type") } } //...省略serializer()を使っていきたいですね。笑
参考
公式のdocsに色々書いてあります
https://github.com/Kotlin/kotlinx.serialization/blob/master/docs/json.md
docs一覧(種類が多い)
https://github.com/Kotlin/kotlinx.serialization/tree/master/docsKSerializerのフィールドであるdescriptorは今回実装していませんが、jsonフィールドをマッピングしてその位置によって変換する場合に使えるのかな?と思ってます。
サンプルでは実装してあるものもあるが、利用していないことが多い(なくても動いていそう)
まだまだ理解が足りていないので、「実装すべき!」「パフォーマンス上がるよ!」などありましたらアドバイスいただけると幸いです。最後に
Serializerを利用すると、アプリで通信後のロジックを実装する際に意味のあるクラスとして扱えるので有用だと思います。
CustomSerializerでライブラリクラスやsealed classもパースできることが分かったので、様々なケースに対応できそうです。
- 投稿日:2020-10-22T17:54:37+09:00
モバイル向けFlutterアプリをWeb対応するときに注意したいこと
Platform判定はできない
Platform.isIOSなどで判定しているところは動かないので、その前段階でkIsWebでWebかどうかを判定する
モバイル向けのsecure_strageのパッケージは非対応
アプリ内にログイントークンなど持ちたいからflutter_secure_storageプラグイン使うと思うけど、Webでは非対応なのでshared_preferencesプラグインを使う
APIRequestがエラーになる
CROSサポート(参考)を有効にする必要がある。
開発でテストするなら以下のChrome extensionをインストールしたら解決できる
https://chrome.google.com/webstore/detail/cors-unblock/lfhmikememgdcahcdlaciloancbhjino/related?hl=jaFileの扱いについて
そもそもパッケージが違うよ Webではファイルパスでファイルに直接アクセスできないからon memoryで扱う
dart:io
dart:htmlNetworkから画像が取得できる??
できるけど、AuthHeaderが効かないから画像が取得できない場合もある
https://github.com/flutter/flutter/issues/57187カメラ使える?
まだ非対応です。
https://github.com/flutter/flutter/issues/45297WebサーバーないけどWebで公開して確認したい!
Github Page(https://pages.github.com/)使えます。
プライベートリポジトリでは無料プランだと使えません。Bitbucketならプライベートリポジトリでもつかえます
https://support.atlassian.com/bitbucket-cloud/docs/publishing-a-website-on-bitbucket-cloud/
- 投稿日:2020-10-22T16:49:07+09:00
Flutter製アプリをAndroid向けにリリースしようと準備し始めたらエラーが止まらなかった
やろうとしたこと
制作中だったアプリが一通り完成したため、Google Play Storeで公開するための準備を始めました。
起こった問題
ネット上の情報を頼りに作業を進めていくと、"Package name"を変更するタイミングが来るはずです。
私は
- app/build.gradle
- main/AndroidManifest.xml
- debug/AndroidManifest.xml
の3箇所を変更しました。
しかし、この Package name を変更した直後からよくわからないバグが発生しました。解決方法
結論からいうと
MainActivity.ktの1行目の Package name を修正し忘れていました。
この記事が参考になります。最後に
あまり多くの人に起きるエラーじゃないかなとも思いましたが、自分は結構時間を溶かしてしまったので同じ問題を抱えた誰かに届くといいなと思っています。
- 投稿日:2020-10-22T16:33:42+09:00
【Kotlin】FirebaseのRemote Configを使ってみる
はじめに
Androidアプリを作っていると変数を外部から操作したい事ってあると思うのですが、今回FirebaseのRemoteConfigを使って実装してみました。
初めて使ってみてとても簡単に実装できたので、今更感はあるかと思いますが備忘録として残しておこうと思います。
おかしなところなどあったらツッコミお願いします!※Firebaseの導入部分は割愛しますので必要に応じてお調べください。
準備
ライブラリを追加
build.gradle(Module.app)dependencies{ implementation 'com.google.firebase:firebase-config-ktx:19.2.0'//追加 }Firebase側の設定
パラメータキーと受け取る値を設定します。受け取る値には色々と条件を設定することも可能です。
また、Firebaseの他のサービスと違い、これらは後から編集や削除が自由にできます(全部そうして欲しい)。構成
MainActivity.kt:Firebaseから受け取ったデータを表示するだけ
activity_main.xml
remote_config_defaults.xml:Firebaseからのfetchに失敗したとき用のデフォルト値を設定するファイルレイアウト
activity_main.xml<androidx.constraintlayout.widget.ConstraintLayout xmlns:android="http://schemas.android.com/apk/res/android" xmlns:app="http://schemas.android.com/apk/res-auto" xmlns:tools="http://schemas.android.com/tools" android:layout_width="match_parent" android:layout_height="match_parent" android:background="@color/colorBackground" tools:context=".MainActivity"> <TextView android:id="@+id/rc_text" android:layout_width="wrap_content" android:layout_height="wrap_content" app:layout_constraintTop_toTopOf="parent" app:layout_constraintBottom_toBottomOf="parent" app:layout_constraintStart_toStartOf="parent" app:layout_constraintEnd_toEndOf="parent" android:text="Now Loading" android:textSize="20sp" android:textColor="@color/colorText"/> </androidx.constraintlayout.widget.ConstraintLayout>今回はテキストを表示するだけです。
Firebaseとの通信中等はandroid:textに設定した値が表示されます(一瞬ですが)。デフォルト設定ファイル
res/xml内にファイルを作成します。
remote_config_defaults.xml<defaultsMap> <entry> <key>remote_config_text</key> <value>RemoteConfigからの受信に失敗しました。</value> </entry> </defaultsMap>keyにはFirebase側で設定したパラメータキーと同じ値を設定します。
valueには何らかの理由でFirebaseから値を受け取れなかった時用のデフォルト値を設定します。実装
MainActivity.kyclass MainActivity : AppCompatActivity() { private lateinit var rc_text:TextView private lateinit var remoteConfig: FirebaseRemoteConfig override fun onCreate(savedInstanceState: Bundle?) { super.onCreate(savedInstanceState) setContentView(R.layout.activity_main) rc_text = findViewById(R.id.rc_text) remoteConfig = Firebase.remoteConfig //開発用 val configSettings = remoteConfigSettings { minimumFetchIntervalInSeconds = 3600//最小fetch間隔(s) } remoteConfig.setConfigSettingsAsync(configSettings) //開発用 remoteConfig.setDefaultsAsync(R.xml.remote_config_defaults)//デフォルト設定用ファイル remoteConfigFetch() } private fun remoteConfigFetch(){ remoteConfig.fetchAndActivate().addOnCompleteListener(this){task -> if(task.isSuccessful){ //fetch成功 }else{ //fetch失敗 Toast.makeText(applicationContext, R.string.msg_error_fetch, Toast.LENGTH_SHORT).show() } rc_text.text = remoteConfig.getString("remote_cofig_text") } } }通常は前回のfetchから12時間以上経過しないと次のfetchは行われないようなので頻繁に更新が必要な場合には不向きです。
開発時はminimumFetchIntervalInSecondsを3600に設定すれば1時間おきにfetchできるようになります(それでも長いですが)。
あとはリスナーでfetch成功とfetch失敗を受けていますが、いずれの場合もgetStringしてます。こうすることでfetchできればFirebaseに設定した値に、失敗したらデフォルト値(またはキャッシュしていればその値)になります。おしまい
12時間おきの制限があるとはいえ、これを無料で使えるのはありがたいですよね。
しかもFirebaseのサービスは本当に簡単に実装することができるので、やりたいことが色々でてきます。
このRemoteConfigも本来はA/Bテストや強制アップデートなんかに使うことが多いみたいですが、他にも沢山使い道がありそうです。

- 投稿日:2020-10-22T16:25:16+09:00
Android11 SDK30でpackage名を取得できなくなった問題
最近Android11になってから動作しない問題がちょくちょく続いてます。
皆さんはどうでしょうか??前置きが長かったですが、さくっと修正方法紹介します。
パッケージのアクセス方法がAndroid11から変更されたみたいです。従来のコード
val packages: List<PackageInfo> = context.packageManager.getInstalledPackages(flag)
val packageNames: List<String> = packages.map { it.packageName }
追加
AndroidManifestに追加
<manifest package="com.example.game">
    <queries>
        <package android:name="com.example.store" />
        <package android:name="com.example.services" />
    </queries>
    ...
</manifest>
参考
https://developer.android.com/preview/privacy/package-visibility?hl=ja
- 投稿日:2020-10-22T11:19:42+09:00
Android(Pixel、Xperia、Galaxy、AQUOS)画面サイズ、ピクセル数早見表
Androidスマートフォン画面サイズ一覧表です
- 対象端末は2016年以降に発売している日本国内の端末です(※一部Pixelシリーズを除く)
- キャリア別の派生端末は省略しているものがあります
- 情報は2020/10/22時点のものとなります
Pixelシリーズ
機種名 型番 有機ELディスプレイ対応 画面サイズ ピクセル数 アスペクト比 発売初期搭載iOS 最終対応iOS 発売年 Android11.0対応 Pixel 5 1080 x 1920 9:16 Android 7.1 (Nougat) Android 10 2016/10/20 Pixel XL 5.5 1440 x 2560 9:16 Android 7.1 (Nougat) Android 10 2016/10/20 Pixel 2 5 1080 x 1920 9:16 Android 8 Android 11 2017/10/19 ● Pixel2 XL 5.5 1440 x 2880 1:2 Android 8 Android 11 2017/10/19 ● Pixel 3 ● 5.5 1080 x 2160 9:18 Android 9.0 Android 11 2018/10/9 ● Pixel3 XL ● 6.3 1440 x 2960 9:18.5 Android 9.0 Android 11 2018/10/9 ● Pixel 3a ● 5.6 1080 x 2220 9:18.5 Android 9.0 Android 11 2019/5/17 ● Pixel 3a XL ● 6 1080 x 2160 9 : 18 Android 9.0 Android 11 2019/5/17 ● Pixel 4 ● 5.7 1080 x 2280 9 : 19 Android 10 Android 11 2019/10/24 ● Pixel 4 XL ● 6.3 1440 x 3040 9 : 19 Android 10 Android 11 2019/10/24 ● Pixel 4a ● 5.8 1080 x 2340 9 : 19.5 Android 10 Android 11 2020/8/20 ● Pixel 4a (5G) ● 6.2 1080 x 2340 9 : 19.5 Android 11 Android 11 2020/10/15 ● Pixel 5 ● 6 1080 x 2340 9 : 19.5 Android 11 Android 11 2020/10/15 ● Xperiaシリーズ
機種名 型番 有機ELディスプレイ対応 画面サイズ ピクセル数 アスペクト比 発売初期搭載iOS 最終対応iOS 発売年 Android11.0対応 Xperia X Performance SO-04H(docomo)、SOV33(au)、502SO(Softbank) 5 1080×1920 9:16 Android 6.0(Marshmallow) Android 8.0(Oreo)(docomo au)、Android 7(Softbank) 2016/06/24 Xperia XZ SO-01J(docomo)、SOV34(au)、601SO(Softbank) 5.2 1080×1920 9:16 Android 6.0(Marshmallow) Android 8.0(Oreo)(docomo au)、Android 7(Softbank) 2016/11/02 Xperia X Compact SO-02J(docomo) 4.6 720×1280 9:16 Android 6.0(Marshmallow) Android 8.0(Oreo) 2016/11/02 Xperia XZs SO-03J(docomo)、SOV35(au)、602SO(Softbank) 5.2 1080×1920 9:16 Android 7.1 Android 8.0.0 2017/05/26 Xperia XZ Premium SO-04J(docomo) 5.5 2160×3840 9:16 Android 7.1 Android 9.0.0 2017/06/16 Xperia XZ1 SO-01K(docomo)、SOV36(au)、701SO(Softbank) 5.2 1080×1920 9:16 Android 8.0(Oreo) Android 9(Pie) 2017/11/10 Xperia XZ1 Compact SO-02K(docomo) 4.6 720×1280 9:16 Android 8.0(Oreo) Android 9(Pie) 2017/11/17 Xperia XZ2 SO-03K(docomo)、SOV37(au)、702SO(Softbank) 5.7 1080×2160 9:18 Android 8.0(Oreo) Android 10(docomo au)、Android 9(Pie)(Softbank) 2018/05/31 Xperia XZ2 Premium SO-04K(docomo)、SOV38(au) 5.8 2160×3840 9:16 Android 8.0(Oreo) Android 10 2018/07/27 Xperia XZ2 Compact SO-05K(docomo) 5 1080×2160 9:18 Android 8.0(Oreo) Android 10 2018/06/22 Xperia XZ3 SO-01L(docomo)、SOV39(au)、801SO(Softbank) ● 6 1440×2880 9:18 Android 9(Pie) Android 10 2018/11/09 Xperia Ace SO-02L(docomo) 5 1080×2160 9:18 Android 9(Pie) Android 10 2019/06/01 Xperia 1 SO-03L(docomo)、SOV40(au)、802SO(Softbank) ● 6.5 1644×3840 9:21 Android 9(Pie) Android 10 2019/06/14 ● Xperia 5 SO-01M(docomo)、SOV41(au)、901SO(Softbank) ● 6 1080×2520 9:21 Android 9(Pie) Android 10 2019/11/01(docomo au)、2019/10/25(Softbank) ● Xperia 8 SOV42(au) 6 1080×2520 9:21 Android 9(Pie) Android 10 2019/10/25 Xperia 1 II SO-51A(docomo)、SOG01(au) ● 6.5 1644×3840 9:21 Android 10 Android 10 2020/06/18 Xperia 10 II SO-41A(docomo)、SOV43(au) ● 6 1080×2520 9:21 Android 10 ※ 2020/06/25 ● Xperia 5 II SOG02(au)、A002SO(Softbank) ● 6 1080×2520 9:21 Android 10 Android 10 2020/10/17 AQUOSシリーズ
機種名 型番 有機ELディスプレイ対応 画面サイズ ピクセル数 アスペクト比 発売初期搭載iOS 最終対応iOS 発売年 Android11.0対応 AQUOS SERIE mini SHV33(au) 4.7 1080×1920 9:16 Android 5.1.1 Android 7.0 2016/01/23 AQUOS ZETA SH-01H(docomo) 5.3 1080x1920 9:16 Android 6.0 Android 8.0 2016/06/10 AQUOS SERIE SHV34(au) 5.3 1080×1920 9:16 Android 6.0 Android 8.0 2016/06/10 AQUOS Xx3 506SH(SoftBank) 5.3 1080×1920 9:16 Android 6.0 Android 8.0 2016/06/10 AQUOS U SHV35(au) 5 720x1280 9:16 Android 6.0 Android 8.0 2016/06/24 AQUOS EVER SH-02J(docomo) 5 720x1,280 9:16 Android 6.0 Android 8.0 2016/11/04 AQUOS U SHV37(au) 5 720x1280 9:16 Android 6.0 Android 8.0 2016/11/18 AQUOS SERIE mini SHV38(au) 4.7 1080×1920 9:16 Android 7.0 Android 8.0 2017/02/03 AQUOS Xx3 mini 603SH(SoftBank) 4.7 1080×1920 9:16 Android 7.0 Android 8.0 2017/02/03 AQUOS R SHV39(au)、SH-03J(docomo)、605SH(SoftBank) 5 1440x2560 9:16 Android 7.1 Android 9 2017/07/07 AQUOS ea 606SH(SoftBank) 5 720x1280 9:16 Android 7.0 2017/7/14 AQUOS sense SH-01K(docomo)、SHV40(au) 5 1080x1920 9:18 Android 7.1 Android 9 2017/11/10(docomo)、2017/11/02(au) AQUOS R compact SHV41(au)、701SH(SoftBank) 4.9 1080x2032 9:17 Android 8.0 Android 10 2017/12/22 AQUOS R2 SHV42(au)、SH-03K(docomo)、706SH(SoftBank) 6 1440x3040 9:19 Android 8.0 Android 10 2018/06/08 AQUOS sense2 SH-01L(docomo)、SHV43(au) 5.5 1080×2160 1:2 Android 8.1 Android 10 2018/11/09 AQUOS zero 801SH(SoftBank) 6.2 1440x2992 9:18.7 Android 9 Android 10 2018/12/21 AQUOS R2 Compact 803SH(SoftBank) 5.2 1080x2280 9:19 Android 9 Android 10 2019/01/18 AQUOS R3 SH-04L(docomo)、SHV44(au)、808SH(SoftBank) 6.2 1440x3120 6:13 Android 9 Android 10 2019/06/01(docomo)、2019/05/25(au)(SoftBank) AQUOS sense2、かんたん (au) 5.5 1080×2160 9:18 Android 9 Android 10 2019/06/14 AQUOS sense3 SH-02M(docomo)、SHV45(au) 5.5 1080x2160 1:2 Android 9 Android 10 2019/11/01(docomo)、2019/11/2(au) AQUOS sense3 plus サウンド SHV46(au) 6 1080x2220 9:18.5 Android 9 Android 10 2019/12/12 AQUOS zero2 SH-01M(docomo)、SHV47(au)、906SH(SoftBank) ● 6.4 1080x2340 9:19.5 Android 10 Android 10 2020/1/30(docomo)、2020/1/31(au)(SoftBank) AQUOS R5G SH-51A(docomo)、SHG01(au)、908SH(SoftBank) 6.5 1440x3168 9:19.8 Android 10 Android 10 2020/3/25(docomo)、2020/3/27(au)(SoftBank) AQUOS sense3 basic SHV48(au) 5.5 1080x2160 9:18 Android 9 Android 10 2020/06/19 シンプルスマホ5 A001SH(SoftBank) 5.5 1080x2160 9:18 Android 10 Android 10 2020/09/04 AQUOS Zero5G basic DX SHG02(au) ● 6.4 1080x2340 9:19.5 Android 10 Android 10 2020/09/19 AQUOS Zero5G basic A002SH(SoftBank) ● 6.4 1080x2340 9:19.5 Android 10 Android 10 2020/10/09 Galaxyシリーズ
機種名 型番 有機ELディスプレイ対応 画面サイズ ピクセル数 アスペクト比 発売初期搭載iOS 最終対応iOS 発売年 Android11.0対応 Galaxy S7 edge SC-02H(docomo)、SCV33(au)、SCV33(au五輪Edition) ● 5.5 1440×2560 9:16 Android 6.0 Android 8.0 2016/05/19、2016/07/19(au五輪Edition) Galaxy S8 SC-02J(docomo)、SCV36(au) ● 5.8 1440×2960 9:18.5 Android 7.0 Android 9.0 2017/06/08 Galaxy S8+ SC-03J(docomo)、SCV35(au) ● 6.2 1440×2960 9:18.5 Android 7.0 Android 9.0 2017/06/08 Galaxy Feel SC-04J(docomo) ● 4.7 720×1280 9:16 Android 7.0 Android 8.0 2017/06/15 Galaxy Note8 SC-01K(docomo)、SCV37(au) ● 6.3 1440×2960 9:18.5 Android 7.1 Android 9.0 2017/10/26 Galaxy S9 SC-02K(docomo)、SCV38(au) ● 5.8 1440×2960 9:18.5 Android 9.0 Android 10 2018/05/18 Galaxy S9+ SC-03K(docomo)、SCV39(au) ● 6.2 1440×2960 9:18.5 Android 9.0 Android 10 2018/05/18 Galaxy Note9 SC-01L(docomo)、SCV40(au) ● 6.4 1440×2960 9:18.5 Android 9.0 Android 10 2018/10/25 Galaxy Feel2 SC-02L(docomo) ● 5.6 720×1480 9:18 Android 8.1 Android 10 2018/11/09 Galaxy S10 SC-03L(docomo)、SCV41(au) ● 6.1 1440x3040 9:19 Android 9.0 Android 10 2019/06/01(docomo)、2019/05/23(au) Galaxy S10+ SC-04L(docomo)、SC-05L(docomo五輪edition)、SCV42(au) ● 6.4 1440x3040 9:19 Android 9.0 Android 10 2019/06/01(docomo)、2019/07/24(docomo五輪edition)、2019/05/23(au) Galaxy A30 SCV43(au) ● 6.4 1080x2340 6:13 Android 9.0 Android 10 2019/06/06 Galaxy Note10+ SC-01M(docomo)、SC-01M(docomo スターウォーズEdition)、SCV45(au) ● 6.8 1440×3040 9:19 Android 9.0 Android 10 2019/10/18、2019/12/13(docomo スターウォーズEdition) Galaxy Fold SCV44(au) ● 7.3 1536×2152 10:16 Android 9.0 Android 10 2019/10/25 Galaxy A20 SC-02M(docomo)、SCV46(au) 5.8 720×1560 9:19.5 Android 9.0 Android 10 2019/11/01(docomo)、2019/10/25(au) Galaxy Z Flip SCV47(au) ● 6.7 1080x2636 9:21.9 Android 10 Android 10 2020/02/28 Galaxy S20 5G SC-51A(docomo)、SCG01(au) ● 6.2 1440x3200 9:20 Android 10 Android 10 2020/03/25(docomo)、2020/03/26(au) Galaxy S20+ 5G SC-52A(docomo)、SCG02(au) ● 6.7 1440x3200 9:20 Android 10 Android 10 2020/06/18(docomo)、2020/03/26(au) Galaxy A41 SC-41A(docomo)、SCV48(au) ● 6.1 1080x2400 9:20 Android 10 Android 10 2020/06/25(docomo)、2020/07/08(au) Galaxy S20 Ultra 5G SCG03(au) ● 6.9 1440x3200 9:20 Android 10 Android 10 2020/07/03
- 投稿日:2020-10-22T10:32:26+09:00
Navigation 2.3.1でonNavDestinationSelectedを使ってActivityに遷移できない
AndroidX の Navigation 2.3.1 で
MenuItem#onNavDestinationSelectedを使用して Activity へ遷移させると遷移が正しくできない問題に遭遇しました。
Fragment への遷移ではこの現象は発生しません。Workaround
Issue Tracker に報告したところ、バグ扱いになったのでライブラリ側で対応してくれるのを待ってもいいかもしれません。
https://issuetracker.google.com/issues/171364502Activity への遷移の時は
navigateを使用するようにすれば回避することができます。override fun onOptionsItemSelected(item: MenuItem): Boolean { val navController = findNavController(R.id.nav_host_fragment) if (navController.currentDestination?.parent?.findNode(item.itemId) is ActivityNavigator.Destination) { navController.navigate(item.itemId) return true } return item.onNavDestinationSelected(navController) || super.onOptionsItemSelected(item) }
- 投稿日:2020-10-22T00:54:51+09:00
How to create Bitmap form inflating FrameLayout (.. or other layout)
I got into a bit of trouble when I tried to create a dynamic layout and generate a Bitmap without displaying it on the screen, so I'll leave this as a note.
    fun createLayoutBitmap() {
        val frameLayout = createMeasuredFrameLayout()
        val bitmap = createBitmap(frameLayout)
        // save bitmap or set Views ...
    }

    fun createMeasuredFrameLayout(): FrameLayout {
        // inflate or new your layout
        return FrameLayout(context).apply {
            setBackgroundColor(Color.YELLOW)
            val tv = TextView(context).apply {
                text = "test"
            }
            // apply pixel size to TextView
            addView(tv, Rect(0, 0, 100, 200).toLayoutParams())
            // important: you need call measure() after build layout. do not add after measure(). my mistaken  point.
            measure(ViewGroup.LayoutParams.WRAP_CONTENT, ViewGroup.LayoutParams.WRAP_CONTENT)
        }
    }

    fun createBitmap(view: View): Bitmap {
        // apply drawing bitmap size in pixel.
        val rect = Rect(0, 0, 500, 500)
        return Bitmap.createBitmap(rect.width(), rect.height(), Bitmap.Config.ARGB_8888).also {
            view.layout(rect.left, rect.top, rect.width(), rect.height())
            view.draw(Canvas(it))
        }
    }
    // rect is intuitive.
    fun Rect.toLayoutParams(): ViewGroup.LayoutParams {
        return FrameLayout.LayoutParams(width(), height()).apply {
            leftMargin = left
            topMargin = top
        }
    }
this is a very easy sample code.