- 投稿日:2020-09-12T17:58:51+09:00
【JavaScript】怖がらないで、引数分割束縛(argument destructuring)【Vue.js】
関数({ $axios })とか初見だと、ビビる引数の書き方でてきますよね
その名も
引数分割束縛。なんか、恐い言葉です。これの目的は、何回も記されるコードを
因数分解して、省略しちゃおうというのが目的です。asyncData
contextを省略するパターン
async asyncData(context) {
  const posts = await context.$axios.$get('/posts')
  return { posts }
},
↓
async asyncData({ $axios }) {
  const posts = await $axios.$get('/posts')
  return { posts }
},
contenxtとresを省略するパターン
async asyncData (context) {
  const res = await axios.get('/posts/' + context.params.id)
  return { post: res.data }
}
↓
async asyncData ({ params }) {
  const { data } = await axios.get('/posts/' + params.id)
  return { post: data }
}
Vuexのstore
export const actions = {
  async login (context) {
    await context.commit('switchLogin')
  })
}
↓
export const actions = {
  async login ({ commit }) {
    await commit('switchLogin')
  })
}
つまり、何が起きているか。
まず分割代入の仕組みで、代入
{ a } = { a: 1 }
console.log(a)  // 1
オブジェクトのキーから、代入
let option = { a: 1 }
{ a } = option.a
console.log(a)  // 1
要はこんなことが起きている
export const actions = {
  async login (context) {
    await 〇〇('switchLogin')
  })
}

export const actions = {
  async login ({ commit }) {
    await 〇〇('switchLogin')
  })
}
いずれの場合も、「〇〇」と示せるようにすれば良いから
{ commit } = { commit: 〇〇 }
console.log(commit)  // 〇〇

let context = { commit: 〇〇 }
{ commit } = context.commit
console.log(commit)  // 〇〇
- 投稿日:2020-09-12T17:58:51+09:00
【Vue.js】怖がらないで、引数分割束縛(argument destructuring)
関数({ $axios })とか初見だと、ビビる引数の書き方でてきますよね
その名も
引数分割束縛。なんか、恐い言葉です。これの目的は、何回も記されるコードを
因数分解して、省略しちゃおうというのが目的です。asyncData
contextを省略するパターン
async asyncData(context) {
  const posts = await context.$axios.$get('/posts')
  return { posts }
},
↓
async asyncData({ $axios }) {
  const posts = await $axios.$get('/posts')
  return { posts }
},
contenxtとresを省略するパターン
async asyncData (context) {
  const res = await axios.get('/posts/' + context.params.id)
  return { post: res.data }
}
↓
async asyncData ({ params }) {
  const { data } = await axios.get('/posts/' + params.id)
  return { post: data }
}
Vuexのstore
export const actions = {
  async login (context) {
    await context.commit('switchLogin')
  })
}
↓
export const actions = {
  async login ({ commit }) {
    await commit('switchLogin')
  })
}
つまり、何が起きているか。
まず分割代入の仕組みで、代入
{ a } = { a: 1 }
console.log(a)  // 1
オブジェクトのキーから、代入
let option = { a: 1 }
{ a } = option.a
console.log(a)  // 1
要はこんなことが起きている
export const actions = {
  async login (context) {
    await 〇〇('switchLogin')
  })
}

export const actions = {
  async login ({ commit }) {
    await 〇〇('switchLogin')
  })
}
いずれの場合も、「〇〇」と示せるようにすれば良いから
{ commit } = { commit: 〇〇 }
console.log(commit)  // 〇〇

let context = { commit: 〇〇 }
{ commit } = context.commit
console.log(commit)  // 〇〇
- 投稿日:2020-09-12T15:04:05+09:00
【初心者向け】API利用の基本テクニック(ローディングの描画と標準時間の変換について)
背景とこの記事の目的
この度、TwitterAPIを利用したWEBアプリを構築しました。
その際に、「あーこの技術は今後も間違いなく活用するだろうなー」と思ったものがいくつかあったので、備忘として残します。
便利なライブラリもあったのでそちら紹介も兼ねます。
※フロントはvueで作っていますので、その前提で以下のトピックを紹介していきます。目次
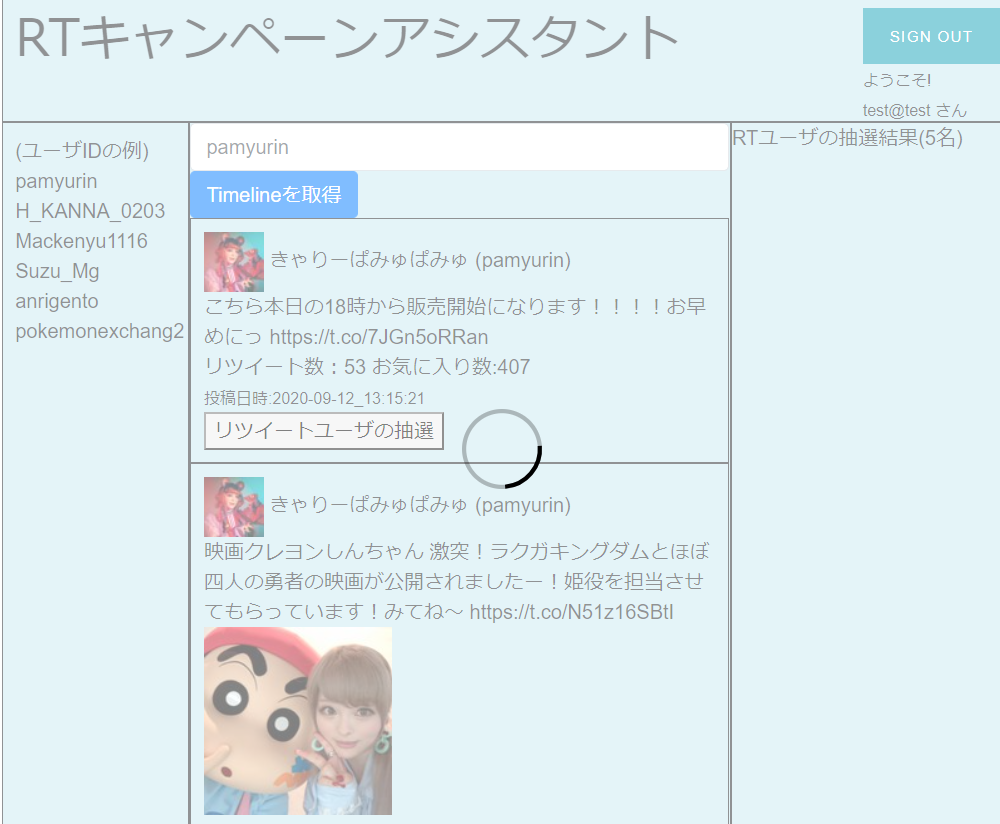
1.非同期通信の際のローディングでぐるぐるさせるやつ(スピナー、インジケーター)
2.APIのレスポンスの中にある時刻を日本時間に変換する非同期通信の際のローディングでぐるぐるさせるやつ(スピナー、インジケーター)
こういうの実装したいと思ったことは皆さん誰しも一度はあるでしょう。
API通信で時間のかかる処理などでは非常に重宝します。もし皆さんがvueを使っているのであれば、「vue-loading-overlay」をおすすめします。
詳しい使い方は以下が参考になります。
https://www.npmjs.com/package/vue-loading-overlay
https://www.kabanoki.net/4916/カスタマイズもある程度できますし、比較的コードの記述量も少ないです。
axiosと組み合わせると以下のような書き方になります。App.vue//scriptタグ内の記述 import Loading from 'vue-loading-overlay'; import 'vue-loading-overlay/dist/vue-loading.css'; export default { name: 'app', data(){ return { isLoading: false, fullPage: true, } }, components:{ "loading":Loading }, methods:{ getTimeline:function(){ alert('Timelineを取得します'); //overlayの処理 let self = this; self.isLoading = true; axios .get('APIのURL', { headers: { //必要に応じて記載 }, params:{ //必要に応じて記載 } }) .then(response => { // handle success self.isLoading = false; }) .catch(function (error) { // handle error self.isLoading = false; console.log(error); }) }, onCancel:function() { console.log('User cancelled the loader.') } //以下略App.vue<!-- templete内の記述 --> <loading :active.sync="isLoading" :can-cancel="true" :on-cancel="onCancel" :is-full-page="fullPage"></loading> <button v-on:click="getTimeline" class= "btn btn-primary"> Timelineを取得 </button>APIのレスポンスの中にある時刻を日本時間に変換する
TwitterのAPIのレスポンスの中に
"created_at": "Thu Apr 06 15:28:43 +0000 2017"
こういうものがありました。
APIのレスポンスには、必ずと言っていいほど時間に関する情報が入っています。そして日本のサービス出ない限り、大抵は標準時で入っています。
これを日本時間に変換する処理をする際は「Moment.js」というライブラリが便利です。詳しい使い方は下記が参考になります。
https://qiita.com/osakanafish/items/5ef636bbcb2c3ef94953
https://momentjs.com/実際の例としては以下の通り
App.vueconst moment = require('moment'); require('moment-timezone'); //略(APIの処理) .then(response => { let obj = JSON.parse(response.data); moment.tz.setDefault('Asia/Tokyo'); //日本時間に合わせる for(var t=0; t<obj.length; t++){ obj[t].created_at = moment(obj[t].created_at,'dd MMM DD HH:mm:ss ZZ YYYY','en').format('YYYY-MM-DD_HH:mm:ss'); }日付の記法は地域(というか国?)によってほんとに様々あるようで、それに応じてコーディングも微妙に変える必要があるようですね。
まとめ
実際に作ってみるといろいろと細かいテクニックが必要になることがよくわかりました。
ボタンの活性・非活性の制御、モーダルウィンドウ(子画面)の作り方、無限スクロールの実装の仕方などなど
上げればキリがないのですが、有用そうなものは時間があるときに記事にして残そうと思います
- 投稿日:2020-09-12T13:48:16+09:00
�laravel + vue.jsでフリマサイトを作成する
マイグレーションファイル作成
ユーザーが退会しても、また戻れるように論理削除にした。
今回は、comment関数をチェーンするのを忘れていたが、comment関数を使用して
何のカラムなのかをコメントに残すことによって可読性が向上するので、必ず使用した方がいい。
```create_users_table.php
<?phpuse Illuminate\Database\Migrations\Migration;
use Illuminate\Database\Schema\Blueprint;
use Illuminate\Support\Facades\Schema;class CreateUsersTable extends Migration
{
/**
* Run the migrations.
*
* @return void
*/
public function up()
{
Schema::create('users', function (Blueprint $table) {
$table->bigIncrements('id');
$table->string('name');
$table->unsignedTinyInteger('age')->nullable();
$table->string('tell')->nullable();
$table->unsignedBigInteger('zip')->nullable();
$table->string('address')->nullable();
$table->string('image_path')->nullable();
$table->string('email')->unique();
$table->timestamp('email_verified_at')->nullable();
$table->string('password');
$table->rememberToken();
$table->timestamps();
$table->softDeletes();
});
}/** * Reverse the migrations. * * @return void */ public function down() { Schema::dropIfExists('users'); }}
```create_product_careories_table.php<?php <?php use Illuminate\Database\Migrations\Migration; use Illuminate\Database\Schema\Blueprint; use Illuminate\Support\Facades\Schema; class CreateProductCategoriesTable extends Migration { /** * Run the migrations. * * @return void */ public function up() { Schema::create('product_categories', function (Blueprint $table) { $table->bigIncrements('id'); $table->string('name'); $table->timestamps(); $table->softDeletes(); }); } /** * Reverse the migrations. * * @return void */ public function down() { Schema::dropIfExists('product_categories'); } } }create_products_table.php<?php use Illuminate\Database\Migrations\Migration; use Illuminate\Database\Schema\Blueprint; use Illuminate\Support\Facades\Schema; class CreateProductsTable extends Migration { /** * Run the migrations. * * @return void */ public function up() { Schema::create('products', function (Blueprint $table) { $table->bigIncrements('id'); $table->string('name'); $table->unsignedBigInteger('product_category_id'); $table->unsignedInteger('price'); $table->string('comment')->nullable(); $table->string('image_path_one')->nullable(); // 投稿できる画像は3枚なので画像のpathを格納するためのカラムを3つ用意する。 $table->string('image_path_two')->nullable(); $table->string('image_path_three')->nullable(); $table->unsignedBigInteger('user_id'); $table->timestamps(); $table->softDeletes(); $table->foreign('product_category_id')->references('id')->on('product_categories'); // productsテーブルのproduct_category_idとproduct_categoriesテーブルのidと外部キー制約を行う $table->foreign('user_id')->references('id')->on('users');// productsテーブルのuser_idとusersテーブルのidと外部キー制約を行う }); } /** * Reverse the migrations. * * @return void */ public function down() { Schema::dropIfExists('products'); } }create_bulletin_boards_table.php<?php use Illuminate\Database\Migrations\Migration; use Illuminate\Database\Schema\Blueprint; use Illuminate\Support\Facades\Schema; class CreateBulletinBoardsTable extends Migration { /** * Run the migrations. * * @return void */ public function up() { Schema::create('bulletin_boards', function (Blueprint $table) { $table->bigIncrements('id'); $table->unsignedBigInteger('sale_user'); //商品を売ったユーザーidを格納するためのカラム $table->unsignedBigInteger('buy_user'); //商品を買ったユーザーidを格納するためのカラム $table->unsignedBigInteger('product_id'); //取引している商品を格納するためのカラム $table->timestamps(); $table->softDeletes(); $table->foreign('product_id')->references('id')->on('products'); }); } /** * Reverse the migrations. * * @return void */ public function down() { Schema::dropIfExists('bulletin_boards'); } }create_messages_table.php<?php use Illuminate\Database\Migrations\Migration; use Illuminate\Database\Schema\Blueprint; use Illuminate\Support\Facades\Schema; class CreateMessagesTable extends Migration { /** * Run the migrations. * * @return void */ public function up() { Schema::create('messages', function (Blueprint $table) { $table->bigIncrements('id'); $table->unsignedBigInteger('bulletin_board_id'); $table->unsignedBigInteger('to_user'); //取引相手のidを格納するためのカラム $table->unsignedBigInteger('from_user'); //投稿者のidを格納するためのカラム $table->string('message'); //メッセージを格納するためのカラム $table->dateTime('send_date'); $table->timestamps(); $table->softDeletes(); $table->foreign('bulletin_board_id')->references('id')->on('bulletin_boards'); }); } /** * Reverse the migrations. * * @return void */ public function down() { Schema::dropIfExists('messages'); } }create_like_products_table.php<?php use Illuminate\Database\Migrations\Migration; use Illuminate\Database\Schema\Blueprint; use Illuminate\Support\Facades\Schema; class CreateLikeProductsTable extends Migration { /** * Run the migrations. * * @return void */ public function up() { Schema::create('like_products', function (Blueprint $table) { $table->bigIncrements('id'); $table->unsignedBigInteger('product_id'); $table->unsignedBigInteger('user_id'); $table->timestamps(); $table->softDeletes(); $table->foreign('product_id')->references('id')->on('products'); $table->foreign('user_id')->references('id')->on('users'); }); } /** * Reverse the migrations. * * @return void */ public function down() { Schema::dropIfExists('like_products'); } }create_add_trading_partner_to_messages_table.php<?php use Illuminate\Database\Migrations\Migration; use Illuminate\Database\Schema\Blueprint; use Illuminate\Support\Facades\Schema; class AddTradingPartnerToMessagesTable extends Migration { /** * Run the migrations. * * @return void */ public function up() { Schema::table('messages', function (Blueprint $table) { $table->string('trading_partner')->after('from_user'); //取引相手の名前を格納するためのカラム }); } /** * Reverse the migrations. * * @return void */ public function down() { Schema::table('messages', function (Blueprint $table) { $table->dropColumn('trading_partner'); }); } }create_add_is_sold_to_products_table.php<?php use Illuminate\Database\Migrations\Migration; use Illuminate\Database\Schema\Blueprint; use Illuminate\Support\Facades\Schema; class AddIsSoldToProductsTable extends Migration { /** * Run the migrations. * * @return void */ public function up() { Schema::table('products', function (Blueprint $table) { $table->boolean('is_sold')->default(false)->after('user_id'); //売れた商品にはtrueを格納するようにする。こうすることで売れた商品はページに出さないようにすることができる }); } /** * Reverse the migrations. * * @return void */ public function down() { Schema::table('products', function (Blueprint $table) { $table->dropColumn('is_sold'); }); } }Model作成
php artisan make:model User -m
と-mオプションをつけてコマンドを打つとマイグレーションとモデルを同時に作成してくれるので便利。
ちなみに
php artisan make:model User -allと打つと、上記に加えて加えてコントローラーも作成してくれる。コードはよくあるmodelなので割愛
seeder作成
seederファイルを作成しておくとdbに必要なデータを流し込めるので便利。
たくさんのデータを流し込みたい場合は、factoryファイルを作成する。商品一覧機能を作成する
products/index.blade.php@extends('layouts.app') @section('content') <form method="get" action="{{ route('products.index') }}"> <div class="form-group mx-5"> <label class="name">名前検索</label> <input type="text" name="name" value="{{ request('name') }}" class="form-control"> </div> <div class="form-group mx-5"> <label class="title">カテゴリー</label> <select name="product_category_id" id="" class="form-control"> <option value="" selected>すべてのカテゴリー</option> @foreach ($productCategories as $productCategory) <option value="{{ $productCategory->id }}" {{ $productCategory->id == request('product_category_id') ? 'selected' : '' }}> {{ $productCategory->name }}</option> @endforeach </select> </div> <div class="form-group mx-5"> <label class="title">表示順</label> <select name="sort" class="form-control"> <option value="" selected>選択してください</option> <option value="price-asc" {{ 'price-asc' == request('sort') ? 'selected' : '' }}>金額が安い順</option> <option value="price-desc" {{ 'price-desc' == request('sort') ? 'selected' : '' }}>金額が高い順 </option> </select> </div> <div class="text-right pr-5"> <input type="submit" class="btn btn-danger" value="検索"> </div> </form> <div class="d-flex flex-row bd-highlight mb-3 font-weight-bold ml-5"> <div class="p-2 bd-highlight">{{ $products->total() }}件の商品が見つかりました</div> <div class="p-2 bd-highlight text-right pr-5"><span class="num">{{ $products->firstItem() }}</span> - <span class="num">{{ $products->lastItem() }}</span>件 / <span class="num">{{ $products->count() }}</span>件中 </div> </div> <div class="row pt-2 px-5"> @foreach ($products as $product) @if (!$product->is_sold)// is_soldがfalseの場合。つまり、売れてない商品のみを表示する。 <a href="{{ route('products.show', $product->id) }}" class="mb-5 ml-5"> <img src="{{isset($product->image_path_one) ? asset(Storage::url($product->image_path_one)) : asset('storage/no-image.png') }}" style="width: 100px; height: 100px;" class="img-thumbnail mx-auto d-block"> <div class="center-block"> <p class="text-center">{{ $product->name }}</p> <p class="text-center">¥{{ number_format($product->price) }}</p> </div> </a> @auth <div id="app"> <like-component :product-id="{{ $product->id }}" :liked-data="{{ auth()->user()->can('likedProduct', $product) ? 'true' : 'false'}}"></like-component> </div> @endauth @endif @endforeach </div> </div> {{ $products->links() }} @endsectionProductController.phppublic function index(ProductSearchService $productSearchService, Request $request)// ProductSearchServiceクラスを作成し、それを注入している。 { $products = $productSearchService($request); // 検索結果にマッチした商品データを$productsに格納している。 $likeProducts = ""; if (Auth::check()) { $likeProducts = Auth::user()->likeProducts()->pluck('product_id'); } return view('products.index', compact([ 'products', 'likeProducts', ])); }ProductSearchService.php<?php namespace App\Services; use App\Models\Product; use Illuminate\Http\Request; class ProductSearchService { public function __invoke(Request $request) { $products = Product::query();// これでProductモデルのクエリビルダーインスタンスを生成。Productモデルで設定したスコープが使えるようになる。 if (filled($request->name)) { $products->fuzzySearch($request->name); } if (filled($request->product_category_id)) { $products->productCategorySearch($request->product_category_id); } if ($request->sort === 'price-asc' || $request->sort === 'price-desc') { if (filled($request->sort)) { $products->orderBySort(...explode('-', $request->input('sort', 'price-desc')));// explode関数を使うことでデミリタである'-'で区切ったフィールド名を条件でソートする。例えば、price-descならexplode関数により'-'で区切ったpriceとdescが配列に格納される。その配列がスプレッド構文である...により展開され、price,descになる。つまり、price-descならpriceの降順でソートしてくれるということになる。 } } return $products->where('is_sold', false)->paginate()->appends($request->query()); //is_soldがfalseのもののみ表示する。paginate()->appends($request->query())とすることで、ページを跨いでもクエリ文字列を持ち越すことができる。 } }Product.phppublic function scopeFuzzySearch(Builder $query, ?string $name) { if (is_null($name)) { return; } return $query->where('products.name', 'like', '%' . $name . '%'); //曖昧検索でひっかかった商品を返す } public function scopeProductCategorySearch(Builder $query, ?int $productCategoryId) { if (is_null($productCategoryId)) { return; } return $query ->join('product_categories', 'product_categories.id', '=', 'products.product_category_id') ->select('products.*') ->where('products.product_category_id', $productCategoryId); //product_categoriesテーブルのidとproductsテーブルのproduct_category_idが紐づいているものを結合し、その上でユーザーより入力されたカテゴリーidと同じproductsテーブルのproduct_category_idの商品を取得する。 } public function scopeOrderBySort(Builder $query, ?string $column, ?string $direction) { if (is_null($column) || is_null($direction)) { return; } return $query->orderBy($column, $direction);// 見ての通り、入力されたカラム名をascかdescでソートする。 }商品詳細機能を作成する
products.show.blade.php@extends('layouts.app') @section('content') <div class="mx-auto" style="width: 800px;"> <div id="app"> <image-component :product="{{ $product}}"></image-component> // 画像を切り替えるコンポーネント @auth <like-component :product-id="{{ $product->id }}" :liked-data="{{ auth()->user()->can('likedProduct', $product) ? 'true' : 'false'}}"></like-component> @endauth </div> <div class="media-body ml-5"> <h4 class="media-heading">{{ $product->name }}</h4> <p class="mt-5">{{ $product->comment }}</p> </div> </div> </div> <div class="product-buy"> <div class="m"> <a href="{{ route('products.index') }}">< 商品一覧に戻る</a> </div> <form action="{{ route('bulletin_boards.store', $product->id) }}" method="post"> @csrf <div class="text-right"> @can('myselfProduct', $product) <p> 出品した商品です</p> @else {{-- <input type="submit" value="買う!" name="submit" class="btn btn-danger"> --}} <input type="hidden" name="amount" value="{{ $product->price }}"> <script src="https://checkout.stripe.com/checkout.js" class="stripe-button" data-key="pk_test_51HClzaKE8qY19OSOmgADigZKIPcs47EwbAqAveZUQFyngbMbKy2ACSr7wn04nzCZeJXV8zuZBcaEXl5pJJBA5n2J00M4DktJ4s" data-amount="{{ $product->price }}" data-name="決済をする" data-label="買う!" data-description="カード情報を入力してください。" data-image="https://stripe.com/img/documentation/checkout/marketplace.png" data-locale="auto" data-currency="JPY"> </script> <p class="mt-3">¥{{ number_format($product->price) }}</p> @endcan </div> </form> </div> </div> @endsectionImageComponent.vue<template> <div> <!-- メイン --> <img :src="this.imageMainUrl" style="width: 200px; height: 200px;" /> <!-- 2 --> <img :src="this.imageOneUrl" @mouseover="swichImg(imageOneUrl)" //マウスを乗せた時にイベントが発火 style="width: 50px; height: 50px;" /> <!-- 2 --> <img :src="this.imageTwoUrl" @mouseover="swichImg(imageTwoUrl)" style="width: 50px; height: 50px;" /> <!-- 3 --> <img :src="this.imageThreeUrl" @mouseover="swichImg(imageThreeUrl)" style="width: 50px; height: 50px;" /> </div> </template> <script lang="js"> export default { props: ['product'], created(){ this.imageMain(); this.imageOne(); this.imageTwo(); this.imageThree(); }, data(){ if (!this.product.image_path_one){ //this.product.image_path_oneが空だった場合は、no-imageの画像を格納 const imageMainUrl = 'http://localhost/storage/no-image.png'; }else{ //this.product.image_path_oneに値が格納されていた場合、 const slicePath = this.product.image_path_one.slice('7', '67') const imageMainUrl = 'http://localhost/storage/'+slicePath; } return { imageMainUrl: "", imageOneUrl: "", imageTwoUrl: "", imageThreeUrl: "", }; }, methods: { imageMain(){ if (!this.product.image_path_one){ this.imageMainUrl = 'http://localhost/storage/no-image.png' }else{ const slicePath = this.product.image_path_one.slice('7', '67') this.imageMainUrl = 'http://localhost/storage/'+slicePath; } }, imageOne(){ if (!this.product.image_path_one){ this.imageOneUrl = 'http://localhost/storage/no-image.png' }else{ const slicePath = this.product.image_path_one.slice('7', '67') this.imageOneUrl = 'http://localhost/storage/'+slicePath; } }, imageTwo(){ if (!this.product.image_path_two){ this.imageTwoUrl = 'http://localhost/storage/no-image.png' }else{ const slicePath = this.product.image_path_two.slice('7', '67') this. imageTwoUrl = 'http://localhost/storage/'+slicePath; } }, imageThree(){ if (!this.product.image_path_three){ this.imageThreeUrl = 'http://localhost/storage/no-image.png' }else{ const slicePath = this.product.image_path_three.slice('7', '67') this.imageThreeUrl = 'http://localhost/storage/'+slicePath; } }, swichImg(path){ this.imageMainUrl = path; }, }, }; </script>ProductController.php/** * Display the specified resource. * * @param int $id * @return \Illuminate\Http\Response */ public function show(Product $product) { $likeProducts = ""; if (Auth::check()) { $likeProducts = Auth::user()->likeProducts()->pluck('product_id'); } return view('products.show', compact( 'product', 'likeProducts', )); }商品投稿機能を作成する
products/create.blade.php@extends ('layouts.app') @section ('content') <div class="mx-auto" style="width: 1200px;"> <div class="row"> @component('components.sidebar') @endcomponent <div class="col"> <h1 class="mb-5">商品を出品する</h1> <form action="{{ route('products.store') }}" method="post" enctype="multipart/form-data"> @csrf <div class="form-group"> <label class="">商品名</label> <span>@error ('name') {{ $message }} @enderror</span> <input type="text" name="name" value="{{ old('name') }}" class="form-control"> </div> <div class="form-group"> <label class="">カテゴリ</label> <select name="product_category_id" class="form-control"> @foreach ($productCategories as $productCategory) <option value="{{ $productCategory->id }}" {{ $productCategory->id == old('product_category_id') ? 'selected' : '' }}> {{ $productCategory->name }}</option> @endforeach </select> </div> <div class="form-group"> <label class="">詳細</label> <textarea name="comment" id="js-count" class="form-control">{{ old('comment') }}</textarea> <p class="counter-text"><span id="js-count-view">0</span>/500文字</p> </div> <div class="form-group"> <label>金額</label> <span>@error ('price') {{ $message }} @enderror</span> <input type="text" name="price" class="form-control" placeholder="50,000" value="{{ old('price') }}"> </div> <div id="app"> <preview-component></preview-component> </div> <div class="text-right" style="width: 900px"> <input type="submit" class="btn btn-danger" value="出品する"> </div> </form> </div> </div> </div> </div> @endsectionPreviewComponent.vue// 画像プレビューのコンポーネント <template> <div class="d-flex justify-content-around"> <div class="p-2"> <label>画像1</label> <input type="file" ref="file_one" @change="setImageOne" name="image_path_one" /> <img :src="data.imageOne" :style="{width: width, height: heght, display: displayOne}" /> </div> <div class="p-2"> <label>画像2</label> <input type="file" ref="file_two" @change="setImageTwo" name="image_path_two" /> <img :src="data.imageTwo" :style="{width: width, height: heght, display: displayTwo}" /> </div> <div class="p-2"> <label>画像3</label> <input type="file" ref="file_three" @change="setImageThree" name="image_path_three" /> <img :src="data.imageThree" :style="{width: width, height: heght, display: displayThree}" /> </div> </div> </template> <script> export default { data() { return { data: { imageOne: "", //画像パスを格納するためのもの imageTwo: "", imageThree: "" }, width: "200px", heght: "200px", displayOne: "none", displayTwo: "none", displayThree: "none" }; }, methods: { setImageOne() { const files = this.$refs.file_one;// ref属性で指定されている名前のDOMを取得 const fileImg = files.files[0]; // 画像データをfileImagに格納 if (fileImg.type.startsWith("image/")) { //画像データのtypeを取得し、それがimage/から始まるものであれば、if文の中の処理を実行 this.data.imageOne = window.URL.createObjectURL(fileImg); // 画像データのurlを生成して格納 this.displayOne = ""; //最初はdisplay:noneで画像を隠している状態だが、noneを外して画像を表示させる仕組み } }, setImageTwo() { const files = this.$refs.file_two; const fileImg = files.files[0]; if (fileImg.type.startsWith("image/")) { this.data.imageTwo = window.URL.createObjectURL(fileImg); this.displayTwo = ""; } }, setImageThree() { const files = this.$refs.file_three; const fileImg = files.files[0]; if (fileImg.type.startsWith("image/")) { this.data.imageThree = window.URL.createObjectURL(fileImg); this.displayThree = ""; } } } }; </script>ProductController.php/** * Show the form for creating a new resource. * * @return \Illuminate\Http\Response */ public function create() { return view('products.create'); } /** * Store a newly created resource in storage. * * @param \Illuminate\Http\Request $request * @return \Illuminate\Http\Response */ public function store(StoreProductRequest $request)// フォームリクエスト作成して注入 { $parameters = $request->validated(); //フォームリクエストのバリデーションに通過した値が$parametersに格納される $parameters['user_id'] = Auth::id(); //新たにuser_idプロパティを作成してそこにログインユーザーのidを格納 Product::create($parameters); //上記のデータをProductテーブルに格納 return redirect(route('my_page'))->with('flash_message', '商品を登録しました。'); //商品を登録した後に遷移するマイページで商品を登録しましたというメッセージをsessionに入れて一度だけそれを表示する。 }商品更新機能
edit.blade.php@extends ('layouts.app') @section ('content') <div class="mx-auto" style="width: 1500px;"> <div class="row"> @component('components.sidebar') @endcomponent <div class="col"> <h1>商品を編集する</h1> <form action="{{ route('products.update', $product->id) }}" method="post" class="form-group" enctype="multipart/form-data" style="width:100%;box-sizing:border-box;"> @csrf @method('PUT') <div class="form-group"> <span>@error ('name') {{ $message }} @enderror</span> 商品名<span class="label-require">必須</span> <input type="text" class="form-control" name="name" value="{{ old('name', $product->name) }}"> </div> <div class="form-group"> カテゴリ<span class="label-require">必須</span> <select name="product_category_id" id="" class="form-control"> @foreach ($productCategories as $productCategory) <option value="{{ $productCategory->id }}" {{ $productCategory->id == old('product_category_id', $product->product_category_id) ? 'selected' : '' }}> {{ $productCategory->name }}</option> @endforeach </select> </div> <div class="form-group"> <label for="">詳細</label> <textarea class="form-control" name="comment" id="js-count" cols="30" rows="10" style="height:150px;">{{ old('comment', $product->comment) }}</textarea> <p class="counter-text"><span id="js-count-view">0</span>/500文字</p> </div> <div class="form-group"> <span>@error ('price') {{ $message }} @enderror</span> <label>金額</label> <input type="text" class="form-control" name="price" placeholder="50,000" value="{{ old('price', $product->price) }}"> <div> <div class="d-flex justify-content-around pt-3"> <div class="p-2"> 画像1 <input type="file" name="image_path_one" class="input-file"> <img src="{{ asset('storage/product_images/'. $product->image_path_one) }}" alt="" class="prev-img" style="display:none;"> </div> <div class="imgDrop-container"> 画像2 <input type="file" name="image_path_two" class="input-file"> <img src="" alt="" class="prev-img" style="display:none;"> </div> <div class="imgDrop-container"> 画像3 <input type="file" name="image_path_three" class="input-file"> <img src="" alt="" class="prev-img" style="display:none;"> </div> </div> <div class="text-right" style="width: 1120px"> <input type="submit" class="btn btn-danger" value="編集する"> </div> </form> </div> </div> </div> @endsectionProductController.php/** * Show the form for editing the specified resource. * * @param int $id * @return \Illuminate\Http\Response */ public function edit(Product $product) { $this->authorize('update', $product); // ポリシーで、自分が出品した商品じゃないと編集できないようにしている return view('products.edit', compact('product')); } /** * Update the specified resource in storage. * * @param \Illuminate\Http\Request $request * @param int $id * @return \Illuminate\Http\Response */ public function update(UpdateProductRequest $request, Product $product) { $this->authorize('update', $product); $parameter = $request->validated(); $product->update($parameter); return redirect(route('my_page')); }ProductPolicy.phppublic function update(User $user, product $product) { return $user->id === $product->user_id; // 自分のuserテーブルのidと出品した商品のuser_idが同じだった場合にtrueを返す。つまり、認可するということ }商品削除機能
ProductController.php/** * Remove the specified resource from storage. * * @param int $id * @return \Illuminate\Http\Response */ public function destroy(Product $product) { $product->delete(); return redirect(route('my_page')); }お気に入り機能
products/index.blade.php@auth //ログインしているユーザーのみお気に入りができるようにする <div id="app"> <like-component :product-id="{{ $product->id }}" // likeComponentにproductIdを渡す :liked-data="{{ auth()->user()->can('likedProduct', $product) ? 'true' : 'false'}}"></like-component> //ログインしているユーザーがポリシーlikedProductでtrueを返された場合はtrueを返す。 </div> @endauthProductPolicy.phppublic function likedProduct(User $user, product $product) { return $product->likedUsers()->whereUserId($user->id)->exists(); // 中間テーブルに格納されている商品idと同じレコードにログインしているユーザーのidがあればtrueを返す }likeComponent.vue<template> <div> <i v-on:click="storeOrDelete" :class="[likedData === true ? 'fas fa-heart ml-3' : 'far fa-heart ml-3']" ></i> </div> </template> <script> export default { props: ["productId", "likedData"], methods: { change() { this.likedData = !this.likedData; }, storeProductId() { axios .post("/like/" + this.productId, { productId: this.productId }) .then(response => { console.log("success"); }) .catch(err => { console.log("error"); }) }, deleteProductId() { axios .delete("/like/" + this.productId, { data: { productId: this.productId } }) .then(response => { console.log("success"); }) .catch(err => { console.log("error"); }); }, storeOrDelete() { if (this.likedData === true) { this.deleteProductId(); this.change(); } else { this.storeProductId(); this.change(); } } } }; </script>LikeController.php<?php namespace App\Http\Controllers; use App\Models\Product; use Illuminate\Support\Facades\Auth; class LikeController extends Controller { /** * Store a newly created resource in storage. * * @param \Illuminate\Http\Request $request * @return \Illuminate\Http\Response */ public function store(Product $product) { Auth::user()->likeProducts()->attach($product); //中間テーブルであるlikeProductsに非同期でlikeComponent.vueから送られてきた商品idを格納する } /** * Display the specified resource. * * @param int $id * @return \Illuminate\Http\Response */ public function delete(Product $product) { Auth::user()->likeProducts()->detach($product); } }User.phppublic function likeProducts() { return $this->belongsToMany(Product::class, 'like_products'); //Productモデルと多対多のリレーションを行う。 }掲示板機能
bulletinBoards/show.blade.php<style> .msg-right { width: 500px; margin-left: auto; position: relative; margin-bottom: 2%; background-color: #d2eaf0; } .msg-left { width: 500px; margin-right: auto; position: relative; margin-bottom: 2%; background-color: #f6e2df; } .avater { position: absolute; right: 102%; } .avater img { border-radius: 40px; height: 30px; width: 30px; } textarea { width: 100%; } input { float: right; } </style> @extends('layouts.app') @section('content') <body class="page-msg page-1colum"> <!-- メインコンテンツ --> @if (session('flash_message')) <div id="app" style="position: absolute; top:0; width: 100%"> <message-component flash-message="{{ session('flash_message') }}"></message-component> </div> @endif <div class="container bg-white"> <div class="row"> <div class="col-6"> <div class="row"> <div class="col-2"> <img src="{{ asset(Storage::url($partnerUser->image_path)) }}" class="avatar" style="width: 50px; height: 50px"><br> </div> <div class="col-4"> {{ $partnerUser->age }}歳<br> 〒{{ substr_replace($partnerUser->zip, '-', 3, 0) }}<br> TEL:{{ $partnerUser->tell }} </div> </div> </div> <div class="col-6"> <div class="row"> <div class="col-2"> <img src="{{ asset(Storage::url($product->image_path_one)) }}" style="width: 50px; height: 50px"> </div> <div class="col-4"> 取引金額:<span class="price">¥{{ number_format($product->price) }}</span><br> 取引開始日:{{ $bulletinBoard->created_at }} </div> </div> </div> </div> </div> <div class="mx-auto bg-white mt-5" style="width: 1140px;"> @foreach ($messages as $message) <div class="{{ Auth::id() !== $partnerUser->id ? 'msg-right' : 'msg-left' }}"> <div class="avater"> <img src="{{ asset(Storage::url(Auth::user()->image_path)) }}"> </div> <p class=""> <span class="triangle"></span> {{ $message->message }} </p> <div class="">{{ $message->created_at }}</div> </div> @endforeach <div class=""> <form action="{{ route('messages.store', $bulletinBoard->id) }}" method="post"> @csrf <textarea name="msg" cols="30" rows="3"></textarea> <input type="submit" value="送信" class=""> </form> </div> </div> </div> @endsectionBuleltinBoardController.phppublic function store(Product $product, Request $request) //商品を購入した場合にこのメソッドが実行される { $bulletinBoard = BulletinBoard::create([ 'sale_user' => $product->user_id, // 商品を売っている人のusersテーブルのidを格納する 'buy_user' => Auth::id(), // 商品を買った人のusersテーブルのidを格納する 'product_id' => $product->id, // 買った商品のproductsテーブルのidを格納する ]); $product->update([ 'is_sold' => true, // 買われた商品のproductsテーブルのis_soldカラムをtrueにする ]); return redirect(route('bulletin_boards.show', $bulletinBoard->id))->with('flash_message', '商品を購入しました。'); // 商品を買った場合には遷移先のbulletin_boards.showでフラッシュメッセージを表示させる } /** * Display the specified resource. * * @param int $id * @return \Illuminate\Http\Response */ public function show(BulletinBoard $bulletinBoard) { $dealUserIds[] = $bulletinBoard->sale_user; // bulletinBoardテーブルのsale_userとbuy_userを配列であるdealUserIdsに格納する $dealUserIds[] = $bulletinBoard->buy_user; if ($key = array_search(Auth::id(), $dealUserIds) !== false) { // unset($dealUserIds[$key]); } $partnerUserId = array_shift($dealUserIds); $partnerUser = User::where('id', $partnerUserId)->first(); $product = Product::where('id', $bulletinBoard->product_id)->first(); $messages = $bulletinBoard->messages()->get(); return view('bulletinBoards.show', compact( 'messages', 'bulletinBoard', 'partnerUser', 'product', )); }マイページ
myPage.index.blade.php@extends('layouts.app') @section('content') @if (session('flash_message')) <div id="app"> <message-component flash-message="{{ session('flash_message') }}"></message-component> </div> @endif <div class="mx-auto" style="width: 1500px;"> <div class="row"> @include('components.sidebar', compact( 'products', )) <div class="col"> <h1 class="text-center">MYPAGE</h1> <h2 class=""> 登録商品一覧 </h2> <div class="row pt-2 px-5"> @foreach ($products as $product) <a href="{{ route('products.edit', $product->id) }}"> <img src="{{isset($product->image_path_one) ? asset(Storage::url($product->image_path_one)) : asset('storage/no-image.png') }}" style="width: 100px; height: 100px;" class="img-thumbnail mx-auto d-block"> <p class="panel-title">{{ $product->name }} <span style="display: block;" class="price">¥{{ number_format($product->price) }}</span></p> </a> <form action="{{ route('products.destroy', $product->id) }}" method="POST"> @csrf @method('DELETE') <button class="btn-danger" type="submit">削除</button> </form> @endforeach </div> <h2 class="title"> 連絡掲示板一覧 </h2> <table class="table"> <thead> <tr> <th>最新送信日時</th> <th>取引相手</th> <th>メッセージ</th> </tr> </thead> <tbody> @foreach ($messages as $message) <tr> <td>{{ ($message['created_at']) }}</td> <td style="width: 100px">{{ $message['trading_partner'] }}</td> <td><a href="{{ route('bulletin_boards.show', $message['bulletin_board_id']) }}">{{ $message['message'] }}</a> </td> </tr> @endforeach </tbody> </table> <h2 class="title"> お気に入り一覧 </h2> @foreach ($likeProducts as $likeProduct) <div class="float-left ml-5"> <a href="{{ route('products.show', $likeProduct->id) }}"> <img src="{{isset($product->image_path_one) ? asset(Storage::url($product->image_path_one)) : asset('storage/no-image.png') }}" style="width: 100px; height: 100px;" class="img-thumbnail mx-auto d-block"> <p>{{ $likeProduct->name }} <span style="display: block;">{{ number_format($likeProduct->price) }}</span></p> </a> </div> @endforeach </div> </div> </div> @endsectionMyPageController.phppublic function index(Request $request) { $products = User::find(Auth::id())->products()->get(); $bulletinBoards = BulletinBoard::where('sale_user', Auth::id())->orWhere('buy_user', Auth::id())->get(); $collectionMessages = Collection::make([]); foreach ($bulletinBoards as $bulletinBoard) { $collectionMessages->push(Message::where('bulletin_board_id', $bulletinBoard->id)->orderBy('created_at', 'desc')->get()); } $arrayMessages = $collectionMessages->toArray(); $messages = []; foreach ($arrayMessages as $arrayMessage) { $messages[] = array_shift($arrayMessage); } $messages = array_filter($messages); $likeProducts = Auth::user()->likeProducts()->get(); return view('myPage.index', compact( 'messages', 'products', 'likeProducts', )); }
- 投稿日:2020-09-12T09:51:11+09:00
LaravelでVue.JSを使ってみる①
環境構築
プロジェクト内でnpm installで利用可能(ver 5.6以降?デフォルトでpackage.jsonに設定してある)
※レンタルサーバーの場合はnode.js入れる必要がある。$ npm install実装してみる
とりあえず、welcome.blade.phpに設定してみます。
resources/views/welcome.blade.php<html lang="{{ app()->getLocale() }}"> <head> ~ <meta name="csrf-token" content="{{ csrf_token() }}"> <link href="{{ asset('css/app.css') }}" rel="stylesheet"> ~ </head> <body> ~ <div id="app"> <example-component></example-component> </div> ~ <script src="{{ asset('js/app.js') }}" defer></script> </body> </html>①head内でcsrfトークンの設定、cssのリンク
<meta name="csrf-token" content="{{ csrf_token() }}">
<link href="{{ asset('css/app.css') }}" rel="stylesheet">
②body内でコンポーネントの設定
vueのコードはresources/assets/js/app.jsに書いてあります。example-componentはデフォルトで設定してあるコンポーネント
   <div id="app">
         <example-component></example-component>
      </div>
③body閉じタグ直前でjsファイルへのリンク
<script src="{{ asset('js/app.js') }}" defer></script>動かしてみる
コンパイルしてページを開くと表示されているはずです。
$ npm run devnpm run dev … minifyされない
npm run prod … minifyされる
npm run watch … 対象ファイルを監視して変更があれば自動でコンパイルしてくれる
- 投稿日:2020-09-12T09:49:38+09:00
Vue.jsの特徴
プログラミング勉強日記
2020年9月12日
JSには色々なフレームワークがあって、開発の用途によって使用するフレームワークが違うと思うので、まとめてみようと思う。ReactについてとAngularについてまとめたので、今回はVue.jsについてまとめる。Vue.jsとは
Vue.jsは、UIを構築するためのJavaScriptのフレームワーク。Vue.jsでコードを書くときは、無駄な長い記述を少なくできる。Vue.js独自の規格やルールも少ないので、他のフレームワークよりも自分の好きな方法でアプリ開発を行うこともできる。
特徴
コンポーネント指向である
ReactとAngularと同様で、Vue.jsもコンポーネント指向である。コンポーネント指向は、ソフトウェアを機能ごとに部品(コンポーネント)として分割して、必要に応じて組み合わせて使う考えのことである。
機能を小さい部品にして持たせているので、状態の管理もしやすくて再利用も容易にできる。再利用性が高くなり、デザインと技術の共同作業を簡単にすることができ、開発スピードの向上ができる。学習コストが低い
様々なフレームワークがあり、開発現場ごとに新しい技術を取得しないといけないことも珍しくないが、その中でもVue.jsは学習コストが低く、初心者や経験者問わずすぐに開発することができるという特徴がある。Vue.jsがシンプルであり、非常に人気が高いので日本語での技術ブログや記事が充実している。
ディレクティブ
Vue.jsはDirectiveというView要素に付加できる独自要素がある。ディレクティブを使用することで、DOMを簡単に操作することができ、HTML要素の表示・非表示を柔軟に変化でき、開発スピードを速められる。
双方向データバインディング
Vue.jsもデータバインドに特化したフレームワークである。
アプリでユーザ画面(View)で操作した内容をデータ(Model)の反映、データ(Model)の内容が変わったときに画面(View)に反映する必要がある。なので、Viewを操作するときはModelに反映するために、画面からHTMLの要素を取得して要素をデータとして処理、処理したデータを画面に反映するプログラムを書く必要がある。クラスを利用可能
JSでは使えなかったクラスを利用することができる。Vue.jsでは連想配列の形でクラスを作成して、様々なデータの入れ物として活用することができる。
TypeScriptも利用可能
Vue CLIにはJestやMochaを使って簡単に単体テストを行うためのプラグインオプションがある。公式のVue Tesyユーティリティもあり、作成したアプリの動作を検証することができる。
URLのルーティングができない
ルーティングとは同じページ上で疑似的なページ遷移すること。
Vue.jsではURLのルーティングを単体で行うことができる。ルーティングを必要とする場合には管理が複雑になることがあり、単一のページ以外が表示されない扱いになり、アクセス解析やSEO上の不都合が生じることがある。古いブラウザには非対応
Vue.jsを利用して作ったサイトは古いブラウザでは見ることができない。
参考文献
【Vue.js入門】特徴や他のフレームワークとの比較などを紹介!
Vue.jsとは?特徴とできることを具体例を交えて紹介
- 投稿日:2020-09-12T08:36:29+09:00
Docker × Laravel 8 Jetstream でログイン、ユーザー登録、2要素認証を実装する
Laravel Jetstream は Laravel8から使える新しいパッケージで、Laravel7以前で利用されていた Laravel UI の後継パッケージとなります。
Laravel Jetstreamの機能
- ログイン機能
- ユーザー登録機能
- メール検証
- 2要素認証
- セッション管理
- Laravel SanctumによるAPIサポート
- チーム管理
上記の機能を提供します。
Laravel Jetstreamの特徴
JetstreamはTailwind CSSを使用して設計されています。
テンプレートとして、LivewireまたはInertiaを選択できます。
- Livewireは主にBladeで書く人向け(SEO、OGPが必要)
- Inertiaは主にVueで書く人向け(SPA)
環境
- PHP: 7.4.4
- Laravel: 8.1.0
- Node: 14.2.0
- Yarn: 1.22.4
- Laravel Jetstream: 0.6.0
環境としてこちらの記事、リポジトリを参考にします。
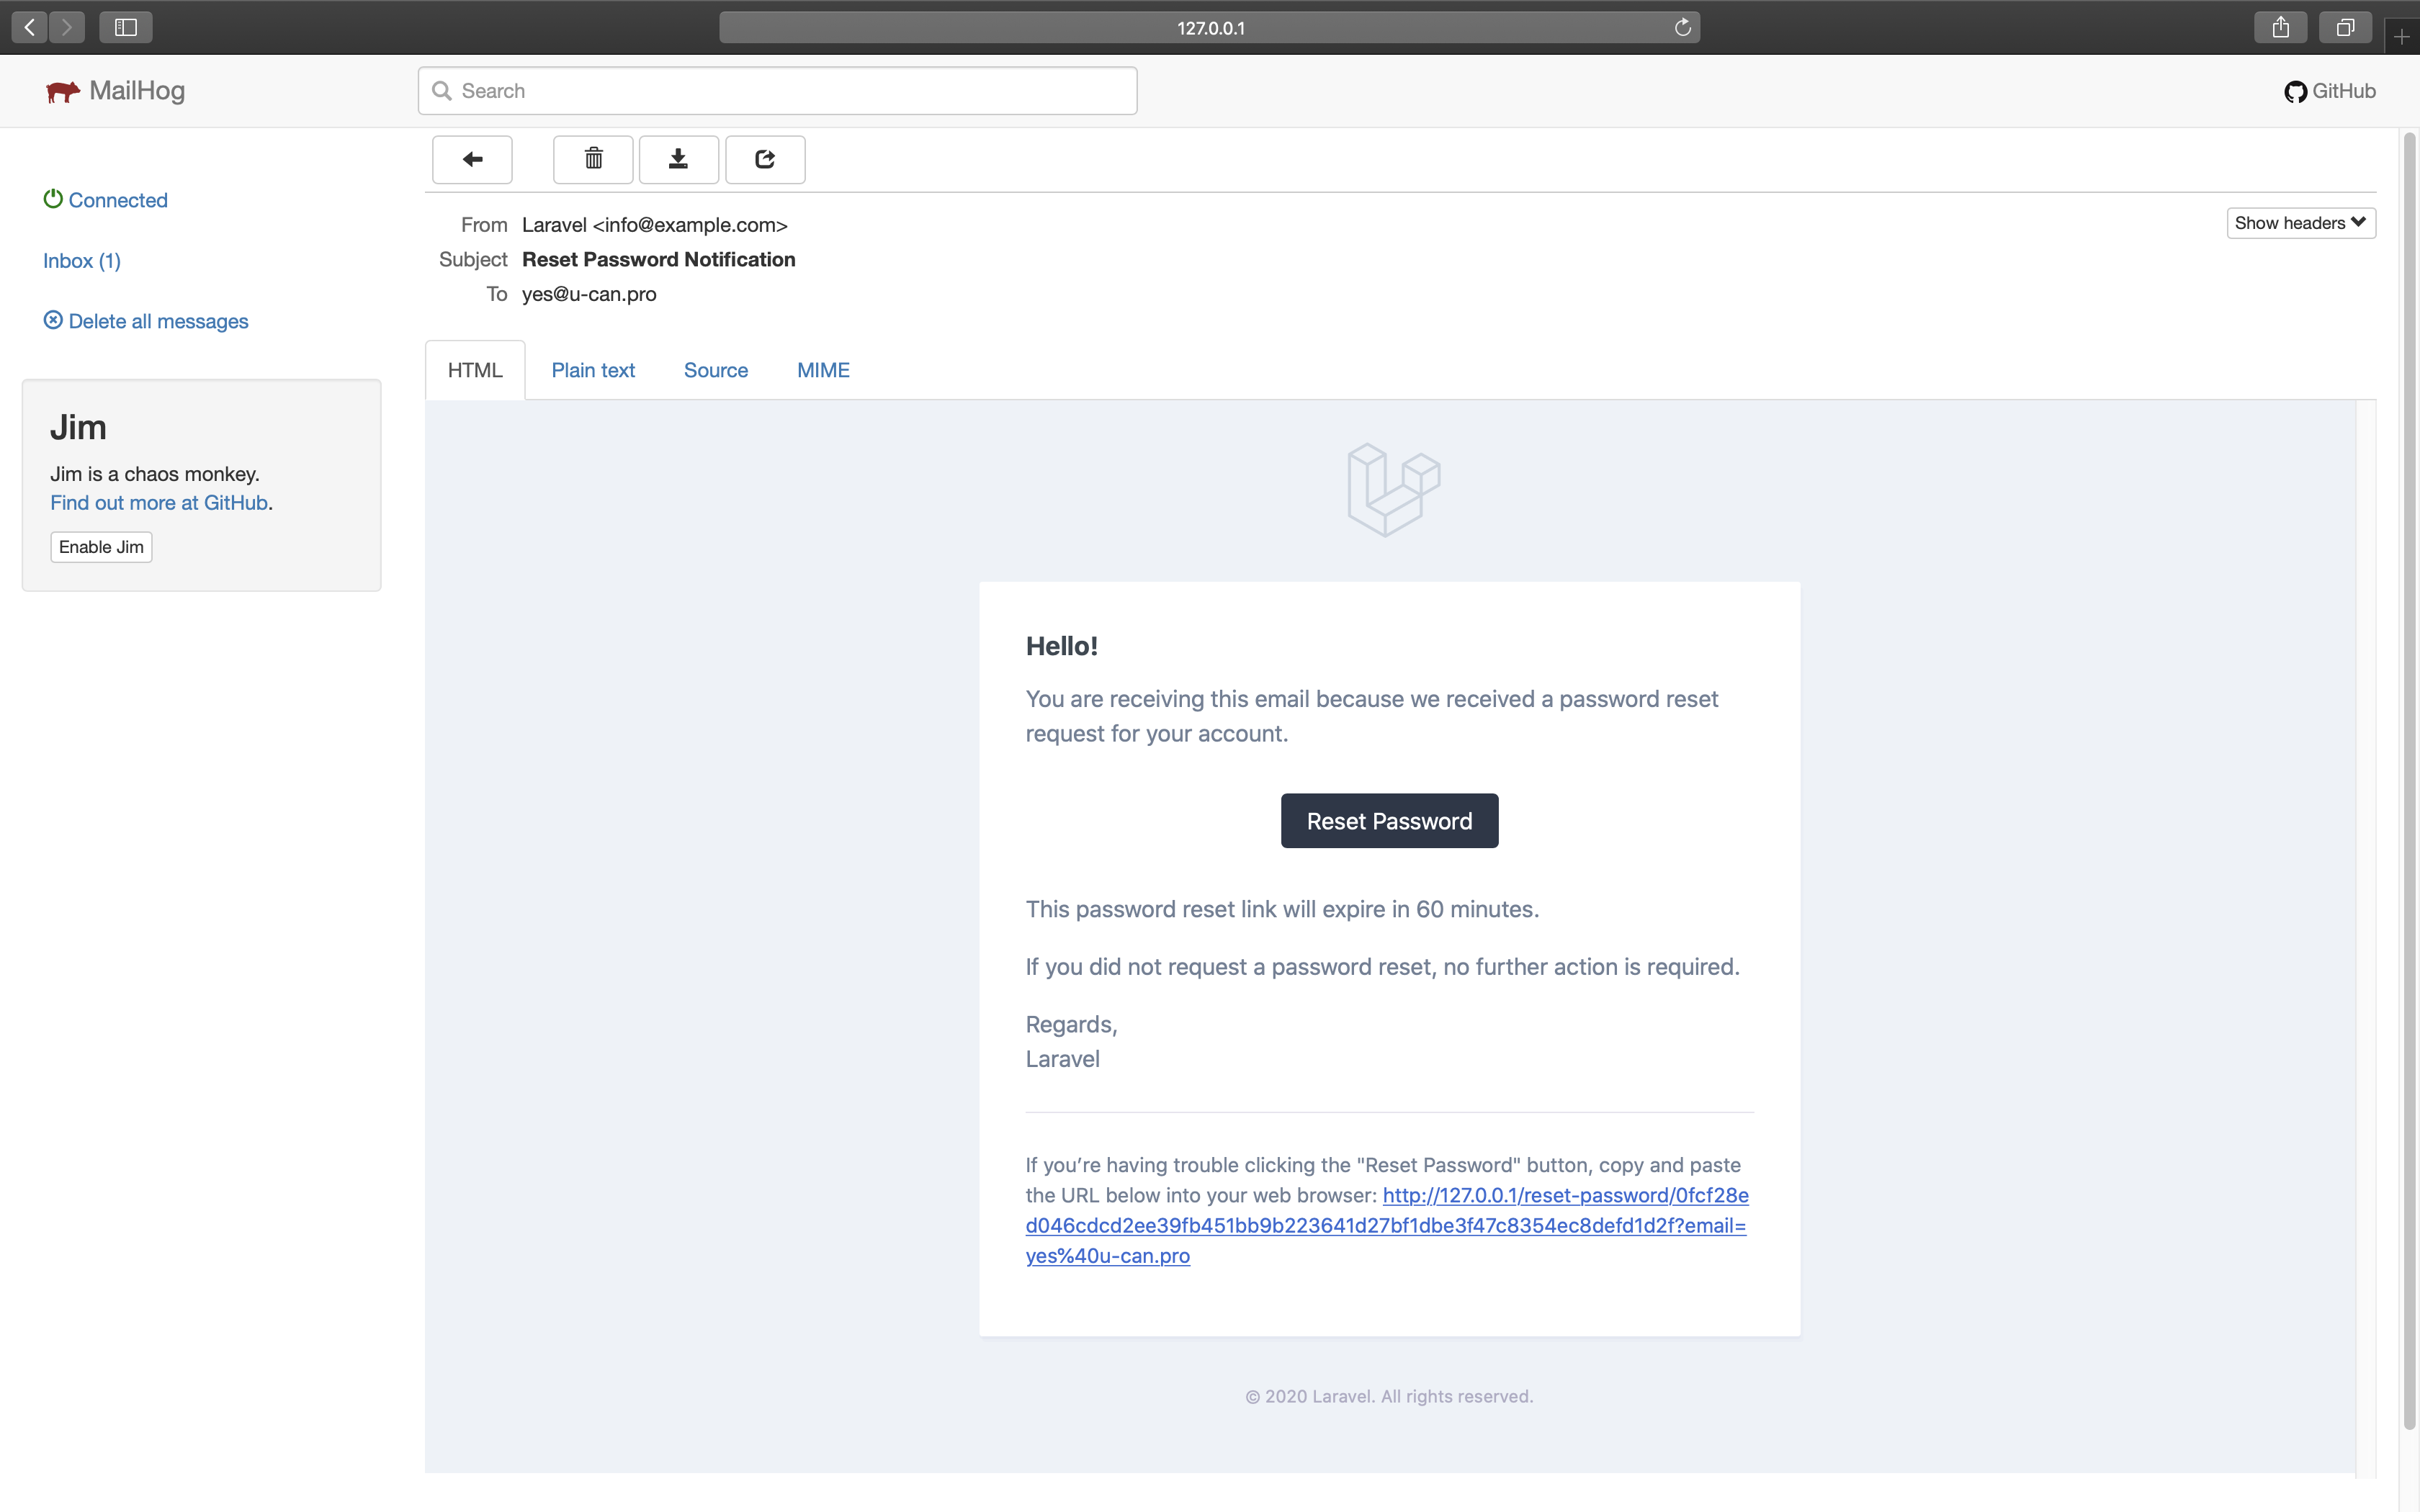
$ git clone git@github.com:ucan-lab/docker-laravel.git $ cd docker-laravel $ make create-projectパスワードリセットメールの動作確認をしたい場合は、下記の記事でメールコンテナを追加すると確認できます。
Livewire(Blade) インストール
$ make app
$ composer require laravel/jetstream
$ php artisan jetstream:install livewire
$ php artisan migrate
$ exit
$ make web $ yarn install $ yarn dev $ exit
Welcome画面が表示されればok
補足: Livewire のファイル差分
$ git status -s
 M .env.example
 M app/Http/Kernel.php
 M app/Models/User.php
 M app/Providers/RouteServiceProvider.php
 M composer.json
 M composer.lock
 M config/app.php
 M config/session.php
 M database/migrations/2014_10_12_000000_create_users_table.php
 M package.json
 M resources/css/app.css
 M resources/views/welcome.blade.php
 M routes/api.php
 M routes/web.php
 M webpack.mix.js
?? app/Actions/Fortify/CreateNewUser.php
?? app/Actions/Fortify/PasswordValidationRules.php
?? app/Actions/Fortify/ResetUserPassword.php
?? app/Actions/Fortify/UpdateUserPassword.php
?? app/Actions/Fortify/UpdateUserProfileInformation.php
?? app/Actions/Jetstream/DeleteUser.php
?? app/Providers/FortifyServiceProvider.php
?? app/Providers/JetstreamServiceProvider.php
?? app/View/Components/AppLayout.php
?? app/View/Components/GuestLayout.php
?? config/fortify.php
?? config/jetstream.php
?? config/sanctum.php
?? database/migrations/2014_10_12_200000_add_two_factor_columns_to_users_table.php
?? database/migrations/2019_12_14_000001_create_personal_access_tokens_table.php
?? database/migrations/2020_09_11_191956_create_sessions_table.php
?? public/css/app.css
?? resources/views/api/api-token-manager.blade.php
?? resources/views/api/index.blade.php
?? resources/views/auth/forgot-password.blade.php
?? resources/views/auth/login.blade.php
?? resources/views/auth/register.blade.php
?? resources/views/auth/reset-password.blade.php
?? resources/views/auth/two-factor-challenge.blade.php
?? resources/views/auth/verify-email.blade.php
?? resources/views/dashboard.blade.php
?? resources/views/layouts/app.blade.php
?? resources/views/layouts/guest.blade.php
?? resources/views/profile/delete-user-form.blade.php
?? resources/views/profile/logout-other-browser-sessions-form.blade.php
?? resources/views/profile/show.blade.php
?? resources/views/profile/two-factor-authentication-form.blade.php
?? resources/views/profile/update-password-form.blade.php
?? resources/views/profile/update-profile-information-form.blade.php
?? tailwind.config.js
Inertia(Vue) インストール
$ make app
$ composer require laravel/jetstream
$ php artisan jetstream:install inertia --teams
$ php artisan migrate
$ exit
$ make web $ yarn install $ yarn dev $ exit
Welcome画面が表示されればok
補足: Inertia のファイル差分
$ git status -s
 M backend/.env.example
 M backend/app/Http/Kernel.php
 M backend/app/Models/User.php
 M backend/app/Providers/AuthServiceProvider.php
 M backend/app/Providers/RouteServiceProvider.php
 M backend/composer.json
 M backend/composer.lock
 M backend/config/app.php
 M backend/config/session.php
 M backend/database/migrations/2014_10_12_000000_create_users_table.php
 M backend/package.json
 M backend/resources/css/app.css
 M backend/resources/js/app.js
 M backend/resources/views/welcome.blade.php
 M backend/routes/api.php
 M backend/routes/web.php
 M backend/webpack.mix.js
?? backend/app/Actions/Fortify/CreateNewUser.php
?? backend/app/Actions/Fortify/PasswordValidationRules.php
?? backend/app/Actions/Fortify/ResetUserPassword.php
?? backend/app/Actions/Fortify/UpdateUserPassword.php
?? backend/app/Actions/Fortify/UpdateUserProfileInformation.php
?? backend/app/Actions/Jetstream/AddTeamMember.php
?? backend/app/Actions/Jetstream/CreateTeam.php
?? backend/app/Actions/Jetstream/DeleteTeam.php
?? backend/app/Actions/Jetstream/DeleteUser.php
?? backend/app/Actions/Jetstream/UpdateTeamName.php
?? backend/app/Models/Membership.php
?? backend/app/Models/Team.php
?? backend/app/Policies/TeamPolicy.php
?? backend/app/Providers/FortifyServiceProvider.php
?? backend/app/Providers/JetstreamServiceProvider.php
?? backend/app/View/Components/GuestLayout.php
?? backend/config/fortify.php
?? backend/config/jetstream.php
?? backend/config/sanctum.php
?? backend/database/migrations/2014_10_12_200000_add_two_factor_columns_to_users_table.php
?? backend/database/migrations/2019_12_14_000001_create_personal_access_tokens_table.php
?? backend/database/migrations/2020_05_21_100000_create_teams_table.php
?? backend/database/migrations/2020_05_21_200000_create_team_user_table.php
?? backend/database/migrations/2020_09_11_221935_create_sessions_table.php
?? backend/public/css/app.css
?? backend/resources/js/Jetstream/ActionMessage.vue
?? backend/resources/js/Jetstream/ActionSection.vue
?? backend/resources/js/Jetstream/ApplicationLogo.vue
?? backend/resources/js/Jetstream/ApplicationMark.vue
?? backend/resources/js/Jetstream/Button.vue
?? backend/resources/js/Jetstream/ConfirmationModal.vue
?? backend/resources/js/Jetstream/DangerButton.vue
?? backend/resources/js/Jetstream/DialogModal.vue
?? backend/resources/js/Jetstream/Dropdown.vue
?? backend/resources/js/Jetstream/DropdownLink.vue
?? backend/resources/js/Jetstream/FormSection.vue
?? backend/resources/js/Jetstream/Input.vue
?? backend/resources/js/Jetstream/InputError.vue
?? backend/resources/js/Jetstream/Label.vue
?? backend/resources/js/Jetstream/Modal.vue
?? backend/resources/js/Jetstream/NavLink.vue
?? backend/resources/js/Jetstream/ResponsiveNavLink.vue
?? backend/resources/js/Jetstream/SecondaryButton.vue
?? backend/resources/js/Jetstream/SectionBorder.vue
?? backend/resources/js/Jetstream/SectionTitle.vue
?? backend/resources/js/Jetstream/SwitchableTeam.vue
?? backend/resources/js/Jetstream/Welcome.vue
?? backend/resources/js/Layouts/AppLayout.vue
?? backend/resources/js/Mixins/InteractsWithErrorBags.js
?? backend/resources/js/Pages/API/ApiTokenManager.vue
?? backend/resources/js/Pages/API/Index.vue
?? backend/resources/js/Pages/Dashboard.vue
?? backend/resources/js/Pages/Profile/DeleteUserForm.vue
?? backend/resources/js/Pages/Profile/LogoutOtherBrowserSessionsForm.vue
?? backend/resources/js/Pages/Profile/Show.vue
?? backend/resources/js/Pages/Profile/TwoFactorAuthenticationForm.vue
?? backend/resources/js/Pages/Profile/UpdatePasswordForm.vue
?? backend/resources/js/Pages/Profile/UpdateProfileInformationForm.vue
?? backend/resources/js/Pages/Teams/Create.vue
?? backend/resources/js/Pages/Teams/CreateTeamForm.vue
?? backend/resources/js/Pages/Teams/DeleteTeamForm.vue
?? backend/resources/js/Pages/Teams/Show.vue
?? backend/resources/js/Pages/Teams/TeamMemberManager.vue
?? backend/resources/js/Pages/Teams/UpdateTeamNameForm.vue
?? backend/resources/views/app.blade.php
?? backend/resources/views/auth/forgot-password.blade.php
?? backend/resources/views/auth/login.blade.php
?? backend/resources/views/auth/register.blade.php
?? backend/resources/views/auth/reset-password.blade.php
?? backend/resources/views/auth/two-factor-challenge.blade.php
?? backend/resources/views/auth/verify-email.blade.php
?? backend/resources/views/layouts/guest.blade.php
?? backend/tailwind.config.js
Screen Shot(Livewire, Inertia 共通)
welcome
Jetstreamをインストールすることで右上に
Login,Registerのメニューが追加されています。
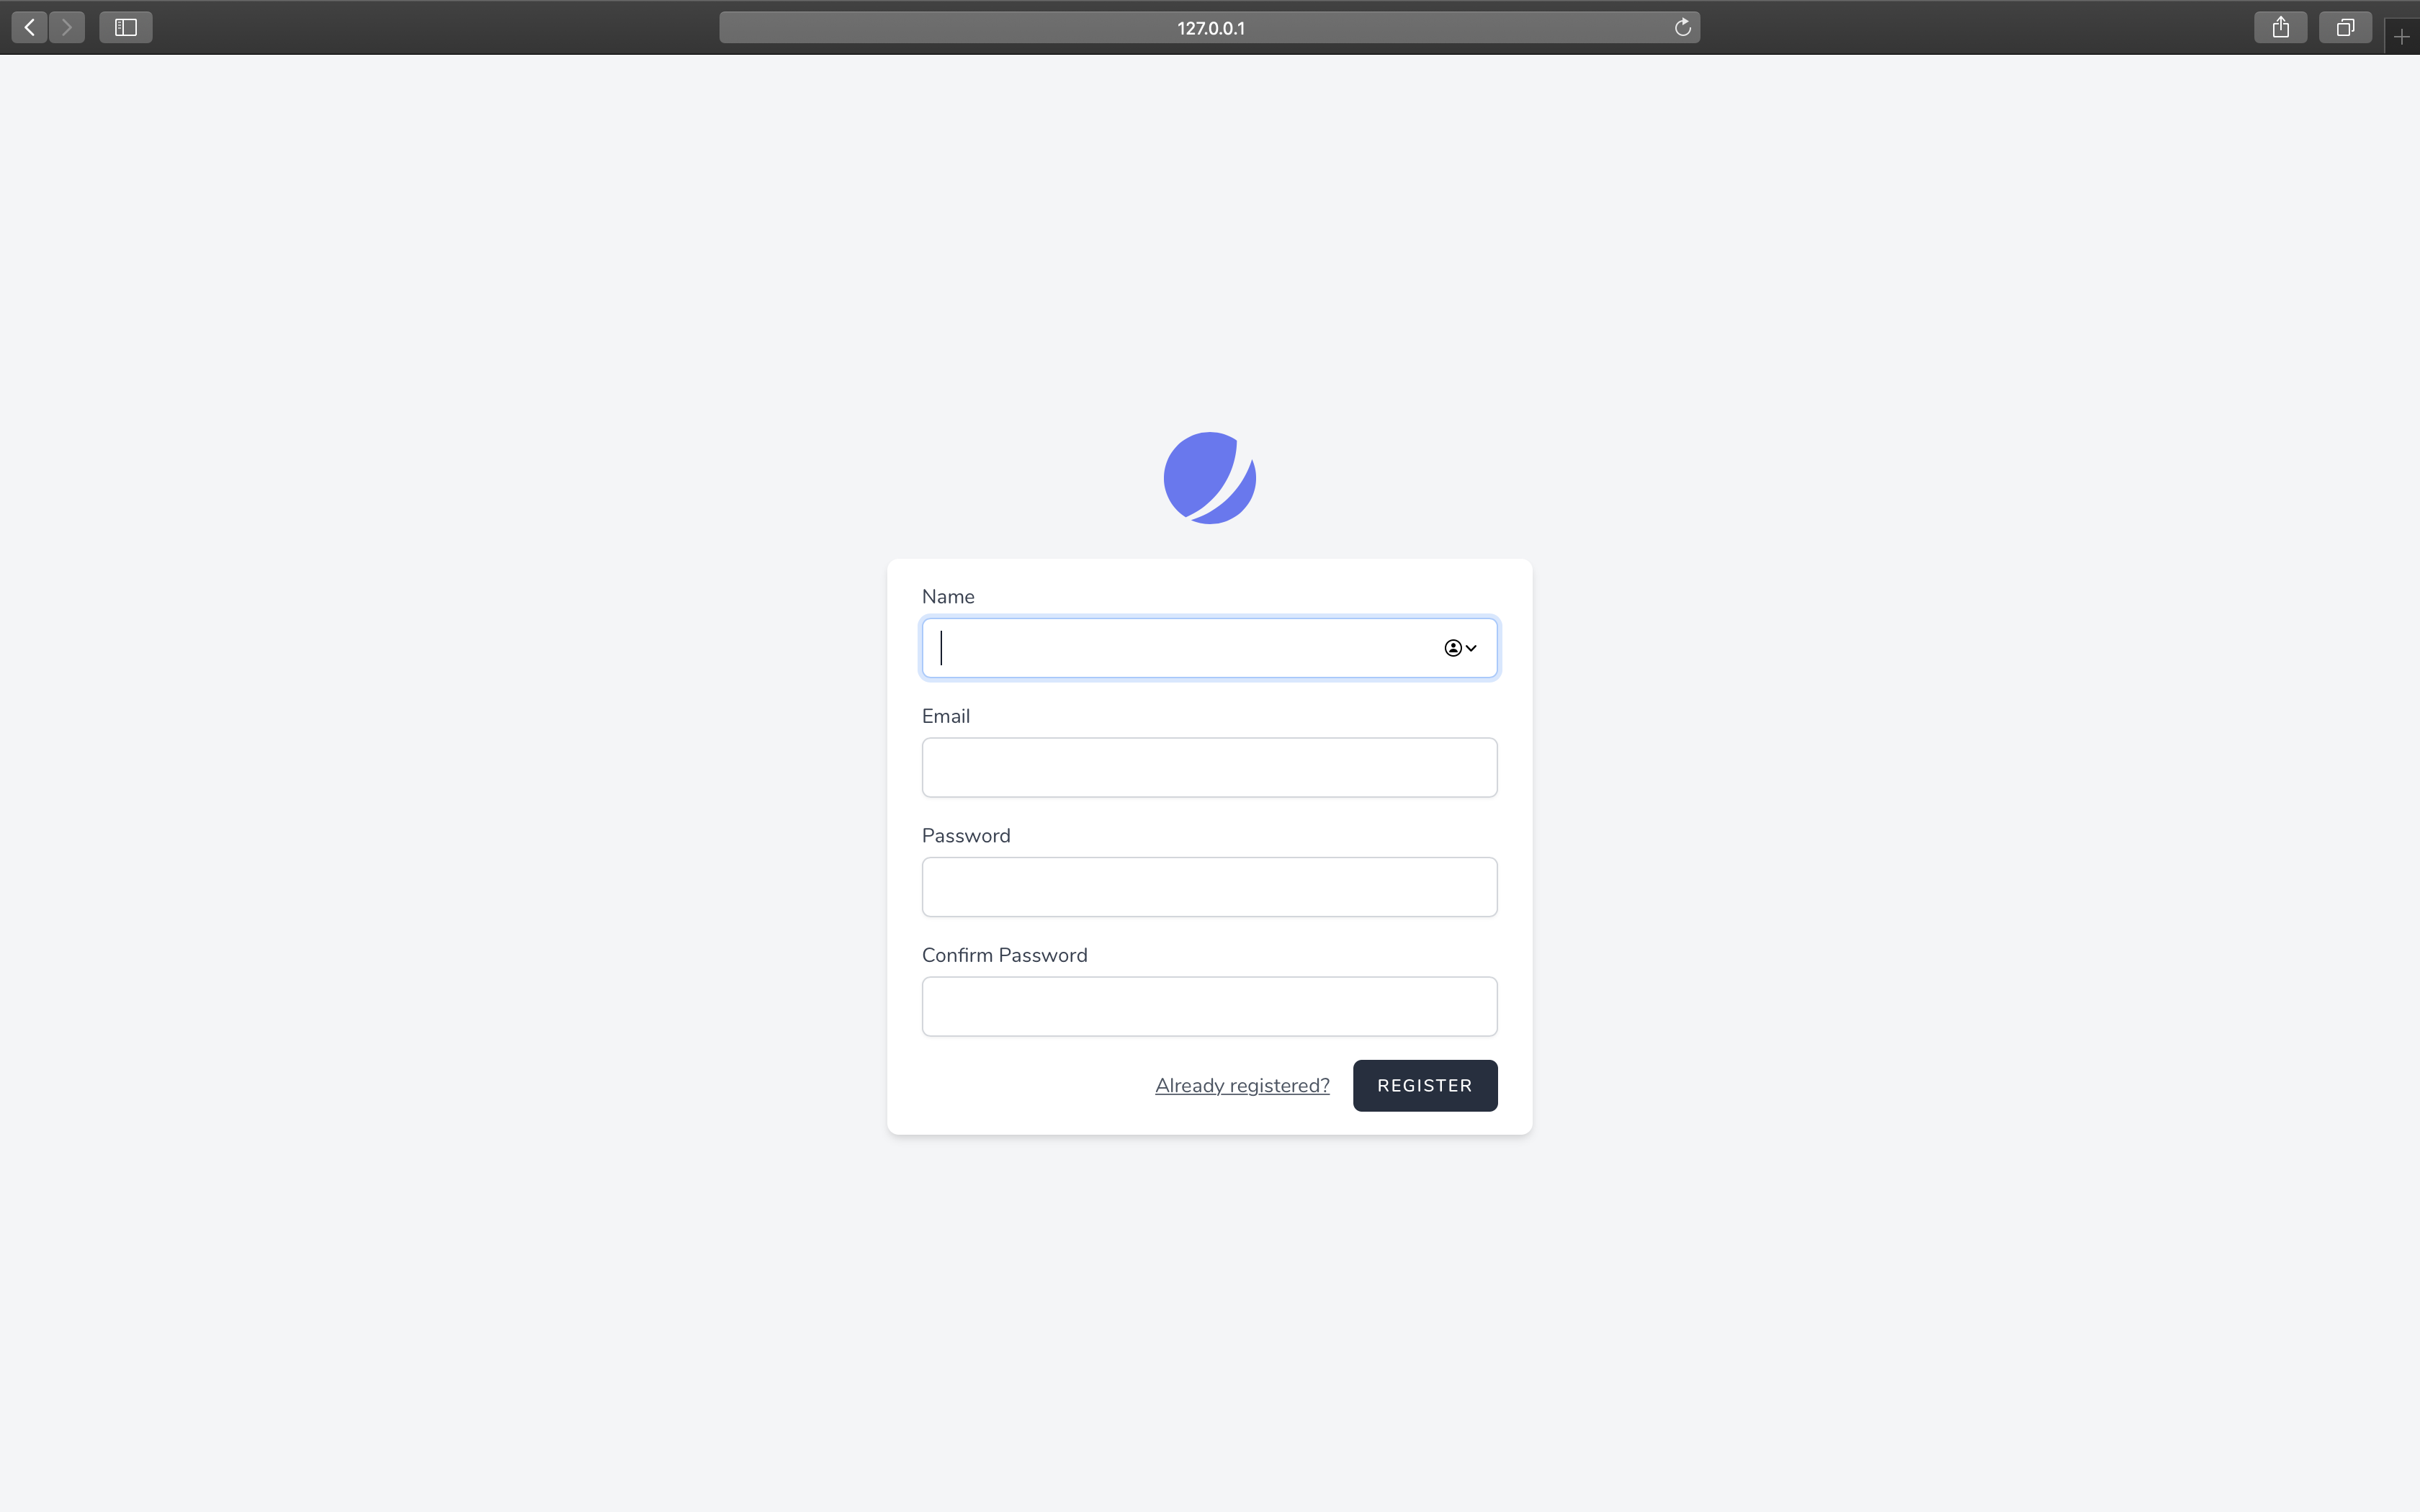
register
ユーザー登録画面です。
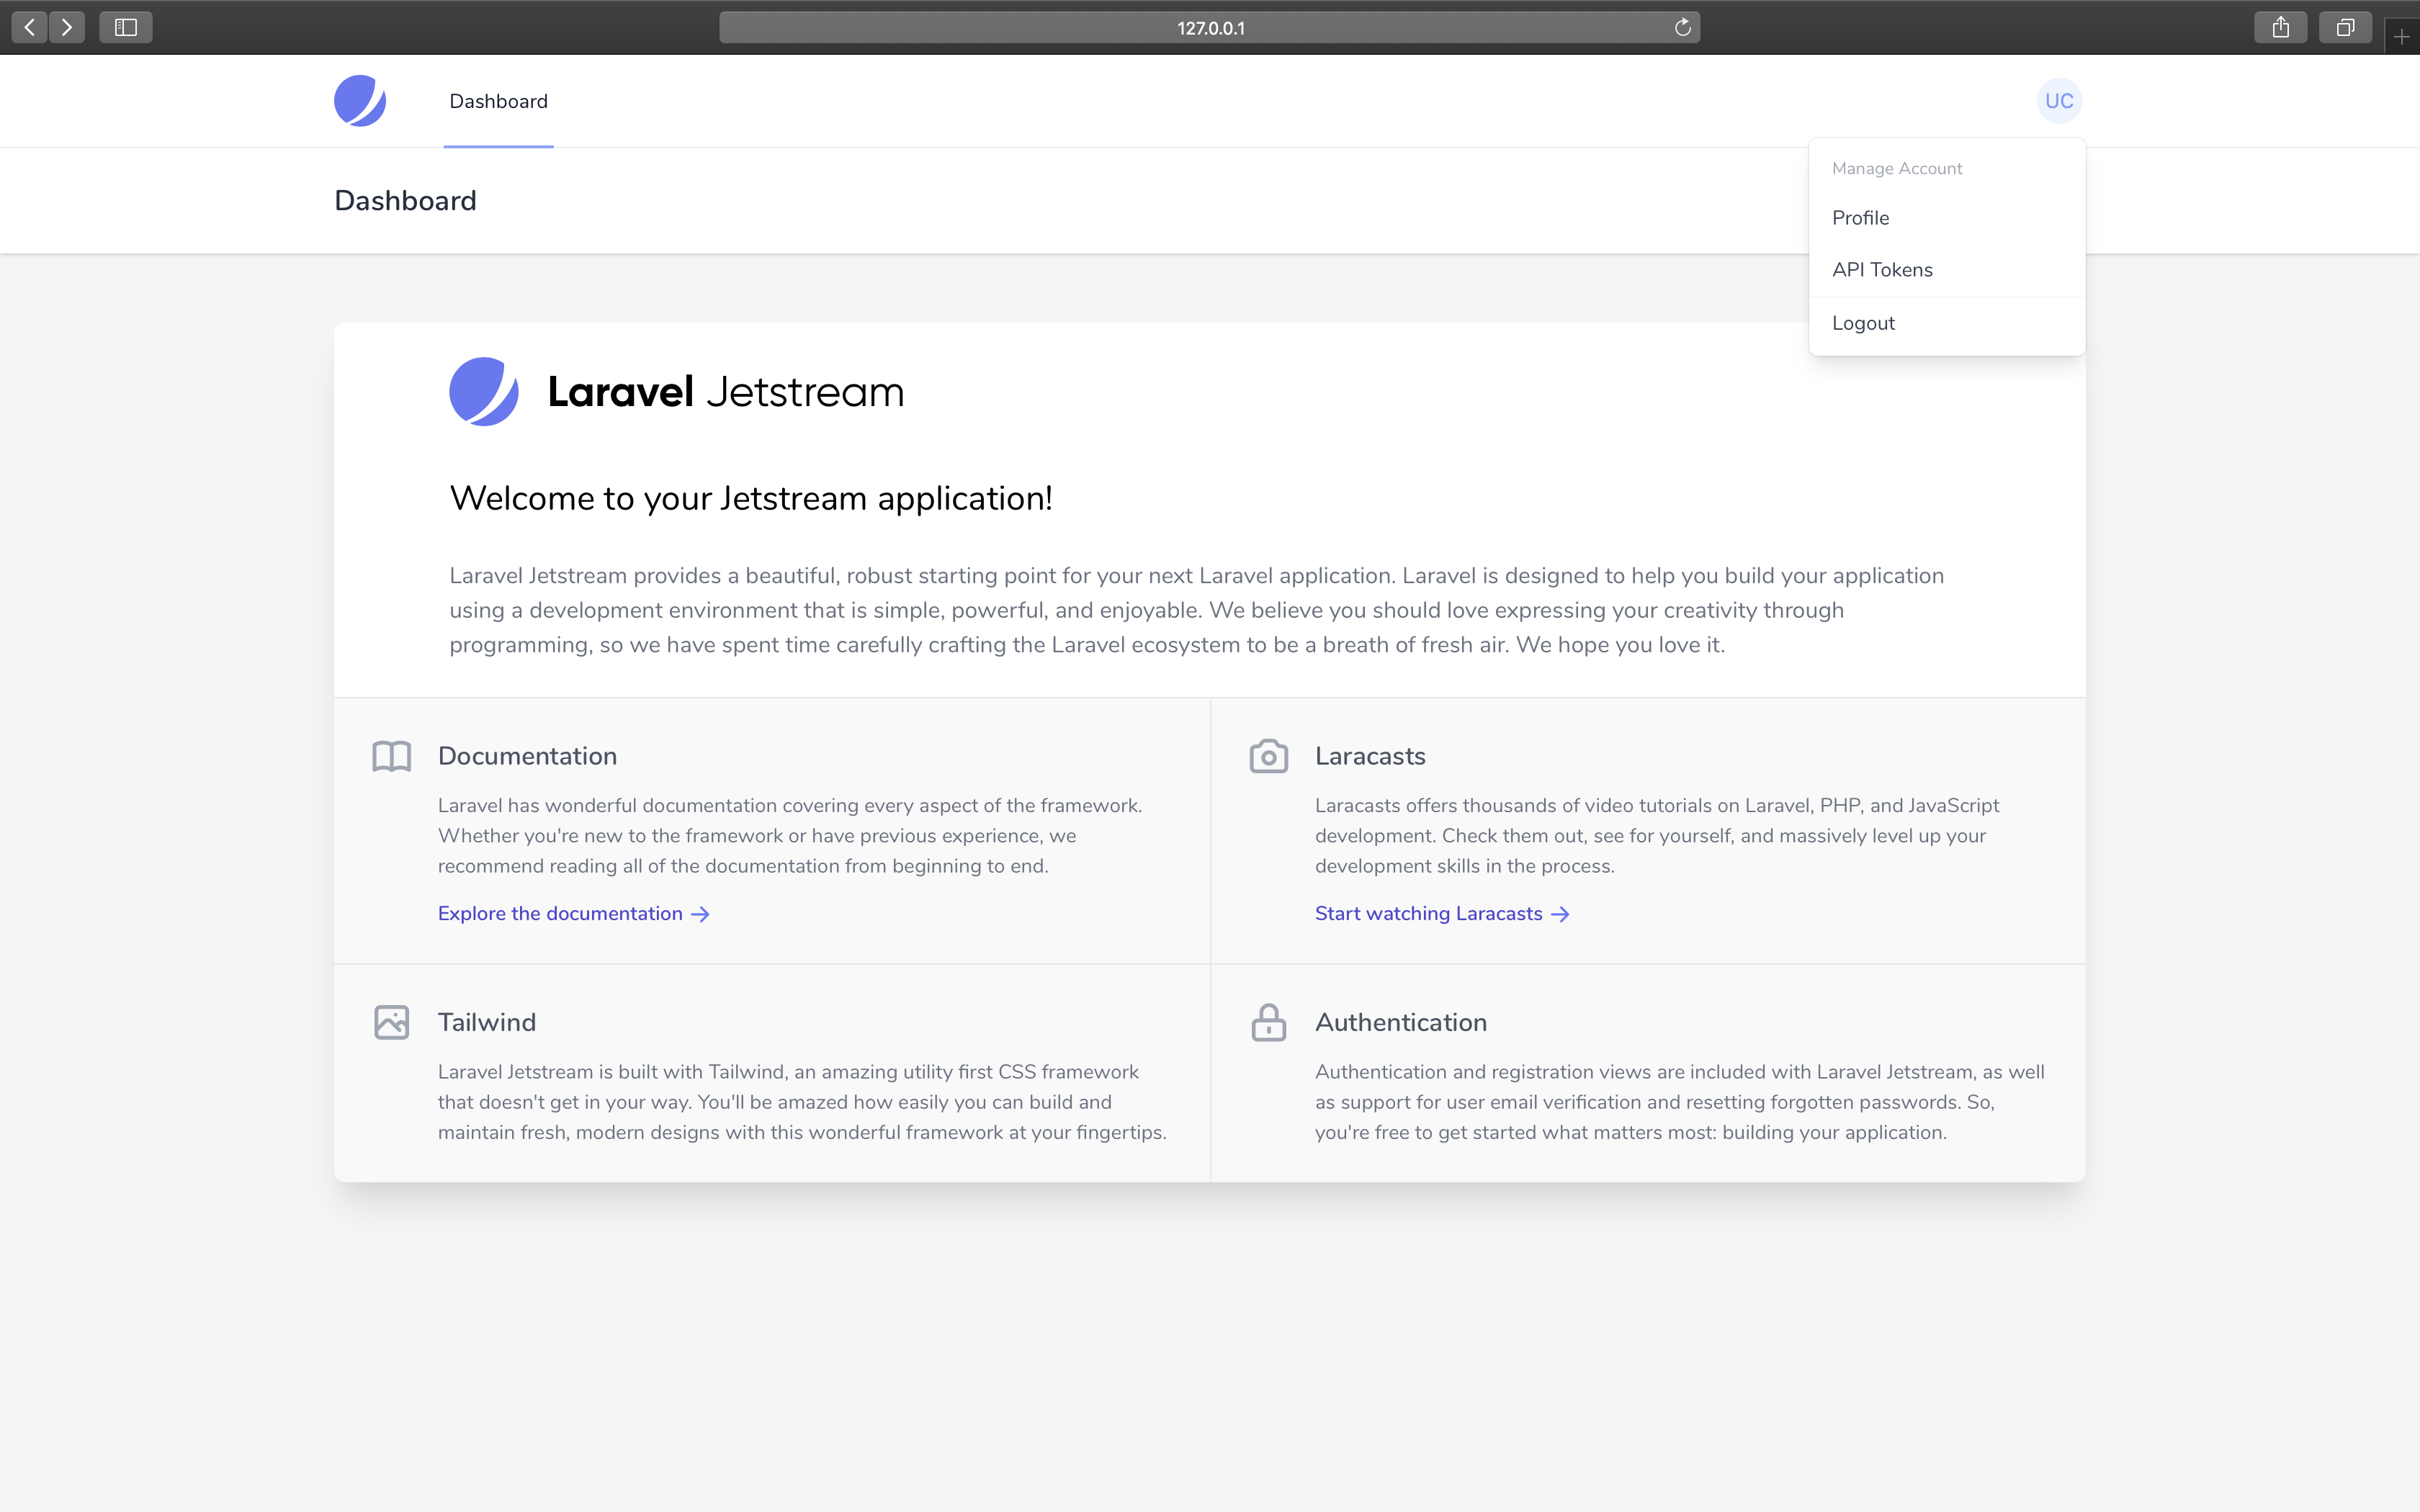
dashboard
ユーザー登録するとログインされ、ダッシュボードに遷移します。
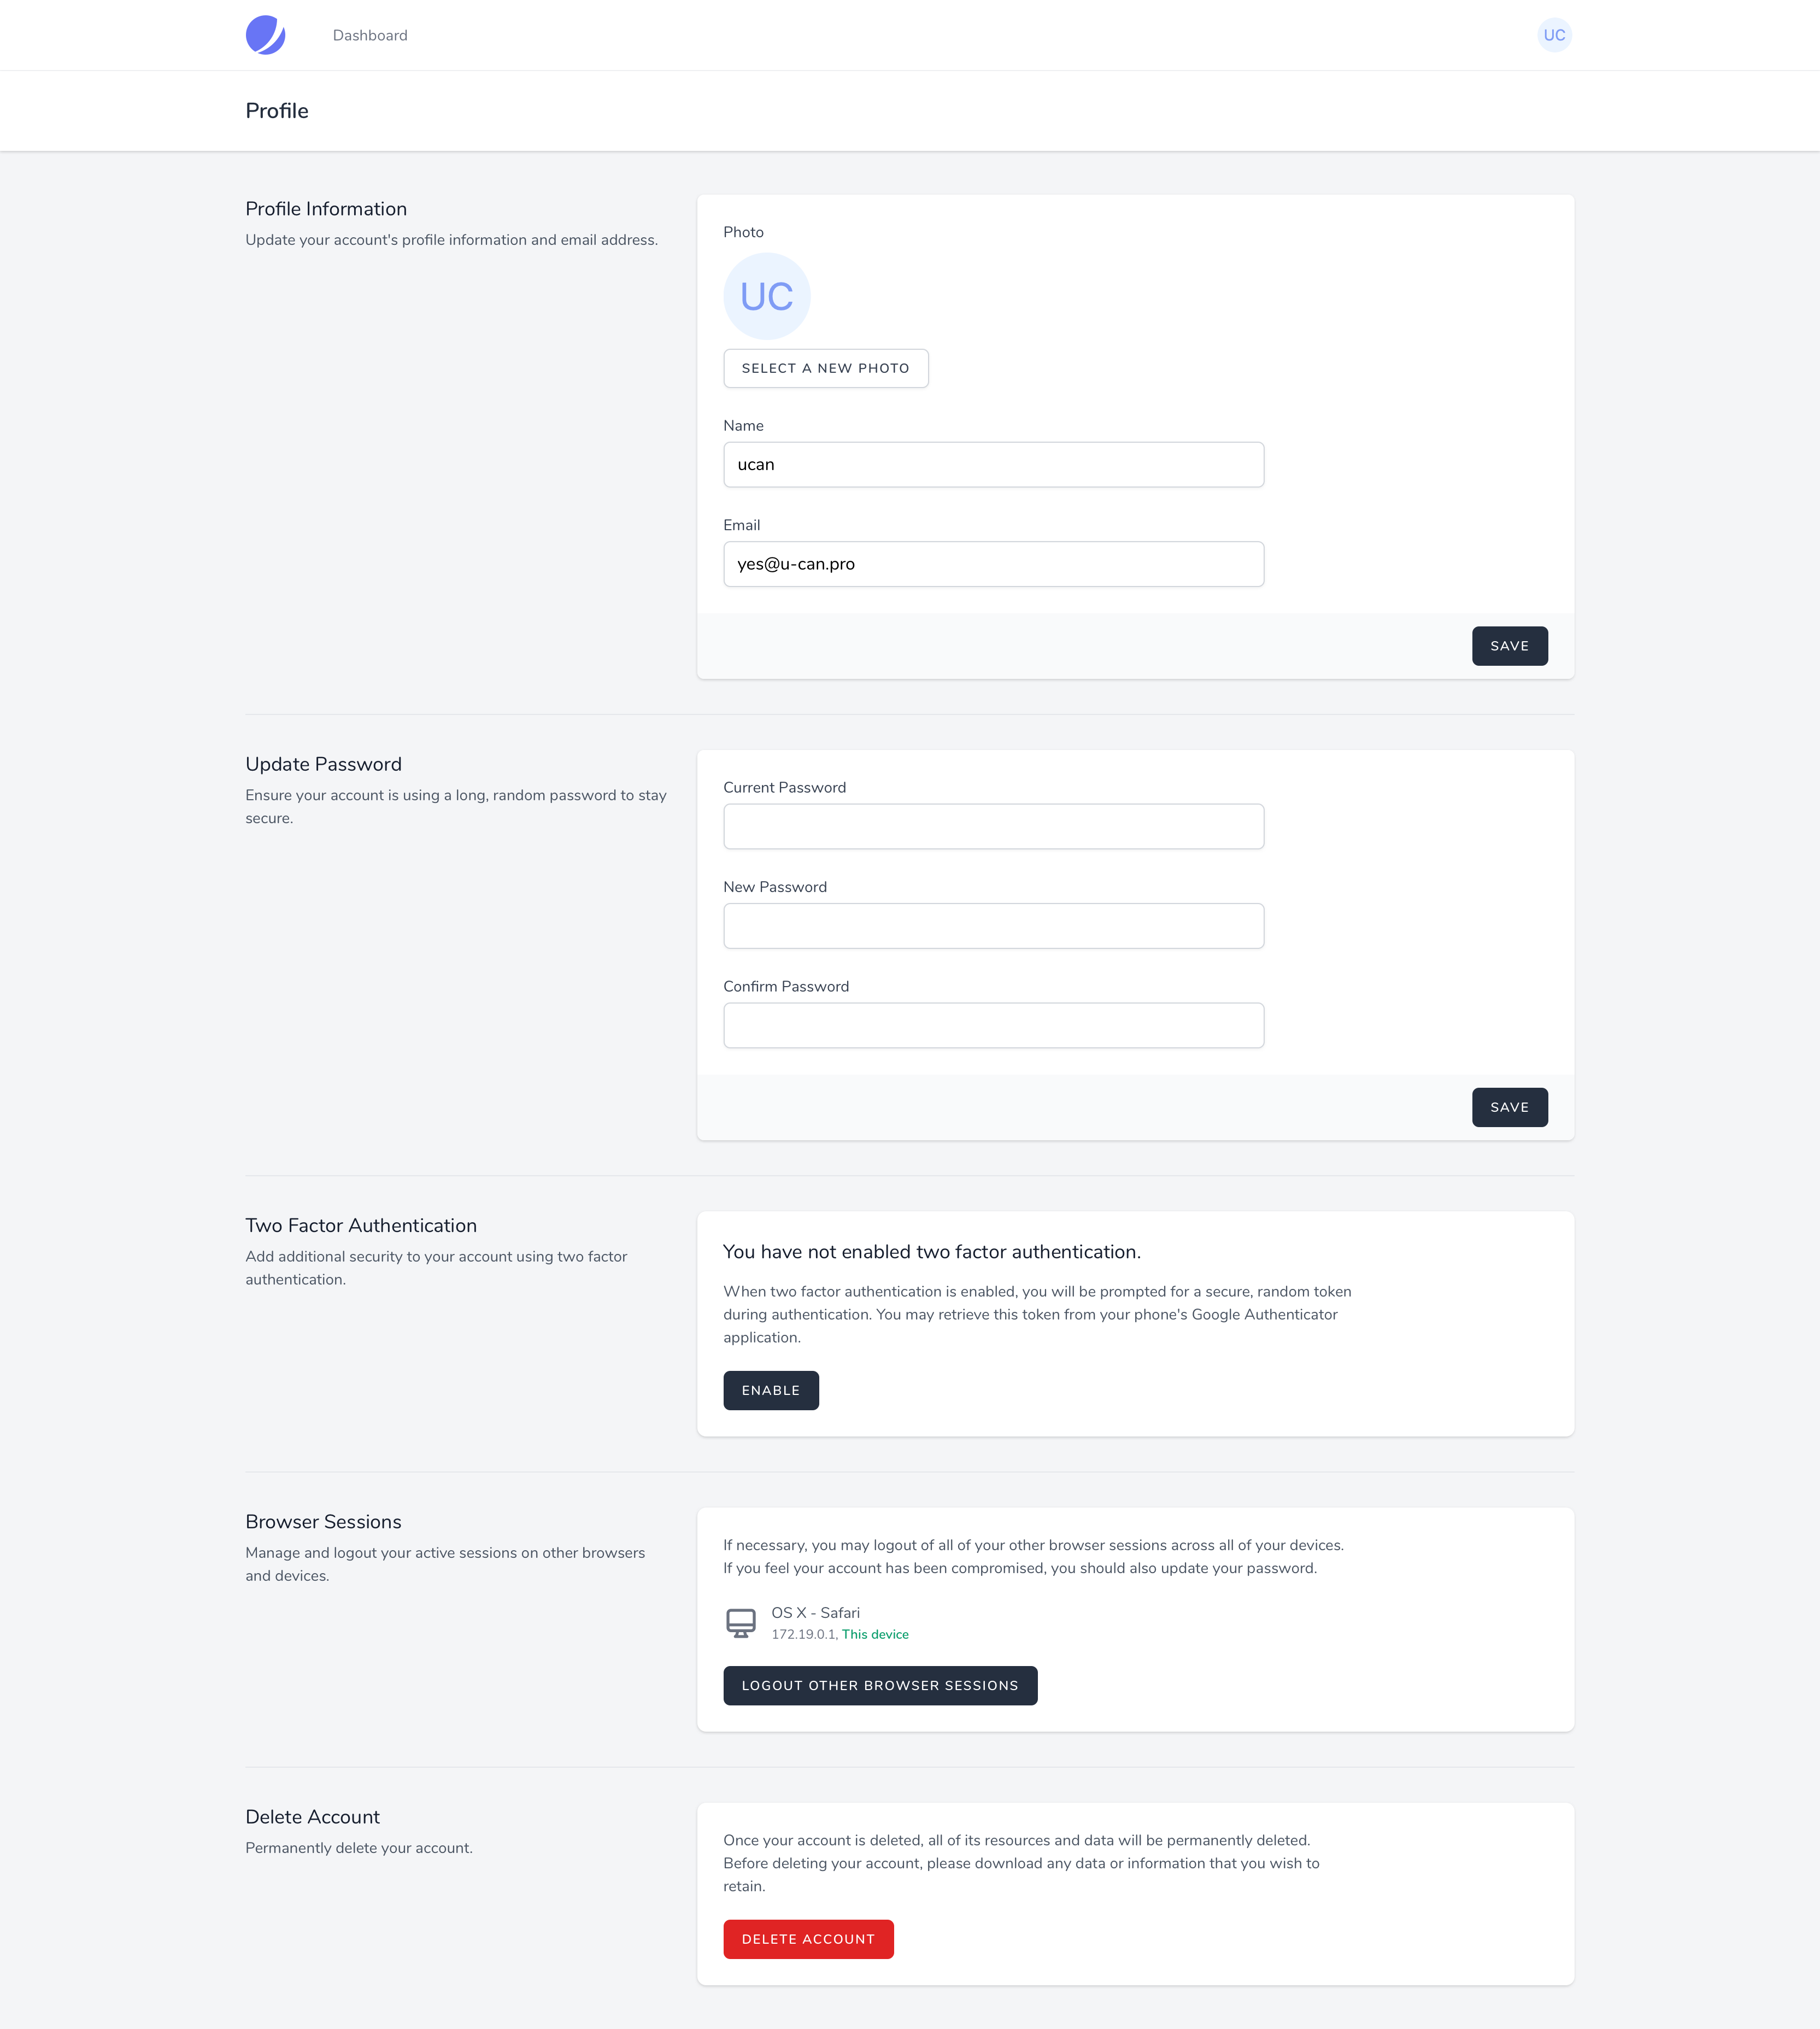
profile
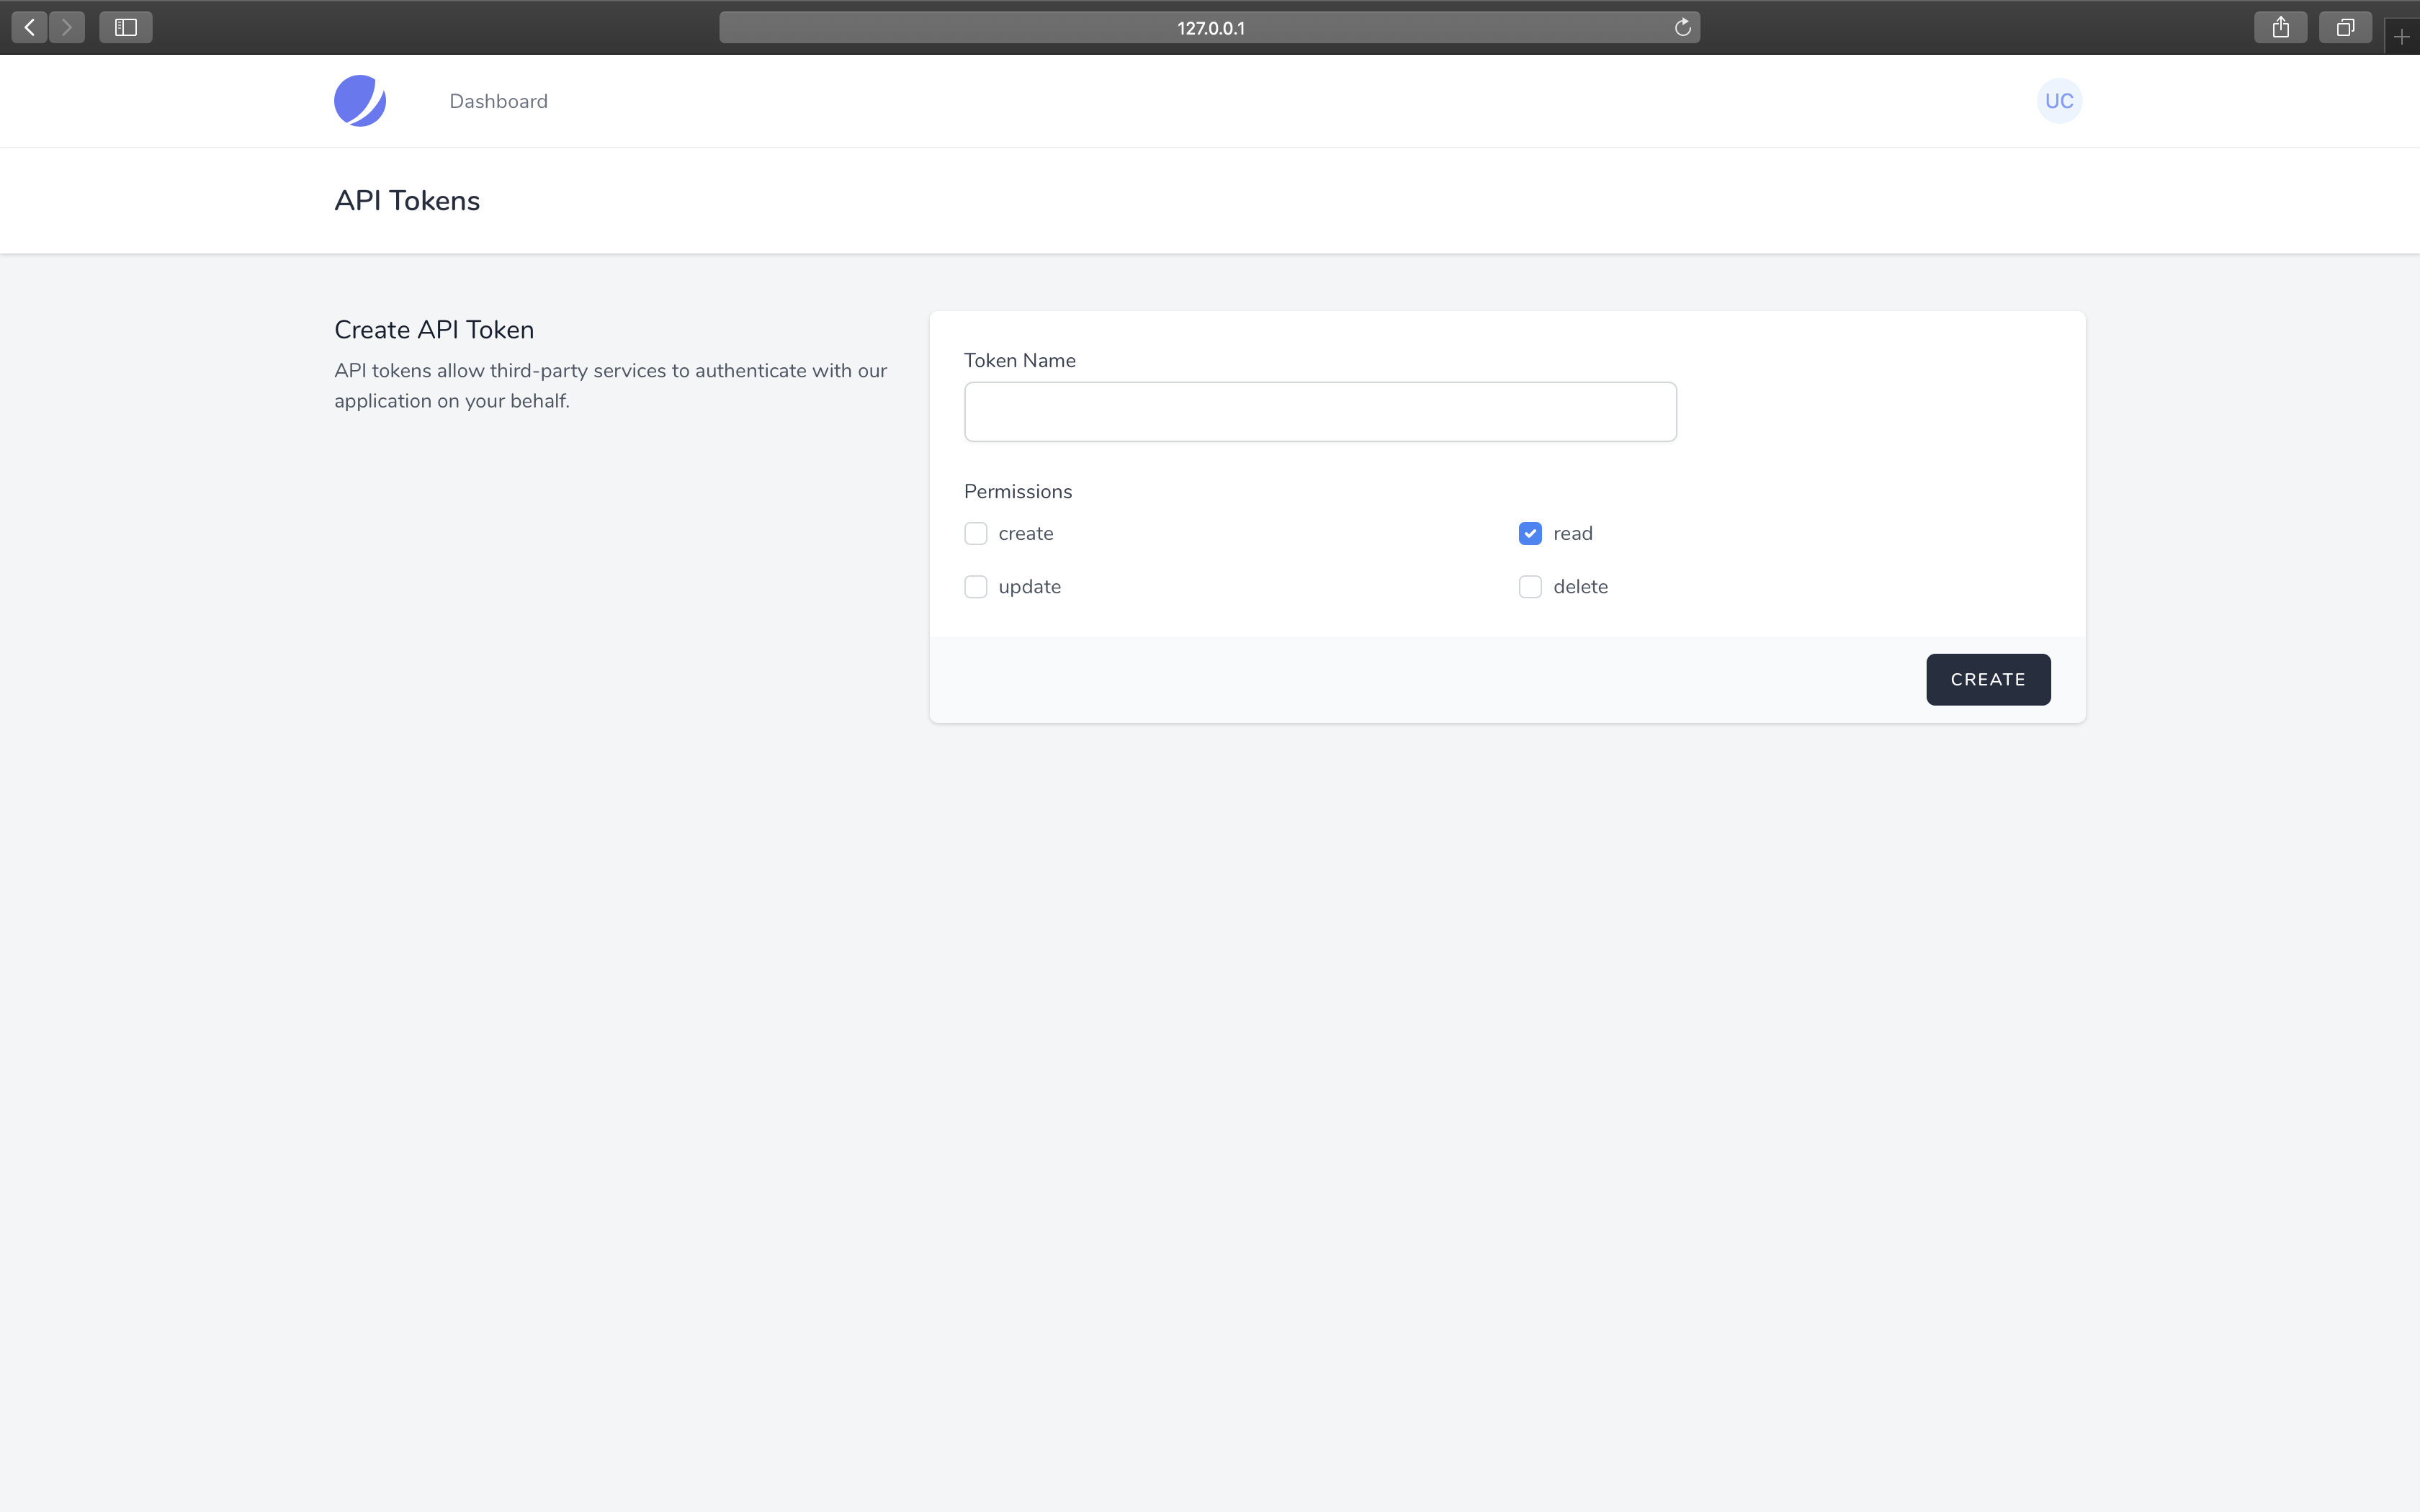
api tokens
login
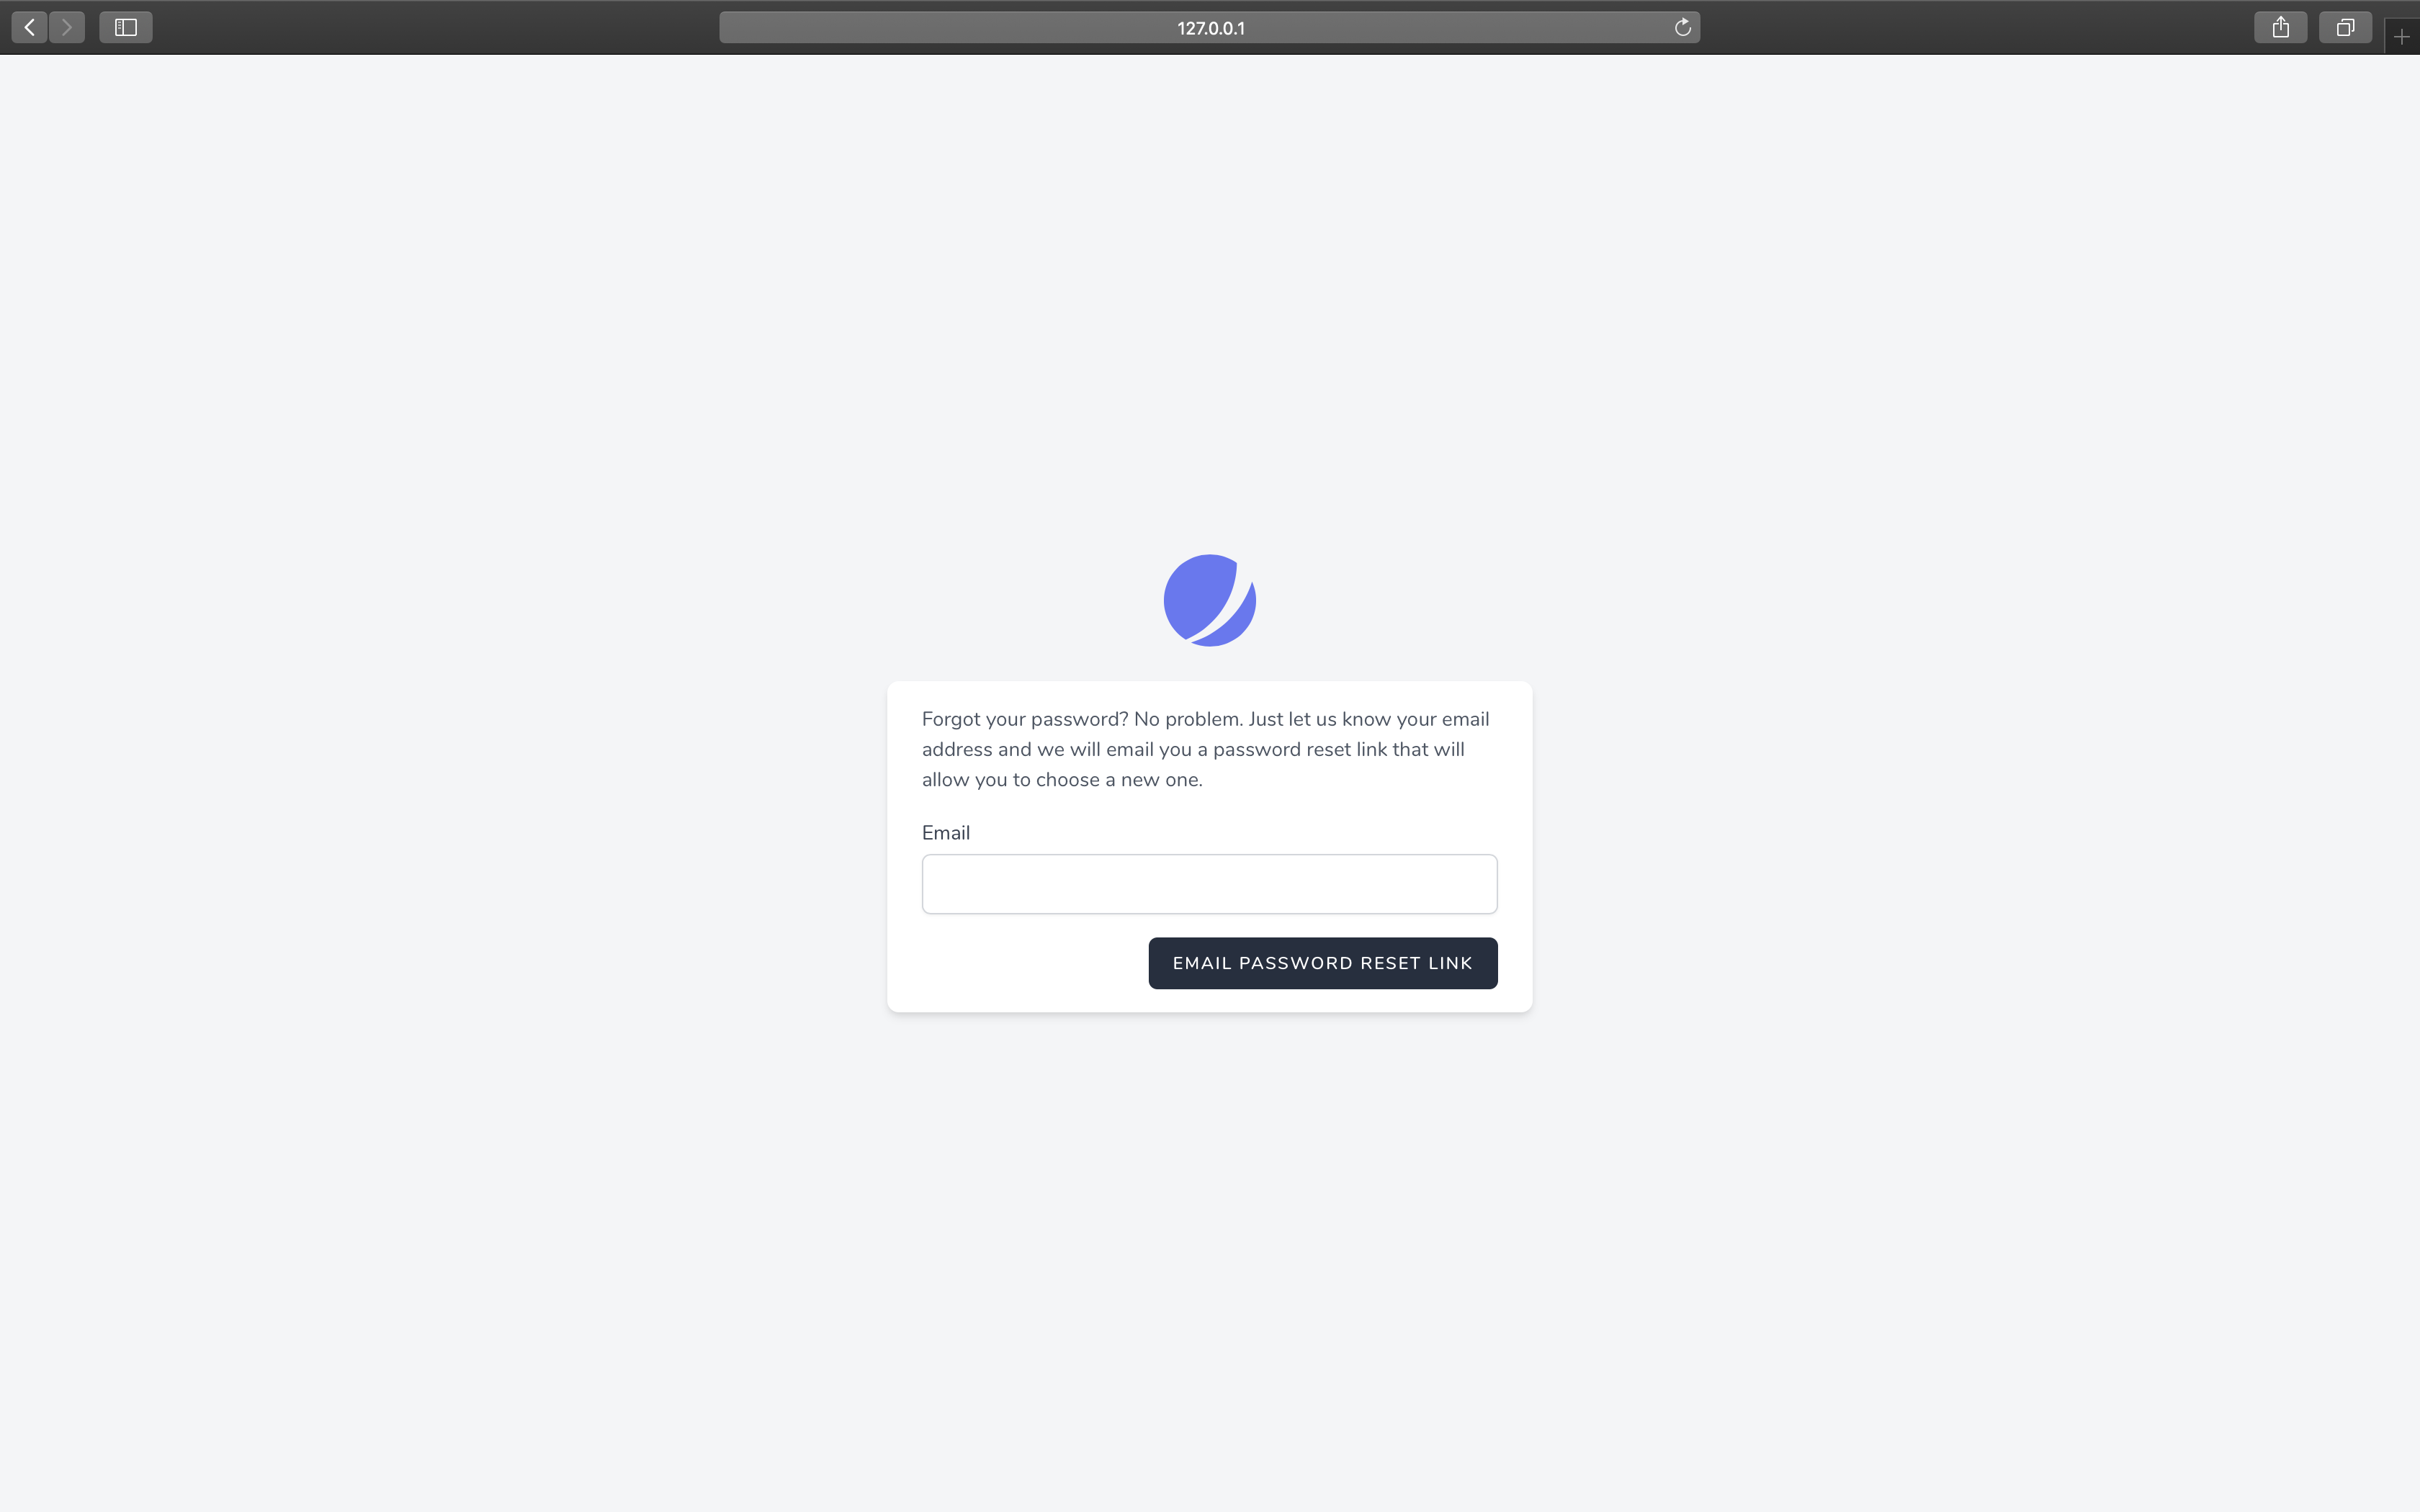
password reset
Screen Shot(Inertia)
dashboard
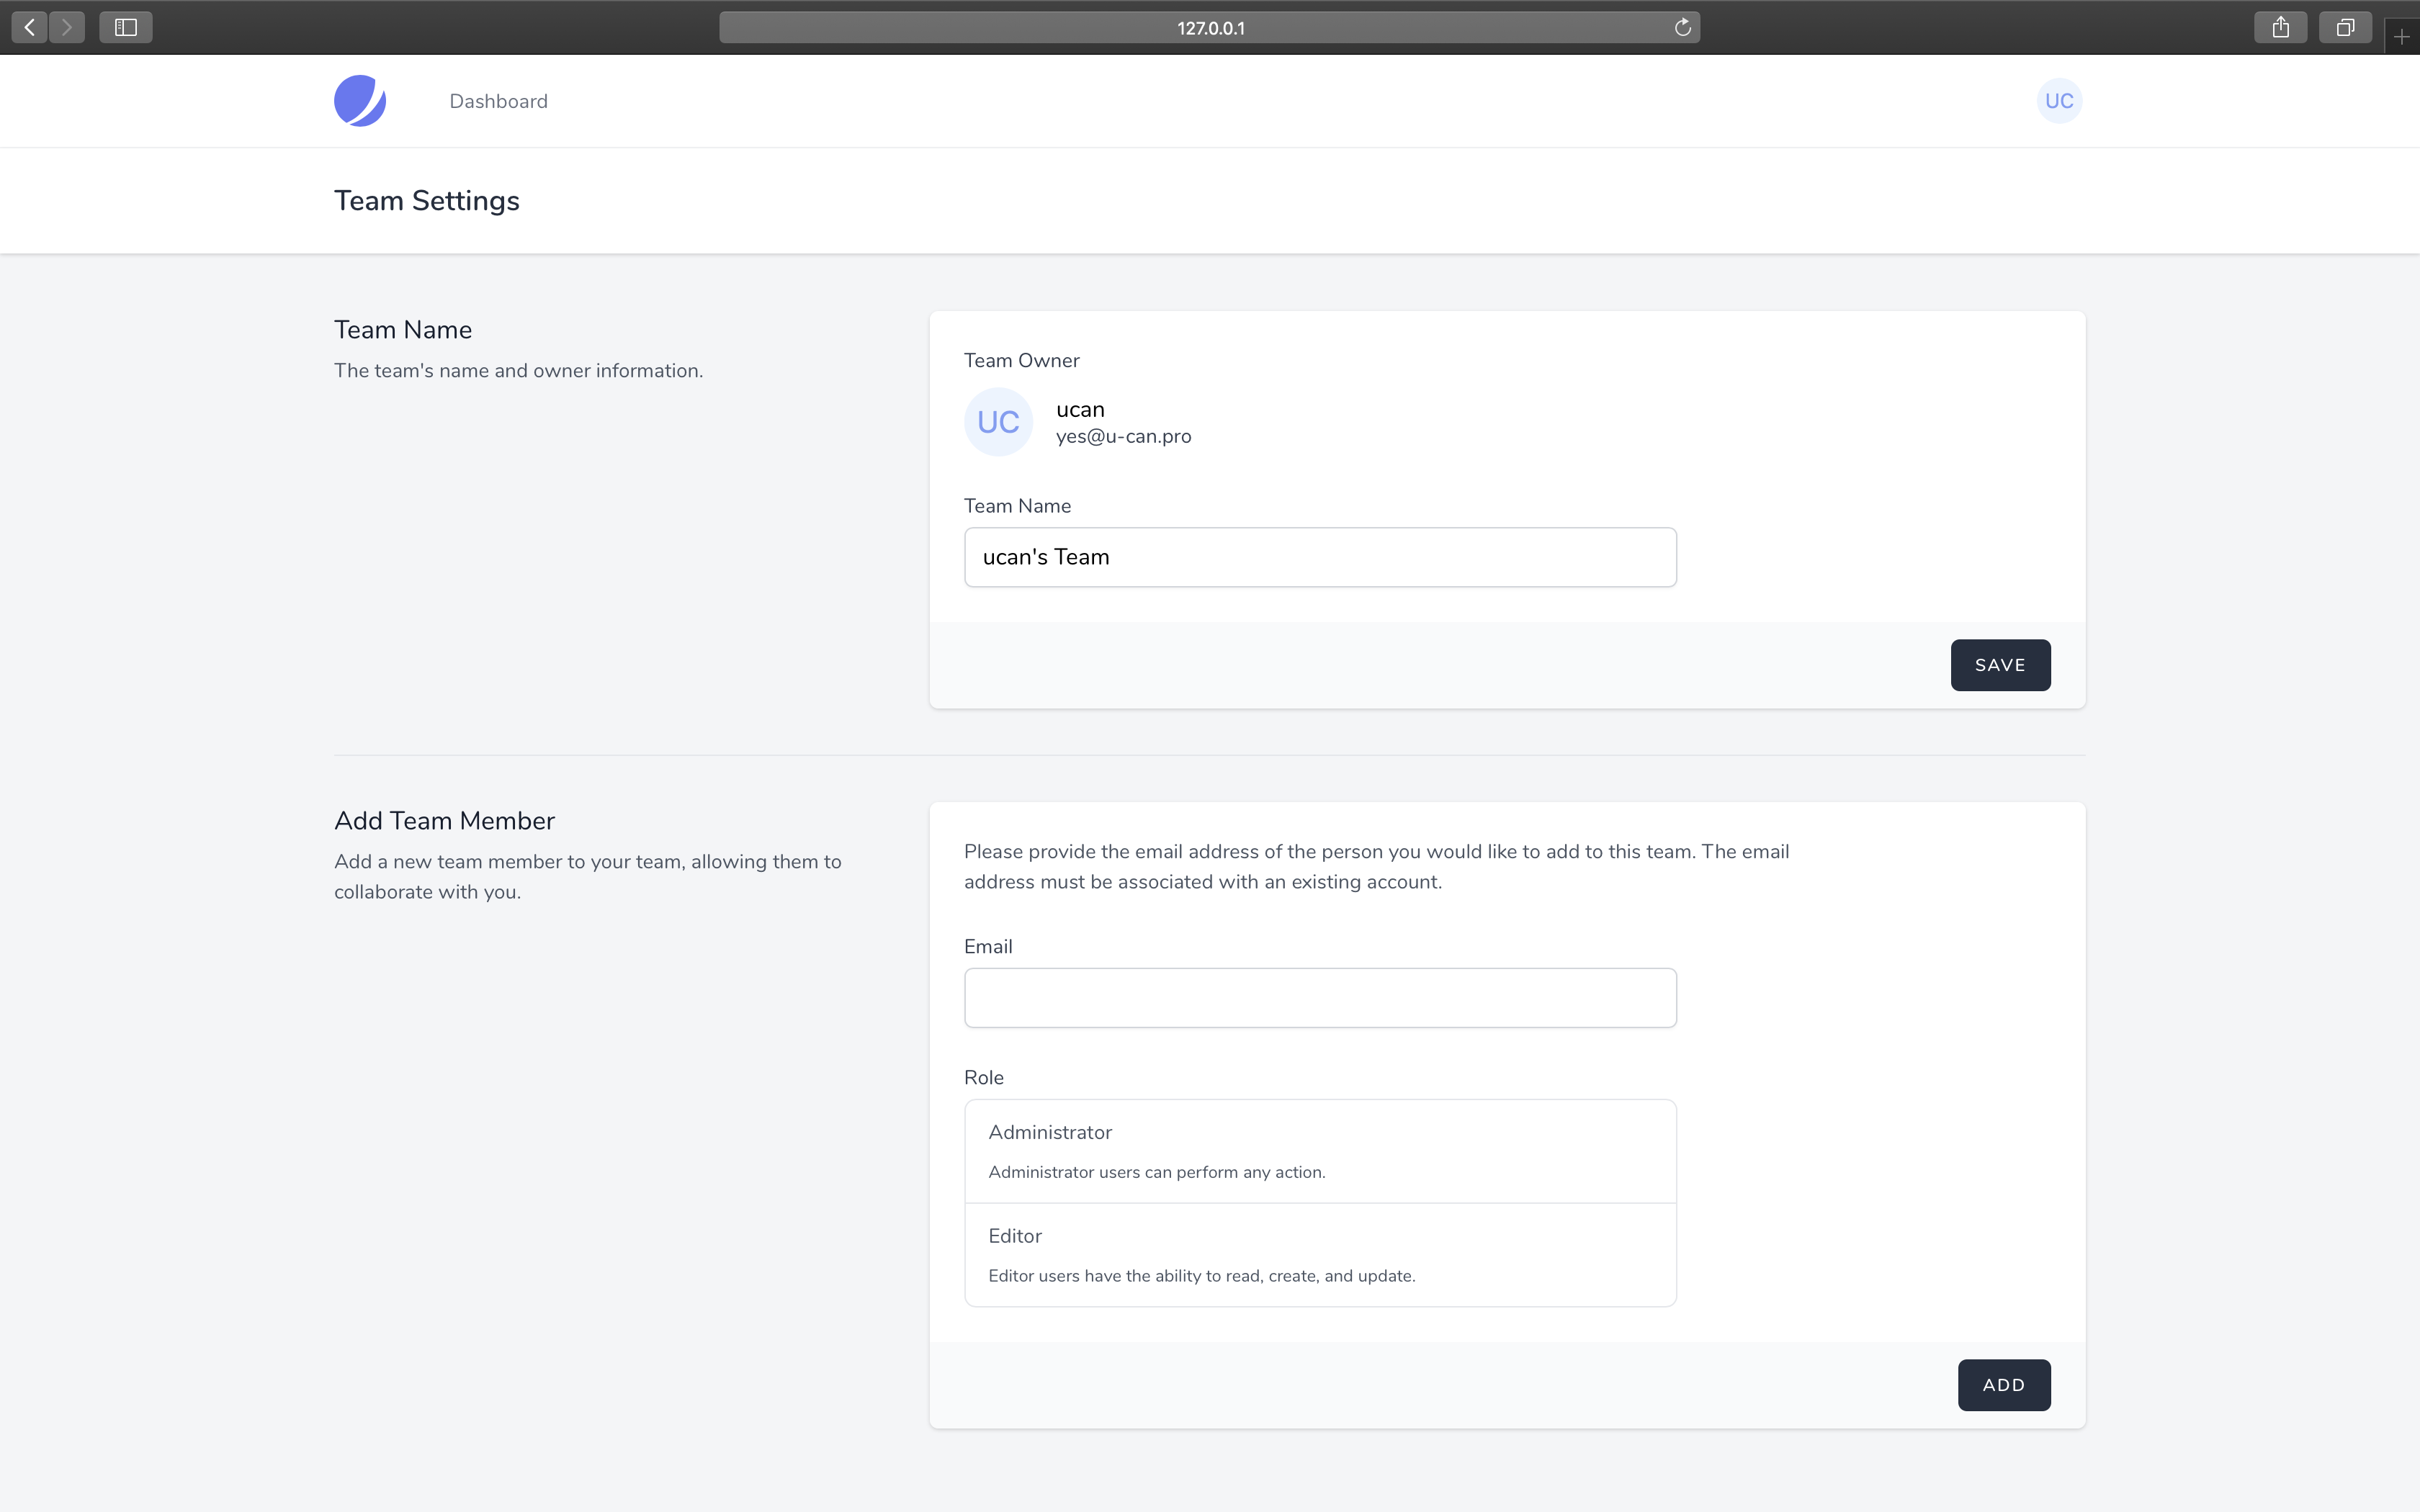
team settings
create new team
2要素認証
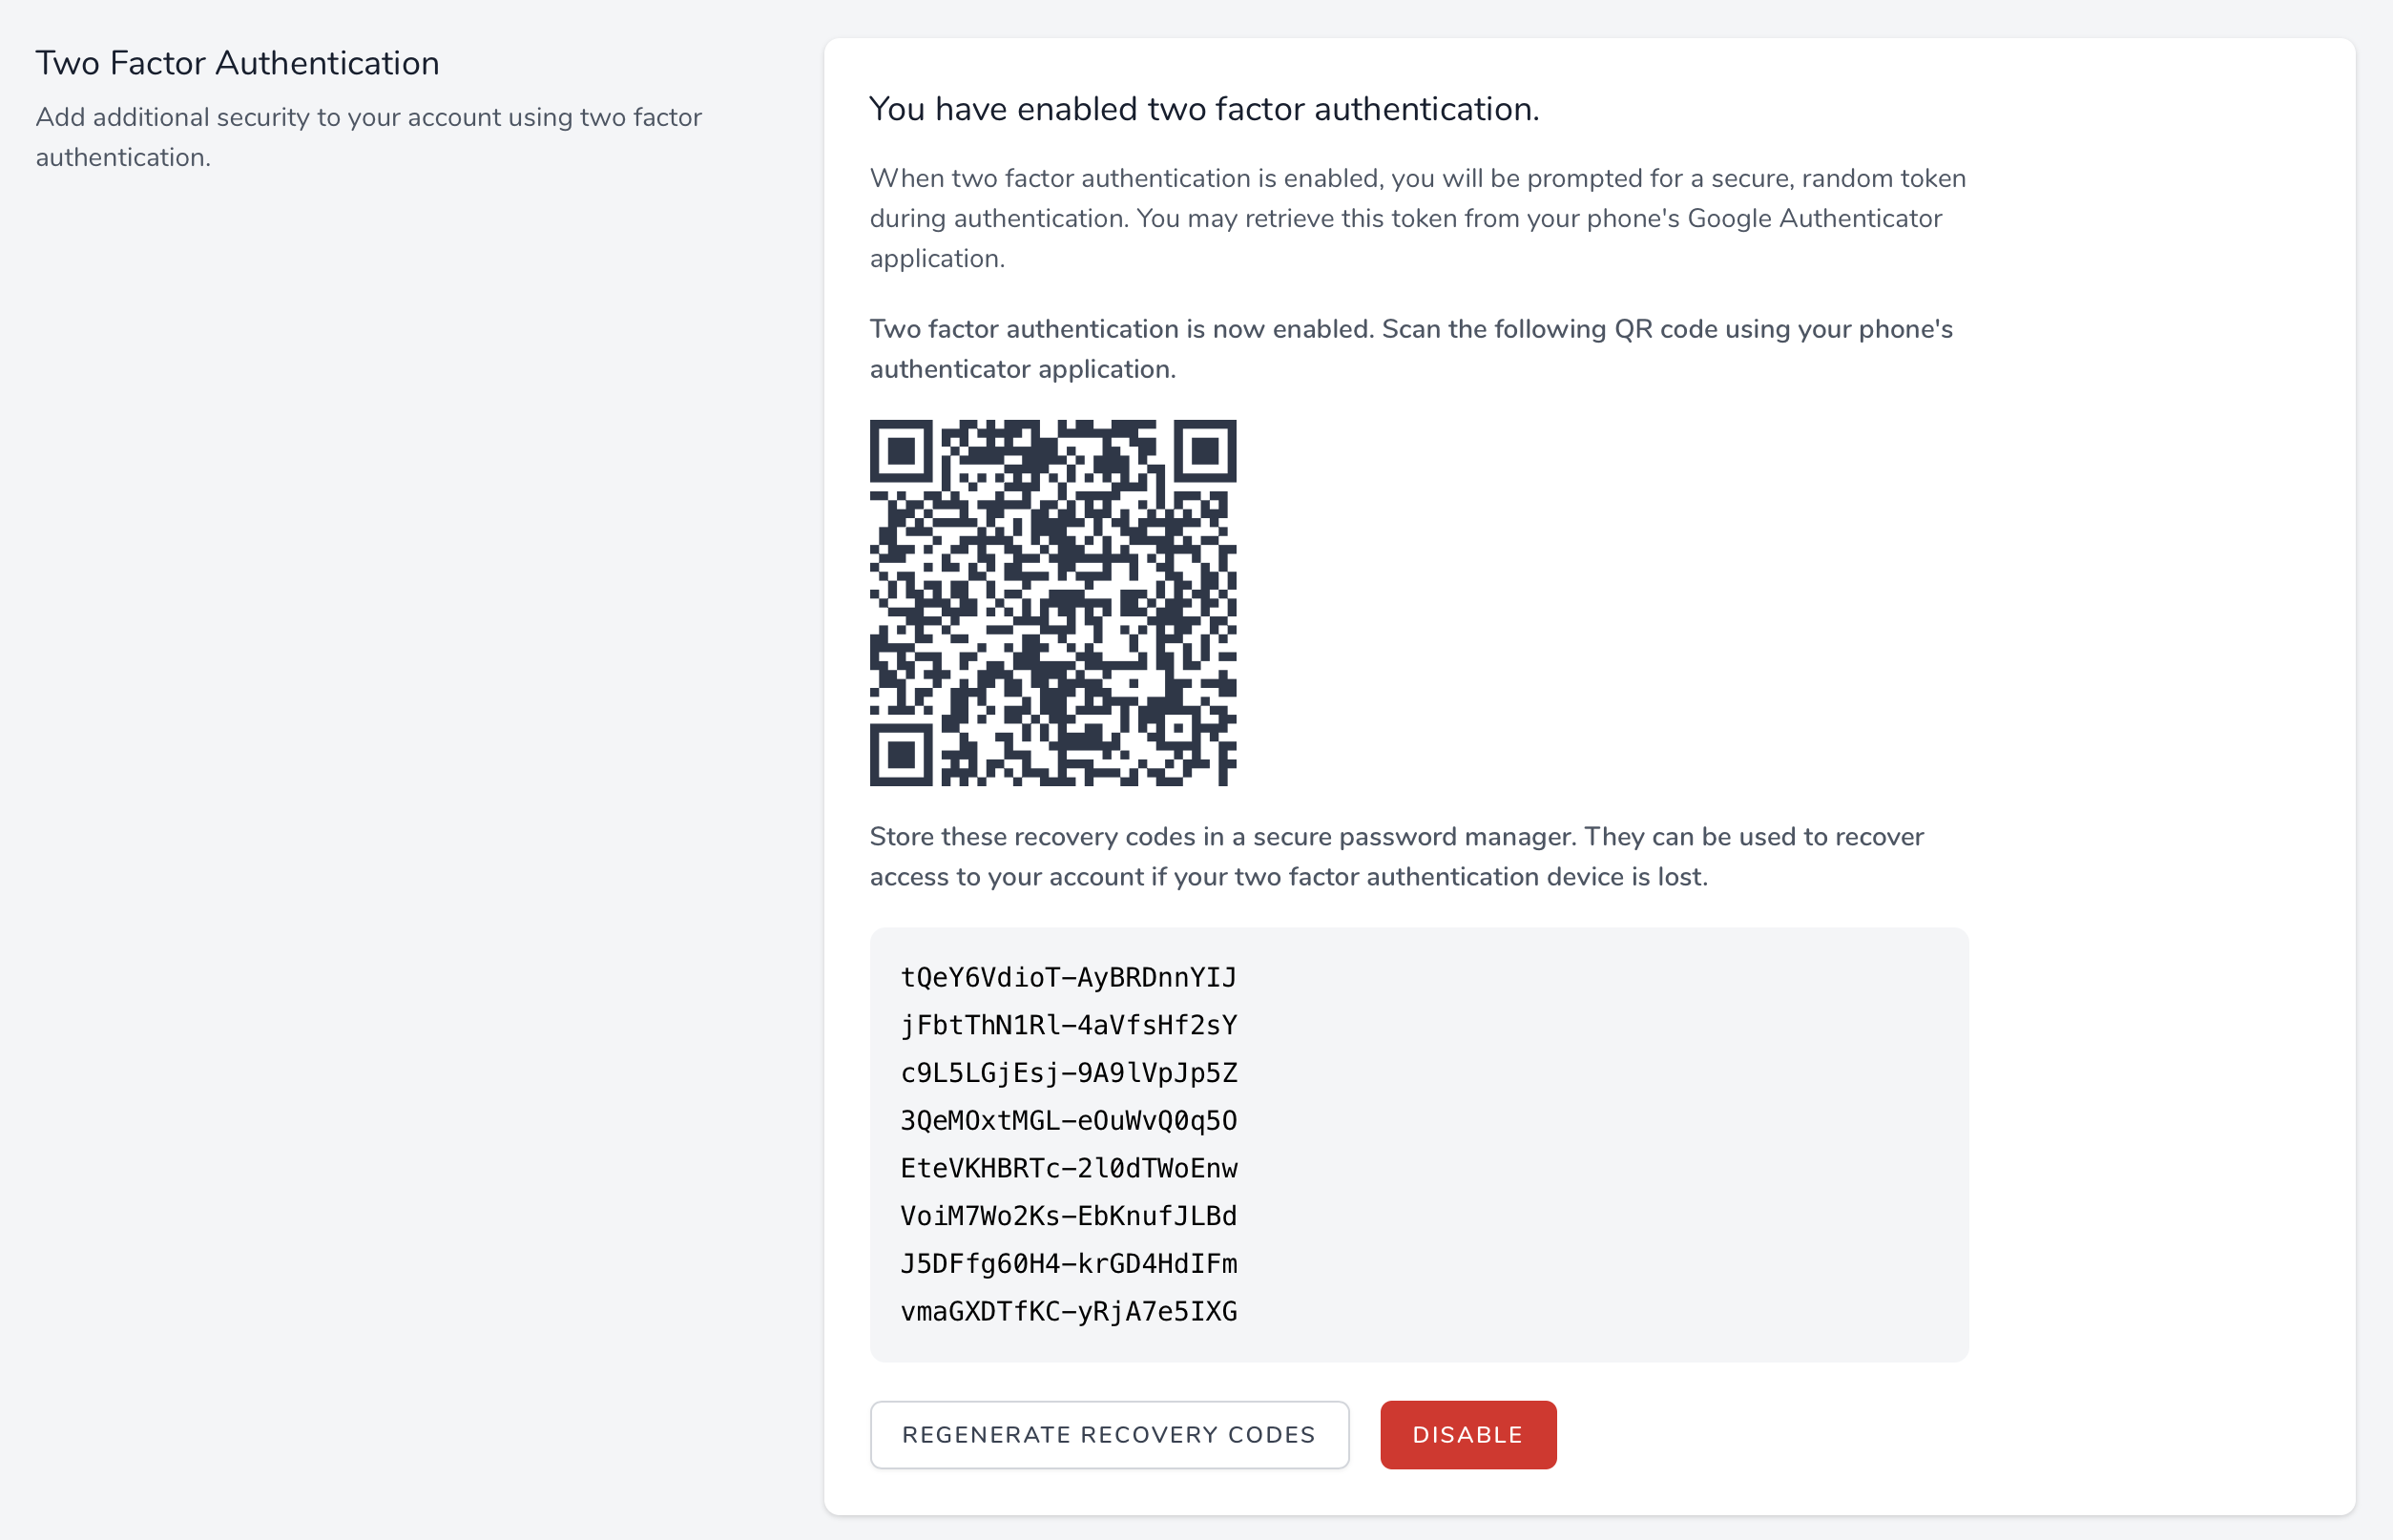
profile ページから Two Factor Authenticationを有効にするとQRコードが表示されます。
Google Authenticator をインストールし、カメラでQRコード読み込むと2要素認証できます。
login ページを進むと認証コードを求めるページが表示される。
ノーコードでここまでできるとは恐れいりますね...