- 投稿日:2020-09-10T23:30:26+09:00
【Laravel×Vue.js】リダイレクト時にセッションデータを持ってメッセージを表示
ログインユーザーのみアクセス可能なURL
/sample/に非ログイン状態でアクセスした際、
ログインページにリダイレクトし、「この機能を使うためにはログインしてください。」とメッセージを表示させた時の実装です。
(/sample/からリダイレクトされた場合のみメッセージを表示する。)SampleController.php
リダイレクトとともにセッションデータを渡す処理を記載
SampleController.phpnamespace App\Http\Controllers; // 現在のHTTPリクエストインスタンスを取得するため、Illuminate\Http\Requestクラスを指定 use Illuminate\Http\Request; class SampleController extends Controller { public function __invoke(Request $request) // 未ログイン時はloginページにリダイレクト // withで「showMessage」というセッションデータを渡す if (!\Auth::check()) { return redirect('login')->with('showMessage', true); } // ログインしていれば/sample/を表示 return view('sample.index'); } }redirect時に、
withを使ってshowMessageというBoolean型のデータを持たせている。
(trueのところに'メッセージです。'とすると、テキストメッセージを持たせることも可能。)これで未ログイン時に/sample/ページにアクセスすると、
/login/にリダイレクトされ、 ページ上でshowMessageの値を使用できる。login.blade.php
ログイン用のviewであるlogin.blade.phpで、セッションを表示してみる。
login.blade.php{{ session('showMessage') }} // 1/login/にshowMessageの真偽値
trueが渡っているので、「1」と表示される。
これでセッションデータで値が渡っているのを確認できた。この値を
vue.jsのコンポーネントに渡す処理をかく。login.blade.php@section('content') <sample-component> :show-message="{{ session('showMessage') ? 'true' : 'false'}} "> </sample-component> @endsectionSampleComponent.vue
コンポーネントが埋め込まれている
login.blade.phpから渡されたセッションデータshow-messageを、
親から子がデータを受け取る際に使うpropsで受け取っておく。
(vue.jsではケバブケースではなくキャメルケースで受け取る。)SampleComponent.vueexport default { props: { showMessage: { type: Boolean, default: false, }, }, };ここまできたら、受け取った
showMessageを使って、
v-ifなどでtrueだったらメッセージを表示するなどが可能。SampleComponent.vue<template> <div class="mb-4"> <div v-if="showMessage"> <p>この機能を使うためにはログインしてください。</p> </div> ...省略... </div> </template> <script> export default { ...省略... props: { showMessage: { type: Boolean, default: false, }, }, }; </script>これで未ログイン時に/sample/ページから/login/にリダイレクトしてきた時のみ、
showMessageというセッションデータを持って真偽の判定を持たせることができました。
- 投稿日:2020-09-10T23:26:30+09:00
2020 Vue/Vuetify WEB開発 TestCafeを使ったE2Eテスト 基礎編
記事の目的
フロントエンドエンジニアとして
エンドツーエンド (E2E) テストをTestCafeで書く機会があったE2Eテストの自動化は初めての経験だったので
これをまとめ、紹介および備忘録とする記事の対象者
- NuxtやVueに実際に触れたことがある人
- フロントエンドエンジニアとして実装経験のある人
- TestCafe に興味がある人
- e2eは全然わからないけどやってみたいという人
開発環境
- MacBook Pro (Retina, 13-inch, Early 2015)
- OS:macOS Mojava 10.14.6
- サーバサイドJavaScript:node v12.14.1
- パッケージマネージャー: yarn v1.22.4
- フレームワーク: nuxt v2.0.0
- JavaScriptライブラリ: Vue v2.6.11
- UIライブラリー: @nuxtjs/vuetify v1.11.2
目次
- Nuxtの導入とサンプル作成
- E2Eテスト作成(TestCafe
Nuxtの導入とサンプル作成
Githubからこの記事で作成したサンプルをダウンロード可能
https://github.com/shiho-hoshino/e2e-sampleNuxtの導入
実際のプロジェクトと同じようにyarnでNuxtをインストール
インストールの初期設定は以下の通り$ yarn create nuxt-app e2e-sample Project name: e2e-sample Programming language: JavaScript Package manager: Yarn UI framework: Vuetify.js Nuxt.js modules: Axios Linting tools: ESLint, Prettier, StyleLint Testing framework: Jest Rendering mode: Single Page App Deployment target: Static (Static/JAMStack hosting) Development tools: #無選択VueとVuetifyを使ったサンプル用ページの作成
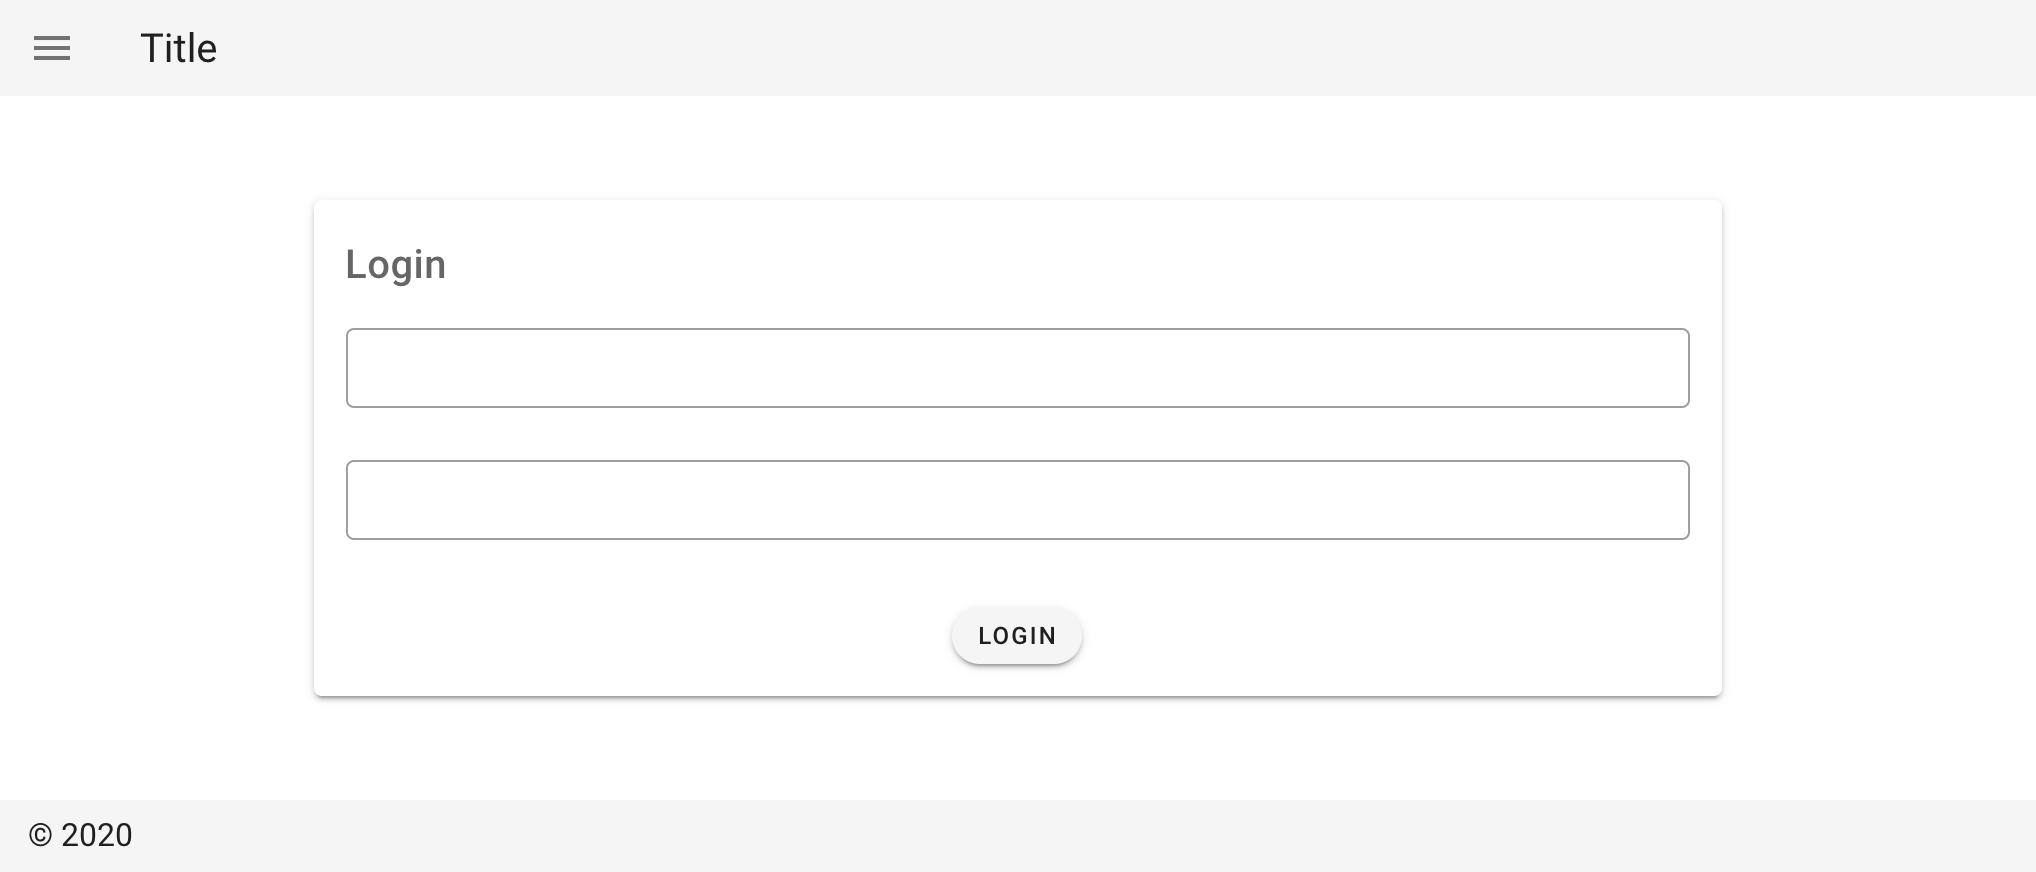
e2eのテストとしてわかりやすくログインページのサンプルを作成
サンプルの状態はこのようにしました
- 入力欄が二つと、ログインボタンのみ
- ログインの認証処理などは含んでいない
- ボタンクリックでHOME画面に遷移する
実際の案件と同じくVueとVuetifyを使用している
サンプルの環境はeslintの設定も追加・変更済みpackage.jsonをinstallし起動
$ yarn install$ yarn run devhttp://localhost:3000/login
起動後にログインページを確認
E2Eテスト作成とローカル実行(TestCafe)
ログイン処理のテストコードを作成する
testcafeをインストール
$ yarn add testcafeサンプルページにテスト用のIDを追加
サンプルで作成した page/login.vue テンプレートに
以下の対応を追加。テストしたい要素にカスタムデータ属性「data-testid」を付ける
後ほどTestCafeでIDを指定して操作する<template> <div> <v-card> <v-card-text> <h1 class="title mb-4"> Login </h1> <v-text-field data-testid="login.email" v-model="data.email" single-line outlined dense /> <v-text-field data-testid="login.password" v-model="data.password" single-line outlined dense /> <div class="mt-2 d-flex justify-center"> <v-btn data-testid="login.btn" small rounded @click="login()" > Login </v-btn> </div> </v-card-text> </v-card> </div> </template>テストコードの作成(TestCafe)
test/e2e/Login.js に以下のコードを記載
Loginテストの流れは以下の通り
- testcafeから必要な関数をimport
- 最初に開くページを「Getting Started」で設定
ローカルでのテスト前提のため、パスは「http://localhost:3000/login/」- 作成したログインページの入力欄にEmailを入力
- 作成したログインページの入力欄にパスワードを入力
- スクリーンショットを撮影
- ログインボタンをクリック
- TOPに遷移したか確認
import {Selector, ClientFunction} from 'testcafe';

fixture`Getting Started`.page`http://localhost:3000/login/`;
const getWindowLocation = ClientFunction(() => window.location);

test('Login', async (targetPage) => {
  let location;
  // 現在のURLを取得
  location = await getWindowLocation();
  // パスが想定通りか確認
  location.pathname.match('/login/');
  await targetPage
      // Emailを入力
      .typeText(Selector('[data-testid="login.email"]'), 'user@email.com')
      // パスワードを入力
      .typeText(Selector('[data-testid="login.password"]'), 'userpass')
      // Screenshotを保存
      .takeScreenshot('e2e/login.png'),
      // ログインボタンをクリック
      .click(Selector('[data-testid="login.btn"]'));
  // 現在のURLを取得
  location = await getWindowLocation();
  // パスが想定通りか確認
  location.pathname.match('/');
});
実行
2つのターミナルを使用する
1のターミナルでサーバーを起動した状態で
2のターミナルでテストコマンドを実行する
サーバーが起動した状態でなければ
指定のサーバーが存在しない状態になるのでテストは走らない[1] ローカルでnuxtを起動する
$ yarn run dev[2] テストを実行する
$ yarn testcafe chrome test/e2e/Login.js※ Testcafeの対象ブラウザ
https://devexpress.github.io/testcafe/documentation/guides/concepts/browsers.html#locally-installed-browsers実行すると以下のように指定のブラウザが起動して
テストコード通りに自動で操作処理が走る
処理が終わると以下のようにパスしたテスト数と
かかった時間が表示されます$ 1 passed (9s)まとめ
未経験でも環境構築が容易
シンプルでわかりやすく簡単にテストコードが書けた本記事では紹介していないが
BrowserstackとTestCafeを連携すれば
自分の所持していないブラウザや環境でも
テストを行うことが可能になるローカルホストのテストは行えないため
テスト用のサーバーなどを用意して
テストを走らせるのが良いBrowserstackについて調査後、記事にまとめる予定
以上 TestCafeを使ったE2Eテスト 基礎編
- 投稿日:2020-09-10T21:54:26+09:00
【Nuxt.js】Vuexを利用したデータのやり取りを追っていく〜ログインデータ編〜【Vue.js】
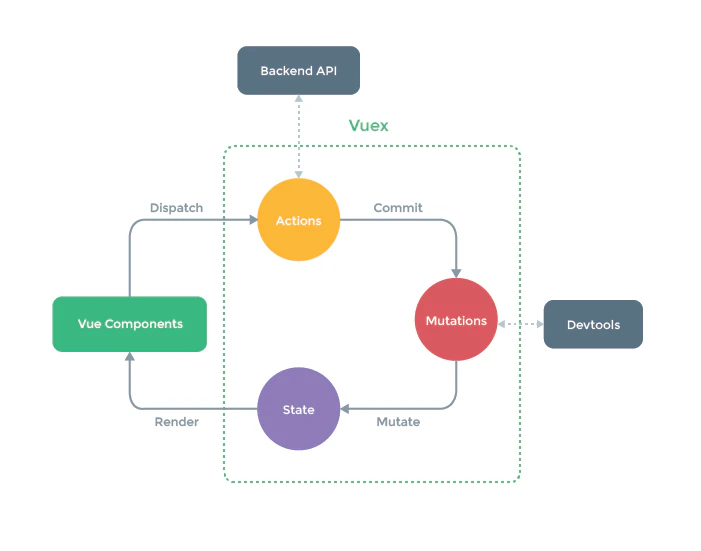
Vuexのデータのやり取りの流れって何回も移動するので、ややこしくなりますよね。。。。
そんなあなたのために、データのやり取りを仕事に例えて追っていこうと思います。まずは、おなじみのデータのサイクルから復習しておきましょう
メソッドの早見表
仕事する場所 仕事を依頼する関数 仕事を受け取る関数 Vueコンポーネント this.$store.dispatch(引継ぎ先関数名, データ) this.$store.getters[stateデータ名] actionsプロパティ context.commit(引き継ぎ先関数名, データ) 関数名(context, payload) mutationsプロパティ 関数名(state, payload)
payloadとは
受け取ったデータのこと1.Vueコンポーネント
仕事を依頼する関数(actionsプロパティへ)
this.$store.dispatch(引継ぎ先関数名, データ)で、actionsプロパティに引き継ぎさせます。<script> export default { data () { return { loginForm: { email: '', password: '', }, } }, methods: { loginSubmit (session) { this.$store.dispatch('login', { email: this.loginForm.email, password: this.loginForm.password, }) } } } </script>2.actionsプロパティ
仕事を受け取る関数(Vueコンポーネントから)
関数名(context, payload)で、データを受け取る仕事を依頼する関数(mutationsプロパティへ)
context.commit(引き継ぎ先関数名, データ)で、mutationプロパティにデータを引き継がせる。store/index.jsexport const state = () => ({ user: { uid: '', name: '', email: '', login: false } }) export const actions = { async login ({ commit }, payload) { const loginUser = await this.$axios.$post('/api/v1/sessions', { session: { email: payload.email, password: payload.password, } }) await commit('getData', { uid: loginUser.data.id, name: loginUser.data.name, email: loginUser.data.email, }) await commit('switchLogin') alert(loginUser.data.name) this.$router.push({ path: `/users/${loginUser.data.id}` }) } }引き継がれたactionsプロパティのloginメソッドの主なお仕事は三つ。
1. 引き継がれたデータをAPIに投げて、帰ってきた値をキャッチする
2. キャッチした値の中のデータを、mutationプロパティに引き継がせる
3. もう一つだけ違う仕事を、同じくmutationプロパティに依頼する3.mutationsプロパティ
仕事を受け取る関数(actionsプロパティから)
関数名(state, payload)で、データを受け取るstore/index.jsexport const mutations = { getData (state, payload) { state.user.uid = payload.uid state.user.name = payload.name state.user.email = payload.email }, switchLogin (state) { state.user.login = true } }mutationsプロパティ内のメソッドのそれぞれの仕事は以下の通り。
1. getDataの仕事は、受け取ったデータをstateデータに格納する
2. switchLoginの仕事は、stateのloginの真偽値をtrueにする4.gettersプロパティ
仕事を納品する(Vueコンポーネントへ)
store/index.jsexport const getters = { user: state => { return state.user } }5.Vueコンポーネント
納品されたものを受け取る(gettesプロパティから)
<template>
  <v-card>
    {{ user }}
  </v-card>
</template>

<script>
・・・
  computed: {
    user () {
      return this.$store.getters['user']
    }
  }
・・・
</script>
- 投稿日:2020-09-10T20:00:14+09:00
コンポーネント間のデータのやりとりを簡単なTODOアプリでまとめる
Vuexに頼りすぎてコンポーネント間のデータの受け渡し方が曖昧だったので、簡単なサンプルアプリでまとめる
また、Vueで開発をしていてコンポーネントを細かく分けない事で以下の問題がよく起こったのでその反省
コンポーネントを分けない問題
・汎用性の悪さ
例えばフォームとボタンを一緒のコンポーネントに作ると、ボタンだけ使い回したい時にフォームまでついてきて汎用性が悪い。・同じような記述をしたコンポーネントファイルが増えDRYに反する
・1ファイルのコード量が増えて可読性が悪い
作成したコンポーネント
・ボタン
・入力フォーム
・ボタンと入力フォームをまとめたコンポーネントただ単にクリックイベントとボタン名を使いまわせるボタン
button.vue<template> <button @click="onClick">{{name}}</button> </template> <script> export default { props:{ name:{ type:String, default:"button" }, onClick:{ type:Function, required:true } }, } </script>入力フォーム。
propsの値はv-modelで直接変更するとエラーになる
computedでv-modelの変更を検知し
親コンポーネントへ入力された値(input)を送り、親側でpropsの値を更新するInput.vue<template> <input type="text" v-model="input"> </template> <script> export default { props:{ inputValue:String }, computed:{ // v-modelのinputの変更を検知 input:{ get(){ return this.$props.inputValue }, // 親コンポーネントにinputを送り出して親側でpropsの値を書き換える set(value){ this.$emit("setValue",value) } } } } </script>ボタンと入力フォームが存在するコンポーネント
入力フォームの値をボタンクリックで配列に格納し親コンポーネントへ渡すForm.vue<template> <div> <!-- $emitで渡ってきたイベントを実行 --> <!-- 子コンポーネントのpropsに$emitの引数で受け取った値をセット --> <Input @setValue="setValue" :inputValue = value /> <!-- Buttonコンポーネントのイベント発火とボタン名を設定 --> <Button :onClick="postTodo" name="add" /> </div> </template> <script> import Button from "@/components/Button.vue" import Input from "@/components/Input.vue" export default { data(){ return{ value:null, todos:[] } }, components:{ Button, Input }, methods:{ postTodo(){ this.todos.push(this.value) this.value="" //todoが追加された配列を親コンポーネントへ渡す this.$emit("setTodo",this.todos) }, setValue(value){ this.value=value } } } </script>Form.vueから受け取った配列todosをv-forでレンダリング
App.vue<template> <div id="app"> <h1>Todo</h1> <Form @setTodo="setTodo" /> <hr> <template v-for="(todo,index) in todos"> <li :key="index">{{todo}}</li> </template> </div> </template> <script> import Form from "@/components/Form.vue" export default { name: 'App', components: { Form }, data(){ return{ todos:null } }, methods:{ setTodo(todos){ this.todos=todos.reverse() }, } } </script>まとめ
・v-modelの値を渡したい時はcomputedで変更を検知して$emit経由で値を渡して親側からpropsを更新する
・$emitでどんどん親へ親へ渡していく。
・兄弟のデータを使う時は親のdataに保管したものを使う
- 投稿日:2020-09-10T17:33:17+09:00
Nuxt.jsでFacebook Customer Chatを導入
思ったより情報が落ちてなかったので、残しておきます。
Customer Chat Pluginとは名の通りFacebookページに顧客からチャットが飛ばせるよっていう仕組みで、こんな感じのMessengerアイコンがサイトに表示されるようになります。
FBページからCustomer Chatの設定
最近UIが変更されたので、ちょっとわかりやすくなったかもしれません。
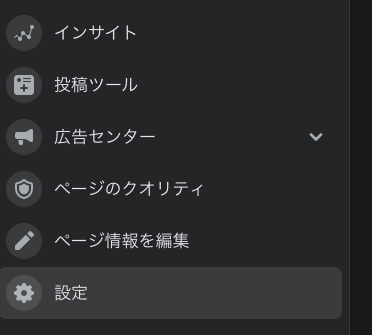
ページの左側にあるメニューから、設定を選択
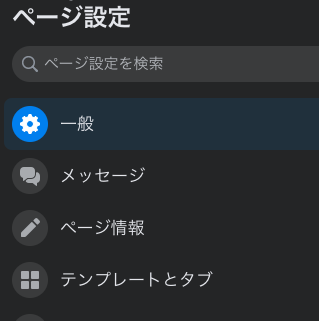
メッセージを選択
半分より下くらいに、
ウェブサイトにMessengerを追加とのメニューが表示されるので、利用を開始ボタンを押します。
そうすると、stepダイアログみたいな表示になるので最後まで進めます。
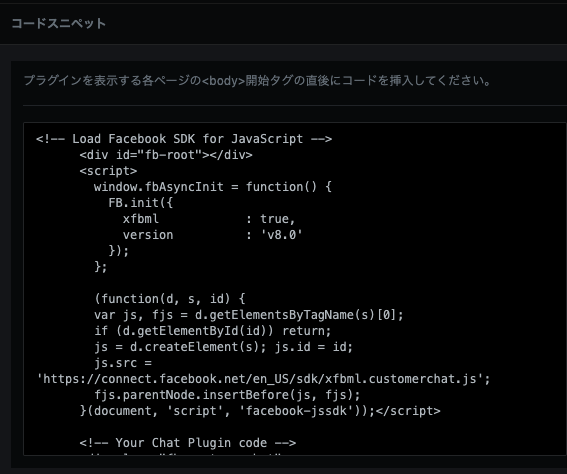
最後にスニペットがでてくるので、コピペしておきましょう。
Nuxt側の設定
ぺたっとスニペットを貼り付けるだけだと楽なんですけど、実際にフレームワーク使ってるとそうはいかなかったりしますよね。
ここではPluginとして読み込んでいきたいと思います。
pluginファイルの作成
さっきのスニペットを以下のように書きます。
ここはVueインスタンスで利用できるようにしてますが、Injectしても良さそうですね。
  import Vue from = 'vue'

  const vueFb = {}
  vueFb.install = function install(Vue, options) {
    (function (d, s, id) {
      var js
      var fjs = d.getElementsByTagName(s)[0]
      if (d.getElementById(id)) { return }
      js = d.createElement(s)
      js.id = id
      js.src = 'https://connect.facebook.net/en_US/sdk/xfbml.customerchat.js'
      fjs.parentNode.insertBefore(js, fjs)
    }(document, 'script', 'facebook-jssdk'))

    window.fbAsyncInit = () => {
      window.FB.init(options)
      Vue.FB = window.FB

      // ここでEventのSubscribeしておくと、ハンドリングがやりやすかったりします
      // FB.Event.subscribe ~
    }
    Vue.FB = undefined
  }

  Vue.use(vueFb, {
    appId: YOUR FACEBOOK ID,
    autoLogAppEvents: true,
    xfbml: true, // ここをfalseにすると任意のタイミングでParseすることができます (表示)
    version: Graph API Version (v3.3 etc)
  })
nuxt.config.jsの追加
clientだけでいいと思うので、modeはclientで指定しています。
plugins: [
    { src: "~/plugins/fb.js", mode: 'client' },
任意の場所にhtmlを追加
Ex. default.vue
<template>
  <div id='app'>
    <nuxt/>
    <div class="fb-customerchat"
      :page_id="YOUR PAGE ID"
      theme_color="#0084ff">
    </div>
  </div>
</template>
これで終わりです。
まとめ
導入はめちゃくちゃ簡単ですね!
まだ安定していませんが、無料でChatサポートができるので個人で開発している方とかはかなりいいんじゃないかなと思います。
もし何かできない、動かないってなった場合はお気軽にDMで質問してください。


- 投稿日:2020-09-10T17:00:37+09:00
セクション17
axiosを使ってデータのやり取りをする
npm install axios
import axios from "axios"cloud firestore rest api検索
結果
https://firestore.googleapis.com/v1/projects/YOUR_PROJECT_ID/databases/(default)/documents/cities/LAYOUR_PROJECT_IDとcities/LAを変える
methods:{
    createComment(){
      axios.post(”https://firestore.googleapis.com/v1/projects/scrapoo/databases/(default)/documents/comment2”,
      {
        fields:{
          name:{
            stringValue:this.name
          },
          comment:{
            stringValue:this.comment
          }
        }
      }
      )
      .then(response=>{
        console.log(response)
      })
    }
  }
getもpostもおなじurl
baseurlなどの共通の設定はmain.jsで読み込む
なぜならmain.jsが最初に読み込まれるから
- 投稿日:2020-09-10T17:00:37+09:00
axios
axiosを使ってデータのやり取りをする
npm install axios
import axios from "axios"cloud firestore rest api検索
結果
https://firestore.googleapis.com/v1/projects/YOUR_PROJECT_ID/databases/(default)/documents/cities/LAYOUR_PROJECT_IDとcities/LAを変える
methods:{
    createComment(){
      axios.post(”https://firestore.googleapis.com/v1/projects/scrapoo/databases/(default)/documents/comment2”,
      {
        fields:{
          name:{
            stringValue:this.name
          },
          comment:{
            stringValue:this.comment
          }
        }
      }
      )
      .then(response=>{
        console.log(response)
      })
    }
  }
getもpostもおなじurl
baseurlなどの共通の設定はmain.jsで読み込む
なぜならmain.jsが最初に読み込まれるから
- 投稿日:2020-09-10T15:30:51+09:00
Vue3 でプロジェクトを作成する 〜 変更点 確認編 〜
Prologue
Vue3 のプロジェクトの立ち上げ方と Vue2 -> Vue3 の移行が現状どのようになっているのか確認するために検証を行いました。
Vue3や使用している CLI 等は今後変更があると思いますので、自身で設定する場合には都度公式を確認することをお勧めします。
環境
- macOS: v10.15.6
- node.js: v12.18.2
- terminal: iTerm
- エディタ: VS Code
- パッケージマネージャ:
yarninstall
vueCLI v4.5.0 で Vue3 のプロジェクトを選択できるようになりました。
参考:
- https://github.com/vuejs/vue-cli/releases/tag/v4.5.0
- https://github.com/vuejs/vue-cli/blob/dev/CHANGELOG.md
- https://v3.vuejs.org/guide/
今回 バージョンが
Vue CLI v4.4.6だったため、yarn global add @vue/cliを実行し、バージョンを上げます。
参考: https://github.com/vuejs/vue-cli/releases以下のコマンドを実行してバージョンの確認の確認をし、問題なければOKです。
vue -V
@vue/cli 4.5.4
プロジェクトの作成 : Default Vue 3 Preview を選択
vue create vue3-nextコマンドを実行します。今回プロジェクトはvue3-nextとしています。Vue CLI v4.5.4 ? Please pick a preset: Default ([Vue 2] babel, eslint) ❯ Default (Vue 3 Preview) ([Vue 3] babel, eslint) Manually select featuresデフォルトで Vue3 が選択できるようになっています。感動。
package.jsonを確認します。"dependencies": { "core-js": "^3.6.5", "vue": "^3.0.0-0" }, "devDependencies": { "@vue/cli-plugin-babel": "~4.5.0", "@vue/cli-plugin-eslint": "~4.5.0", "@vue/cli-service": "~4.5.0", "@vue/compiler-sfc": "^3.0.0-0", "babel-eslint": "^10.1.0", "eslint": "^6.7.2", "eslint-plugin-vue": "^7.0.0-0" },
yarn.lockも確認してみます。vue@^3.0.0-0: version "3.0.0-rc.10" resolved "https://registry.yarnpkg.com/vue/-/vue-3.0.0-rc.10.tgz#31298a757b4fad6ee8973d0fa27c4fde8574bd01" integrity sha512-nRsyIQtOWLDMBb5dsPwg/WdIqznCMVWN6O6wJSzhseKC768wHlZKcJ7SPHhWPid9wi3Ykhtl9vtgvxTK/qICkw== dependencies: "@vue/compiler-dom" "3.0.0-rc.10" "@vue/runtime-dom" "3.0.0-rc.10" "@vue/shared" "3.0.0-rc.10"
vue3.0.0-rc.10がインストールされていて、yarn serveを実行し問題なく表示されて入ればOKです。プロジェクトの作成 : Manually select features を選択
manually selectを選択します。Vue CLI v4.5.4 ? Please pick a preset: Default ([Vue 2] babel, eslint) Default (Vue 3 Preview) ([Vue 3] babel, eslint) ❯ Manually select features次に Vue のバージョンの選択肢が表示されるため、3.x を選択します。
? Choose a version of Vue.js that you want to start the project with
  2.x
❯ 3.x (Preview)
以下はこれまで通り、自分が使うモジュール等を選択していきます。
vue create vue3-next-manually


Vue CLI v4.5.4
? Please pick a preset: Manually select features
? Check the features needed for your project: Choose Vue version, Babel, TS, Rou
ter, Vuex, Linter
? Choose a version of Vue.js that you want to start the project with 3.x (Previe
w)
? Use class-style component syntax? Yes
? Use Babel alongside TypeScript (required for modern mode, auto-detected polyfi
lls, transpiling JSX)? Yes
? Use history mode for router? (Requires proper server setup for index fallback
in production) Yes
? Pick a linter / formatter config: Prettier
? Pick additional lint features: Lint on save
? Where do you prefer placing config for Babel, ESLint, etc.? In dedicated confi
g files
? Save this as a preset for future projects? No
manually selectだと従来通り TS も選択できるため、TS を使用したい方はこちらを選択すると設定周りも楽になります。(Default (Vue 3 Preview)だと手動で入れる必要があります。)
package.jsonを確認します。"dependencies": { "core-js": "^3.6.5", "vue": "^3.0.0-0", "vue-class-component": "^8.0.0-0", "vue-router": "^4.0.0-0", "vuex": "^4.0.0-0" }, "devDependencies": { "@typescript-eslint/eslint-plugin": "^2.33.0", "@typescript-eslint/parser": "^2.33.0", "@vue/cli-plugin-babel": "~4.5.0", "@vue/cli-plugin-eslint": "~4.5.0", "@vue/cli-plugin-router": "~4.5.0", "@vue/cli-plugin-typescript": "~4.5.0", "@vue/cli-plugin-vuex": "~4.5.0", "@vue/cli-service": "~4.5.0", "@vue/compiler-sfc": "^3.0.0-0", "@vue/eslint-config-prettier": "^6.0.0", "@vue/eslint-config-typescript": "^5.0.2", "eslint": "^6.7.2", "eslint-plugin-prettier": "^3.1.3", "eslint-plugin-vue": "^7.0.0-0", "prettier": "^1.19.1", "typescript": "~3.9.3" }次に
yarn.lockも確認してみます。vue@^3.0.0-0: version "3.0.0-rc.10" resolved "https://registry.yarnpkg.com/vue/-/vue-3.0.0-rc.10.tgz#31298a757b4fad6ee8973d0fa27c4fde8574bd01" integrity sha512-nRsyIQtOWLDMBb5dsPwg/WdIqznCMVWN6O6wJSzhseKC768wHlZKcJ7SPHhWPid9wi3Ykhtl9vtgvxTK/qICkw== dependencies: "@vue/compiler-dom" "3.0.0-rc.10" "@vue/runtime-dom" "3.0.0-rc.10" "@vue/shared" "3.0.0-rc.10"以上、2種類の操作を試しましたが、Vue3 のバージョンに違いがないことを確認しました。こちらも
yarn serveを実行して画面が表示されればOKです。プロジェクトの作成 : Manually select features を選択, class-style component を使わない
ここでは CompositionAPI を使いたい場合、
class-style componentを選択しないと違いがあるのかを検証しています。プロジェクトの作成
vue create vue3-next-manually-no-class


Vue CLI v4.5.4
? Please pick a preset: Manually select features
? Check the features needed for your project: Choose Vue version, Babel, TS, Rou
ter, Vuex, Linter
? Choose a version of Vue.js that you want to start the project with 3.x (Previe
w)
? Use class-style component syntax? No
? Use Babel alongside TypeScript (required for modern mode, auto-detected polyfi
lls, transpiling JSX)? Yes
? Use history mode for router? (Requires proper server setup for index fallback
in production) Yes
? Pick a linter / formatter config: Prettier
? Pick additional lint features: Lint on save
? Where do you prefer placing config for Babel, ESLint, etc.? In dedicated confi
g files
? Save this as a preset for future projects? No
package.jsonを確認します。"dependencies": { "core-js": "^3.6.5", "vue": "^3.0.0-0", "vue-router": "^4.0.0-0", "vuex": "^4.0.0-0" }, "devDependencies": { "@typescript-eslint/eslint-plugin": "^2.33.0", "@typescript-eslint/parser": "^2.33.0", "@vue/cli-plugin-babel": "~4.5.0", "@vue/cli-plugin-eslint": "~4.5.0", "@vue/cli-plugin-router": "~4.5.0", "@vue/cli-plugin-typescript": "~4.5.0", "@vue/cli-plugin-vuex": "~4.5.0", "@vue/cli-service": "~4.5.0", "@vue/compiler-sfc": "^3.0.0-0", "@vue/eslint-config-prettier": "^6.0.0", "@vue/eslint-config-typescript": "^5.0.2", "eslint": "^6.7.2", "eslint-plugin-prettier": "^3.1.3", "eslint-plugin-vue": "^7.0.0-0", "prettier": "^1.19.1", "typescript": "~3.9.3" }
yarn.lockも確認してみます。vue@^3.0.0-0: version "3.0.0-rc.10" resolved "https://registry.yarnpkg.com/vue/-/vue-3.0.0-rc.10.tgz#31298a757b4fad6ee8973d0fa27c4fde8574bd01" integrity sha512-nRsyIQtOWLDMBb5dsPwg/WdIqznCMVWN6O6wJSzhseKC768wHlZKcJ7SPHhWPid9wi3Ykhtl9vtgvxTK/qICkw== dependencies: "@vue/compiler-dom" "3.0.0-rc.10" "@vue/runtime-dom" "3.0.0-rc.10" "@vue/shared" "3.0.0-rc.10" // 略 vuex@^4.0.0-0: version "4.0.0-beta.4" resolved "https://registry.yarnpkg.com/vuex/-/vuex-4.0.0-beta.4.tgz#7b319ead2ef30432b7eaa4e37258ea3c5e44f698" integrity sha512-/+4E1dokq5cwbl4mohOqOj8h0vOLOWmLSqlqTf++bfmN9/JKWtwYfsBrzlK0sYrNfuYcpQeX0BVxQHoHXDfYZQ== // 略 vue-router@^4.0.0-0: version "4.0.0-beta.9" resolved "https://registry.yarnpkg.com/vue-router/-/vue-router-4.0.0-beta.9.tgz#8552c38c9b015527e74c9c6cb4c54868219d601e" integrity sha512-k8AGMm3LCTqnsEuF37AD4kcZVMwtnFEzdjACgmIII/xbLnTj3+o5XyH/zREBZutgv5q2hzlLltMVglqDQYMd/A==
"vue-class-component": "^8.0.0-0"がないだけとなります。この辺りも従来通りという感じです。CompositionAPI が使えるか確認
Vue2 までは plugin の
CompositionAPIを import して使う必要がありましたが、Vue3 ではその必要が無くなったということで、実際書いてみます。
src/components/HelloWorld.vueを以下のように変更
- before
<script lang="ts">
import { defineComponent } from "vue";

export default defineComponent({
  name: "HelloWorld",
  props: {
    msg: String
  }
});
</script>
- after
<script lang="ts">
import { defineComponent } from "vue";

export default defineComponent({
  name: "HelloWorld",
  props: {
    msg: {
      type: String
    }
  },
  setup(props) {
    const message = `${props.msg}. + Vue3`;
    return { message };
  }
});
</script>
beforeの時点でvueからdefineComponentが import されているため使えることは当たり前なのですが、念のためsetup等も追記してみました。
追加したテキスト等が表示されていればOKです。
既存のプロジェクトをVue3 に変更
ここからが一番使うのではないでしょうか。
まずはVue2 でプロジェクトを作成します。今回プロジェクト名はvue3-next-cli-pluginとしました。
TS, Vuex, vue-router も一緒にインストールしていきます。vue create vue3-next-cli-plugin Vue CLI v4.5.4 ? Please pick a preset: Manually select features ? Check the features needed for your project: Choose Vue version, Babel, TS, Rou ter, Vuex, Linter ? Choose a version of Vue.js that you want to start the project with 2.x ? Use class-style component syntax? No ? Use Babel alongside TypeScript (required for modern mode, auto-detected polyfi lls, transpiling JSX)? Yes ? Use history mode for router? (Requires proper server setup for index fallback in production) Yes ? Pick a linter / formatter config: Prettier ? Pick additional lint features: Lint on save ? Where do you prefer placing config for Babel, ESLint, etc.? In dedicated confi g files ? Save this as a preset for future projects? No
package.jsonの中身を確認します。"dependencies": { "core-js": "^3.6.5", "vue": "^2.6.11", "vue-router": "^3.2.0", "vuex": "^3.4.0" }, "devDependencies": { "@typescript-eslint/eslint-plugin": "^2.33.0", "@typescript-eslint/parser": "^2.33.0", "@vue/cli-plugin-babel": "~4.5.0", "@vue/cli-plugin-eslint": "~4.5.0", "@vue/cli-plugin-router": "~4.5.0", "@vue/cli-plugin-typescript": "~4.5.0", "@vue/cli-plugin-vuex": "~4.5.0", "@vue/cli-service": "~4.5.0", "@vue/eslint-config-prettier": "^6.0.0", "@vue/eslint-config-typescript": "^5.0.2", "eslint": "^6.7.2", "eslint-plugin-prettier": "^3.1.3", "eslint-plugin-vue": "^6.2.2", "prettier": "^1.19.1", "typescript": "~3.9.3", "vue-template-compiler": "^2.6.11" }
yarn.lockの中身も確認します。vue@^2.6.11: version "2.6.12" resolved "https://registry.yarnpkg.com/vue/-/vue-2.6.12.tgz#f5ebd4fa6bd2869403e29a896aed4904456c9123" integrity sha512-uhmLFETqPPNyuLLbsKz6ioJ4q7AZHzD8ZVFNATNyICSZouqP2Sz0rotWQC8UNBF6VGSCs5abnKJoStA6JbCbfg== // vuex@^3.4.0: version "3.5.1" resolved "https://registry.yarnpkg.com/vuex/-/vuex-3.5.1.tgz#f1b8dcea649bc25254cf4f4358081dbf5da18b3d" integrity sha512-w7oJzmHQs0FM9LXodfskhw9wgKBiaB+totOdb8sNzbTB2KDCEEwEs29NzBZFh/lmEK1t5tDmM1vtsO7ubG1DFw== // vue-router@^3.2.0: version "3.4.3" resolved "https://registry.yarnpkg.com/vue-router/-/vue-router-3.4.3.tgz#fa93768616ee338aa174f160ac965167fa572ffa" integrity sha512-BADg1mjGWX18Dpmy6bOGzGNnk7B/ZA0RxuA6qedY/YJwirMfKXIDzcccmHbQI0A6k5PzMdMloc0ElHfyOoX35A==
HelloWorld.vueは以下の通り。<script lang="ts"> import Vue from "vue"; export default Vue.extend({ name: "HelloWorld", props: { msg: String } }); </script>以上は、以下から行う比較のために参考として置いておきます。
vue add vue-nextで Vue3 を入れる参考: https://github.com/vuejs/vue-cli-plugin-vue-next
コマンドを実行します。
vue add vue-next

?  Installing vue-cli-plugin-vue-next...

yarn add v1.22.4
[1/4] ?  Resolving packages...
[2/4] ?  Fetching packages...
[3/4] ?  Linking dependencies...
[4/4] ?  Building fresh packages...

success Saved lockfile.
success Saved 2 new dependencies.
info Direct dependencies
└─ vue-cli-plugin-vue-next@0.1.3
info All dependencies
├─ vue-cli-plugin-vue-next@0.1.3
└─ vue-loader@16.0.0-beta.5
✨  Done in 4.19s.
✔  Successfully installed plugin: vue-cli-plugin-vue-next


?  Invoking generator for vue-cli-plugin-vue-next...
?  Installing additional dependencies...

yarn install v1.22.4
[1/4] ?  Resolving packages...
[2/4] ?  Fetching packages...
[3/4] ?  Linking dependencies...
[4/4] ?  Building fresh packages...
success Saved lockfile.
✨  Done in 7.65s.
⚓  Running completion hooks...

✔  Successfully invoked generator for plugin: vue-cli-plugin-vue-next
 vue-next  Installed vuex 4.0.
 vue-next  Documentation available at https://github.com/vuejs/vuex/tree/4.0
 vue-next  Installed vue-router 4.0.
 vue-next  Documentation available at https://github.com/vuejs/vue-router-next
インストールが完了しました。次に
package.jsonの中身を確認してみます。"dependencies": { "core-js": "^3.6.5", "vue": "^3.0.0-beta.1", "vue-router": "^4.0.0-alpha.6", "vuex": "^4.0.0-alpha.1" }, "devDependencies": { "@typescript-eslint/eslint-plugin": "^2.33.0", "@typescript-eslint/parser": "^2.33.0", "@vue/cli-plugin-babel": "~4.5.0", "@vue/cli-plugin-eslint": "~4.5.0", "@vue/cli-plugin-router": "~4.5.0", "@vue/cli-plugin-typescript": "~4.5.0", "@vue/cli-plugin-vuex": "~4.5.0", "@vue/cli-service": "~4.5.0", "@vue/compiler-sfc": "^3.0.0-beta.1", "@vue/eslint-config-prettier": "^6.0.0", "@vue/eslint-config-typescript": "^5.0.2", "eslint": "^6.7.2", "eslint-plugin-prettier": "^3.1.3", "eslint-plugin-vue": "^7.0.0-alpha.0", "prettier": "^1.19.1", "typescript": "~3.9.3", "vue-cli-plugin-vue-next": "~0.1.3" }yarn.lock の中身も確認します。
vue@^3.0.0-beta.1:
  version "3.0.0-rc.10"
  resolved "https://registry.yarnpkg.com/vue/-/vue-3.0.0-rc.10.tgz#31298a757b4fad6ee8973d0fa27c4fde8574bd01"
  integrity sha512-nRsyIQtOWLDMBb5dsPwg/WdIqznCMVWN6O6wJSzhseKC768wHlZKcJ7SPHhWPid9wi3Ykhtl9vtgvxTK/qICkw==
  dependencies:
    "@vue/compiler-dom" "3.0.0-rc.10"
    "@vue/runtime-dom" "3.0.0-rc.10"
    "@vue/shared" "3.0.0-rc.10"

// 略

vuex@^4.0.0-alpha.1:
  version "4.0.0-beta.4"
  resolved "https://registry.yarnpkg.com/vuex/-/vuex-4.0.0-beta.4.tgz#7b319ead2ef30432b7eaa4e37258ea3c5e44f698"
  integrity sha512-/+4E1dokq5cwbl4mohOqOj8h0vOLOWmLSqlqTf++bfmN9/JKWtwYfsBrzlK0sYrNfuYcpQeX0BVxQHoHXDfYZQ==

// 略

vue-router@^4.0.0-alpha.6:
  version "4.0.0-beta.9"
  resolved "https://registry.yarnpkg.com/vue-router/-/vue-router-4.0.0-beta.9.tgz#8552c38c9b015527e74c9c6cb4c54868219d601e"
  integrity sha512-k8AGMm3LCTqnsEuF37AD4kcZVMwtnFEzdjACgmIII/xbLnTj3+o5XyH/zREBZutgv5q2hzlLltMVglqDQYMd/A==
package.jsonではvue: ^3.0.0-beta.1となっていましたが、yarn.lockで最新版が落とされていることを確認しました。vue-router,vuexも同様です。Error の解消
このままで
yarn serveを実行すると、エラーが出ます。ERROR Failed to compile with 6 errors 22:57:58 Module Error (from ./node_modules/vue-loader/lib/index.js): [vue-loader] vue-template-compiler must be installed as a peer dependency, or a compatible compiler implementation must be passed via options. // 略 Module build failed (from ./node_modules/vue-loader/lib/index.js): TypeError: Cannot read property 'parseComponent' of undefined at parse (/Users/mi**/work/vue3-next-cli-plugin/node_modules/@vue/component-compiler-utils/dist/parse.js:15:23) at Object.module.exports (/Users/mi**/work/vue3-next-cli-plugin/node_modules/vue-loader/lib/index.js:67:22) // 略 You may use special comments to disable some warnings. Use // eslint-disable-next-line to ignore the next line. Use /* eslint-disable */ to ignore all warnings in a file. ERROR in src/main.ts:6:11 TS2345: Argument of type 'typeof import("/Users/mi**/work/vue3-next-cli-plugin/node_modules/vue/dist/vue")' is not assignable to parameter of type 'Component'. Type 'typeof import("/Users/mi**/work/vue3-next-cli-plugin/node_modules/vue/dist/vue")' is not assignable to type 'ComponentOptionsWithObjectProps<any, any, any, any, any, ComponentOptionsMixin, ComponentOptionsMixin, EmitsOptions, string, Readonly<{ [x: string]: any; }> | Readonly<...>>'. Type 'typeof import("/Users/mi**/work/vue3-next-cli-plugin/node_modules/vue/dist/vue")' is not assignable to type 'ComponentOptionsBase<Readonly<{ [x: string]: any; }> | Readonly<{ [x: string]: any; } & { [x: number]: any; }>, any, any, any, any, ComponentOptionsMixin, ComponentOptionsMixin, EmitsOptions, string>'. Types of property 'watch' are incompatible. Type '{ <T extends readonly (object | Ref<unknown> | ComputedRef<unknown> | (() => unknown))[], Immediate extends boolean = false>(sources: T, cb: WatchCallback<MapSources<T>, MapOldSources<T, Immediate>>, options?: WatchOptions<...> | undefined): WatchStopHandle; <T, Immediate extends boolean = false>(source: WatchSource...' is not assignable to type 'Record<string, ComponentWatchOptionItem>'. Index signature is missing in type '{ <T extends readonly (object | Ref<unknown> | ComputedRef<unknown> | (() => unknown))[], Immediate extends boolean = false>(sources: T, cb: WatchCallback<MapSources<T>, MapOldSources<T, Immediate>>, options?: WatchOptions<...> | undefined): WatchStopHandle; <T, Immediate extends boolean = false>(source: WatchSource...'. 4 | import store from "./store"; 5 | > 6 | createApp(App) | ^^^ 7 | .use(router) 8 | .use(store) 9 | .mount("#app"); ERROR in src/router/index.ts:1:10 TS2305: Module '"../../node_modules/vue-router/dist/vue-router"' has no exported member 'RouteConfig'. > 1 | import { RouteConfig, createRouter, createWebHistory } from "vue-router"; | ^^^^^^^^^^^ 2 | import Home from "../views/Home.vue"; 3 | 4 | const routes: Array<RouteConfig> = [ ERROR in src/store/index.ts:3:21 TS2339: Property 'createStore' does not exist on type '{ Store: typeof Store; mapState: Mapper<Computed> & MapperWithNamespace<Computed> & MapperForState & MapperForStateWithNamespace; ... 4 more ...; createLogger: <S>(option?: LoggerOption<...> | undefined) => Plugin<...>; }'. 1 | import Vuex from "vuex"; 2 | > 3 | export default Vuex.createStore({ | ^^^^^^^^^^^ 4 | state: {}, 5 | mutations: {}, 6 | actions: {}, ERROR in src/views/Home.vue:12:20 TS2339: Property 'extend' does not exist on type 'typeof import("/Users/mi**/work/vue3-next-cli-plugin/node_modules/vue/dist/vue")'. 10 | import HelloWorld from "@/components/HelloWorld.vue"; // @ is an alias to /src 11 | > 12 | export default Vue.extend({ | ^^^^^^ 13 | name: "Home", 14 | components: { 15 | HelloWorld一つずつ修正していきます。
src/**.vue 内を CompositionAPI に則した形で書く
component 内が
Vue.extendのままなので、修正します。こちらは問題なく終了。createApp について
こちらは Vue3 での変更点となります。
変更点: GlobalAPI の再設計によって、
createAppが作成され、それによりアプリインスタンスのみにスコープされるようになりました。自動で書き換えられていますが、型に関する変更を手動で行う必要があります。
shims-vue.d.tsの変更
参考: https://github.com/vuejs/vue-next-webpack-preview/issues/5調べると以下の方がより型に沿っているそうなのですが、今回はとりあえず上記 Issue で議論された内容で修正します。
参考: https://dev.to/lmillucci/building-a-vue-3-component-with-typescript-4pge
shims-vue.d.tsを修正します。
- before
  declare module "*.vue" {
    import Vue from "vue";
    export default Vue;
  }
- after
  declare module "*.vue" {
    import { ComponentOptions } from "vue";
    const component: ComponentOptions
    export default component;
  }
compile エラーは無くなりました。
vue-loader
こちらはエラー内容から依存関係がうまくいっていないような気がしたため、そこに推測を立て、
yarn.lockを確認しながら以下の方法で検証しました。検証:
"vue-cli-plugin-vue-next": "~0.1.3"を削除してインストールすると動く
- before:
yarn.lock"vue-loader-v16@npm:vue-loader@^16.0.0-beta.3", vue-loader@^16.0.0-alpha.3: name vue-loader-v16 version "16.0.0-beta.5" resolved "https://registry.yarnpkg.com/vue-loader/-/vue-loader-16.0.0-beta.5.tgz#04edc889492b03a445e7ac66e9226a70175ca8a0" integrity sha512-ciWfzNefqWlmzKznCWY9hl+fPP4KlQ0A9MtHbJ/8DpyY+dAM8gDrjufIdxwTgC4szE4EZC3A6ip/BbrqM84GqA== dependencies: "@types/mini-css-extract-plugin" "^0.9.1" chalk "^3.0.0" hash-sum "^2.0.0" loader-utils "^1.2.3" merge-source-map "^1.1.0" source-map "^0.6.1"
- after:
yarn.lock"vue-loader-v16@npm:vue-loader@^16.0.0-beta.3", vue-loader@^16.0.0-alpha.3: version "16.0.0-beta.5" resolved "https://registry.yarnpkg.com/vue-loader/-/vue-loader-16.0.0-beta.5.tgz#04edc889492b03a445e7ac66e9226a70175ca8a0" integrity sha512-ciWfzNefqWlmzKznCWY9hl+fPP4KlQ0A9MtHbJ/8DpyY+dAM8gDrjufIdxwTgC4szE4EZC3A6ip/BbrqM84GqA== dependencies: "@types/mini-css-extract-plugin" "^0.9.1" chalk "^3.0.0" hash-sum "^2.0.0" loader-utils "^1.2.3" merge-source-map "^1.1.0" source-map "^0.6.1"2. 別にもう一つプロジェクトを立ち上げて
yarn.lockを削除、インストールして検証した結果、問題なく動いたためやはりうまく依存関係が解決できなかっただけかなと思います。
こちらに関して何かありましたらご意見ください。vue-router
参考: https://github.com/vuejs/vue-router-next
RouteConfigはRouteRecordRawに rename されるとあるので修正します。
src/router/index.tsimport { RouteRecordRaw, createRouter, createWebHistory } from "vue-router"; // 略 const routes: Array<RouteRecordRaw> = [ // 略breaking changes の確認
mode: historyがhistoryに変更されます。こちらは以下の通りインストール時点で変換されていました。
src/router/index.tsconst router = createRouter({ history: createWebHistory(process.env.BASE_URL), routes });
- 全ての route を示す
/*はカスタム正規表現/:catchAll(.*)を用いて宣言するようになるとのことなので、以下のように修正して確認します。const routes: Array<RouteRecordRaw> = [ { path: "/:catchAll(.*)", name: "Home", component: Home }, ];
BASE_URL/asdf等asdf部分を良きように変えてもHomecomponent が表示されればOKです。params の取り扱いについて
params が global な root を通す必要が無くなったため、どのように取得できるのか確認します。
/src/router/index.tsに以下のように追記const routes: Array<RouteRecordRaw> = [ { path: "/:catchAll(.*)", name: "Home", component: Home }, { path: '/account/:id', component: Account // 追記 }, { path: "/about", name: "About", component: () => import(/* webpackChunkName: "about" */ "../views/About.vue") } ];
src/components/Account.vueを作成template 内では従来通りに取得できます。
<template>
    {{ $route.params.id }}
</template>
setup 内では以下のようにして取得することができました。
<script lang="ts">
import { defineComponent } from 'vue';
import { useRouter } from 'vue-router';
import router from '@/router'


export default defineComponent ({
    name: 'Account',
    setup(props, context){

       const { currentRoute }  = router
       console.log(currentRoute.value.params.id)
    }
})
</script>
ただ、こちらは検証不十分のため、ベストプラクティスかわからず...
近い内にもう少し掘り下げたいと思います。Vuex
参考: https://github.com/vuejs/vuex/tree/4.0#vuex-4
breaking changes として、 Vuex のインストールプロセスが変更になり、
createStore関数を使用することになった、とのことなので修正します。
src/store/index.tsimport { createStore } from "vuex"; export default createStore({ state: {}, mutations: {}, actions: {}, modules: {} });ここまでで compile エラーで出ていた箇所の修正は完了ですが、TS で使用する場合には独自にモジュール拡張を宣言する必要があるとのことなので、ドキュメント通りに修正しました。
- vuex-shim.d.ts
import { ComponentCustomProperties } from "vue";
import { Store } from "vuex";

declare module "@vue/runtime-core" {
  interface State {
  }

  interface ComponentCustomProperties {
    $store: Store<State>;
  }
}
今回の breaking changes で、 Vue component 内でのグローバルな型付の削除が行われたため、完全に型付された構造を作ることができるようになりました。
debug をとって確かめるために、以下のように追加していきます。
vuex-shim.d.tsimport { ComponentCustomProperties } from "vue"; import { Store } from "vuex"; declare module "@vue/runtime-core" { interface State { count: number; } interface ComponentCustomProperties { $store: Store<State>; } }
src/store/index.tsimport { createStore } from "vuex"; export default createStore({ state: { count: 1 }, mutations: {}, actions: {}, modules: {} });
src/components/index.ts<script lang="ts"> import { defineComponent, SetupContext } from "vue"; import { useStore } from 'vuex'; export default defineComponent({ name: "HelloWorld", props: { msg: String }, setup() { const store = useStore() console.log(store.state.count) // 1 が表示される } }); </script>参考: https://blog.logrocket.com/whats-new-in-vuex-4/
以上となります。
Epilogue
今回は Vue3 を実装する上でどこから手をつければいいのか把握する、を目標に実際に手を動かして検証してみました。次回は vuejs/rfcs を触りつつもう少し広げて作ってみようと思います。
また実際触ってみて global にする必要がなくなった、という点を忘れてしまいどこに格納されている or どこから取得すればいいのか、と迷いましたが、スコープが小さくなったという点に気をつけ、Document を確認すれば特に困ることはあまりないのかな、と感じました。
ただ、Vue2 から Vue3 へ段階的に上げることができるのか、Vuex や vue-router の切替等、大きなプロジェクトの運用、進め方は やはり考慮しないといけないのか、と思います。勉強途中のため、何かありましたらご連絡ください。
- 投稿日:2020-09-10T14:43:10+09:00
vue/composition-apiでscrollの状態を扱うComposition Functionを作った
概要
上向きにスクロールしたときに表示して、下向きにスクロールしたら隠すフッターを表示する要件が現れたので、
useScrollを作成して、スクロールの向きを絶えずリアクティブに返すComposition Functionとして扱ってみました。ソースコード
import { useWindowScroll } from '@vueuse/core'
import {
  reactive,
  toRefs,
  watch,
} from '@vue/composition-api'

export const useScroll = () => {
  const { x, y } = process.browser ? useWindowScroll() : { ...toRefs(reactive({x: 0, y: 0})) }

  const state = reactive<{
    isUp: boolean,
    isDown: boolean
  }>({
    isUp: false,
    isDown: false,
  })

  watch(() => y.value, (newY, oldY) => {
    state.isUp = newY < oldY
    state.isDown = newY > oldY
  })

  return {
    x,
    y,
    ...toRefs(state),
  }
}
解説
こちらのFunctionには、vueuseというライブラリを使わせてもらっています。
composition-apiを使った、特にブラウザのネイティブAPIで扱える値に関してリアクティブに活用できるFunctionがたくさんあります。今回は
useWindowScrollを利用させていただきました。
これは、windowへのEvent Listenerとして、ステート管理しているスクロールの高さを変更するハンドラを登録していることによって、リアクティブに座標の値を管理できるようにしています。composition-apiのwatchで、スクロールのy値を監視しており、変化したときの古い値との比較によって上昇中か、下降中かを判定しています。
使い方
こんな感じで書くと、スクロールの向きに応じて出たり消えたりするフッターが作れます。高さが70px決め打ちになっているのが少し悔やまれますが、Vue3でStyle周りの改善が入るらしいのでちょっとそれを心待ちにしていようと思っています。
<template>
  <footer :style="footerStyle" class="sync-scroll" :class="{ appear: isUp }">
    <slot />
  </footer>
</template>

<script lang='ts'>
import {
  computed,
  defineComponent,
} from '@nuxtjs/composition-api'
import { useScroll } from '~/composables/utils/window/useScroll'

export default defineComponent({
  setup() {
    const scrollState = useScroll()

    const footerStyle = computed(() => {
      if (scrollState.isUp) {
        return {
          height: '70px',
        }
      }

      return {
        bottom: '-70px',
        height: '70px',
      }
    })

    return {
      ...scrollState,
      footerStyle,
    }
  },
})
</script>

<style lang='scss' scoped>
@import '@/assets/css/variable.scss';

.sync-scroll {
  width: 100%;
  position: fixed;
  bottom: -70px;
  animation-name: hide;
  animation-duration: .4s;
  animation-timing-function: linear;

  &.appear {
    bottom: 0;
    animation-name: appear;
    animation-duration: .4s;
    animation-timing-function: linear;
  }
}

@keyframes appear {
  0% {
    bottom: -70px;
  }
  100% {
    bottom: 0;
  }
}
@keyframes hide {
  0% {
    bottom: 0;
  }
  100% {
    bottom: -70px;
  }
}
</style>
注意点
もとの
useWindowScrollが、スクロールのイベントハンドラにthrottleのような処理を噛ませていないっぽくて、全てのスクロールイベントに対してハンドラを呼び出しているようです。パフォーマンスを重視するならthrottleを噛ませたほうが良いと思います。最後に
composition-apiにハマって日々いろいろ試して発信しているTwitterアカウントはこちらです。
https://twitter.com/Meijin_garden
- 投稿日:2020-09-10T12:28:10+09:00
【完全版】Nuxt.jsにおけるライフサイクルまとめ(SSR/SPA/layouts/pages/components別)
はじめに
Nuxtのライフサイクル記事はたくさんありますが、コンポーネント別にまとめてくれている記事がなかったため、自分用に作成しました。よく使うんですが、よく忘れるんですよね、、、。
前提
バージョン
Nuxt.js 2.14.4
補足
nuxtServerInit
store/index.jsに記述しています。beforeEach/afterEach
pluginsにファイルを作成して、nuxt.config.jsで読み込んでいます。fetch
fetchは、公式推奨のcontextなし(引数なし)と非推奨のcontextあり(引数あり)の2種類があります。その同時実行はできませんが、流れをわかりやすくするために「fetch(有)」と「fetch(無)」という表記で両方記載しています。computed
各コンポーネント内のtemplateで呼び出した場合のタイミングを記載しています。全体の流れ
以下の5つに分けてライフサイクルをまとめています。
- SSR(初回アクセス時)
- CSR(初回アクセス時)
- SPA(初回アクセス時)
- データ更新時
- ページ遷移時
SSR(初回アクセス時)
modeをuniversalに設定かつ初回アクセス時にサーバーサイドで1回実行されます。
- plugins【nuxt.config.js】
- beforeEach【plugins:nuxt.config.js】
- afterEach【plugins:nuxt.config.js】
- nuxtServerInit【store】
- middleware【nuxt.config.js】
- middleware【layouts】
- middleware【pages】
- validate【pages】
- asyncData【pages】
- fetch(有)【pages】
- beforeCreate【layouts】
- created【layouts】
- fetch(無)【layouts】
- computed【layouts】
- beforeCreate【pages】
- created【pages】
- fetch(無)【pages】
- computed【pages】
- beforeCreate【component】
- created【component】
- fetch(無)【component】
- computed【component】
CSR(初回アクセス時)
SSR後に、クライアントサイドで1回だけ実行されます。
- plugin【nuxt.config.js】
- beforeEach【plugin:nuxt.config.js】
- afterEach【plugin:nuxt.config.js】
- beforeCreate【layouts】
- created【layouts】
- beforeMount【layouts】
- computed【layouts】
- beforeCreate【pages】
- created【pages】
- beforeMount【pages】
- computed【pages】
- beforeCreate【components】
- created【components】
- beforeMount【components】
- computed【components】
- mounted【components】
- mounted【pages】
- mounted【layouts】
SPA(初回アクセス時)
modeをspaに設定かつ初回アクセス時にクライアントサイドで1回実行されます。
- plugin【nuxt.config.js】
- beforeEach【plugin:nuxt.config.js】
- afterEach【plugin:nuxt.config.js】
- middleware【nuxt.config.js】
- middleware【layouts】
- middleware【pages】
- validate【pages】
- asyncData【pages】
- fetch(有)【pages】
- beforeCreate【layouts】
- created【layouts】
- beforeMount【layouts】
- fetch(無)【layouts】
- computed【layouts】
- beforeCreate【pages】
- created【pages】
- beforeMount【pages】
- fetch(無)【pages】
- computed【pages】
- beforeCreate【components】
- created【components】
- beforeMount【components】
- fetch(無)【components】
- computed【components】
- mounted【components】
- mounted【pages】
- mounted【layouts】
データ更新時
ページ内のデータが変更されるときに実行されます。
- beforeUpdate【layouts】
- beforeUpdate【pages】
- beforeUpdate【components】
- updated【components】
- updated【pages】
- updated【layouts】
ページ遷移時
SSRでもSPAでも静的サイトでもページ遷移動作は同じです。
※layoutは変更したときのみ
- beforeEach【plugin:nuxt.config.js】
- middleware【nuxt.config.js】
- middleware【layouts】
- middleware【pages】
- validate【pages】
- asyncData【pages】
- fetch(有)【pages】
- afterEach【plugin:nuxt.config.js】
- beforeDestroy【遷移元layouts】
- beforeDestroy【遷移元pages】
- beforeDestroy【遷移元components】
- destroyed【遷移元components】
- destroyed【遷移元pages】
- destroyed【遷移元layouts】
- beforeCreate【layouts】
- created【layouts】
- beforeMount【layouts】
- fetch(無)【layouts】
- computed【layouts】
- beforeCreate【pages】
- created【pages】
- beforeMount【pages】
- fetch(無)【pages】
- computed【pages】
- beforeCreate【components】
- created【components】
- beforeMount【components】
- fetch(無)【components】
- computed【components】
- mounted【components】
- mounted【pages】
- mounted【layouts】
ファイル別の利用可能ライフサイクル
あれ、これってここで記述できるんだっけ?ってことが度々あるので、こちらもまとめました。
layouts
- middleware
- beforeCreate
- created
- fetch(無)
- beforeMount
- computed
- mounted
- beforeUpdate
- update
- beforeDestroy
- destroy
pages
- middleware
- validate
- asyncData
- fetch(有)
- beforeCreate
- created
- fetch(無)
- beforeMount
- computed
- mounted
- beforeUpdate
- update
- beforeDestroy
- destroy
component
middrewareが呼び出せないこと以外は、基本的にlayoutsと同じです。
- beforeCreate
- created
- fetch(無)
- beforeMount
- computed
- mounted
- beforeUpdate
- update
- beforeDestroy
- destroy
その他
今回整理する中で、明確になったことまとめ。
fetchの仕様変更
私の知っているfetchいつの間にか非推奨になっていた、、、
まぁ確かに、asyncDataで事足りてはいましたからね。2020/9/10時点では、context有fetchだと、asyncDataの次に呼ばれ、なしfetchだと、SSRではcreatedの次、CSRではbeforeMountedの次に呼ばれます。
ですので、context無の場合だと、thisを使ってdataやcomputedにアクセスができるんですよね。どんな場合に利用するのかは、下記の記事がわかりやすくまとめてくれています。
computedの実行されるタイミング
- computedに記載しただけでは実行されない。(template内や関数などで呼ぶ必要がある)
- template内での呼び出しの場合は、beforeMountとmountedの間で実行される。
- ライフサイクルから呼び出しができるのは、beforeCreate以降。
同一レイアウトのページ遷移時はmiddlewareのみ実行
同一レイアウトの場合、ページ遷移のたびに実行されるのはmiddlewareのみで、それ以外はレイアウトが切り替わるまで実行されません。
dataにアクセスできるのはcreated以降
beforeCreateではアクセスできませんでした。地味な発見。
静的ページを生成した場合のライフサイクル
基本的にSSRでのgenerateする形になると思いますので、generate時にSSRのライフサイクルが実行されます。そこで生成されたソースにアクセスする形になりますが、その後(CSRとページ遷移)は全く一緒のライフサイクルになります。
beforeEachとafterEachの存在
今回、この2つの存在を初めて知りました。
私は、ページ遷移の共通処理はいつもmiddlewareでやってるんですが、より細かい事をしようと思ったときに活躍してくれそうな予感、、、pluginsは初回に1回しか呼ばれない
いや、これ当たり前といえば当たり前なことなんですが、改めて顕在化されました。
1回だけ処理したい系は基本ここなんですよね。
例えば、SPAモードでnuxtServerInit的なことをしたい場合も、以下の記事のようにpluginsを使って実装します。
[Nuxt.js]nuxtServerInitがSPAモードでは使えないので代替のアクションを用意する
おわりに
もし違いがあれば、ご指摘いただけると幸いです。
参考
Nuxt.js(Vue.js)SSRのライフサイクルを完全に理解したい(wip)
Vue.js と Nuxt.js のライフサイクル早引きメモ
Nuxt.jsにおけるサーバーサイドレンダリングの挙動とライフサイクル
- 投稿日:2020-09-10T09:50:31+09:00
【Nuxt.js+Firebase】ログイン不要!気軽に投稿できるオススメのカレー共有サイトを作りました!
カレーの時代到来
近年、カレーブームがますます加速しているように思われます。
ちょうど今、西武池袋で行われてるカレーイベントでは連日行列が続き、
売り切れ商品も多数あるとのこと!かくいう私も、カレーフリーク。
カレー専用のInstagramを開設し、食べ歩いたカレーを投稿しています。今回、静的サイトを作る練習として、Nuxt.jsとFirebaseを使って、カレー屋さんの共有サイトを作ってみました!
食べログやInstagramと違い、アカウントは不要、匿名で気軽に投稿できるのが特徴です♪
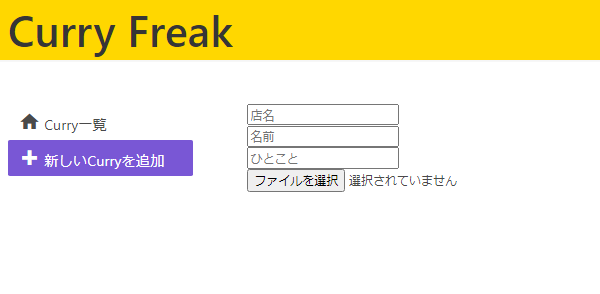
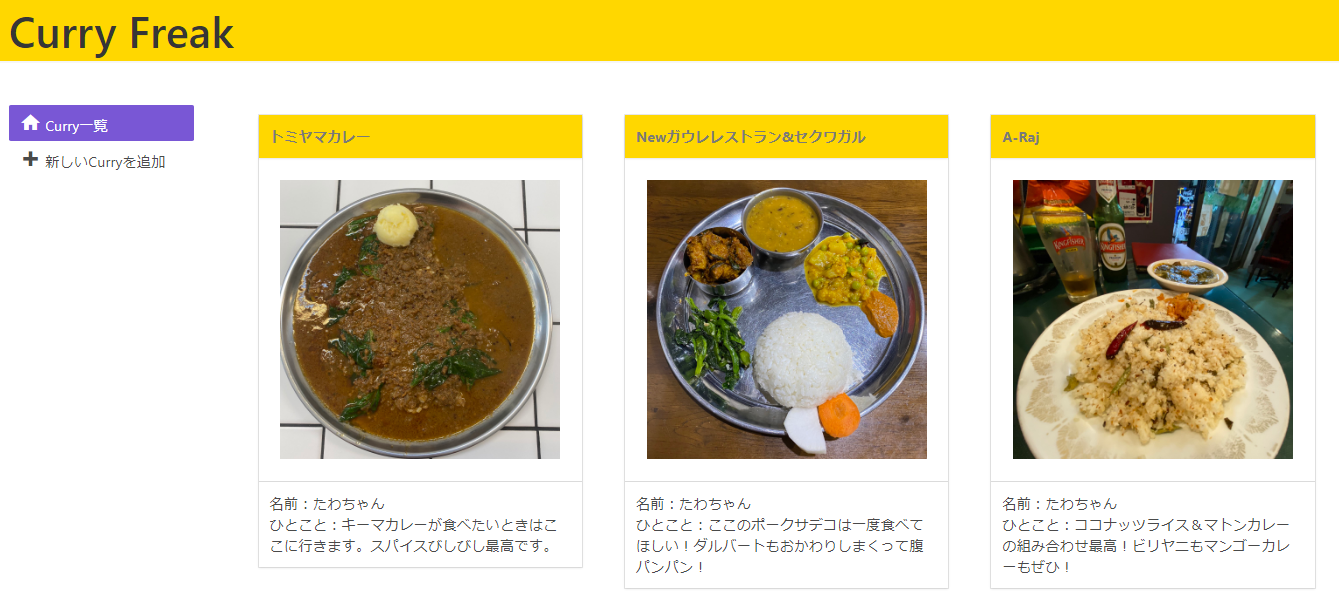
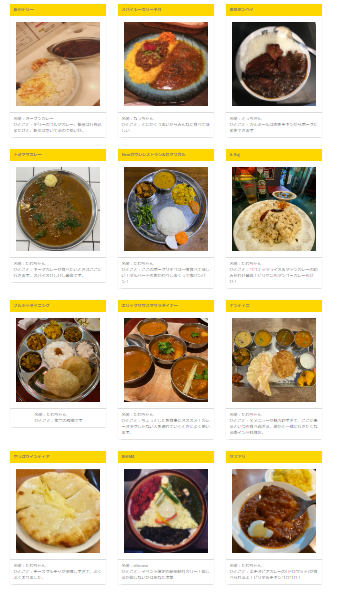
下記にリンクを貼っているので、ぜひ投稿してみてください!カレー共有サイト「Curry Freak」
サイトURL ▶▶▶ https://curryfreak.ml/
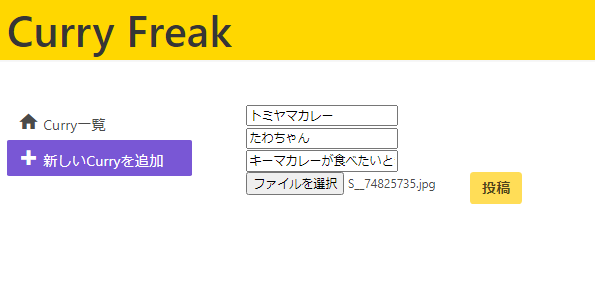
「新しいCurryを追加」のページから、投稿画面が確認できます。
入力が完了すると、投稿ボタンが出現!
(アップロードが完了する前に投稿するとエラーになるので)
投稿ボタンを押すと、「Curry一覧」ページに遷移して、
投稿したカレー屋さん情報をご覧いただけます♪
作り方
まずNuxt.jsでプロジェクトを作成(参考記事)
UIフレームワークを選べるので、今回Buefyを選択しました。
▽
yarn add firebaseでFirebaseのライブラリを追加
▽
yarn devで動作確認しながら、ページやコンポーネントを作成
▽
UIをちょこっと修正
▽
yarn generateを実行し、distフォルダをNetlifyでデプロイ
▽
独自ドメインを設定して、完成♪(参考記事)ページなどのソースコードはgithubにあげたのでご覧ください!
ソースコード ▶▶▶ https://github.com/twtjudy1128/CurryFreak
つまずいたところ
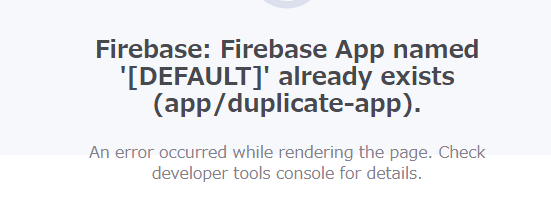
Firebaseの呼び出し
序盤で「Firebase App named '[DEFAULT]' already exists」というエラーが出て進まず。
こちらの記事を拝見し、
何度もFirebaseを初期化して呼び出してしまっていることが原因だとわかったので、
以下のように初期化のコードを修正したら、すぐエラーが消えました♪// Initialize Firebase if (firebase.apps.length === 0) { firebase.initializeApp(config); }V-modelの使い方
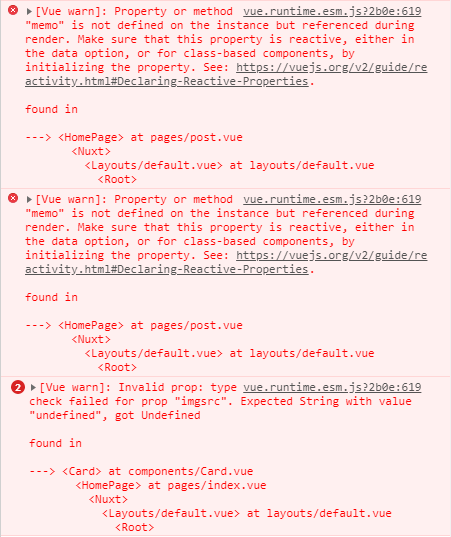
v-onとv-bindをまとめて書くことができるv-model。
フォームで色んな人が使ってるのを見て、私も投稿画面で使ってみました。<div class="postform"> <div> <input v-model="title" placeholder="店名"><br> <input v-model="name" placeholder="名前"><br> <input v-model="memo" placeholder="ひとこと"><br> <input v-show="!image_url" type="file" id="image_file" @change="onFileChange" accept="image/*" required/> <b-button type="is-warning" v-on:click='post' v-show="show"><b>投稿</b></b-button> </div> </div>ところが、以下のように真っ赤になっちゃいました><
調べると、対応するデータが定義されていなかったので、script部分で、以下のように定義。
data(){
    return {
      image_url: null,
      title:'',
      name:'',
      memo:'',
      downloadURL:'',
      show: false,
    };
すると今度は、以下のエラー
The “data” option should be a function that returns a per-instance value in component definitions.
子コンポーネントでは、dataをオブジェクトではなく、関数として定義する必要があるとのこと・・・(難しい)
というわけで、以下のようにちょこっと変更しただけでエラーが綺麗に消えました!data:function(){ return { image_url: null, title:'', name:'', memo:'', downloadURL:'', show: false, };【参考記事】
▶Vue.jsのv-modelを正しく使う
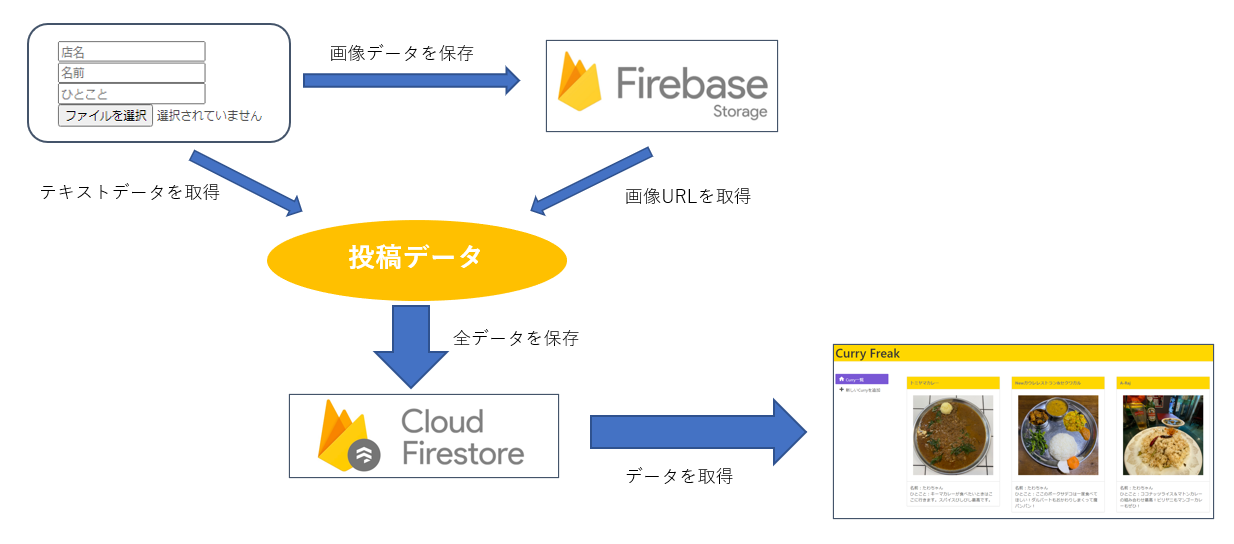
▶【Vue.js】The “data” option should be a function that returns a per-instance value in component definitions.というエラーについて画像とテキストを一緒に投稿する
1番苦戦したところです。笑
上記のような構造を目指して、あーだこーだやってみたのですがエラー続きで心折れかけました。笑
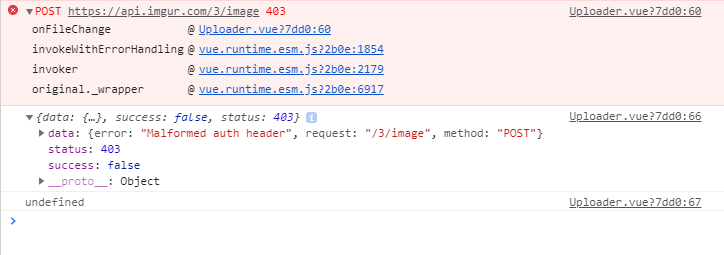
その時に、GyazoやimgurのAPIを使う方法を見つけたのでトライしてみることに。
ところが、GyazoAPIはアクセス権限で引っかかり使えず…。imgurで試してみたのですが、下記のようなエラーが出ました…(今だ解決しておらず)
かなり苦戦していたのですが、 @tkyko13 さんにご協力いただき、
本来やりたかったFirebase StorageとCloud Firestoreを使った方法でうまく投稿できるようになりました。(大感謝)コード長くなるので、ソースコードのpost.vueをご覧いただけると幸いです!
ソースコード ▶▶▶ https://github.com/twtjudy1128/CurryFreak心残りなPOINT
・投稿日時も入れればよかった
・投稿した順に表示できるようにしたい
・画像をアップロードしている間、「アップロード中」のクルクルみたいのを出したい
・UIをもっと綺麗にしたい(フレームワークは便利だけどカスタムのコツがまだ掴めてない)
・ロゴを作りたい
・もう1つページを増やして、おふざけ要素作りたかった色々やりたいこと挙げるとキリがないですね・・・
でも、手こずりながらも、また1つアウトプットできたことが嬉しいです。あなたのオススメのカレー屋さんを教えてください♪
最後までご覧いただき、ありがとうございます!
匿名で簡単に投稿できるので、是非あなたのオススメカレーを投稿してみてくださいね!カレー共有サイト「Curry Freak」 ▶▶▶ https://curryfreak.ml/
(9/11 0:30現在 ストレージの制限超過で画像表示されなくなっています)みんなでカレー食べて、免疫つけて、今日も1日がんばりまっしょー!!!!!
(*^^)v「よろしければLGTMも宜しくお願いします!」
<9/10 18:28追記>
もうこんなに投稿集まってきました~ありがとうございます!
こういう機能も欲しいなどフィードバックもいただけて嬉しいです!
バシバシ投稿よろしくお願いします!
※私の独断で不適切だと思った画像は随時削除しております。ご了承ください。
<9/11 0:30追記>
ストレージの制限超過で一時的に画像が表示されなくなってしまいました…。
でも、それだけ多くのアクセスがあったということなので、前向きに捉えていこうと思います!
こういう事態に直面しないと、自分では予測できなかったと思うので、これを機にリサイズの実装などもできないか検討してみようと思います。<9/11 16:22追記>
画像復活しました!どうやら1日1GBという制限があるようです。やはりリサイズが必要ですねん。
- 投稿日:2020-09-10T01:46:57+09:00
【Nuxt.js + Firebase】写真を投稿するとAIがハッピー指数を測定してランキング付けするシステムを作ったよ
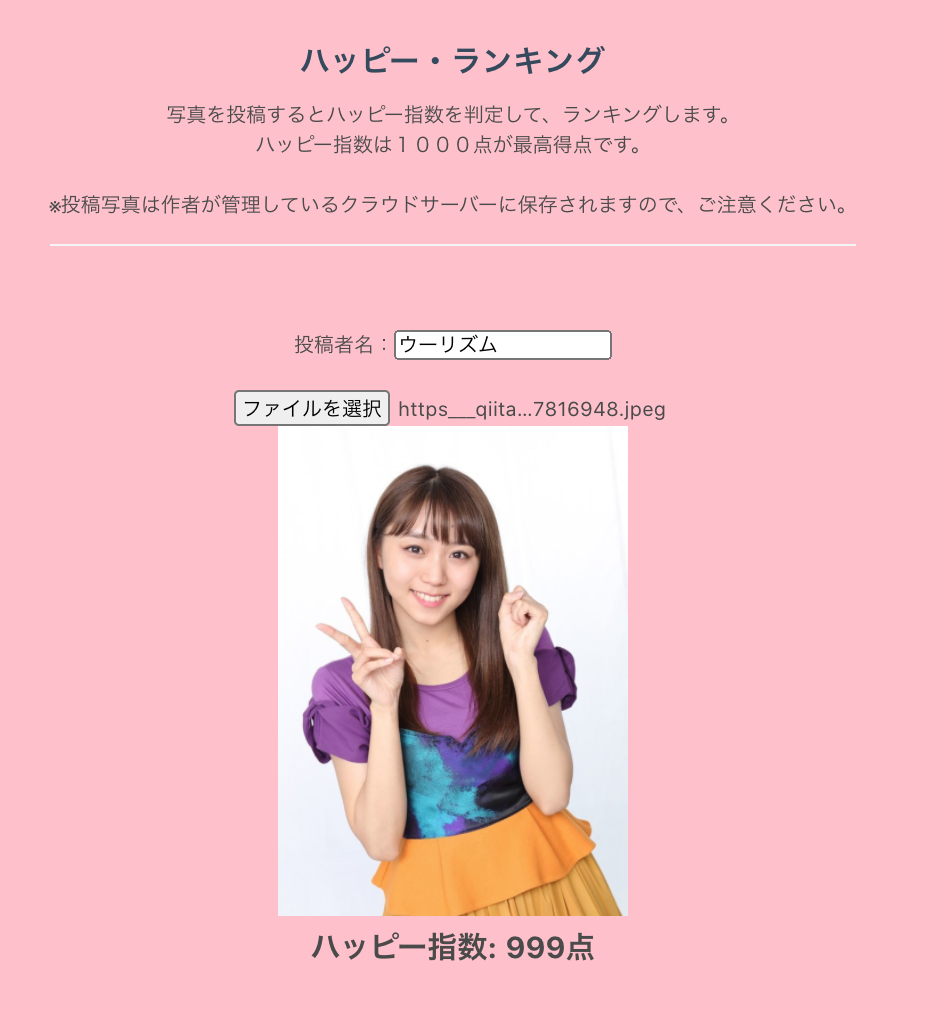
作ったもの
タイトルの通り、写真を投稿すると、どれくらいハッピーなのかAIがハッピー指数を算出します。
写真はパクタソさんより※「ハッピー指数」としましたが、これって「指数」って言ってもいいものだろうか不安になりましたが、頭の悪そうな語感が気に入ったのでこのまま「ハッピー指数」とします。
そして、同時にハッピー指数のランキングを表示します。
写真はパクタソさんよりおお、眩しすぎる。
という訳で、
あなたが世界でどれくらい幸せなのか、調べてみましょう。公開URL
ウェブアプリとして公開していますので、是非お試してください。
ちなみにこのドメインはこちらで取得しました。
freenom環境
フレームワーク :Nuxt.js
CSSフレームワーク:BULMA
開発プラットフォーム:Firebase技術面
表情解析
アップロードした写真を、face-api.js というTensorFlow.jsで学習済みの顔認識の機械学習モデルのライブラリに投げて、表情からハッピー度を取得します。
ハッピー度は0から1の間で、大きいほどハッピー度が高いです。faceapi.resizeResults(detections, displaySize)[0].expressions.happy = 0.999991774559021ハッピー度はこんな感じで取得されます。
小数点が15桁くらいあるので、1000倍して見やすくしました。(ご参考)自分の過去記事
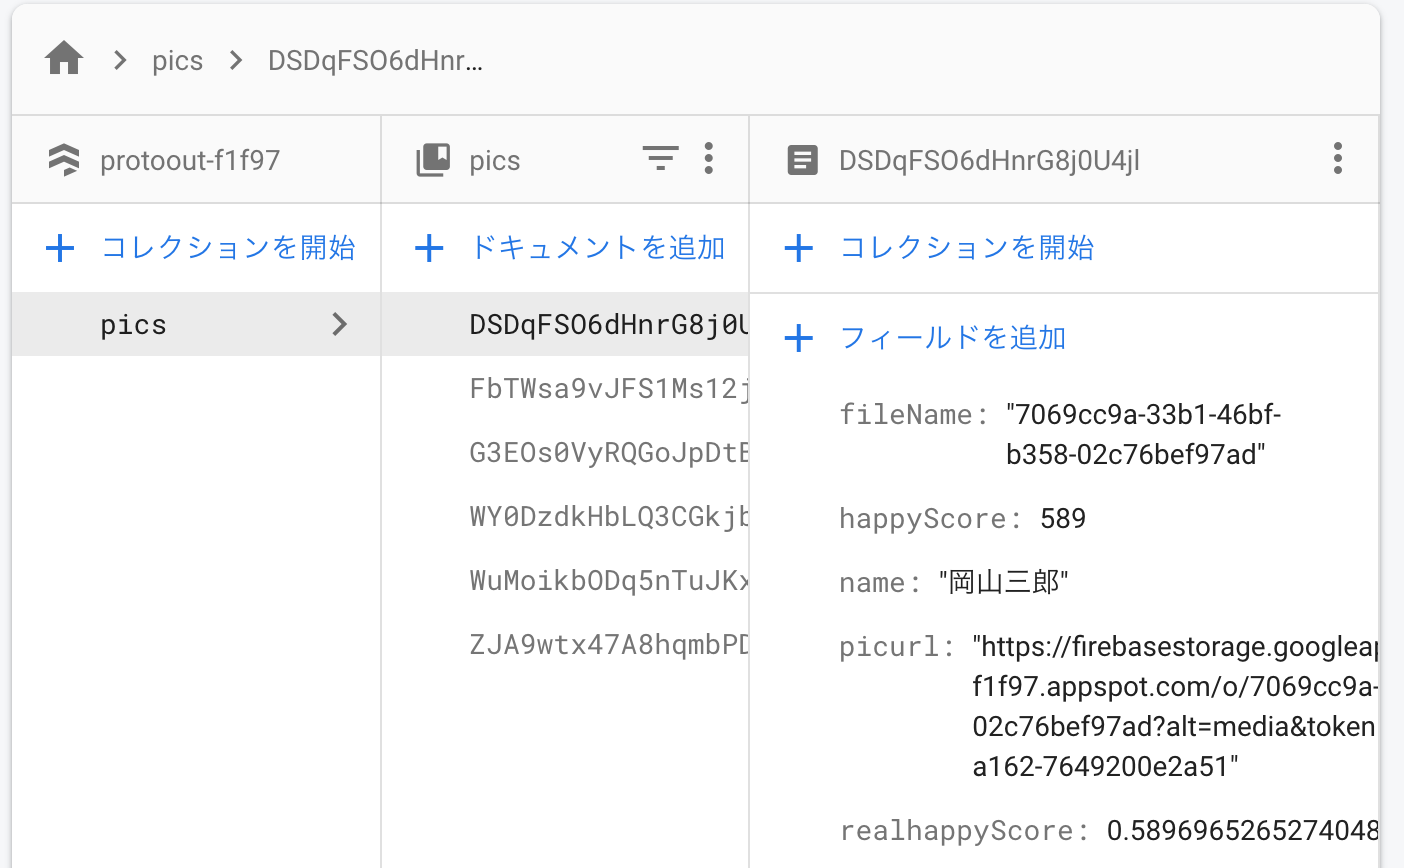
【忙しい現代人のために】表情で扇風機を操作するシステムを作ったよ写真およびデータ保存
- FirebaseのCloud FireStoreというストレージに写真を保存
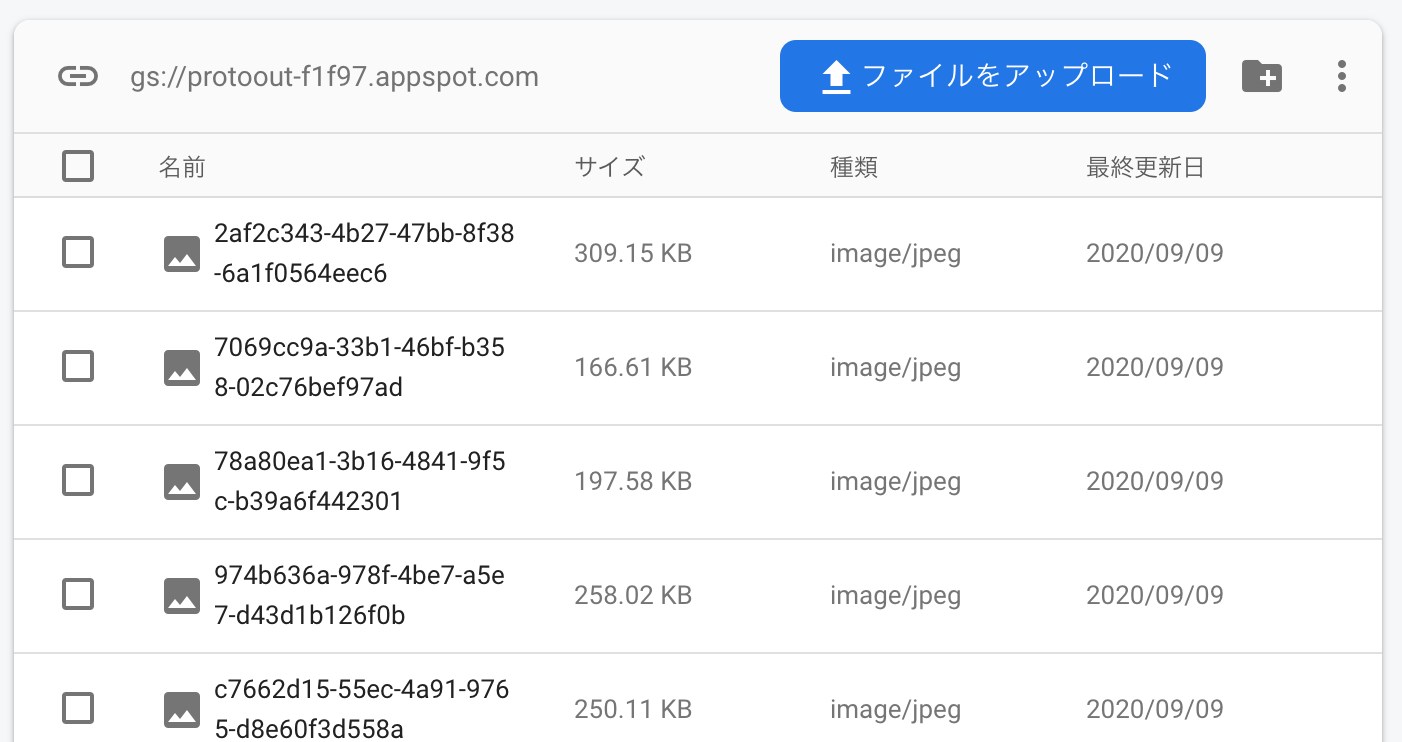
ここでハマったことを別記事に書きました。
【Firebase + Nuxt.js】FirebaseStorageへの画像アップロードでハマったところ
- あとで呼び出すために、写真を保存した場所のURLを、FirebaseのFirestoreに保存 (下記画像の picURLフィールド)
ハマったところ
Nuxt.js、Vue.js
リストの中でのイメージの表示方法
こちらを見て解決しました。ありがとうございました。
【Vue.js】imgタグのsrc要素は指定の仕方によって読み込み方が違うたった、これだけなんですけど、凄くハマりました。
<img :src="data.picurl"/>
非同期処理のコードの書き方
以下のようなコードのことです。
毎回、頭がおかしくなりそうです。
=> を多用すると、訳わからなくなります。
じっくりと勉強しなければ。Pic.vuemethods: { post(pic){ 〜中略〜 // 画像をStorageにアップロード storageRef.put(file).then(() => { let debug_document = document.getElementById("happyScore"); debug_document.innerHTML = "しばらくお待ちください"; // アップロードした画像のURLを取得 const picurl = firebase.storage().ref(fileName).getDownloadURL().then((url) => { const happyScoreGet = getFaceData( document.getElementById('attachedFile')).then((happyScore) => { let debug_document = document.getElementById("happyScore"); let realhappyScore = happyScore; happyScore = Math.floor(happyScore * 1000); //1000倍 debug_document.innerHTML = "ハッピー指数: "+String(happyScore)+"点"; //firestoreにデータを保存 const setScore = docRef.set({ name: this.name, happyScore: happyScore, realhappyScore: realhappyScore , fileName: fileName , picurl: url }); //ランキング作成へ this.get(); }); }).catch((error) => { console.log(error) }) }) } }
face-api.js のファイルのままデプロイすると怒られた
[BABEL] Note: The code generator has deoptimised the styling of /pages/face-api.js as it exceeds the max of 500KB.500KB以上はダメらしいので、
https://github.com/justadudewhohacks/face-api.js/
に書いてある通り、npmでインストールしました。
npm i face-api.js
face-api.jsの機械学習モデルの場所はstaticフォルダへ
同じディレクトリに保存してはいけません。
デプロイされません。
ハマったところは、その他、たくさんあったけど、書ききれないです。
やりたかったけど出来なかったこと
・送信ボタンを付けたかった
(添付ファイルを選んだ瞬間に送信される)
・画像サイズ制限
・画像をリサイズして保存する
・ハッピー指数がでた瞬間に順位が出るようにコード
index.vue<template> <div class="container"> <div> <br><br> <h1 class="title"> ハッピー・ランキング </h1> 写真を投稿するとハッピー指数を判定して、ランキングします。<br> ハッピー指数は1000点が最高得点です。<br><br> ※投稿写真は作者が管理しているクラウドサーバーに保存されますので、ご注意ください。 <br><hr><br><br> <client-only placeholder="Loading..."> <Pic /> </client-only> </div> </div> </template> <script defer src="face-api.js"></script> <script defer src="scripts.js"></script> <script> import Pic from '~/components/Pic.vue' export default { components: { Pic } } </script> <style> .container { margin: 0 auto; min-height: 100vh; display: flex; justify-content: center; align-items: center; text-align: center; background-color: pink; } .title { font-family: 'Quicksand', 'Source Sans Pro', -apple-system, BlinkMacSystemFont, 'Segoe UI', Roboto, 'Helvetica Neue', Arial, sans-serif; display: block; font-weight: bold; font-size: 30px; color: #35495e; letter-spacing: 1px; } #happyScore{ font-size: 30px; font-weight: bold; } .list{ padding-top: 50px; } </style>index.vue<template> <div> 投稿者名:<input v-model="name" placeholder="投稿者名"> <br><br> <input @change="post" type="file" data-label="画像の添付"> <br> <img id="attachedFile" width=350 v-show="uploadedImage" :src="uploadedImage" /> <div id="happyScore"></div> <br><hr> <div class="list"> <h1 class="title"> ハッピー指数 トップ100 </h1> <br> <ul v-for="(data, index) in allData" :key="data.id" class="menu-list" > <li> 順位: {{index + 1}} 位<br> ハッピー指数 : {{data.happyScore}} 点 <br> 投稿者名:{{data.name}} <br> <img width=350 :src="data.picurl"/> </li> <br><br> </ul> </div> <br> </div> </template> <script> import firebase from "firebase/app"; import "firebase/firestore"; import 'firebase/storage'; import * as faceapi from 'face-api.js'; import uuid from 'uuid'; export default { components: {}, data(){ return{ db: {}, allData: [], name: '', fileName: '', picurl: '', uploadedImage: '', happyScore: '', realhappyScore: '', testId: '' } }, methods: { //初期化、設定 //各人の数値を入れること init: () => { const config = { apiKey: "", authDomain: "", databaseURL: "", projectId: "", storageBucket: "gs://xxxxxx-99999.appspot.com", messagingSenderId: "", appId: "", measurementId: "" }; // Initialize Firebase firebase.initializeApp(config); }, post(pic){ const file = pic.target.files[0]; if(!file.type.match('image.*')) { alert("画像ファイルでお願いします"); return; } //イメージファイル描画 let reader = new FileReader(); reader.onload = (pic) => { this.uploadedImage = pic.target.result; }; let imagefiles = pic.target.files || pic.dataTransfer.files; reader.readAsDataURL(imagefiles[0]); let attachedFile = document.getElementById('attachedFile'); const testId = firebase.firestore().collection('pics').doc().id; //ユニークなIDを生成 const docRef = firebase.firestore().collection('pics').doc(testId); const fileName = uuid(); //ファイル名は他と被らないように uuid ライブラリを使って動的に生成 const storageRef = firebase.storage().ref(fileName); // 画像をStorageにアップロード storageRef.put(file).then(() => { let debug_document = document.getElementById("happyScore"); debug_document.innerHTML = "しばらくお待ちください"; // アップロードした画像のURLを取得 const picurl = firebase.storage().ref(fileName).getDownloadURL().then((url) => { const happyScoreGet = getFaceData( document.getElementById('attachedFile')).then((happyScore) => { let debug_document = document.getElementById("happyScore"); let realhappyScore = happyScore; happyScore = Math.floor(happyScore * 1000); //1000倍 debug_document.innerHTML = "ハッピー指数: "+String(happyScore)+"点"; //firestoreにデータを保存 const setScore = docRef.set({ name: this.name, happyScore: happyScore, realhappyScore: realhappyScore , fileName: fileName , picurl: url }); //ランキング作成へ this.get(); }); }).catch((error) => { console.log(error) }) }) }, //データ取得 get: function(){ this.allData = []; //スコアの降順に100個取得 firebase.firestore().collection('pics').orderBy('realhappyScore', 'desc').limit(100).get().then(snapshot => { snapshot.forEach(doc => { this.allData.push(doc.data()); }) }); } }, mounted(){ //ページ読み込み時に実行される this.init(); }, } //表情取得 async function getFaceData(img) { await faceapi.nets.tinyFaceDetector.load("/models") ;//モデル読み込み await faceapi.nets.faceLandmark68Net.load("/models") ;//モデル読み込み await faceapi.nets.faceRecognitionNet.load("/models") ;//モデル読み込み await faceapi.nets.faceExpressionNet.load("/models") ;//モデル読み込み const detectionsWithLandmarks = await faceapi.detectAllFaces(img,new faceapi.TinyFaceDetectorOptions()).withFaceLandmarks(); if (detectionsWithLandmarks.length == 0){ alert('人間じゃないよ'); return(0) }else{ const displaySize = { width: attachedFile.width, height: attachedFile.height } //1つの顔だけなのでfaceapi.detectAllFacesではなくて detectSingleFaceでよいはずが、本件はdetectAllFacesを使った。 const detections = await faceapi.detectAllFaces(attachedFile , new faceapi.TinyFaceDetectorOptions()).withFaceLandmarks().withFaceExpressions() const resizedDetections = faceapi.resizeResults(detections, displaySize) return(resizedDetections[0].expressions.happy); //ハッピー指数を返す } } </script>
番外編 (うちわ受け)
現在、一緒にProtoOut Studioで学んでる受講生が今までQiitaで取り上げた人物で試してみました。
Juri Tawaraさん
代表作:ジェイソン・ステイサムで妄想するのが日課になっていたので、いっそBOTにしてみた。
[UhRhythm](https://qiita.com/UhRhythm)さん
【Vue.js】さ迷うハロオタがお誕生日カレンダーを作った


- 投稿日:2020-09-10T01:46:57+09:00
【Nuxt.js + Firebase】写真を投稿するとAIがハッピー指数を測定してランキング付けするリア充向けのシステムを作ったよ
作ったもの
タイトルの通り、写真を投稿すると、どれくらいハッピーなのかAIがハッピー指数を算出します。
写真はパクタソさんより※「ハッピー指数」としましたが、これって「指数」って言ってもいいものだろうか不安になりましたが、頭の悪そうな語感が気に入ったのでこのまま「ハッピー指数」とします。
そして、同時にハッピー指数のランキングを表示します。
写真はパクタソさんよりおお、眩しすぎる。
キラキラする。
まさにリア充向けシステムだ。という訳で、
あなたが世界でどれくらい幸せなのか、調べてみましょう。公開URL
ウェブアプリとして公開していますので、是非お試してください。
ちなみにこのドメインはこちらで取得しました。
freenom環境
フレームワーク :Nuxt.js
CSSフレームワーク:BULMA
開発プラットフォーム:Firebase技術面
表情解析
アップロードした写真を、face-api.js というTensorFlow.jsで学習済みの顔認識の機械学習モデルのライブラリに投げて、表情からハッピー度を取得します。
ハッピー度は0から1の間で、大きいほどハッピー度が高いです。faceapi.resizeResults(detections, displaySize)[0].expressions.happy = 0.999991774559021ハッピー度はこんな感じで取得されます。
小数点が15桁くらいあるので、1000倍して見やすくし、ハッピー指数ということにしました。(ご参考)自分の過去記事
【忙しい現代人のために】表情で扇風機を操作するシステムを作ったよ写真およびデータ保存
- FirebaseのCloud FireStorageというストレージに写真を保存
ここでハマったことを別記事に書きました。
【Firebase + Nuxt.js】FirebaseStorageへの画像アップロードでハマったところ
- あとで呼び出すために、写真を保存した場所のURLを、FirebaseのFirestoreに保存 (下記画像の picURLフィールド)
ハマったところ
リストの中でのイメージの表示方法
こちらを見て解決しました。ありがとうございました。
【Vue.js】imgタグのsrc要素は指定の仕方によって読み込み方が違うたった、これだけなんですけど、凄くハマりました。
<img :src="data.picurl"/>
非同期処理のコードの書き方
非同期処理が苦手です。
then(() =>{ とか、Promiseとか async とか await とか・・・
毎回、頭が混乱してしまいます。
じっくりと勉強しなければ。
face-api.js のファイルのままデプロイすると怒られた
[BABEL] Note: The code generator has deoptimised the styling of /pages/face-api.js as it exceeds the max of 500KB.500KB以上はダメらしいので、
https://github.com/justadudewhohacks/face-api.js/
に書いてある通り、npmでインストールしました。
npm i face-api.js
face-api.jsの機械学習モデルの場所はstaticフォルダへ
同じディレクトリに保存してはいけません。
デプロイされません。
ハマったところは、その他、たくさんあったけど、書ききれないです。
やりたかったけど出来なかったこと
・送信ボタンを付けたかった
(今のは、添付ファイルを選んだ瞬間に送信される)
・画像をリサイズして保存したかった
・ハッピー指数がでた瞬間に順位が出るようにしたかったコード
index.vue<template> <div class="container"> <div> <br><br> <h1 class="title"> ハッピー・ランキング </h1> 写真を投稿するとハッピー指数を判定して、ランキングします。<br> ハッピー指数は1000点が最高得点です。<br><br> ※投稿写真は作者が管理しているクラウドサーバーに保存されますので、ご注意ください。 <br><hr><br><br> <client-only placeholder="Loading..."> <Pic /> </client-only> </div> </div> </template> <script defer src="face-api.js"></script> <script defer src="scripts.js"></script> <script> import Pic from '~/components/Pic.vue' export default { components: { Pic } } </script> <style> .container { margin: 0 auto; min-height: 100vh; display: flex; justify-content: center; align-items: center; text-align: center; background-color: pink; } .title { font-family: 'Quicksand', 'Source Sans Pro', -apple-system, BlinkMacSystemFont, 'Segoe UI', Roboto, 'Helvetica Neue', Arial, sans-serif; display: block; font-weight: bold; font-size: 30px; color: #35495e; letter-spacing: 1px; } #happyScore{ font-size: 30px; font-weight: bold; } .list{ padding-top: 50px; } </style>index.vue<template> <div> 投稿者名:<input v-model="name" placeholder="投稿者名"> <br><br> <input @change="post" type="file" data-label="画像の添付"> <br> <img id="attachedFile" width=350 v-show="uploadedImage" :src="uploadedImage" /> <div id="happyScore"></div> <br><hr> <div class="list"> <h1 class="title"> ハッピー指数 トップ100 </h1> <br> <ul v-for="(data, index) in allData" :key="data.id" class="menu-list" > <li> 順位: {{index + 1}} 位<br> ハッピー指数 : {{data.happyScore}} 点 <br> 投稿者名:{{data.name}} <br> <img width=350 :src="data.picurl"/> </li> <br><br> </ul> </div> <br> </div> </template> <script> import firebase from "firebase/app"; import "firebase/firestore"; import 'firebase/storage'; import * as faceapi from 'face-api.js'; import uuid from 'uuid'; export default { components: {}, data(){ return{ db: {}, allData: [], name: '', fileName: '', picurl: '', uploadedImage: '', happyScore: '', realhappyScore: '', testId: '' } }, methods: { //初期化、設定 //各人の数値を入れること init: () => { const config = { apiKey: "", authDomain: "", databaseURL: "", projectId: "", storageBucket: "gs://xxxxxx-99999.appspot.com", messagingSenderId: "", appId: "", measurementId: "" }; // Initialize Firebase firebase.initializeApp(config); }, post(pic){ const file = pic.target.files[0]; if(!file.type.match('image.*')) { alert("画像ファイルでお願いします"); return; } //イメージファイル描画 let reader = new FileReader(); reader.onload = (pic) => { this.uploadedImage = pic.target.result; }; let imagefiles = pic.target.files || pic.dataTransfer.files; reader.readAsDataURL(imagefiles[0]); let attachedFile = document.getElementById('attachedFile'); const testId = firebase.firestore().collection('pics').doc().id; //ユニークなIDを生成 const docRef = firebase.firestore().collection('pics').doc(testId); const fileName = uuid(); //ファイル名は他と被らないように uuid ライブラリを使って動的に生成 const storageRef = firebase.storage().ref(fileName); // 画像をStorageにアップロード storageRef.put(file).then(() => { let debug_document = document.getElementById("happyScore"); debug_document.innerHTML = "しばらくお待ちください"; // アップロードした画像のURLを取得 const picurl = firebase.storage().ref(fileName).getDownloadURL().then((url) => { const happyScoreGet = getFaceData( document.getElementById('attachedFile')).then((happyScore) => { let debug_document = document.getElementById("happyScore"); let realhappyScore = happyScore; happyScore = Math.floor(happyScore * 1000); //1000倍 debug_document.innerHTML = "ハッピー指数: "+String(happyScore)+"点"; //firestoreにデータを保存 const setScore = docRef.set({ name: this.name, happyScore: happyScore, realhappyScore: realhappyScore , fileName: fileName , picurl: url }); //ランキング作成へ this.get(); }); }).catch((error) => { console.log(error) }) }) }, //データ取得 get: function(){ this.allData = []; //スコアの降順に100個取得 firebase.firestore().collection('pics').orderBy('realhappyScore', 'desc').limit(100).get().then(snapshot => { snapshot.forEach(doc => { this.allData.push(doc.data()); }) }); } }, mounted(){ //ページ読み込み時に実行される this.init(); }, } //表情取得 async function getFaceData(img) { await faceapi.nets.tinyFaceDetector.load("/models") ;//モデル読み込み await faceapi.nets.faceLandmark68Net.load("/models") ;//モデル読み込み await faceapi.nets.faceRecognitionNet.load("/models") ;//モデル読み込み await faceapi.nets.faceExpressionNet.load("/models") ;//モデル読み込み const detectionsWithLandmarks = await faceapi.detectAllFaces(img,new faceapi.TinyFaceDetectorOptions()).withFaceLandmarks(); if (detectionsWithLandmarks.length == 0){ alert('人間じゃないよ'); return(0) }else{ const displaySize = { width: attachedFile.width, height: attachedFile.height } //1つの顔だけなのでfaceapi.detectAllFacesではなくて detectSingleFaceでよいはずが、本件はdetectAllFacesを使った。 const detections = await faceapi.detectAllFaces(attachedFile , new faceapi.TinyFaceDetectorOptions()).withFaceLandmarks().withFaceExpressions() const resizedDetections = faceapi.resizeResults(detections, displaySize) return(resizedDetections[0].expressions.happy); //ハッピー指数を返す } } </script>
番外編 (内輪ネタ)
現在、一緒にProtoOut Studioで学んでる受講生が今までQiitaで取り上げた人物で試してみました。
- 投稿日:2020-09-10T00:58:27+09:00
みんなで物語をつくりながら連想力を鍛えてアイデア発想力を磨こう
アイデア発想力とは?
アイデアとは、情報と情報の掛け合わせであると言われています。
その掛け合わせるために必要な力が、連想力です。例えば、情報Aと情報Bの関連性を発見したり、情報Aと情報Bをベースにホップ・ステップ・ジャンプで飛躍してみたりするような連想によって、新しいアイデアを生み出していきます。
なので、アイデアを生み出す力を磨くには、連想力を磨くことが大事です。
じゃあ、どうやると磨いていけるのか?
言葉遊びゲーム「空文字アワー」とは?
その1つの方法が、言葉遊びゲーム「空文字アワー」です。
このゲームは、ある一文から連想した情報を文に追加することで、
新たな物語をつくっていきます。まあやってみるとわかると思うので、
詳細はこちらをご覧いただき、
ぜひ最新の文に情報を追加してみてください。使った技術
・nuxt.js
・Vue.js
・FirebaseのCloud Firestore実装の仕方
今回は、初めてnuxt.jsってやつを使いました。
正直使いこなすには程遠いですが、それでも、nuxt.js、Vue.js、Cloud Firestoreを使い、独自ドメインでNetlifyで公開まで持っていけたのは進歩です。nuxt.jsの流れ
yarn create nuxt-app [任意のプロジェクト名]今回のUI frameworkは、
UI framework: Bulmaを使用。
ひとまず形ができたら、
$ yarn devをして、ローカルサーバーからサイトが閲覧できるようにしながら、
pagesやComponentsの中のファイルを作りました。で、それができたら、
$ yarn generateする。
これによって、distファイルができるので、そのファイルごとNetlifyに取り込むと、すぐにWEBアプリが公開できました。
独自ドメインでの公開の流れ
まずは無料で独自ドメインを取得します。色々無料で取得する方法があるようですが、今回はfreenomで取得しました。
freenomで取得する際の流れはこちらを参照しました。
ドメインを取得できたら、My domainのURLや情報をNetlifyの方に入力すると、少し時間はかかかるものの、わあしはすぐににWEBが独自ドメインで公開できます。
nuxt.jsのpages
index.vue<template> <div class="container"> <div> <Logo /> <h1 class="title"> 【言葉ゲーム】空文字アワー <p>~ないものつなぎ~</p> </h1> <div class = "content-explain"> <p>ある簡単な文に( )があります。ここに「言葉」を入れ、さらに( )を加えます。 次の人も同じことをする。これを全員で繰り返していくゲームです。 「空文字アワー」は、どんどんつないで変化を起こすのが醍醐味です。 最終的にどんなストーリーができあがるかは、みなさんのセンス次第。</p> </div> <div class = "content-explain"> <h2>進め方</h2> <ol> <li>最初の一文と( )を提示します。</li> <li>次に答える人が( )に言葉を加え、自分の言葉を加えた( )を外します。</li> <li>さらに( )を好きな位置に加えます。これを期間内繰り返します。</li> </ol> </div> <div class = "content-explain2"> <h2>ルール</h2> <ol> <li>連続して同じ人が答えることはできません。</li> <li>連続しない限り、期間中何度でも回答できます。</li> <li>手前の全ての回答をコピペして残してください。</li> <li>元の文を修正することはできません。</li> <li>文意が伝わるように展開していきましょう。</li> </ol> </div> <div class = "content-explain2"> <h2>例はこちら</h2> <p>【Hiro】東京では( )雨が降っていた。</p> <p>【お名前】( )東京では季節はずれの雨が降っていた。</p> <p>【お名前】高層ビルの立ち並ぶ東京では季節はずれの雨が( )降っていた。</p> <p>【お名前】高層ビルの立ち並ぶ東京では季節はずれの雨がしとしとと降っていた( )。</p> <p>【お名前】高層ビルの立ち並ぶ東京で( )は季節はずれの雨がしとしとと降っていたのを見て昨年のことを思い出した。</p> </div> <div class = "content-explain2"> <h2>今回のテーマ:桃太郎</h2> <img src = "../image01.jpg"> <client-only placeholder="Loading..."> <Memo /> </client-only> </div> <div class = "footer"> </div> </div> </div> </template> <script> export default {} </script> <style> h2{ font-size:30px; } .container { margin: 0 auto; min-height: 100vh; display: flex; justify-content: center; align-items: center; text-align: center; } .content-explain{ margin: 40 auto; height: 150px; } .content-explain2{ margin: 40 auto; height: 200px; } .title { font-family: 'Quicksand', 'Source Sans Pro', -apple-system, BlinkMacSystemFont, 'Segoe UI', Roboto, 'Helvetica Neue', Arial, sans-serif; display: block; font-weight: 300; font-size: 50px; color: #35495e; letter-spacing: 1px; } .subtitle { font-weight: 300; font-size: 42px; color: #526488; word-spacing: 5px; padding-bottom: 15px; } .links { padding-top: 15px; } .footer{ height: 200px; } </style>memo.vue<template> <div> ★★★つくられた物語★★★ <!-- {{allData}} --> <ul v-for="data in allData" :key="data.id" class="menu-list" > <li> {{data.name}} / {{data.answer}} </li> </ul> <p> <input v-model="name" placeholder="名前"> <input v-model="answer" placeholder="回答"> <button v-on:click='post'>送信</button> </p> </div> </template> <script> import firebase from "firebase/app"; import "firebase/firestore"; export default { components: {}, data(){ return{ db: {}, allData: [], name: '', answer: 'ここに回答', } }, methods: { init: () => { const config = { apiKey: "AIzaSyBvouEQqs3Cqz_F-re7SCW-FLvPuISQsnc", authDomain: "protoout-2359e.firebaseapp.com", databaseURL: "https://protoout-2359e.firebaseio.com", projectId: "protoout-2359e", storageBucket: "protoout-2359e.appspot.com", messagingSenderId: "1085072592944", appId: "1:1085072592944:web:30da6171b08c3734979df5", measurementId: "G-T3FMEWMY87" }; // Initialize Firebase firebase.initializeApp(config); }, post: function(){ const testId = firebase.firestore().collection('memos').doc().id; //ユニークなIDを生成 const docRef = firebase.firestore().collection('memos').doc(testId); const setAda = docRef.set({ name: this.name, answer: this.answer }); this.get(); }, get: function(){ this.allData = []; firebase.firestore().collection('memos').get().then(snapshot => { snapshot.forEach(doc => { // console.log(doc); this.allData.push(doc.data()); }) }); } }, mounted(){ this.init(); this.get(); }, } </script> <style> </style>