- 投稿日:2020-09-07T23:53:52+09:00
AWSを使ったWordPress環境構築(単一構成)
事前準備
EC2インスタンスを作成
SSH接続
$ssh -i .ssh/key.pem ec2-user@public_ip※key.pemはssh_key
※public_ipはインスタンスのpublic_ip
Apacheのインストール
- Apachのインストール・起動
$ sudo yum install -y httpd
$ sudo systemctl start httpd
MySQL5.7のインストール
MySQL Yum RepositoryからMySQL5.7をインストールする。
- Yumリポジトリの情報のインストール
$ sudo yum localinstall https://dev.mysql.com/get/mysql80-community-release-el7-3.noarch.rpm
- MySQL8.0リポジトリを無効にし、MySQL5.7リポジトリを有効にする
$ sudo yum-config-manager --disable mysql80-community
$ sudo yum-config-manager --enable mysql57-community
#適用されているか確認
$ cat /etc/yum.repos.d/mysql-community.repo
- MySQLのインストール・起動
$ sudo yum install -y mysql-community-server
$ sudo systemctl start mysqld
- MySQLの初期パスワードの確認
$ sudo cat /var/log/mysqld.log | grep root@localhost
[Note] A temporary password is generated for root@localhost: 12桁の文字列
- MySQLのパスワード変更
$ mysqladmin -uroot -p password
Enter password:古いパスワード
New password:新しいパスワード
Confirm new password:新しいパスワード
#Warnigがでても変更はできています
Warning: Since password will be sent to server in plain text, use ssl connection to ensure password safety.
- WordPress用のDB・ユーザーを作成する
$ mysql -uroot -p
Enter password:設定したパスワード
#WordPress用のユーザー作成
mysql> CREATE USER 'wordpress'@'localhost' IDENTIFIED BY 'wordpressユーザーのパスワード';
#WordPress用のDB作成
mysql> CREATE DATABASE `wordpress`;
#DB権限を作成したユーザーに付与
mysql> GRANT ALL PRIVILEGES ON `wordpress`.* TO "wordpress"@"localhost";
#設定反映
mysql> FLUSH PRIVILEGES;
mysql> EXIT;
PHP7.4のインストール
sudo yum install phpを実行すると、PHP5.4がインストールされてしまします。Amazon LinuxのリポジトリにPHP5.4しかないためです。
amazon-linux-extrasを使用することで解決できます。
- amazon-linux-extrasが存在するかの確認
$ which amazon-linux-extras
/usr/bin/amazon-linux-extras
- amazon-linux-extrasがインストールされていない場合は、インストールを行う
$ sudo yum install -y amazon-linux-extras
$ sudo yum update -y
- amazon-linux-extrasからPHP7.4をインストールする
$ sudo amazon-linux-extras install -y php7.4
$ sudo yum clean metadata
#追加でパッケージをインストール(必要なければ不要です。)
$ sudo yum install -y php-mbstring php-xml
$ sudo yum update -y
WordPressのインストール
- WordPressをインストール
#インストールしたいディレクトリに移動
$ cd ~
$ wget http://ja.wordpress.org/latest-ja.zip
$ unzip latest-ja.zip
- 設定ファイルの編集を行います。
#サンプルをコピー $ cp wordpress/wp-config-sample.php wordpress/wp-config.php $ sudo vim wordpress/wp-config.php #DBの設定値を変更する。 define( 'DB_NAME', 'database_name_here' ); define( 'DB_USER', 'username_here' ); define( 'DB_PASSWORD', 'password_here' ); define( 'DB_HOST', 'localhost' ); #セキュリティーキーの変更する。 define( 'AUTH_KEY', 'put your unique phrase here' ); define( 'SECURE_AUTH_KEY', 'put your unique phrase here' ); define( 'LOGGED_IN_KEY', 'put your unique phrase here' ); define( 'NONCE_KEY', 'put your unique phrase here' ); define( 'AUTH_SALT', 'put your unique phrase here' ); define( 'SECURE_AUTH_SALT', 'put your unique phrase here' ); define( 'LOGGED_IN_SALT', 'put your unique phrase here' ); define( 'NONCE_SALT', 'put your unique phrase here' );※セキュリティキーはオンラインジェネレータ を使用してください。
- Apachの設定
Amazon Linuxの場合、
.htaccessがディフォルトで無効となっているため設定を行う必要がある。実際の親ファイル
/etc/httpd/conf/httpd.confではなくconf.dに設定を記載する。$ sudo vim /etc/httpd/conf.d/file_name.conf #「sample」にはアクセスしたいURIを指定 #「/home/ec2-user/wordpress/」にはインストールしたディレクトリを指定する Alias /sample/ /home/ec2-user/wordpress/ <Directory "/home/ec2-user/wordpress"> AllowOverride All Options None Require all granted #ipを制限する場合に記載 Require ip ×××××××××××× </Directory> #Apache文法の確認 $ sudo httpd -t Syntax OK $ sudo systemctl restart httpd
http://ホスト/sample/にアクセスしてWordPressの初期設定画面が開ければ成功です!アクセスした際に403エラーとなる場合は権限設定を行う。
#実行権限の付与
#「/home/ec2-user」にはインストールしたディレクトリを指定する
$ sudo chmod o+x /home/ec2-user
間違っている点があればお教えください!
冗長化構成は後日アップします!参考
Amazon Linux による WordPress ブログのホスティング
- 投稿日:2020-09-07T21:54:30+09:00
[rails sエラー]md5.bundle
目的地
作成済みアプリで問題なくrails s実行
現在
$ rails s
省略)
/Users/ユーザーの名前/.rbenv/versions/2.5.1/lib/ruby/2.5.0/rubygems/core_ext/kernel_require.rb:59:in `require': dlopen(/Users/ユーザーの名前/.rbenv/versions/2.5.1/lib/ruby/2.5.0/x86_64-darwin18/digest/md5.bundle, 9): Library not loaded: /usr/local/opt/openssl/lib/libssl.1.0.0.dylib (LoadError)
Referenced from: /Users/ユーザーの名前/.rbenv/versions/2.5.1/lib/ruby/2.5.0/x86_64-darwin18/digest/md5.bundle
Reason: image not found - /Users/ユーザーの名前/.rbenv/versions/2.5.1/lib/ruby/2.5.0/x86_64-darwin18/digest/md5.bundle
原因
pythonの環境構築したことでopensslのバージョンが変わってしまったこと?
やったこと
- rubyの再インストール
- bundlerのバージョン調整
- mysqlインストール
rubyの再インストール
rubyが参照していたバージョンのOpenSSLがなくなったことにより、エラー発生
どうやら再インストールするしかないらしい$ ruby -v ruby 2.5.1p57 (2018-03-29 revision 63029) [x86_64-darwin18]$ rbenv uninstall 2.5.1 $ rbenv install 2.5.1$ruby -v # ruby 2.5.1p0 ←のように表示されればOKbundle installしてみる
$ bundle install
Traceback (most recent call last):
    2: from /Users/<user名>/.rbenv/versions/2.5.3/bin/bundle:23:in `<main>'
    1: from /Users/<user名>/.rbenv/versions/2.5.3/lib/ruby/2.5.0/rubygems.rb:308:in `activate_bin_path'
/Users/<user名>/.rbenv/versions/2.5.3/lib/ruby/2.5.0/rubygems.rb:289:in `find_spec_for_exe': can't find gem bundler (>= 0.a) with executable bundle (Gem::GemNotFoundException)
can't find gem bundler (>= 0.a) with executable bundle (Gem::GemNotFoundException)
。。。
アプリディレクトリ下のbundleのバージョンとglobalのバージョンが違うらしい
bundlerのバージョン調整
アプリ内のgemfileを確認
gemfile.lockRUBY VERSION ruby 2.5.1p57 BUNDLED WITH 2.0.2現在のバージョン確認
bundler -v
Bundler version 2.0.1
合わせる
$ gem uninstall bundler -v 2.0.1
$ gem install bundler -v 2.0.2
bundle installしてみる
$ bundle install

(色々なgemのインストールのログが出てくる)
.
.
.
Installing ...
Fetching mysql2 0.5.2
Installing mysql2 0.5.2 with native extensions
Gem::Ext::BuildError: ERROR: Failed to build gem native extension.

    current directory: /Users/fukudatakumi/tabelog/vendor/bundle/ruby/2.5.0/gems/mysql2-0.5.2/ext/mysql2
/Users/fukudatakumi/.rbenv/versions/2.5.1/bin/ruby -I /Users/fukudatakumi/.rbenv/versions/2.5.1/lib/ruby/site_ruby/2.5.0 -r ./siteconf20190321-35638-onb5bd.rb extconf.rb
--with-opt-lib\=/usr/local/opt/openssl/lib\ --with-opt-include\=-I/usr/local/opt/openssl/include
checking for rb_absint_size()... yes
checking for rb_absint_singlebit_p()... yes
checking for rb_wait_for_single_fd()... yes
-----
Using mysql_config at /usr/local/opt/mysql@5.7/bin/mysql_config
-----
checking for mysql.h... yes
checking for errmsg.h... yes
checking for SSL_MODE_DISABLED in mysql.h... yes
checking for SSL_MODE_PREFERRED in mysql.h... yes
checking for SSL_MODE_REQUIRED in mysql.h... yes
checking for SSL_MODE_VERIFY_CA in mysql.h... yes
checking for SSL_MODE_VERIFY_IDENTITY in mysql.h... yes
checking for MYSQL.net.vio in mysql.h... yes
checking for MYSQL.net.pvio in mysql.h... no
checking for MYSQL_ENABLE_CLEARTEXT_PLUGIN in mysql.h... yes
checking for SERVER_QUERY_NO_GOOD_INDEX_USED in mysql.h... yes
checking for SERVER_QUERY_NO_INDEX_USED in mysql.h... yes
checking for SERVER_QUERY_WAS_SLOW in mysql.h... yes
checking for MYSQL_OPTION_MULTI_STATEMENTS_ON in mysql.h... yes
checking for MYSQL_OPTION_MULTI_STATEMENTS_OFF in mysql.h... yes
checking for my_bool in mysql.h... yes
-----
Don't know how to set rpath on your system, if MySQL libraries are not in path mysql2 may not load
-----
-----
Setting libpath to /usr/local/opt/mysql@5.7/lib
-----
creating Makefile

current directory: /Users/fukudatakumi/tabelog/vendor/bundle/ruby/2.5.0/gems/mysql2-0.5.2/ext/mysql2
make "DESTDIR=" clean

current directory: /Users/fukudatakumi/tabelog/vendor/bundle/ruby/2.5.0/gems/mysql2-0.5.2/ext/mysql2
make "DESTDIR="
compiling client.c
compiling infile.c
compiling mysql2_ext.c
compiling result.c
compiling statement.c
linking shared-object mysql2/mysql2.bundle
ld: warning: directory not found for option '-L/usr/local/opt/openssl/lib --with-opt-include=-I/usr/local/opt/openssl/include'
ld: library not found for -lssl
clang: error: linker command failed with exit code 1 (use -v to see invocation)
make: *** [mysql2.bundle] Error 1

make failed, exit code 2

Gem files will remain installed in /Users/fukudatakumi/tabelog/vendor/bundle/ruby/2.5.0/gems/mysql2-0.5.2 for inspection.
Results logged to /Users/fukudatakumi/tabelog/vendor/bundle/ruby/2.5.0/extensions/x86_64-darwin-18/2.5.0-static/mysql2-0.5.2/gem_make.out

An error occurred while installing mysql2 (0.5.2), and Bundler cannot continue.
Make sure that `gem install mysql2 -v '0.5.2' --source 'https://rubygems.org/'` succeeds before bundling.
エラー変わったけど、、、
Make sure thatgem install mysql2 -v '0.5.2' --source 'https://rubygems.org/'succeeds before bundling.
らしいので
mysqlインストールするかぁmysqlインストール
指示されたコード打ってみる
$ gem install mysql2 -v '0.5.3' --source 'https://rubygems.org/'
Fetching mysql2 0.5.3
Installing mysql2 0.5.3 with native extensions
Gem::Ext::BuildError: ERROR: Failed to build gem native extension.

    current directory: /Users/name/.rbenv/versions/2.5.3/lib/ruby/gems/2.5.0/gems/mysql2-0.5.3/ext/mysql2
/Users/name/.rbenv/versions/2.5.3/bin/ruby -r ./siteconf20181128-2670-lgcxlu.rb extconf.rb
checking for rb_absint_size()... yes
checking for rb_absint_singlebit_p()... yes
checking for rb_wait_for_single_fd()... yes
-----
Using mysql_config at /usr/local/bin/mysql_config
-----
checking for mysql.h... yes
checking for errmsg.h... yes
checking for SSL_MODE_DISABLED in mysql.h... yes
checking for SSL_MODE_PREFERRED in mysql.h... yes
checking for SSL_MODE_REQUIRED in mysql.h... yes
checking for SSL_MODE_VERIFY_CA in mysql.h... yes
checking for SSL_MODE_VERIFY_IDENTITY in mysql.h... yes
checking for MYSQL.net.vio in mysql.h... yes
checking for MYSQL.net.pvio in mysql.h... no
checking for MYSQL_ENABLE_CLEARTEXT_PLUGIN in mysql.h... yes
checking for SERVER_QUERY_NO_GOOD_INDEX_USED in mysql.h... yes
checking for SERVER_QUERY_NO_INDEX_USED in mysql.h... yes
checking for SERVER_QUERY_WAS_SLOW in mysql.h... yes
checking for MYSQL_OPTION_MULTI_STATEMENTS_ON in mysql.h... yes
checking for MYSQL_OPTION_MULTI_STATEMENTS_OFF in mysql.h... yes
checking for my_bool in mysql.h... no
-----
Dont know how to set rpath on your system, if MySQL libraries are not in path mysql2 may not load
-----
-----
Setting libpath to /usr/local/Cellar/mysql/8.0.12/lib
-----
creating Makefile

current directory: /Users/name/.rbenv/versions/2.5.3/lib/ruby/gems/2.5.0/gems/mysql2-0.5.3/ext/mysql2
make "DESTDIR=" clean

current directory: /Users/name/.rbenv/versions/2.5.3/lib/ruby/gems/2.5.0/gems/mysql2-0.5.3/ext/mysql2
make "DESTDIR="
compiling client.c
compiling infile.c
compiling mysql2_ext.c
compiling result.c
compiling statement.c
linking shared-object mysql2/mysql2.bundle
ld: library not found for -lssl
clang: error: linker command failed with exit code 1 (use -v to see invocation)
make: *** [mysql2.bundle] Error 1

make failed, exit code 2

Gem files will remain installed in /Users/name/.rbenv/versions/2.5.3/lib/ruby/gems/2.5.0/gems/mysql2-0.5.3 for inspection.
Results logged to /Users/name/.rbenv/versions/2.5.3/lib/ruby/gems/2.5.0/extensions/x86_64-darwin-18/2.5.0-static/mysql2-0.5.3/gem_make.out

An error occurred while installing mysql2 (0.5.2), and Bundler cannot continue.
Make sure that `gem install mysql2 -v '0.5.3' --source 'https://rubygems.org/'` succeeds before bundling.

In Gemfile:
  mysql2
どうやら、
ld: library not found for -lssl
がエラー起こしてるらしいhttps://qiita.com/HrsUed/items/ca2e0aee6a2402571cf6
を参考にさしてもらいterminal$ brew info openssl openssl@1.1: stable 1.1.1g (bottled) [keg-only] Cryptography and SSL/TLS Toolkit https://openssl.org/ /usr/local/Cellar/openssl@1.1/1.1.1g (8,059 files, 18MB) Poured from bottle on 2020-05-20 at 17:52:32 From: https://github.com/Homebrew/homebrew-core/blob/master/Formula/openssl@1.1.rb ==> Caveats A CA file has been bootstrapped using certificates from the system keychain. To add additional certificates, place .pem files in /usr/local/etc/openssl@1.1/certs and run /usr/local/opt/openssl@1.1/bin/c_rehash openssl@1.1 is keg-only, which means it was not symlinked into /usr/local, because macOS provides LibreSSL. If you need to have openssl@1.1 first in your PATH run: echo 'export PATH="/usr/local/opt/openssl@1.1/bin:$PATH"' >> /Users/kento/.bash_profile For compilers to find openssl@1.1 you may need to set: export LDFLAGS="-L/usr/local/opt/openssl@1.1/lib" export CPPFLAGS="-I/usr/local/opt/openssl@1.1/include" For pkg-config to find openssl@1.1 you may need to set: export PKG_CONFIG_PATH="/usr/local/opt/openssl@1.1/lib/pkgconfig" ==> Analytics install: 578,162 (30 days), 1,761,588 (90 days), 7,253,878 (365 days) install-on-request: 61,776 (30 days), 207,766 (90 days), 910,622 (365 days) build-error: 0 (30 days)export LDFLAGS="-L/usr/local/opt/openssl@1.1/lib"
export CPPFLAGS="-I/usr/local/opt/openssl@1.1/include"
このオプションの値を指定してインストールするgem install mysql2 -v '0.5.2' --source 'https://rubygems.org/' -- --with-cppflags=-I/usr/local/opt/openssl@1.1/include --with-ldflags=-L/usr/local/opt/openssl@1.1/libbundle install してみる
rails s してみるおわり
- 投稿日:2020-09-07T21:54:30+09:00
[rails sエラー]md5.bundleとmysqlインストールエラー
目的地
作成済みアプリで問題なくrails s実行
現在
$ rails s
省略)
/Users/ユーザーの名前/.rbenv/versions/2.5.1/lib/ruby/2.5.0/rubygems/core_ext/kernel_require.rb:59:in `require': dlopen(/Users/ユーザーの名前/.rbenv/versions/2.5.1/lib/ruby/2.5.0/x86_64-darwin18/digest/md5.bundle, 9): Library not loaded: /usr/local/opt/openssl/lib/libssl.1.0.0.dylib (LoadError)
Referenced from: /Users/ユーザーの名前/.rbenv/versions/2.5.1/lib/ruby/2.5.0/x86_64-darwin18/digest/md5.bundle
Reason: image not found - /Users/ユーザーの名前/.rbenv/versions/2.5.1/lib/ruby/2.5.0/x86_64-darwin18/digest/md5.bundle
原因
pythonの環境構築したことでopensslのバージョンが変わってしまったこと?
やったこと
- rubyの再インストール
- bundlerのバージョン調整
- mysqlインストール
rubyの再インストール
rubyが参照していたバージョンのOpenSSLがなくなったことにより、エラー発生
どうやら再インストールするしかないらしい$ ruby -v ruby 2.5.1p57 (2018-03-29 revision 63029) [x86_64-darwin18]$ rbenv uninstall 2.5.1 $ rbenv install 2.5.1$ruby -v # ruby 2.5.1p0 ←のように表示されればOKbundle installしてみる
$ bundle install
Traceback (most recent call last):
    2: from /Users/<user名>/.rbenv/versions/2.5.3/bin/bundle:23:in `<main>'
    1: from /Users/<user名>/.rbenv/versions/2.5.3/lib/ruby/2.5.0/rubygems.rb:308:in `activate_bin_path'
/Users/<user名>/.rbenv/versions/2.5.3/lib/ruby/2.5.0/rubygems.rb:289:in `find_spec_for_exe': can't find gem bundler (>= 0.a) with executable bundle (Gem::GemNotFoundException)
can't find gem bundler (>= 0.a) with executable bundle (Gem::GemNotFoundException)
。。。
アプリディレクトリ下のbundleのバージョンとglobalのバージョンが違うらしい
bundlerのバージョン調整
アプリ内のgemfileを確認
gemfile.lockRUBY VERSION ruby 2.5.1p57 BUNDLED WITH 2.0.2現在のバージョン確認
bundler -v
Bundler version 2.0.1
合わせる
$ gem uninstall bundler -v 2.0.1
$ gem install bundler -v 2.0.2
bundle installしてみる
$ bundle install

(色々なgemのインストールのログが出てくる)
.
.
.
Installing ...
Fetching mysql2 0.5.2
Installing mysql2 0.5.2 with native extensions
Gem::Ext::BuildError: ERROR: Failed to build gem native extension.

    current directory: /Users/fukudatakumi/tabelog/vendor/bundle/ruby/2.5.0/gems/mysql2-0.5.2/ext/mysql2
/Users/fukudatakumi/.rbenv/versions/2.5.1/bin/ruby -I /Users/fukudatakumi/.rbenv/versions/2.5.1/lib/ruby/site_ruby/2.5.0 -r ./siteconf20190321-35638-onb5bd.rb extconf.rb
--with-opt-lib\=/usr/local/opt/openssl/lib\ --with-opt-include\=-I/usr/local/opt/openssl/include
checking for rb_absint_size()... yes
checking for rb_absint_singlebit_p()... yes
checking for rb_wait_for_single_fd()... yes
-----
Using mysql_config at /usr/local/opt/mysql@5.7/bin/mysql_config
-----
checking for mysql.h... yes
checking for errmsg.h... yes
checking for SSL_MODE_DISABLED in mysql.h... yes
checking for SSL_MODE_PREFERRED in mysql.h... yes
checking for SSL_MODE_REQUIRED in mysql.h... yes
checking for SSL_MODE_VERIFY_CA in mysql.h... yes
checking for SSL_MODE_VERIFY_IDENTITY in mysql.h... yes
checking for MYSQL.net.vio in mysql.h... yes
checking for MYSQL.net.pvio in mysql.h... no
checking for MYSQL_ENABLE_CLEARTEXT_PLUGIN in mysql.h... yes
checking for SERVER_QUERY_NO_GOOD_INDEX_USED in mysql.h... yes
checking for SERVER_QUERY_NO_INDEX_USED in mysql.h... yes
checking for SERVER_QUERY_WAS_SLOW in mysql.h... yes
checking for MYSQL_OPTION_MULTI_STATEMENTS_ON in mysql.h... yes
checking for MYSQL_OPTION_MULTI_STATEMENTS_OFF in mysql.h... yes
checking for my_bool in mysql.h... yes
-----
Don't know how to set rpath on your system, if MySQL libraries are not in path mysql2 may not load
-----
-----
Setting libpath to /usr/local/opt/mysql@5.7/lib
-----
creating Makefile

current directory: /Users/fukudatakumi/tabelog/vendor/bundle/ruby/2.5.0/gems/mysql2-0.5.2/ext/mysql2
make "DESTDIR=" clean

current directory: /Users/fukudatakumi/tabelog/vendor/bundle/ruby/2.5.0/gems/mysql2-0.5.2/ext/mysql2
make "DESTDIR="
compiling client.c
compiling infile.c
compiling mysql2_ext.c
compiling result.c
compiling statement.c
linking shared-object mysql2/mysql2.bundle
ld: warning: directory not found for option '-L/usr/local/opt/openssl/lib --with-opt-include=-I/usr/local/opt/openssl/include'
ld: library not found for -lssl
clang: error: linker command failed with exit code 1 (use -v to see invocation)
make: *** [mysql2.bundle] Error 1

make failed, exit code 2

Gem files will remain installed in /Users/fukudatakumi/tabelog/vendor/bundle/ruby/2.5.0/gems/mysql2-0.5.2 for inspection.
Results logged to /Users/fukudatakumi/tabelog/vendor/bundle/ruby/2.5.0/extensions/x86_64-darwin-18/2.5.0-static/mysql2-0.5.2/gem_make.out

An error occurred while installing mysql2 (0.5.2), and Bundler cannot continue.
Make sure that `gem install mysql2 -v '0.5.2' --source 'https://rubygems.org/'` succeeds before bundling.
エラー変わったけど、、、
Make sure thatgem install mysql2 -v '0.5.2' --source 'https://rubygems.org/'succeeds before bundling.
らしいので
mysqlインストールするかぁmysqlインストール
指示されたコード打ってみる
$ gem install mysql2 -v '0.5.3' --source 'https://rubygems.org/'
Fetching mysql2 0.5.3
Installing mysql2 0.5.3 with native extensions
Gem::Ext::BuildError: ERROR: Failed to build gem native extension.

    current directory: /Users/name/.rbenv/versions/2.5.3/lib/ruby/gems/2.5.0/gems/mysql2-0.5.3/ext/mysql2
/Users/name/.rbenv/versions/2.5.3/bin/ruby -r ./siteconf20181128-2670-lgcxlu.rb extconf.rb
checking for rb_absint_size()... yes
checking for rb_absint_singlebit_p()... yes
checking for rb_wait_for_single_fd()... yes
-----
Using mysql_config at /usr/local/bin/mysql_config
-----
checking for mysql.h... yes
checking for errmsg.h... yes
checking for SSL_MODE_DISABLED in mysql.h... yes
checking for SSL_MODE_PREFERRED in mysql.h... yes
checking for SSL_MODE_REQUIRED in mysql.h... yes
checking for SSL_MODE_VERIFY_CA in mysql.h... yes
checking for SSL_MODE_VERIFY_IDENTITY in mysql.h... yes
checking for MYSQL.net.vio in mysql.h... yes
checking for MYSQL.net.pvio in mysql.h... no
checking for MYSQL_ENABLE_CLEARTEXT_PLUGIN in mysql.h... yes
checking for SERVER_QUERY_NO_GOOD_INDEX_USED in mysql.h... yes
checking for SERVER_QUERY_NO_INDEX_USED in mysql.h... yes
checking for SERVER_QUERY_WAS_SLOW in mysql.h... yes
checking for MYSQL_OPTION_MULTI_STATEMENTS_ON in mysql.h... yes
checking for MYSQL_OPTION_MULTI_STATEMENTS_OFF in mysql.h... yes
checking for my_bool in mysql.h... no
-----
Dont know how to set rpath on your system, if MySQL libraries are not in path mysql2 may not load
-----
-----
Setting libpath to /usr/local/Cellar/mysql/8.0.12/lib
-----
creating Makefile

current directory: /Users/name/.rbenv/versions/2.5.3/lib/ruby/gems/2.5.0/gems/mysql2-0.5.3/ext/mysql2
make "DESTDIR=" clean

current directory: /Users/name/.rbenv/versions/2.5.3/lib/ruby/gems/2.5.0/gems/mysql2-0.5.3/ext/mysql2
make "DESTDIR="
compiling client.c
compiling infile.c
compiling mysql2_ext.c
compiling result.c
compiling statement.c
linking shared-object mysql2/mysql2.bundle
ld: library not found for -lssl
clang: error: linker command failed with exit code 1 (use -v to see invocation)
make: *** [mysql2.bundle] Error 1

make failed, exit code 2

Gem files will remain installed in /Users/name/.rbenv/versions/2.5.3/lib/ruby/gems/2.5.0/gems/mysql2-0.5.3 for inspection.
Results logged to /Users/name/.rbenv/versions/2.5.3/lib/ruby/gems/2.5.0/extensions/x86_64-darwin-18/2.5.0-static/mysql2-0.5.3/gem_make.out

An error occurred while installing mysql2 (0.5.2), and Bundler cannot continue.
Make sure that `gem install mysql2 -v '0.5.3' --source 'https://rubygems.org/'` succeeds before bundling.

In Gemfile:
  mysql2
どうやら、
ld: library not found for -lssl
がエラー起こしてるらしいhttps://qiita.com/HrsUed/items/ca2e0aee6a2402571cf6
を参考にさしてもらいterminal$ brew info openssl openssl@1.1: stable 1.1.1g (bottled) [keg-only] Cryptography and SSL/TLS Toolkit https://openssl.org/ /usr/local/Cellar/openssl@1.1/1.1.1g (8,059 files, 18MB) Poured from bottle on 2020-05-20 at 17:52:32 From: https://github.com/Homebrew/homebrew-core/blob/master/Formula/openssl@1.1.rb ==> Caveats A CA file has been bootstrapped using certificates from the system keychain. To add additional certificates, place .pem files in /usr/local/etc/openssl@1.1/certs and run /usr/local/opt/openssl@1.1/bin/c_rehash openssl@1.1 is keg-only, which means it was not symlinked into /usr/local, because macOS provides LibreSSL. If you need to have openssl@1.1 first in your PATH run: echo 'export PATH="/usr/local/opt/openssl@1.1/bin:$PATH"' >> /Users/kento/.bash_profile For compilers to find openssl@1.1 you may need to set: export LDFLAGS="-L/usr/local/opt/openssl@1.1/lib" export CPPFLAGS="-I/usr/local/opt/openssl@1.1/include" For pkg-config to find openssl@1.1 you may need to set: export PKG_CONFIG_PATH="/usr/local/opt/openssl@1.1/lib/pkgconfig" ==> Analytics install: 578,162 (30 days), 1,761,588 (90 days), 7,253,878 (365 days) install-on-request: 61,776 (30 days), 207,766 (90 days), 910,622 (365 days) build-error: 0 (30 days)export LDFLAGS="-L/usr/local/opt/openssl@1.1/lib"
export CPPFLAGS="-I/usr/local/opt/openssl@1.1/include"
このオプションの値を指定してインストールするgem install mysql2 -v '0.5.2' --source 'https://rubygems.org/' -- --with-cppflags=-I/usr/local/opt/openssl@1.1/include --with-ldflags=-L/usr/local/opt/openssl@1.1/libbundle install してみる
rails s してみるおわり
- 投稿日:2020-09-07T17:50:39+09:00
node環境でのmysql
nodejs環境でmysqlを使用する方法
mysqlインスタンスの作成
const mysql = require('mysql')
const connection = mysql.createPool({
     host: 'localhost',
     user: 'root',
     password: 'secret',
     database: 'my_db'
})
データの参照
select文
connection.query('SELECT * FROM `books` WHERE `author` = ?', ['David'], function(error, results, fields){
//error: クエリ実行時にエラーが発生したらエラーオブジェクトを持つ
//results: クエリの実行結果を持つ
//fields: クエリ実行結果のフィールドに関するオブジェクト
})
データの挿入
insert文
connection.query('INSERT INTO `books` SET ?', data, function(error, results, fields){
//error:クエリ実行時にエラーが発生したらエラーオブジェクトを持つ
//results:クエリの実行結果を持つ
//fields:クエリ実行結果のフィールドに関するオブジェクト
})
データの更新
update文
connection.query('UPDATE `books` SET カラム名 = ? WHERE id = ?, ['name', 3], function(error, results, field){
//error:クエリ実行時にエラーが発生したらエラーオブジェクトを持つ
//results:クエリの実行結果を持つ
//fields:クエリ実行結果のフィールドに関するオブジェクト
})
データの削除
delete文
connection.query('DELETE FROM `books` WHERE id = ?', [3], function(error, results, fields){
//error:クエリ実行時にエラーが発生したらエラーオブジェクトを持つ
//results:クエリの実行結果を持つ
//fields:クエリ実行結果のフィールドに関するオブジェクト
})
- 投稿日:2020-09-07T15:47:45+09:00
Azure Database for MySQL での Azure AD 利用方法
目的
Azure Database for MySQL (以下 Azure MySQL)で、
Azure Active Directory 認証によってログインする方法の整理。Microsoft Docs を辿ってもフワッとした箇所が多く、手探りで確認する場面が多かったため。
個人用備忘録でもある手順の概略
Azure AD 管理者の操作
- Azure にログイン
- アクセストークンを取得
- Azure MySQL サーバーに接続
- Azure AD ユーザーを作成
- Azure AD ユーザーに権限を付与
Azure AD ユーザーの操作
- Azure にログイン
- アクセストークンを取得
- Azure MySQL サーバーに接続
準備物
Azure CLI
クロスプラットフォームのCLIツール。
Azure ポータルで操作が完結しないため、「az」コマンドの実行に必要。MySQL Workbench (必要に応じて)
MySQL 公式のGUIツール。Azure MySQL サーバーへの接続用。
Visual C++ 2019 Redistributable Packages のインストールを求められる場合は、以下をダウンロード。
Azure AD 管理者
- Azure ポータルで「Active Directory 管理者」として指定したユーザー
Azure AD ユーザー
- Azure テナントに存在するユーザー
Azure AD 管理者の操作
1. Azure にログイン
*Azure CLI のインストール後
Windows Powershell 等で以下のコマンドを入力。az loginWeb ブラウザが立ち上がったら Azure で使用するアカウントを選択し、ログイン。
2. アクセストークンを取得
Azure MySQL サーバーに接続するためのアクセストークンを取得する。
これがパスワードの代わりになる。AD パスワードは使用できない!以下のコマンドを入力。
az account get-access-token --resource-type oss-rdbms以下のような JSON が返ってくる。
{
  "accessToken": "めちゃめちゃ長い文字列",
  "expiresOn": "...",
  "subscription": "...",
  "tenant": "...",
  "tokenType": "Bearer"
}
accessToken にある文字列をアクセストークンとして接続に使用する。
アクセストークンの有効期限は取得後の60分間!
expiresOn にある時刻が有効期限。
有効期限が切れたら再度コマンドでトークンを取得し直す必要がある...。3. Azure MySQL サーバーへの接続
MySQL Workbench を使用する場合
以下の情報を使用し、Azure MySQL サーバーに接続する。
項目名 値 Hostname サーバー名
(例: hogehogedb.mysql.database.azure.com)Port 3306 Username Azure AD 管理者@サーバー
(例: AzureADadmin@yourdomain.com@hogehogedb)Password 取得したアクセストークン Advanced タブ下にある [Enable Cleartext Authentication Plugin] をオンにすること。
mysql.exe を使用する場合
mysql.exe を使って Azure MySQL サーバーに接続する場合は、以下のコマンドを実行。
mysql -h hogehogedb.mysql.database.azure.com \
  --user AzureADadmin@yourdomain.com@hogehogedb \
  --enable-cleartext-plugin \
  --password=`az account get-access-token --resource-type oss-rdbms --output tsv --query accessToken`
4. Azure AD ユーザーを作成
そのままでは Azure AD 管理者以外のユーザーは Azure AD 認証でサーバーに接続できないため、
Azure AD でログインできるユーザーを作成する。以下の SQL を実行。
CREATE AADUSER 'piyo01@yourdomain.com';5. Azure AD ユーザーに権限を付与
作成したユーザーはデフォルトでは権限を持たないため、権限を指定して付与。
以下の SQL を実行。(例)
GRANT
    SELECT, INSERT, UPDATE, DELETE
ON
    hogehogedb.*
TO
    'piyo01@yourdomain.com'@'%'
WITH GRANT OPTION;
FLUSH PRIVILEGES;
Azure AD ユーザーの操作
1. Azure にログイン
ユーザーが個別にログイン。
az login2. アクセストークンを取得
ログイン後、ユーザーが個別にアクセストークンを取得。
az account get-access-token --resource-type oss-rdbms3. Azure MySQL サーバーへの接続
各自の Azure AD ユーザー名と、個別で取得したアクセストークンを使い、
Azure MySQL サーバーに接続する。
項目名 値 Username Azure AD ユーザー@サーバー
(例: piyo01@yourdomain.com@hogehogedb)Password 取得したアクセストークン Azure AD 管理者が取得したアクセストークンとは別!
まとめ
Azure AD の情報で Azure Database for MySQL サーバーにログインできる!
注意事項
* SQL Server や Azure SQL の行レベルセキュリティを再現したい場合は、Azure AD グループユーザーを作成し、DB/テーブル権限を与えて制御するしかなさそう
- 投稿日:2020-09-07T14:22:28+09:00
【エラー無し】phpMyAdmin ログイン画面が表示されない件 解決
特にエラーが出ている訳ではないのですが、学習中に某記事に沿って進めていると沼にハマりました。
【問題】
phpMyAdminのログイン画面が表示されない【解決方法】
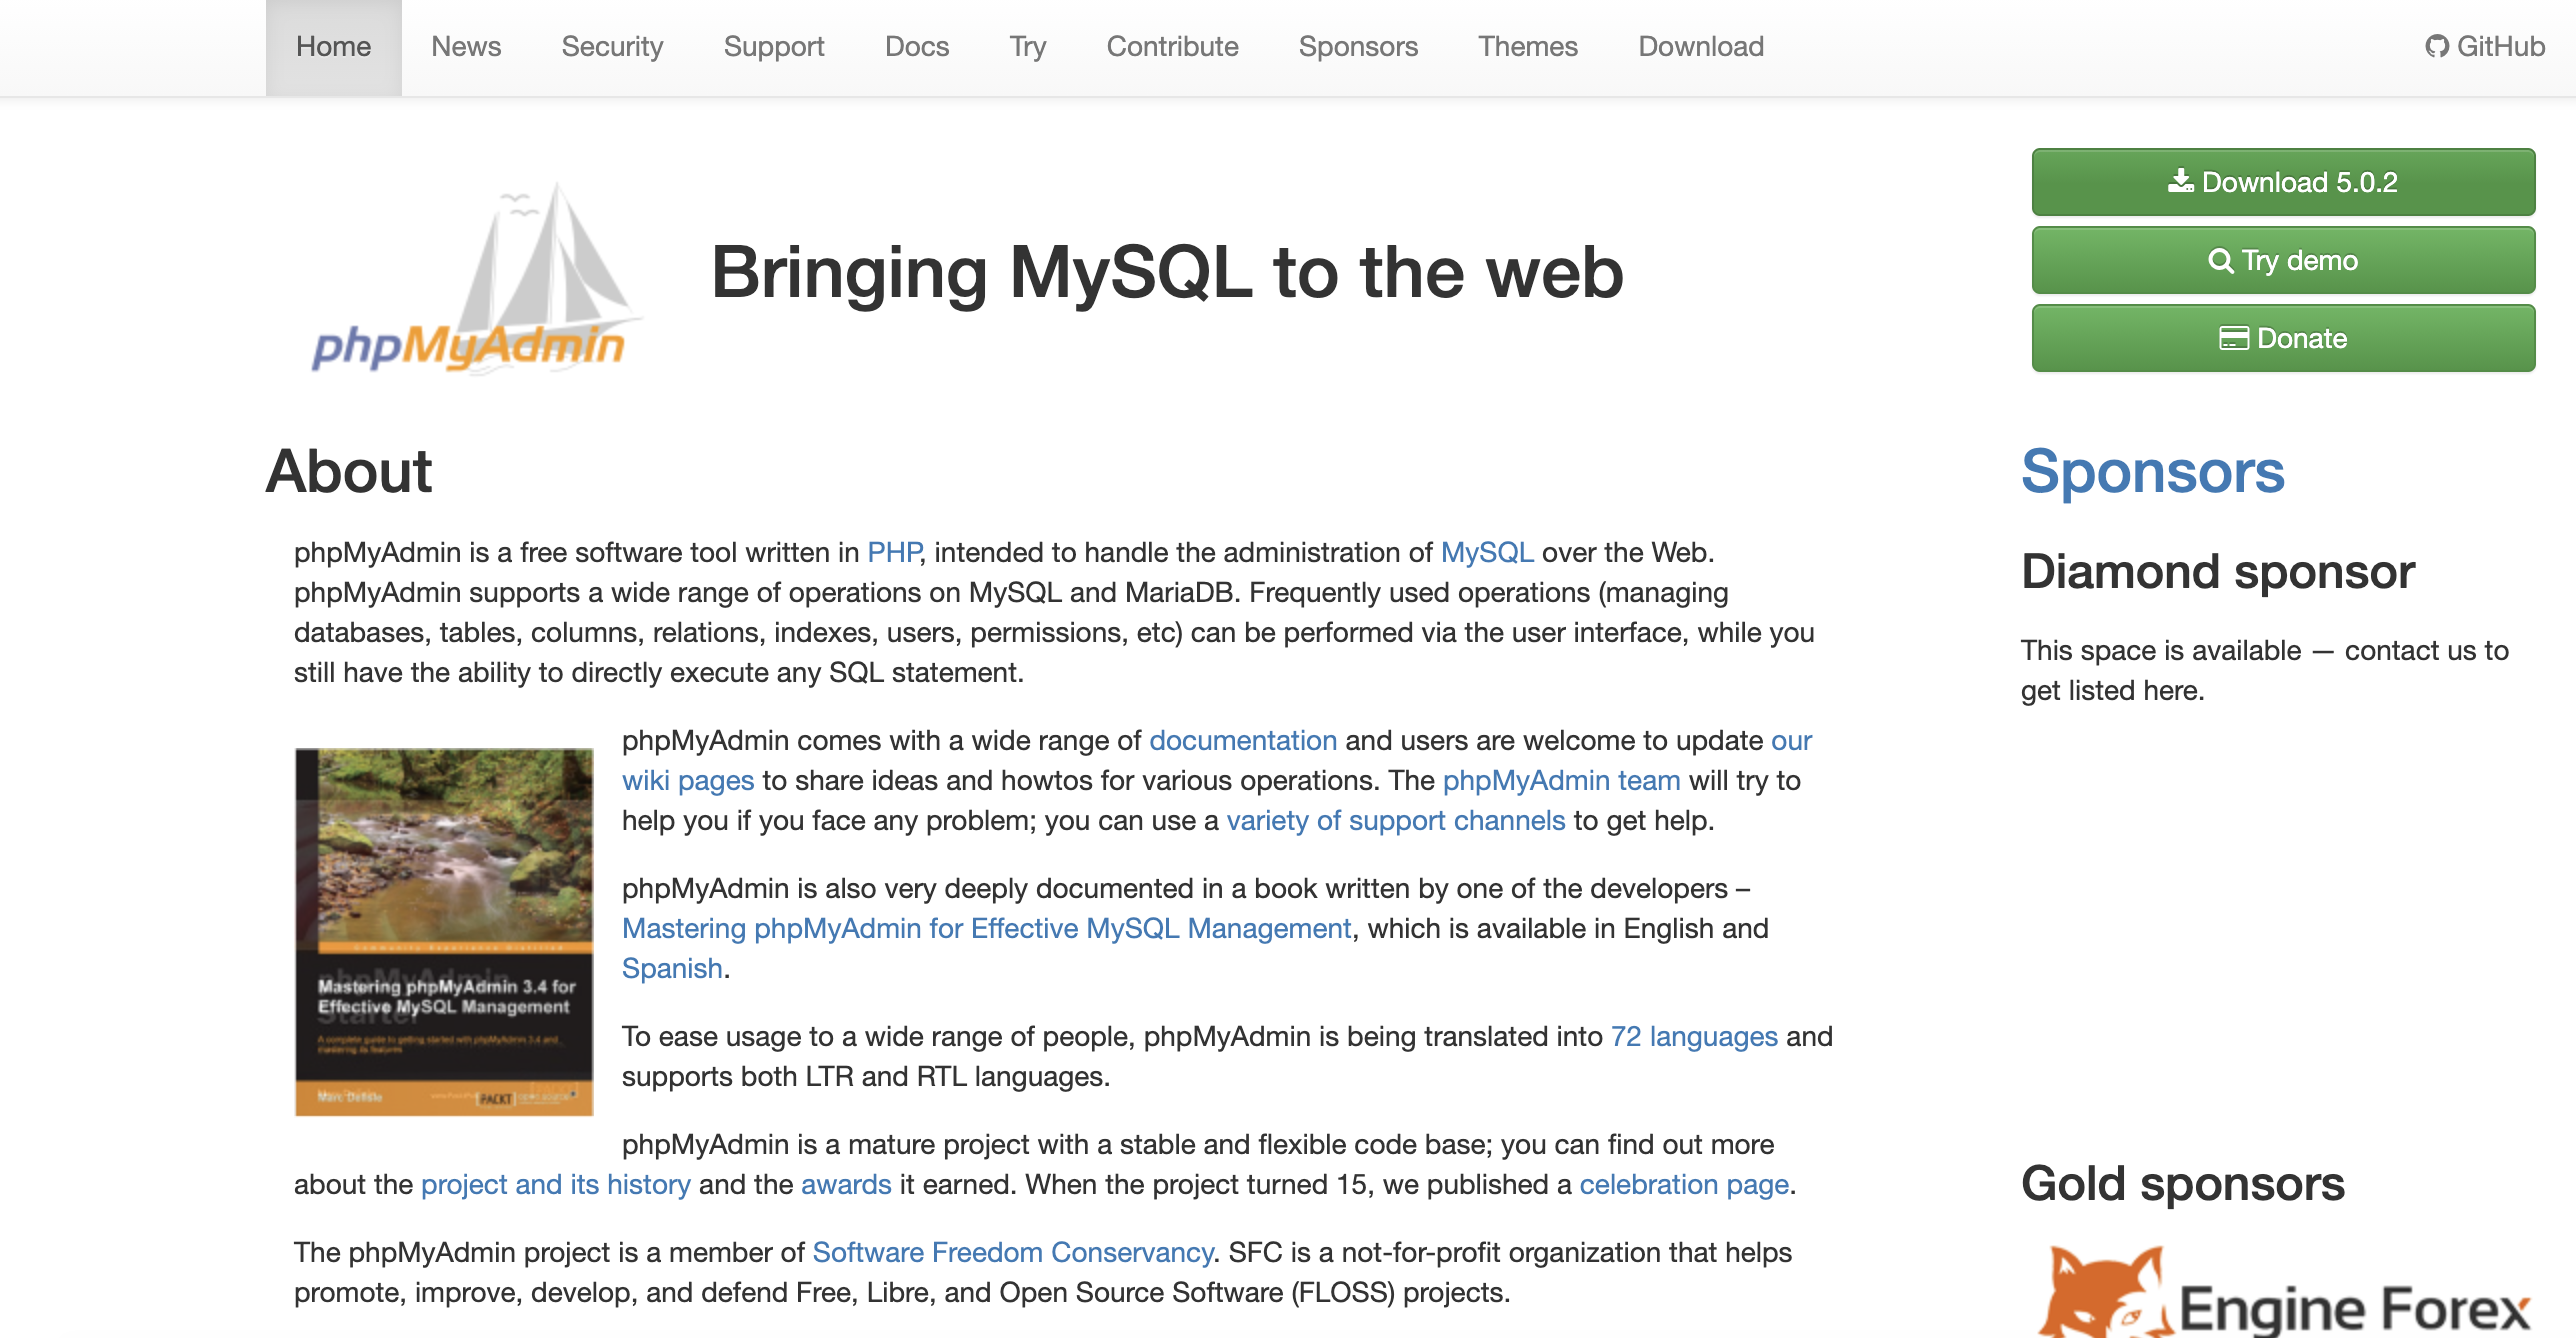
❶phpMyAdminをダウンロード(HP右側にあるDownload)
https://www.phpmyadmin.net/
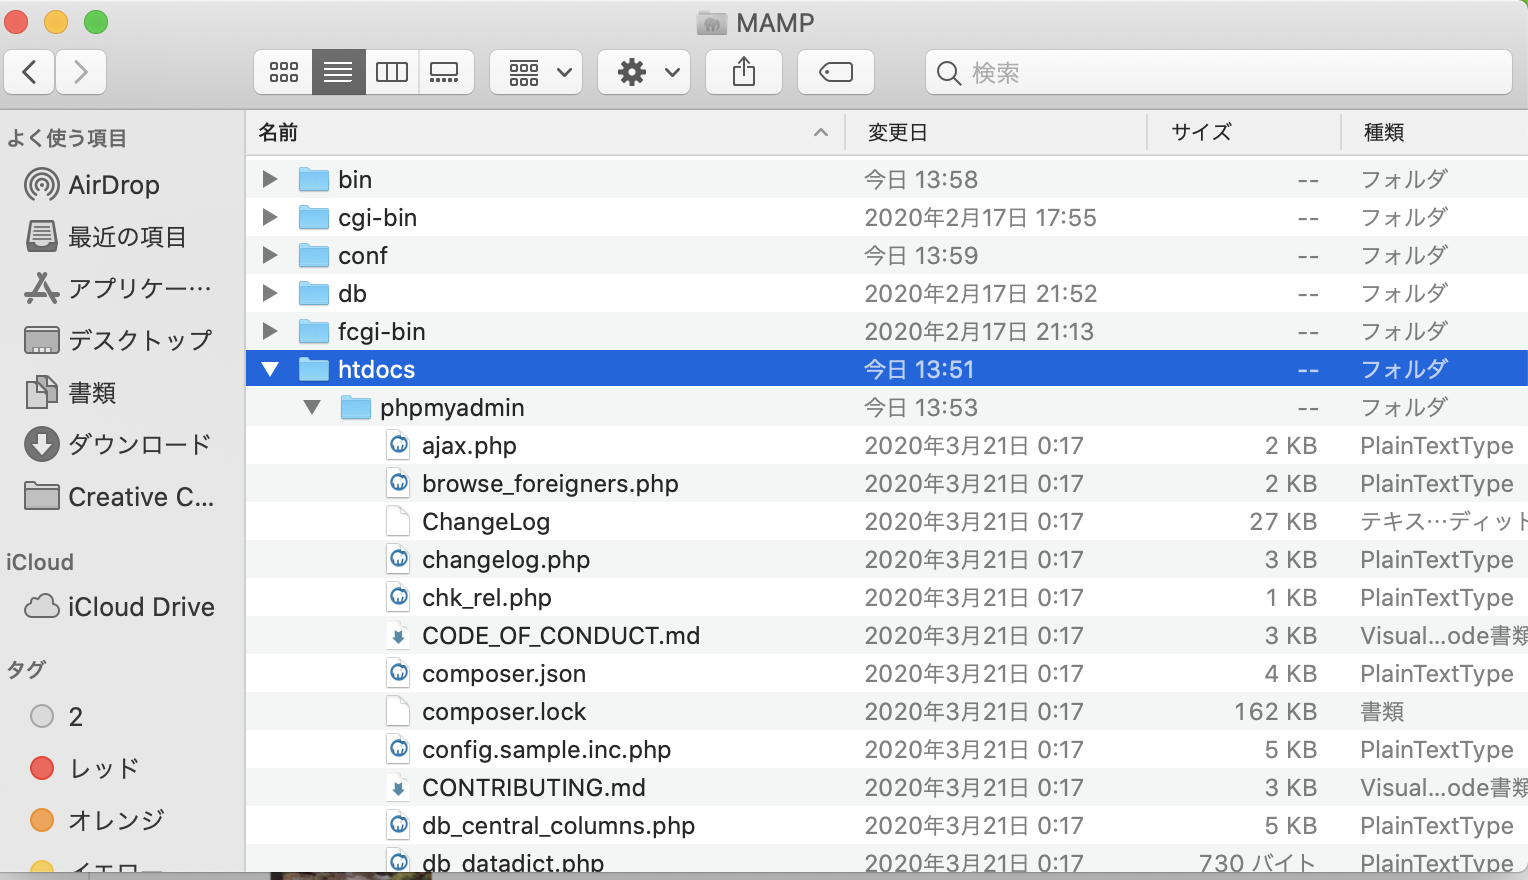
❷phpMyAdminダウンロードファイルをMAMP内>htdocsファイルに移動
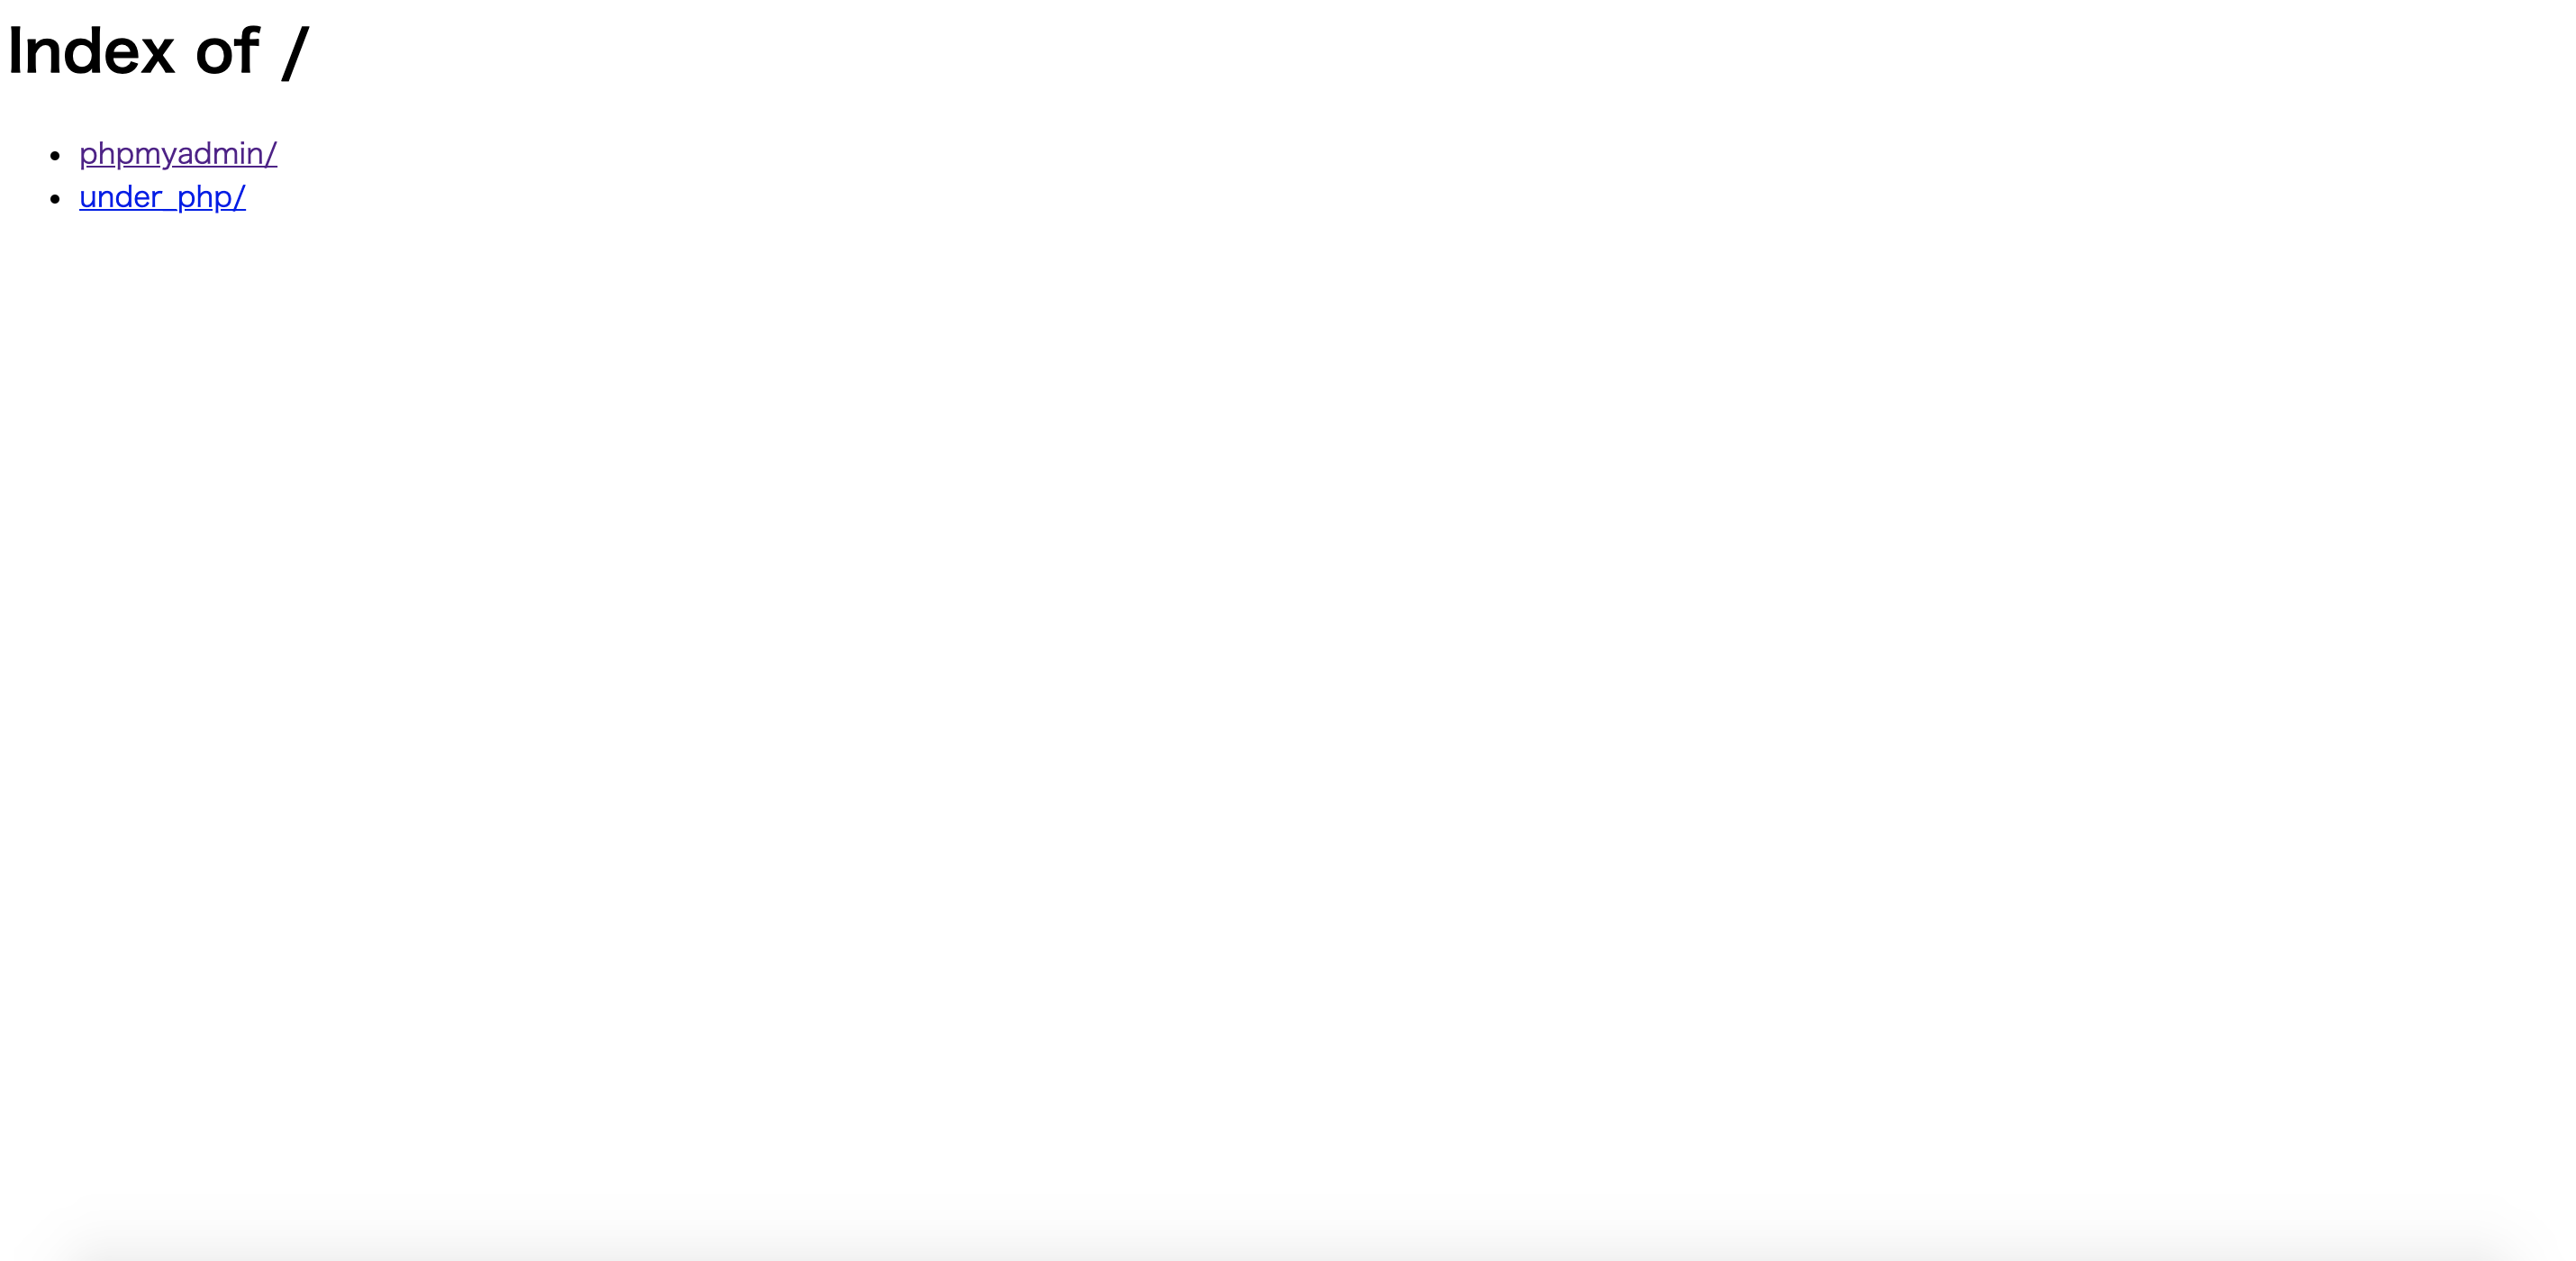
❸Chromeで localhost で検索
❹以下画像のページが表示されるのでphpMyAdminファイルをクリック
※under_phpは私のMAMP>htdocsファイルに入っている当記事とは関係ないファイルです。補足:phpMyAdminからダウンロードしたファイル名を短くするため[phpmyadmin]と変更しているだけです。
以上4点でたどり着きたかったphpMyAdminページが開きました!