- 投稿日:2020-07-03T19:46:12+09:00
【PHP】Mixed Content(混合コンテンツ)が起きた際の対処法
■概要
ステージング環境から本番環境にデプロイした際、ページがHTTP表記になっており、
かつデベロッパーツールのコンソールにエラーが出ていた。
確認すると、
Mixed Content: The page at 'https://test.com/test/' was loaded over HTTPS, but requested an insecure url 'http://test.com/test/'. This content should also be served over HTTPS.■原因
ステージング環境ではSSL対応をしていないため、
PHPで表示中のサイトURLを取得する方法がHTTPのままになっていた。
それにより、ブラウザからこのページに安全ではないURLが含まれているとアラートが出されていた。■対処法
始めは修正前の書き方をしていたので、プロトコルを変更すれば解決するが、
ステージングと本番環境によって出し分ける方法を取った方がコードとしてもきれいだと思い、
URLの取得方法を変えてみた。修正前<?php echo esc_url('http://' . $_SERVER['HTTP_HOST'] . $_SERVER['REQUEST_URI'])?>↓
修正後<?php echo esc_url( (empty($_SERVER["HTTPS"]) ? "http://" : "https://") . $_SERVER['HTTP_HOST'] . $_SERVER['REQUEST_URI'] ); ?>修正内容
三項演算子を使い、HTTPとHTTPSでの接続を条件分岐しています。
分かりやすくif文を使った場合、下記のようになります。if (empty($_SERVER["HTTPS"])) { echo "http://"; } else { echo "https://"; }■参考サイト
- 投稿日:2020-07-03T19:14:35+09:00
CodeIgniterのルーティング設定
前提条件
ルートURLにアクセスすると
CodeIgniterのwelcomeページが表示される
(例)http://example.com/
課題
application/config/routes.phpの設定で、
$route['home']='home/index';というルーティングを設定しても
/index.php/home
にアクセスしなければindexメソッドが実行されないこれを/homeで実行できるようにしたい。
apacheのmod_rewriteモジュールを使う
mod_rewriteでは、アクセスURLを別のURLに変換してアクセスさせる
つまり、/exampleというアクセスを/index.php/exampleに変換してアクセスさせるように
設定すると上記の課題は解決できる。流れとしては、mod_rewriteモジュールを有効にし、
.htaccessでmod_rewriteの設定をapacheの設定に加える#apacheのmod_rewriteモジュールを読み込む $ a2enmod rewrite#apacheの設定にて、公開ディレクトリでの.htaccessを有効にする $ vi /etc/apache2/apache2.confapache2.conf#加える設定 <Directory /var/www/html/> Options Indexes FollowSymLinks #↓これ AllowOverride All Require all granted </Directory>その後公開ディレクトリ(/var/www/html)配下に、下記の内容の.htaccessを作成
.htaccessRewriteEngine On RewriteCond %{REQUEST_FILENAME} !-f RewriteCond %{REQUEST_FILENAME} !-d RewriteRule ^(.*)$ index.php/$1 [L]設定が完了したら、apacheをリスタート
$ service apache2 restartこれでルーティングは正常に機能する。

- 投稿日:2020-07-03T19:13:00+09:00
CodeIgniterの環境構築
前提条件
以前書いた、PHP7.4の開発環境をUbuntuに構築する手順です。
これを参考に環境構築していただければと思います。CodeIgniterのインストール
まずはプロジェクトディレクトリに移動し、ubuntuを立ち上げる
次に、立ちあげたサーバーにssh接続$ vagrant up $ vagrant ssh公開ディレクトリに移動し、CodeIgniterをインストール
#公開ディレクトリの一つ上の階層に移動(デフォルトの公開ディレクトリは/var/www/html)
$ cd /var/www
$ ls
html

#CodeIgniterをインストール
$ wget https://codeload.github.com/bcit-ci/CodeIgniter/zip/3.1.11
$ ls
3.1.11  html

#インストールしたzip形式のcodeigniterを解凍するためにunzipコマンドをインストール
$ sudo apt install unzip

#zip形式のCodeIgniterを解凍
$ unzip 3.1.11
$ ls
3.1.11  CodeIgniter-3.1.11  html

#名前の変更(CodeIgniter-3.1.11 -> Codeigniter)
$ mv  CodeIgniter-3.1.11 Codeigniter

#不用になったzipファイルを削除
$ rm -rf 3.1.11
$ ls
Codeigniter html
CodeIgniterセットアップ
#index.phpを公開用のドキュメントルートに移動
$ mv Codeigniter/index.php html/
上記で移動した、index.phpを一部書き換える
Codeigniterのapplicationディレクトリ、systemディレクトリへのパスを下記のように変更
- $application_folder = '../Codeigniter/application';
- $system_path = '../Codeigniter/system';
index.php<?php /** * CodeIgniter * * An open source application development framework for PHP * * This content is released under the MIT License (MIT) * * Copyright (c) 2014 - 2019, British Columbia Institute of Technology * * Permission is hereby granted, free of charge, to any person obtaining a copy * of this software and associated documentation files (the "Software"), to deal * in the Software without restriction, including without limitation the rights * to use, copy, modify, merge, publish, distribute, sublicense, and/or sell * copies of the Software, and to permit persons to whom the Software is * furnished to do so, subject to the following conditions: * * The above copyright notice and this permission notice shall be included in * all copies or substantial portions of the Software. * * THE SOFTWARE IS PROVIDED "AS IS", WITHOUT WARRANTY OF ANY KIND, EXPRESS OR * IMPLIED, INCLUDING BUT NOT LIMITED TO THE WARRANTIES OF MERCHANTABILITY, * FITNESS FOR A PARTICULAR PURPOSE AND NONINFRINGEMENT. IN NO EVENT SHALL THE * AUTHORS OR COPYRIGHT HOLDERS BE LIABLE FOR ANY CLAIM, DAMAGES OR OTHER * LIABILITY, WHETHER IN AN ACTION OF CONTRACT, TORT OR OTHERWISE, ARISING FROM, * OUT OF OR IN CONNECTION WITH THE SOFTWARE OR THE USE OR OTHER DEALINGS IN * THE SOFTWARE. * * @package CodeIgniter * @author EllisLab Dev Team * @copyright Copyright (c) 2008 - 2014, EllisLab, Inc. (https://ellislab.com/) * @copyright Copyright (c) 2014 - 2019, British Columbia Institute of Technology (https://bcit.ca/) * @license https://opensource.org/licenses/MIT MIT License * @link https://codeigniter.com * @since Version 1.0.0 * @filesource */ /* *--------------------------------------------------------------- * APPLICATION ENVIRONMENT *--------------------------------------------------------------- * * You can load different configurations depending on your * current environment. Setting the environment also influences * things like logging and error reporting. * * This can be set to anything, but default usage is: * * development * testing * production * * NOTE: If you change these, also change the error_reporting() code below */ define('ENVIRONMENT', isset($_SERVER['CI_ENV']) ? $_SERVER['CI_ENV'] : 'development'); /* *--------------------------------------------------------------- * ERROR REPORTING *--------------------------------------------------------------- * * Different environments will require different levels of error reporting. * By default development will show errors but testing and live will hide them. */ switch (ENVIRONMENT) { case 'development': error_reporting(-1); ini_set('display_errors', 1); break; case 'testing': case 'production': ini_set('display_errors', 0); if (version_compare(PHP_VERSION, '5.3', '>=')) { error_reporting(E_ALL & ~E_NOTICE & ~E_DEPRECATED & ~E_STRICT & ~E_USER_NOTICE & ~E_USER_DEPRECATED); } else { error_reporting(E_ALL & ~E_NOTICE & ~E_STRICT & ~E_USER_NOTICE); } break; default: header('HTTP/1.1 503 Service Unavailable.', TRUE, 503); echo 'The application environment is not set correctly.'; exit(1); // EXIT_ERROR } /* *--------------------------------------------------------------- * SYSTEM DIRECTORY NAME *--------------------------------------------------------------- * * This variable must contain the name of your "system" directory. * Set the path if it is not in the same directory as this file. */ $system_path = '../Codeigniter/system'; /* *--------------------------------------------------------------- * APPLICATION DIRECTORY NAME *--------------------------------------------------------------- * * If you want this front controller to use a different "application" * directory than the default one you can set its name here. The directory * can also be renamed or relocated anywhere on your server. If you do, * use an absolute (full) server path. * For more info please see the user guide: * * https://codeigniter.com/user_guide/general/managing_apps.html * * NO TRAILING SLASH! */ $application_folder = '../Codeigniter/application'; /* *--------------------------------------------------------------- * VIEW DIRECTORY NAME *--------------------------------------------------------------- * * If you want to move the view directory out of the application * directory, set the path to it here. The directory can be renamed * and relocated anywhere on your server. If blank, it will default * to the standard location inside your application directory. * If you do move this, use an absolute (full) server path. * * NO TRAILING SLASH! */ $view_folder = ''; /* * -------------------------------------------------------------------- * DEFAULT CONTROLLER * -------------------------------------------------------------------- * * Normally you will set your default controller in the routes.php file. * You can, however, force a custom routing by hard-coding a * specific controller class/function here. For most applications, you * WILL NOT set your routing here, but it's an option for those * special instances where you might want to override the standard * routing in a specific front controller that shares a common CI installation. * * IMPORTANT: If you set the routing here, NO OTHER controller will be * callable. In essence, this preference limits your application to ONE * specific controller. Leave the function name blank if you need * to call functions dynamically via the URI. * * Un-comment the $routing array below to use this feature */ // The directory name, relative to the "controllers" directory. Leave blank // if your controller is not in a sub-directory within the "controllers" one // $routing['directory'] = ''; // The controller class file name. Example: mycontroller // $routing['controller'] = ''; // The controller function you wish to be called. // $routing['function'] = ''; /* * ------------------------------------------------------------------- * CUSTOM CONFIG VALUES * ------------------------------------------------------------------- * * The $assign_to_config array below will be passed dynamically to the * config class when initialized. This allows you to set custom config * items or override any default config values found in the config.php file. * This can be handy as it permits you to share one application between * multiple front controller files, with each file containing different * config values. * * Un-comment the $assign_to_config array below to use this feature */ // $assign_to_config['name_of_config_item'] = 'value of config item'; // -------------------------------------------------------------------- // END OF USER CONFIGURABLE SETTINGS. DO NOT EDIT BELOW THIS LINE // -------------------------------------------------------------------- /* * --------------------------------------------------------------- * Resolve the system path for increased reliability * --------------------------------------------------------------- */ // Set the current directory correctly for CLI requests if (defined('STDIN')) { chdir(dirname(__FILE__)); } if (($_temp = realpath($system_path)) !== FALSE) { $system_path = $_temp.DIRECTORY_SEPARATOR; } else { // Ensure there's a trailing slash $system_path = strtr( rtrim($system_path, '/\\'), '/\\', DIRECTORY_SEPARATOR.DIRECTORY_SEPARATOR ).DIRECTORY_SEPARATOR; } // Is the system path correct? if ( ! is_dir($system_path)) { header('HTTP/1.1 503 Service Unavailable.', TRUE, 503); echo 'Your system folder path does not appear to be set correctly. Please open the following file and correct this: '.pathinfo(__FILE__, PATHINFO_BASENAME); exit(3); // EXIT_CONFIG } /* * ------------------------------------------------------------------- * Now that we know the path, set the main path constants * ------------------------------------------------------------------- */ // The name of THIS file define('SELF', pathinfo(__FILE__, PATHINFO_BASENAME)); // Path to the system directory define('BASEPATH', $system_path); // Path to the front controller (this file) directory define('FCPATH', dirname(__FILE__).DIRECTORY_SEPARATOR); // Name of the "system" directory define('SYSDIR', basename(BASEPATH)); // The path to the "application" directory if (is_dir($application_folder)) { if (($_temp = realpath($application_folder)) !== FALSE) { $application_folder = $_temp; } else { $application_folder = strtr( rtrim($application_folder, '/\\'), '/\\', DIRECTORY_SEPARATOR.DIRECTORY_SEPARATOR ); } } elseif (is_dir(BASEPATH.$application_folder.DIRECTORY_SEPARATOR)) { $application_folder = BASEPATH.strtr( trim($application_folder, '/\\'), '/\\', DIRECTORY_SEPARATOR.DIRECTORY_SEPARATOR ); } else { header('HTTP/1.1 503 Service Unavailable.', TRUE, 503); echo 'Your application folder path does not appear to be set correctly. Please open the following file and correct this: '.SELF; exit(3); // EXIT_CONFIG } define('APPPATH', $application_folder.DIRECTORY_SEPARATOR); // The path to the "views" directory if ( ! isset($view_folder[0]) && is_dir(APPPATH.'views'.DIRECTORY_SEPARATOR)) { $view_folder = APPPATH.'views'; } elseif (is_dir($view_folder)) { if (($_temp = realpath($view_folder)) !== FALSE) { $view_folder = $_temp; } else { $view_folder = strtr( rtrim($view_folder, '/\\'), '/\\', DIRECTORY_SEPARATOR.DIRECTORY_SEPARATOR ); } } elseif (is_dir(APPPATH.$view_folder.DIRECTORY_SEPARATOR)) { $view_folder = APPPATH.strtr( trim($view_folder, '/\\'), '/\\', DIRECTORY_SEPARATOR.DIRECTORY_SEPARATOR ); } else { header('HTTP/1.1 503 Service Unavailable.', TRUE, 503); echo 'Your view folder path does not appear to be set correctly. Please open the following file and correct this: '.SELF; exit(3); // EXIT_CONFIG } define('VIEWPATH', $view_folder.DIRECTORY_SEPARATOR); /* * -------------------------------------------------------------------- * LOAD THE BOOTSTRAP FILE * -------------------------------------------------------------------- * * And away we go... */ require_once BASEPATH.'core/CodeIgniter.php';確認
下記載にアクセルしてCodeIgniterが表示されれば完了
下は最初にvagrantで設定済み
http://192.168.33.10
- 投稿日:2020-07-03T19:12:17+09:00
【AWS】AWS SDK for PHPを使ってSESでメールを送信する
はじめに
PHPでSESを使ってメールを送信したいが、ちょっとAWSの認証まわりが面倒くさかったり、
検索しても以前の情報とかがヒットしたりするので書いておきます。
認証まわりは色々やり方がありますが、AWS認証情報用のiniファイルを作成して実行する方法です。送信用のポリシーを作成する
SES送信用のポリシーを作成してください。
{
  "Version": "2012-10-17",
  "Statement": [
    {
      "Effect": "Allow",
      "Action": "ses:SendEmail",
      "Resource": "*"
    }
  ]
}
SES認証用のユーザーを作成して、iniファイルを作成する
AWSのIAMでSES認証用のユーザーを作成してください。
ポリシーは上で作ったやつ。
作成すると、「Access key ID」、「Secret access key」が表示されるので、それを元に以下のiniファイルを作成してください。aws_credential.ini[default] aws_access_key_id = XXXXXXXXXXXXXXXXXXXXXX aws_secret_access_key = XXXXXXXXXXXXXXXXXXXXXXcomposer
composerでAWS SDKを取得してください。
requireに「"aws/aws-sdk-php": "3.*"」を追加して、composer updateする。PHP
aws_ses.phpinclude_once dirname(__DIR__) . '/vendor/autoload.php'; use Aws\Credentials\CredentialProvider; use Aws\Ses\SesClient; use Aws\Exception\AwsException; // iniファイルで設定した[]のテキストを設定 $profile = 'default'; // ini指定 $path = dirname(__DIR__) . '/aws_credential.ini'; // iniファイルでの認証するための処理 $provider = CredentialProvider::ini($profile, $path); $provider = CredentialProvider::memoize($provider); // SES用オブジェクト生成 $client = new Aws\Ses\SesClient([ 'region' => 'us-east-1', // SESを設定しているリージョン 'version' => '2010-12-01', 'credentials' => $provider ]); // 送信元メールアドレス $from_mail = 'no-reply@test.com'; // SESで設定したメールアドレス // 送信先メールアドレス $to_mail = 'test@gmail.com'; //送信者名 $from_name = mb_encode_mimeheader("テスト送信者",'utf-8'); // 文字コード $char_set = 'UTF-8'; // 件名 $subject = '件名でーす'; // 本文 $body = '本文でーす'; try { // メール送信 $result = $client->sendEmail([ 'Destination' => [ 'ToAddresses' => [$to_mail], ], 'ReplyToAddresses' => [$from_mail], 'Source' => $from_name, 'Message' => [ 'Body' => [ 'Text' => [ 'Charset' => $char_set, 'Data' => $body, ], ], 'Subject' => [ 'Charset' => $char_set, 'Data' => $subject, ], ], ]); // 送信ID $messageId = $result['MessageId']; } catch (AwsException $e) { $this->log("SES送信失敗。" . $e->getAwsErrorMessage()); }以上でございます!
- 投稿日:2020-07-03T13:28:50+09:00
【Laravel】エラーページ のカスタマイズ
内容
laravelでは、エラーが発生したときに表示させるページがあらかじめ用意されています
例えば、404 Not Foundや500 Server Errorなどです
しかし、そのページをそのまま利用することは一般的にありません
そこでエラーページのカスタマイズを説明したいと思います
内容は少ないですが、備忘録として記録しておきます方法
resources/views/errors/以下にビューを配置すればOKです
ただし、ファイル名はエラーコードと同じにしなければなりません
例えば、404.blade.phpや500.blade.phpのようにです手作業でファイルを作っていってもいいですが、あらかじめ用意されているエラーページがわからなかったり、ページもれがあるといけないので、以下のコマンドを実行することをおすすめします
php artisan vendor:publish --tag=laravel-errorsこれによって、resources/views/errors/以下に用意されているビューが生成されます(厳密にはコピーされます)
HTTP例外を発生させるのにabortヘルパーが便利です
引数にエラーコードを指定するだけでエラーを故意的に発生させることができます
第二引数にメッセージを指定して、$exception->getMessage()で呼び出すことができますabort(404, 'Not Found');おわり
Laravelでは例外処理があらかじめ組み込ませているので、エラー周辺はページのカスタマイズだけで、簡単なアプリは作れます
- 投稿日:2020-07-03T13:07:28+09:00
【Laravel】No connections available in the pool...の原因と対処法
はじめに
Laravelにて開発中、以下のようなエラーが発生したため、その原因と対処法を簡単に記します。
laravel.logNo connections available in the pool {"exception":"[object] (Predis\\ClientException(code: 0): No connections available in the pool at /var/www/application/vendor/predis/predis/src/Connection/Aggregate/RedisCluster.php:337)...エラーメッセージより
Redisの接続に異常がある
と見当がつく。
原因
Redisへの接続情報に誤りがあった。
具体的には、Redisのホスト名が誤っていた。
根本原因は、AWS Systems Managerのパラメータストアで管理していた、Redisのホスト名に関する変数の値が古いままとなっていた。対処法
- Laravelの.envを確認。
- Redis接続情報とAWSのElastiCacheにて使用しているRedis情報を照合。
- ホスト名に誤り発見。「REDIS_HOST=」の部分。
- Laravelの.env修正。
- しかし直らず。
- Laravelの.envの作成元であるphp-fpmを確認。
- 該当部分の設定も変更。同じく「REDIS_HOST=」の部分。
- php-fpm再起動。
sudo service php-fpm restart- 直った。
蛇足
php-fpm管理の環境変数初期設定にはAWS Systems Managerを利用していた。
当エラー発生前にEC2インスタンスの再起動が発生しており、AWS Systems ManagerのRedisホスト名が古いままであり実際の値と異なっていたため、Redisへの接続に不具合が生じることとなった。
よって根本解決として、AWS Systems ManagerのRedisホストの変数名を新しいものへと変更した。終わりです。
- 投稿日:2020-07-03T13:07:28+09:00
【Laravel × Redis】No connections available in the pool...の原因と対処法
はじめに
Laravelにて開発中、以下のようなエラーが発生したため、その原因と対処法を簡単に記します。
laravel.logNo connections available in the pool {"exception":"[object] (Predis\\ClientException(code: 0): No connections available in the pool at /var/www/application/vendor/predis/predis/src/Connection/Aggregate/RedisCluster.php:337)...エラーメッセージより
Redisの接続に異常がある
と見当がつく。
原因
Redisへの接続情報に誤りがあった。
具体的には、Redisのホスト名が誤っていた。
根本原因は、AWS Systems Managerのパラメータストアで管理していた、Redisのホスト名に関する変数の値が古いままとなっていた。対処法
- Laravelの.envを確認。
- Redis接続情報とAWSのElastiCacheにて使用しているRedis情報を照合。
- ホスト名に誤り発見。「REDIS_HOST=」の部分。
- Laravelの.env修正。
- しかし直らず。
- Laravelの.envの作成元であるphp-fpmを確認。
- 該当部分の設定も変更。同じく「REDIS_HOST=」の部分。
- php-fpm再起動。
sudo service php-fpm restart- 直った。
蛇足
php-fpm管理の環境変数初期設定にはAWS Systems Managerを利用していた。
当エラー発生前にEC2インスタンスの再起動が発生しており、AWS Systems ManagerのRedisホスト名が古いままであり実際の値と異なっていたため、Redisへの接続に不具合が生じることとなった。
よって根本解決として、AWS Systems ManagerのRedisホストの変数名を新しいものへと変更した。終わりです。
- 投稿日:2020-07-03T11:28:18+09:00
laravel6のIgnition問題
概要
システム保守の関係上、JBNDBのRSSを常にチェックしているが、先日見た事ないような深刻度の脆弱性が出てきた。
・Laravel 用の Ignition page における脆弱性
きゅ、、9.8!!!??? ( MAX10 )
これはヤバいという事で対応したが、すんなりいかなかった話。Ignitionとは
GitHub
laravel6から採用されたComposerパッケージのエラーメッセージ表示ツール。
見易くて綺麗。
Laravel6インストール後composer.jsonを見るとデフォルトでrequire-dev内(development環境)に記載されている。
対応方法(失敗)
ignition 2.0.5未満は影響を受ける、とある。
最新にしてみる。composer.json{ ... "require-dev": { "facade/ignition": "^2.0.5", "fzaninotto/faker": "^1.4", "mockery/mockery": "^1.0", ...しかし、
composer installで以下のようなエラーが、、、% composer install Loading composer repositories with package information Updating dependencies (including require-dev) Your requirements could not be resolved to an installable set of packages. Problem 1 - Conclusion: don't install laravel/framework v6.18.23 - Conclusion: don't install laravel/framework v6.18.22 ... - facade/ignition 2.0.5 requires illuminate/support ^7.0|^8.0 -> satisfiable by illuminate/support[7.x-dev, 8.x-dev, v7.0.0, v7.0.1, v7.0.2, v7.0.3, v7.0.4, v7.0.5, v7.0.6, v7.0.7, v7.0.8, v7.1.0, v7.1.1, v7.1.2, v7.1.3, v7.10.0, v7.10.1, v7.10.2, v7.10.3, v7.11.0, v7.12.0, v7.13.0, v7.14.0, v7.14.1, v7.15.0, v7.16.0, v7.16.1, v7.17.0, v7.17.1, v7.17.2, v7.18.0, v7.2.0, v7.2.1, v7.2.2, v7.3.0, v7.4.0, v7.5.0, v7.5.1, v7.5.2, v7.6.0, v7.6.1, v7.6.2, v7.7.0, v7.7.1, v7.8.0, v7.8.1, v7.9.0, v7.9.1, v7.9.2].えーと、何、、、laravel7以降しかサポートしてねぇの??
現在システム運用中でignition自体development環境でしかビルドされてないのに7にあげるとかないでしょ、、、対応方法
- Ignitionを捨てる
見易くてデバッグしやすいかもしれないが、本番では使わないし、必要ならPHP標準のエラー表示で見たらいい。
composer.jsonから"facade/ignition":,を削除してビルドし直す。- Ignitionの代わりにWhoopsを入れる
composer.jsonの"facade/ignition":,を削除して"filp/whoops": "^2.7",を追記し、ビルドし直す。
※ Whoopsとは:
- Laravel6未満で採用されていたエラー表示ツール。
- 過去に脆弱性は報告されているものの、今は無し。
Whoopsは多少見た目と使い勝手が悪いかもしれないが、必要十分であると思う。
かと言ってWhoopsすら脆弱性ゼロとは言い切れないので、問題を抱えたくないなら削除してもいいんじゃないかと。


- 投稿日:2020-07-03T10:52:27+09:00
読解メモ: PHP RFC: Make constructors and destructors return void
この記事は @carrotRakko が PHP RFC: Make constructors and destructors return void を読み解いて自分なりにまとめなおしたものです。
英語の解釈や PHP の仕様/実装などなどについて間違っている部分を見つけたらご指摘くださると幸いです。
この記事を書いている時点で読んでいるリビジョンは 2020/07/02 23:13 のもの です。
__construct()の返り値の型指定型指定の仕方を3パターン考えてみます↓
- 型指定なし:
__construct()- 型指定あり &
void:__construct(): void- 型指定あり &
void以外:__construct(): boolPHP 7.4.x では(事実)
型指定の仕方 どうなる 型指定なし: __construct()問題なし 型指定あり & void:__construct(): voidFatal error 型指定あり & void以外:__construct(): boolFatal error PHP 8.0 では(提案)
型指定の仕方 どうなる 型指定なし: __construct()問題なし 型指定あり & void:__construct(): void問題なし 型指定あり & void以外:__construct(): boolFatal error PHP 8.1/9.0 では(提案)
PHP 8.0 では(提案) と同じです。
型指定の仕方 どうなる 型指定なし: __construct()問題なし 型指定あり & void:__construct(): void問題なし 型指定あり & void以外:__construct(): boolFatal error
__construct()に返り値の型指定をしなかった場合暗黙的に返り値の型指定とみなされるパターンを2つ考えてみます↓
- なにも指定していないとみなされる(そのまま): 文法違反ですが強いて言うなら
__construct(): void|mixedvoidを指定したとみなされる:__construct(): voidとみなされるPHP 7.4.x では(事実)
なにも指定していないとみなされる(そのまま): 文法違反ですが強いて言うなら
__construct(): void|mixedPHP 8.0 では(提案)
なにも指定していないとみなされる(そのまま): 文法違反ですが強いて言うなら
__construct(): void|mixedPHP 8.1/9.0 では(提案)
voidを指定したとみなされる:__construct(): voidとみなされる
__construct()から値を返した場合PHP の怒り方を3パターン考えてみます↓
- 怒られない
DeprecatedFatal errorPHP 7.4.x では(事実)
怒られない
PHP 8.0 では(提案)
DeprecatedPHP 8.1/9.0 では(提案)
Fatal error
- 投稿日:2020-07-03T10:18:27+09:00
なぜサーバーサイド言語と合わせて、JabvaScriptを理解しておく必要があるのか。
PHPは通信を行わないと変化が起こらない。サーバーサイド。
例:現在時刻は、リロードした時にだけわかる。
JavaScriptは、通信がなくても変化が起きる。クライアントサイド。
例:現在時刻は、毎秒変わる。javascriptのデメリットは、データの保存ができない。その時その端末のみのアクション、データ、記録。
Ajax(非同期通信)=JavaScript
- 投稿日:2020-07-03T09:21:47+09:00
型を指定したからといって安心してはいけない(戒め
PHPネタです。
みんな強いから知ってると思うけど、僕は雑魚なのでメモがてら。
PHPにおけるキャストの動きをクラス生成(コンストラクタの挙動)を例に検証してみます。
PHP 7.3.11 で検証しています。あまり意識してなかったキャストの挙動について
下記のようなコンストラクタをもつクラスについて、数値以外の引数を渡してしまった場合、
本来であればエラーとなって欲しい気もしますが、おそらく数値型にキャストされるだろうなと推測する方が多いかと思います。class MyTest { private $param; public function __construct(int $param) { $this->param = $param; } }案の定、数値型にキャスト可能な文字列が引数に入っていた場合、文字列->数値へのキャストが行われ、
正常にオブジェクトが生成されます。$obj = new MyTest("1"); var_dump($obj) // Result object(MyTest)#1 (1) { ["message":"MyTest":private]=> int(1) }数値型にキャスト可能な文字列が引数に入っていた場合
と書きましたが、"0x13", "0b110101"などの文字列リテラルで渡してもエラーを起こしません。
ただし、0に変換されてメンバ変数に格納されてしまいます。
これは仕様なのか分かりませんが、なんとなく気持ち悪いですね(小並$obj = new MyTest("0b00101"); var_dump($obj); // Result object(MyTest)#1 (1) { ["message":"MyTest":private]=> int(0) }数値と解釈できない文字列の場合に限り、エラーとなります。
$obj = new MyTest("yahho");

// Result
Fatal error: Uncaught TypeError: Argument 1 passed to MyTest::__construct() must be of the type int, string given, called in /Users/y-nishi/Desktop/constructor.php on line 32 and defined in /Users/y-nishi/Desktop/constructor.php:9
Stack trace:
#0 /Users/y-nishi/Desktop/constructor.php(32): MyTest->__construct('yahho')
#1 {main}
  thrown in /Users/y-nishi/Desktop/constructor.php on line 9
もちろん、オブジェクトも同様にエラーになります。
$obj = new MyTest(new Hoge());

// Result
Fatal error: Uncaught TypeError: Argument 1 passed to MyTest::__construct() must be of the type string, object given, called in /Users/y-nishi/Desktop/constructor.php on line 35 and defined in /Users/y-nishi/Desktop/constructor.php:9
Stack trace:
#0 /Users/y-nishi/Desktop/constructor.php(35): MyTest->__construct(Object(Hoge))
#1 {main}
  thrown in /Users/y-nishi/Desktop/constructor.php on line 9
意図しない型の引数が入ってきたらどうしてもエラーにしたい!
そんな事言うなら静的型付け言語使えよって話なんですが、PHPをメインで使っている会社やPJはかなり多いかと思います。
この要望に立ち向かうために、前述のもちろん、オブジェクトも同様にエラーになります。
の挙動を応用します。
プリミティブなstringやintを使うのではなく、ラップしたクラスを用意して使おうという考えです。
DDDでいうところのValueObjectの考え方と同じです。このようなクラスを用意してみました。
class ID_A {
  private $intVal;
  public function __construct(int $intVal) {
    $this->intVal = $intVal;
  }

  public function toInt():int {
    return $this->intVal;
  }
}

class ID_B {
  private $strVal;
  public function __construct(string $strVal) {
    $this->strVal = $strVal;
  }

  public function toString():string {
    return $this->strVal;
  }
}

class Hoge{
  private $id;
  public function __construct(ID_A $id) {
    $this->id = $id;
  }
}
この状態では
ID_Aクラスから生成されたオブジェクト以外の引数を受け付けません。// 正常 $obj = new Hoge(new ID_A()); var_dump($obj); // Result object(Hoge)#1 (1) { ["id":"Hoge":private]=> object(ID_A)#2 (0) { } }// エラー $obj = new Hoge(new ID_B()); var_dump($obj); // Result Fatal error: Uncaught TypeError: Argument 1 passed to Hoge::__construct() must be an instance of ID_A, instance of ID_B given, called in /Users/y-nishi/Desktop/constructor.php on line 42 and defined in /Users/y-nishi/Desktop/constructor.php:37 Stack trace: #0 /Users/y-nishi/Desktop/constructor.php(42): Hoge->__construct(Object(ID_B)) #1 {main} thrown in /Users/y-nishi/Desktop/constructor.php on line 37ただ1点注意事項があり、継承関係にあるクラスであり、かつアップキャスト可能なオブジェクト(スーパークラスが存在する)の場合はキャストされます。
※ダウンキャストが発生する場合はエラーとなります。class ID_A {} // ID_Aを継承した class ID_B extends ID_A {} class Hoge{ private $id; public function __construct(ID_A $id) { $this->id = $id; } } $obj = new Hoge(new ID_B()); var_dump($obj); // Result object(Hoge)#1 (1) { ["id":"Hoge":private]=> object(ID_B)#2 (0) { // ID_Bのオブジェクトが入る。 } }動的片付け言語は型を意識せずに書けるのですが、挙動を意識せずに書くと意図しない動作になってしまうので注意して書いていきたいですね。
- 投稿日:2020-07-03T06:34:41+09:00
[php基礎] foreach文とif文を使って合計金額と最高価格を表示させる
$menus = array(
  array('name' => 'CURRY', 'price' => 900),
  array('name' => 'PASTA', 'price' => 1200),
  array('name' => 'COFFEE', 'price' => 600)
);
上記の配列の合計金額と最高金額を表示させる。
↓$totalprice = 0; $maxprice = 0; $maxname = ''; foreach ($menus as $menu) { $name = $menu['name']; $price = $menu['price']; echo $name.'は'.$price.'円です'; echo '<br>'; $totalprice += $price; if ($maxprice < $price){ $maxprice = $price; $maxname = $name; } } echo '合計金額は'.$totalprice.'円です'; echo '<br>'; echo $maxname.'が最高価格で'.$maxprice.'円です';*foreach文の前に合計金額、最高価格、最高価格の商品名を定義させる。
*foreach文中にif文を使って、price(比べる価格)がmaxprice(最高価格)より大きい時、maxpriceにpriceの値を再定義させる。またその商品名(name)をmaxmane(最高価格の商品名)に再定義させる。※最高価格の商品名には空の文字列にクウォーテーションで定義しておく。
↓$maxname = '';
- 投稿日:2020-07-03T01:07:38+09:00
PHP composerでext-httpエラーの解決方法
有益な記事がなく苦労したのでメモ
環境
PHP7.4(CakePHP3.5)
ローカル(mac mojaba 10.14.6)PhpStormで拡張モジュールはcomposer.jsonに書かないと警告が出るらしい
簡単にまとめるとタイトルの通り
ext-httpも例外ではないらしい
php拡張由来の定数や関数などに依存しているときにcomposer.jsonにその依存が明示されていることを検査するらしい
でもそれを強制するってそんな大切か?って思うんですがw
ネット上をサーフィンしまくって解決
  Problem 1
    - The requested PHP extension ext-http * is missing from your system.
      Install or enable PHP's http extension.
composerでこのエラーが出た場合はpecl_httpをインストールする必要があった。
PHP組み込み拡張モジュールとは別に、Pecl拡張モジュールというネット上から取得してくる拡張モジュールが存在する
https://www.php.net/manual/ja/install.pecl.downloads.phpApacheでphpを動かしているとphp.iniでextensionの設定のみでできるような記憶であったが(?)
ローカルの場合はhttpモジュールがないのでインストールする必要がある。実施手順
$ brew install autoconf
$ brew install m4
$ which m4
/usr/bin/m4
m4の実行パスがMAMPとかのパスになっている場合.bash_profile(.zshprofile)でexportしているPATHで/usr/binをMAMPパスよりも前に持ってくる
php -vでphpのパスが変わってしまった場合も同様に、/usr/binよりも前にphpパスを持って来ればOK$ sudo pecl install pecl_http $ php -vphp.iniにextension=http.soが記載されていればOK
php -v などで下記エラーが出る場合はphp.iniでextensionの重複を消すPHP Warning: Module 'raphf' already loaded in Unknown on line 0
PHP Warning: Module 'propro' already loaded in Unknown on line 0
PHP Warning: Module 'raphf' already loaded in Unknown on line 0ちなみにphp.iniの場所特定
$  php -i | grep php.ini
Configuration File (php.ini) Path => /usr/local/etc/php/7.4
Loaded Configuration File => /usr/local/etc/php/7.4/php.ini
参考記事
https://www.php.net/manual/ja/install.pecl.downloads.php
https://www.366service.com/jp/qa/640015a450ba68b8414671db0ac15a48
https://stackoverflow.com/questions/59618142/fixing-m4-on-mac-os-10-14-5
- 投稿日:2020-07-03T00:25:53+09:00
GuzzleでのAPI通信先でのデータ取得方法を知りたい
結論
POSTで送るなら$_POSTでいいじゃない!!!!!
$postData = $_POST['hoge'];これで取れます。
念の為
        if(isset($_POST['hoge'])){
            $hoge = $_POST['hoge'];
        } else {
            // Error return
            return 何らかのエラーコードなりをレスポンスすればよいでしょう
        }
とすればきっと良いはず。
半日の時間は何だったのかという己の愚かさと
$_POSTとか数年ぶりに書いたので今もこの書き方で良いのだろうか
という疑問も新たに生まれた伸びしろと思いたい。
ここからは元文
$requestでデータが取れない
$request->all();できっとPOSTからのデータは取得出来るはず、、、
そんな簡単に考えていたら、半日ハマってしまっている。環境
PHP7系(APIも)
dockerそもそもAPIは呼び出し側しか触ったことがなかった!
今までサービス内、サービス外、様々なAPIを触って、なんとなくAPIは
リクエストに対してレスポンスをくれるものという考えしかなかったが、
今回受け渡し側を触ることになって、
ど、ど、どどおおやってリクエストデータを取得しているの?ググっても受け渡し側(リクエスト側)はたくさん出てくるのに対して
レスポンス送る側のAPIってどうなってるの?
・・・わからない色々試した
デバッグ
$d = $request->all();
dd($d);
結果
array(3) {
  ["hoge"]=>
  string(1) "A"
  ["hogeB"]=>
  string(2) "BB"
  ["hoge_code"]=>
  array(1) {
    [0]=>
    string(12) "hoge-code"
  }
}
<script> Sfdump = window.Sfdump || (function (doc) { var refStyle = doc.createElement('style'), rxEsc = /([.*+?^${}()|\[\]\/\\])/g, idRx = /\bsf-dump-\d+-ref[01 ▶
</pre><script>Sfdump("sf-dump-132360725")</script>
なんか配列にちゃんと入ってるけど!けど取れない・・・
これからまた検索の渦にハマるのだろうか
半日アレヤコレヤ考えても全く進めない。。。
このような場合、レスポンス返す側はどうやってデータを取得するのでしょうか
- 投稿日:2020-07-03T00:10:40+09:00
Laravel Log dailyログとerrorログを別々に出力する
目的
- エラーログだけ別ファイルに出力して欲しい時の方法を下記に記載する。
実施環境
- MacのローカルにLaravelの環境を構築して実施する。環境構築手順の記事はリンクを後述する。
- ハードウェア環境
項目 情報 OS macOS Catalina(10.15.5) ハードウェア MacBook Pro (13-inch, 2020, Four Thunderbolt 3 ports) プロセッサ 2 GHz クアッドコアIntel Core i5 メモリ 32 GB 3733 MHz LPDDR4 グラフィックス Intel Iris Plus Graphics 1536 MB
- ソフトウェア環境
項目 情報 備考 PHP バージョン 7.4.3 Homwbrewを用いて導入 Laravel バージョン 7.0.8 commposerを用いてこちらの方法で導入→Mac Laravelの環境構築を行う MySQLバージョン 8.0.19 for osx10.13 on x86_64 Homwbrewを用いてこちらの方法で導入→Mac HomebrewでMySQLをインストールする 前提条件
- 下記、または下記に準ずる方法でLaravelの環境構築がされていること。
前提情報
- 本記事ではログの出力までの方法を最短で記載する、ログの機能の詳細の説明は実施しない。
- 本記事ではあえてエラーを発生させるべく.envファイルにDBの設定などを記載しない。
読後感
- dailyログをアプリ名ディレクトリ/storage/logs/直下のdaily-YYYY-MM-DD.logファイルに「[YYYY-MM-DD HH:MM:SS] local.DEBUG: test」と言う文字列で出力し、errorログをアプリ名ディレクトリ/storage/logs/直下のerror.logに「[YYYY-MM-DD HH:MM:SS] local.ERRORLOG: error test」と言う文字列で出力することができる。
概要
- アプリ作成
- ルーティングの記載
- UserHomeController作成と記載
- dailyログ出力確認
- errorログ出力確認
- ログの設定変更
- 確認
詳細
アプリ作成
アプリを作成する任意のディレクトリに移動して下記コマンドを実行して「test」と言う名前のアプリを作成する。(オプション
--authを付与してユーザ認証機能付きアプリを作成する。)$ laravel new test --authルーティングの記載
testディレクトリで下記コマンドを実行してルーティングファイルを開く。
$ routes/web.php開いたルーティングファイルに下記の一行を記載する。
routes/web.phpRoute::get('/user_home', 'UserHomeController@index');記載後のルーティングファイルの内容を下記に記載する。
routes/web.php<?php use Illuminate\Support\Facades\Route; /* |-------------------------------------------------------------------------- | Web Routes |-------------------------------------------------------------------------- | | Here is where you can register web routes for your application. These | routes are loaded by the RouteServiceProvider within a group which | contains the "web" middleware group. Now create something great! | */ Route::get('/', function () { return view('welcome'); }); Auth::routes(); Route::get('/home', 'HomeController@index')->name('home'); //下記を追記 Route::get('/user_home', 'UserHomeController@index');保存して閉じる。
UserHomeController作成と記載
testディレクトリで下記コマンドを実行してUserHomeController.phpを作成する。
$ php artisan make:controller UserHomeController下記コマンドを実行して先のコマンドで作成したUserHomeController.phpを開く。
$ vi app/Http/Controllers/UserHomeController.php開いたUserHomeController.phpを下記の様に修正する。
test/app/Http/Controllers/UserHomeController.php<?php namespace App\Http\Controllers; use Illuminate\Http\Request; //下記を追記する、下記の宣言がないとエラーになる use Illuminate\Support\Facades\Log; class UserHomeController extends Controller { //下記を追記する public function index() { //Log::debug('ログとして出力したい文字列')の様に記載する Log::debug('test'); return redirect('/'); } //上記までを追記する。 }保存して閉じる。
dailyログ出力確認
testディレクトリで下記コマンドを実行してまだlogファイルが存在していないことを確認する。「No such file or directory」が出力されればsingle.logファイルとdaily.logは存在しない。
$ ls storage/logs/laravel.log
>ls: storage/logs/laravel.log: No such file or directory
testディレクトリで下記コマンドを実行してローカルサーバを起動する。
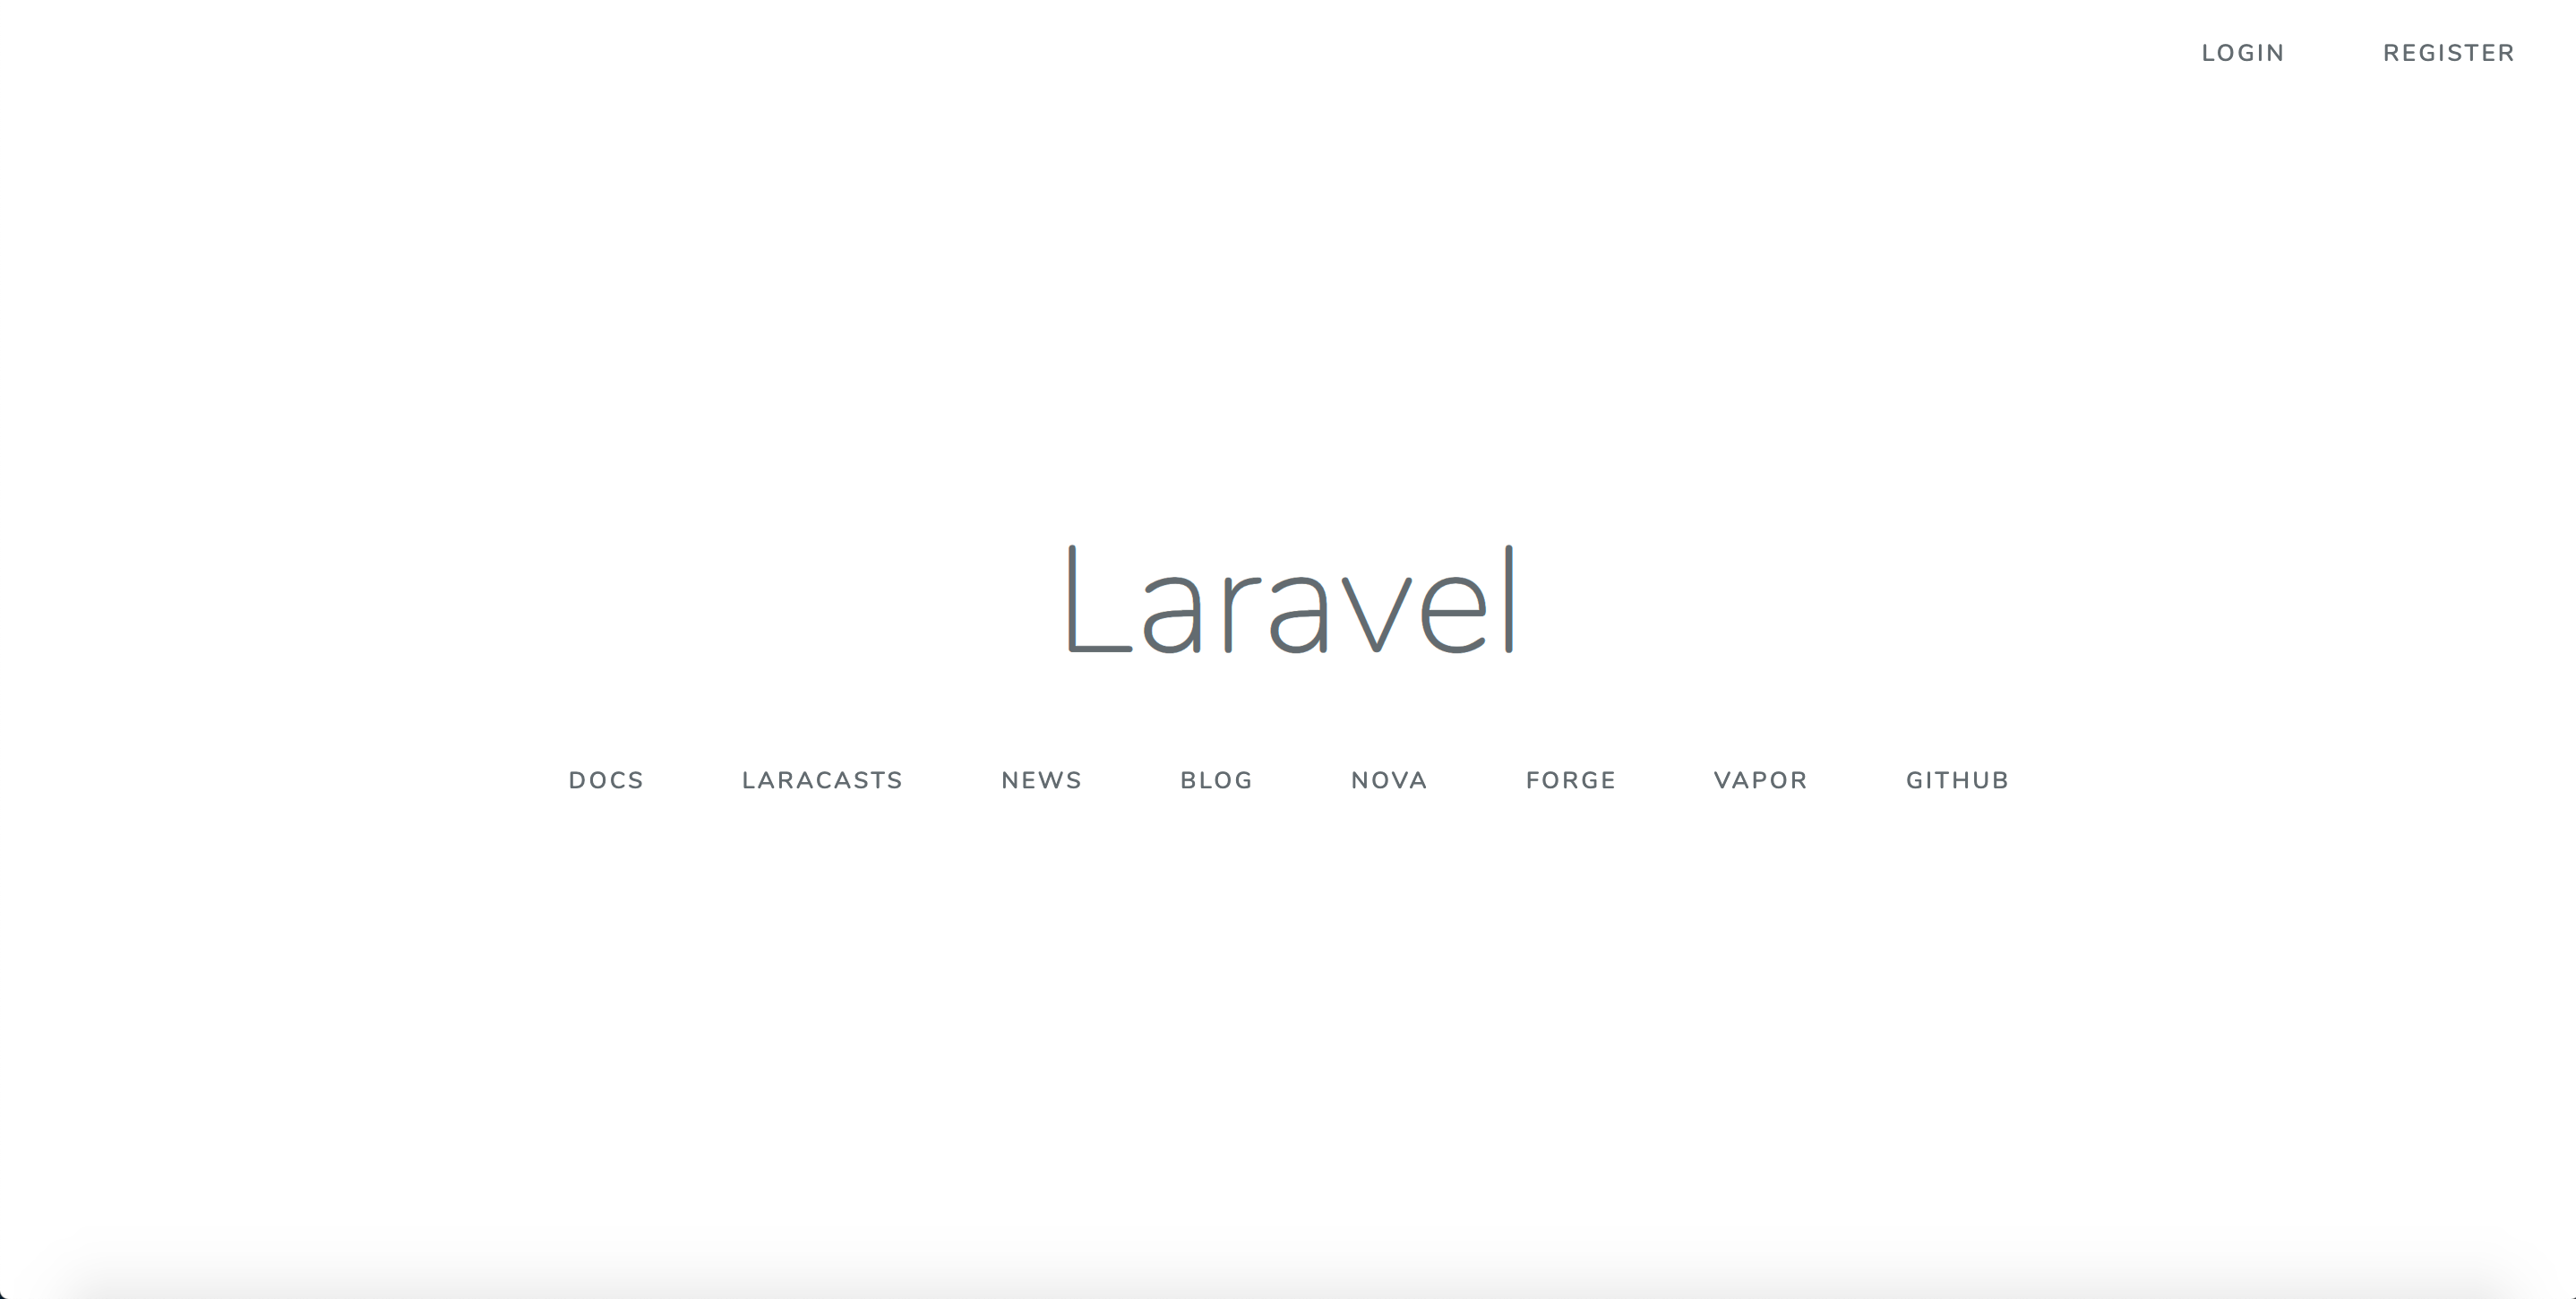
$ php artisan serveブラウザからtestアプリにアクセスする。デフォルトだとhttp://127.0.0.1:8000/にアクセスするとブラウザでtestアプリが表示できる。
下記画面が表示されていることを確認する。
http://127.0.0.1:8000/user_homeにアクセスしてみる。(アクセスしても何も起こらず、先の画像と同じLaravelのトップページが表示されると思うがその動作は期待する動作である。)
testディレクトリで下記コマンドを実行してログファイルを開く。
$ less storage/logs/laravel.log下記の一行が記載されていることを確認する。(YYYY-MM-DD HH:MM:SSはみなさんがhttp://127.0.0.1:8000/user_homeにアクセスした時間が入る。)
test/storage/logs/laravel.log[YYYY-MM-DD HH:MM:SS] local.DEBUG: testerrorログ出力確認
下記画面右上の「LOGIN」をクリックしログイン画面に進む。
なんでも良いのでE-Mail AddressとPasswordを入力して「Login」をクリックする。
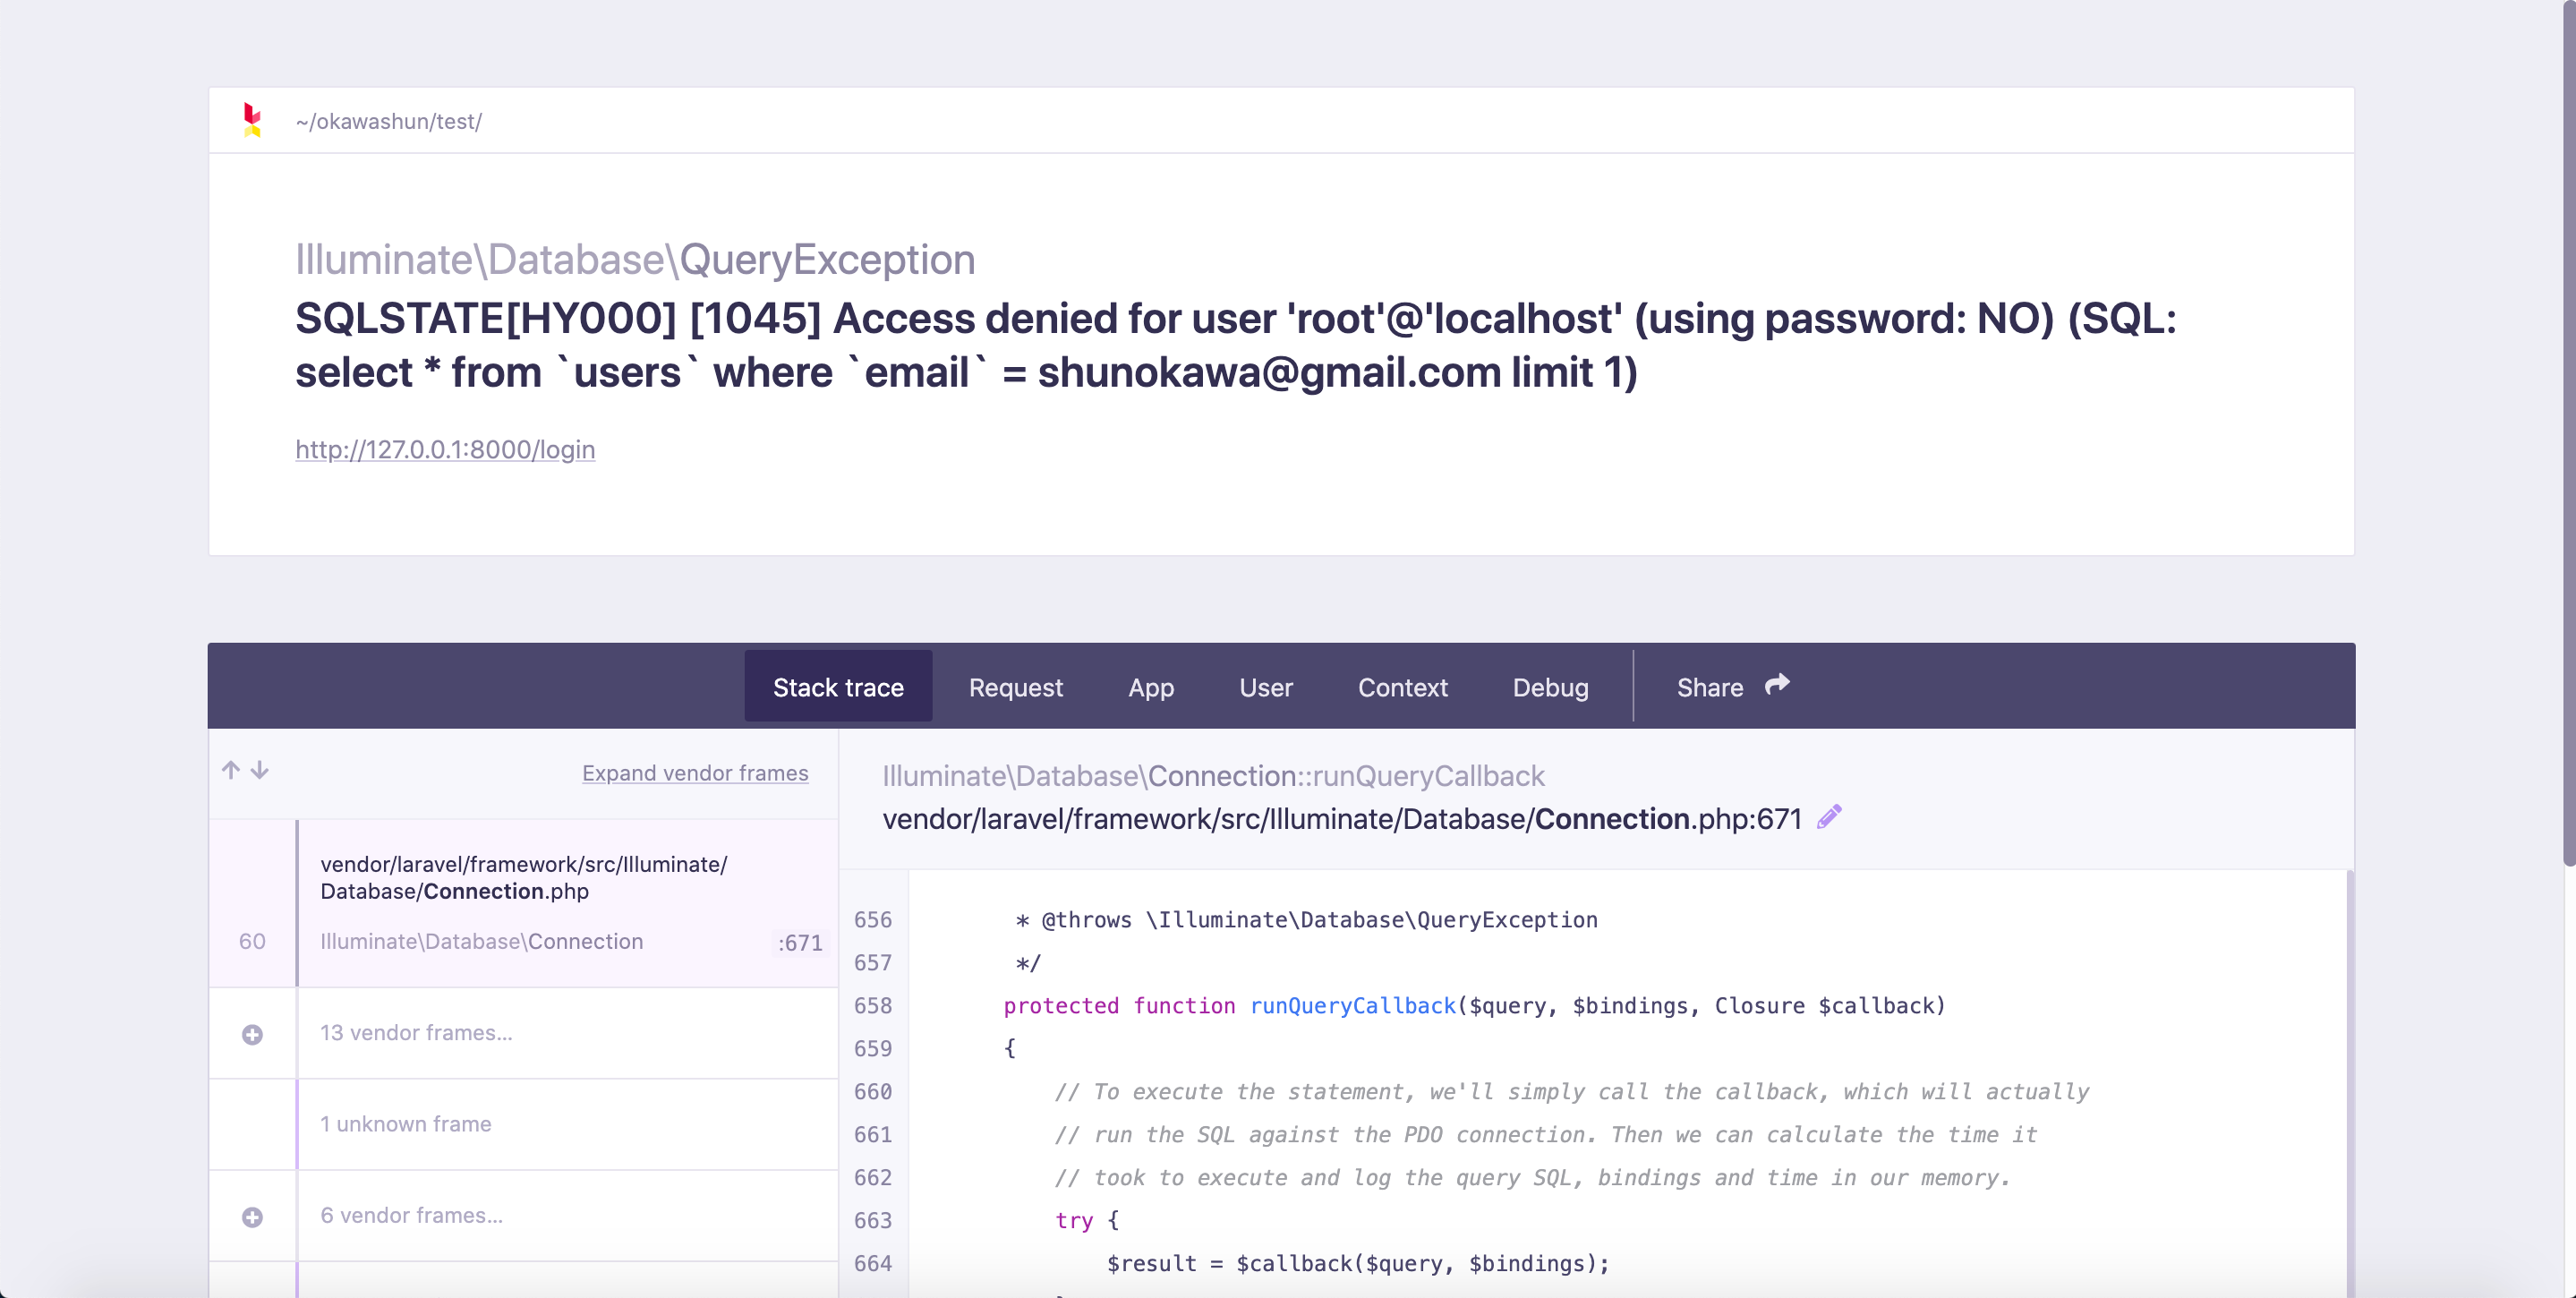
下記の様なエラーが出る(このエラー画面は期待する画面である。)
testディレクトリで下記コマンドを実行してログファイルを開く。
$ less storage/logs/laravel.log下記の様な出力が記載されていることを確認する。
[2020-07-01 03:14:59] local.ERROR: SQLSTATE[HY000] [1045] Access denied for user 'root'@'localhost' (using password: NO) (SQL: select * from `users` where `email` = shunokawa@gmail.com limit 1) {"exception":"[object] (Illuminate\\Database\\QueryException(code: 1045): SQLSTATE[HY000] [1045] Access denied for user 'root'@'localhost' (using password: NO) (SQL: select * from `users` where `email` = shunokawa@gmail.com limit 1) at /Users/okawashun/test/vendor/laravel/framework/src/Illuminate/Database/Connection.php:671)
[stacktrace]
#0 /Users/okawashun/test/vendor/laravel/framework/src/Illuminate/Database/Connection.php(631): Illuminate\\Database\\Connection->runQueryCallback('select * from `...', Array, Object(Closure))
#1 /Users/okawashun/test/vendor/laravel/framework/src/Illuminate/Database/Connection.php(339): Illuminate\\Database\\Connection->run('select * from `...', Array, Object(Closure))
#2 /Users/okawashun/test/vendor/laravel/framework/src/Illuminate/Database/Query/Builder.php(2203): Illuminate\\Database\\Connection->select('select * from `...', Array, true)
        ・
        ・
        ・
ログの設定変更
testディレクトリで下記コマンドを実行してログの設定ファイルを開く。
$ vi config/logging.php開いた設定ファイルを下記の様に修正する。
test/config/logging.php<?php use Monolog\Handler\NullHandler; use Monolog\Handler\StreamHandler; use Monolog\Handler\SyslogUdpHandler; return [ /* |-------------------------------------------------------------------------- | Default Log Channel |-------------------------------------------------------------------------- | | This option defines the default log channel that gets used when writing | messages to the logs. The name specified in this option should match | one of the channels defined in the "channels" configuration array. | */ 'default' => env('LOG_CHANNEL', 'stack'), /* |-------------------------------------------------------------------------- | Log Channels |-------------------------------------------------------------------------- | | Here you may configure the log channels for your application. Out of | the box, Laravel uses the Monolog PHP logging library. This gives | you a variety of powerful log handlers / formatters to utilize. | | Available Drivers: "single", "daily", "slack", "syslog", | "errorlog", "monolog", | "custom", "stack" | */ 'channels' => [ 'stack' => [ 'driver' => 'stack', //下記修正・追記する 'channels' => [ 'daily', 'errors', ], 'ignore_exceptions' => false, ], 'single' => [ 'driver' => 'single', 'path' => storage_path('logs/laravel.log'), 'level' => 'debug', ], 'daily' => [ 'driver' => 'daily', //下記を修正する 'path' => storage_path('logs/daily.log'), 'level' => 'debug', 'days' => 14, ], 'slack' => [ 'driver' => 'slack', 'url' => env('LOG_SLACK_WEBHOOK_URL'), 'username' => 'Laravel Log', 'emoji' => ':boom:', 'level' => 'critical', ], 'papertrail' => [ 'driver' => 'monolog', 'level' => 'debug', 'handler' => SyslogUdpHandler::class, 'handler_with' => [ 'host' => env('PAPERTRAIL_URL'), 'port' => env('PAPERTRAIL_PORT'), ], ], 'stderr' => [ 'driver' => 'monolog', 'handler' => StreamHandler::class, 'formatter' => env('LOG_STDERR_FORMATTER'), 'with' => [ 'stream' => 'php://stderr', ], ], 'syslog' => [ 'driver' => 'syslog', 'level' => 'debug', ], 'errorlog' => [ 'driver' => 'errorlog', 'level' => 'debug', ], 'null' => [ 'driver' => 'monolog', 'handler' => NullHandler::class, ], 'emergency' => [ 'path' => storage_path('logs/laravel.log'), ], //下記を追記 'errors' => [ 'driver' => 'daily', 'path' => storage_path('logs/error.log'), 'level' => 'error', 'days' => 14, ], //上記までを追記 ], ];確認
testディレクトリで下記コマンドを実行してまだlogファイルが存在していないことを確認する。「No such file or directory」が出力されればsingle.logファイルとdaily.logは存在しない。
$ ls storage/logs/daily*
>ls: storage/logs/daily*: No such file or directory
$ ls storage/logs/error*
>ls: storage/logs/error*: No such file or directory
testディレクトリで下記コマンドを実行してローカルサーバを起動する。
$ php artisan serveブラウザからtestアプリにアクセスする。デフォルトだとhttp://127.0.0.1:8000/にアクセスするとブラウザでtestアプリが表示できる。
下記画面が表示されていることを確認する。
http://127.0.0.1:8000/user_homeにアクセスしてみる。(アクセスしても何も起こらず、先の画像と同じLaravelのトップページが表示されると思うがその動作は期待する動作である。)
二つのファイルに下記の一行が記載されていることを確認する。(YYYY-MM-DD HH:MM:SSはみなさんがhttp://127.0.0.1:8000/user_homeにアクセスした時間が入る。)
test/storage/logs/laravel.log[YYYY-MM-DD HH:MM:SS] local.DEBUG: test下記画面右上の「LOGIN」をクリックしログイン画面に進む。
なんでも良いのでE-Mail AddressとPasswordを入力して「Login」をクリックする。
下記の様なエラーが出る(このエラー画面は期待する画面である。)
testディレクトリで下記コマンドを実行してログファイルを開く。
$ less storage/logs/error.log下記の様な出力が記載されていることを確認する。
[2020-07-01 03:14:59] local.ERROR: SQLSTATE[HY000] [1045] Access denied for user 'root'@'localhost' (using password: NO) (SQL: select * from `users` where `email` = shunokawa@gmail.com limit 1) {"exception":"[object] (Illuminate\\Database\\QueryException(code: 1045): SQLSTATE[HY000] [1045] Access denied for user 'root'@'localhost' (using password: NO) (SQL: select * from `users` where `email` = shunokawa@gmail.com limit 1) at /Users/okawashun/test/vendor/laravel/framework/src/Illuminate/Database/Connection.php:671)
[stacktrace]
#0 /Users/okawashun/test/vendor/laravel/framework/src/Illuminate/Database/Connection.php(631): Illuminate\\Database\\Connection->runQueryCallback('select * from `...', Array, Object(Closure))
#1 /Users/okawashun/test/vendor/laravel/framework/src/Illuminate/Database/Connection.php(339): Illuminate\\Database\\Connection->run('select * from `...', Array, Object(Closure))
#2 /Users/okawashun/test/vendor/laravel/framework/src/Illuminate/Database/Query/Builder.php(2203): Illuminate\\Database\\Connection->select('select * from `...', Array, true)
        ・
        ・
        ・
正常に書き込まれていた場合作業完了となる。
参考文献