- 投稿日:2020-07-03T23:48:40+09:00
Zabbix4.4を構築してみた話
はじめに
Zabbixを触ってみたいなと思い、せっかくならGCPで、かつ構築した時点(2020年2月)でZabbix最新版の4.4で構築してみました。
構成
まずはZabbixサーバ用のインスタンスを作成します。
以下のように作成しました。
マシンスペックに関しては監視対象の数や登録する監視項目の数で必要なスペックが変わってきますが、
今回はテストなので適当です。
項目 内容 インスタンス名 zabbix-server リージョン us-central1 ゾーン us-central1-f マシンタイプ n1-standard-2(vCPU x 2、メモリ 7.5 GB) ブートディスク CentOS 7 IPアドレス 静的IPアドレスを作成 使用した環境は以下になります。
項目 内容 OS CentOS 7.7 ミドルウェア Apache
MariaDB
PHPZabbix server 4.4 Zabbix agent 4.4 手順
参考にさせていただいたサイト一覧
- Zabbix 公式ドキュメント
- QiitaのZabbix関連の記事
1. 必要なパッケージのインストール
Zabbixリポジトリの追加します。
新しいバージョンが公開されている場合は以下の公式リポジトリから確認してください。リポジトリ構成パッケージをインストールします。
$ rpm -Uvh https://repo.zabbix.com/zabbix/4.4/rhel/7/x86_64/zabbix-release-4.4-1.el7.noarch.rpm次に、前提として必要なパッケージをインストールしていきます。
phpについてはgroupinstallを使い関連パッケージも一緒にインストールします。# 必要パッケージのインストール $ yum install httpd $ yum install mariadb mariadb-server $ yum groupinstall php次にZabbixサーバに必要なパッケージをインストールします。
yes/noを何度か聞かれますがすべてyで進めてください。面倒でしたら発行コマンドに-yをつけて実行しますと、すべてyで実行されます。$ yum install zabbix-web-mysql zabbix-web-japanese zabbix-server-mysql2.もろもろ設定していく
まずはZabbix serverの設定から行います。
# 設定ファイルの編集 - 該当行のコメントアウトを外し、DBのパスワードを設定する
$ vi /etc/zabbix/zabbix_server.conf
以下変更内容
-------------------------------------------------
# DBPassword=
↓
DBPassword=xxxxxxxxxx <---ここに任意のパスワードを記載
-------------------------------------------------
次にDBの設定を行います。
# 自動起動設定を有効にする $ systemctl enable mariadb # サービスの起動 $ systemctl start mariadb # DBの初期設定を実施 # yes/noを何度か聞かれますがすべて[y]で進めてください。パスワードはzabbix_server.confで設定したものと同じものにしました。 $ mysql_secure_installation # DBへログイン $ mysql -u root -p <パスワード> # データベースzabbix文字セットutf8 collate utf8_binを作成します。 MariaDB [(none)]> CREATE DATABASE zabbix character set utf8 collate utf8_bin; MariaDB [(none)]> CREATE USER zabbix@localhost IDENTIFIED BY '<パスワード>'; MariaDB [(none)]> GRANT ALL ON zabbix.* TO zabbix@localhost; MariaDB [(none)]> quit ByeZabbix用のスキーマファイルをデータベースに読み込みます。
$ zcat /usr/share/doc/zabbix-server-mysql-4.4.*/create.sql.gz | mysql -u zabbix -p zabbix
Enter password:  ←DBユーザzabbixのパスワードを入力
SELinuxの設定を無効化し、OSを再起動します。
$ vi /etc/sysconfig/selinux
#変更箇所
SELINUX=enforcing
↓
SELINUX=disabled

#再起動
$ reboot
ファイアウォール設定(zabbixサーバ側)
$ firewall-cmd --add-port=10051/tcp --zone=public --permanent
success
$ firewall-cmd --add-service=http --zone=public --permanent
success
$ firewall-cmd --reload
success
Apacheの自動起動設定とサービス起動を行います。
$ systemctl enable httpd
$ systemctl start httpd
ざっくり最低限Zabbixサーバ側の設定は以上です。
3. 監視対象の設定
ここからは監視対象側での設定となります。
zabbix-agentのインストール
# Zabbixリポジトリの追加
$ rpm -Uvh https://repo.zabbix.com/zabbix/4.4/rhel/7/x86_64/zabbix-release-4.4-1.el7.noarch.rpm

$ yum install zabbix-agent
設定ファイルの編集
$ vi /etc/zabbix/zabbix_agentd.conf
# リモートコマンド監視の有効化, コメントアウトを外して、値を1に変更する
#以下変更箇所
# EnableRemoteCommands=0
↓
EnableRemoteCommands=1

# 監視を許可するサーバIPアドレス
# ZabbixサーバのIPアドレスに変更する
Server=127.0.0.1
↓
Server=xxx.xxx.xxx.xxx

# アクティブチェック監視データの送信先サーバIPアドレス
# ZabbixサーバのIPアドレスに変更する
ServerActive=127.0.0.1
↓
ServerActive=xxx.xxx.xxx.xxx

# OS上のホスト名ではなく、Zabbix監視設定上のホスト名なので注意
Hostname=Zabbix server
↓
Hostname=myhost01
zabbix-agentの自動起動設定とサービス起動を行います。
$ systemctl enable zabbix-agent

$ systemctl start zabbix-agent
ファイアウォール設定(被監視サーバ側)
$ firewall-cmd --add-port=10050/tcp --zone=public --permanent

$ firewall-cmd --add-source=<ここにZabbixサーバのIPアドレス> --zone=public --permanent

$ firewall-cmd --reload
ざっくり最低限Zabbix-agent側の設定は完了です。
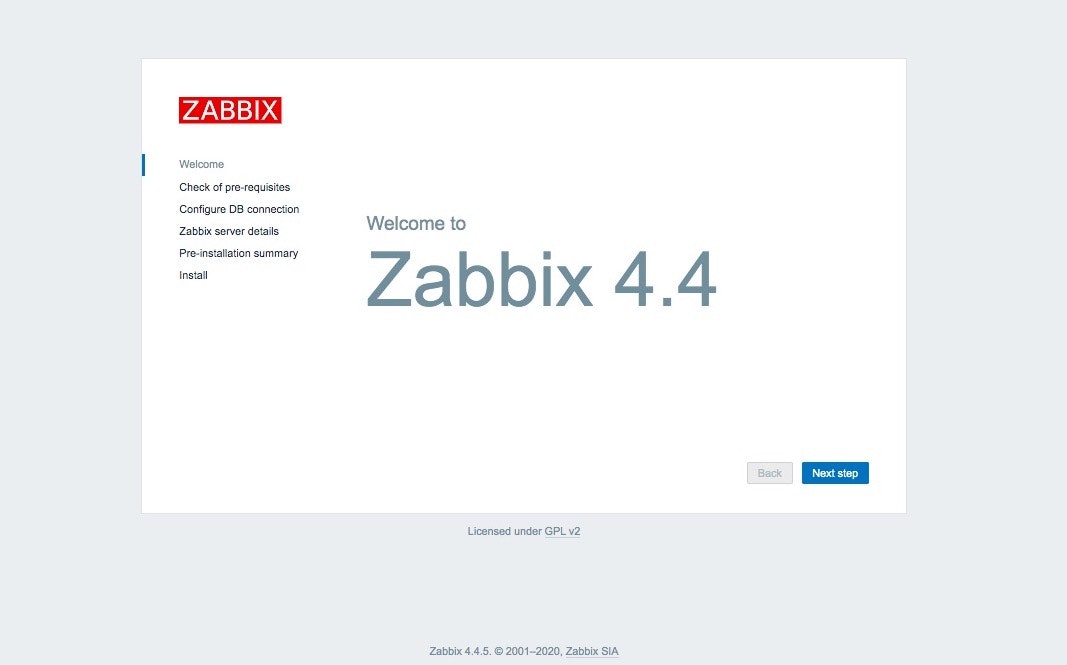
管理画面を見てみましょう!
http://ZabbixサーバのIPアドレス/zabbix/
画面の説明に沿って初期設定を進めていく
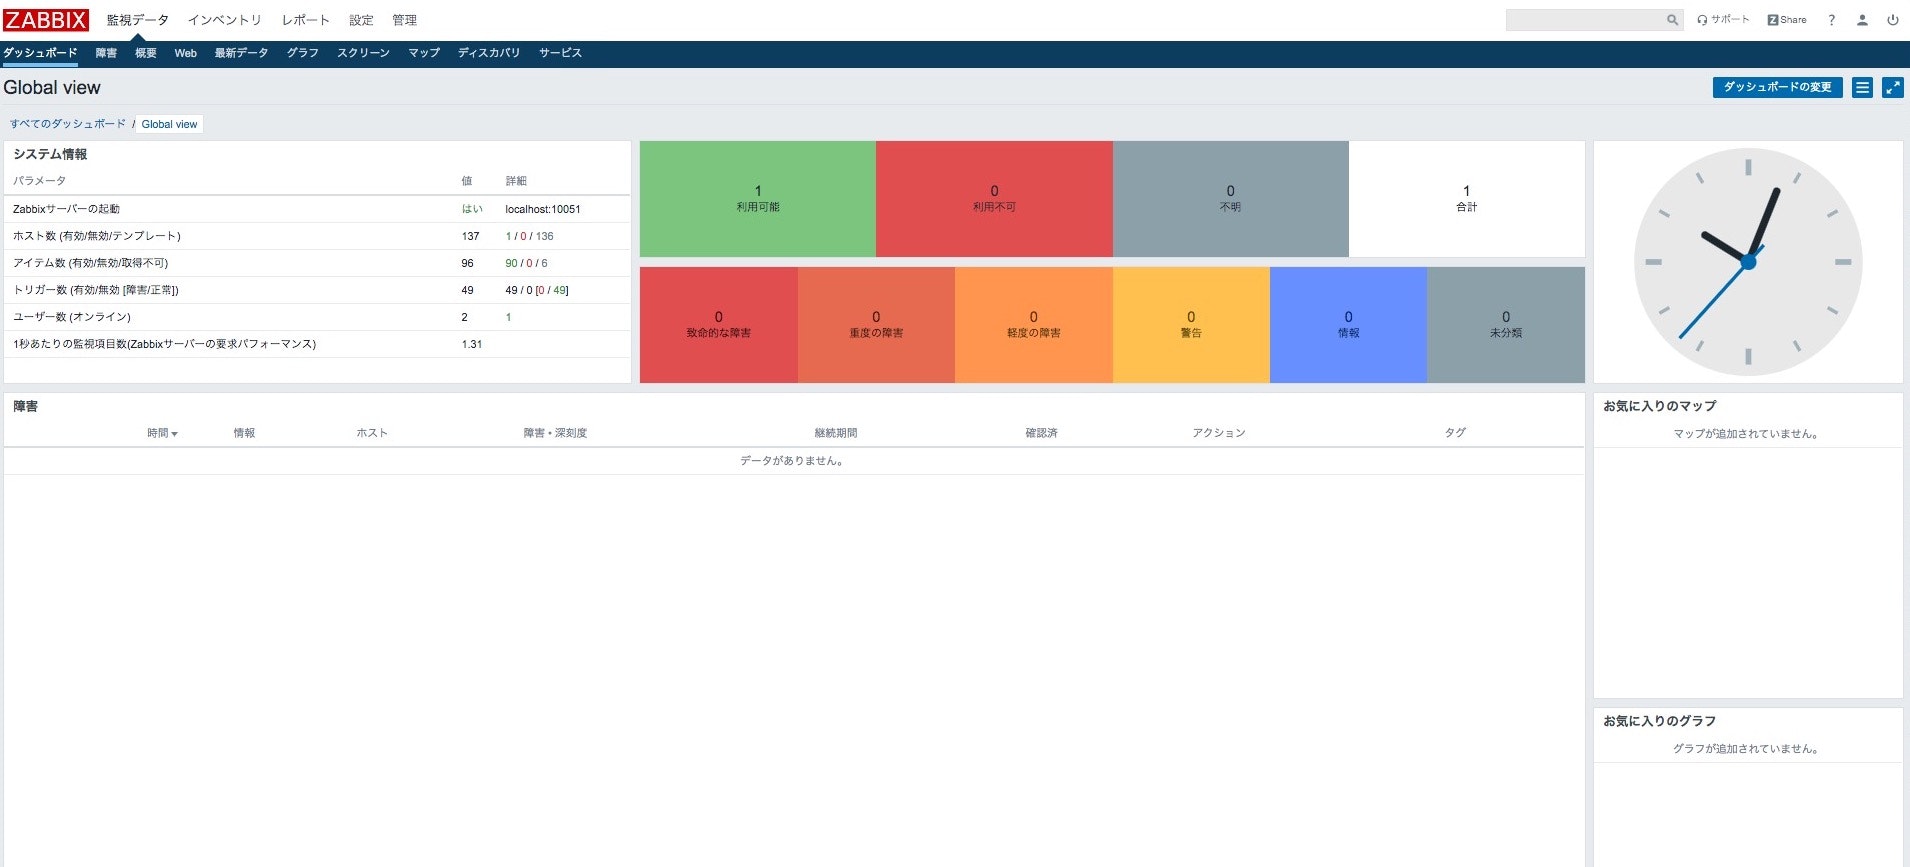
ダッシュボードが表示される事を確認、これで初期設定は完了です。
ここまでで監視が取れるまでの設定は完了です。お疲れ様でした。
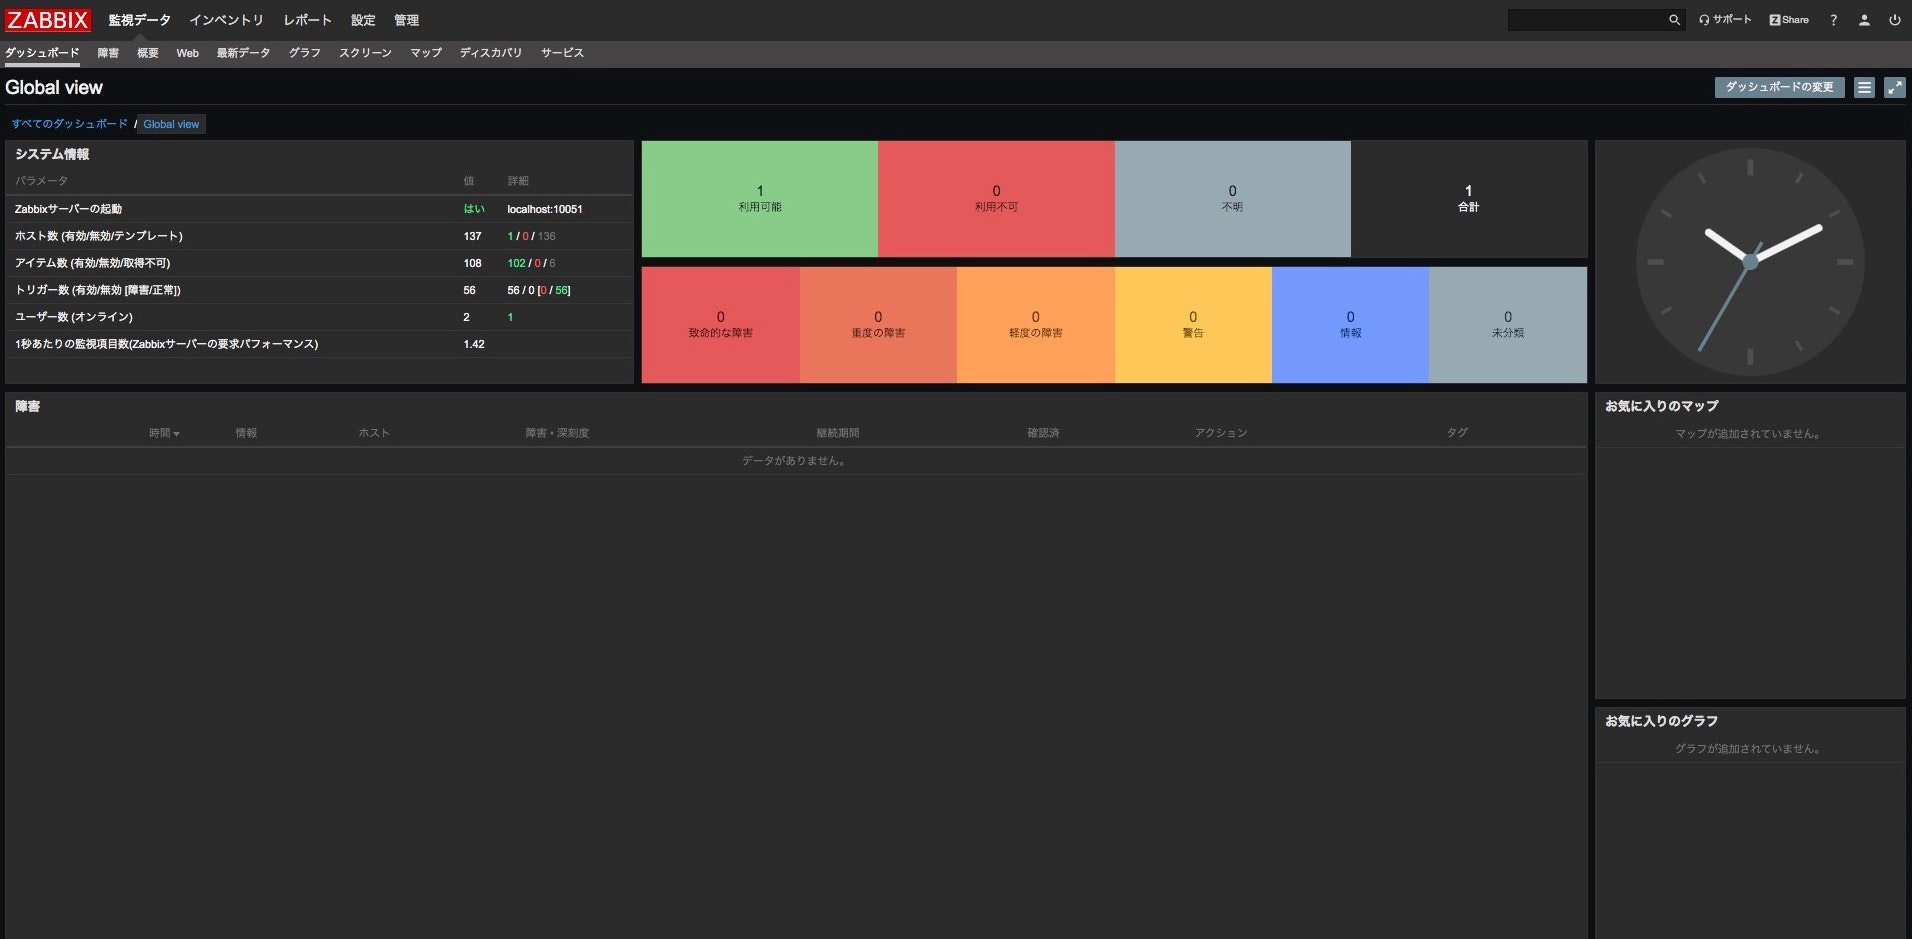
余談になりますが、個人的にはテーマは目に優しいダークテーマがおすすめです。
以下より設定が可能です。
ダッシュボードはこんな感じ
まとめ
このあと以前に構築したマイクラサーバとdiscord-bot用サーバを監視してみましたが、
Zabbixいいですね、かなり気に入りました^^Zabbixをもっと使えるように色々試して勉強していきたいと思いました。
それではまた!

- 投稿日:2020-07-03T19:13:00+09:00
CodeIgniterの環境構築
前提条件
以前書いた、PHP7.4の開発環境をUbuntuに構築する手順です。
これを参考に環境構築していただければと思います。CodeIgniterのインストール
まずはプロジェクトディレクトリに移動し、ubuntuを立ち上げる
次に、立ちあげたサーバーにssh接続$ vagrant up $ vagrant ssh公開ディレクトリに移動し、CodeIgniterをインストール
#公開ディレクトリの一つ上の階層に移動(デフォルトの公開ディレクトリは/var/www/html)
$ cd /var/www
$ ls
html

#CodeIgniterをインストール
$ wget https://codeload.github.com/bcit-ci/CodeIgniter/zip/3.1.11
$ ls
3.1.11  html

#インストールしたzip形式のcodeigniterを解凍するためにunzipコマンドをインストール
$ sudo apt install unzip

#zip形式のCodeIgniterを解凍
$ unzip 3.1.11
$ ls
3.1.11  CodeIgniter-3.1.11  html

#名前の変更(CodeIgniter-3.1.11 -> Codeigniter)
$ mv  CodeIgniter-3.1.11 Codeigniter

#不用になったzipファイルを削除
$ rm -rf 3.1.11
$ ls
Codeigniter html
CodeIgniterセットアップ
#index.phpを公開用のドキュメントルートに移動
$ mv Codeigniter/index.php html/
上記で移動した、index.phpを一部書き換える
Codeigniterのapplicationディレクトリ、systemディレクトリへのパスを下記のように変更
- $application_folder = '../Codeigniter/application';
- $system_path = '../Codeigniter/system';
index.php<?php /** * CodeIgniter * * An open source application development framework for PHP * * This content is released under the MIT License (MIT) * * Copyright (c) 2014 - 2019, British Columbia Institute of Technology * * Permission is hereby granted, free of charge, to any person obtaining a copy * of this software and associated documentation files (the "Software"), to deal * in the Software without restriction, including without limitation the rights * to use, copy, modify, merge, publish, distribute, sublicense, and/or sell * copies of the Software, and to permit persons to whom the Software is * furnished to do so, subject to the following conditions: * * The above copyright notice and this permission notice shall be included in * all copies or substantial portions of the Software. * * THE SOFTWARE IS PROVIDED "AS IS", WITHOUT WARRANTY OF ANY KIND, EXPRESS OR * IMPLIED, INCLUDING BUT NOT LIMITED TO THE WARRANTIES OF MERCHANTABILITY, * FITNESS FOR A PARTICULAR PURPOSE AND NONINFRINGEMENT. IN NO EVENT SHALL THE * AUTHORS OR COPYRIGHT HOLDERS BE LIABLE FOR ANY CLAIM, DAMAGES OR OTHER * LIABILITY, WHETHER IN AN ACTION OF CONTRACT, TORT OR OTHERWISE, ARISING FROM, * OUT OF OR IN CONNECTION WITH THE SOFTWARE OR THE USE OR OTHER DEALINGS IN * THE SOFTWARE. * * @package CodeIgniter * @author EllisLab Dev Team * @copyright Copyright (c) 2008 - 2014, EllisLab, Inc. (https://ellislab.com/) * @copyright Copyright (c) 2014 - 2019, British Columbia Institute of Technology (https://bcit.ca/) * @license https://opensource.org/licenses/MIT MIT License * @link https://codeigniter.com * @since Version 1.0.0 * @filesource */ /* *--------------------------------------------------------------- * APPLICATION ENVIRONMENT *--------------------------------------------------------------- * * You can load different configurations depending on your * current environment. Setting the environment also influences * things like logging and error reporting. * * This can be set to anything, but default usage is: * * development * testing * production * * NOTE: If you change these, also change the error_reporting() code below */ define('ENVIRONMENT', isset($_SERVER['CI_ENV']) ? $_SERVER['CI_ENV'] : 'development'); /* *--------------------------------------------------------------- * ERROR REPORTING *--------------------------------------------------------------- * * Different environments will require different levels of error reporting. * By default development will show errors but testing and live will hide them. */ switch (ENVIRONMENT) { case 'development': error_reporting(-1); ini_set('display_errors', 1); break; case 'testing': case 'production': ini_set('display_errors', 0); if (version_compare(PHP_VERSION, '5.3', '>=')) { error_reporting(E_ALL & ~E_NOTICE & ~E_DEPRECATED & ~E_STRICT & ~E_USER_NOTICE & ~E_USER_DEPRECATED); } else { error_reporting(E_ALL & ~E_NOTICE & ~E_STRICT & ~E_USER_NOTICE); } break; default: header('HTTP/1.1 503 Service Unavailable.', TRUE, 503); echo 'The application environment is not set correctly.'; exit(1); // EXIT_ERROR } /* *--------------------------------------------------------------- * SYSTEM DIRECTORY NAME *--------------------------------------------------------------- * * This variable must contain the name of your "system" directory. * Set the path if it is not in the same directory as this file. */ $system_path = '../Codeigniter/system'; /* *--------------------------------------------------------------- * APPLICATION DIRECTORY NAME *--------------------------------------------------------------- * * If you want this front controller to use a different "application" * directory than the default one you can set its name here. The directory * can also be renamed or relocated anywhere on your server. If you do, * use an absolute (full) server path. * For more info please see the user guide: * * https://codeigniter.com/user_guide/general/managing_apps.html * * NO TRAILING SLASH! */ $application_folder = '../Codeigniter/application'; /* *--------------------------------------------------------------- * VIEW DIRECTORY NAME *--------------------------------------------------------------- * * If you want to move the view directory out of the application * directory, set the path to it here. The directory can be renamed * and relocated anywhere on your server. If blank, it will default * to the standard location inside your application directory. * If you do move this, use an absolute (full) server path. * * NO TRAILING SLASH! */ $view_folder = ''; /* * -------------------------------------------------------------------- * DEFAULT CONTROLLER * -------------------------------------------------------------------- * * Normally you will set your default controller in the routes.php file. * You can, however, force a custom routing by hard-coding a * specific controller class/function here. For most applications, you * WILL NOT set your routing here, but it's an option for those * special instances where you might want to override the standard * routing in a specific front controller that shares a common CI installation. * * IMPORTANT: If you set the routing here, NO OTHER controller will be * callable. In essence, this preference limits your application to ONE * specific controller. Leave the function name blank if you need * to call functions dynamically via the URI. * * Un-comment the $routing array below to use this feature */ // The directory name, relative to the "controllers" directory. Leave blank // if your controller is not in a sub-directory within the "controllers" one // $routing['directory'] = ''; // The controller class file name. Example: mycontroller // $routing['controller'] = ''; // The controller function you wish to be called. // $routing['function'] = ''; /* * ------------------------------------------------------------------- * CUSTOM CONFIG VALUES * ------------------------------------------------------------------- * * The $assign_to_config array below will be passed dynamically to the * config class when initialized. This allows you to set custom config * items or override any default config values found in the config.php file. * This can be handy as it permits you to share one application between * multiple front controller files, with each file containing different * config values. * * Un-comment the $assign_to_config array below to use this feature */ // $assign_to_config['name_of_config_item'] = 'value of config item'; // -------------------------------------------------------------------- // END OF USER CONFIGURABLE SETTINGS. DO NOT EDIT BELOW THIS LINE // -------------------------------------------------------------------- /* * --------------------------------------------------------------- * Resolve the system path for increased reliability * --------------------------------------------------------------- */ // Set the current directory correctly for CLI requests if (defined('STDIN')) { chdir(dirname(__FILE__)); } if (($_temp = realpath($system_path)) !== FALSE) { $system_path = $_temp.DIRECTORY_SEPARATOR; } else { // Ensure there's a trailing slash $system_path = strtr( rtrim($system_path, '/\\'), '/\\', DIRECTORY_SEPARATOR.DIRECTORY_SEPARATOR ).DIRECTORY_SEPARATOR; } // Is the system path correct? if ( ! is_dir($system_path)) { header('HTTP/1.1 503 Service Unavailable.', TRUE, 503); echo 'Your system folder path does not appear to be set correctly. Please open the following file and correct this: '.pathinfo(__FILE__, PATHINFO_BASENAME); exit(3); // EXIT_CONFIG } /* * ------------------------------------------------------------------- * Now that we know the path, set the main path constants * ------------------------------------------------------------------- */ // The name of THIS file define('SELF', pathinfo(__FILE__, PATHINFO_BASENAME)); // Path to the system directory define('BASEPATH', $system_path); // Path to the front controller (this file) directory define('FCPATH', dirname(__FILE__).DIRECTORY_SEPARATOR); // Name of the "system" directory define('SYSDIR', basename(BASEPATH)); // The path to the "application" directory if (is_dir($application_folder)) { if (($_temp = realpath($application_folder)) !== FALSE) { $application_folder = $_temp; } else { $application_folder = strtr( rtrim($application_folder, '/\\'), '/\\', DIRECTORY_SEPARATOR.DIRECTORY_SEPARATOR ); } } elseif (is_dir(BASEPATH.$application_folder.DIRECTORY_SEPARATOR)) { $application_folder = BASEPATH.strtr( trim($application_folder, '/\\'), '/\\', DIRECTORY_SEPARATOR.DIRECTORY_SEPARATOR ); } else { header('HTTP/1.1 503 Service Unavailable.', TRUE, 503); echo 'Your application folder path does not appear to be set correctly. Please open the following file and correct this: '.SELF; exit(3); // EXIT_CONFIG } define('APPPATH', $application_folder.DIRECTORY_SEPARATOR); // The path to the "views" directory if ( ! isset($view_folder[0]) && is_dir(APPPATH.'views'.DIRECTORY_SEPARATOR)) { $view_folder = APPPATH.'views'; } elseif (is_dir($view_folder)) { if (($_temp = realpath($view_folder)) !== FALSE) { $view_folder = $_temp; } else { $view_folder = strtr( rtrim($view_folder, '/\\'), '/\\', DIRECTORY_SEPARATOR.DIRECTORY_SEPARATOR ); } } elseif (is_dir(APPPATH.$view_folder.DIRECTORY_SEPARATOR)) { $view_folder = APPPATH.strtr( trim($view_folder, '/\\'), '/\\', DIRECTORY_SEPARATOR.DIRECTORY_SEPARATOR ); } else { header('HTTP/1.1 503 Service Unavailable.', TRUE, 503); echo 'Your view folder path does not appear to be set correctly. Please open the following file and correct this: '.SELF; exit(3); // EXIT_CONFIG } define('VIEWPATH', $view_folder.DIRECTORY_SEPARATOR); /* * -------------------------------------------------------------------- * LOAD THE BOOTSTRAP FILE * -------------------------------------------------------------------- * * And away we go... */ require_once BASEPATH.'core/CodeIgniter.php';確認
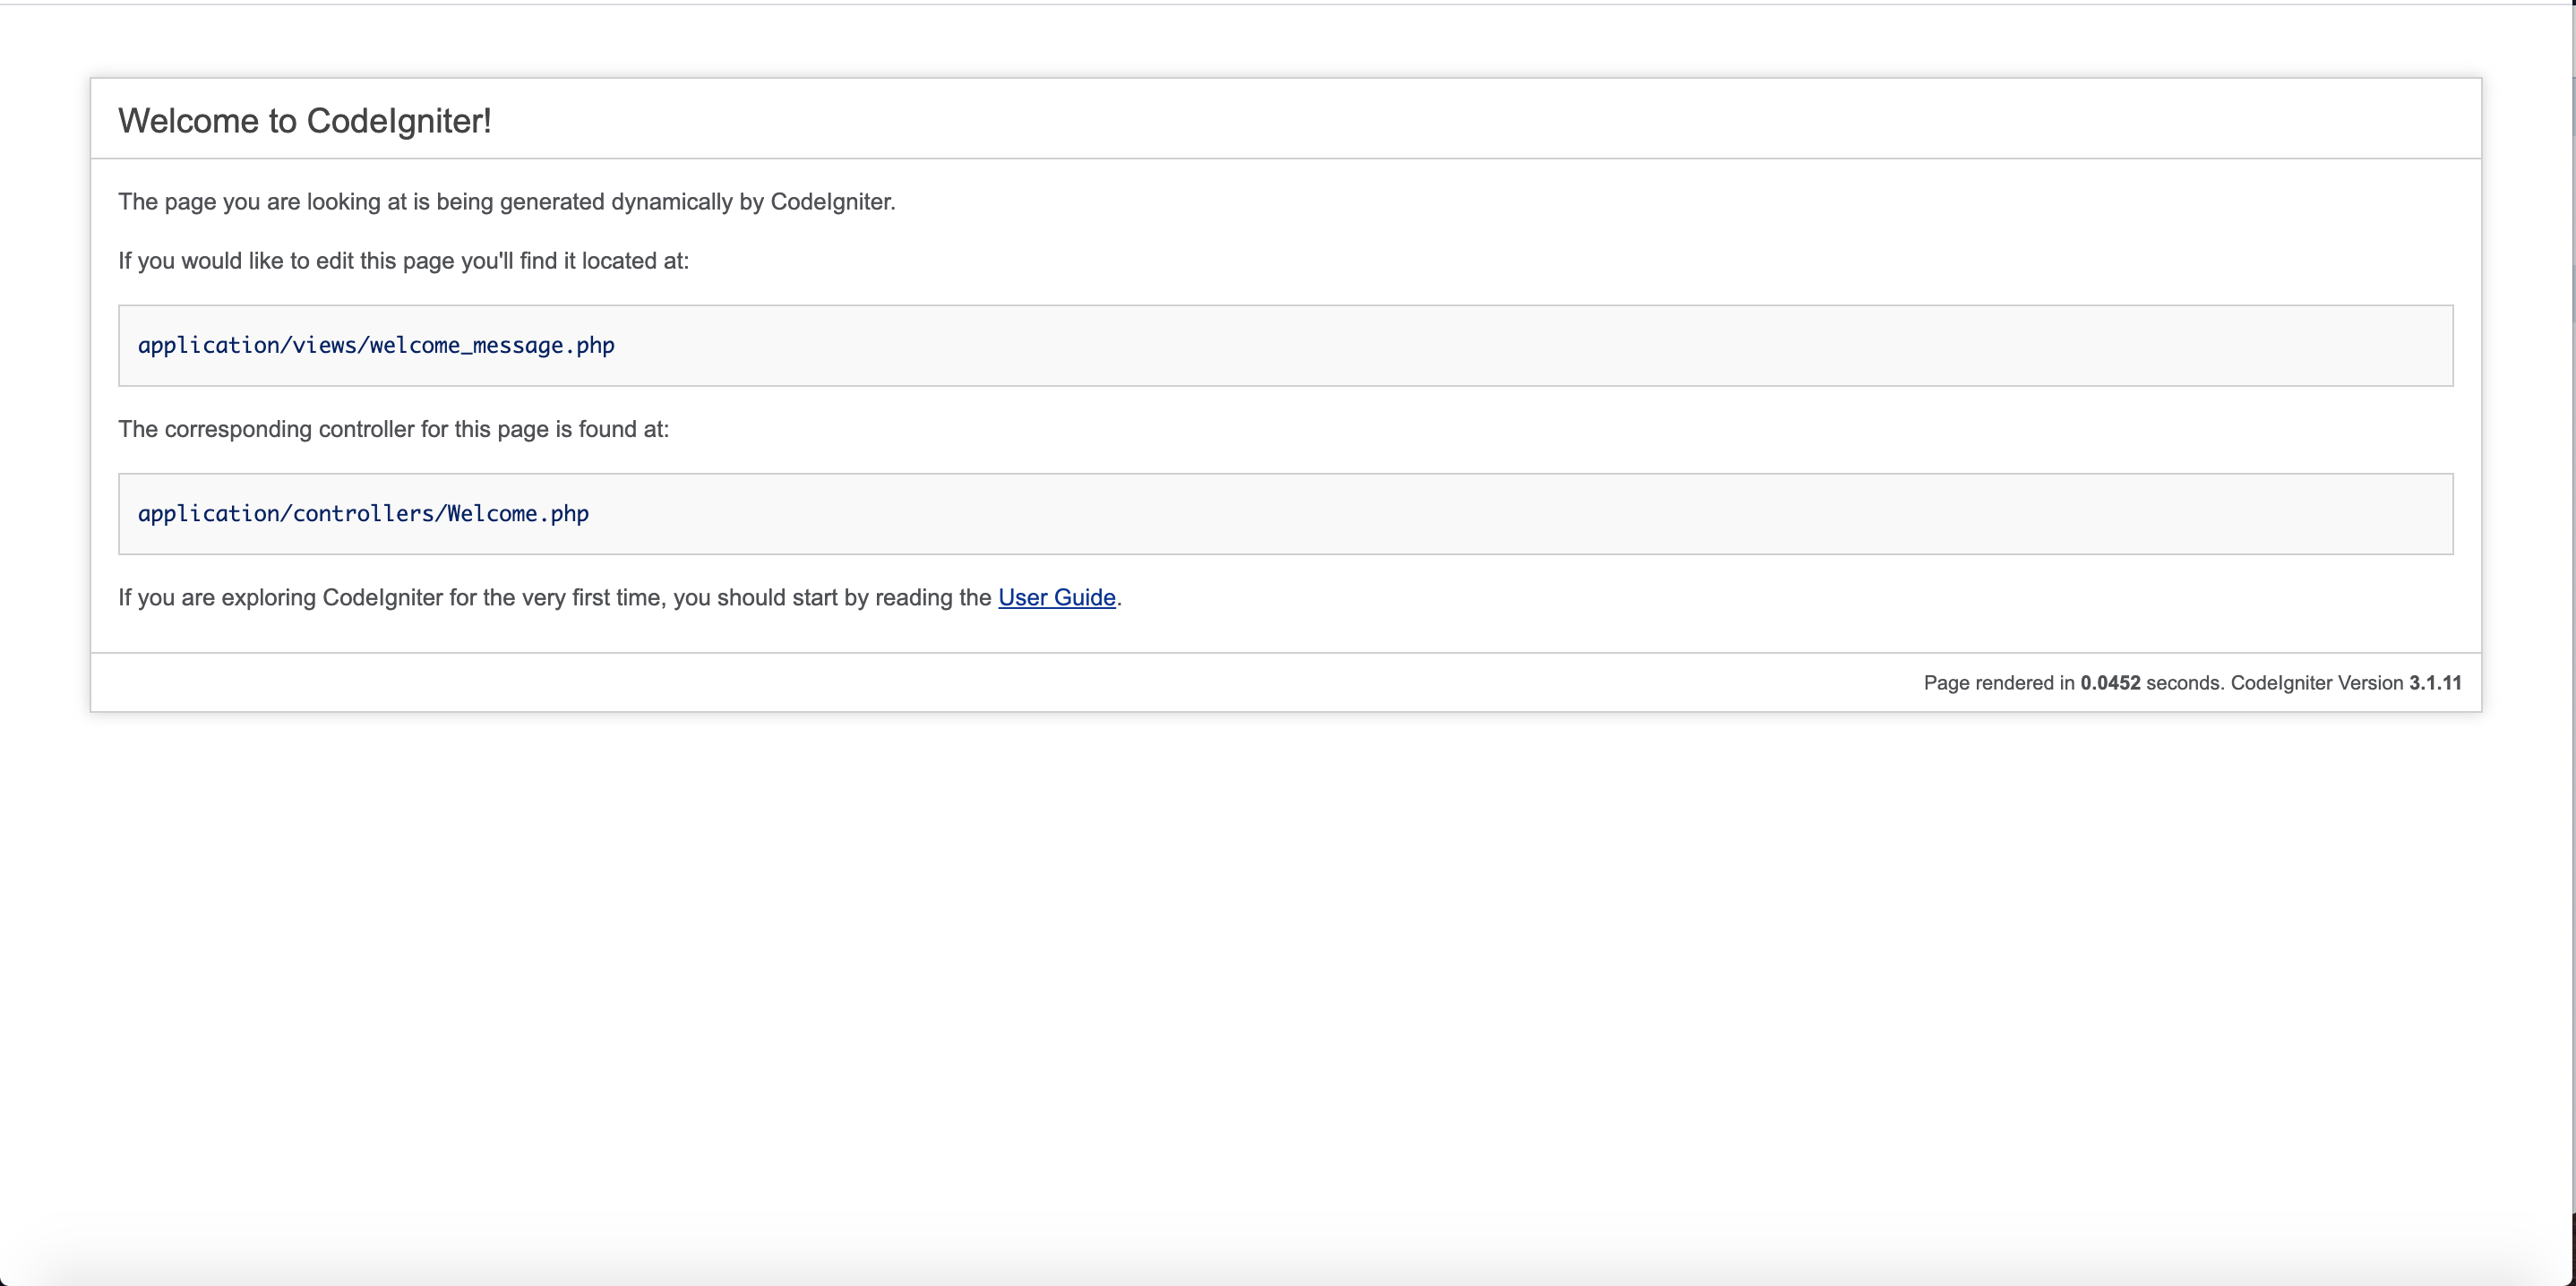
下記載にアクセルしてCodeIgniterが表示されれば完了
下は最初にvagrantで設定済み
http://192.168.33.10
- 投稿日:2020-07-03T16:35:14+09:00
.bash_profileと.bashrcの使い方
前提
ユーザがLinuxにログインすると、以下の順番で実行される
1
.bash_profile
2.bashrc.bash_profile
ログイン時に1回だけ実行したいときに、ここに書く。
.bashrc
シェルを起動するたびに実行したいときに、ここに書く。
エイリアス(ショートカットコマンド)を設定するときは、.bashrcに記述する。
.bashrc# example -------------- Git Aliases -------------- alias gaa='git add .' alias gcm='git commit -m' alias gl='git log' alias gs='git status' alias gpom='git push origin master' alias gpfom='git push -f origin master'参考サイト
.bash_profileと.bashrcについて
本当に正しい .bashrc と .bash_profile の使ひ分け以上
- 投稿日:2020-07-03T15:17:10+09:00
公開鍵を用いたssh接続
はじめに
理屈をちゃんと理解していないからよく忘れて、何度も調べるパスワードなしのssh接続。
この投稿は、過去に諸先輩方がアップしてくれた分かりやすいサイトの内容を、自分が把握しやすいように再構成しただけです。
先輩の皆様ありがとうございます。やりたいこと
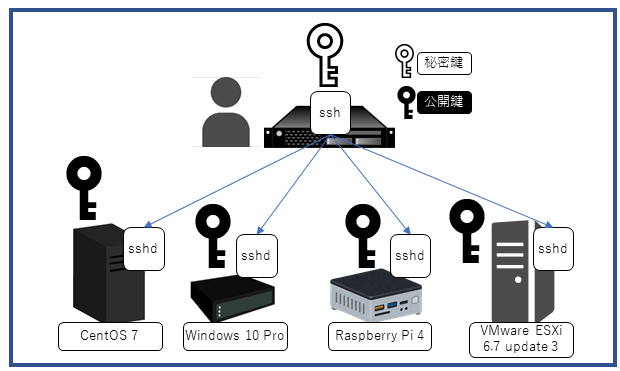
一台のマシンから複数台のマシン/さまざまなOSにssh接続するとき、パスワードを打ち込まないでアクセスしたい。
単純なログインの簡略化ではなく、リモートコマンドを実行することを念頭に、公開鍵を利用した接続手順をまとめる。今回想定している構成は以下。
【接続元】
マシン IPアドレス Linux(CentOS) 192.168.10.100 【接続先】
マシン IPアドレス Linux(CentOS) 192.168.10.101 VMware ESXi 192.168.10.200 Windows 10 Pro 192.168.10.201 1. 接続元で秘密鍵と公開鍵を生成
接続元のサーバで、秘密鍵と公開鍵のペアを作成し、公開鍵を接続先に渡す。基本はこれだけ。
なので、まず接続元のサーバにログインして鍵のペアを作る。
rootユーザで接続元Linuxにログインする。そして以下のコマンドで鍵を生成する。rsaで鍵を作る場合は特に指定は必要ない。# ssh-keygen Generating public/private rsa key pair. Enter file in which to save the key (/root/.ssh/id_rsa): Enter passphrase (empty for no passphrase): Enter same passphrase again: Your identification has been saved in /root/.ssh/id_rsa. Your public key has been saved in /root/.ssh/id_rsa.pub. The key fingerprint is: SHA256:xxxxxxxxxxxxxxxxxxxxxxxxxxxxxxxxxxxxx root@hostnamekeyの保管先ファイルとパスフレーズを設定するよう求められる。
鍵のできる場所はデフォルトの/root/.ssh/id_rsaでいいので、単純にEnterキーを押す。
のちのち自動化処理に使いたいので、パスフレーズは空で。単純にEnterキーを押す。鍵が生成されたことを確認する。
# cd .ssh
# ls
id_rsa  id_rsa.pub  known_hosts
秘密鍵:id_rsaと公開鍵:id_rsa.pubができている。2. 接続先設定:Linux編
まず、Linux(CentOS 7)の場合の手順。接続先Linuxサーバのsshdが有効になっていることが前提。
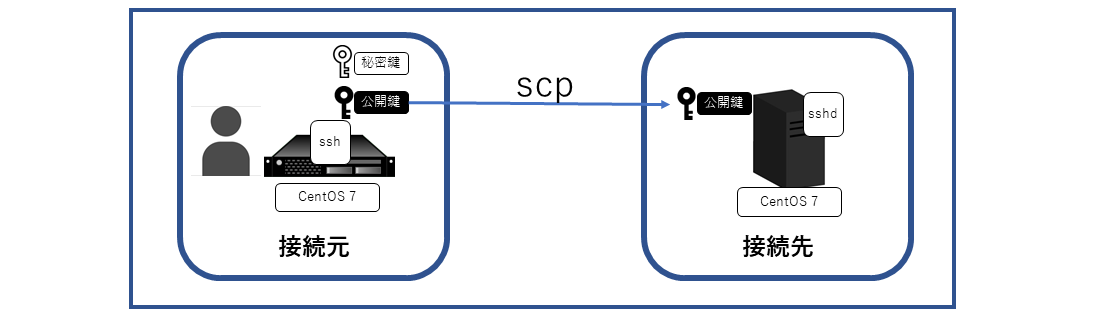
公開鍵の配布
接続元で作った公開鍵を接続先Linuxに渡す。
鍵の受け渡しには、scpを使った。もちろんこの段階では公開鍵を使った設定をしていないのでパスワードを入力する。
接続元で実行# scp /root/.ssh/id_rsa.pub root@192.168.10.101:/root/接続先のLinuxにrootでログインして、受け渡した公開鍵を.ssh/authorized_keysに追記する。
接続先で実行# mkdir .ssh # chmod 700 .ssh # cat id_rsa.pub >> .ssh/authorized_keys # rm id_rsa.pubsshd設定変更とサービスの再起動
接続先のsshd_configを一部修正する。
接続先で実行# vi /etc/ssh/sshd_config公開鍵認証に関する一か所だけ変更する。実際には先頭に#がついてるのを外すだけ。
接続先で実行PubkeyAuthentication yes書き換えたら、サービスを再起動する。
# systemctl restart sshdこれで、接続元Linuxから接続先Linuxへのsshアクセスの際に、パスワードを聞かれずに接続できる。
3. 接続先設定:VMware ESXi編
次に、VMware ESXi 6.7 update 3の場合の設定。
ESXiのsshdサービスの有効化
ESXiのsshdサービスはデフォルトで無効化されているので、これを有効化する。
- ブラウザを開き、対象のESXiにアクセスする。
- ホスト>管理>サービスを開く。
- TSM-SSHを選択し、アクションをクリック。
- ポリシーを選択し、
ホストと連動して起動および停止しますを選ぶ。- TSM-SSHを選択したままにして、
起動ボタンをクリックする。これでsshdサービスは立ち上がり、次回以降ESXiを再起動した際もsshdサービスが上がってくる。
公開鍵の配布
接続元で作った公開鍵を接続先ESXiに渡す。ここでもscpで渡す。
sh:接続元で実行
# scp /root/.ssh/id_rsa.pub root@192.168.10.200:/
接続先のESXiにrootでsshログインして、受け渡した公開鍵を/etc/ssh/keys-root/authorized_keysに追記する。
接続先(ESXi)で実行~] cat id_rsa.pub >> /etc/ssh/keys-root/authorized_keysESXiはサービスの再起動は必要ない。これで終わり。
4. 接続先設定:Windows 10 Pro
機能の追加
Windows 10 バージョン1803以降であれば、sshdサービスを追加できる。追加方法は以下の通り。
- スタートメニューを右クリック>
設定をクリック。- Windowsの設定>
アプリをクリック。- アプリと機能にある
オプション機能をクリック。機能の追加をクリック。OpenSSHサーバーを選択し、インストールボタンが表示されるのでクリック。- 画面右上の×ボタンで閉じる。
Windows 10 Proのsshdサービスの有効化
インストールしただけではサービスが有効化されていないので、以下の方法で有効化する。
- 検索ボックスに「サービス」と入力して検索。
サービス画面を開く。- サービス名:
OpenSSH SSH Serverを探し、プロパティを開く。- スタートアップの種類:
自動を選択し、適用ボタンとOKボタンをクリック。公開鍵の配布
接続元で作った公開鍵をこれまたscpを使って接続先のWindows 10に渡す。
なおWindows 10上のユーザー名はTechとする。接続元で実行# scp /root/.ssh/id_rsa.pub Tech@192.168.10.201:/これでWindows 10に公開鍵がコピーできたので、今度はWindows 10側で操作する。
PowerShellを開き、受取った公開鍵をユーザーのホームは以下にある.ssh/authorized_keysに書き込む。接続先(Windows10)で実行> mkdir .ssh > cat C:\id_rsa.pub >> .ssh/authorized_keyssshdサービスの設定変更とサービスの再起動
設定ファイルは、
C:\ProgramData\ssh\sshd_conf。最初、どこにあるか探してしまった。。。
このファイルの中で、1か所コメントを外して、2か所コメント化する。
具体的には公開鍵認証を有効化する設定と、AuthorizedKeyのファイルはローカルの配下にあるものだけを使う設定。オリジナル#PubkeyAuthentication yes (省略) Match Group administrators AuthorizedKeysFile __PROGRAMDATA__/ssh/administrators_authorized_keys↓
変更後PubkeyAuthentication yes (省略) #Match Group administrators # AuthorizedKeysFile __PROGRAMDATA__/ssh/administrators_authorized_keysこの後、sshdサービスを再起動する。
これでWindowsにもパスワードなしでssh接続ができるようになった。
参考にしたサイト
https://qiita.com/Tanaaaaan/items/50c3f0ddc15c40b750d2
https://sig9.hatenablog.com/entry/2015/05/27/185218
http://ttm.jimba.ddo.jp/adiary.cgi/teraterm/0147
https://www.atmarkit.co.jp/ait/articles/1903/28/news005.html
- 投稿日:2020-07-03T14:29:06+09:00
grepコマンド
ついに昨日で途切れてしまった連続記録。。
続けることが大事だけど、それで止めるのはよくないので気を取り直して再スタート。grepコマンドとは
・ファイルの中で「文字列(パターン)」が含まれている行を表示するコマンド
・検索対象には、複数のファイルやディレクトリを指定できる
・ファイルを指定しなかった場合は、標準入力から読み込む
※パイプ(|)と組み合わせて、他のコマンドの出力結果から必要な箇所だけを絞り込んで表示する際によく使われる代表的なオプション
・-c:マッチした行数のみ表示
・-v:マッチしなかった行数のみ表示
・-n:先頭に行番号をつけてマッチした行を表示
・-f:検索パターンからファイルを読み込む
・-i:大文字と小文字を区別しない
・-E:egrepと同様(拡張正規表現)
・-F:fgrepと同様(検索パターンエオ固定文字列)以上。
- 投稿日:2020-07-03T13:05:50+09:00
Allwinner F1C100S/200S について下調べ
F1C100S/200S とは
Alliwinner の超安Soc。
メモリ32M(F1C100S) ないし 64M(F1C200S)が内蔵されている。外付けのストレージデバイス、電源、シリアルやUSBなどのI/O、コンデンサぐらいを接続するだけで、Linux を動かすことができる。F1C200 は Aliexpressだと3〜400円ぐらいから、F1C100Sでなおかつ Taobao だと 100円ぐらいから入手可能。
(キャプチャー上の値段は元表記)Arduinoを元に、オレオレ基板をつくることがよくされている。F1C100S/200Sを使うと Linux のオレオレ基板をさくっと作ることができるようになるのではないか?
基板を作ってみるために、下調べ。公式ページ
http://www.allwinnertech.com/index.php?c=product&a=index&id=74製品比較
http://www.allwinnertech.com/index.php?c=product&a=index&pid=4
Linux Sunxi (ユーザーコミュニティ)
https://linux-sunxi.org/Main_PageLinux Sunxiで公開されているデータシート
- https://linux-sunxi.org/images/b/ba/F1C100s_Datasheet_V1.0.pdf
- https://linux-sunxi.org/images/1/11/Allwinner_F1C200s_Datasheet_V1.0.pdf
F1C100S
F1C200Sとの違いは
F1C100Sを使った事例
- Sipeed Lichee Nano
公式ページ? http://nano.lichee.pro/
SwitchScience の販売ページ https://www.switch-science.com/catalog/5705/
回路図など https://dl.sipeed.com/LICHEE/Nano/HDK@sat0ken さんの記事 「Lichee Pi Nano をはじめてみる」
https://qiita.com/sat0ken/items/bdbe149c91349a892013
- Linux名刺
回路図 https://www.thirtythreeforty.net/posts/2019/12/my-business-card-runs-linux/businesscard.pdf
- PocketGo
http://nuneno.cocolog-nifty.com/blog/2020/03/index.html
Allwinner
https://www.slideshare.net/shimadah/allwinneros-65719676
@shimadah さんの「AllwinnerタブレットのOSを作ってみる(中編)」
- Allwinnerやタブレットメーカーは、GPL違反を繰り返している
- ベンダーのKernelにはBackdoorが入っているのではないか?という話がある
- "Allwinner has also been accused of including a backdoor in its published version of the Linux kernel."
- https://en.wikipedia.org/wiki/Allwinner_Technology
今の所 F1C100S/200S ではGPL違反などは確認されていない。


- 投稿日:2020-07-03T13:05:50+09:00
Allwinner F1C100s/200s について下調べ
F1C100s/200s とは
Alliwinner の超安 Soc 。
メモリ32M(F1C100s) ないし 64M(F1C200s)が内蔵されている。これに以下の部品を追加するだけで、Linux を動かすことができる。
- ストレージとして eMMC チップや SDカード
- 電源
- シリアルやUSBなどのI/O
- コンデンサ
F1C200s は Aliexpressだと3〜400円ぐらいから、F1C100sでなおかつ Taobao だと 100円ぐらいから入手可能。
(キャプチャー上の値段は中国元表記、2020/07/03現在 15〜16円/元)Makers 界隈では Arduino を元にして、オレオレ基板をつくることがよく行われている。ATMEGA32 チップを使って基板を作るのは CAD 体験としても はんだづけ体験としても、Makers 入門に最適だ。
同じように、F1C100s/200s を使うと Linux の動作するオレオレ基板をさくっと作ることができるようになるのではないか?基板を作ってみるために、下調べ。
公式ページ
http://www.allwinnertech.com/index.php?c=product&a=index&id=74製品比較
http://www.allwinnertech.com/index.php?c=product&a=index&pid=4
上記にはeLQFP128 とあるが、QFN88の間違いLinux Sunxi (ユーザーコミュニティ)
https://linux-sunxi.org/Main_PageLinux Sunxiで公開されているデータシート
- https://linux-sunxi.org/images/b/ba/F1C100s_Datasheet_V1.0.pdf
- https://linux-sunxi.org/images/1/11/Allwinner_F1C200s_Datasheet_V1.0.pdf
違い
F1C100s と F1C200s は以下のような違いがある。
F1C100s F1C200s オンチップメモリ 32MB 64MB Video Playback 720p 1080p F1C100Sを使った事例
- Sipeed Lichee Nano
公式ページ? http://nano.lichee.pro/
SwitchScience の販売ページ https://www.switch-science.com/catalog/5705/
回路図など https://dl.sipeed.com/LICHEE/Nano/HDK@sat0ken さんの記事 「Lichee Pi Nano をはじめてみる」
https://qiita.com/sat0ken/items/bdbe149c91349a892013
- Linux名刺
回路図 https://www.thirtythreeforty.net/posts/2019/12/my-business-card-runs-linux/businesscard.pdf
- PocketGo
http://nuneno.cocolog-nifty.com/blog/2020/03/index.html
Allwinner
https://www.slideshare.net/shimadah/allwinneros-65719676
@shimadah さんの「AllwinnerタブレットのOSを作ってみる(中編)」
- Allwinnerやタブレットメーカーは、GPL違反を繰り返している
- ベンダーのKernelにはBackdoorが入っているのではないか?という話がある
- "Allwinner has also been accused of including a backdoor in its published version of the Linux kernel."
- https://en.wikipedia.org/wiki/Allwinner_Technology
今の所 F1C100S/200S ではGPL違反などは確認されていない。
- 投稿日:2020-07-03T03:55:37+09:00
gcc で 0文字でセグフォらせる
はじめに
流行ってるネタへの便乗です。
手っ取り早く実演
動作確認環境として x86-64 Ubuntu 19.04 + gcc 8.3.0 を使用しています。ソースコードは不要なので、読み出すと EOF を返す
/dev/nullで代用しています。ビルドと実行$ gcc -zexecstack -nostdlib -Wl,-Ttext=0x2504890000 -Wl,-e0xfa -xc /dev/null && ./a.out Segmentation fault (core dumped) $解説
先のコマンドで生成した a.out の先頭をダンプしたのが下記です。
$ hexdump -C a.out | head -16
00000000  7f 45 4c 46 02 01 01 00  00 00 00 00 00 00 00 00  |.ELF............|
00000010  03 00 3e 00 01 00 00 00  fa 00 00 00 00 00 00 00  |..>.............|
00000020  40 00 00 00 00 00 00 00  28 22 00 00 00 00 00 00  |@.......("......|
00000030  00 00 00 00 40 00 38 00  09 00 40 00 0c 00 0b 00  |....@.8...@.....|
00000040  06 00 00 00 04 00 00 00  40 00 00 00 00 00 00 00  |........@.......|
00000050  40 00 00 00 00 00 00 00  40 00 00 00 00 00 00 00  |@.......@.......|
00000060  f8 01 00 00 00 00 00 00  f8 01 00 00 00 00 00 00  |................|
00000070  08 00 00 00 00 00 00 00  03 00 00 00 04 00 00 00  |................|
00000080  38 02 00 00 00 00 00 00  38 02 00 00 00 00 00 00  |8.......8.......|
00000090  38 02 00 00 00 00 00 00  1c 00 00 00 00 00 00 00  |8...............|
000000a0  1c 00 00 00 00 00 00 00  01 00 00 00 00 00 00 00  |................|
000000b0  01 00 00 00 04 00 00 00  00 00 00 00 00 00 00 00  |................|
000000c0  00 00 00 00 00 00 00 00  00 00 00 00 00 00 00 00  |................|
000000d0  b1 02 00 00 00 00 00 00  b1 02 00 00 00 00 00 00  |................|
000000e0  00 10 00 00 00 00 00 00  01 00 00 00 04 00 00 00  |................|
000000f0  00 10 00 00 00 00 00 00  00 00 89 04 25 00 00 00  |............%...|
00000100  00 00 89 04 25 00 00 00  00 00 00 00 00 00 00 00  |....%...........|
$
ELF ファイルのヘッダとなっております。
00000018 からの 8バイト fa 00 00 00 00 00 00 00 がエントリとなっており、000000fa からの 7バイト 89 04 25 00 00 00 00 が実行される命令となっています。この 7バイトを逆アセンブルすると逆アセンブル000000fa 89 04 25 00 00 00 mov dword ptr [0], eax 00000100 00という内容で、要は 0番地に EAX レジスタの値を書き込むというものです。結果セグフォが発生します。
通常の ELF ファイルではヘッダとは別のセクションに命令が配置されるのでヘッダ中に飛び込むようなことはしませんが、今回の例ではリンカへの指示(-Wl,-Ttext=0x2504890000)で配置アドレスを調整することでセクションヘッダ中に任意のバイト列を設け、エントリアドレスを指定(-Wl,-e0xfa)することでそのバイト列を実行しています。
応用として、ちょっと変えると違うエラーも出せますよ。
ビルドと実行$ gcc -zexecstack -nostdlib -Wl,-Ttext=0xcc0000 -Wl,-e0xfa -xc /dev/null && ./a.out Trace/breakpoint trap (core dumped) $逆アセンブル000000fa cc int3ビルドと実行$ gcc -zexecstack -nostdlib -Wl,-Ttext=0x0b0f0000 -Wl,-e0xfa -xc /dev/null && ./a.out Illegal instruction (core dumped) $逆アセンブル000000fa 0f 0b ud2ビルドと実行$ gcc -zexecstack -nostdlib -Wl,-Ttext=0x35f60000 -Wl,-e0xfa -xc /dev/null && ./a.out Floating point exception (core dumped) $逆アセンブル000000fa f6 35 00 00 00 00 div byte ptr 0x100[rip] 00000100 00 db 0x00おわりに
おわりです。