- 投稿日:2020-05-21T16:58:03+09:00
ConstraintLayoutでNegativeMarginを入れたい
NegativeMargin用のSpaceを追加し、そのSpaceに対して参照をつければ実現できる。
negative_margin_contraint_layout.xml<?xml version="1.0" encoding="utf-8"?> <androidx.constraintlayout.widget.ConstraintLayout xmlns:android="http://schemas.android.com/apk/res/android" xmlns:app="http://schemas.android.com/apk/res-auto" android:layout_width="match_parent" android:layout_height="wrap_content"> <ImageView android:id="@+id/imageView" android:layout_width="wrap_content" android:layout_height="wrap_content" android:layout_marginTop="16dp" android:layout_marginBottom="16dp" app:layout_constraintBottom_toBottomOf="parent" app:layout_constraintStart_toStartOf="parent" app:layout_constraintTop_toTopOf="parent" /> <Space android:id="@+id/topNegativeMargin" android:layout_width="wrap_content" android:layout_height="4dp" app:layout_constraintBottom_toTopOf="@id/imageView" app:layout_constraintStart_toStartOf="parent" /> <TextView android:id="@+id/textView" android:layout_width="wrap_content" android:layout_height="wrap_content" app:layout_constraintStart_toEndOf="@id/imageView" app:layout_constraintTop_toTopOf="@id/topNegativeMargin" /> </androidx.constraintlayout.widget.ConstraintLayout>
- 投稿日:2020-05-21T16:10:33+09:00
AndroidStudioでAndroid開発を学習
はじめに
対象としている人、環境
Windows10でAndroidStudio3.6.2を使って開発言語Kotlinを使ったアプリ開発を学習したいという人向けに書いています。
実際には2020年4月から開発を開始した筆者が、その日学習したことを忘れないようにするためのメモのように記載しています。パソコン用、マイコン用など他の開発言語をある程度理解している必要があります。
ここまで進めていることが前提
Androidアプリを開発するためのソフトAndroidStudioのインストールが必要です。現時点でのバージョンは3.6.2になります。
AndroidStudioは日本語化を済ませています。
対象となるAndroidデバイスは仮想Androidで
Pixel 2 API26 1080x1920 420dpi API 26 Android8.0(GooglePlay) cou x86 14G
という設定で登録しています。仮想Androidデバイス上で環境を日本語の設定、入力も日本語の設定のほか、タイムゾーンも日本を選んでおきます。
AndroidStudioで新規プロジェクトの作成
AndroidStudioは下記の操作を終わらせた状態からの説明になります。
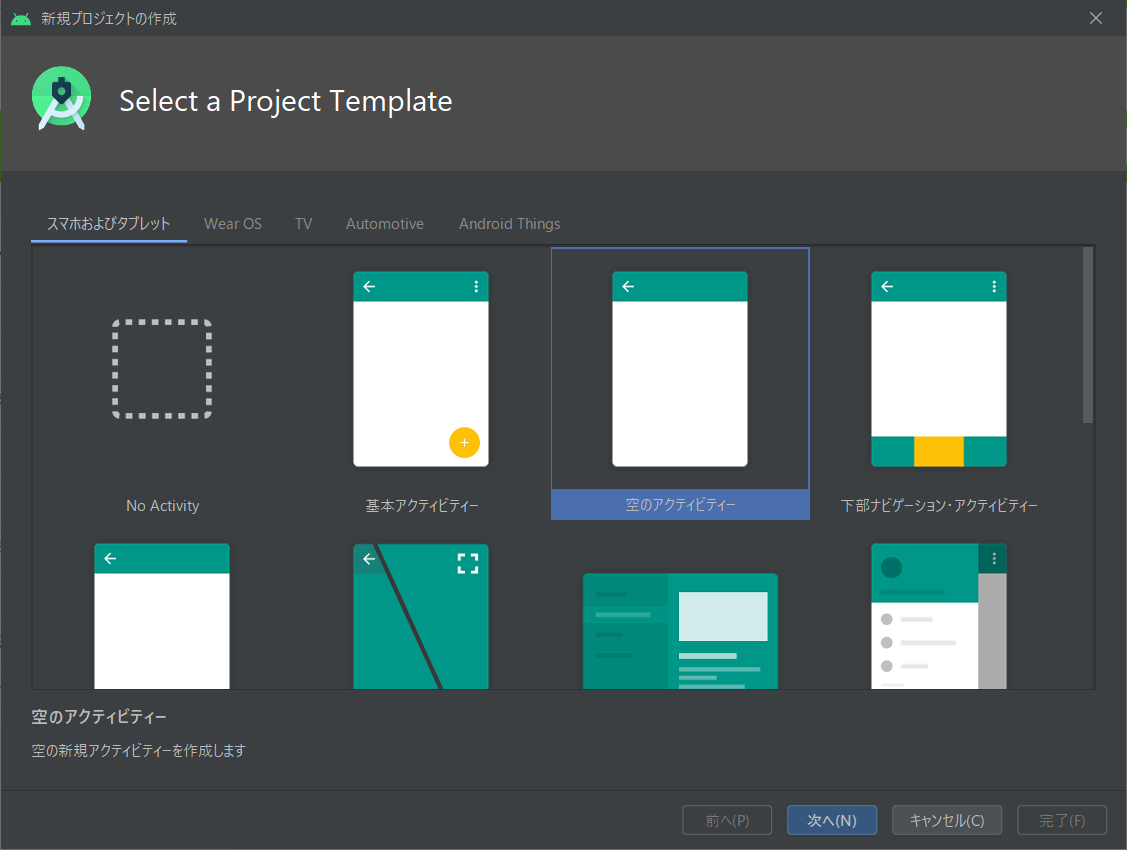
新規プロジェクトを選択
空のアクティビティを選択して次へ
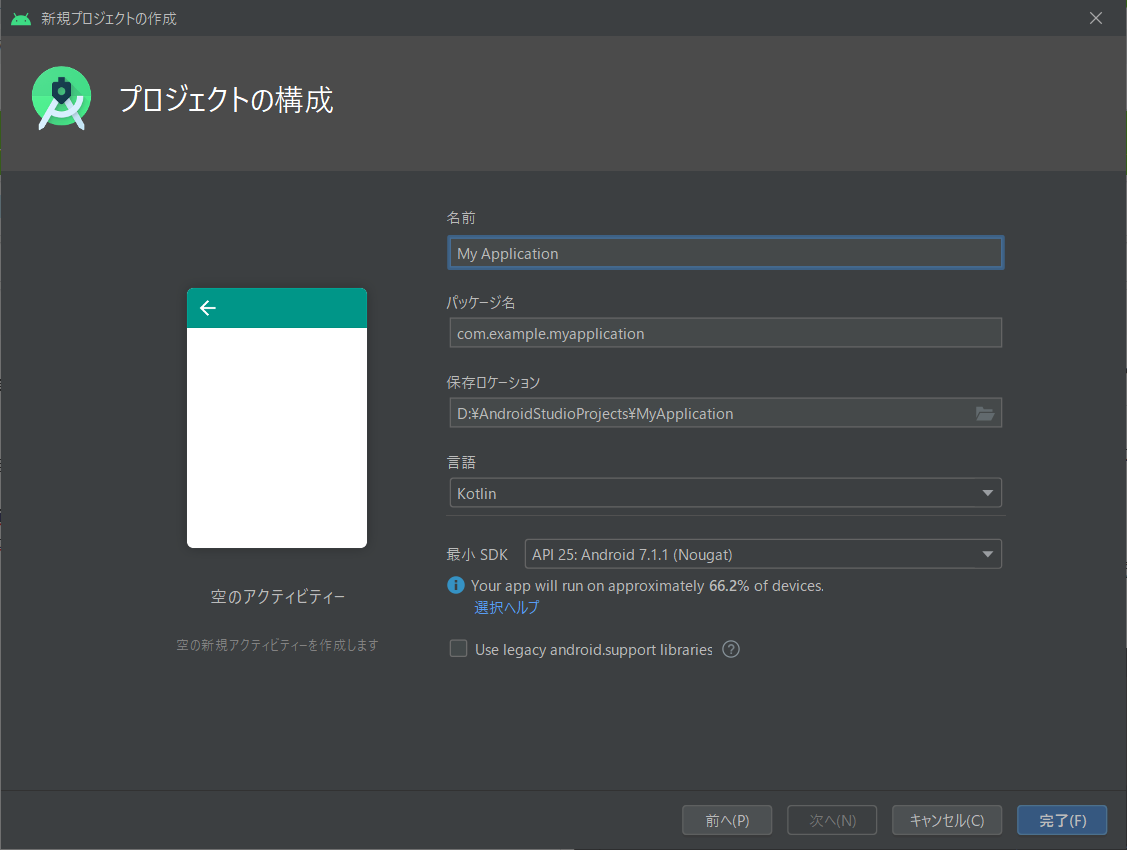
アプリの名前は都度適切に付けて下さい。
保存ロケーションはデフォルトから変更しています。
画面ではDドライブに専用フォルダを使用してそのフォルダ内にファイルが作成されるようにしています。
言語はKotlinを使用しています。
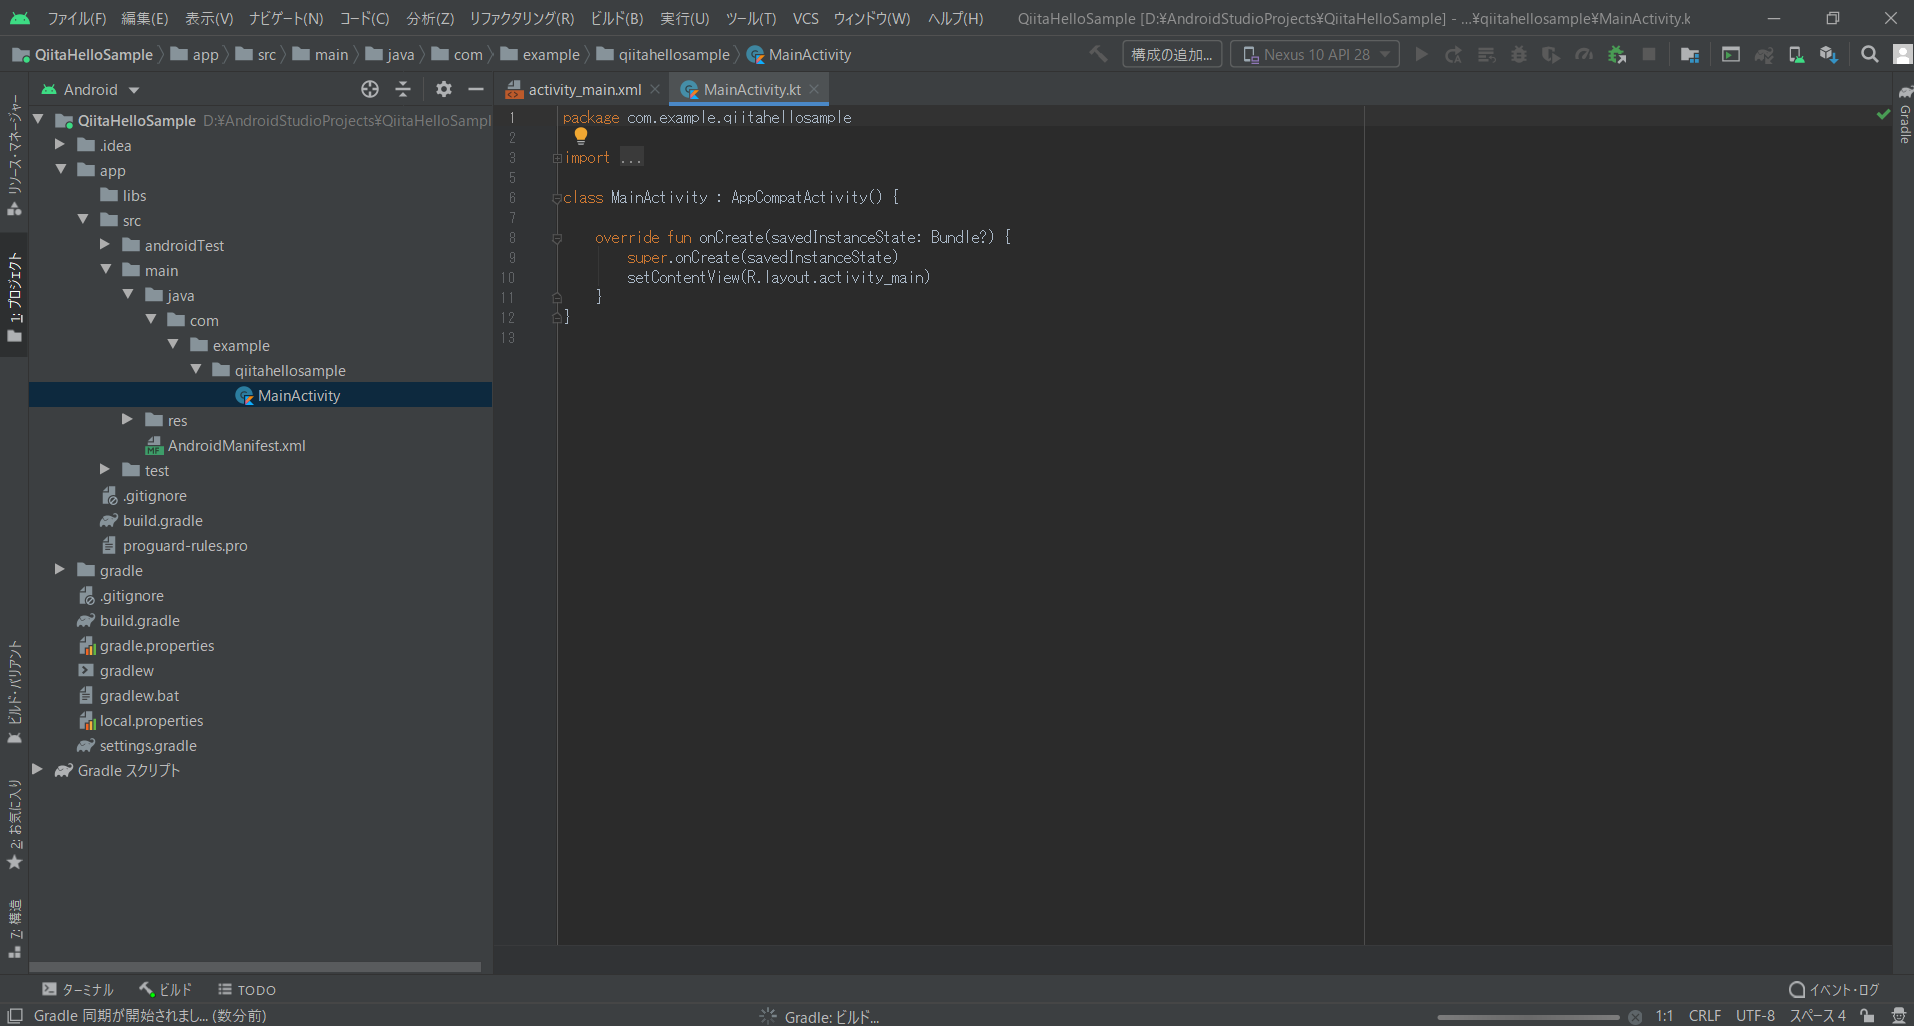
開発画面が表示されますが、裏で色々処理が行われていますので、まだ待ちます。
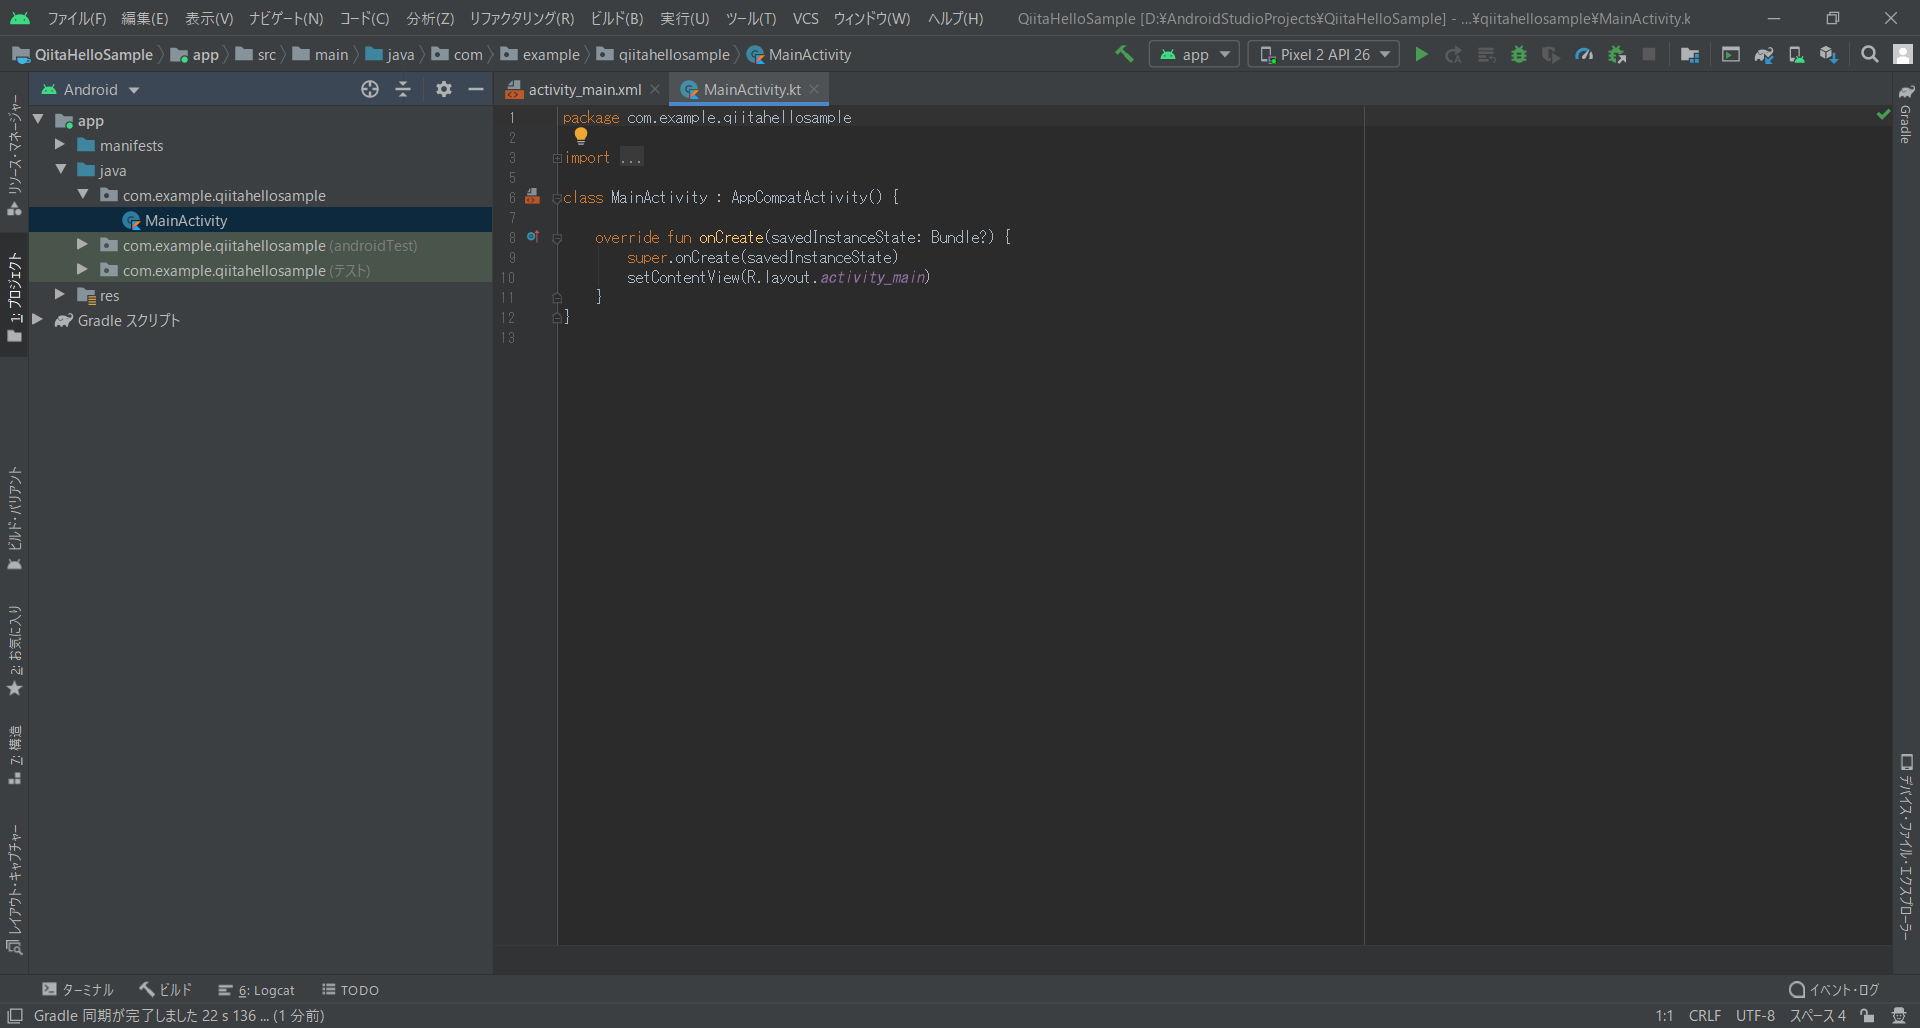
落ち着くと左側のツリー表示が
このようになります。
まずはここまで出来るようになっておく必要があります。これ以降の説明ではすべてここまで終わっていることが前提となっています。
- 投稿日:2020-05-21T16:10:05+09:00
2回目のKotlin contextの引数
初めての人用は割と見つかるけど、そのあと何したら良いのか分からないので、その段階にいる私が詰まったところをメモっていく
間違いなくこれは正しい内容ではない、最低限の内容本題
Contextの引数に何を入れたら動くのか分からない
→this入れたら動いたMainActivity.ktclass MainActivity : AppCompatActivity() { override fun onCreate(savedInstanceState: Bundle?) { super.onCreate(savedInstanceState) setContentView(R.layout.activity_main) sampleFunction(this) } fun sampleFunction(context: Context?) { // 中身 } }
- 投稿日:2020-05-21T15:50:06+09:00
【Unity】ScrollViewでボタン付きのリストを作成する
注意
備忘録で、記事に時間をかけたくないので
わりと適当に書いてます。環境
Unity 2018.4.19 (64bit)
.Net 4.x目的
・ボタンがついた表を作成する。
・削除ボタンでその行を削除する。
・選択ボタンでその行の値を取り出す。構成
準備
Viewport内のContentを自動的にサイズ調整してもらう
ScrollView->Viewport->Contentに以下をAddComponentしましょう
・Vertical Layout Group
・Content Size Filter
RowのPrefabを作成
構成を下図に示します.
Script(ScrollViewRow.cs)
using System.Collections.Generic;
using UnityEngine;
using UnityEngine.UI;

//Listおよび出力先を管理
public class ScrollViewManager
{
    public List<ScrollViewRow> list = new List<ScrollViewRow>();
    public Text _Output;

    public ScrollViewManager(Text Output)
    {
        _Output = Output;
    }

    public void SetOutput(string text)
    {
        _Output.text = text;
    }
}


public class ScrollViewRow : MonoBehaviour
{
    private int _value;         //Text内で表示される値
    private ScrollViewManager _manager;

    public static ScrollViewRow Create(GameObject ScrollView_Content, GameObject prefab)
    {

        //オブジェクトの生成
        GameObject obj = Instantiate(prefab, new Vector3(0, 0, 0), Quaternion.identity,ScrollView_Content.transform);
        //コンポーネントをAdd
       return obj.AddComponent<ScrollViewRow>();
    }

    public ScrollViewRow ValueSet(ScrollViewManager manager, int value)
    {
        _manager = manager;
        _value = value;
        return this;
    }

    void Start()
    {
        _manager.list.Add(this);

        //テキストの設定
        gameObject.transform.Find("Text").GetComponent<Text>().text = _value.ToString();

        //選択ボタンイベント登録
        gameObject.transform.Find("SelectButton").GetComponent<Button>().onClick.AddListener(SelectButtonOnClick);

        //削除ボタンイベント登録
        gameObject.transform.Find("DeleteButton").GetComponent<Button>().onClick.AddListener(DeleteButtonOnClick);

    }

    private void SelectButtonOnClick()
    {
        _manager.SetOutput(_value.ToString());
    }

    private void DeleteButtonOnClick()
    {
        _manager.list.Remove(this);
        Destroy(gameObject);
    }
}
Script(Sample.cs)
using UnityEngine;
using UnityEngine.UI;
public class SampleScript : MonoBehaviour
{
    [SerializeField] Text Output;
    [SerializeField] GameObject ScrollView_Content;
    [SerializeField] GameObject RowPrefab;
    void Start()
    {
        ScrollViewManager manager = new ScrollViewManager(Output);

        for (int i = 0; i < 100; i++)
        {
            ScrollViewRow.Create(ScrollView_Content, RowPrefab).ValueSet(manager, i);
        }
    }

}
結果
あとがき
はじめて記事を書きましたが、時間が結構かかるので
つづけられる気がしません


- 投稿日:2020-05-21T02:19:05+09:00
Android Smart Phoneをpythonを使ってWeb Serverにする。
Android Smart Phoneをpythonを使ってWeb Serverにする。
Pydroid 3 - IDE for Python 3を使ったけど手を火傷して使用中止!
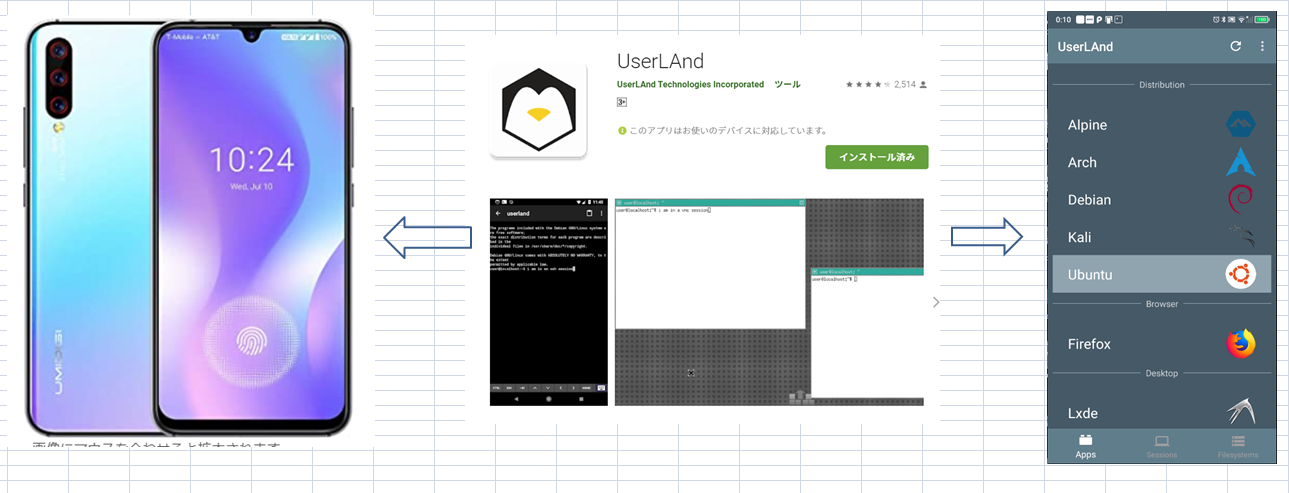
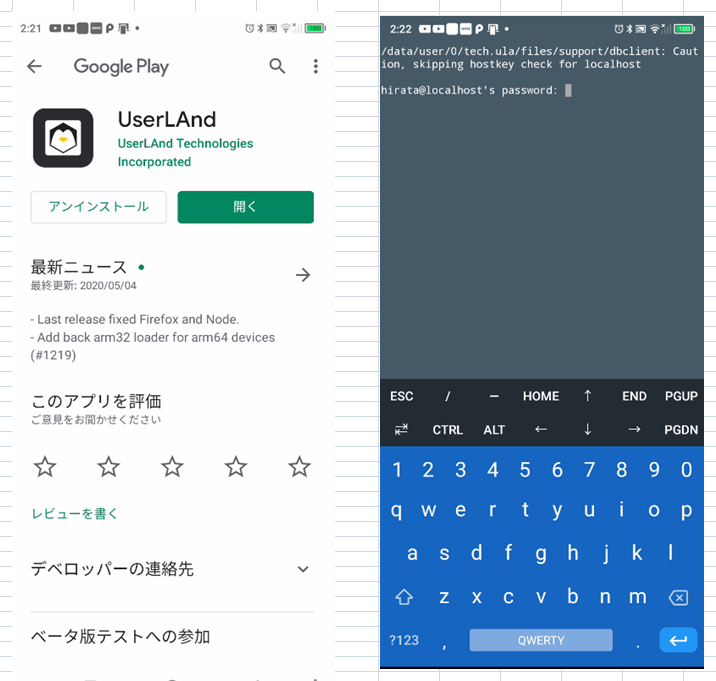
UserLandをGoogle Playよりインストールする。
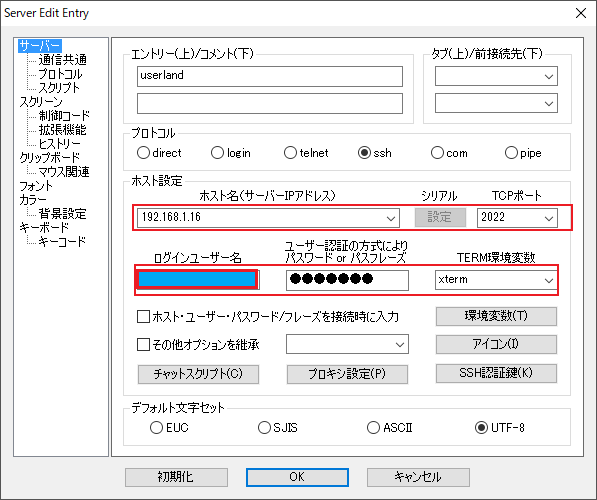
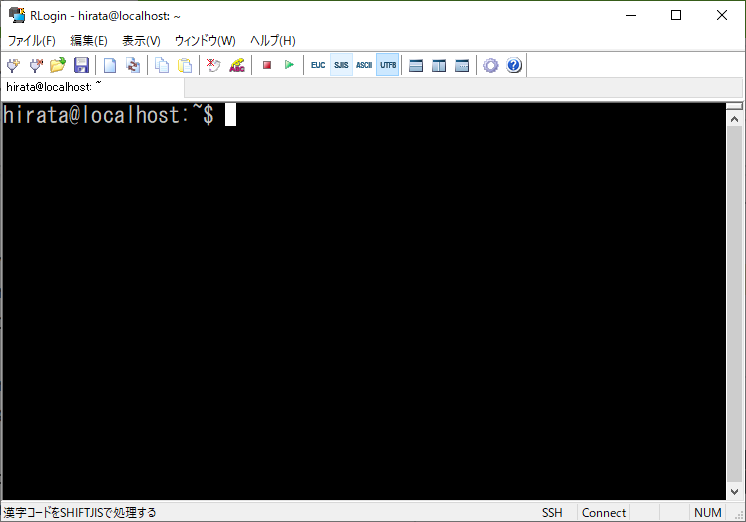
sshでログインする。Rloginを使っています。Port 2022です。
linux画面が立ち上がります。
環境整備します。vim editorを使えるようにします。
sudo apt update
sudo apt upgrade -y
sudo apt install -y vim

vim test.c
#include <stdio.h>
int main(){
        printf("hello world\n");
}

hirata@localhost:~$ cc test.c
hirata@localhost:~$ ./a.out
hello world
hirata@localhost:~$
hello worldが出ればOK!
pythonの導入と確認
sudo apt update
sudo apt install python3
sudo apt install python3-pip

hirata@localhost:~$ python3
Python 3.6.9 (default, Apr 18 2020, 01:56:04)
[GCC 8.4.0] on linux
Type "help", "copyright", "credits" or "license" for more information.
>>>
bottoleの導入
sudo pip3 install bottleテストプログラムの作成
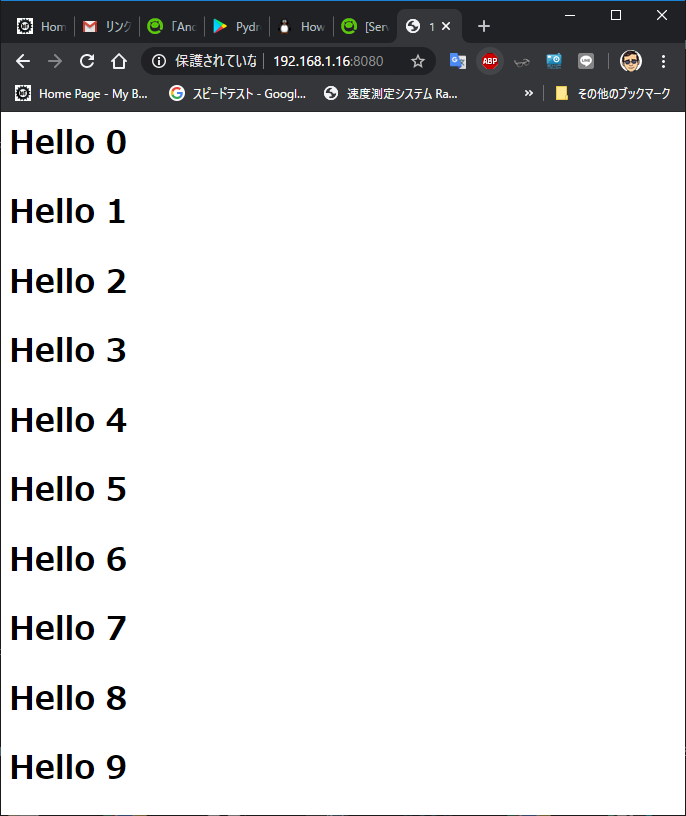
web.pyfrom bottle import route, run @route('/') def root(): str="" for i in range(10): str=str+"<h1>Hello %d</h1>"%i return str @route('/hello') def hello(): return "<h1>Hello World!</h1>" run(host='192.168.1.16', port=8080, debug=True)実行
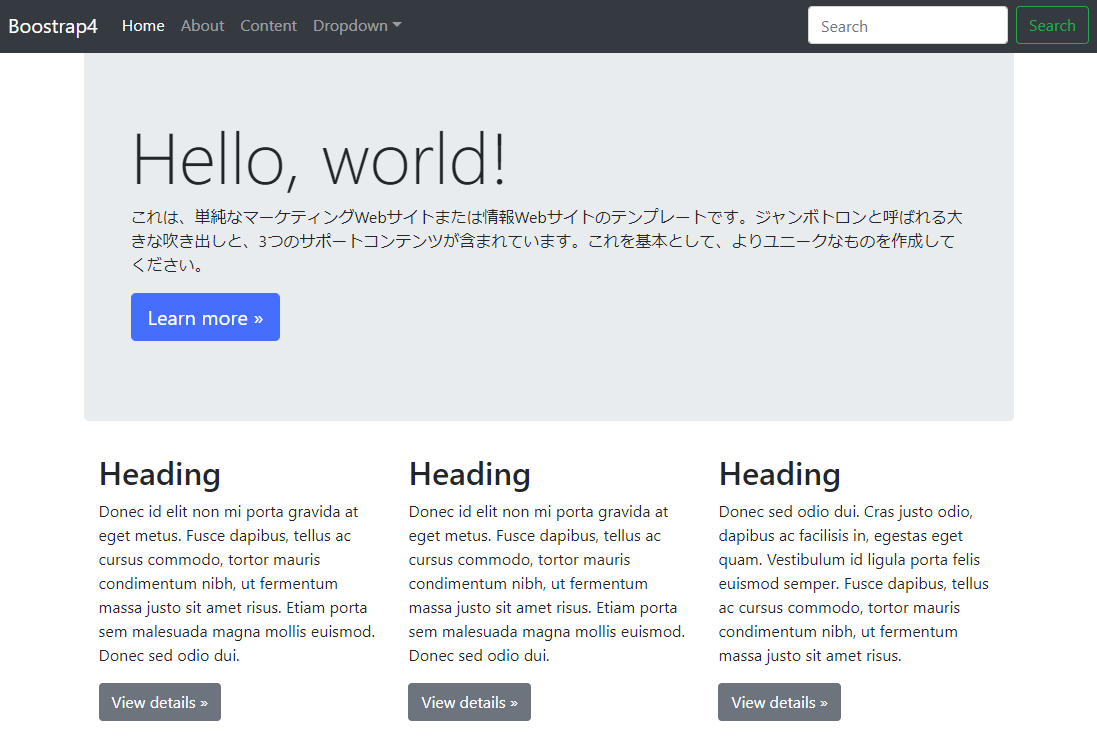
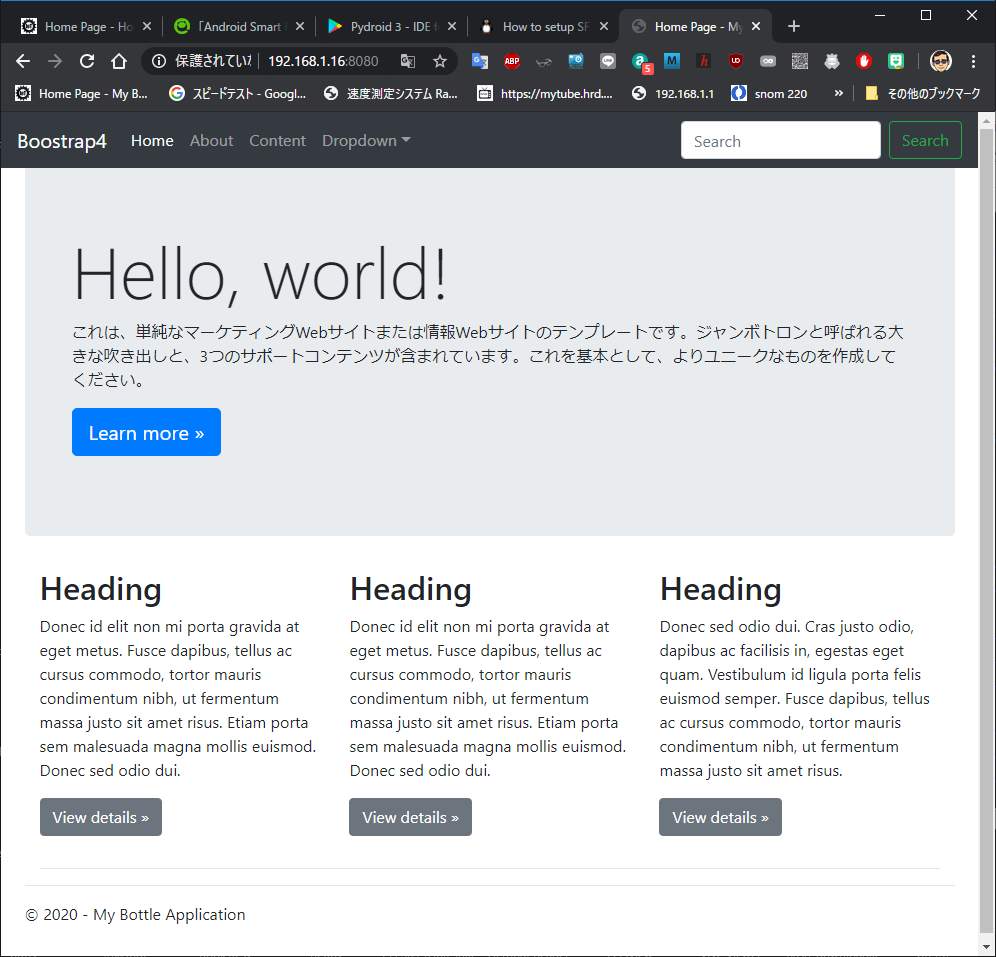
Visual Studio 2019で作成されたテンプレートの実行
. |-- app.py |-- routes.py |-- static | |-- content | | |-- bootstrap-grid.css | | |-- bootstrap-grid.css.map | | |-- bootstrap-grid.min.css | | |-- bootstrap-grid.min.css.map | | |-- bootstrap-reboot.css | | |-- bootstrap-reboot.css.map | | |-- bootstrap-reboot.min.css | | |-- bootstrap-reboot.min.css.map | | |-- bootstrap.css | | |-- bootstrap.css.map | | |-- bootstrap.min.css | | |-- bootstrap.min.css.map | | |-- jumbotron.css | | `-- site.css | |-- fonts | | |-- glyphicons-halflings-regular.eot | | |-- glyphicons-halflings-regular.svg | | |-- glyphicons-halflings-regular.ttf | | `-- glyphicons-halflings-regular.woff | `-- scripts | |-- _references.js | |-- bootstrap.bundle.js | |-- bootstrap.bundle.js.map | |-- bootstrap.bundle.min.js | |-- bootstrap.bundle.min.js.map | |-- bootstrap.js | |-- bootstrap.js.map | |-- bootstrap.min.js | |-- bootstrap.min.js.map | |-- jquery-1.10.2.intellisense.js | |-- jquery-1.10.2.js | |-- jquery-1.10.2.min.js | |-- jquery-1.10.2.min.map | |-- jquery.validate-vsdoc.js | |-- jquery.validate.js | |-- jquery.validate.min.js | |-- jquery.validate.unobtrusive.js | |-- jquery.validate.unobtrusive.min.js | |-- modernizr-2.6.2.js | |-- respond.js | `-- respond.min.js `-- views |-- about.tpl |-- contact.tpl |-- index.tpl `-- layout.tplapp.py""" This script runs the application using a development server. """ import bottle import os import sys # routes contains the HTTP handlers for our server and must be imported. import routes if '--debug' in sys.argv[1:] or 'SERVER_DEBUG' in os.environ: # Debug mode will enable more verbose output in the console window. # It must be set at the beginning of the script. bottle.debug(True) def wsgi_app(): """Returns the application to make available through wfastcgi. This is used when the site is published to Microsoft Azure.""" return bottle.default_app() if __name__ == '__main__': PROJECT_ROOT = os.path.abspath(os.path.dirname(__file__)) STATIC_ROOT = os.path.join(PROJECT_ROOT, 'static').replace('\\', '/') HOST = os.environ.get('SERVER_HOST', 'localhost') try: PORT = int(os.environ.get('SERVER_PORT', '5555')) except ValueError: PORT = 5555 @bottle.route('/static/<filepath:path>') def server_static(filepath): """Handler for static files, used with the development server. When running under a production server such as IIS or Apache, the server should be configured to serve the static files.""" return bottle.static_file(filepath, root=STATIC_ROOT) # Starts a local test server. HOST,PORT="192.168.1.16",8080 bottle.run(server='wsgiref', host=HOST, port=PORT)routes.py""" Routes and views for the bottle application. """ from bottle import route, view from datetime import datetime @route('/') @route('/home') @view('index') def home(): """Renders the home page.""" return dict( year=datetime.now().year ) @route('/contact') @view('contact') def contact(): """Renders the contact page.""" return dict( title='Contact', message='Your contact page.', year=datetime.now().year ) @route('/about') @view('about') def about(): """Renders the about page.""" return dict( title='About', message='Your application description page.', year=datetime.now().year )

- 投稿日:2020-05-21T01:56:00+09:00
初めてGroupieを使ったからまとめました
AndroidのRecyclerViewを便利に扱わせてくれるライブラリGroupie。
勉強するにあたりgithubのexampleを参考したので、学んだことを共有したいので書きたいと思います。
様々な表示方法を実装した上でのポイントや疑問に思ったことをまとめるので、この記事を読んだだけで表示できるようになるといったものではないのでご了承ください。コードでの説明はありません。自分が実装したものをgithubのリポジトリに載せてありますのでご確認いただけたら嬉しいです。
なお、まだまだ始めたばかりで簡単に使ったことしかない上に、調べたつもりではありますが個人の思想が勝手に広がっている可能性があるのでご注意いただきたいです。Groupieの要素について
Adapter
groupAdapter = GroupAdapter<GroupieViewHoder>()で生成する。- この
groupAdapterにItemやSectionを追加することで簡単にリスト表示することができる。add(Group),addAll(List<Group>),update(List<Group>)などのメソッドを使って追加。Group
ItemやSectionのことを指す。ItemやSectionにInterfaceとして実装されている。Item
- recyclerViewに入れる要素1つ1つを示す。
Itemごとにlayoutを組んで、良い感じにgroupAdapterに追加していくことで様々な画面を作ることができる。- ItemクラスにてViewと値を結びつけたりどのlayoutを適用するか指定できる。
Section
- 複数の
ItemをかたまりとしてSectionに追加し、そのSectionをgroupAdapterに追加することができる。Itemを塊でまとめてSectionとすることでコードもまとまってくるのでしょうか...
実装してみた
どうやって勉強しようかなと考えた時にGroupiePlayGroundを作り、exampleを見ながら興味があったものを実装することにしました。4種類の活用例を紹介したいと思います。
まずはこちらの技術も使っているのでご確認ください。
- DataBinding
- LiveData
共通の仕様
- Itemの削除が可能
- ClickとLongClickできるようになっている
SimpleGroupie
ひたすらItemをadapterに追加したものです。
SectionごとにまとめてHeaderItemみたいなものを自作したらタイトル+中身みたいなものを作れます。(マストでSectionでまとめる必要はないのかな...まとめる利点ってなにかあるのかな...)POINTS
groupAdapter.add(Group)のように追加する。+=という演算子もgroupieではaddとして使えるようになっているので見た目としてもわかりやすいです。
ExpandableGroupie
これは主にResoCoderさんの記事を参考にさせていただきました。それに加えてオリジナリティを出すためにアイテムにお気に入りか否かの属性を持たせてClickでアイテムを移動できるようにしました。
Sectionの中身をExpandable(要素の表示をを広げたり縮めたり)できる。POINTS
ExpandableGroup()の引数にはExpandableItemというInterfaceを実装したItemを入れてあげる。ExpandableGroup()にExpandableにするアイテムを例の如く追加します。- Itemクラス側でも
ExpandableGroupを使って、ToggleListenerを設定したりとか、状態を管理しないといけない。
CarouselGroupie
まるでカルーセルかのように横にスクロールできるもの。これもまたタイトル+カルーセルを一塊としてあげると綺麗なレイアウトになりそう。recyclerViewの中にrecyclerViewをネストするのは想像できたもののItemのコンストラクタにカルーセル用のadapterを渡す実装があるのかと驚きました。
POINTS
groupAdapterに追加するItemの1つをcarouselItemとしてrecyclerViewをもつlayoutを実装する。- carousel内で表示させる
Itemなども含めたcarouselAdapterを別で用意して、carouselItemのコンストラクタとしてcarouselAdapterを渡す。
DraggableGroupie
Itemを動かして順番を変えることができる楽しいUIができます。うまく動かないケースがあるのでそこをどうにかして修正したいところです...理解が不十分でごめんなさい。
POINTS
- 自分で作った
Itemを継承したDraggableItemを実装する。- Itemクラスにて
ItemTouchHelperというrecyclerViewにあるクラスを使って動作を取得する。TouchCallBackを使ってアイテムの順番を入れ替える処理をする。- recyclerViewにCallBackをアタッチしてあげる。

いろいろメモ
Adapter#addAll と Adapter#update の違いって?
なんでそんなことを思ったのか
どちらも引数に
List<Group>を取ります。
このようなケースがありました。もともと#addAllを使ってリストの中身の追加をしていて、のちに#updateで中身を変更したいとなって何も考えずにどちらも書いていました。
そうするとリストの中身の変更はされるものの、1回点滅してから表示が変更されるという挙動になってしまいました。
そこで#updateのみで実装したら、想定通りの挙動をしたので解決したのですが、#addAllとは...??となってしまいました。個人的見解
実装を見てみるとどちらも
adapter.addAll()をしているということは変わりがないようです。
updateは新しいGroupと古いGroupの差分を見て、よしなに処理をしてくれているようです。綺麗にアニメーションされない!
うまくアニメーションが行われず、点滅してリストの中身が変わっているということがありました。
Item.getId()を実装するとアニメーションが動くようです。まとめ
RecyclerViewを生で実装したときよりかなり分かりやすかったです。exampleを見ながらではありますが、今回勉強したことでレイアウトを作る幅がかなり広がったので嬉しいです。他にも無限にスクロールできたりとかスワイプでアイテムを削除できたりするものもあったので今後も参考にしたいと思います。今回はFragment上でほとんど全ての操作をしているので本当は他のクラスで実装するのが最適なのではないかなど思うことはたくさんあったので、よかったら是非ご指摘いただきたいです。読んでいただきありがとうございました。今回作ったもの:GroupiePlayGround
- 投稿日:2020-05-21T01:11:44+09:00
androidx.appcompatのバージョン1.1.0でWebView内を長押しするとクラッシュするので調べてみた話
appcompatのバージョンを1.1.0に上げた
appcompatのバージョンを上げて動作確認を行なっていた際にWebViewでコピーした内容を貼り付けようと長押ししたところ
クラッシュしてしまい原因を調査したため調査結果を記載動作確認を行なった環境とクラッシュ状況
- Android5.1のemulator
- 起動した瞬間にクラッシュ
- Android6.0のemulator
- WebView内で長押しをするとクラッシュ
- Android7.0以降のemulator
- WebView内を長押ししてもクラッシュしない
クラッシュログ
W/System.err: at android.content.res.Resources.getValue(Resources.java:1351)
        at android.content.res.Resources.loadXmlResourceParser(Resources.java:2774)
        at android.content.res.Resources.getLayout(Resources.java:1165)
        at android.view.MenuInflater.inflate(MenuInflater.java:108)
        at org.chromium.content.browser.SelectActionModeCallback.createActionMenu(SelectActionModeCallback.java:153)
        at org.chromium.content.browser.SelectActionModeCallback.onCreateActionMode(SelectActionModeCallback.java:124)
        at com.android.webview.chromium.FloatingSelectActionModeCallback.onCreateActionMode(FloatingSelectActionModeCallback.java:32)
        at com.android.internal.policy.PhoneWindow$DecorView$ActionModeCallback2Wrapper.onCreateActionMode(PhoneWindow.java:3531)
        at com.android.internal.policy.PhoneWindow$DecorView.startActionMode(PhoneWindow.java:2772)
        at com.android.internal.policy.PhoneWindow$DecorView.startActionModeForChild(PhoneWindow.java:2729)
        at android.view.ViewGroup.startActionModeForChild(ViewGroup.java:812)
        at android.view.ViewGroup.startActionModeForChild(ViewGroup.java:812)
        at android.view.ViewGroup.startActionModeForChild(ViewGroup.java:812)
        at android.view.ViewGroup.startActionModeForChild(ViewGroup.java:812)
        at android.view.ViewGroup.startActionModeForChild(ViewGroup.java:812)
        at android.view.View.startActionMode(View.java:5335)
        at com.android.webview.chromium.WebViewContentsClientAdapter.startFloatingActionMode(WebViewContentsClientAdapter.java:432)
        at com.android.webview.chromium.WebViewContentsClientAdapter.startActionMode(WebViewContentsClientAdapter.java:414)
        at org.chromium.android_webview.AwContentViewClient.startActionMode(AwContentViewClient.java:73)
        at org.chromium.content.browser.ContentViewCore.showSelectActionMode(ContentViewCore.java:2131)
        at org.chromium.content.browser.ContentViewCore.onSelectionEvent(ContentViewCore.java:2203)
        at org.chromium.android_webview.AwContents.nativeOnDraw(Native Method)
        at org.chromium.android_webview.AwContents.access$4500(AwContents.java:92)
        at org.chromium.android_webview.AwContents$AwViewMethodsImpl.onDraw(AwContents.java:2731)
        at org.chromium.android_webview.AwContents.onDraw(AwContents.java:1191)
        at com.android.webview.chromium.WebViewChromium.onDraw(WebViewChromium.java:1713)
        at android.webkit.WebView.onDraw(WebView.java:2486)
        at android.view.View.draw(View.java:16178)
調べてみた
Google Issue Trackerに同様の内容が投稿されていた
androidx.appcompat:appcompat 1.1.0 crashes webview when long pressed
https://issuetracker.google.com/issues/141351441対応方法
appcompatのバージョンを「1.0.2」とする
または、現在bataが公開されている「1.2.0-beta01」を利用することで解消できる様子※「1.2.0-beta01」のリリースノートに「WebView を長押しした際に、androidx.appcompat:appcompat:1.1.0 によって WebView がクラッシュする問題を修正しました」と記載されている
https://developer.android.com/jetpack/androidx/releases/appcompat?hl=ja#version_120_2
- 投稿日:2020-05-21T01:11:44+09:00
androidx.appcompatのバージョンを1.1.0にしてemulatorでWebView内を長押しするとクラッシュするので調べてみた話
appcompatのバージョンを1.1.0に上げた
appcompatのバージョンを上げて動作確認を行なっていた際にWebViewでコピーした内容を貼り付けようと長押ししたところ
クラッシュしてしまい原因を調査したため調査結果を記載動作確認を行なった環境とクラッシュ状況
- Android5.1のemulator
- 起動した瞬間にクラッシュ
- Android6.0のemulator
- WebView内で長押しをするとクラッシュ
- Android7.0以降のemulator
- WebView内を長押ししてもクラッシュしない
- Android5.1の実機
- WebView内を長押ししてもクラッシュしない
クラッシュログ
W/System.err: at android.content.res.Resources.getValue(Resources.java:1351)
        at android.content.res.Resources.loadXmlResourceParser(Resources.java:2774)
        at android.content.res.Resources.getLayout(Resources.java:1165)
        at android.view.MenuInflater.inflate(MenuInflater.java:108)
        at org.chromium.content.browser.SelectActionModeCallback.createActionMenu(SelectActionModeCallback.java:153)
        at org.chromium.content.browser.SelectActionModeCallback.onCreateActionMode(SelectActionModeCallback.java:124)
        at com.android.webview.chromium.FloatingSelectActionModeCallback.onCreateActionMode(FloatingSelectActionModeCallback.java:32)
        at com.android.internal.policy.PhoneWindow$DecorView$ActionModeCallback2Wrapper.onCreateActionMode(PhoneWindow.java:3531)
        at com.android.internal.policy.PhoneWindow$DecorView.startActionMode(PhoneWindow.java:2772)
        at com.android.internal.policy.PhoneWindow$DecorView.startActionModeForChild(PhoneWindow.java:2729)
        at android.view.ViewGroup.startActionModeForChild(ViewGroup.java:812)
        at android.view.ViewGroup.startActionModeForChild(ViewGroup.java:812)
        at android.view.ViewGroup.startActionModeForChild(ViewGroup.java:812)
        at android.view.ViewGroup.startActionModeForChild(ViewGroup.java:812)
        at android.view.ViewGroup.startActionModeForChild(ViewGroup.java:812)
        at android.view.View.startActionMode(View.java:5335)
        at com.android.webview.chromium.WebViewContentsClientAdapter.startFloatingActionMode(WebViewContentsClientAdapter.java:432)
        at com.android.webview.chromium.WebViewContentsClientAdapter.startActionMode(WebViewContentsClientAdapter.java:414)
        at org.chromium.android_webview.AwContentViewClient.startActionMode(AwContentViewClient.java:73)
        at org.chromium.content.browser.ContentViewCore.showSelectActionMode(ContentViewCore.java:2131)
        at org.chromium.content.browser.ContentViewCore.onSelectionEvent(ContentViewCore.java:2203)
        at org.chromium.android_webview.AwContents.nativeOnDraw(Native Method)
        at org.chromium.android_webview.AwContents.access$4500(AwContents.java:92)
        at org.chromium.android_webview.AwContents$AwViewMethodsImpl.onDraw(AwContents.java:2731)
        at org.chromium.android_webview.AwContents.onDraw(AwContents.java:1191)
        at com.android.webview.chromium.WebViewChromium.onDraw(WebViewChromium.java:1713)
        at android.webkit.WebView.onDraw(WebView.java:2486)
        at android.view.View.draw(View.java:16178)
調べてみた
Google Issue Trackerに同様の内容が投稿されていた
androidx.appcompat:appcompat 1.1.0 crashes webview when long pressed
https://issuetracker.google.com/issues/141351441対応方法
appcompatのバージョンを「1.0.2」とする
または、現在bataが公開されている「1.2.0-beta01」を利用することで解消できる様子※「1.2.0-beta01」のリリースノートに「WebView を長押しした際に、androidx.appcompat:appcompat:1.1.0 によって WebView がクラッシュする問題を修正しました」と記載されている
https://developer.android.com/jetpack/androidx/releases/appcompat?hl=ja#version_120_2