- 投稿日:2020-03-25T23:32:48+09:00
【超初心者向け】クロージャの書き方【swift】
クロージャとは
swiftのLanguage Guideによると
クロージャは、コードの中で渡したり使用したりすることができる自己完結型の機能ブロックです。
中略
クロージャは、それらが定義されているコンテキストから任意の定数や変数への参照を取得して保存することができます。これは、それらの定数や変数の上で閉じることとして知られています。
最近話題のDeepLに翻訳してもらいました。
関数をクロージャにしてみよう!
以下の関数をクロージャで書いてみます。
・関数
func closurePractice(num1: Int, num2: Int) -> Int {
    return num1 + num2
}
・クロージャ
{ (num1: Int, num2: Int) -> Int in
    return num1 + num2
}
クロージャを使うと、このように処理を簡潔に記載することができます。
クロージャをもっと簡潔に書いてみる
型推論を使うことで、データ型の記載を省略することができます。
{ (num1, num2) in
    return num1 + num2
}
処理が1行の場合は、さらに
returnも省略することができます。{ (num1, num2) in num1 + num2 }参考サイト
- 投稿日:2020-03-25T22:23:32+09:00
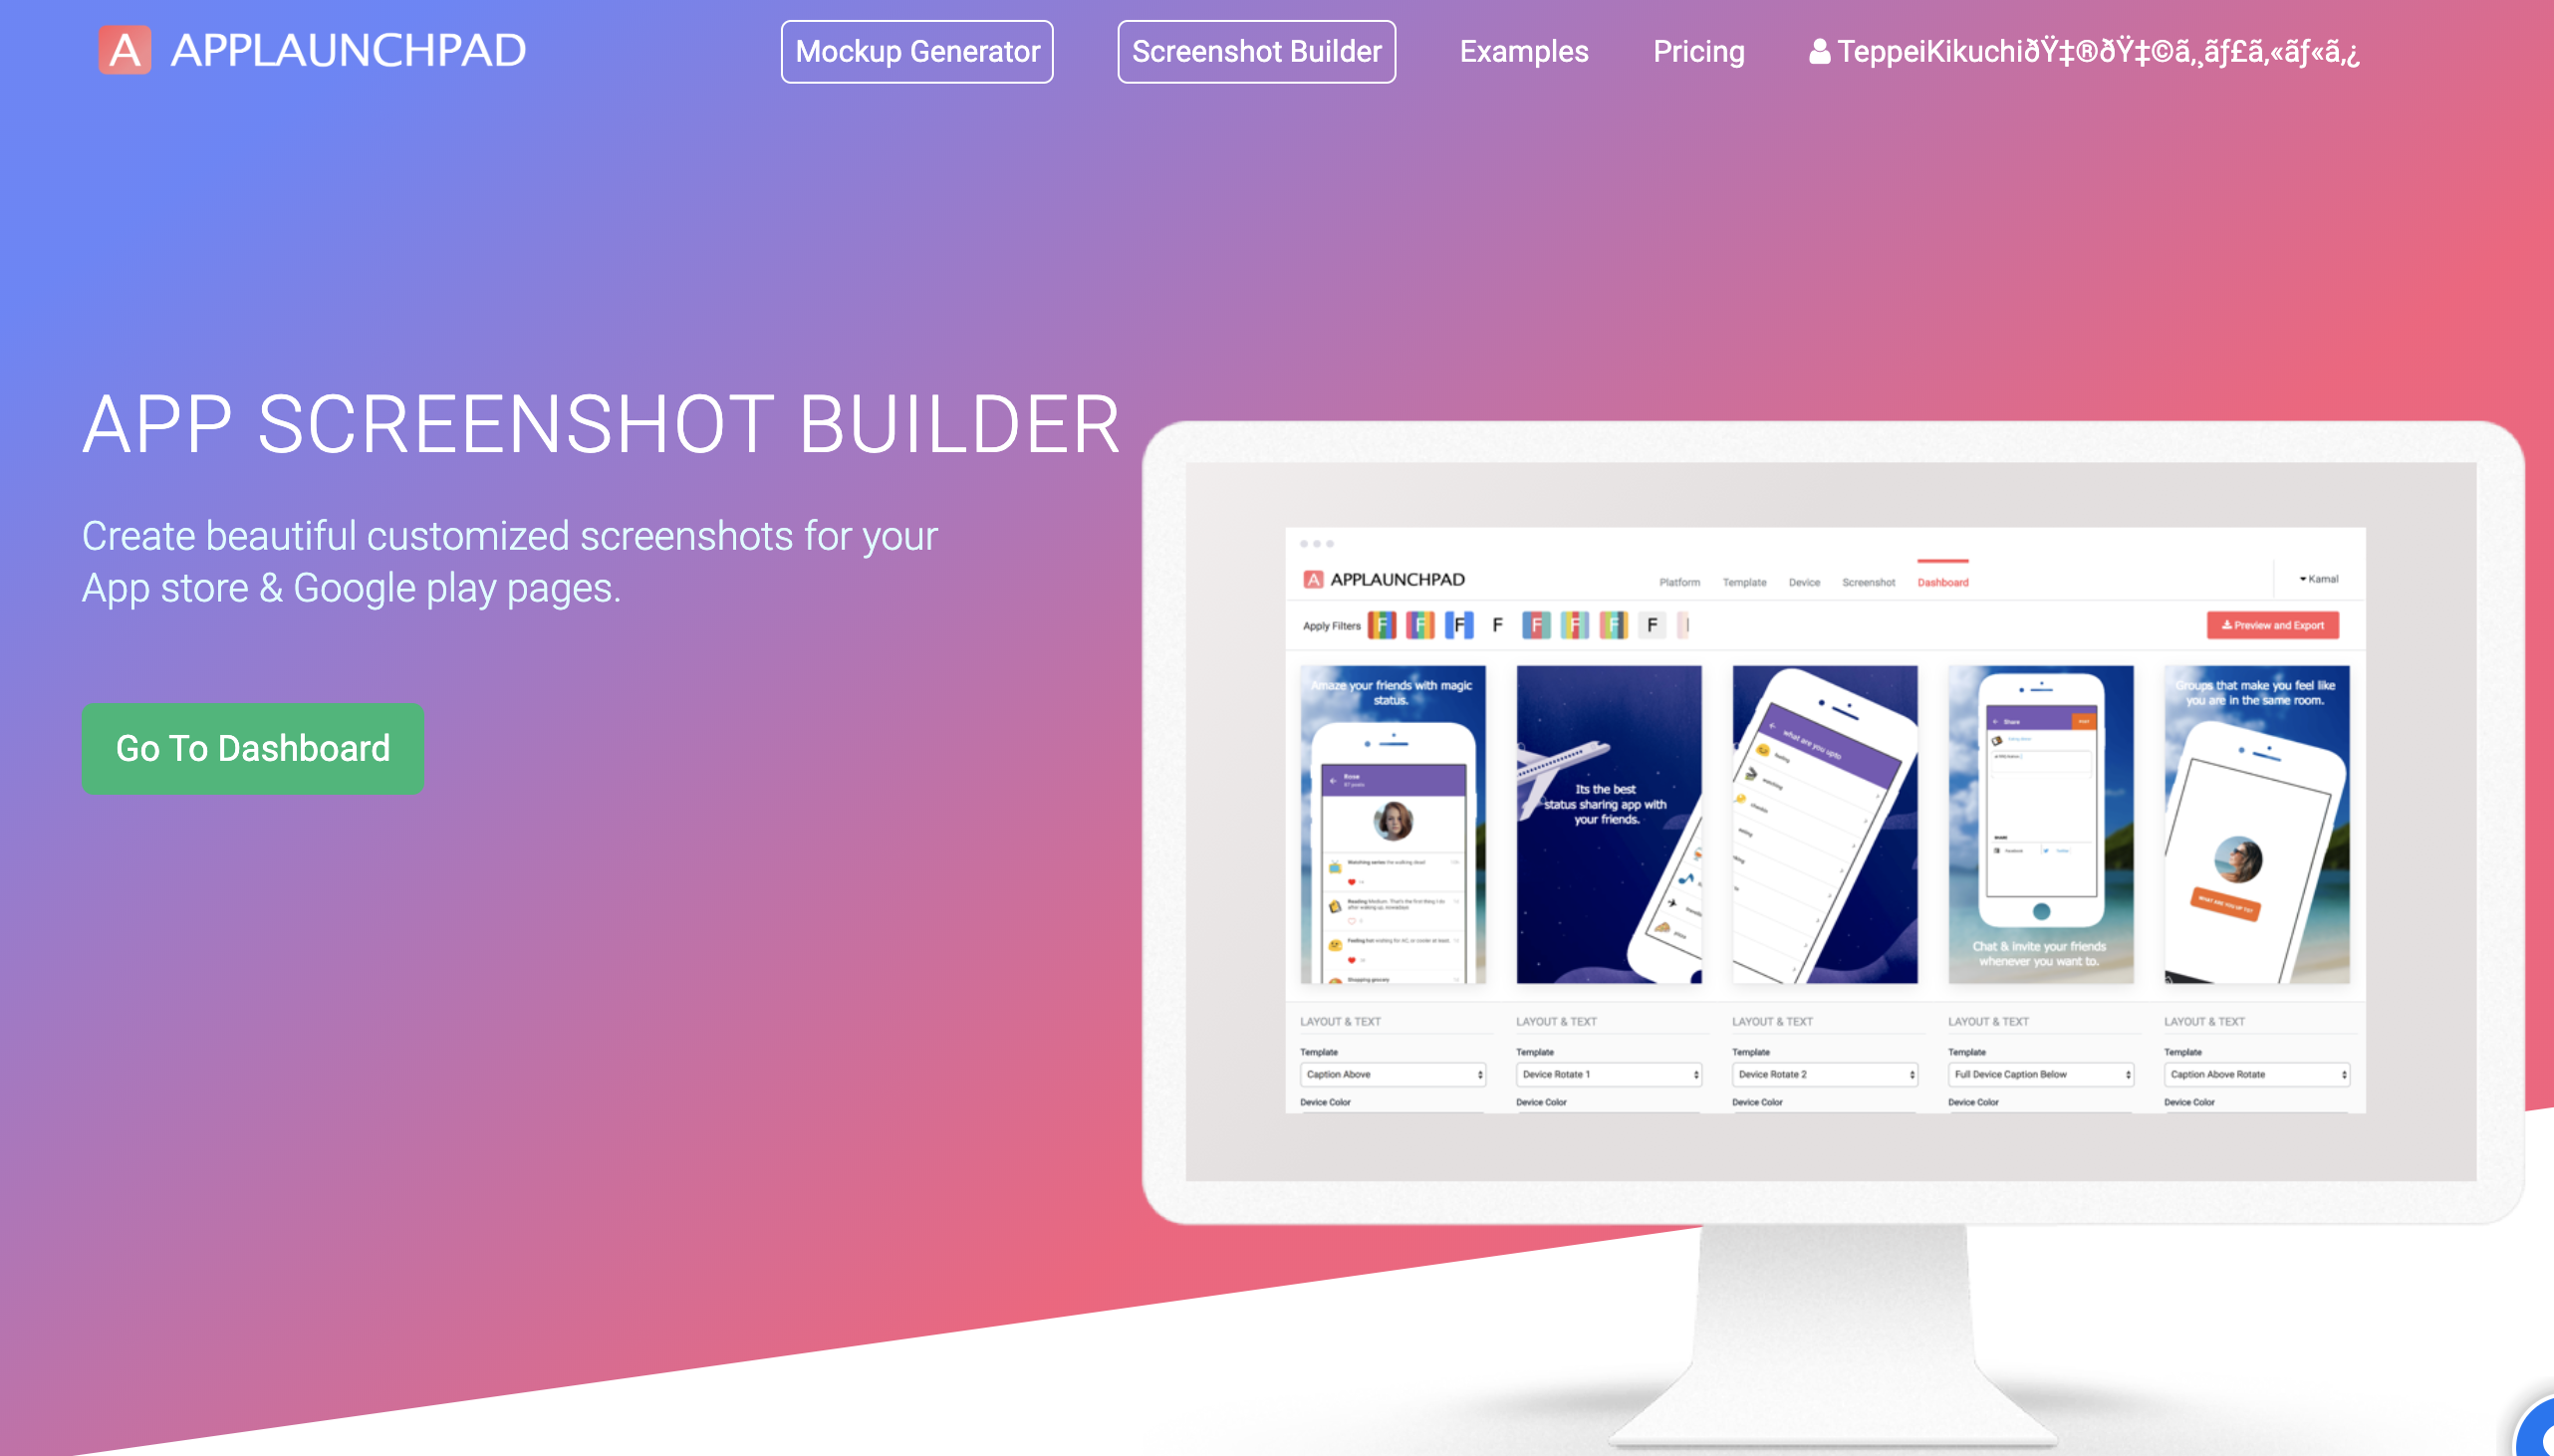
【AppStore申請】スクリーンショット作成
今回AppStore申請時に、スクリーンショットの生成ツールとして、APPLAUNCHPADというツールを使用したので紹介。
APPLAUNCHPAD
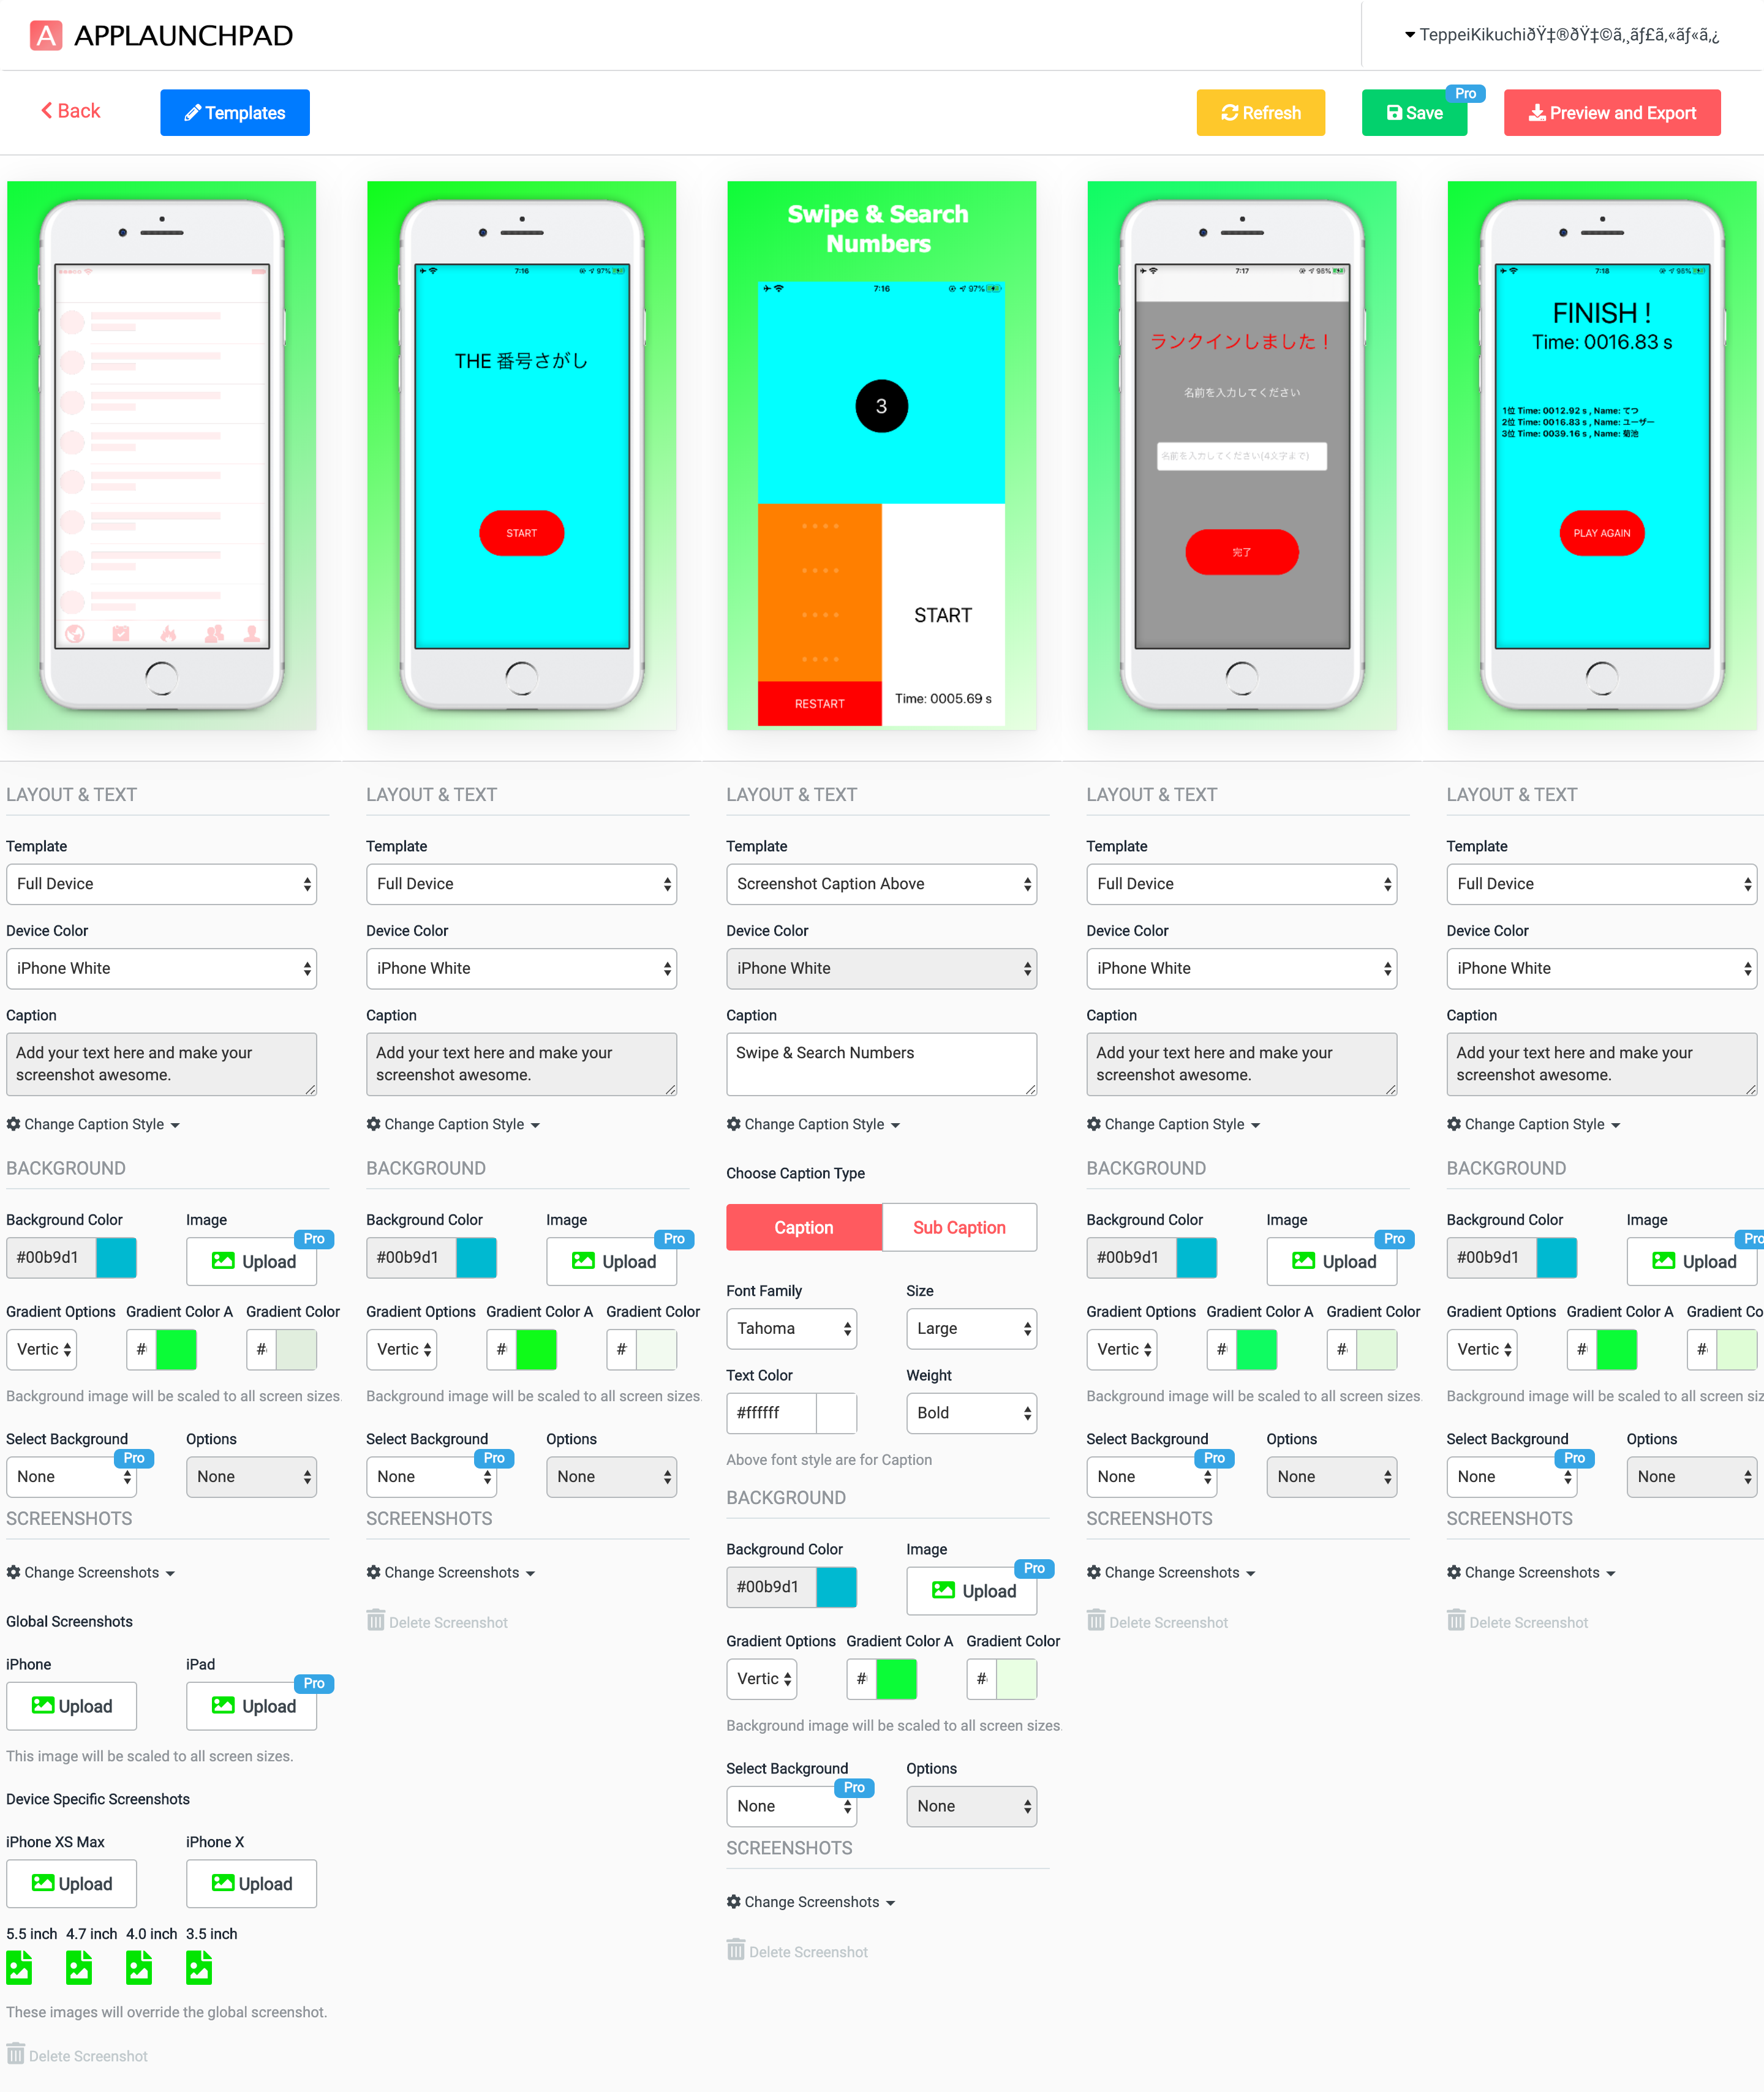
作成した様子
iPhone7で撮影したスクリーンショットを基に、自動で各サイズのスクリーンショットを生成してくれ、流行りの感じの広告風の画像が作成できた。
無料だとテンプレートは限られるが、十分に使用できると感じた。
簡単に作成したのはこんな感じです。↓↓↓
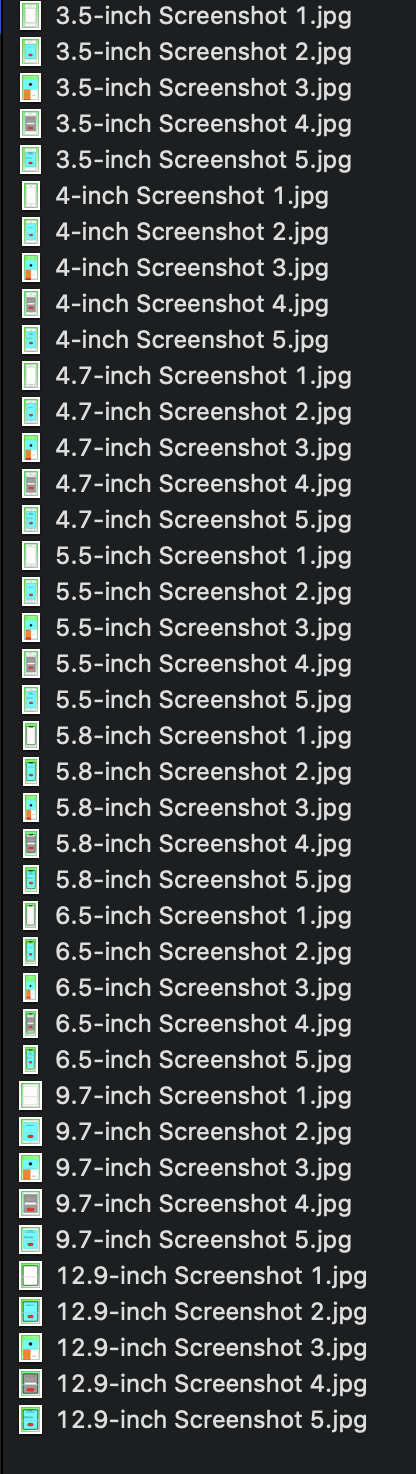
書き出し
各サイズこんな感じで書き出されます。
- 投稿日:2020-03-25T20:06:08+09:00
Flutter iOS permission_handler 不要なパーミッションリクエストを削除する
permission_handler は、Flutter用のアプリ権限プラグイン。 このプラグインは、権限をリクエストおよびチェックするためのクロスプラットフォーム(iOS、Android)APIを提供します。
このプラグインを導入すると、内部的にすべての権限のリクエスト処理があるためか、
アプリの送信を行うと、たくさんの権限のリクエストに関連した設定が不足として、has one or more issuesメールが送られきてしまいます。加え、
ビルドステータスが”バイナリが無効”に変更されました
とされ、 App Store Connectへのアプリの送信が完了することができませんでした。Missing Push Notification Entitlement あたりのみの場合であれば、無視できるのが通常ですが、これほどあるのはまずいようです。
使用しない権限の削除する方法について、プラグインページの、
You can remove permissions you don't use by:
とある箇所で方法が説明されています。Podfile に、これらを追加しろ、とありますが、
Podfile.post_install do |installer| installer.pods_project.targets.each do |target| target.build_configurations.each do |config| ... # Here are some configurations automatically generated by flutter # You can remove unused permissions here # for more infomation: https://github.com/BaseflowIT/flutter-permission-handler/blob/develop/ios/Classes/PermissionHandlerEnums.h # e.g. when you don't need camera permission, just add 'PERMISSION_CAMERA=0' config.build_settings['GCC_PREPROCESSOR_DEFINITIONS'] ||= [ '$(inherited)', ## dart: PermissionGroup.calendar # 'PERMISSION_EVENTS=0', ## dart: PermissionGroup.reminders # 'PERMISSION_REMINDERS=0', ## dart: PermissionGroup.contacts # 'PERMISSION_CONTACTS=0', ## dart: PermissionGroup.camera # 'PERMISSION_CAMERA=0', ## dart: PermissionGroup.microphone # 'PERMISSION_MICROPHONE=0', ## dart: PermissionGroup.speech # 'PERMISSION_SPEECH_RECOGNIZER=0', ## dart: PermissionGroup.photos # 'PERMISSION_PHOTOS=0', ## dart: [PermissionGroup.location, PermissionGroup.locationAlways, PermissionGroup.locationWhenInUse] # 'PERMISSION_LOCATION=0', ## dart: PermissionGroup.notification # 'PERMISSION_NOTIFICATIONS=0', ## dart: PermissionGroup.mediaLibrary # 'PERMISSION_MEDIA_LIBRARY=0', ## dart: PermissionGroup.sensors # 'PERMISSION_SENSORS=0' ] end end endすでに、↓のように、post_installのセクションがあると思いますので、
Podfile.post_install do |installer| installer.pods_project.targets.each do |target| target.build_configurations.each do |config| config.build_settings['ENABLE_BITCODE'] = 'NO' end end endこの中に追加するようにし、一旦このようにします。
Podfile.post_install do |installer| installer.pods_project.targets.each do |target| target.build_configurations.each do |config| config.build_settings['ENABLE_BITCODE'] = 'NO' # You can remove unused permissions here # for more infomation: https://github.com/BaseflowIT/flutter-permission-handler/blob/develop/ios/Classes/PermissionHandlerEnums.h # e.g. when you don't need camera permission, just add 'PERMISSION_CAMERA=0' config.build_settings['GCC_PREPROCESSOR_DEFINITIONS'] ||= [ '$(inherited)', ## dart: PermissionGroup.calendar # 'PERMISSION_EVENTS=0', ## dart: PermissionGroup.reminders # 'PERMISSION_REMINDERS=0', ## dart: PermissionGroup.contacts # 'PERMISSION_CONTACTS=0', ## dart: PermissionGroup.camera # 'PERMISSION_CAMERA=0', ## dart: PermissionGroup.microphone # 'PERMISSION_MICROPHONE=0', ## dart: PermissionGroup.speech # 'PERMISSION_SPEECH_RECOGNIZER=0', ## dart: PermissionGroup.photos # 'PERMISSION_PHOTOS=0', ## dart: [PermissionGroup.location, PermissionGroup.locationAlways, PermissionGroup.locationWhenInUse] # 'PERMISSION_LOCATION=0', ## dart: PermissionGroup.notification # 'PERMISSION_NOTIFICATIONS=0', ## dart: PermissionGroup.mediaLibrary # 'PERMISSION_MEDIA_LIBRARY=0', ## dart: PermissionGroup.sensors # 'PERMISSION_SENSORS=0' ] end end endこの状態だとまだ、すべてのパーミッションのリクエストON状態なので、
不要のないパーミッションの箇所をコメントアウト解除することで、削除できます。↓ 以下例は、すべてのパーミッションの関連を削除した状態例です。
Podfile.post_install do |installer| installer.pods_project.targets.each do |target| target.build_configurations.each do |config| config.build_settings['ENABLE_BITCODE'] = 'NO' # You can remove unused permissions here # for more infomation: https://github.com/BaseflowIT/flutter-permission-handler/blob/develop/ios/Classes/PermissionHandlerEnums.h # e.g. when you don't need camera permission, just add 'PERMISSION_CAMERA=0' config.build_settings['GCC_PREPROCESSOR_DEFINITIONS'] ||= [ '$(inherited)', # dart: PermissionGroup.calendar 'PERMISSION_EVENTS=0', # dart: PermissionGroup.reminders 'PERMISSION_REMINDERS=0', # dart: PermissionGroup.contacts 'PERMISSION_CONTACTS=0', # dart: PermissionGroup.camera 'PERMISSION_CAMERA=0', # dart: PermissionGroup.microphone 'PERMISSION_MICROPHONE=0', # dart: PermissionGroup.speech 'PERMISSION_SPEECH_RECOGNIZER=0', # dart: PermissionGroup.photos 'PERMISSION_PHOTOS=0', # dart: [PermissionGroup.location, PermissionGroup.locationAlways, PermissionGroup.locationWhenInUse] 'PERMISSION_LOCATION=0', # dart: PermissionGroup.notification 'PERMISSION_NOTIFICATIONS=0', # dart: PermissionGroup.mediaLibrary 'PERMISSION_MEDIA_LIBRARY=0', # dart: PermissionGroup.sensors 'PERMISSION_SENSORS=0' ] end end end必要に応じて、
pod update
pod install
を実行。
これで、has one or more issuesメールがMissing Push Notification Entitlementにみになり、送信が正常に完了できました。
送られてきたメール
Dear Developer,
We identified one or more issues with a recent delivery for your app, "アプリ名" 1.0.0 (1). Please correct the following issues, then upload again.
ITMS-90683: Missing Purpose String in Info.plist - Your app's code references one or more APIs that access sensitive user data. The app's Info.plist file should contain a NSContactsUsageDescription key with a user-facing purpose string explaining clearly and completely why your app needs the data. Starting Spring 2019, all apps submitted to the App Store that access user data are required to include a purpose string. If you're using external libraries or SDKs, they may reference APIs that require a purpose string. While your app might not use these APIs, a purpose string is still required. You can contact the developer of the library or SDK and request they release a version of their code that doesn't contain the APIs. Learn more (https://developer.apple.com/documentation/uikit/core_app/protecting_the_user_s_privacy).
ITMS-90683: Missing Purpose String in Info.plist - Your app's code references one or more APIs that access sensitive user data. The app's Info.plist file should contain a NSCalendarsUsageDescription key with a user-facing purpose string explaining clearly and completely why your app needs the data. Starting Spring 2019, all apps submitted to the App Store that access user data are required to include a purpose string. If you're using external libraries or SDKs, they may reference APIs that require a purpose string. While your app might not use these APIs, a purpose string is still required. You can contact the developer of the library or SDK and request they release a version of their code that doesn't contain the APIs. Learn more (https://developer.apple.com/documentation/uikit/core_app/protecting_the_user_s_privacy).
ITMS-90683: Missing Purpose String in Info.plist - Your app's code references one or more APIs that access sensitive user data. The app's Info.plist file should contain a NSAppleMusicUsageDescription key with a user-facing purpose string explaining clearly and completely why your app needs the data. Starting Spring 2019, all apps submitted to the App Store that access user data are required to include a purpose string. If you're using external libraries or SDKs, they may reference APIs that require a purpose string. While your app might not use these APIs, a purpose string is still required. You can contact the developer of the library or SDK and request they release a version of their code that doesn't contain the APIs. Learn more (https://developer.apple.com/documentation/uikit/core_app/protecting_the_user_s_privacy).
ITMS-90683: Missing Purpose String in Info.plist - Your app's code references one or more APIs that access sensitive user data. The app's Info.plist file should contain a NSMotionUsageDescription key with a user-facing purpose string explaining clearly and completely why your app needs the data. Starting Spring 2019, all apps submitted to the App Store that access user data are required to include a purpose string. If you're using external libraries or SDKs, they may reference APIs that require a purpose string. While your app might not use these APIs, a purpose string is still required. You can contact the developer of the library or SDK and request they release a version of their code that doesn't contain the APIs. Learn more (https://developer.apple.com/documentation/uikit/core_app/protecting_the_user_s_privacy).
ITMS-90683: Missing Purpose String in Info.plist - Your app's code references one or more APIs that access sensitive user data. The app's Info.plist file should contain a NSSpeechRecognitionUsageDescription key with a user-facing purpose string explaining clearly and completely why your app needs the data. Starting Spring 2019, all apps submitted to the App Store that access user data are required to include a purpose string. If you're using external libraries or SDKs, they may reference APIs that require a purpose string. While your app might not use these APIs, a purpose string is still required. You can contact the developer of the library or SDK and request they release a version of their code that doesn't contain the APIs. Learn more (https://developer.apple.com/documentation/uikit/core_app/protecting_the_user_s_privacy).
Though you are not required to fix the following issues, we wanted to make you aware of them:
ITMS-90078: Missing Push Notification Entitlement - Your app appears to register with the Apple Push Notification service, but the app signature's entitlements do not include the "aps-environment" entitlement. If your app uses the Apple Push Notification service, make sure your App ID is enabled for Push Notification in the Provisioning Portal, and resubmit after signing your app with a Distribution provisioning profile that includes the "aps-environment" entitlement. Xcode does not automatically copy the aps-environment entitlement from provisioning profiles at build time. This behavior is intentional. To use this entitlement, either enable Push Notifications in the project editor's Capabilities pane, or manually add the entitlement to your entitlements file. For more information, see https://developer.apple.com/library/content/documentation/NetworkingInternet/Conceptual/RemoteNotificationsPG/HandlingRemoteNotifications.html#//apple_ref/doc/uid/TP40008194-CH6-SW1.
ITMS-90683: Missing Purpose String in Info.plist - Your app's code references one or more APIs that access sensitive user data. The app's Info.plist file should contain a NSLocationAlwaysUsageDescription key with a user-facing purpose string explaining clearly and completely why your app needs the data. Starting Spring 2019, all apps submitted to the App Store that access user data are required to include a purpose string. If you're using external libraries or SDKs, they may reference APIs that require a purpose string. While your app might not use these APIs, a purpose string is still required. You can contact the developer of the library or SDK and request they release a version of their code that doesn't contain the APIs. Learn more (https://developer.apple.com/documentation/uikit/core_app/protecting_the_user_s_privacy).
ITMS-90683: Missing Purpose String in Info.plist - Your app's code references one or more APIs that access sensitive user data. The app's Info.plist file should contain a NSLocationWhenInUseUsageDescription key with a user-facing purpose string explaining clearly and completely why your app needs the data. Starting Spring 2019, all apps submitted to the App Store that access user data are required to include a purpose string. If you're using external libraries or SDKs, they may reference APIs that require a purpose string. While your app might not use these APIs, a purpose string is still required. You can contact the developer of the library or SDK and request they release a version of their code that doesn't contain the APIs. Learn more (https://developer.apple.com/documentation/uikit/core_app/protecting_the_user_s_privacy).
Best regards,
The App Store Team
- 投稿日:2020-03-25T20:05:00+09:00
FlutterでWidgetの位置とサイズを取得する
FlutterでWidgetの位置やサイズを取得したい
検索しても地図上の位置を取得するのばっかヒットしてつらい
GlobalKeyを使ってRenderBoxを取得する
参考サイト:https://medium.com/@diegoveloper/flutter-widget-size-and-position-b0a9ffed9407
TestState.dart//class TestWidgetは省略 GlobaleKey globaleKey = GlobalKey(); //←これが重要 class _TestState extends State<TestWidget>{ @override Widget build(BuildContext context) { return Column( children: <Widget>[ Expanded( child: RaisedButton( child: Text("test"), onPressed: (){ //↓変数はRenderBoxで宣言(.findRenderObject()で帰ってくるのは"RenderObject"のため RenderBox box = globalKey.currentContext.findRenderObject(); print("ウィジェットのサイズ :${box.size}"); print("ウィジェットの位置 :${box.localToGlobal(Offset.zero)}"); }, ), ), Center( child: Text("このウィジェットのサイズ", key: globalKey, //←知りたいWidgetにGlobalKeyをセット ), ), ], ); } }RenderBox box = globalKey.currentContext.findRenderObject();
↑
これでGlobalKeyをセットしたWidgetを元に描画されたRenderBoxインスタンスを取得出来ます。(返ってくるのはRenderObjectなので変数の宣言はRenderBoxにする)結果
ウィジェットのサイズ :Size(88.0, 48.0)
ウィジェットの位置 :Offset(0.0,24.0).localeToGlobal(Offset)で取得している位置は、ウィジェットの左上の点
引数のOffsetがゼロでない場合、その分の座標が足される注意点
GlobalKeyを付けたWidgetが一度もBuildされていない場合、RenderBoxは取得出来ない
一度もWidgetがbuildされていない場合、RenderBoxはそもそも描画されていないので取得出来ません。(大きさが可変のWidgetを考えてみれば分かる)//失敗するやり方 GlobaleKey globaleKey = GlobaleKey(); class _TestState extends State<TestWidget> { //サイズと位置を取得するメソッド String _getLocaleAndSize() { RenderBox box = globalKey.currentContext.findRenderObject(); return "ウィジェットのサイズ :${box.size}\n" "ウィジェットの位置 :${box.localToGlobal(Offset.zero)}"; } @override Widget build(BuildContext context) { return Column( children: <Widget>[ Expanded( child: RaisedButton( child: Text(_getLocaleAndSize()),//←ボタンのタイトルにする onPressed: () { print(_getLocaleAndSize); }, ), ), Center( child: Text( "このウィジェットのサイズ", key: globalKey, ), ), ], ); } }結果
エラー
The method 'findRenderObject' was called on null.
Receiver: null
Tried calling: findRenderObject()回避法
WidgetsBinding.instance.addPostFrameCallback(Function callback)を使う
WidgetsBinding.addPostFrameCallbackを使うとBuild終了時に実行する処理が書けますvar globalKey = GlobalKey(); class _TestState extends State<TestWidget> { String _getLocaleAndSize() { RenderBox box = globalKey.currentContext.findRenderObject(); return "ウィジェットのサイズ :${box.size}\n" "ウィジェットの位置 :${box.localToGlobal(Offset.zero)}"; } String _text;//←変数を用意 @override Widget build(BuildContext context) { if (_text == null)//Build時、テキストがnullの場合↓を実行 WidgetsBinding.instance.addPostFrameCallback((cb){ setState(() { _text = _getLocaleAndSize(); }); }); return Column( children: <Widget>[ Expanded( child: RaisedButton( child: Text(_text ?? "テキストはまだない"), onPressed: () { print(_getLocaleAndSize); }, ), ), Center( child: Text( "このウィジェットのサイズ", key: globalKey, ), ), ], ); } }注意
WidgetsBinding.addPostFrameCallbackは他にも色々使えて便利ですが、build時に使用するときは無限ループしないように気をつけましょうね~
- 投稿日:2020-03-25T19:41:24+09:00
@Stateの値によって処理を制御する方法いくつか
はじめに
@Stateで定義した値に変化が生じた際、それに応じて処理を挟み込むいくつかの方法です。準備
デモ用に、文字列の末尾が3の倍数だったらアホになるExtensionを生やします。
extension String {
    var needsAho: Bool {
        self.last
            .flatMap { Int("\($0)") }
            .flatMap { $0 % 3 == 0 } ?? false
    }
}
1. Computed Propertyを使う
- 一番シンプルな方法で、値に変化があると即時に反映されます
struct ContentView: View {
    @State private var inputText: String = ""
    private var displayText: String {
        inputText.needsAho ? "?" : ""
    }

    var body: some View {
        VStack {
            TextField("title", text: $inputText)
            Text(displayText)
        }.padding()
    }
}
2. Publishedを使う
- 1.の方法では、例えば「1秒間の間に連続されて入力された場合、まとめて1回だけ処理を行いたい」といった場合などに対応できません
ObservableObjectにPublishedプロパティを生やすことで、Publisherとして扱うことができるようになるので、Combineオペレーターを使えるようになりますclass ViewModel: ObservableObject { @Published var inputText: String = "" @Published var displayText: String = "" private var cancellables: Set<AnyCancellable> = [] init() { $inputText .debounce(for: 1.0, scheduler: DispatchQueue.main) .map { $0.needsAho ? "?" : "" } .receive(on: DispatchQueue.main) .assign(to: \.displayText, on: self) .store(in: &self.cancellables) } deinit { self.cancellables.forEach { $0.cancel() } } } struct ContentView: View { @ObservedObject private var viewModel = ViewModel() var body: some View { VStack { TextField("title", text: $viewModel.inputText) Text(viewModel.displayText) }.padding() } }
3. CurrentValueSubjectを使う
- 2の方法では、いちいち
ObservableObjectを作らなくてはなりませんCurrentValueSubjectを@Stateプロパティで持っておけば、Viewだけで同様の挙動を実現できますstruct ContentView: View { @State private var inputTextSubject: CurrentValueSubject<String, Never> = .init("") @State private var displayText: String = "" @State private var cancellables: Set<AnyCancellable> = [] var body: some View { VStack { TextField("title", text: $inputTextSubject.value) Text(displayText) } .padding() .onAppear { self.inputTextSubject .debounce(for: 1.0, scheduler: DispatchQueue.main) .map { $0.needsAho ? "?" : "" } .receive(on: DispatchQueue.main) .assign(to: \.displayText, on: self) .store(in: &self.cancellables) } .onDisappear { self.cancellables.forEach { $0.cancel() } } } }


- 投稿日:2020-03-25T19:23:05+09:00
AVSampleBufferDisplayLayerを透過する
特殊なケースですが、透過情報を持ったSampleBufferを
AVSampleBufferDisplayLayerにenqueueしても、背景が透過されないことがあります。これは
AVSampleBufferDisplayLayerが透過できない訳ではなく、enqueueしたCMSampleBufferに透過情報があるかどうかのフラグが有効になっていないため起こる問題です。次のようにSampleBufferに含まれるimageBufferに対して
kCVImageBufferAlphaChannelIsOpaqueフラグを落とせば透過が有効になります。imageBuffer.attachments.merge([kCVImageBufferAlphaChannelIsOpaque as String : false], mode: .shouldPropagate)
- 投稿日:2020-03-25T18:43:59+09:00
FlutterでSplashスクリーンを設定する
SplashScreenとは?
アプリを起動させた時にアイコンが中央に表示される画面のことです。
これがあるだけで、大分アプリっぽくなりますよね?
実装にはiOSとAndroidで異なる手順を踏まなくてはいけなくなるので、
それぞれについて説明していきます。iOS
iOSは比較的簡単な手順で済みます。
1. project/ios/Runner/Assets.xcassets/LaunchImage.imageset/配下に画像を保存
2. project/ios/Runner/Assets.xcassets/LaunchImage.imageset/Contents.jsonを編集
以上の2つのみです。画像を保存
この時、画像は1x, 2x, 3xの3つの倍率を用意しなければいけません。
カスタムで4xの倍率を用意してもいいみたいです。Contents.jsonの編集
Contents.jsonを以下のコードに書き換えます。
{
  "images" : [
    {
      "idiom" : "universal",
      "filename" : "画像ファイル名.png",
      "scale" : "1x"
    },
    {
      "idiom" : "universal",
      "filename" : "画像ファイル名@2x.png",
      "scale" : "2x"
    },
    {
      "idiom" : "universal",
      "filename" : "画像ファイル名@3x.png",
      "scale" : "3x"
    },
    {
      "idiom" : "universal",
      "filename" : "画像ファイル名@4x.png",
      "scale" : "4x"
    }
  ],
  "info" : {
    "version" : 1,
    "author" : "xcode"
  }
}
Android
Androidは結構苦戦しました?
その時遭遇したエラー対処方法なども一緒に載せておくので、合わせてみていただけると
問題なくできると思います。
1. project/android/app/src/main/res/配下に画像を保存
2. project/android/app/src/main/res/values/styles.xmlを編集
3. project/android/app/src/main/res/drawable/launch_backgound.xmlに追加
以上の3つの手順になります。画像を保存する
AndroidはiOSと異なり、hdpi,mdpi,xhdpi,xxhdpi,xxxhdpiの5つの倍率を用意しなければいけません。
また、{フォルダ名}-hdpi/{画像ファイル名} のように、それぞれの倍率をディレクトリごとで分けなければいけないので少し面倒です?
ここで画像ファイル名を決める時に、大文字と-(ハイフン)は使用できないので注意してください!
a-zと0-9と_(アンダースコア)のみになりますので、iOSの方で画像名に大文字を使用している場合は変更が必要になります。styles.xmlを編集
styles.xmlを以下のコードに書き換えます。
カラーコードが書かれているところは背景色の色なので、好きな色に変更することができます。<?xml version="1.0" encoding="utf-8"?> <resources> <style name="LaunchTheme" parent="@android:style/Theme.Black.NoTitleBar"> <item name="android:windowBackground">@フォルダ名/launch_background</item> </style> <!-- #FFFFFFはカスタム可能です--> <color name="background">#FFFFFF</color> </resources>launch_background.xmlを編集
android:drawableを@color/backgroudに置き換えます。
これによりstyles.xmlで指定した背景色に変更することができます。
また、新たにitemタグを追加してください。... <item android:drawable="@color/background"/> <item android:drawable="@フォルダ名/画像ファイル名" android:gravity="center" /> ...エラー対処
adb: failed to install /Users//Desktop/flutter_sample/build/app/outputs/apk/app.apk: Failure [INSTALL_FAILED_INSUFFICIENT_STORAGE] Error launching application on Android SDK built for x86.
実行しようとすると上記のエラーが出て、デバッグできないようなことがありました。
これは、エミュレータのStorageがいっぱいになっているのが原因でした。
- エミュレータの不要なアプリを消す
- 新規のエミュレータを作成する
このどちらかを行えば解決しました。
SplashScreenとは関係のないエラーですが、参考までに記述しておきます。Splashスクリーンの表示アイコンが大きすぎる
もう一つはAndroidのみで起きた現象ですが、用意したアイコンが大きすぎたのか、画面いっぱいにアイコンが表示されてしまいました。
この対処にはlaunch_background.xmlを追加で編集する必要があります。
先ほど追加したitemタグの要素にwidthとheightを指定してあげるといい感じに修正できました?<item android:width="200dp" <--追加 android:height="200dp" <--追加 android:drawable="@mipmap/launch_splash" android:gravity="center" />まとめ
Androidでやけに苦戦しまいましたが、なんとか実装ができました!
次回はアプリアイコンについてやろうかなと思います?
誰かのお役に立てたら嬉しいです?✨
それではまた!参考文献
https://qiita.com/shinki_uei/items/c0b9b9a6d25e280c7bec
https://www.developerlibs.com/2018/07/flutter-how-to-fix-white-screen-on-app.html
https://miajimyu.hatenablog.com/entry/2019/09/30/212723
- 投稿日:2020-03-25T17:04:52+09:00
【iOS】AppStoreアプリ申請 Reject(リジェクト)例
アプリ申請をしてみたら以下のようなリジェクトがあったので、共有ついでに、対処方法ご存知の方いましたら、おまちしています。
ちなみに今回が初めての申請で、、とはいえとてもしょうもないアプリをテスト的に配布してみようかなと思ったので、コンテンツ不足とかは予測していましたが、、、
リジェクト内容
Hello,

We are unable to continue this app’s review because your Apple Developer Program account is currently under investigation for not following the App Store Review Guidelines’ Developer Code of Conduct.

Common practices that may lead to an investigation include, but are not limited to:

- Inaccurately describing an app or service
- Misleading app content
- Engaging in inauthentic ratings and reviews manipulation
- Providing misleading customer support responses
- Providing misleading responses in Resolution Center
- Engaging in misleading purchasing or bait-and-switch schemes
- Engaging in other dishonest or fraudulent activity within or outside of the app

During our investigation, we will not review any apps you submit. Please do not create a new developer account or make any app transfers while waiting for the investigation to be completed. Once we have completed our investigation, we will notify you via Resolution Center. Due to the nature of the investigation you will be ineligible to receive an expedited review until the investigation is completed.

We do not require any additional information from you at this time, nor do we have any additional details to share. We appreciate your continued patience during our investigation.

Best regards,

App Store Review
ちなみにGoogle翻訳
こんにちは、

Apple Developer Programアカウントは現在、App Storeレビューガイドラインの開発者の行動規範に違反しているため、調査中であるため、このアプリのレビューを続行できません。

調査につながる可能性のある一般的な慣行には以下が含まれますが、これらに限定されません。

-アプリやサービスを不正確に説明している
-誤解を招くアプリコンテンツ
-信頼できない評価とレビュー操作に従事する
-誤解を招く顧客サポート応答を提供する
-解決センターで誤解を招く応答を提供する
-誤解を招く購入や餌とスイッチのスキームに従事
-アプリ内外での不正行為や不正行為

調査中、送信されたアプリは確認されません。調査が完了するまで、新しいデベロッパーアカウントを作成したり、アプリを転送したりしないでください。調査が完了すると、解決センターを通じて通知されます。調査の性質上、調査が完了するまで、迅速な審査を受けることはできません。

現時点では、お客様からの追加情報は必要ありません。また、共有する追加情報もありません。調査中、引き続きご理解いただきますようお願いいたします。

宜しくお願いします、

App Storeレビュー
参考までに
- 投稿日:2020-03-25T05:22:51+09:00
Kivy-iOS メモ
Kivyとは?
python3 でiOSアプリやandroidアプリなどのUIを記述可能なライブラリ
Kivy導入時に参考にした情報をまとめておく。
導入
- https://qiita.com/sobassy/items/b06e76cf23046a78ba05
- https://github.com/kivy/kivy-ios
- https://qiita.com/tea63/items/c318ac7a1c09a78acab0
pathの繋げ方(エラー出た人だけ)