- 投稿日:2020-01-17T23:52:08+09:00
Laravel6.xでLINEログインしてみた
Laravel6.xでLINEログインしてみた時のメモ。
環境
Mac
Laravel Framework 6.9.0環境構築
以下を参考にしました。わかりやすかったです。ありがとうございます。
参考サイト:初心者でもLaradockでLaravelの環境構築をエラーなしで行おう!(Mac ver)
https://qiita.com/mukae_tech/items/24709085948a6d707da3実装
Laravelのプロジェクトを作成したので、実装していきます。
以下のLINEドキュメントを参考にしています。参考サイト:ウェブアプリにLINEログインを組み込む
https://developers.line.biz/ja/docs/line-login/web/integrate-line-login/LINEドキュメントにある通り、LINEコンソールでチャネルを作成しないといけないです。
Git
https://github.com/hinamomo/laravel60-quickstart-basic
ソース抜粋
ルーティング
app/routes/web.phpRoute::get('/', function () { return view('welcome'); }); Route::get('/home', 'HomeController@index')->name('home'); Route::get('/line_login', 'LineLoginController@index')->name('line_login');初期表示画面
ヘッダー部やスタイル部は省略しています。
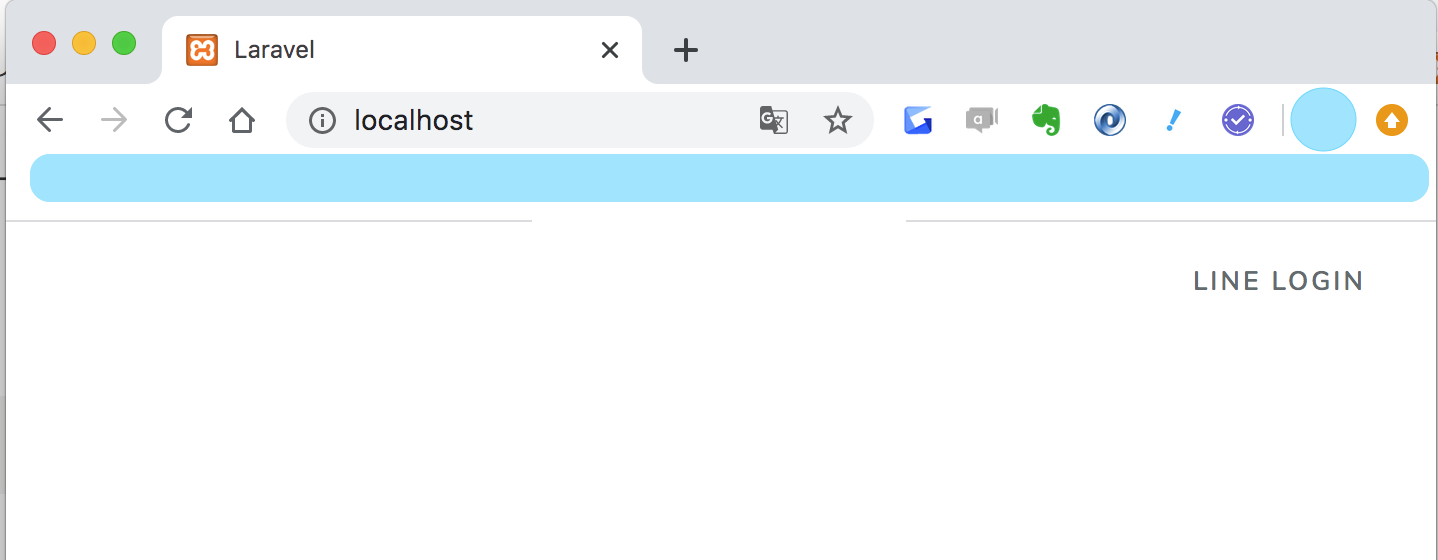
app/resources/views/welcome.blade.php<body> <div class="flex-center position-ref full-height"> <div class="top-right links"> <a href="/line_login">LINE LOGIN</a> </div> </div> <!-- エラーメッセージがある場合--> @if (session('flash_message')) <div class="content top-center flex-center flash_message bg-success text-center py-3 my-0"> {{ session('flash_message') }} </div> @endif </body>LINEログインコントローラ
app/Http/Controllers/LineLoginController<?php namespace App\Http\Controllers; use Illuminate\Http\Request; use App\Task; use Illuminate\Support\Str; class LineLoginController extends Controller { public function index() { // state生成 $state = Str::random(40); \Cookie::queue('state', $state,100); // nonce生成 $nonce = Str::random(40); \Cookie::queue('nonce', $nonce,100); // LINE認証 $uri ="https://access.line.me/oauth2/v2.1/authorize?response_type=code"; $client_id_uri = "&client_id=".env('CLIENT_ID', false); $redirect_uri ="&redirect_uri=http://localhost/home"; $state_uri = "&state=".$state; $scope_uri="&scope=openid%20profile"; $prompt_uri = "&prompt=consent"; $nonce_uri = "&nonce="; return redirect($uri.$client_id_uri.$redirect_uri.$state_uri.$scope_uri.$prompt_uri.$nonce_uri); } }ホームコントローラ
CLIENT_IDとCHANNEL_SECRETの値はLINEコンソールの値を設定します。
私は.envに書いたものを呼び出しています。
(定数ファイルとかも作った方が良いですね。。とりあえずgit ignoreされているファイルに書いてみました)app/Http/Controllers/HomeController<?php namespace App\Http\Controllers; use Illuminate\Http\Request; use App\Task; use GuzzleHttp\Client; class HomeController extends Controller { /** * Show the application dashboard. * * @return \Illuminate\Contracts\Support\Renderable */ public function index(Request $request) { // state検証 $state_line = $request->input('state'); $state_cookie = \Cookie::get('state'); // stateが異なる場合 if($state_line !== $state_cookie){ \Session::flash('flash_message', 'state検証エラー'); return redirect('/'); } // エラーレスポンスが返って来た場合はエラーを返却 $error_description = $request->input('error_description'); if($error_description != ""){ \Session::flash('flash_message', '権限が拒否されました'); return redirect('/'); } // アクセストークンを発行する $code = $request->input('code'); $this->basic_request($code); $tasks = Task::orderBy('created_at','asc')->get(); return view('tasks',[ 'tasks' => $tasks ]); } // アクセストークン発行 // 参考 https://yaba-blog.com/laravel-call-api/ public function basic_request(String $code) { $client = new Client(); $response = $client->request('POST', 'https://api.line.me/oauth2/v2.1/token', array( "headers" => array( "Content-Type" => "application/x-www-form-urlencoded", ), "form_params" => array( "grant_type" => "authorization_code", "code" => $code, "redirect_uri" => "http://localhost/home", "client_id" => env('CLIENT_ID', false), "client_secret" => env('CHANNEL_SECRET') ) )); $post = $response->getBody(); $post = json_decode($post, true); //レスポンスから新規記事のURLを取得 $access_token = $post['access_token']; $this-> verify_access_token($access_token); } // アクセストークン検証 public function verify_access_token(String $access_token){ $url = "https://api.line.me/oauth2/v2.1/verify?access_token=" . $access_token ; $method = "GET"; //接続 $client = new Client(); $response = $client->request($method, $url); $posts = $response->getBody(); $posts = json_decode($posts, true); } }ホーム画面(メイン側)
ナビゲーター(タイトルっぽい部分)のタイトル名だけ変更したのでそこだけ載せておきます
resources/views/layouts/app.blade.php<nav class="navbar navbar-default"> <div class="container"> <div class="navbar-header"> <!-- Branding Image --> <a class="navbar-brand" href="{{ url('/') }}"> ホーム </a> </div> </div> </nav>ホーム画面(サブ側)
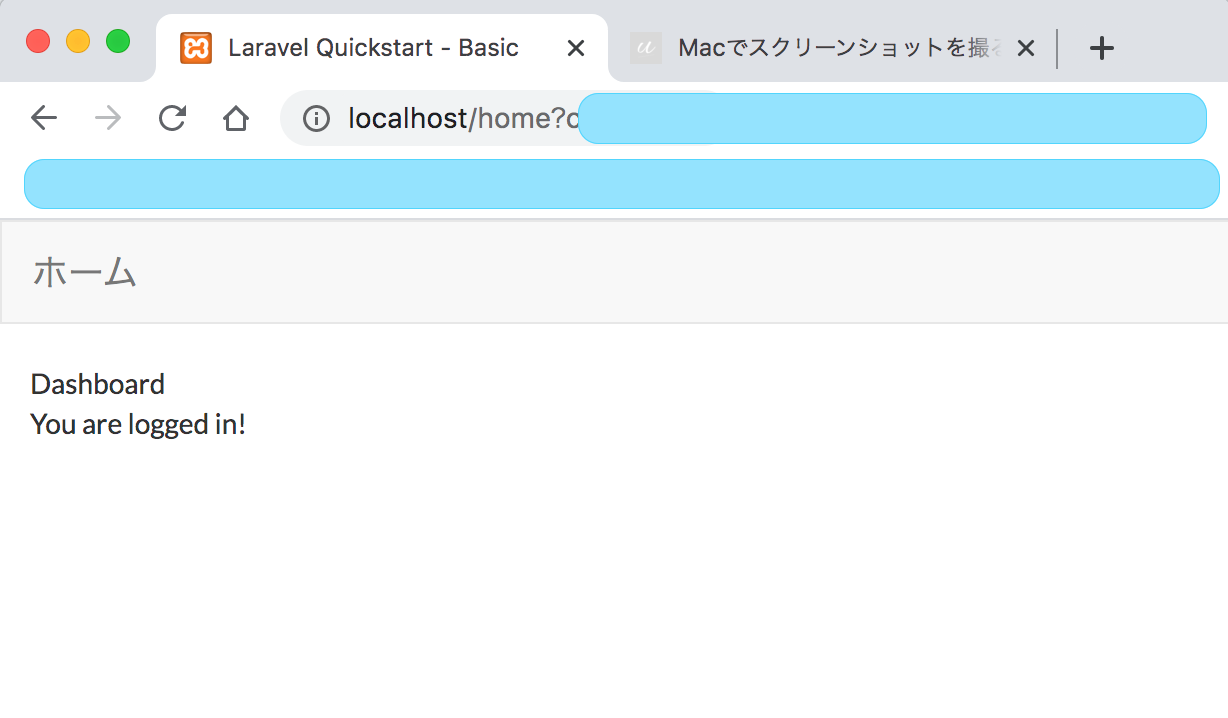
/resources/views/home.blade.php@extends('layouts.app') @section('content') <div class="container"> <div class="row justify-content-center"> <div class="col-md-8"> <div class="card"> <div class="card-header">Dashboard</div> <div class="card-body"> @if (session('status')) <div class="alert alert-success" role="alert"> {{ session('status') }} </div> @endif You are logged in! </div> </div> </div> </div> </div> @endsection実際の画面
初期表示画面
ここからスタート
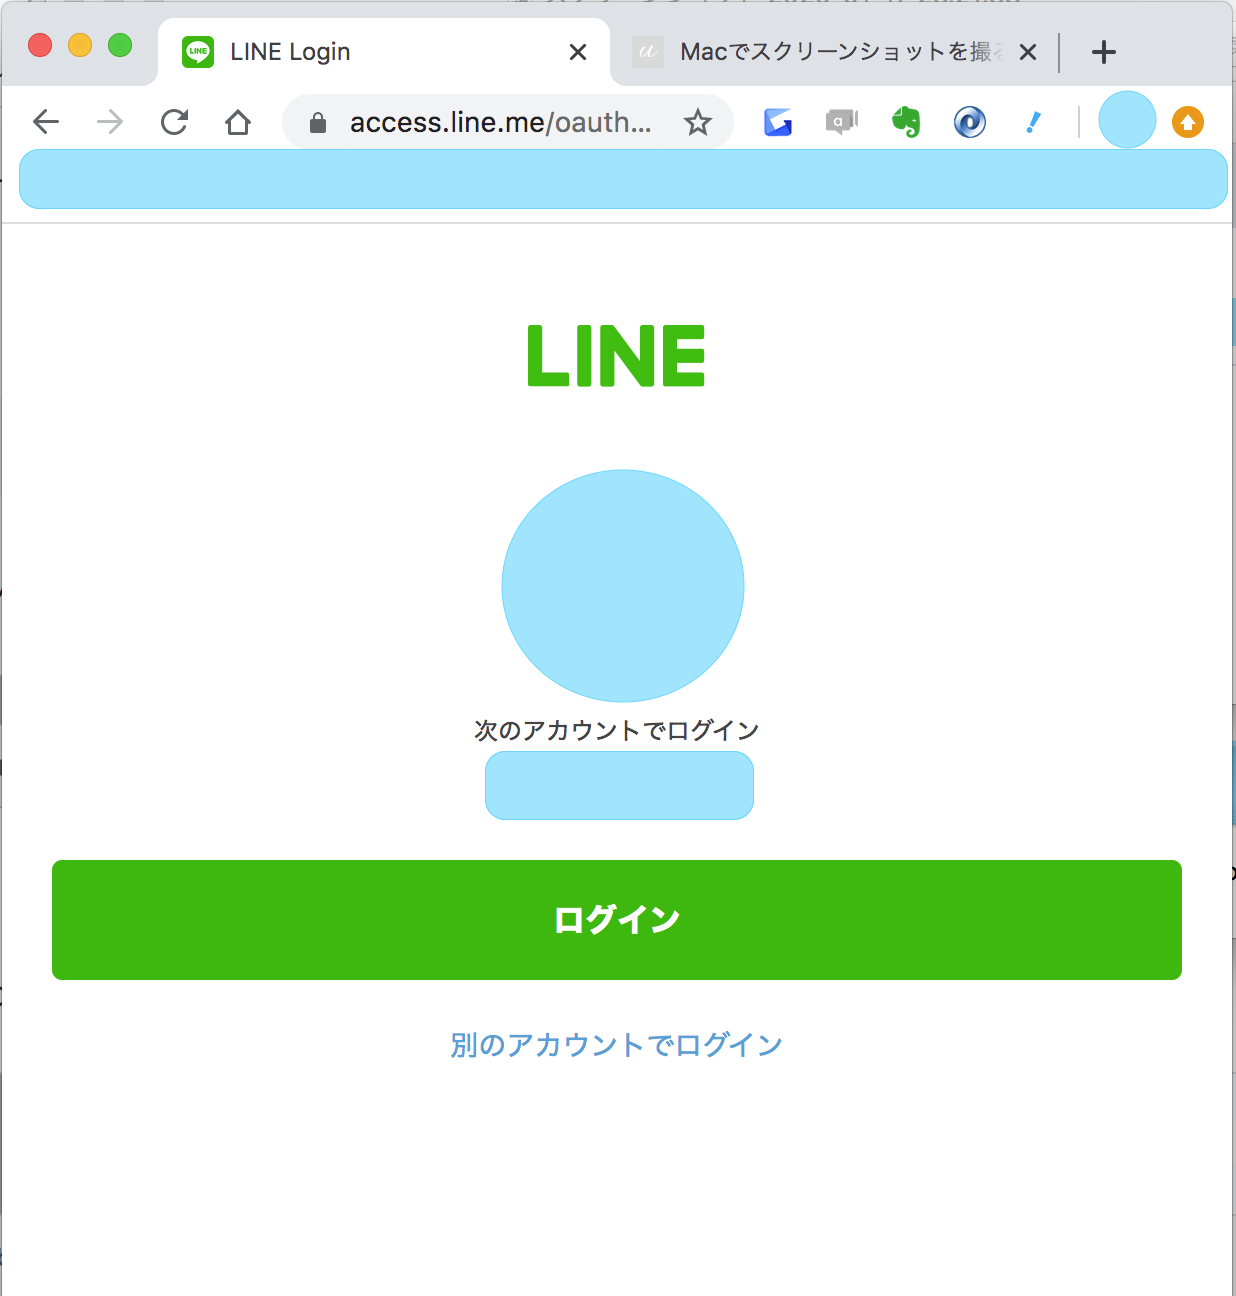
LINEログイン画面(LINEにリクエストを送ったらリダイレクトされる)
あ、サービス連携する時よく見るやつだ(小並感)
LINE権限許可画面(LINEログイン後、リダイレクトされる)
あ、無料スタンプダウンロードする時よく見るやつだ(小並感)
ホーム画面
ログインできた!
まとめ
冬休みにやっていたことまとめ。
LINEのユーザ情報を取得できたりもしますが、水色編集が増えて大変なので(そこ?)、
ログインのところまでまとめました。
API呼び出しの書き方とかレスポンスの項目取得の書き方とか
とにかく書き方がわからなくてもどかしかったです。
もっと勉強したいです。
初めての投稿で緊張します。
えい(ぽち)

- 投稿日:2020-01-17T23:26:02+09:00
3秒でPHPのコードをデバッグする方法
こちらのPHP SandboxというサイトからPHPをお手軽実行できます
PHPのバージョンも選べるので最高ですね
http://sandbox.onlinephpfunctions.com/先輩に教えてもらいました

- 投稿日:2020-01-17T23:14:14+09:00
Laravel REST API事始め
Laravel事始め
簡単な勤怠入力が可能なシステムを作ってみようということで去年末から色々検討した末にバックエンドをPHP/Laravelで構築することに決めたので、早速触ってみようということでやってみたことので、その流れをざっくりメモ。
記憶を頼りに書いているのでなにか間違っているかもしれない。
内容
- Windows 10にPHPとLaravelを入れる
- REST APIでGET/POSTリクエストを受付
- MySQLを読み書き
- VSCodeでデバッグする
環境
- Windows 10 (10.0.18363)
- MySQL 8.0
- PHP 7.3.8 TS x64
- Laravel 6.11.0
- VSCode 1.14.1
導入編
MySQLの導入
dev.mysql.comから
MySQL Community Serverを落としてきてインストールWorkbenchを起動して適当にDBを作成
PHPの導入
インストール
- windows.php.netから
VC15 x64 Thread Safeを落としてきてPATHを通す- xdebug.orgから
PHP 7.3 VC15 TS (64 bit)を落としてきてextension_dir配下に配置設定
php.ini-development.iniをコピーしてphp.iniを作成
extension_dirのコメントを外しextension_dir = "D:/php/ext"のようにフルパスで設定
Dynamic Extensionsセクションで以下の機能を有効化
curlmbstringopensslpdo_mysqlpdo_sqlite最終行にxdebugセクションを追加
   [xdebug]
   zend_extension="ふるぱす/php_xdebug-2.9.1-7.3-vc15-x86_64.dll"
   xdebug.remote_enable=1
   xdebug.remote_autostart=1
Laravelの導入
- getcomposer.orgからComposerを落としてきてインストール
composer global require laravel/installerを叩くlaravel new hogeでプロジェクトを作成php artisan serveで起動確認VSCodeの設定
- 以下の拡張機能をインストール
PHP DebugPHP IntelliSense開発編
DB設定
.envを開きDB_CONNECTION=mysqlの辺りを設定モデルの作成
DBアクセスを提供してくれるっぽい
php artisan make:model Hogeでモデルを作成database\migrations\にモデルが出来ているので適当なテーブルレイアウトになるように変更
- カラムの型は公式ドキュメント
php artisan migrateでDBにテーブルが生える
- PKとか細かい設定はDB側で変える
コントローラーの作成
HTTPリクエストの受け口。勝手にルーティングしてくれる
php artisan make:controller HogeContoller -rでコントローラーを生成- 各メソッドの動きは次のような感じっぽい。書いてないのは使ってない
index()はコントローラーにGET投げたときに- GET: example.com/hoge/
show()はコントローラーにパラメーター付きの投げたときに- GET: example.com/hoge/123
store()はコントローラーにPOST投げたときに- POST: example.com/hoge/
- コードの頭の方に
use App\Hoge;としてモデルを参照できるようにするルーターの調整
routes\web.phpにRoute::resource('hoge', 'HogeController');を追加。これで/hogeをHogeControllerに割当できるようになるコントローラーの調整
DBの内容を全件返す
return response(Hoge::all());DBの内容をフィルタして返す
return response(Hoge::all()->where('カラム名', '=', $id));DBにデータを登録する
php
Hoge::create([
"id": "1",
"name": "hogeyama hoge"
]);
このときモデル
app\Hoge.phpで登録したいフィールドを許可する必要があるので、以下のように実装
protected $fillable= array('id', 'name');トラブルシュート
POSTするとpage expired
routes\web.phpにRoute::resource('hoge', 'HogeController');を追加した上でstore()にPOSTの処理を書くこと。
- 因みにこれはCSRF関係のエラーです
HTTP RESPONSE STATUSが500
- 実装がなんかおかしいのでデバッグして確認
Failed loading Zend extension 'php_xdebug-
- xdebugのDLLバージョンやTSの有無が違う。PHPのバージョンやビルドと一致したものにする
指定されたモジュールが見つかりません。と出ている場合は絶対パスで設定するto fillable property to allow mass assignment
- モデルの
$fillableでDBに登録許可する対象項目を設定する
protected $fillable= array('id', 'name');
- 投稿日:2020-01-17T23:14:14+09:00
Laravel事始め
Laravel事始め
簡単な勤怠入力が可能なシステムを作ってみようということで去年末から色々検討した末にバックエンドをPHP/Laravelで構築することに決め、早速触ってみようということで、その流れをざっくりメモ。
記憶を頼りに書いているのでなにか間違っているかもしれない。
内容
- Windows 10にPHPとLaravelを入れる
- REST APIでGET/POSTリクエストを受付
- MySQLを読み書き
- VSCodeでデバッグする
環境
- Windows 10 (10.0.18363)
- MySQL 8.0
- PHP 7.3.8 TS x64
- Laravel 6.11.0
- VSCode 1.14.1
導入編
MySQLの導入
dev.mysql.comから
MySQL Community Serverを落としてきてインストールWorkbenchを起動して適当にDBを作成
PHPの導入
インストール
- windows.php.netから
VC15 x64 Thread Safeを落としてきてPATHを通す- xdebug.orgから
PHP 7.3 VC15 TS (64 bit)を落としてきてextension_dir配下に配置設定
php.ini-development.iniをコピーしてphp.iniを作成
extension_dirのコメントを外しextension_dir = "D:/php/ext"のようにフルパスで設定
Dynamic Extensionsセクションで以下の機能を有効化
curlmbstringopensslpdo_mysqlpdo_sqlite最終行にxdebugセクションを追加
   [xdebug]
   zend_extension="ふるぱす/php_xdebug-2.9.1-7.3-vc15-x86_64.dll"
   xdebug.remote_enable=1
   xdebug.remote_autostart=1
Laravelの導入
- getcomposer.orgからComposerを落としてきてインストール
composer global require laravel/installerを叩くlaravel new hogeでプロジェクトを作成php artisan serveで起動確認VSCodeの設定
- 以下の拡張機能をインストール
PHP DebugPHP IntelliSense開発編
DB設定
.envを開きDB_CONNECTION=mysqlの辺りを設定モデルの作成
DBアクセスを提供してくれるっぽい
php artisan make:model Hogeでモデルを作成database\migrations\にモデルが出来ているので適当なテーブルレイアウトになるように変更
- カラムの型は公式ドキュメント
php artisan migrateでDBにテーブルが生える
- PKとか細かい設定はDB側で変える
コントローラーの作成
HTTPリクエストの受け口。勝手にルーティングしてくれる
php artisan make:controller HogeContoller -rでコントローラーを生成- 各メソッドの動きは次のような感じっぽい。書いてないのは使ってない
index()はコントローラーにGET投げたときに- GET: example.com/hoge/
show()はコントローラーにパラメーター付きのGET投げたときに- GET: example.com/hoge/123
store()はコントローラーにPOST投げたときに- POST: example.com/hoge/
- コードの頭の方に
use App\Hoge;としてモデルを参照できるようにするルーターの調整
routes\web.phpにRoute::resource('hoge', 'HogeController');を追加。これで/hogeをHogeControllerに割当できるようになるコントローラーの調整
DBの内容を全件返す
return response(Hoge::all());DBの内容をフィルタして返す
return response(Hoge::all()->where('カラム名', '=', $id));DBにデータを登録する
Hoge::create([
"id": "1",
"name": "hogeyama hoge"
]);
このときモデル
app\Hoge.phpで登録したいフィールドを許可する必要があるので、以下のように実装
protected $fillable= array('id', 'name');トラブルシュート
POSTするとpage expired
routes\web.phpにRoute::resource('hoge', 'HogeController');を追加した上でstore()にPOSTの処理を書くこと
- 因みにこれはCSRF関係のエラー
HTTP RESPONSE STATUSが500
- 実装がなんかおかしいのでデバッグして確認
Failed loading Zend extension 'php_xdebug-
- xdebugのDLLバージョンやTSの有無が違う。PHPのバージョンやビルドと一致したものにする
指定されたモジュールが見つかりません。と出ている場合は絶対パスで設定するto fillable property to allow mass assignment
- モデルの
$fillableでDBに登録許可する対象項目を設定する
protected $fillable= array('id', 'name');
- 投稿日:2020-01-17T22:49:16+09:00
CakePHPでredirect後、即actionを停止する方法
普段はaction内で
return $this->redirect(...)とやるのであまり気になりませんが、
例えば特殊な権限周りを別関数やComponentでチェックして、ダメなら呼び出し先で即redirectで飛ばしてしまいたい場合があります。
(毎回毎回action側で返り値見てif文でredirect...は面倒だし冗長)その場合、https://github.com/cakephp/cakephp/issues/11197 で提案されている、Exceptionを使う実装が良さそうです。
以下のようなコードをAppController.phpに書いて、redirect()の代わりにredirectWithException()を呼ぶだけで実装できます。ただし、この場合actinoがその場所で本当に止まるため、DBやファイル編集中に使わないよう注意が必要。
多分afterFilterやbeforeRedirectも動かない。↓サンプル (上リンクで提案されてる例から少し変更(RedirectExceptionやRouterの場所追加した))
// redirect()の代わりにredirectWithException()を使う
// AppController.phpにコピペでOK。

    public function redirectWithException($url, $status = 302) {
        throw new \Cake\Routing\Exception\RedirectException(\Cake\Routing\Router::url($url, true), $status);
    }

    public function startupProcess() {
        try {
            return parent::startupProcess();
        } catch (\Cake\Routing\Exception\RedirectException $e) {
            return $this->redirect($e->getMessage(), $e->getCode());
        }
    }

    public function invokeAction() {
        try {
            return parent::invokeAction();
        } catch (\Cake\Routing\Exception\RedirectException $e) {
            return $this->redirect($e->getMessage(), $e->getCode());
        }
    }

    public function shutdownProcess() {
        try {
            return parent::shutdownProcess();
        } catch (\Cake\Routing\Exception\RedirectException $e) {
            return $this->redirect($e->getMessage(), $e->getCode());
        }
    }
- 投稿日:2020-01-17T18:15:34+09:00
Symfony4.4 ログイン中のアカウントのパスワードの再チェックフォームの実装
課題
パスワードの変更やクレジットカードの削除など、システム上、重要な変更をする場合は、ログインをしている状態でも、本人確認のために、再度、パスワードを確認したい。
バリデーションを眺めていたら、目的に合致する機能があったので、使ってみました。
TL;DR
こちらも、ズバリ、バリデーションとして、UserPasswordが用意されている。
こちらを使うと、現在ログイン済みのアカウントのパスワードとチェックをしてくれるというもの。
フォームクラスとして、以下のように定義して使います。
コントローラとTwigテンプレも掲載します。App/Form/PasswordChangeType.php<?php namespace App\Form; use Symfony\Component\Form\AbstractType; use Symfony\Component\Form\Extension\Core\Type\PasswordType; use Symfony\Component\Form\Extension\Core\Type\RepeatedType; use Symfony\Component\Form\FormBuilderInterface; use Symfony\Component\OptionsResolver\OptionsResolver; use Symfony\Component\Security\Core\Validator\Constraints\UserPassword; use Symfony\Component\Validator\Constraints\Length; use Symfony\Component\Validator\Constraints\NotBlank; class PasswordChangeType extends AbstractType { public function buildForm(FormBuilderInterface $builder, array $options) { $builder ->add('oldPassword', PasswordType::class, [ 'constraints' => [ new UserPassword([ 'message' => '正しいパスワードを設定してください。' ]) ] ]) ->add('newPassword', RepeatedType::class, [ 'type' => PasswordType::class, 'required' => true, 'invalid_message' => '再入力されたパスワードと一致しません。', 'constraints' => [ new NotBlank([ 'message' => 'パスワードを設定指定ください。', ]), new Length([ 'min' => 6, 'minMessage' => 'パスワードは、{{ limit }}文字以上で設定してください。', // max length allowed by Symfony for security reasons 'max' => 100, 'maxMessage' => 'パスワードは、{{limit}}文字以内で設定してください。' ]), ], ]) ; } }App/Controller/changePasswordController.php/** * @Route("/password/change", name="password_change") * @param Request $request * @param UserPasswordEncoderInterface $passwordEncoder * @param Security $security * @return \Symfony\Component\HttpFoundation\Response */ public function changePassword(int $id, Request $request, UserPasswordEncoderInterface $passwordEncoder, Security $security) { $email = $security->getUser()->getUsername(); /** @var User $user */ $user = $this->getDoctrine()->getRepository(User::class)->findOneBy(['email' => $email]); $form = $this->createForm(UserPasswordType::class); $form->handleRequest($request); if ($form->isSubmitted() && $form->isValid()) { $user->setPassword( $passwordEncoder->encodePassword( $user, $form->get('newPassword')->getData() ) ); $this->getDoctrine()->getManager()->flush(); $this->addFlash('success', 'パスワードを変更しました。'); } return $this->render('changePassword/password.html.twig', [ 'passwordForm' => $form->createView() ]); }templates/changePassword/password.html.twig<div class="container"> <div class="row justify-content-center"> <div class="col-4"> {{ form_start(passwordForm) }} {{ form_row(passwordForm.oldPassword, {label:'現在のパスワード'}) }} {{ form_row(passwordForm.newPassword.first, {label:'新しいパスワード'}) }} {{ form_row(passwordForm.newPassword.second, {label:'新しいパスワード再入力'}) }} <button class="btn btn-primary" name="confirm" type="submit"><i class="fas fa-check fa-fw mr-2"></i>変更する</button> {{ form_end(passwordForm) }} </div> </div> </div>以下が実際の動作

- 投稿日:2020-01-17T17:18:21+09:00
Laravelで非同期チャットアプリを作ろう(1)
はじめに
この記事では、片方がコメントを送信したら、もう片方の人はリロードしなくても、コメントが表示されるチャットアプリを作っていきたいと思います。
完成物
認証機能の実装
雛形の生成
$ laravel new ChatAppマイグレーションの実行
$ cd ChatApp
$ php artisan migrate
laravel/uiのインストール
$ composer require laravel/uiログイン機能の実装
$ php artisan ui vue --auth
$ npm install
$ npm run dev
resources/views/welcome.blade.php
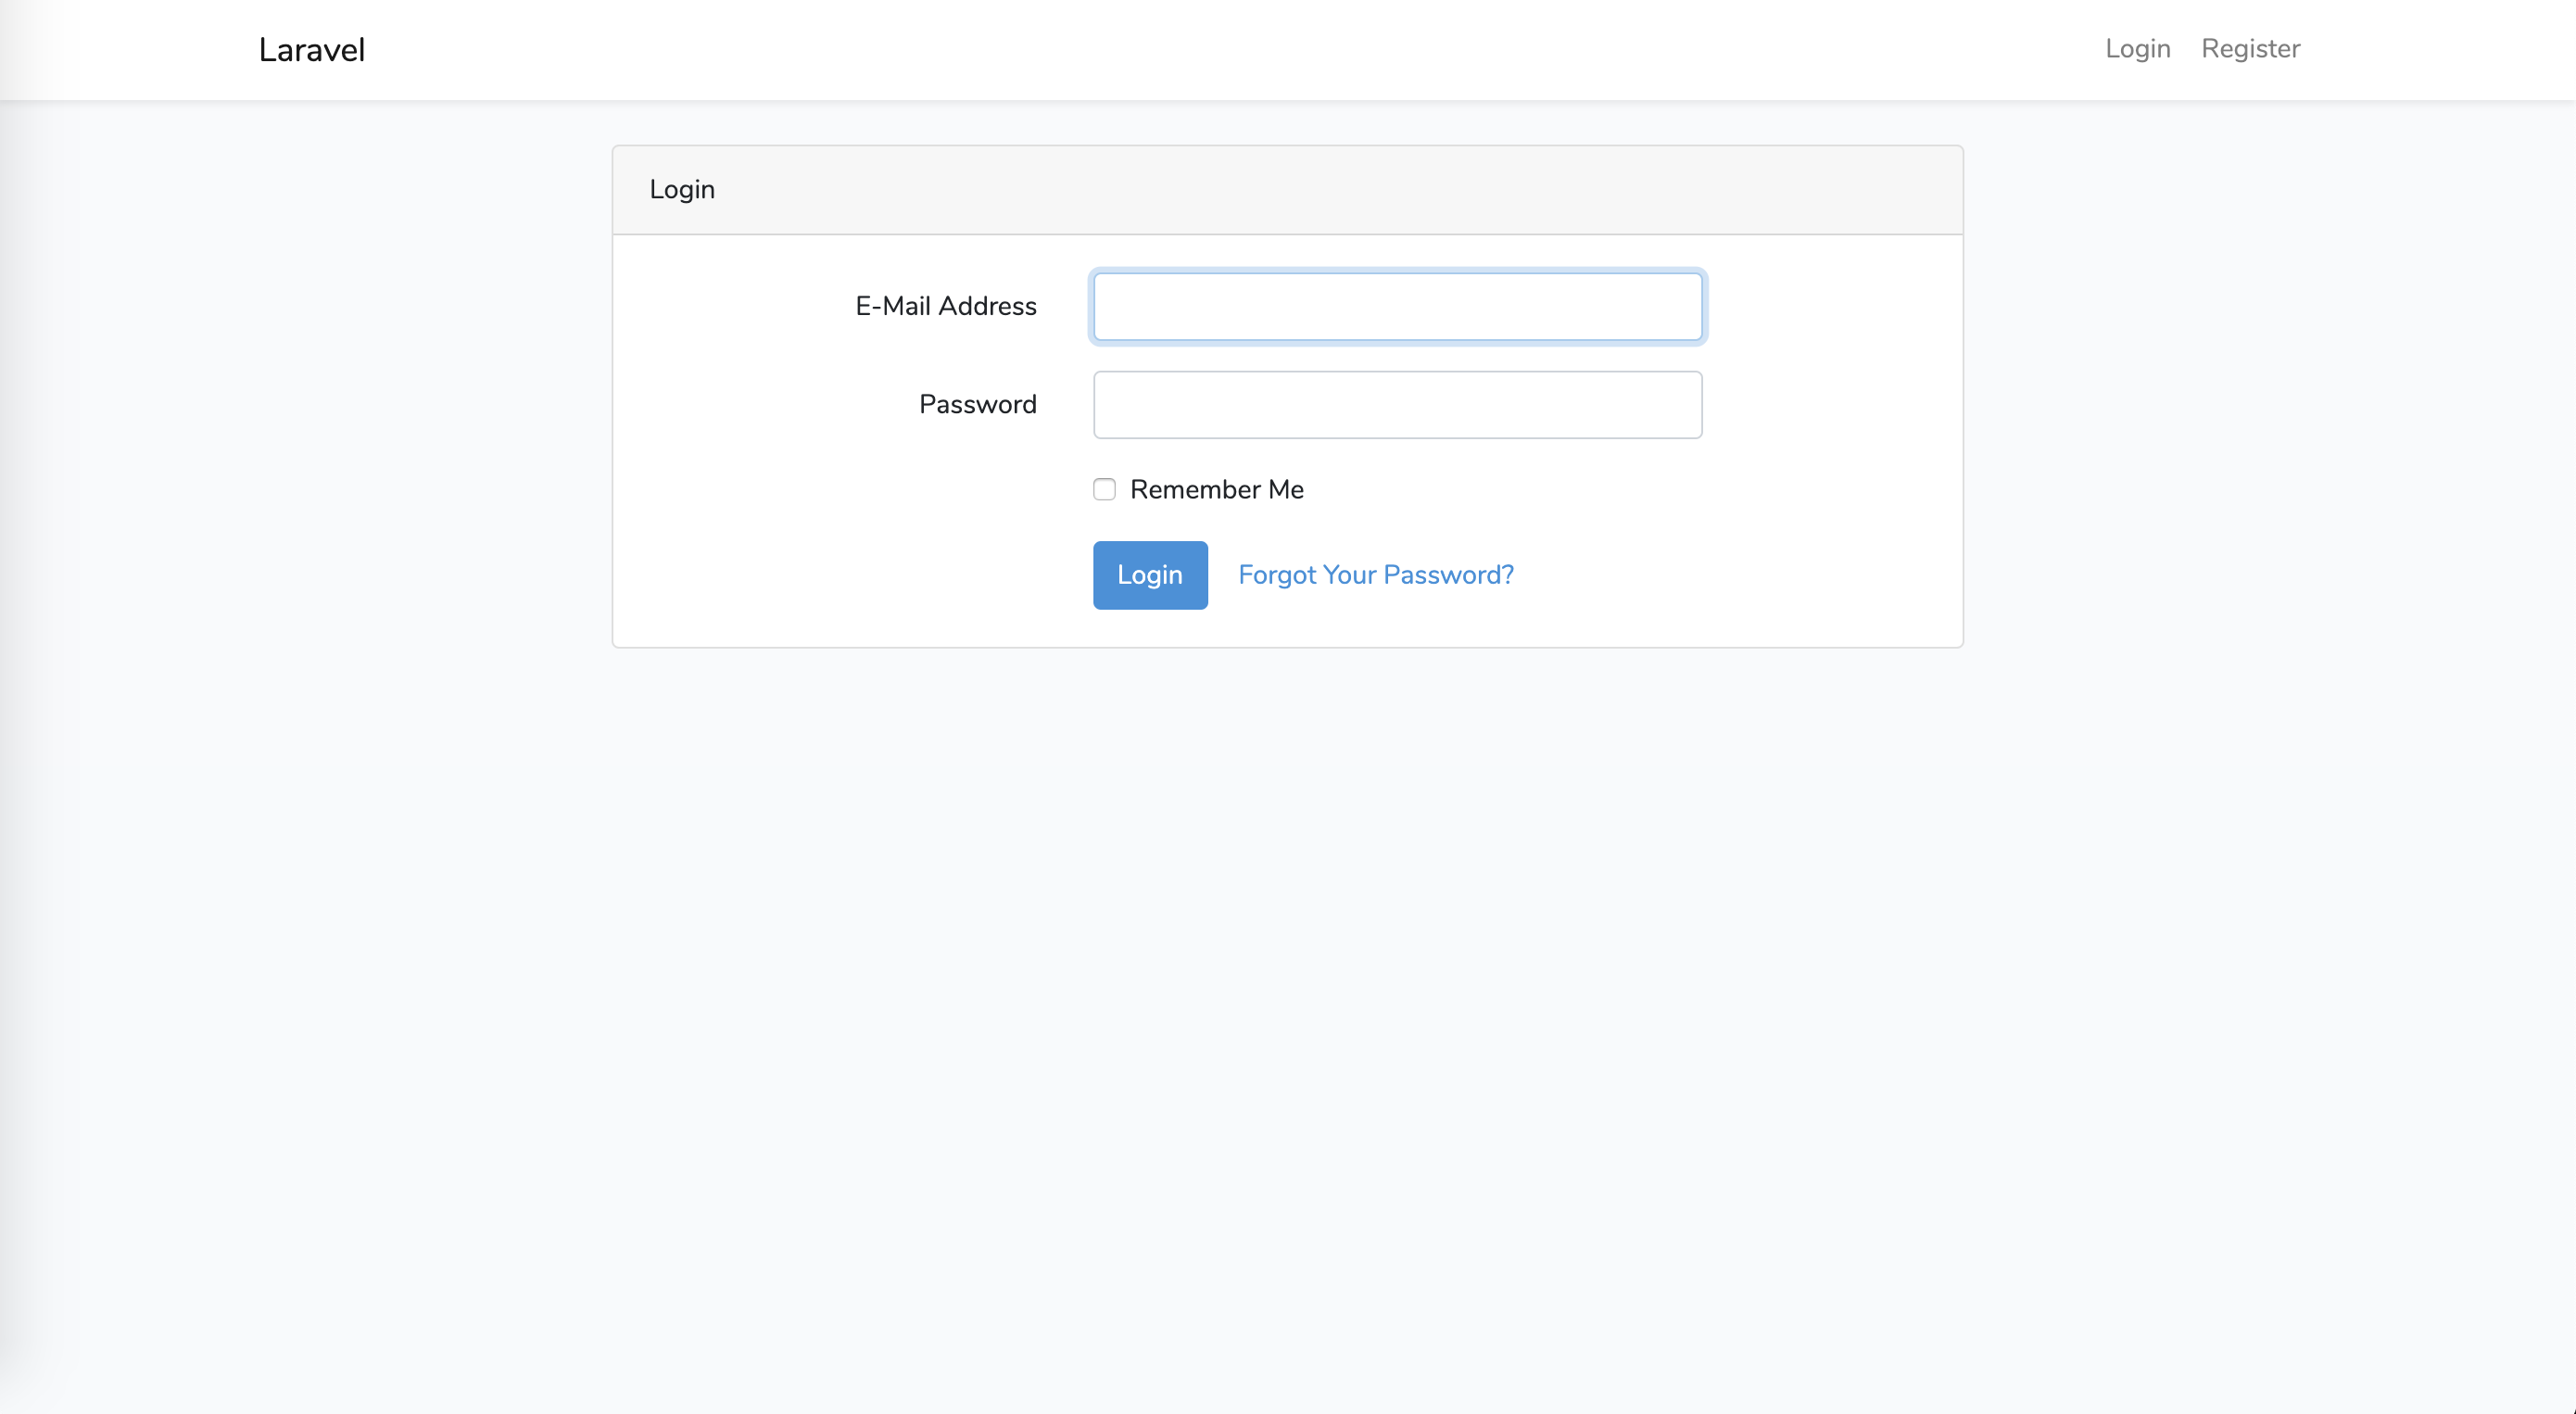
resources/views/auth/login.blade.php
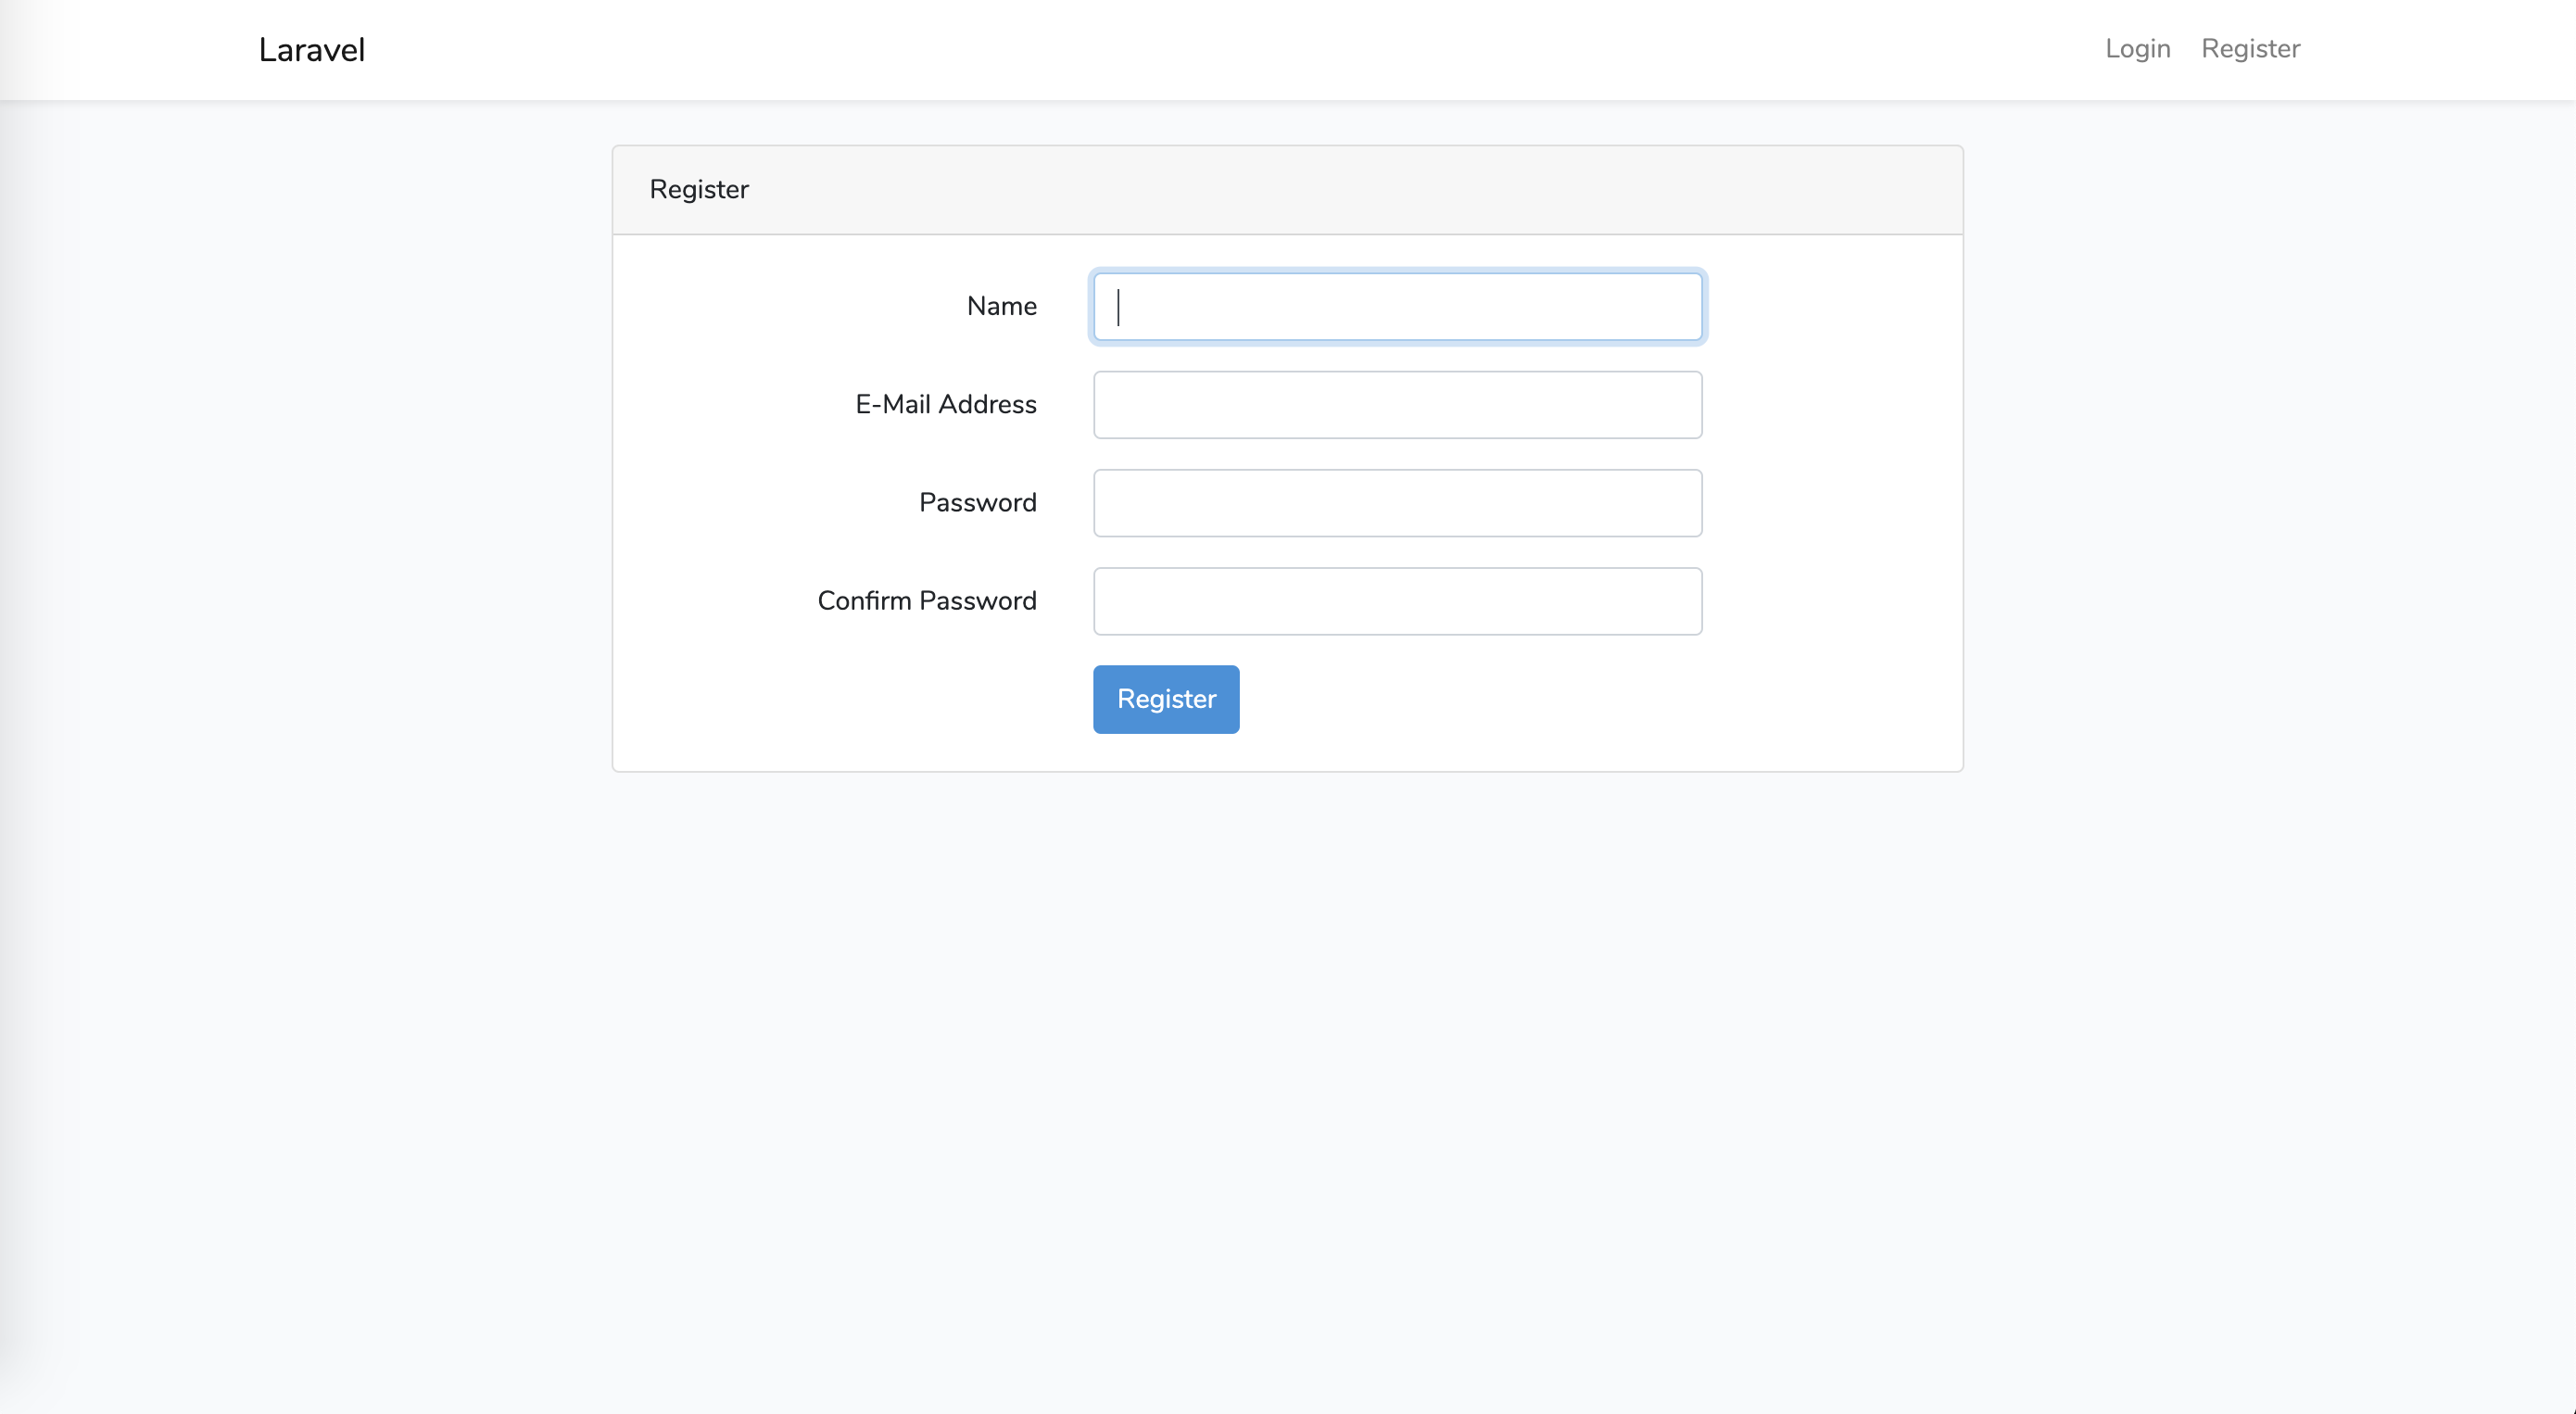
resources/views/auth/register.blade.php
パスワードを8文字以上から4文字以上に変更する
app/Http/Controllers/Auth/RegisterController.phpの55行目の箇所を以下のように書き換える。
app/Http/Controllers/Auth/RegisterController.php'password' => ['required', 'string', 'min:4', 'confirmed']DBとの接続をする
phpMyAdminで、ChatAppというデータベースを作成する。
.envファイルの
APP_NAMEとDB_USERNAMEとDB_PASSWORDにそれぞれ対応した値を記述する。APP_NAME=ChatApp APP_ENV=local APP_KEY= APP_DEBUG=true APP_URL=http://localhost LOG_CHANNEL=stack DB_CONNECTION=mysql DB_HOST=127.0.0.1 DB_PORT=3306 DB_DATABASE=ChatApp DB_USERNAME=(phpMyAdminのユーザー名) DB_PASSWORD=(phpMyAdminのパスワード)見た目を作る
home.blade.phpを編集する
ホーム画面に、コメントを表示するボードとコメントを入力する欄と送信ボタンをつける。
resources/views/home.blade.php@extends('layouts.app') @section('content') <div class="chat-container row justify-content-center"> <div class="chat-area"> <div class="card"> <div class="card-header">Comment</div> <div class="card-body chat-card"> </div> </div> </div> </div> <div class="comment-container row justify-content-center"> <div class="input-group comment-area"> <textarea class="form-control" placeholder="input massage" aria-label="With textarea"></textarea> <button type="input-group-prepend button" class="btn btn-outline-primary comment-btn">Submit</button> </div> </div> @endsectioncssでデザインを整える
public/cssフォルダに新しくview.cssを作る。
public/css/view.css.chat-container { width: 100%; height: 100%; } .chat-card { height: 67vh; overflow: auto; } .chat-area { width: 70%; } .comment-container { position: fixed; bottom: 20px; text-align: center; width: 100%; } .comment-area { width: 70%; } .comment-btn { margin: 0px 10px; } .comment-body { padding: 5px 30px 20px 30px; } .comment-body:hover { background-color: #dfdfdf; } .comment-body-user { font-weight: bold; font-size: 20px; } .comment-body-time { font-size: 10px; margin-top: 10px; margin-left: 5px; color: #a0a0a0; } /*# sourceMappingURL=view.css.map */view側で、view.cssを読み込む。resources/views/layouts/app.blade.phpに下のコードを追加する。
resources/views/layouts/app.blade.php<link href="{{ asset('css/view.css') }}" rel="stylesheet">コメントを表示する部品を作る
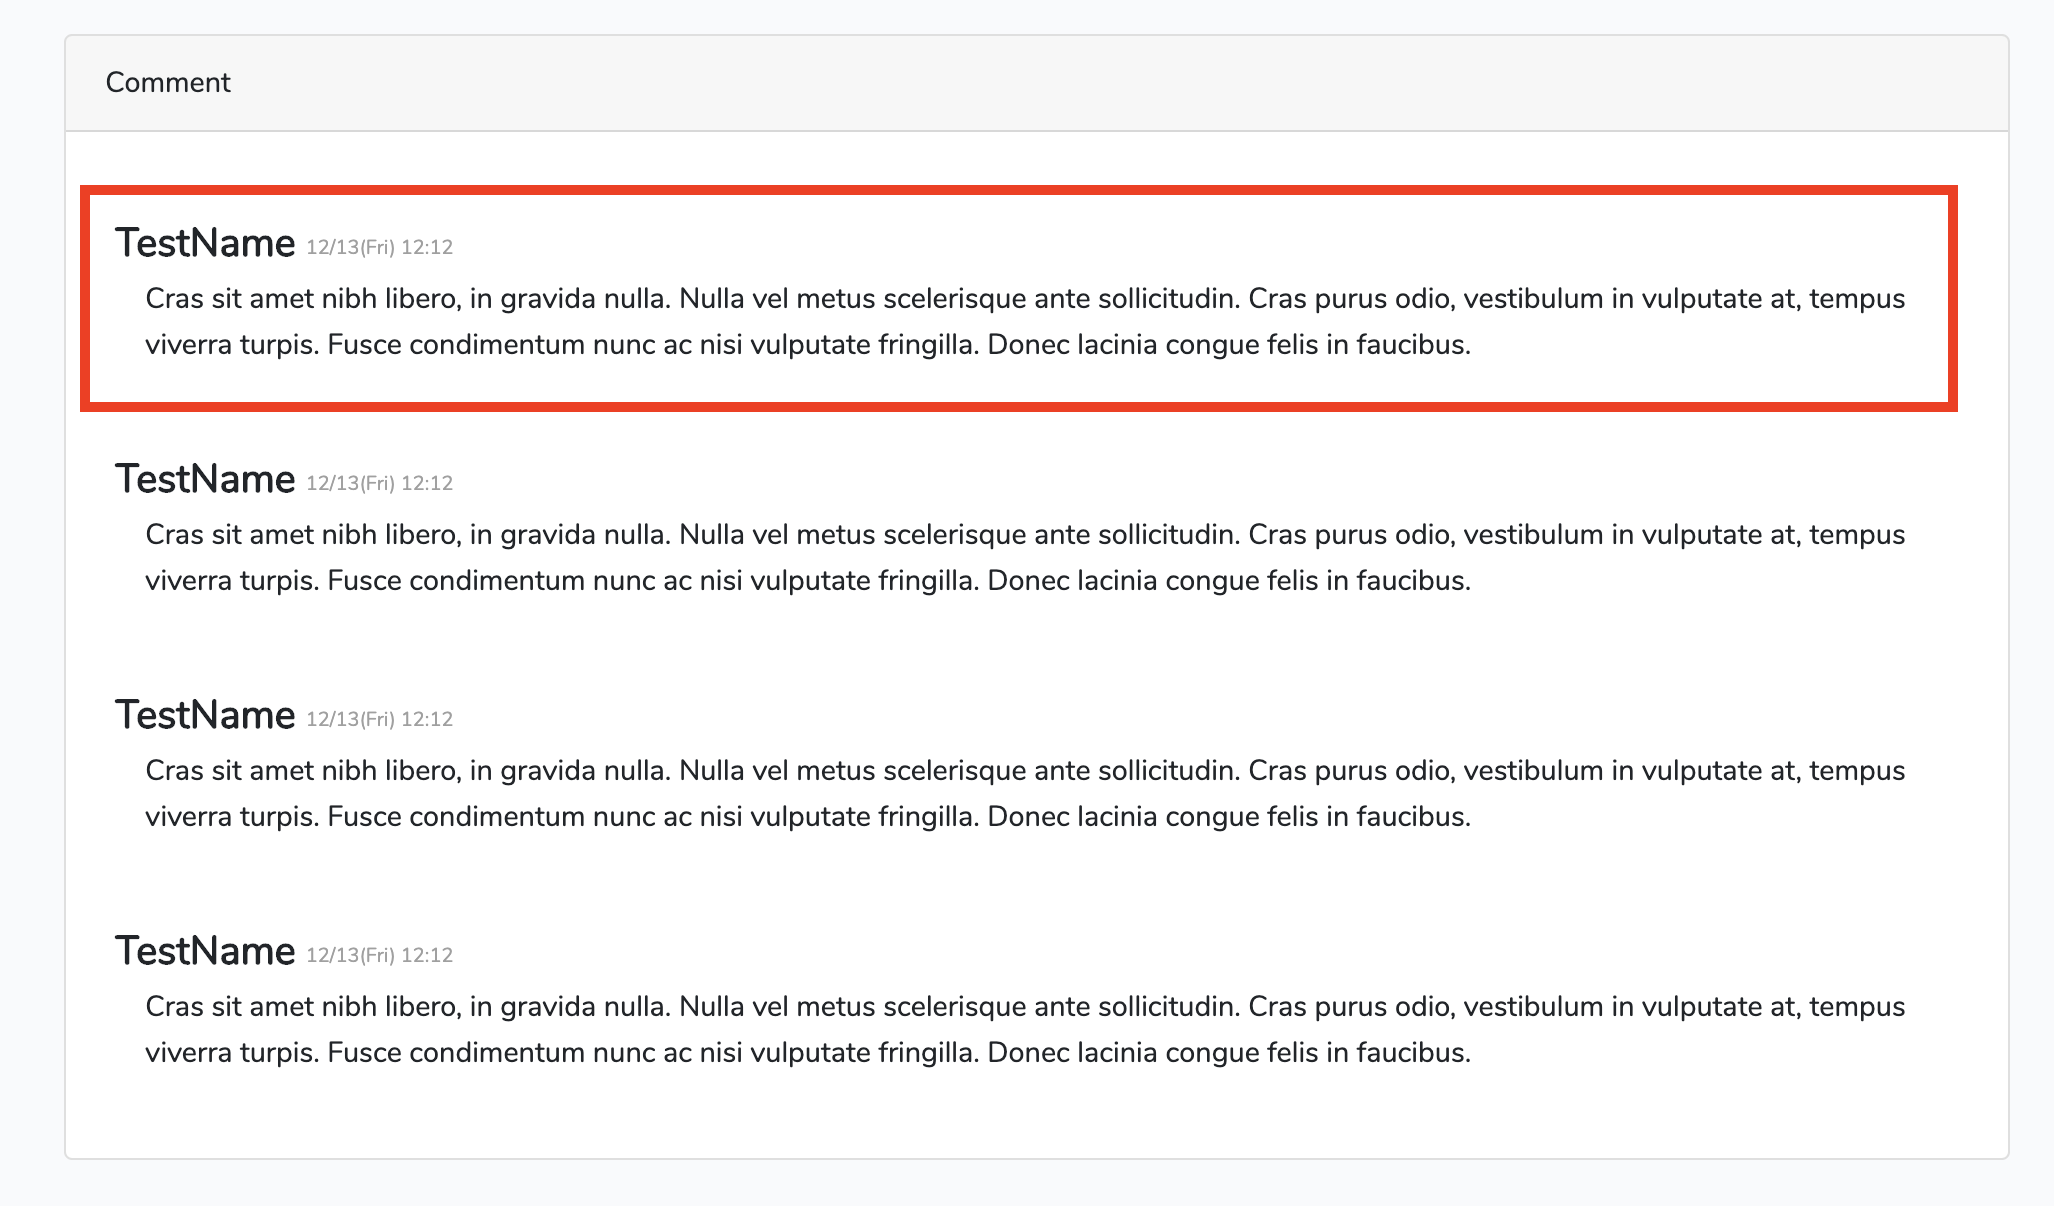
resources/viewsフォルダに新しくcomponentsフォルダを作り、その中にcomment.blade.phpを作成する。
resources/views/components/comment.blade.php<div class="media"> <div class="media-body comment-body"> <div class="row"> <span class="comment-body-user">TestName</span> <span class="comment-body-time">2020-01-06 12:16:45</span> </div> <span class="comment-body-content"> Cras sit amet nibh libero, in gravida nulla. Nulla vel metus scelerisque ante sollicitudin. Cras purus odio, vestibulum in vulputate at, tempus viverra turpis. Fusce condimentum nunc ac nisi vulputate fringilla. Donec lacinia congue felis in faucibus. </span> </div> </div>home.blade.phpにコメントを表示する部品を埋め込む
resources/views/home.blade.php@extends('layouts.app') @section('content') <div class="chat-container row justify-content-center"> <div class="chat-area"> <div class="card"> <div class="card-header">Comment</div> <div class="card-body chat-card"> @include('components.comment') @include('components.comment') @include('components.comment') @include('components.comment') @include('components.comment') @include('components.comment') @include('components.comment') @include('components.comment') @include('components.comment') @include('components.comment') @include('components.comment') @include('components.comment') @include('components.comment') @include('components.comment') @include('components.comment') @include('components.comment') </div> </div> </div> </div> <div class="comment-container row justify-content-center"> <div class="input-group comment-area"> <textarea class="form-control" placeholder="input massage" aria-label="With textarea"></textarea> <button type="input-group-prepend button" class="btn btn-outline-primary comment-btn">Submit</button> </div> </div> @endsectionコメントを保存するテーブルを作る
マイグレーションの作成
$ php artisan make:migration create_comments_tabledatabase/migrations/2020_01_05_064658_create_comments_table.php<?php use Illuminate\Database\Migrations\Migration; use Illuminate\Database\Schema\Blueprint; use Illuminate\Support\Facades\Schema; class CreateCommentsTable extends Migration { /** * Run the migrations. * * @return void */ public function up() { Schema::create('comments', function (Blueprint $table) { $table->bigIncrements('id'); $table->integer('login_id'); $table->string('name'); $table->string('comment'); $table->timestamps(); }); } /** * Reverse the migrations. * * @return void */ public function down() { Schema::dropIfExists('comments'); } }モデルの作成
$ php artisan make:model Commentapp/Comment.php<?php namespace App; use Illuminate\Database\Eloquent\Model; class Comment extends Model { protected $fillable = [ 'login_id', 'name', 'comment' ]; protected $guarded = [ 'create_at', 'update_at' ]; }データベースからデータを取得して、画面に反映させる
HomeController.phpを開いて、
use App\Comment;を追加し、index関数を以下のように書き換える。app/Http/Controllers/HomeController.php<?php namespace App\Http\Controllers; use Illuminate\Http\Request; use App\Comment; use Illuminate\Support\Facades\Auth; class HomeController extends Controller { /** * Create a new controller instance. * * @return void */ public function __construct() { $this->middleware('auth'); } /** * Show the application dashboard. * * @return \Illuminate\Contracts\Support\Renderable */ public function index() { $comments = Comment::get(); return view('home', ['comments' => $comments]); } }foreachで、コメントを表示させる。comment.blade.phpにも、データを渡す。
resources/views/home.blade.php<div class="card-body chat-card"> @foreach ($comments as $item) @include('components.comment', ['item' => $item]) @endforeach </div>resources/views/components/comment.blade.php<div class="media"> <div class="media-body comment-body"> <div class="row"> <span class="comment-body-user">{{$item->name}}</span> <span class="comment-body-time">{{$item->created_at}}</span> </div> <span class="comment-body-content">{{$item->comment}}</span> </div> </div>コメントを送信できるようにする
コメントをデータベースに保存する関数を作る
HomeController.phpでadd関数を作る。
app/Http/Controllers/HomeController.phppublic function add(Request $request) { $user = Auth::user(); $comment = $request->input('comment'); Comment::create([ 'login_id' => $user->id, 'name' => $user->name, 'comment' => $comment ]); return redirect()->route('home'); }add関数をweb.phpに登録する
routes/web.phpRoute::post('/add', 'HomeController@add')->name('add');フォームを作る
home.blade.phpのコメントを送信する部分を、以下のように書き換える。
resources/views/home.blade.php<form method="POST" action="{{route('add')}}"> @csrf <div class="comment-container row justify-content-center"> <div class="input-group comment-area"> <textarea class="form-control" id="comment" name="comment" placeholder="input massage" aria-label="With textarea"></textarea> <button type="submit" class="btn btn-outline-primary comment-btn">Submit</button> </div> </div> </form>Shift+Enterでコメントを送信できるようにする。
home.blade.phpのコメントを送信する部分を、以下のように書き換える。
resources/views/home.blade.php<form method="POST" action="{{route('add')}}"> @csrf <div class="comment-container row justify-content-center"> <div class="input-group comment-area"> <textarea class="form-control" id="comment" name="comment" placeholder="push massage (shift + Enter)" aria-label="With textarea" onkeydown="if(event.shiftKey&&event.keyCode==13){document.getElementById('submit').click();return false};"></textarea> <button type="submit" id="submit" class="btn btn-outline-primary comment-btn">Submit</button> </div> </div> </form>今回はここまで。次回は、本題である非同期通信を用いて、リアルタイムでチャットができるようにしたいと思います。


- 投稿日:2020-01-17T16:06:03+09:00
Symfony4.4 パスワード変更フォームでパスワードの確認エリアを作成する
課題
Symfonyのフォームで、以下のようなパスワードを設定する場合に、再度パスワードを入力させる確認用のテキストフィールドを作りたい。
TL;DR
ずばり、フォームタイプとして、RepeatedType Fieldが用意されている。
これは指定するフォームタイプ。例えば、テキストフィールドとか、パスワードフィールドを2つ用意してくれる。
ちょうどサンプルがそのまんま使えてしまう。
use Symfony\Component\Form\Extension\Core\Type\PasswordType;
use Symfony\Component\Form\Extension\Core\Type\RepeatedType;
// ...

$builder->add('password', RepeatedType::class, [
    'type' => PasswordType::class,
    'invalid_message' => 'The password fields must match.',
    'options' => ['attr' => ['class' => 'password-field']],
    'required' => true,
    'first_options'  => ['label' => 'Password'],
    'second_options' => ['label' => 'Repeat Password'],
]);
感想
Symfonyの便利機能を発掘するためには、検索キーワードの選択が重要ですね。

- 投稿日:2020-01-17T14:57:25+09:00
お問い合わせフォームの雛形(駆け出しのWEB担当者用)
あくまでも問い合わせフォームの雛形という考えのもとソースコードを提供します。
※動作環境は7.2以上になります。詳しい内容はこちらを参照ください。➡クリック
ファイルのダウンロードは下記になります。
【ダウンロードファイルには広告は表示されません】
https://zip358.com/tool/request/request.zip
サンプルページ
https://zip358.com/tool/request/./view/index.html<!DOCTYPE html> <html lang="ja"> <head> <meta charset="UTF-8"> <meta name="viewport" content="width=device-width, initial-scale=1, shrink-to-fit=no"> <meta http-equiv="X-UA-Compatible" content="ie=edge"> <title>お問い合わせ</title> <script src="https://code.jquery.com/jquery-3.4.1.min.js" integrity="sha256-CSXorXvZcTkaix6Yvo6HppcZGetbYMGWSFlBw8HfCJo=" crossorigin="anonymous"></script> <link rel="stylesheet" href="https://stackpath.bootstrapcdn.com/bootstrap/4.4.1/css/bootstrap.min.css" integrity="sha384-Vkoo8x4CGsO3+Hhxv8T/Q5PaXtkKtu6ug5TOeNV6gBiFeWPGFN9MuhOf23Q9Ifjh" crossorigin="anonymous"> <script src="https://cdn.jsdelivr.net/npm/popper.js@1.16.0/dist/umd/popper.min.js" integrity="sha384-Q6E9RHvbIyZFJoft+2mJbHaEWldlvI9IOYy5n3zV9zzTtmI3UksdQRVvoxMfooAo" crossorigin="anonymous"></script> <script src="https://stackpath.bootstrapcdn.com/bootstrap/4.4.1/js/bootstrap.min.js" integrity="sha384-wfSDF2E50Y2D1uUdj0O3uMBJnjuUD4Ih7YwaYd1iqfktj0Uod8GCExl3Og8ifwB6" crossorigin="anonymous"></script> <script src="js/common.js"></script> <style> .jumbotron{ background-color: #2bd4d0; color: #fff; } .btn-primary { color: #fff; background-color: #2bd4d0 !important; border-color: #2bd4d0 !important; } .input-group-text{ background-color: #2bd4d0; border: 1px solid #2bd4d0; } </style> </head> <body> <div class="jumbotron jumbotron-fluid"> <div class="container"> <h1 class="display-4">お問い合わせ</h1> <p class="lead">必須項目を入力し送信ボタンを押してください。</p> </div> <div class="alert alert-warning" id="error_sendmail" role="alert"> </div> </div> <div class="container"> <div class="row"> <div class="input-group mb-3"> <div class="input-group-prepend"> <span class="input-group-text">お名前[必須]</span> </div> <input type="text" name="name" class="form-control" id="name" placeholder="name" value="{{name}}"> </div> <div class="alert alert-warning" id="error_name" role="alert"> </div> <div class="input-group mb-3"> <div class="input-group-prepend"> <span class="input-group-text">メールアドレス[必須]</span> </div> <input type="email" name="email" class="form-control" id="email" placeholder="name@example.com" value="{{email}}"> </div> <div class="alert alert-warning" id="error_email" role="alert"> </div> <div class="input-group mb-3"> <div class="input-group-prepend"> <span class="input-group-text" id="basic-addon1">@</span> </div> <input type="text" name="twitter_account" class="form-control" placeholder="twitter account" aria-label="twitter account" aria-describedby="basic-addon1" value="{{twitter_account}}"> </div> <div class="input-group mb-3"> <div class="input-group-prepend"> <span class="input-group-text">お問い合わせ内容[必須]</span> </div> <select name="meun" class="form-control" id="exampleFormControlSelect1"> {{meun_option|raw}} </select> </div> <div class="alert alert-warning" id="error_meun" role="alert"> </div> <div class="input-group"> <div class="input-group-prepend"> <span class="input-group-text">コメント[必須]</span> </div> <textarea name="comment" rows="10" class="form-control" aria-label="コメント">{{comment}}</textarea> </div> </div> <div class="row"> <footer class="blockquote-footer"> <small class="text-muted"> ご自由に記入ください。 </small> </footer> </div> <div class="alert alert-warning" id="error_comment" role="alert"> </div> <button type="button" class="mt-2 btn btn-primary btn-lg btn-block">送信する</button> </div> </body> </html>index.php<?php require 'vendor/autoload.php'; session_start(); $loader = new \Twig\Loader\FilesystemLoader('./view'); $twig = new \Twig\Environment($loader); $json = json_decode (@file_get_contents("select.json")); if(count($_SESSION)>1){ $data = []; foreach($_SESSION as $key=>$val){ $data = $data + array($key=>$val); if(!is_null(select_option($json,$key,$val))){ $data = $data + select_option($json,$key,$val); } } echo $twig->render('index.html',$data); }else{ $data = select_option($json); echo $twig->render('index.html',$data); } function select_option($json="",$key="",$val=""){ $str = Null; if(!$json)return false; if($key){ if($json->$key){ foreach($json->$key as $op){ $selected = $op == $val?" selected ":""; $str[$key . "_option"].="<option value='$op'$selected>$op</option>"; } } return $str; }else{ foreach($json as $name=>$key){ foreach($key as $i=>$op){ $str[$name. "_option"].="<option value='$op'>$op</option>"; } } return $str; } }
- 投稿日:2020-01-17T13:03:23+09:00
FuelPHPでDBのコネクションを取得する方法
DBのコネクションの確認をしたと思って試してみました。
DBクラスのinstance()メソッドが使用できます。
http://fuelphp.jp/docs/1.9/classes/database/db.html#/method_instance
instance メソッドは Database_Connection のインスタンスを返します。 例えば同時に複数のデータベース接続を使用する必要がある場合など、 データベースインスタンスに直接アクセスすることができます。
// デフォルトの接続を取得
$db = DB::instance(); // or 'default'

// 名前を指定して接続を取得
$db = DB::instance('backup');
// 出力結果 object(Database_MySQLi_Connection)#26 (10) { ["_connection":protected]=> object(mysqli)#31 (19) { ["affected_rows"]=> int(1) ["client_info"]=> string(79) "mysqlnd 5.0.12-dev - 20150407 - $Id: b39695XXX2d1d9ed7902b8bae237XXXXXXXX $" ["client_version"]=> int(50012) ["connect_errno"]=> int(0) ["connect_error"]=> NULL ["errno"]=> int(0) ["error"]=> string(0) "" ["error_list"]=> array(0) { } ["field_count"]=> int(0) ["host_info"]=> string(25) "Localhost via UNIX socket" ["info"]=> NULL ["insert_id"]=> int(4272) ["server_info"]=> string(6) "5.6" ["server_version"]=> int(50635) ["stat"]=> string(136) "Uptime: 8192 Threads: 3 Questions: 1040 Slow queries: 0 Opens: 311 Flush tables: 1 Open tables: 304 Queries per second avg: 0.126" ["sqlstate"]=> string(5) "00000" ["protocol_version"]=> int(10) ["thread_id"]=> int(24) ["warning_count"]=> int(0) } ["_connection_id":protected]=> string(40) "2c02b1be7ed4e8b313b2df2afXXXXXXXXXXX" ["_identifier":protected]=> string(1) "`" ["_db_type"]=> string(5) "mysql" ["last_query"]=> string(294) "INSERT INTO user mask...XXXXXX" : : {省略}中を見てみると、このインスタンスにlast_query()用のクエリ文字列も持っているようですね!
- 投稿日:2020-01-17T11:11:03+09:00
Laravel Eloquent firstWhere()到着
Taylorさんをはじめ、Laravelに貢献する開発者が頑張っていて、だんだんと新しい機能を追加されています。今回(2020-01-15)リリースされたLaravel 6.11.0 に含まれている機能の一つをしょかいします。
firstWhere() の 機能をEloquentに
あるモデルを一意キーで検索する時、たとえばUserの
emaiIlやphonenumberなど、下記のようなコードを使うと思いますUser::where('phonenumber', '12345')->first();が このPRでこのための専用の関数
firstWhere(キー、値)が追加され、上記のコードをこのように書けるようになりました!User::firstWhere('phonenumber', '12345');便利ですね!今までこの機能はcollectionにふくまれていますが、これから
Eloquentのモデルに使えるようになりました!### 注意点
現時点、この機能はEloquentのクエリー・ビルダーしか対応されていないので、残念ながら
Illuminate\Database\Query\Builderクラスでは使えません。つまり、下記のコードを実行すればエラーが発生します。
 DB::table('users')->firstWhere('phonenumber', '12345');
 // エラー
参照リンク
https://github.com/laravel/framework/compare/v6.10.1...v6.11.0
https://github.com/laravel/framework/pull/31089
https://laravel.com/docs/6.x/collections#method-first-where
- 投稿日:2020-01-17T11:08:27+09:00
エルビス演算子(三項演算子の省略記法)とNull合体演算子(PHP7以降で追加)の違い
エルビス演算子とNull合体演算子の違い
エルビス演算子は、条件値が
falseとみなされる値の場合、後者の値が式の結果となります。
Null演算子は、条件値がnullの場合、後者の値が式の結果となります。$v1 = ''; $v2 = null; $v1 ?: false; // false $v1 ?? false; // "" $v2 ?: false; // false $v2 ?? false; // falsefalseとみなされる値(php.netより)
boolean に変換する場合、次の値は FALSE とみなされます。
- boolean の FALSE
- integer の 0 および -0 (ゼロ)
- float の 0.0 および -0.0 (ゼロ)
- 空の文字列、 および文字列の "0"
- 要素の数がゼロである 配列
- 特別な値 NULL (値がセットされていない変数を含む)
- 空のタグから作成された SimpleXML オブジェクト
警告: -1 は、他のゼロでない数と同様に (正負によらず) TRUE とみなされます。
以下、実験。文字列の0は
falseですが、文字列の0.0はtrueになります。boolval(null); // false boolval('null'); // true boolval("null"); // true boolval(0); // false boolval('0'); // false boolval("0"); // false boolval(''); // false boolval(""); // false boolval(0.0); // false boolval('0.0'); // true!! boolval("0.0"); // true!! boolval(false); // false boolval('false'); // true boolval("false"); // true
- 投稿日:2020-01-17T01:08:57+09:00
プログラミングをかじったからには何らかの制作物を作りたい#4 ~Laravel, ページ作成, ルーティング
説明
このエントリーは初心者がとりあえず何かを作りたいと考え、それのみを理由にして記述しているものの4です。そのため、技術的な誤りや勘違いが多分に含まれている可能性があります。ご了承くださいませ。もしよろしければご指摘やご教示を頂けましたら幸いです。
できたもの
前回のあらすじ
プログラミングをかじったからには何らかの制作物を作りたい#3 ~作り直し編、完成したもの~
https://qiita.com/tatsuki1112/items/5bbffaa9da8f7727f7c5実際に作成したものはできていて、それがどんなものなのかを説明した。
Laravel編
今回はLaravelでページを作成し、ルーティングなども行いました。
開発環境のMac上にDockerでLaravelを扱えるようにしました。ページ作成 ~blade~
Laravelではviewにbladeというテンプレートが使用できます。Bladeを使うと、その中にPHPを記載できたり、テンプレートを継承したり、分割して記述したりなどができます。
今回私が作ったものに関して言えば以下のように分割して記述しています。
ページ名 ファイル名 トップ jangkengTop.blade.php 最強の一手を決める inspection.blade.php ?のモーダル inspectionModal.blade.php 勝敗を決める judge.blade.php ?のモーダル judgeModal.blade.php 結果一覧 total.blade.php これらはすべて
src/resources/views/layouts/下にあるapp.blade.phpを継承して記述しています。そのため、一度app.blade.phpにhead要素などを記述すれば、それを継承したテンプレートではいちいちそれらを記述する必要がなくなります。
ではそれらは如何にして利用すればよいのでしょうか。
@yield@extends@section@includeまず、viewの親を定義するのに使われるのが
@yieldです。今回はbody要素内部以外の部分を共通化したかったのでapp.blade.phpを以下のように記述しました(イメージ)。<!DOCTYPE html> <html lang="ja"> <head> <title>JANGKENG</title> </head> <body> @yield('content') </body> </html>それから子ビューを記述します
top, inspection, judge, totalはすべてこのapp.blade.phpを継承しています。@extends('layouts.app') @section('content') <body> 内容を記述 @include('modal') </body> @endsection先頭の
@extends('layouts.app')で上記親ビューを継承し、@sectionと@endsectionの間の内容が親ビューのcontent部分に入ります。
今回は@include部分にはモーダルを分割して記述しました。
includeとyieldの違いがいまいちよくわからなかったのですが、どうやらincludeは単なる親子関係などがないhtmlを分割するためにあるものと言う感じでしょうか。
https://stackoverflow.com/questions/41916127/whats-the-difference-between-laravels-yield-and-include確かに今回モーダル部分を分割した際にも、
inspectionModal.blade.phpなどには特別な記述はせず、他のviewと同一のディレクトリに置いてあるのみです。ルーティング
今回作成したものには、トップ、最強の一手、勝敗、合計という4枚のページがあります。これらを遷移させるためにルーティングをします。
Laravelのルーティングsrc/routes/web.phpで記述されます。
特に説明するよりも普通にコードを見ていただいたほうがわかりやすいと思います。web.phpRoute::get('/', function () { return view('jangkenTop'); }); Route::get('/inspect', function (){ return view('inspection'); }); Route::get('/judge', function () { return view('judge'); }); Route::get('/total', 'ResultsController@getResults'); Route::post('/inspect', 'ResultsController@setResults');それぞれにアクセスされたときにそれぞれのviewを返すという形です。total画面のみ、DBが関連してくるので単にviewを返すのではなく、コントローラーを経由しています。
このへんについては後ほど記述します。今日はこのへんで、次回はLaravelMixやJqueryについて書きます!
- 投稿日:2020-01-17T00:50:29+09:00
わりかし簡単なLAMP開発環境構築方法
やぁ。
皆様、こう思ったことはありませんでしょうか?
【コーディング以前に、環境構築がドチャクソめんどくせぇ】
私はときどき、しょっちゅう、頻繁に、よくあります。
・できるだけ、端末の環境は汚したくない
・つまり、XAMPPは使いたくない
・でも、OSがWindows HomeなのでDockerは使えない
・「SSH接続してからhttpd.confをvimで編集して~...」とか言われると、モチベをデストロイされる
要するに
「仮想環境を使って開発したいけど、Apacheとかのインストールをするのは面倒くさそうだからやりたくねぇ」
そんな状態であるわけです。『いや、やれよ』って言われたらぐうの音も出ないどころか平土下座するしかありませんが、
めんどいものはめんどい。
誰がなんと言おうが、めんどいものはめんどいし、毎朝陽は昇るし、もう30歳を超えたというのに新垣結衣は可愛いし、引退して10年以上経ったけども立花里子のAVを未だに私は観ているのである。
めんどいので、簡単に済む方法を調べてみた
- 仮想環境を用いるのは確定事項なので、とりあえずVirtualBox使うことにする
- VirtualBox使うなら、Vagrant使うとラクっぽい
- LAMP環境構築済みのVagrant Boxがあるので、それを使えばコマンド一発で環境構築できる
- 「Vagrant Manager」とやらを使うと、仮想環境の操作をGUIで行えるらしい
調べてみた結果、以上のことがわかりました。
ほほぅ、これは素晴らしい。。。!
早速、インスールと環境構築を行ってみます。
やってみた
まずは、①VirtualBox, ②Vagrant, ③Vagrant Managerをインストールします。
次に、LAMP環境構築済みのVagrant Boxをダウンロードします。
方法は以下2通りあって、どちらでもいいと思われます。
※gitコマンドからダウンロードした場合は、「my-project」部分を任意のディレクトリにする?のかな?
git clone https://github.com/scotch-io/scotch-box my-project- SCOTCH BOX ダウンロードページからzipファイルをダウンロードして、任意のディレクトリに解凍
ちなみに私はgitのインストールすらしていないので、githubからダウンロードしました。
なんか、ほら、ね?
プライベートなぼっちプロジェクトだとね、ソースのバージョン管理とか、ねぇ?
むしろ面倒になってしまって、ねぇ?わかってくれますか?わかって?
まぁ、なんかしらのエラーは起きるよね
ここまでで、準備は完了です。
早速、待望のLAMP仮想環境を立ち上げてみよう!
cd my-project
vagrant up
これで仮想環境が立ち上がるはずだが、エラーが起きて立ち上がらない。。。。
エラーの解決方法
エラー文を保存していないのは心苦しいのですが、、、。
- 【Vagrantが最新バージョンのVirtualBoxに対応してない】
⇒最新ではなく、ちょっと古いバージョンのVirtualBoxをインストールし直す
※VirutalBoxインストーラ(過去のバージョン) ダウンロードページ
- 【ホスト側のVirtualBoxとゲスト側のVirtualBoxのバージョンが合致しない】
⇒vagrantのプラグインをインストール
※コマンド:vagrant plugin install vagrant-vbguest以上で解決し、無事にLAMP仮想環境を立ち上げることに成功しました。
まとめ
- ミドルウェアのインストールetcがめんどければ、LAMP環境構築済みのBoxを使うのも悪くないと思うよ!
- Vagrantを使っているなら、Vagrant Managerは便利。
- そして私は、今後も立花里子のお世話になる。
- 投稿日:2020-01-17T00:44:00+09:00
PHP 定数
目的
- 定数の定義方法をまとめる
書き方の例
- 定数は書き換えられない。
- 定数の出力時は定数名の前に
$はつけない。- 下記に定数の定義方法をまとめる。
//定数の定義
define("定数名(大文字)", "定数に書くのする不変の値");

//定数の出力
echo 定数名;
特殊な定数
- 下記にコードを書く際に定義せずともすでに最初から定義されている定数を紹介する。
//現在の行数を出力する定数
var_dump(__LINE__);

//実行されているファイル名を出力する定数
var_dump(__FILE__);

//実行されているファイルが存在するディレクトリを出力する定数
var_dump(__DIR__);