- 投稿日:2020-01-16T22:49:14+09:00
ログイン機能の実装(ウィザード形式にするために)
1.deviseの導入及びユーザーのデフォルトでのログインが可能になるまで
以下の手順で導入
GEMFILE.gem 'devise'ターミナル.rails g devise:install任意のコントローラー(***)を用意して、ルーティングの設定をします。
この場合は、トップページに当たる部分のルーティングの設定をしています。config/routes.rbRails.application.routes.draw do root to: "***#index" endターミナル.rails g controller ***今回はindexアクションにおいて、特にモデルとのやり取りなどは行わないので、コントローラ内の記述はしません。(任意でトップページのビューは作成したものを使用)
次いでdeviseにおけるデフォルトのログイン機能を実装します。
ターミナル.rails g devise user今回は、deviseのデフォルトで用意されているemailとpasswordを最初のビュー場で登録させてから、次のページにてuserのprofileを登録するようにしたいと思います。
その為、そのまま下記のコマンドを実行していきます。ターミナル.rails db:migrate※ただし、今回とは異なりuserモデルの方に名前等を追加したい場合には、下記のコマンド実行前にマイグレーションファイルの編集をしてカラムの追加の必要性が発生します。
その場合には下記のようにコントローラー及びモデルのバリデーションの記述を一部追加する必要性があるapp/controllers/application_controller.rbclass ApplicationController < ActionController::Base before_action :configure_permitted_parameters, if: :devise_controller? protected def configure_permitted_parameters devise_parameter_sanitizer.permit(:sign_up, keys: [:追加カラム名, :追加カラム名]) end endapp/models/user.rb# Include default devise modules. Others available are: # :confirmable, :lockable, :timeoutable, :trackable and :omniauthable devise :database_authenticatable, :registerable, :recoverable, :rememberable, :validatable validates :追加カラム名, :追加カラム名 ,presence: true end上記を任意の状況に応じて実行後、追加したカラムを入力できるように、新規登録画面のビューを編集する必要があります。デフォルトではdeviseのビューファイルは隠れているので、以下のコマンドを実行します。
ターミナル.rails g devise:viewsapp/views/devise/registrations/new.html.erb<%= form_for(resource, as: resource_name, url: registration_path(resource_name)) do |f| %> <%= render "devise/shared/error_messages", resource: resource %> <div class="field"> <%= f.label :追加カラム名 %><br /> <%= f.text_field :追加カラム名 %> </div> <div class="field"> <%= f.label :追加カラム名 %><br /> <%= f.number_field :追加カラム名 %> </div> <div class="field"> <%= f.label :email %><br /> <%= f.email_field :email, autofocus: true, autocomplete: "email" %> </div> <%# 以下省略 %>※追加するカラムがない場合にはrails db:migrateを実行後にここまでの操作を省略して、以下から続きを実行
任意のビューに下記の記述を追加してログインしていない場合には新規登録またはログインを実行させる画面に移行させる記述を追記していきます。app/views/***/index.html.erb<% if user_signed_in?%> <h2>ログインしています</h2> <%= link_to "ログアウト", destroy_user_session_path, method: :delete %> <% else %> <h2>ログインしていません</h2> <%= link_to "新規登録", new_user_registration_path %> <%= link_to "ログイン", new_user_session_path %> <% end %>2.ウィザード形式でのユーザーの新規登録を実行出来るようにする
今回やっていくこととしては、ユーザー登録の画面でユーザー情報を入力させ、それをsessionに保持させておきます。そして次のプロフィール情報を登録する画面で名前や年齢、性別を入力させ、最後のステップでsessionに保持していたユーザー情報と、それに関連するプロフィール情報をテーブルに保存する流れで行なっていきます。
まず、まだ作成していないプロフィールモデルの作成を実行します。ターミナル.rails g model profile次いで、Userモデルとのリレーションのために、外部キーとしてuser_idが入るようにして、コマンドを実行します。
db/migrate/20XXXXX.rbclass CreateProfiles < ActiveRecord::Migration[5.2] def change create_table :profiles do |t| t.string :name, null: false t.integer :age, null: false t.string :gender, null: false t.references :user t.timestamps end end endターミナル.rails db:migrateマイグレートを実行後、テーブルやカラム作成されているか確認して、モデルのバリデーションおよびアソシエーションを設定します。
Userモデルに対してoptional: trueを設けています。optional: trueは外部キーがnullであることを許可するオプションです。
同様にUserモデルについてもアソシエーションを設定します。app/models/profile.rbclass Profile < ApplicationRecord belongs_to :user, optional: true validates :name, :age, :gender ,presence: true endapp/models/user.rbclass User < ApplicationRecord # Include default devise modules. Others available are: # :confirmable, :lockable, :timeoutable, :trackable and :omniauthable devise :database_authenticatable, :registerable, :recoverable, :rememberable, :validatable has_one :profile end次いでdeviseのコントローラを作成し、編集できる形にします。
ターミナル.rails g devise:controllers users現状rake routesを行うとdevise管理化のコントローラーが呼ばれてしまっているということが確認できます。
そこで以下のようにroutes.rbを編集して、どのコントローラを参照するのか明示してあげます。config/routes.rbRails.application.routes.draw do devise_for :users, controllers: { registrations: 'users/registrations', } root to: "***#index" end編集後に再度rake routesをすると、参照するコントローラが変更されていることが確認できます。(今回はユーザ新規登録に必要なregistrationsコントローラのみに適用)
そしてここからの流れを再度確認すると
●userモデルのインスタンスの作成
●バリデーションチェックしたユーザー情報をsessionに保持してprofileモデルのインスタンスの生成
●バリデーションチェックしたバリデーションチェックしたプロフィール情報とsessionで保持していたユーザー情報を保存
という流れで実装していく必要があります。userモデルのインスタンスの作成
app/controllers/users/registrations_controller.rbclass Users::RegistrationsController < Devise::RegistrationsController # 省略 def new @user = User.new end # 省略 endnewアクションに対応するフォーム形成
app/views/devise/registrations/new.html.erb<h2>ユーザー情報登録</h2> <%= form_for(@user, url: user_registration_path) do |f| %> <%= render "devise/shared/error_messages", resource: @user %> <div class="field"> <%= f.label :email %><br /> <%= f.email_field :email, autofocus: true, autocomplete: "email" %> </div> <div class="field"> <%= f.label :password %> <% if @minimum_password_length %> <em>(<%= @minimum_password_length %> characters minimum)</em> <% end %><br /> <%= f.password_field :password, autocomplete: "new-password" %> </div> <div class="field"> <%= f.label :password_confirmation %><br /> <%= f.password_field :password_confirmation, autocomplete: "new-password" %> </div> <div class="actions"> <%= f.submit "Next" %> </div> <% end %> <%= render "devise/shared/links" %>上記で元のところからの変更点は、resourceという文字列部分(このdeviseのログイン機能で実装されるモデルが入るresourceとは、仮引数のようなもので実装する状況に応じたモデル名に変更する必要がありそうです)やボタンをnextにするなど細かい部分を修正しています。
変更後にビューが反映されているかを確認します。
確認後はユーザー登録フォーム上で"Next"をクリックすると、次の情報を登録するページに遷移しますが、その前にcreateアクション内で追記する必要があるので下記のように編集を実施します。createアクションの編集
app/controllers/users/registrations_controller.rbclass Users::RegistrationsController < Devise::RegistrationsController before_action :configure_sign_up_params, only: [:create] # 省略 def create @user = User.new(sign_up_params) unless @user.valid? flash.now[:alert] = @user.errors.full_messages render :new and return end session["devise.regist_data"] = {user: @user.attributes} session["devise.regist_data"][:user]["password"] = params[:user][:password] @profile = @user.build_profile render :new_profiles end # 省略 protected def configure_sign_up_params devise_parameter_sanitizer.permit(:sign_up, keys: [:attribute]) end end上記の編集によってどのようになったかを項目ごとに確認していきます。
1ページ目で入力した情報のバリデーションチェック
まず、Userモデルのインスタンスを生成し、最初の画面から送られてきたパラメータをインスタンス変数@userに代入します。そのインスタンス変数に対してvalid?メソッドを適用することで送られてきたパラメータが指定されたバリデーションに違反しないかどうかチェックしています。falseになった場合は、エラーメッセージとともにnewアクションへrenderさせます。
1ページで入力した情報をsessionに保持させること
次いで入力した情報をsessionに保持させます。
今回のようにウィザード形式にする場合には最後のページまで遷移した後に保存するというようにするために、今回はsessionという機能を用います。
バリデーションチェックが完了したら、session["devise.regist_data"]に値を代入します。この時、sessionにハッシュオブジェクトの形で情報を保持させるために、attributesメソッドを用いてデータを整形しています。また、paramsの中にはパスワードの情報は含まれていますが、attributesメソッドでデータ整形をした際にパスワードの情報は含まれていません。そこで、パスワードを再度sessionに代入する必要があります。次画面にてプロフィール情報登録で使用するインスタンスを生成、当該ページへ遷移すること
次画面では、このユーザーモデルに紐づくプロフィール情報を入力させるため、該当するインスタンスを生成しておく必要があります。そのために、build_profileで今回生成したインスタンス@userに紐づくProfileモデルのインスタンスを生成します。ここで生成したProfileモデルのインスタンスは、@profileというインスタンス変数に代入します。そして、プロフィール情を登録させるページを表示するnew_profileアクションのビューへrenderしています。
次にnew_profileアクションとcreate_profileアクションのルーティングを設定します。
config/routes.rbRails.application.routes.draw do devise_for :users, controllers: { registrations: 'users/registrations' } devise_scope :user do get 'profiles', to: 'users/registrations#new_profile' post 'profiles', to: 'users/registrations#create_profile' end root to: "***#index" endapp/views/devise/registrations/new_profile.html.erb<h2>プロフィール情報登録</h2> <%= form_for @profile do |f| %> <%= render "devise/shared/error_messages", resource: @profile %> <div class="field"> <%= f.label :name %><br /> <%= f.text_field :name %> </div> <div class="field"> <%= f.label :age %><br /> <%= f.text_field :age %> </div> <div class="field"> <%= f.label :gender %><br /> <%= f.text_field :gender %> </div> <div class="actions"> <%= f.submit "Sign up" %> </div> <% end %> <%= render "devise/shared/links" %>ルーティング先のビューも下記のように作成して、画面遷移の確認をします。
config/routes.rbRails.application.routes.draw do devise_for :users, controllers: { registrations: 'users/registrations' } devise_scope :user do get 'profiles', to: 'users/registrations#new_profile' post 'profiles', to: 'users/registrations#create_profile' end root to: "***#index" end最後にcreate_profileアクションで、ユーザー情報とプロフィール情報全てをテーブルに保存するように実装します。
create_profileアクションの再編集
app/controllers/users/registrations_controller.rb#省略 def create_profile @user = User.new(session["devise.regist_data"]["user"]) @profile = Profile.new(profile_params) unless @profile.valid? flash.now[:alert] = @profile.errors.full_messages render :new_profile and return end @user.build_profile(@profile.attributes) @user.save sign_in(:user, @user) end #省略 protected def profile_params params.require(:profile).permit(:name, :age, :gender) end上記の編集によってどのようになったかを項目ごとに確認していきます。
2ページ目で入力したプロフィール情報のバリデーションチェック
最初の入力画面でのcreateアクションと同様に、valid?メソッドを用いて、バリデーションチェックを行います。
バリデーションチェックが完了した情報と、sessionで保持していた情報とあわせ、ユーザー情報として保存すること
build_profileを用いて送られてきたparamsを、保持していたsessionが含まれる@userに代入します。そしてsaveメソッドを用いてテーブルに保存します。
ログインをすること
ユーザーの新規登録ができても、ログインができているわけではありません。それをsign_inメソッドを利用してログイン作業を行いましょう。
上記が完了したらprofile_createに対応するビューを作成します。app/views/devise/registrations/create_profile.html.erb<h2>登録が完了しました</h2> <%= link_to "トップへ戻る", root_path%>sessionを削除すること
このようにすることでユーザー登録画面をウィザード形式にすることが可能となります。
次の記事ではSNS認証をこちらに追加していきたいと思います。
- 投稿日:2020-01-16T21:54:43+09:00
【RSpec】同じパターンのテストシナリオをJSONで定義して外出しする
解決できるケース
以下のようなケースに適用できると思います。
あくまで飛び道具的な手法なので、常用は良いと思いません。
- 同じ機能を複数のパラメータパターンで実行して結果を評価する場合、実装を軽量化できる。
- JSONファイルにパラメータ部分のみを外出しするため、RSpecを書けない人でもテストケースのメンテナンスが可能
経緯
ある案件で給与計算モジュールを実装した際に、深夜・残業・休日の手当や、勤務時間に関するモジュールなどを実装し、それぞれテストケースを作りました。
ただ、それだと心もとないため、給与計算モジュール群の統合テストケースを実装することとなりました。例えば、
「時給¥1000で10:00~15:00勤務」「時給¥1001円で18:00~24:00勤務」・・・など
一定のパラメータに複数パターンを入力して結果を評価するテストケースが必要になりました。
そこで、ケースはJSONファイルに書き出しておき、テストの実装はループでやってみようということで、以下のようなRSpecを作成しました。実装
contextをtest_caseの数分ループすることで、同じようなテストケースをずらずら書き並べる必要がなくなっています。
※内容は例なので簡略化しています。Rspec
  # 給与計算パターンの検証
  describe 'calculate salary' do

    # テストケースJSONファイルをロード
    test_cases = JSON.parse(IO.read(Rails.root.join("spec/json/salary_calculator_test_case.json")), symbolize_names: true)

    # テストケースの数分、テストを実行する
    test_cases.each do |test_case|

      # [:execution]がfalseのテストケースは無視する
      next unless test_case[:execution]

      # [:pattern]に設定してあるケース名を引用
      context "case [#{test_case[:pattern]}]" do

        # 勤務時間
        let(:worktimes) { test_case.key?(:worktimes) ? test_case[:worktimes] : [] }
        # 休憩時間
        let(:resttimes) { test_case.key?(:resttimes) ? test_case[:resttimes] : [] }
        # 給与
        let(:hourly_wage) { test_case.key?(:hourly_wage) ? test_case[:hourly_wage] : 1000 }

        # 計算処理の実行結果を評価対象とする
        subject { execute(worktimes, resttimes, amount)}

        # テスト結果の評価
        it 'calculate correctly ' do
            expect(subject).to eq test_case[:expect]
        end
      end
    end
  end
テストケースJSON
[
    {
        "pattern": "work 10:00-15:00/rest 12:00-13:00/hourly_wage ¥1000",
        "worktimes": [
            { "start": "2020-01-06 10:00:00", "end": "2020-01-06 15:00:00" }
        ],
        "resttimes": [
            { "start": "2020-01-06 12:00:00", "end": "2020-01-06 13:00:00" }
        ],
        "hourly_wage": 1000,
        "expect": 4000,
        "execution": true,
        "comment": "通常"
    },
    {
        "pattern": "work 18:00-24:00/rest 20:00-21:00/hourly_wage ¥1001",
        "worktimes": [
            { "start": "2020-01-06 18:00:00", "end": "2020-01-07 00:00:00" }
        ],
        "resttimes": [
            { "start": "2020-01-06 20:00:00", "end": "2020-01-06 21:00:00" }
        ],
        "hourly_wage": 1001,
        "expect": 5501
        "execution": true,
        "comment": "深夜手当あり"
    },
    {
        ...
    }
    ...
]
JSONのテストケース中には、以下の項目を含んでおくと便利でした。
- "execution": テストケースを実行するかどうか。1ケースだけテストしたい時に他を全てfalseにして無駄な時間を食わずに済む。
- "comment": テストでは使用しないが、メンテナンス時にわかりやすくなる。テストケースを定義した資料に記載されているケース名を転記して、わかりやすくしたり。
あとがき
ご参考になれば幸いです。
- 投稿日:2020-01-16T19:48:15+09:00
macOSをCatalinaにしたらRubyとRailsが消えた時【zsh: /usr/local/bin/rails: bad interpreter: System/Library/Frameworks/Ruby.framework/Versions/2.0/usr/bin/ruby: no such file or directory】の対処
Catalinaにした後Rubymineのプラグインを挿入後の再起動でRailsが消えた
エディターでRubymineを使用しているのですが、プラグインを挿入し再起動、%rails sなどのコマンドをしても、『Rails is not currently installed on this system. To get the latest version, simply type: $ sudo gem install rails』とエラーが発生。
rbenvのパスの設定が変わったと想定
ここら辺の環境設定ではプログラミング初心者はとても頭を悩ます分野。
プログラミングスクールのDive Into Codeに通っていた頃、メンターの皆様によく教わりました。
「bash~が〜」とか「システムでのRubyとローカルは違う〜」「rbenvのpathは〜」
色々教わりましたが、Rubyの構文やRailsの仕組み、そもそもブラウザの仕組みやHTMLやCSSを働きながら多方面の分野を勉強する為、環境構築はとても苦手でした。極論:教授して頂いたコードをコピペ
ここでは一応腹落ちするまで教えて頂きましたが、30分ググったりして悩んだ場合は素直に教えてもらい先に進んだ方が良い。ただ自分のこの調べる力は、後々のエンジニアとしての『再現性』を豊にするの実感。
エンジニアの8~9割りはエラーやバグの解決に時間を要する為、プログラミング初心者は解決できなくともそこで挫折しないで良い経験だとして、力として欲しい。「~/.zshrc」ファイルにrbenvのpath設定をしてあげる
話題を本題に戻します。
%which ruby をコマンドした場合、
/usr/bin/ruby の表示。
このままだと、いくら%rails sなどのRailsコマンドをしても、
【zsh: /usr/local/bin/rails: bad interpreter: /System/Library/Frameworks/Ruby.framework/Versions/2.0/usr/bin/ruby: no such file or directory
Rails is not currently installed on this system. To get the latest version, simply type:】のエラー表示が出る。
その後には、【 $ sudo gem install rails】とアドバイスされる。結果論: $ sudo gem install railsのコマンドは要らない
元々railsのgemはインストールされている中で、pathが違った為のエラー。
なので、pathを通す為にコマンドしてあげれば良い。%which rubyで【/Users/ユーザー名/.rbenv/shims/ruby】になるまで
https://teratail.com/questions/218281 このサイトを参考にしました。
ただここでは一時的な解決にしかならない為、エディターを再起動したり、違うターミナル開けた場合、同じエラーになりました。対処法の結論
%echo 'export PATH="$HOME/.rbenv/bin:$HOME/.rbenv/shims:$PATH"' >> ~/.zshenv
%echo 'eval "$(rbenv init -)"' >> ~/.zshenv
%echo 'source $HOME/.zshenv' >> ~/.zshrc
exec $SHELL
source $HOME/.zshenv
%Which ruby

/Users/ユーザー名/.rbenv/shims/ruby
%which rails

/Users/ユーザー名/.rbenv/shims/rails
もうOSのアップデートの度に、びっくりしなくて済みます。
参考にしたサイト
https://medium.com/@petehanner/getting-rails-to-work-with-catalina-zsh-84146e1d2099
備忘録としてコマンドだけをツイートしたのも残しておきます。
https://twitter.com/ARTS_papa/status/1217754991819030529
- 投稿日:2020-01-16T19:46:11+09:00
Homebrew + rbenv + Bundler + dockerで開発環境をマネージドに構築する(番外編-Ruby on Railsアプリ)
〜後編〜からの続き
前提
- 便宜上、既存のワーキングコピーがあります
- ただし、
Dockerfileやdocker-compose.ymlは後編からガラッと変わりますDocker手順
Dockerfileのコマンド
コマンド 説明 FROM 使用するイメージとバージョン RUN コマンドの実行。railsに必要な必要なnodejsとpostgeqsqlをインストールしている WORKDIR そのままの意味。作業ディレクトリを設定します。 ADD ローカルのファイルをコンテナへコピーする(昔のCOPYコマンドになります) ENTRYPOINT 一番最初に実行するコマンド(ここではentrypoint.shを参照) EXPOSE コンテナがリッスンするport番号 CMD イメージ内部のソフトウェア実行(つまりRailsのことですね) 1. Dockerfileを作成する
DockerfileFROM ruby:2.6.5 # Setting environment ENV LANG C.UTF-8 ENV TZ Asia/Tokyo ENV APP_HOME /var/www/capistrano_sample_app_v1 # Install libraries RUN apt-get update -qq && \ apt-get install -y build-essential \ libpq-dev \ nodejs \ vim \ default-mysql-client RUN gem install bundler -v '2.1.4' # Create app home RUN mkdir -p $APP_HOME WORKDIR $APP_HOME # Copy Gemfile from origin ADD Gemfile $APP_HOME/Gemfile RUN bundle _2.1.4_ install --path vendor/bundle ADD . $APP_HOME2. docker-composeを作成する
docker-compose.ymlversion: '3' services: mysql: # https://dev.mysql.com/doc/relnotes/mysql/5.7/en/ image: mysql:5.7 environment: MYSQL_ALLOW_EMPTY_PASSWORD: "yes" MYSQL_DATABASE: capistrano_sample MYSQL_USER: developer MYSQL_PASSWORD: %masking% MYSQL_ROOT_PASSWORD: password ports: - "3306:3306" command: mysqld --innodb_file_per_table=1 --innodb_file_format=barracuda --innodb_large_prefix=1 redis: # https://github.com/RedisLabs/docker-library-redis image: redis:3.2-alpine # memcached: # https://github.com/autopilotpattern/memcached/releases # image: memcached:1.4-alpine app: build: context: . dockerfile: "Dockerfile" tty: true stdin_open: true ports: - "8080:8080" # environment: # RAILS_LOG_TO_STDOUT: "true" # STACKDRIVER_LOGGING_MODE: "agent" # command: /bin/sh -c "rm -f /capistrano_sample_app_v1/tmp/pids/server.pid && bundle exec rails s -p 8080 -b '0.0.0.0'" command: /bin/sh -c "rm -f tmp/pids/server.pid && bundle exec rails s -p 8080 -b '0.0.0.0'" volumes: # ホストのカレントディレクトリをコンテナの/appにマウント - "./:/app" links: - mysql - redis # - memcached3.docker build
Terminal$ docker-compose up --build Creating network "capistrano_sample_app_v1_default" with the default driver Pulling mysql (mysql:5.7)... 5.7: Pulling from library/mysql 804555ee0376: Pull complete c53bab458734: Pull complete ca9d72777f90: Pull complete 2d7aad6cb96e: Pull complete 8d6ca35c7908: Pull complete 6ddae009e760: Pull complete 327ae67bbe7b: Pull complete 9e05241b7707: Pull complete e822978df8f0: Pull complete 14ca71ed53be: Pull complete 026afe6fd35e: Pull complete Digest: sha256:2ca675966612f34b4036bbcfa68cb049c03e34b561fba0f88954b03931823d29 Status: Downloaded newer image for mysql:5.7 Pulling redis (redis:3.2-alpine)... 3.2-alpine: Pulling from library/redis 4fe2ade4980c: Pull complete fb758dc2e038: Pull complete 989f7b0c858b: Pull complete 42b4b9f869ad: Pull complete 17e06138ef20: Pull complete c0ecd66db81e: Pull complete Digest: sha256:e9083e10f5f81d350a3f687d582aefd06e114890b03e7f08a447fa1a1f66d967 Status: Downloaded newer image for redis:3.2-alpine Building app Step 1/11 : FROM ruby:2.6.5 ---> a161c3e3dda8 Step 2/11 : ENV LANG C.UTF-8 ---> Using cache ---> 5e1f7a284c55 Step 3/11 : ENV TZ Asia/Tokyo ---> Using cache ---> 36064309c74a Step 4/11 : ENV APP_HOME /var/www/capistrano_sample_app_v1 ---> Using cache ---> b6ad93523f4f Step 5/11 : RUN apt-get update -qq && apt-get install -y build-essential libpq-dev nodejs vim default-mysql-client ---> Using cache ---> 27f7958c4205 Step 6/11 : RUN gem install bundler -v '2.1.4' ---> Using cache ---> 2152e68a959d Step 7/11 : RUN mkdir -p $APP_HOME ---> Using cache ---> 34bf7f30bbcb Step 8/11 : WORKDIR $APP_HOME ---> Using cache ---> 1be2dad77d77 Step 9/11 : ADD Gemfile $APP_HOME/Gemfile ---> Using cache ---> f2549fe43d36 Step 10/11 : RUN bundle _2.1.4_ install --path vendor/bundle ---> Using cache ---> 55ba3d1dbf0c Step 11/11 : ADD . $APP_HOME ---> 4d459e27e55e Successfully built 4d459e27e55e Successfully tagged capistrano_sample_app_v1_app:latest Creating capistrano_sample_app_v1_mysql_1 ... done Creating capistrano_sample_app_v1_redis_1 ... done Creating capistrano_sample_app_v1_app_1 ... done Attaching to capistrano_sample_app_v1_redis_1, capistrano_sample_app_v1_mysql_1, capistrano_sample_app_v1_app_1 mysql_1 | 2020-01-16 09:55:41+00:00 [Note] [Entrypoint]: Entrypoint script for MySQL Server 5.7.29-1debian9 started. redis_1 | 1:C 16 Jan 09:55:40.955 # Warning: no config file specified, using the default config. In order to specify a config file use redis-server /path/to/redis.conf mysql_1 | 2020-01-16 09:55:45+00:00 [Note] [Entrypoint]: Switching to dedicated user 'mysql' redis_1 | _._ redis_1 | _.-``__ ''-._ redis_1 | _.-`` `. `_. ''-._ Redis 3.2.12 (00000000/0) 64 bit redis_1 | .-`` .-```. ```\/ _.,_ ''-._ redis_1 | ( ' , .-` | `, ) Running in standalone mode redis_1 | |`-._`-...-` __...-.``-._|'` _.-'| Port: 6379 redis_1 | | `-._ `._ / _.-' | PID: 1 redis_1 | `-._ `-._ `-./ _.-' _.-' redis_1 | |`-._`-._ `-.__.-' _.-'_.-'| redis_1 | | `-._`-._ _.-'_.-' | http://redis.io redis_1 | `-._ `-._`-.__.-'_.-' _.-' redis_1 | |`-._`-._ `-.__.-' _.-'_.-'| redis_1 | | `-._`-._ _.-'_.-' | redis_1 | `-._ `-._`-.__.-'_.-' _.-' redis_1 | `-._ `-.__.-' _.-' redis_1 | `-._ _.-' redis_1 | `-.__.-' redis_1 | redis_1 | 1:M 16 Jan 09:55:40.961 # WARNING: The TCP backlog setting of 511 cannot be enforced because /proc/sys/net/core/somaxconn is set to the lower value of 128. redis_1 | 1:M 16 Jan 09:55:40.961 # Server started, Redis version 3.2.12 redis_1 | 1:M 16 Jan 09:55:40.961 # WARNING you have Transparent Huge Pages (THP) support enabled in your kernel. This will create latency and memory usage issues with Redis. To fix this issue run the command 'echo never > /sys/kernel/mm/transparent_hugepage/enabled' as root, and add it to your /etc/rc.local in order to retain the setting after a reboot. Redis must be restarted after THP is disabled. redis_1 | 1:M 16 Jan 09:55:40.961 * The server is now ready to accept connections on port 6379 mysql_1 | 2020-01-16 09:55:45+00:00 [Note] [Entrypoint]: Entrypoint script for MySQL Server 5.7.29-1debian9 started. mysql_1 | 2020-01-16 09:55:45+00:00 [Note] [Entrypoint]: Initializing database files mysql_1 | 2020-01-16T09:55:45.597324Z 0 [Warning] TIMESTAMP with implicit DEFAULT value is deprecated. Please use --explicit_defaults_for_timestamp server option (see documentation for more details). mysql_1 | 2020-01-16T09:55:45.635369Z 0 [Warning] InnoDB: Using innodb_file_format is deprecated and the parameter may be removed in future releases. See http://dev.mysql.com/doc/refman/5.7/en/innodb-file-format.html mysql_1 | 2020-01-16T09:55:48.077398Z 0 [Warning] InnoDB: New log files created, LSN=45790 mysql_1 | 2020-01-16T09:55:48.646754Z 0 [Warning] InnoDB: Creating foreign key constraint system tables. mysql_1 | 2020-01-16T09:55:48.952749Z 0 [Warning] No existing UUID has been found, so we assume that this is the first time that this server has been started. Generating a new UUID: 5f8348e1-3846-11ea-8ab5-0242ac130003. mysql_1 | 2020-01-16T09:55:49.020134Z 0 [Warning] Gtid table is not ready to be used. Table 'mysql.gtid_executed' cannot be opened. mysql_1 | 2020-01-16T09:55:51.294446Z 0 [Warning] CA certificate ca.pem is self signed. app_1 | from /var/www/capistrano_sample_app_v1/vendor/bundle/ruby/2.6.0/gems/bootsnap-1.4.5/lib/bootsnap.rb:22:in `setup': The 'disable_trace' method is not allowed with this Ruby version. current: 2.6.5, allowed version: < 2.5.0 mysql_1 | 2020-01-16T09:55:51.879252Z 1 [Warning] root@localhost is created with an empty password ! Please consider switching off the --initialize-insecure option. app_1 | => Booting Puma app_1 | => Rails 5.2.4.1 application starting in development app_1 | => Run `rails server -h` for more startup options app_1 | Puma starting in single mode... app_1 | * Version 3.12.2 (ruby 2.6.5-p114), codename: Llamas in Pajamas app_1 | * Min threads: 5, max threads: 5 app_1 | * Environment: development app_1 | * Listening on tcp://0.0.0.0:8080 app_1 | Use Ctrl-C to stop mysql_1 | 2020-01-16 09:55:58+00:00 [Note] [Entrypoint]: Database files initialized mysql_1 | 2020-01-16 09:55:58+00:00 [Note] [Entrypoint]: Starting temporary server mysql_1 | 2020-01-16 09:55:58+00:00 [Note] [Entrypoint]: Waiting for server startup mysql_1 | 2020-01-16T09:55:58.626438Z 0 [Warning] TIMESTAMP with implicit DEFAULT value is deprecated. Please use --explicit_defaults_for_timestamp server option (see documentation for more details). mysql_1 | 2020-01-16T09:55:58.627939Z 0 [Note] mysqld (mysqld 5.7.29) starting as process 80 ... mysql_1 | 2020-01-16T09:55:58.631949Z 0 [Warning] InnoDB: Using innodb_file_format is deprecated and the parameter may be removed in future releases. See http://dev.mysql.com/doc/refman/5.7/en/innodb-file-format.html mysql_1 | 2020-01-16T09:55:58.632065Z 0 [Note] InnoDB: PUNCH HOLE support available mysql_1 | 2020-01-16T09:55:58.632232Z 0 [Note] InnoDB: Mutexes and rw_locks use GCC atomic builtins mysql_1 | 2020-01-16T09:55:58.632267Z 0 [Note] InnoDB: Uses event mutexes mysql_1 | 2020-01-16T09:55:58.632275Z 0 [Note] InnoDB: GCC builtin __atomic_thread_fence() is used for memory barrier mysql_1 | 2020-01-16T09:55:58.632281Z 0 [Note] InnoDB: Compressed tables use zlib 1.2.11 mysql_1 | 2020-01-16T09:55:58.632286Z 0 [Note] InnoDB: Using Linux native AIO mysql_1 | 2020-01-16T09:55:58.632901Z 0 [Note] InnoDB: Number of pools: 1 mysql_1 | 2020-01-16T09:55:58.633235Z 0 [Note] InnoDB: Using CPU crc32 instructions mysql_1 | 2020-01-16T09:55:58.634985Z 0 [Note] InnoDB: Initializing buffer pool, total size = 128M, instances = 1, chunk size = 128M mysql_1 | 2020-01-16T09:55:58.644127Z 0 [Note] InnoDB: Completed initialization of buffer pool mysql_1 | 2020-01-16T09:55:58.646140Z 0 [Note] InnoDB: If the mysqld execution user is authorized, page cleaner thread priority can be changed. See the man page of setpriority(). mysql_1 | 2020-01-16T09:55:58.660112Z 0 [Note] InnoDB: Highest supported file format is Barracuda. mysql_1 | 2020-01-16T09:55:58.702341Z 0 [Note] InnoDB: Creating shared tablespace for temporary tables mysql_1 | 2020-01-16T09:55:58.702446Z 0 [Note] InnoDB: Setting file './ibtmp1' size to 12 MB. Physically writing the file full; Please wait ... mysql_1 | 2020-01-16T09:55:58.916889Z 0 [Note] InnoDB: File './ibtmp1' size is now 12 MB. mysql_1 | 2020-01-16T09:55:58.917944Z 0 [Note] InnoDB: 96 redo rollback segment(s) found. 96 redo rollback segment(s) are active. mysql_1 | 2020-01-16T09:55:58.917995Z 0 [Note] InnoDB: 32 non-redo rollback segment(s) are active. mysql_1 | 2020-01-16T09:55:58.919329Z 0 [Note] InnoDB: 5.7.29 started; log sequence number 2629932 mysql_1 | 2020-01-16T09:55:58.919668Z 0 [Note] InnoDB: Loading buffer pool(s) from /var/lib/mysql/ib_buffer_pool mysql_1 | 2020-01-16T09:55:58.920063Z 0 [Note] Plugin 'FEDERATED' is disabled. mysql_1 | 2020-01-16T09:55:58.922411Z 0 [Note] InnoDB: Buffer pool(s) load completed at 200116 9:55:58 mysql_1 | 2020-01-16T09:55:58.926524Z 0 [Note] Found ca.pem, server-cert.pem and server-key.pem in data directory. Trying to enable SSL support using them. mysql_1 | 2020-01-16T09:55:58.926589Z 0 [Note] Skipping generation of SSL certificates as certificate files are present in data directory. mysql_1 | 2020-01-16T09:55:58.927349Z 0 [Warning] CA certificate ca.pem is self signed. mysql_1 | 2020-01-16T09:55:58.927419Z 0 [Note] Skipping generation of RSA key pair as key files are present in data directory. mysql_1 | 2020-01-16T09:55:58.929692Z 0 [Warning] Insecure configuration for --pid-file: Location '/var/run/mysqld' in the path is accessible to all OS users. Consider choosing a different directory. mysql_1 | 2020-01-16T09:55:58.938200Z 0 [Note] Event Scheduler: Loaded 0 events mysql_1 | 2020-01-16T09:55:58.938729Z 0 [Note] mysqld: ready for connections. mysql_1 | Version: '5.7.29' socket: '/var/run/mysqld/mysqld.sock' port: 0 MySQL Community Server (GPL) mysql_1 | 2020-01-16 09:55:59+00:00 [Note] [Entrypoint]: Temporary server started. mysql_1 | Warning: Unable to load '/usr/share/zoneinfo/iso3166.tab' as time zone. Skipping it. mysql_1 | Warning: Unable to load '/usr/share/zoneinfo/leap-seconds.list' as time zone. Skipping it. mysql_1 | Warning: Unable to load '/usr/share/zoneinfo/zone.tab' as time zone. Skipping it. mysql_1 | Warning: Unable to load '/usr/share/zoneinfo/zone1970.tab' as time zone. Skipping it. mysql_1 | mysql_1 | 2020-01-16 09:56:06+00:00 [Note] [Entrypoint]: Stopping temporary server mysql_1 | 2020-01-16T09:56:06.599321Z 0 [Note] Giving 0 client threads a chance to die gracefully mysql_1 | 2020-01-16T09:56:06.599402Z 0 [Note] Shutting down slave threads mysql_1 | 2020-01-16T09:56:06.599412Z 0 [Note] Forcefully disconnecting 0 remaining clients mysql_1 | 2020-01-16T09:56:06.599422Z 0 [Note] Event Scheduler: Purging the queue. 0 events mysql_1 | 2020-01-16T09:56:06.599572Z 0 [Note] Binlog end mysql_1 | 2020-01-16T09:56:06.600707Z 0 [Note] Shutting down plugin 'ngram' mysql_1 | 2020-01-16T09:56:06.600763Z 0 [Note] Shutting down plugin 'partition' mysql_1 | 2020-01-16T09:56:06.600771Z 0 [Note] Shutting down plugin 'BLACKHOLE' mysql_1 | 2020-01-16T09:56:06.600777Z 0 [Note] Shutting down plugin 'ARCHIVE' mysql_1 | 2020-01-16T09:56:06.600781Z 0 [Note] Shutting down plugin 'PERFORMANCE_SCHEMA' mysql_1 | 2020-01-16T09:56:06.600812Z 0 [Note] Shutting down plugin 'MRG_MYISAM' mysql_1 | 2020-01-16T09:56:06.600817Z 0 [Note] Shutting down plugin 'MyISAM' mysql_1 | 2020-01-16T09:56:06.600831Z 0 [Note] Shutting down plugin 'INNODB_SYS_VIRTUAL' mysql_1 | 2020-01-16T09:56:06.600836Z 0 [Note] Shutting down plugin 'INNODB_SYS_DATAFILES' mysql_1 | 2020-01-16T09:56:06.601155Z 0 [Note] Shutting down plugin 'INNODB_SYS_TABLESPACES' mysql_1 | 2020-01-16T09:56:06.601163Z 0 [Note] Shutting down plugin 'INNODB_SYS_FOREIGN_COLS' mysql_1 | 2020-01-16T09:56:06.601167Z 0 [Note] Shutting down plugin 'INNODB_SYS_FOREIGN' mysql_1 | 2020-01-16T09:56:06.601170Z 0 [Note] Shutting down plugin 'INNODB_SYS_FIELDS' mysql_1 | 2020-01-16T09:56:06.601173Z 0 [Note] Shutting down plugin 'INNODB_SYS_COLUMNS' mysql_1 | 2020-01-16T09:56:06.601176Z 0 [Note] Shutting down plugin 'INNODB_SYS_INDEXES' mysql_1 | 2020-01-16T09:56:06.601179Z 0 [Note] Shutting down plugin 'INNODB_SYS_TABLESTATS' mysql_1 | 2020-01-16T09:56:06.601182Z 0 [Note] Shutting down plugin 'INNODB_SYS_TABLES' mysql_1 | 2020-01-16T09:56:06.601186Z 0 [Note] Shutting down plugin 'INNODB_FT_INDEX_TABLE' mysql_1 | 2020-01-16T09:56:06.601189Z 0 [Note] Shutting down plugin 'INNODB_FT_INDEX_CACHE' mysql_1 | 2020-01-16T09:56:06.601192Z 0 [Note] Shutting down plugin 'INNODB_FT_CONFIG' mysql_1 | 2020-01-16T09:56:06.601195Z 0 [Note] Shutting down plugin 'INNODB_FT_BEING_DELETED' mysql_1 | 2020-01-16T09:56:06.601198Z 0 [Note] Shutting down plugin 'INNODB_FT_DELETED' mysql_1 | 2020-01-16T09:56:06.601201Z 0 [Note] Shutting down plugin 'INNODB_FT_DEFAULT_STOPWORD' mysql_1 | 2020-01-16T09:56:06.601204Z 0 [Note] Shutting down plugin 'INNODB_METRICS' mysql_1 | 2020-01-16T09:56:06.601207Z 0 [Note] Shutting down plugin 'INNODB_TEMP_TABLE_INFO' mysql_1 | 2020-01-16T09:56:06.601211Z 0 [Note] Shutting down plugin 'INNODB_BUFFER_POOL_STATS' mysql_1 | 2020-01-16T09:56:06.601214Z 0 [Note] Shutting down plugin 'INNODB_BUFFER_PAGE_LRU' mysql_1 | 2020-01-16T09:56:06.601217Z 0 [Note] Shutting down plugin 'INNODB_BUFFER_PAGE' mysql_1 | 2020-01-16T09:56:06.601220Z 0 [Note] Shutting down plugin 'INNODB_CMP_PER_INDEX_RESET' mysql_1 | 2020-01-16T09:56:06.601223Z 0 [Note] Shutting down plugin 'INNODB_CMP_PER_INDEX' mysql_1 | 2020-01-16T09:56:06.601226Z 0 [Note] Shutting down plugin 'INNODB_CMPMEM_RESET' mysql_1 | 2020-01-16T09:56:06.601229Z 0 [Note] Shutting down plugin 'INNODB_CMPMEM' mysql_1 | 2020-01-16T09:56:06.601232Z 0 [Note] Shutting down plugin 'INNODB_CMP_RESET' mysql_1 | 2020-01-16T09:56:06.601236Z 0 [Note] Shutting down plugin 'INNODB_CMP' mysql_1 | 2020-01-16T09:56:06.601239Z 0 [Note] Shutting down plugin 'INNODB_LOCK_WAITS' mysql_1 | 2020-01-16T09:56:06.601242Z 0 [Note] Shutting down plugin 'INNODB_LOCKS' mysql_1 | 2020-01-16T09:56:06.601245Z 0 [Note] Shutting down plugin 'INNODB_TRX' mysql_1 | 2020-01-16T09:56:06.601248Z 0 [Note] Shutting down plugin 'InnoDB' mysql_1 | 2020-01-16T09:56:06.601457Z 0 [Note] InnoDB: FTS optimize thread exiting. mysql_1 | 2020-01-16T09:56:06.602096Z 0 [Note] InnoDB: Starting shutdown... mysql_1 | 2020-01-16T09:56:06.703296Z 0 [Note] InnoDB: Dumping buffer pool(s) to /var/lib/mysql/ib_buffer_pool mysql_1 | 2020-01-16T09:56:06.703781Z 0 [Note] InnoDB: Buffer pool(s) dump completed at 200116 9:56:06 mysql_1 | 2020-01-16T09:56:08.246243Z 0 [Note] InnoDB: Shutdown completed; log sequence number 12441955 mysql_1 | 2020-01-16T09:56:08.249558Z 0 [Note] InnoDB: Removed temporary tablespace data file: "ibtmp1" mysql_1 | 2020-01-16T09:56:08.249620Z 0 [Note] Shutting down plugin 'MEMORY' mysql_1 | 2020-01-16T09:56:08.249628Z 0 [Note] Shutting down plugin 'CSV' mysql_1 | 2020-01-16T09:56:08.249632Z 0 [Note] Shutting down plugin 'sha256_password' mysql_1 | 2020-01-16T09:56:08.249635Z 0 [Note] Shutting down plugin 'mysql_native_password' mysql_1 | 2020-01-16T09:56:08.249751Z 0 [Note] Shutting down plugin 'binlog' mysql_1 | 2020-01-16T09:56:08.253458Z 0 [Note] mysqld: Shutdown complete mysql_1 | mysql_1 | 2020-01-16 09:56:08+00:00 [Note] [Entrypoint]: Temporary server stopped mysql_1 | mysql_1 | 2020-01-16 09:56:08+00:00 [Note] [Entrypoint]: MySQL init process done. Ready for start up. mysql_1 | mysql_1 | 2020-01-16T09:56:09.018888Z 0 [Warning] TIMESTAMP with implicit DEFAULT value is deprecated. Please use --explicit_defaults_for_timestamp server option (see documentation for more details). mysql_1 | 2020-01-16T09:56:09.020190Z 0 [Note] mysqld (mysqld 5.7.29) starting as process 1 ... mysql_1 | 2020-01-16T09:56:09.024040Z 0 [Warning] InnoDB: Using innodb_file_format is deprecated and the parameter may be removed in future releases. See http://dev.mysql.com/doc/refman/5.7/en/innodb-file-format.html mysql_1 | 2020-01-16T09:56:09.024328Z 0 [Note] InnoDB: PUNCH HOLE support available mysql_1 | 2020-01-16T09:56:09.024371Z 0 [Note] InnoDB: Mutexes and rw_locks use GCC atomic builtins mysql_1 | 2020-01-16T09:56:09.024378Z 0 [Note] InnoDB: Uses event mutexes mysql_1 | 2020-01-16T09:56:09.024382Z 0 [Note] InnoDB: GCC builtin __atomic_thread_fence() is used for memory barrier mysql_1 | 2020-01-16T09:56:09.024388Z 0 [Note] InnoDB: Compressed tables use zlib 1.2.11 mysql_1 | 2020-01-16T09:56:09.024395Z 0 [Note] InnoDB: Using Linux native AIO mysql_1 | 2020-01-16T09:56:09.024922Z 0 [Note] InnoDB: Number of pools: 1 mysql_1 | 2020-01-16T09:56:09.025108Z 0 [Note] InnoDB: Using CPU crc32 instructions mysql_1 | 2020-01-16T09:56:09.026850Z 0 [Note] InnoDB: Initializing buffer pool, total size = 128M, instances = 1, chunk size = 128M mysql_1 | 2020-01-16T09:56:09.036547Z 0 [Note] InnoDB: Completed initialization of buffer pool mysql_1 | 2020-01-16T09:56:09.038578Z 0 [Note] InnoDB: If the mysqld execution user is authorized, page cleaner thread priority can be changed. See the man page of setpriority(). mysql_1 | 2020-01-16T09:56:09.061020Z 0 [Note] InnoDB: Highest supported file format is Barracuda. mysql_1 | 2020-01-16T09:56:10.650530Z 0 [Note] InnoDB: Creating shared tablespace for temporary tables mysql_1 | 2020-01-16T09:56:10.650727Z 0 [Note] InnoDB: Setting file './ibtmp1' size to 12 MB. Physically writing the file full; Please wait ... mysql_1 | 2020-01-16T09:56:10.920702Z 0 [Note] InnoDB: File './ibtmp1' size is now 12 MB. mysql_1 | 2020-01-16T09:56:10.922096Z 0 [Note] InnoDB: 96 redo rollback segment(s) found. 96 redo rollback segment(s) are active. mysql_1 | 2020-01-16T09:56:10.922158Z 0 [Note] InnoDB: 32 non-redo rollback segment(s) are active. mysql_1 | 2020-01-16T09:56:10.922898Z 0 [Note] InnoDB: Waiting for purge to start mysql_1 | 2020-01-16T09:56:10.973211Z 0 [Note] InnoDB: 5.7.29 started; log sequence number 12441955 mysql_1 | 2020-01-16T09:56:10.973628Z 0 [Note] InnoDB: Loading buffer pool(s) from /var/lib/mysql/ib_buffer_pool mysql_1 | 2020-01-16T09:56:10.973931Z 0 [Note] Plugin 'FEDERATED' is disabled. mysql_1 | 2020-01-16T09:56:10.979959Z 0 [Note] InnoDB: Buffer pool(s) load completed at 200116 9:56:10 mysql_1 | 2020-01-16T09:56:10.981172Z 0 [Note] Found ca.pem, server-cert.pem and server-key.pem in data directory. Trying to enable SSL support using them. mysql_1 | 2020-01-16T09:56:10.981228Z 0 [Note] Skipping generation of SSL certificates as certificate files are present in data directory. mysql_1 | 2020-01-16T09:56:10.981958Z 0 [Warning] CA certificate ca.pem is self signed. mysql_1 | 2020-01-16T09:56:10.982025Z 0 [Note] Skipping generation of RSA key pair as key files are present in data directory. mysql_1 | 2020-01-16T09:56:10.982602Z 0 [Note] Server hostname (bind-address): '*'; port: 3306 mysql_1 | 2020-01-16T09:56:10.982676Z 0 [Note] IPv6 is available. mysql_1 | 2020-01-16T09:56:10.991740Z 0 [Note] - '::' resolves to '::'; mysql_1 | 2020-01-16T09:56:10.991902Z 0 [Note] Server socket created on IP: '::'. mysql_1 | 2020-01-16T09:56:10.994292Z 0 [Warning] Insecure configuration for --pid-file: Location '/var/run/mysqld' in the path is accessible to all OS users. Consider choosing a different directory. mysql_1 | 2020-01-16T09:56:11.005402Z 0 [Note] Event Scheduler: Loaded 0 events mysql_1 | 2020-01-16T09:56:11.005836Z 0 [Note] mysqld: ready for connections. mysql_1 | Version: '5.7.29' socket: '/var/run/mysqld/mysqld.sock' port: 3306 MySQL Community Server (GPL)4. プロセスの確認
Terminal$ docker-compose ps Name Command State Ports -------------------------------------------------------------------------------------------------- capistrano_sample_app_v1_app_1 /bin/sh -c rm -f /app/tmp/ ... Up 0.0.0.0:8080->8080/tcp capistrano_sample_app_v1_mysql_1 docker-entrypoint.sh mysql ... Up 3306/tcp, 33060/tcp capistrano_sample_app_v1_redis_1 docker-entrypoint.sh redis ... Up 6379/tcp5.appのコンテナにアクセスできるか確認
Terminal$ docker exec -it capistrano_sample_app_v1_app_1 /bin/bash root@a72845229f9c:/var/www/capistrano_sample_app_v1# root@a72845229f9c:/var/www/capistrano_sample_app_v1# ps aux USER PID %CPU %MEM VSZ RSS TTY STAT START TIME COMMAND root 1 0.0 0.0 2384 744 pts/0 Ss+ 18:55 0:00 /bin/sh -c rm -f /app/tmp/pids/server.pid && bin/rails s -p 8080 -b '0.0.0.0' root 7 0.2 6.3 1125704 130296 pts/0 Sl+ 18:55 0:04 puma 3.12.2 (tcp://0.0.0.0:8080) [capistrano_sample_app_v1] root 27 1.0 0.1 5748 3400 pts/1 Ss 19:28 0:00 /bin/bash root 32 0.0 0.1 9388 2992 pts/1 R+ 19:28 0:00 ps aux root@a72845229f9c:/var/www/capistrano_sample_app_v1# ls Capfile Dockerfile Gemfile Gemfile.lock README.md Rakefile app bin config config.ru db docker-compose.yml lib log package.json spec storage tmp vendor root@a72845229f9c:/var/www/capistrano_sample_app_v1# bundle exec rails c from /var/www/capistrano_sample_app_v1/vendor/bundle/ruby/2.6.0/gems/bootsnap-1.4.5/lib/bootsnap.rb:22:in `setup': The 'disable_trace' method is not allowed with this Ruby version. current: 2.6.5, allowed version: < 2.5.0 Loading development environment (Rails 5.2.4.1) irb(main):001:0> irb(main):002:0> Rails.env => "development" irb(main):003:0> irb(main):004:0> quit root@a72845229f9c:/var/www/capistrano_sample_app_v1#6.mysqlのコンテナにアクセスできるか確認
Terminal$ docker exec -it capistrano_sample_app_v1_mysql_1 /bin/bash root@38fa1f53821a:/# mysql -udeveloper -p capistrano_sample Enter password: Welcome to the MySQL monitor. Commands end with ; or \g. Your MySQL connection id is 2 Server version: 5.7.29 MySQL Community Server (GPL) Copyright (c) 2000, 2020, Oracle and/or its affiliates. All rights reserved. Oracle is a registered trademark of Oracle Corporation and/or its affiliates. Other names may be trademarks of their respective owners. Type 'help;' or '\h' for help. Type '\c' to clear the current input statement. mysql> show tables -> ; Empty set (0.00 sec)ここまでで、開発のためのコンテナの設定は完了しています
尚、コンテナを実行しているホストマシンのワーキングコピーで変更があった場合、
dockerをstop / startすることで変更反映できます7. Webアプリのコンテナをセットアップする
Terminal$ docker exec -it capistrano_sample_app_v1_app_1 /bin/bash # bundle exec rails db:migrate RAILS_ENV=development8.URLアクセス
ローカルホストのRailsにアクセスする
ワーキングスペースの開発など
1. bundle install
Terminal$ bundle _2.1.4_ install --path vendor/bundleYour Ruby version is 2.3.7, but your Gemfile specified 2.6.5となる場合
- 上記、bundle installをしないと、systemのruby versionを見るようです
mysql2の原因でエラーが出た方はこちら参考に
Terminal$ bundle config --local build.mysql2 "--with-ldflags=-L/usr/local/opt/openssl@1.1/lib --with-cppflags=-I/usr/local/opt/openssl@1.1/include" $ bundle _2.1.4_ install --path vendor/bundle [DEPRECATED] The `--path` flag is deprecated because it relies on being remembered across bundler invocations, which bundler will no longer do in future versions. Instead please use `bundle config set path 'vendor/bundle'`, and stop using this flag The dependency tzinfo-data (>= 0) will be unused by any of the platforms Bundler is installing for. Bundler is installing for ruby but the dependency is only for x86-mingw32, x86-mswin32, x64-mingw32, java. To add those platforms to the bundle, run `bundle lock --add-platform x86-mingw32 x86-mswin32 x64-mingw32 java`. Fetching gem metadata from https://rubygems.org/......... Fetching gem metadata from https://rubygems.org/. Resolving dependencies... ...途中省略... Fetching mysql2 0.5.3 Installing mysql2 0.5.3 with native extensions ...途中省略... Bundle complete! 37 Gemfile dependencies, 148 gems now installed. Bundled gems are installed into `./vendor/bundle`2. 機能を追加してみる
Terminal$ bundle exec rails generate scaffold v1::Event game:string description:string event_date:date join_limit:integer latitude:string longitude:string --skip-assets --skip-helper --skip-stylesheets --skip-view-specs --skip-jbuilder --skip-migration invoke active_record create app/models/v1/high_store.rb create app/models/v1.rb invoke rspec create spec/models/v1/event_spec.rb invoke resource_route route namespace :v1 do resources :events end invoke scaffold_controller create app/controllers/v1/events_controller.rb invoke rspec create spec/controllers/v1/events_controller_spec.rb create spec/routing/v1/events_routing_spec.rb invoke rspec create spec/requests/v1/events_spec.rb $ rm app/models/v1.rbリポジトリ
- 本記事のリポジトリは「webmaster-patche/capistrano_sample_app_v1」にて公開しております
- 投稿日:2020-01-16T16:28:37+09:00
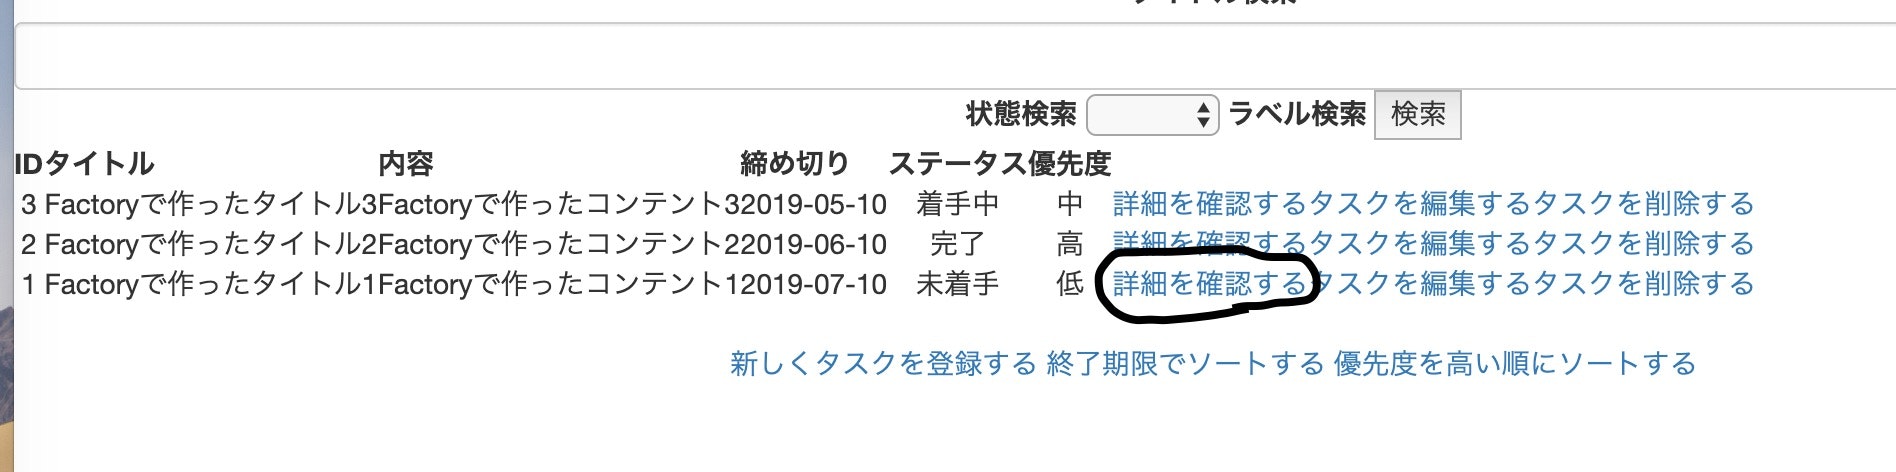
system_specテストにおいて特定のリンクをクリックする方法
- 投稿日:2020-01-16T16:25:02+09:00
変数で見るRubyとPythonの違い
ローカル変数のスコープ
rubyではローカル変数の参照は定義されたスコープ内のみです。
rubya = 1 def func puts a end func #=> error (undefined local variable)pythonでは子孫スコープからも参照できます。
pythona = 1 def func(): print(a) func() #=> 1さらに、ローカル変数は定義されているスコープが消滅しても、子孫スコープなどから参照されている限り消去されません。この性質を応用してインスタンス変数を持つクラスのようなものを作ることもできます。このクラスもどきのインスタンスメソッドもどきをクロージャーと言います。
pythondef cls(): # クラスもどき x = {} # インスタンス変数もどき def a(): # クロージャー x['a'] = 1 def b(): # クロージャー x['b'] = 1 def g(): # クロージャー return x return a, b, g # xのスコープは関数呼び出し終了とともに消滅する a, b, g = cls() a(); b(); print(g()) #=> {'a': 1, 'b': 1}定数クロージャー
rubyでも定数ならクロージャーが存在します。例を挙げる前に、少しだけrubyの説明をします。
rubyでは定数と変数は全く別の手法で管理されています。変数のスコープは関数定義(do構文等含まず)やクラス定義で変化します。一方、定数のスコープはモジュール定義(クラス定義含む)でのみ変化します。そして定数の探索は、
ネストが存在する場合、この定数はそのネストの要素の中で順に探索される
(定数の自動読み込みと再読み込みより)という様に行われます(但しオープンクラスの場合は探索しない)。つまり、定数は子孫スコープからも参照できます。
この性質を使うと、クロージャーを作ることが出来ます。
rubymodule A X = 'x' # インスタンス変数もどき module B # クラスもどき def show # クロージャー puts X end end end class C # インスタンスもどき extend A::B end C.show #=> xローカル変数に見えるインスタンスメソッド
定義が見当たらないローカル変数への参照は、実は引数なしのインスタンスメソッド呼び出しかもしれません。本当によく出会います。
rubyclass C def hoge # インスタンスメソッド return "hoge" end def show fuga = "fuga" puts hoge # インスタンスメソッド呼び出し puts fuga # ローカル変数参照 end endさらに、クラスマクロのattr_accessor、attr_reader、attr_writerを使えば、ローカル変数に見えるインスタンスメソッドを簡単に作れます。変数の実体は、引数のシンボルに@を前置した名前のインスタンス変数です。
rubyclass C attr_accessor :hoge # インスタンス変数@hogeが実体 def initialize self.hoge = "hoge" # インスタンスメソッドhoge=を呼び出し end def show fuga = "fuga" # ローカル変数fugaを定義&初期化 puts hoge # インスタンスメソッドhogeを呼び出し puts fuga # ローカル変数fugaを参照 end end C.new.methods.include?(:hoge) #=> true C.new.methods.include?(:hoge=) #=> truepythonの場合は、インスタンスメソッド呼び出しにselfが付いていたり、関数呼び出しの括弧が省略できなかったりするので、簡単に見分けられます。それよりも、インスタンスメソッド呼び出しとクラスメソッド呼び出しを区別するのが大変です。
pythonclass C: def hoge(self): return "hoge" @classmethod def piyo(cls): return "piyo" def show(self): fuga = "fuga" print(self.hoge()) # インスタンスメソッド呼び出し print(fuga) # ローカル変数参照 print(self.piyo()) # クラスメソッド呼び出しローカル変数による上書き
(scivola様のコメントを元に追加しました)
先ほどの例でインスタンスメソッドhoge=を呼び出す際、selfをレシーバーとして明示しました。
ruby(再掲)class C attr_accessor :hoge def initialize self.hoge = "hoge" # ここ end ...これは、selfを明示しないとローカル変数hogeの定義として扱われるからです。
rubyclass C attr_accessor :hoge def initialize hoge = "hoge" # ローカル変数hogeの定義 end def show puts hoge end end C.new.show #=> nil同じことが、pythonでも起こり得ます。例えば、先ほど紹介したクラスもどきの場合、インスタンス変数もどきは更新できません。
pythondef cls(): x = {} # インスタンス変数的振る舞いをする def u(): x = 'updated' # 実はローカル変数xの定義 def g(): return x return u, g # xのスコープは関数呼び出し終了とともに消滅する u, g = cls() u(); print(g()) #=> {}pythonではselfを省略できないので、インスタンス変数の更新の際に間違うことはないでしょう。
pythonclass C: def __init__(self): self.hoge = "not updated" def wrong(self): hoge = "updated" # 間違いに気付き易い def correct(self): self.hoge = "updated" def show(self): #print(hoge) #=> error (name 'hoge' is not defined) print(self.hoge) c = C() c.wrong(); c.show(); #=> not updated c.correct(); c.show(); #=> updatedinclude先のインスタンス変数を参照
rubymodule M def show puts @message end end class C include M def initialize @message = "accessible" end end C.new.show #=> accessiblepythonでも似たことが出来ます。
pythonclass S: def show(self): print(self.message) class C(S): def __init__(self): self.message = "accessible" C().show() #=> accessible関数を変数に代入
rubyでは関数呼び出しの括弧を省略できます。そのため、関数を変数に代入することは出来ません。
rubydef func return "called" end a = func # 関数funcの呼び出し puts a #=> calledObject#methodインスタンスメソッドを使って、関数をMethodオブジェクトに変換すると、変数に代入できます。
rubydef func return "called" end a = method(:func) # Methodオブジェクトの代入 puts a #=> #<Method: main.func> puts a.call #=> called一方、pythonでは関数を変数に代入できます。
pythondef func(): return "called" a = func # 関数funcの代入 print(func) #=> <function func at 0x...>
- 投稿日:2020-01-16T15:05:45+09:00
gRPCメモ
自身のメモとしてgRPCをまとめてみました。
gRPCとは
protocol buffersをMessage interchange format(メッセージのI/Oに使うための形式)として使えるリモートプロシージャコールシステムです。
protocol buffersとは
IDL:Interface Definition Language (インタフェース定義言語)を用いたファイルフォーマットです。
gRPCで何ができるのか
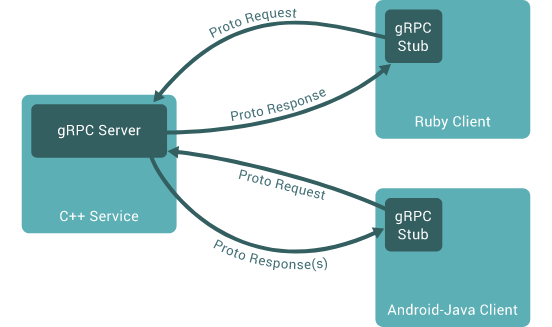
クライアントが別のマシンにあるメソッドをまるでローカルにあるかのように使えるようになります。
下の図のように様々なプログラミング言語に対して実装できる。
雑に言うと
今までjsonなどを介してAPIを叩いていたようなところを、もっと確固たる定義をもった上でより高パフォーマンスでやりとりができる…という感じでしょうか。
protocol bufferの定義の仕方
やりとりするmessageの構成は、以下のようにname-valueでfieldを定義します。
person.protomessage Person { string name = 1; int32 id = 2; bool has_ponycopter = 3; }gRPC Serverの定義はrpcメソッドを使って行います。
greeter.proto// The greeter service definition. service Greeter { // Sends a greeting rpc SayHello (HelloRequest) returns (HelloReply) {} } // The request message containing the user's name. message HelloRequest { string name = 1; } // The response message containing the greetings message HelloReply { string message = 1; }protoファイルののコンパイル
上のgreeter.protoをGo言語ようにコンパイルする場合は以下のようなコマンドを叩きます。
protoc --go_out=plugins=grpc:./ ./greeter.protoこのコンパイルでClient側のメソッドもServer側のメソッドも作成されます。
もし、何かのディレクトリの中にあるすべての.protoをコンパイルしたい場合は、以下のような感じでワイルドカードを使うこともできます。
protoc --go_out=plugins=grpc:./ ./*.protoもし、どこかのディレクトリに入れたいという場合は、grpc:後のところを書き換えます。
以下の場合はprotoディレクトリの中にコンパイルされたデータが書き出されます。
protoc --go_out=plugins=grpc:proto ./*.protoもし、どこかのディレクトリからどこかのディレクトリに書き出したい場合は、以下のような書き方になります。
protoc -I protobuf --go_out=plugins=grpc:proto protobuf/*.proto
-I が無いとprotoディレクトリ配下にprotbufディレクトリが作成され、そのなかにコンパイルされたデータが書き出されます。
-I はimportの基点となる場所をしてしてやるオプションと考えてもらえば良いかもしれません。
--go_out=plugins=grpc:と書いているのですが、protocol buffer自体は別にgRPCのためだけのものではないので、このようにgRPCのための書き出しですよーというオプションを書いておく必要があります。Ruby用にコンパイルしたい場合は --go_outを書き換えます。(複数書けば複数の言語のファイルを同時に書き出せます。)
protoc -I protobuf --ruby_out=plugins=grpc:proto protobuf/*.protogRPCサーバーのリクエストとレスポンスの種類
種類は4つあります。
Unary RPC
一番シンプルな方法で、単一のメッセージのリクエストに対して、単一のメッセージをレスポンスで返す方法です。
greeter.protorpc SayHello(HelloRequest) returns (HelloResponse) { }Server streaming RPC
単一のメッセージのリクエストに対して、複数のメッセージをレスポンスで返す方法です。
例えばですが、何かのデータの一覧が欲しいなどと言うときに、この方法を使えたりします。greeter.protorpc LotsOfReplies(HelloRequest) returns (stream HelloResponse) { }Client streaming RPC
複数のメッセージのリクエストを受けた上で、単一のメッセージのレスポンスを返します。
greeter.proto

rpc LotsOfGreetings(stream HelloRequest) returns (HelloResponse) {

}
Bidirectional streaming RPC
これはリクエストもレスポンスも複数のメッセージをレスポンスを扱う方法ですが、
すべてのメッセージを待って、すべてのメッセージを書き出して返すことも、一つメッセージを受け取る毎に、メッセージを書き出していき、最後にまとめてメッセージを返すことも、サーバー側の実装次第で返ることができます。greeter.protorpc BidiHello(stream HelloRequest) returns (stream HelloResponse) { }サーバー側の実装
主な処理は以下のような感じです。
main.gopackage main import ( pb "github.com/{リポジトリ名}/{デフォルトならproto}" "flag" "net" "log" "sync" "fmt" "google.golang.org/grpc" "google.golang.org/grpc/credentials" "google.golang.org/grpc/testdata" ) var ( tls = flag.Bool("tls", false, "Connection uses TLS if true, else plain TCP") certFile = flag.String("cert_file", "", "The TLS cert file") keyFile = flag.String("key_file", "", "The TLS key file") jsonDBFile = flag.String("json_db_file", "", "A json file containing a list of features") port = flag.Int("port", 10000, "The server port") ) func main() { flag.Parse() // 引数を入れて実行したい時用にflagを使ってます。 // hostとportを設定します。 lis, err := net.Listen("tcp", fmt.Sprintf("localhost:%d", *port)) if err != nil { log.Fatalf("failed to listen: %v", err) } // 必要であればcredentialの設定をします。 var opts []grpc.ServerOption if *tls { if *certFile == "" { *certFile = testdata.Path("server1.pem") } if *keyFile == "" { *keyFile = testdata.Path("server1.key") } creds, err := credentials.NewServerTLSFromFile(*certFile, *keyFile) if err != nil { log.Fatalf("Failed to generate credentials %v", err) } opts = []grpc.ServerOption{grpc.Creds(creds)} } // gRPCのサーバーを初期化 grpcServer := grpc.NewServer(opts...) // protocでコンパイルされたコードからサーバーを登録するメソッドを実行 pb.RegisterGreeterServer(grpcServer, newServer()) // サーバーを起動 grpcServer.Serve(lis) }上の記述で書いていないのですがnewServer()という関数が重要なのですが、Register*Serverの第二引数にはprotoのServer内で定義したメソッドを持ったinterfaceを入れる形になっています。
その為に以下のような形の定義もmainに入れておきます。(例えば、Server streaming RPCだけ定義している場合)
main.gotype greeterServer struct {} // nilかerrを返せばstreamingが終了します。 func(s *greeterServer) LotsOfReplies(req *pb.LotsOfRepliesRequest, stream pb.Greeter_LotsOfRepliesServer) error { hs := []pb.HelloReply{ pb.HelloReply{ Name: "ohayo" }, pb.HelloReply{ Name: "konnichiwa" }, pb.HelloReply{ Name: "konbanwa" }, } for _, h := range hs { if err := stream.Send(&h); err != nil { return err } } return nil } func newServer() *greeterServer { s := &greeterServer{} return s }その他
repeated
protoの定義の中でmessageの中に配列をいれたい場合はRepeatedが使えます。
greeter.protomessage HelloResponse { repeated string name = 1; }こうするとnameの配列を返す事ができます。
複数のmessageを返したい場合はstreamでmessageの中で処理できるならrepeatedというところでしょうか。oneof
messageに入るのがstringの可能性もあるし、int32の可能性もある…なんて場合に使えます。
greeter.protomessage HelloResponse { oneof name { string text = 1; int32 id = 2; } }リファレンス
- 投稿日:2020-01-16T14:52:51+09:00
graphql-rubyでresolverを使ってqueryをシンプルに保つ
概要
graphql-rubyを使っていると、query_type.rbが肥大化してしまう傾向にあります。
GitHubのIssueを見ていたところ、query_type.rbにおいてResolverを使うことで肥大化を(なるべく)回避するベストプラクティスが紹介されていて、公式ガイドにも反映されていなかったようなので共有したいと思います。
参考Issue:
https://github.com/rmosolgo/graphql-ruby/issues/1825#issuecomment-441306410ちなみに確認したバージョンは以下の通りです。
ライブラリ バージョン ruby 2.6.5 graphql-ruby 1.19.5 また、GraphQLのレスポンスとしては、ユーザー単体とリストを返却することを想定するものとします。
ユーザーのモデルは以下のイメージです。
db/schema.rbcreate_table "users", force: :cascade do |t| t.string "email" t.string "password" t.string "first_name" t.string "last_name" t.datetime "created_at", null: false t.datetime "updated_at", null: false endちなみに表示に用いるUserTypeは以下を想定しています。
app/graphql/types/user_type.rbmodule Types class UserType < BaseObject field :id, Int, null: false field :email, String, null: false field :password, String, null: false field :first_name, String, null: true field :last_name, String, null: true end end普通のQuery
graphql-rubyにおいて普通にquery_typeを書いていくと、例えばこんな感じになるかと思います。
app/graphql/types/query_type.rbmodule Types class QueryType < BaseObject field :users, Types::UserType.connection_type, null: false do argument :id, Int, required: false argument :email, String, required: false argument :first_name, String, required: false argument :last_name, String, required: false end def users(**args) res = User.all args.each do |k, v| # argumentsはGraphQLの仕様上、keyがキャメルケースになる。argsにはスネークケースで入っている argument = self.class.arguments[k.to_s.camelize(:lower)] # 各argumentで絞り込む res = res.where("#{k} = ?", v) end res end field :user, Types::UserType, null: false do argument :id, Int, required: true end def user(id:) User.find(id) end end end出力するデータのカスタマイズをする場合、どうしてもquery_type自身に実装を行なっていく必要があります。
もちろんもう少しシンプルに記載することもできるかもしれませんが、いずれにせよREADに関わる全クエリをquery_type.rbに記載しないといけないため、queryの種類が増えるほど見通しが悪くなっていきます。
Resolverを使ったQuery
Queryには
resolveオプションがありますが、これを用いて処理をResolverに投げることで処理を外出しします。app/graphql/types/query_type.rbmodule Types class QueryType < BaseObject field :users, resolver: Resolvers::UserConnectionResolver field :user, resolver: Resolvers::UserResolver end endquery_type.rbに関して言えばだいぶシンプルで見通しが良くなりました。
当然ながら、具体的に何を返すかについてはResolverで実装が必要です。
とはいえquery_type.rbにあった処理をただResolver側に移すだけになります。app/graphql/resolvers/user_connection_resolver.rbmodule Resolvers class UserConnectionResolver < GraphQL::Schema::Resolver type UserType.connection_type, null: false argument :id, Int, required: false argument :email, String, required: false argument :first_name, String, required: false argument :last_name, String, required: false def resolve(**args) res = User.all args.each do |k, v| argument = self.class.arguments[k.to_s.camelize(:lower)] res = res.where("#{k} = ?", v) end res end end endapp/graphql/resolvers/user_resolver.rbmodule Resolvers class UserResolver < GraphQL::Schema::Resolver type UserType, null: false argument :id, Int, required: true def resolve(id:) User.find(id) end end endこのように処理をResolverとして切り出すことで、query_type.rbをGraphQLのルーティングを行うファイルにして、各resolver.rbでController的に処理を実装していくといった構成にすることができます。
Resolverの使用は注意が必要?
Resolverのパターンを紹介しましたが、公式ガイドでは本当にResolverを使う必要があるか?とResolverの使用に懐疑的なようです。
- テストがしづらくなる
- graphql-rubyの更新
- Resolverが肥大化していってしまう
といったことが懸念視されているようです。
ただここで紹介したテクニックに関しては、参考Issue内で作者も良いパターンだと認めておりドキュメントの更新をしてくれという風にコメントしているので、今後ガイド側も更新されるかもしれません。
どんなケースでもResolverを使えばいいというわけではなさそうなので、他のケースに当てはめるときは注意が必要そうです。
ということでresolverを使ったパターンの紹介でした。
- 投稿日:2020-01-16T14:51:26+09:00
master以外のブランチからherokuにpushする方法
railsアプリを作って、herokuをデプロイする(masterブランチ以外からデプロイする方法も同時に載せています。)
1 コミット
$ git add .
$ git commit -m "heroku"
$ git push origin ブランチ名
2 herokuにアプリケーションを新規作成する
$ heroku create3-1 herokuにデプロイする(masterブランチにいる時)
$ git push heroku master3-2 herokuにデプロイする(master以外のブランチにいる時)
$ git push heroku <現在いるブランチ名>:master※3-1 or 3-2 どちらかを実行してください
4 herokuにデータベースを作成する
$ heroku run rails db:migrate5 アプリケーションを開く
$ heroku open以上で、完成です。
- 投稿日:2020-01-16T14:44:35+09:00
Redis の WebAPI (Ruby CGI)
こちらで定めた仕様を満たすサーバーサイドのプログラムです。
Nginx + fcgiwrap で動作を確認しました。
Redis の WebAPI を作成redis_read.rb#! /usr/bin/ruby # -*- coding: utf-8 -*- # --------------------------------------------------------------------- # redis_read.ruby # # Jan/16/2020 # # --------------------------------------------------------------------- require 'redis' require "cgi" require "json" # STDERR.puts "*** 開始 ***" # $cgi=CGI.new key = $cgi["key"] # key = "t1852" redis = Redis.new(:host => "localhost", :port => 6379) value = redis.get key puts "Content-type: text/json; charset=UTF-8\n\n" puts value # STDERR.puts "*** 終了 ***" # ---------------------------------------------------------------------redis_insert.rb#! /usr/bin/ruby # -*- coding: utf-8 -*- # --------------------------------------------------------------------- # redis_insert.ruby # # Jan/16/2020 # # --------------------------------------------------------------------- require 'redis' require "cgi" require "json" # STDERR.puts "*** 開始 ***" # $cgi=CGI.new key = $cgi["key"] value = $cgi["value"] redis = Redis.new(:host => "localhost", :port => 6379) redis.set key,value puts "Content-type: text/json; charset=UTF-8\n\n" # puts value # STDERR.puts "*** 終了 ***"redis_list.rb#! /usr/bin/ruby # -*- coding: utf-8 -*- # --------------------------------------------------------------------- # redis_list.ruby # # Jan/16/2020 # # --------------------------------------------------------------------- require 'redis' require 'json' # STDERR.puts "*** 開始 ***" # redis = Redis.new(:host => "localhost", :port => 6379) keys = redis.keys json_str = JSON.pretty_generate(keys) puts "Content-type: text/json; charset=UTF-8\n\n" puts json_str # STDERR.puts "*** 終了 ***" # ---------------------------------------------------------------------
- 投稿日:2020-01-16T11:11:17+09:00
#Ruby Error class message / raise second args or Error class initialized message
- 投稿日:2020-01-16T11:04:25+09:00
rails g migrate で外部キーを追加する
ポートフォリオ作成中に後から外部キーを追加しよとしたら、コマンドに詰まったので忘れないために記事にしておく。
articleテーブルにuser_idを追加する
rails g migration AddUserRefToArticles user:references成功したら
rake db:migrateを実行する。
- 投稿日:2020-01-16T09:21:40+09:00
RubyonRailsを勉強していてずっとわかっていなかったこと
このQiitaはRubyを勉強している中で
私が「ずっと理解できていなかったこと」と「その理由」と「勉強して理解したこと」をまとめたものです。まだまだ間違っている部分もあるかもしれないのと
私自身まだわからないところ(の部分 )もあるため
その点踏まえてみてください
ずっと理解できていなかったこと
MVCモデルについての理解
※以下、私の昔の理解なのでところどころ間違ってます!
・ルーティング…リクエストに対して適切な場所に移動させる役割。
ブラウザからリクエストが来る。リクエストに対してルーティングで送り先を、コントローラとアクションを指定。・コントローラー…実装したい機能を決める場所。
・実装したい機能に対して適切なアクションを設定。その際にはRailsで決められてる7つのアクションのどれかに沿って決める。
【Rails】7つのアクションとそれぞれの役割
・そのアクションの中にDBからデータを持って来るために変数を定義しないといけない。それは@からはじまる。
・変数を定義するためにはrailsであらかじめ定められたメソッドで定義できるっぽい。・ビュー…DBから送られてきたデータを表示する場所
・HTMLの中で <% %> とか <%= %> で囲むとコントローラーで定義した変数を使えるっぽい。そこは動的になる。
・それ以外は普通のHTMLとCSSを書いていくと静的になる。・モデル…コントローラーからDBへの橋渡し役。DB設計に何か命令する役目?
・テーブル作成と同時にrails g modelをしなければいけない。
・modelを作成した後は特に編集とかは要らないっぽい。・マイグレーションファイル…DB設計を記述するところ。
その他理解できなかったこと
・なぜクラスとインスタンスが存在するのか?
・MVCモデルにおいてクラスはどれをさしているのか?
・クラスからインスタンスが生成されるというのはMVCにおけるどの部分をさしているのか?
・controllerのアクションの中には何を定義するのか?
・引数はなんで使うのか?なぜ理解をしていなかったか
Rubyでは、
すべてのデータがオブジェクトとして扱われ、オブジェクトごとに性質や使えるメソッドを持つという概念を理解していなかった。(もちろんRubyを習い始めた時に、「オブジェクト指向」についての説明は出てきたが、その概念が初めてで理解できなかったし、そんなに大事なものだと思っていなかった。)
勉強して理解したいこと
勉強して理解ことを「User model」と「Tweet model」の2つをもつツイートアプリの例とともに説明。
モデルについて
モデルの存在意義
・データベースの設計図。そのデータベースに定義したいメソッドを書く場所。(アソシエーション、バリデーション、そのモデル独自のメソッドなど)
・そのためモデルはDB設計が必要なものしかつくらない。静的なサイトであればモデルはいらない。user.rbclass User < ApplicationRecord devise :database_authenticatable, :registerable, :recoverable, :rememberable, :validatable #ユーザーのログイン機能に関する記述 has_many :tweets #tweet modelに対するアソシエーション validates :nickname, presence: true, length: { maximum: 6 } #バリデーション endtweet.rbclass Tweet < ApplicationRecord belongs_to :user #user modelに対するアソシエーション endRailsで定義されているメソッドの存在
・上記のようにモデルに記述がされていなくても、もともとrailsで定義されているメソッドがある。
①テーブルのカラム名
例えば、tweets tableを以下のように定義している場合
migrationfileclass CreateTweets < ActiveRecord::Migration[5.2] def change create_table :tweets do |t| t.string :name t.text :text t.text :image t.timestamps null: true end end endtweet modelには記述されていないが以下のようなメソッドが定義されている。
tweet.rbclass Tweet < ApplicationRecord belongs_to :user #user modelに対するアソシエーション #以下、記述はされていないが使えるメソッド def name @name end def text @text end def image @image end end②Application Recordクラスのメソッド(クラスの継承)
rails g modelコマンドで生成されるモデルクラスは全てApplicationRecordというクラスを継承している。
ApplicationRecordというクラスには
テーブルにアクセスして情報を取得するためのメソッドが定義されており、モデルクラスはそれを継承し利用することでテーブルから情報を取得している。記述されていないがtweet modelには以下のようなメソッドが定義されている。
tweet.rbclass Tweet < ApplicationRecord belongs_to :user #user modelに対するアソシエーション #以下、記述はされていないが使えるメソッド def all # ここの記述がわかんない end def new # ここの記述がわかんない end def save # ここの記述がわかんない end def create # ここの記述がわかんない end end
コントローラーについて
コントローラーの存在意義
モデルに定義してあるメソッドを使う役割。
users_controller.rbclass UsersController < ApplicationController def show user = User.find(params[:id]) # User modelで最初から定義されているfindメソッドを用いてidを引数にuserを見つけて来る @nickname = user.nickname # User modelで最初から定義されているnicknameをメソッド使って、user tableからnicknameを見つけてくる @tweets = user.tweets.page(params[:page]).per(5).order("created_at DESC") end endtweets_controller.rbclass TweetsController < ApplicationController before_action :move_to_index, except: :index def index @tweets = Tweet.includes(:user).page(params[:page]).per(5).order("created_at DESC") end def new end def create Tweet.create(image: tweet_params[:image], text: tweet_params[:text], user_id: current_user.id) end def destroy tweet = Tweet.find(params[:id]) if tweet.user_id == current_user.id tweet.destroy end end def edit @tweet = Tweet.find(params[:id]) end def update tweet = Tweet.find(params[:id]) if tweet.user_id == current_user.id tweet.update(tweet_params) end end def show @tweet = Tweet.find(params[:id]) end def search @tweets = Tweet.search(params[:keyword]) respond_to do |format| format.html format.json end end private def tweet_params params.permit(:image, :text) end def move_to_index redirect_to action: :index unless user_signed_in? end end
Q.controllerのアクションの中には何を定義するのか?
AかBのいづれか。

A.モデルに定義してあるメソッドを使って、データを引き出す
B.モデルに定義してあるメソッドを使って、データを引き出しインスタンス変数を定義してビューに渡す

その際にUser ControllerではUser modelで定義されているメソッドもつかえるし、tweet modelで定義されているメソッドも使える。
クラスとインスタンス
Q.なぜクラスとインスタンスが存在するのか?
・Rubyでは、すべてのデータがオブジェクトとして扱われ、オブジェクトごとに性質や使えるメソッドを持つ
・オブジェクトを効率的に生成・管理するために、クラスとインスタンスという概念が存在する
・オブジェクト同士の共通の属性・メソッドをまとめて定義したものがクラスである
・クラスに基いて生成されたオブジェクトがインスタンス
例)Userモデルにはクラスとしてログイン機能をつけたり、ニックネームの登録の際のバリデーションをつけておく。
そこから実際に登録されたユーザー1人1人がインスタンス。Q.MVCモデルにおいてクラスはどれをさしているのか?
・Controller
・Model
・table
(オブジェクトに共通の属性・メソッドを
まとめて定義したものはすべてクラス。)
Q.クラスからインスタンスが生成されるというのはMVCにおけるどの部分をさしているのか?
(Controllerで)Modelのメソッドを使うとき。
必ずインスタンスが生成される。
引数について
Q.引数はなぜ使うのか
メソッドを異なる条件によって使うため。
tweets_controller.rb#このままだと毎回idが1のツイートしか編集できない def edit @tweet = Tweet.find(1) end #引数をわたすことによって様々なidのツイートの編集ができるようになる def edit @tweet = Tweet.find(params[:id]) end以上。
間違っているところがあればご指摘ください。

- 投稿日:2020-01-16T09:15:02+09:00
rubyでファイル末尾の改行を消す
git diffしたときの
「\ No newline at end of file」がウザいのでrubyで置換した・パターン1
ruby -i -ne 'print ARGF.eof? ? $_.chomp : $_' test.txt・パターン2
ruby -i -e 'print ARGF.read.strip' test.txtsedでやりたかったな
もっといい方法あれば教えて下さい
viで↓をやるのがめんどくさかった
https://qiita.com/lemtosh469/items/b3a5b3b40d9f44dfbd06(本当は末尾に改行がある方が正しいらしい)
- 投稿日:2020-01-16T08:01:35+09:00
[Ruby]ネストされたHash(連想配列)をフラット(1階層)にする②
最近の勉強で学んだ事を、ノート代わりにまとめていきます。
主に自分の学習の流れを振り返りで残す形なので色々、省いてます。
Webエンジニアの諸先輩方からアドバイスやご指摘を頂けたらありがたいです!Hash(連想配列)を取り除く
前回からの続きです!
・[Ruby]ネストされたHash(連想配列)をフラット(1階層)にする①
ここからやっていきたいのは配列に入っている要素がHashだったら変数に変換する処理します。
要は、配列に入っている要素をチェックしてHashだったら特定の処理をしたら良いのです。#配列の場合 family_array = [ "sazae", "masuo", "tarao" ] pry(main)> family_array.is_a?(Hash) => false #連想配列の場合 family_hash = { "tsuma" => "sazae", "otto" => "masuo", "kodomo" => "tarao" } pry(main)> family_hash.is_a?(Hash) => true・Hashかどうかを判定しつつ任意の{key: value}を持っているかどうかを判定するメソッドを作った
配列の要素を確認する処理
・配列に対する繰り返し
・Ruby eachが初心者でも書ける!知っていると便利な知識とは?array = hash.each_with_object([]) {|(k, v), array| array.concat v} pry(main)> i=0 pry(main)> array.each do |var| pry(main)* if var.is_a?(Hash) pry(main)* params = var.keys pry(main)* array.delete_at(i) pry(main)* array.concat(params) pry(main)* print(array) pry(main)* end pry(main)* i=i+1; pry(main)* end => [:name, :gender, :birthday, :primary, :clinic, :status, :age, :cycle, :history_test, :culture_test, :math_test, :house, :address, :favorite, :score, :history_score, :culuture_score, :math_score, :levels, :experience]できた!
メソッドにしていく!
フラットにする為の処理をメソッドにしていきます!
・Rubyのメソッドについて
メソッドとは
メソッドは色々な処理をひとつにまとめて定義して、何度も再利用(実行)できるようにしたものです。
def メソッドの名前
  やりたい処理
end
ではメソッド化していきます!
def flat_params(array)
  i=0
  array.each do |var|
     if var.is_a?(Hash)
       params = var.keys
       array.delete_at(i)
       array.concat(params)
     end
     i=i+1;
  end
end

array = hash.each_with_object([]) {|(k, v), array| array.concat v}
array = flat_params(array)
=> [:name,
 :gender,
 :birthday,
 :primary,
 :clinic,
 :status,
 :age,
 :cycle,
 :history_test,
 :culture_test,
 :math_test,
 :house,
 :address,
 :favorite,
 :score,
 :history_score,
 :culuture_score,
 :math_score,
 :levels,
 :experience]
これでフラットにできました!
参考記事
・class Array
・【Ruby入門】ハッシュ(hash)をeachで取り出す!その他ハッシュの応用について
・Rubyで配列の要素数を調べるための3つのメソッドまとめ
・【Ruby入門】Rubyにおけるメソッド(関数)の使い方
- 投稿日:2020-01-16T02:53:41+09:00
heroku 登録から(rails mysql)デプロイまで
ローカルでは動作確認済みのRailsアプリを、heroku初デプロイ
環境
- heroku
- MacBookpro
- ruby 2.6.3
- bundrer 2.0.2
- rails 6.0.1
- Mysql2 0.5.3
- GitHub にて git clone(もしくは push) してある状態
<今後の時短のために記録> 今回Qiita自己用記録も含め、10時間かかった様子。
他でデプロイに14日かけてうまく行かず...原因がMVCではない事を再認識できた。知識不足、書籍等を活用する予定。
heroku1日で出来るのは有難い。
①heroku にアカウント登録
https://jp.heroku.com/<<AWS と違い、基本ローカルからコマンド 入力 >>
②config/routes.rbのindex編集
Rails.application.routes.draw do
resources :blogs
root 'home#top'   #トップページ:homeコントローラのtopアクションに設定
gem mysql (の確認。今回はローカルから記入済みなので、もし変更したらbundle install)
$ git add .
$ git commit
$ git push origin master   (GitHubへ)
③herokuのインストール
$ brew tap heroku/brew && brew install heroku

$ heroku -v(ersion)    確認
④$ heroku login のため sshキー設定 <④は省略内容にはなる為 他サイト参考必須>
(ローカルの.ssh に移動)
$ ssh-keygen -t rsa
:作成したいキー名_rsa
ls確認。$ eval "$(ssh-agent -s)"cd デプロイ先の階層に戻る
$ heroku keys:add ~/.ssh/作成した_rsa.pub........SSH key... done で成功。
$ heroku keys で確認可 *キーはherokuのHPでも確認可
⑤ $ heroku create (herokuのHPで作成したアプリ名)
$ git remote heroku (herokuのHPで作成したいアプリ名)Name (作成したいアプリ名) is already taken。。。 で作成された
<<< $ git remote -v
origin
origin git@github.com:。。。。。。。(GitHubのしかないため、リモート:herokuを設定。アプリ名を指定しないとherokuリモートは自動で
作成される様子。)$ heroku git:remote -a (作成したアプリ名)
set git remote heroku to https://git.heroku.com/(作成したアプリ名) と出る
$ git remote -v で確認。
heroku
origin
>>>
⑥ DB設定
< [公式heroku参考] https://elements.heroku.com/addons/cleardb >$ heroku create cleardb:ignite Please verify your account to install this add-on plan (please enter a credit card) For more ▸ information, see https://devcenter.heroku.com/categories/billing Verify now at ▸ https://heroku.com/verifyheroku hpにてクレカの登録
⑦環境変数の設定
$ heroku config ($ git config --list)で内容確認)


> CLEARDB_DATABASE_URL: mysql://<ユーザー名>:<パスワード>@<ホスト名>/<データベース名>?reconnect=true
$ heroku config:add DB_NAME='<データベース名>'heroku_b7dabcdb1795021 $ heroku config:add DB_USERNAME='<ユーザー名>'b1716d8a771568 $ heroku config:add DB_PASSWORD='<パスワード>'e006146a $ heroku config:add DB_HOSTNAME='<ホスト名>'us-cdbr-iron-east-05.cleardb.net $ heroku config:add DB_PORT='3306' $ heroku config:add DATABASE_URL='mysql2://<ユーザー名>:<パスワード>@<ホスト名>/<データベース名>?reconnect=true'$ heroku config で設定内容 再確認
⑧ config/environments/production.rb を記入
config/environments/production.rbconfig.assets.compile = true config.assets.initialize_on_precompile=false<herokuへpush>
$ git add .
$ git commit


$ git push heroku master
⑨database.yml 設定
変更)production: <<: *default database: [データベース名] username: [ユーザ名] password: <%= ENV['DATABASE_PASSWORD'] %>
(10) herokuのDBのマイグレーション
$ heroku rake db:migrate

$ heroku open
remote: Verifying deploy... done. 成功。
[上のURLの方。ターミナ下方のURLではない。
https://(各自)...herokuapp.com/ (← これ => deployed to Heroku ]<urlに接続>
<ログを表示>
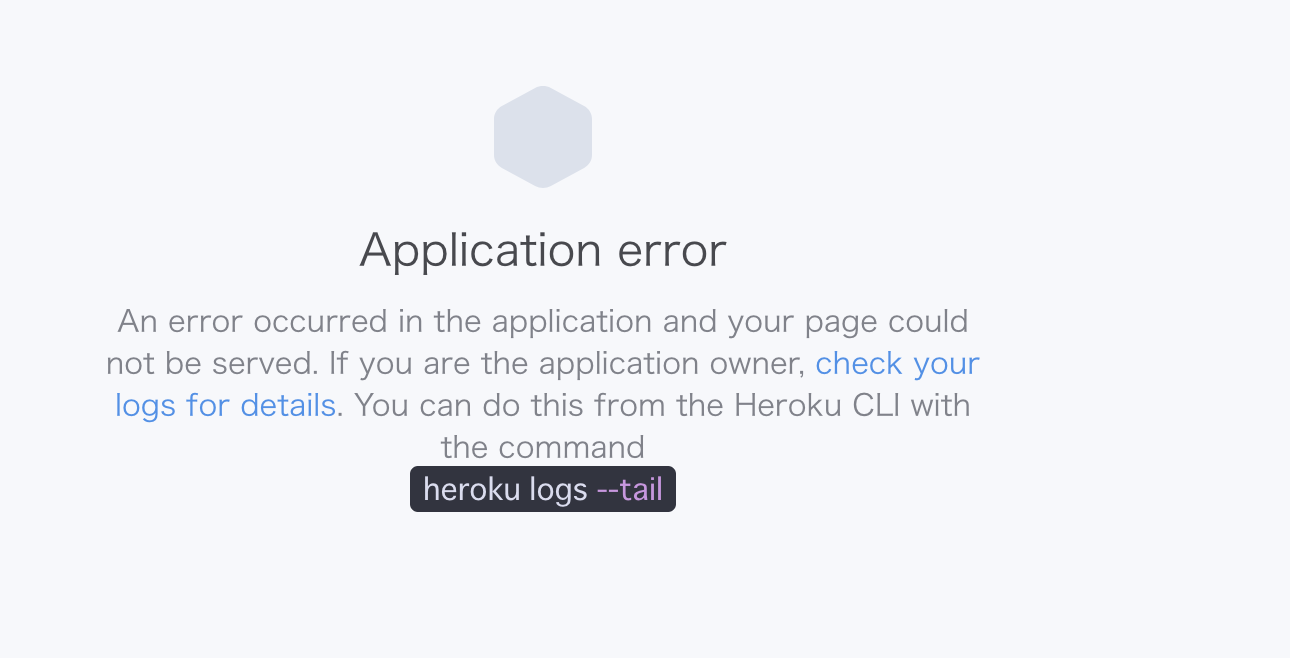
$ heroku logs
(heroku logs --tail)
↑ 見ても原因が良くわからない為 ↓で今回はエラー解決した
$ heroku run rails console の方が分かる
<urlに接続したが、エラーindex.htmlに繋がる。>
ここからエラー内容3回目
$ heroku restart 一応。
(firebaseデプロイ時は時差があった、が変わらず。)
$ heroku logs --tail
内容が分からず、
$ heroku run rails console  で原因が分かりやすい。

Could not load the 'mysql' Active Record adapter. Ensure that the adapter is spelled correctly in config/database.yml and that you've added the necessary adapter gem to your Gemfile. (LoadError)
ここで、Gemfile に合わせ mysql → mysql2 に変更した。
デプロイ成功
②config/routes.rbで指定したindex.htmlが表示された。
ここから↓ git push heroku master成功までの
実際のエラー対処記載 一部を参考に残す。
⑨ ←ここでエラー内容1回目
Could not load the 'mysql' A....database.yml も確認しろと出る。database.yml 確認修正↓
⑦の $ heroku config:add DATABASE_URL='mysql2://<ユーザー名>:<パスワード>@<ホスト名>/<データベース名>?reconnect=true'
を Gemfile に合わせ mysql → mysql2 に最終的に変更。かつ bundle install
エラー内容2回目
...
Could not detect rake tasks
remote:  !     ensure you can run `$ bundle exec rake -P` ...URI::InvalidURIError: bad URI(is not URI?): mysql2:....
$ rbenv -v rbenv 1.1.2 $ ruby -v ruby '2.6.4' $ gem install bundler -v 2.0.2 $ bundle install( + update) $ rbenv -v が1.1.2のままの為、 $ rm Gemfile.lock $ bundle install でGemfile.lock 再 bundler -v 2.0.2へ。 (add . commit ) $ git push heroku master 変わらず同エラー。 今回は公式サイトを参考に、 ruby '2.6.3'に下げる。 $ rbenv install 2.6.3 $ rbenv local 2.6.3 (Gemfileも変更。$ bundle install $ rbenv rehash) 変わらず同エラー。 $ heroku config 設定ミスか確認。 $ heroku config:add DATABASE_URL='mysql://...をmysql2:... に変更。 変わらず同エラー。 <直接な解決なのかは不明だが、今回は、$ heroku create アプリ名を指定しないで再度やり直す。このエラーは解決> $ heroku create $ git remote で自動herokuリモートが作成された。 $ git push heroku masterbad URI(is not URI?): mysql2:...エラーは解決したが、
新たなエラー1回目remote: ! remote: ! Precompiling assets failed.Precompil なので、
config/application.rbに
config.assets.initialize_on_precompile = true を追記。
config/environments/production.rbの
onfig.assets.compile = false を trueに。

変わらず。
$ RAILS_ENV=production (bundle exec) rake assets:precompile
変わらず。
webpacker.yml .gitignore の編集で解決した。
webpacker.yml 内に
production:
<<: *default
compile: true がある為と思われる。全て知識不足が原因。
実際には③で 小さいエラーが出て bundle update install 等をプラス作業した
その後、push。<基本だが一応残す>
rails -v
ruby -v
mysql -v

。。。ローカルの諸々の確認はした前提の内容。
③で
...Warning: heroku update available from 7.35.0 to 7.35.1.....

$ heroku uodate を実行。
$ heroku -v 確認
⑨ mysql2 エラー
($ brew update && brew upgrade ruby-build できなかった)
GitHub 接続確認
$ ssh -T github git@github.com
他サーバーにて設定変更してしまった為今回 再設定。
参考にしたサイト
mysqlを使ったRailsアプリをHerokuにデプロイする流れ
追えなくなってしまいましたが、その他、多々多々参考にさせて頂きました。
herokuチュートリアル
一部コマンドが公式の方が新しい様子です...
- 投稿日:2020-01-16T01:00:24+09:00
[Ruby]ネストされたHash(連想配列)をフラット(1階層)にする①
最近の勉強で学んだ事を、ノート代わりにまとめていきます。
主に自分の学習の流れを振り返りで残す形なので色々、省いてます。
Webエンジニアの諸先輩方からアドバイスやご指摘を頂けたらありがたいです!Arra(配列)とHash(連想配列)
・ChefTips: RubyのArray(配列)とHash(連想配列)入門
Array(配列) とは
Arrayは、イメージしやすく言うと複数のValue(値)が入っている入れ物です。順番(添字)をつけてValue(値)を管理します。順番は1からではなく、0から始まります。
# Array family_array を定義
family_array = [ "sazae", "masuo", "tarao" ]
Hash(連想配列) とは
ArrayはValue(値)を管理するために添字を使いますが、Hashは添字の代わりにKeyを使います。KeyとValueのペアは "=>"(ハッシュロケット) で表現します。
Keyは数字と違いなんらかの意味を持つので、コードが読みやすくなるという利点があります。下のサンプルコードを見てください。なんとなく、sazaeが妻で、mazuoが夫で、taraoが子供であることがコードを呼んでいる人に伝わりますよね。# Hash family_hash を定義 family_hash = { "tsuma" => "sazae", "otto" => "masuo", "kodomo" => "tarao" }今回やりたい事
こんなネストされたHashがあるとします、これをフラット(1階層)にしていきます!
・ネストがあるhashの、keyとvalueの取得についてこれを
hash =
{:basic=>[:name, :gender, :birthday],
 :history=>
  [:primary, :clinic, :status, :age],
 :test=>
  [:cycle,
   :history_test,
   :culture_test,
   :math_test,
   {:score=>[], :history_score=>[], :culuture_score=>[], :math_score=>[]}
  ],
 :tarou_infomation=>[:house, :address,:favorite, {:levels=>[], :experience=>[]}],
 }
こうしたい!パターンです!
hash =
[
:name,
:gender,
:birthday,
:primary,
:clinic,
:status,
:age,
:cycle,
:history_test,
:culture_test,
:math_test,
:score,
:history_score,
:culuture_score,
:math_score,
:house,
:address,
:favorite,
:levels,
:experience
]
色々試してみる
キーだけを消してバリューの要素だけとる。
・Rubyでハッシュオブジェクトからキーや値を取り出す方法【初心者向け】
・ハッシュを配列に変換するpry(main)> hash.values => [[:name, :gender, :birthday], [:primary, :clinic, :status, :age], [:cycle, :history_test, :culture_test, :math_test, {:score=>[], :history_score=>[], :culuture_score=>[], :math_score=>[]}], [:house, :address, :favorite, {:levels=>[], :experience=>[]}]]次はこれをフラットに!
flattenメソッドを使用して配列を平坦化する。
・flatten, flatten! (Array) - Rubyリファレンスpry(main)> hash.values.flatten => [:name, :gender, :birthday, :primary, :clinic, :status, :age, :cycle, :history_test, :culture_test, :math_test, {:score=>[], :history_score=>[], :culuture_score=>[], :math_score=>[]}, :house, :address, :favorite, {:levels=>[], :experience=>[]}]よし!フラットにできたけどHashが〜
ちなみにeach_with_objectを使えば一発でできました。
・Ruby: injectとeach_with_objectをうまく使い分けるpry(main)> hash.each_with_object([]) {|(k, v), array| array.concat v} => [:name, :gender, :birthday, :primary, :clinic, :status, :age, :cycle, :history_test, :culture_test, :math_test, {:score=>[], :history_score=>[], :culuture_score=>[], :math_score=>[]}, :house, :address, :favorite, {:levels=>[], :experience=>[]}]これは配列の中に連想配列がネストされているので
連想配列には別の対処が必要です。配列にしたいHashをインデックスで指定
pry(main)> hash.values.flatten[11]
=> {:score=>[], :history_score=>[], :culuture_score=>[], :math_score=>[]}
これをキーだけの配列にはできる
 pry(main)> hash.values.flatten[11].keys
=> [:score, :history_score, :culuture_score, :math_score]
ゴリ押しで新しい変数にhashの要素だけdelete_atメソッドで削除してkesで作成した配列をconcatメソッドで1つの配列に結合する方法もありますがあまりしたくない。
・【Ruby】配列の要素を追加・削除
・Rubyで複数の配列を1つの配列に結合するために色々やってみたしかも、そこそこ記述が多くなりそうなのでメソッドにするか〜
という事で次回は、Hash(連想配列)をフラット(1階層)にする記述をメソッドにしていきます!
・[Ruby]ネストされたHash(連想配列)をフラット(1階層)にする②参考記事
・扱いにくい階層の深いHashをフラット(1階層)にする
・how to permit an array with strong parameters
・Ruby :: ハッシュを配列に変換する
・[Ruby]配列をマージ・結合する
・【Ruby入門】defについてまとめてみました(return,self,defined)