- 投稿日:2019-07-27T23:13:15+09:00
UnityのAndroid実機ビルドでつまづいた話
初投稿です
経緯
久々にUnityでAndroid開発を行おうとするとエラーが出てビルドできない
割とあるあるなのでいつも通り検索をかけたが,表示されているエラーに引っかかるものはなかった
エラーは以下の通りUnable to start ADB server. Please make sure the Android SDK is installed and is properly configured in the Editor. See the Console for more details.使用環境
Windows 10
Unity
2018.4 LTS
2019.1Android Studio
3.4.2Galaxy Note 9
OS Android9.0 Pie試したこと
まず疑ったのはUnityの設定
SDKのパスを確認したが問題なかった
バージョンを変更してみるも変わらず
次に疑ったのはAndroid Studioで以前使っていたバージョンは古かったため誤作動が起こっていると予想した
再インストールしてもSDKが更新されないことがあるため,関連ファイルを削除して再インストールを行ったが変化なし悩んだ結果
ADBサーバが起動しないと言っているけどコマンドは
なぁ...
端末もキチンと認識しているし,デバイスマネージャーでも確認できる
ドライバも生きてるしエクスプローラで端末内に参照もかけられる...adbで端末の認識は...しない!?
adb devicesで表示される端末
まさかのゼロList of devices attached adb server version (32) doesn't match this client (36); killing... error: could not install *smartsocket* listener: cannot bind to 127.0.0.1:503could not read ok from ADB Server 7: 通常、各ソケット アドレスに対してプロトコル、ネットワーク アドレス、またはポートのどれか 1 つのみを使用できます。 (10048) * failed to start daemon * error: cannot connect to daemonこれはUSBドライバが怪しいなと思い更新してみた
駄目だったUSB転送モードのせいかと確認してみる
ファイルを転送になっている...ん?
そういえばadb devicesで127.0.0.1って見たな
もしかしてUSBテザリングか??
--追記--
ファイル転送でも認識することは確認した認識した!!!!
私が以前メインで使っていたのはAndroid4.2のZ Ultraで
MTP通信を選択していたのでてっきりファイル転送かと思ったけど
こんなのわかるか!そんなこんなでBuild And Runできました!
まとめ
- adb devicesで端末が認識されるか確認
- 認識されていなければAndroidの設定を疑う
- 設定があっていればUSBドライバを疑う
Android StudioとかUnityの環境を疑うのは最後にしよう
環境構築めんどくさいし--追記--
またビルドできなくなりました
原因がわかり次第追記しようと思います
- 投稿日:2019-07-27T23:13:15+09:00
UnityのAndroid実機ビルドでつまづいた話その1
初投稿です
経緯
久々にUnityでAndroid開発を行おうとするとエラーが出てビルドできない
割とあるあるなのでいつも通り検索をかけたが,表示されているエラーに引っかかるものはなかった
エラーは以下の通りUnable to start ADB server. Please make sure the Android SDK is installed and is properly configured in the Editor. See the Console for more details.使用環境
Windows 10
Unity
2018.4 LTS
2019.1Android Studio
3.4.2Galaxy Note 9
OS Android9.0 Pie試したこと
まず疑ったのはUnityの設定
SDKのパスを確認したが問題なかった
バージョンを変更してみるも変わらず
次に疑ったのはAndroid Studioで以前使っていたバージョンは古かったため誤作動が起こっていると予想した
再インストールしてもSDKが更新されないことがあるため,関連ファイルを削除して再インストールを行ったが変化なし悩んだ結果
ADBサーバが起動しないと言っているけどコマンドは
なぁ...
端末もキチンと認識しているし,デバイスマネージャーでも確認できる
ドライバも生きてるしエクスプローラで端末内に参照もかけられる...adbで端末の認識は...しない!?
adb devicesで表示される端末
まさかのゼロList of devices attached adb server version (32) doesn't match this client (36); killing... error: could not install *smartsocket* listener: cannot bind to 127.0.0.1:503could not read ok from ADB Server 7: 通常、各ソケット アドレスに対してプロトコル、ネットワーク アドレス、またはポートのどれか 1 つのみを使用できます。 (10048) * failed to start daemon * error: cannot connect to daemonこれはUSBドライバが怪しいなと思い更新してみた
駄目だったUSB転送モードのせいかと確認してみる
ファイルを転送になっている...ん?
そういえばadb devicesで127.0.0.1って見たな
もしかしてUSBテザリングか??
--追記--
ファイル転送でも認識することは確認した認識した!!!!
私が以前メインで使っていたのはAndroid4.2のZ Ultraで
MTP通信を選択していたのでてっきりファイル転送かと思ったけど
こんなのわかるか!そんなこんなでBuild And Runできました!
まとめ
- adb devicesで端末が認識されるか確認
- 認識されていなければAndroidの設定を疑う
- 設定があっていればUSBドライバを疑う
Android StudioとかUnityの環境を疑うのは最後にしよう
環境構築めんどくさいし--追記--
またビルドできなくなりました
原因がわかり次第追記しようと思います
続き書きました
- 投稿日:2019-07-27T22:52:08+09:00
AndroidStudioを用いないUnityでのAndroidX対応
はじめに
AdMobで
play-services-adsのバージョン18.0.0以降を使用する場合はAndroidXへの移行が必須となる
AndroidXとはAndroidStudioを用いたAndroidXへの移行はこちらのサイトに説明があるが、AndroidStudioを用いずにUnity単体での対応方法がなかったためメモしておく
実装環境
- Unity 2019.1.7f1
- Google Mobile Ads Unity Plugin v3.17
対処方法
- build.gradleファイルを書き換えるスクリプトを記述する
- AndroidSupportのライブラリをAndroidX用に変更する
build.gradleファイル書き換え
AndroidX対応に必要な
android.useAndroidX=trueとandroid.enableJetifier=trueを追加Editor/Build/AndroidPostBuildProcessorusing System.IO; using UnityEditor.Android; namespace Editor.Build { public class AndroidPostBuildProcessor : IPostGenerateGradleAndroidProject { /// <summary> /// 実行順を指定(0がデフォルト、低いほど先に実行される) /// </summary> public int callbackOrder => 999; /// <summary> /// build.gradleをビルド時に書き換える /// </summary> void IPostGenerateGradleAndroidProject.OnPostGenerateGradleAndroidProject(string path) { var gradlePropertiesFile = path + "/gradle.properties"; if (File.Exists(gradlePropertiesFile)) { File.Delete(gradlePropertiesFile); } var writer = File.CreateText(gradlePropertiesFile); writer.WriteLine("org.gradle.jvmargs=-Xmx4096M"); writer.WriteLine("android.useAndroidX=true"); writer.WriteLine("android.enableJetifier=true"); writer.Flush(); writer.Close(); } } }AndroidSupportのライブラリをAndroidX用に変更
バージョンや名前は2019年7月時点で最新のもの、最新状態はmvnrepository等のサイトで調べる
旧版compile group: 'com.android.support', name: 'customtabs', version: '28.0.0' compile group: 'com.android.support', name: 'support-annotations', version: '28.0.0' compile group: 'com.android.support', name: 'support-compat', version: '28.0.0' compile group: 'com.android.support', name: 'support-core-ui', version: '28.0.0' compile group: 'com.android.support', name: 'support-core-utils', version: '28.0.0' compile group: 'com.android.support', name: 'support-fragment', version: '28.0.0' compile group: 'com.android.support', name: 'support-media-compat', version: '28.0.0' compile group: 'com.android.support', name: 'support-v4', version: '28.0.0' compile group: 'com.android.support', name: 'recyclerview-v7', version: '28.0.0' compile group: 'com.android.support', name: 'appcompat-v7', version: '28.0.0' compile group: 'com.android.support', name: 'cardview-v7', version: '28.0.0' compile group: 'com.android.support.constraint', name: 'constraint-layout-solver', version: '1.1.3' compile group: 'com.android.support.constraint', name: 'constraint-layout', version: '1.1.3'AndroidX対応版compile group: 'androidx.browser', name: 'browser', version: '1.0.0' compile group: 'androidx.annotation', name: 'annotation', version: '1.1.0' compile group: 'androidx.core', name: 'core', version: '1.1.0-rc02' compile group: 'androidx.legacy', name: 'legacy-support-core-ui', version: '1.0.0' compile group: 'androidx.legacy', name: 'legacy-support-core-utils', version: '1.0.0' compile group: 'androidx.fragment', name: 'fragment', version: '1.1.0-rc03' compile group: 'androidx.media', name: 'media', version: '1.1.0-rc01' compile group: 'androidx.legacy', name: 'legacy-support-v4', version: '1.0.0' compile group: 'androidx.recyclerview', name: 'recyclerview', version: '1.1.0-beta01' compile group: 'androidx.appcompat', name: 'appcompat', version: '1.1.0-rc01' compile group: 'androidx.cardview', name: 'cardview', version: '1.0.0' compile group: 'androidx.constraintlayout', name: 'constraintlayout-solver', version: '2.0.0-beta2' compile group: 'androidx.constraintlayout', name: 'constraintlayout', version: '2.0.0-beta2'
- 投稿日:2019-07-27T14:14:23+09:00
Espresso Test Recorderの導入
はじめに
Android Studioに搭載されているUIテスト記録ツール Espresso Test Recorder を使用してみました。
Espresso Test Recorderはアプリの操作を記録することでEspressoでのテストコードへと自動で変換してくれる便利なツールです。
EspressoのAPIの知識がなくても直感的にテストが作成することが可能です。以下のような、クリックすると文字が変化するありがちなサンプルコードで実際に確認していきます。
実行
- Android Studioでテストしたいプロジェクトを開いておく
- テストアプリが動作する端末もしくはエミュレータを用意しておく
当然ですが、上記2つの準備が必要です。
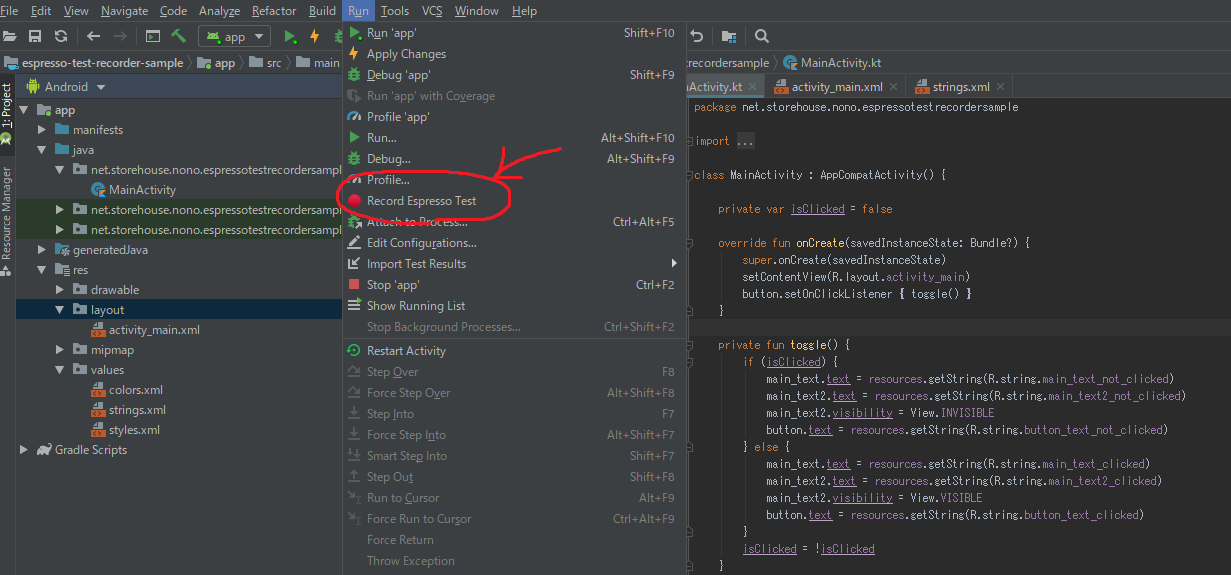
Android Studioから端末が認識されている状態で、Run -> Record Espresso Testを選択すると記録開始です。
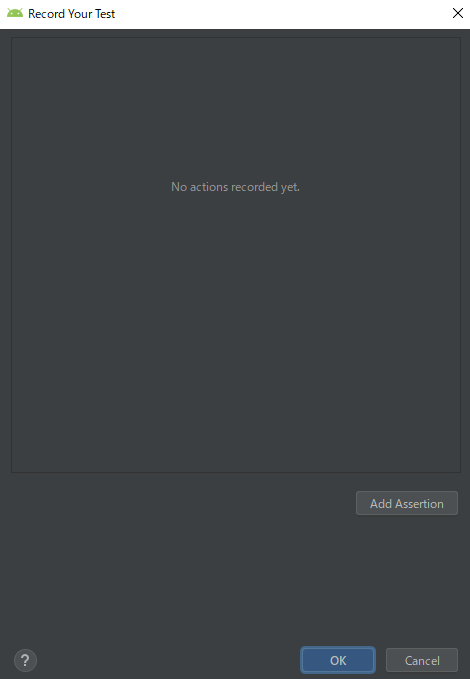
端末上でアプリが立ち上がり、Android Studio上にRecord Your Testと書かれたダイアログが表示され記録できる状態となります。
記録
記録が始まったら、実際にテストしたい手順でアプリを操作します。
ひとつ操作するたびに、Record Your Testダイアログに操作した内容が記録されていきます。記録時の応答速度が遅いため、ダイアログに操作内容が反映されるのを待ってから次の操作を行うようにしましょう。
間違った操作もそのまま記録されてしまうので注意が必要ですが、後ほどコードを手動で修正すればよいだけなのであまり気にする必要はありません。アサーション
アサーションを記録するには Record Your Test ダイアログ右下のAdd Assertionボタンを押します。
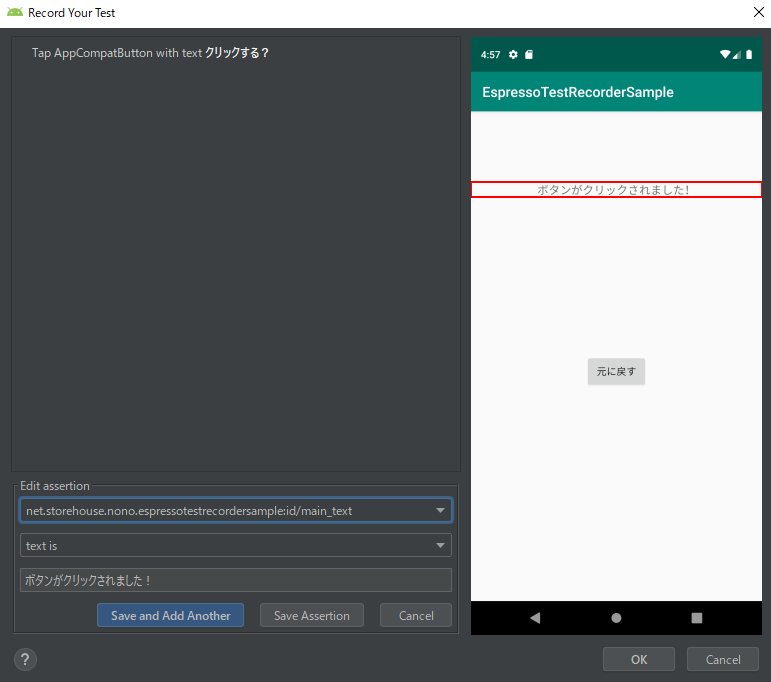
ボタンを押してしばらく待つと、右半分にテスト対象アプリの画面が表示された状態になります。
以下の操作でアサーションを記録していきます。
- スクリーンショット上で、検証したい箇所をクリック
- 検証対象のViewが赤枠で囲まれるため、対象が正しいか確認
- ダイアログ左下のEdit assertion枠でアサーションを設定
- ダイアログ左上に検証手順が記録されていることを確認
Save and Add Anotherボタン
アサーションを記録し、引き続き別のアサーションを記録するSave Assertionボタン
アサーションを記録し、動作の記録に戻るアサーションの種類
text is
Edit assertionで指定したViewのテキスト文字列と一致しているか検証
exists
Edit assertionで指定したViewが存在していることを検証
does not exist
Edit assertionで指定したViewが存在していないことを検証
テストの保存
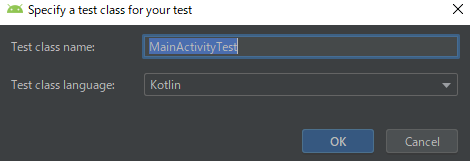
先ほどのダイアログの右下のOKを押すと、テストが自動生成されます。
テストクラス名と言語を聞かれるので入力して保存しましょう。
生成されたテストコード
「ボタンクリック後、指定した文字列が表示されているかどうか」のテストが自動生成されました。
MainActivityTest.ktpackage net.storehouse.nono.espressotestrecordersample import android.support.test.espresso.Espresso.onView import android.support.test.espresso.action.ViewActions.click import android.support.test.espresso.assertion.ViewAssertions.matches import android.support.test.espresso.matcher.ViewMatchers.* import android.support.test.filters.LargeTest import android.support.test.rule.ActivityTestRule import android.support.test.runner.AndroidJUnit4 import android.view.View import android.view.ViewGroup import org.hamcrest.Description import org.hamcrest.Matcher import org.hamcrest.Matchers.allOf import org.hamcrest.TypeSafeMatcher import org.junit.Rule import org.junit.Test import org.junit.runner.RunWith @LargeTest @RunWith(AndroidJUnit4::class) class MainActivityTest { @Rule @JvmField var mActivityTestRule = ActivityTestRule(MainActivity::class.java) @Test fun mainActivityTest() { val appCompatButton = onView( allOf( withId(R.id.button), withText("クリックする?"), childAtPosition( childAtPosition( withId(android.R.id.content), 0 ), 2 ), isDisplayed() ) ) appCompatButton.perform(click()) val textView = onView( allOf( withId(R.id.main_text), withText("ボタンがクリックされました!"), childAtPosition( childAtPosition( withId(android.R.id.content), 0 ), 0 ), isDisplayed() ) ) textView.check(matches(withText("ボタンがクリックされました!"))) val appCompatButton2 = onView( allOf( withId(R.id.button), withText("元に戻す"), childAtPosition( childAtPosition( withId(android.R.id.content), 0 ), 2 ), isDisplayed() ) ) appCompatButton2.perform(click()) val textView2 = onView( allOf( withId(R.id.main_text), withText("ボタンをクリックしてね"), childAtPosition( childAtPosition( withId(android.R.id.content), 0 ), 0 ), isDisplayed() ) ) textView2.check(matches(withText("ボタンをクリックしてね"))) val textView3 = onView( allOf( withId(R.id.main_text2), withText("押すとこのテキストは消えるよ"), childAtPosition( childAtPosition( withId(android.R.id.content), 0 ), 1 ), isDisplayed() ) ) textView3.check(matches(withText("押すとこのテキストは消えるよ"))) } private fun childAtPosition( parentMatcher: Matcher<View>, position: Int ): Matcher<View> { return object : TypeSafeMatcher<View>() { override fun describeTo(description: Description) { description.appendText("Child at position $position in parent ") parentMatcher.describeTo(description) } public override fun matchesSafely(view: View): Boolean { val parent = view.parent return parent is ViewGroup && parentMatcher.matches(parent) && view == parent.getChildAt(position) } } } }テスト結果
ちゃんとテストも通りますね。
気になったところ
- does not exist でviewが存在しないことを確認するアサーションを作るとき、スクリーンショットに存在しないViewが選べないため結局手動で作る必要がある…?
- 余計な操作が記憶され、都度消すのはやはり手間
不自由はあるけれど、シンプルなテストだったり簡単な枠組み作成くらいには使えるかも。


- 投稿日:2019-07-27T11:13:43+09:00
EditTextのbackgroundの色を変える時につまづいたこと
はじめての投稿です!
分かりづらい、書いてる内容が間違ってる、こうした方がいいよなどありましたら
ぜひコメント欄までお願いします!今回はandroidのEditTextのbackgroundの色を変えたいときにハマった話です。
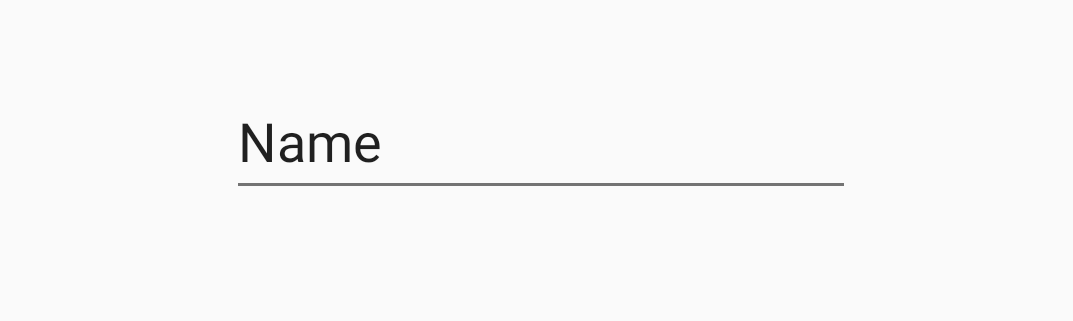
みなさんご存知のEditText。文字が入力できるやつですね。
[通常のEditText]
上の画像は高さをwrap_contentで指定してあります。でもこれより高さを小さくしたい時ありますよね。
高さを小さくするとこんな感じの見た目になります。
[layout_heightをwrap_contentよりも小さくしたEditText]
あれなんかNameが消えましたね。。でもこれbackgroundを指定すると見えるようになるんです。
[android:background="@color/color"を追加]
おおー見えた。
もちろん透明が良ければ@color/colorのところを@android:color/transparentに変えてあげればオッケーです。ここまでは僕も知っていました。ですが今回コード上からbackgroundの色をセットしたら、予想と違う結果になったのです!
先ほどのxmlでbackgroundの指定を消して代わりに以下のコードを追加しました。
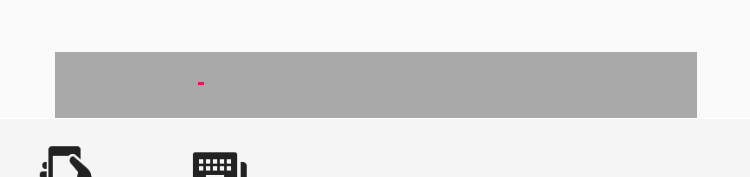
editText2.setBackgroundColor(resources.getColor(R.color.color))そしてこれの結果がこちら。
Nameという文字が表示されていない!!
(すいません。キーボード開いている状態でキャプチャをとったので下に何か写り込んでるのは気にしないでください)ただよく見ると赤い線がありますよね。つまり入力カーソルはこの位置にあるのです。でも文字が見えていない。。
試行錯誤した結果、最終的にはxmlの方で
android:padding="0dp"
を指定することによって直りました!ここからは推測なのですが、xmlでandroid:backgroundを指定した時はただ色や画像をセットするだけではなく
paddingなど他のプロパティも変更されてるのかなーと思いました。
詳しいことがわかる方がいらっしゃいましたらぜひ教えてください
setBackgroundしてるのに!コードは間違ってないはずなのに!と1時間くらいハマったので
もし同じような方がいらっしゃったらぜひ参考にしていただけたら嬉しいです!!以上、EditTextのbackgroundの話でした。
我ながら読みづらい文になったな。。。
androidの勉強とともに文章力も鍛えていこう。。


- 投稿日:2019-07-27T08:24:34+09:00
AndroidでテンキーのようなViewを作る
アプリ内の入力システムを自分で作る必要があったのでメモ兼ねて記事を書きます。
説明が足りていない点や改善点などあればコメントで遠慮なくご指摘ください。
仕様
- テンキーのように動作する
- キーを押している間は色が変わる
- 再利用可能(カスタムViewとして使い回せる)
- xmlから入力対象となるEditText(TextView)をidで指定できる
実装
アプリ全体のソースコードはこちら
今回はTableLayoutを継承したViewとして作っていきます。values/attrs.xml<?xml version="1.0" encoding="utf-8"?> <resources> <declare-styleable name="NumericKeyboard"> <attr name="targetField" format="reference" /> </declare-styleable> </resources>drawable/keyboard_divider.xml<?xml version="1.0" encoding="utf-8"?> <shape xmlns:android="http://schemas.android.com/apk/res/android"> <solid android:color="@android:color/darker_gray"/> <size android:width="1dp" android:height="1dp"/> </shape>drawable/keyboard_button_background.xml<?xml version="1.0" encoding="utf-8"?> <selector xmlns:android="http://schemas.android.com/apk/res/android"> <item android:state_pressed="true"> <shape> <solid android:color="#dddddd" /> </shape> </item> <item android:state_pressed="false"> <shape> <solid android:color="@android:color/transparent" /> </shape> </item> </selector>values/styles.xml<resources> ... <style name="KeyboardRow"> <item name="android:layout_width">match_parent</item> <item name="android:layout_height">wrap_content</item> <item name="android:gravity">center</item> <item name="android:divider">@drawable/keyboard_divider</item> <item name="android:showDividers">middle</item> </style> <style name="KeyboardButton"> <item name="android:layout_width">wrap_content</item> <item name="android:layout_height">match_parent</item> <item name="android:layout_weight">1</item> <item name="android:paddingTop">12dp</item> <item name="android:paddingBottom">12dp</item> <item name="android:background">@drawable/keyboard_button_background</item> <item name="android:clickable">true</item> <item name="android:focusable">true</item> <item name="android:gravity">center</item> <item name="android:scaleType">fitCenter</item> <item name="android:textColor">@android:color/black</item> <item name="android:textSize">20sp</item> <item name="android:textStyle">bold</item> </style> </resources>layout/numeric_keyboard.xml<?xml version="1.0" encoding="utf-8"?> <merge xmlns:app="http://schemas.android.com/apk/res-auto" xmlns:android="http://schemas.android.com/apk/res/android"> <TableRow style="@style/KeyboardRow"> <TextView style="@style/KeyboardButton" android:id="@+id/numericKey7" android:text="7" /> <TextView style="@style/KeyboardButton" android:id="@+id/numericKey8" android:text="8" /> <TextView style="@style/KeyboardButton" android:id="@+id/numericKey9" android:text="9" /> </TableRow> <TableRow style="@style/KeyboardRow"> <TextView style="@style/KeyboardButton" android:id="@+id/numericKey4" android:text="4" /> <TextView style="@style/KeyboardButton" android:id="@+id/numericKey5" android:text="5" /> <TextView style="@style/KeyboardButton" android:id="@+id/numericKey6" android:text="6" /> </TableRow> <TableRow style="@style/KeyboardRow"> <TextView style="@style/KeyboardButton" android:id="@+id/numericKey1" android:text="1" /> <TextView style="@style/KeyboardButton" android:id="@+id/numericKey2" android:text="2" /> <TextView style="@style/KeyboardButton" android:id="@+id/numericKey3" android:text="3" /> </TableRow> <TableRow style="@style/KeyboardRow"> <TextView style="@style/KeyboardButton" android:clickable="false" /> <TextView style="@style/KeyboardButton" android:id="@+id/numericKey0" android:text="0" /> <ImageView style="@style/KeyboardButton" android:id="@+id/numeric_key_backspace" android:tint="@android:color/black" app:srcCompat="@android:drawable/ic_input_delete" /> </TableRow> </merge>NumericKeyboard.ktclass NumericKeyboard @JvmOverloads constructor( context: Context, attrs: AttributeSet? = null ) : TableLayout(context, attrs), View.OnClickListener { private val keyValues = mapOf( R.id.numericKey0 to "0", R.id.numericKey1 to "1", R.id.numericKey2 to "2", R.id.numericKey3 to "3", R.id.numericKey4 to "4", R.id.numericKey5 to "5", R.id.numericKey6 to "6", R.id.numericKey7 to "7", R.id.numericKey8 to "8", R.id.numericKey9 to "9" ) private val targetFieldId: Int private lateinit var inputConnection: InputConnection init { context.obtainStyledAttributes(attrs, R.styleable.NumericKeyboard).also { typedArray -> targetFieldId = typedArray.getResourceIdOrThrow(R.styleable.NumericKeyboard_targetField) }.recycle() View.inflate(context, R.layout.numeric_keyboard, this).apply { keyValues.keys.forEach { id -> findViewById<View>(id).setOnClickListener(this@NumericKeyboard) } findViewById<View>(R.id.numeric_key_backspace).setOnClickListener(this@NumericKeyboard) } dividerDrawable = context.getDrawable(R.drawable.keyboard_divider) showDividers = LinearLayout.SHOW_DIVIDER_BEGINNING or LinearLayout.SHOW_DIVIDER_MIDDLE } override fun onAttachedToWindow() { super.onAttachedToWindow() val targetField: TextView = (parent as View).findViewById(targetFieldId) targetField.isFocusable = false inputConnection = targetField.onCreateInputConnection(EditorInfo()) } override fun onClick(v: View?) { val view = v ?: return if (view.id == R.id.numeric_key_backspace) { inputConnection.deleteSurroundingText(1, 0) } else if (view.id in keyValues.keys) { val value = keyValues[view.id] ?: return inputConnection.commitText(value, 1) } } }解説
今回の仕様に「xmlから入力対象となるEditText(TextView)をidで指定できる」があるので、xml側で指定できるよう追加のattrを
attrs.xmlで設定しています。利用する側はこんな感じです。activity_main.xml<?xml version="1.0" encoding="utf-8"?> <androidx.constraintlayout.widget.ConstraintLayout xmlns:android="http://schemas.android.com/apk/res/android" xmlns:tools="http://schemas.android.com/tools" xmlns:app="http://schemas.android.com/apk/res-auto" android:layout_width="match_parent" android:layout_height="match_parent" android:background="@android:color/white" tools:context=".MainActivity"> <EditText android:id="@+id/target" android:layout_width="wrap_content" android:layout_height="wrap_content" app:layout_constraintLeft_toLeftOf="parent" app:layout_constraintRight_toRightOf="parent" app:layout_constraintTop_toTopOf="parent"/> <com.yt8492.numerickeyboard.NumericKeyboard android:layout_width="match_parent" android:layout_height="wrap_content" app:targetField="@id/target" app:layout_constraintStart_toStartOf="parent" app:layout_constraintEnd_toEndOf="parent" app:layout_constraintBottom_toBottomOf="parent" /> </androidx.constraintlayout.widget.ConstraintLayout>
NumericKeyboardのapp:targetField="@id/target"というようにEditTextのidを指定しています。
ここで取得したidをもとにKotlin(Java)側でInputConnectionを生成し、押されたキーに対応する値をinputConnection.commitText(value, 1)で渡す(=EditTextに入力される)という実装にしています。「キーを押している間は色が変わる」はキーを押しているときとそうでないときに色を変える
keyboard_button_backgroundを各キーのbackgroundに指定することで実現しています。

- 投稿日:2019-07-27T05:09:32+09:00
scrollToPositionWithOffset()の引数のoffsetはpositionのoffsetではない
RecyclerViewを使う際、先頭以外の特定のアイテムまでスクロールした状態でリスト表示したい場合にLinearLayoutManagerのscrollToPosition(position)を使ったりすることがあると思います。
LinearLayoutManager#scrollToPosition(position)
LinearLayoutManagerのドキュメントを眺めていると、もう1つscrollToPositionWithOffset(position, offset)というメソッドがありました。
LinearLayoutManager#scrollToPositionWithOffset(position, offset)後者の
scrollToPositionWithOffset(position, offset)ですが、positionに対応するアイテムまでスクロールし、offsetに指定された値だけpositionをオフセットしてくれるのかと思ったのですが、
どうやらそうではなく、offsetに指定された値だけピクセル単位でオフセットしてくれるそうです。ドキュメントにもきちんと書いてありました。
Parameter Description position int: Index (starting at 0) of the reference item. offset int: The distance (in pixels) between the start edge of the item view and start edge of the RecyclerView. 先入観はよくないですね。気をつけたいと思います。
- 投稿日:2019-07-27T05:09:32+09:00
scrollToPositionWithOffset()の引数のoffsetはpositionをオフセットするわけではない
何だか非常に分かりづらいタイトルになってしまいましたが…笑
RecyclerViewを使う際、先頭以外の特定のアイテムまでスクロールした状態でリスト表示したい場合にLinearLayoutManagerのscrollToPosition(position)を使ったりすることがあると思います。
LinearLayoutManager#scrollToPosition(position)
LinearLayoutManagerのドキュメントを眺めていると、もう1つscrollToPositionWithOffset(position, offset)というメソッドがありました。
LinearLayoutManager#scrollToPositionWithOffset(position, offset)この
scrollToPositionWithOffset(position, offset)ですが、offsetに指定された値だけpositionをオフセットし、そこからpositionに対応するアイテムまでスクロールしてくれる(例えばscrollToPositionWithOffset(5, 2)であれば2だけpositionをオフセットし、そこから5だけスクロールするので、表示上はscrollToPosition(7)とした場合と同じになる)のかと思ったのですが、
どうやらそうではなく、offsetに指定された値だけピクセル単位でオフセットしてくれるそうです。ドキュメントにもきちんと書いてありました。
Parameter Description position int: Index (starting at 0) of the reference item. offset int: The distance (in pixels) between the start edge of the item view and start edge of the RecyclerView. 先入観はよくないですね。気をつけたいと思います。