- 投稿日:2019-02-27T22:59:50+09:00
Unity2018のStandardAssetsの場所
メモ
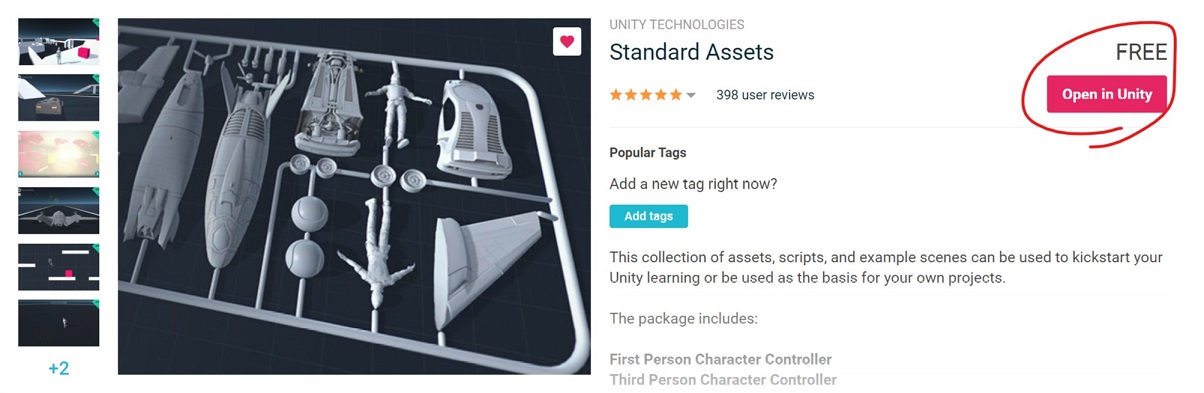
Unity2018以降あたりからStandardAssetsをUnityインストール時にインポート出来なくなっているようです。
AssetStoreを開いてインポートすればいいのですが、毎度やるのも面倒なのでURLをメモ。
Unityがインストールされた環境で適当なブラウザで開いてOpeninUnityボタンを押せばUnityが立ち上がる気がします。Standard Assets - Asset Store
https://assetstore.unity.com/packages/essentials/asset-packs/standard-assets-32351
参考
Unity 2018で標準アセットを使用する - Qiita
【Unity】ImportPackage(StandardAssets)が無い時の対処 - テラシュールブログ
- 投稿日:2019-02-27T22:47:07+09:00
UnityでAndroidアプリをビルドする
準備
・SDK、JDKをインストールしておく。
・Google USB Driverをインストールしておく。パスの設定
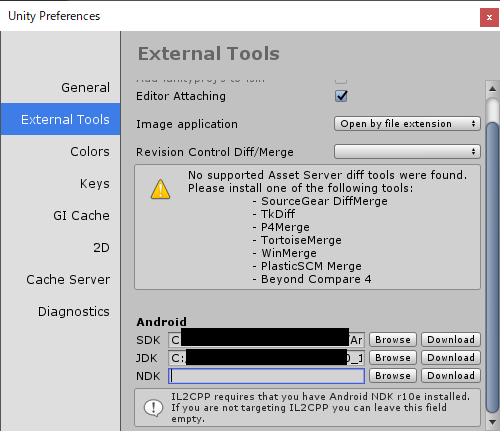
まず、SDKとJDKのパスを設定します。
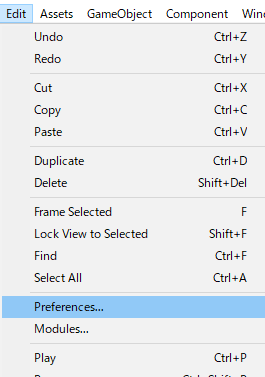
Edit>Preferences を選びます。
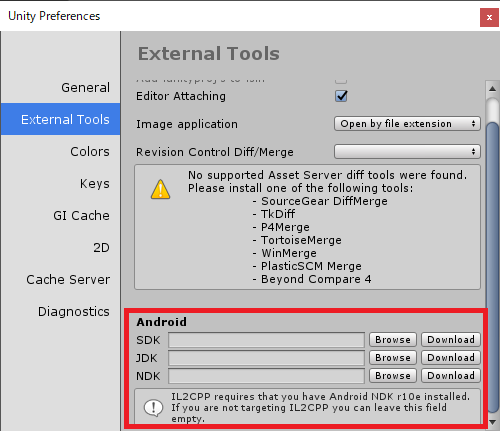
External Tools欄を選んで、赤枠内にパスを設定します。
IL2CPPを使う場合はNDKも必要らしいのですが、まだよくわかりません……
とりあえず、まだ設定していません。ビルド設定
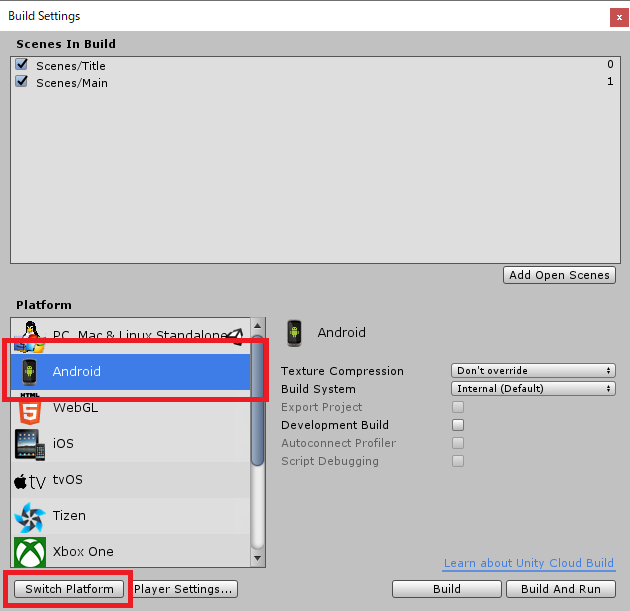
File>Build Settings を選びます。
PlatformのAndroidを選択して、左下のSwitch Platformを押します。
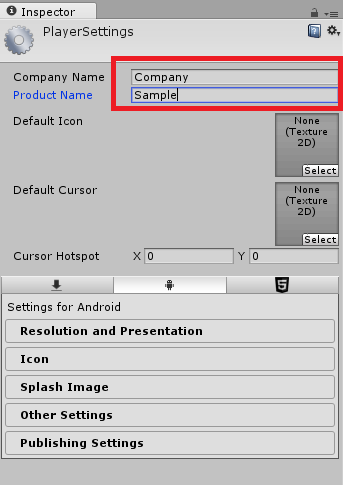
もしAndroid Build Supportがインストールされていなければ、インストールボタンがあるので押します。次に、Player Settingsを押します。
Company NameとProduct Nameを入力します。
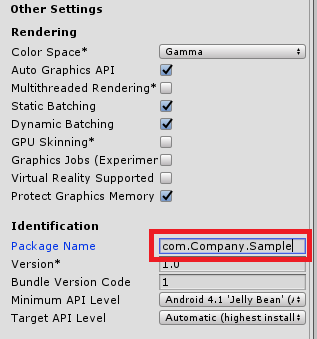
次に、Other Settings内のPackage Name欄を入力します。
「com.(Company Name).(Product Name)」で設定します。他にもいろいろ設定できそうです。
実行
後はBuild And Runを押して実行です。
- 投稿日:2019-02-27T20:16:18+09:00
動画を自動トレース⇒Unityでキャラクターに踊ってもらう
やりたいこと
動画からモーションを自動トレースして、Unityで好きなキャラクターに踊って(動いて)もらう
OpenPoseや3d-pose-baselineなどディープラーニング技術を組み合わせて、動画からMMDモーションを自動生成するプログラムを@miu200521358様が開発しています。ここではMMDの代わりに、Unityで動かします。
MMDモーショントレース自動化への挑戦【ver1.00】(ニコニコ動画)
https://www.nicovideo.jp/watch/sm34626229実行例)
自動トレース元: https://nico.ms/sm27620009?from=20 :やっこ様、まりやん様
3Dモデル:Masscat、Unity-Chan(© Unity Technologies Japan/UCL)どうやって実現するか
MMDモーション自動生成の手順の途中で生成される3Dポーズデータ(pos.txt)を利用します。
@romaroma様が実現方法を以下の記事で紹介しています。ただ、なぜか私の環境(モデル:Unity-Chan, MassCat、Unity:ver.2017.4.19f1)で上手く動かなかったため、@romaroma様の記事を参考にてプログラムを作成しました。参考ページ @romaroma様
https://qiita.com/romaroma/items/ffbdae4ecfc4c8ff31cd1.3Dポーズデータの作成
以下の@miu200521358様の記事の参考にして動画から3Dポーズデータ(pos.txt)を作成してください。
構築・実行には時間と手間がかかります。最初は1人の動画で試してみることをお勧めします。【目次】MMDモーショントレース自動化への挑戦
https://qiita.com/miu200521358/items/d826e9d70853728abc51
- Windows への OpenPose導入手順
- Windows への FCRN-DepthPrediction-vmd の導入手順 【2019/2/15追加】
- Windows への 3d-pose-baseline-vmd の導入手順
※3.の手順でpos.txtが生成されるため、4.以降の手順は不要です。
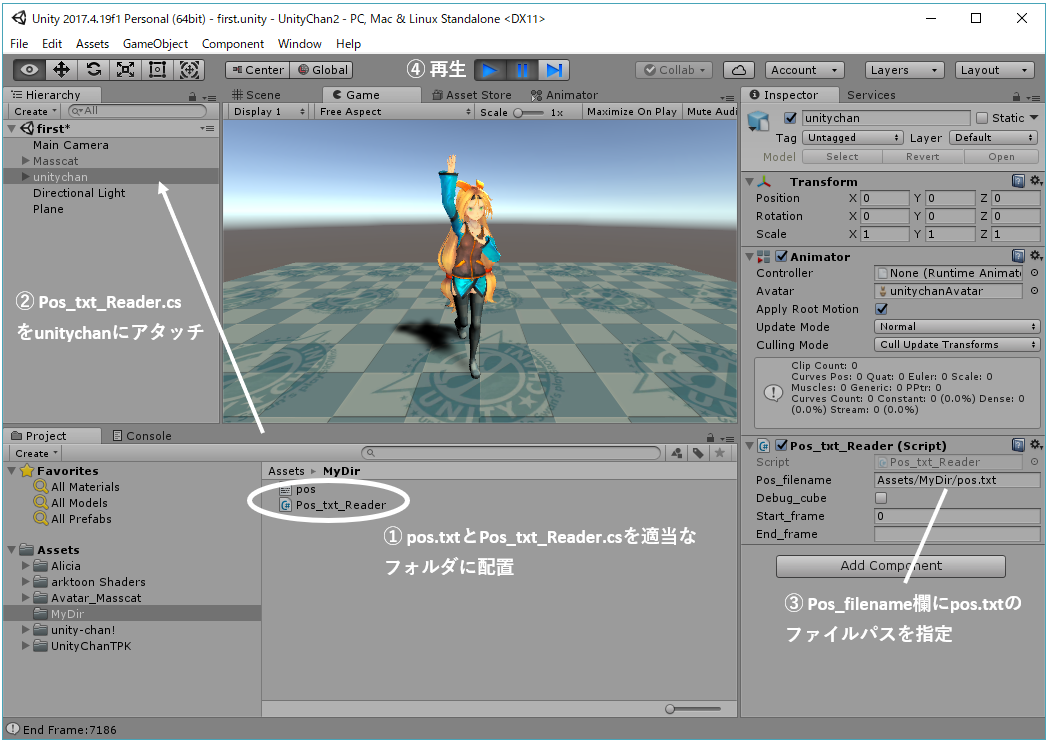
2.キャラクターを動かす
上記の3で作成されるpos.txtと、下記のプログラム(Pos_txt_Reader.cs)を適当なフォルダに配置し、Pos_txt_Reader.csをキャラクターにアタッチ後、Pos_filenameにpos.txtのパスを指定し、再生してください。
プログラムはgithubにもあげておきます。スムージング処理や足IK処理をしていません。時間ができたら対応したいと思います。
https://github.com/kenkra/Unity-3d-pose-baseline
Pos_txt_Reader.csusing System.Collections; using System.Collections.Generic; using UnityEngine; using System.IO; using System; // pos.txtのデータ // https://github.com/miu200521358/3d-pose-baseline-vmd/blob/master/doc/Output.md // 0 :Hip // 1 :RHip // 2 :RKnee // 3 :RFoot // 4 :LHip // 5 :LKnee // 6 :LFoot // 7 :Spine // 8 :Thorax // 9 :Neck/Nose // 10:Head // 11:LShoulder // 12:LElbow // 13:LWrist // 14:RShoulder // 15:RElbow // 16:RWrist public class Pos_txt_Reader : MonoBehaviour { float scale_ratio = 0.001f; // pos.txtとUnityモデルのスケール比率 // pos.txtの単位はmmでUnityはmのため、0.001に近い値を指定。モデルの大きさによって調整する float heal_position = 0.05f; // 足の沈みの補正値(単位:m)。プラス値で体全体が上へ移動する float head_angle = 15f; // 顔の向きの調整 顔を15度上げる public String pos_filename; // pos.txtのファイル名 public Boolean debug_cube; // デバッグ用Cubeの表示フラグ public int start_frame; // 開始フレーム public String end_frame; // 終了フレーム float play_time; // 再生時間 Transform[] bone_t; // モデルのボーンのTransform Transform[] cube_t; // デバック表示用のCubeのTransform Vector3 init_position; // 初期のセンターの位置 Quaternion[] init_rot; // 初期の回転値 Quaternion[] init_inv; // 初期のボーンの方向から計算されるクオータニオンのInverse List<Vector3[]> pos; // pos.txtのデータを保持するコンテナ int[] bones = new int[10] { 1, 2, 4, 5, 7, 8, 11, 12, 14, 15 }; // 親ボーン int[] child_bones = new int[10] { 2, 3, 5, 6, 8, 10, 12, 13, 15, 16 }; // bonesに対応する子ボーン int bone_num = 17; Animator anim; int s_frame; int e_frame; // pos.txtのデータを読み込み、リストで返す List<Vector3[]> ReadPosData(string filename) { List<Vector3[]> data = new List<Vector3[]>(); List<string> lines = new List<string>(); StreamReader sr = new StreamReader(filename); while (!sr.EndOfStream) { lines.Add(sr.ReadLine()); } sr.Close(); foreach (string line in lines) { string line2 = line.Replace(",", ""); string[] str = line2.Split(new string[] { " " }, System.StringSplitOptions.RemoveEmptyEntries); // スペースで分割し、空の文字列は削除 Vector3[] vs = new Vector3[bone_num]; for (int i = 0; i < str.Length; i += 4) { vs[(int)(i/4)] = new Vector3(-float.Parse(str[i + 1]), float.Parse(str[i + 3]), -float.Parse(str[i + 2])); } data.Add(vs); } return data; } // BoneTransformの取得。回転の初期値を取得 void GetInitInfo() { bone_t = new Transform[bone_num]; init_rot = new Quaternion[bone_num]; init_inv = new Quaternion[bone_num]; bone_t[0] = anim.GetBoneTransform(HumanBodyBones.Hips); bone_t[1] = anim.GetBoneTransform(HumanBodyBones.RightUpperLeg); bone_t[2] = anim.GetBoneTransform(HumanBodyBones.RightLowerLeg); bone_t[3] = anim.GetBoneTransform(HumanBodyBones.RightFoot); bone_t[4] = anim.GetBoneTransform(HumanBodyBones.LeftUpperLeg); bone_t[5] = anim.GetBoneTransform(HumanBodyBones.LeftLowerLeg); bone_t[6] = anim.GetBoneTransform(HumanBodyBones.LeftFoot); bone_t[7] = anim.GetBoneTransform(HumanBodyBones.Spine); bone_t[8] = anim.GetBoneTransform(HumanBodyBones.Neck); bone_t[10] = anim.GetBoneTransform(HumanBodyBones.Head); bone_t[11] = anim.GetBoneTransform(HumanBodyBones.LeftUpperArm); bone_t[12] = anim.GetBoneTransform(HumanBodyBones.LeftLowerArm); bone_t[13] = anim.GetBoneTransform(HumanBodyBones.LeftHand); bone_t[14] = anim.GetBoneTransform(HumanBodyBones.RightUpperArm); bone_t[15] = anim.GetBoneTransform(HumanBodyBones.RightLowerArm); bone_t[16] = anim.GetBoneTransform(HumanBodyBones.RightHand); // Spine,LHip,RHipで三角形を作ってそれを前方向とする。 Vector3 init_forward = TriangleNormal(bone_t[7].position, bone_t[4].position, bone_t[1].position); init_inv[0] = Quaternion.Inverse(Quaternion.LookRotation(init_forward)); init_position = bone_t[0].position; init_rot[0] = bone_t[0].rotation; for (int i = 0; i < bones.Length; i++) { int b = bones[i]; int cb = child_bones[i]; // 対象モデルの回転の初期値 init_rot[b] = bone_t[b].rotation; // 初期のボーンの方向から計算されるクオータニオン init_inv[b] = Quaternion.Inverse(Quaternion.LookRotation(bone_t[b].position - bone_t[cb].position,init_forward)); } } // 指定の3点でできる三角形に直交する長さ1のベクトルを返す Vector3 TriangleNormal(Vector3 a, Vector3 b, Vector3 c) { Vector3 d1 = a - b; Vector3 d2 = a - c; Vector3 dd = Vector3.Cross(d1, d2); dd.Normalize(); return dd; } // デバック用cubeを生成する。生成済みの場合は位置を更新する void UpdateCube(int frame) { if (cube_t == null) { // 初期化して、cubeを生成する cube_t = new Transform[bone_num]; for (int i = 0; i < bone_num; i++) { Transform t = GameObject.CreatePrimitive(PrimitiveType.Cube).transform; t.transform.parent = this.transform; t.localPosition = pos[frame][i] * scale_ratio; t.name = i.ToString(); t.localScale = new Vector3(0.05f, 0.05f, 0.05f); cube_t[i] = t; Destroy(t.GetComponent<BoxCollider>()); } } else { // モデルと重ならないように少しずらして表示 Vector3 offset = new Vector3(1.2f, 0, 0); // 初期化済みの場合は、cubeの位置を更新する for (int i = 0; i < bone_num; i++) { cube_t[i].localPosition = pos[frame][i] * scale_ratio + new Vector3(0, heal_position, 0) + offset; } } } void Start() { anim = GetComponent<Animator>(); play_time = 0; if (System.IO.File.Exists (pos_filename) == false) { Debug.Log("<color=blue>Error! Pos file not found(" + pos_filename + "). Check Pos_filename in Inspector.</color>"); } pos = ReadPosData(pos_filename); GetInitInfo(); if (pos != null) { // inspectorで指定した開始フレーム、終了フレーム番号をセット if (start_frame >= 0 && start_frame < pos.Count) { s_frame = start_frame; } else { s_frame = 0; } int ef; if (int.TryParse(end_frame, out ef)) { if (ef >= s_frame && ef < pos.Count) { e_frame = ef; } else { e_frame = pos.Count - 1; } } else { e_frame = pos.Count - 1; } Debug.Log("End Frame:" + e_frame.ToString()); } } void Update() { if (pos == null) { return; } play_time += Time.deltaTime; int frame = s_frame + (int)(play_time * 30.0f); // pos.txtは30fpsを想定 if (frame > e_frame) { play_time = 0; // 繰り返す frame = s_frame; } if (debug_cube) { UpdateCube(frame); // デバッグ用Cubeを表示する } Vector3[] now_pos = pos[frame]; // センターの移動と回転 Vector3 pos_forward = TriangleNormal(now_pos[7], now_pos[4], now_pos[1]); bone_t[0].position = now_pos[0] * scale_ratio + new Vector3(init_position.x, heal_position, init_position.z); bone_t[0].rotation = Quaternion.LookRotation(pos_forward) * init_inv[0] * init_rot[0]; // 各ボーンの回転 for (int i = 0; i < bones.Length; i++) { int b = bones[i]; int cb = child_bones[i]; bone_t[b].rotation = Quaternion.LookRotation(now_pos[b] - now_pos[cb], pos_forward) * init_inv[b] * init_rot[b]; } // 顔の向きを上げる調整。両肩を結ぶ線を軸として回転 bone_t[8].rotation = Quaternion.AngleAxis(head_angle, bone_t[11].position - bone_t[14].position) * bone_t[8].rotation; } }
- 投稿日:2019-02-27T11:38:50+09:00
Text Mesh Pro を使って日本語ルビをつけるのと、注意したいところ
ルビをつける
ふりがなふりたいですよね。
子供向けに作るコンテンツだと欲しくなると思います。設定
参考リンクにあるように Style Sheet の設定で実現可能です。(横書き)
リンク先の内容をもとに、自分の環境用に設定したのが以下の通り。
種類 Name Opening Tags Closing Tags 1文字用 p1 <space=-2.8em><voffset=.85em><size=50%><mspace=4em></size></voffset></mspace>2文字用 p2 <space=-3.6em><voffset=.85em><size=50%><mspace=4em></size></voffset></mspace>3文字用 p3 <space=-6.7em><voffset=.85em><size=50%><mspace=4em></size></voffset></mspace>4文字用 p4 <space=-7.5em><voffset=.85em><size=50%><mspace=4em></size></voffset></mspace>5文字用 p5 <space=-8.5em><voffset=.85em><size=50%><mspace=4em></size></voffset></mspace>6文字用 p6 <space=-11em><voffset=.85em><size=50%><mspace=4em></size></voffset></mspace>問題点
印刷物などだと、ルビの有無で行の位置が変わることはありませんが、
この方法で上揃えにした場合、ルビの有無で行の位置が変わってしまいます。動的に差し替わるテキストフィールドで、ルビの有無が混在する場合に、
デザイン調整がしづらくなります。対応
挿入するテキスト文字列の冒頭に
<line-height=1em>などを付与してtextプロパティに代入することで、
2行目以降の行についてはルビの有無に左右されずに行間が固定できます。
1行目は許容する形。例
<line-height=1em>青<p2>あお</p2>い空<p2>そら</p2>別案として、改行が無い、箇条書きみたいな文章であれば
テキストフィールドを分割して、下揃えにしてあげることでも解決できそうです。参考
http://baba-s.hatenablog.com/entry/2019/01/10/122500
https://forum.unity.com/threads/how-to-display-extra-little-characters-above-characters-in-a-text.387772/