- 投稿日:2020-12-15T23:40:19+09:00
docker バインドマウントをreadonlyにすれば早くなるか?
macでdocker開発時にファイルio?周りで遅くなる問題があるが、バインドマウントをreadonlyにすれば早くなるのか調べる。
なんとなくreadonlyにした方が早くなる気がするコンテナの/appにLaravleのコードをマウントする。
FROM centos:centos8

RUN dnf module install -y php:7.4

WORKDIR /app
CMD [ "php", "artisan", "serve", "--port=80", "--host=0.0.0.0" ]
まずは普通にroオプション付けずにマウントする。
$ docker run -it --rm -v ~/Documents/test/docker/volume_test/ro_test:/app -p 8080:80 ro_test負荷テストにはabテストを使用。
10人で10リクエスト = 合計100リクエストで試験。
1秒あたり2.78リクエスト捌ける
全部処理するのに36秒$ ab -n 100 -c 10 http://localhost:8080/ This is ApacheBench, Version 2.3 <$Revision: 1843412 $> Copyright 1996 Adam Twiss, Zeus Technology Ltd, http://www.zeustech.net/ Licensed to The Apache Software Foundation, http://www.apache.org/ Benchmarking localhost (be patient).....done Server Software: Server Hostname: localhost Server Port: 8080 Document Path: / Document Length: 17473 bytes Concurrency Level: 10 Time taken for tests: 35.945 seconds Complete requests: 100 Failed requests: 0 Total transferred: 1861900 bytes HTML transferred: 1747300 bytes Requests per second: 2.78 [#/sec] (mean) Time per request: 3594.549 [ms] (mean) Time per request: 359.455 [ms] (mean, across all concurrent requests) Transfer rate: 50.58 [Kbytes/sec] received Connection Times (ms) min mean[+/-sd] median max Connect: 0 0 0.1 0 1 Processing: 380 3392 655.6 3578 3659 Waiting: 379 3391 655.7 3578 3659 Total: 380 3392 655.6 3578 3659 Percentage of the requests served within a certain time (ms) 50% 3578 66% 3596 75% 3609 80% 3616 90% 3630 95% 3642 98% 3653 99% 3659 100% 3659 (longest request)readonlyありの方でマウントする
$ docker run -it --rm -v ~/Documents/test/docker/volume_test/ro_test:/app:ro -p 8080:80 ro_test1秒あたり2.27リクエスト捌ける
全部処理するのに43秒
あれ、readonlyの方が処理が遅くなっている。ab -n 100 -c 10 http://localhost:8080/ This is ApacheBench, Version 2.3 <$Revision: 1843412 $> Copyright 1996 Adam Twiss, Zeus Technology Ltd, http://www.zeustech.net/ Licensed to The Apache Software Foundation, http://www.apache.org/ Benchmarking localhost (be patient).....done Server Software: Server Hostname: localhost Server Port: 8080 Document Path: / Document Length: 519560 bytes Concurrency Level: 10 Time taken for tests: 43.979 seconds Complete requests: 100 Failed requests: 0 Non-2xx responses: 100 Total transferred: 51981200 bytes HTML transferred: 51956000 bytes Requests per second: 2.27 [#/sec] (mean) Time per request: 4397.921 [ms] (mean) Time per request: 439.792 [ms] (mean, across all concurrent requests) Transfer rate: 1154.25 [Kbytes/sec] received Connection Times (ms) min mean[+/-sd] median max Connect: 0 0 0.1 0 0 Processing: 455 4155 808.2 4374 4487 Waiting: 447 4145 808.2 4362 4478 Total: 455 4155 808.2 4374 4488 Percentage of the requests served within a certain time (ms) 50% 4374 66% 4400 75% 4436 80% 4444 90% 4457 95% 4471 98% 4483 99% 4488 100% 4488 (longest request)readonlyの時はstorage以下に書き込もうとしてエラーになって余計に時間がかかっている・・・?
試しにstorage以下だけroを外してみる。マウント時に後から-vを追加することで上書きできるらしい。
$ docker run -it --rm -v $(pwd)/ro_test:/app:ro -v $(pwd)/ro_test/storage:/app/storage -p 8080:80 ro_testabテストすると、
1秒あたり2.73リクエスト捌ける
全部処理するのに36秒
と、ほぼroなしの状態と同じになった。ab -n 100 -c 10 http://localhost:8080/ This is ApacheBench, Version 2.3 <$Revision: 1843412 $> Copyright 1996 Adam Twiss, Zeus Technology Ltd, http://www.zeustech.net/ Licensed to The Apache Software Foundation, http://www.apache.org/ Benchmarking localhost (be patient).....done Server Software: Server Hostname: localhost Server Port: 8080 Document Path: / Document Length: 17473 bytes Concurrency Level: 10 Time taken for tests: 36.620 seconds Complete requests: 100 Failed requests: 0 Total transferred: 1861900 bytes HTML transferred: 1747300 bytes Requests per second: 2.73 [#/sec] (mean) Time per request: 3661.974 [ms] (mean) Time per request: 366.197 [ms] (mean, across all concurrent requests) Transfer rate: 49.65 [Kbytes/sec] received Connection Times (ms) min mean[+/-sd] median max Connect: 0 0 0.0 0 0 Processing: 370 3461 688.7 3613 4053 Waiting: 369 3461 688.8 3613 4053 Total: 370 3461 688.7 3613 4054 Percentage of the requests served within a certain time (ms) 50% 3613 66% 3629 75% 3640 80% 3644 90% 4031 95% 4044 98% 4050 99% 4054 100% 4054 (longest request)このことからro付けても早くなるわけではなさそう。
- 投稿日:2020-12-15T23:28:24+09:00
DockerとPythonとTwitterAPIで社内業務を自動化してみた+おまけ
社内の案件でツイッターと連動したキャンペーンを担当している方が、
手動でツイートを収集しなければいけないという悩みを抱えており、
何とかしてあげたいという思いから、DockerとPythonを使って
ツイートの収集ツールを作成してみました。作る際に直面した問題点
- 無料のTwitterDeveloperアカウントを所有していたが、取得できるツイートに制限が多く、
かといって自動化のためだけにに高額なプレミアム契約はできないそこで以下のサードパーティライブラリ"GetOldTweet"を使って
API無しで任意の数と時期のツイートを取得できるプログラムを作成
https://github.com/Jefferson-Henrique/GetOldTweets-python
=> ある日からプログラムがエラーを吐くようになり、調べたところIssueが挙げられていた
バグが解消される見込みがしばらくはなさそう困っていたところ、Issueにインドのエンジニアがコメントしていた
以下のリポジトリを発見
https://github.com/itsayushisaxena/Get_Old_Tweets-Python
どうやらソースコードを見ると、TwitterStandardAPIのアカウントは必要だが、
tweepyとsnscrapeを組み合わせて、これまでと同じように欲しい範囲と数の
ツイートが取得できそうということで作ったもの
- DockerでPython3の動作する環境構築
- PythonでTwitterAPIを使ったスクレイピング
- 担当の方にdockerコマンドを意識させずにターミナルから使えるように
自動化するシェルスクリプトソースコードはこちら
https://github.com/hikkymouse1007/GetTweets_pub今回は、案件担当の方のPCで動かせてかつ、難しい操作を排除できる仕組みを
考えて作りました。そこでDockerとシェルスクリプトによってコンテナ起動・ツイート取得・CSV作成
までを実行してくれる一連の流れを作ってみました。ディレクトリ構造は以下のようになっております。
.
├── Dockerfile
├── Makefile
├── README.md
├── command
│   └── twitter //シェルスクリプト
├── docker-compose.yml
└── src
    ├── csv_files //ここにCSVを出力
    └── got_v2.py //Pythonのソースコード
Dockerfile, docker-compose
python3の動くコンテナのレシピは以下の記事を参考にさせていただきました。
https://qiita.com/reflet/items/4b3f91661a54ec70a7dc
tweepyが3.9に対応していないため、今回はpython3.8のバージョンを指定しました。pythonの動作環境と必要なライブラリをインストールします。
# Dockerfile
FROM python:3.8
USER root

RUN apt-get update
RUN apt-get -y install locales && \
    localedef -f UTF-8 -i ja_JP ja_JP.UTF-8
RUN apt-get -y install sudo
RUN sudo apt-get update && apt-get install -y cowsay fortunes
ENV PATH $PATH:/usr/games
RUN echo $PATH

ENV LANG ja_JP.UTF-8
ENV LANGUAGE ja_JP:ja
ENV LC_ALL ja_JP.UTF-8
ENV TZ JST-9
ENV TERM xterm

RUN apt-get install -y vim less
RUN pip install --upgrade pip
RUN pip install --upgrade setuptools
RUN pip install requests requests_oauthlib
RUN pip install pandas
RUN pip install IPython
RUN pip install twitter
RUN pip install tweepy
RUN pip install snscrape
# docker-compose.yml version: '3' services: python3: restart: always build: . container_name: 'python3' working_dir: '/root/' tty: true volumes: - ./src:/root/srcgot.py
TwtterAPIにアクセスし、ツイートを取得するためのソースコードです。
基本のソースコードはこちらのリポジトリから拝借しました。
https://github.com/itsayushisaxena/Get_Old_Tweets-PythontwitterStandardAPIのアカウント発行時に貰う以下の情報を入力してください。
定数名 入力するキーの種類 TWITTER_CLIENT_KEY APIキー TWITTER_CLIENT_SECRET APIシークレットキー TWITTER_CLIENT_ID_ACCESS_TOKEN アクセストークン TWITTER_CLIENT_ID_ACCESS_TOKEN_SECRET シークレットトークン 簡単な流れとしては、後述するシェルスクリプトからdockerコンテナ内に
環境変数を渡し、pythonで環境変数からハッシュタグなどの情報を読み取り、
tweepyとsnscrapeを使って、tweetを取得。
取得したツイートをCSVファイルに出力といった処理を実行します。import tweepy import csv import os import snscrape.modules.twitter as sntwitter import sys sys.dont_write_bytecode = True #ENV_VALUES tag = os.environ["TAG"] since_date = os.environ["FROM"] until_date = os.environ["UNTIL"] tweet_count = os.environ["NUM"] #Provide your own credentials here. TWITTER_CLIENT_KEY = '####################' TWITTER_CLIENT_SECRET = '########################' TWITTER_CLIENT_ID_ACCESS_TOKEN = '####################################' TWITTER_CLIENT_ID_ACCESS_TOKEN_SECRET = '################################' auth = tweepy.OAuthHandler(TWITTER_CLIENT_KEY, TWITTER_CLIENT_SECRET) auth.set_access_token(TWITTER_CLIENT_ID_ACCESS_TOKEN, TWITTER_CLIENT_ID_ACCESS_TOKEN_SECRET) api = tweepy.API(auth,wait_on_rate_limit=True) #pip install snscrape csvFile = open('/root/src/csv_files/%s_from_%s_to_%s_%s_tweets.csv' %(tag, since_date, until_date, tweet_count), 'a') csvWriter = csv.writer(csvFile) maxTweets = int(tweet_count) # the number of tweets you require print('%s since:%s until:%s' % (tag, since_date, until_date)) for i,tweet in enumerate(sntwitter.TwitterSearchScraper('%s' % tag +'since:%s until:%s' % (since_date, until_date)).get_items()) : if i > maxTweets : break csvWriter.writerow([tweet.date, tweet.username, tweet.content]) #If you need more information, just provide the attributesシェルスクリプト
ここではtwiiterという名前のコマンドのパスを通すことで、検索したい条件に一致する
ツイートを取得するための処理を全て実行させます。
ここで標準入力されたパラメータはDockerコンテナ内に環境変数として渡されます。command/twitter
#!/bin/sh
echo "次のデータを入力してenterを押してください"
read -p "ハッシュタグ(eg. #テスト): " str1
read -p "データ取得開始日(eg. 2020-08-10): " str2
read -p "データ取得終了日(eg. 2020-08-20): " str3
read -p "取得ツイート件数(eg. 100): " str4
TAG=$str1 FROM=$str2 UNTIL=$str3 NUM=$str4
echo "入力されたデータ"
echo $TAG $FROM $UNTIL $NUM

ANIMALS=("cheese" \
         "cock" \
         "dragon-and-cow" \
        "ghostbusters" \
        "pony" \
        "stegosaurus" \
        "turtle" \
        "turkey" \
        "gnu"\
        )
ANIMAL=${ANIMALS[$(($RANDOM % ${#ANIMALS[*]}))]}

docker-compose -f ~/path/to/docker-compose.yml \
    run \
    --rm \
    -e TAG=$TAG \
    -e FROM=$FROM \
    -e UNTIL=$UNTIL \
    -e NUM=$NUM \
    -e ANIMAL=$ANIMAL \
    python3 \
    /bin/bash -c "python /root/src/got_v2.py && cowsay -f $ANIMAL “ツイートを収集したよ” "

FILENAME="${TAG}_from_${FROM}_to_${UNTIL}_${NUM}_tweets.csv"
echo $FILENAME
mkdir -p ~/Desktop/twitter_csv_files
cp src/csv_files/$FILENAME ~/Desktop/twitter_csv_files
open ~/Desktop/twitter_csv_files/$FILENAME
Makefile
make pathでディレクトリの作成・twitterコマンドの作成を一発で実行してくれます。
makeコマンドは本リポジトリのルートディレクトリで実行します。
今回はユーザディレクトリの直下にcommadというディレクトリを作成し、
そこにtwitterコマンド用のスクリプトファイルを設置します。
make rm-pathでパスを削除可能。docker-path: @echo $(PWD) path: @mkdir ~/command @cp ./command/twitter ~/command/twitter @ln -si ~/command/twitter /usr/local/bin @chmod 777 ~/command/twitter rm-path: @rm -rf ~/command @rm /usr/local/bin/twitter実際に動かしてみた
今回作成したプログラムを動かしてみた動画を以下に記載します。
おまけ
先程の動画に謎の動物が入っていますが、こちらはcowsayというプログラムを
今回作成したDockerイメージにインストールしています。
作業者が単調な作業に飽きないように可愛い動物がランダムにCSVファイルの作成完了を
教えてくれるようにしました。
シェルスクリプトに書いた動物名をdockerの起動時にランダムに環境変数として渡し、
スクリプトの終盤にcowsayコマンドを実行させています。例
ここに書いた動物以外にも色々あるので、興味のある方は調べて追加してみてください。
参考記事
- シェルスクリプト https://qiita.com/Lambda34/items/7d24ebe6f7bde5bedddc
- GetOldTweet(TPL) https://github.com/hikkymouse1007/Get_Old_Tweets-Python
- Docker+Python3 https://qiita.com/reflet/items/4b3f91661a54ec70a7dc
- Cowsay https://qiita.com/Hiroki_lzh/items/8cf206d54f91e29b3912#unix%E3%81%A7%E6%9C%89%E5%90%8D%E3%81%AA%E3%82%A2%E3%82%B9%E3%82%AD%E3%83%BC%E3%82%A2%E3%83%BC%E3%83%88%E3%82%92%E5%87%BA%E5%8A%9B%E3%81%99%E3%82%8Bcowsay

- 投稿日:2020-12-15T22:20:53+09:00
Lambda on Terraform Container
はじめに
この記事はterraform Advent Calendar 2020の15日目です。
もともとTerraformのテストについてつらつら書こうとしましたが、re:Invent2020でLambdaのコンテナサポートされました
今回re:Invent2020で発表された中で、比較的反響がでかかった発表じゃないでしょうか
この波に乗らねば、ということで、Terraformをコンテナ化してLambdaで実行できるようにしてみました
※決してLambdaをTerraformで構築する記事ではありません構成
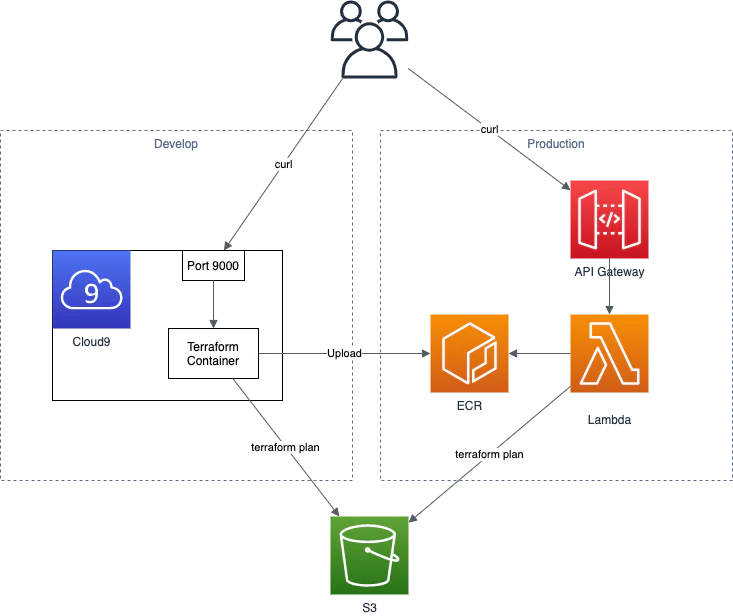
今回の構成は下記です
開発ではCloud9を利用して、内部でコンテナを使って確認を行い、本番ではECRにイメージをアップしてLambdaから利用するという形になります
今回は時間がなかったのでAPI Gatewayは未使用ですユースケース
ユースケースとしては下記の2つほどあるかと思ってます
- 共通実行基盤
- 監視
共通実行基盤としては、よくTerraformの実行基盤で悩む人がいると思うのですが、こちらを今回作成するLambdaを共通基盤とするのも一つの案かと思います
今回はただコードを持ってきて叩いてますが、これをCodeCommitやGithubで管理してるコードを引っ張ってくるようにすれば、最新コードをとってデプロイできるかと思います監視としては、よくコードとリソースが乖離している問題があると思いますが、今回のLambdaを利用すれば、乖離したら検知できるようにできます。今回の作成したAPIを叩けば追加・変更・削除のリソース数が取れるので、PrometheusでもDatadogでも利用すれば0じゃない時にアラートを出せるかと思います
リポジトリ
対象のリポジトリは下記です
https://github.com/Yusuke-Shimizu/terraform_on_lambda
記事読むのだるいって人はcloneして使ってください
Dockerfileと.envrcの値は各自修正してご利用ください(アクセスキーとシークレットキー書いたままプッシュしちゃダメだよ!)コンテナイメージ
コンテナをLambdaに乗っける場合、下記のどちらかで構築する必要があります
- ベースイメージを利用
- Lambda ランタイム APIを実装
ランタイムAPIは必要なAPIを作る必要があるので、柔軟性はありますが手間が多いです
ベースイメージの方が、FROMに入れて追加していくだけで簡単なため、今回はこちらを利用しますベースイメージの選定
今回はPythonを利用してTerraformを実行していきます
Terraform自体がGoなので、Goでやろうとしたのですが、いかんせんGoの経験が少ないのと、Lambda on Goの情報も少ないので断念しました。。
Amazon ECR Public Galleryを参考に下記のようにベースイメージを決めましたFROM public.ecr.aws/lambda/python:3.8 ...ちなみに、このFROMの
public.ecr.awsもre:Invent2020で発表されたECR Publicです
簡単にいうと、AWS版のDocker HubですTerraformのインストール
上記のPythonイメージはPythonの実行しか出来ないため、Terraformを実行できるようにする必要があります
そのため、下記のようにzipをインストールしてterraformの実行をできるようにしますARG terraform_version="0.14.2" ADD https://releases.hashicorp.com/terraform/${terraform_version}/terraform_${terraform_version}_linux_amd64.zip terraform_${terraform_version}_linux_amd64.zip RUN yum -y install unzip wget RUN unzip ./terraform_${terraform_version}_linux_amd64.zip -d /usr/local/bin/ RUN rm -f ./terraform_${terraform_version}_linux_amd64.zip ENV TF_DATA_DIR /tmp実行ディレクトリ
Lambdaは実行するとき、/var/taskディレクトリで実行するのですが、基本的にこのディレクトリでファイルを作成したり修正することはできません
参考:https://stackoverflow.com/questions/45608923/aws-lambda-errormessage-errno-30-read-only-file-system-drive-python-quicそのため、最後の
ENV TF_DATA_DIR /tmpでTFのデータ出力先を変更してます
参考:https://www.terraform.io/docs/commands/environment-variables.htmlDockerfileの残り
あとはAWSのキーや必要なファイルをコピーしてhandlerを実行するだけでDockerfileは完了です
AWSキーは本来はLambdaのロールを利用すれば良いのですが、ローカル検証も合わせて実行したいので、とりあえずで入れてます
本来はここもsts化するなり外部から環境変数を注入するタイプにしたほうが良いと思いますENV AWS_ACCESS_KEY_ID 【アクセスキー】 ENV AWS_SECRET_ACCESS_KEY 【シークレットキー】 # copy files COPY app.py ${LAMBDA_TASK_ROOT} COPY main.tf ${LAMBDA_TASK_ROOT} CMD [ "app.handler" ]Python
Pythonコードとしては、handle関数をapp.pyに作成すれば良いです
やってることとしては、tfファイルを/tmpにコピーして、terraformを初期化してplanを実行してます
/tmpに移動する理由としては、$ terraform initを実行したタイミングで、カレントディレクトリにファイルを作成するのですが、上記で説明したように/tmp以外でファイル作成が出来ないので、移動してから実行としていますdef handler(event, context): cmd('./', "cp ./main.tf /tmp/") cmd('/tmp/', "terraform init --upgrade") result = cmd('/tmp/', "terraform plan") last_result = extraction(result) return last_resultplanの結果は下記でaddやchangeの数を正規表現でとってきて、dictで返すようにしてます
def extraction(plan):
    print(plan)
    change_state = {'add': 0, 'change': 0, 'destroy': 0}
    if "No changes" in plan:
        return change_state
    elif "Plan" in plan:
        line_extraction = re.findall("Plan.*", plan)
        result = "".join(line_extraction)

        change_state['add'] = int(re.findall('(\d)\sto\sadd', result)[0])
        change_state['change'] = int(re.findall('(\d)\sto\schange', result)[0])
        change_state['destroy'] = int(re.findall('(\d)\sto\sdestroy', result)[0])
        return change_state
    elif "Error" in plan:
        line_extraction = re.findall("Error.*", plan)
        result = "".join(line_extraction)
        return result
    else:
        result = "予期せぬエラーです。ログを確認して下さい。"
        return result
Terraform
Terraformのコードは簡単にS3バケットの作成にしました
provider "aws" {
  region  = "ap-northeast-1"
}

resource "aws_s3_bucket" "default" {
  bucket = "created-by-lambda"
  acl    = "private"
}
ローカル(Cloud9)での実行
下記のように実行して、コンテナを起動します
$ export REPOSITORY_NAME=【リポジトリ名】
$ docker build -t ${REPOSITORY_NAME} .
$ docker run --rm -p 9000:8080 ${REPOSITORY_NAME}
そして、ローカルの9000番ポートを叩くと、下記のようにS3が作成されるため、addに1が入った状態でかえってきました
$ curl -sd '{}' http://localhost:9000/2015-03-31/functions/function/invocations | jq .
{
  "add": 1,
  "change": 0,
  "destroy": 0
}
ECRへアップ
上記で設定した
REPOSITORY_NAMEの名前でECRのリポジトリを作成します
その後、下記でイメージをプッシュすると、ECRへイメージがlatestで上がっています$ export AWS_ACCOUNT_ID=$(aws sts get-caller-identity | jq -r .Account) $ export REGISTRY_URL=${AWS_ACCOUNT_ID}.dkr.ecr.ap-northeast-1.amazonaws.com $ aws ecr get-login-password --region ap-northeast-1 | docker login --username AWS --password-stdin ${REGISTRY_URL} $ docker tag ${REPOSITORY_NAME} ${REGISTRY_URL}/${REPOSITORY_NAME} $ docker push ${REGISTRY_URL}/${REPOSITORY_NAME}Lambdaで実行
Lambdaの作成
まず実行基盤のLambdaを作成します
といっても、コンソールからポチポチやっていけば良いです
自動化するならsamかCDKが良いかと思います(個人的にはCDK推し)コンソールからだと、関数の作成からコンテナイメージを選択し、関数名適当に決めてコンテナイメージも「画像を参照」ボタンから対象のリポジトリのlatestを選択すればOKです
一点注意しないといけないのが、今回のTerraformの実行は時間がかかってメモリも多少食うので、下記のように設定してください
タイムアウト:1分
メモリ:4GB実行
さて、準備が出来たので、ようやくLambdaからコンテナのTerraformを叩いてみましょう
こちらもコンソールから軽くテスト出来るので、こちらで試してみましょうテストイベントは何でも良いので、デフォのものを利用して実行してみました
すると、下記のようにjsonでTerraformのplan結果が帰ってきました
これを利用すれば、外部からこのAPIを叩いて、現状のリソースとの差分がないかを監視することが出来ますさいごに
Lambdaがコンテナで実行できるようになったので、Terraformを入れて実行してみました
今後は、API Gatewayと連携してAPI化して、Terraformの監視をしたり、planだけじゃなくapplyを実行するアプリも作っていきたいですね

- 投稿日:2020-12-15T22:03:43+09:00
docker volume調べた
dockerのvolumeについて調べた。
・dockerコンテナの内部データは削除時に消える。
・データ永続化のためにホストやdocker volumeというdockerが管理する領域をマウントする。
・マウントに指定したファイルやディレクトリはコンテナ削除した後も残る(データがコンテナ外部に保存されている感じ)
・マウントには二種類ある。hostのディレクトリを同期するタイプとdockerが管理するvolume空間をマウントするやつ。
・前者をバインドマウント, 後者をvolumeという。
・前者は開発中のコードをコンテナ内に同期して開発するのに使ったりする(エディタで編集しながらコンテナ内にコードを配置できる)。後者はホスト側で管理しなくても良い時に使う(mysqlのデータとかnginxとphpを繋ぐソケットファイルとか)使い方 基本
docker run実行時に-v オプションでマウントできる
書式は-v ホストpath:コンテナpath。
ホストのpathに相対pathは使えないので絶対pathで書くこと。↓a.txtを同期させる $ docker run -it --rm -v ~/Documents/test/docker/volume_test/a.txt:/a.txt centos:centos8 [root@defef339acca /]# ls -la -rw-r--r-- 1 root root 4 Dec 15 12:02 a.txt 略ホスト側でa.txtを更新するとコンテナ側にも反映される。
また、コンテナ側から変更してもホスト側に反映される。$ echo "aaa" > a.txt ↓コンテナ側 [root@defef339acca /]# cat a.txt aaaホスト側でa.txtを削除するとコンテナ側でバグる。ls -la だと存在するが、ファイルへのアクセスはできなくなる。
[root@defef339acca /]# ls -la
-?????????   ? ?    ?       ?            ? a.txt
[root@defef339acca /]# cat a.txt
cat: a.txt: No such file or directory
コンテナ側でa.txtを削除しようとするとエラーになる。ファイル編集は可能。
[root@57c0c3b18570 /]# rm a.txt
rm: remove regular file 'a.txt'? yes
rm: cannot remove 'a.txt': Device or resource busy
a.txtがホスト側にない状態でマウントしようとすると、a.txtという名前でディレクトリが作成され、それがマウントされる。
[root@47850246319a /]# ls -la
drwxr-xr-x   2 root root   64 Dec 15 12:12 a.txt
ファイルだけでなく、ディレクトリもマウントできる。
$ mkdir hoge

$ touch hoge/a.txt

$ docker run -it --rm -v ~/Documents/test/docker/volume_test/hoge:/hoge centos:centos8

[root@3c0109bbdf3c /]# ls -la

drwxr-xr-x   3 root root   96 Dec 15 12:24 hoge
使い方 複数volumeマウント
-vオプションは複数使用できる。
$ docker run -it --rm -v ~/Documents/test/docker/volume_test/a.txt:/a.txt -v ~/Documents/test/docker/volume_test/b.txt:/b.txt centos:centos8
[root@19354f136991 /]# ls -la
-rw-r--r--   1 root root    0 Dec 15 12:14 a.txt
-rw-r--r--   1 root root    0 Dec 15 12:14 b.txt
使い方 dockerボリュームをマウントする
-vオプションの値を変えることでdockerボリュームをマウントできる
ホストのディレクトリをマウントする際は絶対pathを使用したが、dockerボリュームをマウントする際はvolume名を指定する
-v volume名:コンテナpath$ docker run -it --rm -v hoge:/hoge centos:centos8 [root@31ac4d5be7fa /]# ls -la drwxr-xr-x 2 root root 4096 Dec 15 12:40 hoge [root@31ac4d5be7fa /]# touch hoge/a.txt [root@31ac4d5be7fa /]# exit --rmをつけてコンテナ起動しているのでexit時にコンテナは破棄される。 ↓再度コンテナを作成する $ docker run -it --rm -v hoge:/hoge centos:centos8 ↓hogeはdockerボリュームになっているので永続化されていることが分かる。 [root@4c03049e11c9 /]# ls hoge a.txtdocker volumeをコマンドで確認する
$ docker volume ls
DRIVER    VOLUME NAME
local     hoge
dockerボリュームをマウントする際はvolume名を指定しなくても良い。
volume名を指定しないvolumeを匿名ボリュームという。
その場合は、コンテナpathだけ指定する。
-v コンテナpath$ docker run -it --rm -v /fuga centos:centos8 [root@6806bc7b9bcf /]# ls -la drwxr-xr-x 2 root root 4096 Dec 15 12:44 fugaただし、volume名を指定しないとvolume名はハッシュ値となり何のvolumeなのか分かりづらくなるのでおすすめしない。
$ docker volume ls
DRIVER    VOLUME NAME
local     16fba3a332888fcd049a7dd569d6d27f360cc07ef58000bfee93f25e85416df9
また、volume名をつけない + --rm付きで起動した場合、コンテナ内でディレクトリは作成されたがvolumeは作成されず永続化されなかった。--rmなしでやるとvolumeが作成された。
(あれ、こんな挙動だったっけ?)docker volumeコマンド
docker volumeコマンドには以下がある。
$ docker volume

Usage:  docker volume COMMAND

Manage volumes

Commands:
  create      Create a volume
  inspect     Display detailed information on one or more volumes
  ls          List volumes
  prune       Remove all unused local volumes
  rm          Remove one or more volumes

Run 'docker volume COMMAND --help' for more information on a command.
ls でvolume一覧を表示する。
prune で未使用のローカルvolume削除
rm で特定のvolume削除docker volume inspectについて
inspect = 検査。
volumeの詳細情報を教えてくれるらしい。
Mountpointを見るとvolumeがどこに格納されているか分かる。このpathはmac上のpathではなくdocker engineが動いているvm上のpath。$ docker volume ls DRIVER VOLUME NAME local 16fba3a332888fcd049a7dd569d6d27f360cc07ef58000bfee93f25e85416df9 local bbb local hoge $ docker volume inspect hoge [ { "CreatedAt": "2020-12-15T12:40:52Z", "Driver": "local", "Labels": null, "Mountpoint": "/var/lib/docker/volumes/hoge/_data", "Name": "hoge", "Options": null, "Scope": "local" } ]参考
公式
https://matsuand.github.io/docs.docker.jp.onthefly/storage/volumes/
- 投稿日:2020-12-15T21:52:40+09:00
dokcer-compose run で Please run `yarn install –check-files` to update.エラー
はじめに
Docker環境を構築してる際にエラーが出たので、その解決方法をメモととして記事に残します。
Docker内の環境
ruby 2.6.3-alpine3.10
rails 6.0.1事象
dokcer-compose run を実行すると下記エラーコードが出た。
エラーコード
Please run `yarn install –check-files` to update.対処方法
config/environmet/development.rb に下記のyarnの設定に関するコードを追加する
config.webpacker.check_yarn_integrity = false以上で解決できると思います。
- 投稿日:2020-12-15T21:20:27+09:00
既存のRails6プロジェクト(API)をDockerで開発(少しイメージの軽量化)
本記事は東京学芸大学 櫨山研究室 Advent Calendar 2020の15日目の記事になります.
はじめに
本記事はRails6が出たのでその環境をDocker化し,また少しイメージを軽くする方法です(RDBはMysql8.0を想定).
起動を確認するところまでを記事にしています.
railsのプロジェクトはローカルで作成したもの使用しています(私はローカルで以下のように作成しています).console$ rails new api --api -d mysqlフロントとバックエンドを分けて開発を行いたかったので,Rails6プロジェクトをapiモードで作成しています.
また本記事ではフロントエンド側の記述はしていません.
普段はRailsを使用していないので,メモとして残します?♂️開発環境
- MacOs:
- Docker:
- docker-compose:
- ruby:2.6.3(rbenv で管理: 参考記事)
- Rails 6
- Mysql8.0
1. 準備
今回は既存のRails6プロジェクト(apiモード)をDockerしていきます.
1.1 ディレクトリ構成
今回はdocker-compose.ymlやDockerfileが階層的になっているため,
makeで実行していきます.1.2 ファイルの準備
Makefile
Makefile.PHONY: build build: docker-compose -f docker/docker-compose.yml build .PHONY: start start: docker-compose -f docker/docker-compose.yml up --remove-orphans .PHONY: start.background start.background: docker-compose -f docker/docker-compose.yml up -d --remove-orphans .PHONY: stop stop: docker-compose -f docker/docker-compose.yml down
buildでパッケージの取得startでアプリケーションを実行start.backgroundでバックグラウンドでアプリケーションを実行stopでアプリケーションを停止docker-compose.yml
docker/docker-compose.ymlversion: "3" services: api: container_name: api build: context: ../. dockerfile: ./docker/api/Dockerfile tty: true working_dir: /api volumes: - ../api:/api env_file: # dockerディレクトリ直下にapi.envファイルを作成し環境変数を設定する. - api.env ports: - "8000:3000" # フロントエンド側が3000番開放になるので変更 depends_on: - db command: bundle exec rails s -p 3000 -b '0.0.0.0' networks: - sample-rails-docker-network db: container_name: db build: context: ../. dockerfile: ./docker/mysql/Dockerfile volumes: - ./mysql/db:/docker-entrypoint-initdb.d env_file: # dockerディレクトリ直下にmysql.envファイルを作成し環境変数を設定する. - mysql.env networks: - sample-rails-docker-network networks: # 名前解決できるようにネットワークの設定 sample-rails-docker-network: driver: bridgeDockerfile:Mysql関連
docker/mysql/my.cnfFROM mysql:8.0 # mysq;8.0を使用する EXPOSE 3306 ADD docker/mysql/my.cnf /etc/mysql/conf.d/my.cnf CMD ["mysqld"]3306番ポートを開放し,設定ファイルを読み込みます.
docker/mysql/Dockerfile[mysqld] character-set-server=utf8 default_authentication_plugin=mysql_native_password [mysql] default-character-set=utf8 [client] default-character-set=utf8mysqlのvolumeは
docker/mysql/dbに設定しているので,必要な場合はそちらに配置してください.Dockerfile:Rails 6関連
docker/api/DockerfileFROM ruby:2.6.3-alpine as builder # ruby:2.6.3-alpineを使用する,bundle installするためにbuilderとして使用 RUN apk update && \ apk upgrade && \ apk --no-cache add mysql-client mysql-dev tzdata build-base && \ gem install bundler WORKDIR /tmp COPY api/Gemfile Gemfile COPY api/Gemfile.lock Gemfile.lock RUN bundle install FROM ruby:2.6.3-alpine ENV LANG ja_JP.UTF-8 RUN apk --update add mysql-client mysql-dev tzdata nodejs && \ gem install bundler ENV APP_HOME /api RUN mkdir -p $APP_HOME WORKDIR $APP_HOME COPY --from=builder /usr/local/bundle /usr/local/bundle COPY api $APP_HOME今回使用するimageは
ruby:2.6.3-alpineですが,それぞれの環境で変更しても大丈夫です.
マルチステージングにし,bundle installにだけ必要なもの(build-base)を省くようにする.(apk delで消しても問題ない.)
今回はmysqlが動く最低限の環境になっています.Rails関連
Gemfile
api/Gemfilesource 'https://rubygems.org' git_source(:github) { |repo| "https://github.com/#{repo}.git" } ruby '2.6.3' # Bundle edge Rails instead: gem 'rails', github: 'rails/rails' gem 'rails', '~> 6.0.3', '>= 6.0.3.2' # database gem 'mysql2' # Use Puma as the app server gem 'puma', '~> 4.1' # Reduces boot times through caching; required in config/boot.rb gem 'bootsnap', '>= 1.4.2', require: false # Use Rack CORS for handling Cross-Origin Resource Sharing (CORS), making cross-origin AJAX possible gem 'rack-cors' group :development, :test do # Call 'byebug' anywhere in the code to stop execution and get a debugger console gem 'byebug', platforms: [:mri, :mingw, :x64_mingw] end group :development do gem 'listen', '~> 3.2' # Spring speeds up development by keeping your application running in the background. Read more: https://github.com/rails/spring gem 'spring' gem 'spring-watcher-listen', '~> 2.0.0' end # Windows does not include zoneinfo files, so bundle the tzinfo-data gem gem 'tzinfo-data', platforms: [:mingw, :mswin, :x64_mingw, :jruby]Gemfileは,
mysql2,rack-corsを設定しています.
rack-corsはCORSの設定です.こちらもそれぞれの開発環境に合わせて変更してください(変更時にはDockerfileでapk add で加えるパッケージもも変更する必要があるので気をつけてください).
cors.rb
api/config/initializers/cors.rb# Be sure to restart your server when you modify this file. # Avoid CORS issues when API is called from the frontend app. # Handle Cross-Origin Resource Sharing (CORS) in order to accept cross-origin AJAX requests. # Read more: https://github.com/cyu/rack-cors Rails.application.config.middleware.insert_before 0, Rack::Cors do allow do origins '*' resource '*', headers: :any, methods: [:get, :post, :put, :patch, :delete, :options, :head] end endCORSの設定は全てを許可しているので,それぞれで変更しましょう.
ルーティング(routes.rb)
api/config/routes.rbRails.application.routes.draw do namespace 'api' do namespace 'v1' do resources :hoges end end endAPIなのでルーティングをVersion管理しやすくしておきます.
コントローラー(hoges_controller.rb)
api/app/controllers/api/v1/hoges_controller.rbmodule Api module V1 class HogesController < ApplicationController def index render json: { status: 'SUCCESS', message: 'Hello Rails!'} end end end end2. ビルドとアプリケーションの実行
2.1 rails new
今回は既存のプロジェクトを使用したので,省略します.(参考記事)
2.2 rake db:create
今回はDBの接続確認はしないので省略します.
参考までにapi直下で,以下のコマンドで環境を作成できます.console$ rails g model post title:string text:text $ rails g controller posts $ rails db:create $ rake db:migrate2-3. 依存関係の解決&imageの取得
console$ make build
apk add [パッケージ]とbundle installをしますので,少し時間がかかります.2-4. アプリケーションの実行
console$ make startRailsとmysqlが起動します.
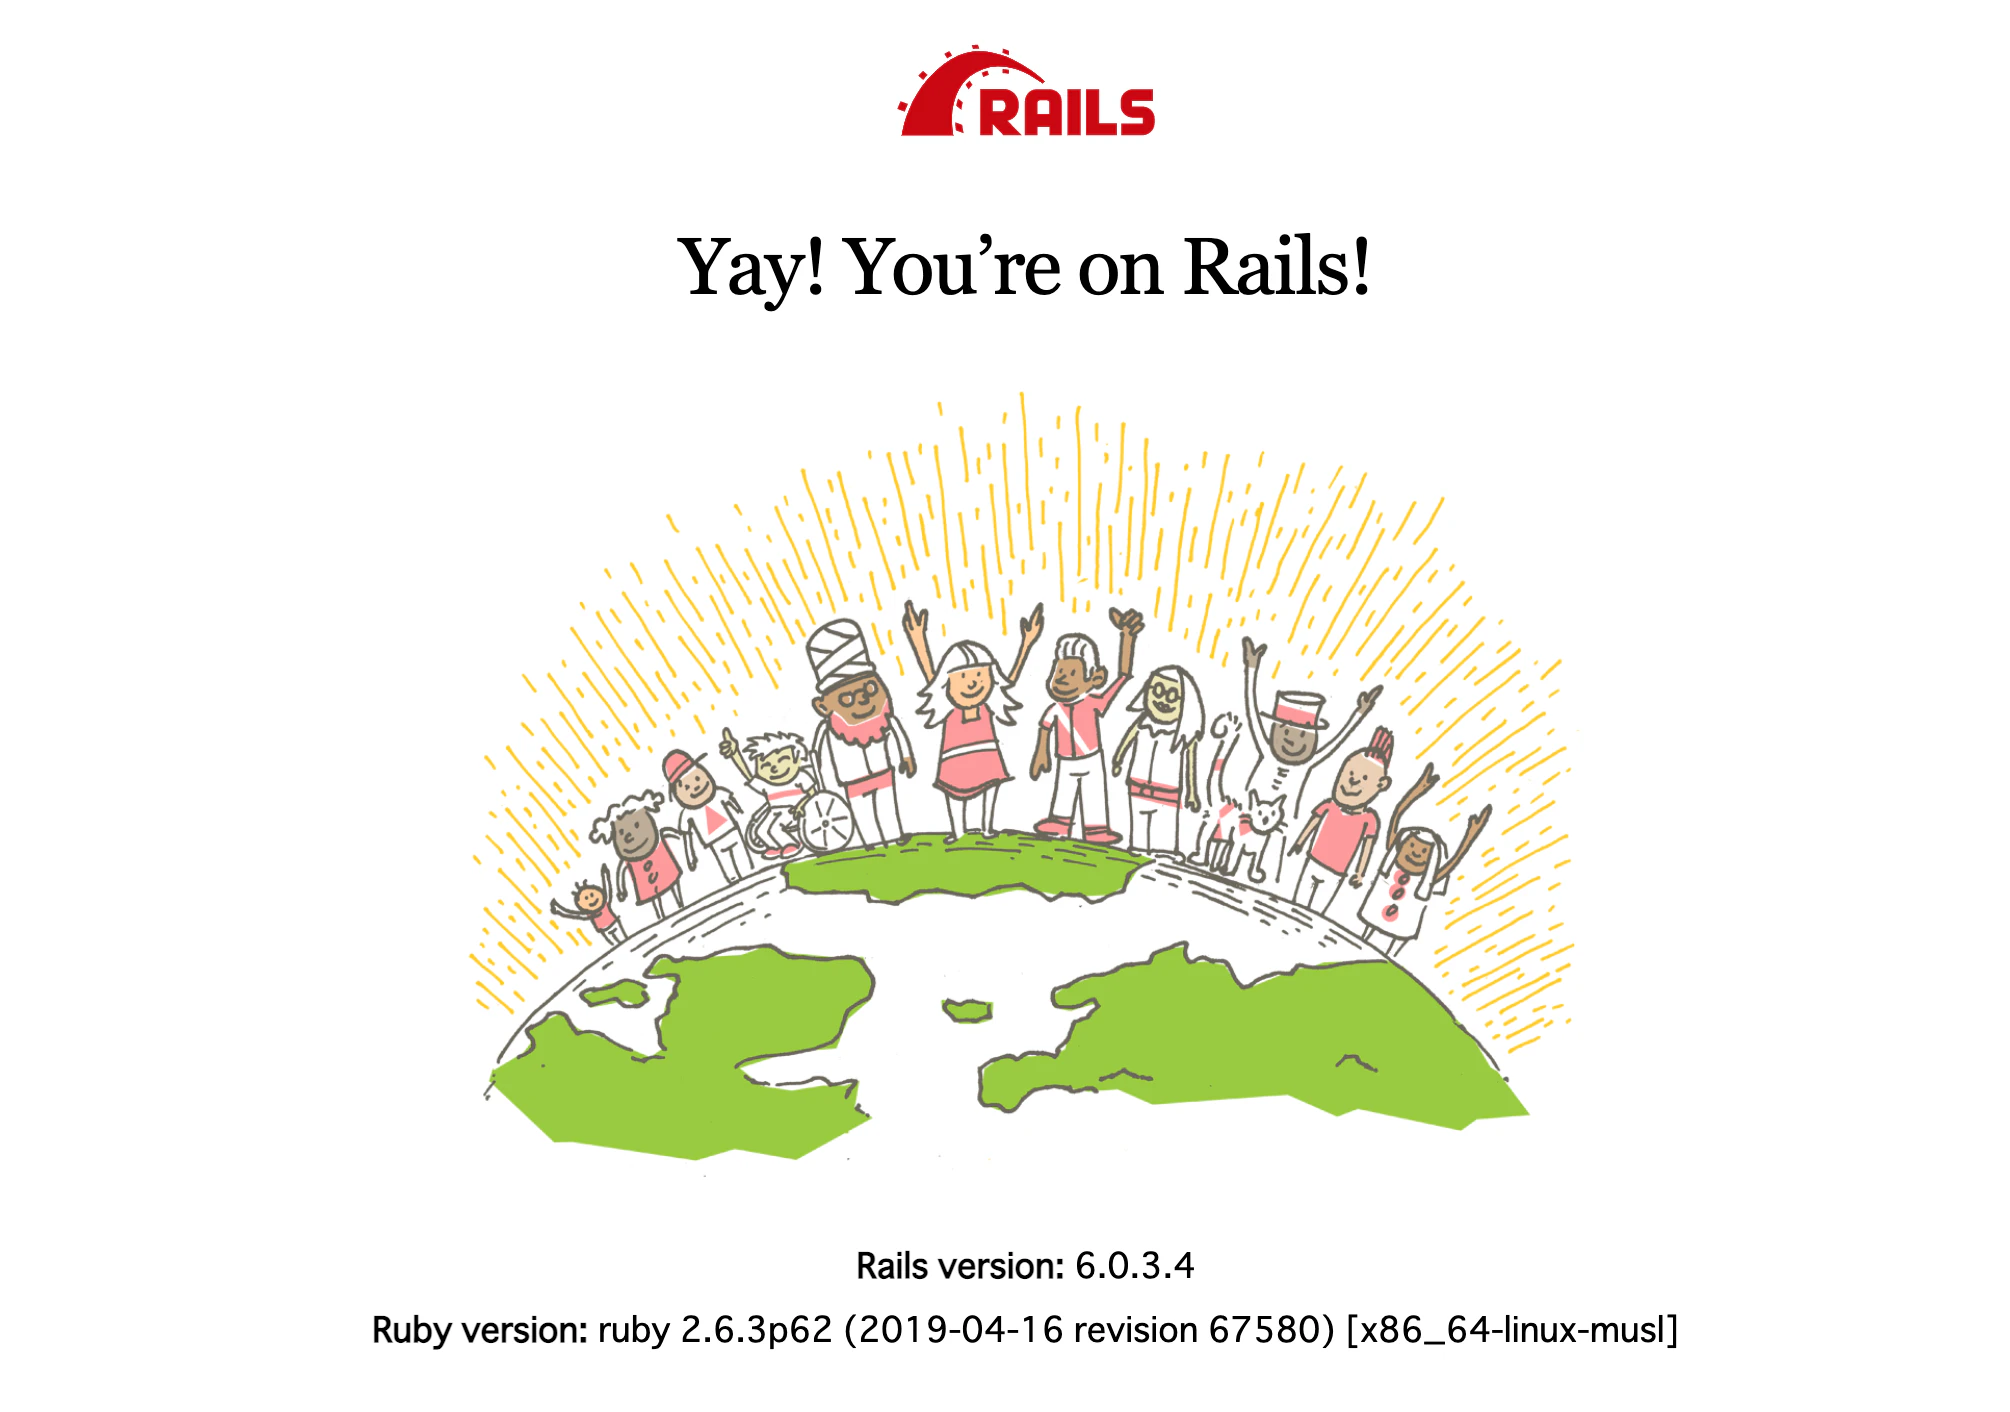
起動の確認
いつもの画面が出てくれば問題なく起動できています.
api化の確認
console% curl http://localhost:8000/api/v1/hoges {"status":"SUCCESS","message":"Hello Rails!"}%問題なくできています!!
2.5 他のイメージと比較
サイズはプロジェクト事態が存在しての大きさになります.
イメージ サイズ ruby:2.6.3 1.1GB ruby:2.6.3-alpine 387MB ruby:2.6.3-alpine(ビルドベース削除) 264MB
bundle install時に必要なbuild-baseを削除するだけでかなり削減されています!おわりに
Rails6が出たので,そのAPIプロジェクトのDocker化,微量ながら軽量化をしました.
特に元イメージとalpineの差はとても大きいので,イメージサイズを減らすことができてよかったです.
これで好きなフロントエンドを使用してRailsのAPIを使用します.
- 投稿日:2020-12-15T21:20:27+09:00
Rails6プロジェクト(API)をDockerで開発(少しイメージの軽量化)
本記事は東京学芸大学 櫨山研究室 Advent Calendar 2020の15日目の記事になります.
はじめに
本記事はRails6が出たのでその環境をDocker化し,また少しイメージを軽くする方法です(RDBはMysql8.0を想定).
起動を確認するところまでを記事にしています.
railsのプロジェクトはローカルで作成したもの使用しています(私はローカルで以下のように作成しています).console$ rails new api --api -d mysqlフロントとバックエンドを分けて開発を行いたかったので,Rails6プロジェクトをapiモードで作成しています.
また本記事ではフロントエンド側の記述はしていません.
普段はRailsを使用していないので,メモとして残します?♂️開発環境
- MacOs:
- Docker:
- docker-compose:
- ruby:2.6.3(rbenv で管理: 参考記事)
- Rails 6
- Mysql8.0
1. 準備
今回は既存のRails6プロジェクト(apiモード)をDockerしていきます.
1.1 ディレクトリ構成
今回はdocker-compose.ymlやDockerfileが階層的になっているため,
makeで実行していきます.1.2 ファイルの準備
Makefile
Makefile.PHONY: build build: docker-compose -f docker/docker-compose.yml build .PHONY: start start: docker-compose -f docker/docker-compose.yml up --remove-orphans .PHONY: start.background start.background: docker-compose -f docker/docker-compose.yml up -d --remove-orphans .PHONY: stop stop: docker-compose -f docker/docker-compose.yml down
buildでパッケージの取得startでアプリケーションを実行start.backgroundでバックグラウンドでアプリケーションを実行stopでアプリケーションを停止docker-compose.yml
docker/docker-compose.ymlversion: "3" services: api: container_name: api build: context: ../. dockerfile: ./docker/api/Dockerfile tty: true working_dir: /api volumes: - ../api:/api env_file: # dockerディレクトリ直下にapi.envファイルを作成し環境変数を設定する. - api.env ports: - "8000:3000" # フロントエンド側が3000番開放になるので変更 depends_on: - db command: bundle exec rails s -p 3000 -b '0.0.0.0' networks: - sample-rails-docker-network db: container_name: db build: context: ../. dockerfile: ./docker/mysql/Dockerfile volumes: - ./mysql/db:/docker-entrypoint-initdb.d env_file: # dockerディレクトリ直下にmysql.envファイルを作成し環境変数を設定する. - mysql.env networks: - sample-rails-docker-network networks: # 名前解決できるようにネットワークの設定 sample-rails-docker-network: driver: bridgeDockerfile:Mysql関連
docker/mysql/my.cnfFROM mysql:8.0 # mysq;8.0を使用する EXPOSE 3306 ADD docker/mysql/my.cnf /etc/mysql/conf.d/my.cnf CMD ["mysqld"]3306番ポートを開放し,設定ファイルを読み込みます.
docker/mysql/Dockerfile[mysqld] character-set-server=utf8 default_authentication_plugin=mysql_native_password [mysql] default-character-set=utf8 [client] default-character-set=utf8mysqlのvolumeは
docker/mysql/dbに設定しているので,必要な場合はそちらに配置してください.Dockerfile:Rails 6関連
docker/api/DockerfileFROM ruby:2.6.3-alpine as builder # ruby:2.6.3-alpineを使用する,bundle installするためにbuilderとして使用 RUN apk update && \ apk upgrade && \ apk --no-cache add mysql-client mysql-dev tzdata build-base && \ gem install bundler WORKDIR /tmp COPY api/Gemfile Gemfile COPY api/Gemfile.lock Gemfile.lock RUN bundle install FROM ruby:2.6.3-alpine ENV LANG ja_JP.UTF-8 RUN apk --update add mysql-client mysql-dev tzdata nodejs && \ gem install bundler ENV APP_HOME /api RUN mkdir -p $APP_HOME WORKDIR $APP_HOME COPY --from=builder /usr/local/bundle /usr/local/bundle COPY api $APP_HOME今回使用するimageは
ruby:2.6.3-alpineですが,それぞれの環境で変更しても大丈夫です.
マルチステージングにし,bundle installにだけ必要なもの(build-base)を省くようにする.(apk delで消しても問題ない.)
今回はmysqlが動く最低限の環境になっています.Rails関連
Gemfile
api/Gemfilesource 'https://rubygems.org' git_source(:github) { |repo| "https://github.com/#{repo}.git" } ruby '2.6.3' # Bundle edge Rails instead: gem 'rails', github: 'rails/rails' gem 'rails', '~> 6.0.3', '>= 6.0.3.2' # database gem 'mysql2' # Use Puma as the app server gem 'puma', '~> 4.1' # Reduces boot times through caching; required in config/boot.rb gem 'bootsnap', '>= 1.4.2', require: false # Use Rack CORS for handling Cross-Origin Resource Sharing (CORS), making cross-origin AJAX possible gem 'rack-cors' group :development, :test do # Call 'byebug' anywhere in the code to stop execution and get a debugger console gem 'byebug', platforms: [:mri, :mingw, :x64_mingw] end group :development do gem 'listen', '~> 3.2' # Spring speeds up development by keeping your application running in the background. Read more: https://github.com/rails/spring gem 'spring' gem 'spring-watcher-listen', '~> 2.0.0' end # Windows does not include zoneinfo files, so bundle the tzinfo-data gem gem 'tzinfo-data', platforms: [:mingw, :mswin, :x64_mingw, :jruby]Gemfileは,
mysql2,rack-corsを設定しています.
rack-corsはCORSの設定です.こちらもそれぞれの開発環境に合わせて変更してください(変更時にはDockerfileでapk add で加えるパッケージもも変更する必要があるので気をつけてください).
cors.rb
api/config/initializers/cors.rb# Be sure to restart your server when you modify this file. # Avoid CORS issues when API is called from the frontend app. # Handle Cross-Origin Resource Sharing (CORS) in order to accept cross-origin AJAX requests. # Read more: https://github.com/cyu/rack-cors Rails.application.config.middleware.insert_before 0, Rack::Cors do allow do origins '*' resource '*', headers: :any, methods: [:get, :post, :put, :patch, :delete, :options, :head] end endCORSの設定は全てを許可しているので,それぞれで変更しましょう.
ルーティング(routes.rb)
api/config/routes.rbRails.application.routes.draw do namespace 'api' do namespace 'v1' do resources :hoges end end endAPIなのでルーティングをVersion管理しやすくしておきます.
コントローラー(hoges_controller.rb)
api/app/controllers/api/v1/hoges_controller.rbmodule Api module V1 class HogesController < ApplicationController def index render json: { status: 'SUCCESS', message: 'Hello Rails!'} end end end end2. ビルドとアプリケーションの実行
2.1 rails new
今回は既存のプロジェクトを使用したので,省略します.(参考記事)
2.2 rake db:create
今回はDBの接続確認はしないので省略します.
参考までにapi直下で,以下のコマンドで環境を作成できます.console$ rails g model post title:string text:text $ rails g controller posts $ rails db:create $ rake db:migrate2-3. 依存関係の解決&imageの取得
console$ make build
apk add [パッケージ]とbundle installをしますので,少し時間がかかります.2-4. アプリケーションの実行
console$ make startRailsとmysqlが起動します.
起動の確認
いつもの画面が出てくれば問題なく起動できています.
api化の確認
console% curl http://localhost:8000/api/v1/hoges {"status":"SUCCESS","message":"Hello Rails!"}%問題なくできています!!
2.5 他のイメージと比較
サイズはプロジェクト事態が存在しての大きさになります.
イメージ サイズ ruby:2.6.3 1.1GB ruby:2.6.3-alpine 387MB ruby:2.6.3-alpine(ビルドベース削除) 264MB
bundle install時に必要なbuild-baseを削除するだけでかなり削減されています!おわりに
Rails6が出たので,そのAPIプロジェクトのDocker化,微量ながら軽量化をしました.
特に元イメージとalpineの差はとても大きいので,イメージサイズを減らすことができてよかったです.
これで好きなフロントエンドを使用してRailsのAPIを使用します.
- 投稿日:2020-12-15T21:14:57+09:00
【入門】はじめての Docker Desktop for Mac のインストールと CentOS の仮想環境構築のセットアップ
【入門】はじめての Docker Desktop for Mac のインストールと CentOS の仮想環境構築のセットアップ
最近では、Linuxの環境を利用したいときに 無償の Docker Desktop (for Mac and Windows ) で Linuxコンテナを使うというのがお手軽になりつつあります。
今回、MacBookに Doker Desktop for Mac をインストールし、CentOSの仮想環境を構築する手順について、はじめがからていねいにまとめて、ご紹介します。また、途中で Dockerコマンドなどについても詳しく説明していくので、 Docker初心者で CentOSの仮想環境を構築したいという方は、是非参考にしていただければ幸いです。
- 前提条件
- 事前準備
- Docker Desktop for Mac のインストール
- CentOS コンテナ (仮想環境) の構築
- CentOS コンテナ (仮想環境)の整備
- 作業済み CentOS コンテナ (仮想環境)の保存
なお、Windows 10のノートPCに Doker Desktop for Windows をインストールし、CentOSの仮想環境を構築する手順については「【入門】はじめての Docker Desktop for Windows のインストールと CentOS の仮想環境構築のセットアップ」の方を参照していただければと思います。
前提条件
システム要件の詳細はこちらを参照してください。
なお、今回インストールしたデバイスの仕様とWindowsの仕様は次の通りです。
- MacBook Pro (13-inch, 2016, Four Thunderbolt 3 Ports)
- プロセッサ 2.9 GHz デュアルコアIntel Core i5
- メモリ 16 GB 2133 MHz LPDDR3
- エディション Windows 10 Pro
- macOS Big Sur バージョン 11.0.1Docker Desktop for Mac のインストール
インストール
インストーラーをダウンロードする
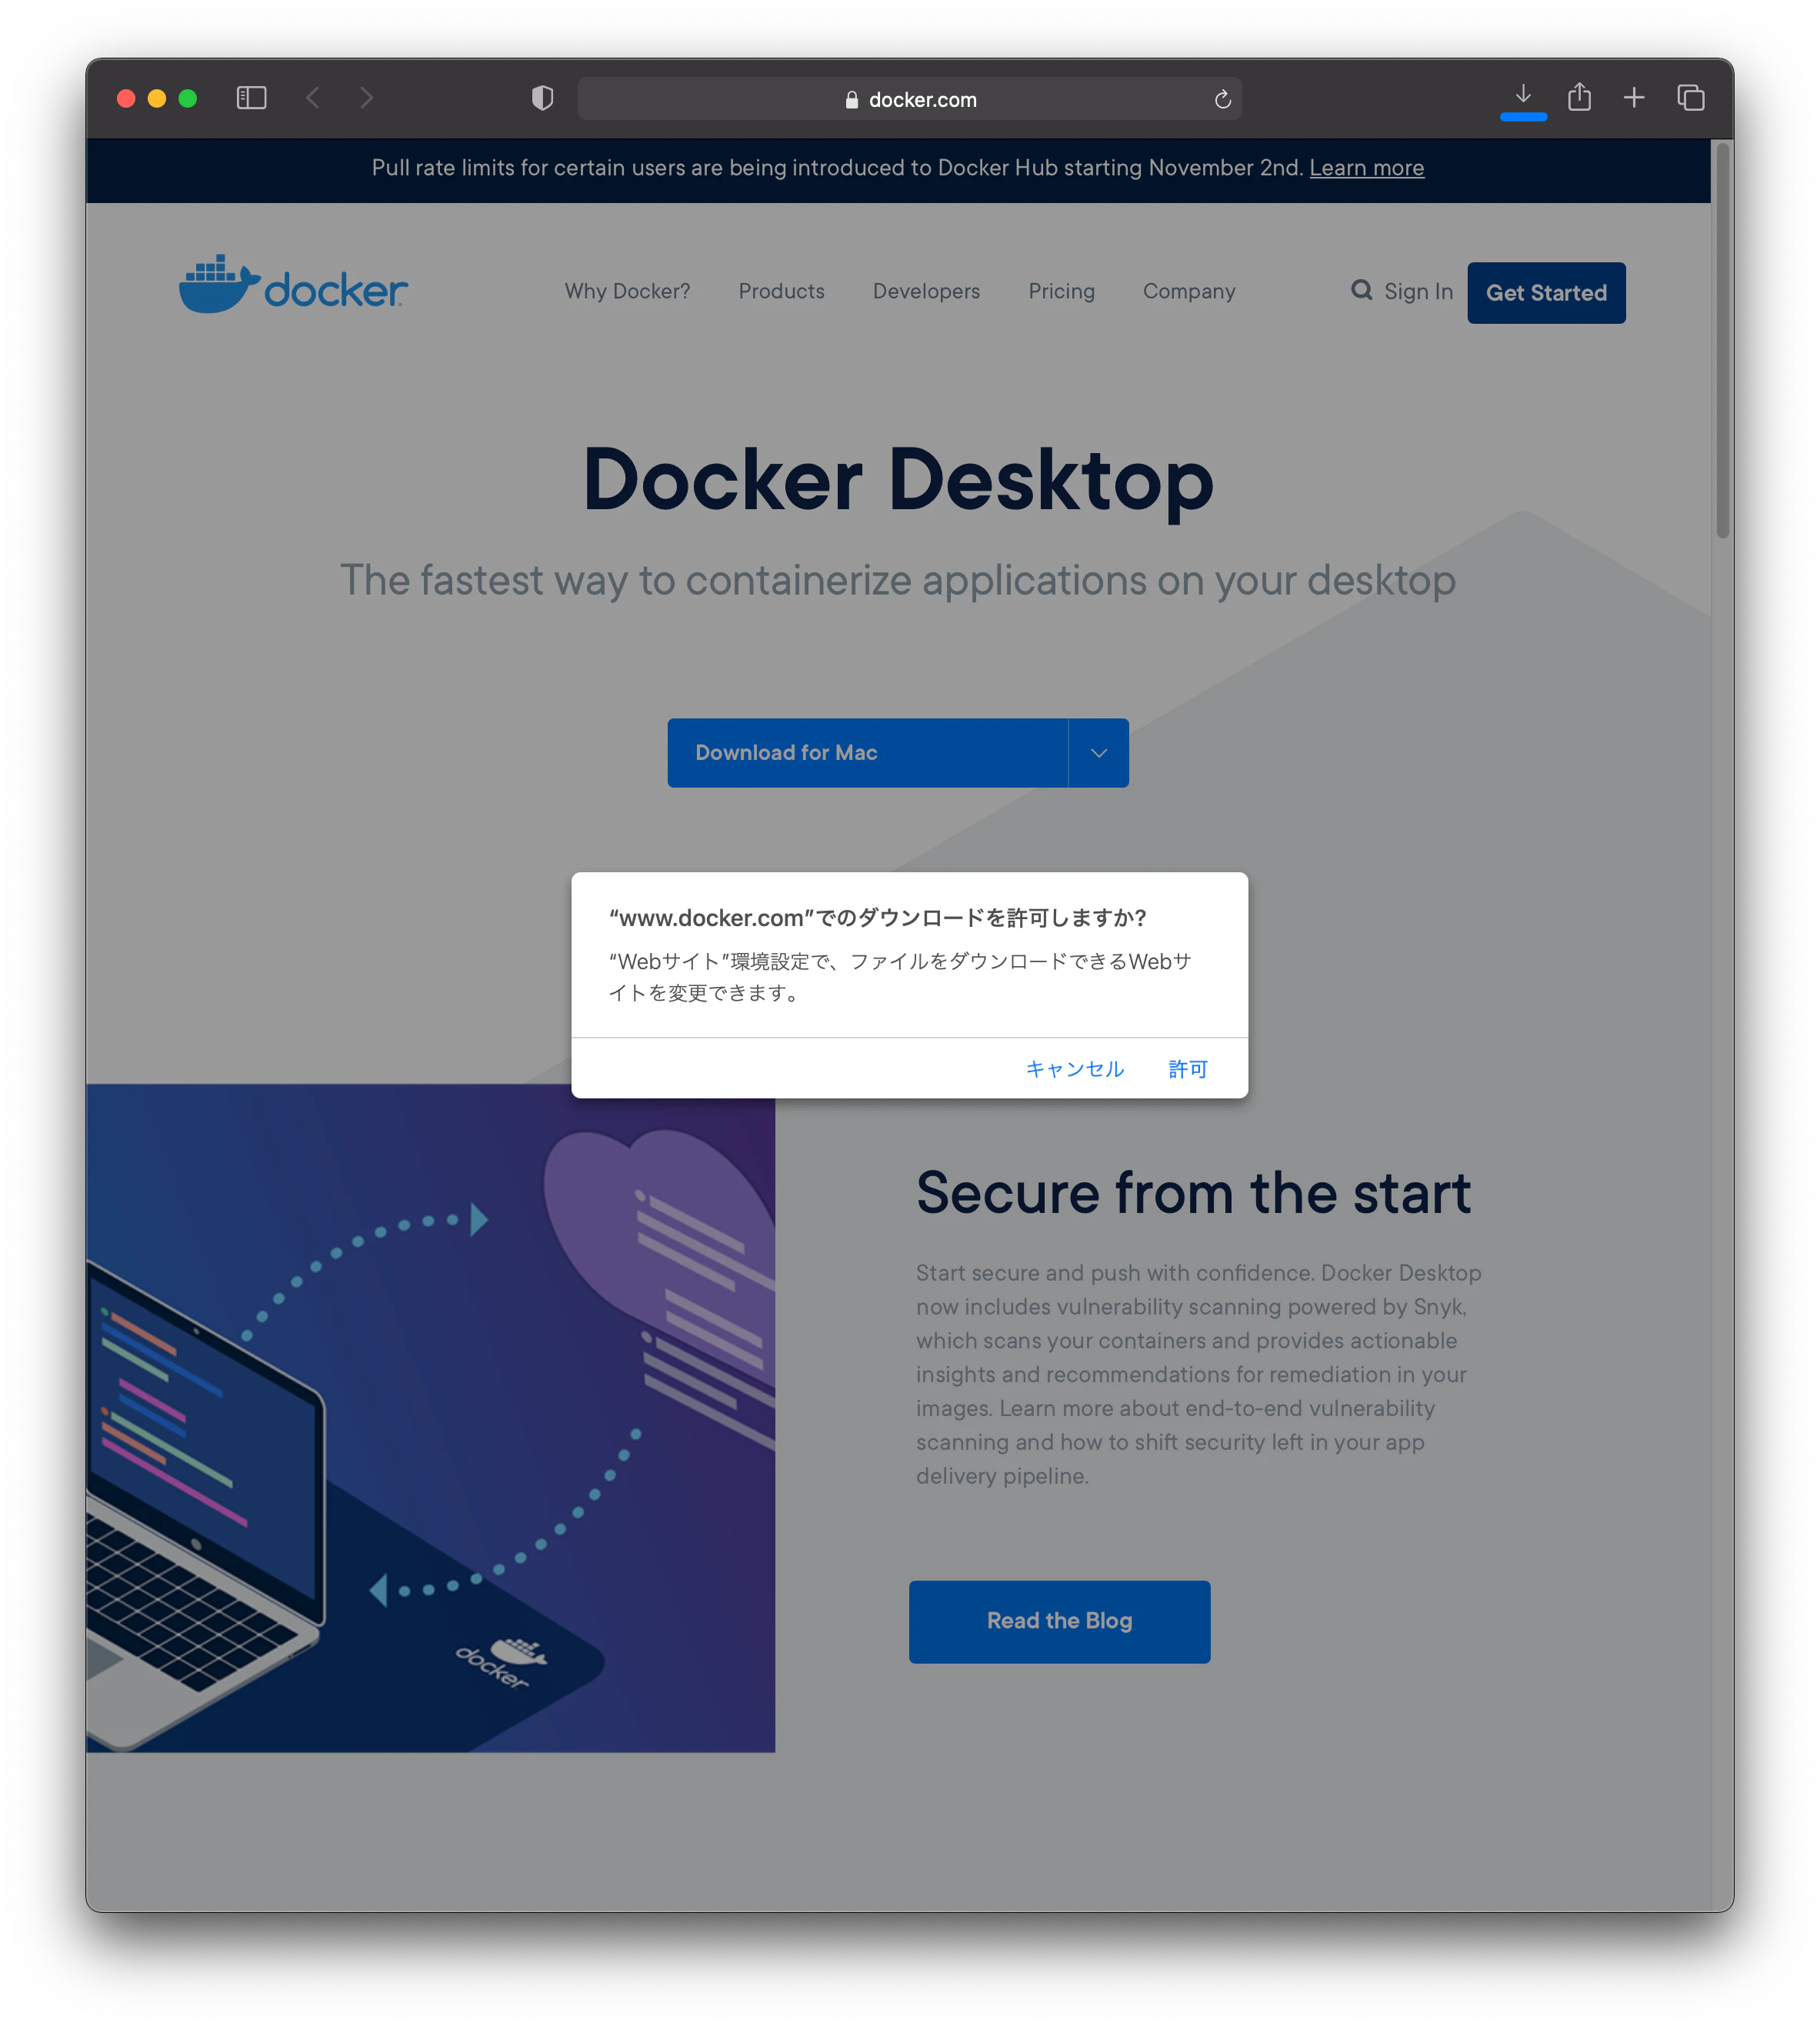
インストールは次のサイトで Docker for Mac インストーラーをダウンロードしてインストールしていくことができます。
https://www.docker.com/products/docker-desktop
[Download for Mac] のダウンロードボタンをクリックします。
これで、[Docker.dmg] ファイルがダウンロードできます。ファイルは1つだけです。ここまでで MacBookマシンへのダウンロードまでが完了です。
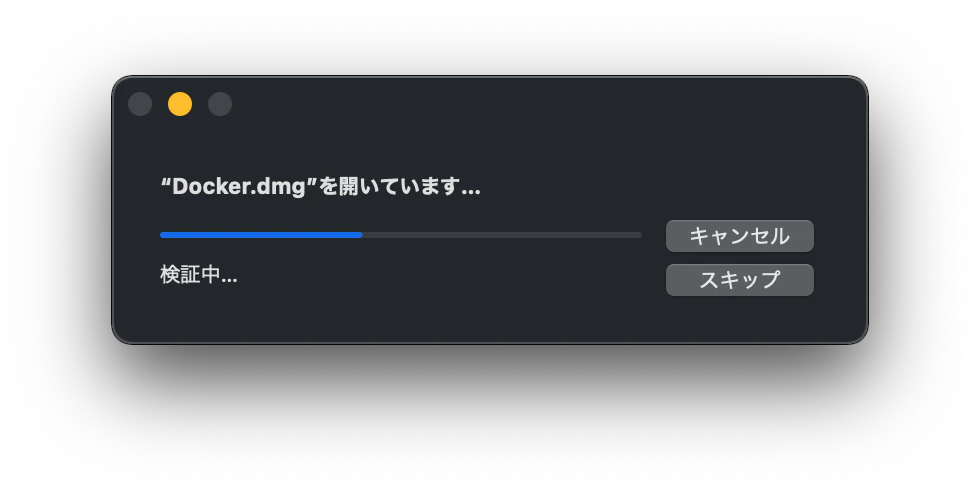
MacBookマシンへのインストールする
次はインストールを行います。ダウンロードした[Docker.dmg] ファイルをダブルクリックしてインストーラを実行します。
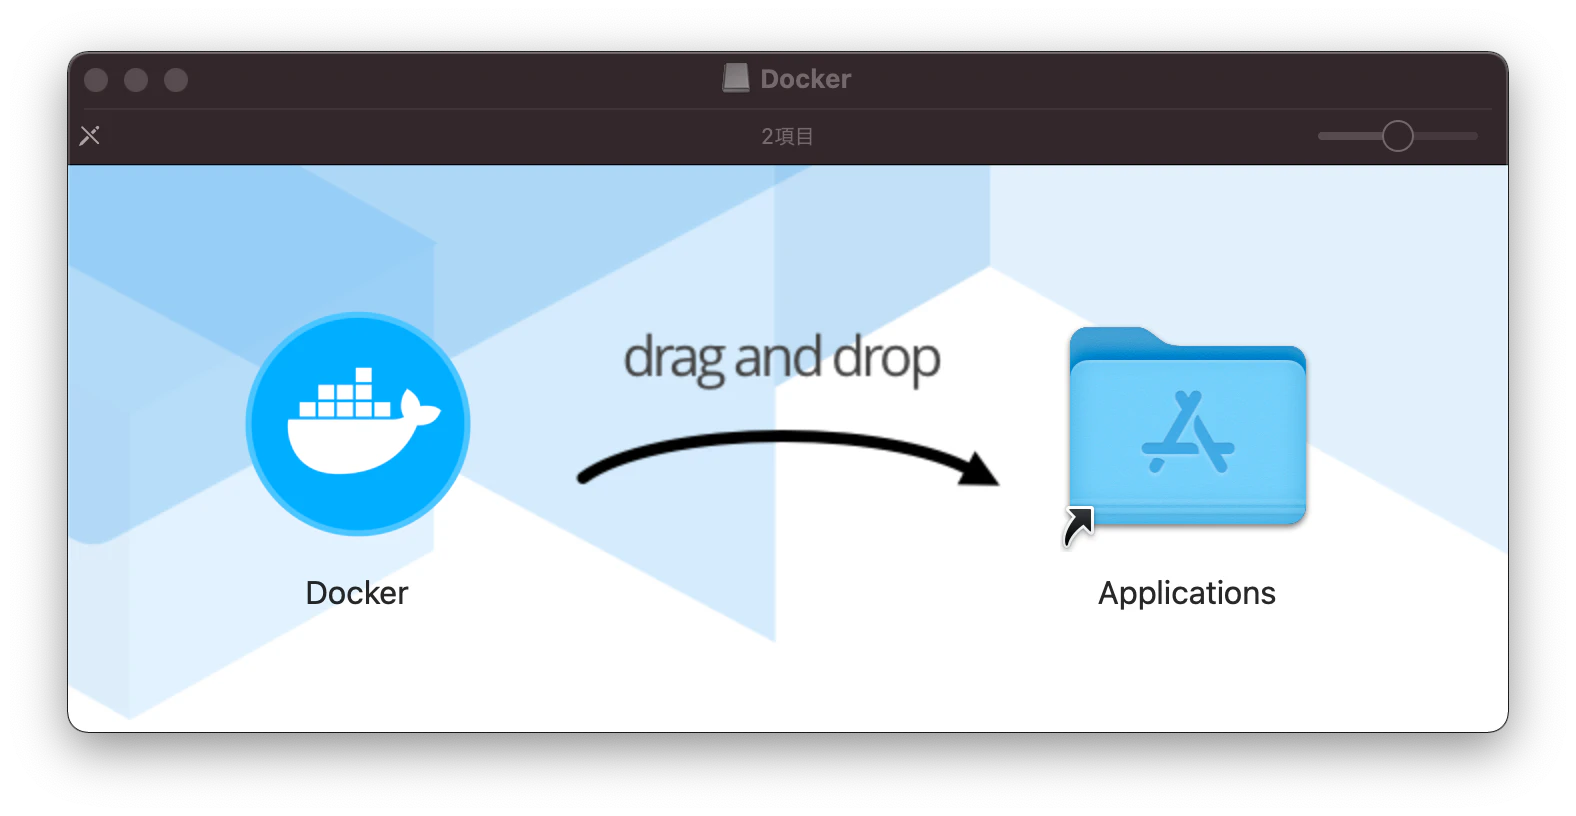
左側の「Docker」のアイコンを右側の「Appllications」フォルダにドラッグ&ドロップします。
アプリケーション一覧を確認し、Docker.appが入っていたらインストール完了です。Dockerの起動
アプリケーションから「Docker.app」をクリックして起動します。
初回起動時にセキュリティ警告が出たら「開く」をクリックします。
ネットワークコンポーネントへのアクセスを問われるウィンドウが出たら「OK」を押して許可のためMacBook本体のパスワードを入力します。
初回起動時にはダッシュボード上にチュートリアルが表示されます。とりあえず、「Skip tutorial」をクリックしてください。
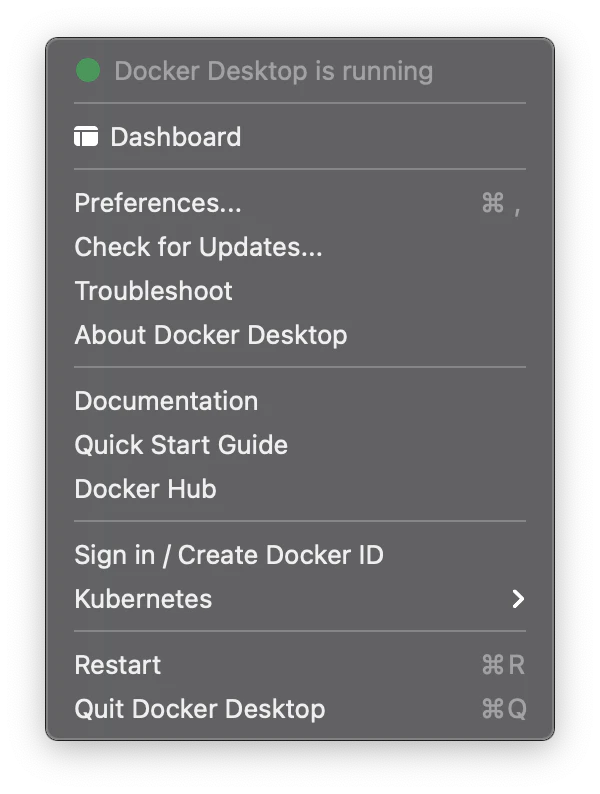
次のような画面が通常のDocker Dashboardです。
なお、ダッシュボードはDocker起動中であればナビゲーションからも起動できます。
動作確認
Docker のバージョンの確認をしてみる
まずは、インストールされた Docker のバージョンを確認してみましょう。
ターミナル を起動して、docker version コマンドでバージョン情報が表示されます。$ docker version Client: Docker Engine - Community Cloud integration: 1.0.4 Version: 20.10.0 API version: 1.41 Go version: go1.13.15 Git commit: 7287ab3 Built: Tue Dec 8 18:55:43 2020 OS/Arch: darwin/amd64 Context: default Experimental: true Server: Docker Engine - Community Engine: Version: 20.10.0 API version: 1.41 (minimum version 1.12) Go version: go1.13.15 Git commit: eeddea2 Built: Tue Dec 8 18:58:04 2020 OS/Arch: linux/amd64 Experimental: false containerd: Version: v1.4.3 GitCommit: 269548fa27e0089a8b8278fc4fc781d7f65a939b runc: Version: 1.0.0-rc92 GitCommit: ff819c7e9184c13b7c2607fe6c30ae19403a7aff docker-init: Version: 0.19.0 GitCommit: de40ad0Hello Worldを動かしてみる
では、早速、プログラマにはおなじみの hello world をやってみましょう。
docker run コマンドは、イメージからコンテナを起動するコマンドです。$ docker run hello-world上記のコマンドの場合、hello-world というイメージからコンテナを作成して起動するという意味になります。ただし、ローカルに hello-world イメージがないため、Docker デーモンが hello-world イメージを Docker Hub(Docker社が運営する、インターネット上でイメージを公開・共有したりする Docker Registry サービス)からダウンロードし、イメージからコンテナを起動します。一般的には、イメージはファイルシステムとアプリケーションやミドルウェア、実行時に必要とするパラメータから構成されます。
このコンテナは次のような標準出力を出して終了します。
$ docker run hello-world
Unable to find image 'hello-world:latest' locally
latest: Pulling from library/hello-world
0e03bdcc26d7: Pull complete
Digest: sha256:1a523af650137b8accdaed439c17d684df61ee4d74feac151b5b337bd29e7eec
Status: Downloaded newer image for hello-world:latest

Hello from Docker!
This message shows that your installation appears to be working correctly.

To generate this message, Docker took the following steps:
 1. The Docker client contacted the Docker daemon.
 2. The Docker daemon pulled the "hello-world" image from the Docker Hub.
    (amd64)
 3. The Docker daemon created a new container from that image which runs the
    executable that produces the output you are currently reading.
 4. The Docker daemon streamed that output to the Docker client, which sent it
    to your terminal.

To try something more ambitious, you can run an Ubuntu container with:
 $ docker run -it ubuntu bash

Share images, automate workflows, and more with a free Docker ID:
 https://hub.docker.com/

For more examples and ideas, visit:
 https://docs.docker.com/get-started/
$
注意
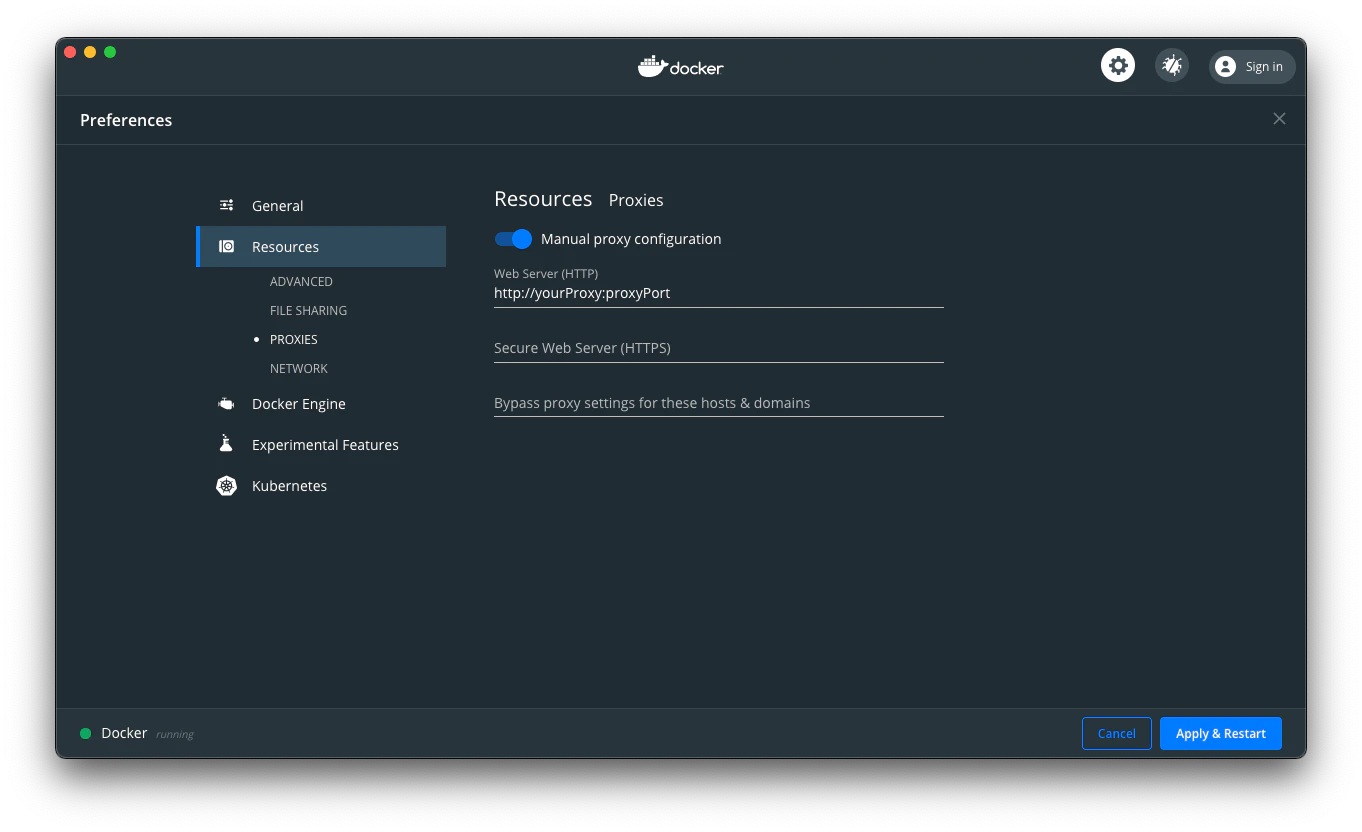
次のようなエラーが発生した場合、Proxyなどのネットワーク関連の設定の問題の場合があります。
$ docker run hello-world
Unable to find image 'hello-world:latest' locally
docker: Error response from daemon: Get https://registry-1.docker.io/v2/: dial tcp: lookup registry-1.docker.io on 192.168.65.1:53: no such host.
See 'docker run --help'.
Docker Desktopメニューで[setting]を選択し[setting]ダイアログの[Resources]タブの[PROXIES]でProxyの設定をしてみてください。
CentOS コンテナ (仮想環境) の構築
先ほどの hello-world の例で、コマンドラインでイメージの取得とコンテナの作成・起動・実行が簡単にできることがおわかりいただけたと思います。
では、本題の CentOS のイメージを取得し、CentOS のコンテナ (仮想環境) を作成・起動させてみましょう。CentOS の イメージの取得
イメージを取得する
CentOS のコンテナのイメージも Docker Hub の CentOS のリポジトリの中で、CentOS のバージョンごとにタグ付けされて管理されています。
それでは CentOS7 の Docker イメージを取得しましょう。 Docker イメージの取得は docker pull コマンドを利用します。なお、すでに Docker ID を取得しログインしているので、この DokerHub サービスを利用することができます$ docker pull centos:centos7 centos7: Pulling from library/centos 2d473b07cdd5: Pull complete Digest: sha256:0f4ec88e21daf75124b8a9e5ca03c37a5e937e0e108a255d890492430789b60e Status: Downloaded newer image for centos:centos7 docker.io/library/centos:centos7 $これで CentOS イメージのダウンロードが終わりました。環境に依存しますが数十秒で終了します。なお、pull コマンドの「centos:centos7」の意味は、centosリポジトリの、centos7タグが付いたイメージという意味です。これを理解すればいろいろなリポジトリからいろいろなイメージをダウンロードできるようになります。
取得した イメージを確認する
取得した Docker イメージは docker images コマンドで一覧表示できます。
$ docker images REPOSITORY TAG IMAGE ID CREATED SIZE centos centos7 8652b9f0cb4c 4 weeks ago 204MB hello-world latest bf756fb1ae65 11 months ago 13.3kB $centos リポジトリの centos7 タグが付いたイメージが IMAGE ID 8652b9f0cb4c で、そして Hello Worldを動かしてみる時に使用した hello-worldリポジトリのlatestタグが付いたイメージが IMAGE ID bf756fb1ae65 で保管されていることを示しています。
CentOS コンテナ の作成・起動
コンテナ を作成・起動する
CentOS7 のイメージが取得できたら、さっそく CentOS コンテナを作成して起動してみましょう。
Docker イメージからコンテナを作成して起動するには docker run コマンドを利用します。次のように docker run コマンドを実行して、コンテナを作成・起動してみます。ここでは新しく作成するコンテナに "centos7f" という名前を付けています。CentOS7 のイメージから CentOS7 コンテナを作成し、同時にコンテナも起動し、そのタイミングで自動的にログインし、そのまま bash シェルに接続します。
$ docker run -it --name="centos7f" centos:centos7 /bin/bash #このように、いきなり Centos コンテナ起動し、ログインした状態になります。このまま exit コマンドを実行すれば、このコンテナは停止します。
# exit exit $起動または存在しているコンテナの確認をする
docker ps コマンドを実行してみてください。
docker ps コマンドは、コンテナリストを表示・取得するコマンドです。現在起動または存在しているコンテナをリストにしてくれます。オプションなしの場合は、現在起動中のコンテナを表示してくれます。
$ docker ps CONTAINER ID IMAGE COMMAND CREATED STATUS PORTS NAMES $今回は、停止された状態なので、現在起動中のコンテナはありません。
下記のように -a、--allオプションをつけた場合は、停止中のコンテナを含めたすべてのコンテナを表示してくれます。
$ docker ps -a CONTAINER ID IMAGE COMMAND CREATED STATUS PORTS NAMES 2e57a6f562a8 centos:centos7 "/bin/bash" 3 minutes ago Exited (0) 2 minutes ago centos7f 1c5f75cb06e6 hello-world "/hello" 27 minutes ago Exited (0) 27 minutes ago inspiring_chatelet $イメージの centos:centos7 からコンテナが"centos7f"という名前で作成・起動され、bin/shコマンドを実行し、現在は、停止した状態であることを示しています。
Centos コンテナ (仮想環境) の再開・接続
停止中のコンテナを再開する
停止したコンテナを docker start コマンドで再開できます。
"centos7f" を再開させます。
$ docker start centos7f centos7f $docker ps コマンドでコンテナ"centos7f"が確かに再開していることを確認しましょう。
docker ps CONTAINER ID IMAGE COMMAND CREATED STATUS PORTS NAMES 2e57a6f562a8 centos:centos7 "/bin/bash" 6 minutes ago Up 36 seconds centos7f起動中のコンテナへ接続する
起動させたコンテナに接続して操作する場合は、docker attach コマンドまたは docker execコマンド を用います。
docker attach コマンドの場合は、次のようになります。
$ docker attach centos7f #ただし docker attach コマンドでコンテナに接続後、exit コマンドで接続から抜けると、コンテナが停止してしまいます。 コンテナを稼動させたままにしたい場合は、Ctrl + P、Ctrl + Q を続けて押して抜ける必要があります。
ここでは、Ctrl + P、Ctrl + Q を続けて押して、コンテナを稼動させたまま抜けてみます。次のようなメッセージが出力されます。
# read escape sequence $ここで、docker ps コマンドでコンテナの状況を確認してみましょう。
CentOS コンテナ "centos7f" は稼働中です。$ docker ps -a CONTAINER ID IMAGE COMMAND CREATED STATUS PORTS NAMES 2e57a6f562a8 centos:centos7 "/bin/bash" 9 minutes ago Up 4 minutes centos7f 1c5f75cb06e6 hello-world "/hello" 34 minutes ago Exited (0) 34 minutes ago inspiring_chateletこの状態であれば、再度、CentOS コンテナ (centos7f) に接続することができます。
今度は、docker attach コマンドではなく docker exec コマンドも用いてコンテナに接続して操作してみましょう。ただし、動作に微妙な違いがあります。
$ docker exec -it centos7f /bin/bash #docker attach コマンド と docker exec コマンドの動作の違いは次の通りです。
attach コマンド exec コマンド 稼働中のコンテナで起動している PID=1 のプロセスの標準入出力 (STDIN/STDOUT) に接続 (attach) する。 コンテナ内でシェルが動作していなければ接続することができない。 attachコマンドで抜けるとコンテナが停止してしまう exitコマンドで抜けるてもコンテナは停止しない Centos コンテナ (仮想環境) の作成・起動 (バックグランド)
コンテナを作成しバックグラウンドで起動する
別の ターミナル を起動します。
次のように docker run コマンドを -d で実行して、コンテナを作成しコマンドプロンプトの裏でバックグラウンド起動してみましょう。ここでは新しく作成するコンテナに "centos7b" という名前をつけています。
centos7 イメージからコンテナを作成してバックグラウンドで起動します。Last login: Mon Dec 14 19:43:55 on ttys000 The default interactive shell is now zsh. To update your account to use zsh, please run `chsh -s /bin/zsh`. For more details, please visit https://support.apple.com/kb/HT208050. $ docker run -it -d --name="centos7b" centos:centos7 /bin/bash 9246cc7051bf88970fbeb84fc5aed0e508143f7737c5684514fe7d076eb99ff7 $CentOS コンテナ (仮想環境) の停止・削除
コンテナの削除をするには、まずは動ているコンテナを停止させてから削除することになります。
では、docker ps コマンドで動作しているコンテナを確認します。
$ docker ps CONTAINER ID IMAGE COMMAND CREATED STATUS PORTS NAMES 9246cc7051bf centos:centos7 "/bin/bash" About a minute ago Up About a minute centos7b 2e57a6f562a8 centos:centos7 "/bin/bash" 17 minutes ago Up 12 minutes centos7f $Ctrl + P、Ctrl + Q を続けて押して、稼動させたまま抜けたコンテナ "centos7f" と、先ほどバックグラウンドで起動したコンテナ "centos7b" を確認することができるはずです。
起動しているコンテナの停止する
では、docker stop コマンドで、動作しているコンテナを停止させます。
$ docker stop centos7b centos7f centos7b centos7f $docker ps コマンドで、現在のコンテナの稼働状況を確認します。
先に述べた通り、-a、--allオプションをつけた場合は、停止中のコンテナを含めたすべてのコンテナを表示してくれます。
$ docker ps -a CONTAINER ID IMAGE COMMAND CREATED STATUS PORTS NAMES 9246cc7051bf centos:centos7 "/bin/bash" 5 minutes ago Exited (137) 56 seconds ago centos7b 2e57a6f562a8 centos:centos7 "/bin/bash" 22 minutes ago Exited (137) 56 seconds ago centos7f 1c5f75cb06e6 hello-world "/hello" 46 minutes ago Exited (0) 46 minutes ago inspiring_chatelet現在、存在しているコンテナは、"centos7b", "centos7f", "inspiring_chatelet" の3つであることが確認できるでしょう。"inspiring_chatelet" というコンテナの名前はイメージ hello-world からコンテナが作成・起動された時に一意的にたまたま決まったものです。なので、違う名前が表示されているかもしれません。
では、docker rm コマンドで、3つのコンテナを削除してみましょう。
コンテナ(仮想環境)を削除する
$ docker rm centos7b centos7f laughing_lehmann centos7b centos7f inspiring_chatelet $削除が完了しますと、削除対象のコンテナ名が出力されます。
$ docker ps -a CONTAINER ID IMAGE COMMAND CREATED STATUS PORTS NAMESこれで、コンテナがすべて削除されました。
イメージを削除する
Docker イメージの削除は、docker rmi コマンドを用います。
その前にdocker images コマンドで、取得したDockerイメージを一覧表示できます。
$ docker images REPOSITORY TAG IMAGE ID CREATED SIZE centos centos7 8652b9f0cb4c 4 weeks ago 204MB hello-world latest bf756fb1ae65 11 months ago 13.3kB $docker rmi コマンドを用いて、取得したDockerイメージを削除してみます。
$ docker rmi centos:centos7 hello-world:latest Untagged: centos:centos7 Untagged: centos@sha256:0f4ec88e21daf75124b8a9e5ca03c37a5e937e0e108a255d890492430789b60e Deleted: sha256:8652b9f0cb4c0599575e5a003f5906876e10c1ceb2ab9fe1786712dac14a50cf Deleted: sha256:174f5685490326fc0a1c0f5570b8663732189b327007e47ff13d2ca59673db02 Untagged: hello-world:latest Untagged: hello-world@sha256:1a523af650137b8accdaed439c17d684df61ee4d74feac151b5b337bd29e7eec Deleted: sha256:bf756fb1ae65adf866bd8c456593cd24beb6a0a061dedf42b26a993176745f6b Deleted: sha256:9c27e219663c25e0f28493790cc0b88bc973ba3b1686355f221c38a36978ac63これで、docker上からすべてのイメージが削除されました。
CentOS コンテナ (仮想環境)の整備
centos:centos7 のイメージは、最小構成 (?)でインストールされた CentOS7 環境であるようなので、実際に使用するには、構築した CentOS コンテナに個別に必要なもののインストールや環境の整備の作業をしなければなりません。
参考までにとりあえず、unzipコマンドを使えるようにする手順を紹介します。まずは、Centos7 のコンテナやイメージなど削除してしまったので、復習をかねて、再度 Docker for Windows 上の CentOS コンテナ (仮想環境) を構築をします。
CentOS コンテナ (仮想環境) の構築 【復習】
CentOS の Docker イメージを取得
$ docker pull centos:centos7 centos7: Pulling from library/centos 2d473b07cdd5: Pull complete Digest: sha256:0f4ec88e21daf75124b8a9e5ca03c37a5e937e0e108a255d890492430789b60e Status: Downloaded newer image for centos:centos7 docker.io/library/centos:centos7 $ docker images REPOSITORY TAG IMAGE ID CREATED SIZE centos centos7 8652b9f0cb4c 4 weeks ago 204MB $CentOS コンテナの作成・起動
$ docker run -it --name="my_centos" centos:centos7 /bin/bash #unzip コマンドのインストール
unzip コマンドを入力したら、次のような"コマンドが見つかりません"という旨のメッセージが出力されました。
# unzip bash: unzip: command not found #まずは yum update コマンドで CentOS のパッケージを最新の状態にしておきます。
# yum update Loaded plugins: fastestmirror, ovl Determining fastest mirrors * base: ftp.riken.jp * extras: ftp.riken.jp * updates: ftp.riken.jp base | 3.6 kB 00:00:00 extras | 2.9 kB 00:00:00 updates | 2.9 kB 00:00:00 (1/4): base/7/x86_64/group_gz | 153 kB 00:00:00 (2/4): extras/7/x86_64/primary_db | 222 kB 00:00:00 (3/4): updates/7/x86_64/primary_db | 3.7 MB 00:00:00 (4/4): base/7/x86_64/primary_db | 6.1 MB 00:00:01 Resolving Dependencies --> Running transaction check ---> Package bind-license.noarch 32:9.11.4-26.P2.el7 will be updated ---> Package bind-license.noarch 32:9.11.4-26.P2.el7_9.2 will be an update ---> Package centos-release.x86_64 0:7-9.2009.0.el7.centos will be updated ---> Package centos-release.x86_64 0:7-9.2009.1.el7.centos will be an update ---> Package coreutils.x86_64 0:8.22-24.el7 will be updated ---> Package coreutils.x86_64 0:8.22-24.el7_9.2 will be an update ---> Package curl.x86_64 0:7.29.0-59.el7 will be updated ---> Package curl.x86_64 0:7.29.0-59.el7_9.1 will be an update ---> Package glib2.x86_64 0:2.56.1-7.el7 will be updated ---> Package glib2.x86_64 0:2.56.1-8.el7 will be an update ---> Package kpartx.x86_64 0:0.4.9-133.el7 will be updated ---> Package kpartx.x86_64 0:0.4.9-134.el7_9 will be an update ---> Package libcurl.x86_64 0:7.29.0-59.el7 will be updated ---> Package libcurl.x86_64 0:7.29.0-59.el7_9.1 will be an update ---> Package python.x86_64 0:2.7.5-89.el7 will be updated ---> Package python.x86_64 0:2.7.5-90.el7 will be an update ---> Package python-libs.x86_64 0:2.7.5-89.el7 will be updated ---> Package python-libs.x86_64 0:2.7.5-90.el7 will be an update ---> Package systemd.x86_64 0:219-78.el7 will be updated ---> Package systemd.x86_64 0:219-78.el7_9.2 will be an update ---> Package systemd-libs.x86_64 0:219-78.el7 will be updated ---> Package systemd-libs.x86_64 0:219-78.el7_9.2 will be an update --> Finished Dependency Resolution Dependencies Resolved ====================================================================================================================================================== Package Arch Version Repository Size ====================================================================================================================================================== Updating: bind-license noarch 32:9.11.4-26.P2.el7_9.2 updates 90 k centos-release x86_64 7-9.2009.1.el7.centos updates 27 k coreutils x86_64 8.22-24.el7_9.2 updates 3.3 M curl x86_64 7.29.0-59.el7_9.1 updates 271 k glib2 x86_64 2.56.1-8.el7 updates 2.5 M kpartx x86_64 0.4.9-134.el7_9 updates 81 k libcurl x86_64 7.29.0-59.el7_9.1 updates 223 k python x86_64 2.7.5-90.el7 updates 96 k python-libs x86_64 2.7.5-90.el7 updates 5.6 M systemd x86_64 219-78.el7_9.2 updates 5.1 M systemd-libs x86_64 219-78.el7_9.2 updates 418 k Transaction Summary ====================================================================================================================================================== Upgrade 11 Packages Total download size: 18 M Is this ok [y/d/N]: y Downloading packages: Delta RPMs disabled because /usr/bin/applydeltarpm not installed. warning: /var/cache/yum/x86_64/7/updates/packages/bind-license-9.11.4-26.P2.el7_9.2.noarch.rpm: Header V3 RSA/SHA256 Signature, key ID f4a80eb5: NOKEY Public key for bind-license-9.11.4-26.P2.el7_9.2.noarch.rpm is not installed (1/11): bind-license-9.11.4-26.P2.el7_9.2.noarch.rpm | 90 kB 00:00:00 (2/11): centos-release-7-9.2009.1.el7.centos.x86_64.rpm | 27 kB 00:00:00 (3/11): curl-7.29.0-59.el7_9.1.x86_64.rpm | 271 kB 00:00:00 (4/11): glib2-2.56.1-8.el7.x86_64.rpm | 2.5 MB 00:00:00 (5/11): kpartx-0.4.9-134.el7_9.x86_64.rpm | 81 kB 00:00:00 (6/11): coreutils-8.22-24.el7_9.2.x86_64.rpm | 3.3 MB 00:00:00 (7/11): python-2.7.5-90.el7.x86_64.rpm | 96 kB 00:00:00 (8/11): libcurl-7.29.0-59.el7_9.1.x86_64.rpm | 223 kB 00:00:00 (9/11): systemd-libs-219-78.el7_9.2.x86_64.rpm | 418 kB 00:00:00 (10/11): systemd-219-78.el7_9.2.x86_64.rpm | 5.1 MB 00:00:00 (11/11): python-libs-2.7.5-90.el7.x86_64.rpm | 5.6 MB 00:00:00 ------------------------------------------------------------------------------------------------------------------------------------------------------ Total 12 MB/s | 18 MB 00:00:01 Retrieving key from file:///etc/pki/rpm-gpg/RPM-GPG-KEY-CentOS-7 Importing GPG key 0xF4A80EB5: Userid : "CentOS-7 Key (CentOS 7 Official Signing Key) <security@centos.org>" Fingerprint: 6341 ab27 53d7 8a78 a7c2 7bb1 24c6 a8a7 f4a8 0eb5 Package : centos-release-7-9.2009.0.el7.centos.x86_64 (@CentOS) From : /etc/pki/rpm-gpg/RPM-GPG-KEY-CentOS-7 Is this ok [y/N]: y Running transaction check Running transaction test Transaction test succeeded Running transaction Updating : libcurl-7.29.0-59.el7_9.1.x86_64 1/22 Updating : coreutils-8.22-24.el7_9.2.x86_64 2/22 Updating : python-libs-2.7.5-90.el7.x86_64 3/22 Updating : systemd-libs-219-78.el7_9.2.x86_64 4/22 Updating : centos-release-7-9.2009.1.el7.centos.x86_64 5/22 Updating : systemd-219-78.el7_9.2.x86_64 6/22 Failed to get D-Bus connection: Operation not permitted Updating : python-2.7.5-90.el7.x86_64 7/22 Updating : curl-7.29.0-59.el7_9.1.x86_64 8/22 Updating : glib2-2.56.1-8.el7.x86_64 9/22 Updating : 32:bind-license-9.11.4-26.P2.el7_9.2.noarch 10/22 Updating : kpartx-0.4.9-134.el7_9.x86_64 11/22 Cleanup : systemd-219-78.el7.x86_64 12/22 Cleanup : curl-7.29.0-59.el7.x86_64 13/22 Cleanup : python-2.7.5-89.el7.x86_64 14/22 Cleanup : centos-release-7-9.2009.0.el7.centos.x86_64 15/22 Cleanup : 32:bind-license-9.11.4-26.P2.el7.noarch 16/22 Cleanup : python-libs-2.7.5-89.el7.x86_64 17/22 Cleanup : coreutils-8.22-24.el7.x86_64 18/22 Cleanup : libcurl-7.29.0-59.el7.x86_64 19/22 Cleanup : systemd-libs-219-78.el7.x86_64 20/22 Cleanup : glib2-2.56.1-7.el7.x86_64 21/22 Cleanup : kpartx-0.4.9-133.el7.x86_64 22/22 Verifying : python-2.7.5-90.el7.x86_64 1/22 Verifying : kpartx-0.4.9-134.el7_9.x86_64 2/22 Verifying : centos-release-7-9.2009.1.el7.centos.x86_64 3/22 Verifying : coreutils-8.22-24.el7_9.2.x86_64 4/22 Verifying : libcurl-7.29.0-59.el7_9.1.x86_64 5/22 Verifying : curl-7.29.0-59.el7_9.1.x86_64 6/22 Verifying : python-libs-2.7.5-90.el7.x86_64 7/22 Verifying : systemd-libs-219-78.el7_9.2.x86_64 8/22 Verifying : 32:bind-license-9.11.4-26.P2.el7_9.2.noarch 9/22 Verifying : systemd-219-78.el7_9.2.x86_64 10/22 Verifying : glib2-2.56.1-8.el7.x86_64 11/22 Verifying : systemd-libs-219-78.el7.x86_64 12/22 Verifying : glib2-2.56.1-7.el7.x86_64 13/22 Verifying : kpartx-0.4.9-133.el7.x86_64 14/22 Verifying : 32:bind-license-9.11.4-26.P2.el7.noarch 15/22 Verifying : centos-release-7-9.2009.0.el7.centos.x86_64 16/22 Verifying : systemd-219-78.el7.x86_64 17/22 Verifying : python-libs-2.7.5-89.el7.x86_64 18/22 Verifying : coreutils-8.22-24.el7.x86_64 19/22 Verifying : python-2.7.5-89.el7.x86_64 20/22 Verifying : libcurl-7.29.0-59.el7.x86_64 21/22 Verifying : curl-7.29.0-59.el7.x86_64 22/22 Updated: bind-license.noarch 32:9.11.4-26.P2.el7_9.2 centos-release.x86_64 0:7-9.2009.1.el7.centos coreutils.x86_64 0:8.22-24.el7_9.2 curl.x86_64 0:7.29.0-59.el7_9.1 glib2.x86_64 0:2.56.1-8.el7 kpartx.x86_64 0:0.4.9-134.el7_9 libcurl.x86_64 0:7.29.0-59.el7_9.1 python.x86_64 0:2.7.5-90.el7 python-libs.x86_64 0:2.7.5-90.el7 systemd.x86_64 0:219-78.el7_9.2 systemd-libs.x86_64 0:219-78.el7_9.2 Complete! #エラーが生じた場合、こちらを参考してください。
yum install コマンドで、unzip をインストールします。
# yum install unzip Loaded plugins: fastestmirror, ovl Loading mirror speeds from cached hostfile * base: ftp.riken.jp * extras: ftp.riken.jp * updates: ftp.riken.jp Resolving Dependencies --> Running transaction check ---> Package unzip.x86_64 0:6.0-21.el7 will be installed --> Finished Dependency Resolution Dependencies Resolved ====================================================================================================================================================== Package Arch Version Repository Size ====================================================================================================================================================== Installing: unzip x86_64 6.0-21.el7 base 171 k Transaction Summary ====================================================================================================================================================== Install 1 Package Total download size: 171 k Installed size: 365 k Is this ok [y/d/N]: y Downloading packages: unzip-6.0-21.el7.x86_64.rpm | 171 kB 00:00:00 Running transaction check Running transaction test Transaction test succeeded Running transaction Installing : unzip-6.0-21.el7.x86_64 1/1 Verifying : unzip-6.0-21.el7.x86_64 1/1 Installed: unzip.x86_64 0:6.0-21.el7 Complete! #これで unzip コマンドのインストールができました。
# unzip UnZip 6.00 of 20 April 2009, by Info-ZIP. Maintained by C. Spieler. Send bug reports using http://www.info-zip.org/zip-bug.html; see README for details. Usage: unzip [-Z] [-opts[modifiers]] file[.zip] [list] [-x xlist] [-d exdir] Default action is to extract files in list, except those in xlist, to exdir; file[.zip] may be a wildcard. -Z => ZipInfo mode ("unzip -Z" for usage). -p extract files to pipe, no messages -l list files (short format) -f freshen existing files, create none -t test compressed archive data -u update files, create if necessary -z display archive comment only -v list verbosely/show version info -T timestamp archive to latest -x exclude files that follow (in xlist) -d extract files into exdir modifiers: -n never overwrite existing files -q quiet mode (-qq => quieter) -o overwrite files WITHOUT prompting -a auto-convert any text files -j junk paths (do not make directories) -aa treat ALL files as text -U use escapes for all non-ASCII Unicode -UU ignore any Unicode fields -C match filenames case-insensitively -L make (some) names lowercase -X restore UID/GID info -V retain VMS version numbers -K keep setuid/setgid/tacky permissions -M pipe through "more" pager -O CHARSET specify a character encoding for DOS, Windows and OS/2 archives -I CHARSET specify a character encoding for UNIX and other archives See "unzip -hh" or unzip.txt for more help. Examples: unzip data1 -x joe => extract all files except joe from zipfile data1.zip unzip -p foo | more => send contents of foo.zip via pipe into program more unzip -fo foo ReadMe => quietly replace existing ReadMe if archive file newer #unzip コマンドをインストールした CentOS のコンテナの"my_centos" を停止して抜けます。
# exit exit $作業済み CentOS コンテナ (仮想環境)の保存
今回、CentOS コンテナ (仮想環境)に対して unzip コマンドをインストールをしました。
このように設定や更新などのカスタマイズ作業をおこなったコンテナの状態をイメージとして保存しておくことができます。
では、今回のカスタマイズ作業をおこなった CentOS コンテナ からイメージを作って保存をしてみます。保存するコンテナを停止する
まず、 オプションなしで、現在起動中のコンテナを確認します。
$ docker ps CONTAINER ID IMAGE COMMAND CREATED STATUS PORTS NAMES $今回は、unzip コマンドのインストールしたCentOS のコンテナの"my_centos" は、停止状態のはずなので、現在起動中のコンテナはありません。
コンテナが動いている状態でコンテナに接続されていない場合は docker stop コマンドで停止させることができます。
次に -a オプションをつけて、停止中のコンテナを含めたすべてのコンテナを表示します。
$ docker ps -a CONTAINER ID IMAGE COMMAND CREATED STATUS PORTS NAMES 6d6d204664d1 centos:centos7 "/bin/bash" 23 minutes ago Exited (0) 3 minutes ago my_centos $unzip コマンドのインストールなどの作業が行われ、現在停止した状態である CentOS コンテナの"my_centos"が表示されます。
停止したコンテナをイメージに保存する
docker images コマンドで、作成されているイメージを確認します。
$ docker images REPOSITORY TAG IMAGE ID CREATED SIZE centos centos7 8652b9f0cb4c 4 weeks ago 204MB $カスタマイズ作業をおこなった CentOS コンテナの"my_centos"を docker commit コマンドで、Docker イメージ "my_centos" として保存します。
$ docker commit my_centos my_centos sha256:528149497a38f8a5c7e3c3dacf3a876d03c0a5abbc9e110a14de621a4b3db0a9 $なお、一時停止せず、コンテナが動いたままの状態でDockerイメージを作成する場合は「--pause=false」オプションを使用します。
docker imagesコマンドにて、Dockerイメージが作成されているか確認します
$ docker images REPOSITORY TAG IMAGE ID CREATED SIZE my_centos latest 528149497a38 2 minutes ago 357MB centos centos7 8652b9f0cb4c 4 weeks ago 204MB $新たに Dokcer イメージ "my_centos" が追加されたことがわかります。
作成されたイメージの内容を確認する
先ほど作業した内容がちゃんと反映されている イメージなのか、確認してみましょう。
docker rm コマンドで、コンテナ "my_centos" を削除します。
$ docker ps -a CONTAINER ID IMAGE COMMAND CREATED STATUS PORTS NAMES 6d6d204664d1 centos:centos7 "/bin/bash" 34 minutes ago Exited (0) 15 minutes ago my_centos $ docker rm my_centos my_centos $ docker ps -a CONTAINER ID IMAGE COMMAND CREATED STATUS PORTS NAMES $これで、すべてのコンテナがなくなりました。
では、docker run コマンドで、イメージ "my_centos" からコンテナ "my_centos" を作成・起動してみます。
$ docker run -it --name="my_centos" my_centos /bin/bash #unzip コマンドを実行してみます。
# unzip UnZip 6.00 of 20 April 2009, by Info-ZIP. Maintained by C. Spieler. Send bug reports using http://www.info-zip.org/zip-bug.html; see README for details. Usage: unzip [-Z] [-opts[modifiers]] file[.zip] [list] [-x xlist] [-d exdir] Default action is to extract files in list, except those in xlist, to exdir; file[.zip] may be a wildcard. -Z => ZipInfo mode ("unzip -Z" for usage). -p extract files to pipe, no messages -l list files (short format) -f freshen existing files, create none -t test compressed archive data -u update files, create if necessary -z display archive comment only -v list verbosely/show version info -T timestamp archive to latest -x exclude files that follow (in xlist) -d extract files into exdir modifiers: -n never overwrite existing files -q quiet mode (-qq => quieter) -o overwrite files WITHOUT prompting -a auto-convert any text files -j junk paths (do not make directories) -aa treat ALL files as text -U use escapes for all non-ASCII Unicode -UU ignore any Unicode fields -C match filenames case-insensitively -L make (some) names lowercase -X restore UID/GID info -V retain VMS version numbers -K keep setuid/setgid/tacky permissions -M pipe through "more" pager -O CHARSET specify a character encoding for DOS, Windows and OS/2 archives -I CHARSET specify a character encoding for UNIX and other archives See "unzip -hh" or unzip.txt for more help. Examples: unzip data1 -x joe => extract all files except joe from zipfile data1.zip unzip -p foo | more => send contents of foo.zip via pipe into program more unzip -fo foo ReadMe => quietly replace existing ReadMe if archive file newer #さいごに
今回、MacBookに Doker Desktop for Mac をインストールし、CentOS の仮想環境を構築・設定・保存などの一連の手順を詳細に記述したつもりです。
もし、記述について誤りがあったり、気になることがあれば、編集リクエストやコメントでフィードバックしていただけると助かります。


- 投稿日:2020-12-15T18:45:27+09:00
ECS + CodePipline でコンテナ管理
アプリケーションを作る際にコンテナを使う人も多くなってきたのではないでしょうか。
今回は、CodeCommitにDockerfileをアップロードしたらBuildして自動でECSのタスクが更新される仕組みをコード化したいと思います。インフラをコードで管理するためにCloudFormationを使用します。awslabsが公開しているコードを参照し、Cloudformationで作成します。いずれTerraFormでも作りたいと思います。
awslabs
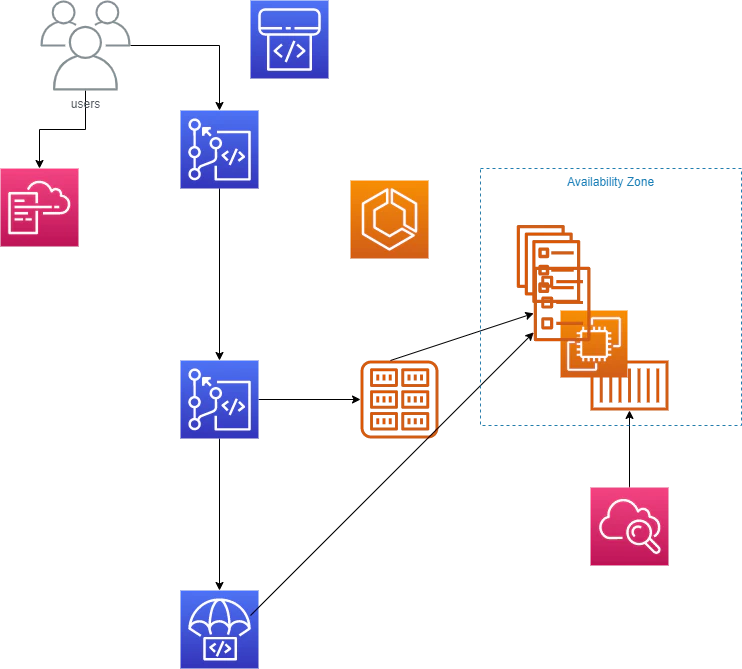
https://github.com/awslabs/ecs-refarch-continuous-deployment今回作成するアーキテクチャは以下のようになります。
EC2かFargateかはスタックを作る際に選択可能な形となります。なお、スタック作成時はAWS公式のdocker image(php-sample)を使用しますので、他のimageを使用したい場合にはDockerfileをCodeCommitにアップロードしてください。
(なお、PiplineにGithubを使用したいという方はawslabsのコードをご参照ください。)
ディレクトリ構造は下記となります。templatesフォルダにある5つのyamlはS3にアップロードしてご使用ください。
├── ecs-refarch-continuous-deployment.yaml
├── tempaltes
    ├── vpc.yaml
    ├── load-balancer.yaml
    ├── ecs-cluster.yaml
    ├── service.yaml
    └── deployment-pipline.yaml
まずはVPCからです。
---
AWSTemplateFormatVersion: 2010-09-09


Parameters:
  Name:
    Type: String

  VpcCIDR:
    Type: String

  Subnet1CIDR:
    Type: String

  Subnet2CIDR:
    Type: String


Resources:
  VPC:
    Type: AWS::EC2::VPC
    Properties:
      CidrBlock: !Ref VpcCIDR
      Tags:
        - Key: Name
          Value: !Ref Name

  InternetGateway:
    Type: AWS::EC2::InternetGateway
    Properties:
      Tags:
        - Key: Name
          Value: !Ref Name

  InternetGatewayAttachment:
    Type: AWS::EC2::VPCGatewayAttachment
    Properties:
      InternetGatewayId: !Ref InternetGateway
      VpcId: !Ref VPC

  Subnet1:
    Type: AWS::EC2::Subnet
    Properties:
      VpcId: !Ref VPC
      AvailabilityZone: !Select [ 0, !GetAZs ]
      MapPublicIpOnLaunch: true
      CidrBlock: !Ref Subnet1CIDR
      Tags:
        - Key: Name
          Value: !Sub ${Name} (Public)

  Subnet2:
    Type: AWS::EC2::Subnet
    Properties:
      VpcId: !Ref VPC
      AvailabilityZone: !Select [ 1, !GetAZs ]
      MapPublicIpOnLaunch: true
      CidrBlock: !Ref Subnet2CIDR
      Tags:
        - Key: Name
          Value: !Sub ${Name} (Public)

  RouteTable:
    Type: AWS::EC2::RouteTable
    Properties:
      VpcId: !Ref VPC
      Tags:
        - Key: Name
          Value: !Ref Name

  DefaultRoute:
    Type: AWS::EC2::Route
    Properties:
      RouteTableId: !Ref RouteTable
      DestinationCidrBlock: 0.0.0.0/0
      GatewayId: !Ref InternetGateway

  Subnet1RouteTableAssociation:
    Type: AWS::EC2::SubnetRouteTableAssociation
    Properties:
      RouteTableId: !Ref RouteTable
      SubnetId: !Ref Subnet1

  Subnet2RouteTableAssociation:
    Type: AWS::EC2::SubnetRouteTableAssociation
    Properties:
      RouteTableId: !Ref RouteTable
      SubnetId: !Ref Subnet2


Outputs:
  Subnets:
    Value: !Join [ ",", [ !Ref Subnet1, !Ref Subnet2 ] ]
  VpcId:
    Value: !Ref VPC
次にLoadBalancer(ALB)です。NLBのTemplateもありますので、見たいという方はコメントしてください!
Parameters:
  LaunchType:
    Type: String
    Default: Fargate
    AllowedValues:
      - Fargate
      - EC2

  Subnets:
    Type: List<AWS::EC2::Subnet::Id>

  VpcId:
    Type: String


Conditions:
  EC2: !Equals [ !Ref LaunchType, "EC2" ]


Resources:
  SecurityGroup:
    Type: "AWS::EC2::SecurityGroup"
    Properties:
      GroupDescription: !Sub ${AWS::StackName}-alb
      SecurityGroupIngress:
        - CidrIp: "0.0.0.0/0"
          IpProtocol: tcp
          FromPort: 80
          ToPort: 80
      VpcId: !Ref VpcId

  LoadBalancer:
    Type: AWS::ElasticLoadBalancingV2::LoadBalancer
    Properties:
      Subnets: !Ref Subnets
      SecurityGroups:
        - !Ref SecurityGroup

  LoadBalancerListener:
    Type: AWS::ElasticLoadBalancingV2::Listener
    Properties:
      LoadBalancerArn: !Ref LoadBalancer
      Port: 80
      Protocol: HTTP
      DefaultActions:
        - Type: forward
          TargetGroupArn: !Ref TargetGroup

  TargetGroup:
    Type: AWS::ElasticLoadBalancingV2::TargetGroup
    DependsOn: LoadBalancer
    Properties:
      VpcId: !Ref VpcId
      Port: 80
      Protocol: HTTP
      Matcher:
        HttpCode: 200-299
      HealthCheckIntervalSeconds: 10
      HealthCheckPath: /
      HealthCheckProtocol: HTTP
      HealthCheckTimeoutSeconds: 5
      HealthyThresholdCount: 2
      TargetType: !If [ EC2, "instance", "ip" ]
      TargetGroupAttributes:
        - Key: deregistration_delay.timeout_seconds
          Value: 30

  ListenerRule:
    Type: AWS::ElasticLoadBalancingV2::ListenerRule
    Properties:
      ListenerArn: !Ref LoadBalancerListener
      Priority: 1
      Conditions:
        - Field: path-pattern
          Values:
            - /
      Actions:
        - TargetGroupArn: !Ref TargetGroup
          Type: forward


Outputs:
  TargetGroup:
    Value: !Ref TargetGroup

  ServiceUrl:
    Description: URL of the load balancer for the sample service.
    Value: !Sub http://${LoadBalancer.DNSName}

  SecurityGroup:
    Value: !Ref SecurityGroup
次にCluseterです。今回はAMIはマッピングを利用しました。SSMを使用して最新のAMIを取得してくることもできますが、リージョン別に自動選択したかったので採用しませんでした。
Parameters:
  LaunchType:
    Type: String
    Default: Fargate
    AllowedValues:
      - Fargate
      - EC2

  InstanceType:
    Type: String
    Default: t2.micro

  ClusterSize:
    Type: Number
    Default: 2

  Subnets:
    Type: List<AWS::EC2::Subnet::Id>

  SecurityGroup:
    Type: AWS::EC2::SecurityGroup::Id

  VpcId:
    Type: AWS::EC2::VPC::Id

  KeyName:
    Description: The EC2 Key Pair to allow SSH access to the instance
    Type: "AWS::EC2::KeyPair::KeyName"


Conditions:
  EC2: !Equals [ !Ref LaunchType, "EC2" ]

Mappings:
  AWSRegionToAMI:
    ap-south-1:
      AMI: ami-00491f6f
    eu-west-3:
      AMI: ami-9aef59e7
    eu-west-2:
      AMI: ami-67cbd003
    eu-west-1:
      AMI: ami-1d46df64
    ap-northeast-2:
      AMI: ami-c212b2ac
    ap-northeast-1:
      AMI: ami-872c4ae1
    sa-east-1:
      AMI: ami-af521fc3
    ca-central-1:
      AMI: ami-435bde27
    ap-southeast-1:
      AMI: ami-910d72ed
    ap-southeast-2:
      AMI: ami-58bb443a
    eu-central-1:
      AMI: ami-509a053f
    us-east-1:
      AMI: ami-28456852
    us-east-2:
      AMI: ami-ce1c36ab
    us-west-1:
      AMI: ami-74262414
    us-west-2:
      AMI: ami-decc7fa6

Resources:
  EC2Role:
    Type: AWS::IAM::Role
    Condition: EC2
    Properties:
      Path: /
      AssumeRolePolicyDocument:
        Statement:
          - Action: sts:AssumeRole
            Effect: Allow
            Principal:
              Service: ec2.amazonaws.com
      ManagedPolicyArns:
        - arn:aws:iam::aws:policy/service-role/AmazonEC2ContainerServiceforEC2Role

  InstanceProfile:
    Type: AWS::IAM::InstanceProfile
    Condition: EC2
    Properties:
      Path: /
      Roles:
        - !Ref EC2Role

  Cluster:
    Type: AWS::ECS::Cluster
    Properties:
      ClusterName: !Ref AWS::StackName

  AutoScalingGroup:
    Type: AWS::AutoScaling::AutoScalingGroup
    Condition: EC2
    Properties:
      VPCZoneIdentifier: !Ref Subnets
      LaunchConfigurationName: !Ref LaunchConfiguration
      MinSize: !Ref ClusterSize
      MaxSize: !Ref ClusterSize
      DesiredCapacity: !Ref ClusterSize
      Tags:
        - Key: Name
          Value: !Sub ${AWS::StackName} - ECS Host
          PropagateAtLaunch: true
    CreationPolicy:
      ResourceSignal:
        Timeout: PT15M
    UpdatePolicy:
      AutoScalingRollingUpdate:
        MinInstancesInService: 1
        MaxBatchSize: 1
        PauseTime: PT15M
        WaitOnResourceSignals: true

  LaunchConfiguration:
    Type: AWS::AutoScaling::LaunchConfiguration
    Condition: EC2
    Metadata:
      AWS::CloudFormation::Init:
        config:
          commands:
            01_add_instance_to_cluster:
                command: !Sub echo ECS_CLUSTER=${Cluster} > /etc/ecs/ecs.config
          files:
            "/etc/cfn/cfn-hup.conf":
              mode: 000400
              owner: root
              group: root
              content: !Sub |
                [main]
                stack=${AWS::StackId}
                region=${AWS::Region}
            "/etc/cfn/hooks.d/cfn-auto-reloader.conf":
              content: !Sub |
                [cfn-auto-reloader-hook]
                triggers=post.update
                path=Resources.ContainerInstances.Metadata.AWS::CloudFormation::Init
                action=/opt/aws/bin/cfn-init -v --region ${AWS::Region} --stack ${AWS::StackName} --resource LaunchConfiguration
          services:
            sysvinit:
              cfn-hup:
                enabled: true
                ensureRunning: true
                files:
                  - /etc/cfn/cfn-hup.conf
                  - /etc/cfn/hooks.d/cfn-auto-reloader.conf
    Properties:
      ImageId: !FindInMap [ AWSRegionToAMI, !Ref "AWS::Region", AMI ]
      InstanceType: !Ref InstanceType
      IamInstanceProfile: !Ref InstanceProfile
      SecurityGroups:
        - !Ref SecurityGroup
      KeyName: !Ref KeyName
      UserData:
        "Fn::Base64": !Sub |
          #!/bin/bash
          yum install -y aws-cfn-bootstrap
          /opt/aws/bin/cfn-init -v --region ${AWS::Region} --stack ${AWS::StackName} --resource LaunchConfiguration
          /opt/aws/bin/cfn-signal -e $? --region ${AWS::Region} --stack ${AWS::StackName} --resource AutoScalingGroup

Outputs:
  ClusterName:
      Value: !Ref Cluster
次にServiceです。
Parameters:
  Cluster:
    Type: String

  DesiredCount:
    Type: Number
    Default: 1

  LaunchType:
    Type: String
    Default: Fargate
    AllowedValues:
      - Fargate
      - EC2

  TargetGroup:
    Type: String

  SecurityGroup:
    Type: AWS::EC2::SecurityGroup::Id

  Subnets:
    Type: List<AWS::EC2::Subnet::Id>


Conditions:
  Fargate: !Equals [ !Ref LaunchType, "Fargate" ]

  EC2: !Equals [ !Ref LaunchType, "EC2" ]


Resources:
  TaskExecutionRole:
    Type: AWS::IAM::Role
    Properties:
      Path: /
      AssumeRolePolicyDocument:
        Version: 2012-10-17
        Statement:
          - Action: sts:AssumeRole
            Effect: Allow
            Principal:
              Service: ecs-tasks.amazonaws.com
      ManagedPolicyArns:
        - arn:aws:iam::aws:policy/service-role/AmazonECSTaskExecutionRolePolicy

  LogGroup:
    Type: AWS::Logs::LogGroup
    Properties:
      LogGroupName: !Sub /ecs/${AWS::StackName}
      RetentionInDays: 14

  FargateService:
    Type: AWS::ECS::Service
    Condition: Fargate
    Properties:
      Cluster: !Ref Cluster
      DesiredCount: !Ref DesiredCount
      TaskDefinition: !Ref TaskDefinition
      LaunchType: FARGATE
      NetworkConfiguration:
        AwsvpcConfiguration:
          AssignPublicIp: ENABLED
          SecurityGroups:
            - !Ref SecurityGroup
          Subnets: !Ref Subnets
      LoadBalancers:
        - ContainerName: simple-app
          ContainerPort: 80
          TargetGroupArn: !Ref TargetGroup

  EC2Service:
    Type: AWS::ECS::Service
    Condition: EC2
    Properties:
      Cluster: !Ref Cluster
      DesiredCount: !Ref DesiredCount
      TaskDefinition: !Ref TaskDefinition
      LaunchType: EC2
      LoadBalancers:
        - ContainerName: simple-app
          ContainerPort: 80
          TargetGroupArn: !Ref TargetGroup

  TaskDefinition:
    Type: AWS::ECS::TaskDefinition
    Properties:
      Family: !Sub ${AWS::StackName}-simple-app
      RequiresCompatibilities:
        - !If [ Fargate, "FARGATE", "EC2" ]
      Memory: 512
      Cpu: 256
      NetworkMode: !If [ Fargate, "awsvpc", "bridge" ]
      ExecutionRoleArn: !Ref TaskExecutionRole
      ContainerDefinitions:
        - Name: simple-app
          Image: amazon/amazon-ecs-sample
          Essential: true
          Memory: 256
          MountPoints:
            - SourceVolume: my-vol
              ContainerPath: /var/www/my-vol
          PortMappings:
            - HostPort: 80
              ContainerPort: 80
          LogConfiguration:
            LogDriver: awslogs
            Options:
              awslogs-region: !Ref AWS::Region
              awslogs-group: !Ref LogGroup
              awslogs-stream-prefix: !Ref AWS::StackName
        - Name: busybox
          Image: busybox
          EntryPoint:
            - sh
            - -c
          Essential: true
          Memory: 256
          VolumesFrom:
            - SourceContainer: simple-app
          Command:
            - /bin/sh -c "while true; do /bin/date > /var/www/my-vol/date; sleep 1; done"
      Volumes:
        - Name: my-vol


Outputs:
  Service:
    Value: !If [ Fargate, !Ref FargateService, !Ref EC2Service ]
次にパイプラインの構築です。
Parameters:
  CodeCommitRepositoryName:
    Type: String

  Cluster:
    Type: String

  Service:
    Type: String


Resources:
  Repository:
    Type: AWS::ECR::Repository
    DeletionPolicy: Retain

  CodeBuildServiceRole:
    Type: AWS::IAM::Role
    Properties:
      Path: /
      AssumeRolePolicyDocument:
        Version: 2012-10-17
        Statement:
          - Effect: Allow
            Principal:
              Service: codebuild.amazonaws.com
            Action: sts:AssumeRole
      Policies:
        - PolicyName: root
          PolicyDocument:
            Version: 2012-10-17
            Statement:
              - Resource: "*"
                Effect: Allow
                Action:
                  - logs:CreateLogGroup
                  - logs:CreateLogStream
                  - logs:PutLogEvents
                  - ecr:GetAuthorizationToken
                  - secretsmanager:GetSecretValue
              - Resource: !Sub arn:aws:s3:::${ArtifactBucket}/*
                Effect: Allow
                Action:
                  - s3:GetObject
                  - s3:PutObject
                  - s3:GetObjectVersion
              - Resource: !Sub arn:aws:ecr:${AWS::Region}:${AWS::AccountId}:repository/${Repository}
                Effect: Allow
                Action:
                  - ecr:GetDownloadUrlForLayer
                  - ecr:BatchGetImage
                  - ecr:BatchCheckLayerAvailability
                  - ecr:PutImage
                  - ecr:InitiateLayerUpload
                  - ecr:UploadLayerPart
                  - ecr:CompleteLayerUpload

  CodePipelineServiceRole:
    Type: AWS::IAM::Role
    Properties:
      Path: /
      AssumeRolePolicyDocument:
        Version: 2012-10-17
        Statement:
          - Effect: Allow
            Principal:
              Service: codepipeline.amazonaws.com
            Action: sts:AssumeRole
      Policies:
        - PolicyName: root
          PolicyDocument:
            Version: 2012-10-17
            Statement:
              - Resource:
                  - !Sub arn:aws:s3:::${ArtifactBucket}/*
                Effect: Allow
                Action:
                  - s3:PutObject
                  - s3:GetObject
                  - s3:GetObjectVersion
                  - s3:GetBucketVersioning
              - Resource: "*"
                Effect: Allow
                Action:
                  - ecs:DescribeServices
                  - ecs:DescribeTaskDefinition
                  - ecs:DescribeTasks
                  - ecs:ListTasks
                  - ecs:RegisterTaskDefinition
                  - ecs:UpdateService
                  - codebuild:StartBuild
                  - codebuild:BatchGetBuilds
                  - iam:PassRole

  ArtifactBucket:
    Type: AWS::S3::Bucket
    DeletionPolicy: Retain

  CodeBuildProject:
    Type: AWS::CodeBuild::Project
    Properties:
      Artifacts:
        Type: CODEPIPELINE
      Source:
        Type: CODEPIPELINE
        BuildSpec: |
          version: 0.2
          phases:
            pre_build:
              commands:
                - $(aws ecr get-login --no-include-email)
                - TAG="$(echo $CODEBUILD_RESOLVED_SOURCE_VERSION | head -c 8)"
                - IMAGE_URI="${REPOSITORY_URI}:${TAG}"
            build:
              commands:
                - docker build --tag "$IMAGE_URI" .
            post_build:
              commands:
                - docker push "$IMAGE_URI"
                - printf '[{"name":"simple-app","imageUri":"%s"}]' "$IMAGE_URI" > images.json
          artifacts:
            files: images.json
      Environment:
        ComputeType: BUILD_GENERAL1_SMALL
        Image: aws/codebuild/docker:17.09.0
        Type: LINUX_CONTAINER
        EnvironmentVariables:
          - Name: AWS_DEFAULT_REGION
            Value: !Ref AWS::Region
          - Name: REPOSITORY_URI
            Value: !Sub ${AWS::AccountId}.dkr.ecr.${AWS::Region}.amazonaws.com/${Repository}
      Name: !Ref AWS::StackName
      ServiceRole: !Ref CodeBuildServiceRole

  Pipeline:
    Type: AWS::CodePipeline::Pipeline
    Properties:
      RoleArn: !GetAtt CodePipelineServiceRole.Arn
      ArtifactStore:
        Type: S3
        Location: !Ref ArtifactBucket
      Stages:
        - Name: Source
          Actions:
            - Name: App
              ActionTypeId:
                Category: Source
                Owner: AWS
                Version: 1
                Provider: CodeCommit
              Configuration:
                RepositoryName: !Ref CodeCommitRepositoryName
                BranchName: master
              RunOrder: 1
              OutputArtifacts:
                - Name: App
        - Name: Build
          Actions:
            - Name: Build
              ActionTypeId:
                Category: Build
                Owner: AWS
                Version: 1
                Provider: CodeBuild
              Configuration:
                ProjectName: !Ref CodeBuildProject
              InputArtifacts:
                - Name: App
              OutputArtifacts:
                - Name: BuildOutput
              RunOrder: 1
        - Name: Deploy
          Actions:
            - Name: Deploy
              ActionTypeId:
                Category: Deploy
                Owner: AWS
                Version: 1
                Provider: ECS
              Configuration:
                ClusterName: !Ref Cluster
                ServiceName: !Ref Service
                FileName: images.json
              InputArtifacts:
                - Name: BuildOutput
              RunOrder: 1


Outputs:
  PipelineUrl:
    Value: !Sub https://console.aws.amazon.com/codepipeline/home?region=${AWS::Region}#/view/${Pipeline}
以上5つのファイルをS3にアップロードしてください。
最後にまとめのテンプレートです。Parameters: LaunchType: Type: String Default: Fargate AllowedValues: - Fargate - EC2 Description: > The launch type for your service. Selecting EC2 will create an Auto Scaling group of t2.micro instances for your cluster. See https://docs.aws.amazon.com/AmazonECS/latest/developerguide/launch_types.html to learn more about launch types. TemplateBucket: Type: String Description: > The S3 bucket from which to fetch the templates used by this stack. CodeCommitRepositoryName: Type: String ClusterSize: Type: Number Default: 2 DesiredCount: Type: Number Default: 1 KeyName: Description: The EC2 Key Pair to allow SSH access to the instance Type: "AWS::EC2::KeyPair::KeyName" Metadata: AWS::CloudFormation::Interface: ParameterLabels: CodeCommitRepositoryName: default: "CodeCommitRepositoryName" LaunchType: default: "Launch Type" ParameterGroups: - Label: default: Cluster Configuration Parameters: - LaunchType - Label: default: CodeCommit Configuration Parameters: - CodeCommitRepositoryName - Label: default: Stack Configuration Parameters: - TemplateBucket - Label: default: TaskDesiredCount Parameters: - DesiredCount Resources: Cluster: Type: AWS::CloudFormation::Stack Properties: TemplateURL: !Sub "https://s3.amazonaws.com/${TemplateBucket}/ecs-cluster.yaml" Parameters: LaunchType: !Ref LaunchType SecurityGroup: !GetAtt LoadBalancer.Outputs.SecurityGroup Subnets: !GetAtt VPC.Outputs.Subnets VpcId: !GetAtt VPC.Outputs.VpcId ClusterSize: !Ref ClusterSize KeyName: !Ref KeyName DeploymentPipeline: Type: AWS::CloudFormation::Stack Properties: TemplateURL: !Sub "https://s3.amazonaws.com/${TemplateBucket}/deployment-pipeline.yaml" Parameters: Cluster: !GetAtt Cluster.Outputs.ClusterName Service: !GetAtt Service.Outputs.Service CodeCommitRepositoryName: !Ref CodeCommitRepositoryName LoadBalancer: Type: AWS::CloudFormation::Stack Properties: TemplateURL: !Sub "https://s3.amazonaws.com/${TemplateBucket}/load-balancer.yaml" Parameters: LaunchType: !Ref LaunchType Subnets: !GetAtt VPC.Outputs.Subnets VpcId: !GetAtt VPC.Outputs.VpcId VPC: Type: AWS::CloudFormation::Stack Properties: TemplateURL: !Sub "https://s3.amazonaws.com/${TemplateBucket}/vpc.yaml" Parameters: Name: !Ref AWS::StackName VpcCIDR: 10.215.0.0/16 Subnet1CIDR: 10.215.10.0/24 Subnet2CIDR: 10.215.20.0/24 Service: Type: AWS::CloudFormation::Stack Properties: TemplateURL: !Sub "https://s3.amazonaws.com/${TemplateBucket}/service.yaml" Parameters: Cluster: !GetAtt Cluster.Outputs.ClusterName LaunchType: !Ref LaunchType TargetGroup: !GetAtt LoadBalancer.Outputs.TargetGroup SecurityGroup: !GetAtt LoadBalancer.Outputs.SecurityGroup Subnets: !GetAtt VPC.Outputs.Subnets DesiredCount: !Ref DesiredCount Outputs: ServiceUrl: Description: The sample service that is being continuously deployed. Value: !GetAtt LoadBalancer.Outputs.ServiceUrl PipelineUrl: Description: The continuous deployment pipeline in the AWS Management Console. Value: !GetAtt DeploymentPipeline.Outputs.PipelineUrl以上となります。最後までご覧いただきありがとうございます。
参照記事
https://qiita.com/chisso/items/3c4dd1af0382d4978288
https://github.com/awslabs/ecs-refarch-continuous-deployment
- 投稿日:2020-12-15T18:06:11+09:00
PHP8.0 + Laravel6.x(LTS)環境をDocker Composeで手早く作る
本記事はAll About Group(株式会社オールアバウト) Advent Calendar 2020 15日目になります。
概要三行
- LAMP(PHP8.0) + Laravelの簡易開発環境をDocker Composeで作成
- 基本コピペで誰でも作業できるように記述。
{}で囲んでいる箇所は任意に書き換えてください。概要
PHP8.0が正式リリースされましたね。https://www.php.net/releases/8.0/en.php
実行速度の改善はありがたい限りです。
気になる楽しみ!ということで、今回はPHP8で遊べるように簡易のLAMP+laravel開発環境を構築いたしました。環境構築_概要
使用技術 / 環境
- Docker Compose
- centos7
- PHP8.0
- laravel6.x(LTS)
- MySQL(5.7)
- phpMyAdmin
構成について
先に、今回作成する開発環境の構成を説明しておきます
{開発環境_命名は自由} /
├── docker-compose.yaml
├── web_php8/
|  ├── Dockerfile
|  └── setup/
|     ├──.bashrc
|     └── httpd/
|        └── app.conf
└── repository/
   └── {laravelアプリ(命名は自由)}
名称 種別 概要 {開発環境_命名は自由}/ ? ディレクトリ 今回の開発環境ファイルを束ねるディレクトリ docker-compose.yaml ? ファイル docker composeの実行ファイル web_php8/ ? ディレクトリ WEB系コンテナの関連ファイル置き場です web_php8/Dockerfile ? ファイル 今回作成するWEB系コンテナのDocker Fileです web_php8/setup/ ? ディレクトリ WEB系コンテナ内での設定ファイル郡です web_php8/setup/.bashrc ? ファイル WEB系コンテナ内に適用するbashrcです web_php8/setup/httpd/ ? ディレクトリ WEB系コンテナ内に適用するApacheの設定ファイル郡です web_php8/setup/httpd/app.conf ? ファイル WEB系コンテナで摘要するconfファイルです repository/ ? ディレクトリ WEBサーバーで稼働させるWEBアプリ置き場です repository/{laravelアプリ(命名は自由)} ? ディレクトリ 今回WEB系コンテナ内で稼働させるLaravelアプリです 本件で立ち上がるコンテナは、WEB、DB、PHP-MY-ADMINの3つです。
最低限の環境なので、自由に変更/追加するといいと思います。
repositoryディレクトリに保管したアプリをWEBコンテナ内にマウントしており、
アプリ開発する際には、localのrepository/{laravelアプリ(命名は自由)}を編集すれば、コンテナ内に反映されます。URL
今回の構築にて作成されるURLを記載します
名称 URL アプリURL http://localhost/ phpMyAdmin http://localhost:89/ 前提
- 筆者はMac端末で作業しております。
{}で囲んでいる箇所は任意に書き換えてください。- docker-composeは既に入っているものとします。
環境構築_手順
docker-compose.yamlの作成
複数のdockerコンテナを束ねるDocker Composeのyamlファイルを作成します。
※ {}で囲んでいる箇所は任意に書き換えてくださいmkdir {開発環境_命名は自由}; cd {開発環境_命名は自由} vim docker-compose.yaml下記を
docker-compose.yamlに記述してくださいdocker-compose.yamlversion: '3' services: web_php8: build: context: ./web_php8 volumes: - ./repository/{laravelアプリ(命名は自由)}:/var/www/{laravelアプリ(命名は自由)} - ./web_php8/setup/.bashrc:/root/.bashrc ports: - "80:80" working_dir: /var/www/{laravelアプリ(命名は自由)}/ environment: TZ: "Asia/Tokyo" db: image: mysql:5.7 ports: - "3306:3306" environment: MYSQL_DATABASE: test_db MYSQL_USER: test_user MYSQL_PASSWORD: test_pass MYSQL_ALLOW_EMPTY_PASSWORD: "yes" TZ: "Asia/Tokyo" php-my-admin: image: phpmyadmin/phpmyadmin links: - db ports: - "89:80" environment: MYSQL_USERNAME: test_user MYSQL_ROOT_PASSWORD: test_pass PMA_HOST: db PMA_PORT: 3306立ち上げる各コンテナとその設定を定義しています。
WEBコンテナはPHP8.0の導入など、色々やりたいので、個別でDockerFileを作成します。WEB系コンテナの作成①Docker File編
WEB系のDockerコンテナを立ち上げるためのDocker Fileを作成します。
mkdir web_php8; cd web_php8
vim Dockerfile
下記を
Dockerfileに記述してくださいFROM centos:centos7 # timezone RUN rm -f /etc/localtime \ && cp -p /usr/share/zoneinfo/Japan /etc/localtime # php8.0 RUN yum -y update \ && yum -y install https://dl.fedoraproject.org/pub/epel/epel-release-latest-7.noarch.rpm \ && yum -y install https://rpms.remirepo.net/enterprise/remi-release-7.rpm \ && yum -y install yum-utils \ && yum-config-manager --disable 'remi-php*' && yum-config-manager --enable remi-php80 \ && yum remove php* \ && yum -y install php php-{cli,fpm,mysqlnd,zip,devel,gd,mbstring,curl,xml,pear,bcmath,json} \ && php --version # apache RUN yum install -y httpd httpd-devel \ && rm -rf /var/cache/yum/* \ && yum clean all \ && mkdir -p /app/ENV /AccessLog.local COPY ./setup/httpd/app.conf /etc/httpd/conf.d/app.conf # composer RUN cd /tmp && curl -sS https://getcomposer.org/installer | php \ && mv ./composer.phar /usr/bin/composer CMD ["httpd", "-D", "FOREGROUND"]WEB系コンテナに必要なツール類や設定はここで定義しています。
WEB系コンテナの作成②関連ファイル編
WEB系コンテナ内にて摘要する各ファイルを作成しておきます
まずは、コンテナ内に適用するbashrcを作成します
mkdir setup; cd setup
vim .bashrc
中身は自由ですので、皆さんのお好きな設定を記述ください。
(マウントしちゃってもいいと思います)次にApache confファイルを作成しておきます
mkdir httpd; cd httpd
vim app.conf
app.confに下記を記述してくださいapp.conf<VirtualHost *:80> ServerName localhost DocumentRoot /var/www/{laravelアプリ(命名は自由)}/public ErrorLog "/dev/stdout" CustomLog "/dev/stdout" combined <Directory /var/www/{laravelアプリ(命名は自由)}/public> AllowOverride All Options Includes FollowSymLinks Order allow,deny Allow from all </Directory> </VirtualHost>Laravelアプリケーション_①アプリのclone
実際に稼働するLaravelアプリを作っていきましょう。
ディレクトリを移動して、laravelをgit cloneします。
ここではWEBアプリはrepositoryディレクトリ配下で管理するようにしています。cd ../../../ mkdir repository; cd repository git clone -b 6.x https://github.com/laravel/laravel.git {適当なアプリ名}環境の立ち上げ
下記にてdocker-composeを実行。
cd で移動しまくってて、わかりにくく申し訳ないですが
docker-compose.yamlと同階層で実行すればOKです。cd ../ docker-compose up各環境が立ち上がり、各コンテナのログが流れ始めたことを確認します。
Laravelアプリケーション_②初期設定
laravelをcloneした後に実行するお作法です。
権限とcomposer、そしてenv周りcd repository/{laravelアプリ(命名は自由)} chmod -R 777 storage chmod -R 777 bootstrap/cache docker-compose exec web_php8 /bin/bash -c “composer install” cp -p .env.example .env php artisan key:generateこの時点で http://localhost:/ にアクセスし、Laravelのテストページが表示されていたら、構築成功です。
Laravelアプリケーション_③DB周り初期設定
.envに本環境のDB設定を記述しましょう
sed  -e 's/DB_HOST=127.0.0.1/DB_HOST=db/' .env
sed  -e 's/DB_DATABASE=laravel/DB_DATABASE=test_db/' .env
sed  -e 's/DB_USERNAME=root/DB_USERNAME=test_user/' .env
sed  -e 's/DB_PASSWORD=/DB_PASSWORD=test_pass/' .env
接続テスト兼、DBマイグレーション
下記にてmigrateを実行をし、デフォルトのテーブル郡が作成できれば成功です。docker-compose exec web_php8 /bin/bash -c “cd /app/operation-cms && php artisan migrate方法は何でもいいですが一例として。
下記にてphpMyAdminからDB内を確認できます。
http://localhost:89/
- 投稿日:2020-12-15T16:03:21+09:00
Lambda関数でEmbulkコマンドを実行してみる
はじめに
この記事は BeeX Advent Calendar 2020 の12/16の記事です。
==
前の記事でLambdaのコンテナイメージでの実行を試してみました。
今回はそれに加えて、最近よく使っているEmbulkコマンドを使えないか試してみました。
環境
PC:Windows 10
Docker:Docker version 19.03.13, build 4484c46d9d前提
- Dockerの初期設定は完了済み
- Python3はインストール済み(Lambdaランタイムと同じかそれ以上)
- AWSアカウントは作成済み
- Amazon ECRリポジトリは作成済み
実際の操作
lambda functionの作成
@shiro01さんの記事を参考にLambda Functionを作成します。
今回はEmbulkの実行の確認なのでシンプルにヘルプコマンドを実行してみます。lambda_function.pyimport subprocess def lambda_handler(event, context): cmd = ['/usr/bin/embulk','help'] out = subprocess.run(cmd,shell=True , stdout=subprocess.PIPE) print(out.stdout.decode())1つ注意点として、subprocess.runの引数に"shell=Treu"を追加しています。
これを追加しないとOSErrorが発生します。参考
Dockerfileの作成
続いてDockerfileを作成します。
Embulkは事前にインストールして実行ファイルを作成しておきます。
DockerfileのCOPYでEmbulkとlambda_functionをコンテナ上にコピーします。FROM amazon/aws-lambda-python:3.7 COPY lambda_function.py ./ COPY embulk /usr/bin RUN chmod +x /usr/bin/embulk CMD [ "lambda_function.lambda_handler" ]イメージをBuildする
以下のコマンドでイメージをビルドします。
$ cd [DockerFile格納先DIR]
$ docker build -t lambda_embulk .
イメージが作成されます。
$ docker images
REPOSITORY    TAG       IMAGE ID       CREATED              SIZE
lambda_embulk latest    472005da7cf7   About a minute ago   980MB
ローカルテスト
以下のコマンドでローカルでLambdaを実行することが可能です。
$ docker run -p 9000:8080 lambda_embulk:latest
time="2020-12-15T06:11:57.95" level=info msg="exec '/var/runtime/bootstrap' (cwd=/var/task, handler=)"
別のウィンドウを開いて、以下のコマンドを実行します。
curlコマンドのレスポンスとしてはnullが返ってきます。$ curl -XPOST "http://localhost:9000/2015-03-31/functions/function/invocations" -d''{}' nullコンテナを実行しているウィンドウを確認すると実行された結果がコンソールに表示されています。
"embulk help"コマンドが実行されているので、ローカルテストは問題なさそうです。$ docker run -p 9000:8080 lambda_embulk:latest time="2020-12-15T06:13:53.604" level=info msg="exec '/var/runtime/bootstrap' (cwd=/var/task, handler=)" START RequestId: 0ed577b3-6a07-447a-bccb-c03d255c0201 Version: $LATEST time="2020-12-15T06:13:57.601" level=info msg="extensionsDisabledByLayer(/opt/disable-extensions-jwigqn8j) -> stat /opt/disable-extensions-jwigqn8j: no such file or directory" time="2020-12-15T06:13:57.601" level=warning msg="Cannot list external agents" error="open /opt/extensions: no such file or directory" Embulk v0.9.23 Usage: embulk [-vm-options] <command> [--options] Commands: mkbundle <directory> # create a new plugin bundle environment. bundle [directory] # update a plugin bundle environment. run <config.yml> # run a bulk load transaction. cleanup <config.yml> # cleanup resume state. preview <config.yml> # dry-run the bulk load without output and show preview. guess <partial-config.yml> -o <output.yml> # guess missing parameters to create a complete configuration file. gem <install | list | help> # install a plugin or show installed plugins. new <category> <name> # generates new plugin template migrate <path> # modify plugin code to use the latest Embulk plugin API example [path] # creates an example config file and csv file to try embulk. selfupdate [version] # upgrades embulk to the latest released version or to the specified version. VM options: -E... Run an external script to configure environment variables in JVM (Operations not just setting envs are not recommended nor guaranteed. Expect side effects by running your external script at your own risk.) -J-O Disable JVM optimizations to speed up startup time (enabled by default if command is 'run') -J+O Enable JVM optimizations to speed up throughput -J... Set JVM options (use -J-help to see available options) -R--dev Set JRuby to be in development mode Use `<command> --help` to see description of the commands. END RequestId: 0ed577b3-6a07-447a-bccb-c03d255c0201 REPORT RequestId: 0ed577b3-6a07-447a-bccb-c03d255c0201 Init Duration: 1.03 ms Duration: 591.61 ms Billed Duration: 600 mMemory Size: 3008 MB Max Memory Used: 3008 MBECRリポジトリへのPush
AWSコンソールからリポジトリを作成します。
以下のコマンドで作成したECRリポジトリにイメージをPushします。
ここら辺は前回の記事をほぼ同じです。
Embulkが少々サイズがあるので、前回よりPushに時間がかかります。$ docker tag lambda_embulk:latest XXXXXXXXXXXXX.dkr.ecr.ap-northeast-1.amazonaws.com/lambda-embulk $ docker images REPOSITORY TAG IMAGE ID CREATED SIZE 941996685139.dkr.ecr.ap-northeast-1.amazonaws.com/lambda-embulk latest 472005da7cf7 11 minutes ago 980MB$ aws ecr get-login-password --region ap-northeast-1 | docker login --username AWS --password-stdin XXXXXXXXXXXXX.dkr.ecr.ap-northeast-1.amazonaws.com Login Succeeded$ docker push XXXXXXXXXXXXX.dkr.ecr.ap-northeast-1.amazonaws.com/lambda-embulk:latest The push refers to repository [XXXXXXXXXXXXX.dkr.ecr.ap-northeast-1.amazonaws.com/lambda-embulk] 5f70bf18a086: Pushed 65f9fe7cdd01: Pushed 1965e83122e7: Pushed 701bdcbf3b47: Pushed 6e660533f001: Pushed 069cd8bd11dd: Pushed 6e191121f7ea: Pushed d6fa53d6caa6: Pushed 1fb474cee41c: Pushed b1754cf6954d: Pushed 464c816a7003: Pushed latest: digest: sha256:XXXXXXXXXXXXXXXXXXXXXXXXXXXXXXXXXXXXXXXXXXXXXXX size: 2624無事にアップロードできました。
Lambda作成・実行
AWSのコンソールからLambda関数を作成します。
Lambda関数が作成されました。
実行結果確認
timeoutでエラーが出ました。
Lambdaの基本設定でタイムアウト値が3秒になっていたので、とりあえず3分に変更します。
少し時間はかかりましたが、正常終了しました。
出力内容を見る限りEmbulkのhelpコマンドも実行できているみたいです。
さいごに
これが良いかどうかは別として、無事にLambdaでEmbulkを実行することができました。
多分実運用するならLambdaのスペックとかdiffファイルどこで保持するとか色々検討すべきことはありますが、とりあえずs3に置いてそこから小規模の処理を動かすとかならいけるんじゃないですかね?知らんけど。ただEmbulkの処理ってLambdaの実行時間に収まることあまりないから、その辺りは難しいところかもしれません。

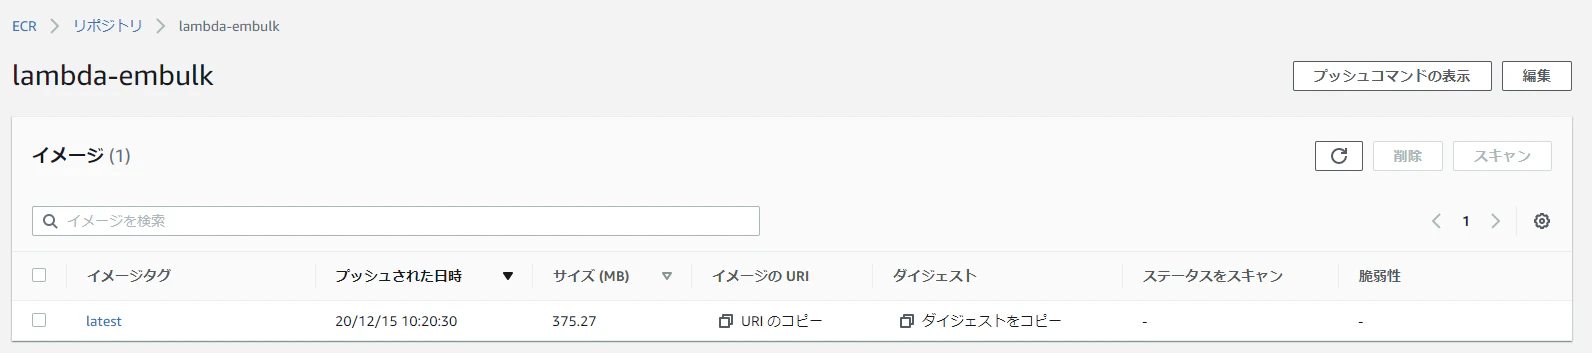
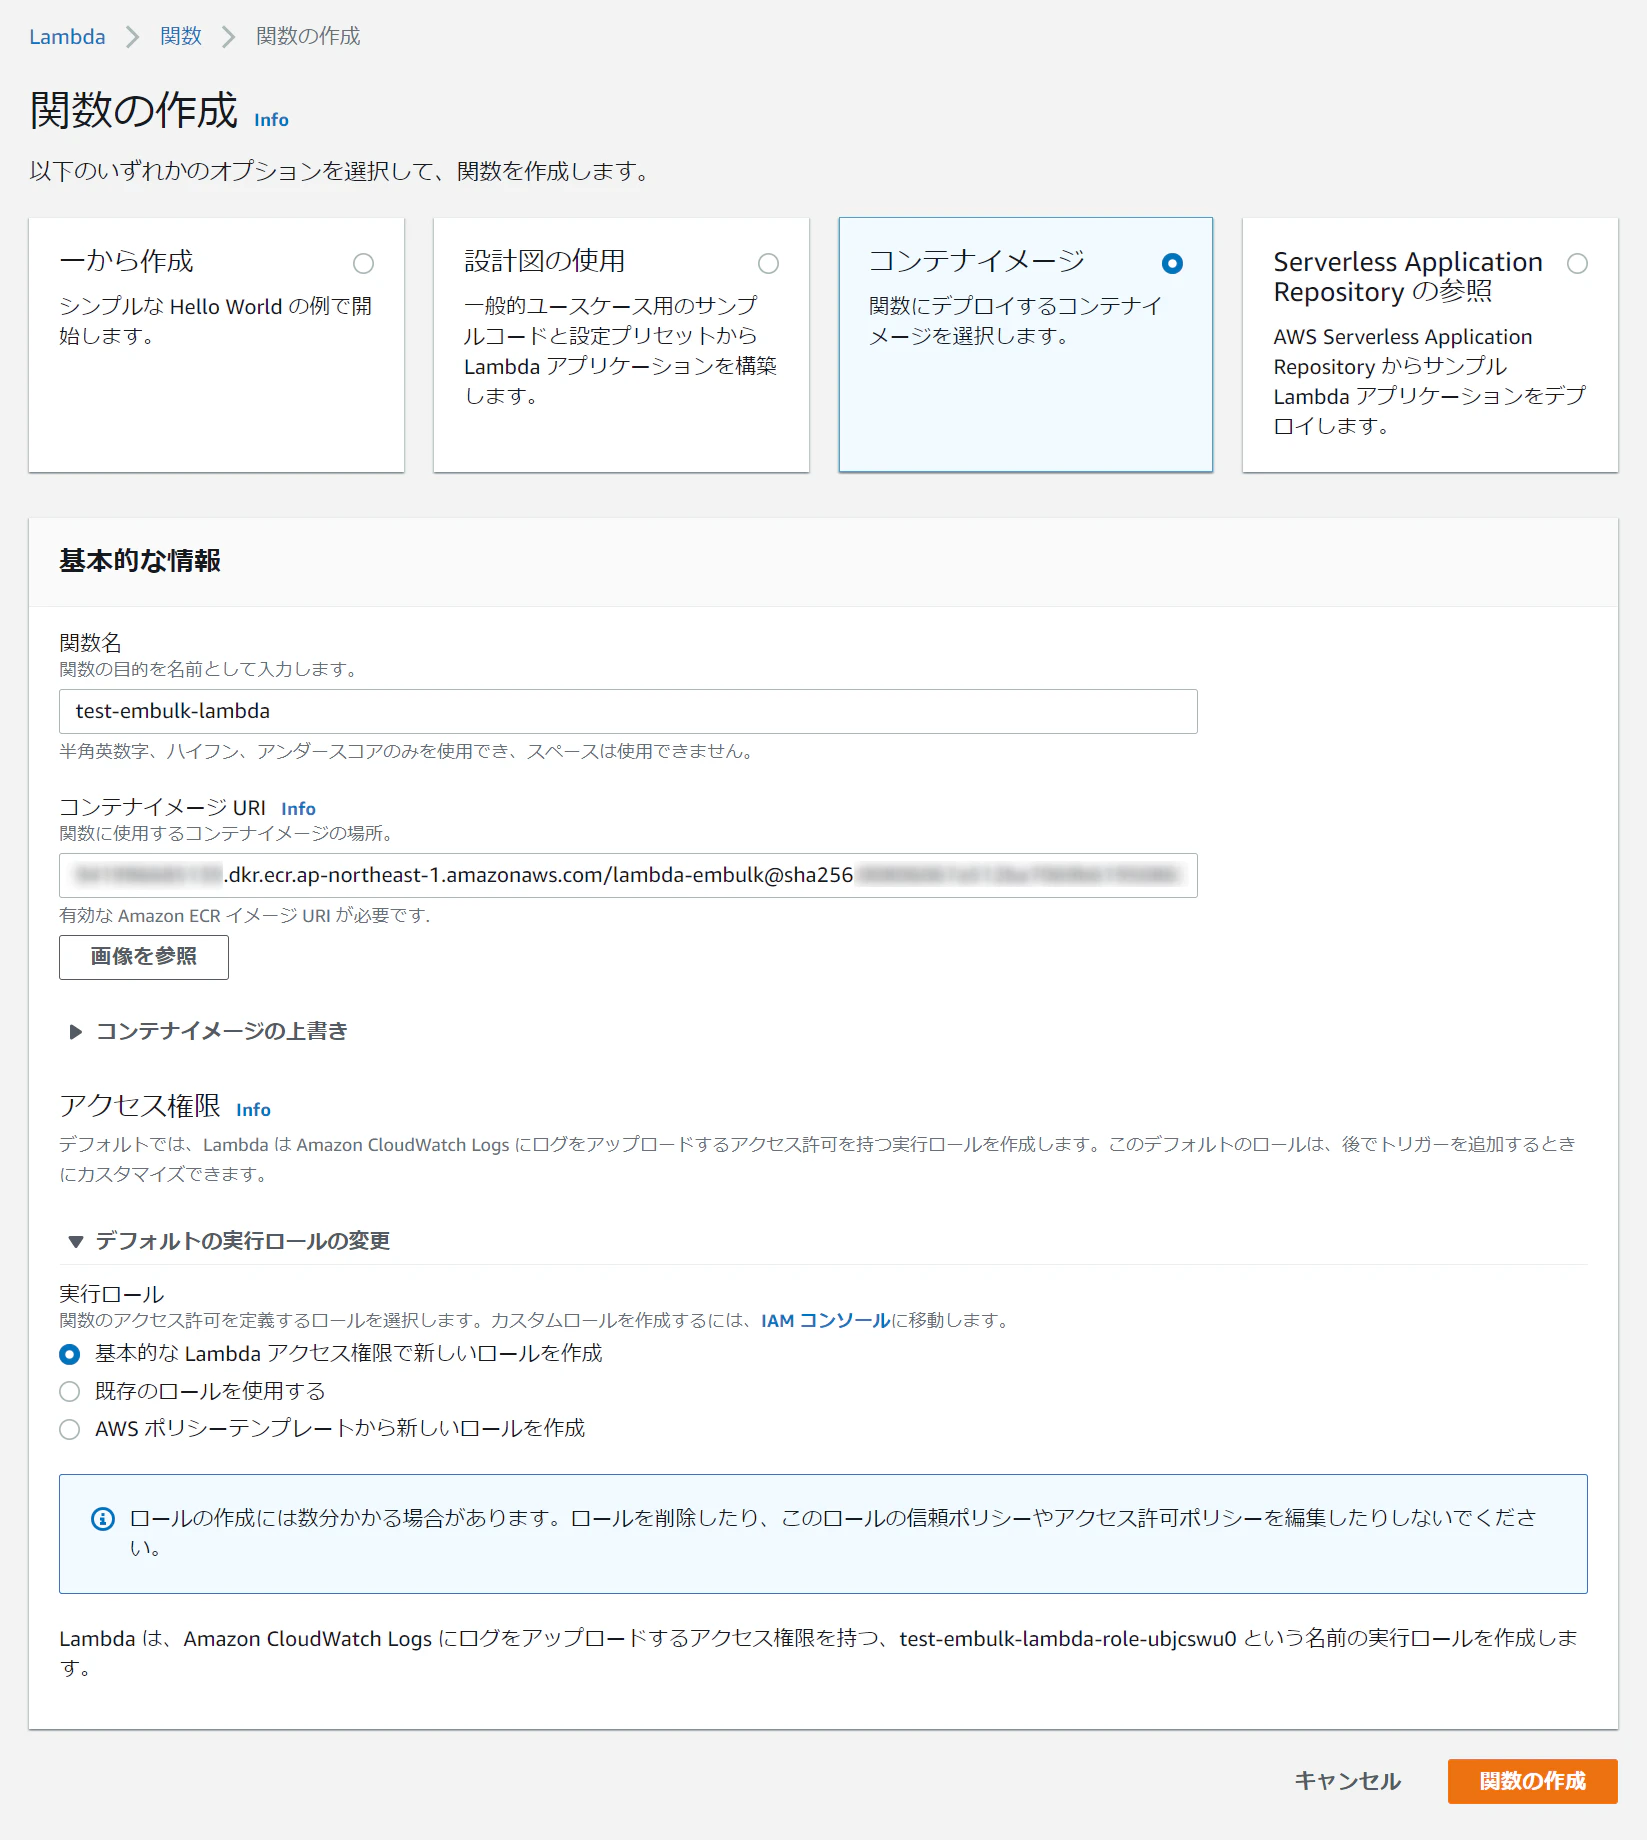
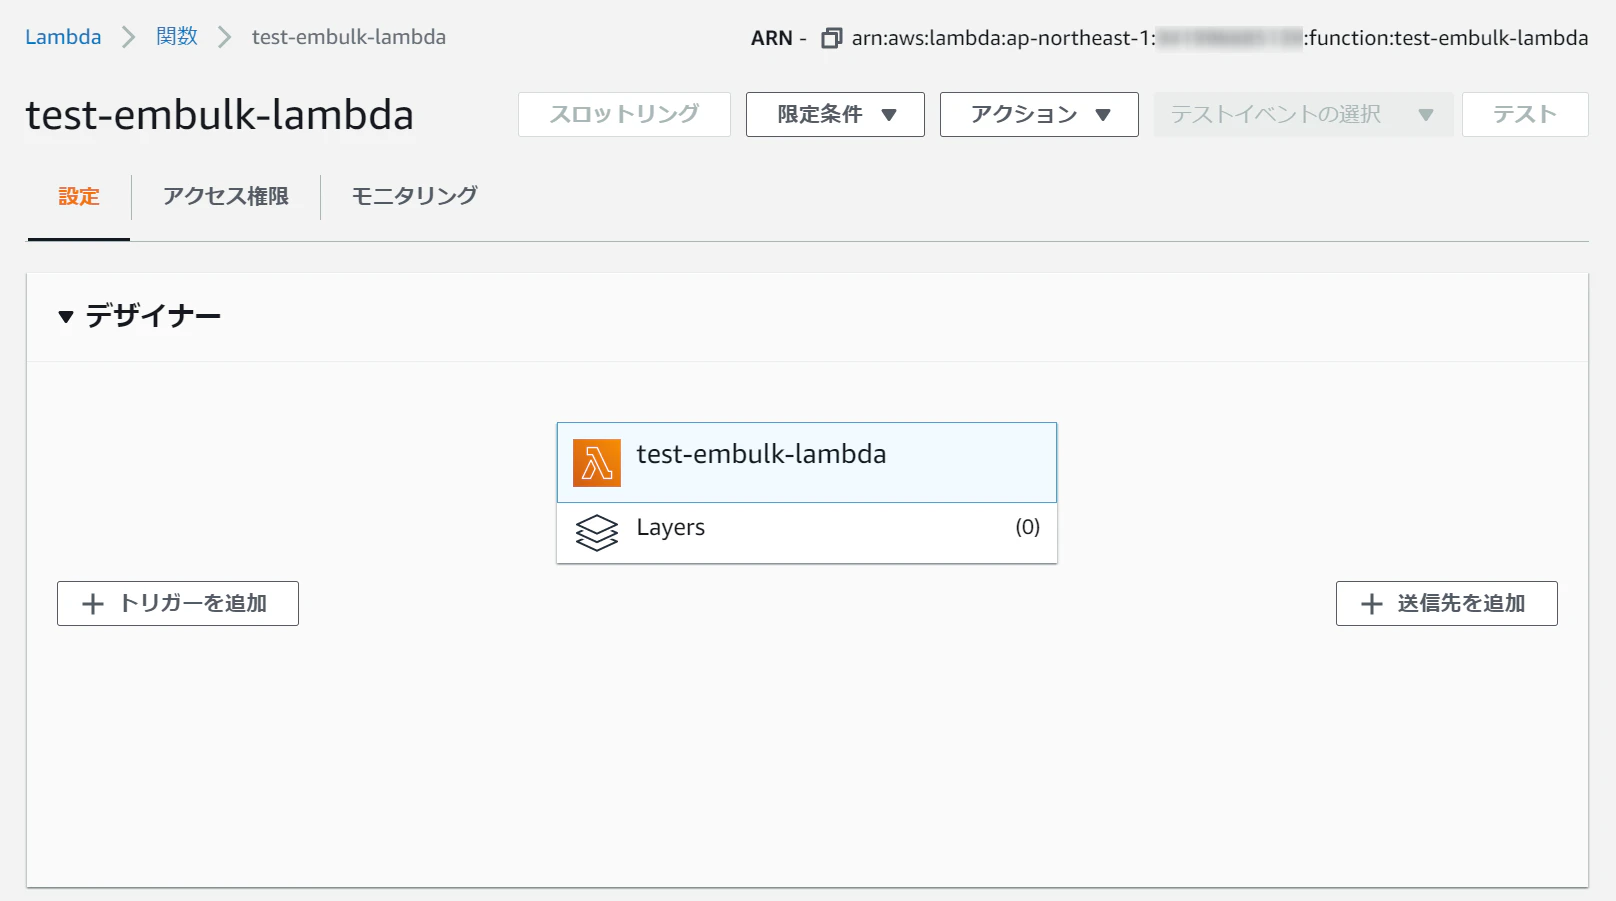
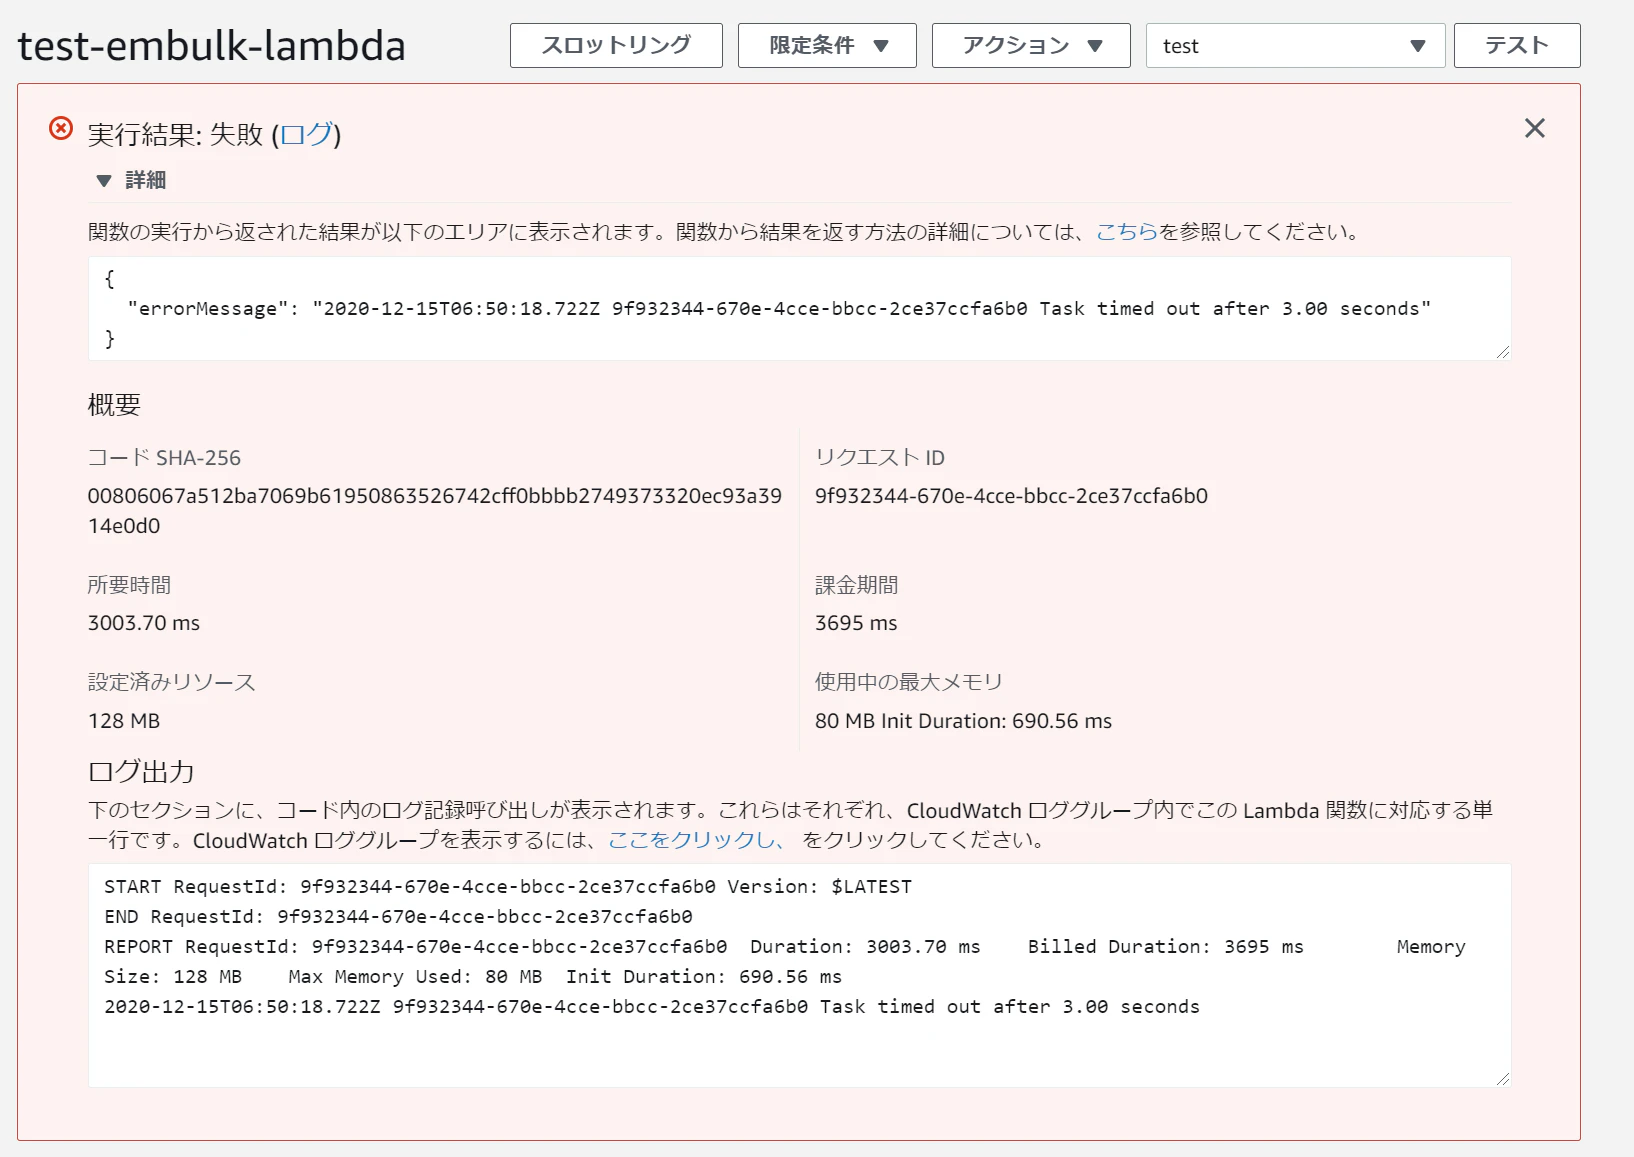
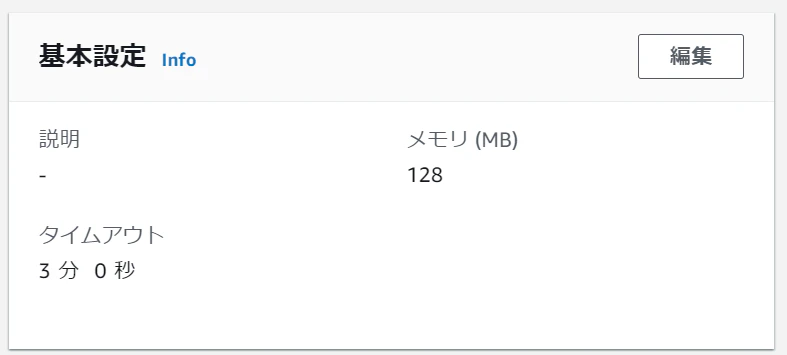

- 投稿日:2020-12-15T14:59:53+09:00
docker環境でlaravel/Duskをインストール(laravel6)
煮詰まっちゃったんで記事に残しておきます
前提条件
simotarooさんの絶対に失敗しないDockerでLaravel+Vueの実行環境(LEMP環境)を構築する方法、もしくはdockerにてlaravel,PHPの環境構築済みの方
環境
mac
docker (LEMP環境)
構築方法
任意のdockerfileに以下を追加しbuildし直す
※僕はsimotarooさんの記事を参考にして構築したためphpのdockerfileに記述しましたdockerfileRUN apt-get -y install libzip-dev RUN docker-php-ext-install zip RUN apt-get -y install libnss3 RUN apt-get -y install libasound2-data libasound2 xdg-utils RUN apt install sudo RUN apt-get install -y wget RUN apt-get install -y gnupg2 RUN wget -q -O - https://dl-ssl.google.com/linux/linux_signing_key.pub | apt-key add - RUN echo "deb http://dl.google.com/linux/chrome/deb/ stable main" >> /etc/apt/sources.list.d/google.list RUN sudo apt update RUN sudo apt-get install -y google-chrome-stable RUN apt-get install -y fonts-ipafont.envのAPP_URLを書き換え
.envAPP_URL = http://localhost を APP_URL=http://127.0.0.1:8000 に書き換えtests/DuskTestCase.phpを書き換え
tests/DuskTestCase.phpprotected function driver() { $options = (new ChromeOptions)->addArguments([ '--no-sandbox', '--disable-gpu', '--headless', '--window-size=1920,1080', '--lang=ja_JP', ]);インストール後プロジェクト内で
composer require --dev laravel/dusk:
artisan dusk:install
php artisan serve
そんでテスト実行
php artisan dusk
PHPUnit 8.5.8 by Sebastian Bergmann and contributors.

.                                                                   1 / 1 (100%)

Time: 11.2 seconds, Memory: 24.00 MB

OK (1 test, 1 assertion)
成功したら無事完成です
- 投稿日:2020-12-15T14:17:22+09:00
【Docker】MySQLとの接続
概要
- ホストとコンテナの標準出力を結びつける
標準出力の結びつけ
- psオプションでCONTAINER ID または NAMESを確認する
% docker ps
CONTAINER ID   IMAGE               COMMAND                  CREATED      STATUS         PORTS                    NAMES
- itオプションで標準出力を結びつける
- -i:ホストの標準入出力をコンテナに結びつける
- -t:コンテナの標準入出力をコンテナに結びつける
% docker exec -it [CONTAINER ID または NAMES] bash
- mysqlにログイン(passはdatabase.ymlで確認)
- -u:ユーザーの指定
- -p:パスワード使用
% mysql -u root -p以上
- 投稿日:2020-12-15T13:22:02+09:00
Nuxt.js + Rails APIをDocker上で立ち上げCRUD操作してみる
今回初めて Nuxt.js を触りました。
Todoアプリを作ろうかなと思ったのですが, せっかくならAPIを叩こうじゃないかということでサーバーサイドも用意してみました。サーバーサイドはRuby on Rails(API), クライアントサイドはNuxt.ts(Nuxt.js + TypeScript), DBはpostgresという構成で実装していきます。
環境構築に関しては, サーバーサイド/クライアンドサイド共にDocker上で動かしており, ディレクトリ構成はモノシリックにまとめました。
↓ソースコードはこちら
動作環境
macOS Catalina : version 10.15.4
Docker for macはインストール済みとする。ディレクトリ構成
ディレクトリ構成. ├── client-side ├── server-side └── docker-compose.yml1. サーバーサイド(Ruby on Rails)
Dockerfile作成
server-side/配下にdockerfileを作成。DockerfileFROM ruby:2.7.0 RUN apt-get update -qq && \ apt-get install -y \ build-essential \ libpq-dev \ nodejs \ postgresql-client WORKDIR /app COPY Gemfil Gemfile.lock /app/ RUN bundle installGemfile, Gemfile.lock作成
同じく
server-side/配下にGemfileとGemfile.lockを作成。Gemfile内に以下を記述。
Gemfilesource 'https://rubygems.org' gem 'rails', '6.0.3'Gemfile.lockは空のままで大丈夫。
docker-compose.yml作成
railsとpostgresの設定をdocker-compose.ymlに書いていきます。
docker-compose.ymlversion: '3.8' volumes: db_data: services: db: image: postgres volumes: - db_data/var/lib/postgresql/data environment: POSTGRES_PASSWORD: password server-side: build: ./server-side/ command: bundle exec rails server -b 0.0.0.0 image: server-side ports: - 3000:3000 volumes: - ./server-side:/server-app tty: true stdin_open: true depends_on: - db links: - dbAPIモードで
rails new以下のコマンドを叩けば,
server-side/配下にrails関連のファイル群が作成されます。$ docker-compose run server-side rails new . --api --force --database=postgresql --skip-bundle
database.ymlの内容を修正このままだとserver-sideのコンテナからDBのコンテナにアクセスできないので
database.ymlの内容を修正します。以下のようになっていると思うので
database.ymldefault: &default adapter: postgresql encoding: unicode # For details on connection pooling, see Rails configuration guide # https://guides.rubyonrails.org/configuring.html#database-pooling pool: <%= ENV.fetch("RAILS_MAX_THREADS") { 5 } %>以下のように編集。
database.ymldefault: &default adapter: postgresql encoding: unicode host: db user: postgres password: password # For details on connection pooling, see Rails configuration guide # https://guides.rubyonrails.org/configuring.html#database-pooling pool: <%= ENV.fetch("RAILS_MAX_THREADS") { 5 } %>
server-sideホストを受け入れるように修正この設定をすることで, Nuxtからserver-sideにアクセスできます。
server-side/config/environments/development.rbconfig.hosts << "server-side"DBを作成
以下のコマンドを叩いてdbを作成。
$ docker-compose run server-side rails db:create動作させてみる
以下のコマンドを打って,
localhost:3000にアクセス。
railsのデフォ画面が表示されればOK!$ docker-compose up -dサーバーサイドのAPIを実装
以下のコマンドを叩き, コンテナの中に入った上で作業を進めていきます。
$ docker exec -it server-side bashルーティングを設定。
routes.rbRails.application.routes.draw do # For details on the DSL available within this file, see https://guides.rubyonrails.org/routing.html namespace :api do namespace :v1 do resources :todos do collection do get :complete end end end end endTodoモデル, todosコントローラーを作成。
$ rails g model Todo title:string isDone:boolean
$ rails db:migrate
$ rails g controller api::v1::todos
controllerの中身は以下のように書きました。
api/app/controllers/api/v1/posts_controller.rbclass Api::V1::TodosController < ApplicationController before_action :set_todo, only: [:update, :destroy] def index todos = Todo.where(isDone: false) render json: { status: 'SUCCESS', message: 'Loaded todos', data: todos } end def complete todos = Todo.where(isDone: true) render json: { status: 'SUCCESS', message: 'Loaded todos', data: todos } end def create todo = Todo.new(todo_params) if todo.save render json: { status: 'SUCCESS', data: todo } else render json: { status: 'ERROR', data: todo.errors } end end def destroy @todo.destroy render json: { status: 'SUCCESS', message: 'Deleted the todo', data: @todo } end def update if @todo.update(todo_params) render json: { status: 'SUCCESS', message: 'Updated the todo', data: @todo } else render json: { status: 'ERROR', message: 'Not updated', data: @todo.errors } end end private def set_todo @todo = Todo.find(params[:id]) end def todo_params params.require(:todo).permit(:title, :isDone) end end動作確認
この記事を参考に, Postmanを利用してCRUD操作ができるかどうか確認します。
curlコマンドでも確認できますが, たぶんPostmanの方が楽。2. クライアントサイド(Nuxt.js)
環境構築
基本的には 公式のInstallation に沿って進めるだけ。
nodeはインストール済みとします。(今回の環境では12/15現時点でのLTS ver. 14.15.1を使用しています。)プロジェクトの作成
まずは
create-nuxt-appで雛形作りましょう。$ npx create-nuxt-app client-side色々質問されると思うのですが, 今回は以下のように設定しました。(その他はデフォルト)
terminal? Project name: client-side ? Programming language: TypeScript ? Package manager: Yarn ? UI framework: None ? Nuxt.js modules: Axios ? Linting tools: None ? Testing framework: None ? Rendering mode: Single Page App ? Deployment target: Server (Node.js hosting) ? Development tools: (Press <space> to select, <a> to toggle all, <i> to invert selection) ? Continuous integration: None ? Version control system: Noneこの辺りの設定は各自の好みで設定してください。
全てのオプションは ここから 確認できます。Dockerfile作成
client-side/配下にDockerfileを作成。DockerfileFROM node:14.15.1 WORKDIR /client-app COPY package.json yarn.lock ./ RUN yarn install CMD ["yarn", "dev"]docker-compose.ymlに
client-sideの設定を追加
server-sideの設定を記述したdocker-compose.yml にclient-sideの設定を追加します。docker-compose.ymlversion: '3.8' volumes: db_data: services: db: image: postgres volumes: - db_data/var/lib/postgresql/data environment: POSTGRES_PASSWORD: password server-side: build: ./server-side/ image: server-side ports: - 3000:3000 volumes: - ./server-side:/server-app command: bundle exec rails server -b 0.0.0.0 tty: true stdin_open: true depends_on: - db links: - db # ここから下を追加 client-side: build: ./client-side/ image: client-side ports: - 8000:8000 volumes: - ./client-side:/client-app - /client-app/node_modules command: sh -c "yarn && yarn dev"portの設定
このままだとエラーが出るので, portとhostを以下のように設定します。
nuxt.config.jsexport default { // Disable server-side rendering (https://go.nuxtjs.dev/ssr-mode) ssr: false, // ここを追記 server: { port: 8000, host: '0.0.0.0', }, // 以下省略 }動作させてみる
以下のコマンドを打って,
localhost:8000にアクセスするとNuxt.jsのデフォ画面が表示されます。$ docker-compose up -dこれで環境構築は完了!
3. サーバーサイドとクライアントサイドの連携
いよいよクライアント側からサーバーサイドのAPIを叩きにいきます。
感動の瞬間。。。CORS (オリジン間リソース共有) 問題を解消
CORSについては こちらの記事 が参考になると思います。
公式とGitHubのREADMEに解決方法がありました。
READMEの記述を参考に@nuxtjs/proxyをインストールし,app/nuxt.config.jsを以下のように編集します。
サーバーサイドのポート番号をは3000で指定していたので, ここはserver-side:3000で。(コンテナ間の通信はコンテナ名で解決するため,localhostではなくserver-sideにしている。)$ yarn add @nuxtjs/proxyapp/nuxt.config.jsmodules: [ '@nuxtjs/axios', '@nuxtjs/proxy' ], // 以下を追加 proxy: { '/api': { target: 'http://server-side:3000', pathRewrite: { '^/api': '/api/v1/', }, }, },Composition APIとaxiosを設定
この辺り使いたいので設定しましたが, なくてもCRUD操作はできます。
shell$ yarn add @nuxtjs/composition-apiclient-side/nuxt.config.jsmodules: [ '@nuxtjs/proxy', //追加 '@nuxtjs/axios', '@nuxtjs/composition-api', ],client-side/tsconfig.json"types": [ "@types/node", "@nuxt/types", #追加 "@nuxtjs/axios" ]型定義
client-sideに新たにmodels/todo.tsディレクトリを作り, 以下を記述。todo.tsexport interface ITodo { id: number; title: string; isDone: boolean; }viewを記述
本当はコンポーネントに分割して書くべきですが, 今回は1ファイルにまとめた方が見やすいかなと思ったのでまとめます。
client-side/pages/index.vueに以下の内容を記述。client-side/pages/index.vue<script lang="ts"> import { defineComponent, reactive, ref, onMounted, } from "@nuxtjs/composition-api"; import { ITodo } from "../models/todo"; import $axios from "@nuxtjs/axios"; export default defineComponent({ setup(_, { root }) { onMounted(() => { getTodo(); }); const todoItem = reactive({ title: "", isDone: false, }); const todoList = ref<ITodo[]>([]); const completeTodoList = ref<ITodo[]>([]); // todoをpost const addTodo = async () => { try { await root.$axios.post("/api/todos/", { title: todoItem.title, isDone: todoItem.isDone, }); getTodo(); todoItem.title = ""; } catch (e) { console.log(e); } }; // todoをget const getTodo = async () => { try { const response = await root.$axios.get("/api/todos"); todoList.value = { ...response.data.data }; getCompleteTodo(); } catch (e) { console.log(e); } }; // todoをupdate const updateTodo = async (i: number, todo: ITodo) => { try { const newTodo = todoList.value[i].title; await root.$axios.patch(`/api/todos/${todo.id}`, { title: newTodo }); } catch (e) { console.log(e); } }; // todoをdelete const deleteTodo = async (id: number) => { try { await root.$axios.delete(`/api/todos/${id}`); getTodo(); } catch (e) { console.log(e); } }; // todoをdone const completeTodo = async (todo: ITodo) => { try { todo.isDone = !todo.isDone; await root.$axios.patch(`/api/todos/${todo.id}`, { isDone: todo.isDone, }); getTodo(); } catch (e) { console.log(e); } }; // complete_todoをget const getCompleteTodo = async () => { try { const response = await root.$axios.get("/api/todos/complete"); completeTodoList.value = { ...response.data.data }; } catch (e) { console.log(e); } }; return { todoItem, todoList, completeTodoList, addTodo, deleteTodo, updateTodo, completeTodo, }; }, }); </script> <template> <div class="container"> <section class="todo-new"> <h1>Add todos</h1> <input v-model="todoItem.title" type="text" placeholder="todoを記入" /> <button @click="addTodo()">Todoを追加</button> </section> <section class="todo-index"> <h1>Incomplete todos</h1> <ul> <li v-for="(todo, i) in todoList" :key="i"> <input class="item" type="checkbox" :checked="todo.isDone" @change="completeTodo(todo)" /> <input class="item" type="text" v-model="todo.title" @change="updateTodo(i, todo)" /> <button @click="deleteTodo(todo.id)">削除する</button> </li> </ul> </section> <section class="todo-complete"> <h1>Complete todos</h1> <ul> <li v-for="(todo, i) in completeTodoList" :key="i"> <input class="item" type="checkbox" :checked="todo.isDone" @change="completeTodo(todo)" /> {{ todo.title }} <button @click="deleteTodo(todo.id)">削除する</button> </li> </ul> </section> </div> </template> <style> .container { margin: 80px auto; min-height: 100vh; text-align: center; } section { margin-bottom: 30px; } .item { font-size: 1rem; margin: 0 10x; } li { list-style: none; margin-bottom: 0.5em; } </style>実際に動作させてみる
docker-compose upさせて,
localhost:8000にアクセスすると以下のような画面になると思います。
実際にtodoを追加/編集/削除してみてください。
まとめ
Dockerfileを1から書いたのも初めてだったので良い勉強になりました。
Nuxt.jsに関しては知らないことしかないので勉強していきます。
「ここのコードもっとこうした方がいいよ!」というのがあればぜひアドバイスお願いします。

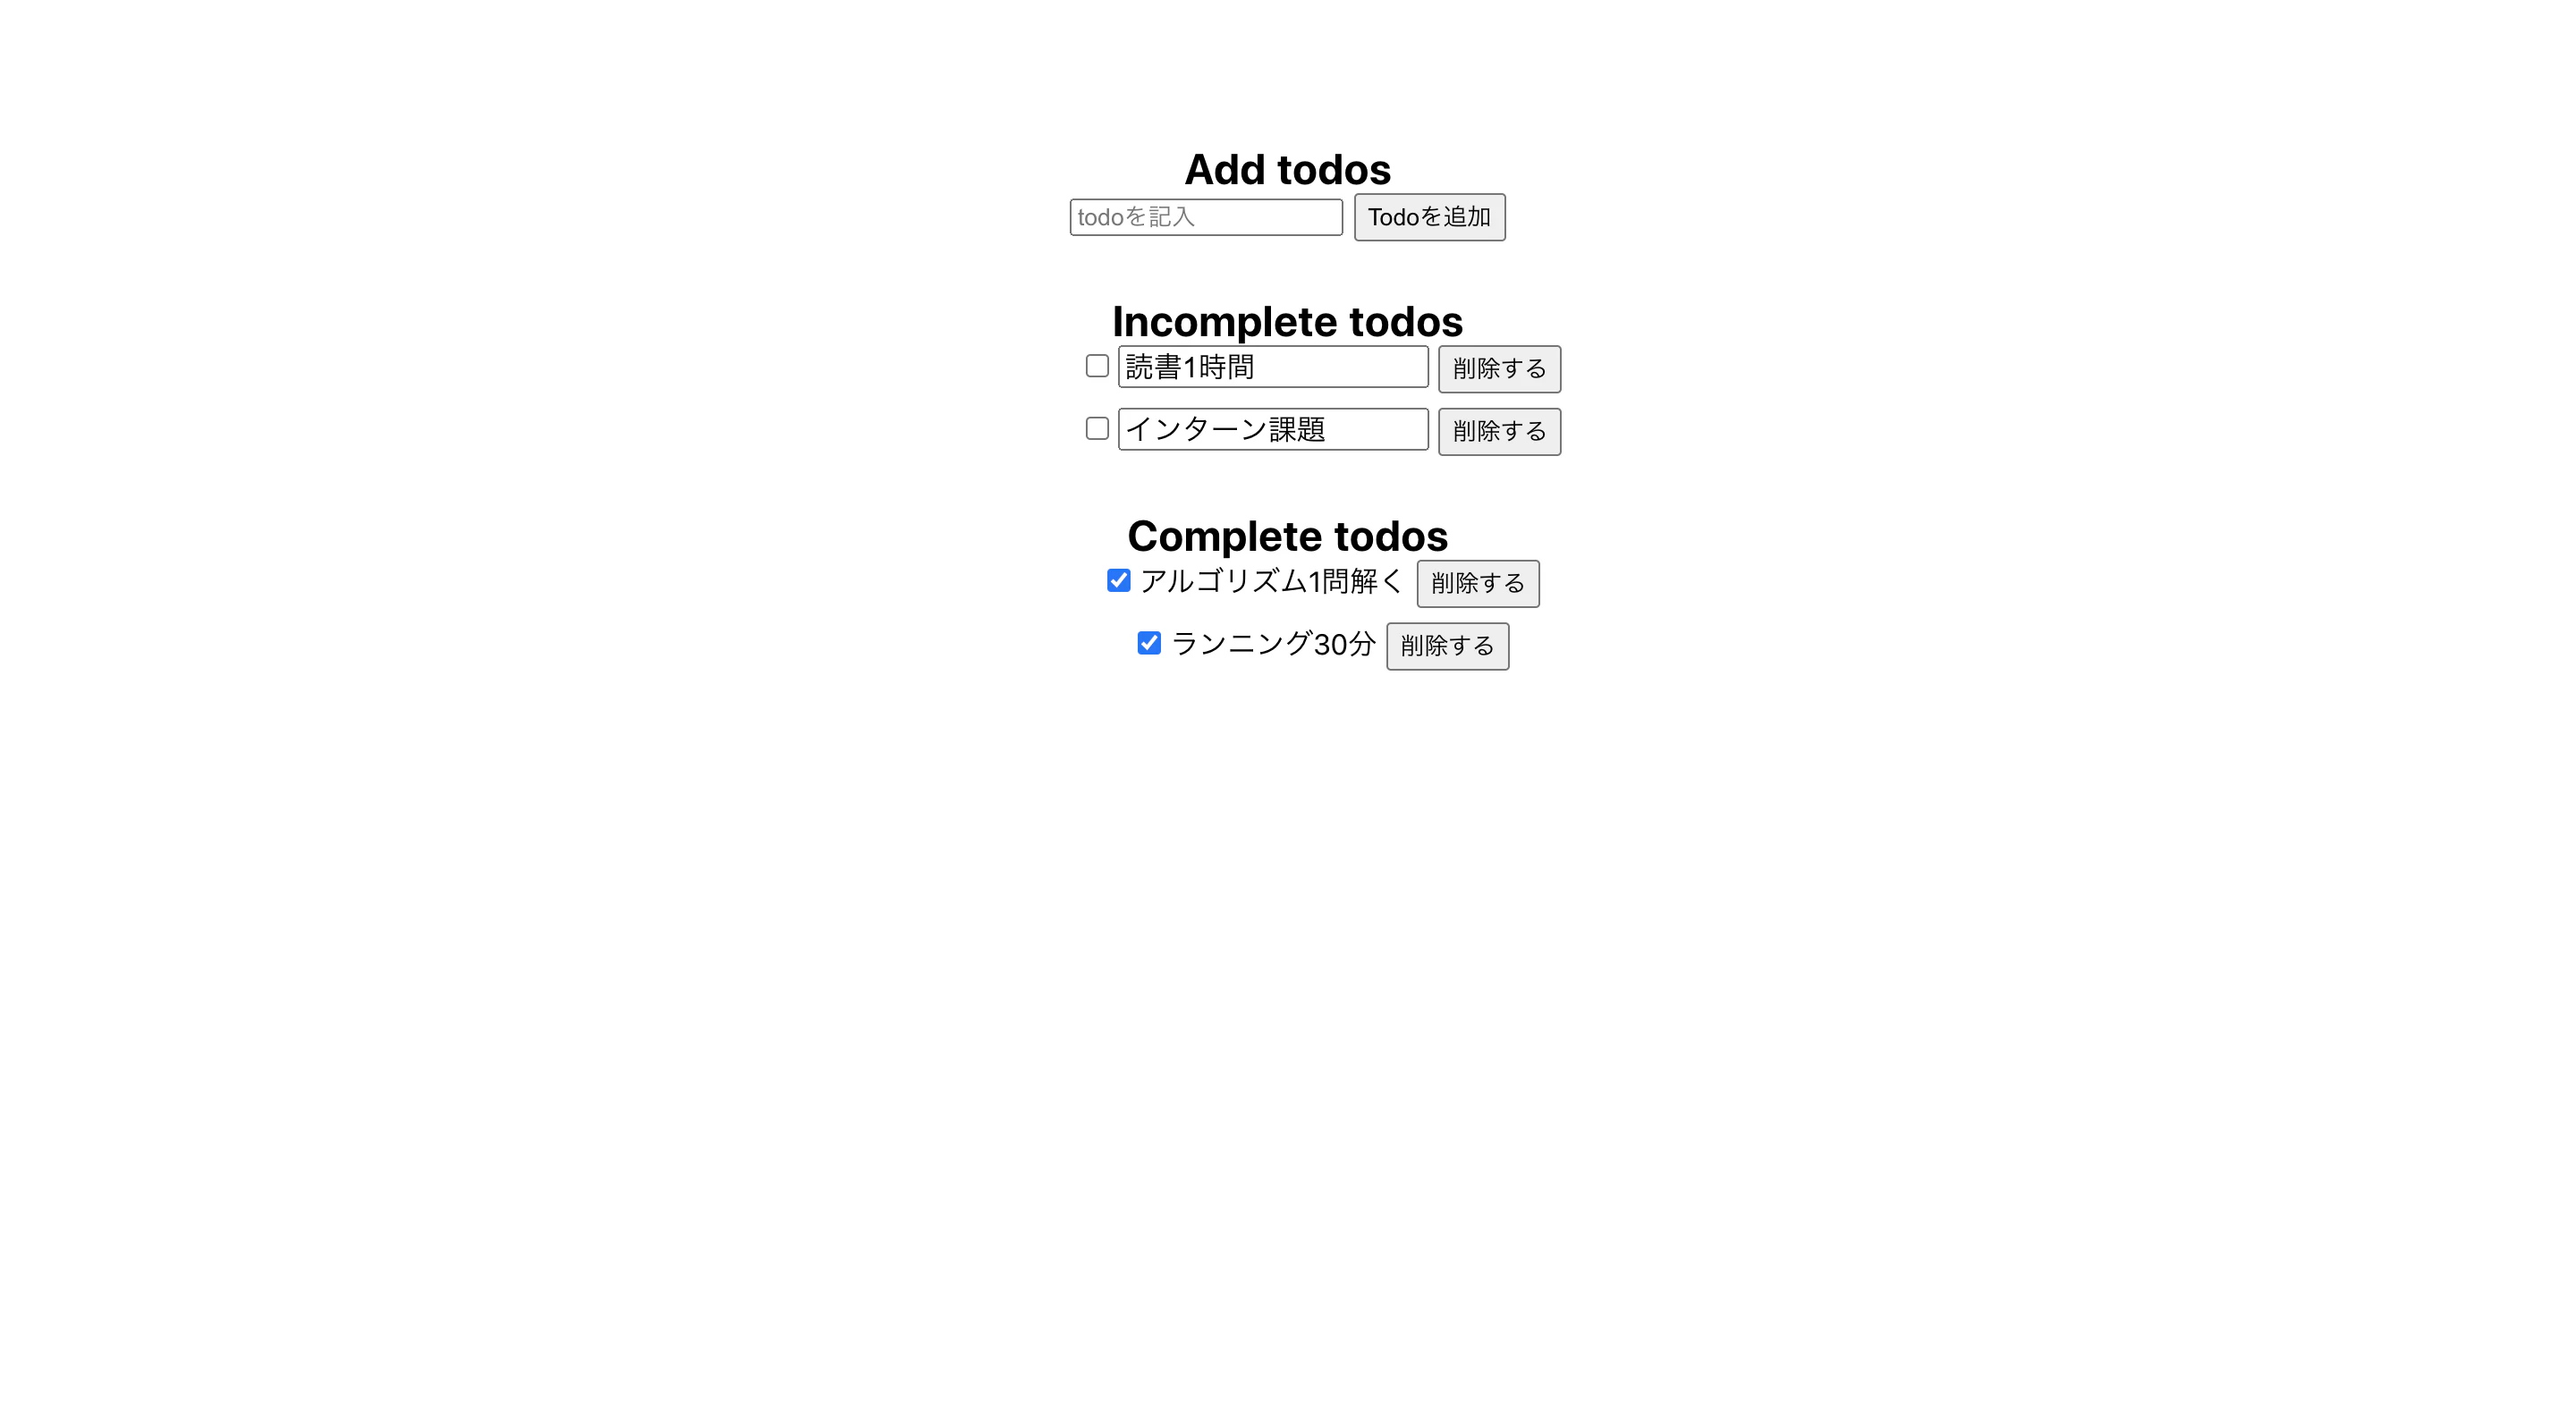
- 投稿日:2020-12-15T12:47:25+09:00
Dockerを使用してマルチノードでOpen Distro for Elasticsearchのローカル開発環境を構築
今回の記事にするOpen Distro for Elasticsearch(以下odfe)は、Amazon Elasticsearch Service(以下Amazon ES)のアップストリームです。
将来的にAmazon ESで運用する予定のため開発環境をodfeで構築しています。
マルチノードでodfeの開発環境を構築するときに詰まった箇所があるので、今回はそのことについてまとめていきたいと思います。環境構築
環境構築は基本的にはodfeの公式ドキュメントに準じて行っています。
https://opendistro.github.io/for-elasticsearch-docs/docs/install/docker/詰まった箇所①クラスター内に3つのマスター適格ノードを含める
ですが、公式ドキュメントではクラスターを2ノードで構成しており、ドキュメントに沿って2ノードで作成することは耐障害性の面で非推奨です。
Elastic社から以下のように説明されています。通常は、クラスター内に3つのマスター適格ノードを含めることが推奨されます。ノードの1つに障害が発生しても、その他の2つで安全にクォーラムを形成し、続行できるからです。クラスター内のマスター適格ノードが2つ以下の場合は、そのいずれの障害にも耐えられません。それとは逆に、クラスター内にマスター適格ノードが4つ以上ある場合は、マスターの選出およびクラスターステータスの更新に時間がかかる可能性があります。(新世代Elasticsearchクラスターコーディネーション)
なので、今回はクラスターを3つのマスター適格ノードで構成するようdocker-composeファイルに設定を書いています。
参考記事:Important discovery and cluster formation settings補足
また、バージョン6系まではマスター適格ノードを偶数台にしないよう設定する必要があったのですが、バージョン7系から新たなクラスターコーディネーションの仕組みが導入されて、偶数台構成であってもElasticsearchが自動で調整しスプリットブレインの発生を回避してくれるようになっています。
詳細はElastic Stack実践ガイド(Elasticsearch/Kibana編)筆者のQiitaがとても分かりやすいので、ご覧ください。「ElasticsearchのMasterノードって偶数台で構成してもいいんですか?」(2020年版)
dockerファイル
今回作成したDockerファイルとdocker-composeファイルは以下です。
Dockerfile.esFROM amazon/opendistro-for-elasticsearch:1.11.0 RUN /usr/share/elasticsearch/bin/elasticsearch-plugin install --batch analysis-kuromoji RUN /usr/share/elasticsearch/bin/elasticsearch-plugin install --batch analysis-icudocker-compose.ymlversion: "3" services: elasticsearch-node1: build: context: . dockerfile: dockerfiles/Dockerfile.es container_name: elasticsearch-node1 environment: - cluster.name=elasticsearch-cluster - node.name=elasticsearch-node1 - discovery.seed_hosts=elasticsearch-node1,elasticsearch-node2,elasticsearch-node3 - cluster.initial_master_nodes=elasticsearch-node1,elasticsearch-node2,elasticsearch-node3 - bootstrap.memory_lock=true # along with the memlock settings below, disables swapping - "ES_JAVA_OPTS=-Xms512m -Xmx512m" # minimum and maximum Java heap size, recommend setting both to 50% of system RAM ulimits: memlock: soft: -1 hard: -1 nofile: soft: 65536 # maximum number of open files for the Elasticsearch user, set to at least 65536 on modern systems hard: 65536 volumes: - elasticsearch-data1:/usr/share/elasticsearch/data ports: - 9200:9200 - 9600:9600 # required for Performance Analyzer networks: - elasticsearch-net elasticsearch-node2: build: context: . dockerfile: dockerfiles/Dockerfile.es container_name: elasticsearch-node2 environment: - cluster.name=elasticsearch-cluster - node.name=elasticsearch-node2 - discovery.seed_hosts=elasticsearch-node1,elasticsearch-node2,elasticsearch-node3 - cluster.initial_master_nodes=elasticsearch-node1,elasticsearch-node2,elasticsearch-node3 - bootstrap.memory_lock=true - "ES_JAVA_OPTS=-Xms512m -Xmx512m" ulimits: memlock: soft: -1 hard: -1 nofile: soft: 65536 hard: 65536 volumes: - elasticsearch-data2:/usr/share/elasticsearch/data networks: - elasticsearch-net elasticsearch-node3: build: context: . dockerfile: dockerfiles/Dockerfile.es container_name: elasticsearch-node3 environment: - cluster.name=elasticsearch-cluster - node.name=elasticsearch-node3 - discovery.seed_hosts=elasticsearch-node1,elasticsearch-node2,elasticsearch-node3 - cluster.initial_master_nodes=elasticsearch-node1,elasticsearch-node2,elasticsearch-node3 - bootstrap.memory_lock=true - "ES_JAVA_OPTS=-Xms512m -Xmx512m" ulimits: memlock: soft: -1 hard: -1 nofile: soft: 65536 hard: 65536 volumes: - elasticsearch-data3:/usr/share/elasticsearch/data networks: - elasticsearch-net kibana: image: amazon/opendistro-for-elasticsearch-kibana:1.11.0 container_name: elasticsearch-kibana ports: - 5601:5601 expose: - "5601" environment: ELASTICSEARCH_URL: https://elasticsearch-node1:9200 ELASTICSEARCH_HOSTS: https://elasticsearch-node1:9200 networks: - elasticsearch-net volumes: elasticsearch-data1: elasticsearch-data2: elasticsearch-data3: networks: elasticsearch-net:設定値についてもodfeの公式ドキュメントで説明されているので参照されると良いと思います。
Amazon ESでは、デフォルトですべてのドメインにICU AnalysisとJapanese (kuromoji) Analysisのプラグインが含まれているため、odfeの開発環境にも該当のプラグインを入れています。
詰まった箇所②マルチノードで立ち上げると一部のコンテナが立ち上がらない
docker-composeでコンテナを起動する時に、マルチノードで立ち上げようとすると、一部のコンテナが
exit with 137で終了してしまいました。
exit with 137で終了し、一部のコンテナが立ち上がらない場合、Docker Engineのメモリ不足の可能性が考えられます。Issueにも上がっているので、自分と同様に一部のコンテナが立ち上がらなかった方は、Docker Desktopの設定画面からDocker Engineのメモリを増やす対応を取ってみてください。
自分の環境ではこの対応でexit with 137が出なくなりすべてのコンテナが立ち上がりました。おわりに
マルチノードでodfeの開発環境を構築するときに詰まった箇所を紹介しました。
私自身Elasticsearchの利用ははじめてなので、設定に不備がある場合はコメント、編集リクエストをいただけますと幸いです。明日のアドベントカレンダーは@mt-kageが担当します!お楽しみに〜!
- 投稿日:2020-12-15T12:06:09+09:00
ECR Public をDockerHubの代わりに使ってみた(DockerHubのDownload Rate Limit対策)
あらまし
CodeBuildでDockerのビルド中にDockerHubにひっかかりました。AWSの新サービスECR Publicを使って簡単に回避できました。
事象
CodeBuildで
ubuntuをbaseイメージとしたDockerコンテナをビルドしようとしたところ、以下のエラーが発生しました。error pulling image configuration: toomanyrequests: Too Many Requests. Please see https://docs.docker.com/docker-hub/download-rate-limit/調査
DockerHubが最近ダウンロード数に制限をかける事になった。ダウンロード数はグローバルIP/アカウント(ログインすれば)ごとに制限がかかるとの事。
クラスメソッドさんの記事が詳しい。
“Too Many Requests.” でビルドが失敗する…。AWS CodeBuild で IP ガチャを回避するために Docker Hub ログインしよう!という話対応
(DockerHubの認証めんどくさいな、、、、と思ってたところ)ちょうど、AWSがDockerHubの代替となるサービス
ECR Publicを提供し始めたので、こちらを利用する事にしました。[速報]AWS、Docker Hubの代替を狙う「Amazon Elastic Container Registry Public」提供開始。AWS re:Invent 2020
AWSがDocker Hubの代替サービスを発表予告。パブリックにコンテナイメージを公開可能で50GBまで無料、AWSからなら何度でもプルし放題にDockerHubに認証を入れるパターンと比較して、
- 簡単
- 無料枠の幅が大きい
- AWSサービスで使うならRateLimit気にしなくて良い
というメリットがあると判断しました。
ECR Publicにアクセスすると、主要な公式イメージは登録されてる模様です。(全て確認したわけではないです)
ImageURIがあるので(tagの構成はDockerHubと同じ)、DockerFileのfromを書き換えるだけです。
FROM public.ecr.aws/ubuntu/ubuntu:bionicどうやらDockerHubと全く同じものがhostingされているらしく(同じhashでしたし、Dockerのcacheも効きました)、単純に書き換えるだけですんなり動きました。
nginxのDocker用リポジトリを見たら、自動でECRPublicにpushするようなスクリプトがありました。
まとめ
少し使ってみただけですが、公式イメージの取得元として、DockerHubの代替としてECR Publicは使えそうです。
特にAWS環境を使っている場合は、特に制限も無いので特に有用だと思われます。
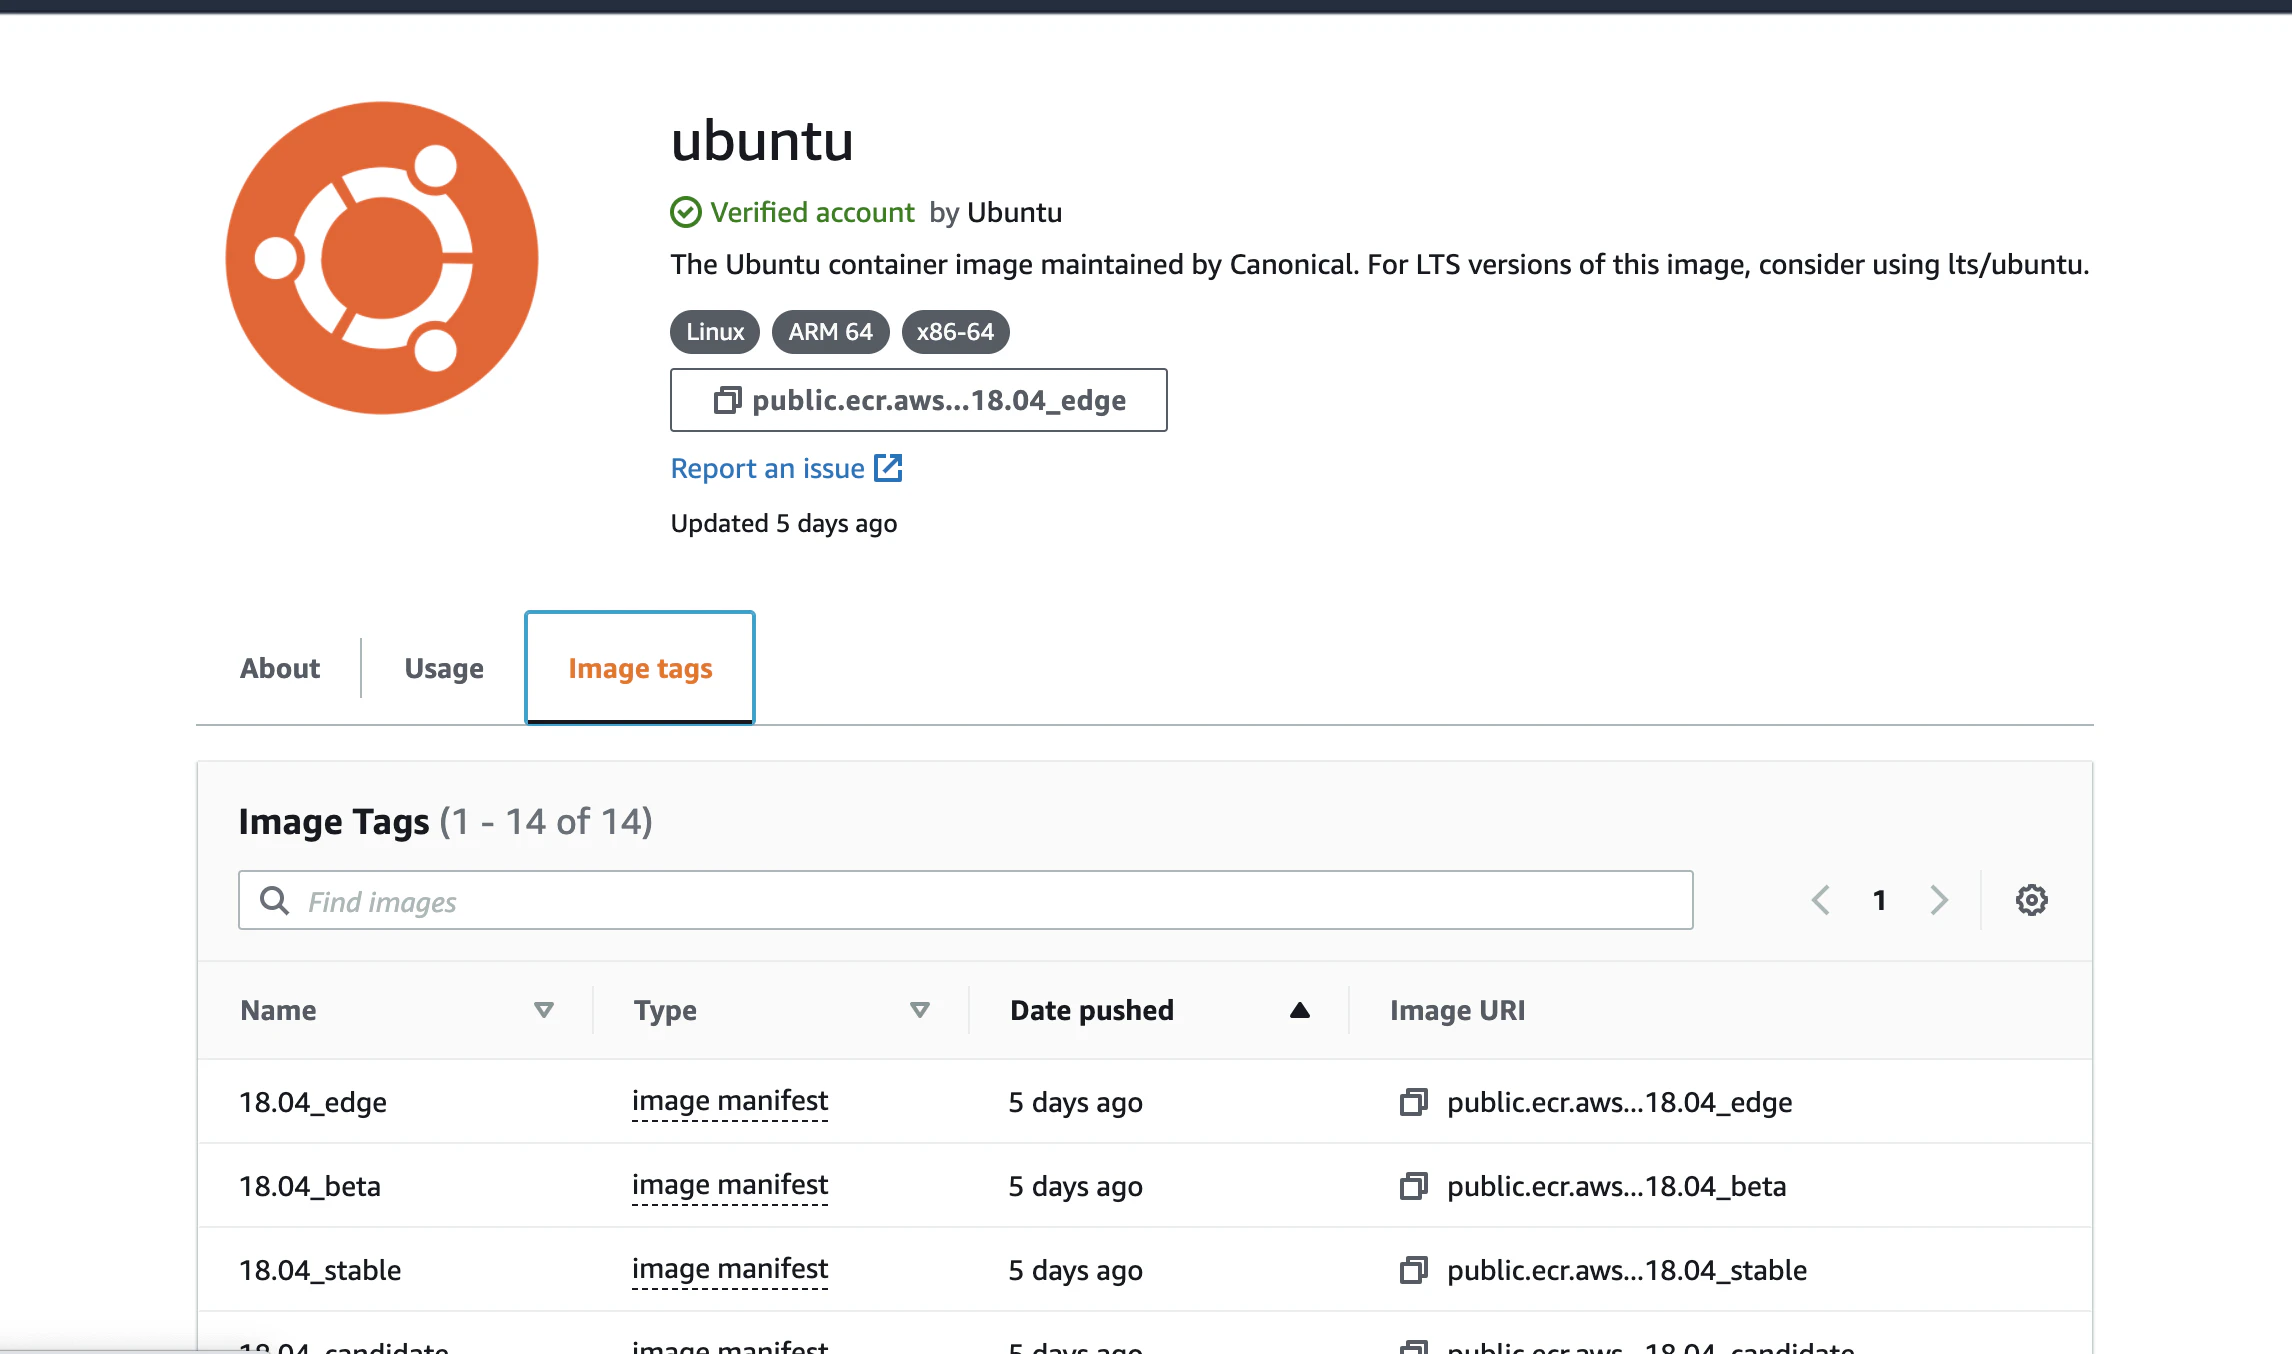
- 投稿日:2020-12-15T12:03:52+09:00
【Docker】コンテナ作成までの操作#2
本投稿の目的
・Dockerの操作についての議事録です。
学習に使った教材
Udemyの "米国AI開発者がゼロから教えるDocker講座" を教材として使用しました。
○container作成 (2.image作成する場合)
○build contextの作成
mkdir <build context名>・build context とは,docker image を作成する際のimage元となるフォルダ
○build contextへ移動
cd <build context名>・カレントディレクトリが build context の状態にする
○Dockerfileの作成,編集
touch Dockerfile・build context 内にDockerfileというテキストファイルを作成 (これは naming convention *命名規則)
・この中に書いたコマンド実行されてimageが作成される (編集方法は別途記事を書くので割愛)○imageの作成
docker build .・ "." はカレントディレクトリを意味する (カレントディレクトリうちのDockerfileを使てimage作成が実行される)
・名前とTAGを指定してないので "none" というimageが作成される
・dangling image とよばれる【Dockerfileを明示的に指定する場合】
docker build -f docker -f <Dockerfileのpath/名前>・-f はDockerfileを明示的に指定するためのオプション
・ の部分には適切なpathとファイル名を記述する【名前とTAGを指定して作成する場合】
docker build -t <image名>:<TAG> .・-t は名前を付けてimageを作成するためのオプション
・ の部分は,通常はlatestと書く○containerの作成
docker run <image名>・作成したいcontainerの素となるimage名を指定してrunを実行
・#1で説明したとおり,これではデフォルトコマンドを実行後にexitしてcontainerから抜けてしまう【run後のデフォルトコマンドを上書きして実行】
docker run <image名> <上書きコマンド>・デフォルトコマンドの代わりに上書きコマンドを実行
・これでは上書きコマンドを実行後にexitしてcontainerから抜けてしまう
・デフォルトコマンドはrun実行後に docker ps -a のCommandから確認可能
・上書きするとここに指定したCommandが表示される【run後にcontainerに残るための記述】
docker run -it <image名> bash・これでcontainer起動後にexitせずにcontainerの中にとどまる
・そのため,ターミナルの実行前の記述が以下のように変化するroot@xxxxxxxxxxx:/#・これはContainer上のOSにbashを通してアクセスする状態になったことを意味する
・デフォルトではコンテナ起動後はrootユーザーになる
・Continaerからexitで抜ける処理は実行されていない
・container から抜けるときは以下を実行するとHostのターミナル状態に戻るexit○-itとは?
docker run -it <image名> bash・run後にcontainerに残るための記述に使用することが多いコマンド
・-iと-tを重ねて-it
・それぞれには以下の意味がある○-i
・インプット可能
・HOSTからコンテナへのSTDIN(入力ch)を繋ぐコマンド
・繋がないとHostにしか入力が伝わらないため,コンテナへ指示が届かない【chとは】
・ "STDIN" "STDOUT" "STDERR" の3つがある
・STDIN : キーボードの入力をプログラムへ繋ぐためのch
・STDOUT,STDERR : プログラム結果をモニタへ出力するためのch○-t
・ターミナル表示が綺麗になる (pretyにする)
・コマンド保管も使用可能になる
- 投稿日:2020-12-15T10:32:41+09:00
Dockerを使ってLaravelのローカル開発環境を作る(Apache版)
Laravel Advent Calendar 2020 - Qiita の 15日目 の記事です。
昨日は @noel_kuma さんのLinter / FormatterからLaravelへの贈り物の記事でした!
明日は @kyoya0819 さんの記事です!概要
最強のLaravel開発環境をDockerを使って構築する【新編集版】
この記事の反響が多く、Apache版も作って欲しいという要望もあってので記事を書いてみました。
対象読者
- Laravelを愛する心の持っている方
- PHP, Linux, Git, Dockerの知識をある程度持っている方
リポジトリ
https://github.com/ucan-lab/docker-laravel-apache
使い方
A. Laravelプロジェクトの新規作成
$ git clone git@github.com:ucan-lab/docker-laravel-apache.git $ cd docker-laravel-apache $ make create-project以上の3ステップでLaravelの新規プロジェクトの環境構築は完了です。
A'. Laravelプロジェクトをバージョン指定して新規作成
MakefileのLaravelインストール部分を書き換えます。docker-compose exec app composer create-project --prefer-dist "laravel/laravel=6.*" .B. 既存のLaravelプロジェクトの環境を構築する
$ git clone git@github.com:ucan-lab/docker-laravel-apache.git # Laravelプロジェクトを docker-laravel-apache/backend へクローンする $ git clone git@github.com:laravel/laravel.git docker-laravel-apache/backend $ cd docker-laravel-apache $ make initこれで既存のLaravelプロジェクトの環境構築は完了です。
コンテナ構成
├── web
└── db
web, db の2つのコンテナ構成で進めます。
nginxとの違い
Nginxの場合は、php-fpm(アプリケーションサーバー)とコンテナを分けていました。
Apacheの場合は、mod_phpというモジュールがデフォルトでインストールされており、それがPHPを実行してくれるアプリケーションサーバーを兼ねるウェブサーバーです。ディレクトリ構成
.
├── backend # Laravelプロジェクトのルートディレクトリ
├── infra
│     └── docker
│          ├── apache
│          │   └── httpd.conf
│          ├── mysql
│          │   ├── Dockerfile
│          │   └── my.cnf
│          └── php
│              ├── Dockerfile
│              └── php.ini
├── .env.example
├── Makefile
└── docker-compose.yml
nginx版との差分
※nginx版との違いはnginxのディレクトリがapacheディレクトリに変わったくらいですね?
- infra/docker/apache/httpd.conf
- infra/docker/php/Dockerfile
- Makefile
- docker-compose.yml
変更点に関しては、上記の4つのファイルに注目していただければ良いかなと思います。
プルリクエストで詳細な差分を確認できます。
- https://github.com/ucan-lab/docker-laravel-apache/pull/2
- https://github.com/ucan-lab/docker-laravel-apache/pull/4
PHP のベースコンテナ
イメージタグに
php:<version>-apacheが用意されています。解説など
docker-compose.yml
version: "3.8"
volumes:
  db-store:
services:
  web:
    build:
      context: .
      dockerfile: ./infra/docker/php/Dockerfile
    ports:
      - ${WEB_PORT:-80}:80
    volumes:
      - ./backend:/work/backend
    environment:
      - DB_CONNECTION=mysql
      - DB_HOST=db
      - DB_PORT=3306
      - DB_DATABASE=${DB_NAME:-laravel_local}
      - DB_USERNAME=${DB_USER:-phper}
      - DB_PASSWORD=${DB_PASS:-secret}

  db:
    build:
      context: .
      dockerfile: ./infra/docker/mysql/Dockerfile
    ports:
      - ${DB_PORT:-3306}:3306
    volumes:
      - db-store:/var/lib/mysql
    environment:
      - MYSQL_DATABASE=${DB_NAME:-laravel_local}
      - MYSQL_USER=${DB_USER:-phper}
      - MYSQL_PASSWORD=${DB_PASS:-secret}
      - MYSQL_ROOT_PASSWORD=${DB_PASS:-secret}
appとwebコンテナをまとめて、webコンテナのみになりました。
どっちにするか悩みましたけど、webコンテナにしました。解説することないので、次へ行きます。
infra/docker/php/Dockerfile
infra/docker/php/DockerfileFROM node:14-buster as node FROM php:7.4-apache-buster LABEL maintainer="ucan-lab <yes@u-can.pro>" SHELL ["/bin/bash", "-oeux", "pipefail", "-c"] # timezone environment ENV TZ=UTC \ # locale LANG=en_US.UTF-8 \ LANGUAGE=en_US:en \ LC_ALL=en_US.UTF-8 \ # composer environment COMPOSER_ALLOW_SUPERUSER=1 \ COMPOSER_HOME=/composer # composer command COPY --from=composer:2.0 /usr/bin/composer /usr/bin/composer # node command COPY --from=node /usr/local/bin /usr/local/bin # npm command COPY --from=node /usr/local/lib /usr/local/lib # yarn command COPY --from=node /opt /opt RUN apt-get update && \ apt-get -y install git libicu-dev libonig-dev libzip-dev unzip locales && \ apt-get clean && \ rm -rf /var/lib/apt/lists/* && \ locale-gen en_US.UTF-8 && \ localedef -f UTF-8 -i en_US en_US.UTF-8 && \ a2enmod rewrite && \ docker-php-ext-install intl pdo_mysql zip bcmath && \ composer config -g process-timeout 3600 && \ composer config -g repos.packagist composer https://packagist.org COPY ./infra/docker/php/php.ini /usr/local/etc/php/php.ini COPY ./infra/docker/apache/httpd.conf /etc/apache2/sites-available/000-default.conf WORKDIR /work/backendphp, composer, nodeの3つのコンテナをマルチステージビルドして使ってます。
(phpのイメージ内にapacheも入ってます。)nodeいらないよって場合はDockerfileから削除しちゃってください。
英語圏の方にも使ってもらえるように言語&タイムゾーンのデフォルトは英語にしてます。
実際に使うときは日本に変更してご利用ください。
a2enmod rewriteはApacheのmod_rewriteモジュールを有効化してます。
これがないとLaravelのルーティングがうまく機能しなくなります。infra/docker/apache/httpd.conf
infra/docker/apache/httpd.conf<VirtualHost *:80> ServerName example.com ServerAdmin webmaster@localhost DocumentRoot /work/backend/public ErrorLog ${APACHE_LOG_DIR}/error.log CustomLog ${APACHE_LOG_DIR}/access.log combined <Directory /work/backend/public> Options Indexes FollowSymLinks AllowOverride All Require all granted </Directory> </VirtualHost>最低限設定必要な項目だけ設定してます。
- 投稿日:2020-12-15T04:21:14+09:00
DockerとAlfredでMySQLとRedisのお手軽環境構築
はじめに
2020 年度 XTech グループアドベントカレンダーの 15 日目の記事です。
エキサイト株式会社、新卒の西牧です。今回は、Docker と Alfred で MySQL と Redis をお手軽に環境構築する方法を紹介したいと思います。
必要なもの Docker で立ち上げて、Alfred でどこからでも呼び出せるようにするという流れです。
コードはこちら。環境
macOS: 10.15.1
docker-compose: 1.27.4
Alfred: 4.0.9docker-composeですべて立ち上げる
docker-compose で以下のものを立ち上げます。
- MySQL
- Redis
- adminer
- redisinsight
MySQL の GUI クライアントには adminer を、Redis の GUI クライアントには redis-insight を使います。
理由としては、デスクトップアプリより web アプリがよかった(個人的にはできるだけ web で完結したい)のと、軽量なことぐらいです。
ちなみに以前は、Sequel Pro と Medis を使っていましたが、どちらもあまり使いやすくなく、adminer と redisinsight の方が個人的にはいいと思います。$ docker-compose up -dversion: '3' services: redis: image: redis:latest restart: always ports: - 6378:6379 command: redis-server /usr/local/etc/redis/redis.conf volumes: - ./redis/data:/data - ./redis/redis.conf:/usr/local/etc/redis/redis.conf redisinsight: image: redislabs/redisinsight restart: always ports: - 8011:8001 volumes: - ./redisinsight:/db depends_on: - redis mysql: image: mysql:5.7 restart: always environment: MYSQL_USER: docker MYSQL_PASSWORD: docker MYSQL_ROOT_PASSWORD: local_root_password MYSQL_DATABASE: db ports: - 3307:3306 volumes: - ./mysql/data:/var/lib/mysql - ./mysql/conf.d:/etc/mysql/conf.d adminer: image: adminer:latest restart: always environment: # choose your favorite design from https://www.adminer.org/ ADMINER_DESIGN: lucas-sandery ports: - 8090:8080 depends_on: - mysql動作確認
立ち上げられると、GUI クライアントを開いて、MySQL と Redis に接続してみます。
- adminer: http://localhost:8090/
- redisinsight: http://localhost:8011/
adminer を開くとこんな感じです。デザインは環境変数で変えられます。
接続情報のサーバには、docker-compose.ymlで書いたサービス名 mysql を入れます。
redisinsight はこんな感じです。
接続情報は以下の通りです。
- Name: 任意の名前
- Host:
docker-compose.ymlで書いたサービス名 redis- Port: 6379
GUI クライアントをどこからでも呼び出せるようにする
Alfred を使います。
Alfredとはなんぞや?という方は、Alfredを使いこなせてない君に!【Alfredの使い方完全版】
いうたら、spotlight 検索の上位互換みたいなやつです。
Alfred の Web Search に 先ほどの http://localhost:8090/ とかを登録しておくと、ポート番号を覚えておく必要もないし、どっからでも呼び出せるので便利です。
Web Search というのは、URL にキーワードを紐付けて登録しておくと、Alfred でそのキーワードを実行することで、登録した URL をブラウザで開けるというものです。
画像のようにして http://localhost:8090/ を登録してみます。
- Search URL: http://localhost:8090/
- Title: 任意の名前
- Keyword: 任意の単語
登録後、実行すると、登録した URL が自動で開きます。
おわりに
最近は Docker で入れられるツールも増えてきているので、うまく活用すると、オンボーディングコストさげられそうだなと、これ書いてて思いました。
みなさんもためしてみてください〜
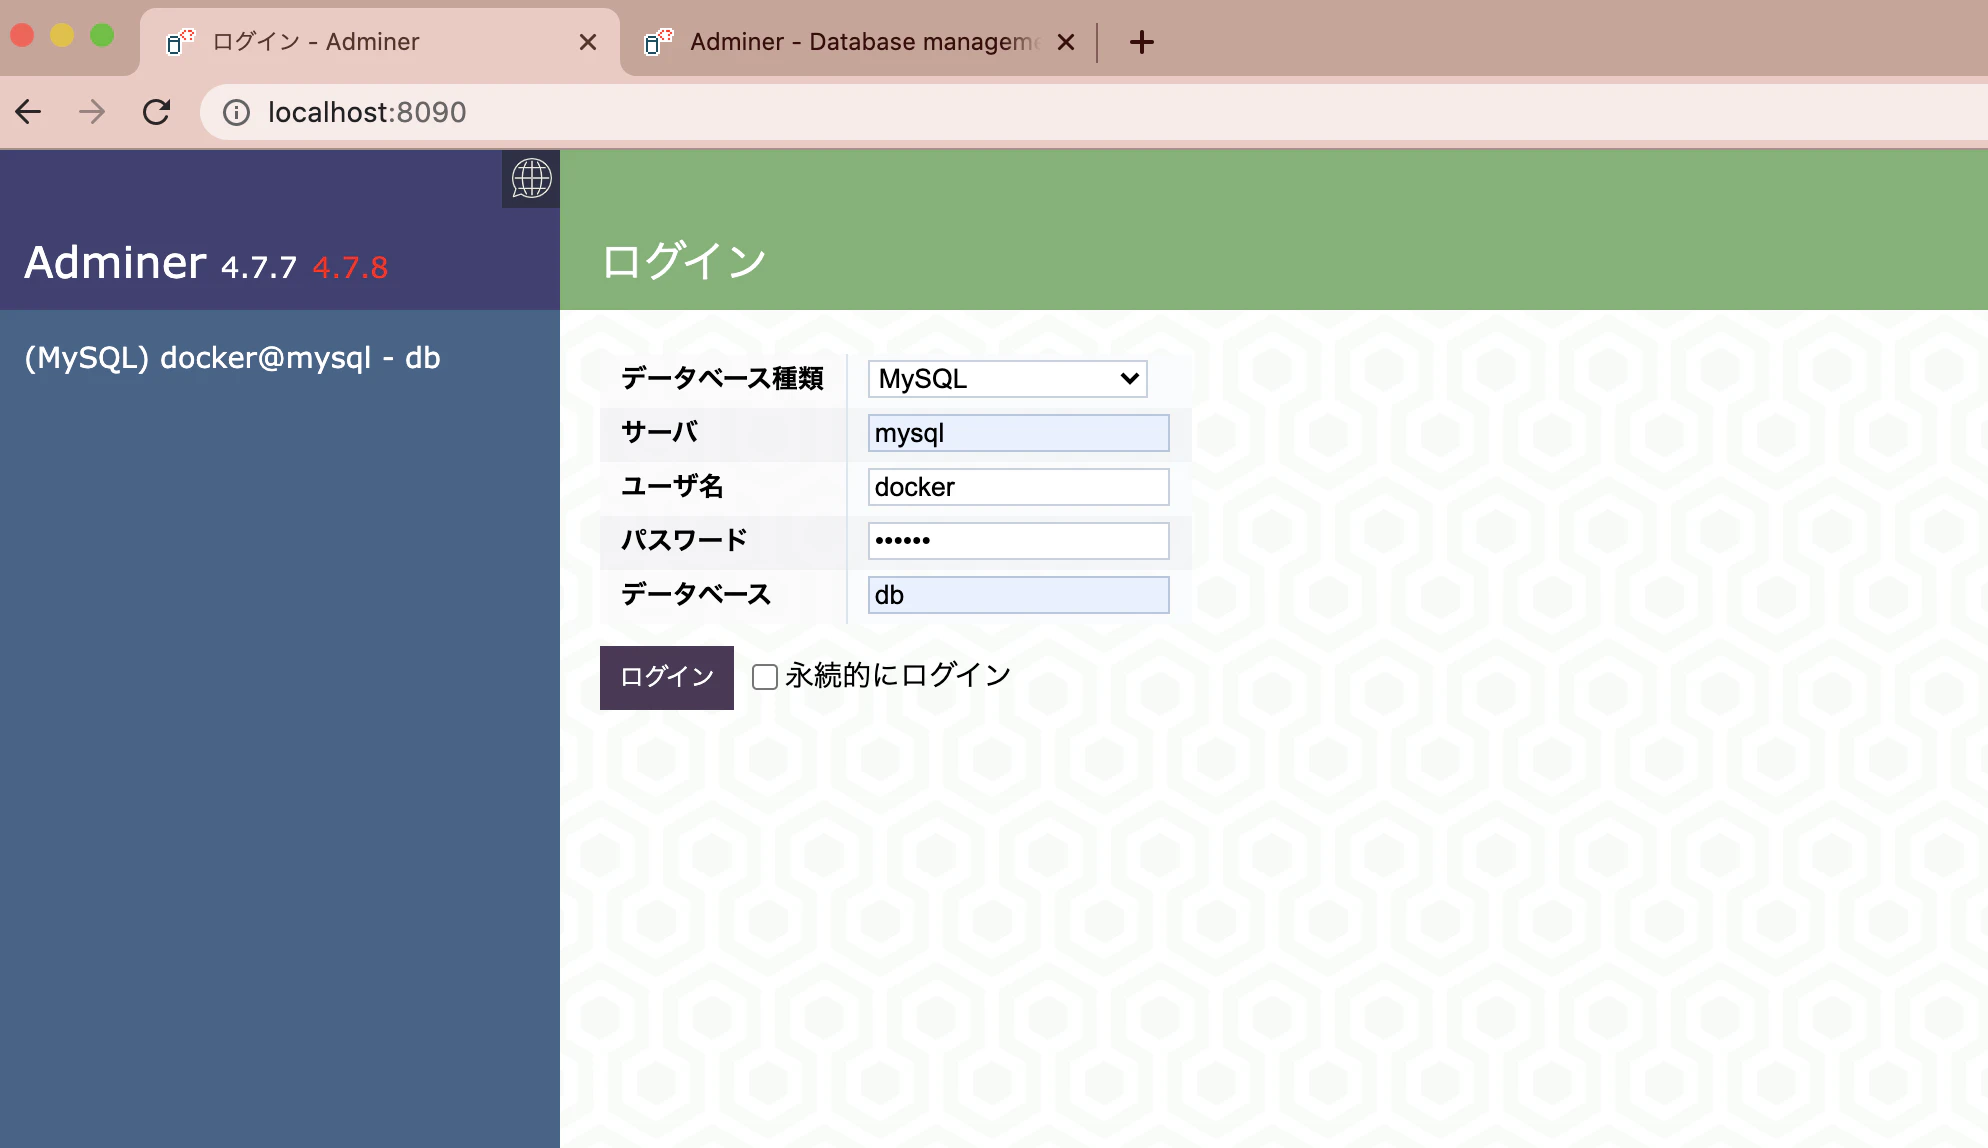
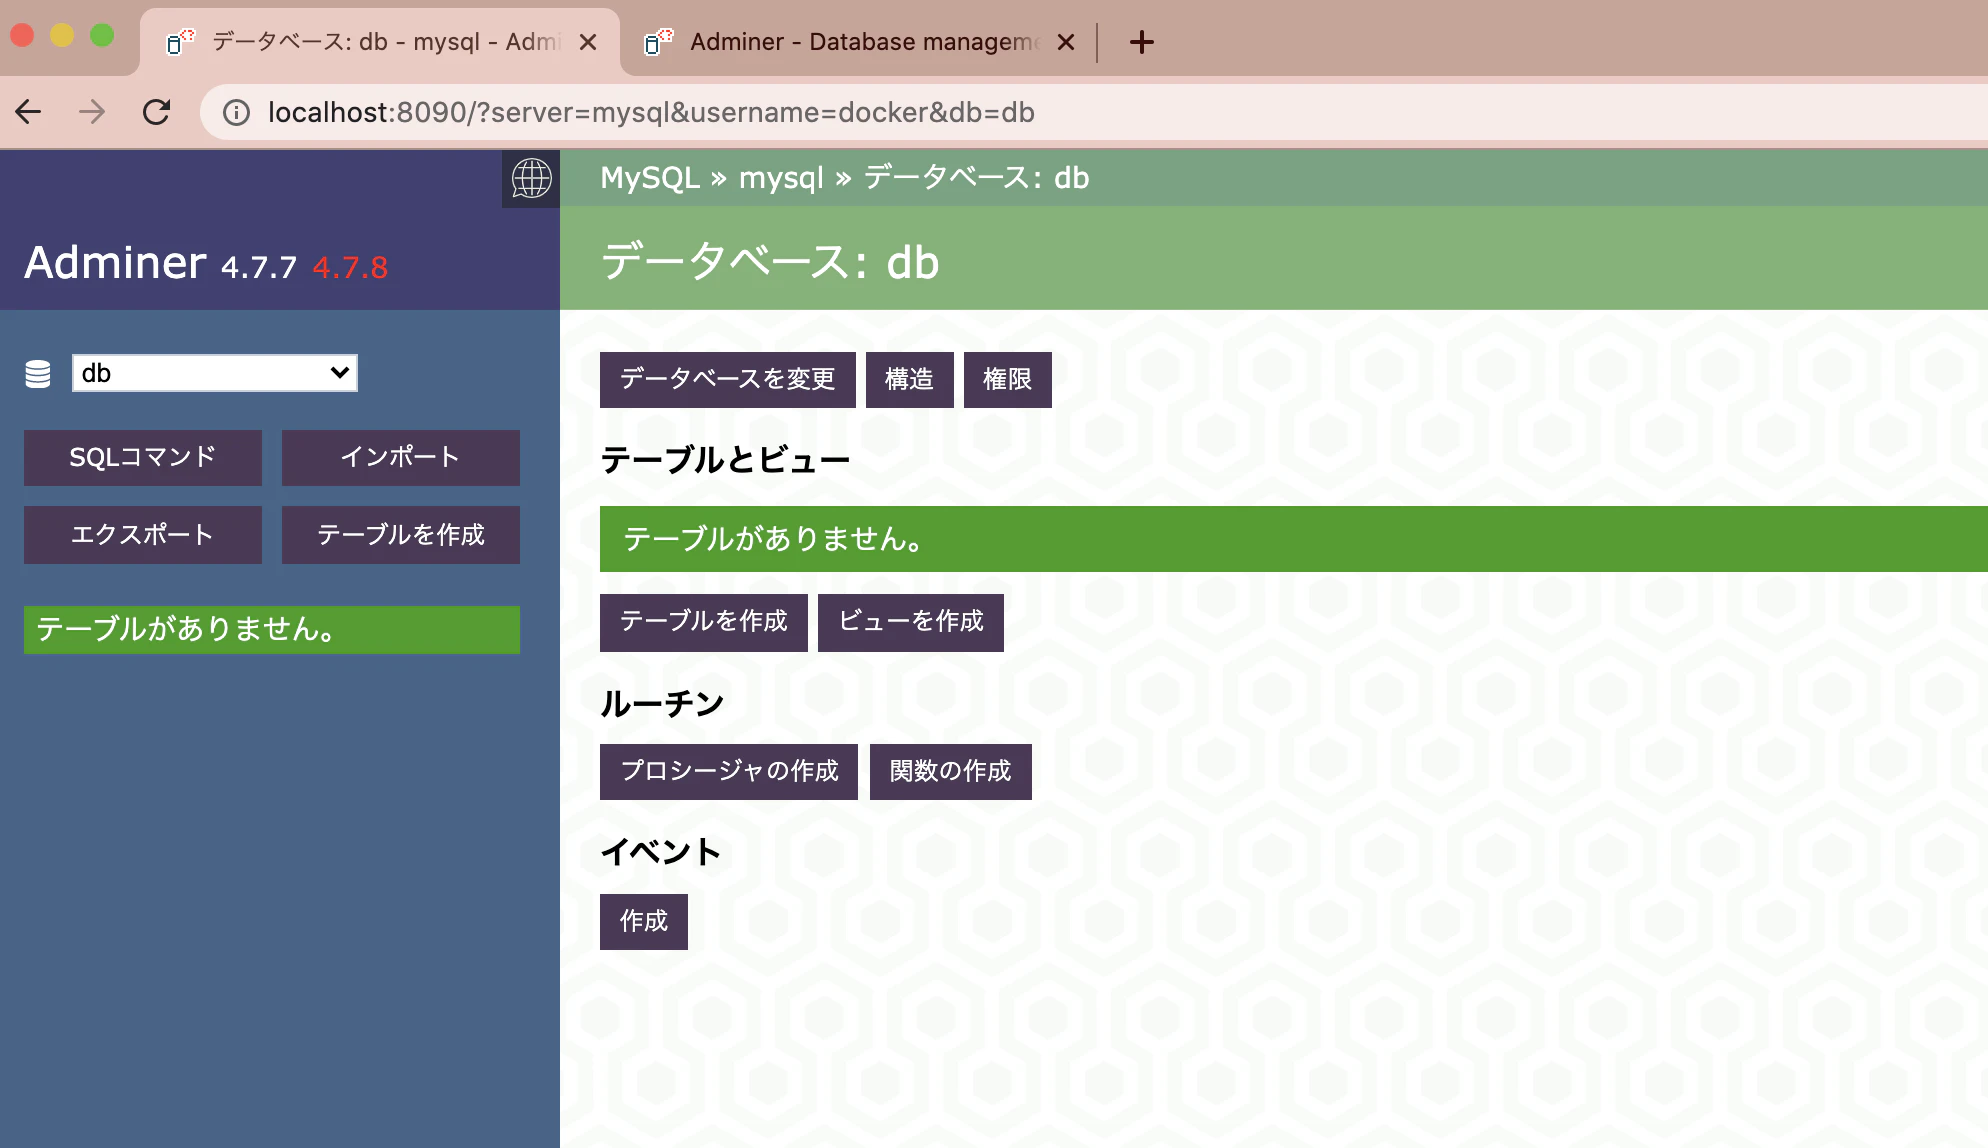
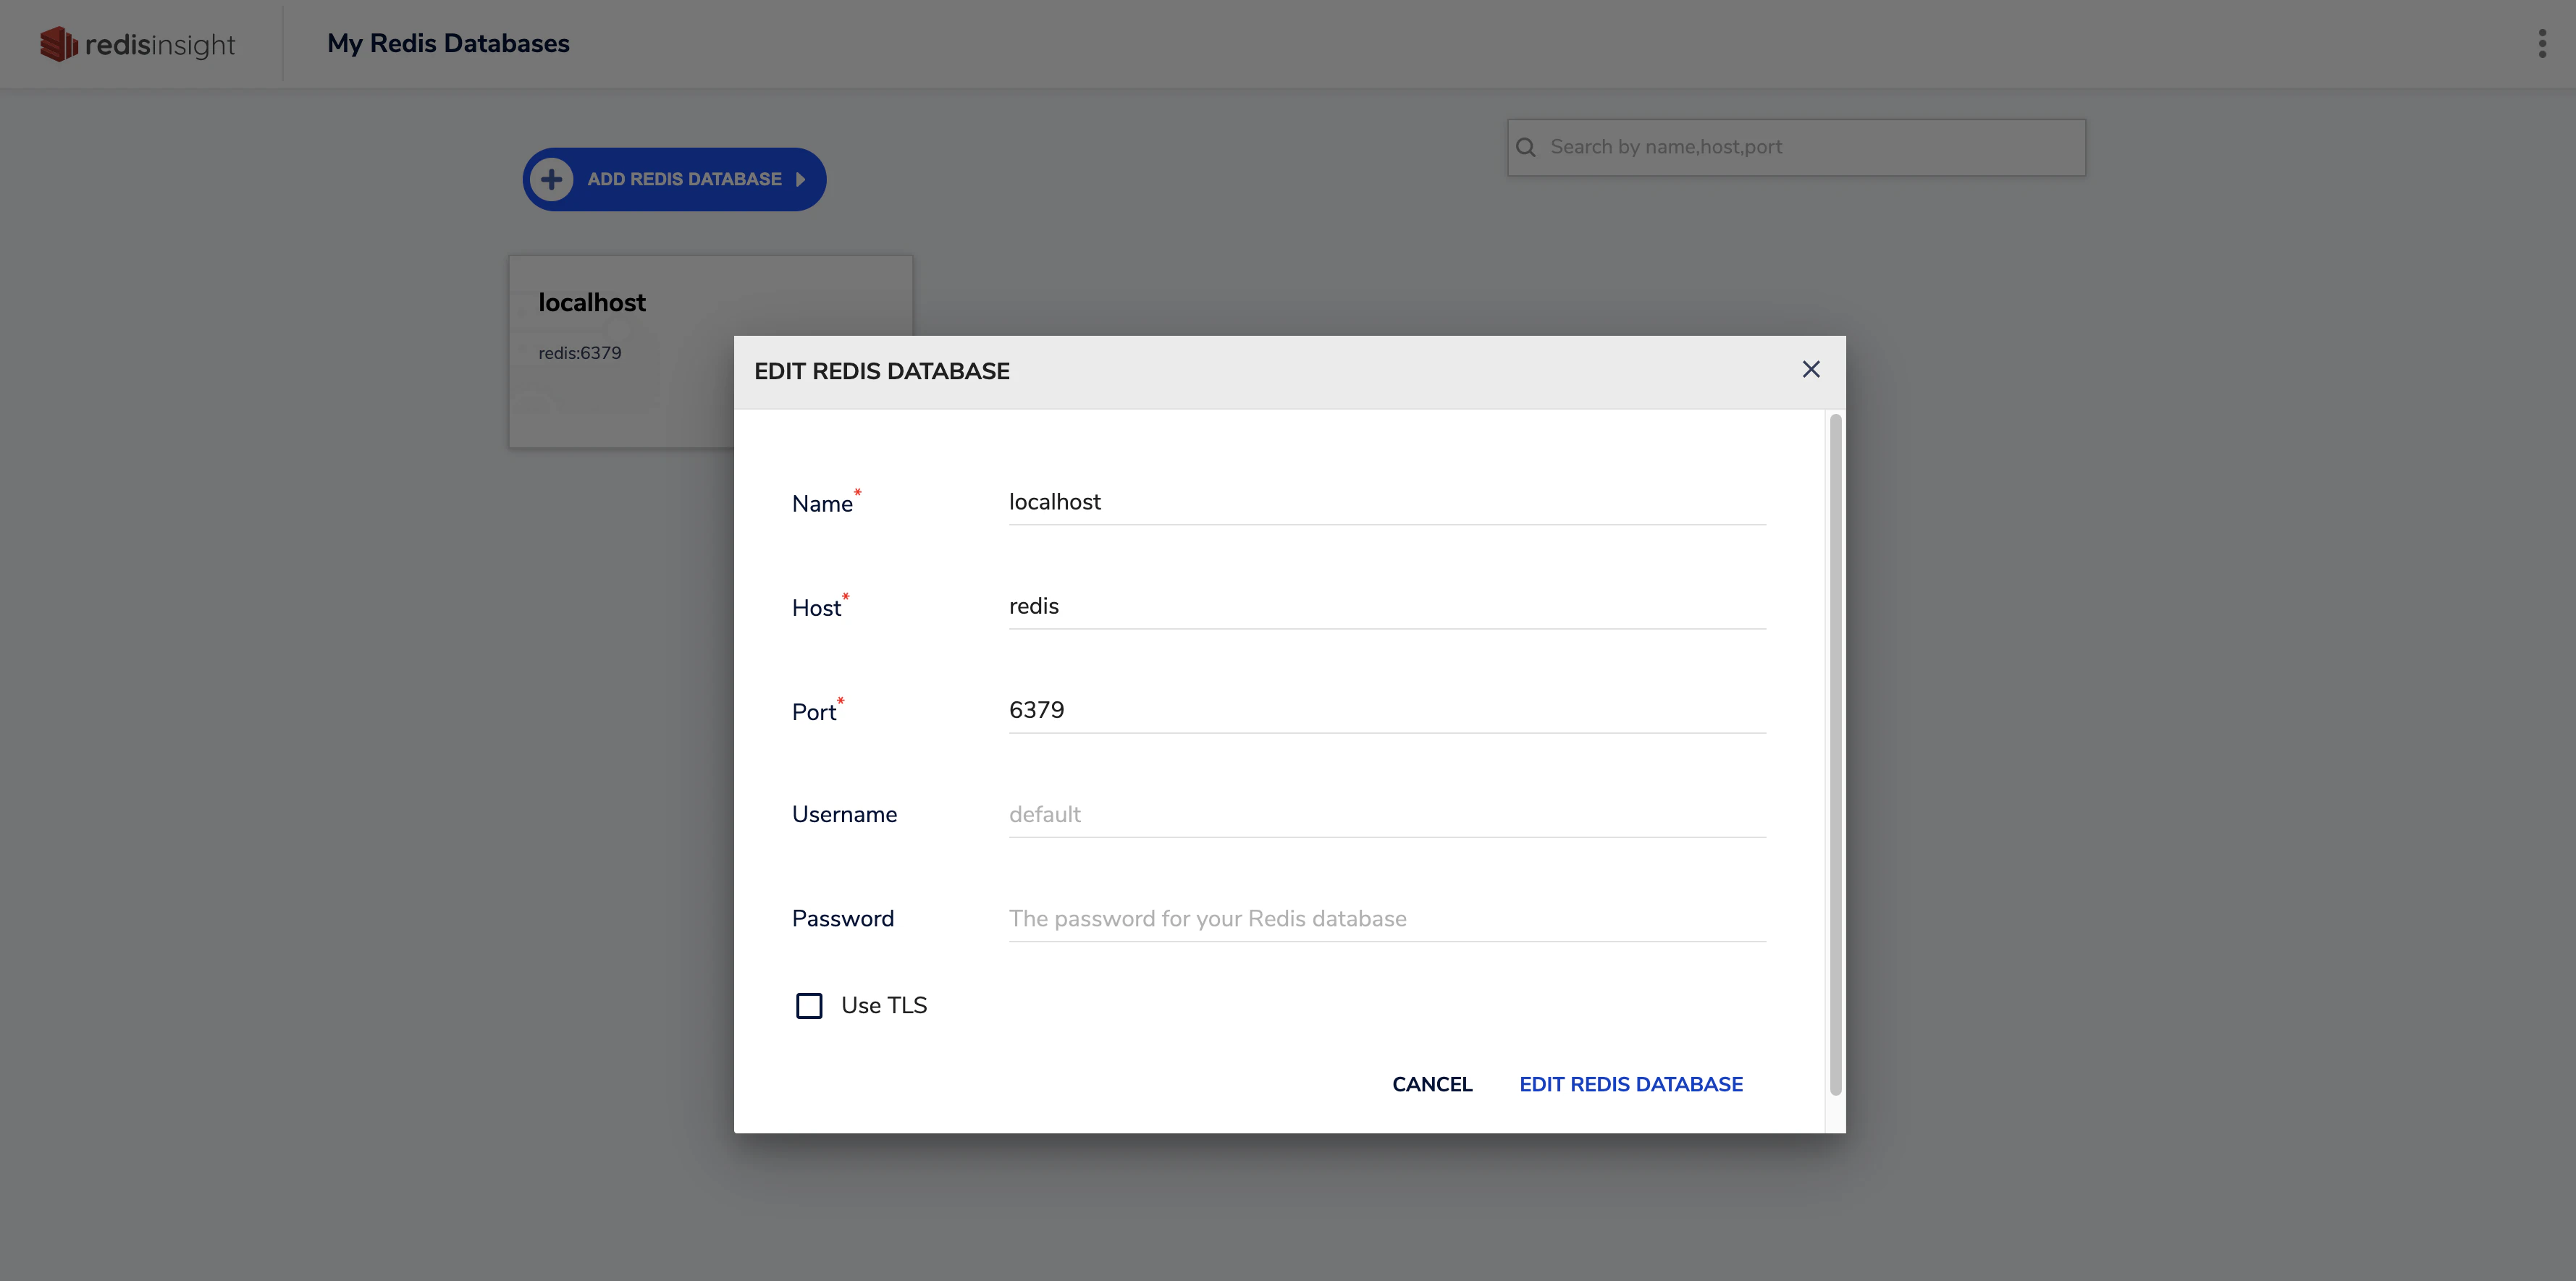
- 投稿日:2020-12-15T00:17:42+09:00
「Rails APIモードとReact Hooksを使ってToDoリストを作る」をdocker上に配置する
目的
これもやったことの備忘録が目的になります。
Know Howより、How to methodな内容にします背景
バックエンドとフロントエンドを分けたアプリケーションをdockerにあと乗せする記事がなかったため。
せっかくやったのだから記事にしちゃおうって考えです。アウトライン
- docker-compose.ymlを用意する
- Dockerfile(Backend用)を用意する
- entrypoint.shを用意する
- Dockerfile(Frontend用)を用意する
- rails側の調整
- axiosmaterial-uiのインストール
やってみよう!
docker-compose.yml
既存のrailsアプリ等に「後からdocker」を用意する場合でも、
アプリを作り始める時でも、やることはほとんど変わりません。docker-compose.ymlはメインのディレクトリ上に配置します。
docker-compose.ymlversion: '3' services: db: image: mysql:5.6 environment: MYSQL_ROOT_PASSWORD: password MYSQL_DATABASE: root volumes: - mysql-data:/var/lib/mysql ports: - "4306:3306" #別件で3306は使っていたので4306を指定しました app: build: context: . dockerfile: Dockerfile_back command: /bin/sh -c "rm -f /myapp/tmp/pids/server.pid && bundle exec rails s -p 3001 -b '0.0.0.0'" image: rails:dev volumes: - .:/myapp #myappというところは任意で設定してください - ./app/vendor/bundle:/myapp/vendor/bundle environment: TZ: Asia/Tokyo RAILS_ENV: development ports: - "3001:3001" depends_on: - db front: build: context: todo_front dockerfile: Dockerfile_front volumes: - ./todo_front:/todo_front command: /bin/sh -c "cd todo_front && yarn && yarn start" ports: - "3000:3000" volumes: mysql-data: bundle:Dockerfile(バックエンド用)を用意する
entrypoint.shを用意する
Rubyのバージョンを既存のrailsアプリのRubyバージョンを合わせました。
それとmyappというのは任意になります。合わせてもOKです!
SQLがmysql-clientと入力するとエラーになります。
いつしか、maliadb-clientに統一されたようです。
Dockerfile_backとentrypoint.shはdocker-compose.ymlと同じディレクトリ階層に配置しています。Dockerfile_backFROM ruby:2.6.3 RUN apt-get update && \ apt-get install -y mariadb-client nodejs vim RUN mkdir /myapp WORKDIR /myapp ADD Gemfile /myapp/Gemfile ADD Gemfile.lock /myapp/Gemfile.lock RUN gem install bundler RUN bundle install ADD . /myapp COPY entrypoint.sh /usr/bin/ RUN chmod +x /usr/bin/entrypoint.sh ENTRYPOINT ["entrypoint.sh"] EXPOSE 3001 CMD ["rails", "server", "-b", "0.0.0.0"]entrypoint.sh#!/bin/bash set -e # Remove a potentially pre-existing server.pid for Rails. rm -f /myapp/tmp/pids/server.pid # Then exec the container's main process (what's set as CMD in the Dockerfile). exec "$@"Dockerfile(frontend用)
todo_frontディレクトリ上に配置します。Dockerfile_frontFROM node:14Rails側の調整
database.yml'を調整してあげます。host: db`に変えてあげます。
socket通信になっているので、database.ymldefault: &default adapter: mysql2 encoding: utf8mb4 pool: <%= ENV.fetch("RAILS_MAX_THREADS") { 5 } %> username: root password: - socket: /tmp/mysql.sock + host: dbaxiosmaterial-uiのインストール
コンテナをバックグラウンドで立ち上げます。
そして、axiosやmaterial-uiをインストールします。
ちなみにexecはすでにコンテナが立ち上がっている状態で使えます。
コンテナが立ち上がっていない時はrunを使います。
終わったら、dbを作って、マイグレートして、植えて終わりになります。console$ docker-compose up -d #コンテナを立ち上げる $ docker-compose exec front npm install axios $ docker-compose exec front npm install @material-ui/core $ docker-compose exec app bin/rails db:create $ docker-compose exec app bin/rails db:migrate $ docker-compose exec app bin/rails db:seed
localhost:3000にアクセスすると、前回と同じ画面が立ち上がるはずです。
終わり終わりに
今回は、docker for Macの調子が悪く、何度もattachが発生しました。
再起動すると次のプロセスに行けました。
なんだろう、もう少しdockerの勉強した方がいいかなと思いました。Zennに投稿した記事
- 投稿日:2020-12-15T00:01:24+09:00
Goで手早くJSON APIを構築してみた
※この記事は自身のブログからの転載です。
Goで手早くJSON APIを構築してみた | outputableGoで手早くJSON APIを構築してみたのでメモっておく。
環境構築
手短にいきたいのでDockerで。
軽量なalpineを選択。
コンテナ側の使用PORTも忘れず開放しておく。
ビルダーイメージ側のプラットフォームも実行側イメージに合わせておかないとGoサーバが起動しないので注意。
- Dockerfile
FROM golang:1.15.3-alpine3.12 as builder

ENV GO111MODULE=on

ENV GOPATH=

WORKDIR /usr/src/app

COPY . ./

RUN go mod init gochi1 && go get && go build .

FROM alpine:3.12 as gochi1

COPY --from=builder /usr/src/app .

EXPOSE 8080

CMD ["./gochi1"]
- .dockerignore
イメージ化の際避けたいファイルなどを指定しておく。
.gitignore
go.mod
go.sum
ここからgo moduleに準じたプロジェクトを作る。$ mkdir gochi1 $ cd gochi1 $ touch main.goプログラムの構築
サーバーを作る。
ライブラリで「chi」というのがあったので今回はそれを利用してみる。
- main.go
package main

import (
    "gochi1/resources"
    "net/http"
    "github.com/go-chi/chi"
    "github.com/go-chi/chi/middleware"
    "os"
    "fmt"
)

func main() {
    r := chi.NewRouter()

    r.Use(middleware.RequestID)
    r.Use(middleware.RealIP)
    r.Use(middleware.Logger)
    r.Use(middleware.Recoverer)
    r.Use(middleware.BasicAuth("secret-room", map[string]string{"user1": "value1"}))

    r.Get("/", func(w http.ResponseWriter, r *http.Request) {
        w.Write([]byte("ベタ打ち"))
    })

    r.Mount("/users", resources.UsersResource{}.Routes())

    port := os.Getenv("PORT")
    if port == "" {
        port = "8080"
  }

    http.ListenAndServe(fmt.Sprintf(":%s", port), r)
}
- resources/todos.go
ロジックの分離。
DBの代わりにグローバル変数で状態変化を再現している。package resources import ( "net/http" "github.com/go-chi/chi" "encoding/json" "io/ioutil" "reflect" ) type Response2 struct { Name string `json:"name"` Todos []string `json:"todos"` } var state Response2 type UsersResource struct {} func (ur UsersResource) Routes() chi.Router { r := chi.NewRouter() r.Get("/", ur.List) r.Post("/", ur.Create) r.Put("/", ur.Delete) r.Route("/{id}", func(r chi.Router) { r.Get("/", ur.Get) r.Put("/", ur.Update) r.Delete("/", ur.Delete) }) return r } func (ur UsersResource) List(w http.ResponseWriter, r *http.Request) { res := &Response2{ Name: "John", Todos: []string{"compile", "clean", "console"}} w.Header().Set("Content-Type", "application/json; charset=UTF-8") // <- Added w.WriteHeader(http.StatusOK) if err := json.NewEncoder(w).Encode(res); err != nil { panic(err) } return } func (ur UsersResource) Create(w http.ResponseWriter, r *http.Request) { defer r.Body.Close() body, err := ioutil.ReadAll(r.Body) if err != nil { panic(err) } var response2 Response2 error := json.Unmarshal(body, &response2) if error != nil { panic(err) } for i, v := range response2.Todos { todo := v if !reflect.DeepEqual(state, Response2{}) { todo = state.Todos[i] } if len(todo) > 9 && len(todo) <= 15 { response2.Todos[i] = todo + "(long)" } else if len(todo) > 15 { response2.Todos[i] = v } else { response2.Todos[i] = todo + "(short)" } } res := &Response2{ Name: response2.Name + "(updated)", Todos: response2.Todos} state = *res w.Header().Set("Content-Type", "application/json; charset=UTF-8") // <- Added w.WriteHeader(http.StatusOK) if err := json.NewEncoder(w).Encode(res); err != nil { panic(err) } return } func (ur UsersResource) Get(w http.ResponseWriter, r *http.Request) { w.Write([]byte("ベタ打ち")) } func (ur UsersResource) Update(w http.ResponseWriter, r *http.Request) { w.Write([]byte("ベタ打ち")) } func (ur UsersResource) Delete(w http.ResponseWriter, r *http.Request) { w.Write([]byte("ベタ打ち")) }サーバ起動、アクセスしてみる
サーバ起動
$ go run main.go以下のコマンド or ブラウザアクセスでレスポンスをみてみる。
$ curl -X GET localhost:8080/users -u user1:value1BASIC認証がかけられており、ユーザー名、パスワードが求められる。
認証が失敗すれば、レスポンスヘッダ
WWW-Authenticate: `Basic realm=secret-room`のように返ってくる。
$ curl -X POST localhost:8080/users -d '{"name": "test", "todos": ["compile","test","package"]}' -u user1:value1また、POSTでデータを送ってみると、送るたびにレスポンスが変化しているのを確認した。
dockerでやってみる
カレントディレクトリの構成は、前述のファイル群を含んだ以下の構成で行う。
$ tree -a
.
├── .dockerignore
├── go.mod
├── Dockerfile
├── go.sum
├── main.go
└── resources
    └── users.go
$ docker build -t tester1/gochi1:1.0 . $ docker run -it --rm -d -p 8080:8080 --name tester1-gochi1 tester1/gochi1:1.0前項で起動していたGoサーバを一旦停止し、dockerコンテナ作成・起動後、前述のURLにアクセスすると非コンテナ時と同様に動作した。
後片付けは
$ docker ps -a //で該当のコンテナIDを探して
$ docker stop [コンテナID]
$ docker images //で該当イメージIDを探して
$ docker rmi [イメージID]
で完了した。
最後に
とりあえずGoのライブラリを使って即席でJSON APIを立ててみたが、比較的簡単に実装できてお手軽感があっていいな、と思った。
動きも早いのでこれからもっと触っていくための走り書きをここにして終わりにしたいと思う。
おしまい。