- 投稿日:2020-12-06T23:02:26+09:00
数々の苦難を乗り越えTorch for R with CUDA on Dockerを完成させたというお話
この記事はFujitsu Advent Calendar 2020 6日目の記事です。
Deep Learningと言えばPythonの独壇場というイメージがずっと有りましたが,ここに来てR言語でもDeep Learningのモデルを構築,学習,推論が出来る様になったということを知りました。早速RStdio環境をNVIDIA Dockerを用いて構築し,「Torch for R1」を試してみたいと思います。しかし,それは思いの他難儀なことになろうとは当初思っていませんでした。。。
tokyor/rstudioイメージファイルをベースにコンテナを構築
当初以下のDockerfile(tokyor/rstudio)とdocker-compose.ymlを用いて試しました。GPUを利用出来るNVIDIA Docker2に対応出来れば完成すると考えたからです。しかし,筆者の考えは甘かったことがすぐに証明されます。
tokyor/rstudioのイメージファイルをベースに作成したDockerfileFROM tokyor/rstudio RUN apt update && apt upgrade -y RUN apt install -y vim wget curl gitdocker-compose.ymlversion: "2.4" services: rstudio_docker: build: context: . dockerfile: Dockerfile runtime: nvidia environment: - NVIDIA_VISIBLE_DEVICES=all - NVIDIA_DRIVER_CAPABILITIES=all ports: - 8787:8787 volumes:構築したコンテナにTorch for Rをインストールしてみます。
install.packages("torch")
実行結果
> install.packages("torch")
Installing package into ‘/usr/local/lib/R/site-library’
(as ‘lib’ is unspecified)
trying URL 'https://cran.rstudio.com/src/contrib/torch_0.1.1.tar.gz'
Content type 'application/x-gzip' length 5014778 bytes (4.8 MB)
==================================================
downloaded 4.8 MB

* installing *source* package ‘torch’ ...
** package ‘torch’ successfully unpacked and MD5 sums checked
** libs
g++ -std=gnu++11 -I/usr/local/lib/R/include -DNDEBUG  -I"/usr/local/lib/R/site-library/Rcpp/include" -I/usr/local/include   -fpic  -g -O2 -fstack-protector-strong -Wformat -Werror=format-security -Wdate-time -D_FORTIFY_SOURCE=2 -g -c RcppExports.cpp -o RcppExports.o
g++ -std=gnu++11 -I/usr/local/lib/R/include -DNDEBUG  -I"/usr/local/lib/R/site-library/Rcpp/include" -I/usr/local/include   -fpic  -g -O2 -fstack-protector-strong -Wformat -Werror=format-security -Wdate-time -D_FORTIFY_SOURCE=2 -g -c autograd.cpp -o autograd.o
g++ -std=gnu++11 -I/usr/local/lib/R/include -DNDEBUG  -I"/usr/local/lib/R/site-library/Rcpp/include" -I/usr/local/include   -fpic  -g -O2 -fstack-protector-strong -Wformat -Werror=format-security -Wdate-time -D_FORTIFY_SOURCE=2 -g -c contrib.cpp -o contrib.o
g++ -std=gnu++11 -I/usr/local/lib/R/include -DNDEBUG  -I"/usr/local/lib/R/site-library/Rcpp/include" -I/usr/local/include   -fpic  -g -O2 -fstack-protector-strong -Wformat -Werror=format-security -Wdate-time -D_FORTIFY_SOURCE=2 -g -c cuda.cpp -o cuda.o
g++ -std=gnu++11 -I/usr/local/lib/R/include -DNDEBUG  -I"/usr/local/lib/R/site-library/Rcpp/include" -I/usr/local/include   -fpic  -g -O2 -fstack-protector-strong -Wformat -Werror=format-security -Wdate-time -D_FORTIFY_SOURCE=2 -g -c device.cpp -o device.o
In file included from device.cpp:2:0:
torch_types.h:7:0: warning: "LANTERN_HOST_HANDLER" redefined
 #define LANTERN_HOST_HANDLER lantern_host_handler();

In file included from device.cpp:1:0:
lantern/lantern.h:35:0: note: this is the location of the previous definition
 #define LANTERN_HOST_HANDLER

In file included from device.cpp:1:0:
lantern/lantern.h: In function ‘bool lanternInit(const string&, std::__cxx11::string*)’:
lantern/lantern.h:4097:6: note: variable tracking size limit exceeded with -fvar-tracking-assignments, retrying without
 bool lanternInit(const std::string &libPath, std::string *pError)
      ^~~~~~~~~~~
g++ -std=gnu++11 -I/usr/local/lib/R/include -DNDEBUG  -I"/usr/local/lib/R/site-library/Rcpp/include" -I/usr/local/include   -fpic  -g -O2 -fstack-protector-strong -Wformat -Werror=format-security -Wdate-time -D_FORTIFY_SOURCE=2 -g -c dimname_list.cpp -o dimname_list.o
g++ -std=gnu++11 -I/usr/local/lib/R/include -DNDEBUG  -I"/usr/local/lib/R/site-library/Rcpp/include" -I/usr/local/include   -fpic  -g -O2 -fstack-protector-strong -Wformat -Werror=format-security -Wdate-time -D_FORTIFY_SOURCE=2 -g -c dtype.cpp -o dtype.o
g++ -std=gnu++11 -I/usr/local/lib/R/include -DNDEBUG  -I"/usr/local/lib/R/site-library/Rcpp/include" -I/usr/local/include   -fpic  -g -O2 -fstack-protector-strong -Wformat -Werror=format-security -Wdate-time -D_FORTIFY_SOURCE=2 -g -c gen-namespace.cpp -o gen-namespace.o
g++ -std=gnu++11 -I/usr/local/lib/R/include -DNDEBUG  -I"/usr/local/lib/R/site-library/Rcpp/include" -I/usr/local/include   -fpic  -g -O2 -fstack-protector-strong -Wformat -Werror=format-security -Wdate-time -D_FORTIFY_SOURCE=2 -g -c generator.cpp -o generator.o
g++ -std=gnu++11 -I/usr/local/lib/R/include -DNDEBUG  -I"/usr/local/lib/R/site-library/Rcpp/include" -I/usr/local/include   -fpic  -g -O2 -fstack-protector-strong -Wformat -Werror=format-security -Wdate-time -D_FORTIFY_SOURCE=2 -g -c indexing.cpp -o indexing.o
g++ -std=gnu++11 -I/usr/local/lib/R/include -DNDEBUG  -I"/usr/local/lib/R/site-library/Rcpp/include" -I/usr/local/include   -fpic  -g -O2 -fstack-protector-strong -Wformat -Werror=format-security -Wdate-time -D_FORTIFY_SOURCE=2 -g -c lantern.cpp -o lantern.o
g++ -std=gnu++11 -I/usr/local/lib/R/include -DNDEBUG  -I"/usr/local/lib/R/site-library/Rcpp/include" -I/usr/local/include   -fpic  -g -O2 -fstack-protector-strong -Wformat -Werror=format-security -Wdate-time -D_FORTIFY_SOURCE=2 -g -c layout.cpp -o layout.o
g++ -std=gnu++11 -I/usr/local/lib/R/include -DNDEBUG  -I"/usr/local/lib/R/site-library/Rcpp/include" -I/usr/local/include   -fpic  -g -O2 -fstack-protector-strong -Wformat -Werror=format-security -Wdate-time -D_FORTIFY_SOURCE=2 -g -c memory_format.cpp -o memory_format.o
g++ -std=gnu++11 -I/usr/local/lib/R/include -DNDEBUG  -I"/usr/local/lib/R/site-library/Rcpp/include" -I/usr/local/include   -fpic  -g -O2 -fstack-protector-strong -Wformat -Werror=format-security -Wdate-time -D_FORTIFY_SOURCE=2 -g -c nn_utils_rnn.cpp -o nn_utils_rnn.o
g++ -std=gnu++11 -I/usr/local/lib/R/include -DNDEBUG  -I"/usr/local/lib/R/site-library/Rcpp/include" -I/usr/local/include   -fpic  -g -O2 -fstack-protector-strong -Wformat -Werror=format-security -Wdate-time -D_FORTIFY_SOURCE=2 -g -c qscheme.cpp -o qscheme.o
g++ -std=gnu++11 -I/usr/local/lib/R/include -DNDEBUG  -I"/usr/local/lib/R/site-library/Rcpp/include" -I/usr/local/include   -fpic  -g -O2 -fstack-protector-strong -Wformat -Werror=format-security -Wdate-time -D_FORTIFY_SOURCE=2 -g -c quantization.cpp -o quantization.o
g++ -std=gnu++11 -I/usr/local/lib/R/include -DNDEBUG  -I"/usr/local/lib/R/site-library/Rcpp/include" -I/usr/local/include   -fpic  -g -O2 -fstack-protector-strong -Wformat -Werror=format-security -Wdate-time -D_FORTIFY_SOURCE=2 -g -c reduction.cpp -o reduction.o
g++ -std=gnu++11 -I/usr/local/lib/R/include -DNDEBUG  -I"/usr/local/lib/R/site-library/Rcpp/include" -I/usr/local/include   -fpic  -g -O2 -fstack-protector-strong -Wformat -Werror=format-security -Wdate-time -D_FORTIFY_SOURCE=2 -g -c save.cpp -o save.o
g++ -std=gnu++11 -I/usr/local/lib/R/include -DNDEBUG  -I"/usr/local/lib/R/site-library/Rcpp/include" -I/usr/local/include   -fpic  -g -O2 -fstack-protector-strong -Wformat -Werror=format-security -Wdate-time -D_FORTIFY_SOURCE=2 -g -c scalar.cpp -o scalar.o
g++ -std=gnu++11 -I/usr/local/lib/R/include -DNDEBUG  -I"/usr/local/lib/R/site-library/Rcpp/include" -I/usr/local/include   -fpic  -g -O2 -fstack-protector-strong -Wformat -Werror=format-security -Wdate-time -D_FORTIFY_SOURCE=2 -g -c storage.cpp -o storage.o
g++ -std=gnu++11 -I/usr/local/lib/R/include -DNDEBUG  -I"/usr/local/lib/R/site-library/Rcpp/include" -I/usr/local/include   -fpic  -g -O2 -fstack-protector-strong -Wformat -Werror=format-security -Wdate-time -D_FORTIFY_SOURCE=2 -g -c tensor.cpp -o tensor.o
g++ -std=gnu++11 -I/usr/local/lib/R/include -DNDEBUG  -I"/usr/local/lib/R/site-library/Rcpp/include" -I/usr/local/include   -fpic  -g -O2 -fstack-protector-strong -Wformat -Werror=format-security -Wdate-time -D_FORTIFY_SOURCE=2 -g -c tensor_list.cpp -o tensor_list.o
g++ -std=gnu++11 -I/usr/local/lib/R/include -DNDEBUG  -I"/usr/local/lib/R/site-library/Rcpp/include" -I/usr/local/include   -fpic  -g -O2 -fstack-protector-strong -Wformat -Werror=format-security -Wdate-time -D_FORTIFY_SOURCE=2 -g -c tensor_options.cpp -o tensor_options.o
g++ -std=gnu++11 -I/usr/local/lib/R/include -DNDEBUG  -I"/usr/local/lib/R/site-library/Rcpp/include" -I/usr/local/include   -fpic  -g -O2 -fstack-protector-strong -Wformat -Werror=format-security -Wdate-time -D_FORTIFY_SOURCE=2 -g -c utils.cpp -o utils.o
g++ -std=gnu++11 -I/usr/local/lib/R/include -DNDEBUG  -I"/usr/local/lib/R/site-library/Rcpp/include" -I/usr/local/include   -fpic  -g -O2 -fstack-protector-strong -Wformat -Werror=format-security -Wdate-time -D_FORTIFY_SOURCE=2 -g -c variable_list.cpp -o variable_list.o
g++ -std=gnu++11 -shared -L/usr/local/lib/R/lib -L/usr/local/lib -o torch.so RcppExports.o autograd.o contrib.o cuda.o device.o dimname_list.o dtype.o gen-namespace.o generator.o indexing.o lantern.o layout.o memory_format.o nn_utils_rnn.o qscheme.o quantization.o reduction.o save.o scalar.o storage.o tensor.o tensor_list.o tensor_options.o utils.o variable_list.o -L/usr/local/lib/R/lib -lR
Renaming torch lib to torchpkg
"/usr/local/lib/R/bin/Rscript" "../tools/renamelib.R"
installing to /usr/local/lib/R/site-library/torch/libs
** R
** inst
** preparing package for lazy loading
Error : 'pairlist2' is not an exported object from 'namespace:rlang'
Error : unable to load R code in package ‘torch’
ERROR: lazy loading failed for package ‘torch’
* removing ‘/usr/local/lib/R/site-library/torch’
Warning in install.packages :
  installation of package ‘torch’ had non-zero exit status

The downloaded source packages are in
    ‘/tmp/Rtmpvhb8H5/downloaded_packages’
>
上記のコマンドではエラーに阻まれてインストール出来ませんでしたので,ドキュメントでダメだった場合はこれと書いてあったコマンドでインストールを試みました。
remotes::install_github("mlverse/torch")
実行結果
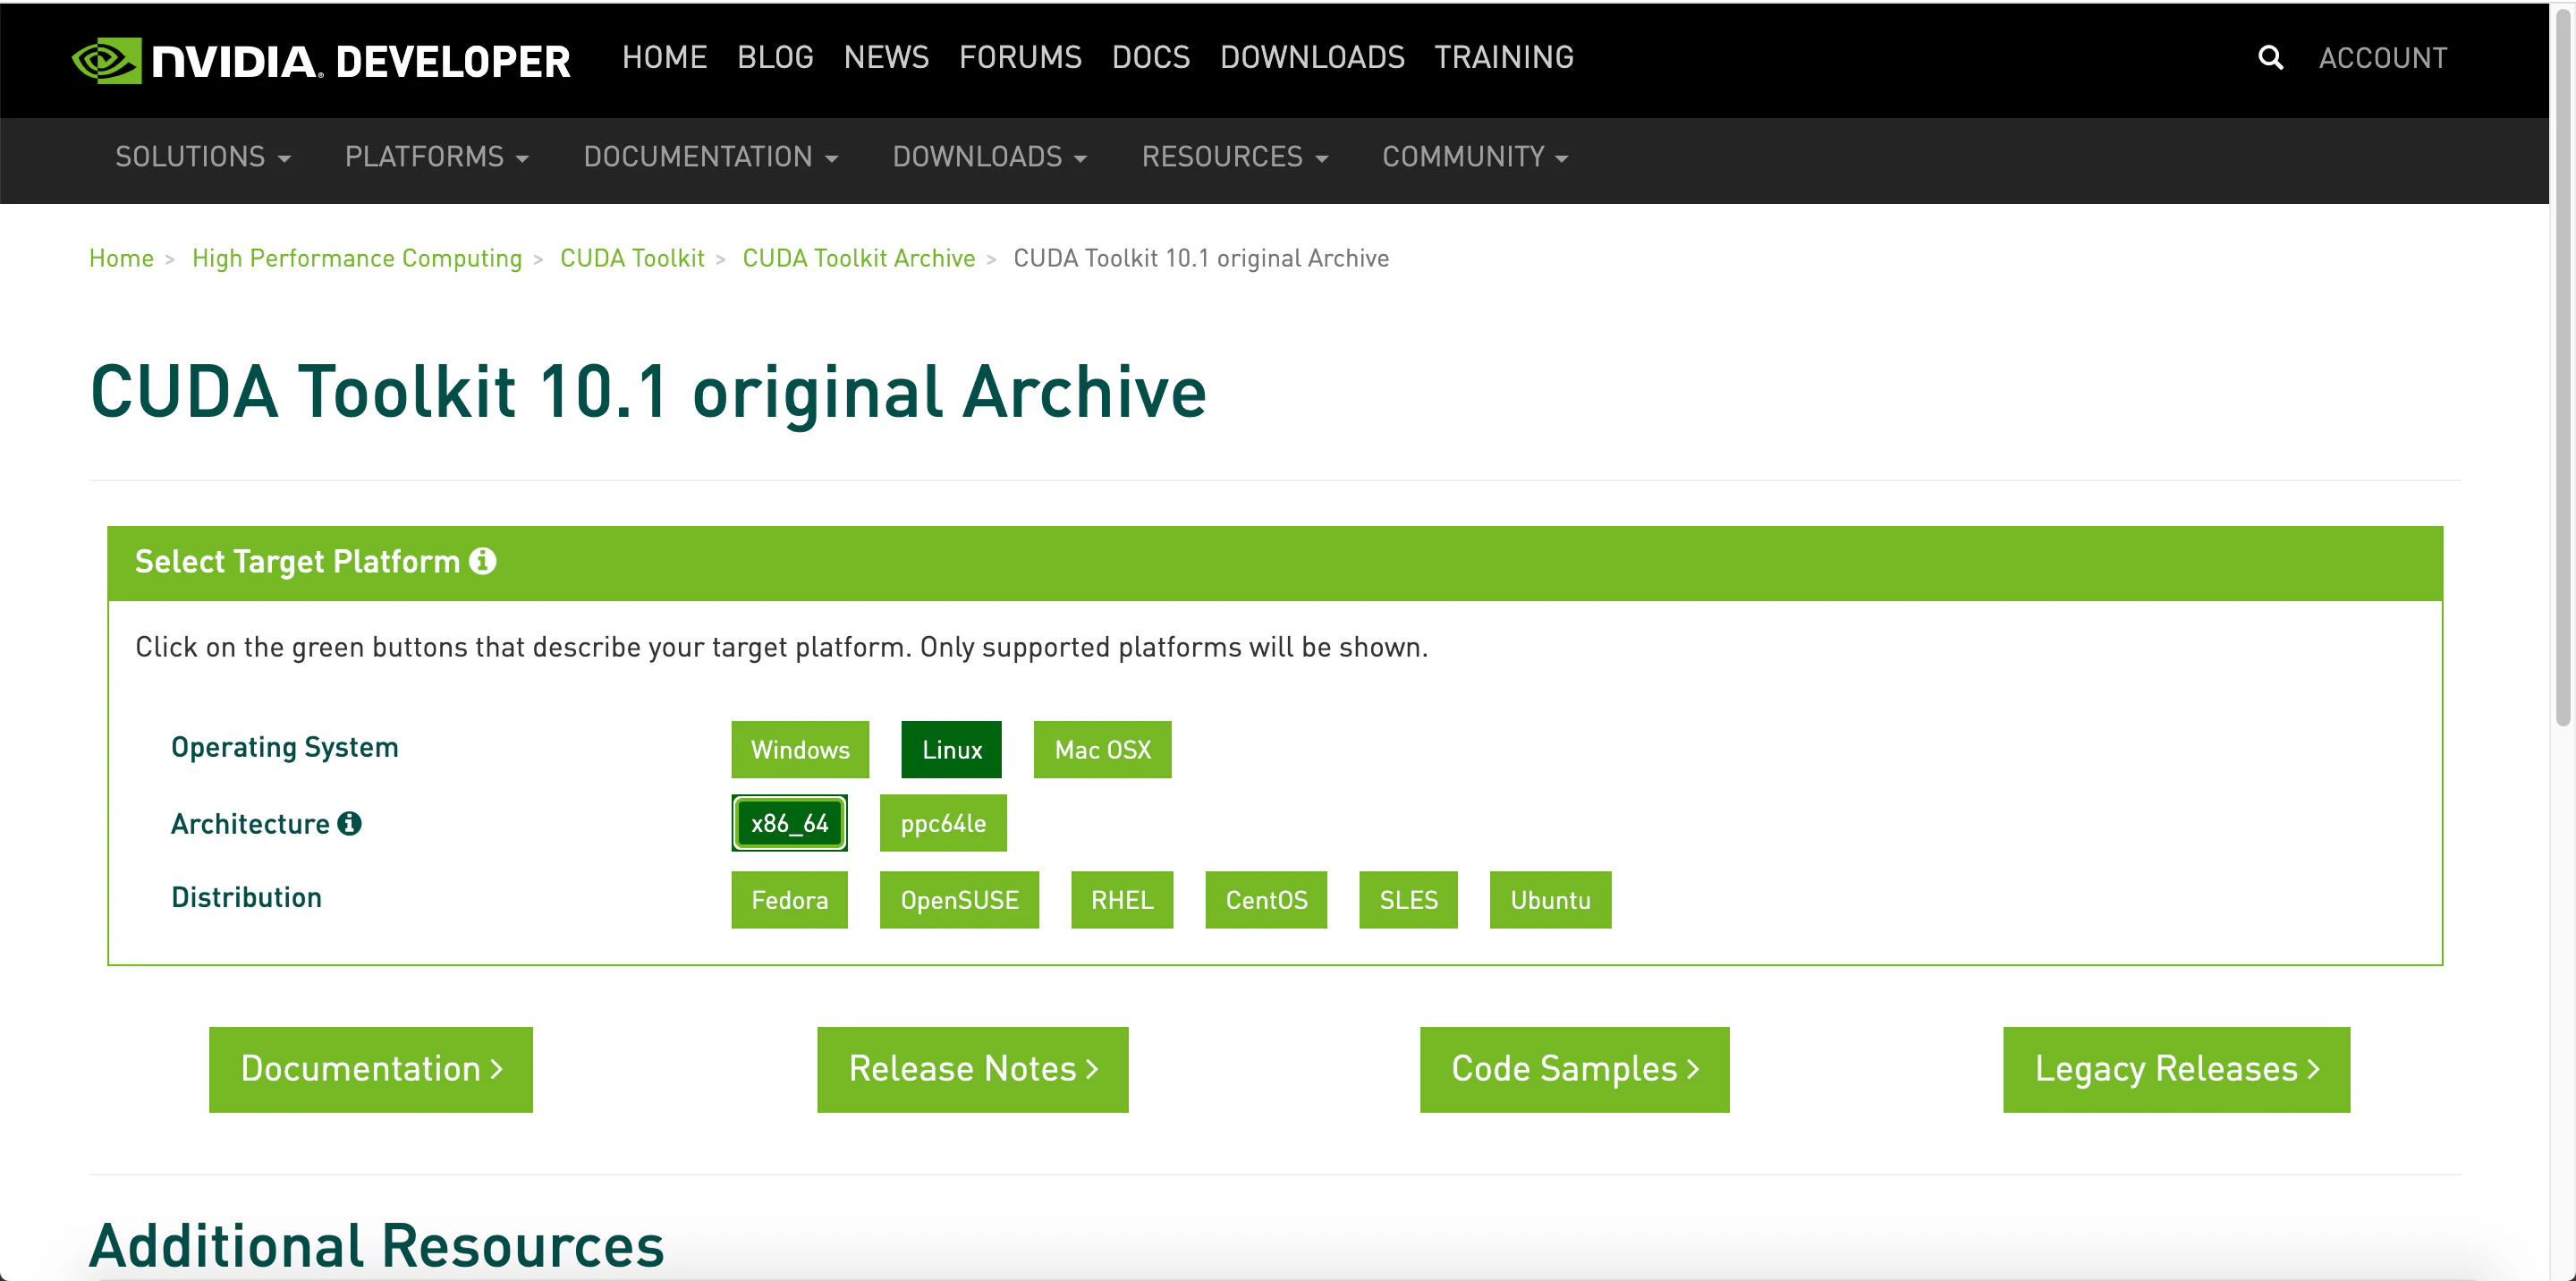
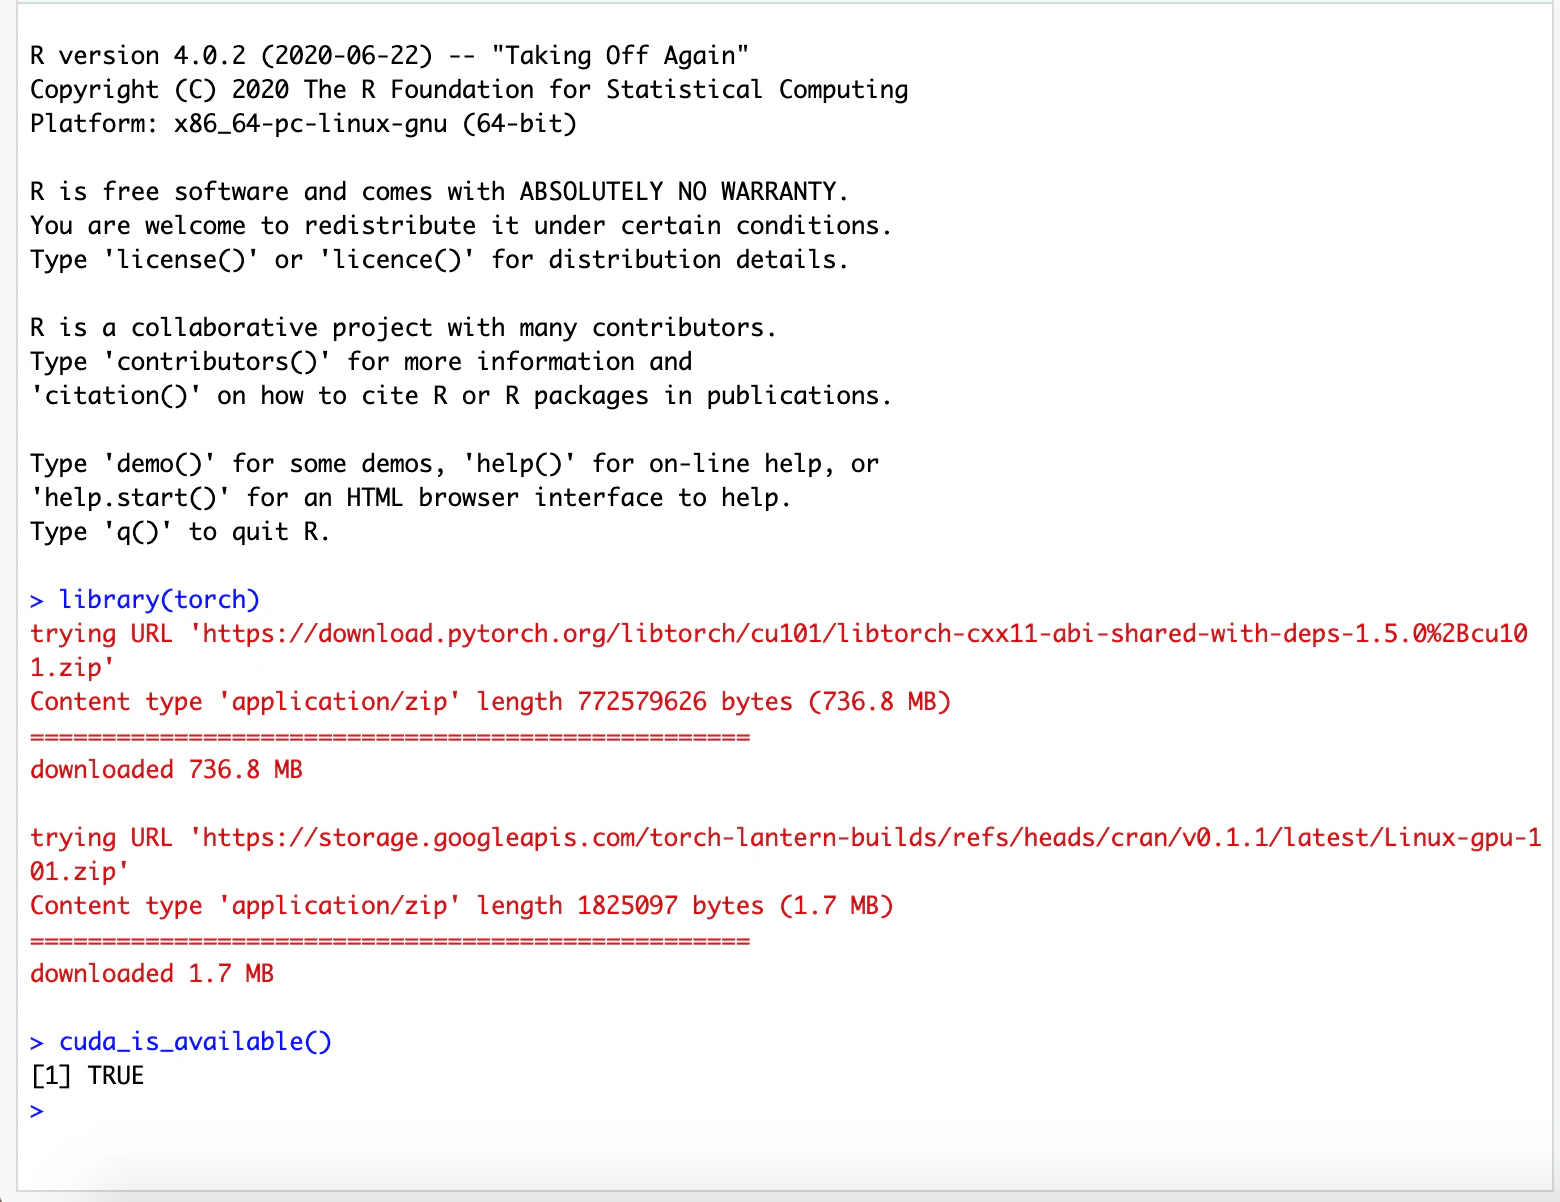
> remotes::install_github("mlverse/torch")
Downloading GitHub repo mlverse/torch@master
Installing 6 packages: bit, bit64, R6, Rcpp, rlang, withr
Installing packages into ‘/usr/local/lib/R/site-library’
(as ‘lib’ is unspecified)
trying URL 'https://cran.rstudio.com/src/contrib/bit_4.0.4.tar.gz'
Content type 'application/x-gzip' length 279723 bytes (273 KB)
==================================================
downloaded 273 KB

trying URL 'https://cran.rstudio.com/src/contrib/bit64_4.0.5.tar.gz'
Content type 'application/x-gzip' length 135091 bytes (131 KB)
==================================================
downloaded 131 KB

trying URL 'https://cran.rstudio.com/src/contrib/R6_2.5.0.tar.gz'
Content type 'application/x-gzip' length 63361 bytes (61 KB)
==================================================
downloaded 61 KB

trying URL 'https://cran.rstudio.com/src/contrib/Rcpp_1.0.5.tar.gz'
Content type 'application/x-gzip' length 2950521 bytes (2.8 MB)
==================================================
downloaded 2.8 MB

trying URL 'https://cran.rstudio.com/src/contrib/rlang_0.4.8.tar.gz'
Content type 'application/x-gzip' length 847517 bytes (827 KB)
==================================================
downloaded 827 KB

trying URL 'https://cran.rstudio.com/src/contrib/withr_2.3.0.tar.gz'
Content type 'application/x-gzip' length 91443 bytes (89 KB)
==================================================
downloaded 89 KB

* installing *source* package ‘bit’ ...
** package ‘bit’ successfully unpacked and MD5 sums checked
** libs
gcc -I/usr/local/lib/R/include -DNDEBUG   -I/usr/local/include   -fpic  -g -O2 -fstack-protector-strong -Wformat -Werror=format-security -Wdate-time -D_FORTIFY_SOURCE=2 -g  -c attrutil.c -o attrutil.o
gcc -I/usr/local/lib/R/include -DNDEBUG   -I/usr/local/include   -fpic  -g -O2 -fstack-protector-strong -Wformat -Werror=format-security -Wdate-time -D_FORTIFY_SOURCE=2 -g  -c bit.c -o bit.o
gcc -I/usr/local/lib/R/include -DNDEBUG   -I/usr/local/include   -fpic  -g -O2 -fstack-protector-strong -Wformat -Werror=format-security -Wdate-time -D_FORTIFY_SOURCE=2 -g  -c chunkutil.c -o chunkutil.o
gcc -I/usr/local/lib/R/include -DNDEBUG   -I/usr/local/include   -fpic  -g -O2 -fstack-protector-strong -Wformat -Werror=format-security -Wdate-time -D_FORTIFY_SOURCE=2 -g  -c clone.c -o clone.o
gcc -I/usr/local/lib/R/include -DNDEBUG   -I/usr/local/include   -fpic  -g -O2 -fstack-protector-strong -Wformat -Werror=format-security -Wdate-time -D_FORTIFY_SOURCE=2 -g  -c init.c -o init.o
gcc -I/usr/local/lib/R/include -DNDEBUG   -I/usr/local/include   -fpic  -g -O2 -fstack-protector-strong -Wformat -Werror=format-security -Wdate-time -D_FORTIFY_SOURCE=2 -g  -c integerutil.c -o integerutil.o
gcc -I/usr/local/lib/R/include -DNDEBUG   -I/usr/local/include   -fpic  -g -O2 -fstack-protector-strong -Wformat -Werror=format-security -Wdate-time -D_FORTIFY_SOURCE=2 -g  -c merge.c -o merge.o
gcc -I/usr/local/lib/R/include -DNDEBUG   -I/usr/local/include   -fpic  -g -O2 -fstack-protector-strong -Wformat -Werror=format-security -Wdate-time -D_FORTIFY_SOURCE=2 -g  -c rle.c -o rle.o
gcc -I/usr/local/lib/R/include -DNDEBUG   -I/usr/local/include   -fpic  -g -O2 -fstack-protector-strong -Wformat -Werror=format-security -Wdate-time -D_FORTIFY_SOURCE=2 -g  -c sort.c -o sort.o
gcc -shared -L/usr/local/lib/R/lib -L/usr/local/lib -o bit.so attrutil.o bit.o chunkutil.o clone.o init.o integerutil.o merge.o rle.o sort.o -L/usr/local/lib/R/lib -lR
installing to /usr/local/lib/R/site-library/bit/libs
** R
** inst
** byte-compile and prepare package for lazy loading
** help
*** installing help indices
** building package indices
** installing vignettes
** testing if installed package can be loaded
* DONE (bit)
* installing *source* package ‘R6’ ...
** package ‘R6’ successfully unpacked and MD5 sums checked
** R
** preparing package for lazy loading
** help
*** installing help indices
*** copying figures
** building package indices
** testing if installed package can be loaded
* DONE (R6)
* installing *source* package ‘Rcpp’ ...
** package ‘Rcpp’ successfully unpacked and MD5 sums checked
** libs
g++  -I/usr/local/lib/R/include -DNDEBUG -I../inst/include/  -I/usr/local/include   -fpic  -g -O2 -fstack-protector-strong -Wformat -Werror=format-security -Wdate-time -D_FORTIFY_SOURCE=2 -g  -c api.cpp -o api.o
g++  -I/usr/local/lib/R/include -DNDEBUG -I../inst/include/  -I/usr/local/include   -fpic  -g -O2 -fstack-protector-strong -Wformat -Werror=format-security -Wdate-time -D_FORTIFY_SOURCE=2 -g  -c attributes.cpp -o attributes.o
g++  -I/usr/local/lib/R/include -DNDEBUG -I../inst/include/  -I/usr/local/include   -fpic  -g -O2 -fstack-protector-strong -Wformat -Werror=format-security -Wdate-time -D_FORTIFY_SOURCE=2 -g  -c barrier.cpp -o barrier.o
g++  -I/usr/local/lib/R/include -DNDEBUG -I../inst/include/  -I/usr/local/include   -fpic  -g -O2 -fstack-protector-strong -Wformat -Werror=format-security -Wdate-time -D_FORTIFY_SOURCE=2 -g  -c date.cpp -o date.o
g++  -I/usr/local/lib/R/include -DNDEBUG -I../inst/include/  -I/usr/local/include   -fpic  -g -O2 -fstack-protector-strong -Wformat -Werror=format-security -Wdate-time -D_FORTIFY_SOURCE=2 -g  -c module.cpp -o module.o
g++  -I/usr/local/lib/R/include -DNDEBUG -I../inst/include/  -I/usr/local/include   -fpic  -g -O2 -fstack-protector-strong -Wformat -Werror=format-security -Wdate-time -D_FORTIFY_SOURCE=2 -g  -c rcpp_init.cpp -o rcpp_init.o
g++ -shared -L/usr/local/lib/R/lib -L/usr/local/lib -o Rcpp.so api.o attributes.o barrier.o date.o module.o rcpp_init.o -L/usr/local/lib/R/lib -lR
installing to /usr/local/lib/R/site-library/Rcpp/libs
** R
** inst
** preparing package for lazy loading
** help
*** installing help indices
** building package indices
** installing vignettes
** testing if installed package can be loaded
* DONE (Rcpp)
* installing *source* package ‘rlang’ ...
** package ‘rlang’ successfully unpacked and MD5 sums checked
** libs
gcc -I/usr/local/lib/R/include -DNDEBUG -I./lib/  -I/usr/local/include  -fvisibility=hidden -fpic  -g -O2 -fstack-protector-strong -Wformat -Werror=format-security -Wdate-time -D_FORTIFY_SOURCE=2 -g  -c capture.c -o capture.o
gcc -I/usr/local/lib/R/include -DNDEBUG -I./lib/  -I/usr/local/include  -fvisibility=hidden -fpic  -g -O2 -fstack-protector-strong -Wformat -Werror=format-security -Wdate-time -D_FORTIFY_SOURCE=2 -g  -c export.c -o export.o
gcc -I/usr/local/lib/R/include -DNDEBUG -I./lib/  -I/usr/local/include  -fvisibility=hidden -fpic  -g -O2 -fstack-protector-strong -Wformat -Werror=format-security -Wdate-time -D_FORTIFY_SOURCE=2 -g  -c internal.c -o internal.o
gcc -I/usr/local/lib/R/include -DNDEBUG -I./lib/  -I/usr/local/include  -fvisibility=hidden -fpic  -g -O2 -fstack-protector-strong -Wformat -Werror=format-security -Wdate-time -D_FORTIFY_SOURCE=2 -g  -c lib.c -o lib.o
gcc -I/usr/local/lib/R/include -DNDEBUG -I./lib/  -I/usr/local/include  -fvisibility=hidden -fpic  -g -O2 -fstack-protector-strong -Wformat -Werror=format-security -Wdate-time -D_FORTIFY_SOURCE=2 -g  -c version.c -o version.o
gcc -shared -L/usr/local/lib/R/lib -L/usr/local/lib -o rlang.so capture.o export.o internal.o lib.o version.o -L/usr/local/lib/R/lib -lR
installing to /usr/local/lib/R/site-library/rlang/libs
** R
** inst
** byte-compile and prepare package for lazy loading
** help
*** installing help indices
*** copying figures
** building package indices
** testing if installed package can be loaded
* DONE (rlang)
* installing *source* package ‘withr’ ...
** package ‘withr’ successfully unpacked and MD5 sums checked
** R
** inst
** preparing package for lazy loading
** help
*** installing help indices
*** copying figures
** building package indices
** installing vignettes
** testing if installed package can be loaded
* DONE (withr)
* installing *source* package ‘bit64’ ...
** package ‘bit64’ successfully unpacked and MD5 sums checked
** libs
gcc -I/usr/local/lib/R/include -DNDEBUG   -I/usr/local/include   -fpic  -g -O2 -fstack-protector-strong -Wformat -Werror=format-security -Wdate-time -D_FORTIFY_SOURCE=2 -g  -c bsearch.c -o bsearch.o
gcc -I/usr/local/lib/R/include -DNDEBUG   -I/usr/local/include   -fpic  -g -O2 -fstack-protector-strong -Wformat -Werror=format-security -Wdate-time -D_FORTIFY_SOURCE=2 -g  -c cache.c -o cache.o
gcc -I/usr/local/lib/R/include -DNDEBUG   -I/usr/local/include   -fpic  -g -O2 -fstack-protector-strong -Wformat -Werror=format-security -Wdate-time -D_FORTIFY_SOURCE=2 -g  -c hash64.c -o hash64.o
gcc -I/usr/local/lib/R/include -DNDEBUG   -I/usr/local/include   -fpic  -g -O2 -fstack-protector-strong -Wformat -Werror=format-security -Wdate-time -D_FORTIFY_SOURCE=2 -g  -c init.c -o init.o
gcc -I/usr/local/lib/R/include -DNDEBUG   -I/usr/local/include   -fpic  -g -O2 -fstack-protector-strong -Wformat -Werror=format-security -Wdate-time -D_FORTIFY_SOURCE=2 -g  -c integer64.c -o integer64.o
integer64.c:270:1: warning: ‘no_sanitize’ attribute directive ignored [-Wattributes]
 __attribute__((no_sanitize("signed-integer-overflow"))) SEXP plus_integer64(SEXP e1_, SEXP e2_, SEXP ret_){
 ^~~~~~~~~~~~~
integer64.c:285:1: warning: ‘no_sanitize’ attribute directive ignored [-Wattributes]
 __attribute__((no_sanitize("signed-integer-overflow"))) SEXP minus_integer64(SEXP e1_, SEXP e2_, SEXP ret_){
 ^~~~~~~~~~~~~
integer64.c:300:1: warning: ‘no_sanitize’ attribute directive ignored [-Wattributes]
 __attribute__((no_sanitize("signed-integer-overflow"))) SEXP diff_integer64(SEXP x_, SEXP lag_, SEXP n_, SEXP ret_){
 ^~~~~~~~~~~~~
integer64.c:347:1: warning: ‘no_sanitize’ attribute directive ignored [-Wattributes]
 __attribute__((no_sanitize("signed-integer-overflow"))) SEXP times_integer64_integer64(SEXP e1_, SEXP e2_, SEXP ret_){
 ^~~~~~~~~~~~~
gcc -I/usr/local/lib/R/include -DNDEBUG   -I/usr/local/include   -fpic  -g -O2 -fstack-protector-strong -Wformat -Werror=format-security -Wdate-time -D_FORTIFY_SOURCE=2 -g  -c sort64.c -o sort64.o
gcc -I/usr/local/lib/R/include -DNDEBUG   -I/usr/local/include   -fpic  -g -O2 -fstack-protector-strong -Wformat -Werror=format-security -Wdate-time -D_FORTIFY_SOURCE=2 -g  -c sortuse64.c -o sortuse64.o
gcc -shared -L/usr/local/lib/R/lib -L/usr/local/lib -o bit64.so bsearch.o cache.o hash64.o init.o integer64.o sort64.o sortuse64.o -lm -L/usr/local/lib/R/lib -lR
installing to /usr/local/lib/R/site-library/bit64/libs
** R
** data
** exec
** inst
** byte-compile and prepare package for lazy loading
** help
*** installing help indices
** building package indices
** testing if installed package can be loaded
* DONE (bit64)

The downloaded source packages are in
    ‘/tmp/Rtmpvhb8H5/downloaded_packages’
Installing package into ‘/usr/local/lib/R/site-library’
(as ‘lib’ is unspecified)
* installing *source* package ‘torch’ ...
** libs
g++ -std=gnu++11 -I/usr/local/lib/R/include -DNDEBUG  -I"/usr/local/lib/R/site-library/Rcpp/include" -I/usr/local/include   -fpic  -g -O2 -fstack-protector-strong -Wformat -Werror=format-security -Wdate-time -D_FORTIFY_SOURCE=2 -g -c RcppExports.cpp -o RcppExports.o
g++ -std=gnu++11 -I/usr/local/lib/R/include -DNDEBUG  -I"/usr/local/lib/R/site-library/Rcpp/include" -I/usr/local/include   -fpic  -g -O2 -fstack-protector-strong -Wformat -Werror=format-security -Wdate-time -D_FORTIFY_SOURCE=2 -g -c autograd.cpp -o autograd.o
g++ -std=gnu++11 -I/usr/local/lib/R/include -DNDEBUG  -I"/usr/local/lib/R/site-library/Rcpp/include" -I/usr/local/include   -fpic  -g -O2 -fstack-protector-strong -Wformat -Werror=format-security -Wdate-time -D_FORTIFY_SOURCE=2 -g -c contrib.cpp -o contrib.o
g++ -std=gnu++11 -I/usr/local/lib/R/include -DNDEBUG  -I"/usr/local/lib/R/site-library/Rcpp/include" -I/usr/local/include   -fpic  -g -O2 -fstack-protector-strong -Wformat -Werror=format-security -Wdate-time -D_FORTIFY_SOURCE=2 -g -c cuda.cpp -o cuda.o
g++ -std=gnu++11 -I/usr/local/lib/R/include -DNDEBUG  -I"/usr/local/lib/R/site-library/Rcpp/include" -I/usr/local/include   -fpic  -g -O2 -fstack-protector-strong -Wformat -Werror=format-security -Wdate-time -D_FORTIFY_SOURCE=2 -g -c device.cpp -o device.o
In file included from device.cpp:2:0:
torch_types.h:7:0: warning: "LANTERN_HOST_HANDLER" redefined
 #define LANTERN_HOST_HANDLER lantern_host_handler();

In file included from device.cpp:1:0:
lantern/lantern.h:35:0: note: this is the location of the previous definition
 #define LANTERN_HOST_HANDLER

In file included from device.cpp:1:0:
lantern/lantern.h: In function ‘bool lanternInit(const string&, std::__cxx11::string*)’:
lantern/lantern.h:4949:6: note: variable tracking size limit exceeded with -fvar-tracking-assignments, retrying without
 bool lanternInit(const std::string &libPath, std::string *pError)
      ^~~~~~~~~~~
g++ -std=gnu++11 -I/usr/local/lib/R/include -DNDEBUG  -I"/usr/local/lib/R/site-library/Rcpp/include" -I/usr/local/include   -fpic  -g -O2 -fstack-protector-strong -Wformat -Werror=format-security -Wdate-time -D_FORTIFY_SOURCE=2 -g -c dimname_list.cpp -o dimname_list.o
g++ -std=gnu++11 -I/usr/local/lib/R/include -DNDEBUG  -I"/usr/local/lib/R/site-library/Rcpp/include" -I/usr/local/include   -fpic  -g -O2 -fstack-protector-strong -Wformat -Werror=format-security -Wdate-time -D_FORTIFY_SOURCE=2 -g -c dtype.cpp -o dtype.o
g++ -std=gnu++11 -I/usr/local/lib/R/include -DNDEBUG  -I"/usr/local/lib/R/site-library/Rcpp/include" -I/usr/local/include   -fpic  -g -O2 -fstack-protector-strong -Wformat -Werror=format-security -Wdate-time -D_FORTIFY_SOURCE=2 -g -c gen-namespace.cpp -o gen-namespace.o
g++ -std=gnu++11 -I/usr/local/lib/R/include -DNDEBUG  -I"/usr/local/lib/R/site-library/Rcpp/include" -I/usr/local/include   -fpic  -g -O2 -fstack-protector-strong -Wformat -Werror=format-security -Wdate-time -D_FORTIFY_SOURCE=2 -g -c generator.cpp -o generator.o
g++ -std=gnu++11 -I/usr/local/lib/R/include -DNDEBUG  -I"/usr/local/lib/R/site-library/Rcpp/include" -I/usr/local/include   -fpic  -g -O2 -fstack-protector-strong -Wformat -Werror=format-security -Wdate-time -D_FORTIFY_SOURCE=2 -g -c indexing.cpp -o indexing.o
g++ -std=gnu++11 -I/usr/local/lib/R/include -DNDEBUG  -I"/usr/local/lib/R/site-library/Rcpp/include" -I/usr/local/include   -fpic  -g -O2 -fstack-protector-strong -Wformat -Werror=format-security -Wdate-time -D_FORTIFY_SOURCE=2 -g -c lantern.cpp -o lantern.o
g++ -std=gnu++11 -I/usr/local/lib/R/include -DNDEBUG  -I"/usr/local/lib/R/site-library/Rcpp/include" -I/usr/local/include   -fpic  -g -O2 -fstack-protector-strong -Wformat -Werror=format-security -Wdate-time -D_FORTIFY_SOURCE=2 -g -c layout.cpp -o layout.o
g++ -std=gnu++11 -I/usr/local/lib/R/include -DNDEBUG  -I"/usr/local/lib/R/site-library/Rcpp/include" -I/usr/local/include   -fpic  -g -O2 -fstack-protector-strong -Wformat -Werror=format-security -Wdate-time -D_FORTIFY_SOURCE=2 -g -c memory_format.cpp -o memory_format.o
g++ -std=gnu++11 -I/usr/local/lib/R/include -DNDEBUG  -I"/usr/local/lib/R/site-library/Rcpp/include" -I/usr/local/include   -fpic  -g -O2 -fstack-protector-strong -Wformat -Werror=format-security -Wdate-time -D_FORTIFY_SOURCE=2 -g -c nn_utils_rnn.cpp -o nn_utils_rnn.o
g++ -std=gnu++11 -I/usr/local/lib/R/include -DNDEBUG  -I"/usr/local/lib/R/site-library/Rcpp/include" -I/usr/local/include   -fpic  -g -O2 -fstack-protector-strong -Wformat -Werror=format-security -Wdate-time -D_FORTIFY_SOURCE=2 -g -c qscheme.cpp -o qscheme.o
g++ -std=gnu++11 -I/usr/local/lib/R/include -DNDEBUG  -I"/usr/local/lib/R/site-library/Rcpp/include" -I/usr/local/include   -fpic  -g -O2 -fstack-protector-strong -Wformat -Werror=format-security -Wdate-time -D_FORTIFY_SOURCE=2 -g -c quantization.cpp -o quantization.o
g++ -std=gnu++11 -I/usr/local/lib/R/include -DNDEBUG  -I"/usr/local/lib/R/site-library/Rcpp/include" -I/usr/local/include   -fpic  -g -O2 -fstack-protector-strong -Wformat -Werror=format-security -Wdate-time -D_FORTIFY_SOURCE=2 -g -c reduction.cpp -o reduction.o
g++ -std=gnu++11 -I/usr/local/lib/R/include -DNDEBUG  -I"/usr/local/lib/R/site-library/Rcpp/include" -I/usr/local/include   -fpic  -g -O2 -fstack-protector-strong -Wformat -Werror=format-security -Wdate-time -D_FORTIFY_SOURCE=2 -g -c save.cpp -o save.o
g++ -std=gnu++11 -I/usr/local/lib/R/include -DNDEBUG  -I"/usr/local/lib/R/site-library/Rcpp/include" -I/usr/local/include   -fpic  -g -O2 -fstack-protector-strong -Wformat -Werror=format-security -Wdate-time -D_FORTIFY_SOURCE=2 -g -c scalar.cpp -o scalar.o
g++ -std=gnu++11 -I/usr/local/lib/R/include -DNDEBUG  -I"/usr/local/lib/R/site-library/Rcpp/include" -I/usr/local/include   -fpic  -g -O2 -fstack-protector-strong -Wformat -Werror=format-security -Wdate-time -D_FORTIFY_SOURCE=2 -g -c storage.cpp -o storage.o
g++ -std=gnu++11 -I/usr/local/lib/R/include -DNDEBUG  -I"/usr/local/lib/R/site-library/Rcpp/include" -I/usr/local/include   -fpic  -g -O2 -fstack-protector-strong -Wformat -Werror=format-security -Wdate-time -D_FORTIFY_SOURCE=2 -g -c tensor.cpp -o tensor.o
g++ -std=gnu++11 -I/usr/local/lib/R/include -DNDEBUG  -I"/usr/local/lib/R/site-library/Rcpp/include" -I/usr/local/include   -fpic  -g -O2 -fstack-protector-strong -Wformat -Werror=format-security -Wdate-time -D_FORTIFY_SOURCE=2 -g -c tensor_list.cpp -o tensor_list.o
g++ -std=gnu++11 -I/usr/local/lib/R/include -DNDEBUG  -I"/usr/local/lib/R/site-library/Rcpp/include" -I/usr/local/include   -fpic  -g -O2 -fstack-protector-strong -Wformat -Werror=format-security -Wdate-time -D_FORTIFY_SOURCE=2 -g -c tensor_options.cpp -o tensor_options.o
g++ -std=gnu++11 -I/usr/local/lib/R/include -DNDEBUG  -I"/usr/local/lib/R/site-library/Rcpp/include" -I/usr/local/include   -fpic  -g -O2 -fstack-protector-strong -Wformat -Werror=format-security -Wdate-time -D_FORTIFY_SOURCE=2 -g -c utils.cpp -o utils.o
g++ -std=gnu++11 -I/usr/local/lib/R/include -DNDEBUG  -I"/usr/local/lib/R/site-library/Rcpp/include" -I/usr/local/include   -fpic  -g -O2 -fstack-protector-strong -Wformat -Werror=format-security -Wdate-time -D_FORTIFY_SOURCE=2 -g -c variable_list.cpp -o variable_list.o
g++ -std=gnu++11 -shared -L/usr/local/lib/R/lib -L/usr/local/lib -o torch.so RcppExports.o autograd.o contrib.o cuda.o device.o dimname_list.o dtype.o gen-namespace.o generator.o indexing.o lantern.o layout.o memory_format.o nn_utils_rnn.o qscheme.o quantization.o reduction.o save.o scalar.o storage.o tensor.o tensor_list.o tensor_options.o utils.o variable_list.o -L/usr/local/lib/R/lib -lR
Renaming torch lib to torchpkg
"/usr/local/lib/R/bin/Rscript" "../tools/renamelib.R"
installing to /usr/local/lib/R/site-library/torch/libs
** R
** preparing package for lazy loading
** help
*** installing help indices
*** copying figures
** building package indices
** installing vignettes
** testing if installed package can be loaded
* DONE (torch)
>
インストールが無事完了しました。さて気を取り直してTorch for RでDeep Learningだと意気込んだ矢先に以下の警告が。。。最新のCUDA11.0には対応していないので,CUDA10.x,9.2のいずれかの環境で構築しないとGPUは動かないですよという内容。
> library("torch")
Cuda 11.0 detected but torch only supports: cpu, 10.1, 10.2, 9.2
trying URL 'https://download.pytorch.org/libtorch/cpu/libtorch-cxx11-abi-shared-with-deps-1.7.0%2Bcpu.zip'
Content type 'application/zip' length 165327275 bytes (157.7 MB)
==================================================
downloaded 157.7 MB

trying URL 'https://storage.googleapis.com/torch-lantern-builds/refs/heads/master/latest/Linux-cpu.zip'
Content type 'application/zip' length 1531419 bytes (1.5 MB)
==================================================
downloaded 1.5 MB
CUDA10.xをインストールして再度チャレンジしようと思った矢先に以下の問題に突き当たります。。。
CUDA10.xはDebianでは動かない
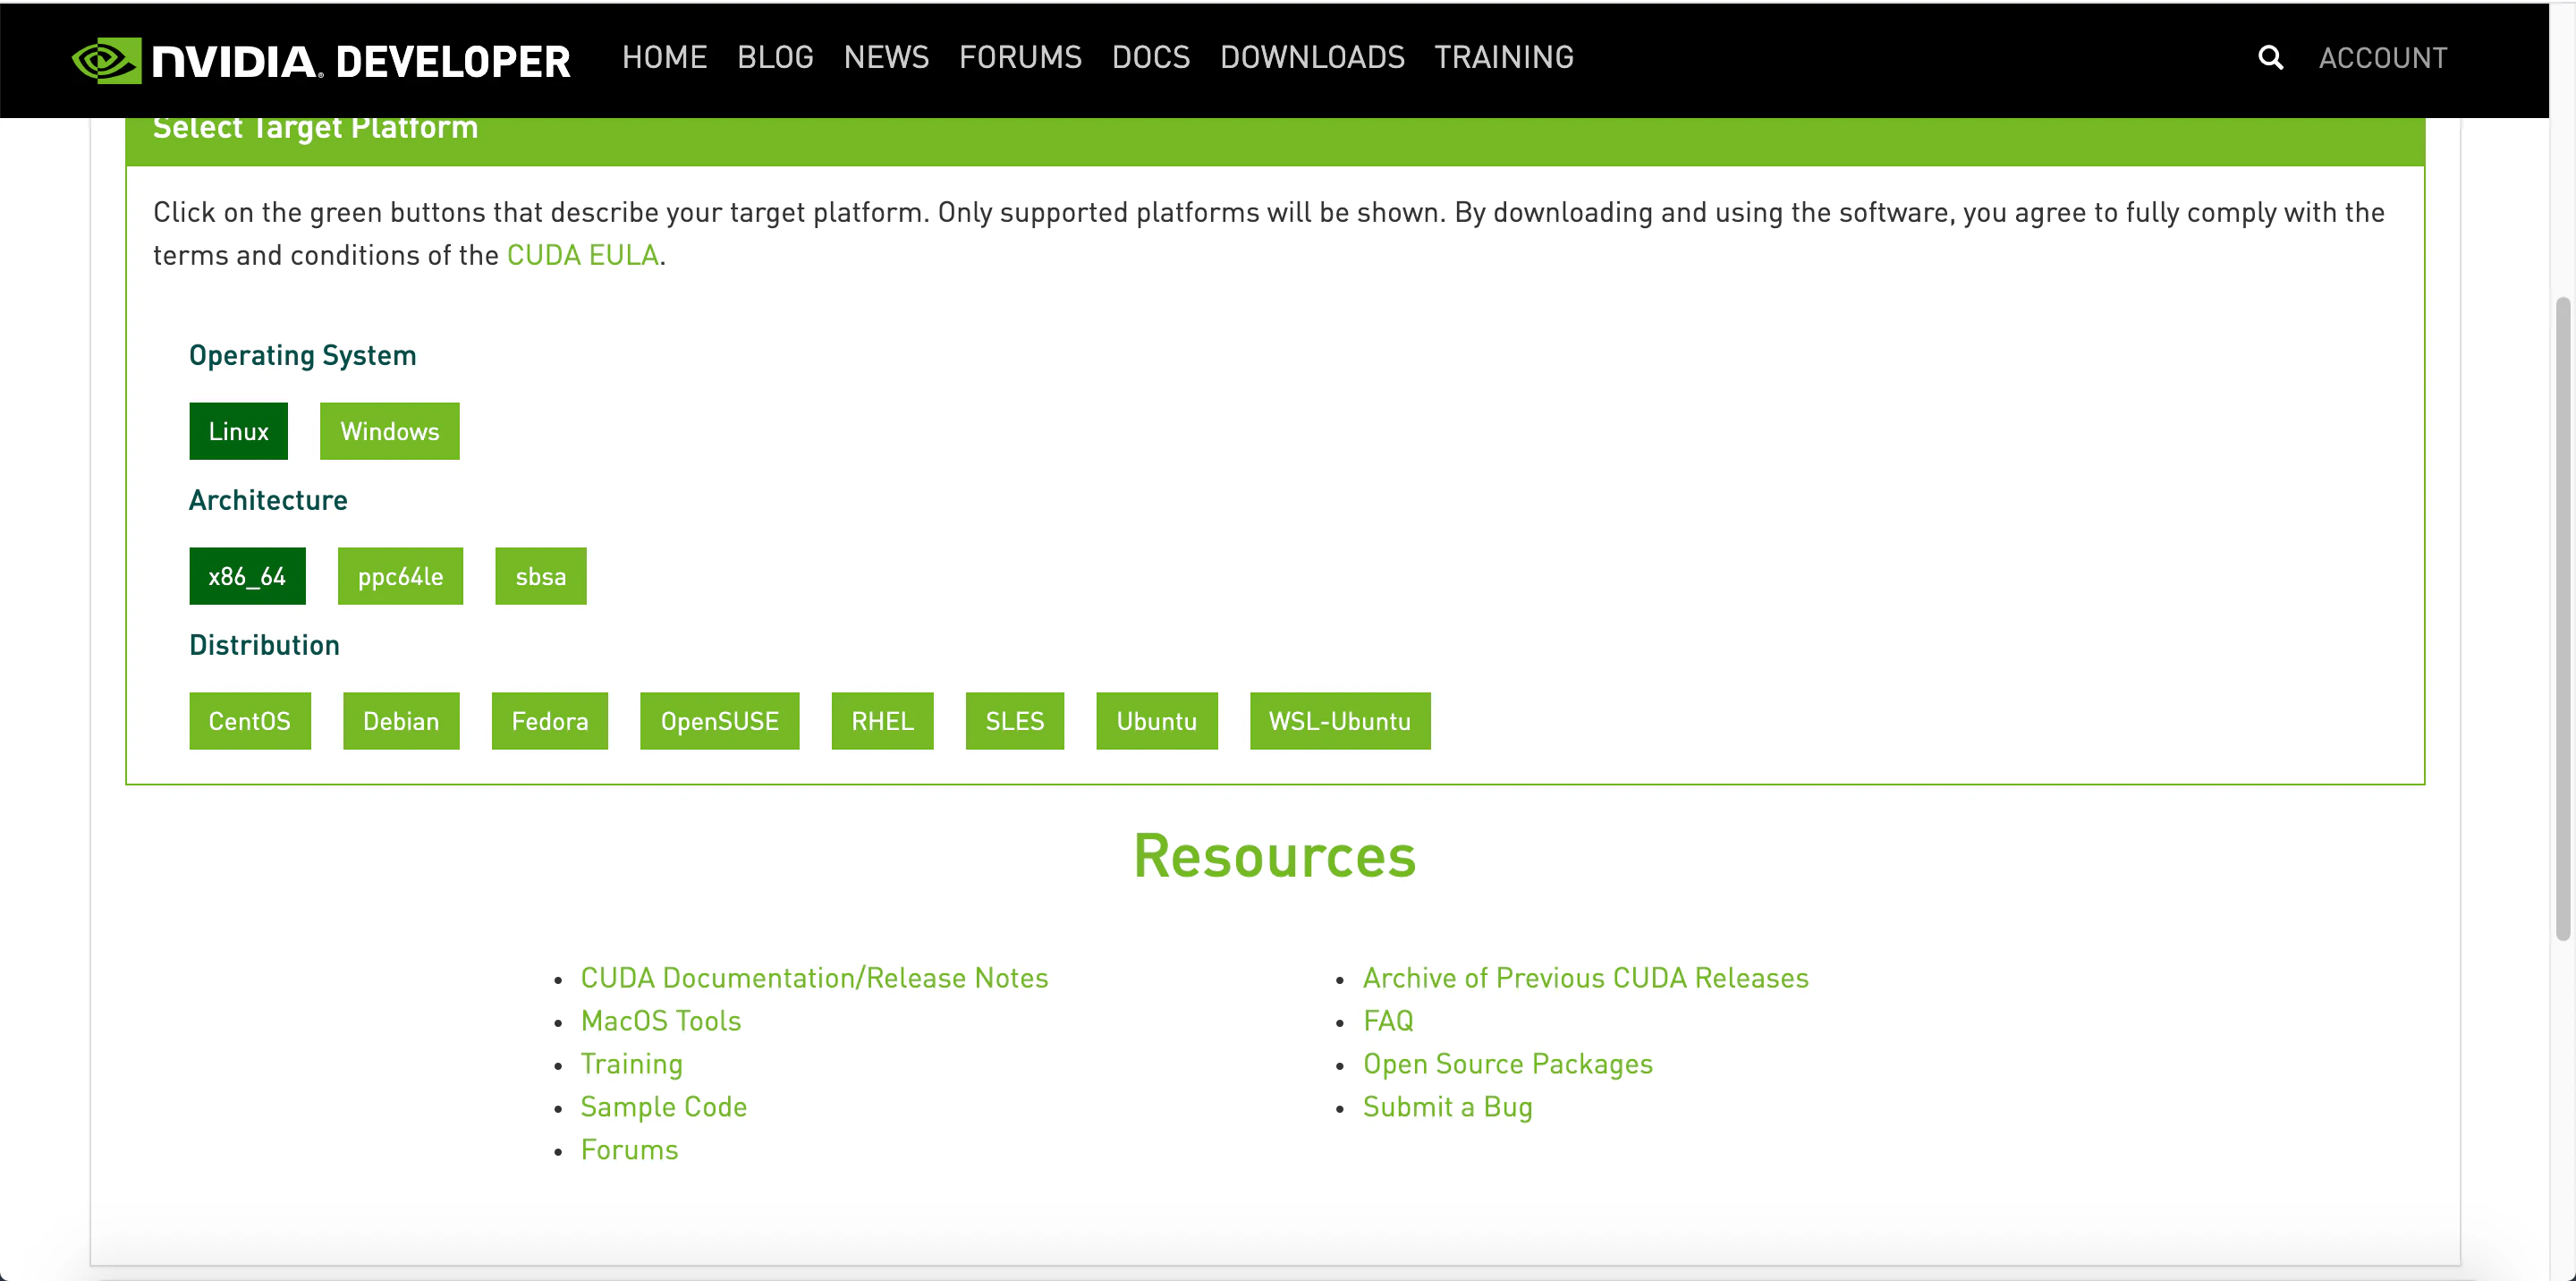
CUDA10.xをインストールしようと思い,Ubuntu18.04におけるインストール方法を公式サイトから調べてDockerfileに反映しましたが,エラーで通りません。。。実はtokyor/rstudioのご先祖様のイメージはDebian2ベースとなっています。DebianにCUDA10.xをインストールしようとした所,対応していないことが分かりました。。。(詳細は下図)
CUDA10.1ではそもそもDebianが選べない。。。
CUDA11はDebianに対応しているが,Torch for Rが対応していない。。。
Ubuntu18ベースに新たなイメージをビルド
Ubuntu18.04で尚且つCUDA10.2がインストールされているイメージをベースにRStudioのコンテナイメージをビルドして,Torch for Rが利用出来るコンテナ環境を構築することにしました。実際に作成したDockerfileとdocker-compose.ymlを以下に示します。今回作成したDockerfileは以下のコンテナイメージファイルをベースに筆者が独自に改良して作成しました。イメージ4つ分の内容を1つのDockerfileに詰め込んだので長い長いソースとなってしまいました。。。


ベースとしたイメージ: nvidia/cuda:10.1-cudnn7-devel
参考としたイメージ
参考イメージを元に以下の改良を追加
- Ubuntuには非対応なので削除したライブラリ
- libicu63
- libjpeg62-turbo
- Ubuntu向けに追加したライブラリ
- libreadline-dev
- xorg-dev
- libbz2-dev
- liblzma-dev
- libpcre2-dev
- libcurl4-openssl-dev
- 記載を削除した処理
- autoremove/autoclean処理(∵ 何故かCUDA関連の実行ファイルまで消えてしまうため)
- torch/torch vision及びその他必用なライブラリのインストール
FROM nvidia/cuda:10.1-cudnn7-devel ARG ROOT_PASSWD ARG PASSWD # Set up R(Reference rocker/r-ver) ARG R_VERSION_FULL=4.0.2 ARG R_VERSION=4 ENV CRAN=${CRAN:-https://cran.rstudio.com} ENV LC_ALL=en_US.UTF-8 ENV LANG=en_US.UTF-8 ENV TERM=xterm ENV DEBIAN_FRONTEND=noninteractive RUN apt-get update && apt-get install -y --no-install-recommends bash-completion libbz2-dev \ ca-certificates file fonts-texgyre g++ gfortran gsfonts libblas-dev libbz2-1.0 libcurl4 \ libcurl4-openssl-dev libjpeg-dev liblzma-dev libopenblas-dev libpangocairo-1.0-0 libpcre2-dev \ libpcre3 libpng16-16 libreadline-dev libtiff5 liblzma5 locales make unzip wget xorg-dev zip zlib1g \ && BUILDDEPS="curl default-jdk libbz2-dev libcairo2-dev libcurl4-openssl-dev libpango1.0-dev libjpeg-dev \ libicu-dev libpcre3-dev libpng-dev libreadline-dev libtiff5-dev liblzma-dev libx11-dev libxt-dev perl \ tcl8.6-dev tk8.6-dev texinfo texlive-extra-utils texlive-fonts-recommended texlive-fonts-extra \ texlive-latex-recommended x11proto-core-dev xauth xfonts-base xvfb zlib1g-dev" \ && echo "en_US.UTF-8 UTF-8" >> /etc/locale.gen && locale-gen en_US.utf8 && /usr/sbin/update-locale LANG=en_US.UTF-8 \ && apt-get install -y --no-install-recommends $BUILDDEPS \ && cd tmp/ \ ## Download source code && wget https://cran.r-project.org/src/base/R-${R_VERSION}/R-${R_VERSION_FULL}.tar.gz \ ## Extract source code && tar -xf R-${R_VERSION_FULL}.tar.gz \ && cd R-${R_VERSION_FULL} \ ## Set compiler flags && R_PAPERSIZE=letter \ R_BATCHSAVE="--no-save --no-restore" R_BROWSER=xdg-open PAGER=/usr/bin/pager PERL=/usr/bin/perl R_UNZIPCMD=/usr/bin/unzip \ R_ZIPCMD=/usr/bin/zip R_PRINTCMD=/usr/bin/lpr LIBnn=lib AWK=/usr/bin/awk \ CFLAGS="-g -O2 -fstack-protector-strong -Wformat -Werror=format-security -Wdate-time -D_FORTIFY_SOURCE=2 -g" \ CXXFLAGS="-g -O2 -fstack-protector-strong -Wformat -Werror=format-security -Wdate-time -D_FORTIFY_SOURCE=2 -g" \ ## Configure options ./configure --enable-R-shlib --enable-memory-profiling --with-readline --with-blas --with-tcltk --disable-nls --with-recommended-packages \ ## Build and install && make \ && make install \ ## Add a library directory (for user-installed packages) && mkdir -p /usr/local/lib/R/site-library \ && chown root:staff /usr/local/lib/R/site-library \ && chmod g+ws /usr/local/lib/R/site-library \ ## Fix library path && sed -i '/^R_LIBS_USER=.*$/d' /usr/local/lib/R/etc/Renviron \ && echo "R_LIBS_USER=\${R_LIBS_USER-'/usr/local/lib/R/site-library'}" >> /usr/local/lib/R/etc/Renviron \ && echo "R_LIBS=\${R_LIBS-'/usr/local/lib/R/site-library:/usr/local/lib/R/library:/usr/lib/R/library'}" >> /usr/local/lib/R/etc/Renviron \ ## Set configured CRAN mirror && if [ -z "$BUILD_DATE" ]; then MRAN=$CRAN; \ else MRAN=https://mran.microsoft.com/snapshot/${BUILD_DATE}; fi \ && echo MRAN=$MRAN >> /etc/environment \ && echo "options(repos = c(CRAN='$MRAN'), download.file.method = 'libcurl')" >> /usr/local/lib/R/etc/Rprofile.site \ ## Use littler installation scripts && Rscript -e "install.packages(c('littler', 'docopt'), repo = '$CRAN')" \ && ln -s /usr/local/lib/R/site-library/littler/examples/install2.r /usr/local/bin/install2.r \ && ln -s /usr/local/lib/R/site-library/littler/examples/installGithub.r /usr/local/bin/installGithub.r \ && ln -s /usr/local/lib/R/site-library/littler/bin/r /usr/local/bin/r \ ## Clean up from R source install && cd / \ && rm -rf /tmp/* \ && rm -rf /var/lib/apt/lists/* # Set up RStudio(Reference rocker/rstudio) ARG RSTUDIO_VERSION ENV RSTUDIO_VERSION=${RSTUDIO_VERSION:-1.2.5042} ARG S6_VERSION ARG PANDOC_TEMPLATES_VERSION ENV S6_VERSION=${S6_VERSION:-v1.21.7.0} ENV S6_BEHAVIOUR_IF_STAGE2_FAILS=2 ENV PATH=/usr/lib/rstudio-server/bin:$PATH ENV PANDOC_TEMPLATES_VERSION=${PANDOC_TEMPLATES_VERSION:-2.9} ## Download and install RStudio server & dependencies ## Attempts to get detect latest version, otherwise falls back to version given in $VER ## Symlink pandoc, pandoc-citeproc so they are available system-wide RUN apt-get update && apt-get install -y --no-install-recommends git libapparmor1 libclang-dev libedit2 libssl-dev \ lsb-release multiarch-support psmisc procps python-setuptools sudo \ && if [ -z "$RSTUDIO_VERSION" ]; \ then RSTUDIO_URL="https://www.rstudio.org/download/latest/stable/server/bionic/rstudio-server-latest-amd64.deb"; \ else RSTUDIO_URL="http://download2.rstudio.org/server/bionic/amd64/rstudio-server-${RSTUDIO_VERSION}-amd64.deb"; fi \ && wget -q $RSTUDIO_URL \ && dpkg -i rstudio-server-*-amd64.deb \ && rm rstudio-server-*-amd64.deb \ ## Symlink pandoc & standard pandoc templates for use system-wide && ln -s /usr/lib/rstudio-server/bin/pandoc/pandoc /usr/local/bin \ && ln -s /usr/lib/rstudio-server/bin/pandoc/pandoc-citeproc /usr/local/bin \ && git clone --recursive --branch ${PANDOC_TEMPLATES_VERSION} https://github.com/jgm/pandoc-templates \ && mkdir -p /opt/pandoc/templates \ && cp -r pandoc-templates*/* /opt/pandoc/templates && rm -rf pandoc-templates* \ && mkdir /root/.pandoc && ln -s /opt/pandoc/templates /root/.pandoc/templates \ && apt-get clean \ && rm -rf /var/lib/apt/lists/ \ ## RStudio wants an /etc/R, will populate from $R_HOME/etc && mkdir -p /etc/R \ ## Write config files in $R_HOME/etc && echo '\n\ \n# Configure httr to perform out-of-band authentication if HTTR_LOCALHOST \ \n# is not set since a redirect to localhost may not work depending upon \ \n# where this Docker container is running. \ \nif(is.na(Sys.getenv("HTTR_LOCALHOST", unset=NA))) { \ \n options(httr_oob_default = TRUE) \ \n}' >> /usr/local/lib/R/etc/Rprofile.site \ && echo "PATH=${PATH}" >> /usr/local/lib/R/etc/Renviron \ ## Need to configure non-root user for RStudio && useradd rstudio \ && echo "rstudio:rstudio" | chpasswd \ && mkdir /home/rstudio \ && chown rstudio:rstudio /home/rstudio \ && addgroup rstudio staff \ ## Prevent rstudio from deciding to use /usr/bin/R if a user apt-get installs a package && echo 'rsession-which-r=/usr/local/bin/R' >> /etc/rstudio/rserver.conf \ ## use more robust file locking to avoid errors when using shared volumes: && echo 'lock-type=advisory' >> /etc/rstudio/file-locks \ ## configure git not to request password each time && git config --system credential.helper 'cache --timeout=3600' \ && git config --system push.default simple \ ## Set up S6 init system && wget -P /tmp/ https://github.com/just-containers/s6-overlay/releases/download/${S6_VERSION}/s6-overlay-amd64.tar.gz \ && tar xzf /tmp/s6-overlay-amd64.tar.gz -C / \ && mkdir -p /etc/services.d/rstudio \ && echo '#!/usr/bin/with-contenv bash \ \n## load /etc/environment vars first: \ \n for line in $( cat /etc/environment ) ; do export $line ; done \ \n exec /usr/lib/rstudio-server/bin/rserver --server-daemonize 0' \ > /etc/services.d/rstudio/run \ && echo '#!/bin/bash \ \n rstudio-server stop' \ > /etc/services.d/rstudio/finish \ && mkdir -p /home/rstudio/.rstudio/monitored/user-settings \ && echo 'alwaysSaveHistory="0" \ \nloadRData="0" \ \nsaveAction="0"' \ > /home/rstudio/.rstudio/monitored/user-settings/user-settings \ && chown -R rstudio:rstudio /home/rstudio/.rstudio RUN wget -P /etc/cont-init.d/ -O userconf https://github.com/rocker-org/rocker-versioned/blob/master/rstudio/userconf.sh ## running with "-e ADD=shiny" adds shiny server RUN wget -P /etc/cont-init.d/ -O add https://github.com/rocker-org/rocker-versioned/blob/master/rstudio/add_shiny.sh RUN wget -P /etc/rstudio/ https://github.com/rocker-org/rocker-versioned/blob/master/rstudio/disable_auth_rserver.conf RUN wget -P /usr/lib/rstudio-server/bin/ -O pam-helper https://github.com/rocker-org/rocker-versioned/blob/master/rstudio/pam-helper.sh EXPOSE 8787 ## automatically link a shared volume for kitematic users VOLUME /home/rstudio/kitematic # Install some requires(Reference rocker/tidyverse) RUN apt-get update -qq && apt-get -y --no-install-recommends install \ libxml2-dev libcairo2-dev libsqlite-dev libmariadbd-dev libmariadbclient-dev \ libpq-dev libssh2-1-dev unixodbc-dev libsasl2-dev \ && Rscript -e "install.packages(c('tidyverse', 'dplyr', 'devtools', 'formatR', \ 'remotes', 'selectr', 'caTools', 'BiocManager'))" # Set up localize(Reference tokyor/rstudio) # Change environment to Japanese(Character and DateTime) ENV LANG ja_JP.UTF-8 ENV LC_ALL ja_JP.UTF-8 RUN sed -i '$d' /etc/locale.gen && echo "ja_JP.UTF-8 UTF-8" >> /etc/locale.gen \ && locale-gen ja_JP.UTF-8 && /usr/sbin/update-locale LANG=ja_JP.UTF-8 LANGUAGE="ja_JP:ja" RUN /bin/bash -c "source /etc/default/locale" RUN ln -sf /usr/share/zoneinfo/Asia/Tokyo /etc/localtime # Install ipaexfont and some requires RUN apt-get update && apt-get install -y fonts-ipaexfont vim curl # Install packages RUN Rscript -e "install.packages(c('githubinstall', 'ranger'))" # Install torch for R RUN Rscript -e "install.packages('torch')" RUN Rscript -e "remotes::install_github('mlverse/torchvision')" RUN echo 'root:'${ROOT_PASSWD} | chpasswd RUN echo 'rstudio:'${PASSWD} | chpasswd RUN echo "rstudio ALL=(ALL:ALL) ALL" >> /etc/sudoers RUN gpasswd -a rstudio sudo CMD ["/init"]version: "2.4" services: rstudio_docker: build: context: . dockerfile: Dockerfile runtime: nvidia environment: - NVIDIA_VISIBLE_DEVICES=all - NVIDIA_DRIVER_CAPABILITIES=all ports: - 8787:8787 volumes: - ../rstudio_home:/home/rstudio restart: alwaysまた,コマンド入力が面倒くさいのでイメージビルド用に以下のシェルファイルも作成しました。rstudio/rstudioが認証情報だとGoogle Chromeの警告(パスワードの弱さに関する)が出るので変更することにします。
auth.txtというファイルを作成し,そこにパスワードを記載することで,コマンドの履歴にパスワードの内容が残らない様にしています。#!/bin/bash if [ "${1}" = "-nc" ]; then cat auth.txt | xargs -n 2 sh -c 'docker-compose build --no-cache --build-arg ROOT_PASSWD=$0 --build-arg PASSWD=$1' else cat auth.txt | xargs -n 2 sh -c 'docker-compose build --build-arg ROOT_PASSWD=$0 --build-arg PASSWD=$1' fiCUDAが有効にならない苦難の歴史
上記のDockerfileをビルドしてコンテナを起動すればいよいよGPU版のTorch for RをDocker上で利用出来る様になる筈でした。しかし,実際に待っていたのは,以下の図の様な状況です。。。
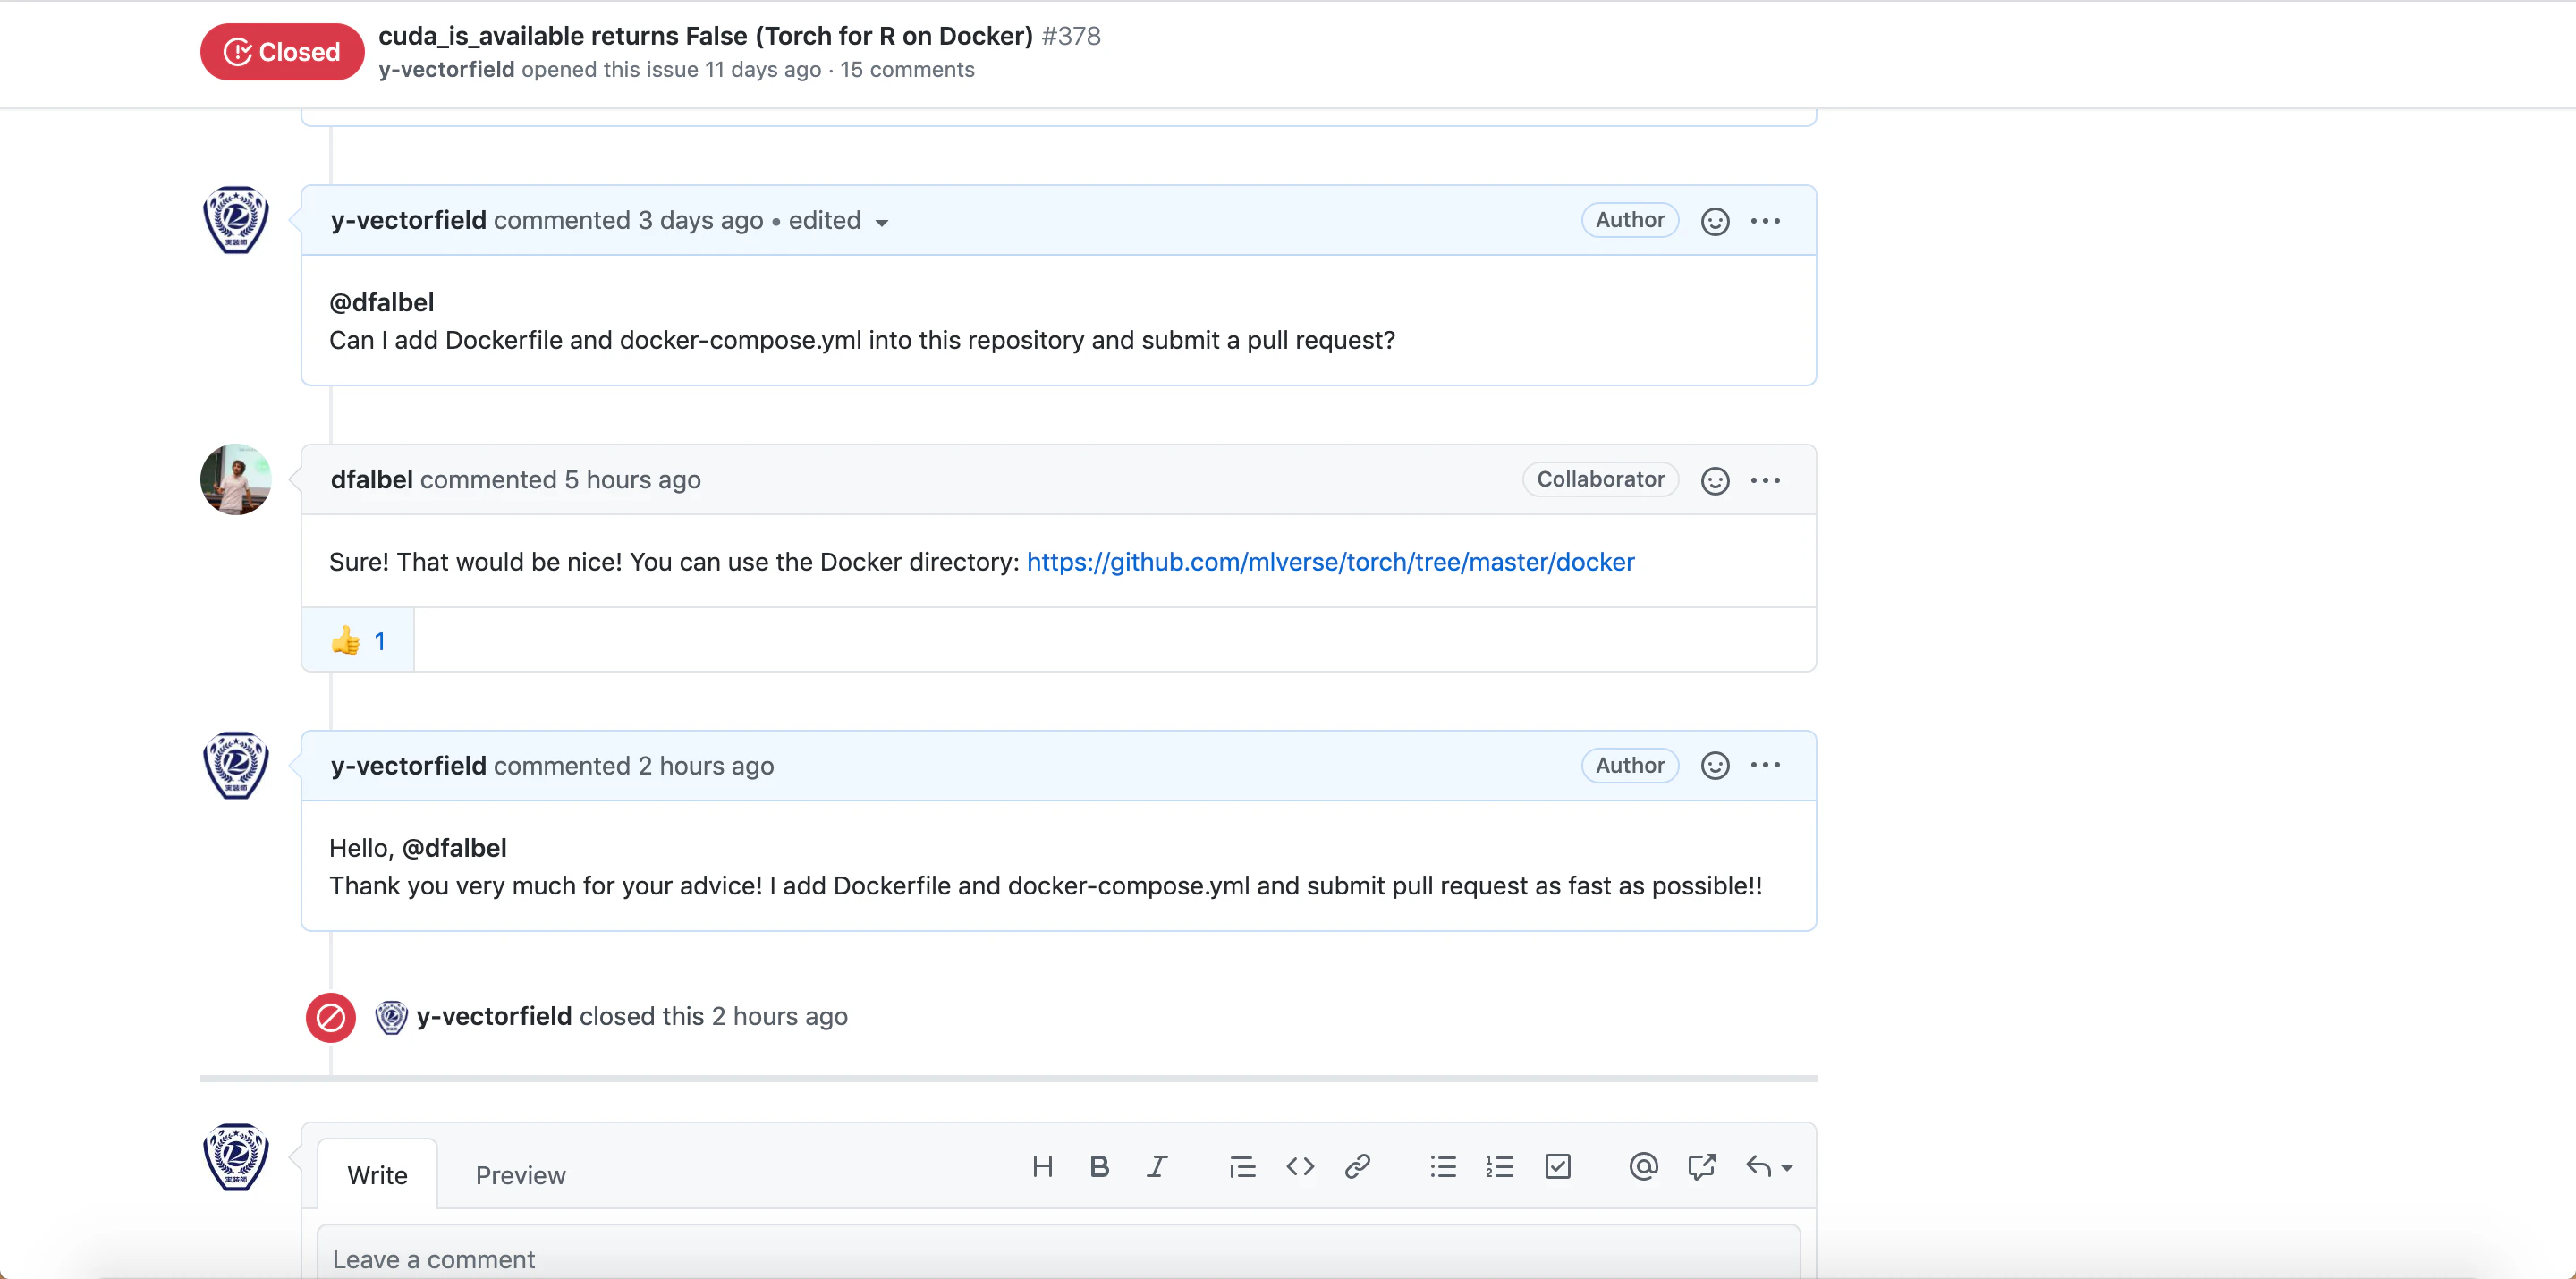
万事休す。。。一縷の望みを託すべくGitHubにIssueを上げてみました。詳細は以下を参照して下さい。(本家RStudio社のエンジニアとの議論になるとは夢にも思っていませんでした。RStudio社がブラジルの会社だったという事実を今回初めて知りました。)
結局解決。。。しかし,その方法が。。。
Issueを見て頂くとお分かり頂けますが,結局
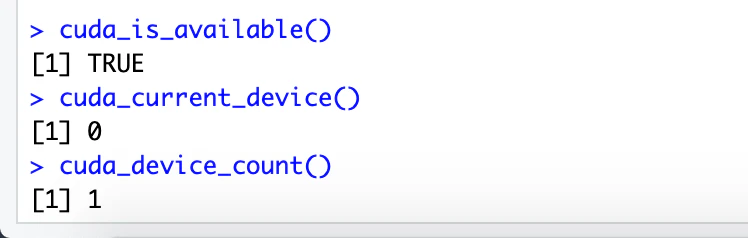
cuda_is_available() == FalseとなるトラブルはDockerfileをリビルド(厳密にはキャッシュされているコンテナイメージを使用しない)を実施すると解決しました。但し,キャッシュを用いずにリビルドする作業は何度も実施していましたが,解決に至っていなかったのが,ある日もう一度やってみようと思ってやってみたら解決したので,Docker Hubに上がっていたイメージファイルにバグが有ったか,キャッシュを使わないビルドをやっているつもりでキャッシュを使ってしまっていたのかもしれません。どっちにしてもキャッシュされていたコンテナイメージは壊れていたということはこのことから分かりました。
以下の図の様にGPUのデバイス番号が得られている。Rはリストのインデックスは1から開始する仕様であることが知られていますが,CUDA DeviceのIDは0から開始するという奇妙な仕様です。
2020/12/7追記: 苦難の歴史が認められ本家のリポジトリに。。。
ダメ元でコミュニティーのリポジトリに成果物を追加出来ないか聞いてみた所,何と!!あっさり許可が下りてしまいました。地球の裏側のエンジニア3に筆者の苦闘の成果が認められた瞬間です。(参照)
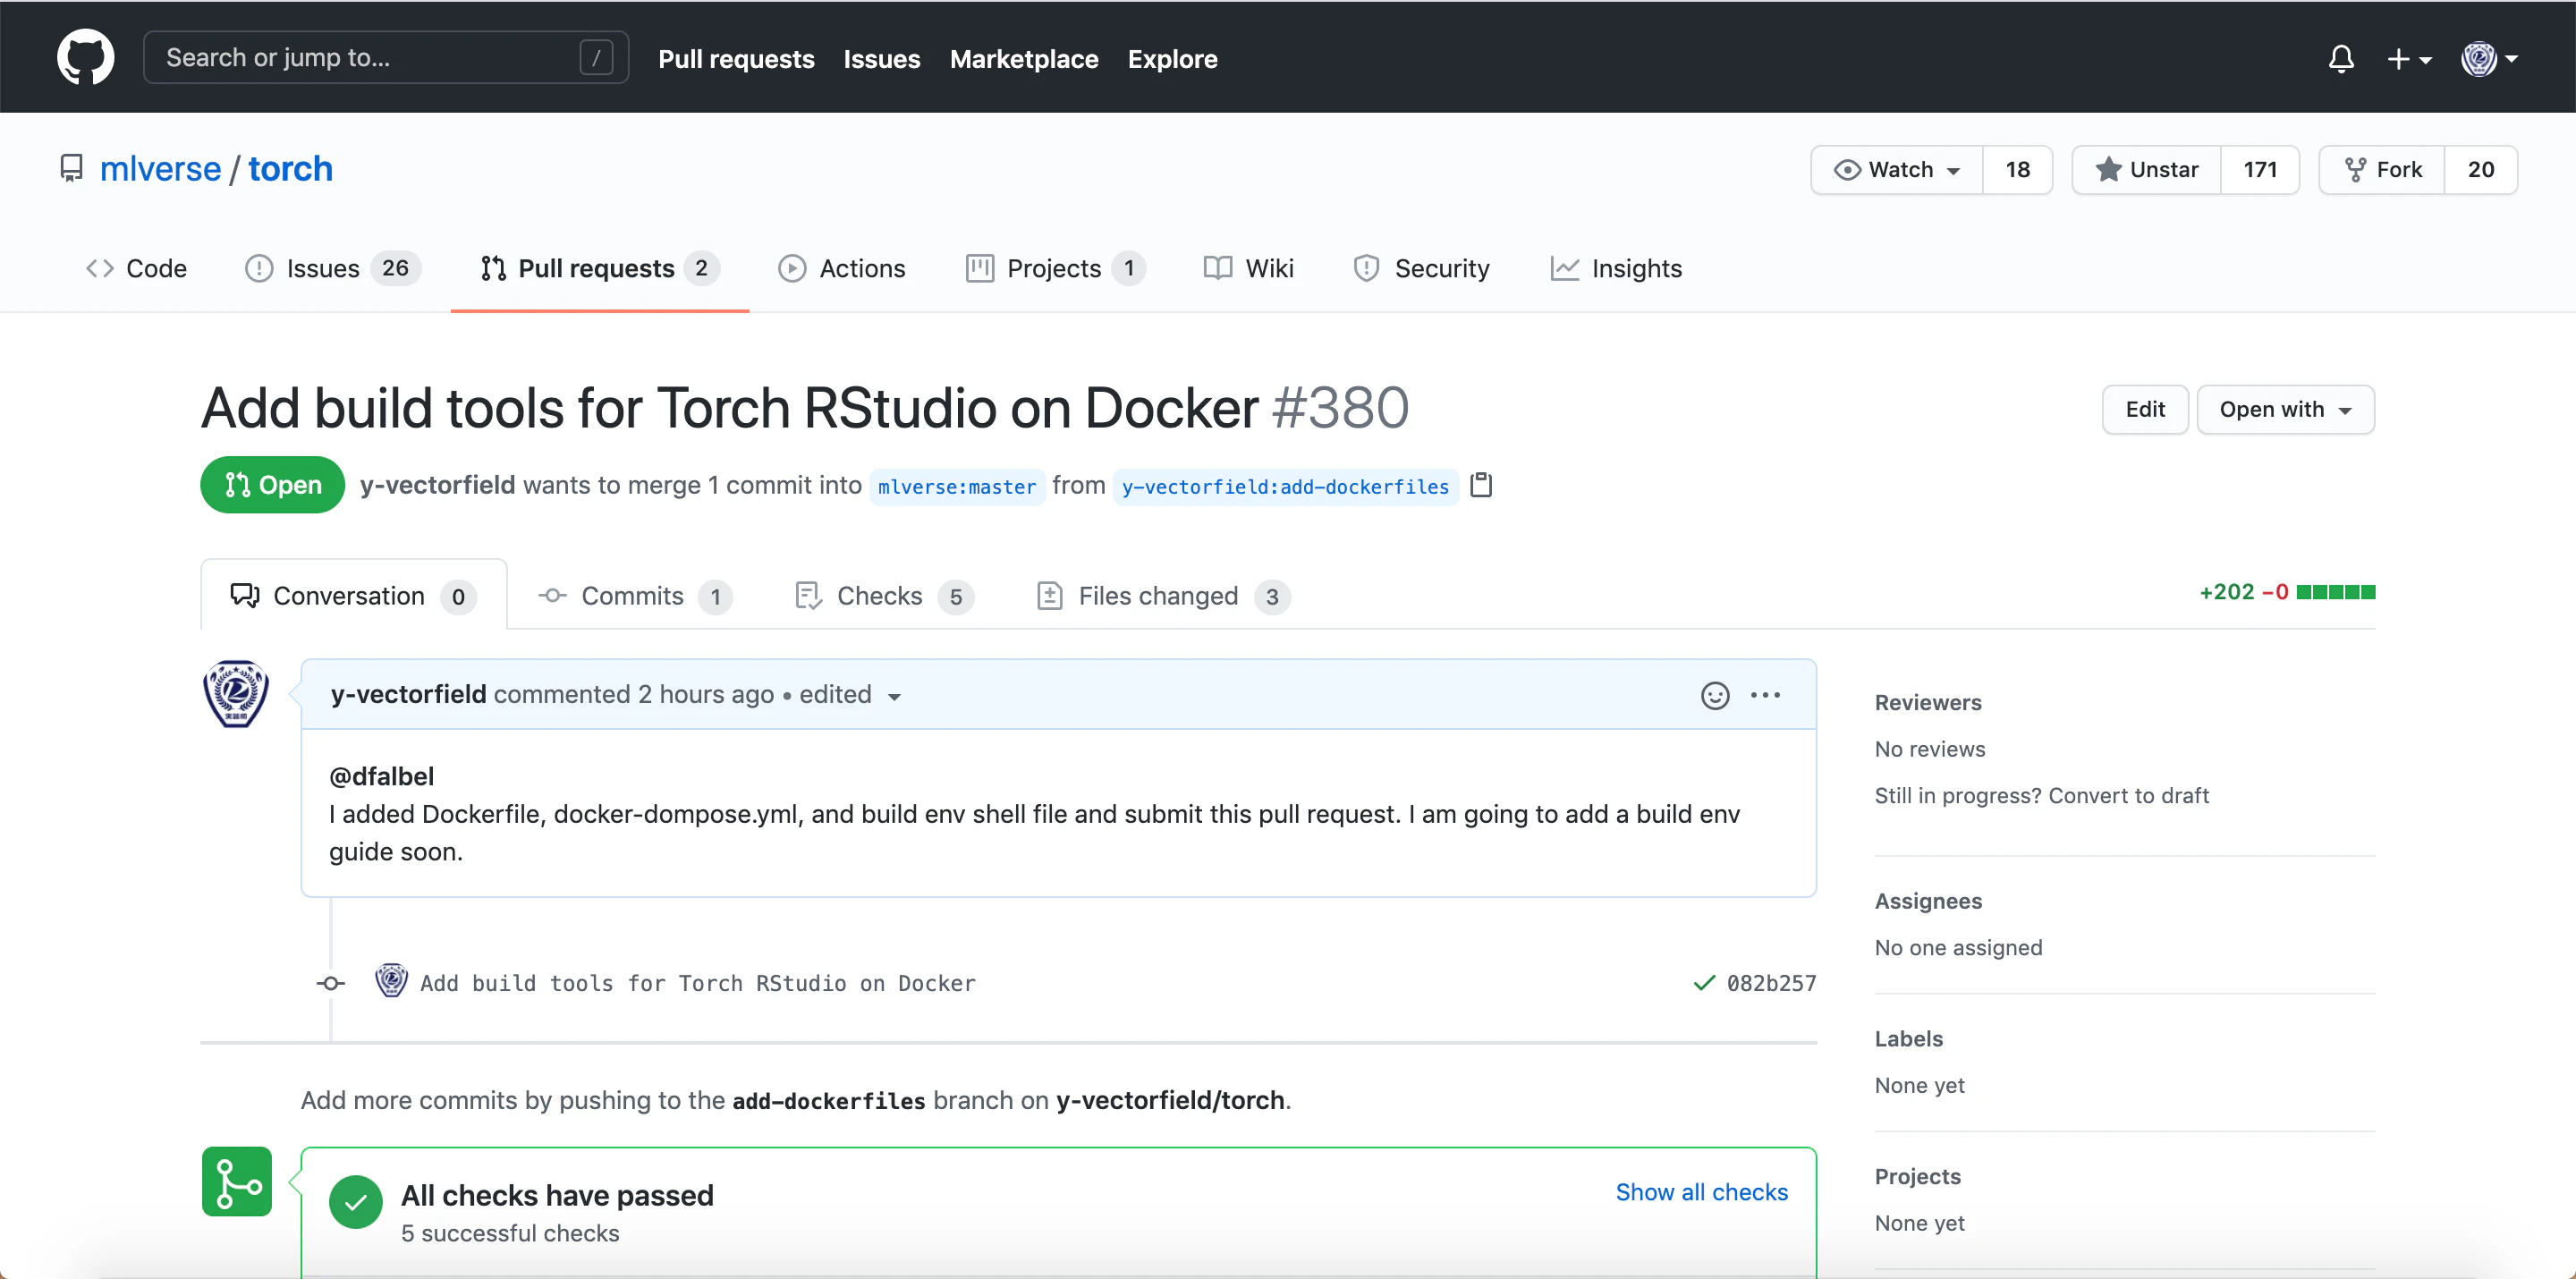
Pull Requestを出してみた!!
御言葉に甘えてPull Requestを出してみました。マージされれば本家のリポジトリから環境構築ツールが利用出来ます。請うご期待!!
Mergeされました!!(2020/12/7)
無事Mergeされました。めでたしめでたし。但し環境構築ガイドを追加するという追加タスクが。。。(Pull Requestに書いてしまったので。。。しかも,in Englishで。。。)
まとめ
Torch for RをGPUモードで実行出来る環境をDockerでお手軽に構築出来る様にDockerfile, docker-compose.yml等の必用なファイルの作成を今回実施しました。これもTorch for RがCUDA11に対応すれば,お役御免になるかもしれませんが,それまでは今回作成した環境でTorch for Rを用いてDNNで遊んでみようと思います。
今後の展望
- MLP(Multi Layer Perceptron)で手書き文字認識を試してみる
- DNNで手書き文字認識を試してみる
- もう少し複雑なデータセットでDNNを試す
- Kaggleでも活用してみる
- 友人に利用を紹介する etc...
Reference


- 投稿日:2020-12-06T21:50:05+09:00
【初心者向け】20分でLaravel開発環境を爆速構築するDockerハンズオン
概要
docker(docker-compose)でLEMP環境(PHP/nginx/MySQL)を構築し、Laravelの新規プロジェクト作成、構築した環境を破棄してから環境の再構築までをハンズオン形式で行います。
ご注意
記事を寄稿したタイミングでは、補足の解説は特になくコマンドだけのご紹介だったので、コマンド部分のみコピペすれば20分で終わる内容でした。
しかし、継ぎ足しで解説を追記していった結果、普通に読みながら進めていくと2時間ぐらいのボリュームになってしまってます?ご了承下さい?♂️
更新履歴
- 2020/09/09 Laravel8(当時はLaravel6が出た頃)がリリースされ、こちらの記事も内容が古くなったので全て書き直しました。
目的
Dockerの細かい概念などはすっ飛ばして、
このハンズオンの通りに進めればDocker×Laravelの環境を構築できます。
習うより慣れろで行ってみましょう!ハンズオン終了時のGitHub
https://github.com/ucan-lab/docker-laravel-handson
ハンズオンイベント
【ぺちオブ】ゆーきゃんプレゼンツ!Laravel + Docker 環境構築ハンズオン
https://phper-oop.connpass.com/event/137152
あの有名なぺちオブのイベントとしてハンズオン講師をやらせていただきました!
ありがとうございます?レビュワー
- hiroさん @hirodragon
- かひろくん @kahirokunn
- もっぷ先生 @kobayashi-m42
- こはさん @smspp
スペシャルサンクス?♂️?
前提条件
- Mac基準ですが、Windowsでも動作することを確認済み
- コマンドは
[環境] $とprefixを付けてます。- 所要時間は事前準備部分を除いて20分を目安としてます。
- エディタはファイル編集時にお好みのもので開いて作業ください?
構築環境(Dockerイメージ、各種バージョン)
- php: 7.4-fpm-buster
- composer: 1.10
- nginx: 1.18-alpine
- mysql: 8.0
- Laravel: 8.x
dockerおすすめ書籍
冒頭で習うより慣れろと言いましたが、習っておくのもそれはそれで良いことなのでオススメの書籍や記事をご紹介します。私はこの辺りの記事や本を読んで勉強したのでオススメしてます。
マンガでわかるdockerシリーズ
@llminatoll さんがDockerについてマンガで分かりやすく説明されてます。
初めての方はこちらのマンガでDockerの概念を学んでから進めると理解しやすいです。dockerおすすめ記事・サイト
公式系
記事
スライド
- Docker入門-基礎編 いまから始めるDocker管理【2nd Edition】
- Dockerfileを改善するためのBest Practice 2019年版
- Dockerfile を書くためのベストプラクティス解説編
事前準備
Windowsユーザー
Git Bashのインストールをお願いします。(Linuxコマンドをそのまま打てるようになります)
Git Bash を起動した際は下記のコマンドを実行ください。
$ exec winpty bashGitHubアカウントの作成
Gitの初期設定
user.emailとuser.nameが設定されていればok!
Gitの初期設定を行ってない場合、下記の記事を参考に初期設定をお願いします。最終的に下記のように表示されればokです。
$ git config --list | grep user
user.email=xxx@yyy.com
user.name=zzz
GitHub SSH接続設定
$ ssh -T github.com
Warning: Permanently added 'github.com,52.69.186.44' (RSA) to the list of known hosts.
Hi ucan-lab! You've successfully authenticated, but GitHub does not provide shell access.
successfully authenticatedの文字が出ればok!
Warningは気にしなくてok!GitHub SSH接続設定を行ってない場合、下記の記事を参考に初期設定をお願いします。
もしくはハンズオンをHTTPSに置き換えて進めてください。docker, docker-compose のインストール
[Mac] Docker for Macをインストール
[Windows] Docker for Windowsをインストール
イントール確認
[mac] $ docker --version Docker version 19.03.12, build 48a66213fe [mac] $ docker-compose --version docker-compose version 1.26.2, build eefe0d31Docker起動確認
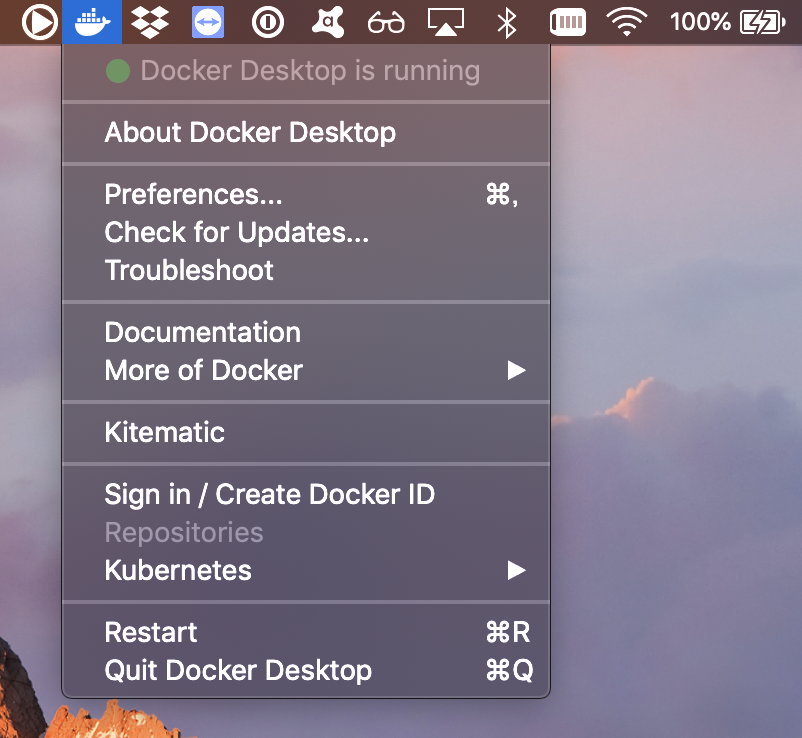
インストールしたDockerを起動してください。
running状態になっていればokです。
ここまでで事前準備終了です。
今回のハンズオンのゴール
- 3層アーキテクチャのコンテナの構築
- ウェブサーバー(web)
- nginxで静的コンテンツ配信サーバを構築
- アプリケーションサーバー(app)
- nginxを経由してPHPを動作させるアプリケーションサーバを構築
- PHPパッケージ管理ツールComposerのインストール
- データベースサーバー(db)
- MySQLデータベースサーバーの構築
- Laravelをインストールしてwelcome画面の表示
- LaravelとMySQLを連携し、マイグレーションを実行
- Docker環境の破棄
- Docker環境をGitHubから再構築
?【初心者向け】20分でLaravel開発環境を爆速構築するDockerハンズオン?
- 所要時間: 20分目安
作業ディレクトリを作成
[mac] $ mkdir docker-laravel-handson
[mac] $ cd docker-laravel-handson
最終的なディレクトリ構成
.
├── README.md (この名前にするとGitHubで見た時にHTMLに変換して表示してくれる)
├── infra (*1)
│   ├── mysql (*1)
│   │   ├── Dockerfile
│   │   └── my.cnf (*1)
│   ├── nginx (*1)
│   │   └── default.conf (*1)
│   └── php (*1)
│       ├── Dockerfile (この名前にするとファイル名の指定を省略できる)
│       └── php.ini (*1)
├── docker-compose.yml (この名前にするとファイル名の指定を省略できる)
└── backend (*1)
    └── Laravelをインストールするディレクトリ
このディレクトリ構成を目指します。
(*1)任意の名前に変更してもokです。リモートリポジトリを作成
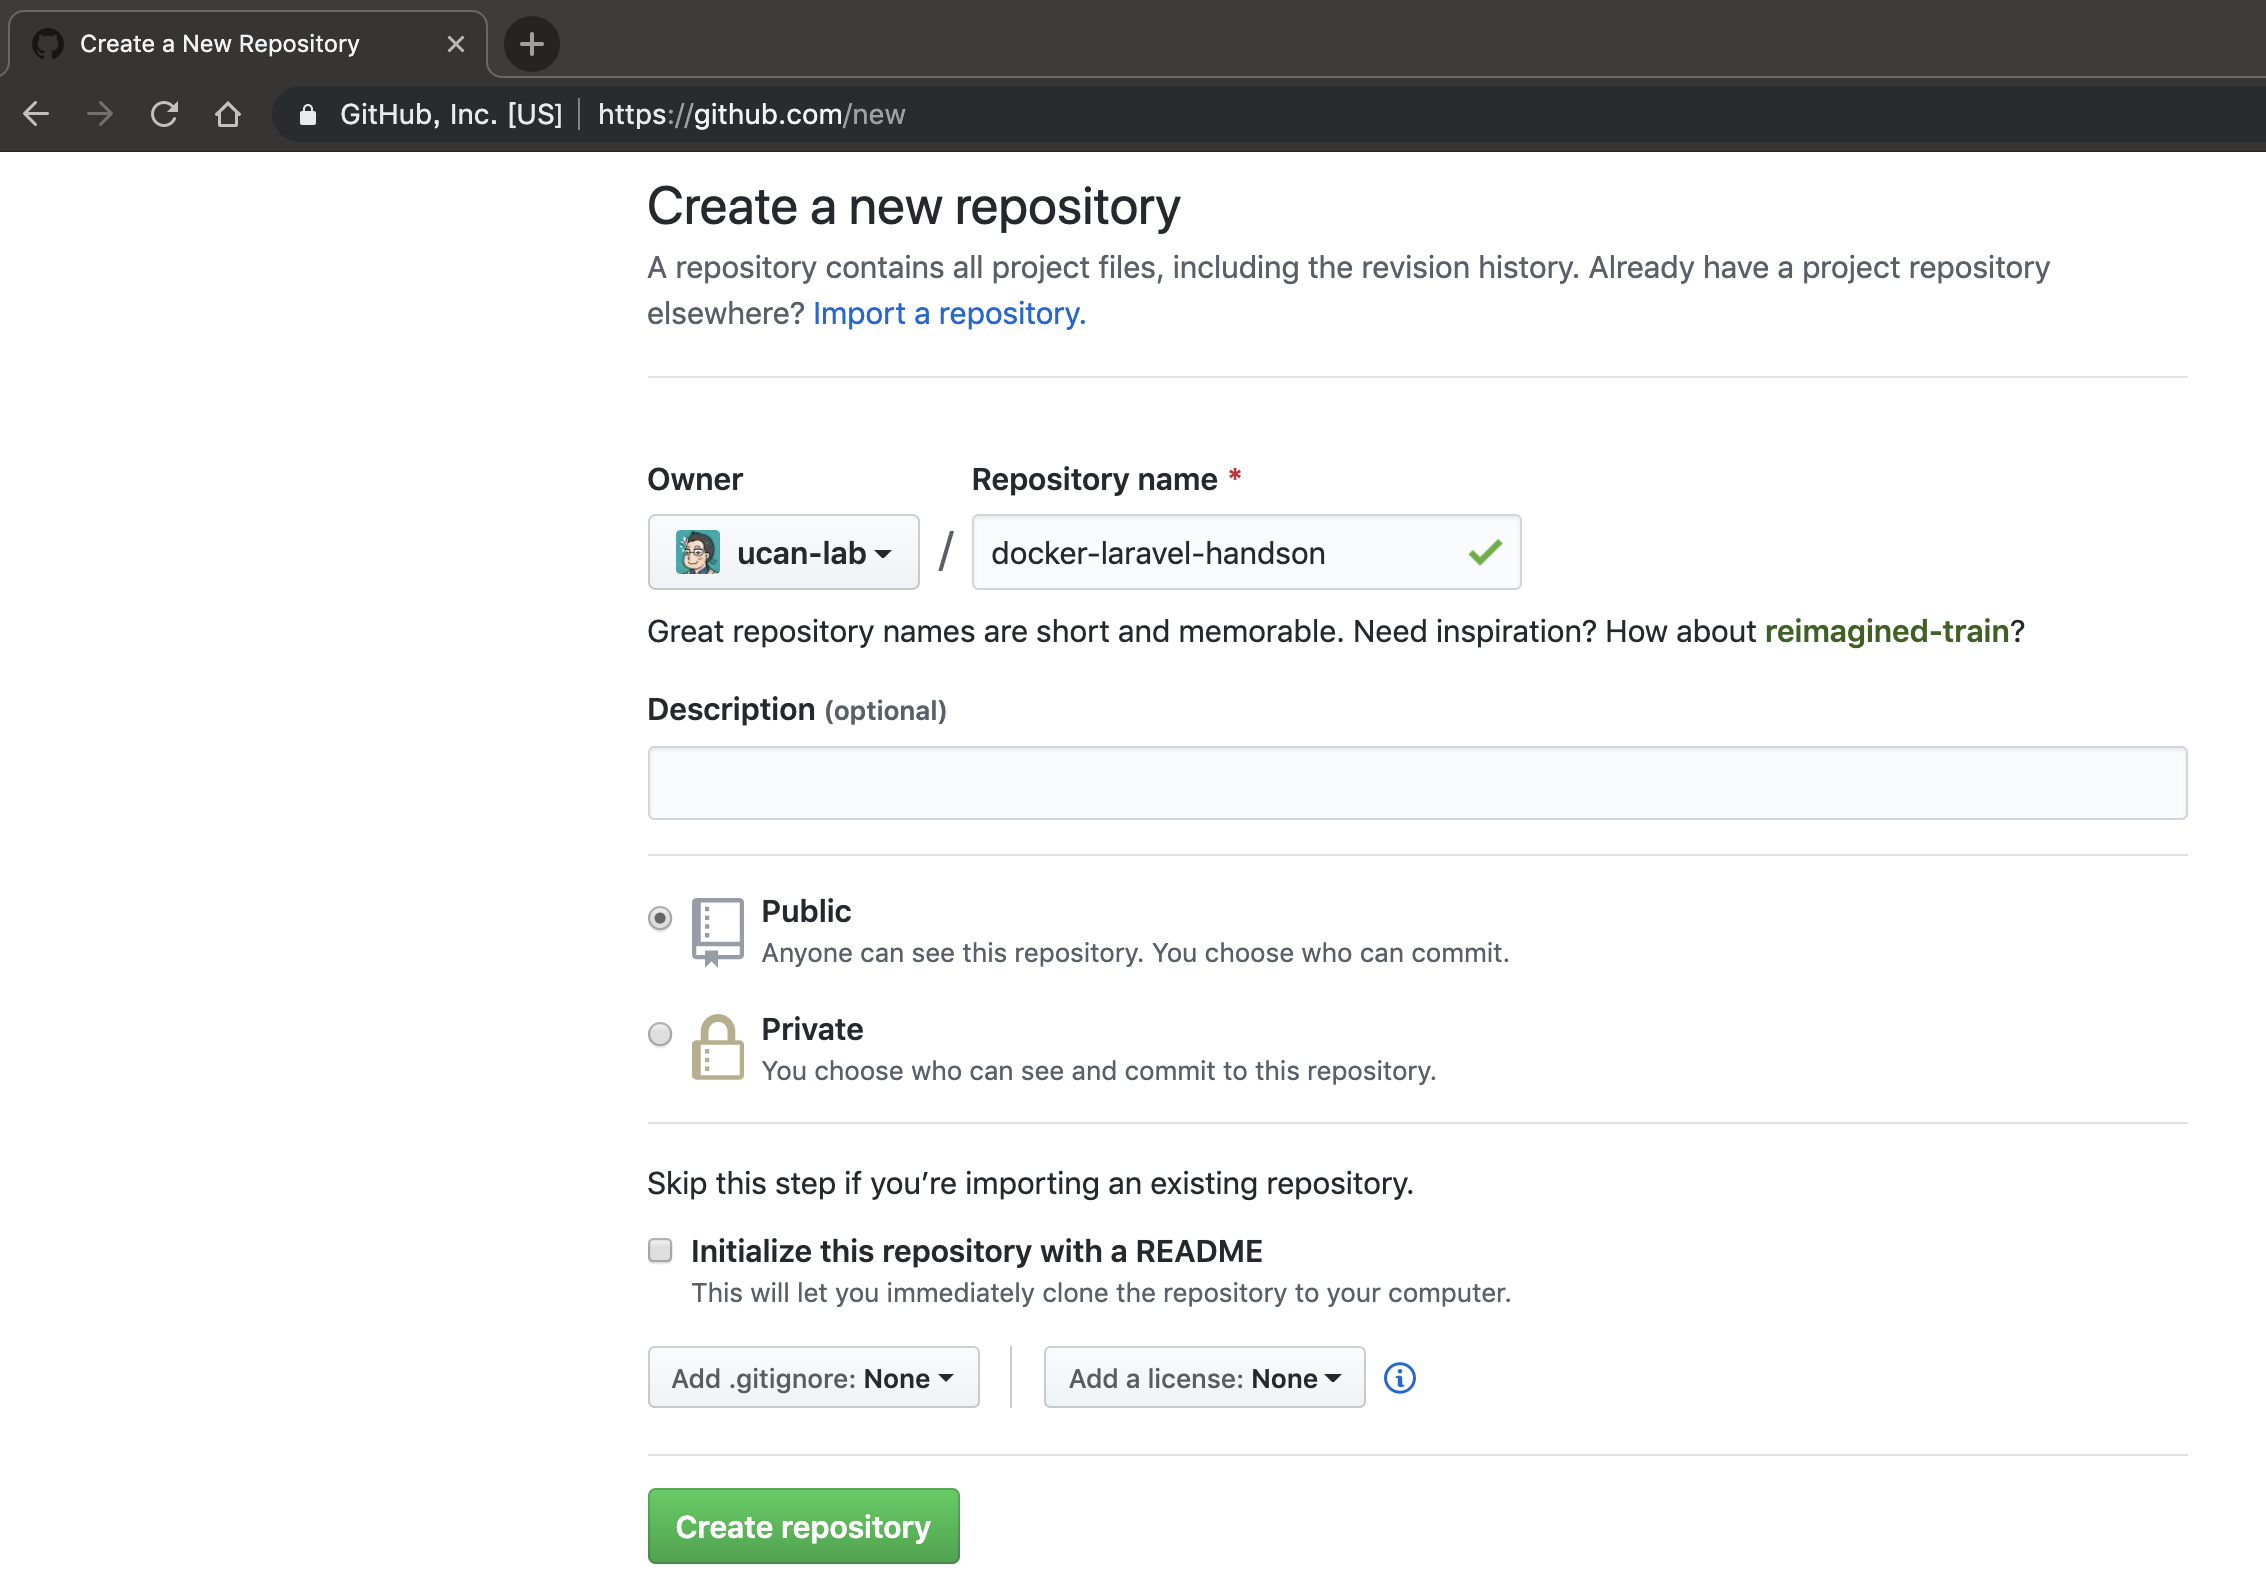
リポジトリ名
docker-laravel-handsonのGitHubリモートリポジトリを作成する。リモートリポジトリへ初回コミット&プッシュ
[mac] $ echo "# docker-laravel-handson" >> README.md
[mac] $ git init
[mac] $ git add README.md
[mac] $ git commit -m "first commit"
[mac] $ git branch -M main
※ 2020/10/1 からデフォルトブランチがmasterからmainに変更されました。
リモートリポジトリを登録します。
リモートリポジトリ先は適宜置き換えてください。[mac] $ git remote add origin git@github.com:ucan-lab/docker-laravel-handson.gitリモートリポジトリ先が正しく設定されていることを確認してください。
[mac] $ git remote -v
origin  git@github.com:ucan-lab/docker-laravel-handson.git (fetch)
origin  git@github.com:ucan-lab/docker-laravel-handson.git (push)

# もしリモートリポジトリ先を間違えた場合は下記のコマンドから変更できます。
[mac] $ git remote set-url origin <リモートリポジトリ>
リモートリポジトリ先の名前を
originと付けられていること。
リモートリポジトリ先のURL等に間違いがないことを確認する。GitHubへpushします。
[mac] $ git push -u origin main
-uオプションは--set-upstreamの省略
- ローカルリポジトリの現在のブランチ(main)をリモートリポジトリ(origin)のmainにpush先を設定
- 以降は
git pushだけでgit push origin mainと同義GitHubのリモートリポジトリのmainブランチへpushされていることを確認します。
お好みのGUIエディタで開く
ymlファイルをCUIエディタで書いていくのは大変なのでお好みのGUIエディタ(今回はVSCode)で開きます。
codeコマンドがインストールされていれば、簡単にプロジェクトをVSCodeで開けます。[mac] $ code .
また、
control+shift+@で統合ターミナルをVSCodeで開くことができます。
ファイルの編集もコマンドの実行もVSCodeだけで行えます。
アプリケーションサーバ(app)コンテナを作る
PHPアプリケーションサーバコンテナを作成します。
公式のPHP-FPMイメージをベースイメージとしてカスタマイズします。ディレクトリ構成
.
├── infra
│   └── php
│       ├── Dockerfile
│       └── php.ini # PHPの設定ファイル
├── backend # Laravelをインストールするディレクトリ
└── docker-compose.yml
docker-compose.yml を作成する
touchコマンドで空ファイルを作成してますが、作成後はお好みのエディタで編集ください。
ファイル名のタイプミス防止のため空ファイルだけ作成してます。
当ハンズオンはこの流れで進めていきます。[mac] $ touch docker-compose.yml作成した
docker-compose.ymlを下記の通りに編集します。docker-compose.ymlversion: "3.8" services: app: build: ./infra/php volumes: - ./backend:/work
docker-compose.ymlファイルはインデント(半角スペース)が意味を持ちます。注意してコピペしてください。docker-compose.yml: 設定値の補足
docker-compose.ymlversion: "3.8"Docker Composeファイルのバージョンを指定しています。
https://matsuand.github.io/docs.docker.jp.onthefly/compose/compose-file/compose-versioning/
通常はメジャー番号とマイナー番号を両方指定します。
ちなみにマイナーバージョンを指定しない場合はデフォルト0が使用されます。docker-compose.yml# 下記は同じ指定になる version: "3" version: "3.0"docker-compose.ymlservices: app: # => サービス名は任意 build: ./infra/php volumes: - ./backend:/workサービス名に
app(アプリケーションサーバー)の名前を付けて定義しています。
サービス名は任意に決められます。
build:で指定しているのはビルドコンテキストを指定します。
ビルドコンテキストとは、docker buildを実行する際の現在の作業ディレクトリのことをビルドコンテキスト(build context)と呼びます。
Dockerfileが置かれている./infra/phpディレクトリをビルドコンテキストとして指定します。
Dockerビルドの際はDockerfileのファイルを探すので、ファイル名の指定は不要です。
volumes:ではホスト側のディレクトリや名前付きボリュームをコンテナ側へマウントしたい時に指定します。
今回はホスト側の./backendディレクトリをappサービスのコンテナ内/workへマウントしてます。./docker/php/Dockerfile を作成する
- Composerコマンドのインストール
- Laravelで必要なPHP拡張機能のインストール
- bcmath, pdo_mysql が不足しているので追加インストール
[mac] $ mkdir -p infra/php [mac] $ touch infra/php/Dockerfile下記のコードを丸ごとコピーして Dockerfile へ貼り付けてください。
infra/php/DockerfileFROM php:7.4-fpm-buster SHELL ["/bin/bash", "-oeux", "pipefail", "-c"] ENV COMPOSER_ALLOW_SUPERUSER=1 \ COMPOSER_HOME=/composer COPY --from=composer:1.10 /usr/bin/composer /usr/bin/composer RUN apt-get update && \ apt-get -y install git unzip libzip-dev libicu-dev libonig-dev && \ apt-get clean && \ rm -rf /var/lib/apt/lists/* && \ docker-php-ext-install intl pdo_mysql zip bcmath COPY ./php.ini /usr/local/etc/php/php.ini WORKDIR /work./docker/php/Dockerfile: 設定値の補足
Dockerfileはテキストファイルであり、Dockerイメージを作り上げるために実行する命令をこのファイルに含めることができます。
各種Docker命令を解説します。
FROM php:7.4-fpm-busterhttps://matsuand.github.io/docs.docker.jp.onthefly/engine/reference/builder/#from
FROM命令はイメージビルドのためのベースイメージを設定します。
FROM イメージ名:タグ名で指定します。php | Docker Hub公式イメージをベースイメージとして利用します。
SHELL ["/bin/bash", "-oeux", "pipefail", "-c"]https://matsuand.github.io/docs.docker.jp.onthefly/engine/reference/builder/#shell
SHELL命令は何も指定しない場合は
SHELL ["/bin/sh", "-c"]がデフォルト値となります(Linuxの場合)パイプ中のあらゆる段階でエラーがあれば失敗とするため、
pipefailオプションを明示的に指定してます。
-oオプションはオプションを設定するためのオプションです。
-eオプションを定義しておくと、そのシェルスクリプト内で何らかのエラーが発生した時点で、それ以降の処理を中断できます。
-uオプションを定義しておくと、未定義の変数に対して読み込み等を行おうとした際にエラーとなります。
-xオプションを定義しておくと、実行したコマンドを全て標準エラー出力に出してくれます。おまじないと思ってもらえればokです。SHELL命令は必須ではないです。
ENV COMPOSER_ALLOW_SUPERUSER=1 \ COMPOSER_HOME=/composerhttps://matsuand.github.io/docs.docker.jp.onthefly/engine/reference/builder/#env
ENV命令はコンテナ内のサーバー環境変数を設定します。
COPY --from=composer:1.10 /usr/bin/composer /usr/bin/composerhttps://matsuand.github.io/docs.docker.jp.onthefly/engine/reference/builder/#copy
RUN apt-get update && \ apt-get -y install git unzip libzip-dev libicu-dev libonig-dev && \ apt-get clean && \ rm -rf /var/lib/apt/lists/* && \ docker-php-ext-install intl pdo_mysql zip bcmathhttps://matsuand.github.io/docs.docker.jp.onthefly/engine/reference/builder/#run
Debian系のパッケージ管理ツールは
apt-get,aptとありますが、Dockerfile内でaptを実行するとCLIインターフェース向けではないと警告が表示されるため、apt-getを使用します。
apt-get updateインストール可能なパッケージの「一覧」を更新します。
実際のパッケージのインストール、アップグレードなどは行いません。
apt-get -y install xxxLaravelのインストールに必要なパッケージをインストールします。
下記のパッケージをインストールしておけばokだと思います。
- https://packages.debian.org/ja/sid/git
- https://packages.debian.org/ja/sid/unzip
- https://packages.debian.org/ja/sid/libzip-dev
- https://packages.debian.org/ja/sid/libicu-dev
- https://packages.debian.org/ja/sid/libonig-dev
apt-get clean && rm -rf /var/lib/apt/lists/*ここはパッケージインストールで使用したキャッシュファイルを削除しています。phpの公式Dockerイメージには、
docker-php-ext-install,docker-php-ext-enable,docker-php-ext-configureのPHP拡張ライブラリを簡単に利用するための便利コマンドが予め用意されています。
docker-php-ext-install intl pdo_mysql zip bcmathPHPの拡張ライブラリをインストールしています。
- https://www.php.net/manual/ja/book.intl.php
- https://www.php.net/manual/ja/ref.pdo-mysql.php
- https://www.php.net/manual/ja/book.zip.php
- https://www.php.net/manual/ja/book.bc.php
COPY ./php.ini /usr/local/etc/php/php.inihttps://matsuand.github.io/docs.docker.jp.onthefly/engine/reference/builder/#copy
WORKDIR /workhttps://matsuand.github.io/docs.docker.jp.onthefly/engine/reference/builder/#workdir
./docker/php/php.ini を作成する
php.ini はPHPの設定ファイル
- PHPエラーメッセージの設定
- PHPエラーログの設定
- メモリ等の設定(お好みで)
- タイムゾーン設定
- 文字コード設定
[mac] $ touch infra/php/php.iniphp.inizend.exception_ignore_args = off expose_php = on max_execution_time = 30 max_input_vars = 1000 upload_max_filesize = 64M post_max_size = 128M memory_limit = 256M error_reporting = E_ALL display_errors = on display_startup_errors = on log_errors = on error_log = /dev/stderr default_charset = UTF-8 [Date] date.timezone = Asia/Tokyo [mysqlnd] mysqlnd.collect_memory_statistics = on [Assertion] zend.assertions = 1 [mbstring] mbstring.language = Japanesebuild & up
- appコンテナの作成
- PHPのバージョン確認
- Laravelで必要なPHP拡張機能の確認
[mac] $ docker-compose up -d --build
docker-composeコマンドはdocker-compose.ymlがあるディレクトリで実行します。docker-compose upはdocker-compose.ymlに定義したサービスを起動します。-d「デタッチド」モードでコンテナを起動します。
- デフォルトは「アタッチド」モードで全てのコンテナログを画面上に表示
- 「デタッチド」モードではバックグラウンドで動作
--buildコンテナの開始前にイメージを構築します
- 特に変更がない場合はキャッシュが使用されます。
[mac] $ docker-compose ps Name Command State Ports ------------------------------------------------------------------------------- docker-laravel-handson_app_1 docker-php-entrypoint php-fpm Up 9000/tcpdocker-laravel-handson_app_1 コンテナの State が Up になっていたら正常に起動している状態です。
docker-compose psコンテナ一覧を表示します。
- Name: コンテナ名
- Command: 最後に実行されたコマンド
- State: 状態(Up)はコンテナが起動している状態
- Ports: 9000/tcp(コンテナのポート)
- 9000番のホストポートは公開されていないので、コンテナの外からはアクセスできない
appコンテナ内ミドルウェアのバージョン確認(コンテナに入ってコマンド実行)
作成したappコンテナの中に入ってPHP, Composerのバージョン、インストール済みの拡張機能を確認します。
Laravel 7.xのサーバ要件に必要な拡張機能が入っていることを確認します。[mac] $ docker-compose exec app bash # PHPのバージョン確認 [app] # php -v PHP 7.4.6 (cli) (built: May 15 2020 13:01:21) ( NTS ) Copyright (c) The PHP Group Zend Engine v3.4.0, Copyright (c) Zend Technologies # Composerのバージョン確認 [app] # composer -V Composer version 1.10.10 2020-08-03 11:35:19 # インストール済みの拡張機能の一覧 [app] # php -m [PHP Modules] bcmath Core ctype curl date dom fileinfo filter ftp hash iconv intl json libxml mbstring mysqlnd openssl pcre PDO pdo_mysql pdo_sqlite Phar posix readline Reflection session SimpleXML sodium SPL sqlite3 standard tokenizer xml xmlreader xmlwriter zip zlib [Zend Modules]
exitでコンテナの外に出ます。[app] $ exit
control+dでもコンテナから出られます。補足説明
appコンテナ内に入ってphpコマンドを実行しています。
docker-compose exec実行中のコンテナ内で、コマンドを実行します。appサービス名(コンテナ名)を指定します。PHPのバージョン確認(コンテナの外からコマンド実行)
コンテナの外から
phpコマンドを実行することもできます。
docker-compose exec [サービス名] [実行したいコマンド][mac] $ docker-compose exec app php -v PHP 7.4.6 (cli) (built: May 15 2020 13:01:21) ( NTS ) Copyright (c) The PHP Group Zend Engine v3.4.0, Copyright (c) Zend Technologies結果にコミット
[mac] $ git status (use "git add <file>..." to include in what will be committed) docker-compose.yml infra/php/Dockerfile infra/php/php.ini [mac] $ git add . [mac] $ git status On branch main Changes to be committed: (use "git restore --staged <file>..." to unstage) new file: docker-compose.yml new file: infra/php/Dockerfile new file: infra/php/php.ini [mac] $ git commit -m "feat create docker app container" [main f5a637f] feat create docker app container 3 files changed, 49 insertions(+) create mode 100644 docker-compose.yml create mode 100644 infra/php/Dockerfile create mode 100644 infra/php/php.ini [mac] $ git logウェブサーバー(web)コンテナを作る
nginxウェブサーバーコンテナを作成します。
nginxのベースイメージをそのまま利用します。ディレクトリ構成
. ├── infra │ └── nginx │ └── default.conf # nginxの設定ファイル ├── backend │ └── public # 動作確認用に作成 │ ├── index.html # HTML動作確認用 │ └── phpinfo.php # PHP動作確認用 └─── docker-compose.ymldocker-compose.yml へ追記する
- ポート転送の設定(今回は10080ポートにする)
- タイムゾーンの設定
version: "3.8" services: app: build: ./infra/php volumes: - ./backend:/work # 追記 web: image: nginx:1.18-alpine ports: - 10080:80 volumes: - ./backend:/work - ./infra/nginx/default.conf:/etc/nginx/conf.d/default.conf working_dir: /work
docker-compose.ymlファイルはインデント(半角スペース)が意味を持ちます。注意してコピペしてください。appコンテナの設定と同じインデントレベルで貼り付けます。docker-compose.yml: 設定値の解説
image: nginx:1.18-alpinehttps://matsuand.github.io/docs.docker.jp.onthefly/compose/compose-file/#image
コンテナを起動させるイメージを指定します。
nginx | Docker Hubを指定してます。
今回は公式のnginxイメージをそのまま利用しています。(Dockerfileは不要)ちなみにnginxは
1.10,1.12等の偶数のバージョンが安定バージョンになります。
特に理由がなければ偶数バージョンをご利用ください。ports: - 10080:80https://matsuand.github.io/docs.docker.jp.onthefly/compose/compose-file/#ports
nginxへ外(ホスト側)からコンテナ内へアクセスさせるため公開用のポートを設定します。
ホスト側:コンテナ側と設定します。volumes: - ./backend:/work - ./infra/nginx/default.conf:/etc/nginx/conf.d/default.confhttps://matsuand.github.io/docs.docker.jp.onthefly/compose/compose-file/#volumes
ホスト側にあるディレクトリ、ファイルをコンテナ内へマウントさせています。
docker/nginx/default.conf を作成する
[mac] $ mkdir infra/nginx
[mac] $ touch infra/nginx/default.conf
Laravel公式にnginxの設定例が用意されているので、こちらを流用します。
https://readouble.com/laravel/7.x/ja/deployment.htmldefault.confserver { listen 80; server_name example.com; root /work/public; add_header X-Frame-Options "SAMEORIGIN"; add_header X-XSS-Protection "1; mode=block"; add_header X-Content-Type-Options "nosniff"; index index.php; charset utf-8; location / { try_files $uri $uri/ /index.php?$query_string; } location = /favicon.ico { access_log off; log_not_found off; } location = /robots.txt { access_log off; log_not_found off; } error_page 404 /index.php; location ~ \.php$ { fastcgi_pass app:9000; fastcgi_param SCRIPT_FILENAME $realpath_root$fastcgi_script_name; include fastcgi_params; } location ~ /\.(?!well-known).* { deny all; } }
root,fastcgi_passドキュメントルート設定を書き換えてます。
nginxの設定を詳しく知りたい方は下記の記事がオススメです。build & up
[mac] $ docker-compose down
[mac] $ docker-compose up -d --build
docker-composeコマンドはdocker-compose.ymlがあるディレクトリで実行します。[mac] $ docker-compose ps Name Command State Ports -------------------------------------------------------------------------------------------- docker-laravel-handson_app_1 docker-php-entrypoint php-fpm Up 9000/tcp docker-laravel-handson_web_1 nginx -g daemon off; Up 0.0.0.0:10080->80/tcpdocker-laravel-handson_web_1 コンテナの State が Up になっていたら正常に起動している状態です。
また、
Portsの項目が、appコンテナは9000/tcpでwebコンテナは0.0.0.0:10080->80/tcpと表示形式が異なってます。
これはホスト上の10080番ポートをコンテナの80番ポートへ割り当てています。nginxのバージョン確認
[mac] $ docker-compose exec web nginx -v
nginx version: nginx/1.18.0
webコンテナの確認
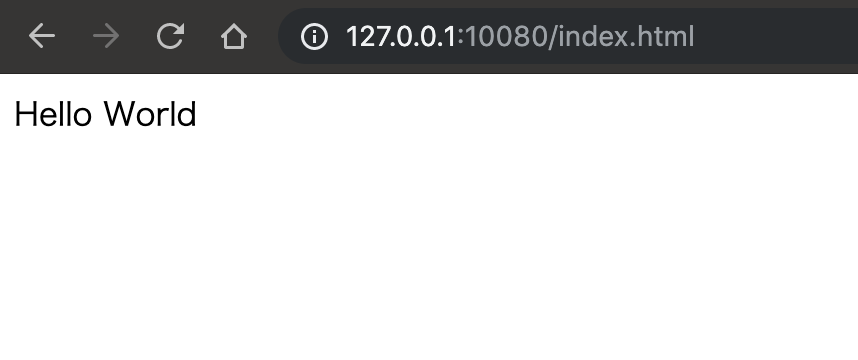
- webコンテナの動作確認
- HTMLとPHPが表示されるか
[mac] $ mkdir backend/public
[mac] $ echo "Hello World" > backend/public/index.html
[mac] $ echo "<?php phpinfo();" > backend/public/phpinfo.php
http://127.0.0.1:10080/index.html
「Hello World」が表示されることを確認する。
http://127.0.0.1:10080/phpinfo.php
phpinfoの情報が表示されることを確認する。
[mac] $ rm -rf backend/*確認用に作成したHTML, PHPファイルは不要なので削除します。
結果にコミット
[mac] $ git status
On branch main
Changes not staged for commit:
  (use "git add <file>..." to update what will be committed)
  (use "git restore <file>..." to discard changes in working directory)
    modified:   docker-compose.yml
    modified:   infra/php/Dockerfile

Untracked files:
  (use "git add <file>..." to include in what will be committed)
    infra/nginx/default.conf

[mac] $ git add .
[mac] $ git status
On branch main
Changes to be committed:
  (use "git restore --staged <file>..." to unstage)
    modified:   docker-compose.yml
    new file:   infra/nginx/default.conf
    modified:   infra/php/Dockerfile

[mac] $ git commit -m "feat create docker web container"
[main 5e278c1] feat create docker web container
 3 files changed, 29 insertions(+), 1 deletion(-)
 create mode 100644 infra/nginx/default.conf

[mac] $ git log
Laravelをインストールする
- app コンテナに入り、Laravelをインストール
- welcomeページが表示されるか
[mac] $ docker-compose exec app bash
[app] $ composer create-project --prefer-dist "laravel/laravel=8.*" .
[app] $ php artisan -V
Laravel Framework 8.0.0

[app] $ exit
composer create-project --prefer-dist
--prefer-distzipでダウンロードするため高速- composer の–prefer-distってよく使うけど何してる?
composer create-projectコマンドでメモリ足りない問題の対策artisanについて
- Laravelが用意しているコマンドラインインターフェイス
- https://readouble.com/laravel/7.0/ja/artisan.html
php artisan list使用可能なコマンド一覧を表示Laravel ウェルカム画面の表示
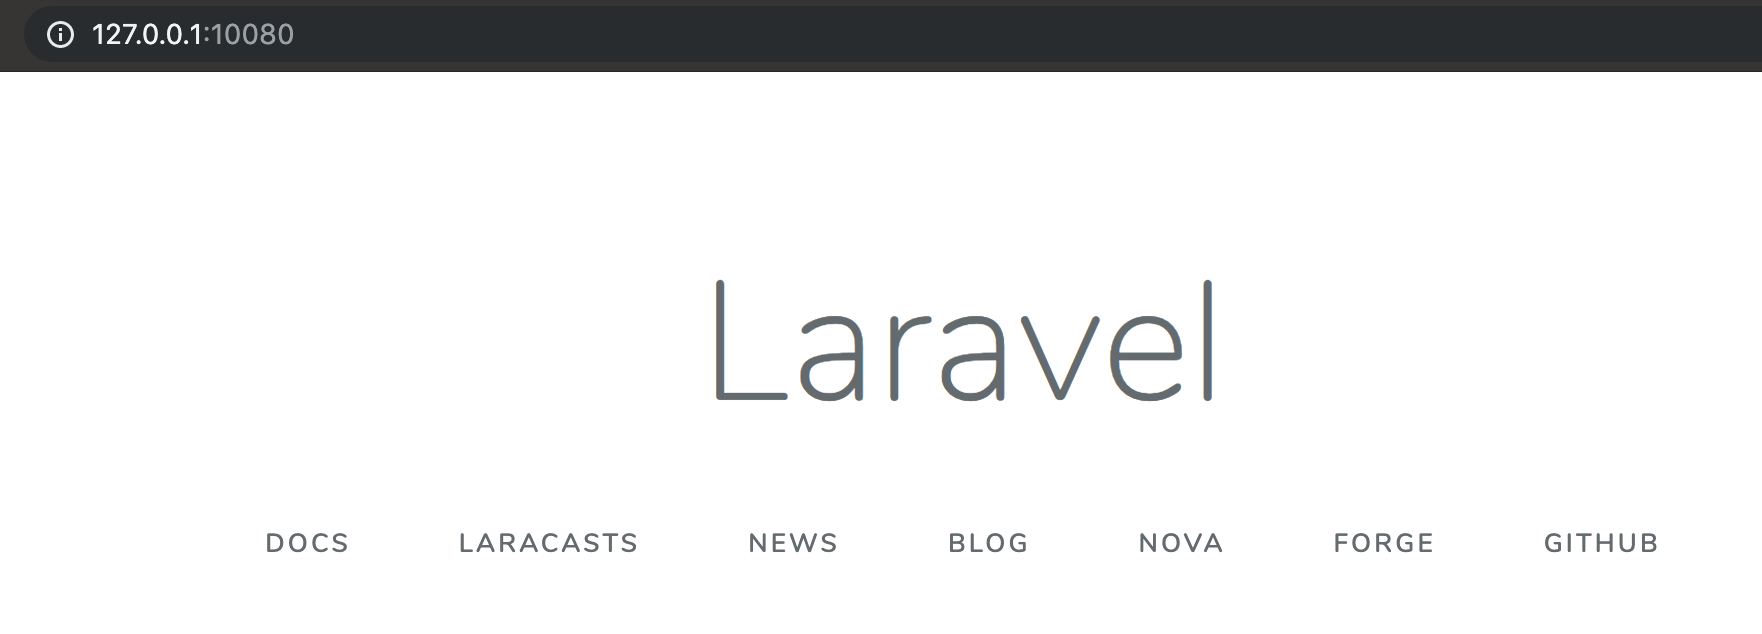
LaravelのWelcome画面が表示されることを確認する。
結果にコミット
[mac] $ git status
[mac] $ git add .
[mac] $ git status
[mac] $ git commit -m "feat laravel install"
[mac] $ git log
データベース(db)コンテナを作る
MySQLデータベースコンテナを作成します。
MySQLのベースイメージをそのまま利用します。参考記事
ディレクトリ構成
.
├── infra
│   └── mysql
│       ├── Dockerfile
│       └── my.cnf # MySQLの設定ファイル
└── docker-compose.yml
docker-compose.yml へ追記する
- データベース名やユーザー名等の接続情報とタイムゾーンの設定は環境変数で渡す
- トップレベルvolumeを使用してデータの永続化
version: "3.8"
services:
  app:
    build: ./infra/php
    volumes:
      - ./backend:/work

  web:
    image: nginx:1.18-alpine
    ports:
      - 10080:80
    volumes:
      - ./backend:/work
      - ./infra/nginx/default.conf:/etc/nginx/conf.d/default.conf
    working_dir: /work

  # 追記
  db:
    build: ./infra/mysql
    volumes:
      - db-store:/var/lib/mysql

volumes:
  db-store:
docker-compose.ymlファイルはインデント(半角スペース)が意味を持ちます。注意してコピペしてください。webコンテナの設定と同じインデントレベルでdbコンテナの設定を貼り付けます。volumesはトップレベル(servicesと同じレベル)に貼り付けます。- DockerのMySQLイメージ起動時に渡す環境変数
- Docker for Macのmount遅い問題まとめ
- Performance tuning for volume mounts (shared filesystems)
./docker/mysql/Dockerfile を作成する
[mac] $ mkdir infra/mysql
[mac] $ touch infra/mysql/Dockerfile
下記のコードを丸ごとコピーして Dockerfile へ貼り付けてください。
infra/mysql/DockerfileFROM mysql:8.0 ENV MYSQL_DATABASE=laravel_local \ MYSQL_USER=phper \ MYSQL_PASSWORD=secret \ MYSQL_ROOT_PASSWORD=secret \ TZ=Asia/Tokyo COPY ./my.cnf /etc/mysql/conf.d/my.cnf RUN chmod 644 /etc/mysql/conf.d/my.cnfコメントでいただいたのですが、Windows環境でボリュームマウントを行うと、ファイルパーミッションが777となるようです。
my.cnfに書き込み権限が付いてるとMySQLの起動時にエラーが発生します。
その対策としてボリュームマウントではなくDockerfileを作成してmy.cnfファイルコピー、読み取り専用に権限変更してます。docker/mysql/my.cnf を作成する
- 文字コードの設定
- タイムゾーンの設定
- ログ設定
[mac] $ mkdir infra/mysql [mac] $ touch infra/mysql/my.cnfmy.cnf[mysqld] # character set / collation character_set_server = utf8mb4 collation_server = utf8mb4_0900_ai_ci # timezone default-time-zone = SYSTEM log_timestamps = SYSTEM # Error Log log-error = mysql-error.log # Slow Query Log slow_query_log = 1 slow_query_log_file = mysql-slow.log long_query_time = 1.0 log_queries_not_using_indexes = 0 # General Log general_log = 1 general_log_file = mysql-general.log [mysql] default-character-set = utf8mb4 [client] default-character-set = utf8mb4build & up
[mac] $ docker-compose down
[mac] $ docker-compose up -d --build
docker-composeコマンドはdocker-compose.ymlがあるディレクトリで実行します。[mac] $ docker-compose ps Name Command State Ports -------------------------------------------------------------------------------------------- docker-laravel-handson_app_1 docker-php-entrypoint php-fpm Up 9000/tcp docker-laravel-handson_db_1 docker-entrypoint.sh mysqld Up 3306/tcp, 33060/tcp docker-laravel-handson_web_1 nginx -g daemon off; Up 0.0.0.0:10080->80/tcpdocker-laravel-handson_db_1 コンテナの State が Up になっていたら正常に起動している状態です。
[mac] $ docker-compose exec db mysql -V
mysql  Ver 8.0.20 for Linux on x86_64 (MySQL Community Server - GPL)
マイグレーション実行(エラーが発生します)
[mac] $ docker-compose exec app bash
[app] $ php artisan migrate

   Illuminate\Database\QueryException

  SQLSTATE[HY000] [2002] Connection refused (SQL: select * from information_schema.tables where table_schema = laravel and table_name = migrations and table_type = 'BASE TABLE')

  at vendor/laravel/framework/src/Illuminate/Database/Connection.php:671
    667▕         // If an exception occurs when attempting to run a query, we'll format the error
    668▕         // message to include the bindings with SQL, which will make this exception a
    669▕         // lot more helpful to the developer instead of just the database's errors.
    670▕         catch (Exception $e) {
  ➜ 671▕             throw new QueryException(
    672▕                 $query, $this->prepareBindings($bindings), $e
    673▕             );
    674▕         }
    675▕

      +37 vendor frames
  38  artisan:37
      Illuminate\Foundation\Console\Kernel::handle(Object(Symfony\Component\Console\Input\ArgvInput), Object(Symfony\Component\Console\Output\ConsoleOutput))

[app] $ exit
SQLSTATE[HY000] [2002] Connection refusedこのエラーはよく見るMySQLのエラーです。
MySQLに接続拒否されたエラーなので、この場合は大体MySQLへの接続設定に誤りがあります。
backend/.envのDB接続設定を修正する。[mac] $ vim backend/.env DB_CONNECTION=mysql DB_HOST=db DB_PORT=3306 DB_DATABASE=laravel_local DB_USERNAME=phper DB_PASSWORD=secret
backend/.env.exampleも同様にDB接続設定を修正しておきます。[mac] $ vim backend/.env.example DB_CONNECTION=mysql DB_HOST=db DB_PORT=3306 DB_DATABASE=laravel_local DB_USERNAME=phper DB_PASSWORD=secretマイグレーション実行(再実行)
[mac] $ docker-compose exec app bash
[app] $ php artisan migrate

Migration table created successfully.
Migrating: 2014_10_12_000000_create_users_table
Migrated:  2014_10_12_000000_create_users_table (0.07 seconds)
Migrating: 2014_10_12_100000_create_password_resets_table
Migrated:  2014_10_12_100000_create_password_resets_table (0.04 seconds)
Migrating: 2019_08_19_000000_create_failed_jobs_table
Migrated:  2019_08_19_000000_create_failed_jobs_table (0.02 seconds)
試しにデータを作ってみる
[mac] $ docker-compose exec app bash
[app] php artisan tinker
$user = new App\Models\User();
$user->name = 'phper';
$user->email = 'phper@example.com';
$user->password = Hash::make('secret');
$user->save();
[mac] $ docker-compose exec db bash [db] $ mysql -u $MYSQL_USER -p$MYSQL_PASSWORD $MYSQL_DATABASE [mysql] > SELECT * FROM users; +----+--------------------+-----------------------------+---------------------+--------------------------------------------------------------+----------------+---------------------+---------------------+ | id | name | email | email_verified_at | password | remember_token | created_at | updated_at | +----+--------------------+-----------------------------+---------------------+--------------------------------------------------------------+----------------+---------------------+---------------------+ | 1 | phper | phper@example.com | NULL | $2y$10$/cmcAIdF7twOntcazkn4/e61YAM2F99hCrOo.qRUz7cUa/ZydrbVS | NULL | 2020-08-24 17:09:53 | 2020-08-24 17:09:53 | +----+--------------------+-----------------------------+---------------------+--------------------------------------------------------------+----------------+---------------------+---------------------+ 1 rows in set (0.00 sec)結果にコミット
[mac] $ git status
[mac] $ git add .
[mac] $ git status
[mac] $ git commit -m "feat create docker db container"
[mac] $ git log
GitHubにpush
[mac] $ git pushリモートリポジトリへpushされていることを確認します。
Docker環境の再構築
Docker環境の破棄
コンテナの停止、ネットワーク・名前付きボリューム・コンテナイメージ、未定義コンテナを削除
[mac] $ docker-compose down --rmi all --volumes --remove-orphans作業ディレクトリの削除
プロジェクトを削除するので、GUIエディタは閉じておきましょう。
[mac] $ cd ..
[mac] $ rm -rf docker-laravel-handson
Visual Studio Code等のGUIエディタで開いている場合は、一度エディタを終了しましょう。
環境の再構築
GitHubからリポジトリをクローン
** 自身のリポジトリ先に適宜変更してください **
[mac] $ git clone git@github.com:ucan-lab/docker-laravel-handson.git
[mac] $ cd docker-laravel-handson
[mac] $ docker-compose up -d --build
/work/public/../vendor/autoload.phpを開くのに失敗してエラーになっていることを確認します。
git cloneが終わった状態ではappコンテナ内に/work/vendorディレクトリが存在しないためです。Laravelインストール
app コンテナに入ります。
[mac] $ docker-compose exec app bash
vendorディレクトリへライブラリ群をインストールします。
composer.lockファイルを参照します。[app] $ composer install
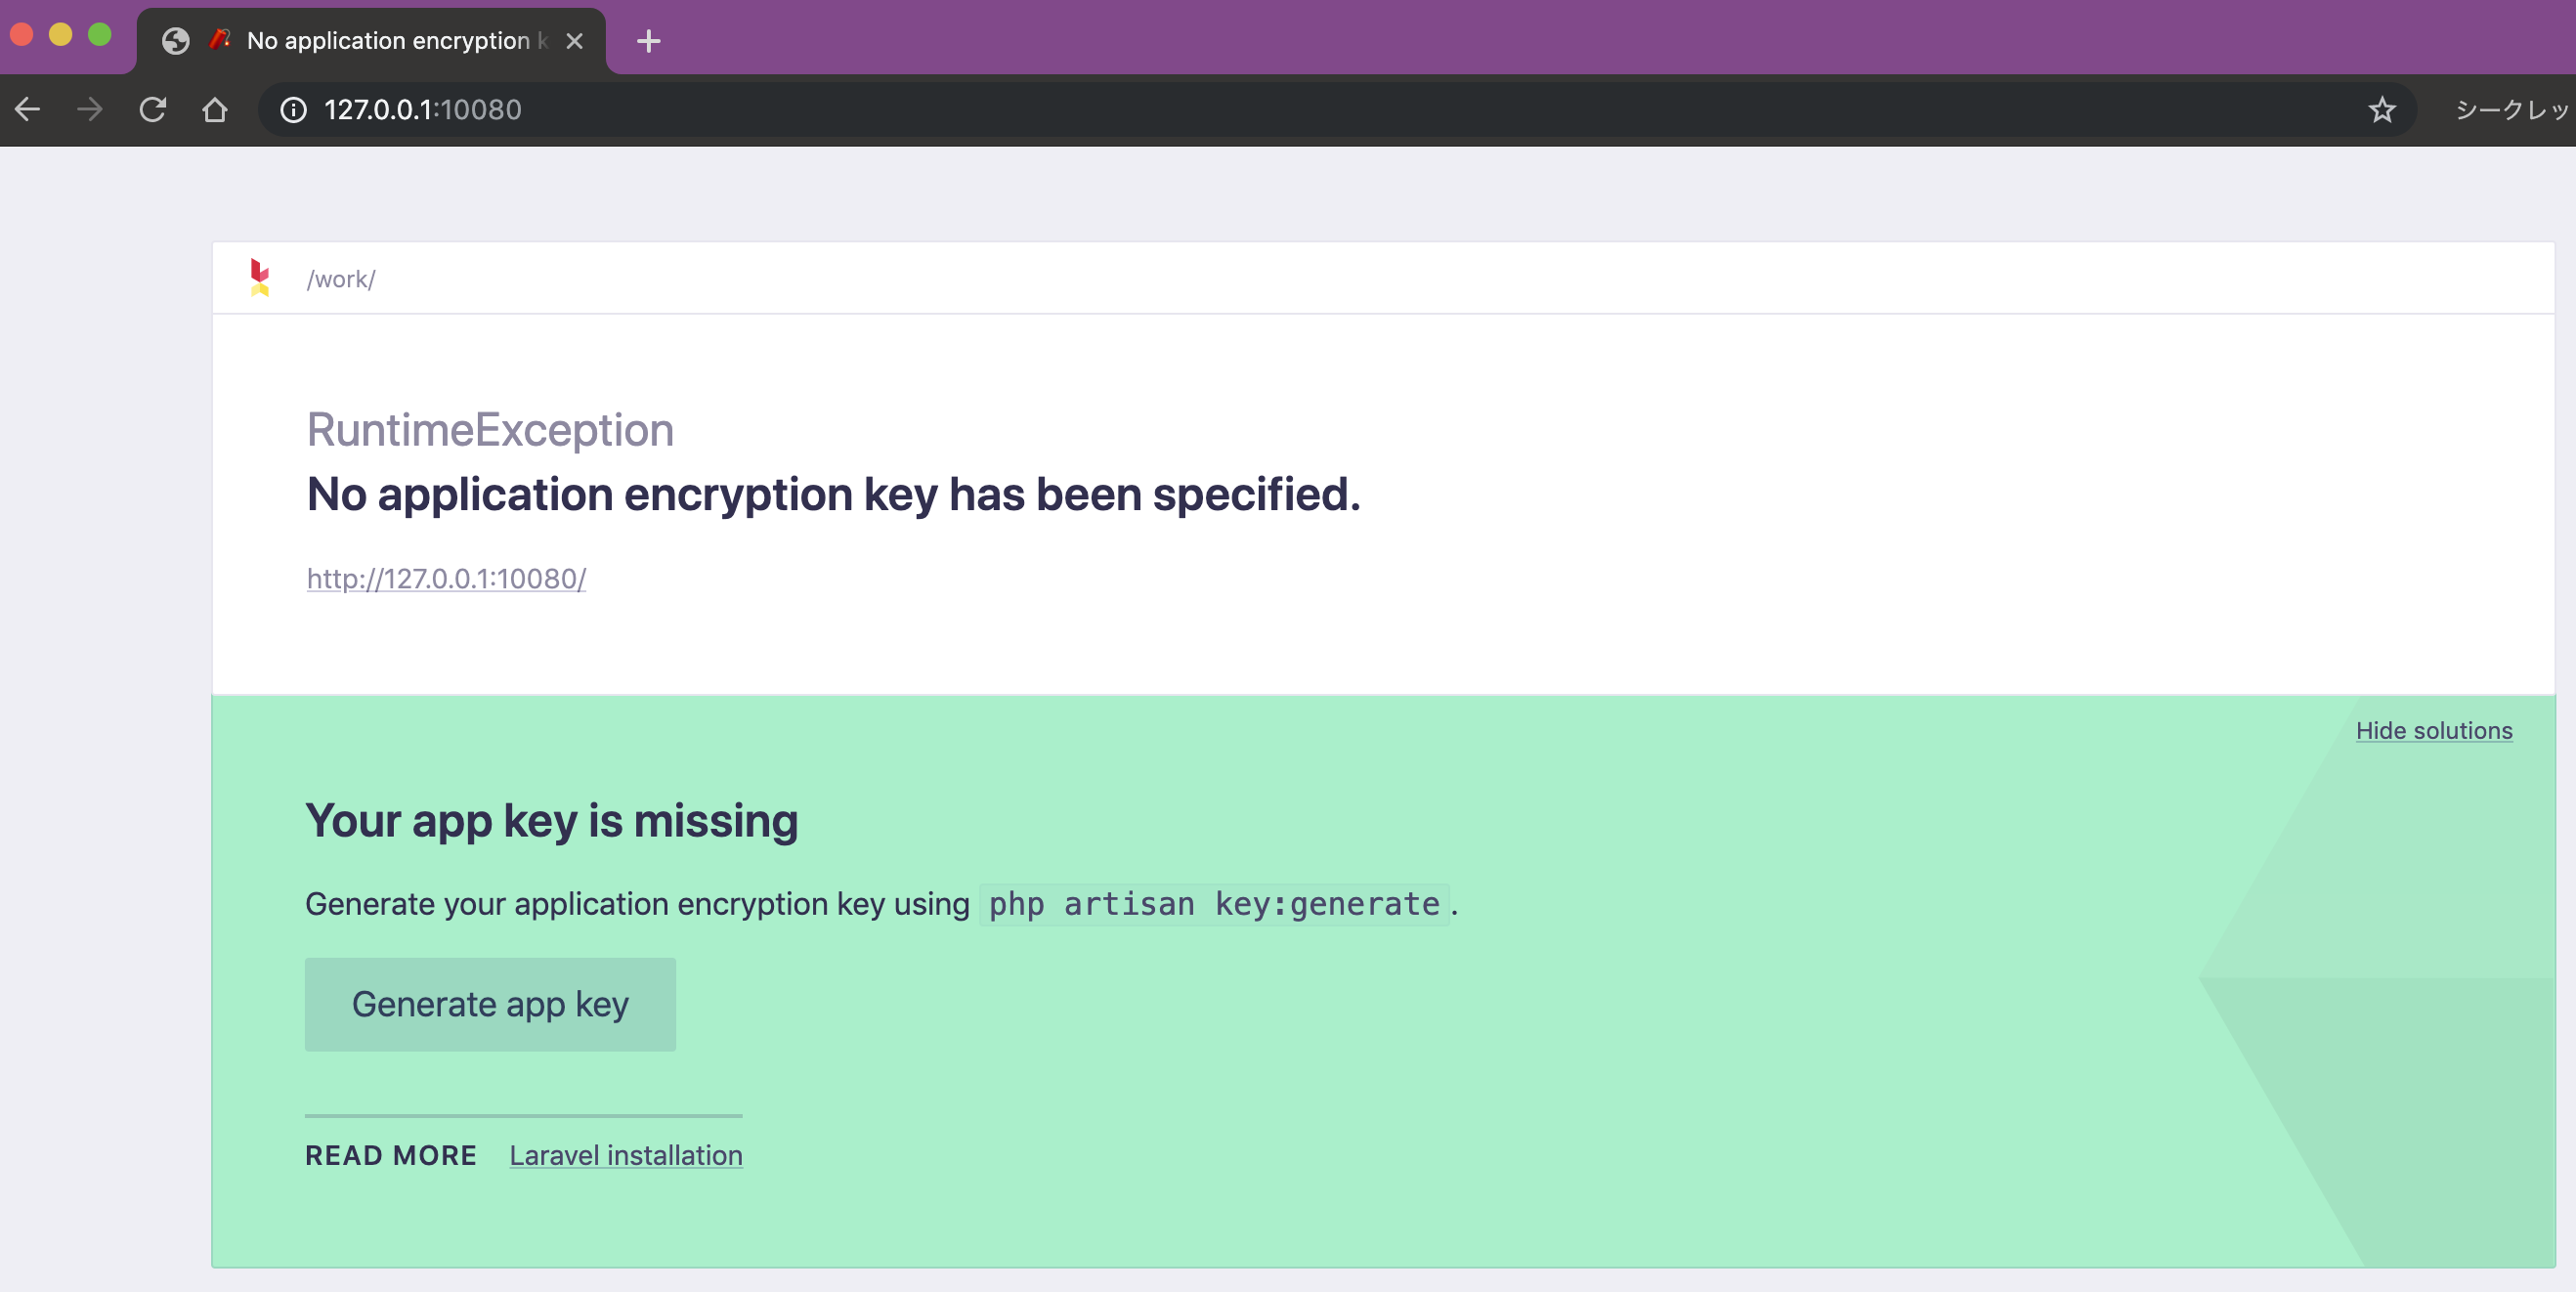
composer install時は.env環境変数ファイルは作成されないので、.env.exampleを元にコピーして作成します。[app] $ cp .env.example .env
.envにAPP_KEY=の値がないとこのエラーが発生します。
このコマンドでアプリケーションキーを生成できます。[app] $ php artisan key:generate
Welcome画面が表示されることを確認します。
[app] $ php artisan migrate最後にマイグレーションを実行して成功すればハンズオン終了です。
お疲れ様でした?? コンテナを停止して終了してください。[app] $ exit [mac] $ docker-compose downオマケ
MySQLに接続したい
[mac] $ docker-compose exec db bash -c 'mysql -u${MYSQL_USER} -p${MYSQL_PASSWORD} ${MYSQL_DATABASE}'

mysql> show tables;
+---------------------+
| Tables_in_homestead |
+---------------------+
| migrations          |
| password_resets     |
| users               |
+---------------------+
3 rows in set (0.00 sec)

mysql> desc users;
+-------------------+---------------------+------+-----+---------+----------------+
| Field             | Type                | Null | Key | Default | Extra          |
+-------------------+---------------------+------+-----+---------+----------------+
| id                | bigint(20) unsigned | NO   | PRI | NULL    | auto_increment |
| name              | varchar(255)        | NO   |     | NULL    |                |
| email             | varchar(255)        | NO   | UNI | NULL    |                |
| email_verified_at | timestamp           | YES  |     | NULL    |                |
| password          | varchar(255)        | NO   |     | NULL    |                |
| remember_token    | varchar(100)        | YES  |     | NULL    |                |
| created_at        | timestamp           | YES  |     | NULL    |                |
| updated_at        | timestamp           | YES  |     | NULL    |                |
+-------------------+---------------------+------+-----+---------+----------------+
8 rows in set (0.01 sec)
マイグレーションが実行されるとLaravel側で最初から用意されている
users,password_resetsのテーブルが生成されています。Laravelのログをコンテナログに表示する
backend/.envを修正する。LOG_CHANNEL=stderr
backend/routes/web.phpRoute::get('/', function () { logger('welcome route.'); return view('welcome'); });$ docker-compose logs # -f でログウォッチ $ docker-compose logs -f # サービス名を指定してログを表示 $ docker-compose logs -f appMySQLクライアントツールで接続したい
docker-compose.ymlのdbサービスに下記設定を追記して、コンテナを再起動して設定を反映してください。ports: - 33060:3306dbコンテナへのポート転送設定がないとホストからアクセスが行えません。
MySQLクライアントツールは「Sequel Ace」がオススメです。Windowsエラーメモ
Error response from daemon
$ docker-compose up -d --build
docker: Error response from daemon: Get https://registry-1.docker.io/v2/: net/http: request canceled while waiting for connection (Client.Timeout exceeded while awaiting headers).
解決策をいくつか
- Docker For Windowsを再起動する
- Dockerでpullやrunを行ったときイメージダウンロードができなくなった問題の解決法
- Proxy環境下のDockerトラブルシューティング
- さわって理解する Docker 入門
マイグレーションエラーの補足
Host '172.27.0.2' is not allowed to connect to this MySQL server
$ php artisan migrate
   Illuminate\Database\QueryException  : SQLSTATE[HY000] [1130] Host '172.27.0.2' is not allowed to connect to this MySQL server (SQL: select * from information_schema.tables where table_schema = homestead and table_name = migrations and table_type = 'BASE TABLE')

  at /work/vendor/laravel/framework/src/Illuminate/Database/Connection.php:664
    660|         // If an exception occurs when attempting to run a query, we'll format the error
    661|         // message to include the bindings with SQL, which will make this exception a
    662|         // lot more helpful to the developer instead of just the database's errors.
    663|         catch (Exception $e) {
  > 664|             throw new QueryException(
    665|                 $query, $this->prepareBindings($bindings), $e
    666|             );
    667|         }
    668|

  Exception trace:

  1   PDOException::("SQLSTATE[HY000] [1130] Host '172.27.0.2' is not allowed to connect to this MySQL server")
      /work/vendor/laravel/framework/src/Illuminate/Database/Connectors/Connector.php:70

  2   PDO::__construct("mysql:host=db;port=3306;dbname=homestead", "homestead", "secret", [])
      /work/vendor/laravel/framework/src/Illuminate/Database/Connectors/Connector.php:70

  Please use the argument -v to see more details.
このエラーが発生した場合は
my.cnfを作成する前にdocker-compose up -dでビルドしてしまった可能性が高いです。$ docker-compose down --volumes --rmi all $ docker-compose up -d --build設定ファイルがない状態でMySQLの初期化が行われたでデータが永続化されてしまってるので一度ボリューム毎削除してビルドし直せばokです。
docker volumes の共有で Permission denied (SELinux) 問題
CentOS 等の場合 volumes でホストと共有したファイル(ディレクトリ)にアクセスできないことがあります。
書き込み権限を与える
$ chmod -R 777 logs
$ chmod -R 777 src/storage/logs
ログディレクトリはホスト側からもコンテナ側からも書き込みするので、書き込み権限を付与しておきましょう。
応用
より実用的な構成のdocker構成の記事を書いてますので、よかったらこちらの記事も読んでもらえると嬉しいです。


- 投稿日:2020-12-06T21:30:48+09:00
【Docker】環境構築
環境
- Ruby: 2.6.0
- Rails: 6.0.3
- MySQL
- MacOS
Dockerの要約
Dockerとは?
Docker Engineを常駐させることで、ゲストOSを使用せず、ホストOSを基盤にミドルウェア以降を仮想環境(コンテナ)として起動する仕組み。- ミドルウェア等の層をimageと呼び、
Docker Hubで公開されている構成を流用したり、Dockerfileを用いて自身で新規作成する事もできる。docker-compose.ymlに複数のコンテナ構成を記述することでこれらを一括起動できる。- 流動データはコンテナ削除とともに消えるため、残したい場合にはホストのデータをコンテナにマウントする必要がある(
docker-compose.ymlに記述)。手順
1. Dockerfile・docker-compose.yml作成
FROM ruby:2.6.5
RUN apt-get update -qq && apt-get install -y build-essential libpq-dev nodejs
WORKDIR /myapp
COPY Gemfile /myapp/Gemfile
COPY Gemfile.lock /myapp/Gemfile.lock
RUN gem install bundler:2.0.2 && bundle install
COPY . /myapp
[FROM] 使用するイメージとバージョン
[RUN] コマンドの実行
[WORKDIR] 作業ディレクトリ
[ADD] ファイルをコンテナへコピー
[EXPOSE] port番号
[CMD] イメージ内部のソフトウェア実行(ここではRailsを指す)docker-compose.ymlversion: '3' services: db: image: mysql:5.6 environment: MYSQL_ROOT_PASSWORD: password MYSQL_DATABASE: root volumes: - mysql-data:/var/lib/mysql ports: - "3306:3306" web: tty: true stdin_open: true build: . command: /bin/sh -c "rm -f tmp/pids/server.pid && bundle exec rails s -p 3000 -b '0.0.0.0'" volumes: - .:/myapp ports: - "3000:3000" links: - db volumes: mysql-data:dbボリュームを設定しコンテナを終了してもデータをボリューム内に残すための記述。
appボリュームを設定しローカルにあるディレクトリをコンテナにマウントするための記述。
コマンドの/bin/sh -c "rm -f tmp/pids/server.pidに関しては、Pidファイル削除のために記述。起動時に残っているとエラーを吐くため削除が必要。自分で削除しても良いが、これを書けば起動時に自動で削除するようになる。2. database.yml
database.ymldefault: &default adapter: mysql2 encoding: utf8 pool: <%= ENV.fetch("RAILS_MAX_THREADS") { 5 } %> username: root password: password host: db3. エラーへの対処
trueをfalseに変更すると正常に動作する。
厳密な整合性のチェックをオフにする事でエラーを回避しているようです。
記述時点では、アプリケーション動作に問題は発生していません。======================================== Your Yarn packages are out of date! Please run `yarn install --check-files` to update. ========================================webpacker.yml# Verifies that correct packages and versions are installed by inspecting package.json, yarn.lock, and node_modules check_yarn_integrity: false以上
- 投稿日:2020-12-06T20:33:02+09:00
WSL2 のDocker for Windowsで動作が重い時の原因と対処方法
問題:WSL2のDocker for Windowsの動作が重い・・・
Windows10 Homeの環境に、WSL2でDocker for Windowsがインストールできるようになって、よかったなぁと思って使っていたら、Dockerコンテナの動作が遅かったり、Docker buildコマンドでイメージ作成がにやたらと時間がかかったりするようで、なんだかおかしいなと思っていました。
原因:WindowsとWSL2(Ubuntu)のファイルシステム変換処理に時間がかかっていた。
これまで、ソース群をWindowsの「C:\Source\Project」みたいなところに入れてました。WSL2(Ubuntu)では、この場所は「/mnt/c/Source/Project」に該当します。
実はこのように「/mnt/」以下の場所は、WindowsのファイルシステムからWSL2(Ubuntu)のファイルシステムに変換かける処理が発生するようで、このために動作がめっちゃ遅くなってたようです。対処方法:ソース群をWindowsファイルシステム配下のフォルダから、WSL2(Ubuntu)ファイルシステム配下のフォルダに移動させる。
WSL2とDocker for Windowsがこの問題を解決してくれたら良いのですが、まだ対応方法がないようです。
現状のベストプラクティスとしては、ソース群をWindowsファイルシステムである「/mnt/」以下に配置せず、WSL2(Ubuntu)のファイルシステム管理下のフォルダに配置して、Dockerを動作させることみたいです。私の場合Ubuntuのbashで、 mvコマンドを使い、「mv /mnt/c/Source/Project /home/username/Source」みたいなコマンドで、ソース群を「/home/username」配下に配置しました。
このファイル移動はファイルシステム変換があるため、かなり時間がかかります。ファイル移動の後、Dockerコンテナを起動して動作を確認したところ、軽くなっていました。
また、Docker buildコマンドでイメージ作成したところ、COPYコマンドがめっちゃ早くなり、使用上耐えられるまでのビルド速度になりました。ファイル操作とGit操作にはVisual Studio codeを使う。
Windowsファイルシステム配下のフォルダから、WSL2(Ubuntu)ファイルシステム配下のフォルダに移動するということは、WindowsのGUIでどうやって使うようにするかが問題になります。
Windowsのエクスプローラーで使いたい場合は、パスに「\wsl$」を入れると、ネットワークフォルダとして表示させることができます。
しかしエクスプローラーでは、ファイルシステム変換がかかるため、1つ1つのファイルを操作するにはいいですが、まとめてファイルを操作するときに、アプリによっては激重だったりエラーになったりするようです。GitのGUIクライアントとしてSourcetreeを使っていましたが、この場合もファイルをまとめて操作するので、動作が重くならないか心配です。
おすすめな方法としては、ファイル操作とGit操作にはVisual Studio codeを使います。
https://azure.microsoft.com/ja-jp/products/visual-studio-code/①「Remote Development」プラグインで「Remote WSL」プラグインを入れる。
Visual Studio codeに「Remote Development」というプラグインを入れると「Remote WSL」というプラグインが入ります。
https://code.visualstudio.com/blogs/2019/05/02/remote-development
こちらをつかうと、WSL2(Ubuntu)配下のファイル群にアクセスして、自由にファイルを操作したり、編集して開発できるようになります。②「Git History」プラグインを入れる。
Visual Studio codeでは標準で基本的なGit操作ができますが、標準ではGitログ履歴がありません。
Visual Studio codeに「Git History」というプラグインを入れると、Sourcetreeのように、Gitのログ履歴をみながらGit操作ができるようになります。
https://marketplace.visualstudio.com/items?itemName=donjayamanne.githistory③WSL2(Ubuntu)でGitHubにアクセスするためのキーペアを作ってGitHubに登録する
Visual Studio codeのWSLでは、「/home/username/.ssh/」配下にある、下記のファイルがGitへのアクセス情報として使われますのでWSL2(Ubuntu)でキーペアを作って、GitHubに登録しておきましょう。
そうすると、Visual Studio codeのWSLでもGitHubを使えるようになります。/home/username/.ssh/id_rsa
/home/username/.ssh/id_rsa.pub
/home/username/.ssh/known_hostshttps://docs.github.com/ja/free-pro-team@latest/github/authenticating-to-github/generating-a-new-ssh-key-and-adding-it-to-the-ssh-agent
(Linuxを参考にやってみてください)
- 投稿日:2020-12-06T19:49:27+09:00
left4dead2サーバー用のDockerイメージを作り、GCE上で動かしてみた #1(使い方編)
はじめに
コンテナ(Docker)について学んだため、何かアウトプットしたいと思いl4d2用のサーバーのコンテナを作成し、googleが提供するIaaSであるGoogle Compute Engine上で動かしてみました。
今回は#1ということで、作成したコンテナの使い方を紹介します。
「コンテナなんて使ったことない、鯖なんて立てたことないよ」という人でも立てられることを目指しました。以下は記事を読み進めるにあたっての留意いただきたい事項です。
- 今回は「とりあえず」使えるサーバーを構築してみることが目的なので、dockerfileの中身がイマイチです(この詳細は、別途記事(#2)を作って説明します)。この点はご容赦ください。
- #1は「使い方編」ですが、#2で「コンテナ作成の過程で得た知見編」、#3, 4で「サーバー構築までで苦労したこと編」を書く予定です。
使い方
1. GCE上の基本設定(登録からファイアウォール設定まで)
まずはGCEのコンソール画面を開きます(今回はGUIを使います)。
初めての方は「無料トライアル」を選択して登録を行います(2020/12時点で無料トライアル$300, 90日間が利用可能)。最初にファイアウォールの設定をします。l4d2はデフォルトで27015番ポートを使用するので接続を許可する必要があります。
画面左上にあるGCPのナビゲーションメニューを選択し、ネットワーキングの項目のVPCネットワーク、ファイアウォールを選択します。
次に、「ファイアウォール ルールの作成」を選択し、任意の名前を設定してターゲットタグ(ここではl4d2とします)、ソースIPの範囲(どこからでも繋げられるよう、0.0.0.0/0を設定)、指定したプロトコルとポート(TCP, UDPの27015を許可)の3つを入力します。
2. GCE上の基本設定(インスタンス起動まで)
次に、再びナビゲーションメニューを選択し、コンピューティングの項目のCompute Engine(GCE)、VMインスタンスを選択します。そしてVMインスタンスの作成を選択。
インスタンスの名前は任意で問題無く、リージョンは近いところ(東京)を選んでおけば大丈夫です。
マシンタイプは2vCPU, 8GBメモリにします(4GBでも動くと思いますが、極端に遅いような気がしたので8GBにしています)。
コンテナイメージのデプロイを選択し、コンテナイメージを入力(ここでは、今回dockerイメージのリポジトリをdocker hub上に作成しているので、「ekarunian/l4d2-server:1.0」を入力します。
ブートディスクはデフォルトだと10GBですが、コンテナが重いので30GBを選択します(25GBはダメでした)。
下にスクロールして、「管理、セキュリティ、ディスク、ネットワーキング、単一テナンシー」の折りたたみメニューを展開し、ネットワーキングタブのネットワークタグにファイアウォール設定で設定したターゲットタグ(l4d2)を入力します。これでこのインスタンスは27015ポート(TCP/UDP)を許可します。
次に管理タブを選択し、プリエンプティブをオンにします。
今回は友人と一日だけ遊ぶような場合を想定しており24時間でインスタンスが消えても大丈夫なので、これを選択します(いないと思いますが、24時間以上遊ぶ場合はオフにします)。
これを設定するとサーバーコストが下がります。今までの設定をプリエンプティブオフで作成すると1時間に約\$0.087(2020/12/06時点)かかりますが、オンでは1時間に約$0.027(同日時点)となります。
ここまで設定したら一番下の「作成」を選択し、インスタンスを起動します。
しばらくすると、以下のような画面が出ると思いますので、外部IPを控えておいてください(サーバーに接続するのに必要です)。また、SSH接続を選択してターミナルに接続します。
(今回、外部IPは固定していないので特に隠していません)3. インスタンス内での操作(コンテナ、サーバー起動まで)
インスタンスを起動(して、ターミナルにssh接続)したら、数分待ちます。
ターミナルに「docker images」と入力し、下記のように「ekarunian/l4d2-server」がリポジトリにあればOKです。(GCE上の)ローカルにあるdockerイメージの一覧ekaru2an@instance-2 ~ $ docker images REPOSITORY TAG ekarunian/l4d2-server 1.0 gcr.io/gce-containers/konlet v.0.11-latest gcr.io/stackdriver-agents/stackdriver-logging-agent確認出来たら、「docker run -it -p 27015:27015 -p 27015:27015/udp --name l4d2 ekarunian/l4d2-server:1.0 bash」でコンテナを起動します。
-pオプションでサーバーからコンテナへポートの転送設定(今回はクライアントからの送信がデフォルトで27015なので、サーバー側(コロンの前)を27015にしています。コンテナ側もこれに合わせています。)を行い、bashを対話型で実行します。
最初は反応がないですが、少しすると下記のように2行目が出てきます。コンテナを起動ekaru2an@instance-2 ~ $ docker run -it -p 27015:27015 -p 27015:27015/udp --name l4d2 ekarunian/l4d2-server:1.0 bash steam@534a1f30218e:~/l4d2server/left4dead2$ここに「../srcds_run -game left4dead2 +map c1m1_hotel coop」を入力してエンターを押下すると色々メッセージが出て(エラーメッセージも含まれておりますが、問題ありません)、下記の2行が出ればサーバー起動成功です。
ゲームサーバーを起動steam@534a1f30218e:~/l4d2server/left4dead2$ ../srcds_run -game left4dead2 +map c1m1_hotel coop ---(省略)--- Connection to Steam servers successful. VAC secure mode is activated.「c1m1_hotel coop」は起動時のマップ指定となり、ここでマップを変更できます。
例えば、Left 4 Dead 2 Dedicated Server Guideの下部にマップ名が列挙されております。
また、サーバー起動後はこの画面でl4d2のコンソール機能がadmin権限で使えます。例えば「god 1」などとすれば無敵になります(ただし、ゲーム中はログが爆速で流れるので注意が必要です)。
チートコマンドはwikiなどを参考にしてください。
サーバーを閉じるときは「exit」などを入れれば終了します。4. ゲーム側の設定(部屋に入るまで)
ここからはl4d2ゲーム側の設定です。l4d2を起動したら、設定->キーボード/マウス->開発者コンソールを許可 を有効にします。
有効にすると、"`" キーまたは "半角/全角" キーでコンソールを表示できるようになります。
コンソールを表示したらGCEのインスタンス作成時に控えた外部IPを利用し、以下を入力してサーバーを有効にし、connectでサーバーに入ります。
これで、先ほど「../srcds_run・・・」で設定したマップに入れます。コンソール画面に以下を入力mm_dedicated_force_servers [インスタンスの外部IP] connect [インスタンスの外部IP]招待が出来ないので、友人側にも同様にコンソールを有効にしてもらい、「connect [インスタンスの外部IP]」を入力してもらうことで、一緒に遊ぶことが可能となります。
なお、本サーバーは知らない人が入りにくい設定にしておりますが、入れない設定ではないので注意してください(少なくとも、私は友人と3時間プレイして際は入ってきませんでした)。あとは、ゲームを楽しんで、終わったらサーバーを閉じてGCEインスタンスを停止したらおしまいです。
5. まとめ
今回は、誰でもl4d2 dedicatedサーバーが構築できることを目指してコンテナの作成、Qiita記事の作成をしました。結果、1時間3円程度のサーバーが構築できました。
「この手順に従ってもおかしなことが起きたよ」などがありましたらコメントいただけますとありがたいです。また、今更言うなという感じですが、今回起動したサーバーは通常設定のサーバーではなく、色々な設定をハチャメチャに弄っております(通常設定のサーバーならローカル環境でもつくれるので。。。)。
どうなっているのかは実際に遊んで確認してみてください。
ちなみに、下記のサイトを参考に、色々なプラグインを入れております。
- 涼月蒼菜様のブログ「気まま研究所」の記事:Left 4 Dead 2 Dedicated サーバの建て方
- ztar様のブログ「SunriseBlue」の記事:L4D2でうごく!自作(改造)プラグイン置き場
その他、今回のdockerfileはsteamCMDのdockerイメージをベースに作成しております
今後やりたいこと
- 今回はdockerfileだけでゴリ押してしまったので、サーバー設定を容易に変更できるようコンテナを綺麗にし直す(優先度:高)。
- #2で詳細を記載しますが、もう少しクレバーな見た目になるようにdocker-composeを作りつつ再整理します。
- アドオンマップ等modの導入(優先度:高)
- これはl4d2 dedicated serverの設定を変えるだけなのでそんなに難しくない(はず)
- ゲームプレイ中にサーバーへ生じた変更をGCSにバックアップする仕組みを作る(優先度:中)
- l4d2だとプレイ結果をサーバーにフィードバックする必要がないので不要ですが、今後別のゲームでdedicated serverが作れるようになったらバックアップ用コンテナを作成し、GCSと連携(定期バックアップ等)が出来るようにしたいです。今のところ、Craftopiaというゲームの開発ロードマップに「使えるようにするよ!」的なことが書いてあるので、完成したら触ってみます。
- Kubernetes(GKE)を使ってサーバーを構築してみたい(優先度:低)
- 一方、個人利用の範囲ではスケーリングやヘルスチェック等のコンテナオーケストレーションのメリットは享受できないので、構築することそのものが目的になってしまう。
おわりに
今回、DockerとGCEを用いてサーバーを作成しましたが、何故この手法を選んだのかは以下の通りです。
- まず、個人PC上でサーバーを構築するとその環境に依存してしまいます(例えばポートの設定・回線・動作の安定性等が人によって異なりますので、他者の環境で確実に動作するかが不明です)。
- そこで、GCE上で動作させることによりこれらの問題を解消します(AWSのECSでも同様のことが出来ると思いますが、今回は個人的に好きな方(GCE)を使っています)。
- サーバー自体はsteamCMDというsteamクライアントのCLI版が存在するので、スクリプトで頑張って書こうと思えばサーバー構築もできると思いますが、サーバー設定を弄る時にテスト環境と本番環境とで環境の違いによるエラーが出るかもしれないのが嫌でした。
- 動作環境を含めてコンテナでパッケージ化すれば、サーバー設定を弄っても環境の違いによるエラーは出ませんし、更に今後steamの別ゲームで同様にdedicated serverが作れるようになった時に再利用できると思いました。(ただし、今回はこの点で結構ミスってしまい変更容易性や再利用性が悪くなっています。この点は#2で詳述します。)
こういった点でも、コンテナとクラウドの組合せは相性が良いことを実感することが出来ました。
さて、今回の記事でサーバーの動作を確認出来ると、次は必然的に「サーバー設定を自分で弄りたい!」となるわけですが、これをやろうとすると(何度も言いますが)このコンテナがべスプラでないことが分かってきます(恥ずかしい限りですが、動いたのでOKです(*'ω'*))。この理由は次回の記事で書きたいと思います。
最後まで読んでいただきありがとうございます_(._.)_
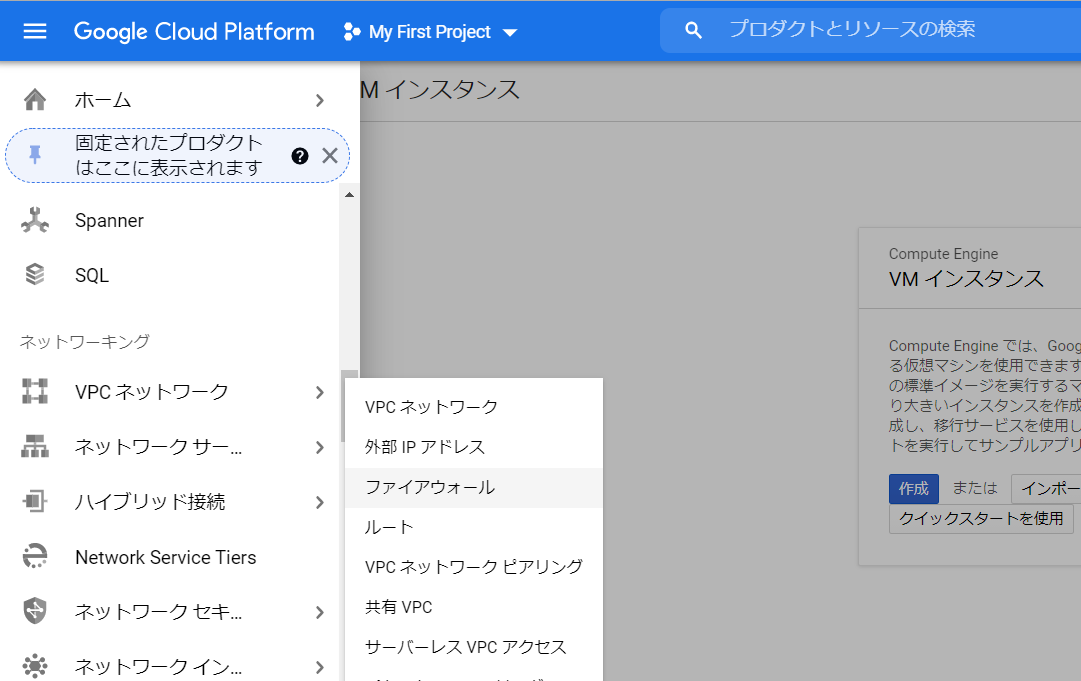


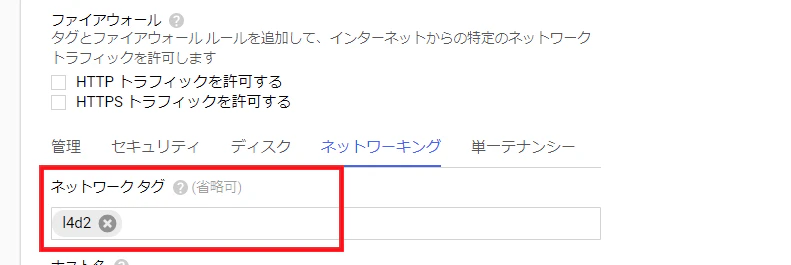
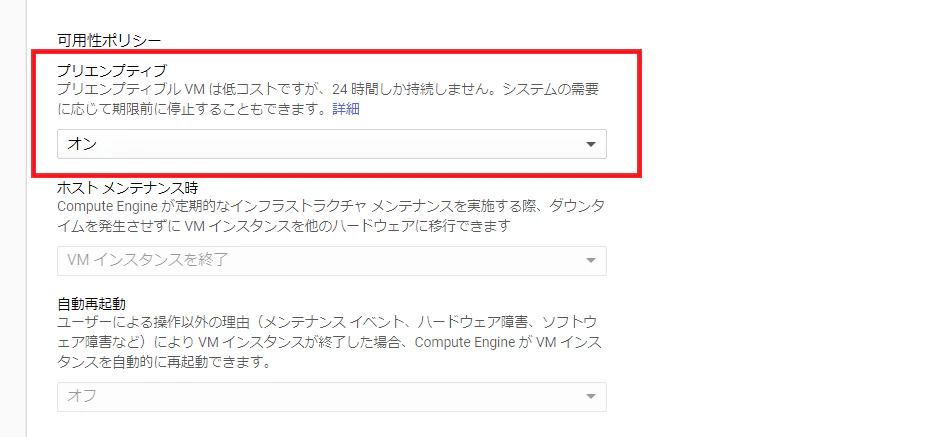
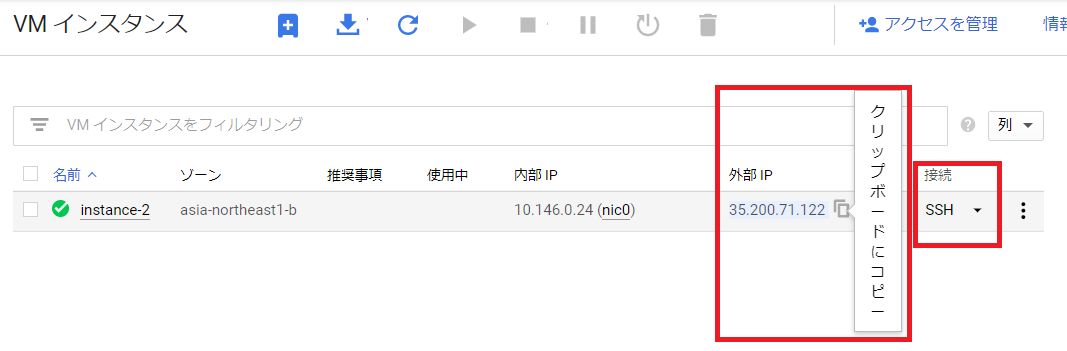
- 投稿日:2020-12-06T17:21:12+09:00
(Dockerfile)プログラマのためのDocker教科書読む.5
Dockerfileとは何か
前回までは、Dockerイメージを元にして、コンテナを生成し、ミドルウェアのインストールなどを手動で行った。
そしてその構築した状態のコンテナからイメージに保存をした。
- ベースになるDockerイメージ
- Dockerコンテナ内で行った操作
- 環境変数の設定
- コンテナ内で動作させておくデーモン実行
- ...その他
上記のように手動で行っていた操作を記述するためのファイルがDockerfile。
docker buildコマンドでそのDockerfileに記述された構成情報を元にDockerイメージを作成することができる。基本構文
「Dockerfile」のファイル名に拡張子はない。
命令は大文字でも小文字でも問題はないが、慣例的に大文字で統一して書く。基本書式
命令 引数Dockerfileの主な命令
命令 説明 FROM ベースイメージの指定 RUN コマンド実行 CMD コンテナの実行コマンド LABEL ラベルを指定 EXPOSE ポートのエクスポート ENV 環境変数 ADD ファイル/ディレクトリの追加 COPY ファイルのコピー ENTRYPOINT コンテナの実行コマンド VOLUME ボリュームのマウント USER ユーザの指定 WORKDIR 作業ディレクトリ ARG Dockerfile内の変数 ONBUILD ビルド完了後に実行される命令 STOPSIGNAL システムコールシグナルの設定 HEALTHCHECK コンテナのヘルスチェック SHELL デフォルトシェルの設定 コメントを書く場合は
#をつけるDockerfile# ここはコメントです 命令 引数 # ここもコメントですDockerfileの作成
「DockerコンテナをどのDockerイメージから生成するか」の情報を必ず記述する必要がある。
このイメージをベースイメージという。FROM どのDockerイメージから生成するか
FROM命令は必須項目
Dockerfile# ベースイメージの設定 FROM centos:centos7タグ名を省略したときは、最新バージョンが適用される。
イメージを一意に特定するときにダイジェストを使う。中間イメージを再利用する
キャッシュとして残しておく。内部的に再利用している。他のイメージをビルドするとき、保管していた中間イメージを再利用することでビルドが高速化する。
イメージを作成して、そのキャッシュの中間イメージを使用したときUsing cacheと表示される。(使用したくない場合はdocker buildコマンドに-no-cacheオプションをつける)
Dockerfileの命令ひとつひとつがレイヤーになる。上からの命令順に重なっていく。レイヤーが増えるので、同時に書ける命令は1行で書くとよい。
これは4つレイヤーが作成される。
DockerfileRUN yum -y install httpd RUN yum -y install php RUN yum -y install php-mbstring RUN yum -y install php-pear上と同じ命令だが続けて書くことで、(4つあるやりたいことが)1つのレイヤーで作成される。
DockerfileRUN yum -y install httpd php php-mbstring php-pear可読性が上がるので
\で改行入れるとよい。DockerfileRUN yum -y install\ httpd\ php\ php-mbstring\ php-pear本番環境のイメージを軽量化する
(goテストサンプルを触った)
まずはgo buildコマンドでビルドを行い、実行可能バイナリファイルを作成する。
本番環境用のDockerイメージを作成するとき、busyboxを使う。(Linuxコマンド群を単一ファイルにまとめたもの。必要最低限のLinuxシェル環境を使うときに利用されている。)
ここに開発環境Dockerイメージでビルドしたファイルをコピーして起動する命令を書く。→本番環境用のイメージが完成する。コマンド/デーモンを実行
Dockerイメージを作るため
- 必要なミドルウェアをインストールし、ユーザアカウントやディレクトリを作成するなどのコマンドを実行する必要がある。
- イメージからコンテナを生成したとき、サーバプロセスなどをデーモンとして動かす必要がある。 →この命令を学ぶ
RUN インストール実行
ミドルウェアをインストールする、環境構築のためのコマンドを実行する。
イメージを作成するためにRUNを使う。
コンテナの中で実行する命令ではない記述方法
- Shell形式での記述
/bin/shを使ってコマンドを実行したいとき- Dockerコンテナ内で
/bin/sh -cを使ってコマンドを実行したときと同じ動作をする- Exec形式での記述
- シェルを介さず直接実行する
- JSON配列で指定(シェルのパスを指定してシェルを利用することもできる)
- $HOME など環境変数は指定できない。
DockerfileFROM ubuntu:latest RUN echo こんにちはShellです RUN ["echo", "こんにちはExecです"] RUN ["/bin/bash", "-c", "echo 'こんにちはExecでbashを使用しました'"]CMD デーモン実行
RUN命令でイメージを元に生成したコンテナ内でコマンドを実行するためにCMD命令を使う。
Dockerfileには1つのCMD命令を記述することができる。(複数書いてある場合は最後のCMDが実行される)たとえば
Webサーバを稼働させるため、Nginxをインストールするコマンド→RUN命令
インストールしたNginxをデーモンとしてコンテナ内で常時動作させる→CMD命令記述方法
- Exec形式
- RUNと同じ
- Shell形式
- RUNと同じ
- ENTRYPOINT命令のパラメータとしての記述
ENTRYPOINT デーモンの実行
DockerfileからビルドしたイメージからDockerコンテナを起動するために、
docker container runを実行したときこのENTRYPOINT命令が実行される。記述方法
- Exec形式
- Shell形式
CMDとENTRYPOINTの違い
どちらもデーモンの実行。CMD→
docker container runコマンドで引数を指定した場合引数の命令に上書きされる
ENTRYPOINT→必ずコンテナで実行されるコマンドそのものを指定する(コマンドの引数はCMDで)この設定をすることにより、デフォルトでコンテナを実行したときの動作を決定できる。
DockerfileFROM ubuntu:16.04 # TOPの実行 ENTRYPOINT ["TOP"] CMD ["-d", "10"]コマンドを実行する
CMD命令で指定した10秒ごとに更新する場合(デフォルト)docker container run -it sample2秒ごとに更新する場合(引数でCMD命令を上書き)
docker container run -it sample -d 2ONBUILD ビルド完了後に実行
Dockerfileに ONBUILD命令コマンドを実行するように設定すると、はじめにビルドしたときのイメージを使いDockerfileのFROM命令でベースイメージとして設定してビルドしたときにONBUILD命令が実行される。
コマンドの実行タイミングをひとつ遅らせる。ベースイメージとして使われること前提のとき。主にインフラ部分を記述しベースイメージをビルド→そのベースイメージにプログラムをデプロイしビルドすると動く
以下の流れでインフラベースイメージとアプリケーションをデプロイさせる
- ベースイメージを作成
- Webコンテンツ開発
- Webサーバ用イメージ作成
- Webサーバ用コンテナ起動
ベースイメージ作成
Dockerfile.base# ベースイメージの設定 FROM ubuntu:latest # Nginxのインストール RUN apt-get -y update && apt-get -y upgrade RUN apt-get -y install nginx # ポート指定 EXPOSE 80 # Webコンテンツ配置(website.tarがWebコンテンツ) ONBUILD ADD website.tar /var/www/html/ # Nginxの実行 CMD ["nginx", "-g", "daemon off;"]イメージを作成する
$ docker build -t web-base -f Dockerfile.base .

~略~
Successfully built fdde0428dad9
Successfully tagged web-base:latest
Webコンテンツ開発
適当にhtmlとcssを作成してtarコマンドでまとめるwebsite/index.html<!DOCTYPE html> <html lang="jp"> <head> <meta charset="UTF-8"> <meta name="viewport" content="width=device-width, initial-scale=1.0"> <title>テスト</title> <link rel="stylesheet" href="./style.css"> </head> <body> <main> <h1>Dockerfileのテスト用です</h1> </main> </body> </html>website/style.css@charset "utf-8"; h1 { color: palevioletred; }まとめる
$ tar cvf website.tar website/
a website
a website/index.html
a website/style.css
Webサーバ用イメージの作成
Dockerfile# 先ほど作成したベースイメージを取得 FROM web-baseこのDockerfileを実行すると、Dockerfile.baseで指定していた
ONBUILD命令が実行される。ビルド前の構成
ONBUILD/
  ∟website/
  ∟Dockerfile.base
  ∟Dockerfile   ←
  ∟website.tar  ← Dockerfileと同じ配下に
ビルドする
$ docker build -t testview-image .
testview-imageが作成されたことを確認$ docker image ls REPOSITORY TAG IMAGE ID CREATED SIZE testview-image latest a7096195b31e 32 seconds ago 324MB web-base latest c58b4fcfe34d 55 seconds ago 324MBWebサーバー用コンテナ起動
$ docker container run -d -p 80:80 testview-imagehttp://localhost/website/ を開くとアプリケーションが表示された!
ここまでDockerイメージ(ベースイメージ)をインフラ担当の方が作り、そのベースイメージをアプリケーション開発者たちがアプリケーションごとに使用したイメージの流れ。
STOPSIGNAL
システムを終了するときに送信するシグナルを設定したいとき。
シグナル番号(9など)、またはシグナル名(SIGKILLなど)が指定できるHELTHCHECK コンテナのヘルスチェック
コンテナのプロセスが正しく動いているかをチェックしたいとき。
環境/ネットワーク設定
ENV 環境変数の設定
- key value型
- 1つの値を設定できる
- ket=value型
- こちらだと複数の値を設定できる。
DockerfileENV myName "MY NAME" ENV myOrder "Gin Whisky juice"DockerfileENV myName="MY NAME" \ myOrder=Gin \ Whisky \ juice変数の前に
\を追加するとエスケープ処理ができる。
ENV命令で指定した環境変数は、コンテナ実行時docker container runコマンドの--envオプションを使用すれば変更できる。WORKDIR 作業ディレクトリ設定
作業するディレクトリを指定する
環境変数に入れたパスも使用できるDockerfileENV DIRPATH /first ENV DIRNAME second WORKDIR $DIRPATH/$DIRNAME RUN ["pwd"]USER ユーザ指定
Dockerfileの次の命令を実行するためのユーザーを指定できる
LABEL ラベルの指定
イメージにバージョン情報や、作成者情報、コメントなどを持たせることができる
旧バージョンではMAINTAINERという名前だったが今は非推奨になっている。EXPOSE ポート指定
コンテナを公開するポートを指定する
Dockerに実行中のコンテナがlistenしているネットワークポートを知らせる。docker container runコマンドの-pオプションを使用するとき、どのポートをホストへ公開するか設定する。DockerfileEXPOSE 8080ARG Dockerfile内の変数
ENVと違いdockerfile内だけで使用できる変数。
DockerfileARG YOURNAME="your" RUN echo $YOURNAMEビルド時に上書きできる
docker build . --build-arg YOURNAME="NAME"SHELL デフォルトでシェルを設定
シェル形式でコマンド実行する際にデフォルトのシェル設定を行うときは、SHELL命令を使う。
Linux上でのデフォルトのシェルは["/bin/sh", "-c"]DockerfileSHELL ["/bin/bash", "-c"] RUN echo HELLOSHELL命令を指定すると、それ以降のDockerfile内でShell形式で指定したRUN命令、CMD命令、ENTRYPOINT命令で有効になる。
ファイルの設定
ADD ファイル/ディレクトリを追加
DockerfileADD host.html /docker_dir/ファイルがtarアーカイブか、圧縮フォーマットのときは、ディレクトリとして解凍される。
COPY ファイルをコピー
単純にイメージないにファイルを配置したいときに使う。
COPY命令の構文はADD命令と同じで役割も似ているが、ADD命令はリモートファイルのダウンロードやアーカイブの解凍などの機能を持つが、COPY命令はホスト上のファイルをイメージ内にコピーするだけ。VOLUME ボリューム割り当て
コンテナは永続データを保持することに適していない。
なのでVOLUME命令にてホストマシン上のボリューム(コンテナ外のストレージ)にマウントするのがよい。まとめ
Dockerfileからイメージを作成することができる。
ONBUILD命令を書いておくことでベースイメージが作成できる。ポエム
前に試しで起動したDockerのDockerfile見ようと思ったらDockerfileじゃなかった。(
docker-compose.ymlだった)
今はdocker-composeが主流だから初心者はそちらから学んだほうがわかりやすいという記事もありました。つぎ複数コンテナの運用管理だけど、ここで
docker-compose.yml触れるみたいです。やっと!参考文献

- 投稿日:2020-12-06T17:18:29+09:00
入門Docker アウトプット
Dockerとは
Dockerはコンテナと呼ばれる仮想化の技術であり、特定の環境をパッケージングして、どの環境でも動かせることができる。従来はVM型という仮想化もあった。配布の容易性がDockerを流行らせた原因だと考えられる。
docker-compose
docker-composeは複数のDockerを動かすツールであるオーケストレーションツール
をローカルで動かすためのツール。Dockerを使用する際にほぼセットで使われる。コンポーネント
・Docker Image
Dockerfileというファイルに記述し、ビルドすることで、環境のスナップショットとしての役割を持つ。OSやソフトウェア、ランタイムなどの環境を提供する。・Docker Container
Docker Imageであるスナップショットから起動したプロセス。「1コンテナ = 1プロセス」で設計する。ほかにもNetworkやVolumeがある。
参考:https://y-ohgi.com/introduction-docker/1_introduction/docker/
- 投稿日:2020-12-06T17:07:48+09:00
Dockerコンテナ上でGatsbyを動かす
確認環境
- OS: macOS Catalina
- Docker: version 19.03.13
- docker-compose: version 1.27.4
Docker Compose
まずはComposeファイルを準備します。
docker-compose.ymlversion: '3' services: gatsby: build: ./docker/gatsby volumes: - ./gatsby:/usr/src/app ports: - "8000:8000" tty: trueDockerfile
次はDockerfileを準備します。
Composeファイル内に記載されている./docker/gatsby内に配置します。
ファイル名はDockerfileです。
※おそらくQiitaの仕様で拡張子のないファイルのファイル名を以下で表示させることができないので補足FROM node:15.3.0-alpine3.10 WORKDIR /usr/src/app RUN apk update && \ apk add git && \ npm install -g gatsby-cli EXPOSE 8000コマンド実行
以下コマンドを実行します。
コンテナ起動
$ docker-compose up -dスターターダウンロード
$ docker-compose exec gatsby gatsby new . https://github.com/gatsbyjs/gatsby-starter-hello-worldサーバ起動
$ docker-compose exec gatsby gatsby develop --host=0.0.0.0動作確認
http://localhost:8000/
にアクセスして以下画像のように表示されたら成功です。
※公式ドキュメントより引用

- 投稿日:2020-12-06T14:52:50+09:00
docker-composeの後につくbash,ashの違い
仕事で利用している開発環境では、、、
docker-compose exec -it <container> bashなんだけど、自分が個人開発で使っているものは、
docker-compose exec -it <contaienr> ashでした。
bashで使っている環境のコマンドはashにするとエラーになるし、もう一方も同じ。これってどんな違いがあるのかな?と思い調べてみました。
TL;DR
dockerコンテナ内部でシェルを使う時の参照元の違い
詳細
言わずもがなではありますが、シェルはOS(Linux)を操作するCUIのことです。
開発を行うにあたってはdockerコンテナに入ってから色々コマンドを打つわけですが、そのコマンドを打つためにbashを参照しています。
bashの中には「pwdというコマンドが送られてきたら現在のパスを表示する」みたいなコマンドが登録されていて、シェルが実行できるワケですね。ただ、同じLinuxでもディストリービューションによってシェルの置き場所が
bashではない場合があります。それを確認できるのが下記のコマンド。
echo $SHELL
// /bin/bash or /bin/ash
bashでコンテナに入れるdockerコンテナ内で打った時は/bin/bash、
ashで入れる場合は/bin/ashになります。いわゆる「パスを通す」みたいなコトを
docker-composeでもやっています。LinuxやDockerのキホンを知らなかったコトをさらけ出しただけのような気もしますが、スッキリしました!
参考資料
下記記事が分かりやすく、とても助かりました!
- 投稿日:2020-12-06T14:45:42+09:00
docker-copose.yml個人的Tips集
Docker Compolseはとても便利ですね。私も業務内外で利用しています。
しかし、一度環境構築したあとは、docker-compose.ymlを修正する機会が少なく、ファイルに定義されている、項目やオプションの意味を忘れてしまうことが多いです。
気になった都度、調べては忘れてというサイクルを何度も繰り返しているため、今後のために1つに記事にまとめようと思います。本記事では、私が感じた
docker-compose.ymlの個人的ポイントをいくつか記載します。題材とするdocker-compose.yml
本記事は、Railsを使って個人開発しているサービスの
docker-compose.ymlを題材とします。
リポジトリは、 https://github.com/yuki0920/supplebox ですが、日々メンテしているので、本記事とファイル構成が若干変わっているかもしれません。version: '3' services: db: image: postgres ports: - '5432:5432' volumes: - pgdata:/var/lib/postgresql/data environment: POSTGRES_HOST_AUTH_METHOD: trust web: build: . command: bundle exec rails server -p 3000 -b '0.0.0.0' depends_on: - db ports: - '3000:3000' environment: DATABASE_HOST: 'db' tty: true stdin_open: true volumes: - .:/myapp:delegated volumes: pgdata:volumesについて
volumesの
pgdata:/var/lib/postgresql/dataのpgdataとは何か?volumes: - pgdata:/var/lib/postgresql/dataのpgdataはデータボリューム(単にボリュームともいう)を指しています。データボリュームとは、Docker Engine上に確保した領域のことを指しています。このデータのマウント方法をボリュームマウントと呼びます。
Docker Engine上の領域は、下記のように確認できます。
Rails + Dockerの場合、volumesにpgdataを渡すと、アプリケーション名_pgdataのボリュームが作成されます。$ docker volume ls DRIVER VOLUME NAME local <app_name>_pgdataCompose ファイル・リファレンス — Docker-docs-ja 17.06 ドキュメント
volumesの
pgdata:/var/lib/postgresql/dataの/var/lib/postgresql/dataとは何か?先と同じ例ですが、
volumes: - pgdata:/var/lib/postgresql/dataの
/var/lib/postgresql/dataはコンテナ上のデータが保管されている場所です。
postgresコンテナでは、デフォルトのデータ保管場所が/var/lib/postgresql/dataとなります。
このデータの保管場所は、コンテナごとに異なっており、mysqlコンテナならば、/var/lib/mysqlとなります。
こうしたデータの保管場所については、ドキュメントの「Where to Store Data」の項目に記載があります。https://hub.docker.com/_/postgres
https://hub.docker.com/_/mysqlvolumesの
.:/myappの.とは何か?volumes: - .:/myappの
.はDockerホスト上のカレントディレクトリを指しています。こちらは、Docker Engine上ではなく、Dockerホスト上というのが先と異なるポイントです。
このようなボリュームのマウント方法をバインドマウントと呼びます。Dockerにおける2つのボリュームのマウント方法は2通り
Dockerでは、データ領域をマウントする方法が2通りあることがわかりますので、簡単にまとめます。
1. ボリュームマウント
ボリュームマウントが良いケース
- Dockerほすとからへんしないとき(例えば、データベース用のコンテナなど)
2. バインドマウント
バインドマウントがよいケース
- ディレクトリの変更をDockerコンテナに反映したいとき(例えば、アプリケーション用のコンテナなど)
stdin_openとttyについて
stdin_open: trueとは何か?stdin_openとは標準入出力とエラー出力をコンテナに結びつける設定です。
docker run -it <container_name>の-iにあたる設定です。
tty: trueとは何か?ttyとは、擬似端末(キーボードによる入力)をコンテナに結びつける設定です。
docker run -it <container_name>の-tにあたる設定です。コンテナのシェルを起動するには
docker runコマンドの-itオプションについて確認します。(シェルのような)インタラクティブなプロセスでは、コンテナのプロセスに対して tty を割り当てるために、 -i -t を一緒に使う必要があります。
Docker run リファレンス — Docker-docs-ja 17.06 ドキュメントドキュメントどおりですが、-itはシェルを起動する際に必要なオプションです。
docker-compose.ymlのstdin_openとttyは同様の役割として、シェルを起動するためのものと理解しておくのが良さそうです。さいごに
今後も気になった項目、設定ががあれば追記していきます。
ご指摘等あれば、コメントいただければ幸いです。
- 投稿日:2020-12-06T14:45:42+09:00
docker-compose.yml個人的Tips集
Docker Compolseはとても便利ですね。私も業務内外で利用しています。
しかし、一度環境構築したあとは、docker-compose.ymlを修正する機会が少なく、ファイルに定義されている、項目やオプションの意味を忘れてしまうことが多いです。
気になった都度、調べては忘れてというサイクルを何度も繰り返しているため、今後のために1つに記事にまとめようと思います。本記事では、私が感じた
docker-compose.ymlの個人的ポイントをいくつか記載します。題材とするdocker-compose.yml
本記事は、Railsを使って個人開発しているサービスの
docker-compose.ymlを題材とします。
リポジトリは、 https://github.com/yuki0920/supplebox ですが、日々メンテしているので、本記事とファイル構成が若干変わっているかもしれません。version: '3' services: db: image: postgres ports: - '5432:5432' volumes: - pgdata:/var/lib/postgresql/data environment: POSTGRES_HOST_AUTH_METHOD: trust web: build: . command: bundle exec rails server -p 3000 -b '0.0.0.0' depends_on: - db ports: - '3000:3000' environment: DATABASE_HOST: 'db' tty: true stdin_open: true volumes: - .:/myapp:delegated volumes: pgdata:volumesについて
volumesの
pgdata:/var/lib/postgresql/dataのpgdataとは何か?volumes: - pgdata:/var/lib/postgresql/dataのpgdataはデータボリューム(単にボリュームともいう)を指しています。データボリュームとは、Docker Engine上に確保した領域のことを指しています。このデータのマウント方法をボリュームマウントと呼びます。
Docker Engine上の領域は、下記のように確認できます。
Rails + Dockerの場合、volumesにpgdataを渡すと、アプリケーション名_pgdataのボリュームが作成されます。$ docker volume ls DRIVER VOLUME NAME local <app_name>_pgdataCompose ファイル・リファレンス — Docker-docs-ja 17.06 ドキュメント
volumesの
pgdata:/var/lib/postgresql/dataの/var/lib/postgresql/dataとは何か?先と同じ例ですが、
volumes:
  - pgdata:/var/lib/postgresql/data
の
/var/lib/postgresql/dataはコンテナ上のデータが保管されている場所です。
postgresコンテナでは、デフォルトのデータ保管場所が/var/lib/postgresql/dataとなります。
このデータの保管場所は、コンテナごとに異なっており、mysqlコンテナならば、/var/lib/mysqlとなります。
こうしたデータの保管場所については、ドキュメントの「Where to Store Data」の項目に記載があります。https://hub.docker.com/_/postgres
https://hub.docker.com/_/mysqlvolumesの
.:/myappの.とは何か?volumes: - .:/myappの
.はDockerホスト上のカレントディレクトリを指しています。こちらは、Docker Engine上ではなく、Dockerホスト上というのが先と異なるポイントです。
このようなボリュームのマウント方法をバインドマウントと呼びます。Dockerにおける2つのボリュームのマウント方法は2通り
Dockerでは、データ領域をマウントする方法が2通りあることがわかりますので、簡単にまとめます。
1. ボリュームマウント
ボリュームマウントが良いケース
- Dockerほすとからへんしないとき(例えば、データベース用のコンテナなど)
2. バインドマウント
バインドマウントがよいケース
- ディレクトリの変更をDockerコンテナに反映したいとき(例えば、アプリケーション用のコンテナなど)
stdin_openとttyについて
stdin_open: trueとは何か?stdin_openとは標準入出力とエラー出力をコンテナに結びつける設定です。
docker run -it <container_name>の-iにあたる設定です。
tty: trueとは何か?ttyとは、擬似端末(キーボードによる入力)をコンテナに結びつける設定です。
docker run -it <container_name>の-tにあたる設定です。コンテナのシェルを起動するには
docker runコマンドの-itオプションについて確認します。(シェルのような)インタラクティブなプロセスでは、コンテナのプロセスに対して tty を割り当てるために、 -i -t を一緒に使う必要があります。
Docker run リファレンス — Docker-docs-ja 17.06 ドキュメントドキュメントどおりですが、-itはシェルを起動する際に必要なオプションです。
docker-compose.ymlのstdin_openとttyは同様の役割として、シェルを起動するためのものと理解しておくのが良さそうです。さいごに
今後も気になった項目、設定ががあれば追記していきます。
ご指摘等あれば、コメントいただければ幸いです。
- 投稿日:2020-12-06T12:36:57+09:00
Docker を使った Mysql接続(JDBC + Kotlin + spring Boot)
spring Boot(JDBC)とDocker で「DB接続」を行う(今回はMysqlを採用)
記事としての立ち位置
- 本記事は、Macを使っています。
- とりあえず、動かすことをメインに考えています
1. docker-compose.yml への記述
version: "3"
services:
  db:
    image: mysql:5.7
    restart: always
    ports:
      - 3317:3317
    command: --port 3317
    volumes:
      - ./sql:/docker-entrypoint-initdb.d
    environment:
      - MYSQL_ROOT_PASSWORD=「root」で入るためのパスワード
      - MYSQL_DATABASE=新しいDBのなまえ

  adminer:
    image: adminer
    restart: always
    ports:
    - 8000:8000
2, dockerコンテナの起動のコマンド(これでDBが作成される)
docker-compose up -d確認方法
Docker コマンド
docker-compose exec db bash
mysql> show databases;
3. application.properties に記述する
spring.datasource.url=jdbc:mysql://localhost:3317/{作成をしたDB名}
spring.datasource.username=mysqlにログインをするユーザー名
spring.datasource.password=mysqlにログインをするパスワード
spring.datasource.driver-class-name=com.mysql.cj.jdbc.Driver
spring.datasource.initialization-mode=always
spring.jpa.hibernate.ddl-auto=update
※ port番号は適当です!(3317でも良いですし、9999でもOKです)
必須項目
spring.datasource.url=jdbc:mysql://localhost:3317/{作成をしたDB名}
spring.datasource.username=mysqlにログインをするユーザー名
spring.datasource.password=mysqlにログインをするパスワード
spring.datasource.driver-class-name=com.mysql.cj.jdbc.Driver
4. build.gradle ファイルに、ライブラリを追加
implementation("org.springframework.boot:spring-boot-starter-jdbc")
implementation("mysql:mysql-connector-java")
接続完了!! のはず・・・・
- curlなどでデータを挿入してみる (完了方法)
- 投稿日:2020-12-06T10:25:11+09:00
VSCode拡張 Tomcat for Java でDocker上のTomcat を登録できない時の対処法
これは何
vscodeでtomcatの開発環境を構築する際,Tomcat for JavaにDocker上のtomcatを登録できずハマったときのメモ.
環境
- Windows10pro
- Docker Engine - Community Version: 19.03.13
- WSL2
- 使用イメージ tomcat:9.0.40-jdk11-openjdk-buster
- Visual Studio Code 1.51.1
- Tomcat for Java v0.11.3
- Remote Development v0.20.0
現象
Tomcat: Add Tomcat serverでtomcatのインストールされているディレクトリである/usr/local/tomcatを指定するも,うんともすんとも言わない.permissionの問題だと思い chmod で権限の変更を試みるものの,改善しない.
原因と暫定対処
現時点では不明
私の環境ではdevcontainer.jsonに以下のような設定をしていました.
しかしコンテナを起動してから拡張機能を無効→リロード→有効 と操作することでtomcatを追加できました."extensions": [ "vscjava.vscode-java-pack", "gabrielbb.vscode-lombok", "adashen.vscode-tomcat" ],よって対応としては
- ↑の設定からadashen.vscode-tomcatを削除
- コンテナのビルド後に手動でTomcat for Javaを追加
一応動作させることはできているのですが原因が不明のままです.
- 投稿日:2020-12-06T08:22:58+09:00
Windows10 Home で Docker Desktop の Error response from daemon のエラー対応
Windows10 Home で Docker Desktop の Error response from daemon のエラー対応
症状
Docker Desktop で下記のエラーが発生していました。
Error response from daemon: open \\.\pipe\docker_engine_linux: The system cannot find the file specified.下記のリンクでも同様の症状が発生している方がいらっしゃるようです。
(英語が苦手なので解決したのかどうかは不明です)https://github.com/docker/for-win/issues/4495
解決方法
Windows10 で Docker を使用する場合、複数の実現方法があるようです。
Windows10 Home + Docker Desktop の環境では、下記の組み合わせでないと動かないようです。
この組み合わせにしたらエラーが出なくなりました。
- Windows Insider Program
- Docker Desktop for Windows (Edge)
Windows Insider Program
Windows10 の「設定」から「更新とセキュリティ」を開きます。
左下の「Windows Insider Program」の設定をします。
設定後、PCの再起動もしておきます。
Docker Desktop for Windows (Edge)
下記のサイトから右側の「Get Docker Desktop for Windows (Edge)」をクリックしてダウンロードします。
すでにstableのほうをインストールしていた場合は、アンインストールしてからEdgeのほうを再インストールします。

- 投稿日:2020-12-06T02:42:51+09:00
dockerのコンテナが神隠しにあった話
TL;DR
sudo systemctl restart dockerを実行したら治った
原因まではわからん(分かる人教えて)環境とか
Ubuntu:20.04.1 LTS (Focal Fossa)
Docker version 19.03.8経緯
サーバを再起動し,
sudo docker psしたら何も表示されなかった.しかし,Docker上で動かしているwebアプリ(Jenkins,Jellyfin)にはweb経由でアクセスできた.
コマンド実行結果
sudo docker ps
 ⚓  ~/docker  sudo docker ps
CONTAINER ID        IMAGE               COMMAND             CREATED             STATUS              PORTS               NAMES
前述の通り,実行中のコンテナは無いことになっています.
sudo docker ps -a
 ⚓  ~/docker  sudo docker ps -a
CONTAINER ID        IMAGE               COMMAND                CREATED             STATUS              PORTS               NAMES
7220a06e6d91        jellyfin/jellyfin   "/jellyfin/jellyfin"   2 months ago        Created                                 jellyfin_jellyfin_1
-aオプションをつけると,jellyfinのコンテナのみ表示されます.(Jenkinsはどうして表示されないんだ...?)
sudo docker images
 ⚓  ~/docker  sudo docker images
REPOSITORY          TAG                 IMAGE ID            CREATED             SIZE
jellyfin/jellyfin   latest              360585541fa2        3 months ago        490MB
imageもjellyfinのもののみです
sudo docker container ls -a
 ⚓  ~/docker  sudo docker container ls -a
CONTAINER ID        IMAGE               COMMAND                CREATED             STATUS              PORTS               NAMES
7220a06e6d91        jellyfin/jellyfin   "/jellyfin/jellyfin"   2 months ago        Created                                 jellyfin_jellyfin_1
containerもjellyfinのみです
lsof -i:9090
⚓ ~/docker lsof -i:9090そこで,9090番portで動いているJenkinsを探しましたが,dockerがroot権限で動いているのでsudoをつける必要がありました.
sudo lsof -i:9090
 ⚓  ~/docker  sudo lsof -i:9090
COMMAND    PID USER   FD   TYPE DEVICE SIZE/OFF NODE NAME
docker-pr 2576 root    4u  IPv6  36060      0t0  TCP *:9090 (LISTEN)
当然といえば当然ですが,動いていました.
sudo ps -aux | rg docker
 ⚓  ~/docker  sudo ps -aux|rg docker
(一部省略)
root        2576  0.0  0.0 548248  2876 ?        Sl   00:12   0:00 /usr/bin/docker-proxy -proto tcp -host-ip 0.0.0.0 -host-port 9090 -container-ip 172.19.0.2 -container-port 8080
root        2595  0.0  0.0 548248  2844 ?        Sl   00:12   0:00 /usr/bin/docker-proxy -proto tcp -host-ip 0.0.0.0 -host-port 8920 -container-ip 172.18.0.2 -container-port 8920
root        2608  0.0  0.0 548504  2988 ?        Sl   00:12   0:00 /usr/bin/docker-proxy -proto tcp -host-ip 0.0.0.0 -host-port 8096 -container-ip 172.18.0.2 -container-port 8096
root        2620  0.0  0.0 548248  3580 ?        Sl   00:12   0:00 /usr/bin/docker-proxy -proto udp -host-ip 0.0.0.0 -host-port 7359 -container-ip 172.18.0.2 -container-port 7359
root        2633  0.0  0.0 548248  3588 ?        Sl   00:12   0:00 /usr/bin/docker-proxy -proto udp -host-ip 0.0.0.0 -host-port 1900 -container-ip 172.18.0.2 -container-port 1900
今度は,docker関連のプロセスを調べてみました.
するとdocker-proxyというものがportを掴んでいることが判明しました.sudo killall docker-proxy
⚓ ~/docker sudo killall docker-proxyなので,docker-proxyをkillしました.
今思えばこの手順は必要なかった気がします.sudo ps -aux | rg docker (2回目)
 ⚓  ~/docker  sudo ps -aux|rg docker
root        2576  0.0  0.0      0     0 ?        Z    00:12   0:00 [docker-proxy] <defunct>
root        2595  0.0  0.0      0     0 ?        Z    00:12   0:00 [docker-proxy] <defunct>
root        2608  0.0  0.0      0     0 ?        Z    00:12   0:00 [docker-proxy] <defunct>
root        2620  0.0  0.0      0     0 ?        Z    00:12   0:00 [docker-proxy] <defunct>
root        2633  0.0  0.0      0     0 ?        Z    00:12   0:00 [docker-proxy] <defunct>
killしたので一応確認するとdefunctになっていて,プロセス自体は生きていました.
ここで再起動することを思いつく...
sudo systemctl status docker(再起動する前)
 ⚓  ~/docker  sudo systemctl status docker
● docker.service - Docker Application Container Engine
     Loaded: loaded (/lib/systemd/system/docker.service; enabled; vendor preset: enabled)
     Active: active (running) since Sun 2020-12-06 00:13:05 JST; 1h 57min ago
TriggeredBy: ● docker.socket
       Docs: https://docs.docker.com
   Main PID: 1479 (dockerd)
      Tasks: 20
     Memory: 117.9M
     CGroup: /system.slice/docker.service
             └─1479 /usr/bin/dockerd -H fd:// --containerd=/run/containerd/containerd.sock
sudo systemctl status docker(再起動後)
● docker.service - Docker Application Container Engine
     Loaded: loaded (/lib/systemd/system/docker.service; enabled; vendor preset: enabled)
     Active: active (running) since Sun 2020-12-06 02:11:14 JST; 3s ago
TriggeredBy: ● docker.socket
       Docs: https://docs.docker.com
   Main PID: 14690 (dockerd)
      Tasks: 50
     Memory: 42.9M
     CGroup: /system.slice/docker.service
             ├─14690 /usr/bin/dockerd -H fd:// --containerd=/run/containerd/containerd.sock
             ├─14884 /usr/bin/docker-proxy -proto tcp -host-ip 0.0.0.0 -host-port 8920 -container-ip 172.18.0.2 -container-port 8920
             ├─14898 /usr/bin/docker-proxy -proto tcp -host-ip 0.0.0.0 -host-port 8096 -container-ip 172.18.0.2 -container-port 8096
             ├─14911 /usr/bin/docker-proxy -proto udp -host-ip 0.0.0.0 -host-port 7359 -container-ip 172.18.0.2 -container-port 7359
             ├─14925 /usr/bin/docker-proxy -proto udp -host-ip 0.0.0.0 -host-port 1900 -container-ip 172.18.0.2 -container-port 1900
             └─14938 /usr/bin/docker-proxy -proto tcp -host-ip 0.0.0.0 -host-port 9090 -container-ip 172.19.0.2 -container-port 8080
再起動後では,再起動前と比べてメモリ使用量が減っていました.
感想
killコマンドを使う前に再起動することを覚えようと思いました.
原因は詳しくわかっていないので,なにか気づいたことがあれば教えていただけますと助かります.
- 投稿日:2020-12-06T01:36:17+09:00
VSCode, DockerでHelloWorldを10言語やってみる
はじめに
- VSCodeを使って、10のプログラミング言語でHelloWorldやってみます
- Rust, Go, Python, C++, C#, Ruby, TypeScript, Java, Dart, プロデル!
- なるべくシンプルに、汎用的に
- ローカル環境を汚したくないのでDockerでやります(拡張機能:「Remote-Containers」)
準備
- VSCode 1.51.1
- Windows10 home(Insider Previewバージョン)の環境で試していますが、Macでもほぼ変わらないと思います
- VSCodeをインストールする(方法は割愛)
- Extension:Remote-Containerをインストールする
- Docker環境を用意する
- Windowsなら、Docker Desktop for Windowsを使えるようにします。
- 最近ではWindows10 homeでもDocker for Windowsが使えます、Insider Previewも不要
- 参考:https://qiita.com/poramal/items/11912b5533ec8e7dbaac
- こちらの記事はWindows10 proでやっていますが、homeでもできるはずです
- Macなら、Docker Desktop for Macのインストールは簡単です。
①Rust(まずは人気言語で!)
- 1.まず適当なworkディレクトリを作ってVSCodeで開きます
- この時点でディレクトリ内は空でいいです
- 2.「Command Palette」を開いて、
Remote-Containers:Add Development Container Configuration Files...を実行
Show All Definition...を選択すると全て表示されますRustを選択します.devcontainerディレクトリ、その配下にdevcontainer.jsonとDockerfileが生成されます- 3.コンテナを生成して、VSCodeをコンテナ接続に切り替えます
- ポップアップでも促されると思いますが、「Command Palette」を開いて、
Remote-Containers:Add Development Container Configuration Files...を実行
- Dockerデーモンが起動していることが前提です、初回はdocker imageのダウンロードやビルドもあるので少々時間がかかります。
- コンテナが起動すると、VSCodeも新しく起動されます
- 4.
helloworld.rsを作成して、コーディングします。fn main(){ println!("hello world!"); }
- 5.vscode内のterminalでビルドします、バイナリが生成されます
$ rustc helloworld.rs
- 6.実行します
- まずlaunch.jsonを作成
- 「Command Pallete」を開いて、
Open launch.jsonを選択、LLDBを選択- 中身を少し書き換えます、
"program": "${workspaceFolde}/helloworld"とします。{ // Use IntelliSense to learn about possible attributes. // Hover to view descriptions of existing attributes. // For more information, visit: https://go.microsoft.com/fwlink/?linkid=830387 "version": "0.2.0", "configurations": [ { "type": "lldb", "request": "launch", "name": "Debug", "program": "${workspaceFolder}/helloworld", "args": [], "cwd": "${workspaceFolder}" } ] }
F5で実行します7.最終的な構成です
│  helloworld
│  helloworld.rs
│
├─.devcontainer
│      devcontainer.json
│      Dockerfile
│
└─.vscode
        launch.json
- 8.実務的には、
- さすがにビルド・実行を一発でやりたいです
- こちらをDLしてきてベースにするのが実用的です、詳細は割愛、他の言語も同様にgithubから雛形ひっぱってくるのが賢明
②Go(もう1つ人気言語で!)
- 1.前項参照
- 2.ほぼ前項と同じ
Go→1.15、選択していく- 3.前項参照
- 4.
helloworld.goを作成して、コーディングします。package main import "fmt" func main() { fmt.Printf("hello world!\n") }
- 5.vscode内のterminalで実行します
$ go run helloworld.go
- 6.簡単ですね!
③Python (やっぱり外せませんね)
- 1.前項参照
- 2.ほぼ前項と同じ
Python 3→3.9、選択していく- 3.前項参照
- 4.
helloworld.pyを作成して、コーディングします。print("hello world!")
- 5.vscode内のterminalで実行します
$ python helloworld.py
- 6.こちらも簡単ですね!
④C++ (私は好きです)
- 1.前項参照
- 2.ほぼ前項と同じ
C++→Ubuntu20.04、選択していく- 3.前項参照
- 4.
helloworld.cppを作成して、コーディングします。#include <stdio.h> int main() { printf("hello world"); return 0; }
5.ビルド&実行します
- 最初だけ次のように
launch.json,tasks.jsonを作成- 「Command Pallete」を開いて、
Open launch.json→C++(GDB/LLDB)→g++ Build and debug active file compiler:/usr/bin/g++を選択6.思ったより簡単です!
│  helloworld
│  helloworld.cpp
│
├─.devcontainer
│      devcontainer.json
│      Dockerfile
│
└─.vscode
        launch.json
        tasks.json
⑤C# (こちらも私は好きです)
- 1.前項参照
- 2.ほぼ前項と同じ
C#(.NET Core)→3.1(default)、選択していく- 3.前項参照
- 4.Terminalからプロジェクトを生成します。
$ dotnet new console
5.ビルド&実行します
F5実行で下記のダウンロードが始まります(数分かかる) -
.NET Coreを選択すると、launch.jsonとtask.jsonが生成されます6.こちらも思ったより簡単です!
│  Program.cs
│  test-devcontainer-csharp-helloworld.csproj
│
├─.devcontainer
│  │  devcontainer.json
│  │  Dockerfile
│  │
│  └─library-scripts
│          azcli-debian.sh
│
├─.vscode
│      launch.json
│      tasks.json
⑥Ruby
- 1.前項参照
- 2.ほぼ前項と同じ
Ruby→2.7、選択していく- 3.前項参照
- 4.
helloworld.rbを作成して、コーディングします。print "hello world!\n"
- 5.vscode内のterminalで実行します
$ ruby helloworld.rb
- 6.ディレクトリ構造です
│  helloworld.rb
│
└─.devcontainer
        devcontainer.json
        Dockerfile
⑦TypeScript
- 1.前項参照
- 2.ほぼ前項と同じ
Node.js & TypeScript→14、選択していく- 3.前項参照
- 4.
helloworld.rbを作成して、コーディングします。console.log("hello world!");
- 5.vscode内のterminalで実行します
$ tsc helloworld.cs
$ node helloworld.js
- 6.ディレクトリ構造です
│  helloworld.js
│  helloworld.ts
│
└─.devcontainer
        devcontainer.json
        Dockerfile
⑧Java
- 1.前項参照
- 2.ほぼ前項と同じ
Java→15、選択していく- 3.前項参照
- 4.
helloworld.javaを作成して、コーディングします。public class helloworld{ public static void main(String[] args){ System.out.println("hello world!!"); } }
- 5.vscode内のterminalで実行します
$ javac helloworld.java
$ java helloworld
- 6.ディレクトリ構造です
│  helloworld.class
│  helloworld.java
│
└─.devcontainer
        devcontainer.json
        Dockerfile
⑨Dart
- 1.前項参照
- 2.ほぼ前項と同じ
Dartを選択していく- 3.前項参照
- 4.
helloworld.dartを作成して、コーディングします。void main() { print('hello world!'); }
- 5.vscode内のterminalで実行します
$ dart helloworld.dart
- 6.ディレクトリ構造です
│  helloworld.dart
│
└─.devcontainer
    │  devcontainer.json
    │  Dockerfile
    │
    └─library-scripts
            common-debian.sh
⑩プロデル(笑)
- 1.前項参照
- 2.下記のディレクトリ、ファイルを手動で作成
└─.devcontainer devcontainer.json Dockerfiledevconainer.json{ "name": "Produire", "build": { "dockerfile": "Dockerfile", "context": "..", }, "settings": { "terminal.integrated.shell.linux": "/bin/bash", }, "extensions": [ "utopiat.produirelang" ], }DockerfileFROM mono RUN \ apt-get update && \ apt-get install unzip wget -y && \ rm -rf /var/lib/apt/lists/* RUN wget -O produire.zip https://rdr.utopiat.net/files/mono//produire-mono-1.6.965.zip \ && unzip 'produire.zip' -d /usr/bin
- 3.前項参照
- 4.
helloworld.rdrを作成して、コーディングします。「hello world!」を表示する
- 5.vscode内のterminalで実行します
$ mono /usr/bin/produire-mono/pconsole.exe helloworld.rdr
- 6.ディレクトリ構造です
│  helloworld.rdr
│
└─.devcontainer
        devcontainer.json
        Dockerfile
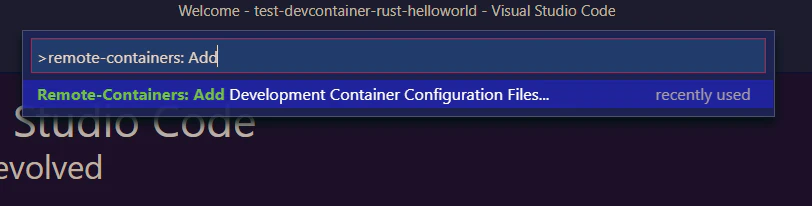


- 投稿日:2020-12-06T01:36:14+09:00
既存のRailsアプリにNginxを導入しよう!(Docker, docker-compose)
前回の記事で作ったRailsアプリにNginxを導入していきます。やっとここまできた!
環境
- Docker 19.03.13
- docker-compose 1.27.4
Dockerfile
rails_test/containers/nginx/DockerfileFROM nginx:1.15.8 RUN rm -f /etc/nginx/conf.d/* ADD nginx.conf /etc/nginx/conf.d/rails_test.conf CMD /usr/sbin/nginx -g 'daemon off;'Dockerfileを新しくディレクトリを作ってそこに置きます。ここらへんのファイル構成は任意です。
特にNginxの記事と変わったところはありませんのであまり説明しませんが、新しく設定ファイルを作成して保存するためADDしています。余計な設定ファイルはrmで消しておきます。nginx.conf
設定ファイルを書きます。
rails_test/containers/nginx/nginx.confupstream rails_test { server unix:///rails_test/tmp/sockets/puma.sock; } server { listen 80; server_name localhost; access_log /var/log/nginx/access.log main; error_log /var/log/nginx/error.log debug; root /rails_test/public; client_max_body_size 100m; error_page 404 /404.html; error_page 505 502 503 504 /500.html; try_files $uri/index.html $uri @rails_test; keepalive_timeout 5; location @rails_test { proxy_set_header X-Real-IP $remote_addr; proxy_set_header X-Forwarded-For $proxy_add_x_forwarded_for; proxy_set_header Host $http_host; proxy_pass http://rails_test; } }ソケット通信をするためupstreamにてパスを指定しています。
docker-compose.yml
以下に修正します。
docker-compose.ymlversion: '3' services: app: build: . volumes: - .:/rails_test + - tmp-data:/rails_test/tmp + - public-data:/rails_test/public + command: puma -C config/puma.rb - command: bash -c "rm -f tmp/pids/server.pid && rails s -b 0.0.0.0" - ports: - - 3000:3000 environment: WEBPACKER_DEV_SERVER_HOST: webpacker env_file: - ./environments/db.env depends_on: - db webpacker: build: . environment: NODE_ENV: development RAILS_ENV: development WEBPACKER_DEV_SERVER_HOST: 0.0.0.0 volumes: - .:/rails_test command: ./bin/webpack-dev-server ports: - 3035:3035 + web: + build: + context: containers/nginx + volumes: + - public-data:/rails_test/public + - tmp-data:/rails_test/tmp + ports: + - 80:80 + depends_on: + - app db: image: mysql:5.7 volumes: - rails-db:/var/lib/mysql env_file: - ./environments/db.env volumes: rails-db: + tmp-data: + public-data:ソケット通信するので3000番ポートが必要なくなります。コマンドも直接pumaを起動するものに変更します。
また、tmpディレクトリを永続化してNginxでpuma.sockを見れるようにしています。puma.rb
pumaのファイルにて以下修正します。差分のみ表示しています。
puma.rb- port ENV.fetch("PORT") { 3000 } + app_root = File.expand_path("../..", __FILE__) + bind "unix://#{app_root}/tmp/sockets/puma.sock"あとは前回同様にビルドしたのちに起動すればNginxとRailsにアクセスできます。
$ docker-compose build
$ docker-compose up -d
$ curl http://localhost
<!DOCTYPE html>
<html>
<head>
  <title>Ruby on Rails</title>
  <meta charset="utf-8">
  <meta name="viewport" content="width=device-width">
             ・
             ・
             ・
所感
これで本番環境とほぼ同じ構成にできました。あとはこれをECSを使ってEC2で動かすのみといったところです。
- 投稿日:2020-12-06T01:12:15+09:00
Docker開発環境でdocker-compose run web bundle exec erb2slim app/views/layouts/ --deletを実行したらエラーが出た
Docker開発環境で構築したアプリにSlimを導入したのでRails newした時にできた
.erbファイルをSlimに変更しようと思い、docker-compose run web bundle exec erb2slim app/views/layouts/ --deletを実行したところ下記のエラーがでたbundler: command not found: erb2slim Install missing gem executables with `bundle install`何をわけわからんこと言ってんねん!いれたやろがい!!!ってキレそうになりながら冷静になってみるとDockerのビルド?をしていないことに気づいたので下記を実行
docker-compose up --build
無事にDockerが起動したらDockerをもう一度止めて、
docker-compose run web bundle exec erb2slim app/views/layouts/ --deletを実行!!そしたら無事にerbファイルがSlimに置き換わっていた!!やったぜ!!!
Dockerで開発環境を作ってるので、Dockerにしっかり更新したよ〜!っていう旨を伝えなくちゃいけないっぽいわね。勉強不足であってるかわからんけど、そんな感じでやったらとりあえずできたのでヨシ!ということでひとつ
おわり!!!!!!