- 投稿日:2019-04-03T21:57:51+09:00
Vagrant + docker 環境で proxy しつつ gulp + browser-sync で自動リロードする
Qiita 初投稿です。
なにがあったのか
ローカルで gulp + browser-sync するのは慣れていたので、Vagrant + docker でも問題ないでしょ~と思ったら自動リロードが動かなかった。
解決
バーチャルマシン上では普通にやると gulp のファイル監視がうまくいかないらしい。
なのでgulpfile.jsの browserSync のところにusePolling: trueを書いてあげないといけない。browserSync.init({ proxy: "接続先", files: [ "監視したいファイル" ], watchOptions: { usePolling: true, interval: 100 }, reloadOnRestart: true, open: false });polling の処理が負荷としてどうなのかは気になるけど、とりあえず動いたのでめでたしめでたし。
- 投稿日:2019-04-03T20:41:20+09:00
DockerでTruffleとganache-cli開発環境を作ってみる
はじめに
スマートコントラクトの開発をしようと思ったときに、
自分のPCにnodejsやtruffleなど色々なものを入れるのが嫌だったので、Dockerだけで動作する環境を作ってみました。環境
OS: Windows 10
やってみる
1.dockerのネットワーク作成
ganache用DockerのIPアドレスを固定化したいため、ネットワークを作成します。
$ docker network create  --subnet=172.18.0.0/16 test_net
dfe148a3b2816882f8ac5ac7cb94a79bb4e1ef378288e43eac60515df1ddc398

$ docker network list
NETWORK ID          NAME                DRIVER              SCOPE
f379ac7c11b6        bridge              bridge              local
a7e6f4a88723        host                host                local
7fcae840c4f5        none                null                local
dfe148a3b281        test_net            bridge              local
2.ganache用のDockerを作成
ganacheのgithubの手順を参考に、ganacheのdockerを作成します。
今回はIPを固定にしたいので、netとipのオプションも追加します。$ docker run -d -p 8545:8545 --net=test_net --ip=172.18.0.5 --name gana trufflesuite/ganache-cli:latest作成したコンテナのログを確認します。
$ docker logs -f gana
Ganache CLI v6.4.1 (ganache-core: 2.5.3)
(node:1) [DEP0005] DeprecationWarning: Buffer() is deprecated due to security and usability issues. Please use the Buffer.alloc(), Buffer.allocUnsafe(), or Buffer.from() methods instead.

Available Accounts
==================
(0) 0x6df229104c1b6f04bbd68afd07d535d2ccadac28 (~100 ETH)
(1) 0xda69c4d9178254ab895f95ff6f21e10fab953d30 (~100 ETH)
(2) 0x9cb9366a753da47053a409e19b1b9a345fdef219 (~100 ETH)
(3) 0x4545e5c2fb9c3a2b06c43fb93e542cc6115509af (~100 ETH)
(4) 0x700b58da0966c8aa1ab71527c3bb830b3274a91b (~100 ETH)
(5) 0xc497f0fb52a11e66c2097e5488fb655f8a19ffb3 (~100 ETH)
(6) 0x16378b97cedc0f52fb71760c5bd0941bb85ea89e (~100 ETH)
(7) 0xdb24e07e637dea6cb83d37d95260434cc103333c (~100 ETH)
(8) 0x2b45f0abcc2db45c3abeef0b8a7ac79bbbfde420 (~100 ETH)
(9) 0x8b4ab25f4c53f89ca2258589d5e77cc3e8a5466d (~100 ETH)

Private Keys
==================
(0) 0x8e87218fe82c3f47073a9363dfa52916e91e435093f2443d00306ffff7895649
(1) 0xc03b19b30f56c9e46f9555057a1dbd1bd8f2286f9c527c2c658cc9b479c53e8f
(2) 0xb47ecd0895de2ef31180011b3b5d19af37486134f7b35452aeaaa6a3a7d3ff89
(3) 0x48605a21579e877e4fc10c0aa85f6c1f15870743d8d00b83c0254f20b81e8d2e
(4) 0x7f7e4248385dbb3f95f30e2a08bef3828dd55020799ea172ad096233e28ad722
(5) 0x1a582fa60c9a6faf372352ff0eef21ed93f299fd3f4d43f6e7cd0d8afd42f684
(6) 0xd0ac93cca580632ed32dd765f38259a37ae68023c9249bff88b7f9483e034fe4
(7) 0x6d52d1bcc8ef9efb94f4ca89153ec42976f826416402447a8faa161c91c0cec7
(8) 0x24515fdfcd2f459a2a1141ddf3bd11b493263b012512cdd44449762bd39a8798
(9) 0x5a6dac6fdd4bec7053b1ad983e2e3aaab85e472f1bd43a2b69e363ae260f17bf

HD Wallet
==================
Mnemonic:      salmon lunar jelly gas upgrade next involve final trigger describe auction refuse
Base HD Path:  m/44'/60'/0'/0/{account_index}

Gas Price
==================
20000000000

Gas Limit
==================
6721975

Listening on 0.0.0.0:8545
ちゃんと動いてそうです。
これでganacheの準備は完了です。3.truffle環境の作成
ubuntuにnodejs、truffle、vimを入れていきます。
まずは、ubuntuのdockerを作成。docker run -it --name tr_gna --net=test_net ubuntu:18.04次にnodejsを入れていきます。
今回はバージョンを変更しやすいnvmでインストールしていきます。$ apt-get update $ apt-get install -y curl $ curl -o- https://raw.githubusercontent.com/creationix/nvm/v0.34.0/install.sh | bash $ . ~/.bashrc $ nvm install 10 $ nvm use 10nodejsを入れたので、truffleをインストールしてきます。
$ npm install -g truffleubunutにtruffleが入りました。
truffleで作成したファイル設定を一部変更する必要があるので、追加でvimも入れます。apt-get install -y vimここまでで、truffle用のdocker作成は完了です。
ganacheのdockerとの連携を確認したいので、サンプルのプログラムを作成します。$ cd $ mkdir MetaCoin $ cd MetaCoin $ truffle unbox metacoin $ ll total 28 drwxr-xr-x 5 root root 4096 Apr 3 03:55 ./ drwx------ 1 root root 4096 Apr 3 03:55 ../ -rw-r--r-- 1 root root 1075 Apr 3 03:55 LICENSE drwxr-xr-x 2 root root 4096 Apr 3 03:55 contracts/ drwxr-xr-x 2 root root 4096 Apr 3 03:55 migrations/ drwxr-xr-x 2 root root 4096 Apr 3 03:55 test/ -rw-r--r-- 1 root root 503 Apr 3 03:55 truffle-config.jsMetaCoin配下のtruffle-config.jsをganacheのdockerを参照するように変更します。
truffle-config.js(修正前)module.exports = { // Uncommenting the defaults below // provides for an easier quick-start with Ganache. // You can also follow this format for other networks; // see <http://truffleframework.com/docs/advanced/configuration> // for more details on how to specify configuration options! /* networks: { development: { host: "127.0.0.1", port: 7545, network_id: "*" }, test: { host: "127.0.0.1", port: 7545, network_id: "*" } } */ };host部分にはganacheコンテナに割り振った固定IPを設定。
port部分にはganacheのログより出力されているポート番号"8545"を設定truffle-config.js(修正後)module.exports = { // Uncommenting the defaults below // provides for an easier quick-start with Ganache. // You can also follow this format for other networks; // see <http://truffleframework.com/docs/advanced/configuration> // for more details on how to specify configuration options! networks: { development: { host: "172.18.0.5", port: 8545, network_id: "*" }, test: { host: "172.18.0.5", port: 8545, network_id: "*" } } };以上で設定完了です。
実際に動かしてみます。4.動かしてみる
テストコマンドを実行してみます。
$ truffle test ./test/TestMetacoin.sol

Compiling your contracts...
===========================
> Compiling ./contracts/ConvertLib.sol
> Compiling ./contracts/MetaCoin.sol
> Compiling ./contracts/Migrations.sol
> Compiling ./test/TestMetacoin.sol
> Artifacts written to /tmp/test-11933-4213-1ellnuw.vqf8
> Compiled successfully using:
   - solc: 0.5.0+commit.1d4f565a.Emscripten.clang


  TestMetacoin
    ✓ testInitialBalanceUsingDeployedContract (71ms)
    ✓ testInitialBalanceWithNewMetaCoin (53ms)


  2 passing (5s)
上手く動きました。
次にマイグレード。$ truffle migrate Compiling your contracts... =========================== > Compiling ./contracts/ConvertLib.sol > Compiling ./contracts/MetaCoin.sol > Compiling ./contracts/Migrations.sol > Artifacts written to /root/MetaCoin/build/contracts > Compiled successfully using: - solc: 0.5.0+commit.1d4f565a.Emscripten.clang Starting migrations... ====================== > Network name: 'development' > Network id: 1554263922708 > Block gas limit: 0x6691b7 1_initial_migration.js ====================== Deploying 'Migrations' ---------------------- > transaction hash: 0x93b3c0b20a73046215d3e7ad63ee2e8a8ecfdf32b731615d614b1cb40aa01eea > Blocks: 0 Seconds: 0 > contract address: 0x62caC8AC9558d91432feF6dcf578524116F61Ed6 > account: 0x6dF229104C1b6F04BBD68Afd07D535D2ccaDac28 > balance: 99.6615823 > gas used: 284908 > gas price: 20 gwei > value sent: 0 ETH > total cost: 0.00569816 ETH > Saving migration to chain. > Saving artifacts ------------------------------------- > Total cost: 0.00569816 ETH 2_deploy_contracts.js ===================== Deploying 'ConvertLib' ---------------------- > transaction hash: 0xa244d12e476b292969371bf60a8440f1942f18301b93dfd2ee83009d40adb073 > Blocks: 0 Seconds: 0 > contract address: 0x97F9Af1C95b97c26ea6b4f767aCc5b1e1bfa46E5 > account: 0x6dF229104C1b6F04BBD68Afd07D535D2ccaDac28 > balance: 99.6585058 > gas used: 111791 > gas price: 20 gwei > value sent: 0 ETH > total cost: 0.00223582 ETH Linking ------- * Contract: MetaCoin <--> Library: ConvertLib (at address: 0x97F9Af1C95b97c26ea6b4f767aCc5b1e1bfa46E5) Deploying 'MetaCoin' -------------------- > transaction hash: 0x4d05c81739bdc99d575782b8acdd02d7469db7377d1349ba67a35a7fadfc1733 > Blocks: 0 Seconds: 0 > contract address: 0x4C36EC7895F0Cb518f07CE24A2905667e770A29D > account: 0x6dF229104C1b6F04BBD68Afd07D535D2ccaDac28 > balance: 99.65133436 > gas used: 358572 > gas price: 20 gwei > value sent: 0 ETH > total cost: 0.00717144 ETH > Saving migration to chain. > Saving artifacts ------------------------------------- > Total cost: 0.00940726 ETH Summary ======= > Total deployments: 3 > Final cost: 0.01510542 ETH上手く動いていそうです。
環境構築完了です!あとは、truffle側のDockerに共有ディレクトリを設定したり、ソースをアップロードするなどすれば、
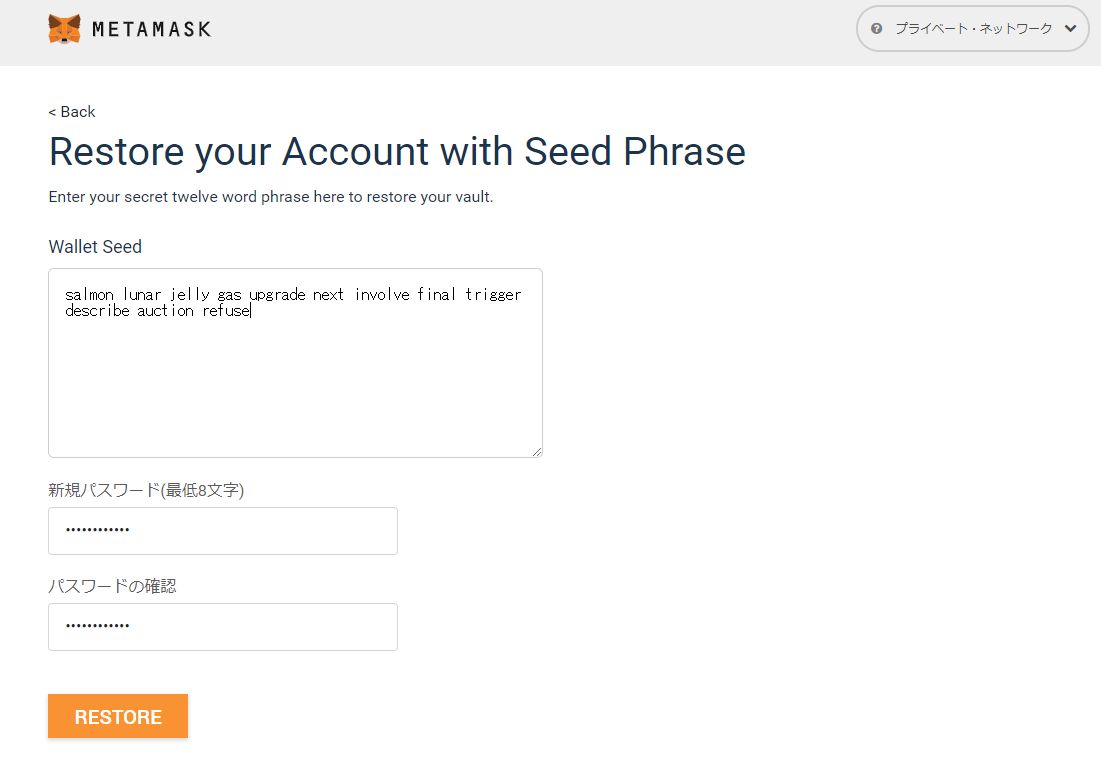
nodejsなどを入れなくても、Docker上でスマートコントラクトの開発ができます!番外編① metamaskでganacheを参照してみる
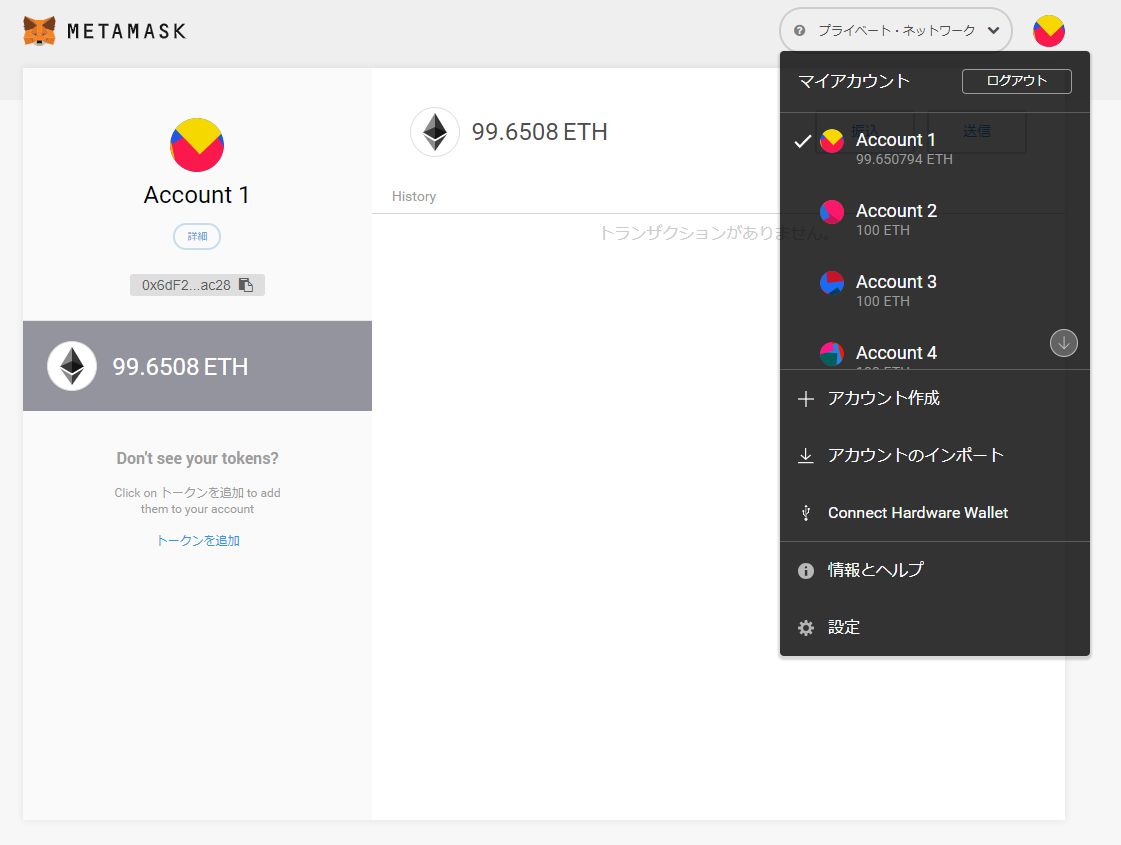
ganache起動時に表示されたニーモニックを設定。
ganacheで作成されたアカウントを参照できました!
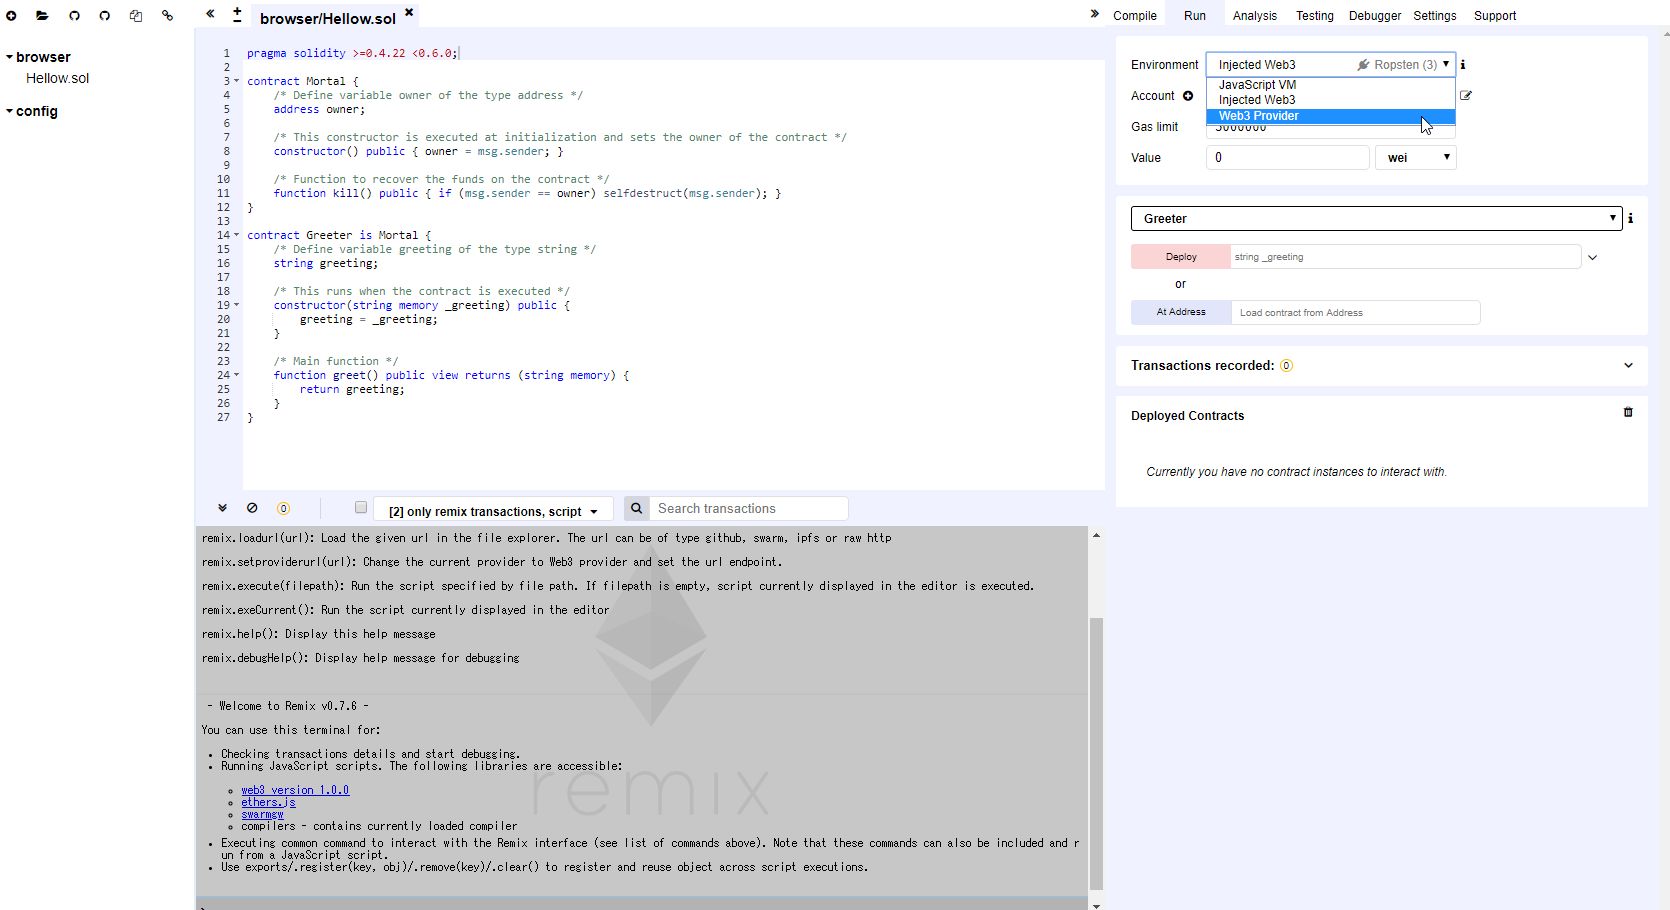
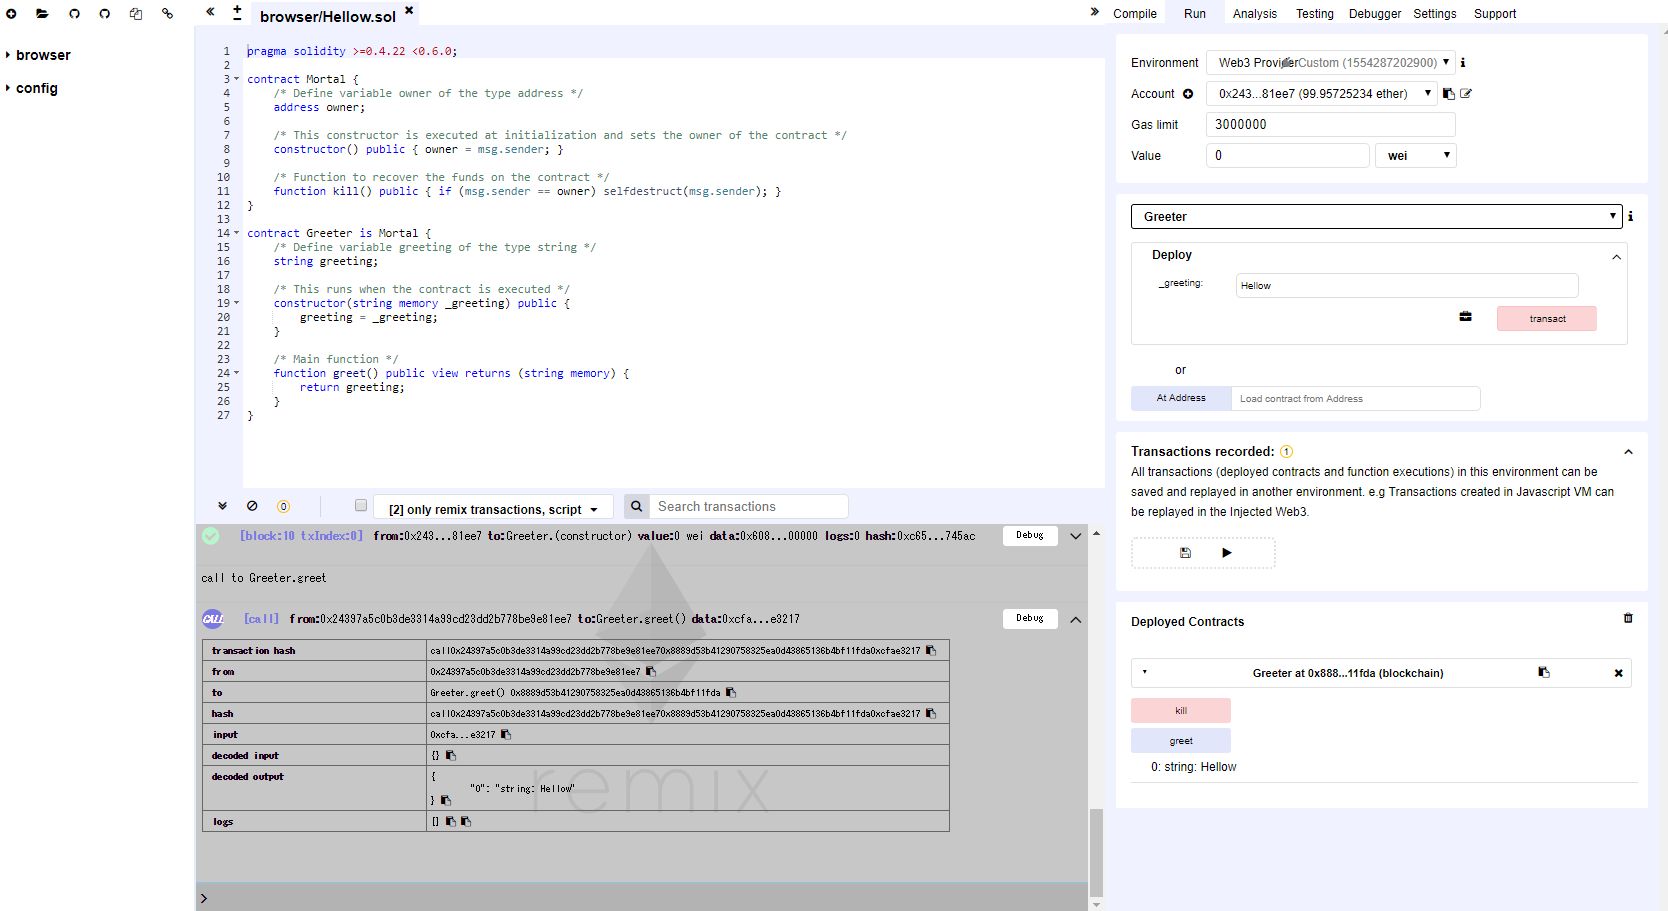
番外編② Remixでganacheを参照してみる
EnvironmentでWeb3Providerを選択。
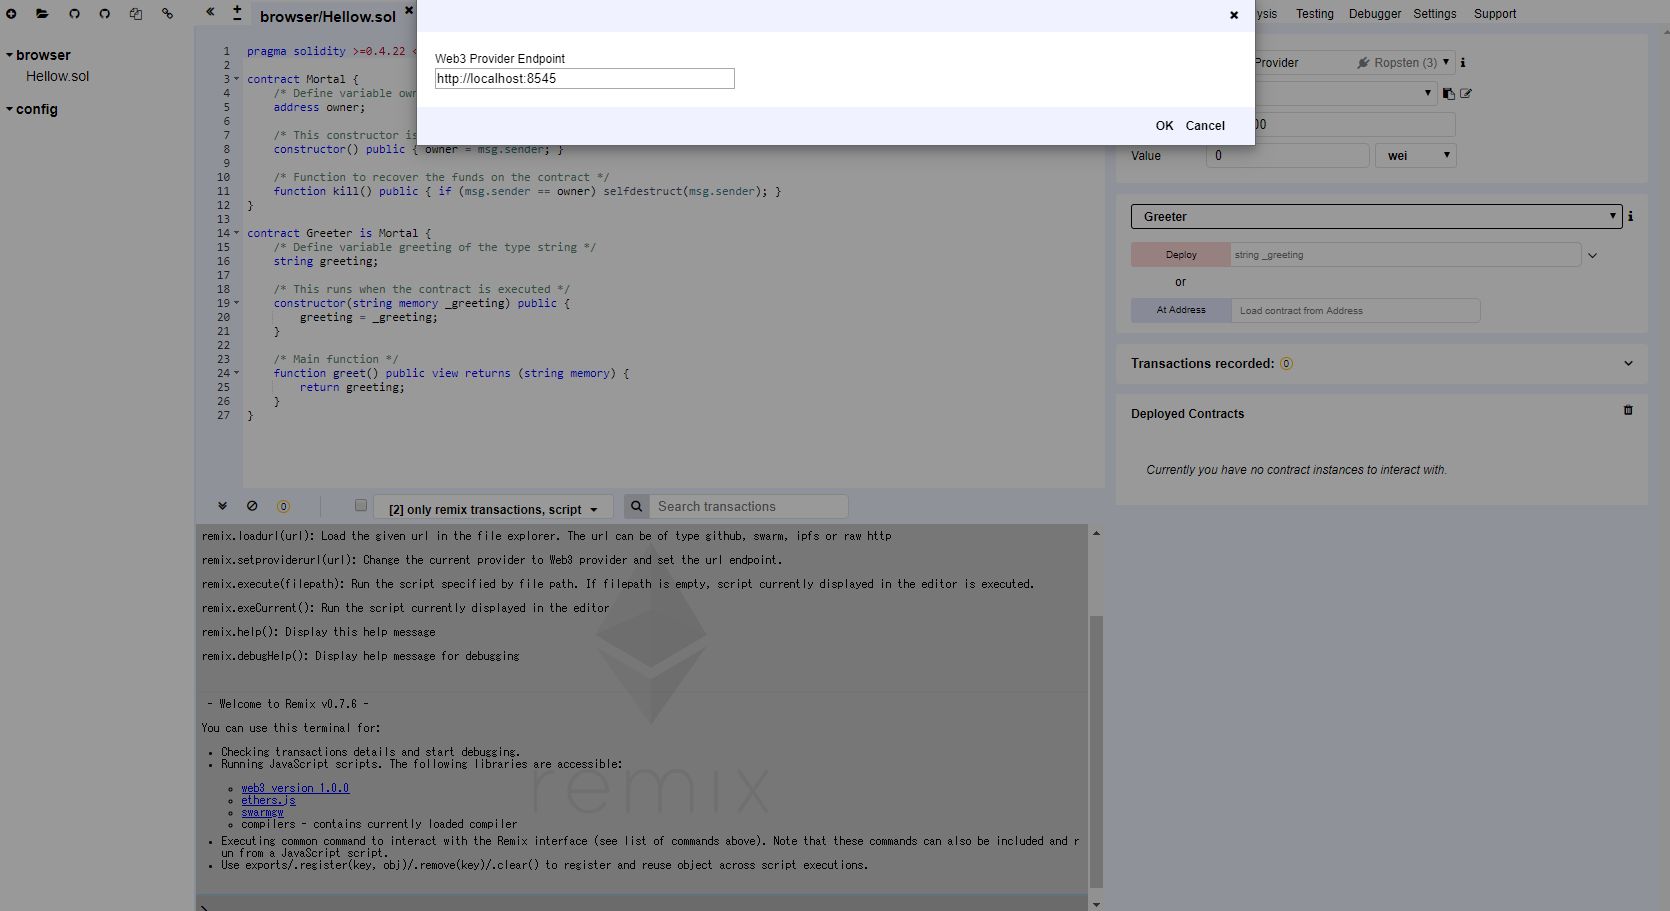
ganacheを参照するように設定。
Accountを参照すると沢山アカウントが入っています。
Hollowが返ってくるようにデプロイして、スマートコントラクトを実行。
ちゃんとHollowが返ってきました!まとめ
今回はDockerでganacheとtruffleの環境を作成してみました。
ganacheはオプションでデータの永続化など色々設定できるみたいなので、そのうちやってみたいと思います。

- 投稿日:2019-04-03T20:18:21+09:00
ことりんと一緒 Springもね - 10. データベースマイグレーション - Flyway for MySQL
概要 / 説明
ことりんと一緒 Springもね - 9. データベースマイグレーション - Flyway では、Flywayを利用したデータベースレイアウトのバージョン管理の方法を確認しました。
そこで利用したデータベースは、作業の簡略化のために H2 Database を使用し、アプリケーションの起動とともに利用できるインメモリデータベースの状態で実施しました。一方で実際にアプリケーションを稼働させる場合は、インメモリデータベースではなく、データベースサーバを立ち上げてドライバ経由で接続するケースがほとんどだと思います。
そこで、今回は MySQL をデータベースサーバとして起動し、それに対して Flyway を使用してみます。
前提 / 環境
ランタイムバージョン
- Kotlin : 1.3.21
- SpringBoot : 2.1.1.RELEASE
Spring Dependencies
- Web
- JDBC
- JPA
- Actuator
- Flyway
開発環境
- OS : Mac
- IDE : IntelliJ IDEA
- Build : Gradle
手順 / 解説
MySQL サーバの準備
MySQLサーバは Docker コンテナを利用して簡単に用意します、
docker-compose.yml の用意
次の環境が起動するようなd
ocker-compose.ymlを作成します。
項目 内容 MySQL バージョン 5.7 アクセスユーザ guest アクセスパスワード guest version: "3.7" services: db: image: mysql:5.7 container_name: my_db environment: MYSQL_ROOT_PASSWORD: root MYSQL_USER: guest MYSQL_PASSWORD: guest MYSQL_DATABASE: guest restart: always command: --default-authentication-plugin=mysql_native_password ports: - 3306:3306MySQL サーバの起動
docker-compose.ymlの配置場所、またはファイルを-fオプションで指定して、次のコマンドで Docker コンテナとして MySQL を起動します。$ docker-compose up -dApplication 定義
以下のデータベース接続定義及びFlyway定義を追加します。
項目 設定値 JDBCドライバ com.mysql.cj.jdbc.Driver データベース接続URL jdbc:mysql://localhost:3306/app?autoReconnect=true&useSSL=false アクセスユーザ guest アクセスパスワード guest Flyway ベースラインバージョン 0.0.0 Flyway ベースライン説明 << Flyway Baseline >> Flyway マイグレーション・スクリプトの配置場所 classpath:db/migration spring: datasource: driver-class-name: com.mysql.cj.jdbc.Driver url: jdbc:mysql://localhost:3306/app?autoReconnect=true&useSSL=false username: guest password: guest flyway: enabled: true url: jdbc:mysql://localhost:3306/app?autoReconnect=true&useSSL=false user: guest password: guest baseline-on-migrate: true baseline-version: 0.0.0 baseline-description: << Flyway Baseline >> locations: classpath:db/migrationFlyway実行 (アプリケーション起動)
アプリケーションの起動時にFlywayを実行します。
SpringBoot 実行
以下のコマンドで SpringBoot を実行します。
$ ./gradlew bootRun起動時ログから Flyway が正常実行されている事が確認できます。
[           main] o.f.c.internal.license.VersionPrinter    : Flyway Community Edition 5.2.4 by Boxfuse
[           main] o.f.c.internal.database.DatabaseFactory  : Database: jdbc:mysql://localhost:3306/app (MySQL 5.7)
[           main] o.f.core.internal.command.DbValidate     : Successfully validated 2 migrations (execution time 00:00.019s)
[           main] o.f.c.i.s.JdbcTableSchemaHistory         : Creating Schema History table: `app`.`flyway_schema_history`
[           main] o.f.core.internal.command.DbMigrate      : Current version of schema `app`: << Empty Schema >>
[           main] o.f.core.internal.command.DbMigrate      : Migrating schema `app` to version 1.0.0 - Create-InitialTable
[           main] o.f.core.internal.command.DbMigrate      : Migrating schema `app` to version 1.1.0 - Insert-InitialData
[           main] o.f.core.internal.command.DbMigrate      : Successfully applied 2 migrations to schema `app` (execution time 00:00.109s)
MySQL 確認
MySQLにアクセスしFlywayによる変更を確認します。
mysql> show tables;
+-----------------------+
| Tables_in_app         |
+-----------------------+
| flyway_schema_history |
| message               |
+-----------------------+
mysql> select id,title,message from message; +--------------------------------------+-------+--------------------+ | id | title | message | +--------------------------------------+-------+--------------------+ | 12345678-e9d9-4d1e-ba79-01f8b8715ba9 | INIT | Inserted by FLYWAY | | 7b23257c-e9d9-4d1e-ba79-01f8b8715ba9 | INIT | Inserted by FLYWAY | +--------------------------------------+-------+--------------------+ 2 rows in set (0.00 sec)
messageテーブルと、Flyway の履歴管理テーブルflyway_schema_historyが作成されている事が確認でき、
データが追加されている事も確認できました。まとめ / 振り返り
組み込みモードでもサーバモードでも起動しているデータベースに対してアクセスする事ができれば、Flywayが使用できる事が確認できました。
データベースレイアウトに変更が発生しがちな開発中のタイミングでは非常に便利なツールだと思います。今回のソース

- 投稿日:2019-04-03T19:09:20+09:00
ネットから隔離されたCentOS7 サーバに Docker を導入する
はじめに
あまり需要のなさそうな情報だけど、もしかしたら開発環境がネットから徹底的に隔離されたSI開発現場などで同じことを考えてる人がいるかも……との思いから共有。作業概要は以下のとおり:
- ネットに繋がった CentOS7 で Docker CE のインストールに必要な全 rpm をダウンロードする
- ダウンロードした rpm 群からリポジトリを作成する
- リポジトリをインストール先環境へ転送し、ローカルインストールを行う
作業環境
ダウンロード用環境
- CentOS 7.5
- インターネット接続有り
インストール先環境
- CentOS 7.5
- Docker CE 18.09
- 開発用のクローズドLANのみに接続
yumdownloader を使って rpm をダウンロード
インターネットに接続されたダウンロード用環境(今回は Vagrant で CentOS 7.5 環境を作成)にて
yumdownloaderを使用して依存関係含めたすべての rpm を入手する。# mkdir -p /work/dockerrpm # cd /work/dockerrpm # yum-config-manager --add-repo https://download.docker.com/linux/centos/docker-ce.repo # yumdownloader --resolve docker-ce終わると、コマンドを実行したディレクトリ配下にインストールに必要となる全 rpm がダウンロードされている。
# ls -l
total 68200
-rw-r--r--. 1 root root   255648 Nov 12 14:21 audit-2.8.4-4.el7.x86_64.rpm
-rw-r--r--. 1 root root   102448 Nov 12 14:21 audit-libs-2.8.4-4.el7.x86_64.rpm
-rw-r--r--. 1 root root    78216 Nov 12 14:21 audit-libs-python-2.8.4-4.el7.x86_64.rpm
-rw-r--r--. 1 root root   302068 Nov 12 14:22 checkpolicy-2.5-8.el7.x86_64.rpm
-rw-r--r--. 1 root root 23217684 Mar 28 05:00 containerd.io-1.2.5-3.1.el7.x86_64.rpm
-rw-r--r--. 1 root root    38436 Nov 30 21:05 container-selinux-2.74-1.el7.noarch.rpm
-rw-r--r--. 1 root root 19625052 Mar 28 05:00 docker-ce-18.09.4-3.el7.x86_64.rpm
-rw-r--r--. 1 root root 14678328 Mar 28 05:00 docker-ce-cli-18.09.4-3.el7.x86_64.rpm
-rw-r--r--. 1 root root    67652 Nov 12 14:31 libcgroup-0.41-20.el7.x86_64.rpm
-rw-r--r--. 1 root root   165932 Nov 12 14:37 libselinux-2.5-14.1.el7.x86_64.rpm
-rw-r--r--. 1 root root   241132 Nov 12 14:37 libselinux-python-2.5-14.1.el7.x86_64.rpm
-rw-r--r--. 1 root root   155092 Nov 12 14:37 libselinux-utils-2.5-14.1.el7.x86_64.rpm
-rw-r--r--. 1 root root   154244 Nov 12 14:37 libsemanage-2.5-14.el7.x86_64.rpm
-rw-r--r--. 1 root root   115284 Nov 12 14:37 libsemanage-python-2.5-14.el7.x86_64.rpm
-rw-r--r--. 1 root root   304196 Nov 12 14:37 libsepol-2.5-10.el7.x86_64.rpm
-rw-r--r--. 1 root root   470188 Feb  1 17:49 policycoreutils-2.5-22.el7_2.5-29.el7_6.1.x86_64.drpm
-rw-r--r--. 1 root root   938004 Feb  1 16:21 policycoreutils-2.5-29.el7_6.1.x86_64.rpm
-rw-r--r--. 1 root root   466748 Feb  1 16:22 policycoreutils-python-2.5-29.el7_6.1.x86_64.rpm
-rw-r--r--. 1 root root    32880 Jul  4  2014 python-IPy-0.75-6.el7.noarch.rpm
-rw-r--r--. 1 root root   495060 Feb  1 16:26 selinux-policy-3.13.1-229.el7_6.9.noarch.rpm
-rw-r--r--. 1 root root  7246376 Feb  1 16:26 selinux-policy-targeted-3.13.1-229.el7_6.9.noarch.rpm
-rw-r--r--. 1 root root   635184 Nov 12 14:46 setools-libs-3.3.8-4.el7.x86_64.rpm
レポジトリの作成
createrepoを使用して Docker CE インストール用のレポジトリを作成。createrepoコマンドがない場合 yum でインストール。# yum install -y createrepo先にダウンロードした rpm のあるディレクトリを指定してレポジトリを作成。成功すると指定したディレクトリの配下に
repodataディレクトリが作成され、レポジトリデータが格納される。# createrepo /work/dockerrpm Spawning worker 0 with 21 pkgs Workers Finished Saving Primary metadata Saving file lists metadata Saving other metadata Generating sqlite DBs Sqlite DBs completeついでに
dockerrpm.repoというリポジトリ設定もここでつくっておく。/work/dockerrpm/dockerrpm.repo[dockerrpm] name=dockerrpm baseurl=file:///work/dockerrpm gpgcheck=0インストール先環境へ転送するために tar.gz にまとめておく。
# cd /
# tar -zcvf dockerrpm.tar.gz work/dockerrpm
インストール先環境へインストール
作成した tar.gz ファイルをインストール先環境へ転送。クローズドな開発環境だとファイルサイズやら持ち込む経路やら媒体やら申請やら何やらでここが地味に高いハードルになることがままあるけどそこはなんとかがんばって……。
無事 tar.gz ファイルをインストール先環境に転送できたら展開する。# cd / # tar -zxvf dockerrpm.tar.gz作成しておいたリポジトリ設定を
yum-config-managerで追加する。# yum-config-manager --add-repo file:///work/dockerrpm/dockerrpm.repo Failed to set locale, defaulting to C Loaded plugins: fastestmirror adding repo from: file:///work/dockerrpm/dockerrpm.repo grabbing file file:///work/dockerrpm/dockerrpm.repo to /etc/yum.repos.d/dockerrpm.repo repo saved to /etc/yum.repos.d/dockerrpm.repoいざインストール。ネットに繋がってないので余計なリポジトリ参照を行わないよう除外しつつ、今回作成したリポジトリのみを有効にする。
# yum install -y --disablerepo=\* --enablerepo=dockerrpm /work/dockerrpm/docker-ce-18.09.4-3.el7.x86_64.rpm最終的に以下のメッセージが出力されていればインストールは成功。
Installed:
  docker-ce.x86_64 3:18.09.4-3.el7

Dependency Installed:
  container-selinux.noarch 2:2.74-1.el7                    containerd.io.x86_64 0:1.2.5-3.1.el7                    docker-ce-cli.x86_64 1:18.09.4-3.el7

Dependency Updated:
  libselinux.x86_64 0:2.5-14.1.el7                             libselinux-python.x86_64 0:2.5-14.1.el7                 libselinux-utils.x86_64 0:2.5-14.1.el7
  libsemanage.x86_64 0:2.5-14.el7                              libsemanage-python.x86_64 0:2.5-14.el7                  libsepol.x86_64 0:2.5-10.el7
  policycoreutils.x86_64 0:2.5-29.el7_6.1                      policycoreutils-python.x86_64 0:2.5-29.el7_6.1          selinux-policy.noarch 0:3.13.1-229.el7_6.9
  selinux-policy-targeted.noarch 0:3.13.1-229.el7_6.9          setools-libs.x86_64 0:3.3.8-4.el7

Complete!
動作確認
Docker を起動し、バージョンを確認。
# systemctl start docker
# docker version
Client:
 Version:           18.09.4
 API version:       1.39
 Go version:        go1.10.8
 Git commit:        d14af54266
 Built:             Wed Mar 27 18:34:51 2019
 OS/Arch:           linux/amd64
 Experimental:      false

Server: Docker Engine - Community
 Engine:
  Version:          18.09.4
  API version:      1.39 (minimum version 1.12)
  Go version:       go1.10.8
  Git commit:       d14af54
  Built:            Wed Mar 27 18:04:46 2019
  OS/Arch:          linux/amd64
  Experimental:     false
別途転送しておいたコンテナイメージを動かしてみる。
# docker load < httpd.tar.gz
7b4e562e58dc: Loading layer [==================================================>]  58.44MB/58.44MB
30d0b099e805: Loading layer [==================================================>]   2.56kB/2.56kB
3fc0ec65884c: Loading layer [==================================================>]   34.6MB/34.6MB
04e703344825: Loading layer [==================================================>]  43.59MB/43.59MB
00adc8ff58d3: Loading layer [==================================================>]  3.584kB/3.584kB
Loaded image: httpd:latest

# docker images
REPOSITORY          TAG                 IMAGE ID            CREATED             SIZE
httpd               latest              dc917399d59d        2 months ago        132MB

# docker run -dti -h httpserver --name httpserver -p 80:80 httpd:latest /bin/bash
5a104396c7bf6edece237af6dd08f90757459b9515a1dfec189c0f8b42946864
# docker exec httpserver apachectl start
AH00558: httpd: Could not reliably determine the server's fully qualified domain name, using 172.17.0.2. Set the 'ServerName' directive globally to suppress this message
httpd.conf がデフォルトのままなので怒られるけど起動はする。
# curl localhost
<html><body><h1>It works!</h1></body></html>
無事動いた。あとは rc.local に Docker 起動を設定しておくなど。
参考
Get Docker CE for CentOS
yum を使用して、パッケージをインストールせずにダウンロードだけ行う
RPMを個別にダウンロードし、yumのローカルリポジトリを構築する
- 投稿日:2019-04-03T18:21:55+09:00
DockerでWordPress環境を構築したらしくじった。でも頑張ったら上手く行ったので情報共有します。
初投稿です。覚書のようなものなので、ざーっとラフに記載します。
こちらの記事を参考にさせていただきつつ、Docker上でWordPressのローカル環境を構築してみたものの、自分の環境ではうまく動きませんでした。環境は下記。
- MacBookPro2018 + MacOSX Mojave(10.14.3)
- DockerDesktop 2.0.0.3(31259)
ローカルWEBサーバー(WordPress側)、ローカルDBサーバー(MySQL側)共に動作しているのですが、WordPress側がMySQL側を参照できていないようで
Error establishing a database connectionが表示されました。原因を調べたところ、MySQLのバージョンがVer8系だったことに起因していました。バージョン未指定でMySQLのImageをDocker Hubからpullすると、latest(Ver8系最新版)がダウンロードされます。しかしWordPressはそのままではMySQL Ver8系では正常動作しないようです。
ググってみたところ、MySQL Ver8系でWordPressを正常動作させる方法は色々あるようですが、一旦動作するところまで持っていきたかったため、
docker runコマンドでコンテナを走らせる際、Ver5.7系のImageを使うよう、下記の指定をしたところ無事に動作しました。docker pull mysql:5.7.25 docker pull wordpress:4.9.1 docker run --name mysql5.7.25 -e MYSQL_ROOT_PASSWORD=password -d mysql:5.7.25 docker run --name wordpress4.9.1 -v /Users/dee909/dev/docker:/tmp --link mysql5.7.25:mysql -d -p 8080:80 wordpress:4.9.1動作検証は、WordPress Ver4.9.1、MySQL Ver5.7.25で行いました。
もし、私と同様に行き詰まった際はお試しください。
セキュリティ等の観点からWordPress、MySQL共に最新版が望ましいので、自力解決できる方はチャレンジいただければと思います。
そしてヒントを下さった、@pugiemonnさん、@maimaxさん、ありがとうございました。追記1
コンテナを走らせる際に、MySQL側にポートフォワーディングを追加してやると、Sequel Pro等からもDBへのアクセスが可能になります。下記はポート3307を3306にフォワードさせています。GUI操作がお好みの方は、一緒に設定してしまうと良いと思います。
docker run --name mysql5.7.25 -e MYSQL_ROOT_PASSWORD=password -d -p 3307:3306 mysql:5.7.25
追記2
WordPress側の
-vオプションはホストとコンテナ内のディレクトリ共有のための紐付けですので、ご自身の環境に合わせて変更してください。共有が不要ならば、まるっと削除しても問題ないです。
サンプルのdocker runコマンドではホスト上の/Users/dee909/dev/dockerディレクトリをコンテナ内の/tmpディレクトリに紐付けしていますが、-v /Users/dee909/dev/docker:/var/www/htmlと変更することで、ホスト側(MacOSXやWindows上)にWordpressのファイル一式を設置し、コンテナ上でWordpressを動作させることができます。
こちらの方がホスト側のテキストエディタでコード編集が行えますし、ホスト上のディレクトリをgit管理することもできますので、使い勝手が良いと思います。

- 投稿日:2019-04-03T17:41:55+09:00
nVIDIA-docker2 を dockerから導入してみよう。
初めに
nVIDIA docker2を使って、機械学習の環境を作っている方も多いと思います。
今回はその手順をまとめたものを記事にしました。ちなみに、これは前回書いたエントリの続き的な物になります。
AWS EC2のGPUが使えるubuntu16.04に、自力でCUDA 9.2/CuDNNを入れてみよう前回は、cuda/cudnnを導入した環境まで構築しました。 次はdockerの環境を導入します。
環境は、大体以下。
ubuntu: 16.04 (AWS上です)
CUDA: 9.2
cudnn: 7_7.5.0.56-1そもそも、なぜDockerを使うのか?
すでに多くの方が説明済みかと思いますので、ここでは多くは触れません。
大きくは以下のメリットがあるかと思います。
- コンテナ化すると、複製が容易かつ作った環境をどこにでも持っていくことができる
- 気軽に複製可能なので、変更したり環境の管理ができる。
- クラウドでもオンプレでも簡単に展開できる。チームに展開しやすい。
今回は、Docker を導入後、nVidia Dockerを導入して軽く確認するところまで説明します。
Docker のセットアップ
これも同様。 基本的に公式の手順を見るほうが良いです。
https://docs.docker.com/install/linux/docker-ce/ubuntu/
古いバージョンのものが入っていないか確認をします。
$ dpkg -l | grep docker
$ dpkg -l | grep runc
$ dpkg -l | grep containerd
$
次に必要なパッケージとgpgキーの入手
$ sudo apt-get update
~略~
$ sudo apt install apt-transport-https ca-certificates curl gnupg-agent software-properties-common
~略~
$ curl -fsSL https://download.docker.com/linux/ubuntu/gpg | sudo apt-key add -
~略~
リポジトリなどを追加し、docker本体をインストールします。
※バージョンを指定しない場合の手順です。

$ sudo apt-key fingerprint 0EBFCD88
$ sudo add-apt-repository \
   "deb [arch=amd64] https://download.docker.com/linux/ubuntu \
   $(lsb_release -cs) \
   stable"
$ sudo apt update
$ sudo apt install docker-ce docker-ce-cli containerd.io
なお、VLを指定したい場合は以下を実行するとよいでしょう。
※バージョンを指定する場合は↓のコマンドでバージョンの一覧を取得して、指定します。
$ apt-cache madison docker-ce
 docker-ce | 5:18.09.3~3-0~ubuntu-xenial | https://download.docker.com/linux/ubuntu xenial/stable amd64 Packages
 docker-ce | 5:18.09.2~3-0~ubuntu-xenial | https://download.docker.com/linux/ubuntu xenial/stable amd64 Packages
 docker-ce | 5:18.09.1~3-0~ubuntu-xenial | https://download.docker.com/linux/ubuntu xenial/stable amd64 Packages
 docker-ce | 5:18.09.0~3-0~ubuntu-xenial | https://download.docker.com/linux/ubuntu xenial/stable amd64 Packages
 docker-ce | 18.06.3~ce~3-0~ubuntu | https://download.docker.com/linux/ubuntu xenial/stable amd64 Packages
 docker-ce | 18.06.2~ce~3-0~ubuntu | https://download.docker.com/linux/ubuntu xenial/stable amd64 Packages
 docker-ce | 18.06.1~ce~3-0~ubuntu | https://download.docker.com/linux/ubuntu xenial/stable amd64 Packages
…
無事インストールできたことの確認をします。
hello-worldというコンテナイメージをPullしてきて、で、それを起動させるとよいかも。$ sudo docker --version Docker version 18.09.3, build 774a1f4 $ sudo docker run hello-world Unable to find image 'hello-world:latest' locally latest: Pulling from library/hello-world 1b930d010525: Pull complete Digest: sha256:2557e3c07ed1e38f26e389462d03ed943586f744621577a99efb77324b0fe535 Status: Downloaded newer image for hello-world:latest Hello from Docker! This message shows that your installation appears to be working correctly. To generate this message, Docker took the following steps: 1. The Docker client contacted the Docker daemon. 2. The Docker daemon pulled the "hello-world" image from the Docker Hub. (amd64) 3. The Docker daemon created a new container from that image which runs the executable that produces the output you are currently reading. 4. The Docker daemon streamed that output to the Docker client, which sent it to your terminal. To try something more ambitious, you can run an Ubuntu container with: $ docker run -it ubuntu bash Share images, automate workflows, and more with a free Docker ID: https://hub.docker.com/ For more examples and ideas, visit: https://docs.docker.com/get-started/これで、dockerまでは完了です。
nVIDIA-Docker 2 のセットアップ
では次にnvidia-docker2のセットアップになります。
ネット上の記事を見ると、nvidia-docker 1 の情報が散見されますので、
色んなページを見まくっている人は気を付けたほうが良いかもしれません。nVidia dockerについても、基本的に公式手順を見ます。
https://github.com/NVIDIA/nvidia-docker
以降の手順は、公式手順を少しだけアレンジされているものです。
runtimeも同時セットアップをしています。$ curl -s -L https://nvidia.github.io/nvidia-docker/gpgkey | \ > sudo apt-key add - OK $ distribution=$(. /etc/os-release;echo $ID$VERSION_ID) $ curl -s -L https://nvidia.github.io/nvidia-docker/$distribution/nvidia-docker.list | \ > sudo tee /etc/apt/sources.list.d/nvidia-docker.list deb https://nvidia.github.io/libnvidia-container/ubuntu16.04/$(ARCH) / deb https://nvidia.github.io/nvidia-container-runtime/ubuntu16.04/$(ARCH) / deb https://nvidia.github.io/nvidia-docker/ubuntu16.04/$(ARCH) / $ sudo apt update利用中のdockerのVersionと一致している物を確認して、インストールします。
↑のほうで、$ sudo docker --version と実行していた結果を使います。$ apt-cache madison nvidia-docker2 nvidia-container-runtime | grep <dockerのVersion> nvidia-docker2 | 2.0.3+docker18.09.3-1 | https://nvidia.github.io/nvidia-docker/ubuntu16.04/amd64 Packages nvidia-container-runtime | 2.0.0+docker18.09.3-1 | https://nvidia.github.io/nvidia-container-runtime/ubuntu16.04/amd64 Packages $ $ sudo apt install -y nvidia-docker2=2.0.3+docker18.09.3-1 nvidia-container-runtime=2.0.0+docker18.09.3-1インストールができたかどうか確認しましょう。 CLIの動作などで確認になるのかなと思います。
$ nvidia-container-cli info
NVRM version:   396.82
CUDA version:   9.2

Device Index:   0
Device Minor:   0
Model:          Tesla K80
Brand:          Tesla
GPU UUID:       GPU-68403f5f-27e8-1262-bdd8-f12bd502d1b2
Bus Location:   00000000:00:1e.0
Architecture:   3.7
ubuntu@ip-10-10-224-17:~$
ubuntu@ip-10-10-224-17:~$
ubuntu@ip-10-10-224-17:~$ nvidia-container-cli list
/dev/nvidiactl
~略~
/usr/lib32/nvidia-396/libGLESv1_CM_nvidia.so.396.82
/run/nvidia-persistenced/socket
docker deamon の condigをreloadします。
$ sudo pkill -SIGHUP dockerdまた、個人的なおすすめとして、
docker の操作を一般ユーザにも開放したほうがよいと思います。
以下は、sudo 不要で一般ユーザでも操作できるようにするための手順です。
これをやると、ubuntu ユーザでsudoなしでdockerが操作できます。$ groups ubuntu adm dialout cdrom floppy sudo audio dip video plugdev netdev $ sudo adduser -a ubuntu docker Adding user `ubuntu' to group `docker' ... Adding user ubuntu to group docker Done. $ ~再ログインなどする~ $ groups ubuntu adm dialout cdrom floppy sudo audio dip video plugdev netdev lxd docker $ということで、 nvidia docker2 が正常に動くことを確認します。
使うコンテナのイメージは公式に提供済みのものがありますのでそれを指定。
cuda toolkitのnvidia-smiとcuda CLIの nvccの動作確認ができれば
コンテナからGPUが使える状態になっているのかなーと思います。$ docker run --runtime=nvidia --rm nvidia/cuda:9.2-cudnn7-devel-ubuntu16.04 nvidia-smi Fri Mar 8 12:37:33 2019 +-----------------------------------------------------------------------------+ | NVIDIA-SMI 396.82 Driver Version: 396.82 | |-------------------------------+----------------------+----------------------+ | GPU Name Persistence-M| Bus-Id Disp.A | Volatile Uncorr. ECC | | Fan Temp Perf Pwr:Usage/Cap| Memory-Usage | GPU-Util Compute M. | |===============================+======================+======================| | 0 Tesla K80 Off | 00000000:00:1E.0 Off | 0 | | N/A 61C P0 57W / 149W | 0MiB / 11441MiB | 99% Default | +-------------------------------+----------------------+----------------------+ +-----------------------------------------------------------------------------+ | Processes: GPU Memory | | GPU PID Type Process name Usage | |=============================================================================| | No running processes found | +-----------------------------------------------------------------------------+ $ docker run --runtime=nvidia --rm nvidia/cuda:9.2-cudnn7-devel-ubuntu16.04 /usr/local/cuda-9.2/bin/nvcc -V nvcc: NVIDIA (R) Cuda compiler driver Copyright (c) 2005-2018 NVIDIA Corporation Built on Tue_Jun_12_23:07:04_CDT_2018 Cuda compilation tools, release 9.2, V9.2.148これでnVidia Dockerの導入まで終わりです。
次は、導入したnvidia docker を使って、そこにフレームワークを導入するとか、サンプルを動かす例を書いていくかもしれません。たぶん
- 投稿日:2019-04-03T17:34:39+09:00
PostgreSQL 9.6 on RHEL の Docker を作成する
PostgreSQL on RHEL の Docker を作成します。
Red Hat Enterprise Linux は開発目的であれば無料で利用することができます。
https://redhat.sios.jp/red-hat-developer-programこれを利用して、RHEL 上に PostgreSQL をインストールした Docker イメージを作成したいと思います。
Developer Program への登録は上記記事を参照してください。intra-mart の検証用として利用したいので、intra-mart が要求する設定をあらかじめ実施します。
これによって、docker run 後何も考えずにすぐに検証用として利用できるような PostgreSQL 9.6 の環境が作れるようになります。DockerfileFROM registry.access.redhat.com/rhel7.6 EXPOSE 22 5432 ENV DEBIAN_FRONTEND noninteractive # subscription COPY subscribe_rhel.sh /subscribe_rhel.sh RUN chmod +x /subscribe_rhel.sh \ && /subscribe_rhel.sh # yum RUN yum -y update \ && yum provides -y '*/applydeltarpm' \ && yum groupinstall -y 'Development Tools' \ && yum install -y initscripts curl tar unzip mlocate openssh-server openssl-devel \ && yum localinstall -y https://download.postgresql.org/pub/repos/yum/9.6/redhat/rhel-7-x86_64/pgdg-redhat96-9.6-3.noarch.rpm \ && yum install -y postgresql96-server epel-release multitail ncurses-devel ncurses-static ncurses-term \ && rm -rf /var/cache/yum/* \ && yum clean all # locale RUN yum reinstall -y glibc-common \ && localedef -i ja_JP -f UTF-8 ja_JP.utf8 \ && touch /etc/sysconfig/i18n \ && echo 'LANG="ja_JP.UTF-8"' >> /etc/sysconfig/i18n \ && echo 'LANG="ja_JP.UTF-8"' > /etc/locale.conf ENV LANG ja_JP.UTF-8 ENV LC_ALL ja_JP.UTF-8 ENV LANGUAGE ja_JP:ja # timezone RUN yum install -y tzdata \ && echo 'ZONE="Asia/Tokyo"' > /etc/sysconfig/clock \ && echo 'UTC=false' >> /etc/sysconfig/clock \ && ln -sf /usr/share/zoneinfo/Asia/Tokyo /etc/localtime # root passwd RUN bash -c 'echo "root:password" | chpasswd' # ssh RUN sed -i -e "s/#PasswordAuthentication yes/PasswordAuthentication yes/g" /etc/ssh/sshd_config \ && sed -i -e "s/#PermitRootLogin yes/PermitRootLogin yes/g" /etc/ssh/sshd_config \ && sed -i -e "s/UsePAM yes/UsePAM no/g" /etc/ssh/sshd_config # PostgreSQL COPY setup_postgresql.sh /setup_postgresql.sh RUN chmod +x /setup_postgresql.sh \ && /setup_postgresql.sh \ && rm -f /setup_postgresql.sh COPY run.sh /run.sh RUN chmod +x /run.sh RUN updatedb CMD ["/run.sh"]yum が使えないので subscription-manager register を実行します。
username と password はあなたのアカウントを設定してください。subscribe_rhel.sh#!/bin/sh subscription-manager register --username 'FIXME' --password 'FIXME' --auto-attach exit 0さて setup_postgresql.sh ですが、CentOS 6/RHEL 6 では以下のようにしてセットアップできました。
setup_postgresql.sh#!/bin/bash service postgresql-9.6 initdb echo "listen_addresses = '*'" >> /var/lib/pgsql/9.6/data/postgresql.conf sed -i -e "s/ident$/trust/g" /var/lib/pgsql/9.6/data/pg_hba.conf sed -i -e "s/127\.0\.0\.1\/32/0\.0\.0\.0\/0/g" /var/lib/pgsql/9.6/data/pg_hba.conf sed -i -e "s/max_connections = 100/max_connections = 200/g" /var/lib/pgsql/9.6/data/postgresql.conf sed -i -e "s/shared_buffers = 128MB/shared_buffers = 512MB/g" /var/lib/pgsql/9.6/data/postgresql.conf echo "postgres:postgres" | chpasswd service postgresql-9.6 start sleep 1 su postgres -c "psql -c \"ALTER USER postgres WITH PASSWORD 'postgres'\"" su postgres -c "psql -c \"CREATE ROLE imart WITH LOGIN PASSWORD 'imart'\"" su postgres -c "psql -c \"CREATE DATABASE imart OWNER=imart encoding 'utf8' TEMPLATE template0\"" su postgres -c "psql -c \"CREATE DATABASE iap_db OWNER=imart encoding 'utf8' TEMPLATE template0\"" su postgres -c "psql -c \"CREATE DATABASE \\\"default\\\" OWNER=imart encoding 'utf8' TEMPLATE template0\"" su postgres -c "psql -d imart -c \"CREATE SCHEMA acceldocuments AUTHORIZATION imart\"" su postgres -c "psql -d iap_db -c \"CREATE SCHEMA acceldocuments AUTHORIZATION imart\"" su postgres -c "psql -d default -c \"CREATE SCHEMA acceldocuments AUTHORIZATION imart\"" service postgresql-9.6 stopここで問題は、RHEL 7 では service ではなく systemctl を利用しますが、docker build では systemctl は利用できない事です。
# service postgresql-9.6 initdb
The service command supports only basic LSB actions (start, stop, restart, try-restart, reload, force-reload, status). For other actions, please try to use systemctl.
無理やり実行しようとしても、
# /usr/pgsql-9.6/bin/postgresql96-setup initdb
Failed to get D-Bus connection: Operation not permitted
failed to find PGDATA setting in postgresql-9.6.service
問題となっているのは以下の箇所です。
/usr/pgsql-9.6/bin/postgresql96-setup# this parsing technique fails for PGDATA pathnames containing spaces, # but there's not much I can do about it given systemctl's output format... PGDATA=`systemctl show -p Environment "${SERVICE_NAME}.service" | sed 's/^Environment=//' | tr ' ' '\n' | sed -n 's/^PGDATA=//p' | tail -n 1`以下のようにして、
sed -i -e "s/if \[ x\"\$PGDATA\" = x \]; then/PGDATA=\/var\/lib\/pgsql\/9.6\/data\/\nif \[ x\"\$PGDATA\" = x \]; then/g" /usr/pgsql-9.6/bin/postgresql96-setupif [ x"$PGDATA" = x ]; thenを
PGDATA=/var/lib/pgsql/9.6/data/
if [ x"$PGDATA" = x ]; then
に置き換えてから /usr/pgsql-9.6/bin/postgresql96-setup initdb をする方法もありますが、無理やり感がぬぐえません。
結論としては、以下のように pg_ctl を利用して initdb が可能です。su postgres -c "/usr/pgsql-9.6/bin/pg_ctl -D /var/lib/pgsql/9.6/data initdb"次に問題となるのは service start と service stop です。
/usr/lib/systemd/system/postgresql-9.6.service# It's not recommended to modify this file in-place, because it will be # overwritten during package upgrades. If you want to customize, the # best way is to create a file "/etc/systemd/system/postgresql-9.6.service", # containing # .include /lib/systemd/system/postgresql-9.6.service # ...make your changes here... # For more info about custom unit files, see # http://fedoraproject.org/wiki/Systemd#How_do_I_customize_a_unit_file.2F_add_a_custom_unit_file.3F # Note: changing PGDATA will typically require adjusting SELinux # configuration as well. # Note: do not use a PGDATA pathname containing spaces, or you will # break postgresql-setup. [Unit] Description=PostgreSQL 9.6 database server Documentation=https://www.postgresql.org/docs/9.6/static/ After=syslog.target After=network.target [Service] Type=notify User=postgres Group=postgres # Note: avoid inserting whitespace in these Environment= lines, or you may # break postgresql-setup. # Location of database directory Environment=PGDATA=/var/lib/pgsql/9.6/data/ # Where to send early-startup messages from the server (before the logging # options of postgresql.conf take effect) # This is normally controlled by the global default set by systemd # StandardOutput=syslog # Disable OOM kill on the postmaster OOMScoreAdjust=-1000 Environment=PG_OOM_ADJUST_FILE=/proc/self/oom_score_adj Environment=PG_OOM_ADJUST_VALUE=0 ExecStartPre=/usr/pgsql-9.6/bin/postgresql96-check-db-dir ${PGDATA} ExecStart=/usr/pgsql-9.6/bin/postmaster -D ${PGDATA} ExecReload=/bin/kill -HUP $MAINPID KillMode=mixed KillSignal=SIGINT # Do not set any timeout value, so that systemd will not kill postmaster # during crash recovery. TimeoutSec=0 [Install] WantedBy=multi-user.targetこのようになっているため、以下のようにして起動/終了します。
# 起動
su postgres -c "PG_OOM_ADJUST_FILE=/proc/self/oom_score_adj; PG_OOM_ADJUST_VALUE=0; /usr/pgsql-9.6/bin/pg_ctl -D /var/lib/pgsql/9.6/data -l /var/lib/pgsql/9.6/data/pg_log/postgresql.log start"
# 終了
su postgres -c "/usr/pgsql-9.6/bin/pg_ctl -D /var/lib/pgsql/9.6/data stop"
まとめると以下のようにしてセットアップが可能です。
setup_postgresql.sh#!/bin/bash export PGSQL=/usr/pgsql-9.6 export PGDATA=/var/lib/pgsql/9.6/data su postgres -c "${PGSQL}/bin/pg_ctl -D $PGDATA initdb" echo "listen_addresses = '*'" >> ${PGDATA}/postgresql.conf sed -i -e "s/ident$/trust/g" ${PGDATA}/pg_hba.conf sed -i -e "s/127\.0\.0\.1\/32/0\.0\.0\.0\/0/g" ${PGDATA}/pg_hba.conf sed -i -e "s/max_connections = 100/max_connections = 200/g" ${PGDATA}/postgresql.conf sed -i -e "s/shared_buffers = 128MB/shared_buffers = 512MB/g" ${PGDATA}/postgresql.conf echo "postgres:postgres" | chpasswd su postgres -c "mkdir -p ${PGDATA}/pg_log" su postgres -c "PG_OOM_ADJUST_FILE=/proc/self/oom_score_adj; PG_OOM_ADJUST_VALUE=0; ${PGSQL}/bin/pg_ctl -D $PGDATA -l ${PGDATA}/pg_log/postgresql.log start" sleep 2 su postgres -c "psql -c \"ALTER USER postgres WITH PASSWORD 'postgres'\"" su postgres -c "psql -c \"CREATE ROLE imart WITH LOGIN PASSWORD 'imart'\"" su postgres -c "psql -c \"CREATE DATABASE imart OWNER=imart encoding 'utf8' TEMPLATE template0\"" su postgres -c "psql -c \"CREATE DATABASE iap_db OWNER=imart encoding 'utf8' TEMPLATE template0\"" su postgres -c "psql -c \"CREATE DATABASE \\\"default\\\" OWNER=imart encoding 'utf8' TEMPLATE template0\"" su postgres -c "psql -d imart -c \"CREATE SCHEMA acceldocuments AUTHORIZATION imart\"" su postgres -c "psql -d iap_db -c \"CREATE SCHEMA acceldocuments AUTHORIZATION imart\"" su postgres -c "psql -d default -c \"CREATE SCHEMA acceldocuments AUTHORIZATION imart\"" su postgres -c "${PGSQL}/bin/pg_ctl -D $PGDATA stop"run.sh#!/bin/bash /subscribe_rhel.sh /usr/sbin/sshd-keygen /usr/sbin/sshd su postgres -c "PG_OOM_ADJUST_FILE=/proc/self/oom_score_adj; PG_OOM_ADJUST_VALUE=0; /usr/pgsql-9.6/bin/pg_ctl -D /var/lib/pgsql/9.6/data restart" multitail -M 0 --follow-all --retry-all -q 1 "/var/lib/pgsql/9.6/data/pg_log/*.log"ビルドします。
docker build -t mypostgresql:9.6 .起動
docker run -itd -p 5432:5432 -p 2222:22 mypostgresql:9.6ssh
ssh -p 2222 root@localhostdocker run 時に -p 2222:22 とした場合、2222 が ssh のポートです。
root/password でログインできます。
localhost の部分は、docker run しているマシンの IP アドレスに置き換えてください。というわけで簡単にですが PostgreSQL 9.6 intra-mart 用構成済みの Docker についての紹介でした。
- 投稿日:2019-04-03T13:40:57+09:00
docker-composeで起動しているRubyアプリケーションをデバッグする方法
自分はRubyのデバッグにはpry-byebugを利用しています。
pry-byebugは、デバッグしたいポイントにbinding.pryを仕込むことでその時点でアプリが停止し、デバッグをすることができます。問題点
フォアグラウンドで
docker-compose upすると、binding.pryを仕込むことで以下のようなログが表示されます。
アプリの実行は中断されますが、あくまでログが表示されているだけなのでこのコンソール上でデバッグはできません。web_1 | 9: def index web_1 | 10: binding.pry web_1 | => 11: end web_1 |解決方法
docker attachでRubyアプリケーションのコンテナに入るとデバッグできます。
$ docker attach ${container_id}

### エンターキーを押すとデバッグができる
[1] pry(#<HomeController>)>
- 投稿日:2019-04-03T10:38:32+09:00
nginxをDockerで利用している時に「413 Request Entity Too Large」で怒られたときの意外な原因
株式会社NoSchoolでCTOをしている@mejilebenです。
今日はdockerでハマったところを書きます。概要
nginxをDockerで利用しているとき、413 Request Entity Too Largeで怒られてしまう事案が発生しました。その原因が、
nginxのDockerではなく、その前段に構えていたhttps-portalというDockerコンテナだったので、メモついでに書き残しておきます。構成
NoSchoolではローカルの開発環境を
Dockerで構成しています。抜粋https-noschool: container_name: https-noschool image: steveltn/https-portal:1 ports: - '80:80' - '443:443' environment: STAGE: local DOMAINS: 'localhost -> http://nginx-noschool' volumes: - ./docker/https-portal/cert:/var/lib/https-portal depends_on: - nginx-noschool nginx-noschool: image: nginx:(VERSION) container_name: nginx-noschool volumes: - ./docker/nginx/default.conf:/etc/nginx/conf.d/default.conf - ./:/opt/noschool environment: TZ: Asia/Tokyo depends_on: - php-noschool php-noschool: build: ./docker/php-fpm container_name: php-noschool volumes: - ./:/opt/noschool working_dir: /opt/noschool environment: TZ: Asia/Tokyo depends_on: - php-front-noschool
nginxをhttpサーバー、PHPの実行環境としてはphp-fpmを利用し、本番同様httpsの環境を再現するために、https-portalを利用しています。起こったこと
ローカルで画像を使った投稿を
POSTしようとすると、413 Request Entity Too Largeと画面に表示され、動作しませんでした。調べたこと
ググれば、要は
nginxのclient_max_body_size設定を書き換えることで上記の症状が治るとのことでした。デフォルトではリクエストの最大バイト数が1MBに設定されており、画像を添付するとゆうに超えてしまうということです。やったこと
上記設定の通り、
nginx自体の設定ファイルは./docker/nginx/default.confに置いてあるので、その中にclient_max_body_size 50M;と書き加え、docker-composeを再起動しました。しかし、それでも画像投稿時に同様のエラーが出てしまいました。
原因
nginxの前段に置いているhttps-portalが同様にnginxを利用してhttps化をしており、そこで引っかかっていたのが原因でした。上記リポジトリのREADMEにもAdvanced Usageとして設定方法が書かれているので、
docker-compose.ymlenvironment: STAGE: local DOMAINS: 'localhost -> http://nginx-noschool' CLIENT_MAX_BODY_SIZE: 10Mというように、
docker-compose.ymlに最大リクエストサイズを指定してあげる必要があります。どうして分かったのか
普段開発するときは
docker-compose up -dしているのですが、今回のように詰まったときは特にdocker-compose upとして、常にDocker側のログを吐き出すようにしています。すると画像を
POSTしたときにエラーログが流れてきたのですが、nginx-noschoolコンテナのログではなく、https-noschoolコンテナのログだったのです。そこでREADMEを見に行った結果、内部的に
nginxを使っているコンテナであることが判明し、今回の設定内容の変更に至りました。
※もちろんnginx側の設定変更も必要です。両方client_max_body_sizeの変更しないといけないのが少々面倒ではありますね。教訓
- なんとなくで
docker-composeしていたらバグった時に戸惑うのでちゃんと把握しておきましょう←- 困ったら
docker-compose upでログ観察最後に
僕が働いているNoSchoolでは仲間を募集中です!
創業期真っ只中、社員は僕と社長の2人きり(+副業メンバー4人)でEdTechを変えに行ってます!興味あればお茶でもしましょう。Twitterからの連絡でも大歓迎です!
https://www.wantedly.com/companies/noschool