- 投稿日:2021-03-04T23:25:27+09:00
LaravelのEloquentとCollection
備忘録
主題の通り実務に入ってヒイヒイ言ってるクソ雑魚エンジニアの備忘録です。
では、Eloquent
Laravelに備わっているデータベースを簡単に扱える機能。
これがあることで生のSQLを書かなくてもデータを追加したり参照したり
様々なことが可能になる。すごい。Collection
Collectionとはリスト形式でデータを格納できるラッパー
のことらしい。
配列と何が違うの!と思うところ。
このCollectionめっちゃ便利Collectionで使えるメソッド↓
https://readouble.com/laravel/6.x/ja/collections.htmlCollectionは最初からwhereやsortBy,groupByなど様々なメソッドが標準で利用できて、
ソート、絞り込み、グルーピング、繰り返し、もうほんとになんでもできる本題
EloquentのメソッドとCollectionのメソッド紛らわしくて混乱するわ!!
転職して初めて基幹システムの開発に放り込まれて詰まったところ。ほんこれ。
- get()
- where()
- groupBy()
- orderBy()
- all()
- first()
上のはほんの一部だがこれ全部EloquentにもCollectionにもある。メソッドの意味もほとんど変わらないんだけど
微妙に扱いが変わってくるから注意が必要。結論
EloquentとCollectionの使い方は記事が腐るほどあってすぐ慣れたので
要点をかいつまむとモデルからgetやallで複数件データを取り出すと取り出したデータはCollection型となって返る
あらかじめ必要なレコードがわかっている場合はfirst()
まとめてデータを取得してそれぞれに処理を行いたい場合は
getやallで取得してforeachなどで都度取り出してデータ処理をかけばいい。/ DBインスタンス
Collection ー DBインスタンス
\ DBインスタンス↑こんなイメージ
もうこれは使いまくって慣れるのが一番楽です。(脳筋)
それではまた。
- 投稿日:2021-03-04T21:27:02+09:00
【個人開発】Vueとajaxを使用したWebサービスを作ってみた
はじめまして きゃっぷ@capgame_です。
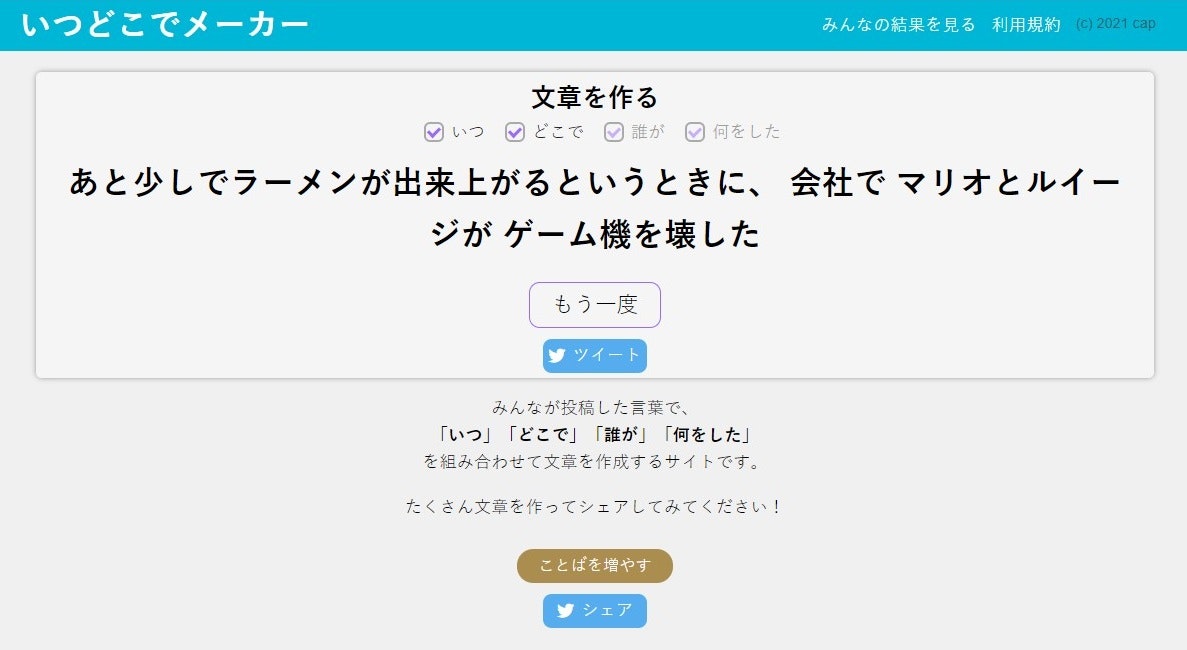
ガチャのようなサービスを作るためにVueや非同期通信について学んだので、そのことについて書いていきます。作ったもの
こんな感じで、ランダムで(投稿された)言葉を組み合わせて、文章を作れるサービスです。
現時点はで100words以上投稿されています。技術
メイン部分 : JavaScript
言葉を組み合わせて文章を作るってのは
main.jsconsole.log(["朝","昼","夜"][parseInt(Math.random() * 3)] + ["佐藤が","田中が","鈴木が"][parseInt(Math.random() * 3)] + ["叫んだ","泣いた","笑った"][parseInt(Math.random() * 3)])みたいなコードで書くことができ、入門書のサンプルによく使われるほどの簡単なプログラムです。
これに、jQueryの
$.get()で言葉を取得しています。投稿部分 : jQuery
こちらもjQueryの
$.get()を使って言葉を投稿しています。そして、データベースは使っていません。
phpのfile_put_contents()及びfile_get_contents()を使ってファイルでセーブしています。
便利ですがちゃんと . とか / のエスケープは行いましょう。CSS : SCSS
SCSSを使って書いてみました。
ヘッダー部分とか入れ子になっていると分かりやすいのでかなり書きやすかったです。
SCSS布教活動したいです。最後に
今までかたくなにライブラリを使わなかったのを後悔するくらいVueで要素いじるのが楽でした。
今回のサイトでは、v-modelとv-bindとv-onくらいしか使ってないので、もっといろいろ学んでみたいと思いました。あとこのサイトに単語たくさん追加してください?
- 投稿日:2021-03-04T20:26:54+09:00
perl ユーザの php メモ
他人様の書いたコードのリライトが必要となったため、超絶久々に php を触った。
その際の初心者的メモphp のみのスクリプト
は1行目に
<?phpで始める。
最終行に?>を記載するのは推奨されていない。phpタグ
リライト対象に
<?PHPと書いてたのあったが、普通は<?phpだよね?つか、<?pHPでも<?PHpでも良いって、、、一応、マニュアルサイトとか大多数の記載通りに
<?phpにしとくべ1ワンライナー
-rを使う$ php -r "echo 1;" 1型
当たり前だけど、変数とかには型があるよねぇ2。
$ php -r 'echo gettype("0123");'
string
$ php -r '$a = "0123" ; echo gettype($a);'
string
$ php -r '$a = "0123" ; echo gettype(substr($a, 0, 3));'
string
$ php -r 'echo gettype(0123);'
integer
$ php -r 'echo 0123;'
83
で、文字列の比較
===を使う3$ php -r '$a = "0123"; echo strcmp($a,"0123") == 0;' 1 $ php -r '$a = "0123"; echo $a === "0123";' 1
strcmpは、関数を呼び出す分遅くなる(と色々なところで指摘されている)ため使わない。
===は、型の比較が入るので、gettypeで想定する状況を確認しながら利用する。elseif
else ifでも通るが、ブロックを使った記法でのみ使用できる。ま
elseifにリライトしとくべきか。unpack
リライト対象で、文字列切り出しに
substr連発するのに切れて、(自分的にperlでは定番である)unpackについて調べる。が、、、戻り値が連想配列 orz...
マニュアルが分かりにくい。
unpackの場合、"連想配列のキーを各フォーマットコードの後4に指定する、とか、/で複数のフォーマットコードを連結するとか、どこで調べるのよ。皆様、バイナリ相手にしてて、ascii相手のサンプルなんてググっても出てこないし、、、
YYYYmmddのunpack
ということで、↓サンプル。この例だと明らかにperlより使い勝手はよい、か?
  $ php -r '$c = unpack("A4y/A2m/A2d", "20210303") ; print_r($c);'
  Array
  (
      [y] => 2021
      [m] => 03
      [d] => 03
  )
- y, m, d をキーに ascii 4文字、2文字、2文字に分割
これが、キーを指定しないと最後のフォーマットコードで取得された文字のみが連想配列になる。
しかもインデクスが1!$ php -r '$c = unpack("A4/A2/A2", "20210303" ) ; print_r($c);' Array ( [1] => 03 )perlでの3桁区切り
perlでの常套手段だった、
(A3)*なんぞ、できない。perlの三桁区切り$ perl -le 'print scalar reverse join ",", unpack "(A3)*", reverse "1234567890"' 1,234,567,890phpでの3桁区切り
str_splitとstrrevをつかう5phpの三桁区切り$ php -r 'echo strrev( join(",", str_split(strrev("1234567890"),3)));' 1,234,567,890array出力の変数への代入
perl での↓コレ
my ( $c, $d ) = @d ;phpでは、
list()を使う$ php -r '$a = array( 1,2,3) ; list( $b, $c, $d ) = $a ; echo $d ;' 3二次元配列とかでも即座に対応できるのはうれしいかな。
$ php -r '$a = array( 1, array(2,3) ) ; list( $b, list( $c, $d ) ) = $a ; echo $d ;'
3
いらない要素は無視することも出来る
$ php -r 'list( , ,$a ) = preg_split("/\s+/", "2021 03 03") ; print $a ;' 03連想配列にも対応できる6。
$ php -r 'list( "y" => $y, "d" => $d ) = unpack("A4y/A2m/A2d", "20210303" ) ; echo $d ;'
03
$ php -r 'list( "1" => $d ) = unpack("x6/A2", "20210303" ) ; echo $d ;'
03
三項演算子
噂で知ってたけど、シンプルな
A ? B : Cのみの使用にとどめるべき。シンタックス確認
-lオプションを使うhoge.php<?php $a = "20210303" ; list( $b ) = unpack( "A4/A2/A2y" ) echo $b ;$ php -l hoge.php Parse error: syntax error, unexpected 'echo' (T_ECHO) in hoge.php on line 4 Errors parsing hoge.phpこんなバギーなコードでも
;抜けしかチェックできないから、リライト対象のバグ探しには使えない。
- 投稿日:2021-03-04T18:04:26+09:00
NginxでNextcloud 21を構築
はじめに
自宅のサーバーにNextcloudを構築したのでその覚書です。
Nextcloudのセキュリティチェックも潰していきます。セットアップ環境
CentOS 7 (サーバーOS)
OSはCentOS 7を使用します。
$ cat /etc/redhat-release
CentOS Linux release 7.9.2009 (Core)
MariaDB (データベース)
データベースはSQLiteでも代用可能ですが、安定性と高速化のため今回はMariaDBを使用します。
またNextcloud 21からはMariaDBを使用する場合は Ver10.~が必須となっています。$ mysql --version mysql Ver 15.1 Distrib 10.5.9-MariaDB, for Linux (x86_64) using readline 5.1Nginx (Webサーバー)
WebサーバーはNginxを使用します。
バージョンは以下の通りです。$ nginx -v nginx version: nginx/1.16.1PHP
NginxはPHPで動作します。
NginxがWebサーバーなので、PHPのFastCGI実装であるPHP-FPMを使用します。
またPHPアクセラレータのOPCacheを使用します。$ php -v PHP 7.4.16 (cli) (built: Mar 2 2021 10:35:17) ( NTS ) Copyright (c) The PHP Group Zend Engine v3.4.0, Copyright (c) Zend Technologies with Zend OPcache v7.4.16, Copyright (c), by Zend TechnologiesNextcloud
今回のメインディッシュです。
バージョンは2021/03/04で最新の21.0.0を使用します。Redis(メモリキャッシュ)
パフォーマン向上のためにキャッシュサーバーを使用します。
$ redis-server --version
Redis server v=6.2.1 sha=00000000:0 malloc=jemalloc-5.1.0 bits=64 build=c4351fa1988ca119
構築
システムを構築していきます。
前提パッケージ
作業に必要な前提パッケージをインストールしていきます。
ここからの作業はすべてrootユーザーで行います。$ su - # yum install epel-release yum-utils unzip curl wget bash-completion bzip2 nginx次にremiリポジトリを使用するパッケージをインストールしていきます。
# yum install --enablerepo=remi,remi-php74 php php-fpm php-cli php-common php-curl php-gd php-mbstring php-mysqlnd php-process php-xml php-opcache php-pecl-apcu php-intl php-pecl-redis php-pecl-zip php-pear redis vimMariaDBをインストールしていきます。
標準リポジトリではVer5.~しかインストールできないので、リポジトリを追加します。# curl -sS https://downloads.mariadb.com/MariaDB/mariadb_repo_setup | sudo bash # yum install mariadb-server mariadb-clientセットアップ
SELinuxを無効化します。
# vim /etc/selinux/config

SELINUX=enforcing
       ↓
SELINUX=disabled
一旦再起動します。
# rebootポートを開放します。ルーターのポートも適宜開放してください。
httpとhttps# firewall-cmd --add-port=80/tcp --permanent # firewall-cmd --add-port=443/tcp --permanent # firewall-cmd --reloadSSL証明書を取得します。
Nginxの設定ファイルを追加します。
このファイルはすでにセキュリティチェック対策済みです。# vim /etc/nginx/conf.d/nextcloud.confserver_nameとssl_certificate, ssl_certificate_keyは適宜変更してください。
内容
長いため折りたたみ
nextcloud.confupstream php-handler { #server 127.0.0.1:9000; server unix:/var/run/php-fpm/php-fpm.sock; } server { listen 80; listen [::]:80; server_name cloud.example.com; # enforce https return 301 https://$server_name:443$request_uri; add_header Strict-Transport-Security 'max-age=15552000; includeSubDomains; preload'; } server { listen 443 ssl http2; listen [::]:443 ssl http2; server_name cloud.example.com; add_header Strict-Transport-Security 'max-age=15552000; includeSubDomains; preload'; # Use Mozilla's guidelines for SSL/TLS settings # https://mozilla.github.io/server-side-tls/ssl-config-generator/ # NOTE: some settings below might be redundant ssl_certificate /etc/letsencrypt/live/cloud.example.com/cert.pem; ssl_certificate_key /etc/letsencrypt/live/cloud.example.com/privkey.pem; # Add headers to serve security related headers # Before enabling Strict-Transport-Security headers please read into this # topic first. #add_header Strict-Transport-Security "max-age=15768000; includeSubDomains; preload;" always; # # WARNING: Only add the preload option once you read about # the consequences in https://hstspreload.org/. This option # will add the domain to a hardcoded list that is shipped # in all major browsers and getting removed from this list # could take several months. add_header Referrer-Policy "no-referrer" always; add_header X-Content-Type-Options "nosniff" always; add_header X-Download-Options "noopen" always; add_header X-Frame-Options "SAMEORIGIN" always; add_header X-Permitted-Cross-Domain-Policies "none" always; add_header X-Robots-Tag "none" always; add_header X-XSS-Protection "1; mode=block" always; # Remove X-Powered-By, which is an information leak fastcgi_hide_header X-Powered-By; # Path to the root of your installation root /var/www/html/nextcloud; location = /robots.txt { allow all; log_not_found off; access_log off; } # The following 2 rules are only needed for the user_webfinger app. # Uncomment it if you're planning to use this app. #rewrite ^/.well-known/host-meta /public.php?service=host-meta last; #rewrite ^/.well-known/host-meta.json /public.php?service=host-meta-json last; # The following rule is only needed for the Social app. # Uncomment it if you're planning to use this app. #rewrite ^/.well-known/webfinger /public.php?service=webfinger last; #rewrite ^/.well-known/nodeinfo /public.php?service=nodeinfo last; location = /.well-known/carddav { return 301 $scheme://$host:$server_port/remote.php/dav; } location = /.well-known/caldav { return 301 $scheme://$host:$server_port/remote.php/dav; } location ^~ /.well-known { return 301 /index.php$uri; } location = /.well-known/webfinger { return 301 /index.php$uri; } location = /.well-known/nodeinfo { return 301 /index.php$uri; } # set max upload size client_max_body_size 512M; fastcgi_buffers 64 4K; # Enable gzip but do not remove ETag headers gzip on; gzip_vary on; gzip_comp_level 4; gzip_min_length 256; gzip_proxied expired no-cache no-store private no_last_modified no_etag auth; gzip_types application/atom+xml application/javascript application/json application/ld+json application/manifest+json application/rss+xml application/vnd.geo+json application/vnd.ms-fontobject application/x-font-ttf application/x-web-app-manifest+json application/xhtml+xml application/xml font/opentype image/bmp image/svg+xml image/x-icon text/cache-manifest text/css text/plain text/vcard text/vnd.rim.location.xloc text/vtt text/x-component text/x-cross-domain-policy; # Uncomment if your server is build with the ngx_pagespeed module # This module is currently not supported. #pagespeed off; location / { rewrite ^ /index.php; } location ~ ^\/(?:build|tests|config|lib|3rdparty|templates|data)\/ { deny all; } location ~ ^\/(?:\.|autotest|occ|issue|indie|db_|console) { deny all; } location ~ ^\/(?:index|remote|public|cron|core\/ajax\/update|status|ocs\/v[12]|updater\/.+|oc[ms]-provider\/.+|.+\/richdocumentscode\/proxy)\.php(?:$|\/) { fastcgi_split_path_info ^(.+?\.php)(\/.*|)$; set $path_info $fastcgi_path_info; try_files $fastcgi_script_name =404; include fastcgi_params; fastcgi_param SCRIPT_FILENAME $document_root$fastcgi_script_name; fastcgi_param PATH_INFO $path_info; fastcgi_param HTTPS on; # Avoid sending the security headers twice fastcgi_param modHeadersAvailable true; # Enable pretty urls fastcgi_param front_controller_active true; fastcgi_pass php-handler; fastcgi_intercept_errors on; fastcgi_request_buffering off; } location ~ ^\/(?:updater|oc[ms]-provider)(?:$|\/) { try_files $uri/ =404; index index.php; } location ~ ^\/(?:index|remote|public|cron|core\/ajax\/update|status|ocs\/v[12]|updater\/.+|oc[ms]-provider\/.+|.+\/richdocumentscode\/proxy)\.php(?:$|\/) { fastcgi_split_path_info ^(.+?.php)(\/.*|)$; set $path_info $fastcgi_path_info; try_files $fastcgi_script_name =404; include fastcgi_params; } # Adding the cache control header for js, css and map files # Make sure it is BELOW the PHP block location ~ \.(?:css|js|woff2?|svg|gif|map)$ { try_files $uri /index.php$request_uri; add_header Cache-Control "public, max-age=15778463"; # Add headers to serve security related headers (It is intended to # have those duplicated to the ones above) # Before enabling Strict-Transport-Security headers please read into # this topic first. #add_header Strict-Transport-Security "max-age=15768000; includeSubDomains; preload;" always; # # WARNING: Only add the preload option once you read about # the consequences in https://hstspreload.org/. This option # will add the domain to a hardcoded list that is shipped # in all major browsers and getting removed from this list # could take several months. add_header Referrer-Policy "no-referrer" always; add_header X-Content-Type-Options "nosniff" always; add_header X-Download-Options "noopen" always; add_header X-Frame-Options "SAMEORIGIN" always; add_header X-Permitted-Cross-Domain-Policies "none" always; add_header X-Robots-Tag "none" always; add_header X-XSS-Protection "1; mode=block" always; # Optional: Don't log access to assets access_log off; } location ~ \.(?:png|html|ttf|ico|jpg|jpeg|bcmap|mp4|webm)$ { try_files $uri /index.php$request_uri; # Optional: Don't log access to other assets access_log off; } }PHP-FPMの設定ファイルを修正します。
基本的にコピペすれば動作しますが、env[PATH]には、以下のコマンドを実行した結果を使用してください。# echo $PATH# vim /etc/php-fpm.d/www.conf
長いため折りたたみ
www.conf; Start a new pool named 'www'. ; the variable $pool can be used in any directive and will be replaced by the ; pool name ('www' here) [www] ; Per pool prefix ; It only applies on the following directives: ; - 'access.log' ; - 'slowlog' ; - 'listen' (unixsocket) ; - 'chroot' ; - 'chdir' ; - 'php_values' ; - 'php_admin_values' ; When not set, the global prefix (or @php_fpm_prefix@) applies instead. ; Note: This directive can also be relative to the global prefix. ; Default Value: none ;prefix = /path/to/pools/$pool ; Unix user/group of processes ; Note: The user is mandatory. If the group is not set, the default user's group ; will be used. ; RPM: apache user chosen to provide access to the same directories as httpd user = nginx ; RPM: Keep a group allowed to write in log dir. group = nginx ; The address on which to accept FastCGI requests. ; Valid syntaxes are: ; 'ip.add.re.ss:port' - to listen on a TCP socket to a specific IPv4 address on ; a specific port; ; '[ip:6:addr:ess]:port' - to listen on a TCP socket to a specific IPv6 address on ; a specific port; ; 'port' - to listen on a TCP socket to all addresses ; (IPv6 and IPv4-mapped) on a specific port; ; '/path/to/unix/socket' - to listen on a unix socket. ; Note: This value is mandatory. listen = /var/run/php-fpm/php-fpm.sock ; Set listen(2) backlog. ; Default Value: 511 ;listen.backlog = 511 ; Set permissions for unix socket, if one is used. In Linux, read/write ; permissions must be set in order to allow connections from a web server. ; Default Values: user and group are set as the running user ; mode is set to 0660 listen.owner = nginx listen.group = nginx listen.mode = 0660 ; When POSIX Access Control Lists are supported you can set them using ; these options, value is a comma separated list of user/group names. ; When set, listen.owner and listen.group are ignored ;listen.acl_users = apache,nginx ;listen.acl_groups = ; List of addresses (IPv4/IPv6) of FastCGI clients which are allowed to connect. ; Equivalent to the FCGI_WEB_SERVER_ADDRS environment variable in the original ; PHP FCGI (5.2.2+). Makes sense only with a tcp listening socket. Each address ; must be separated by a comma. If this value is left blank, connections will be ; accepted from any ip address. ; Default Value: any listen.allowed_clients = 127.0.0.1 ; Specify the nice(2) priority to apply to the pool processes (only if set) ; The value can vary from -19 (highest priority) to 20 (lower priority) ; Note: - It will only work if the FPM master process is launched as root ; - The pool processes will inherit the master process priority ; unless it specified otherwise ; Default Value: no set ; process.priority = -19 ; Set the process dumpable flag (PR_SET_DUMPABLE prctl) even if the process user ; or group is differrent than the master process user. It allows to create process ; core dump and ptrace the process for the pool user. ; Default Value: no ; process.dumpable = yes ; Choose how the process manager will control the number of child processes. ; Possible Values: ; static - a fixed number (pm.max_children) of child processes; ; dynamic - the number of child processes are set dynamically based on the ; following directives. With this process management, there will be ; always at least 1 children. ; pm.max_children - the maximum number of children that can ; be alive at the same time. ; pm.start_servers - the number of children created on startup. ; pm.min_spare_servers - the minimum number of children in 'idle' ; state (waiting to process). If the number ; of 'idle' processes is less than this ; number then some children will be created. ; pm.max_spare_servers - the maximum number of children in 'idle' ; state (waiting to process). If the number ; of 'idle' processes is greater than this ; number then some children will be killed. ; ondemand - no children are created at startup. Children will be forked when ; new requests will connect. The following parameter are used: ; pm.max_children - the maximum number of children that ; can be alive at the same time. ; pm.process_idle_timeout - The number of seconds after which ; an idle process will be killed. ; Note: This value is mandatory. pm = dynamic ; The number of child processes to be created when pm is set to 'static' and the ; maximum number of child processes when pm is set to 'dynamic' or 'ondemand'. ; This value sets the limit on the number of simultaneous requests that will be ; served. Equivalent to the ApacheMaxClients directive with mpm_prefork. ; Equivalent to the PHP_FCGI_CHILDREN environment variable in the original PHP ; CGI. The below defaults are based on a server without much resources. Don't ; forget to tweak pm.* to fit your needs. ; Note: Used when pm is set to 'static', 'dynamic' or 'ondemand' ; Note: This value is mandatory. pm.max_children = 120 ; The number of child processes created on startup. ; Note: Used only when pm is set to 'dynamic' ; Default Value: min_spare_servers + (max_spare_servers - min_spare_servers) / 2 pm.start_servers = 12 ; The desired minimum number of idle server processes. ; Note: Used only when pm is set to 'dynamic' ; Note: Mandatory when pm is set to 'dynamic' pm.min_spare_servers = 6 ; The desired maximum number of idle server processes. ; Note: Used only when pm is set to 'dynamic' ; Note: Mandatory when pm is set to 'dynamic' pm.max_spare_servers = 18 ; The number of seconds after which an idle process will be killed. ; Note: Used only when pm is set to 'ondemand' ; Default Value: 10s ;pm.process_idle_timeout = 10s; ; The number of requests each child process should execute before respawning. ; This can be useful to work around memory leaks in 3rd party libraries. For ; endless request processing specify '0'. Equivalent to PHP_FCGI_MAX_REQUESTS. ; Default Value: 0 ;pm.max_requests = 500 ; The URI to view the FPM status page. If this value is not set, no URI will be ; recognized as a status page. It shows the following informations: ; pool - the name of the pool; ; process manager - static, dynamic or ondemand; ; start time - the date and time FPM has started; ; start since - number of seconds since FPM has started; ; accepted conn - the number of request accepted by the pool; ; listen queue - the number of request in the queue of pending ; connections (see backlog in listen(2)); ; max listen queue - the maximum number of requests in the queue ; of pending connections since FPM has started; ; listen queue len - the size of the socket queue of pending connections; ; idle processes - the number of idle processes; ; active processes - the number of active processes; ; total processes - the number of idle + active processes; ; max active processes - the maximum number of active processes since FPM ; has started; ; max children reached - number of times, the process limit has been reached, ; when pm tries to start more children (works only for ; pm 'dynamic' and 'ondemand'); ; Value are updated in real time. ; Example output: ; pool: www ; process manager: static ; start time: 01/Jul/2011:17:53:49 +0200 ; start since: 62636 ; accepted conn: 190460 ; listen queue: 0 ; max listen queue: 1 ; listen queue len: 42 ; idle processes: 4 ; active processes: 11 ; total processes: 15 ; max active processes: 12 ; max children reached: 0 ; ; By default the status page output is formatted as text/plain. Passing either ; 'html', 'xml' or 'json' in the query string will return the corresponding ; output syntax. Example: ; http://www.foo.bar/status ; http://www.foo.bar/status?json ; http://www.foo.bar/status?html ; http://www.foo.bar/status?xml ; ; By default the status page only outputs short status. Passing 'full' in the ; query string will also return status for each pool process. ; Example: ; http://www.foo.bar/status?full ; http://www.foo.bar/status?json&full ; http://www.foo.bar/status?html&full ; http://www.foo.bar/status?xml&full ; The Full status returns for each process: ; pid - the PID of the process; ; state - the state of the process (Idle, Running, ...); ; start time - the date and time the process has started; ; start since - the number of seconds since the process has started; ; requests - the number of requests the process has served; ; request duration - the duration in µs of the requests; ; request method - the request method (GET, POST, ...); ; request URI - the request URI with the query string; ; content length - the content length of the request (only with POST); ; user - the user (PHP_AUTH_USER) (or '-' if not set); ; script - the main script called (or '-' if not set); ; last request cpu - the %cpu the last request consumed ; it's always 0 if the process is not in Idle state ; because CPU calculation is done when the request ; processing has terminated; ; last request memory - the max amount of memory the last request consumed ; it's always 0 if the process is not in Idle state ; because memory calculation is done when the request ; processing has terminated; ; If the process is in Idle state, then informations are related to the ; last request the process has served. Otherwise informations are related to ; the current request being served. ; Example output: ; ************************ ; pid: 31330 ; state: Running ; start time: 01/Jul/2011:17:53:49 +0200 ; start since: 63087 ; requests: 12808 ; request duration: 1250261 ; request method: GET ; request URI: /test_mem.php?N=10000 ; content length: 0 ; user: - ; script: /home/fat/web/docs/php/test_mem.php ; last request cpu: 0.00 ; last request memory: 0 ; ; Note: There is a real-time FPM status monitoring sample web page available ; It's available in: @EXPANDED_DATADIR@/fpm/status.html ; ; Note: The value must start with a leading slash (/). The value can be ; anything, but it may not be a good idea to use the .php extension or it ; may conflict with a real PHP file. ; Default Value: not set ;pm.status_path = /status ; The ping URI to call the monitoring page of FPM. If this value is not set, no ; URI will be recognized as a ping page. This could be used to test from outside ; that FPM is alive and responding, or to ; - create a graph of FPM availability (rrd or such); ; - remove a server from a group if it is not responding (load balancing); ; - trigger alerts for the operating team (24/7). ; Note: The value must start with a leading slash (/). The value can be ; anything, but it may not be a good idea to use the .php extension or it ; may conflict with a real PHP file. ; Default Value: not set ;ping.path = /ping ; This directive may be used to customize the response of a ping request. The ; response is formatted as text/plain with a 200 response code. ; Default Value: pong ;ping.response = pong ; The access log file ; Default: not set ;access.log = log/$pool.access.log ; The access log format. ; The following syntax is allowed ; %%: the '%' character ; %C: %CPU used by the request ; it can accept the following format: ; - %{user}C for user CPU only ; - %{system}C for system CPU only ; - %{total}C for user + system CPU (default) ; %d: time taken to serve the request ; it can accept the following format: ; - %{seconds}d (default) ; - %{miliseconds}d ; - %{mili}d ; - %{microseconds}d ; - %{micro}d ; %e: an environment variable (same as $_ENV or $_SERVER) ; it must be associated with embraces to specify the name of the env ; variable. Some exemples: ; - server specifics like: %{REQUEST_METHOD}e or %{SERVER_PROTOCOL}e ; - HTTP headers like: %{HTTP_HOST}e or %{HTTP_USER_AGENT}e ; %f: script filename ; %l: content-length of the request (for POST request only) ; %m: request method ; %M: peak of memory allocated by PHP ; it can accept the following format: ; - %{bytes}M (default) ; - %{kilobytes}M ; - %{kilo}M ; - %{megabytes}M ; - %{mega}M ; %n: pool name ; %o: output header ; it must be associated with embraces to specify the name of the header: ; - %{Content-Type}o ; - %{X-Powered-By}o ; - %{Transfert-Encoding}o ; - .... ; %p: PID of the child that serviced the request ; %P: PID of the parent of the child that serviced the request ; %q: the query string ; %Q: the '?' character if query string exists ; %r: the request URI (without the query string, see %q and %Q) ; %R: remote IP address ; %s: status (response code) ; %t: server time the request was received ; it can accept a strftime(3) format: ; %d/%b/%Y:%H:%M:%S %z (default) ; The strftime(3) format must be encapsuled in a %{<strftime_format>}t tag ; e.g. for a ISO8601 formatted timestring, use: %{%Y-%m-%dT%H:%M:%S%z}t ; %T: time the log has been written (the request has finished) ; it can accept a strftime(3) format: ; %d/%b/%Y:%H:%M:%S %z (default) ; The strftime(3) format must be encapsuled in a %{<strftime_format>}t tag ; e.g. for a ISO8601 formatted timestring, use: %{%Y-%m-%dT%H:%M:%S%z}t ; %u: remote user ; ; Default: "%R - %u %t \"%m %r\" %s" ;access.format = "%R - %u %t \"%m %r%Q%q\" %s %f %{mili}d %{kilo}M %C%%" ; The log file for slow requests ; Default Value: not set ; Note: slowlog is mandatory if request_slowlog_timeout is set slowlog = /var/log/php-fpm/www-slow.log ; The timeout for serving a single request after which a PHP backtrace will be ; dumped to the 'slowlog' file. A value of '0s' means 'off'. ; Available units: s(econds)(default), m(inutes), h(ours), or d(ays) ; Default Value: 0 ;request_slowlog_timeout = 0 ; Depth of slow log stack trace. ; Default Value: 20 ;request_slowlog_trace_depth = 20 ; The timeout for serving a single request after which the worker process will ; be killed. This option should be used when the 'max_execution_time' ini option ; does not stop script execution for some reason. A value of '0' means 'off'. ; Available units: s(econds)(default), m(inutes), h(ours), or d(ays) ; Default Value: 0 ;request_terminate_timeout = 0 ; Set open file descriptor rlimit. ; Default Value: system defined value ;rlimit_files = 1024 ; Set max core size rlimit. ; Possible Values: 'unlimited' or an integer greater or equal to 0 ; Default Value: system defined value ;rlimit_core = 0 ; Chroot to this directory at the start. This value must be defined as an ; absolute path. When this value is not set, chroot is not used. ; Note: you can prefix with '$prefix' to chroot to the pool prefix or one ; of its subdirectories. If the pool prefix is not set, the global prefix ; will be used instead. ; Note: chrooting is a great security feature and should be used whenever ; possible. However, all PHP paths will be relative to the chroot ; (error_log, sessions.save_path, ...). ; Default Value: not set ;chroot = ; Chdir to this directory at the start. ; Note: relative path can be used. ; Default Value: current directory or / when chroot ;chdir = /var/www ; Redirect worker stdout and stderr into main error log. If not set, stdout and ; stderr will be redirected to /dev/null according to FastCGI specs. ; Note: on highloaded environement, this can cause some delay in the page ; process time (several ms). ; Default Value: no ;catch_workers_output = yes ; Clear environment in FPM workers ; Prevents arbitrary environment variables from reaching FPM worker processes ; by clearing the environment in workers before env vars specified in this ; pool configuration are added. ; Setting to "no" will make all environment variables available to PHP code ; via getenv(), $_ENV and $_SERVER. ; Default Value: yes ;clear_env = no ; Limits the extensions of the main script FPM will allow to parse. This can ; prevent configuration mistakes on the web server side. You should only limit ; FPM to .php extensions to prevent malicious users to use other extensions to ; execute php code. ; Note: set an empty value to allow all extensions. ; Default Value: .php ;security.limit_extensions = .php .php3 .php4 .php5 .php7 ; Pass environment variables like LD_LIBRARY_PATH. All $VARIABLEs are taken from ; the current environment. ; Default Value: clean env env[HOSTNAME] = $HOSTNAME env[PATH] = [echo $PATHの結果を入力する。] env[TMP] = /tmp env[TMPDIR] = /tmp env[TEMP] = /tmp ; Additional php.ini defines, specific to this pool of workers. These settings ; overwrite the values previously defined in the php.ini. The directives are the ; same as the PHP SAPI: ; php_value/php_flag - you can set classic ini defines which can ; be overwritten from PHP call 'ini_set'. ; php_admin_value/php_admin_flag - these directives won't be overwritten by ; PHP call 'ini_set' ; For php_*flag, valid values are on, off, 1, 0, true, false, yes or no. ; Defining 'extension' will load the corresponding shared extension from ; extension_dir. Defining 'disable_functions' or 'disable_classes' will not ; overwrite previously defined php.ini values, but will append the new value ; instead. ; Note: path INI options can be relative and will be expanded with the prefix ; (pool, global or @prefix@) ; Default Value: nothing is defined by default except the values in php.ini and ; specified at startup with the -d argument ;php_admin_value[sendmail_path] = /usr/sbin/sendmail -t -i -f www@my.domain.com ;php_flag[display_errors] = off php_admin_value[error_log] = /var/log/php-fpm/www-error.log php_admin_flag[log_errors] = on ;php_admin_value[memory_limit] = 128M php_value[opcache.enable] = 1 php_value[opcache.enable_cli] = 1 php_value[opcache.interned_strings_buffer] = 8 php_value[opcache.max_accelerated_files] = 10000 php_value[opcache.memory_consumption] = 128 php_value[opcache.save_comments] = 1 php_value[opcache.revalidate_freq] = 1 ; Set the following data paths to directories owned by the FPM process user. ; ; Do not change the ownership of existing system directories, if the process ; user does not have write permission, create dedicated directories for this ; purpose. ; ; See warning about choosing the location of these directories on your system ; at http://php.net/session.save-path php_value[session.save_handler] = files php_value[session.save_path] = /var/lib/php/session php_value[soap.wsdl_cache_dir] = /var/lib/php/wsdlcache php_value[opcache.file_cache] = /var/lib/php/opcachePHPの設定ファイルを修正します。
こちらもコピペで使用できます。# vim /etc/php.ini
長いので折りたたみ
php.ini[PHP] ;;;;;;;;;;;;;;;;;;; ; About php.ini ; ;;;;;;;;;;;;;;;;;;; ; PHP's initialization file, generally called php.ini, is responsible for ; configuring many of the aspects of PHP's behavior. ; PHP attempts to find and load this configuration from a number of locations. ; The following is a summary of its search order: ; 1. SAPI module specific location. ; 2. The PHPRC environment variable. (As of PHP 5.2.0) ; 3. A number of predefined registry keys on Windows (As of PHP 5.2.0) ; 4. Current working directory (except CLI) ; 5. The web server's directory (for SAPI modules), or directory of PHP ; (otherwise in Windows) ; 6. The directory from the --with-config-file-path compile time option, or the ; Windows directory (usually C:\windows) ; See the PHP docs for more specific information. ; http://php.net/configuration.file ; The syntax of the file is extremely simple. Whitespace and lines ; beginning with a semicolon are silently ignored (as you probably guessed). ; Section headers (e.g. [Foo]) are also silently ignored, even though ; they might mean something in the future. ; Directives following the section heading [PATH=/www/mysite] only ; apply to PHP files in the /www/mysite directory. Directives ; following the section heading [HOST=www.example.com] only apply to ; PHP files served from www.example.com. Directives set in these ; special sections cannot be overridden by user-defined INI files or ; at runtime. Currently, [PATH=] and [HOST=] sections only work under ; CGI/FastCGI. ; http://php.net/ini.sections ; Directives are specified using the following syntax: ; directive = value ; Directive names are *case sensitive* - foo=bar is different from FOO=bar. ; Directives are variables used to configure PHP or PHP extensions. ; There is no name validation. If PHP can't find an expected ; directive because it is not set or is mistyped, a default value will be used. ; The value can be a string, a number, a PHP constant (e.g. E_ALL or M_PI), one ; of the INI constants (On, Off, True, False, Yes, No and None) or an expression ; (e.g. E_ALL & ~E_NOTICE), a quoted string ("bar"), or a reference to a ; previously set variable or directive (e.g. ${foo}) ; Expressions in the INI file are limited to bitwise operators and parentheses: ; | bitwise OR ; ^ bitwise XOR ; & bitwise AND ; ~ bitwise NOT ; ! boolean NOT ; Boolean flags can be turned on using the values 1, On, True or Yes. ; They can be turned off using the values 0, Off, False or No. ; An empty string can be denoted by simply not writing anything after the equal ; sign, or by using the None keyword: ; foo = ; sets foo to an empty string ; foo = None ; sets foo to an empty string ; foo = "None" ; sets foo to the string 'None' ; If you use constants in your value, and these constants belong to a ; dynamically loaded extension (either a PHP extension or a Zend extension), ; you may only use these constants *after* the line that loads the extension. ;;;;;;;;;;;;;;;;;;; ; About this file ; ;;;;;;;;;;;;;;;;;;; ; PHP comes packaged with two INI files. One that is recommended to be used ; in production environments and one that is recommended to be used in ; development environments. ; php.ini-production contains settings which hold security, performance and ; best practices at its core. But please be aware, these settings may break ; compatibility with older or less security conscience applications. We ; recommending using the production ini in production and testing environments. ; php.ini-development is very similar to its production variant, except it is ; much more verbose when it comes to errors. We recommend using the ; development version only in development environments, as errors shown to ; application users can inadvertently leak otherwise secure information. ; This is the php.ini-production INI file. ;;;;;;;;;;;;;;;;;;; ; Quick Reference ; ;;;;;;;;;;;;;;;;;;; ; The following are all the settings which are different in either the production ; or development versions of the INIs with respect to PHP's default behavior. ; Please see the actual settings later in the document for more details as to why ; we recommend these changes in PHP's behavior. ; display_errors ; Default Value: On ; Development Value: On ; Production Value: Off ; display_startup_errors ; Default Value: Off ; Development Value: On ; Production Value: Off ; error_reporting ; Default Value: E_ALL & ~E_NOTICE & ~E_STRICT & ~E_DEPRECATED ; Development Value: E_ALL ; Production Value: E_ALL & ~E_DEPRECATED & ~E_STRICT ; log_errors ; Default Value: Off ; Development Value: On ; Production Value: On ; max_input_time ; Default Value: -1 (Unlimited) ; Development Value: 60 (60 seconds) ; Production Value: 60 (60 seconds) ; output_buffering ; Default Value: Off ; Development Value: 4096 ; Production Value: 4096 ; register_argc_argv ; Default Value: On ; Development Value: Off ; Production Value: Off ; request_order ; Default Value: None ; Development Value: "GP" ; Production Value: "GP" ; session.gc_divisor ; Default Value: 100 ; Development Value: 1000 ; Production Value: 1000 ; session.sid_bits_per_character ; Default Value: 4 ; Development Value: 5 ; Production Value: 5 ; short_open_tag ; Default Value: On ; Development Value: Off ; Production Value: Off ; variables_order ; Default Value: "EGPCS" ; Development Value: "GPCS" ; Production Value: "GPCS" ;;;;;;;;;;;;;;;;;;;; ; php.ini Options ; ;;;;;;;;;;;;;;;;;;;; ; Name for user-defined php.ini (.htaccess) files. Default is ".user.ini" ;user_ini.filename = ".user.ini" ; To disable this feature set this option to an empty value ;user_ini.filename = ; TTL for user-defined php.ini files (time-to-live) in seconds. Default is 300 seconds (5 minutes) ;user_ini.cache_ttl = 300 ;;;;;;;;;;;;;;;;;;;; ; Language Options ; ;;;;;;;;;;;;;;;;;;;; ; Enable the PHP scripting language engine under Apache. ; http://php.net/engine engine = On ; This directive determines whether or not PHP will recognize code between ; <? and ?> tags as PHP source which should be processed as such. It is ; generally recommended that <?php and ?> should be used and that this feature ; should be disabled, as enabling it may result in issues when generating XML ; documents, however this remains supported for backward compatibility reasons. ; Note that this directive does not control the <?= shorthand tag, which can be ; used regardless of this directive. ; Default Value: On ; Development Value: Off ; Production Value: Off ; http://php.net/short-open-tag short_open_tag = Off ; The number of significant digits displayed in floating point numbers. ; http://php.net/precision precision = 14 ; Output buffering is a mechanism for controlling how much output data ; (excluding headers and cookies) PHP should keep internally before pushing that ; data to the client. If your application's output exceeds this setting, PHP ; will send that data in chunks of roughly the size you specify. ; Turning on this setting and managing its maximum buffer size can yield some ; interesting side-effects depending on your application and web server. ; You may be able to send headers and cookies after you've already sent output ; through print or echo. You also may see performance benefits if your server is ; emitting less packets due to buffered output versus PHP streaming the output ; as it gets it. On production servers, 4096 bytes is a good setting for performance ; reasons. ; Note: Output buffering can also be controlled via Output Buffering Control ; functions. ; Possible Values: ; On = Enabled and buffer is unlimited. (Use with caution) ; Off = Disabled ; Integer = Enables the buffer and sets its maximum size in bytes. ; Note: This directive is hardcoded to Off for the CLI SAPI ; Default Value: Off ; Development Value: 4096 ; Production Value: 4096 ; http://php.net/output-buffering output_buffering = 4096 ; You can redirect all of the output of your scripts to a function. For ; example, if you set output_handler to "mb_output_handler", character ; encoding will be transparently converted to the specified encoding. ; Setting any output handler automatically turns on output buffering. ; Note: People who wrote portable scripts should not depend on this ini ; directive. Instead, explicitly set the output handler using ob_start(). ; Using this ini directive may cause problems unless you know what script ; is doing. ; Note: You cannot use both "mb_output_handler" with "ob_iconv_handler" ; and you cannot use both "ob_gzhandler" and "zlib.output_compression". ; Note: output_handler must be empty if this is set 'On' !!!! ; Instead you must use zlib.output_handler. ; http://php.net/output-handler ;output_handler = ; URL rewriter function rewrites URL on the fly by using ; output buffer. You can set target tags by this configuration. ; "form" tag is special tag. It will add hidden input tag to pass values. ; Refer to session.trans_sid_tags for usage. ; Default Value: "form=" ; Development Value: "form=" ; Production Value: "form=" ;url_rewriter.tags ; URL rewriter will not rewrite absolute URL nor form by default. To enable ; absolute URL rewrite, allowed hosts must be defined at RUNTIME. ; Refer to session.trans_sid_hosts for more details. ; Default Value: "" ; Development Value: "" ; Production Value: "" ;url_rewriter.hosts ; Transparent output compression using the zlib library ; Valid values for this option are 'off', 'on', or a specific buffer size ; to be used for compression (default is 4KB) ; Note: Resulting chunk size may vary due to nature of compression. PHP ; outputs chunks that are few hundreds bytes each as a result of ; compression. If you prefer a larger chunk size for better ; performance, enable output_buffering in addition. ; Note: You need to use zlib.output_handler instead of the standard ; output_handler, or otherwise the output will be corrupted. ; http://php.net/zlib.output-compression zlib.output_compression = Off ; http://php.net/zlib.output-compression-level ;zlib.output_compression_level = -1 ; You cannot specify additional output handlers if zlib.output_compression ; is activated here. This setting does the same as output_handler but in ; a different order. ; http://php.net/zlib.output-handler ;zlib.output_handler = ; Implicit flush tells PHP to tell the output layer to flush itself ; automatically after every output block. This is equivalent to calling the ; PHP function flush() after each and every call to print() or echo() and each ; and every HTML block. Turning this option on has serious performance ; implications and is generally recommended for debugging purposes only. ; http://php.net/implicit-flush ; Note: This directive is hardcoded to On for the CLI SAPI implicit_flush = Off ; The unserialize callback function will be called (with the undefined class' ; name as parameter), if the unserializer finds an undefined class ; which should be instantiated. A warning appears if the specified function is ; not defined, or if the function doesn't include/implement the missing class. ; So only set this entry, if you really want to implement such a ; callback-function. unserialize_callback_func = ; The unserialize_max_depth specifies the default depth limit for unserialized ; structures. Setting the depth limit too high may result in stack overflows ; during unserialization. The unserialize_max_depth ini setting can be ; overridden by the max_depth option on individual unserialize() calls. ; A value of 0 disables the depth limit. ;unserialize_max_depth = 4096 ; When floats & doubles are serialized, store serialize_precision significant ; digits after the floating point. The default value ensures that when floats ; are decoded with unserialize, the data will remain the same. ; The value is also used for json_encode when encoding double values. ; If -1 is used, then dtoa mode 0 is used which automatically select the best ; precision. serialize_precision = -1 ; open_basedir, if set, limits all file operations to the defined directory ; and below. This directive makes most sense if used in a per-directory ; or per-virtualhost web server configuration file. ; Note: disables the realpath cache ; http://php.net/open-basedir ;open_basedir = ; This directive allows you to disable certain functions. ; It receives a comma-delimited list of function names. ; http://php.net/disable-functions disable_functions = ; This directive allows you to disable certain classes. ; It receives a comma-delimited list of class names. ; http://php.net/disable-classes disable_classes = ; Colors for Syntax Highlighting mode. Anything that's acceptable in ; <span style="color: ???????"> would work. ; http://php.net/syntax-highlighting ;highlight.string = #DD0000 ;highlight.comment = #FF9900 ;highlight.keyword = #007700 ;highlight.default = #0000BB ;highlight.html = #000000 ; If enabled, the request will be allowed to complete even if the user aborts ; the request. Consider enabling it if executing long requests, which may end up ; being interrupted by the user or a browser timing out. PHP's default behavior ; is to disable this feature. ; http://php.net/ignore-user-abort ;ignore_user_abort = On ; Determines the size of the realpath cache to be used by PHP. This value should ; be increased on systems where PHP opens many files to reflect the quantity of ; the file operations performed. ; Note: if open_basedir is set, the cache is disabled ; http://php.net/realpath-cache-size ;realpath_cache_size = 4096k ; Duration of time, in seconds for which to cache realpath information for a given ; file or directory. For systems with rarely changing files, consider increasing this ; value. ; http://php.net/realpath-cache-ttl ;realpath_cache_ttl = 120 ; Enables or disables the circular reference collector. ; http://php.net/zend.enable-gc zend.enable_gc = On ; If enabled, scripts may be written in encodings that are incompatible with ; the scanner. CP936, Big5, CP949 and Shift_JIS are the examples of such ; encodings. To use this feature, mbstring extension must be enabled. ; Default: Off ;zend.multibyte = Off ; Allows to set the default encoding for the scripts. This value will be used ; unless "declare(encoding=...)" directive appears at the top of the script. ; Only affects if zend.multibyte is set. ; Default: "" ;zend.script_encoding = ; Allows to include or exclude arguments from stack traces generated for exceptions ; Default: Off ; In production, it is recommended to turn this setting on to prohibit the output ; of sensitive information in stack traces zend.exception_ignore_args = On ;;;;;;;;;;;;;;;;; ; Miscellaneous ; ;;;;;;;;;;;;;;;;; ; Decides whether PHP may expose the fact that it is installed on the server ; (e.g. by adding its signature to the Web server header). It is no security ; threat in any way, but it makes it possible to determine whether you use PHP ; on your server or not. ; http://php.net/expose-php expose_php = On ;;;;;;;;;;;;;;;;;;; ; Resource Limits ; ;;;;;;;;;;;;;;;;;;; ; Maximum execution time of each script, in seconds ; http://php.net/max-execution-time ; Note: This directive is hardcoded to 0 for the CLI SAPI max_execution_time = 30 ; Maximum amount of time each script may spend parsing request data. It's a good ; idea to limit this time on productions servers in order to eliminate unexpectedly ; long running scripts. ; Note: This directive is hardcoded to -1 for the CLI SAPI ; Default Value: -1 (Unlimited) ; Development Value: 60 (60 seconds) ; Production Value: 60 (60 seconds) ; http://php.net/max-input-time max_input_time = 60 ; Maximum input variable nesting level ; http://php.net/max-input-nesting-level ;max_input_nesting_level = 64 ; How many GET/POST/COOKIE input variables may be accepted ;max_input_vars = 1000 ; Maximum amount of memory a script may consume ; http://php.net/memory-limit memory_limit = 1024M ;;;;;;;;;;;;;;;;;;;;;;;;;;;;;; ; Error handling and logging ; ;;;;;;;;;;;;;;;;;;;;;;;;;;;;;; ; This directive informs PHP of which errors, warnings and notices you would like ; it to take action for. The recommended way of setting values for this ; directive is through the use of the error level constants and bitwise ; operators. The error level constants are below here for convenience as well as ; some common settings and their meanings. ; By default, PHP is set to take action on all errors, notices and warnings EXCEPT ; those related to E_NOTICE and E_STRICT, which together cover best practices and ; recommended coding standards in PHP. For performance reasons, this is the ; recommend error reporting setting. Your production server shouldn't be wasting ; resources complaining about best practices and coding standards. That's what ; development servers and development settings are for. ; Note: The php.ini-development file has this setting as E_ALL. This ; means it pretty much reports everything which is exactly what you want during ; development and early testing. ; ; Error Level Constants: ; E_ALL - All errors and warnings (includes E_STRICT as of PHP 5.4.0) ; E_ERROR - fatal run-time errors ; E_RECOVERABLE_ERROR - almost fatal run-time errors ; E_WARNING - run-time warnings (non-fatal errors) ; E_PARSE - compile-time parse errors ; E_NOTICE - run-time notices (these are warnings which often result ; from a bug in your code, but it's possible that it was ; intentional (e.g., using an uninitialized variable and ; relying on the fact it is automatically initialized to an ; empty string) ; E_STRICT - run-time notices, enable to have PHP suggest changes ; to your code which will ensure the best interoperability ; and forward compatibility of your code ; E_CORE_ERROR - fatal errors that occur during PHP's initial startup ; E_CORE_WARNING - warnings (non-fatal errors) that occur during PHP's ; initial startup ; E_COMPILE_ERROR - fatal compile-time errors ; E_COMPILE_WARNING - compile-time warnings (non-fatal errors) ; E_USER_ERROR - user-generated error message ; E_USER_WARNING - user-generated warning message ; E_USER_NOTICE - user-generated notice message ; E_DEPRECATED - warn about code that will not work in future versions ; of PHP ; E_USER_DEPRECATED - user-generated deprecation warnings ; ; Common Values: ; E_ALL (Show all errors, warnings and notices including coding standards.) ; E_ALL & ~E_NOTICE (Show all errors, except for notices) ; E_ALL & ~E_NOTICE & ~E_STRICT (Show all errors, except for notices and coding standards warnings.) ; E_COMPILE_ERROR|E_RECOVERABLE_ERROR|E_ERROR|E_CORE_ERROR (Show only errors) ; Default Value: E_ALL & ~E_NOTICE & ~E_STRICT & ~E_DEPRECATED ; Development Value: E_ALL ; Production Value: E_ALL & ~E_DEPRECATED & ~E_STRICT ; http://php.net/error-reporting error_reporting = E_ALL & ~E_DEPRECATED & ~E_STRICT ; This directive controls whether or not and where PHP will output errors, ; notices and warnings too. Error output is very useful during development, but ; it could be very dangerous in production environments. Depending on the code ; which is triggering the error, sensitive information could potentially leak ; out of your application such as database usernames and passwords or worse. ; For production environments, we recommend logging errors rather than ; sending them to STDOUT. ; Possible Values: ; Off = Do not display any errors ; stderr = Display errors to STDERR (affects only CGI/CLI binaries!) ; On or stdout = Display errors to STDOUT ; Default Value: On ; Development Value: On ; Production Value: Off ; http://php.net/display-errors display_errors = Off ; The display of errors which occur during PHP's startup sequence are handled ; separately from display_errors. PHP's default behavior is to suppress those ; errors from clients. Turning the display of startup errors on can be useful in ; debugging configuration problems. We strongly recommend you ; set this to 'off' for production servers. ; Default Value: Off ; Development Value: On ; Production Value: Off ; http://php.net/display-startup-errors display_startup_errors = Off ; Besides displaying errors, PHP can also log errors to locations such as a ; server-specific log, STDERR, or a location specified by the error_log ; directive found below. While errors should not be displayed on productions ; servers they should still be monitored and logging is a great way to do that. ; Default Value: Off ; Development Value: On ; Production Value: On ; http://php.net/log-errors log_errors = On ; Set maximum length of log_errors. In error_log information about the source is ; added. The default is 1024 and 0 allows to not apply any maximum length at all. ; http://php.net/log-errors-max-len log_errors_max_len = 1024 ; Do not log repeated messages. Repeated errors must occur in same file on same ; line unless ignore_repeated_source is set true. ; http://php.net/ignore-repeated-errors ignore_repeated_errors = Off ; Ignore source of message when ignoring repeated messages. When this setting ; is On you will not log errors with repeated messages from different files or ; source lines. ; http://php.net/ignore-repeated-source ignore_repeated_source = Off ; If this parameter is set to Off, then memory leaks will not be shown (on ; stdout or in the log). This is only effective in a debug compile, and if ; error reporting includes E_WARNING in the allowed list ; http://php.net/report-memleaks report_memleaks = On ; This setting is on by default. ;report_zend_debug = 0 ; Store the last error/warning message in $php_errormsg (boolean). Setting this value ; to On can assist in debugging and is appropriate for development servers. It should ; however be disabled on production servers. ; This directive is DEPRECATED. ; Default Value: Off ; Development Value: Off ; Production Value: Off ; http://php.net/track-errors ;track_errors = Off ; Turn off normal error reporting and emit XML-RPC error XML ; http://php.net/xmlrpc-errors ;xmlrpc_errors = 0 ; An XML-RPC faultCode ;xmlrpc_error_number = 0 ; When PHP displays or logs an error, it has the capability of formatting the ; error message as HTML for easier reading. This directive controls whether ; the error message is formatted as HTML or not. ; Note: This directive is hardcoded to Off for the CLI SAPI ; http://php.net/html-errors ;html_errors = On ; If html_errors is set to On *and* docref_root is not empty, then PHP ; produces clickable error messages that direct to a page describing the error ; or function causing the error in detail. ; You can download a copy of the PHP manual from http://php.net/docs ; and change docref_root to the base URL of your local copy including the ; leading '/'. You must also specify the file extension being used including ; the dot. PHP's default behavior is to leave these settings empty, in which ; case no links to documentation are generated. ; Note: Never use this feature for production boxes. ; http://php.net/docref-root ; Examples ;docref_root = "/phpmanual/" ; http://php.net/docref-ext ;docref_ext = .html ; String to output before an error message. PHP's default behavior is to leave ; this setting blank. ; http://php.net/error-prepend-string ; Example: ;error_prepend_string = "<span style='color: #ff0000'>" ; String to output after an error message. PHP's default behavior is to leave ; this setting blank. ; http://php.net/error-append-string ; Example: ;error_append_string = "</span>" ; Log errors to specified file. PHP's default behavior is to leave this value ; empty. ; http://php.net/error-log ; Example: ;error_log = php_errors.log ; Log errors to syslog (Event Log on Windows). ;error_log = syslog ; The syslog ident is a string which is prepended to every message logged ; to syslog. Only used when error_log is set to syslog. ;syslog.ident = php ; The syslog facility is used to specify what type of program is logging ; the message. Only used when error_log is set to syslog. ;syslog.facility = user ; Set this to disable filtering control characters (the default). ; Some loggers only accept NVT-ASCII, others accept anything that's not ; control characters. If your logger accepts everything, then no filtering ; is needed at all. ; Allowed values are: ; ascii (all printable ASCII characters and NL) ; no-ctrl (all characters except control characters) ; all (all characters) ; raw (like "all", but messages are not split at newlines) ; http://php.net/syslog.filter ;syslog.filter = ascii ;windows.show_crt_warning ; Default value: 0 ; Development value: 0 ; Production value: 0 ;;;;;;;;;;;;;;;;; ; Data Handling ; ;;;;;;;;;;;;;;;;; ; The separator used in PHP generated URLs to separate arguments. ; PHP's default setting is "&". ; http://php.net/arg-separator.output ; Example: ;arg_separator.output = "&" ; List of separator(s) used by PHP to parse input URLs into variables. ; PHP's default setting is "&". ; NOTE: Every character in this directive is considered as separator! ; http://php.net/arg-separator.input ; Example: ;arg_separator.input = ";&" ; This directive determines which super global arrays are registered when PHP ; starts up. G,P,C,E & S are abbreviations for the following respective super ; globals: GET, POST, COOKIE, ENV and SERVER. There is a performance penalty ; paid for the registration of these arrays and because ENV is not as commonly ; used as the others, ENV is not recommended on productions servers. You ; can still get access to the environment variables through getenv() should you ; need to. ; Default Value: "EGPCS" ; Development Value: "GPCS" ; Production Value: "GPCS"; ; http://php.net/variables-order variables_order = "GPCS" ; This directive determines which super global data (G,P & C) should be ; registered into the super global array REQUEST. If so, it also determines ; the order in which that data is registered. The values for this directive ; are specified in the same manner as the variables_order directive, ; EXCEPT one. Leaving this value empty will cause PHP to use the value set ; in the variables_order directive. It does not mean it will leave the super ; globals array REQUEST empty. ; Default Value: None ; Development Value: "GP" ; Production Value: "GP" ; http://php.net/request-order request_order = "GP" ; This directive determines whether PHP registers $argv & $argc each time it ; runs. $argv contains an array of all the arguments passed to PHP when a script ; is invoked. $argc contains an integer representing the number of arguments ; that were passed when the script was invoked. These arrays are extremely ; useful when running scripts from the command line. When this directive is ; enabled, registering these variables consumes CPU cycles and memory each time ; a script is executed. For performance reasons, this feature should be disabled ; on production servers. ; Note: This directive is hardcoded to On for the CLI SAPI ; Default Value: On ; Development Value: Off ; Production Value: Off ; http://php.net/register-argc-argv register_argc_argv = Off ; When enabled, the ENV, REQUEST and SERVER variables are created when they're ; first used (Just In Time) instead of when the script starts. If these ; variables are not used within a script, having this directive on will result ; in a performance gain. The PHP directive register_argc_argv must be disabled ; for this directive to have any effect. ; http://php.net/auto-globals-jit auto_globals_jit = On ; Whether PHP will read the POST data. ; This option is enabled by default. ; Most likely, you won't want to disable this option globally. It causes $_POST ; and $_FILES to always be empty; the only way you will be able to read the ; POST data will be through the php://input stream wrapper. This can be useful ; to proxy requests or to process the POST data in a memory efficient fashion. ; http://php.net/enable-post-data-reading ;enable_post_data_reading = Off ; Maximum size of POST data that PHP will accept. ; Its value may be 0 to disable the limit. It is ignored if POST data reading ; is disabled through enable_post_data_reading. ; http://php.net/post-max-size post_max_size = 400M ; Automatically add files before PHP document. ; http://php.net/auto-prepend-file auto_prepend_file = ; Automatically add files after PHP document. ; http://php.net/auto-append-file auto_append_file = ; By default, PHP will output a media type using the Content-Type header. To ; disable this, simply set it to be empty. ; ; PHP's built-in default media type is set to text/html. ; http://php.net/default-mimetype default_mimetype = "text/html" ; PHP's default character set is set to UTF-8. ; http://php.net/default-charset default_charset = "UTF-8" ; PHP internal character encoding is set to empty. ; If empty, default_charset is used. ; http://php.net/internal-encoding ;internal_encoding = ; PHP input character encoding is set to empty. ; If empty, default_charset is used. ; http://php.net/input-encoding ;input_encoding = ; PHP output character encoding is set to empty. ; If empty, default_charset is used. ; See also output_buffer. ; http://php.net/output-encoding ;output_encoding = ;;;;;;;;;;;;;;;;;;;;;;;;; ; Paths and Directories ; ;;;;;;;;;;;;;;;;;;;;;;;;; ; UNIX: "/path1:/path2" ;include_path = ".:/php/includes" ; ; Windows: "\path1;\path2" ;include_path = ".;c:\php\includes" ; ; PHP's default setting for include_path is ".;/path/to/php/pear" ; http://php.net/include-path ; The root of the PHP pages, used only if nonempty. ; if PHP was not compiled with FORCE_REDIRECT, you SHOULD set doc_root ; if you are running php as a CGI under any web server (other than IIS) ; see documentation for security issues. The alternate is to use the ; cgi.force_redirect configuration below ; http://php.net/doc-root doc_root = ; The directory under which PHP opens the script using /~username used only ; if nonempty. ; http://php.net/user-dir user_dir = ; Directory in which the loadable extensions (modules) reside. ; http://php.net/extension-dir ;extension_dir = "./" ; On windows: ;extension_dir = "ext" ; Directory where the temporary files should be placed. ; Defaults to the system default (see sys_get_temp_dir) ;sys_temp_dir = "/tmp" ; Whether or not to enable the dl() function. The dl() function does NOT work ; properly in multithreaded servers, such as IIS or Zeus, and is automatically ; disabled on them. ; http://php.net/enable-dl enable_dl = Off ; cgi.force_redirect is necessary to provide security running PHP as a CGI under ; most web servers. Left undefined, PHP turns this on by default. You can ; turn it off here AT YOUR OWN RISK ; **You CAN safely turn this off for IIS, in fact, you MUST.** ; http://php.net/cgi.force-redirect ;cgi.force_redirect = 1 ; if cgi.nph is enabled it will force cgi to always sent Status: 200 with ; every request. PHP's default behavior is to disable this feature. ;cgi.nph = 1 ; if cgi.force_redirect is turned on, and you are not running under Apache or Netscape ; (iPlanet) web servers, you MAY need to set an environment variable name that PHP ; will look for to know it is OK to continue execution. Setting this variable MAY ; cause security issues, KNOW WHAT YOU ARE DOING FIRST. ; http://php.net/cgi.redirect-status-env ;cgi.redirect_status_env = ; cgi.fix_pathinfo provides *real* PATH_INFO/PATH_TRANSLATED support for CGI. PHP's ; previous behaviour was to set PATH_TRANSLATED to SCRIPT_FILENAME, and to not grok ; what PATH_INFO is. For more information on PATH_INFO, see the cgi specs. Setting ; this to 1 will cause PHP CGI to fix its paths to conform to the spec. A setting ; of zero causes PHP to behave as before. Default is 1. You should fix your scripts ; to use SCRIPT_FILENAME rather than PATH_TRANSLATED. ; http://php.net/cgi.fix-pathinfo ;cgi.fix_pathinfo=1 ; if cgi.discard_path is enabled, the PHP CGI binary can safely be placed outside ; of the web tree and people will not be able to circumvent .htaccess security. ;cgi.discard_path=1 ; FastCGI under IIS supports the ability to impersonate ; security tokens of the calling client. This allows IIS to define the ; security context that the request runs under. mod_fastcgi under Apache ; does not currently support this feature (03/17/2002) ; Set to 1 if running under IIS. Default is zero. ; http://php.net/fastcgi.impersonate ;fastcgi.impersonate = 1 ; Disable logging through FastCGI connection. PHP's default behavior is to enable ; this feature. ;fastcgi.logging = 0 ; cgi.rfc2616_headers configuration option tells PHP what type of headers to ; use when sending HTTP response code. If set to 0, PHP sends Status: header that ; is supported by Apache. When this option is set to 1, PHP will send ; RFC2616 compliant header. ; Default is zero. ; http://php.net/cgi.rfc2616-headers ;cgi.rfc2616_headers = 0 ; cgi.check_shebang_line controls whether CGI PHP checks for line starting with #! ; (shebang) at the top of the running script. This line might be needed if the ; script support running both as stand-alone script and via PHP CGI<. PHP in CGI ; mode skips this line and ignores its content if this directive is turned on. ; http://php.net/cgi.check-shebang-line ;cgi.check_shebang_line=1 ;;;;;;;;;;;;;;;; ; File Uploads ; ;;;;;;;;;;;;;;;; ; Whether to allow HTTP file uploads. ; http://php.net/file-uploads file_uploads = On ; Temporary directory for HTTP uploaded files (will use system default if not ; specified). ; http://php.net/upload-tmp-dir ;upload_tmp_dir = ; Maximum allowed size for uploaded files. ; http://php.net/upload-max-filesize upload_max_filesize = 512M ; Maximum number of files that can be uploaded via a single request max_file_uploads = 40 ;;;;;;;;;;;;;;;;;; ; Fopen wrappers ; ;;;;;;;;;;;;;;;;;; ; Whether to allow the treatment of URLs (like http:// or ftp://) as files. ; http://php.net/allow-url-fopen allow_url_fopen = On ; Whether to allow include/require to open URLs (like http:// or ftp://) as files. ; http://php.net/allow-url-include allow_url_include = Off ; Define the anonymous ftp password (your email address). PHP's default setting ; for this is empty. ; http://php.net/from ;from="john@doe.com" ; Define the User-Agent string. PHP's default setting for this is empty. ; http://php.net/user-agent ;user_agent="PHP" ; Default timeout for socket based streams (seconds) ; http://php.net/default-socket-timeout default_socket_timeout = 60 ; If your scripts have to deal with files from Macintosh systems, ; or you are running on a Mac and need to deal with files from ; unix or win32 systems, setting this flag will cause PHP to ; automatically detect the EOL character in those files so that ; fgets() and file() will work regardless of the source of the file. ; http://php.net/auto-detect-line-endings ;auto_detect_line_endings = Off ;;;;;;;;;;;;;;;;;;;;;; ; Dynamic Extensions ; ;;;;;;;;;;;;;;;;;;;;;; ; If you wish to have an extension loaded automatically, use the following ; syntax: ; ; extension=modulename ; ; For example: ; ; extension=mysqli ; ; When the extension library to load is not located in the default extension ; directory, You may specify an absolute path to the library file: ; ; extension=/path/to/extension/mysqli.so ; ; Note : The syntax used in previous PHP versions ('extension=<ext>.so' and ; 'extension='php_<ext>.dll') is supported for legacy reasons and may be ; deprecated in a future PHP major version. So, when it is possible, please ; move to the new ('extension=<ext>) syntax. ;;;; ; Note: packaged extension modules are now loaded via the .ini files ; found in the directory /etc/php.d; these are loaded by default. ;;;; ;;;;;;;;;;;;;;;;;;; ; Module Settings ; ;;;;;;;;;;;;;;;;;;; [CLI Server] ; Whether the CLI web server uses ANSI color coding in its terminal output. cli_server.color = On [Date] ; Defines the default timezone used by the date functions ; http://php.net/date.timezone ;date.timezone = ; http://php.net/date.default-latitude ;date.default_latitude = 31.7667 ; http://php.net/date.default-longitude ;date.default_longitude = 35.2333 ; http://php.net/date.sunrise-zenith ;date.sunrise_zenith = 90.583333 ; http://php.net/date.sunset-zenith ;date.sunset_zenith = 90.583333 [filter] ; http://php.net/filter.default ;filter.default = unsafe_raw ; http://php.net/filter.default-flags ;filter.default_flags = [iconv] ; Use of this INI entry is deprecated, use global input_encoding instead. ; If empty, default_charset or input_encoding or iconv.input_encoding is used. ; The precedence is: default_charset < input_encoding < iconv.input_encoding ;iconv.input_encoding = ; Use of this INI entry is deprecated, use global internal_encoding instead. ; If empty, default_charset or internal_encoding or iconv.internal_encoding is used. ; The precedence is: default_charset < internal_encoding < iconv.internal_encoding ;iconv.internal_encoding = ; Use of this INI entry is deprecated, use global output_encoding instead. ; If empty, default_charset or output_encoding or iconv.output_encoding is used. ; The precedence is: default_charset < output_encoding < iconv.output_encoding ; To use an output encoding conversion, iconv's output handler must be set ; otherwise output encoding conversion cannot be performed. ;iconv.output_encoding = [imap] ; rsh/ssh logins are disabled by default. Use this INI entry if you want to ; enable them. Note that the IMAP library does not filter mailbox names before ; passing them to rsh/ssh command, thus passing untrusted data to this function ; with rsh/ssh enabled is insecure. ;imap.enable_insecure_rsh=0 [intl] ;intl.default_locale = ; This directive allows you to produce PHP errors when some error ; happens within intl functions. The value is the level of the error produced. ; Default is 0, which does not produce any errors. ;intl.error_level = E_WARNING ;intl.use_exceptions = 0 [sqlite3] ; Directory pointing to SQLite3 extensions ; http://php.net/sqlite3.extension-dir ;sqlite3.extension_dir = ; SQLite defensive mode flag (only available from SQLite 3.26+) ; When the defensive flag is enabled, language features that allow ordinary ; SQL to deliberately corrupt the database file are disabled. This forbids ; writing directly to the schema, shadow tables (eg. FTS data tables), or ; the sqlite_dbpage virtual table. ; https://www.sqlite.org/c3ref/c_dbconfig_defensive.html ; (for older SQLite versions, this flag has no use) ;sqlite3.defensive = 1 [Pcre] ; PCRE library backtracking limit. ; http://php.net/pcre.backtrack-limit ;pcre.backtrack_limit=100000 ; PCRE library recursion limit. ; Please note that if you set this value to a high number you may consume all ; the available process stack and eventually crash PHP (due to reaching the ; stack size limit imposed by the Operating System). ; http://php.net/pcre.recursion-limit ;pcre.recursion_limit=100000 ; Enables or disables JIT compilation of patterns. This requires the PCRE ; library to be compiled with JIT support. pcre.jit=0 [Pdo] ; Whether to pool ODBC connections. Can be one of "strict", "relaxed" or "off" ; http://php.net/pdo-odbc.connection-pooling ;pdo_odbc.connection_pooling=strict ;pdo_odbc.db2_instance_name [Pdo_mysql] ; Default socket name for local MySQL connects. If empty, uses the built-in ; MySQL defaults. pdo_mysql.default_socket= [Phar] ; http://php.net/phar.readonly ;phar.readonly = On ; http://php.net/phar.require-hash ;phar.require_hash = On ;phar.cache_list = [mail function] ; For Unix only. You may supply arguments as well (default: "sendmail -t -i"). ; http://php.net/sendmail-path sendmail_path = /usr/sbin/sendmail -t -i ; Force the addition of the specified parameters to be passed as extra parameters ; to the sendmail binary. These parameters will always replace the value of ; the 5th parameter to mail(). ;mail.force_extra_parameters = ; Add X-PHP-Originating-Script: that will include uid of the script followed by the filename mail.add_x_header = Off ; The path to a log file that will log all mail() calls. Log entries include ; the full path of the script, line number, To address and headers. ;mail.log = ; Log mail to syslog (Event Log on Windows). ;mail.log = syslog [ODBC] ; http://php.net/odbc.default-db ;odbc.default_db = Not yet implemented ; http://php.net/odbc.default-user ;odbc.default_user = Not yet implemented ; http://php.net/odbc.default-pw ;odbc.default_pw = Not yet implemented ; Controls the ODBC cursor model. ; Default: SQL_CURSOR_STATIC (default). ;odbc.default_cursortype ; Allow or prevent persistent links. ; http://php.net/odbc.allow-persistent odbc.allow_persistent = On ; Check that a connection is still valid before reuse. ; http://php.net/odbc.check-persistent odbc.check_persistent = On ; Maximum number of persistent links. -1 means no limit. ; http://php.net/odbc.max-persistent odbc.max_persistent = -1 ; Maximum number of links (persistent + non-persistent). -1 means no limit. ; http://php.net/odbc.max-links odbc.max_links = -1 ; Handling of LONG fields. Returns number of bytes to variables. 0 means ; passthru. ; http://php.net/odbc.defaultlrl odbc.defaultlrl = 4096 ; Handling of binary data. 0 means passthru, 1 return as is, 2 convert to char. ; See the documentation on odbc_binmode and odbc_longreadlen for an explanation ; of odbc.defaultlrl and odbc.defaultbinmode ; http://php.net/odbc.defaultbinmode odbc.defaultbinmode = 1 [MySQLi] ; Maximum number of persistent links. -1 means no limit. ; http://php.net/mysqli.max-persistent mysqli.max_persistent = -1 ; Allow accessing, from PHP's perspective, local files with LOAD DATA statements ; http://php.net/mysqli.allow_local_infile ;mysqli.allow_local_infile = On ; Allow or prevent persistent links. ; http://php.net/mysqli.allow-persistent mysqli.allow_persistent = On ; Maximum number of links. -1 means no limit. ; http://php.net/mysqli.max-links mysqli.max_links = -1 ; Default port number for mysqli_connect(). If unset, mysqli_connect() will use ; the $MYSQL_TCP_PORT or the mysql-tcp entry in /etc/services or the ; compile-time value defined MYSQL_PORT (in that order). Win32 will only look ; at MYSQL_PORT. ; http://php.net/mysqli.default-port mysqli.default_port = 3306 ; Default socket name for local MySQL connects. If empty, uses the built-in ; MySQL defaults. ; http://php.net/mysqli.default-socket mysqli.default_socket = ; Default host for mysqli_connect() (doesn't apply in safe mode). ; http://php.net/mysqli.default-host mysqli.default_host = ; Default user for mysqli_connect() (doesn't apply in safe mode). ; http://php.net/mysqli.default-user mysqli.default_user = ; Default password for mysqli_connect() (doesn't apply in safe mode). ; Note that this is generally a *bad* idea to store passwords in this file. ; *Any* user with PHP access can run 'echo get_cfg_var("mysqli.default_pw") ; and reveal this password! And of course, any users with read access to this ; file will be able to reveal the password as well. ; http://php.net/mysqli.default-pw mysqli.default_pw = ; Allow or prevent reconnect mysqli.reconnect = Off [mysqlnd] ; Enable / Disable collection of general statistics by mysqlnd which can be ; used to tune and monitor MySQL operations. mysqlnd.collect_statistics = On ; Enable / Disable collection of memory usage statistics by mysqlnd which can be ; used to tune and monitor MySQL operations. mysqlnd.collect_memory_statistics = Off ; Records communication from all extensions using mysqlnd to the specified log ; file. ; http://php.net/mysqlnd.debug ;mysqlnd.debug = ; Defines which queries will be logged. ;mysqlnd.log_mask = 0 ; Default size of the mysqlnd memory pool, which is used by result sets. ;mysqlnd.mempool_default_size = 16000 ; Size of a pre-allocated buffer used when sending commands to MySQL in bytes. ;mysqlnd.net_cmd_buffer_size = 2048 ; Size of a pre-allocated buffer used for reading data sent by the server in ; bytes. ;mysqlnd.net_read_buffer_size = 32768 ; Timeout for network requests in seconds. ;mysqlnd.net_read_timeout = 31536000 ; SHA-256 Authentication Plugin related. File with the MySQL server public RSA ; key. ;mysqlnd.sha256_server_public_key = [OCI8] ; see /etc/php.d/20-oci8.ini [PostgreSQL] ; Allow or prevent persistent links. ; http://php.net/pgsql.allow-persistent pgsql.allow_persistent = On ; Detect broken persistent links always with pg_pconnect(). ; Auto reset feature requires a little overheads. ; http://php.net/pgsql.auto-reset-persistent pgsql.auto_reset_persistent = Off ; Maximum number of persistent links. -1 means no limit. ; http://php.net/pgsql.max-persistent pgsql.max_persistent = -1 ; Maximum number of links (persistent+non persistent). -1 means no limit. ; http://php.net/pgsql.max-links pgsql.max_links = -1 ; Ignore PostgreSQL backends Notice message or not. ; Notice message logging require a little overheads. ; http://php.net/pgsql.ignore-notice pgsql.ignore_notice = 0 ; Log PostgreSQL backends Notice message or not. ; Unless pgsql.ignore_notice=0, module cannot log notice message. ; http://php.net/pgsql.log-notice pgsql.log_notice = 0 [bcmath] ; Number of decimal digits for all bcmath functions. ; http://php.net/bcmath.scale bcmath.scale = 0 [browscap] ; http://php.net/browscap ;browscap = extra/browscap.ini [Session] ; Handler used to store/retrieve data. ; http://php.net/session.save-handler session.save_handler = files ; Argument passed to save_handler. In the case of files, this is the path ; where data files are stored. Note: Windows users have to change this ; variable in order to use PHP's session functions. ; ; The path can be defined as: ; ; session.save_path = "N;/path" ; ; where N is an integer. Instead of storing all the session files in ; /path, what this will do is use subdirectories N-levels deep, and ; store the session data in those directories. This is useful if ; your OS has problems with many files in one directory, and is ; a more efficient layout for servers that handle many sessions. ; ; NOTE 1: PHP will not create this directory structure automatically. ; You can use the script in the ext/session dir for that purpose. ; NOTE 2: See the section on garbage collection below if you choose to ; use subdirectories for session storage ; ; The file storage module creates files using mode 600 by default. ; You can change that by using ; ; session.save_path = "N;MODE;/path" ; ; where MODE is the octal representation of the mode. Note that this ; does not overwrite the process's umask. ; http://php.net/session.save-path ; RPM note : session directory must be owned by process owner ; for mod_php, see /etc/httpd/conf.d/php.conf ; for php-fpm, see /etc/php-fpm.d/*conf ;session.save_path = "/tmp" ; Whether to use strict session mode. ; Strict session mode does not accept an uninitialized session ID, and ; regenerates the session ID if the browser sends an uninitialized session ID. ; Strict mode protects applications from session fixation via a session adoption ; vulnerability. It is disabled by default for maximum compatibility, but ; enabling it is encouraged. ; https://wiki.php.net/rfc/strict_sessions session.use_strict_mode = 0 ; Whether to use cookies. ; http://php.net/session.use-cookies session.use_cookies = 1 ; http://php.net/session.cookie-secure ;session.cookie_secure = ; This option forces PHP to fetch and use a cookie for storing and maintaining ; the session id. We encourage this operation as it's very helpful in combating ; session hijacking when not specifying and managing your own session id. It is ; not the be-all and end-all of session hijacking defense, but it's a good start. ; http://php.net/session.use-only-cookies session.use_only_cookies = 1 ; Name of the session (used as cookie name). ; http://php.net/session.name session.name = PHPSESSID ; Initialize session on request startup. ; http://php.net/session.auto-start session.auto_start = 0 ; Lifetime in seconds of cookie or, if 0, until browser is restarted. ; http://php.net/session.cookie-lifetime session.cookie_lifetime = 0 ; The path for which the cookie is valid. ; http://php.net/session.cookie-path session.cookie_path = / ; The domain for which the cookie is valid. ; http://php.net/session.cookie-domain session.cookie_domain = ; Whether or not to add the httpOnly flag to the cookie, which makes it ; inaccessible to browser scripting languages such as JavaScript. ; http://php.net/session.cookie-httponly session.cookie_httponly = ; Add SameSite attribute to cookie to help mitigate Cross-Site Request Forgery (CSRF/XSRF) ; Current valid values are "Strict", "Lax" or "None". When using "None", ; make sure to include the quotes, as `none` is interpreted like `false` in ini files. ; https://tools.ietf.org/html/draft-west-first-party-cookies-07 session.cookie_samesite = ; Handler used to serialize data. php is the standard serializer of PHP. ; http://php.net/session.serialize-handler session.serialize_handler = php ; Defines the probability that the 'garbage collection' process is started on every ; session initialization. The probability is calculated by using gc_probability/gc_divisor, ; e.g. 1/100 means there is a 1% chance that the GC process starts on each request. ; Default Value: 1 ; Development Value: 1 ; Production Value: 1 ; http://php.net/session.gc-probability session.gc_probability = 1 ; Defines the probability that the 'garbage collection' process is started on every ; session initialization. The probability is calculated by using gc_probability/gc_divisor, ; e.g. 1/100 means there is a 1% chance that the GC process starts on each request. ; For high volume production servers, using a value of 1000 is a more efficient approach. ; Default Value: 100 ; Development Value: 1000 ; Production Value: 1000 ; http://php.net/session.gc-divisor session.gc_divisor = 1000 ; After this number of seconds, stored data will be seen as 'garbage' and ; cleaned up by the garbage collection process. ; http://php.net/session.gc-maxlifetime session.gc_maxlifetime = 1440 ; NOTE: If you are using the subdirectory option for storing session files ; (see session.save_path above), then garbage collection does *not* ; happen automatically. You will need to do your own garbage ; collection through a shell script, cron entry, or some other method. ; For example, the following script is the equivalent of setting ; session.gc_maxlifetime to 1440 (1440 seconds = 24 minutes): ; find /path/to/sessions -cmin +24 -type f | xargs rm ; Check HTTP Referer to invalidate externally stored URLs containing ids. ; HTTP_REFERER has to contain this substring for the session to be ; considered as valid. ; http://php.net/session.referer-check session.referer_check = ; Set to {nocache,private,public,} to determine HTTP caching aspects ; or leave this empty to avoid sending anti-caching headers. ; http://php.net/session.cache-limiter session.cache_limiter = nocache ; Document expires after n minutes. ; http://php.net/session.cache-expire session.cache_expire = 180 ; trans sid support is disabled by default. ; Use of trans sid may risk your users' security. ; Use this option with caution. ; - User may send URL contains active session ID ; to other person via. email/irc/etc. ; - URL that contains active session ID may be stored ; in publicly accessible computer. ; - User may access your site with the same session ID ; always using URL stored in browser's history or bookmarks. ; http://php.net/session.use-trans-sid session.use_trans_sid = 0 ; Set session ID character length. This value could be between 22 to 256. ; Shorter length than default is supported only for compatibility reason. ; Users should use 32 or more chars. ; http://php.net/session.sid-length ; Default Value: 32 ; Development Value: 26 ; Production Value: 26 session.sid_length = 26 ; The URL rewriter will look for URLs in a defined set of HTML tags. ; <form> is special; if you include them here, the rewriter will ; add a hidden <input> field with the info which is otherwise appended ; to URLs. <form> tag's action attribute URL will not be modified ; unless it is specified. ; Note that all valid entries require a "=", even if no value follows. ; Default Value: "a=href,area=href,frame=src,form=" ; Development Value: "a=href,area=href,frame=src,form=" ; Production Value: "a=href,area=href,frame=src,form=" ; http://php.net/url-rewriter.tags session.trans_sid_tags = "a=href,area=href,frame=src,form=" ; URL rewriter does not rewrite absolute URLs by default. ; To enable rewrites for absolute paths, target hosts must be specified ; at RUNTIME. i.e. use ini_set() ; <form> tags is special. PHP will check action attribute's URL regardless ; of session.trans_sid_tags setting. ; If no host is defined, HTTP_HOST will be used for allowed host. ; Example value: php.net,www.php.net,wiki.php.net ; Use "," for multiple hosts. No spaces are allowed. ; Default Value: "" ; Development Value: "" ; Production Value: "" ;session.trans_sid_hosts="" ; Define how many bits are stored in each character when converting ; the binary hash data to something readable. ; Possible values: ; 4 (4 bits: 0-9, a-f) ; 5 (5 bits: 0-9, a-v) ; 6 (6 bits: 0-9, a-z, A-Z, "-", ",") ; Default Value: 4 ; Development Value: 5 ; Production Value: 5 ; http://php.net/session.hash-bits-per-character session.sid_bits_per_character = 5 ; Enable upload progress tracking in $_SESSION ; Default Value: On ; Development Value: On ; Production Value: On ; http://php.net/session.upload-progress.enabled ;session.upload_progress.enabled = On ; Cleanup the progress information as soon as all POST data has been read ; (i.e. upload completed). ; Default Value: On ; Development Value: On ; Production Value: On ; http://php.net/session.upload-progress.cleanup ;session.upload_progress.cleanup = On ; A prefix used for the upload progress key in $_SESSION ; Default Value: "upload_progress_" ; Development Value: "upload_progress_" ; Production Value: "upload_progress_" ; http://php.net/session.upload-progress.prefix ;session.upload_progress.prefix = "upload_progress_" ; The index name (concatenated with the prefix) in $_SESSION ; containing the upload progress information ; Default Value: "PHP_SESSION_UPLOAD_PROGRESS" ; Development Value: "PHP_SESSION_UPLOAD_PROGRESS" ; Production Value: "PHP_SESSION_UPLOAD_PROGRESS" ; http://php.net/session.upload-progress.name ;session.upload_progress.name = "PHP_SESSION_UPLOAD_PROGRESS" ; How frequently the upload progress should be updated. ; Given either in percentages (per-file), or in bytes ; Default Value: "1%" ; Development Value: "1%" ; Production Value: "1%" ; http://php.net/session.upload-progress.freq ;session.upload_progress.freq = "1%" ; The minimum delay between updates, in seconds ; Default Value: 1 ; Development Value: 1 ; Production Value: 1 ; http://php.net/session.upload-progress.min-freq ;session.upload_progress.min_freq = "1" ; Only write session data when session data is changed. Enabled by default. ; http://php.net/session.lazy-write ;session.lazy_write = On [Assertion] ; Switch whether to compile assertions at all (to have no overhead at run-time) ; -1: Do not compile at all ; 0: Jump over assertion at run-time ; 1: Execute assertions ; Changing from or to a negative value is only possible in php.ini! (For turning assertions on and off at run-time, see assert.active, when zend.assertions = 1) ; Default Value: 1 ; Development Value: 1 ; Production Value: -1 ; http://php.net/zend.assertions zend.assertions = -1 ; Assert(expr); active by default. ; http://php.net/assert.active ;assert.active = On ; Throw an AssertionError on failed assertions ; http://php.net/assert.exception ;assert.exception = On ; Issue a PHP warning for each failed assertion. (Overridden by assert.exception if active) ; http://php.net/assert.warning ;assert.warning = On ; Don't bail out by default. ; http://php.net/assert.bail ;assert.bail = Off ; User-function to be called if an assertion fails. ; http://php.net/assert.callback ;assert.callback = 0 ; Eval the expression with current error_reporting(). Set to true if you want ; error_reporting(0) around the eval(). ; http://php.net/assert.quiet-eval ;assert.quiet_eval = 0 [mbstring] ; language for internal character representation. ; This affects mb_send_mail() and mbstring.detect_order. ; http://php.net/mbstring.language ;mbstring.language = Japanese ; Use of this INI entry is deprecated, use global internal_encoding instead. ; internal/script encoding. ; Some encoding cannot work as internal encoding. (e.g. SJIS, BIG5, ISO-2022-*) ; If empty, default_charset or internal_encoding or iconv.internal_encoding is used. ; The precedence is: default_charset < internal_encoding < iconv.internal_encoding ;mbstring.internal_encoding = ; Use of this INI entry is deprecated, use global input_encoding instead. ; http input encoding. ; mbstring.encoding_translation = On is needed to use this setting. ; If empty, default_charset or input_encoding or mbstring.input is used. ; The precedence is: default_charset < input_encoding < mbsting.http_input ; http://php.net/mbstring.http-input ;mbstring.http_input = ; Use of this INI entry is deprecated, use global output_encoding instead. ; http output encoding. ; mb_output_handler must be registered as output buffer to function. ; If empty, default_charset or output_encoding or mbstring.http_output is used. ; The precedence is: default_charset < output_encoding < mbstring.http_output ; To use an output encoding conversion, mbstring's output handler must be set ; otherwise output encoding conversion cannot be performed. ; http://php.net/mbstring.http-output ;mbstring.http_output = ; enable automatic encoding translation according to ; mbstring.internal_encoding setting. Input chars are ; converted to internal encoding by setting this to On. ; Note: Do _not_ use automatic encoding translation for ; portable libs/applications. ; http://php.net/mbstring.encoding-translation ;mbstring.encoding_translation = Off ; automatic encoding detection order. ; "auto" detect order is changed according to mbstring.language ; http://php.net/mbstring.detect-order ;mbstring.detect_order = auto ; substitute_character used when character cannot be converted ; one from another ; http://php.net/mbstring.substitute-character ;mbstring.substitute_character = none ; overload(replace) single byte functions by mbstring functions. ; mail(), ereg(), etc are overloaded by mb_send_mail(), mb_ereg(), ; etc. Possible values are 0,1,2,4 or combination of them. ; For example, 7 for overload everything. ; 0: No overload ; 1: Overload mail() function ; 2: Overload str*() functions ; 4: Overload ereg*() functions ; http://php.net/mbstring.func-overload ;mbstring.func_overload = 0 ; enable strict encoding detection. ; Default: Off ;mbstring.strict_detection = On ; This directive specifies the regex pattern of content types for which mb_output_handler() ; is activated. ; Default: mbstring.http_output_conv_mimetype=^(text/|application/xhtml\+xml) ;mbstring.http_output_conv_mimetype= ; This directive specifies maximum stack depth for mbstring regular expressions. It is similar ; to the pcre.recursion_limit for PCRE. ; Default: 100000 ;mbstring.regex_stack_limit=100000 ; This directive specifies maximum retry count for mbstring regular expressions. It is similar ; to the pcre.backtrack_limit for PCRE. ; Default: 1000000 ;mbstring.regex_retry_limit=1000000 [gd] ; Tell the jpeg decode to ignore warnings and try to create ; a gd image. The warning will then be displayed as notices ; disabled by default ; http://php.net/gd.jpeg-ignore-warning ;gd.jpeg_ignore_warning = 1 [exif] ; Exif UNICODE user comments are handled as UCS-2BE/UCS-2LE and JIS as JIS. ; With mbstring support this will automatically be converted into the encoding ; given by corresponding encode setting. When empty mbstring.internal_encoding ; is used. For the decode settings you can distinguish between motorola and ; intel byte order. A decode setting cannot be empty. ; http://php.net/exif.encode-unicode ;exif.encode_unicode = ISO-8859-15 ; http://php.net/exif.decode-unicode-motorola ;exif.decode_unicode_motorola = UCS-2BE ; http://php.net/exif.decode-unicode-intel ;exif.decode_unicode_intel = UCS-2LE ; http://php.net/exif.encode-jis ;exif.encode_jis = ; http://php.net/exif.decode-jis-motorola ;exif.decode_jis_motorola = JIS ; http://php.net/exif.decode-jis-intel ;exif.decode_jis_intel = JIS [Tidy] ; The path to a default tidy configuration file to use when using tidy ; http://php.net/tidy.default-config ;tidy.default_config = /usr/local/lib/php/default.tcfg ; Should tidy clean and repair output automatically? ; WARNING: Do not use this option if you are generating non-html content ; such as dynamic images ; http://php.net/tidy.clean-output tidy.clean_output = Off [soap] ; Enables or disables WSDL caching feature. ; http://php.net/soap.wsdl-cache-enabled soap.wsdl_cache_enabled=1 ; Sets the directory name where SOAP extension will put cache files. ; http://php.net/soap.wsdl-cache-dir ; RPM note : cache directory must be owned by process owner ; for mod_php, see /etc/httpd/conf.d/php.conf ; for php-fpm, see /etc/php-fpm.d/*conf soap.wsdl_cache_dir="/tmp" ; (time to live) Sets the number of second while cached file will be used ; instead of original one. ; http://php.net/soap.wsdl-cache-ttl soap.wsdl_cache_ttl=86400 ; Sets the size of the cache limit. (Max. number of WSDL files to cache) soap.wsdl_cache_limit = 5 [sysvshm] ; A default size of the shared memory segment ;sysvshm.init_mem = 10000 [ldap] ; Sets the maximum number of open links or -1 for unlimited. ldap.max_links = -1 [dba] ;dba.default_handler= [opcache] ; see /etc/php.d/10-opcache.ini [curl] ; A default value for the CURLOPT_CAINFO option. This is required to be an ; absolute path. ;curl.cainfo = [openssl] ; The location of a Certificate Authority (CA) file on the local filesystem ; to use when verifying the identity of SSL/TLS peers. Most users should ; not specify a value for this directive as PHP will attempt to use the ; OS-managed cert stores in its absence. If specified, this value may still ; be overridden on a per-stream basis via the "cafile" SSL stream context ; option. ;openssl.cafile= ; If openssl.cafile is not specified or if the CA file is not found, the ; directory pointed to by openssl.capath is searched for a suitable ; certificate. This value must be a correctly hashed certificate directory. ; Most users should not specify a value for this directive as PHP will ; attempt to use the OS-managed cert stores in its absence. If specified, ; this value may still be overridden on a per-stream basis via the "capath" ; SSL stream context option. ;openssl.capath= [ffi] ; see /etc/php.d/20-ffi.iniPHPセッションディレクトリのグループ情報を変更します。
# chown -R root:nginx /var/lib/php/sessionPHP-FPMとNginxをそれぞれ自動起動するように設定して、PHP-FPMとNginxを起動します。
# systemctl enable nginx && systemctl enable php-fpm
# systemctl start nginx && systemctl start php-fpm
Nextcloud本体をダウンロード、展開します。
# wget  https://download.nextcloud.com/server/releases/nextcloud-21.0.0.tar.bz2
# tar xf nextcloud-21.0.0.tar.bz2
展開したNextcloudをWebサーバーのドキュメントルート(/var/www/html)にコピーします。
# cp -R nextcloud/ /var/www/html/展開したデータとダウンロードしたアーカイブファイルを削除します。
# rm -rf nextcloud && rm -f nextcloud-21.0.0.tar.bz2Nextcloudのデータディレクトリを作成し、所有者を変更します。
# mkdir /var/www/html/nextcloud/data
# chown -R nginx:nginx /var/www/html/nextcloud
MariaDBを自動起動するように設定し、MariaDBを起動します。
# systemctl enable mariadb && systemctl restart mariadbMariaDBの基本セットアップを行います。質問は New password:、Re-enter new password:で rootユーザのパスワードを設定する以外は全て[Enter]キーを押します。
# mysql_secure_installation文字コードの設定をするため、MariaDB設定ファイルを編集します。
# vim /etc/my.cnf.d/server.cnf[mariadb]以下を編集、追記します。
~
[embedded]

# This group is only read by MariaDB servers, not by MySQL.
# If you use the same .cnf file for MySQL and MariaDB,
# you can put MariaDB-only options here
[mariadb]
character-set-server = utf8mb4

[client-mariadb]
default-character-set = utf8mb4
~
MariaDBを再起動します。
# systemctl restart mariadbMariaDBコンソールに接続して新規データベースを作成します。
# mysql -u root -p
Enter Password: 先程の初期セットアップで設定したrootユーザーパスワードを入力します。
MariaDB [(none)]> CREATE DATABASE nextcloud DEFAULT CHARACTER SET utf8mb4; MariaDB [(none)]> quit;ブラウザでhttps://[サーバーのアドレス]にアクセスします。
この画面が表示されたら、[ストレージとデータベース]をクリックします。
管理者アカウントのユーザー名とパスワードを入力し、
[MySQL/MariaDB]をクリックします。
データベースのユーザー名に[root]
データベースのパスワードに[MariaDBで設定したrootユーザーのパスワード]
データベース名に[nextcloud]
localhost:3306とそれぞれ入力し、[セットアップを完了します]をクリックします。NextcloudでRedisを使うようにNexcloud設定ファイルを編集します。
'default_phone_region'行以下を追記します。# vim /var/www/html/nextcloud/config/config.php <?php $CONFIG = array ( 'instanceid' => 'xxxxxxxxxxxx', 'passwordsalt' => 'xxxxxxxxxxxxxxxxxxxxxxxxxxxxxx', 'secret' => 'xxxxxxxxxxxxxxxxxxxxxxxxxxxxxxxxxxxxxx', 'trusted_domains' => array ( 0 => '<サーバのIPアドレス>', ), 'datadirectory' => '/var/www/html/nextcloud/data', 'dbtype' => 'mysql', 'version' => '18.0.4.0', 'overwrite.cli.url' => 'http://<サーバのIPアドレス>/nextcloud', 'dbname' => 'nextcloud', 'dbhost' => 'localhost:3306', 'dbport' => '', 'dbtableprefix' => 'oc_', 'dbuser' => 'nextcloud', 'dbpassword' => 'xxxxxxxx', 'installed' => true, 'default_phone_region' => 'JP', 'memcache.distributed' => '\\OC\\Memcache\\Redis', 'memcache.locking' => '\\OC\\Memcache\\Redis', 'memcache.local' => '\\OC\\Memcache\\APCu', 'redis' => array ( 'host' => 'localhost', 'port' => 6379, ), );PHP-FPMを再起動します。
# systemctl restart php-fpmこれでセットアップは完了です。
お疲れ様でした。Nextcloudのセキュリティ&セットアップ警告
Your web server is not set up correctly to resolve “/.well-known/webfinger”. See the documentation for more information.
*Your web server is not set up correctly to resolve “/.well-known/nodeinfo”. See the documentation for more information.の警告は、/etc/nginx/conf.d/nextcloud.confのserver内に次を追記すると消えます。
nextcloud.conflocation ^~ /.well-known { return 301 /index.php$uri; } location = /.well-known/webfinger { return 301 /index.php$uri; } location = /.well-known/nodeinfo { return 301 /index.php$uri; }PHPモジュール
このインスタンスには推奨されるPHPモジュールがいくつかありません。 パフォーマンスの向上と互換性の向上のために、それらをインストールすることを強くお勧めします。
bcmath
gmp
imagick
の警告は、次のコマンドを実行すると消えます# yum install php74-php-bcmath php74-php-gmp php74-php-imagick # cp /etc/opt/remi/php74/php.d/20-bcmath.ini /etc/php.d/ # cp /etc/opt/remi/php74/php.d/20-gmp.ini /etc/php.d/ # cp /etc/opt/remi/php74/php.d/40-imagick.ini /etc/php.d/ # cp /opt/remi/php74/root/usr/lib64/php/modules/bcmath.so /usr/lib64/php/modules/ # cp /opt/remi/php74/root/usr/lib64/php/modules/gmp.so /usr/lib64/php/modules/ # cp /opt/remi/php74/root/usr/lib64/php/modules/imagick.so /usr/lib64/php/modules/ # systemctl restart nginx && systemctl restart php-fpmあとがき
configファイルをそのままコピペすればセキュリティ&セットアップ警告は合格するように書いていますが、
セキュリティ&セットアップ警告で消えないものや、わからないところがあればコメントをお願いします。
できるだけ早めに返信します。


- 投稿日:2021-03-04T17:03:18+09:00
外部API呼び出しするクラスをモックする
この記事について
バックエンドから外部の API を呼び出すことがありますが、テストではそれをモックで差し替えたいシチュエーションで、Laravel + PHPUnit でどうやるといいか、備忘録です。
はじめに
環境
- Laravel: 8.30.1
- PHPUnit: 9.5.2
- PHP: 8.0.2
概要
架空の API に ping というエンドポイントがあり、テスト時はそいつのスタブをつくって処理を上書きしつつ、想定される引数が渡されるか、とかのチェックをするようにします。
times で回数を指定して、その回数分
pongをカンマ区切りで返すとします。curl -X POST -d times=2 https://api.some-service.example/ping // pong,pong実装
プロダクションコード
API 呼び出しを担当するクラスを ExternalApi として作成します。基本的にはエンドポイントにつき1つ公開メソッドを持たせるといいでしょう。
<?php

namespace App\Services\Api;

use GuzzleHttp\Client;

class ExternalApi
{
    private Client $http;

    public function __construct()
    {
        $this->http = new Client([
            'base_uri' => 'https://api.some-service.example',
        ]);
    }

    public function ping(?int $times = 1): string
    {
        assert($times > 0 && $times < 256);
        // 架空のサービスなのでローカルで完結するようにしておくが、イメージは下記のような感じ
        // $this->http->request('POST', 'ping', ['times' => $times]);
        return collect()->times($times)->map(fn() => 'pong')->join(',');
    }
}
呼び出しのコントローラーのイメージはこんな感じ。
Route::get('/ping', function (Request $request) {
    $user = $request->user();
    $api = app(\App\Services\Api\ExternalApi::class);
    $response = $api->ping($user->ping_count);
    return ['message' => $response];
});
テストコード
ExternalApi のモックをつくる処理をトレイトにまとめます。
<?php

namespace Tests\Concerns\Mock;

use App\Services\Api\ExternalApi;
use Mockery\MockInterface;

trait CreatesExternalApiMock
{
    public function createExternalApiMock(string $method, ...$args): MockInterface
    {
        $stubMethod = "{$method}Stub";
        if (!method_exists($this, $stubMethod)) {
            throw new \InvalidArgumentException('method not found.');
        }
        return $this->$stubMethod($args);
    }

    private function pingStub(array $args): MockInterface
    {
        $state = $args[0] ?? 'default';
        $method = "pingStub_${state}";
        $options = $args[1] ?? [];
        if (!method_exists($this, $method)) {
            throw new \InvalidArgumentException('state not found.');
        }
        return $this->$method($options);
    }

    private function pingStub_default(array $options): MockInterface
    {
        return $this->mock(ExternalApi::class, function (MockInterface $mock) {
            $mock->shouldReceive('ping')->with(null)->once()->andReturn('pong');
        });
    }

    private function pingStub_multiple(array $options): MockInterface
    {
        return $this->mock(ExternalApi::class, function (MockInterface $mock) use ($options) {
            $mock->shouldReceive('ping')->with($options['times'])->once()->andReturn(implode(',', array_fill(0, $options['times'], 'ping')));
        });
    }
}
パターンごとにスタブを用意してやります。
使い方のイメージはこんな感じ。
<?php

namespace Tests\Feature\Http\Controllers;

use App\Models\User;
use Illuminate\Foundation\Testing\RefreshDatabase;
use Tests\Concerns\Mock\CreatesExternalApiMock;
use Tests\TestCase;

class PingControllerTest extends TestCase
{
    use RefreshDatabase;
    use CreatesExternalApiMock;

    /**
     * @param string $state
     * @param array $args
     * @param string $expected
     * @return void
     * @dataProvider dataPing
     */
    public function testPing(string $state, array $args, string $expected)
    {
        $user = factory(User::class)->create(['ping_count' => $args['times'] ?? null]);

        $this->createExternalApiMock('ping', $state, $args);

        $response = $this
            ->actingAs($user)
            ->get('/');

        $response
            ->assertOk()
            ->assertJson(['message' => $expected]);
    }

    public function dataPing(): array
    {
        return [
            '1' => [
                'state' => 'default',
                'args' => [],
                'expected' => 'pong',
            ],
            '2' => [
                'state' => 'multiple',
                'args' => ['times' => 2],
                'expected' => 'pong,pong',
            ],
        ];
    }
}
個人的には入出力のパターンのテストはフィーチャーテストではなくユニットテストでやりたいですが、今回は例なのでフィーチャーテストに書きました。
おわりに
いくつかのプロダクトでこの方法を導入していますが、いまのところ便利に使えています。他にも取り入れられそうなアイデアがあれば、コメント欄にて教えていただけると助かります

- 投稿日:2021-03-04T17:03:18+09:00
Laravelで外部API呼び出しするクラスをモックする
この記事について
バックエンドから外部の API を呼び出すことがありますが、テストではそれをモックで差し替えたいシチュエーションで、Laravel + PHPUnit でどうやるといいか、備忘録です。
はじめに
環境
- Laravel: 8.30.1
- PHPUnit: 9.5.2
- PHP: 8.0.2
概要
架空の API に ping というエンドポイントがあり、テスト時はそいつのスタブをつくって処理を上書きしつつ、想定される引数が渡されるか、とかのチェックをするようにします。
times で回数を指定して、その回数分
pongをカンマ区切りで返すとします。curl -X POST -d times=2 https://api.some-service.example/ping // pong,pong実装
プロダクションコード
API 呼び出しを担当するクラスを SomeServiceApi として作成します。基本的にはエンドポイントにつき1つ公開メソッドを持たせるといいでしょう。
<?php

namespace App\Services\Api;

use GuzzleHttp\Client;

class SomeServiceApi
{
    private Client $http;

    public function __construct()
    {
        $this->http = new Client([
            'base_uri' => 'https://api.some-service.example',
        ]);
    }

    public function ping(?int $times = 1): string
    {
        assert($times > 0 && $times < 256);
        // 架空のサービスなのでローカルで完結するようにしておくが、イメージは下記のような感じ
        // $this->http->request('POST', 'ping', ['times' => $times]);
        return collect()->times($times)->map(fn() => 'pong')->join(',');
    }
}
呼び出しのコントローラーのイメージはこんな感じ。
Route::get('/ping', function (Request $request) {
    $user = $request->user();
    $api = app(\App\Services\Api\SomeService::class);
    $response = $api->ping($user->ping_count);
    return ['message' => $response];
});
テストコード
SomeServiceApi のモックをつくる処理をトレイトにまとめます。
<?php

namespace Tests\Concerns\Mock;

use App\Services\Api\SomeServiceApi;
use Mockery\MockInterface;

trait CreatesExternalApiMock
{
    public function createExternalApiMock(string $method, ...$args): MockInterface
    {
        $stubMethod = "{$method}Stub";
        if (!method_exists($this, $stubMethod)) {
            throw new \InvalidArgumentException('method not found.');
        }
        return $this->$stubMethod($args);
    }

    private function pingStub(array $args): MockInterface
    {
        $state = $args[0] ?? 'default';
        $method = "pingStub_${state}";
        $options = $args[1] ?? [];
        if (!method_exists($this, $method)) {
            throw new \InvalidArgumentException('state not found.');
        }
        return $this->$method($options);
    }

    private function pingStub_default(array $options): MockInterface
    {
        return $this->mock(ExternalApi::class, function (MockInterface $mock) {
            $mock->shouldReceive('ping')->with(null)->once()->andReturn('pong');
        });
    }

    private function pingStub_multiple(array $options): MockInterface
    {
        return $this->mock(ExternalApi::class, function (MockInterface $mock) use ($options) {
            $mock->shouldReceive('ping')->with($options['times'])->once()->andReturn(implode(',', array_fill(0, $options['times'], 'ping')));
        });
    }
}
パターンごとにスタブを用意してやります。
使い方のイメージはこんな感じ。
<?php

namespace Tests\Feature\Http\Controllers;

use App\Models\User;
use Illuminate\Foundation\Testing\RefreshDatabase;
use Tests\Concerns\Mock\CreatesExternalApiMock;
use Tests\TestCase;

class PingControllerTest extends TestCase
{
    use RefreshDatabase;
    use CreatesExternalApiMock;

    /**
     * @param string $state
     * @param array $args
     * @param string $expected
     * @return void
     * @dataProvider dataPing
     */
    public function testPing(string $state, array $args, string $expected)
    {
        $user = factory(User::class)->create(['ping_count' => $args['times'] ?? null]);

        $this->createExternalApiMock('ping', $state, $args);

        $response = $this
            ->actingAs($user)
            ->get('/');

        $response
            ->assertOk()
            ->assertJson(['message' => $expected]);
    }

    public function dataPing(): array
    {
        return [
            '1' => [
                'state' => 'default',
                'args' => [],
                'expected' => 'pong',
            ],
            '2' => [
                'state' => 'multiple',
                'args' => ['times' => 2],
                'expected' => 'pong,pong',
            ],
        ];
    }
}
個人的には入出力のパターンのテストはフィーチャーテストではなくユニットテストでやりたいですが、今回は例なのでフィーチャーテストに書きました。
おわりに
いくつかのプロダクトでこの方法を導入していますが、いまのところ便利に使えています。他にも取り入れられそうなアイデアがあれば、コメント欄にて教えていただけると助かります
- 投稿日:2021-03-04T16:28:20+09:00
条件分岐について
読むのをオススメする人
・PHPをはじめたけど条件分岐の仕方がわからない人
・条件分岐は知っているけど、どの様に条件分岐が動いているか分かってない人条件分岐とは
条件分岐とは、「もしも…」です。
通常は、上から下に全てのプログラムが動く様になっていますが、条件分岐を使うと「もしも1」なら1の条件、「もしも2」なら2の条件を実行するという様に条件によってプログラムを動作するかしないかを決める事ができます。
具体例
例文
総勢10人の会社の会議でアプリケーションを作ることになりました。

しかし、アプリケーションの内容で揉めています。

そこで、10人で多数決を取ることに
もし、
- Yesが5人以上であればアプリを作る
- Yesが4人〜3人なら再検討
- Yesが2人以下であればアプリを作らない
これを条件分岐を使い表す事ができます。
test.php<?php if (10 >= 5) { //もし、Yesが5以上の場合 print 'アプリを作る'.PHP_EOL; } elseif (4 >= 3) { //もし、Yesが4人以下・3人以上の場合 print 'アプリを作るかを再検討する'.PHP_EOL; } else { //もし、Yesが2人以下の場合 print 'アプリは作らない'.PHP_EOL; }この様に書くことにより先ほどの状況をプログラムで表す事ができます。
書き方の説明
説明<?php if (条件) { //ifの条件が一致すれば ここに記述された事が実行される } elseif (条件) { //elseifの条件が一致すれば ここに記述された事が実行される } else { //if・elseif以外の条件の場合 ここに記述された事が実行される }条件分岐は、この様に書かれています。
なので、もしあなたが条件分岐を使いたい時は、上記の通りに書いていけば使用できます。最後まで読んでいただきありがとうございます。
次におすすめの記事
(現在制作中)FizzBuzzの書き方と説明
- 投稿日:2021-03-04T15:56:45+09:00
PHPでAWS Aurora Serverless の Data API の使用してみた
前提条件
AWS SDK for PHP 3.x を利用
Data API の有効化など完了しているとするやってみた感想
可もなく不可もなく
Data APIを利用して結果を取得する
sample.php<?php use Aws\Exception\AwsException; use Aws\RDSDataService\RDSDataServiceClient; try { $client = new RDSDataServiceClient([ 'region' => 'ap-northeast-1', 'version' => 'latest', 'credentials' => [ 'key' => '****', 'secret' => '****', ], ]); $result = $client->executeStatement([ 'secretArn' => 'arn:aws:secretsmanager:ap-northeast-1:****:secret:****', 'resourceArn' => 'arn:aws:rds:ap-northeast-1:****:cluster:****', 'sql' => 'SELECT * FROM hoge', ]); var_dump($result->get('records')); } catch (AwsException $e) { echo $e->getAwsErrorMessage(); }参考
- 投稿日:2021-03-04T15:56:45+09:00
PHPで AWS Aurora Serverless の Data API を利用してみた
前提条件
AWS SDK for PHP 3.x を利用
Data API の有効化など完了しているとするやってみた感想
可もなく不可もなく
RDSDataServiceClientを利用して結果を取得する
sample.php<?php use Aws\Exception\AwsException; use Aws\RDSDataService\RDSDataServiceClient; try { $client = new RDSDataServiceClient([ 'region' => 'ap-northeast-1', 'version' => 'latest', 'credentials' => [ 'key' => '****', 'secret' => '****', ], ]); $result = $client->executeStatement([ 'secretArn' => 'arn:aws:secretsmanager:ap-northeast-1:****:secret:****', 'resourceArn' => 'arn:aws:rds:ap-northeast-1:****:cluster:****', 'sql' => 'SELECT * FROM hoge', ]); var_dump($result->get('records')); } catch (AwsException $e) { echo $e->getAwsErrorMessage(); }参考
- 投稿日:2021-03-04T14:43:29+09:00
LaravelとVue.jsを使った見積作成アプリ その3
前回の復習
前回はVue.jsを使用し見積編集ページのテンプレートを作成しました。今回はdompdfを利用したpdf表示ページとユーザー認証関係のページを作成していきます。
dompdfの導入
larave-dompdfパッケージのインストールはcomposerを使用して行います。
$ composer require barryvdh/laravel-dompdfconfig/app.phpを以下のように編集します。
providersに下記を追記します。app.phpBarryvdh\DomPDF\ServiceProvider::class,aliasesに下記を追記します。
app.php'PDF' => Barryvdh\DomPDF\Facade::class,コントローラーの作成
PDFの作成を行うため、コマンドを使ってコントローラーを作成します。
$ php artisan make:controller PDFController作成されたコントローラーに記述していきます。
PDFController.php<?php namespace App\Http\Controllers; use App\Estimate; use App\Item; use Illuminate\Http\Request; use Illuminate\Support\Facades\Auth; use PDF; class PDFController extends Controller { public function index(Request $request){ $user = Auth::user(); $estimate_id = $request->input('estimate'); $estimate = Estimate::find($estimate_id); $estimated_at = $estimate->estimated_at; $items = Item::where('estimate_id', $estimate_id)->orderBy('id')->get(); $item_price = Item::where('estimate_id', $estimate_id)->get(['quantity', 'unit_price']); $sum_price = 0; if($user->id != $estimate->user_id) { return redirect()->route('estimates.index'); } for($i=0; $i<count($item_price); $i++){ $calculation_price = $item_price[$i]['quantity'] * $item_price[$i]['unit_price']; $sum_price += $calculation_price; } $pdf = PDF::loadView('pdf/generate_pdf', [ 'user' =>$user, 'estimate' => $estimate, 'estimated_at' => date('Y年m月d日', strtotime($estimated_at)), 'items' => $items, 'sum_price' => $sum_price, ]); return $pdf->stream(); } }loadView() を利用することで、通常のビューを用意するのと同じ手順で、PDFに出力したい内容をHTMLで記述することができるようになります。変数を渡すことも可能です。
ルーティングの作成
web.phpRoute::get('pdf','PDFController@index');これでテンプレートを作成すればPDFが表示されます。
日本語化
PDFの作成は可能になりましたが、このままだと日本語が文字化けしてしまいます。日本語のPDFが作成できるように設定を行います。
fontsディレクトリの作成
strageディレクトリの下にfontsディレクトリを作成します。
$ mkdir fontsIPAフォントのダウンロード
以下のサイトからIPAフォントをダウンロードします。
https://moji.or.jp/ipafont/zipファイルとしてダウンロードされるので、解凍後、その中にあるファイルを先ほど作成したstorage/fonts/ディレクトリの下にコピーしてください。
これで無事日本語に対応しましたのでテンプレートを作成していきます。
PDFテンプレートの作成
views/pdf/generate_pdf.blade.phpを作成し記述していきます。
generate_pdf.blade.php<!doctype html> <html> <head> <meta http-equiv="Content-Type" content="text/html; charset=utf-8"/> <style type="text/css"> @font-face { font-family: ipam; font-style: normal; font-weight: normal; src: url('{{ storage_path('fonts/ipam.ttf') }}') format('truetype'); } @font-face { font-family: ipam; font-style: bold; font-weight: bold; src: url('{{ storage_path('fonts/ipam.ttf') }}') format('truetype'); } body { font-family: ipam !important; } .box { width : 50px; height : 50px; background : white; border : medium solid #000000; position: absolute; } </style> </head> <body> <h1 style="text-align:center;">御見積書</h1> <div style="float:left"> <h2>{{ $estimate['customer'] }}様</h2> <p>下記の通り御見積申し上げます</p> <p>件名:{{ $estimate['title'] }}</p> <p>納入期限:{{ $estimate['deadline_at'] }}</p> <p>納入場所:{{ $estimate['location'] }}</p> <p>取引方法:{{ $estimate['transaction'] }}</p> <p>有効期限:{{ $estimate['effectiveness'] }}</p> <u><h2>御見積合計金額 ¥{{ number_format($sum_price * 1.1) }}-</h2></u> </div> <div style="float:right"> <p>見積日 {{ $estimated_at }}</p> <p style="padding-top:25px">〒{{ $user['postal_code'] }}</p> <p>{{ $user['address'] }}</p> <p>{{ $user['address2'] }}</p> <p>{{ $user['company'] }}</p> <p>TEL: {{ $user['phone_number']}} FAX: {{ $user['fax_number'] }}</p> <p>担当者: {{ $user['name'] }}</p> </div> <p class="box" style="margin-top:375px;margin-left: 547px;"></p> <a class="box" style="margin-top:375px;margin-left: 597px;"></a> <a class="box" style="margin-top:375px;margin-left: 647px;"></a> <div style="margin-top:360px"> <table border="1" width="100%" cellspacing="0" cellpadding="0" style="table-layout: auto"> <tr> <th>商品名</th> <th>単位</th> <th>数量</th> <th>単価</th> <th>金額</th> <th>備考</th> </tr> @foreach ($items as $item) <tr> <td> {{ $item['name'] }} </td> <td style="text-align:center"> {{ $item['unit'] }} </td> <td style="text-align:right"> {{ $item['quantity'] }} </td> <td style="text-align:right"> {{ number_format($item['unit_price']) }} </td> <td style="text-align:right"> {{ number_format($item['quantity'] * $item['unit_price']) }} </td> <td style="font-size:12px"> {{ $item['other'] }} </td> </tr> @endforeach <tr> <td style="text-align:right"><税抜合計金額></td> <td></td> <td></td> <td></td> <td style="text-align:right">{{ number_format($sum_price) }}</td> <td></td> </tr> <tr> <td style="text-align:right"><消費税></td> <td></td> <td></td> <td></td> <td style="text-align:right">{{ number_format($sum_price * 0.1) }}</td> <td></td> </tr> <tr> <td>毎度ありがとうございます。</td> <td></td> <td></td> <td style="text-align:center">合計</td> <td style="text-align:right">{{ number_format($sum_price * 1.1) }}</td> <td></td> </tr> </table> </div> </body> </html>headタグの@font-faceでは使用するフォントの設定を行っています。storage_pathにはIPAフォントを保存したstorage/fontsを指定します。
font-style:normalだけでは、h1タグのようなfont-weightがboldに設定されているフォントに文字化けが発生します。上記のようにfont-faceを複数設定することで対応できます。これでPDF表示ページが完成しました。
認証機能
ユーザーと見積を紐付ける
認証機能の追加にともなって、データ構造としてはまずユーザーが存在して、ユーザーごとに自分の見積もりを作っていく形にしたいと思います。
マイグレーション
$ php artisan make:migration add_user_id_to_estimates --table=estimates作成されたファイルを編集していきます。
add_user_id_to_estimates.php<?php use Illuminate\Support\Facades\Schema; use Illuminate\Database\Schema\Blueprint; use Illuminate\Database\Migrations\Migration; class AddUserIdToEstimates extends Migration { /** * Run the migrations. * * @return void */ public function up() { Schema::table('estimates', function (Blueprint $table) { $table->integer('user_id')->unsigned(); $table->foreign('user_id')->references('id')->on('users'); }); } /** * Reverse the migrations. * * @return void */ public function down() { Schema::table('estimates', function (Blueprint $table) { $table->dropColumn('user_id'); }); } }upメソッドではuser_idカラムを追加して外部キーを設定する処理を記述しています。downメソッドでは逆にuser_idカラムを削除する処理を記述しています。
マイグレーションを実行しましょう。$ php artisan migrate:fresh次にユーザーと見積の関係性をモデルに記述していきます。
User.phpclass User extends Authenticatable { // 中略 public function folders() { return $this->hasMany('App\Folder'); } }シーダーの作成
ユーザーのシーダーを作成しましょう。
$ php artisan make:seeder UsersTableSeederdatabase/seeds/UsersTableSeeder.php が作成されるので、以下の内容で編集します。
UserTableSeeder.php<?php use Carbon\Carbon; use Illuminate\Database\Seeder; use Illuminate\Support\Facades\DB; class UsersTableSeeder extends Seeder { /** * Run the database seeds. * * @return void */ public function run() { DB::table('users')->insert([ 'name' => 'test', 'email' => 'dummy@email.com', 'password' => bcrypt('test1234'), 'created_at' => Carbon::now(), 'updated_at' => Carbon::now(), ]); } }データベース上、ユーザーのパスワードは必ず暗号化してデータベースに保存します。平文では保存しません。bcrypt関数は与えられた文字列の暗号化を行います。
次に見積テーブル用のシーダーを編集します。星マークが追加した行です。
EstimateTableSeeder.php<?php use Carbon\Carbon; use Illuminate\Database\Seeder; use Illuminate\Support\Facades\DB; class EstimateTableSeeder extends Seeder { /** * Run the database seeds. * * @return void */ public function run() { $user = DB::table('users')->first(); // ★ $titles = ['2021年おめでとうセール', '商品見積の件', 'サンプル見積の件']; $customers = ['株式会社XXX', '株式会社YYY', '株式会社ZZZ']; foreach (array_map(NULL, $titles, $customers) as [ $title, $customer ]) { DB::table('estimates')->insert([ 'title' => $title, 'user_id' => $user->id, // ★ 'customer' => $customer, 'created_at' => Carbon::now(), 'updated_at' => Carbon::now(), ]); } } }会員登録機能
Laravelには認証機能が最初から搭載されています。認証機能を受け持つコントローラーはapp/Http/Controllers/Authディレクトリにすでに用意されています。ルーティングについても認証用の設定を吐き出すメソッドが用意されているので、基本的にはテンプレートを作成するだけでアプリケーションに認証機能を追加することができます。
ルーティング
web.phpAuth::routes();この1行を記述するだけで、会員登録・ログイン・ログアウト・パスワード再設定の各機能で必要なルーティング設定をすべて定義します。
テンプレート
以下の内容で resources/views/auth/register.blade.phpを作成します。
register.blade.php@extends('layout') @section('content') <div class="container"> <div class="row"> <div class="col col-md-offset-3 col-md-6"> <nav class="panel panel-default"> <h2 class="panel-heading" style="padding-top:25px">会員登録</h2> <div class="panel-body"> @if($errors->any()) <div class="alert alert-danger"> @foreach($errors->all() as $message) <p>{{ $message }}</p> @endforeach </div> @endif <form action="{{ route('register') }}" method="POST"> @csrf <div class="form-group"> <label for="email">メールアドレス</label> <input type="text" class="form-control" id="email" name="email" value="{{ old('email') }}" /> </div> <div class="form-group"> <label for="name">ユーザー名</label> <input type="text" class="form-control" id="name" name="name" value="{{ old('name') }}" /> </div> <div class="form-group"> <label for="password">パスワード</label> <input type="password" class="form-control" id="password" name="password"> </div> <div class="form-group"> <label for="password-confirm">パスワード(確認)</label> <input type="password" class="form-control" id="password-confirm" name="password_confirmation"> </div> <div class="text-right"> <button type="submit" class="btn btn-dark">送信</button> </div> </form> <div class="text-center" style="padding-top:25px"> <a href="{{ route('login.guest') }}"><button class="btn btn-dark">ゲストユーザーとしてログイン</button></a> </div> </div> </nav> </div> </div> </div> @endsection次にログイン機能を実装します。
resources/views/auth/login.blade.phpを以下の内容で作成します。
login.blade.php@extends('layout') @section('content') <div class="container"> <div class="row"> <div class="col col-md-offset-3 col-md-6"> <nav class="panel panel-default"> <h2 class="panel-heading" style="padding-top:25px">ログイン</h2> <div class="panel-body"> @if($errors->any()) <div class="alert alert-danger"> @foreach($errors->all() as $message) <p>{{ $message }}</p> @endforeach </div> @endif <form action="{{ route('login') }}" method="POST"> @csrf <div class="form-group"> <label for="email">メールアドレス</label> <input type="text" class="form-control" id="email" name="email" value="{{ old('email') }}" /> </div> <div class="form-group"> <label for="password">パスワード</label> <input type="password" class="form-control" id="password" name="password" /> </div> <div class="text-right"> <button type="submit" class="btn btn-dark">ログイン</button> </div> </form> </div> </nav> <div class="text-center" style="padding-top:25px"> <a href="{{ route('login.guest') }}"><button class="btn btn-dark">ゲストユーザーとしてログイン</button></a> </div> </div> </div> </div> @endsectionこれでログイン機能の実装は完了です。
プロフィール編集ページ
最後に見積に表示するためのプロフィール編集ページを作成します。
コントローラーの作成
プロフィール編集ページを作成するためのユーザーコントローラーを作成します。
$ php artisan make:controller ItemControllerUserController.php<?php namespace App\Http\Controllers; use Illuminate\Http\Request; use Illuminate\Support\Facades\Auth; class UserController extends Controller { public function showEditForm() { $auth = Auth::user(); return view('auth/edit',[ 'auth' => $auth, ]); } public function edit(Request $request) { $current_user = Auth::user(); $current_user->name = $request->name; $current_user->postal_code = $request->postal_code; $current_user->address = $request->address; $current_user->address2 = $request->address2; $current_user->company = $request->company; $current_user->phone_number = $request->phone_number; $current_user->fax_number = $request->fax_number; $current_user->save(); return redirect()->route('estimates.index'); } }Auth::user()でユーザーの情報を取得しユーザー情報を表示・編集します。
ルーティングの追加
web.phpRoute::group(['middleware' => 'api'], function(){ Route::get('/user/edit', 'UserController@showEditForm')->name('user.edit'); Route::post('/user/edit', 'UserController@edit'); });あとはテンプレートを作成するだけです。
ユーザー編集ページのテンプレートを作成
@extends('layout')

@section('content')
  <div class="container">
    <h2 class="panel-heading" style="padding-top:25px">ユーザー情報編集</h2>
    <form action="{{ route('user.edit')}}" method="post">
      @csrf
      <div class="row">
        <div class="col-sm-2">ユーザー名</div>
        <div class="col-sm-10" style="padding: 3px;">
          <input type="text" name="name" value="{{$auth->name}}">
        </div>
      </div>
      <div class="row">
        <div class="col-sm-2">郵便番号</div>
        <div class="col-sm-10" style="padding: 3px;">
          <input type="text" name="postal_code" value="{{$auth->postal_code}}">
        </div>
      </div>
      <div class="row">
        <div class="col-sm-2">住所</div>
        <div class="col-sm-10" style="padding: 3px;">
          <textarea name="address" value="{{$auth->address}}">{{$auth->address}}</textarea>
        </div>
      </div>
      <div class="row">
        <div class="col-sm-2">ビル・マンション名</div>
        <div class="col-sm-10" style="padding: 3px;">
          <textarea name="address2">{{$auth->address2}}</textarea>
        </div>
      </div>
      <div class="row">
        <div class="col-sm-2">会社名</div>
        <div class="col-sm-10" style="padding: 3px;">
          <textarea name="company">{{$auth->company}}</textarea>
        </div>
      </div>
      <div class="row">
        <div class="col-sm-2">電話番号</div>
        <div class="col-sm-10" style="padding: 3px;">
          <input type="text" name="phone_number" value="{{$auth->phone_number}}">
        </div>
      </div>
      <div class="row">
        <div class="col-sm-2">FAX番号</div>
        <div class="col-sm-10" style="padding: 3px;">
          <input type="text" name="fax_number" value="{{$auth->fax_number}}">
        </div>
      </div>
      <div style="padding-top:25px;">
        <button type="submit" class="btn btn-dark">保存</button>
      </div>
    </form>
  </div>
@endsection
これで予定していた全ての機能が完成しました。
LaravelとVue.js共にまだまだ使いこなせてない機能がたくさんあるので勉強と開発を進めていこうと思います。
- 投稿日:2021-03-04T14:07:22+09:00
LaravelでぐるなびAPIを叩く方法(Guzzle)
Laravel5.8を使用している。
手順
guzzleをインストール
composer require guzzlehttp/guzzleコントローラーに処理を書く
今回はぐるなびAPIでレストラン検索をするから、
RestaurantControllerを作成し、その中にget_restaurantアクションを作成した。RestaurantControllerpublic function get_restaurant() { $client = new \GuzzleHttp\Client(); $response = $client->request( 'GET', 'https://api.gnavi.co.jp/RestSearchAPI/v3/', ['query' => [ 'keyid' => '123123123123123', 'pref' => 'PREF39', 'freeword' => '餃子', 'hit_per_page' => 30 ]] ); $data = [ 'res' => json_decode($response->getBody(), true) ]; return view('restaurant.index', $data);まず、Clientのインスタンスを作成し、その中に
メソッドURLクエリ
を入れて、リクエストとして送っている。getBody()メソッドで中身を取得することはできるが、これはオブジェクトが返されるため、
json_decodeでjson形式に変換している。ビューを編集
restaurant/index.blade.php@foreach ($res['rest'] as $r) <div class="col-md-8"> <div class="card"> <div class="card-header">おすすめ</div> <div class="card-body"> <h4>{{ $r['name'] }}</h4> <br> <p>{{ $r['pr']['pr_long'] }}</p> </div> </div> </div> @endforeachぐるなびAPIのレストラン検索機能では、
['rest']の中に複数のお店の情報が格納されており、さらに、その一つ一つのお店に
店名やその他詳細がぞれぞれ格納されているから、rest-0-name -url -pr -1-name -url -pr -2-name -url -prこのような順番で格納されている
- 投稿日:2021-03-04T13:30:43+09:00
phpbbのための専ブラをtapatalkで開発する
ある人から「6chanの専ブラを作るのが成功の鍵だよ」という旨を言われたため、専用ブラウザを作ろうとしたのですが、アプリ作成スキルがなくて作れない...
そこで、tapatalkという様々なフォーラムに対応した拡張機能を使うことで専ブラ化を試みました。
tapatalkとは
簡単に言うと、オンラインフォーラムを一挙に集約して検索して使えるようにしたアプリ。
どうやって使うの?
登録をしたら、ログインをしてからadminにアクセスして、create groupを選択
その前に
tapatalkの拡張機能をphpbb側で有効にしておく。ダウンロードは以下:
続き
create groupでフォーラムのトップページを指定して登録する。登録後、以下のようにグループ一覧に表示される。
管理画面へのアクセス
グループ一覧から管理画面へアクセスできる。収益化も可能。
フォーラムの読み込みに成功していたら、グリーンで表示される。エラーがあったら赤くなる。
あとはテキトーに管理画面をいじって色々する。
少し待つ
登録してから少し待つと、Tapatalkのアプリから登録したフォーラムを検索できるようになる。
ただし、phpbbの場合、ゲストからはTapatalkを通じて投稿することはできない。
そのため、phpbbのACPからユーザ登録をできるように変更しておく必要がある。
Tapatalkのトップ画面はこちら。
これで、専用ブラウザとしてフォーラムを使えるようになった。


- 投稿日:2021-03-04T09:49:58+09:00
Laravel クエリビルダで実行しているSQLを取得する
# 目的
- Laravelのクエリビルダで実行しているSQLを取得する方法をまとめる
環境
- ハードウェア環境
項目 情報 OS macOS Catalina(10.15.5) ハードウェア MacBook Pro (13-inch, 2020, Four Thunderbolt 3 ports) プロセッサ 2 GHz クアッドコアIntel Core i5 メモリ 32 GB 3733 MHz LPDDR4 グラフィックス Intel Iris Plus Graphics 1536 MB
- ソフトウェア環境
項目 情報 備考 PHP バージョン 7.4.8 Homebrewを用いてこちらの方法で導入→Mac HomebrewでPHPをインストールする Laravel バージョン 6.X commposerを用いてこちらの方法で導入→Mac Laravelの環境構築を行う MySQLバージョン 8.0.19 for osx10.13 on x86_64 Homwbrewを用いてこちらの方法で導入→Mac HomebrewでMySQLをインストールする 情報
- 筆者はMacのローカルにて本記事に記載されている内容を実装し確認する。
方法
下記のようなクエリビルダの記載が任意のメソッド内にあったとする。
$saveInfo = $this->content;
$saveInfo['user_id'] = $saveData['userId'];
$saveInfo['content'] = $saveData['content'];
$saveInfo->save();
下記のようにすることで変数
$sqlに実行直前で実行されたSQL文が格納される。$saveInfo = $this->content; $saveInfo['user_id'] = $saveData['userId']; $saveInfo['content'] = $saveData['content']; $saveInfo->save(); $sql = $saveInfo->toSql();下記のように記載することでSQL文をログに出力する事ができる。
use Illuminate\Support\Facades\Log;

$saveInfo = $this->content;
$saveInfo['user_id'] = $saveData['userId'];
$saveInfo['content'] = $saveData['content'];
$saveInfo->save();
$sql = $saveInfo->toSql();

Log::info($sql);
実際のメソッド内部に処理を記載したものを下記に記載する。筆者はRepositoryにDBアクセス処理を記載している。
アプリ名ディレクトリ/Repositories/ContntRepository.php<?php namespace App\Repositories; use App\Repositories\ContentRepositoryInterface; use App\Models\Content; use Illuminate\Support\Facades\Log; class ContentRepository implements ContentRepositoryInterface { /** * @var Content */ private $content; public function __construct(Content $content) { $this->content = $content; } /** * 全ての投稿内容を取得する * * @return Content|\Illuminate\Database\Eloquent\Collection|\Illuminate\Database\Eloquent\Model|null */ public function getContentAll() { return $this->content->all(); } public function saveContent($saveData) { $saveInfo = $this->content; $saveInfo['user_id'] = $saveData['userId']; $saveInfo['content'] = $saveData['content']; $saveInfo->save(); $sql = $saveInfo->toSql(); Log::info($sql); return true; } }
- 投稿日:2021-03-04T01:05:06+09:00
PHPをherokuにデプロイする!(1)herokuでデータベースの環境変数を設定し利用する
はじめに・・・
今回はPHPをherokuを使用してデプロイするにあたって苦労した点を書いていきたいと思います。苦労した部分はたくさんありますが、まずは注意が必要なデータベースの設定について記事を書いていきたいと思います。基本的な設定に関して今回は詳しい手順を省略していますがよろしくお願いします。
開発環境
まずは今回作成にあたって利用したものです。
php(バージョン7.4.12)+MySQL
Heroku(ユーザー登録が必要です)
Cleardb(herokuのオプション、これがあればMySQLが使えます)
MAMP(PHPの開発環境、今回の話ではあまり関係ありません)これらを用いてアプリ開発に取り組んでいました。ちなみにherokuでは通常PostgreSQLを用いますが、Cleardbというものを使えばMySQLが利用できます。
ただしクレジットカードの登録が必須になります。(無料枠自体はありますし急に課金されることはないようですが、それであっても登録が必須)
herokuでMySQLを使用する詳しい手順は記事にしようとは思っているのですが、参照したサイトがあるのでそちらを紹介します。ちなみに僕はRailsのアプリもMySQLでデプロイしました。
https://trialanderror.jp/heroku-mysql-start/データベースの情報取得
MAMPを利用し、ローカル環境でデータベースに接続する場合は、以前書いた記事のコードで接続を行えます。
https://qiita.com/tetsu_19920922/items/f156c2bec2448eda0d2f
一方本番環境の場合は、herokuのcleardbの情報を元にコードを書き直し、接続する必要があります。
cleardbの情報を取得するには以下のようにターミナルで入力します。(herokuにデプロイする予定のアプリを指定した状態で入力してください)$ heroku config | grep CLEARDB_DATABASE_URLこれを入力すると以下のような形で出力されます。
CLEARDB_DATABASE_URL: mysql://ユーザー名:パスワード@ホスト名/データベース名?reconnect=trueホスト名は最後にcleardb.netがついてきますし、データベース名はherokuから始まると思います。パスワードは8桁になっていると思います。
デプロイ、その前に!
それではこの取得したデータを元にデータベースの接続文を変更・・・となるわけですが、herokuを用いたデプロイにはgitとの連携が不可欠です。
gitにそのままデータベースのユーザー名やパスワードが載ったものをコミットしてしまうと不正に操作されたり、改竄されたりとよくないことがたくさん起こり、ひいてはアプリに大きな障害を来す可能性があります。そこで環境変数を用いることで、gitには見えない形でパスワードやユーザー名を登録し、そこから参照という形をとりましょう!
環境変数を用いる方法はphpであればphpdotenvを使用するというものもありますが、本番環境での利用はあまり推奨していないのと、gitの設定を忘れると結局コミットされてしまう(のと筆者があまり使い方を理解できなかった・・・)ので、今回はherokuで環境変数を設定する方法をとります。herokuに環境変数を入れ込む
heroku config:addの後ユーザー名であれば DB_USERNAME='<ユーザー名>'と言う形でターミナルに入れていきます。もちろんこのユーザー名は上で書いた内容で参照したものを入れてください。具体的に言うと
$ heroku config:add DB_USERNAME='<ユーザー名>'

$ heroku config:add DB_PASSWORD='<パスワード>'

$ heroku config:add DB_NAME='<データベース名>'

$ heroku config:add DB_HOSTNAME='<ホスト名>'

$ heroku config:add DB_PORT='3306'
これを入れていきましょう。ポートはherokuでMySqlを使用する場合3306が開放されているようなのでそれを用いましょう。またユーザー名とパスワードさえ環境変数に入れておけば安全だと思いますが、データベース名、ホスト名も入れてしまってもいいと思います。
入れた環境変数を確認するには、heroku configのみをターミナルで入力してください。削除はheroku config:removeコマンドで可能です。データベースへの接続
あとはデータベースの接続を書き換えていくのみです。herokuの環境変数はgetenvで利用できます。
$user=getenv('DB_USERNAME');
$password=getenv('DB_PASSWORD');
データベース名やホスト名も書き換えても良いでしょう。このように書き換えていけば、gitにパスワードやユーザーネームがアップされることなく、本番環境でデータベースに接続できます!
最後に・・・
初学者なので理解が不足している部分もあるかもしれませんので、何かありましたらご指摘よろしくお願いします。
- 投稿日:2021-03-04T00:59:34+09:00
プログラミング初学者備忘録#1
【プログラミング初学者備忘録 】1日目
投稿のきっかけ
- プログラミングを自己学習で一時期学んでいましたが、しばらく離れてしまったこと
- 自己学習も自分で開発ができるレベルではなく、なんとなく理解しているような状態で終わってしまった
初学者として自分が日々疑問に感じたことや、わからなかった用語について調べた結果などを書いていきたいと思います。
目標
今年中に
- PHPでのWEBページの開発
- pythonでの開発こちらの二個を目標に投稿していきます。
今年の終わりには、それぞれ一個ずつアプリやWEBページを作成・完成させようと思います。
日記や学習の振り返りも含めて日々投稿を目指します。備忘録#1
初回の今回は今までなんとなく流していた用語について
質問された時に答えられずスタート地点に立てていないと思ったので今回は
①プログラミング言語の種類と用途
②Pythonで使われる用語・意味業務で調べたり、気になった部分があったのでこの二点について書いていきます。
①プログラミング言語の種類と用途
インタプリンタ言語
コードを先頭から順に処理・実行していく
コンパイル言語より処理速度は劣るが、コードの簡便性や柔軟性があり、WEBアプリ開発で使用されることが多い。
JavaScript・PHP・Rubyなどが該当するコンパイル言語
処理速度が早いが、翻訳して実行するまでどこがエラーなのかわからない
C言語・C++などが該当する
プログラミング言語 主な用途 PHP WEB関連のバックエンドで使用 JavaScript WEB関連のフロントエンドで使用 Python 汎用性が高く、AIや機械学習で使用 GO 速度を求められるサーバサイドで使用 Kotlin Androidアプリ開発で使用 Java 汎用性が高いが、主に業務アプリで使用 Swift iOS・macOSのアプリ開発で使用 C# サーバーサイド・アプリ開発で使用 C++ 速度やメモリ効率を求める場面で使用 R 統計に強く、AIや機械学習で使用 ②Pythonで使われる用語・意味
用語 意味 使い方 モジュール 呼び出すだけで便利に使える処理を集めたもの import モジュール名 パッケージ 複数のモジュールをディレクトリに入れてひとまとまりにしたもの import パッケージ名 標準ライブラリ Pythonに標準で用意されたパッケージ・モジュール・関数・定数 importの必要があるものとないものがある 外部ライブラリ 標準で用意されていないパッケージ・モジュール・関数・定数 importだけでは使用できず、インストールの必要がある 関数 使う機能をひとまとめにできる機能 def 関数名 pip Pythonのパッケージ管理ツール pip install パッケージ名 今日の一言
今回は初回ということで、今日触れた用語や今まで用途を理解していなかったプログラミング言語について書きました。
明日以降は自主学習で得たことやつまづいたことを書いていこうと思います。もっと基礎の部分から、やり直さないといけないと思うので
そこは追い追い自分の振り返りも含めて更新していきます。
当面は技術的な部分よりも用語やプログラミングに関する思考の部分などを書いていくことが増えると思います。
- 投稿日:2021-03-04T00:59:34+09:00
【初学者備忘録】1:用途別開発言語とPython用語まとめ
【プログラミング初学者備忘録 】1日目
投稿のきっかけ
- プログラミングを自己学習で一時期学んでいましたが、しばらく離れてしまったこと
- 自己学習も自分で開発ができるレベルではなく、なんとなく理解しているような状態で終わってしまった
初学者として自分が日々疑問に感じたことや、わからなかった用語について調べた結果などを書いていきたいと思います。
目標
今年中に
- PHPでのWEBページの開発
- pythonでの開発こちらの二個を目標に投稿していきます。
今年の終わりには、それぞれ一個ずつアプリやWEBページを作成・完成させようと思います。
日記や学習の振り返りも含めて日々投稿を目指します。備忘録#1
初回の今回は今までなんとなく流していた用語について
質問された時に答えられずスタート地点に立てていないと思ったので今回は
①プログラミング言語の種類と用途
②Pythonで使われる用語・意味業務で調べたり、気になった部分があったのでこの二点について書いていきます。
①プログラミング言語の種類と用途
インタプリンタ言語
コードを先頭から順に処理・実行していく
コンパイル言語より処理速度は劣るが、コードの簡便性や柔軟性があり、WEBアプリ開発で使用されることが多い。
JavaScript・PHP・Rubyなどが該当するコンパイル言語
処理速度が早いが、翻訳して実行するまでどこがエラーなのかわからない
C言語・C++などが該当する
プログラミング言語 主な用途 PHP WEB関連のバックエンドで使用 JavaScript WEB関連のフロントエンドで使用 Python 汎用性が高く、AIや機械学習で使用 GO 速度を求められるサーバサイドで使用 Kotlin Androidアプリ開発で使用 Java 汎用性が高いが、主に業務アプリで使用 Swift iOS・macOSのアプリ開発で使用 C# サーバーサイド・アプリ開発で使用 C++ 速度やメモリ効率を求める場面で使用 R 統計に強く、AIや機械学習で使用 ②Pythonで使われる用語・意味
用語 意味 使い方 モジュール 呼び出すだけで便利に使える処理を集めたもの import モジュール名 パッケージ 複数のモジュールをディレクトリに入れてひとまとまりにしたもの import パッケージ名 標準ライブラリ Pythonに標準で用意されたパッケージ・モジュール・関数・定数 importの必要があるものとないものがある 外部ライブラリ 標準で用意されていないパッケージ・モジュール・関数・定数 importだけでは使用できず、インストールの必要がある 関数 使う機能をひとまとめにできる機能 def 関数名 pip Pythonのパッケージ管理ツール pip install パッケージ名 今日の一言
今回は初回ということで、今日触れた用語や今まで用途を理解していなかったプログラミング言語について書きました。
明日以降は自主学習で得たことやつまづいたことを書いていこうと思います。もっと基礎の部分から、やり直さないといけないと思うので
そこは追い追い自分の振り返りも含めて更新していきます。
当面は技術的な部分よりも用語やプログラミングに関する思考の部分などを書いていくことが増えると思います。
- 投稿日:2021-03-04T00:15:24+09:00
【Laravel】FromRequestのバリデーションルールを共通化する + おまけ
・ヮ・)あ、おはようございまーす
みなさんは複数のリクエストで同じパラメータをバリデーションするときにどうしていますか?
私はコピペで書いていたのですが、ルール変更したいときに修正コスト高くなったり
同じパラメータなのに違うルールが書いてあったり…そんなことがあったので Laravelのバリデーションルールを共通化するやつ を作りました
メモとして置いておきますインストール方法
というにはおこがましいですが、ファイル1つだけなんで ValidationRules.php を app 直下にコピーしてださい
※違うディレクトリに置く場合は、名前空間をよしなに書き換えてください
使い方
ルールを定義する
RULESにバリデーションルールを定義しますprotected const RULES = [ 'posts' => [ 'title' => ['string', 'between:10,255'], 'body' => ['string'], 'publish_at' => ['date'], ], ];
- ネストすることもできます
- ルールは配列記法、
|区切りの文字列記法に対応していますルールを取得する
FormRequest などバリデーションルールを取得したいところで
getRules()を呼び出しますpublic function rules(\App\ValidationRules $rules) { return $rules->getRules([ 'posts.title' => ['required'], 'posts.body', 'posts.publish_at', ]); }
- ネストされたルールは
.(ドット)記法で書いてください- 追加したいルールがあれば、連想配列にして渡してあげてください
- 定義していないルールを取得しようとすると
OutOfRangeExceptionがスローされます上の例では以下のルールが返ります
[
  'title' => ['required', 'string', 'between:10,255'],
  'body' => ['string'],
  'publish_at' => ['date'],
]
パラメーター名に別名をつける
users.nameとpets.nameのルールを取得しようとすると、後に指定したpets.nameのルールのみnameのキーで返ってきますこのような状況を避けるには第2引数で別名を指定します
$keyAliases = [
    'users.name' => 'user_name',
    'pets.name' => 'pet_name',
];

app(\App\ValidationRules::class)->getRules(
    [
        'users.name',
        'pets.name',
    ],
    $keyAliases
);
また、常に別名を付けたいパラメータ名がある場合は
ValidationRules::KEY_ALIASESに定義してください
getRules()の第2引数
KEY_ALIASES定数
ドット区切りの最後の文字列(デフォルト)
の優先順位でパラメータ名が採用されます※パラメータ名を変えた場合は、
required_ifのような他のパラメータを参照するルールに気をつけてください
※また、attributesにも気をつけてくださいカスタマイズする
ルールを定義する場所を変更する
ValidationRules::RULESじゃない場所にしたい場合はall()を書き換えるか、ValidationRulesを継承してオーバーライドしてください指定したルールが見つからなかった場合の挙動を変えたい
デフォルトでは定義していないルールを取得しようとすると
OutOfRangeExceptionがスローされます定義していないルールを取得しようとしたとき、空配列を返したい場合は
notFound()を書き換えるか、ValidationRulesを継承してオーバーライドしてくださいおまけ
FormRequestにゲッターメソッドを作る
コントローラーで Requestの
inputallqueryget__getonlyexcept使うのって怖くないですか?
FormRequestでバリデーションされているから安心?
FormRequest側でバリデーションルール変更したとき影響の調査面倒じゃないでしょうか?public function getEmail(): string { return $this->input('email'); }こんなメソッドをバリデーションを実施しているFormRequestに書いてあげて
ついでにユニットテストも書いてあげれば
コントローラーで安心してリクエストパラメーターを受け取れますねまた、バリューオブジェクトに変換してあげることもできるのでDDDニキもにっこりですね
FormRequestでゲッターを書いてよりよいLaravelライフを!