- 投稿日:2021-02-25T23:50:21+09:00
【メモ】Docker環境構築 マイグレーション時のエラーとmysql8.0でのエラー
マイグレーション時のエラー
root@**********:/work# php artisan migrate

   Illuminate\Database\QueryException  : SQLSTATE[HY000] [1045] Access denied for user 'ogge'@'172.26.0.3' (using password: YES) (SQL: select * from information_schema.tables where table_schema = laravel_local and table_name = migrations and table_type = 'BASE TABLE')

  at /work/vendor/laravel/framework/src/Illuminate/Database/Connection.php:669
    665|         // If an exception occurs when attempting to run a query, we'll format the error
    666|         // message to include the bindings with SQL, which will make this exception a
    667|         // lot more helpful to the developer instead of just the database's errors.
    668|         catch (Exception $e) {
  > 669|             throw new QueryException(
    670|                 $query, $this->prepareBindings($bindings), $e
    671|             );
    672|         }
    673|

  Exception trace:

  1   PDOException::("SQLSTATE[HY000] [1045] Access denied for user 'ogge'@'172.26.0.3' (using password: YES)")
      /work/vendor/laravel/framework/src/Illuminate/Database/Connectors/Connector.php:70

  2   PDO::__construct("mysql:host=db;port=3306;dbname=laravel_local", "ogge", "secret", [])
      /work/vendor/laravel/framework/src/Illuminate/Database/Connectors/Connector.php:70

  Please use the argument -v to see more details.
.env
DB_CONNECTION=mysql
DB_HOST=db
DB_PORT=3306
DB_DATABASE=laravel_local
DB_USERNAME=*****
DB_PASSWORD=*****
.env.example
DB_CONNECTION=mysql DB_HOST=db DB_PORT=3306 DB_DATABASE=laravel_local DB_USERNAME=***** DB_PASSWORD=*****database.php'mysql' => [ 'driver' => 'mysql', 'url' => env('DATABASE_URL'), 'host' => env('DB_HOST', 'db'), 'port' => env('DB_PORT', '3306'), 'database' => env('DB_DATABASE', 'laravel_local'), 追記 'username' => env('DB_USERNAME', ''), 'password' => env('DB_PASSWORD', ''), 'unix_socket' => env('DB_SOCKET', ''),以上3つを修正してマイグレーション
root@:*********:/work# php artisan migrate
Migration table created successfully.
Migrating: 2014_10_12_000000_create_users_table
Migrated:  2014_10_12_000000_create_users_table (0.14 seconds)
Migrating: 2014_10_12_100000_create_password_resets_table
Migrated:  2014_10_12_100000_create_password_resets_table (0.06 seconds)
Migrating: 2019_08_19_000000_create_failed_jobs_table
Migrated:  2019_08_19_000000_create_failed_jobs_table (0.03 seconds)
成功だね!!!
その後コンテナに入ってmysqlを立ち上げ?
C:\Users\****\*****\****>docker-compose exec db bash
root@*******:/# mysql -u ***** -p
Enter password:
Welcome to the MySQL monitor.  Commands end with ; or \g.
Your MySQL connection id is 15
Server version: 8.0.23 MySQL Community Server - GPL

Copyright (c) 2000, 2021, Oracle and/or its affiliates.

Oracle is a registered trademark of Oracle Corporation and/or its
affiliates. Other names may be trademarks of their respective
owners.

Type 'help;' or '\h' for help. Type '\c' to clear the current input statement.
どんなユーザーがあるか確認したところエラー
mysql> select user, host from mysql.user;
ERROR 1142 (42000): SELECT command denied to user '****'@'localhost' for table 'user'
rootで入り直して
root@*******:/# mysql -u root -p
Enter password:
Welcome to the MySQL monitor.  Commands end with ; or \g.
Your MySQL connection id is 16
Server version: 8.0.23 MySQL Community Server - GPL

Copyright (c) 2000, 2021, Oracle and/or its affiliates.

Oracle is a registered trademark of Oracle Corporation and/or its
affiliates. Other names may be trademarks of their respective
owners.

Type 'help;' or '\h' for help. Type '\c' to clear the current input statement.
どのユーザーがいるか確認。
hostに%が付いていると,User項目が使えなくなる為,さっきの場合だとコマンドが受け付けてくれなかった。
因みに%はワイルドカードと言うらしく,どんなホストでもサーバーに繋げれるらしい。
※間違ってたらごめんね。【参照】https://rfs.jp/server/mysql/m02/04-11.html
mysql> select host,user from mysql.user;
+-----------+------------------+
| host      | user             |
+-----------+------------------+
| %         | *****            |
| %         | root             |
| localhost | mysql.infoschema |
| localhost | mysql.session    |
| localhost | mysql.sys        |
| localhost | root             |
+-----------+------------------+
6 rows in set (0.01 sec)
権限の確認を行って
mysql> SHOW GRANTS for '*****'@'%';
+-----------------------------------------------------------+
| Grants for *****@%                                        |
+-----------------------------------------------------------+
| GRANT USAGE ON *.* TO `*****`@`%`                         |
| GRANT ALL PRIVILEGES ON `laravel\_local`.* TO `*****`@`%` |
+-----------------------------------------------------------+
2 rows in set (0.01 sec)
終了!!
- 投稿日:2021-02-25T23:50:21+09:00
【メモ】Laravel Docker環境構築 マイグレーション時のエラーとmysql8.0でのエラー
マイグレーション時のエラー
root@**********:/work# php artisan migrate

   Illuminate\Database\QueryException  : SQLSTATE[HY000] [1045] Access denied for user 'ogge'@'172.26.0.3' (using password: YES) (SQL: select * from information_schema.tables where table_schema = laravel_local and table_name = migrations and table_type = 'BASE TABLE')

  at /work/vendor/laravel/framework/src/Illuminate/Database/Connection.php:669
    665|         // If an exception occurs when attempting to run a query, we'll format the error
    666|         // message to include the bindings with SQL, which will make this exception a
    667|         // lot more helpful to the developer instead of just the database's errors.
    668|         catch (Exception $e) {
  > 669|             throw new QueryException(
    670|                 $query, $this->prepareBindings($bindings), $e
    671|             );
    672|         }
    673|

  Exception trace:

  1   PDOException::("SQLSTATE[HY000] [1045] Access denied for user 'ogge'@'172.26.0.3' (using password: YES)")
      /work/vendor/laravel/framework/src/Illuminate/Database/Connectors/Connector.php:70

  2   PDO::__construct("mysql:host=db;port=3306;dbname=laravel_local", "ogge", "secret", [])
      /work/vendor/laravel/framework/src/Illuminate/Database/Connectors/Connector.php:70

  Please use the argument -v to see more details.
.env
DB_CONNECTION=mysql
DB_HOST=db
DB_PORT=3306
DB_DATABASE=laravel_local
DB_USERNAME=*****
DB_PASSWORD=*****
.env.example
DB_CONNECTION=mysql DB_HOST=db DB_PORT=3306 DB_DATABASE=laravel_local DB_USERNAME=***** DB_PASSWORD=*****database.php'mysql' => [ 'driver' => 'mysql', 'url' => env('DATABASE_URL'), 'host' => env('DB_HOST', 'db'), 'port' => env('DB_PORT', '3306'), 'database' => env('DB_DATABASE', 'laravel_local'), 追記 'username' => env('DB_USERNAME', ''), 'password' => env('DB_PASSWORD', ''), 'unix_socket' => env('DB_SOCKET', ''),以上3つを修正してマイグレーション
root@:*********:/work# php artisan migrate

Migration table created successfully.
Migrating: 2014_10_12_000000_create_users_table
Migrated:  2014_10_12_000000_create_users_table (0.14 seconds)
Migrating: 2014_10_12_100000_create_password_resets_table
Migrated:  2014_10_12_100000_create_password_resets_table (0.06 seconds)
Migrating: 2019_08_19_000000_create_failed_jobs_table
Migrated:  2019_08_19_000000_create_failed_jobs_table (0.03 seconds)
成功だね!!!
その後コンテナに入ってmysqlを立ち上げ?
C:\Users\****\*****\****>docker-compose exec db bash
root@*******:/# mysql -u ***** -p
Enter password:

Welcome to the MySQL monitor.  Commands end with ; or \g.
Your MySQL connection id is 15
Server version: 8.0.23 MySQL Community Server - GPL

Copyright (c) 2000, 2021, Oracle and/or its affiliates.

Oracle is a registered trademark of Oracle Corporation and/or its
affiliates. Other names may be trademarks of their respective
owners.

Type 'help;' or '\h' for help. Type '\c' to clear the current input statement.
どんなユーザーがあるか確認したところエラー
mysql> select user, host from mysql.user;

ERROR 1142 (42000): SELECT command denied to user '****'@'localhost' for table 'user'
rootで入り直して
root@*******:/# mysql -u root -p
Enter password:

Welcome to the MySQL monitor.  Commands end with ; or \g.
Your MySQL connection id is 16
Server version: 8.0.23 MySQL Community Server - GPL

Copyright (c) 2000, 2021, Oracle and/or its affiliates.

Oracle is a registered trademark of Oracle Corporation and/or its
affiliates. Other names may be trademarks of their respective
owners.

Type 'help;' or '\h' for help. Type '\c' to clear the current input statement.
どのユーザーがいるか確認。
hostに%が付いていると,User項目が使えなくなる為,さっきの場合だとコマンドが受け付けてくれなかった。
因みに%はワイルドカードと言うらしく,どんなホストでもサーバーに繋げれるらしい。
※間違ってたらごめんね。【参照】https://rfs.jp/server/mysql/m02/04-11.html
mysql> select host,user from mysql.user;
+-----------+------------------+
| host      | user             |
+-----------+------------------+
| %         | *****            |
| %         | root             |
| localhost | mysql.infoschema |
| localhost | mysql.session    |
| localhost | mysql.sys        |
| localhost | root             |
+-----------+------------------+
6 rows in set (0.01 sec)
権限の確認を行って
mysql> SHOW GRANTS for '*****'@'%';

+-----------------------------------------------------------+
| Grants for *****@%                                        |
+-----------------------------------------------------------+
| GRANT USAGE ON *.* TO `*****`@`%`                         |
| GRANT ALL PRIVILEGES ON `laravel\_local`.* TO `*****`@`%` |
+-----------------------------------------------------------+
2 rows in set (0.01 sec)
終了!!
- 投稿日:2021-02-25T21:39:51+09:00
多次元配列を時間順に並び替える
概要
データベースの結果を多次元の配列に代入して時間順に並び替えたのでその方法をメモします。
結論
array_multisort( array_map( "strtotime", array_column( $data, "created_at" ) ), SORT_DESC, $array ) ;一つずつ見ていきます。
実装
こんな感じの配列
$data=[
            {
                "post_id": 76,
                "user_id": 3,
                "description": "hogehoge",
                "created_at": "2021-02-08T09:59:52.000000Z",
            },
            {
                "post_id": 77,
                "user_id": 2,
                "description": "hogehoge",
                "created_at": "2021-02-11T12:08:44.000000Z",
            }
            {
                "post_id": 78,
                "user_id": 2,
                "description": "hogehoge",
                "created_at": "2021-01-26T21:50:47.000000Z",
            }
];
時間順に並べたいので
created_atから参照して並び替えます。array_multisort( ソートしたい配列 , ソート順 ,ソート方法(省略可) , 追加の配列 )
今回ソートしたい配列は$dataですが
created_atが英文日付なので、UNIXタイムスタンプ形式にする必要があります。
ですのでarray_map()関数を使います。array_map(コールバック関数, $配列)
ですので、
array_map("strtotime",array_column( $data, "created_at" ) )で日付を比較できるように変換します。
array_multisort( array_map( "strtotime", array_column( $data, "created_at" ) ), SORT_DESC, $array ) ;結果
$data=[
            {
                "post_id": 78,
                "user_id": 2,
                "description": "hogehoge",
                "created_at": "2021-01-26T21:50:47.000000Z",
            },
            {
                "post_id": 76,
                "user_id": 3,
                "description": "hogehoge",
                "created_at": "2021-02-08T09:59:52.000000Z",
            },
            {
                "post_id": 77,
                "user_id": 2,
                "description": "hogehoge",
                "created_at": "2021-02-11T12:08:44.000000Z",
            }

];
無事時間順に並び替えることができました。
- 投稿日:2021-02-25T20:40:24+09:00
Laravel 8.x Seeder生成で怒られる
Seederでダミーデータを作成する際、グローバルヘルパや関数を使用する際の落とし穴があります。
php artisan make:seed UsersTableSeederで作成すると以下のSeederが生成されます。UsersTableSeeder.php<?php namespace Database\Seeders; use Illuminate\Database\Seeder; class UsersTableSeeder extends Seeder { /** * Run the database seeds. * * @return void */ public function run() { // } }ダミーデータを
runメソッド内に記述しSeederを実行するとヘルパや関数を使用している場合は怒られます。UsersTableSeeder.php<?php namespace Database\Seeders; use Illuminate\Database\Seeder; class UsersTableSeeder extends Seeder { /** * Run the database seeds. * * @return void */ public function run() { DB::table('users')->insert([ 'name' => 'hoge', 'password' => Hash::make('hoge'), 'remember_token' => Str::random(30), ]); } }対処法
ファザードやヘルパを使用する際は宣言してあげる必要があるらしいです。
UsersTableSeeder.php<?php namespace Database\Seeders; use Illuminate\Database\Seeder; //最初からある use Illuminate\Support\Facades\DB; //DBファザード使用の為追加 use Illuminate\Support\Facades\Hash; //Hashファザード使用の為追加 use Illuminate\Support\Str; //strメソッド使用の為追加 class UsersTableSeeder extends Seeder { /** * Run the database seeds. * * @return void */ public function run() { DB::table('users')->insert([ 'name' => 'hoge', 'password' => Hash::make('hoge'), 'remember_token' => Str::random(30), ]); } }参考
- 投稿日:2021-02-25T16:21:41+09:00
Laravel DBレコードの存在判定
LaravelのクエリビルダでDBレコードの存在チェック
記事内容
Laravelでオリジナルアプリのバックエンドを実装していく際に、DBにレコードが存在すればtrueを返し(ページ遷移)、レコードが存在しなければfalseを返す(エラーメッセージを表示する)という機能を実装したので、備忘録として残したいと思います。
開発環境
Laravel 8.22.1
PHP:8.0.1
MySQL:8.0.23
MacOS:11.1 ( Big Sur )
DBレコードの存在チェック
○○Controller.phpDB::table('table名')->where(column, $data)->exists();クエリビルダの基本的な書き方に、existsメソッドを繋げて記述することで簡単にレコードの存在を判定できます。
実際の記述
今回僕は、下記のように記述しました。
内容としては、ユーザーによるフォームからのリクエスト内容と一致するレコードが、存在するかどうかで条件分岐しています。
○○Controller.php$user = User::all()->where('id', $request->id)->first(); $msg = ['msg' => '入力されたIDは存在しません']; if (DB::table('users')->where('id', $request->id)->exists() && [$request->id === $users->id]) { return redirect()->route('home'); } else { return view('login', $msg);ifのカッコ内の記述により、DB内にレコードが存在していて且つ、フォームから送信された内容と一致する場合は、homeビューが返され、DBにレコードが存在しない場合は$msg変数の内容とともにloginビューが返される。
あとがき
今回のアプリを作っていく過程で、フォームからDBにレコードが存在しない値を入力された際、
「Attempt to read property "id" on null」というエラーにつまづき、なかなか前へ進めなかったので、その解決策を模索していたところ、本記事に記載した対処法に至りました。他にも解決策はあると思いますので、laravelの公式ドキュメントや他の記事を参考にして、引き続きアプリの実装をしていきたいと思います。
- 投稿日:2021-02-25T14:58:26+09:00
【AWS】ECSで作ったDocker(Laravel)プロジェクトをRoute53、ALB、ACM、お名前ドットコムを使ってHTTPS化してみた
皆さんこんにちは!
今回はDockerで作ったLaravelプロジェクトをRoute53とALB(ApplicationLoadBalancer)とACM(AmazonCertificateManager)を使ってHTTPS化してみたいと思います!
前提条件
・既にDockerで作ったコンテナをECSで作成していること
・お名前ドットコムでドメインを登録していること補足
DockerをまだECSで作成していない方は以下の記事をご覧ください。
【AWS】AWS超初心者が、頑張ってDockerで作ったLaravelプロジェクトをECR、ECS、EC2を使ってAWS上で動かしてみた
また、お名前ドットコムでドメインを登録していない方は登録してから本記事をご覧ください。(お名前ドットコムでない場合も可ですが、その場合説明が異なる部分があると思うのでご了承ください)
リッスンポート
nginx/default.confserver { listen 80; root /work/laravel/public; index index.php; charset utf-8; error_log /var/log/nginx/error_test.log; location / { root /work/laravel/public; try_files $uri $uri/ /index.php$is_args$args; } location ~ \.php$ { fastcgi_split_path_info ^(.+\.php)(/.+)$; fastcgi_pass app:9000; fastcgi_index index.php; include fastcgi_params; fastcgi_param SCRIPT_FILENAME $document_root$fastcgi_script_name; fastcgi_param PATH_INFO $fastcgi_path_info; } }
nginxのコンテナではlisten 80;としているように、80番のポートをリッスンしています。ここが
443になっている場合は適時変えて頂くか、上記のようにlisten 80;としてください。参考記事
本記事を書くにあたって下記の記事を参考させて頂きました。
AWSでWebサイトをHTTPS化 その1:ELB(+ACM発行証明書)→EC2編
僕が説明不十分なところもあるので、分からない点がある場合はこちらの記事を見て頂くとよいかと。
それでは早速説明していきます!!
ACMでSSL証明書の発行
まず初めにHTTPS化するには、SSL証明書の発行を行います。
AWSはこのSSL証明書の発行が無料となっております。(AWS神)
サービス検索欄で「CertificateManager」を入力しましょう。
- 「証明書のリクエスト」をクリック
- 「パブリック証明書のリクエスト」を選択
- ドメイン名を入力(この後Route53で登録するドメインを入力。現段階ではRoute53にECS用のドメインを登録していないので、お好きなドメインをご入力ください。以下、説明用としてここで入力したドメイン名を
www.example.comとします。)- 「DNSの検証」を選択
- タグは登録してもしなくてもどちらでもいいです
- 「確定とリクエスト」をクリック
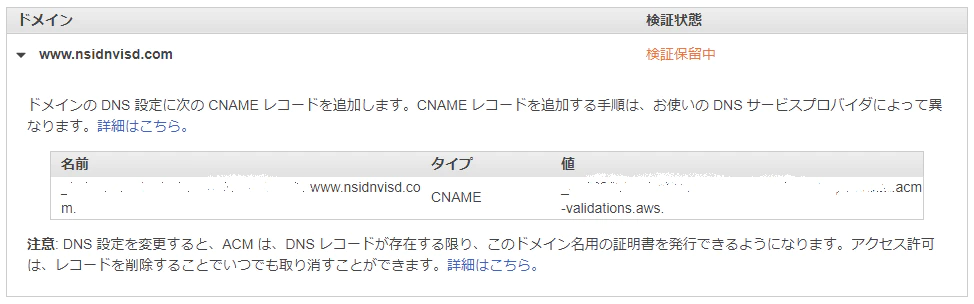
すると画像のように名前や値が表示されます。
これをお名前ドットコムで登録します。
「ドメインのDNS設定」から「DNSレコード設定を利用する」をクリック
そして画像のように先ほどCertificateManagerで発行した名前(ホスト名)と値(VALUE)を登録します。(画像のホスト名や値は適当です)
そしてAWSに戻ってRoute53で先ほどCertificateManagerで登録したドメイン名のホストゾーンを作成します。例で言うと
www.example.comと言う名前で登録します。※注意 既にホストゾーンを作成している場合は、新たにホストゾーンを作成しないでください。後ほど、既に作成してあるホストゾーンで先ほど作成したドメイン名をレコード名として作成してください。
そしたら、作成したホストゾーンの「レコードを作成」をクリック。
タイプを「CNAME」にしてお名前ドットコムで登録したときと同じように名前と値を入れて下さい。
CertificateManagerに戻り、「状況」が「発行済み」になればOK!(時間がかかる場合があります)
ALBでHTTPS登録
サービス検索欄で「ECS」と検索し、左のメニュー欄の「ロードバランシング」にある「ロードバランサー」をクリック。
「ロードバランサーの作成」をクリック。
- 「Application Load Balancer(HTTP、HTTPS)」を選択
- 手順1:名前を入力し、「ロードバランサーのプロトコル」をHTTPSにする(ポート番号が443になる)。「アベイラビリティーゾーン」の「VPC」はECSインスタンスで使用しているVPCを選択。「アベイラビリティーゾーン」にいくつかの候補が出るのですべてにチェック
- 手順2:「証明書タイプ」で「ACMから証明書を選択する」にチェック。「証明書の名前」で先ほど作成した証明書を選択
- 手順3:「新しいセキュリティグループを作成する」にチェック。適当にグループ名を入力し、「タイプ」を「HTTPS」にする
- 手順4:名前を適当に入力し、プロトコルは「HTTP」を選択
- 手順5:利用するインスタンスを選択し「登録済みに追加」をクリック
- 手順6:「作成」をクリック
無事作成されればOK!
EC2インスタンスのセキュリティ登録
これで最後になるので、あともう一息頑張りましょう!
サービス検索欄で「EC2」と検索。
左のメニューの「インスタンス」の「インスタンス」をクリック。
利用するインスタンスの「インスタンスID」をクリック。
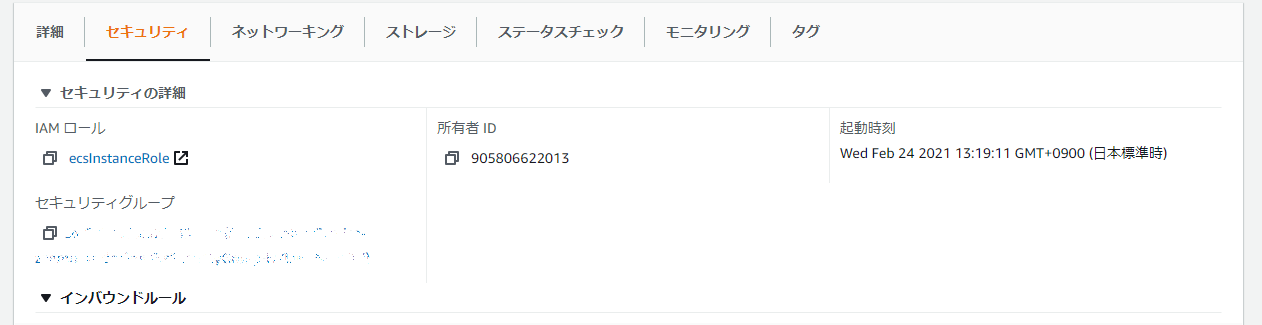
下にある「セキュリティ」タブから「セキュリティグループ」をクリック。
下の「インバウンドルール」から「インバウンドルールを編集」をクリック。
「タイプ」は「HTTP」、「ソース」は先ほど作成したALBのグループ名を選択。
「ルールを保存」をクリック。
これで、独自ドメインかつHTTPS化されたサイトにアクセスすることができます。
例で言うとhttps://www.example.comにアクセスするとDockerで作ったLaravelのサイトが開くようになります。
いかがだったでしょうか??
少し説明不足のところもあると思うので、何かご不明な点があれば遠慮せずにコメント欄にてお申し付けください。
以上、「【AWS】ECSで作ったDocker(Laravel)プロジェクトをRoute53、ALB、ACM、お名前ドットコムを使ってHTTPS化してみた」でした!
良ければ、LGTM、コメントお願いします。
また、何か間違っていることがあればご指摘頂けると幸いです。
他にも初心者さん向けに記事を投稿しているので、時間があれば他の記事も見て下さい!!
あと、最近「ココナラ」で環境構築のお手伝いをするサービスを始めました。
気になる方はぜひ一度ご相談ください!
Thank you for reading


- 投稿日:2021-02-25T13:54:24+09:00
Laravelでページごとに個別のcssを反映させたい
やりたいこと
※私は初心者です
.blade.phpファイルでは親レイアウトに
layouts/親.blade.php<!DOCUTYPE html> <html lang='ja'> <head> <!-- 省略 --> </head> <body> @yield('content') </body> <html>子.blade.php@extends('layouts.親') @section('content') 中身 @endsectionという感じでhtmlを埋め込めた。
これのcssバージョンをやりたい。
2つのやり方があるみたい
- 子blade内に記述するパターン
普通に親側のheadタグ内で
@yield('css')と書き、
子.blade.php@section('css') <!-- ここにcssを記述 --> @endsectionとするやり方。
2. cssファイルを読み込むパターンlayouts/親.blade.php<!DOCUTYPE html> <html lang='ja'> <head> @stack('css') </head>子blade.php@push('css') <link href="{{ asset('css/子.css') }}" rel="stylesheet"> @endpushという感じで書く。
- 投稿日:2021-02-25T13:49:11+09:00
LaravelでStrategyパターン
Strategyパターンやってみました。
割と使い道があるんじゃないかと思います。バージョン
Laravel 6.18.40
PHP 7.4.4Strategyパターン
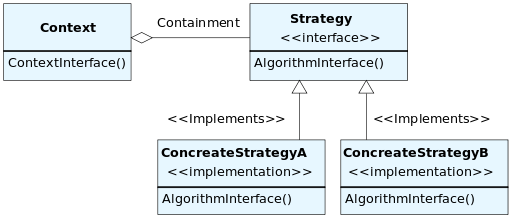
Strategyパターンはstrategy(戦略)という言葉の意味からわかるように、状況に応じて処理を動的に切り替えることを目的としたデザインパターンです。
それぞれの処理をクラスとして定義し、共通の呼び出し部分から呼び出して処理を代替できるようにします。(オブジェクト指向の文脈ではdelegationと言われるようです)実装
仕様
例えば、ユーザーが単発の仕事に応募してその報酬をもらえるようなサイトがあるとします。仕事情報は管理画面からCSVでアップロードする仕様になっています。アップされたCSVの内容はDBに保存されます。
仕事にはいくつかの種類があり、扱うデータが異なります。なので管理者は様々なフォーマットのCSV(ヘッダー行が1行だったり2行だったり、列数が違っていたりなど)をアップロードします。管理画面にあるCSVアップロードフォームは1つで、フォーム内にはファイル用inputとファイルのタイプを選択するselectが存在します。
<!--こんな感じ-->
<form action="{{route('route_name')}}" method="post">
    <input type="file" name="uploaded_file" />
    <select name="file_type">
        @foreach(config('values.file_type') as $label => $fileType)
            <option value="{{$fileType}}">{{$label}}</option>
        @endforeach
    </select>
</form>
考えること
フォームが送信されたらコントローラー内のメソッドでリクエスト値を受け取ります。それからCSVファイル内のデータを読み取って、そのデータをデータベースに保存します。
仕様にもある通り、アップロードされるCSVのフォーマットは何種類もあります。1つのメソッドにまとめてifなどで条件分岐しながらファイルを処理することは可能ですが、読みにくくて変更に弱い処理になってしまいそうです。
Strategyパターンを使えば、今回の場合だと、アップロードされるファイルのタイプごとにクラスを分けてその中で処理を行うことができます。Dto
先にデータをやりとりするためのDtoクラスを定義しておきます。
use Illuminate\Http\UploadedFile;

class FileImportDto
{
    public UploadedFile $uploadedFile;
    public int $fileType;
    public string $fileName;
    public string $filePath;

    public function __construct(UploadedFile $uploadedFile, int $fileType, string $fileName, string $filePath)
    {
        $this->uploadedFile = $uploadedFile;
        $this->$fileType = $fileType;
        $this->$fileName = $fileName;
        $this->$filePath = $filePath;
    }
}
StrategyInterface
CSVファイルのタイプごとに処理が違うので、最終的にタイプごとにクラスを分ける前提です(上の図の各ConcreteStrategyに相当)。そのクラスの雛形となるInterfaceを作成します。
全てのクラスで必要な処理は
- CSVファイルの中身の読み取り
- データをDBに保存
この2つです。
use App\Models\FileImportDto;

interface StrategyInterface
{
    /**
     * @param FileImportDto $fileDto
     * @return array
     */
    public function readData(FileImportDto $fileDto): array;

    /**
     * @param array $fileData
     * @return mixed
     */
    public function storeData(array $fileData);
}
具体的な処理
StrategyInterfaceの実装クラスを作成します。何個でも作成できるのがStrategyパターンのメリットです。今回は一旦3種類にします。
上の仕様の例で仕事情報に種類があると書きましたが、"オフィスワーク"、"飲食"、"運送"の3種類あると仮定します。
具体的な処理内容は今回関係ないので省略します。use App\Models\FileImportDto; class OfficeWorkFile implements StrategyInterface { public function readData(FileImportDto $fileDto): array { //CSVファイルの中身を読み取って配列に詰めて返す処理 (略) } public function storeData(array $fileData) { //配列を受け取って、中身をDBに保存する処理 (略) } }use App\Models\FileImportDto; class RestaurantFile implements StrategyInterface { public function readData(FileImportDto $fileDto): array { //CSVファイルの中身を読み取って配列に詰めて返す処理 (略) } public function storeData(array $fileData) { //配列を受け取って、中身をDBに保存する処理 (略) } }use App\Models\FileImportDto; class DeliveryFile implements StrategyInterface { public function readData(FileImportDto $fileDto): array { //CSVファイルの中身を読み取って配列に詰めて返す処理 (略) } public function storeData(array $fileData) { //配列を受け取って、中身をDBに保存する処理 (略) } }StrategyFactory
具体的な処理を行うクラスを実装できました。次に必要なのは、ファイルのタイプによってどのクラスをインスタンス化するか判別する処理です。
ここについては何通りか方法があると思いますが、今回はStrategyFactoryというクラスを作成してそこで行うことにします。class StrategyFactory { /** * @param int $fileType * @return StrategyInterface */ public static function createStrategy(int $fileType): StrategyInterface { $strategy = null; switch ($fileType) { case config('values.file_type.office_work.value'): $strategy = new OfficeWorkFile(); break; case config('values.file_type.restaurant.value'): $strategy = new RestaurantFile(); break; case config('values.file_type.delivery.value'): $strategy = new DeliveryFile(); break; } return $strategy; } }Context
具体的な処理を、上の図でいう各ConcreteStrategyにdelegationするクラスです。今回の例では場合に応じてOfficeWorkFileクラス、RestaurantFileクラス、もしくはDeliveryFileに処理を行ってもらうクラスということになります。
StrategyFactory::createStrategy()でどのクラスをインスタンス化するか判別し、executeで処理を実行します。class Context { private StrategyInterface $strategy; public function __construct(FileImportDto $fileDto) { $this->setStrategy($fileDto->fileType); } /** * @param int $fileType */ public function setStrategy(int $fileType) { $this->strategy = StrategyFactory::createStrategy($fileType); } /** * @param FileImportDto $fileDto */ public function execute(FileImportDto $fileDto) { $fileData = $this->strategy->readData($fileDto); $this->strategy->storeData($fileData); } }Contextクラスを動かすメソッド
Contextクラスの処理を動かすメソッドが必要です。これはとてもシンプルで、以下のようなものになります。
public function processFile(FileImportDto $fileDto)
{
    $context = new Context($fileDto);
    $context->execute($fileDto);
}
こちらの処理をどこに置くかは好みが分かれると思います。これぐらいならControllerに置いてもよさそうな気がしますが、ビジネスロジック用にServiceクラスというものを作成してそちらに配置することにします。
use App\Models\FileImportDto;
use App\Services\Strategies\Context;

class FileImportService
{
    public function processFile(FileImportDto $fileDto)
    {
        $context = new Context($fileDto);
        $context->execute($fileDto);
    }
}
FormRequest
あとはControllerからServiceクラスにあるprocessFileを呼び出せば完了です。
しかしその前に、リクエスト値をDtoに変換しなければなりません。これをそのままController内で行うのは少しfatな感じになりそうな気がします。
せっかくLaravelを使っているので、FormRequest内に変換処理を書くことにします。class FileImportRequest extends FormRequest { /** * Determine if the user is authorized to make this request. * * @return bool */ public function authorize() { return true; } /** * Get the validation rules that apply to the request. * * @return array */ public function rules() { return [ 'uploaded_file' => /*バリデーションルール*/, 'file_type' => /*バリデーションルール*/ ]; } /** * convert request values into FileImportDto * * @return FileImportDto */ public function convertIntoDto(): FileImportDto { $uploadedFile = $this->file('uploaded_file'); return new FileImportDto( $uploadedFile, (int)$this->input('file_type'), $uploadedFile->getClientOriginalName(), $uploadedFile->path() ); } }Controller
Serviceクラスにある処理を呼び出すのみです。
Dtoへの変換処理はFormRequestに定義してあるので、かなりスッキリしたものになりました。class FileImportController extends Controller { private $service; public function __construct(FileImportService $service) { $this->service = $service; } public function importFile(FileImportRequest $request) { $this->service->processFile($request->convertIntoDto()); return redirect(route('route_name')); } }これでStrategyパターンは完成です?
- 投稿日:2021-02-25T12:04:54+09:00
フォームデータの送信
form要素
データを送信する方法を定義します。その属性すべてが、ユーザーが送信ボタンを押すと送信されるリクエストを調整できるように設計されています。
action 属性
action 属性は、どこにデータを送信するかを定義します。値は妥当な相対/絶対 URL でなければなりません。この属性が与えられなかった場合は、フォームが含まれているページの URL にデータが送信されます。
GET メソッド
GET メソッドは、サーバーに対して指定したリソースを返すよう求めるためにブラウザーが使用するメソッドです。
POST メソッド
POST メソッドは少し異なります。これは、HTTP リクエストの本文で提供したデータを考慮したレスポンスの要求を、ブラウザーがサーバーに送信するためのメソッドです。
- 投稿日:2021-02-25T10:00:16+09:00
Laravelの開発環境をDockerで構築しようとしたら公式さんがLaravel Sailって素敵ツールを提供してくれていました
久しぶりにLaravelで開発することになり、最近のDocker開発環境はどうなってるんだろうと調べてみたら、Laravel 8.xから利用できるようになったLaravel Sailが素敵そうだったので調べてみました。
Laravel Sailとは
Laravel Sail - Laravel - The PHP Framework For Web Artisans
https://laravel.com/docs/8.x/sail#introductionLaravel Sailは、LaravelのデフォルトのDocker開発環境と対話するための軽量のコマンドラインインターフェースです。Sailは、Dockerの経験がなくても、PHP、MySQL、Redisを使用してLaravelアプリケーションを構築するための優れた出発点を提供します。
基本的に、Sailは、プロジェクトのルートに保存されるdocker-compose.ymlファイルとsailスクリプトです。このsailスクリプトは、docker-compose.ymlファイルで定義されたDockerコンテナーと対話するための便利なメソッドをCLIに提供します。
Laravel Sailは、macOS、Linux、およびWindows(WSL2経由)でサポートされています。
まさか公式が対応してくれているとは!
インストール
Mac、Windows、Linuxそれぞれのインストール手順がありましたが、基本的には同じ手順でしたので、Macで試してみます。
前提
前提としてDockerアプリが必須となります。Dockerアプリのインストールについては割愛します。
Mac
Installation - Laravel - The PHP Framework For Web Artisans
https://laravel.com/docs/8.x/installation#getting-started-on-macos8.x公式のSailを利用したインストール手順インストール手順にあるコマンド
curl -s https://laravel.build/example-app | bashについて先に調べてみます。コマンドに含まれる
https://laravel.build/example-appへアクセスするとセットアップスクリプトがダウンロードできます。https://laravel.build/example-app へアクセスしてみると以下のスクリプトが取得できます。
composerのコンテナイメージを取得・起動してそのコンテナ内でlaravel new example-appを実行してプロジェクト作成しています。なるほどーhttpsdocker info > /dev/null 2>&1 # Ensure that Docker is running... if [ $? -ne 0 ]; then echo "Docker is not running." exit 1 fi docker run --rm \ -v $(pwd):/opt \ -w /opt \ laravelsail/php80-composer:latest \ bash -c "laravel new example-app && cd example-app && php ./artisan sail:install" cd example-app CYAN='\033[0;36m' LIGHT_CYAN='\033[1;36m' WHITE='\033[1;37m' NC='\033[0m' echo "" if sudo -n true 2>/dev/null; then sudo chown -R $USER: . echo -e "${WHITE}Get started with:${NC} cd example-app && ./vendor/bin/sail up" else echo -e "${WHITE}Please provide your password so we can make some final adjustments to your application's permissions.${NC}" echo "" sudo chown -R $USER: . echo "" echo -e "${WHITE}Thank you! We hope you build something incredible. Dive in with:${NC} cd example-app && ./vendor/bin/sail up" fi実際に実行してみます。途中、端末のパスワードを求められるので入力します。
$ curl -s https://laravel.build/example-app | bash

Unable to find image 'laravelsail/php80-composer:latest' locally
latest: Pulling from laravelsail/php80-composer
852e50cd189d: Pull complete
0266fc315b01: Pull complete
(略)
Digest: sha256:b387b05f2d55d32d9ab1b861b4bc8347f75b36ca2b259231a3359118682dabad
Status: Downloaded newer image for laravelsail/php80-composer:latest


 _                               _
| |                             | |
| |     __ _ _ __ __ ___   _____| |
| |    / _` | '__/ _` \ \ / / _ \ |
| |___| (_| | | | (_| |\ V /  __/ |
|______\__,_|_|  \__,_| \_/ \___|_|

Warning: TTY mode requires /dev/tty to be read/writable.
    Creating a "laravel/laravel" project at "./example-app"
(略)
Discovered Package: laravel/tinker
Discovered Package: nesbot/carbon
Discovered Package: nunomaduro/collision
Package manifest generated successfully.
    74 packages you are using are looking for funding.
    Use the `composer fund` command to find out more!
    > @php artisan key:generate --ansi
    Application key set successfully.

Application ready! Build something amazing.

Please provide your password so we can make some final adjustments to your application's permissions.

Password:

Thank you! We hope you build something incredible. Dive in with: cd example-app && ./vendor/bin/sail up
つおい。もう開発環境の準備が整いました。
ディレクトリを覗いてみるといたせりつくせり感満載です。$ cd example-app $ ls -al total 640 drwxr-xr-x 27 kai 339809989 864 2 19 19:53 ./ drwxr-xr-x 3 kai 339809989 96 2 19 19:51 ../ -rw-r--r-- 1 kai 339809989 220 2 17 01:58 .editorconfig -rw-r--r-- 1 kai 339809989 865 2 19 19:53 .env -rw-r--r-- 1 kai 339809989 815 2 19 19:53 .env.example -rw-r--r-- 1 kai 339809989 111 2 17 01:58 .gitattributes -rw-r--r-- 1 kai 339809989 191 2 17 01:58 .gitignore -rw-r--r-- 1 kai 339809989 181 2 17 01:58 .styleci.yml -rw-r--r-- 1 kai 339809989 3780 2 17 01:58 README.md drwxr-xr-x 7 kai 339809989 224 2 17 01:58 app/ -rwxr-xr-x 1 kai 339809989 1686 2 17 01:58 artisan* drwxr-xr-x 4 kai 339809989 128 2 17 01:58 bootstrap/ -rw-r--r-- 1 kai 339809989 1646 2 17 01:58 composer.json -rw-r--r-- 1 kai 339809989 268563 2 19 19:51 composer.lock drwxr-xr-x 16 kai 339809989 512 2 17 01:58 config/ drwxr-xr-x 6 kai 339809989 192 2 17 01:58 database/ -rw-r--r-- 1 kai 339809989 2614 2 19 19:53 docker-compose.yml -rw-r--r-- 1 kai 339809989 473 2 17 01:58 package.json -rw-r--r-- 1 kai 339809989 1202 2 17 01:58 phpunit.xml drwxr-xr-x 7 kai 339809989 224 2 17 01:58 public/ drwxr-xr-x 6 kai 339809989 192 2 17 01:58 resources/ drwxr-xr-x 6 kai 339809989 192 2 17 01:58 routes/ -rw-r--r-- 1 kai 339809989 563 2 17 01:58 server.php drwxr-xr-x 5 kai 339809989 160 2 17 01:58 storage/ drwxr-xr-x 6 kai 339809989 192 2 17 01:58 tests/ drwxr-xr-x 45 kai 339809989 1440 2 19 19:53 vendor/ -rw-r--r-- 1 kai 339809989 559 2 17 01:58 webpack.mix.js
.gitignore用意されているので、Gitリポジトリへのコミットもはまらずにできそうです。.gitignore/node_modules /public/hot /public/storage /storage/*.key /vendor .env .env.backup .phpunit.result.cache docker-compose.override.yml Homestead.json Homestead.yaml npm-debug.log yarn-error.log
docker-compose.ymlを眺めてみるとlaravelのDockerfileは./vendor/laravel/sail以下のファイルを参照していることがわかります。コメントアウトされていますが、seleniumやPostgreSQL、memcachedにも対応しているみたいです。ポート変更したい場合、環境変数が利用できるようになっているので、例えば
laravel.testのポートを変更したい場合、.envファイルにAPP_PORT=8000などのように追記すると変更できます。Laravel SailでDocker環境構築 | RE:ENGINES
https://re-engines.com/2021/01/25/laravel-sail/docker-compose.yml# For more information: https://laravel.com/docs/sail version: '3' services: laravel.test: build: context: ./vendor/laravel/sail/runtimes/8.0 dockerfile: Dockerfile args: WWWGROUP: '${WWWGROUP}' image: sail-8.0/app ports: - '${APP_PORT:-80}:80' environment: WWWUSER: '${WWWUSER}' LARAVEL_SAIL: 1 volumes: - '.:/var/www/html' networks: - sail depends_on: - mysql # - pgsql - redis # - selenium # selenium: # image: 'selenium/standalone-chrome' # volumes: # - '/dev/shm:/dev/shm' # networks: # - sail mysql: image: 'mysql:8.0' ports: - '${FORWARD_DB_PORT:-3306}:3306' environment: MYSQL_ROOT_PASSWORD: '${DB_PASSWORD}' MYSQL_DATABASE: '${DB_DATABASE}' MYSQL_USER: '${DB_USERNAME}' MYSQL_PASSWORD: '${DB_PASSWORD}' MYSQL_ALLOW_EMPTY_PASSWORD: 'yes' volumes: - 'sailmysql:/var/lib/mysql' networks: - sail healthcheck: test: ["CMD", "mysqladmin", "ping"] # pgsql: # image: postgres:13 # ports: # - '${FORWARD_DB_PORT:-5432}:5432' # environment: # PGPASSWORD: '${DB_PASSWORD:-secret}' # POSTGRES_DB: '${DB_DATABASE}' # POSTGRES_USER: '${DB_USERNAME}' # POSTGRES_PASSWORD: '${DB_PASSWORD:-secret}' # volumes: # - 'sailpostgresql:/var/lib/postgresql/data' # networks: # - sail # healthcheck: # test: ["CMD", "pg_isready", "-q", "-d", "${DB_DATABASE}", "-U", "${DB_USERNAME}"] redis: image: 'redis:alpine' ports: - '${FORWARD_REDIS_PORT:-6379}:6379' volumes: - 'sailredis:/data' networks: - sail healthcheck: test: ["CMD", "redis-cli", "ping"] # memcached: # image: 'memcached:alpine' # ports: # - '11211:11211' # networks: # - sail mailhog: image: 'mailhog/mailhog:latest' ports: - '${FORWARD_MAILHOG_PORT:-1025}:1025' - '${FORWARD_MAILHOG_DASHBOARD_PORT:-8025}:8025' networks: - sail networks: sail: driver: bridge volumes: sailmysql: driver: local # sailpostgresql: # driver: local sailredis: driver: locallaravelコンテナの
Dockerfileを眺めてみるとタイムゾーンを変更したい場合にカスタマイズしたいかなぁと思う程度です。DockerfileFROM ubuntu:20.04 LABEL maintainer="Taylor Otwell" ARG WWWGROUP WORKDIR /var/www/html ENV DEBIAN_FRONTEND noninteractive ENV TZ=UTC RUN ln -snf /usr/share/zoneinfo/$TZ /etc/localtime && echo $TZ > /etc/timezone RUN apt-get update \ && apt-get install -y gnupg gosu curl ca-certificates zip unzip git supervisor sqlite3 libcap2-bin libpng-dev python2 \ && mkdir -p ~/.gnupg \ && chmod 600 ~/.gnupg \ && echo "disable-ipv6" >> ~/.gnupg/dirmngr.conf \ && apt-key adv --homedir ~/.gnupg --keyserver hkp://keyserver.ubuntu.com:80 --recv-keys E5267A6C \ && apt-key adv --homedir ~/.gnupg --keyserver hkp://keyserver.ubuntu.com:80 --recv-keys C300EE8C \ && echo "deb http://ppa.launchpad.net/ondrej/php/ubuntu focal main" > /etc/apt/sources.list.d/ppa_ondrej_php.list \ && apt-get update \ && apt-get install -y php8.0-cli php8.0-dev \ php8.0-pgsql php8.0-sqlite3 php8.0-gd \ php8.0-curl php8.0-memcached \ php8.0-imap php8.0-mysql php8.0-mbstring \ php8.0-xml php8.0-zip php8.0-bcmath php8.0-soap \ php8.0-intl php8.0-readline \ php8.0-msgpack php8.0-igbinary php8.0-ldap \ php8.0-redis \ && php -r "readfile('http://getcomposer.org/installer');" | php -- --install-dir=/usr/bin/ --filename=composer \ && curl -sL https://deb.nodesource.com/setup_15.x | bash - \ && apt-get install -y nodejs \ && curl -sS https://dl.yarnpkg.com/debian/pubkey.gpg | apt-key add - \ && echo "deb https://dl.yarnpkg.com/debian/ stable main" > /etc/apt/sources.list.d/yarn.list \ && apt-get update \ && apt-get install -y yarn \ && apt-get install -y mysql-client \ && apt-get -y autoremove \ && apt-get clean \ && rm -rf /var/lib/apt/lists/* /tmp/* /var/tmp/* RUN setcap "cap_net_bind_service=+ep" /usr/bin/php8.0 RUN groupadd --force -g $WWWGROUP sail RUN useradd -ms /bin/bash --no-user-group -g $WWWGROUP -u 1337 sail COPY start-container /usr/local/bin/start-container COPY supervisord.conf /etc/supervisor/conf.d/supervisord.conf COPY php.ini /etc/php/8.0/cli/conf.d/99-sail.ini RUN chmod +x /usr/local/bin/start-container EXPOSE 8000 ENTRYPOINT ["start-container"]
./vendor/bin/sail upコマンドを実行してDockerコンテナを立ち上げます。
docker-compose upコマンドでも立ち上げることができました。$ ./vendor/bin/sail up Creating network "example-app_sail" with driver "bridge" Creating volume "example-app_sailmysql" with local driver Creating volume "example-app_sailredis" with local driver Pulling redis (redis:alpine)... alpine: Pulling from library/redis ba3557a56b15: Pull complete (略) Digest: sha256:6ea115e574af216b2175f3783bb1119140b24619632e522841c1aac6990f5e79 Status: Downloaded newer image for redis:alpine Building laravel.test (略) Creating example-app_redis_1 ... done (略) Creating example-app_laravel.test_1 ... done Attaching to example-app_mailhog_1, example-app_redis_1, example-app_mysql_1, example-app_laravel.test_1 mailhog_1 | [HTTP] Binding to address: 0.0.0.0:8025 mailhog_1 | 2021/02/19 11:08:44 Using in-memory storage mailhog_1 | 2021/02/19 11:08:44 [SMTP] Binding to address: 0.0.0.0:1025 mailhog_1 | 2021/02/19 11:08:44 Serving under http://0.0.0.0:8025/ mysql_1 | 2021-02-19 11:08:44+00:00 [Note] [Entrypoint]: Entrypoint script for MySQL Server 8.0.21-1debian10 started. redis_1 | 1:C 19 Feb 2021 11:08:44.329 # oO0OoO0OoO0Oo Redis is starting oO0OoO0OoO0Oo redis_1 | 1:C 19 Feb 2021 11:08:44.329 # Redis version=6.0.10, bits=64, commit=00000000, modified=0, pid=1, just started redis_1 | 1:C 19 Feb 2021 11:08:44.329 # Warning: no config file specified, using the default config. In order to specify a config file use redis-server /path/to/redis.conf mailhog_1 | Creating API v1 with WebPath: mysql_1 | 2021-02-19 11:08:44+00:00 [Note] [Entrypoint]: Switching to dedicated user 'mysql' redis_1 | 1:M 19 Feb 2021 11:08:44.330 * Running mode=standalone, port=6379. redis_1 | 1:M 19 Feb 2021 11:08:44.330 # WARNING: The TCP backlog setting of 511 cannot be enforced because /proc/sys/net/core/somaxconn is set to the lower value of 128. redis_1 | 1:M 19 Feb 2021 11:08:44.330 # Server initialized mailhog_1 | Creating API v2 with WebPath: mysql_1 | 2021-02-19 11:08:44+00:00 [Note] [Entrypoint]: Entrypoint script for MySQL Server 8.0.21-1debian10 started. redis_1 | 1:M 19 Feb 2021 11:08:44.331 * Ready to accept connections mysql_1 | 2021-02-19 11:08:44+00:00 [Note] [Entrypoint]: Initializing database files mysql_1 | 2021-02-19T11:08:44.731409Z 0 [System] [MY-013169] [Server] /usr/sbin/mysqld (mysqld 8.0.21) initializing of server in progress as process 45 mysql_1 | 2021-02-19T11:08:44.739160Z 1 [System] [MY-013576] [InnoDB] InnoDB initialization has started. mysql_1 | 2021-02-19T11:08:45.144394Z 1 [System] [MY-013577] [InnoDB] InnoDB initialization has ended. laravel.test_1 | 2021-02-19 11:08:45,721 INFO Set uid to user 0 succeeded laravel.test_1 | 2021-02-19 11:08:45,726 INFO supervisord started with pid 17 mysql_1 | 2021-02-19T11:08:46.142439Z 6 [Warning] [MY-010453] [Server] root@localhost is created with an empty password ! Please consider switching off the --initialize-insecure option. laravel.test_1 | 2021-02-19 11:08:46,730 INFO spawned: 'php' with pid 19 laravel.test_1 | 2021-02-19 11:08:47,733 INFO success: php entered RUNNING state, process has stayed up for > than 1 seconds (startsecs) mysql_1 | 2021-02-19 11:08:49+00:00 [Note] [Entrypoint]: Database files initialized mysql_1 | 2021-02-19 11:08:49+00:00 [Note] [Entrypoint]: Starting temporary server mysql_1 | 2021-02-19T11:08:49.524217Z 0 [System] [MY-010116] [Server] /usr/sbin/mysqld (mysqld 8.0.21) starting as process 92 mysql_1 | 2021-02-19T11:08:49.538476Z 1 [System] [MY-013576] [InnoDB] InnoDB initialization has started. laravel.test_1 | Starting Laravel development server: http://0.0.0.0:80 mysql_1 | 2021-02-19T11:08:49.706431Z 1 [System] [MY-013577] [InnoDB] InnoDB initialization has ended. mysql_1 | 2021-02-19T11:08:49.809603Z 0 [System] [MY-011323] [Server] X Plugin ready for connections. Socket: /var/run/mysqld/mysqlx.sock mysql_1 | 2021-02-19T11:08:49.959222Z 0 [Warning] [MY-010068] [Server] CA certificate ca.pem is self signed. mysql_1 | 2021-02-19T11:08:49.959381Z 0 [System] [MY-013602] [Server] Channel mysql_main configured to support TLS. Encrypted connections are now supported for this channel. mysql_1 | 2021-02-19T11:08:49.961133Z 0 [Warning] [MY-011810] [Server] Insecure configuration for --pid-file: Location '/var/run/mysqld' in the path is accessible to all OS users. Consider choosing a different directory. mysql_1 | 2021-02-19T11:08:49.991284Z 0 [System] [MY-010931] [Server] /usr/sbin/mysqld: ready for connections. Version: '8.0.21' socket: '/var/run/mysqld/mysqld.sock' port: 0 MySQL Community Server - GPL. mysql_1 | 2021-02-19 11:08:50+00:00 [Note] [Entrypoint]: Temporary server started. laravel.test_1 | [Fri Feb 19 11:08:49 2021] PHP 8.0.2 Development Server (http://0.0.0.0:80) started mysql_1 | Warning: Unable to load '/usr/share/zoneinfo/iso3166.tab' as time zone. Skipping it. mysql_1 | Warning: Unable to load '/usr/share/zoneinfo/leap-seconds.list' as time zone. Skipping it. mysql_1 | Warning: Unable to load '/usr/share/zoneinfo/zone.tab' as time zone. Skipping it. mysql_1 | Warning: Unable to load '/usr/share/zoneinfo/zone1970.tab' as time zone. Skipping it. mysql_1 | 2021-02-19 11:08:52+00:00 [Note] [Entrypoint]: Creating database example_app mysql_1 | mysql_1 | 2021-02-19 11:08:52+00:00 [Note] [Entrypoint]: Stopping temporary server mysql_1 | 2021-02-19T11:08:52.783401Z 11 [System] [MY-013172] [Server] Received SHUTDOWN from user root. Shutting down mysqld (Version: 8.0.21). mysql_1 | 2021-02-19T11:08:54.552265Z 0 [System] [MY-010910] [Server] /usr/sbin/mysqld: Shutdown complete (mysqld 8.0.21) MySQL Community Server - GPL. mysql_1 | 2021-02-19 11:08:54+00:00 [Note] [Entrypoint]: Temporary server stopped mysql_1 | mysql_1 | 2021-02-19 11:08:54+00:00 [Note] [Entrypoint]: MySQL init process done. Ready for start up. mysql_1 | mysql_1 | 2021-02-19T11:08:55.019311Z 0 [System] [MY-010116] [Server] /usr/sbin/mysqld (mysqld 8.0.21) starting as process 1 mysql_1 | 2021-02-19T11:08:55.027315Z 1 [System] [MY-013576] [InnoDB] InnoDB initialization has started. mysql_1 | 2021-02-19T11:08:55.193856Z 1 [System] [MY-013577] [InnoDB] InnoDB initialization has ended. mysql_1 | 2021-02-19T11:08:55.297841Z 0 [System] [MY-011323] [Server] X Plugin ready for connections. Bind-address: '::' port: 33060, socket: /var/run/mysqld/mysqlx.sock mysql_1 | 2021-02-19T11:08:55.410836Z 0 [Warning] [MY-010068] [Server] CA certificate ca.pem is self signed. mysql_1 | 2021-02-19T11:08:55.411005Z 0 [System] [MY-013602] [Server] Channel mysql_main configured to support TLS. Encrypted connections are now supported for this channel. mysql_1 | 2021-02-19T11:08:55.413393Z 0 [Warning] [MY-011810] [Server] Insecure configuration for --pid-file: Location '/var/run/mysqld' in the path is accessible to all OS users. Consider choosing a different directory. mysql_1 | 2021-02-19T11:08:55.435750Z 0 [System] [MY-010931] [Server] /usr/sbin/mysqld: ready for connections. Version: '8.0.21' socket: '/var/run/mysqld/mysqld.sock' port: 3306 MySQL Community Server - GPL. mailhog_1 | [APIv1] KEEPALIVE /api/v1/eventsとくにエラーもなくコンテナが起動しました。素晴らしい。
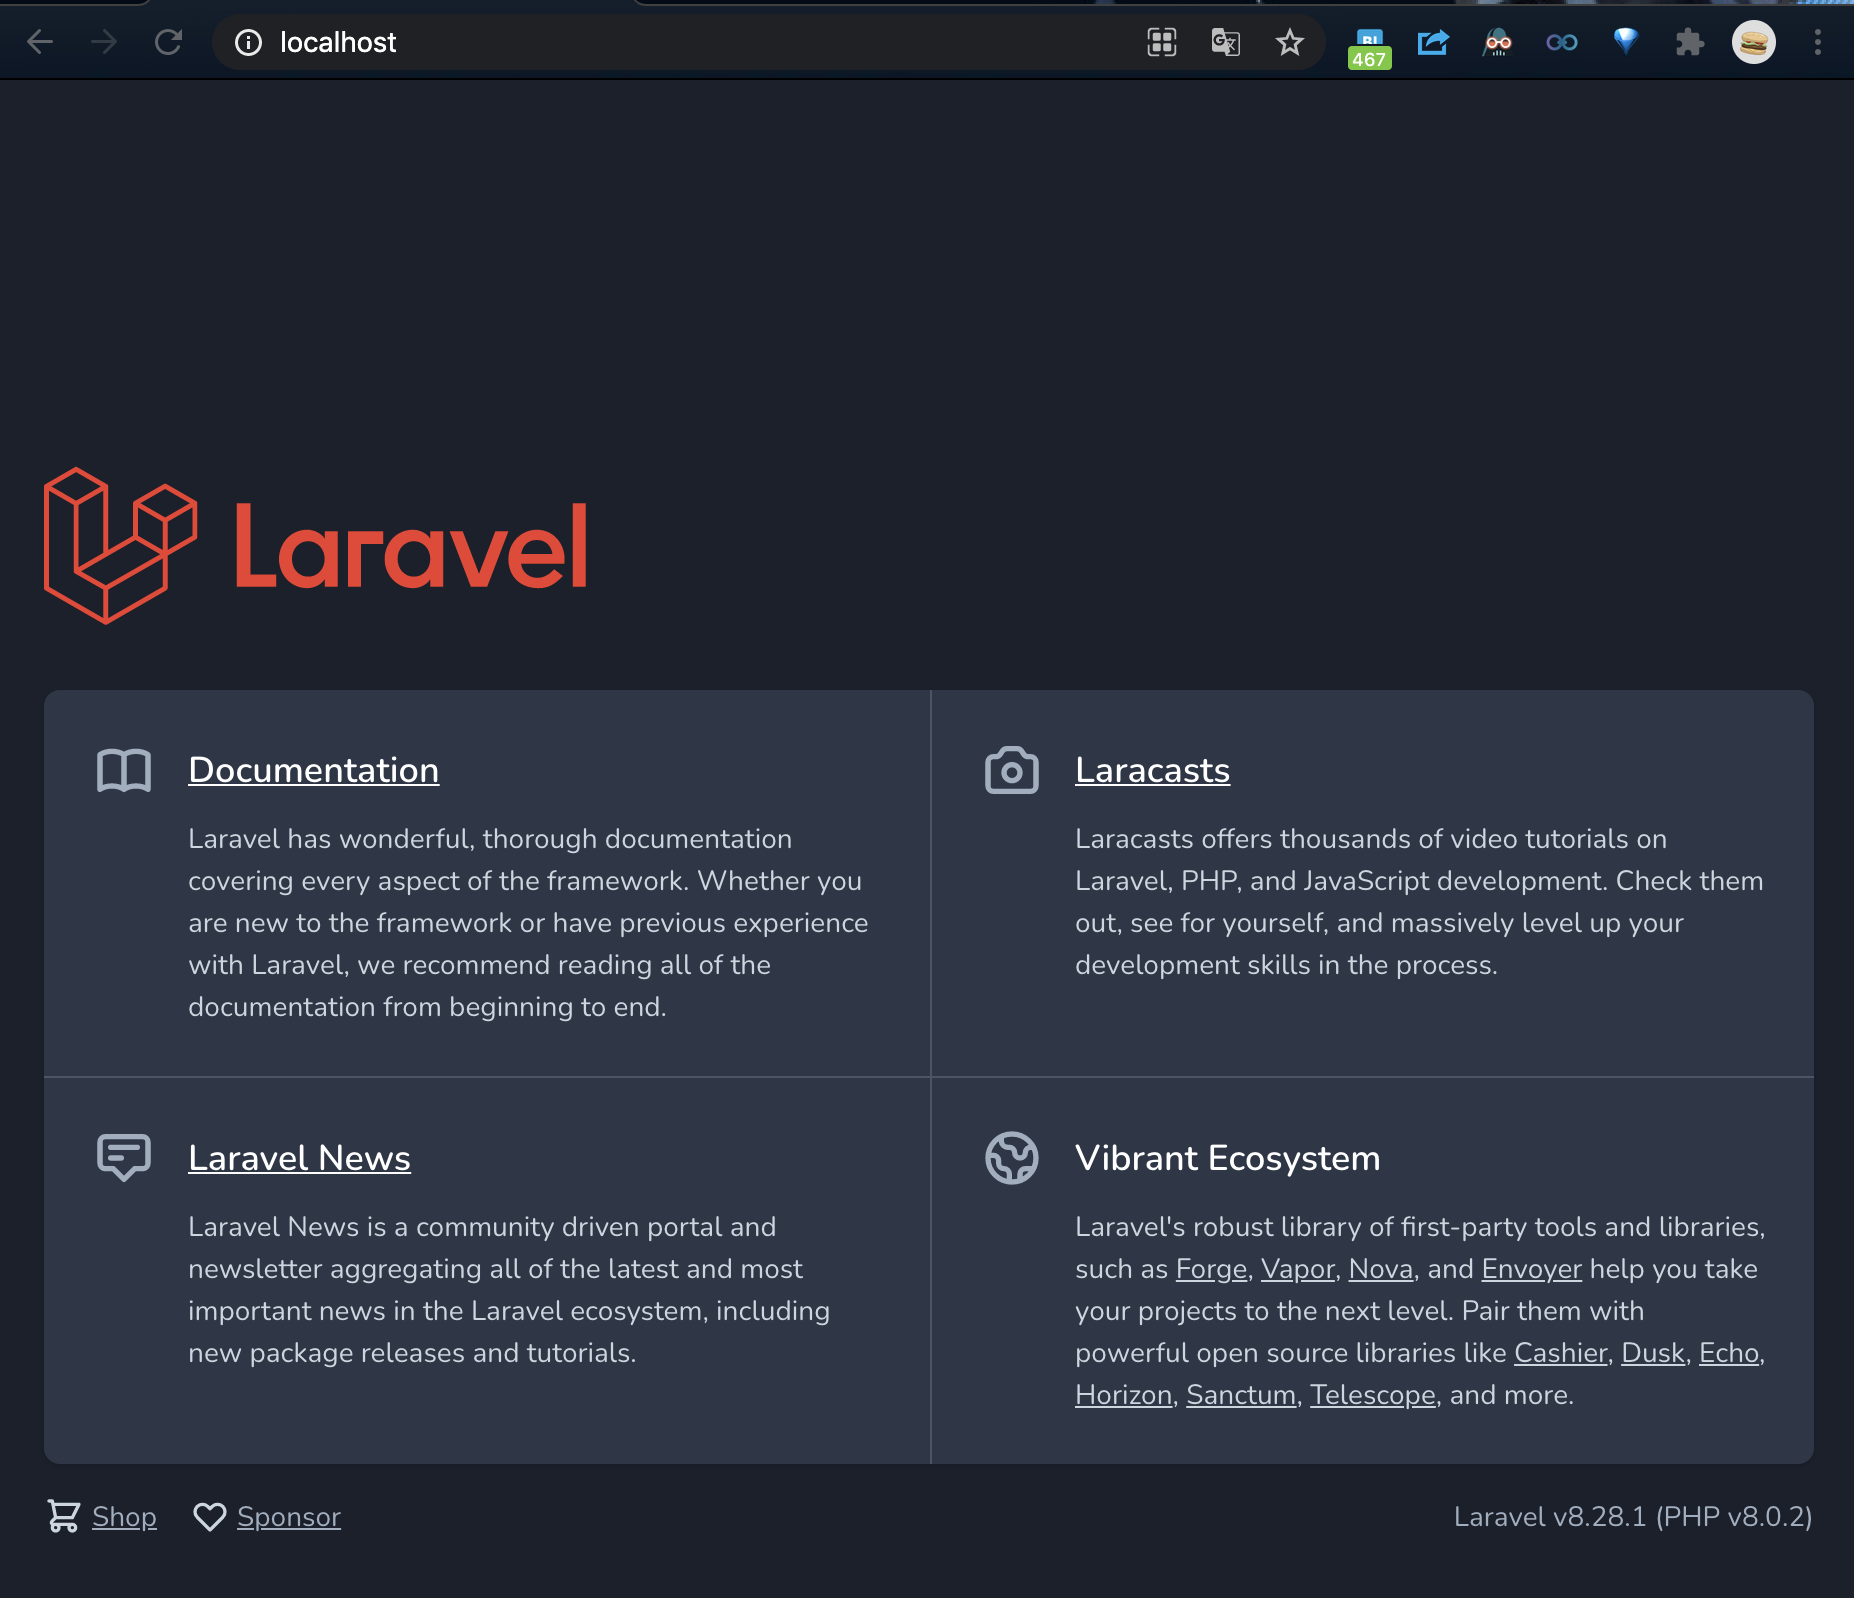
-dオプションをつけることでバックグラウンドで起動することもできました。-dオプションで起動した場合、./vendor/bin/sail stopコマンドでコンテナを終了することができます。http://localhost/ へアクセスするとLaravelアプリが表示されることが確認できます。
MailHogのコンテナも起動しているので、
http://localhost:8025/でダッシュボードが表示できます。
phpMyAdminが使いたい場合
MySQLに関してはphpMyAdminなどの管理ツールは用意されていないので、必要であれば個別に追加するのがよさそうです。
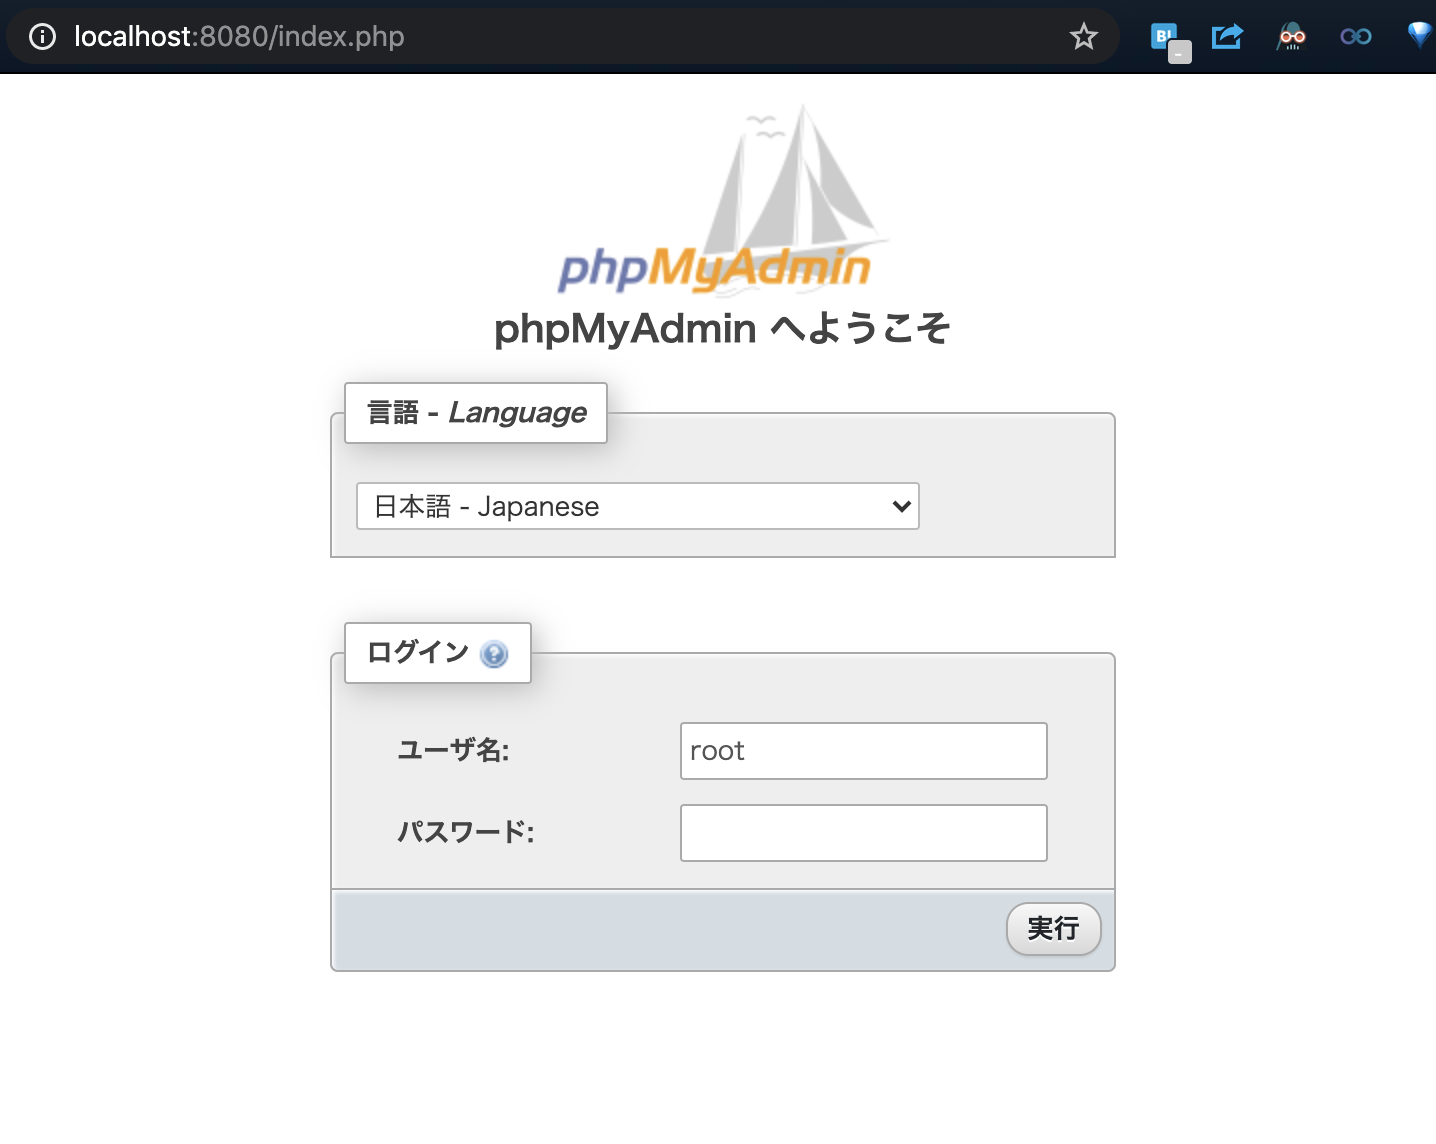
docker-compose.ymlに以下の定義を追加するとphpMyAdminが利用できるようになります。How to add phpmyadmin to laravel 8 sail docker-compose.yml - Stack Overflow
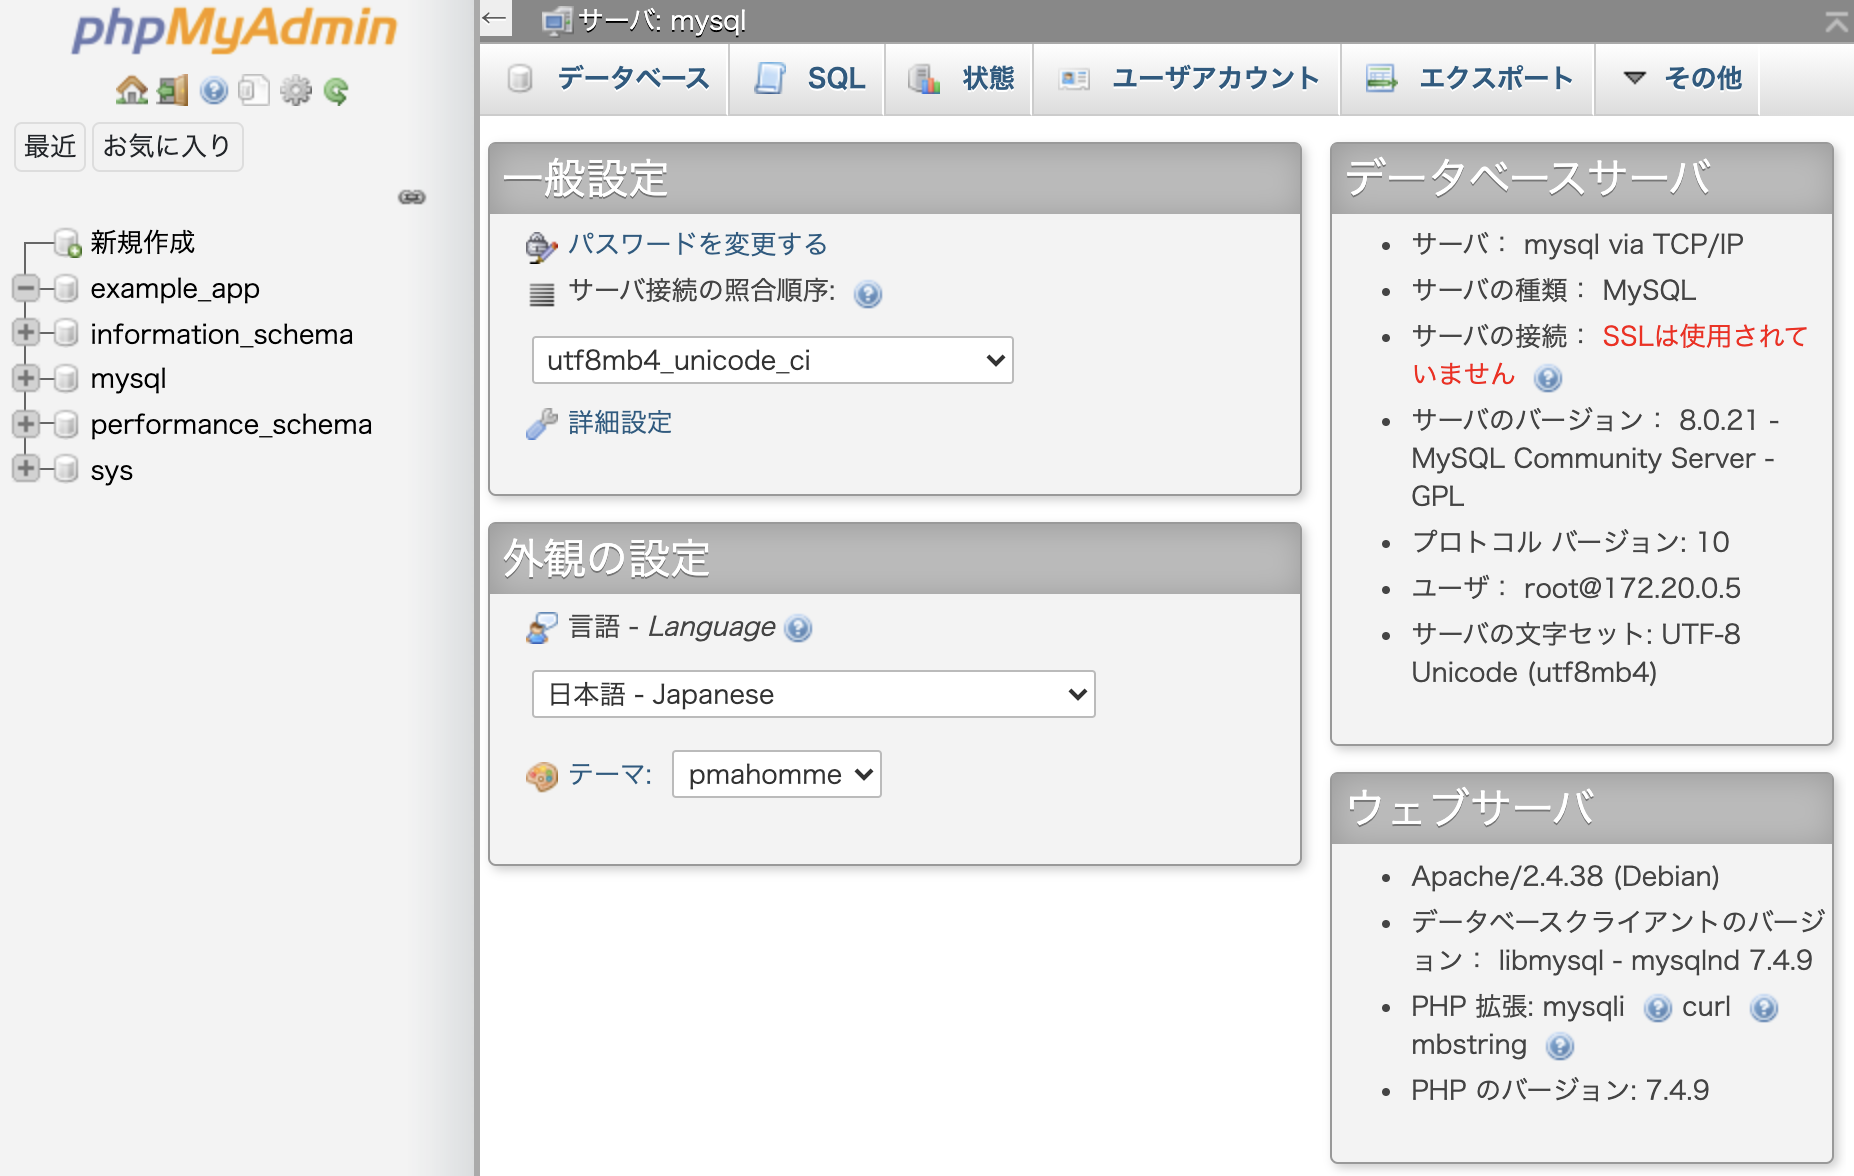
https://stackoverflow.com/questions/66195113/how-to-add-phpmyadmin-to-laravel-8-sail-docker-compose-ymldocker-compose.ymlphpmyadmin: image: phpmyadmin/phpmyadmin links: - mysql:mysql ports: - 8080:80 environment: MYSQL_USERNAME: '${DB_USERNAME}' MYSQL_ROOT_PASSWORD: '${DB_PASSWORD}' PMA_HOST: mysql networks: - sail初期状態だとユーザー名
rootパスワード空でログインできます。
Windows
Installation - Laravel - The PHP Framework For Web Artisans
https://laravel.com/docs/8.x/installation#getting-started-on-windowsWindows Subsystem for Linux 2(WSL2)がインストールされている前提で手順はMacと同じです。
Linux
Installation - Laravel - The PHP Framework For Web Artisans
https://laravel.com/docs/8.x/installation#getting-started-on-linuxMacと同じです。
まとめ
非常に手軽にLaravelの開発環境を構築することができました。Dockerの知識がなくとも利用することができ、開発に集中できるとてもよいツールだったので積極的に利用したいと思います。
参考
Laravel Sail - Laravel - The PHP Framework For Web Artisans
https://laravel.com/docs/8.x/sail#introductionLaravel SailでDocker環境構築 | RE:ENGINES
https://re-engines.com/2021/01/25/laravel-sail/How to add phpmyadmin to laravel 8 sail docker-compose.yml - Stack Overflow
https://stackoverflow.com/questions/66195113/how-to-add-phpmyadmin-to-laravel-8-sail-docker-compose-ymlLaravel Sail なら Docker 開発環境がコマンド 2 撃で構築できる。PHP/MySQLからキューやメール環境までオールインワン
https://www.ritolab.com/entry/217【Docker】Laravel Sailのインストールと使い方を確認 | アールエフェクト
https://reffect.co.jp/laravel/laravel-sail