- 投稿日:2021-01-07T16:38:46+09:00
Nuxt.jsでの「localstorage is not defined」への対応
Nuxt.jsでの開発でdata内でlocalstorageを使おうとしたときに「localstorage is not defined」エラーが出た時の対応メモです。
以下のようにdata内で直接呼び出すとサーバサイドレンダリングしているのでブラウザのストレージにアクセスできずエラーになる。
data () {
  isLoggin: localStorage.currentUser.token !== null
}
対応
以下のようにmounted内でアクセスすれば動作する
  data () {
    isLoggin: false
  },
  mounted () {
    if (localStorage.currentUser) {
      this.isLoggin = localStorage.currentUser.token !== null
    }
  }
参考
https://jp.vuejs.org/v2/cookbook/client-side-storage.html
- 投稿日:2021-01-07T14:00:08+09:00
Vue3 teleport と emits オプションを試してみる
Prologue
WEB+DB PRESS Vol.120 で Vue3の特集がされていました。
内容は初学者でもわかりやすいチュートリアル形式になっているので、これから Vue を始める方でもおすすめだと思います。
その中に Vue3 で出た新しい機能について書かれていたので、今回はそこにフォーカスして試してみました。参考
環境
- macOS: v10.15.6
- node.js: v12.18.2
- terminal: iTerm
- エディタ: VS Code
- パッケージマネージャ:
yarn
<teleport>コンポーネントVue の組み込みコンポーネントで、テンプレートに記述したコンテンツをページ内の任意の箇所に移動させることができます。
=> これによりz-index の回避や header の調整などが可能になる...
実感を得るために、実際に動かしてみます。
サンプルプロジェクトを作成
プロジェクト名は
vue3-prjとして作成していきます。
version は Vue3 を選択しますが、それ以外はお好みで大丈夫かと思います。vue create vue3-prj Vue CLI v4.5.4 ┌─────────────────────────────────────────────┐ │ │ │ New version available 4.5.4 → 4.5.10 │ │ Run yarn global add @vue/cli to update! │ │ │ └─────────────────────────────────────────────┘ ? Please pick a preset: Manually select features ? Check the features needed for your project: Choose Vue version, Babel, TS, Router, Linter ? Choose a version of Vue.js that you want to start the project with 3.x (Preview) ? Use class-style component syntax? No ? Use Babel alongside TypeScript (required for modern mode, auto-detected polyfills, transpiling JSX)? Yes ? Use history mode for router? (Requires proper server setup for index fallback in production) Yes ? Pick a linter / formatter config: Prettier ? Pick additional lint features: Lint on save ? Where do you prefer placing config for Babel, ESLint, etc.? In package.json ? Save this as a preset for future projects? No Vue CLI v4.5.4 ✨ Creating project in /Users/mi**/mii_work/vue3-prj. ? Initializing git repository... ⚙️ Installing CLI plugins. This might take a while... yarn install v1.22.4 info No lockfile found. [1/4] ? Resolving packages... [2/4] ? Fetching packages... success Saved lockfile. info To upgrade, run the following command: $ brew upgrade yarn ✨ Done in 57.46s. ? Invoking generators... ? Installing additional dependencies... yarn install v1.22.4 [1/4] ? Resolving packages... [2/4] ? Fetching packages... [3/4] ? Linking dependencies... [4/4] ? Building fresh packages... success Saved lockfile. ✨ Done in 13.49s. ⚓ Running completion hooks... ? Generating README.md... ? Successfully created project vue3-prj. ? Get started with the following commands: $ cd vue3-prj $ yarn serve
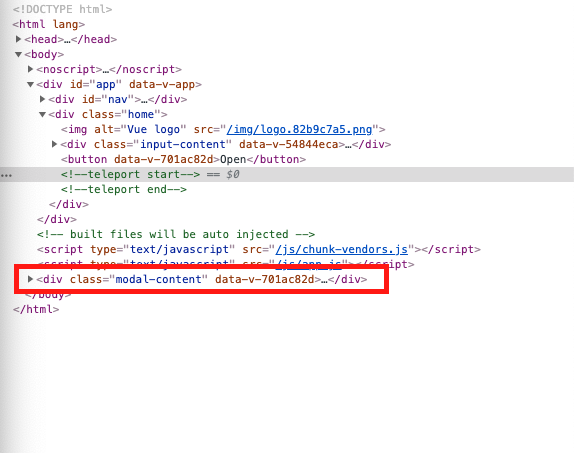
/components/Modal.vueを作成し、シンプルなモーダルを作成します。/components/Modal.vue<template> <button @click="openModal">Open</button> <teleport to="body"> <div v-if="isOpenModal" class="modal-content"> <p> This is Modal!!!!! </p> <p>message: {{ message }}</p> <button @click="closeModal">Close</button> </div> </teleport> </template> <script lang="ts"> import { defineComponent, ref } from "vue"; export default defineComponent({ name: "Modal", props: { message: { type: String } }, setup() { const isOpenModal = ref(false); const openModal = () => { return (isOpenModal.value = true); }; const closeModal = () => { return (isOpenModal.value = false); }; return { openModal, closeModal, isOpenModal }; } }); </script>こちらを
/views/Home.vueの以下の位置に設置します。/views/Home.vue<template> <div class="home"> <img alt="Vue logo" src="../assets/logo.png" /> <Input @send="emitSend" /> <Modal :message="message" /> </div> </template> <script lang="ts"> import { defineComponent, ref } from "vue"; import Input from "@/components/Input.vue"; import Modal from "@/components/Modal.vue"; export default defineComponent({ name: "Home", components: { Input, Modal }, setup() { const message = ref(""); const emitSend = (value: string) => { message.value = value; }; return { emitSend, message }; } }); </script>body に宛先を向けた場合、モーダルを開くボタンをクリックすると、DOM 上では画像の位置に表示されます。
emits オプション
コンポーネントがどのように機能するかをより適切に文書化するために、発行されたすべてのイベントを定義することをお勧めします。
参考:
- https://v3.vuejs.org/guide/component-custom-events.html#defining-custom-events
- https://v3.ja.vuejs.org/api/options-data.html#emits記法としては以下の2通りあるとのことなので、こちらも試してみます。
- カスタムイベント名を配列で列挙する方法
- オブジェクトで定義してデータの有効性をチェックする関数を追加、データの有効性をチェックする方法
/components/Input.vueを作成し、イベントを発火させます。
コンポーネントの設置箇所は上記/views/Home.vue内に記載していますのでご参考ください。/components/Input.vue<template> <div class="input-content"> <input v-model="message" type="text" /> <button @click="sendText">emit</button> </div> </template> <script lang="ts"> import { defineComponent, ref } from "vue"; export default defineComponent({ name: "Input", emits: { send(message: string) { return message.length > 4 } }, setup(props, { emit }) { const message = ref(''); const sendText = () => { emit("send", message.value); }; return { sendText, message }; } }); </script>引数
messageは string 型、長さは4文字以下だとエラーになるように記載しました。
挙動は以下のようになります。warning
- emits オプションを指定していない場合 -> warning が出ます
runtime-core.esm-bundler.js?5c40:38 [Vue warn]: Component emitted event "send-text" but it is neither declared in the emits option nor as an "onSend-text" prop.推奨レベルなので warning として出るのかな、と思います。
- emits オプションを指定して、オプションの条件に添わない値(3文字など)を入力すると warning が出ます。
runtime-core.esm-bundler.js?5c40:38 [Vue warn]: Invalid event arguments: event validation failed for event "send".Epilogue
emitsオプションはもう少しがっつり弾かれるのかとおもったのですが、warning で出ていました。
文書化が目的だからでしょうか。コードや可読性の向上以外にも使えそうなので、引き続き調べてみます。
fragmentsも活用してみましたが、特に意識しないで書けること、もちろんエラーにもならないので、個人的には書きやすくなったなと思いました。
teleportはもう少し複雑な構成だとより恩恵を感じるのかなと感じました。ID 指定などもできるそうなので、試してみたいと思います。
今回はそれぞれ感触を確かめるに留まりましたが、時間があれば実践的なコードを作ってみようと思います。何かご指摘などありましたらご連絡ください。
- 投稿日:2021-01-07T13:01:44+09:00
【Vue】ドラッグで選択できるようにする方法。(結合ありのテーブルセルをドラッグで選択する)
結合セルがあるテーブルの各セルをドラッグで選択できるようにする。
スプシと同じように、選択範囲の中に結合したセルがあれば、そのサイズに合わせて選択範囲を拡張し、常に範囲が四角になるようにする。
目次
考え方
1. mouse系イベントの活用
ドラッグ選択を実現するためには、mousedown, mouseup, mousemoveイベントを使用する。
イベント 内容 ここでの用途 mousedown ポインティングデバイスのボタンが要素上で押されたときに発生 選択が開始したセルの情報を取得。開始フラグを立てる。 mousemove 要素の上を移動したときに発生 現在選択している要素の情報を取得 mouseup ポインティングデバイスのボタンが要素の上で離されたときに発生 終了フラグ イベントは各セルに仕込むのではなく、tableタグに仕込む。(セルが大量の場合に余計なメモリ消費を防ぐため)
ちなみに、よく目にするclickイベントはmousedownとmouseupを組み合わせて作られている。このため、mousedownなどのイベントを使えなくするとclickイベントも使えなくなる。
2. セルの列方向の位置を算出
結合したセルを扱うため、セルの列番号と実際のセルの位置ズレが発生する。
このため、テーブルの状態をスキャンして、各セルの列方向の位置を求める。
3. watchプロパティの活用
ドラッグに合わせて選択範囲を自動算出するため、Vue.jsのwatchプロパティを使う。
mousemoveイベントで選択中のセルが変化した場合に、watchで検知して、選択範囲を算出する。
▼位置ズレの例
例えば、(0, 0)位置のセルのcolspanが3の場合、(0, 1)セルの実際の位置は列番号3の位置となる。
実際のコード
mouse系イベントの活用
vue.jsでイベントを仕込むのは超簡単。タグの中に以下を記述。
@イベント名 = "メソッド名"vue.jsのtemplateタグ内<table @mousedown="mouseDown" @mouseup="mouseUp" @mousemove="mouseMove" @click="clickCell" >個別に複数選択できるようにもしておくため
@click="clickCell"も設置しておく。
各イベントの処理は以下。methodの中に記述mouseDown(e){ this.isDrag = true this.startCell = { rowIndex: e.target.parentNode.rowIndex, cellIndex: e.target.cellIndex, rowspan: e.target.rowSpan, colspan: e.target.colSpan } }, mouseUp(e){ this.isDrag = false }, mouseMove(e){ if(this.isDrag == true && e.target.tagName != "TABLE"){ this.endCell = { rowIndex: e.target.parentNode.rowIndex, cellIndex: e.target.cellIndex, rowspan: e.target.rowSpan, colspan: e.target.colSpan } } }引数のeにはイベントが発生した情報が入っている。
e.target.cellIndexのようにして、欲しい情報を抜き出す。
isDragはドラッグ中を示すフラグ。このフラグがtrueの間のみmousemoveでデータを取得し続ける。mousemoveの条件式の
e.target.tagName != "TABLE"は、ポインターの場所によって、targetがtdタグではなくtableタグを指してしまうことがあり、その場合を除外するため。
イベント内で使う全体共通の変数を3つ追加したため、これをdataプロパティに追加する。dataプロパティdata(){ return{ 略 // Drag用 startCell:[], endCell:[], isDrag: false, }以上でマウスのイベントを検知して必要なデータを取得する処理が完了。
セルの列方向の位置を算出
watchプロパティの中で使用するテーブルのセルの実際の列方向位置を算出するプログラムを作成する。
テーブルのデータを渡すと、各セルがどこの列位置になっているかを返す。
外部にjsファイルを作成し、後からvueにimportする。
scantable.jsconst scanTable = (rows) => { const arr = []; const colIndices = [] for(var y=0; y < rows.length; y++) { var row = rows[y] for(var x=0;x<row.table_cells.length;x++) { var cell = row.table_cells[x], xx = x, tx, ty; for(;arr[y] && arr[y][xx]; ++xx); for(tx = xx; tx < xx + (cell.colspan || 1); ++tx) { for(ty = y; ty < y + (cell.rowspan || 1); ++ty) { if( !arr[ty] ) arr[ty] = [] arr[ty][tx] = 1 if ( !colIndices[y] ) colIndices[y] = [] colIndices[y][x] = xx } } } } return colIndices } export { scanTable }引数で配列情報を渡す(変数rowsに格納)と、処理結果を
colIndicesという変数で返す。
▼実際の処理の例引数で渡すテーブルrows= [ { "table_cells": [ { "cell_type": "TD", "rowspan": 1, "colspan": 2, }, { "cell_type": "TD", "rowspan": 1, "colspan": 1, }, { "cell_type": "TD", "rowspan": 1, "colspan": 3, } ] }, { "table_cells": [ { "cell_type": "TD", "rowspan": 2, "colspan": 1, }, { "cell_type": "TD", "rowspan": 1, "colspan": 1, }, { "cell_type": "TD", "rowspan": 1, "colspan": 2, } ] }, { "table_cells": [ { "cell_type": "TD", "rowspan": 1, "colspan": 1, }, { "cell_type": "TD", "rowspan": 1, "colspan": 1, }, { "cell_type": "TD", "rowspan": 1, "colspan": 1, } ] }, ]上記は以下図の元データ
これに作成したscanTableを実行すると、以下となる。
処理結果scanTable(rows) //出力結果 [0, 2, 3] [0, 1, 2] [1, 2, 3]
watchプロパティの活用
watchプロパティを使って、マウスのドラッグがあった場合に自動で選択範囲を算出する処理を作る。
まずは基点となるセル(rowIndexとcellIndex)を求める。
ドラッグは左上から右下のみでなく、右下から左上にいくパターンも考えられる。watchプロパティ// 基点となるrowIndexとcolIndex let startRowIndex = this.startCell.rowIndex if ( startRowIndex > this.endCell.rowIndex ){ startRowIndex = this.endCell.rowIndex } let startColIndex = this.colIndicies[this.startCell.rowIndex][this.startCell.cellIndex] if ( startColIndex > this.colIndicies[this.endCell.rowIndex][this.endCell.cellIndex] ){ startColIndex = this.colIndicies[this.endCell.rowIndex][this.endCell.cellIndex] } let endRowIndex = this.startCell.rowIndex + this.startCell.rowspan - 1 if ( endRowIndex < this.endCell.rowIndex + this.endCell.rowspan - 1 ){ endRowIndex = this.endCell.rowIndex + this.endCell.rowspan - 1 } let endColIndex = this.colIndicies[this.startCell.rowIndex][this.startCell.cellIndex] + this.startCell.colspan - 1 if ( endColIndex < this.colIndicies[this.endCell.rowIndex][this.endCell.cellIndex] + this.endCell.colspan - 1 ){ endColIndex = this.colIndicies[this.endCell.rowIndex][this.endCell.cellIndex] + this.endCell.colspan - 1 }上記処理で、
startRowIndex、endRowIndex、startColIndex、endColIndexの4つのデータを作成。セルを選択する
対象となるセルを算出し、選択中の配列(currentCells)に格納する処理。
      //対象セルの抽出
      const dragSelectedCells = () => {
        for( let i = 0; i <= endRowIndex; i++ ){
          for( let j = 0; j < this.rows[i].table_cells.length; j++ ){
            //範囲拡張チェック
            //colIndexの延長処理
            if( i <= startRowIndex && startRowIndex <= i + this.rows[i].table_cells[j].rowspan - 1
                || i <= startRowIndex && startRowIndex <= i + this.rows[i].table_cells[j].rowspan - 1
                || startRowIndex <= i && i + this.rows[i].table_cells[j].rowspan - 1 <= endRowIndex){
                  if( this.colIndices[i][j] < startColIndex &&  startColIndex <= this.colIndices[i][j] + this.rows[i].table_cells[j].colspan - 1 ){
                    startColIndex = this.colIndices[i][j]
                    dragSelectedCells()
                  }

                  if( this.colIndices[i][j] <= endColIndex &&  endColIndex < this.colIndices[i][j] + this.rows[i].table_cells[j].colspan - 1 ){
                    endColIndex = this.colIndices[i][j] + this.rows[i].table_cells[j].colspan - 1
                    dragSelectedCells()
                  }
            }

            //rowIndexの延長処理
            if( this.colIndices[i][j] <= startColIndex && startColIndex <= this.colIndices[i][j] + this.rows[i].table_cells[j].colspan - 1
                || this.colIndices[i][j] <= endColIndex && endColIndex <= this.colIndices[i][j] + this.rows[i].table_cells[j].colspan - 1
                || startColIndex <= this.colIndices[i][j] && this.colIndices[i][j] + this.rows[i].table_cells[j].colspan - 1 <= endColIndex ){
                  if( i < startRowIndex && startRowIndex <= (i + this.rows[i].table_cells[j].rowspan - 1) ){
                    startRowIndex = i
                    dragSelectedCells()
                  }

                  if( i <= endRowIndex && endRowIndex < (i + this.rows[i].table_cells[j].rowspan - 1) ){
                    endRowIndex = i + this.rows[i].table_cells[j].rowspan - 1
                    dragSelectedCells()
                  }
            }


            if( startRowIndex <= i && i <= endRowIndex
                && startColIndex <= this.colIndices[i][j] && this.colIndices[i][j] <= endColIndex ){
                  this.currentCells.push({
                    rowIndex: i,
                    cellIndex: j,
                    colIndex: this.colIndices[i][j],
                    rowspan: this.rows[i].table_cells[j].rowspan,
                    colspan: this.rows[i].table_cells[j].colspan,
                  })
            }
          }
        }
      }
      dragSelectedCells()
テーブルのセルが選択範囲に該当するかを一つづつチェックしていく。
colspanやrowspanが1以上(結合してあるセル)を含む場合は、再起的に
dragSelectedCells()を実行することで、選択範囲を再計算する。以上でドラッグ選択の記述が完了。
フルコード
vue.js<template> <div> <p>〜TmpAddRow.vue〜</p> <button @click="clear">選択解除</button> <br> <table @mousedown="mouseDown" @mouseup="mouseUp" @mousemove="mouseMove" @click="clickCell" > <template v-for="(tr, rowIndex) in rows"> <tr :key="rowIndex"> <template v-for="(cell, cellIndex) in tr.table_cells"> <td :key="cellIndex" :class="{'is-active': isActive(rowIndex, cellIndex)}" :rowspan="cell.rowspan || 1" :colspan="cell.colspan || 1" > ( {{rowIndex}} , {{cellIndex}} ) </td> </template> </tr> </template> </table> <br> <p>currentCells : {{currentCells}}</p> </div> </template> <script> import { scanTable } from "./scantable" export default { data(){ return{ currentCells:[], // Drag startCell:[], endCell:[], isDrag: false, rows: [ { "table_cells": [ { "cell_type": "TD", "rowspan": 1, "colspan": 2, }, { "cell_type": "TD", "rowspan": 1, "colspan": 1, }, { "cell_type": "TD", "rowspan": 1, "colspan": 3, } ] }, { "table_cells": [ { "cell_type": "TD", "rowspan": 2, "colspan": 1, }, { "cell_type": "TD", "rowspan": 1, "colspan": 1, }, { "cell_type": "TD", "rowspan": 1, "colspan": 2, } ] }, { "table_cells": [ { "cell_type": "TD", "rowspan": 1, "colspan": 1, }, { "cell_type": "TD", "rowspan": 1, "colspan": 1, }, { "cell_type": "TD", "rowspan": 1, "colspan": 1, } ] }, ] } }, methods:{ //セルに選択状態付与 isActive(rowIndex, cellIndex){ return this.currentCells.findIndex((elem) => elem.rowIndex == rowIndex && elem.cellIndex == cellIndex ) > -1 }, //クリックによる選択状態の変更 clickCell(event){ const cell = event.target const tr = event.target.parentNode if(this.isActive(tr.rowIndex, cell.cellIndex)){ const rmIndex = this.currentCells.findIndex((elem)=> elem.rowIndex == tr.rowIndex && elem.cellIndex == cell.cellIndex ) this.currentCells = [ ...this.currentCells.slice(0, rmIndex), ...this.currentCells.slice(rmIndex + 1) ] } else{ this.currentCells = [ ...this.currentCells, { rowIndex: tr.rowIndex, cellIndex: cell.cellIndex } ] } }, //行内の要素(セル数)の最大値を取得する(行作成用) getMaxCellNum(){ return this.rows.reduce((acc, tr) => { if (acc < tr.table_cells.length){ return tr.table_cells.length }else{ return acc } }, 0) }, clear(){ this.currentCells = [] }, //ドラッグ選択 mouseDown(e){ console.log("mouseDown:",e) this.isDrag = true this.startCell = { rowIndex: e.target.parentNode.rowIndex, cellIndex: e.target.cellIndex, rowspan: e.target.rowSpan, colspan: e.target.colSpan } console.log("startcell:",this.startCell) }, mouseUp(e){ console.log("mouseUp:",e) this.isDrag = false }, mouseMove(e){ if(this.isDrag == true && e.target.tagName != "TABLE"){ console.log("mouseMove:",e) this.endCell = { rowIndex: e.target.parentNode.rowIndex, cellIndex: e.target.cellIndex, rowspan: e.target.rowSpan, colspan: e.target.colSpan } console.log("endCell:",this.endCell) } } }, //dragによる選択範囲の算出 computed:{ colIndices(){ return scanTable( this.rows ) } }, watch:{ endCell(){ this.currentCells = [this.startCell] // 基点となるrowとcol let startRowIndex = this.startCell.rowIndex if ( startRowIndex > this.endCell.rowIndex ){ startRowIndex = this.endCell.rowIndex } let startColIndex = this.colIndices[this.startCell.rowIndex][this.startCell.cellIndex] if ( startColIndex > this.colIndices[this.endCell.rowIndex][this.endCell.cellIndex] ){ startColIndex = this.colIndices[this.endCell.rowIndex][this.endCell.cellIndex] } let endRowIndex = this.startCell.rowIndex + this.startCell.rowspan - 1 if ( endRowIndex < this.endCell.rowIndex + this.endCell.rowspan - 1 ){ endRowIndex = this.endCell.rowIndex + this.endCell.rowspan - 1 } let endColIndex = this.colIndices[this.startCell.rowIndex][this.startCell.cellIndex] + this.startCell.colspan - 1 if ( endColIndex < this.colIndices[this.endCell.rowIndex][this.endCell.cellIndex] + this.endCell.colspan - 1 ){ endColIndex = this.colIndices[this.endCell.rowIndex][this.endCell.cellIndex] + this.endCell.colspan - 1 } //対象セルの抽出 const dragSelectedCells = () => { for( let i = 0; i <= endRowIndex; i++ ){ for( let j = 0; j < this.rows[i].table_cells.length; j++ ){ //範囲拡張チェック //colIndexの延長処理 if( i <= startRowIndex && startRowIndex <= i + this.rows[i].table_cells[j].rowspan - 1 || i <= startRowIndex && startRowIndex <= i + this.rows[i].table_cells[j].rowspan - 1 || startRowIndex <= i && i + this.rows[i].table_cells[j].rowspan - 1 <= endRowIndex){ if( this.colIndices[i][j] < startColIndex && startColIndex <= this.colIndices[i][j] + this.rows[i].table_cells[j].colspan - 1 ){ startColIndex = this.colIndices[i][j] dragSelectedCells() } if( this.colIndices[i][j] <= endColIndex && endColIndex < this.colIndices[i][j] + this.rows[i].table_cells[j].colspan - 1 ){ endColIndex = this.colIndices[i][j] + this.rows[i].table_cells[j].colspan - 1 dragSelectedCells() } } //rowIndexの延長処理 if( this.colIndices[i][j] <= startColIndex && startColIndex <= this.colIndices[i][j] + this.rows[i].table_cells[j].colspan - 1 || this.colIndices[i][j] <= endColIndex && endColIndex <= this.colIndices[i][j] + this.rows[i].table_cells[j].colspan - 1 || startColIndex <= this.colIndices[i][j] && this.colIndices[i][j] + this.rows[i].table_cells[j].colspan - 1 <= endColIndex ){ if( i < startRowIndex && startRowIndex <= (i + this.rows[i].table_cells[j].rowspan - 1) ){ startRowIndex = i dragSelectedCells() } if( i <= endRowIndex && endRowIndex < (i + this.rows[i].table_cells[j].rowspan - 1) ){ endRowIndex = i + this.rows[i].table_cells[j].rowspan - 1 dragSelectedCells() } } if( startRowIndex <= i && i <= endRowIndex && startColIndex <= this.colIndices[i][j] && this.colIndices[i][j] <= endColIndex ){ this.currentCells.push({ rowIndex: i, cellIndex: j, colIndex: this.colIndices[i][j], rowspan: this.rows[i].table_cells[j].rowspan, colspan: this.rows[i].table_cells[j].colspan, }) } } } } dragSelectedCells() } } } </script> <style lang="scss" scoped> table{ width: 80%; user-select: none; th,td{ border: thin solid rgba(0, 0, 0, 0.12); text-align: center; color: gray; } th{ background: #ccc; } th, td{ //選択状態 &.is-active{ border: 1px double #0098f7; } } } button{ background: lightcoral; padding: 5px 20px; color: white; border-radius: 50px; } </style>
▼外部のjsファイルscantable.jsconst scanTable = (rows) => { const arr = []; const colIndices = [] for(var y=0; y < rows.length; y++) { var row = rows[y] for(var x=0;x<row.table_cells.length;x++) { var cell = row.table_cells[x], xx = x, tx, ty; for(;arr[y] && arr[y][xx]; ++xx); for(tx = xx; tx < xx + (cell.colspan || 1); ++tx) { for(ty = y; ty < y + (cell.rowspan || 1); ++ty) { if( !arr[ty] ) arr[ty] = [] arr[ty][tx] = 1 if ( !colIndices[y] ) colIndices[y] = [] colIndices[y][x] = xx } } } } return colIndices } export { scanTable }
(参考)ドラッグ選択の処理を外部ファイルに移動
Vueファイルのwatchプロパティに記述している下記処理が長いので、こちらも外部ファイルに移動する。
ポイントは変数をプロパティ名を指定して渡すこと。
.vue//対象セルの抽出 const dragSelectedCells = () => { for( let i = 0; i <= endRowIndex; i++ ){ for( let j = 0; j < this.rows[i].table_cells.length; j++ ){ //範囲拡張チェック //colIndexの延長処理 if( i <= startRowIndex && startRowIndex <= i + this.rows[i].table_cells[j].rowspan - 1 || i <= startRowIndex && startRowIndex <= i + this.rows[i].table_cells[j].rowspan - 1 || startRowIndex <= i && i + this.rows[i].table_cells[j].rowspan - 1 <= endRowIndex){ if( this.colIndices[i][j] < startColIndex && startColIndex <= this.colIndices[i][j] + this.rows[i].table_cells[j].colspan - 1 ){ startColIndex = this.colIndices[i][j] dragSelectedCells() } if( this.colIndices[i][j] <= endColIndex && endColIndex < this.colIndices[i][j] + this.rows[i].table_cells[j].colspan - 1 ){ endColIndex = this.colIndices[i][j] + this.rows[i].table_cells[j].colspan - 1 dragSelectedCells() } } //rowIndexの延長処理 if( this.colIndices[i][j] <= startColIndex && startColIndex <= this.colIndices[i][j] + this.rows[i].table_cells[j].colspan - 1 || this.colIndices[i][j] <= endColIndex && endColIndex <= this.colIndices[i][j] + this.rows[i].table_cells[j].colspan - 1 || startColIndex <= this.colIndices[i][j] && this.colIndices[i][j] + this.rows[i].table_cells[j].colspan - 1 <= endColIndex ){ if( i < startRowIndex && startRowIndex <= (i + this.rows[i].table_cells[j].rowspan - 1) ){ startRowIndex = i dragSelectedCells() } if( i <= endRowIndex && endRowIndex < (i + this.rows[i].table_cells[j].rowspan - 1) ){ endRowIndex = i + this.rows[i].table_cells[j].rowspan - 1 dragSelectedCells() } } if( startRowIndex <= i && i <= endRowIndex && startColIndex <= this.colIndices[i][j] && this.colIndices[i][j] <= endColIndex ){ this.currentCells.push({ rowIndex: i, cellIndex: j, colIndex: this.colIndices[i][j], rowspan: this.rows[i].table_cells[j].rowspan, colspan: this.rows[i].table_cells[j].colspan, }) } } } } dragSelectedCells()Vueファイル内の記述変更
上記記述を以下のように変更する。
.vuethis.currentCells = dragSelectedCells({ startRowIndex: startRowIndex, endRowIndex: endRowIndex, startColIndex: startColIndex, endColIndex: endColIndex, rows: this.rows, colIndices: this.colIndices, currentCells: this.currentCells, })渡す変数が多いのでごちゃごちゃしているが、記述量はシンプルになった。
また、外部から関数を読み込むのでimportに追記。
vueimport { scanTable, dragSelectedCells } from "./scantable"
jsファイルへの追記
関数を外部のjsファイルに移動する。
.jsconst dragSelectedCells = ({ startRowIndex, endRowIndex, startColIndex, endColIndex, rows, colIndices, currentCells, }) => { for( let i = 0; i <= endRowIndex; i++ ){ for( let j = 0; j < rows[i].table_cells.length; j++ ){ //範囲拡張チェック //colIndexの延長処理 if( i <= startRowIndex && startRowIndex <= i + rows[i].table_cells[j].rowspan - 1 || i <= startRowIndex && startRowIndex <= i + rows[i].table_cells[j].rowspan - 1 || startRowIndex <= i && i + rows[i].table_cells[j].rowspan - 1 <= endRowIndex){ if( colIndices[i][j] < startColIndex && startColIndex <= colIndices[i][j] + rows[i].table_cells[j].colspan - 1 ){ startColIndex = colIndices[i][j] dragSelectedCells({ startRowIndex, endRowIndex, startColIndex, endColIndex, rows, colIndices, currentCells, }) } if( colIndices[i][j] <= endColIndex && endColIndex < colIndices[i][j] + rows[i].table_cells[j].colspan - 1 ){ endColIndex = colIndices[i][j] + rows[i].table_cells[j].colspan - 1 dragSelectedCells({ startRowIndex, endRowIndex, startColIndex, endColIndex, rows, colIndices, currentCells, }) } } //rowIndexの延長処理 if( colIndices[i][j] <= startColIndex && startColIndex <= colIndices[i][j] + rows[i].table_cells[j].colspan - 1 || colIndices[i][j] <= endColIndex && endColIndex <= colIndices[i][j] + rows[i].table_cells[j].colspan - 1 || startColIndex <= colIndices[i][j] && colIndices[i][j] + rows[i].table_cells[j].colspan - 1 <= endColIndex ){ if( i < startRowIndex && startRowIndex <= (i + rows[i].table_cells[j].rowspan - 1) ){ startRowIndex = i dragSelectedCells({ startRowIndex, endRowIndex, startColIndex, endColIndex, rows, colIndices, currentCells, }) } if( i <= endRowIndex && endRowIndex < (i + rows[i].table_cells[j].rowspan - 1) ){ endRowIndex = i + rows[i].table_cells[j].rowspan - 1 dragSelectedCells({ startRowIndex, endRowIndex, startColIndex, endColIndex, rows, colIndices, currentCells, }) } } if( startRowIndex <= i && i <= endRowIndex && startColIndex <= colIndices[i][j] && colIndices[i][j] <= endColIndex ){ currentCells.push({ rowIndex: i, cellIndex: j, colIndex: colIndices[i][j], rowspan: rows[i].table_cells[j].rowspan, colspan: rows[i].table_cells[j].colspan, }) } } } return currentCells } export { scanTable, dragSelectedCells }再起処理の度に変数を渡す必要がある。
最後に外部ファイルに渡す関数を追加。
export { scanTable, dragSelectedCells }以上。


- 投稿日:2021-01-07T12:50:35+09:00
ササっと解決!!firebaseのhostingで変更内容が反映されない時の対処法
皆さんこんにちは!
ここで質問なのですが、皆さんはフロントの部分を実際の環境でテストする際に何のアプリケーションを使っていますか?
色々あるとは思うのですが、多くの人はNetlify、firebaseなどを使うことが多いと思います。(主観)
今回は、その中でもfirebaseのHostingについて書いていこうと思います!
先日、いつものように
firebase deployをコマンドで入力し、実際の環境ではどのように動くのか試してみたところ、deploy自体にエラーは無いものの変更内容が反映されない。。。こりゃ、困った。
色々調べてみたところ、firebaseに限らずどうやらエラーが無く正常に動作している場合の多くは、キャッシュが原因らしい。
なので、
firebase.jsonにキャッシュを消去する設定を加えてあげることで解決できるらしい。以下のように、
headersにキャッシュの設定を加えたら変更内容が反映されました!firebase.json{ "hosting": { "public": "dist", "ignore": [ "firebase.json", "**/.*", "**/node_modules/**" ], "rewrites": [ { "source": "**", "destination": "/index.html" } ], "headers": [{ "source" : "**", "headers" : [{ "key" : "Cache-Control", "value" : "max-age=300" }] }] } }
max-ageの説明についてはfirebaseのドキュメントを参照してください。これで変更内容が反映されると思います!
以上、「ササっと解決!!firebaseのhostingで変更内容が反映されない時の対処法」でした!!!
良ければ、LGTM、コメントお願いします。
また、何か間違っていることがあればご指摘頂けると幸いです。
他にも初心者さん向けに記事を投稿しているので、時間があれば他の記事も見て下さい!!
Thank you for reading
- 投稿日:2021-01-07T09:53:27+09:00
Pug入門
入門背景
Pugで書かれたコードを見た時に動揺してしまったので、Pug入門してみました。
Pugとは
HTMLを簡単に書くためのテンプレートエンジン。
Node.jsで動いている。
vueのテンプレートで書ける。メリット
- < > がいらない。(閉じタグがいらない) → 最高。
- 共通部分を分割して再利用できる。 → コンポーネント化?
- 変数が使える。 → ややこしくなりそう。
- ループやifが使える。 → ん?
慣れたらすごい楽そう。
とりあえずPugで書かれたコードが読めるのを目標にサクッと入門してみる。書き方
インデントで階層化していく
test.pugbody h1 Pugの練習タイトルです。 p Pugの練習パラグラフtest.html<body> <h1>Pugの練習タイトルです。</h1> <p>Pugの練習パラグラフ</p> <body>あゝ、見やすい
classは . idは # で
test.pugbody h1.title 簡単にclassがつけれる p#description もちろんidも .text divは省略可能test.html<body> <h1 class="title">簡単にclassがつけれる</h1> <p id="description">もちろんidも</p> <div class="text">divは省略可能</div> <body>直感的!
属性は()で
test.pugbody input(type="email")test.html<body> <input type="email"> <body>半角スペースで何個も追加可能
変数も使える
test.pugbody -const myClasses = ["class1", "class2", "class3"] div(class=myClasses)test.html<body> <div class="class1 class2 class3"></div> <body>おわり
とりあえずこれで少しは読めるとなったと思う。
- 投稿日:2021-01-07T09:07:46+09:00
vue.jsをrails6で動かすためにwebpack.config.jsを設定してたらエラー出過ぎて草
webpack CLIを動かせるようにしてみる
webpack.config.jsを設定しているのでその設定が正しいかの確認ができればと思いやってみた。
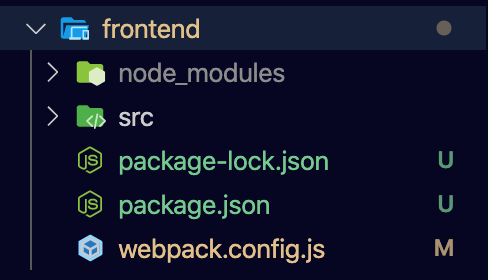
このようなファイル構成にしているのでfrontendディレクトリで以下のコマンドを実行してみた。
webpack --config webpack.config.jsすると以下のように表示される。
webpack --config webpack.config.js
CLI for webpack must be installed.
  webpack-cli (https://github.com/webpack/webpack-cli)

We will use "npm" to install the CLI via "npm install -D".
Do you want to install 'webpack-cli' (yes/no): yes
どうやらwebpackをCLIで動かすためのツールが必要そうである。インストールしますか?と聞かれているので素直にyesと回答
Error: Cannot find module 'webpack-cli/package.json'するとエラーが発生した。おいおいなんでや…
npm install -g webpack-cliということでやむなくグローバルインストールを試すことに。
/usr/local/bin/webpack-cli -> /usr/local/lib/node_modules/webpack-cli/bin/cli.js
npm WARN webpack-cli@4.3.1 requires a peer of webpack@4.x.x || 5.x.x but none is installed. You must install peer dependencies yourself.

+ webpack-cli@4.3.1
added 46 packages from 31 contributors in 4.209s
お、インストールできたっぽい。
これで
webpack --config webpack.config.jsこのコマンドでwebpack.config.jsを読み込むことができるようになった。やった!
次はwebpack.config.jsの設定に移ろう。
一段落したので遭遇したエラーと対処法をまとめた。
webpack --config webpack.config.jsこのコマンドを打つとwebpack.config.jsを読み込んでくれるのでそこで出たエラーを紹介。このエラーを解消しないとwebpacl.config.jsが動かないので…
configuration.module has an unknown property 'loaders'.
configuration.module has an unknown property 'loaders'. These properties are valid:
   object { defaultRules?, exprContextCritical?, exprContextRecursive?, exprContextRegExp?, exprContextRequest?, noParse?, rules?, strictExportPresence?, strictThisContextOnImports?, unknownContextCritical?, unknownContextRecursive?, unknownContextRegExp?, unknownContextRequest?, unsafeCache?, wrappedContextCritical?, wrappedContextRecursive?, wrappedContextRegExp? }
   -> Options affecting the normal modules (`NormalModuleFactory`).
vue-loaderを読み込むために以下のように記述したところ上記エラーに遭遇
module: {
    loaders: [ ここ
      {
        loader: 'vue-loader'
おい!なんでや!となったが代替案も出してくれてたのでそれに倣うことにした。
Did you mean module.rules or module.rules.*.use?module: { rules: [ { loader: 'vue-loader' } ] },loadersをrulesに修正して解決。
TypeError: this._init is not a function at Object.vue
TypeError: this._init is not a function at Object.Vuevueオブジェクトのコンストラクタが動いていなさそうな感じ。調べたら即解決した。
module: { rules: [ { loader: 'vue-loader' } ] },loaderの部分でvue-loaderを読み込む設定が必要だった。
[vue-loader] vue-template-compiler must be installed as a peer dependency,
なんか設定がたりなさそう。調べたところ指示された通りcompilerをインストールすれば良さそう
npm install vue-template-compiler --save-devこれで解決
vue-loader was used without the corresponding plugin. Make sure to include VueLoaderPlugin in your webpack config.
なんか今度はpluginが足りませんと出る。
これも調べたらwebpack.config.js内でプラグインを導入すればいいことに気づき、以下のように記述
const { VueLoaderPlugin } = require("vue-loader");
module.exports = {
 (省略)
  plugins: [new VueLoaderPlugin()]
}
requireも記述しないと以下のエラーが出てしまう
ReferenceError: VueLoaderPlugin is not definedNo matching rule for .vue files found.
これも調べたところconfig内にvueを読み込む設定が必要とのことで以下のように記述
module: {
    rules: [
      {
        test: /\.vue$/, #ここ
        exclude: /node_modules/,
        loader: 'vue-loader'
      }
    ]
  },
testの部分で.vueを読み込むようにした。
The output directory as absolute path (required).
output: {
    path: `${__dirname}/../public/javascripts`,
    filename: '[name].js'
  },
config内のoutput.pathが相対パスだと上記エラーになる。とはいえ絶対パスだと後々不便。と思って調べてたらdirnameというのを使うと良いとあったので使用。これは現在いるパスを変数化するものらしく絶対パスで参照してくれるようだ。
で、ここまでエラーを乗り越えるとようやくconfigが動くようになった。
webpack --config webpack.config.jsこれをすると
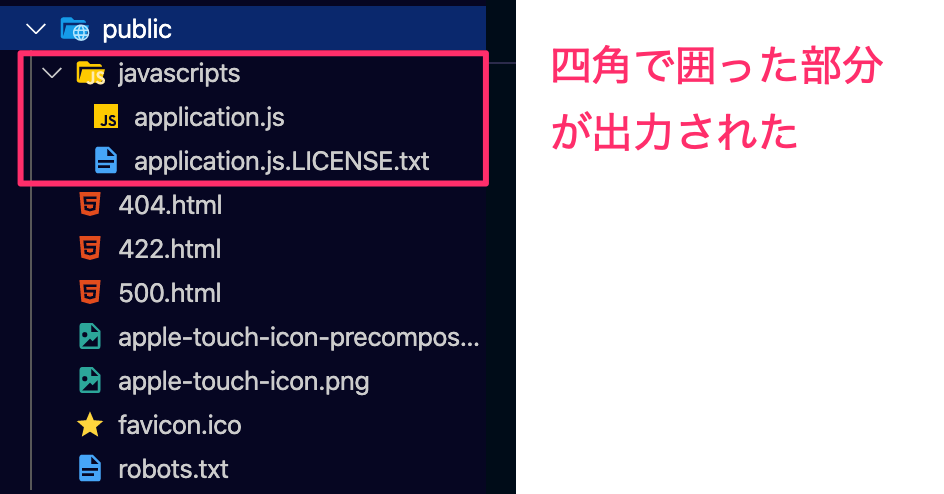
entryのファイルを使ってoutputに書かれたjsを出力してくれる。
今回はpuclicのjavascriptsディレクトリに出力した。
もう少し設定しないとrailsアプリで動かなさそうなので引き続き実装頑張ります…
【参考】
・webpack.config.jsで絶対パス指定を使わずに表記する方法
https://qiita.com/tmak_tsukamoto/items/8f8fc2be80542e3400d6
・VueLoaderPlugin Error] No matching rule for .vue files found - when files have different extension than .vueへの対処法
・【webpack】vue-loader was used without the corresponding plugin. Make sure to include VueLoaderPlugin in your webpack config.への対処法
https://qiita.com/7110/items/0721525ed6ccc263768b
・【webpack】[vue-loader] vue-template-compiler must be installed as a peer dependency, or a compatible compiler implementation must be passed via options.への対処法
https://qiita.com/7110/items/e6fba3dce01ea85bddb7
・Module build failed: TypeError: this._init is not a functionと出た
https://github.com/vuejs/vue-loader/issues/409
・loadersプロパティが使えない!と言われたときの対処法
- 投稿日:2021-01-07T00:45:36+09:00
Vue.js プロパティまとめ
これはなに
Vue.jsのプロパティとコンストラクタのオプションをまとめたメモ。
dataプロパティ
データのオブジェクトを指定。テンプレートから参照できる。
dataプロパティはリアクティブで、値が変わるたびにVue.jsが検知して表示などを切り替えることができる。オブジェクトもしくは関数を設定できるが、あくまでもデータそのものをおくべきで、値を処理する関数や、計算する関数はmethodsやcomputedに設定したほうが良い。
data: { name: 'hoge', price: 1000 }<p>{{ name }}</p> <!-- hoge --> <p>{{ price }}</p> <!-- 1000 -->フィルター(filters)
テキストフォーマット処理を適用する仕組み。日付のフォーマットや数値のフォーマットなど。
filters: { yen_filter(value) { return value + '円' } }<p>{{ 1000 | yen_filter }}</p> <!-- 1000円 -->算出プロパティ(computed)
データに何らかの処理を加えたものをプロパティにしたい場合に使用する。
例えば、複雑な計算式の記述や、同じ計算式をテンプレートの複数箇所などに記述することを避けたい場合など。
データが変更されない限り、一度計算した結果をキャッシュする特徴をもつため、計算した結果を再利用したい場合に使用すると良い。
基本的に引数を渡すことはできない。this(Vueのインスタンス自身)経由で参照するのが良い?data: { value1: 100, value2: 200, }, computed: { some_func () { return (this.value1 + this.value2) * 100 } }<p>{{ some_computed }}</p> <!-- 30000 -->メソッド(methods)
データの変更やサーバーにhttpリクエストを送る際に用いる。
computedと異なり、キャッシュされない。