- 投稿日:2020-11-18T23:30:06+09:00
created_atを○年○月○日と表記したい
やりたい事
・投稿した日付を○年○月○日の表記にする事経緯
・オリジナルアプリDayLogを作成中に変更する必要ができたから試した事
<%= @day.created_at.strftime('%Y%M%D') %>と記述
→20205211/11/11と表示された。原因は'%D'は'%d%m%y'と同値で、%Mは月(month)では無く時間(minutes)を表す表現だった。
参考記事
https://linuxjm.osdn.jp/html/LDP_man-pages/man3/strftime.3.html結果
<%= @day.created_at.strf("%Y年%-m月%-d日") %>
と記述したら2020年11月18日と表示されて解決!*%dの場合は09月、%-dの場合は9月と表示される(%d,%-dでも同じ)
参考記事
https://qiita.com/koda_7932/items/c54978483a002d75ea42
- 投稿日:2020-11-18T23:19:06+09:00
Azureで静的Webページを公開する
背景
初学者がAzureを使って個人用家計簿を作っていく記録を残す。
手順
Azureの管理構造は、[マネジメントグループ]-[サブスクリプション]-[リソースグループ]-[リソース]となっているらしい。
https://docs.microsoft.com/ja-jp/learn/modules/azure-architecture-fundamentals/overviewマネジメントグループは、個人で触るのでいらない。
リソースがVMやDBとかよく見る機能のこと。
リソースグループは、○○アプリで使っているものといった感じで集める機能。
サブスクリプションが、お金の支払いをするところ。最初に、サブスクリプションが必要ということか。
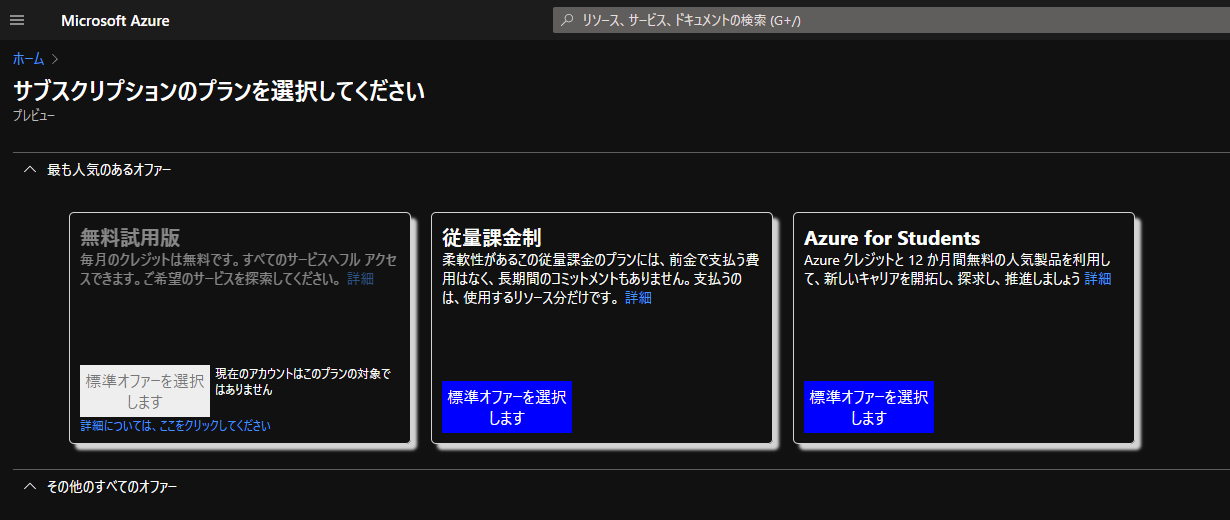
1. Azureサブスクリプションを用意
https://docs.microsoft.com/ja-jp/azure/cost-management-billing/manage/create-subscription
「従量課金制」を選択
テクニカルサポートはなし
サインアップする-> クイック スタート センターに跳ぶ
ホームから、サブスクリプションを開く
サブスクリプション名「従量課金」で作成されている
※グローバル サブスクリプション フィルターによって、隠れているかもしれない。サブスクリプション名の変更
従量課金サブスクリプションを選択 -> 名前を変更をクリック
「サブスクリプション1」に変更2. リソースグループの作成
家計簿アプリ用のリソースグループを作る。
このリソースグループに、家計簿アプリで使うWebページやデータベースのリソースを入れる。サブスクリプションに、先ほど作ったものを選択。
リソースグループを、ここで新しく名前を付ける。
リージョンは、近いということで東日本を選択。
3. Webページの準備
参考:https://docs.microsoft.com/ja-jp/azure/app-service/quickstart-html
App Serviceを使えば、Webページを公開できるらしい。
ガイドでは、Azure Cloud Shellを使ってコマンド操作しましょうとある。
「Azure Cloud Shell」を使うには「Azure File」を用意する必要があるらしい。
クラウド上に、ディレクトリ(新しいフォルダ)を1個用意してくれるようなものか。
クイックスタートでは、gitからサンプルコードをクローンして、保存しておく場所が必要という訳かな。ローカルでコード編集して、上げなおすとかできるよね。ということでPC内の適当なディレクトリ上でクローン。
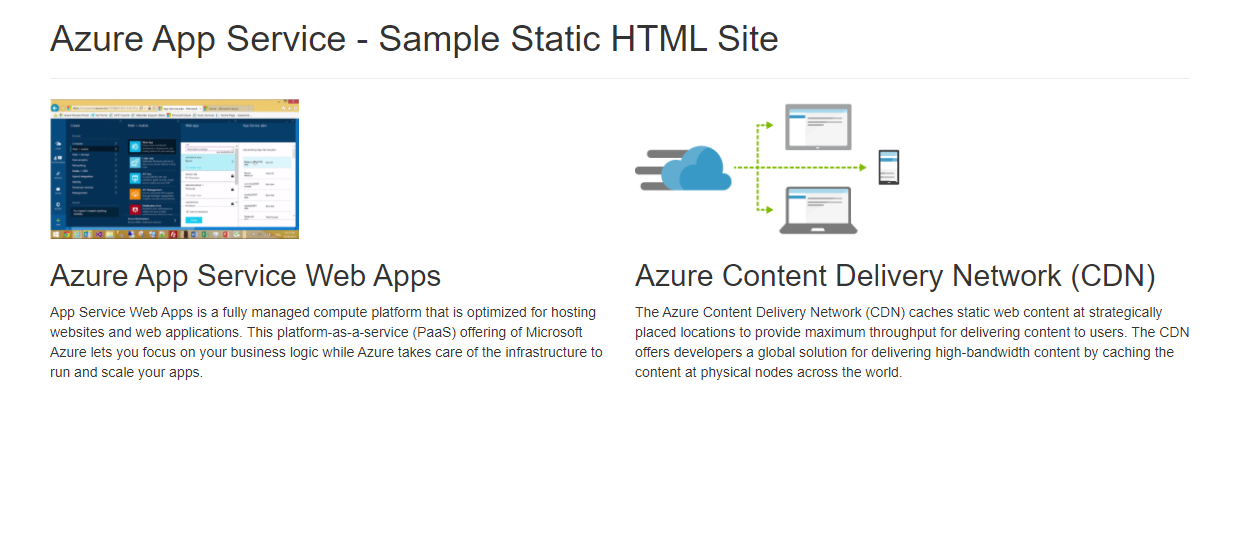
git clone https://github.com/Azure-Samples/html-docs-hello-world.git4. Azure Web App の準備
下記記事を参考に、ポータルからWebアプリを作っていく。
【Azure Web Appを使ってWebページを公開】
-> デプロイ完了。
失敗した手順
各要素について調べたので、記録として残す。ローカルからAzureを操作したい!と調べてみた結果「Visual Studio Code を使用して Node.js を Azure App Service にデプロイする」が参考になりそう。
Azure App Serviseの拡張機能をインストールする。
Node.jsアプリの準備は、代わりに3.のHTMLファイルを上げようと思うのでパス。
Azure にアプリケーションをデプロイするを進めていく。
1.VSCodeを開く
2.~4. gitからクローンしたから、やらなくて良いかな…。
5.あった。選択。
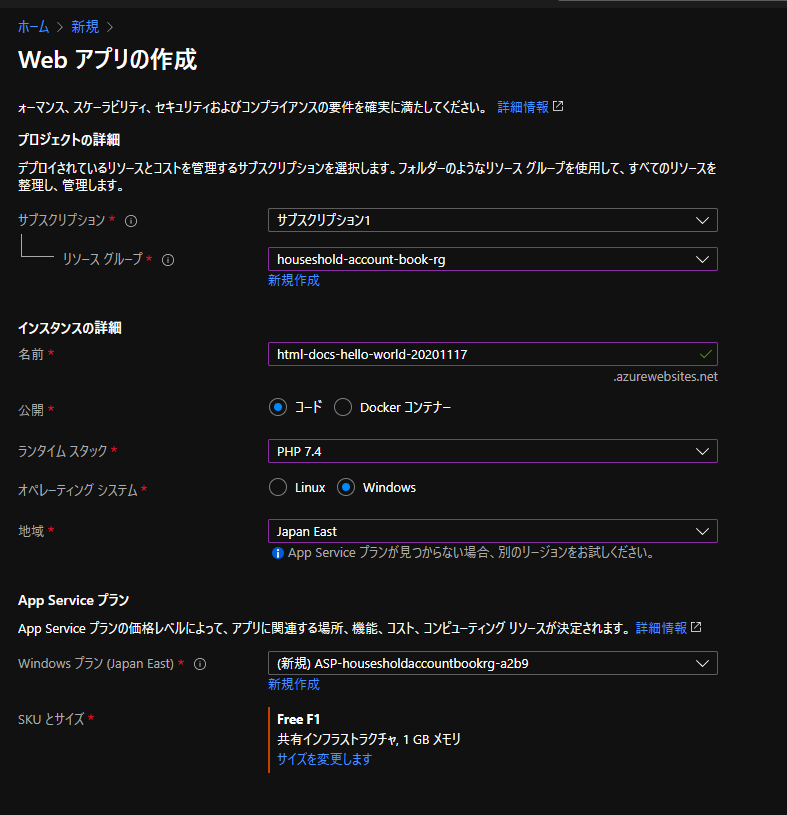
6.
-1 : Web Appの名前を決める。(「html-docs-hello-world-(日付とか数字の羅列)」)
-2 : リソースグループの選択。(2.で作った「houseshold-account-book-rg」を選択)
-3 : ランタイムスタックの選択。ランタイムスタックって何?
-> プログラミングを走らせるための環境を用意してくれるみたい。HTMLのランタイムスタックって、何選べばいいのさ?
クイックスタートからは、何を用意したか読み解けない。
-> クローンしたディレクトリを見ると、HTML,CSS,JavaScriptがある。SPA など JavaScript ベースの 静的な Web サイトは基本的にブラウザ上で実行されるので、実行時にサーバー上のランタイムは必要ありません。
https://k-miyake.github.io/blog/appservice-static-webapps/
-> ランタイムは何でもOKってこと?(なんか近そうということで「PHP7.4」を選択)
-4 : OSの選択。(クイックスタートに合わせて「Windows」)
-5 : サービスプランの選択。(「Create new App Service plan」)
「Azure Service Planの概要」。
うーん。は?
どんなサイズのPCを使っているか、管理名をまた付けるってこと…?App Service Plan に対してお金がかかる
あー。
借りたマシンに名前を付けるぞい。
また別のWebページ(アプリ)を作るときに、同じマシン上で動くようにするぞい。
とかするために使うのね。-6 : 新しいサービスプランの名前を決める。(「(app名)」)
-7 : スペックを決める。SKUとサイズ。(「F1 Free」)
-8 :アプリケーション インサイト リソースを作る。(「スキップ」)
監視ツールを使うか?ということみたい。
https://news.mynavi.jp/article/zeroazure-14/-> エラーが出る
原因不明。ポータルで作る。
5. デプロイする
Azure にアプリケーションをデプロイするを参考に進める。
11.12.14.15.を実行
開けた。
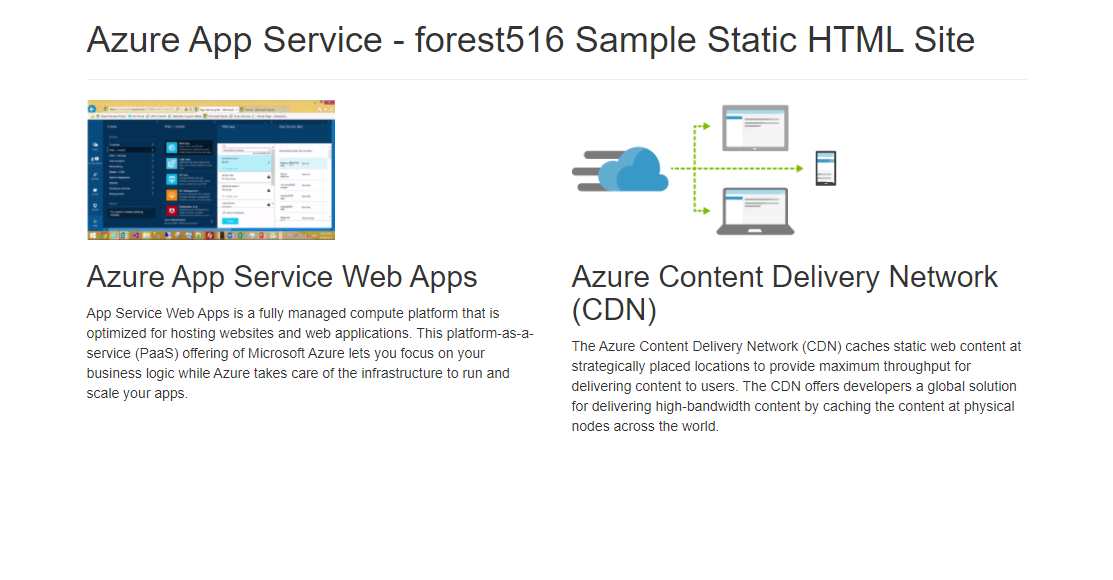
一部修正して、保存。
再デプロイ。変わった!!
失敗した手順
結論:1個上のディレクトリを選択して、自動デプロイするように設定していた。
流れ:
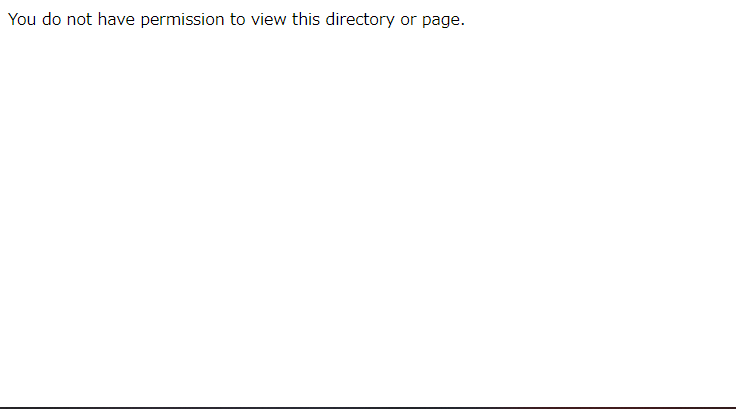
何度更新しても「You do not have permission to view this directory or page.」と言われる。
調べてみたところ、言語ごとに最初に呼び出されるページの名前は指定されているそうです。
azure側が、開けるファイルが存在しないよと言っているらしい。
PHPのランタイムを選んだから、index.phpでないと開けない? -> index.htmlで開けた。他のデプロイ方法を調べていると「/wwwrootフォルダにデプロイする」という文言を良く見かける。
wwwroot とは?
-> サーバー側のルートディレクトリ。GETとかリクエスト受け付けたら、最初にここにあるファイルを返すよ。ということらしい。この中身を見てみたいな…。
とにかくさっさと公開したい!
・高度なツール → Debug console → CMD とたどる(以下のようなページが表示されます「html-docs-hello-world」ディレクトリが丸ごと入っている!
index.htmlが見つからないのか!解決方法:
1. VSCodeから、デプロイ設定をリセット。
2. html-docs-hello-worldディレクトリ(index.htmlが入っているフォルダ)を選択してデプロイし直す。
(間違って入れていたフォルダやファイルは、wwwroot上から綺麗に消えていた。デプロイすると、上書きではなく一度綺麗に消されるのかな?)

- 投稿日:2020-11-18T22:30:42+09:00
スクールに通い始めて
はいどうも!
某プログラミングスクールに通い始めた37歳のおっさんです。
プログラミングは完全に未経験。
そんなおっさんが転職するまでの軌跡(奇跡?)をぼちぼち綴っていこうと思います。先日、中間試験なるものを受けてみたところなんと、44点という結果・・・
学生時代に受けたテストでもこんな点数は取った記憶がなかった。
問題文を見ても何を求められているかわからないし、そもそもコードを読んでてもわからない部分が多すぎて理解ができない。
あれ?これってもしかして記憶力がだいぶ悪くなってる?
そう、気付き始めてしまったのです。
同期の人々よりも時間をかけて自分なりにわかる説明をしてくれる記述を手繰り寄せてなんとか消化する。
google先輩の力でなんとかやってきました。
自分がスペックとして他人に勝てるのは①「情熱」と②「モチベーション」この二つだと思ってます。
①他人が休んでる時にしっかり学習して
②他人が学習しているときに倍の密度で学習する
①も②も関係ないやないかーい!
というツッコミはおいておいて。実際勝てる方法はこれしかないと思ってます。
そして、後がない。
同年代は役職に就いて、レベルアップした内容の仕事をして、家も買ってetc
人生というストーリーで見たらきっといい結末が待っているんじゃないかなと思える内容を歩んでいるわけです。
年齢という取り返せない条件で負けている以上、自分に何か付加価値がないと同じスタートラインに立った時にかなり後ろからスタートしなければいけないわけです。
人よりできないぶん、時間をかける
人より遅いぶん、密度を濃くする
この二つで対応していくのが絶対条件なんじゃないかなと思っています。
そりゃあ負けたら悔しいですよ。
だけど悔しがったってしょうがない。
もう結果として出てしまっているんだから受け止めるしかない。
考えなければいけないのは、じゃあこれからどうするか?っていうところだと思います。
負けた→もういいや→向いてなかった!goodbye!
この流れは簡単です。誰でもできる。
ここから反発してどれだけできるかだと思うんですよね。「諦めたらそこで試合終了ですよ」
有名なバスケットボールの監督が言ってましたね(ちょうど世代)
この言葉を胸に胸に刻んで明日からも頑張ります。ちなみに
「〜していきます」って希望的欲求感に聞こえませんか?
「〜します」って言い切ると決断なんだなって聞こえますよね。
決断すると自分がその目標に向かって行くんですよ。
○○ザップのコミットメント、と同じですよね。
言ったからにはやらなきゃいけない。
良い意味で自分を追い込んで頑張る。
その背中が他の人に勇気を与えられたらいいなって思います。三回目に受けた試験でようやく突破したおっさんより
それではでは
- 投稿日:2020-11-18T20:45:13+09:00
社内業務のシステムをWebで作ろう!
投稿の動機
@NP_Systemsさんの 製造業において、Pythonに加えてWebも活用して飛躍しよう の記事を見て正にキャッチ‐な話題でしたので、社内での活動状況を投稿しようと思いました。現在私は定年後の再就職先として広島市内の名盤製造業に嘱託として勤めています。仕事内容は社内業務システム「業務支援・改」の構築・保守です。
何故Webなのか
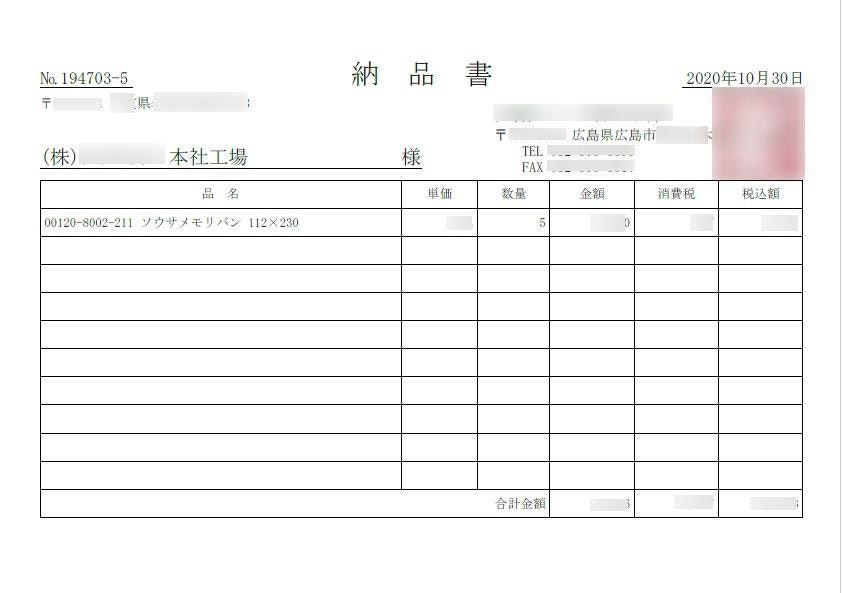
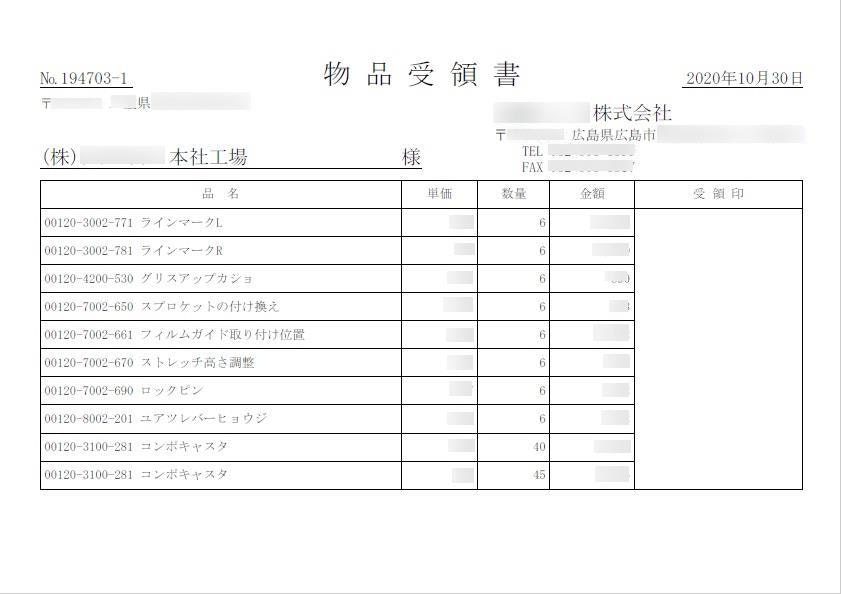
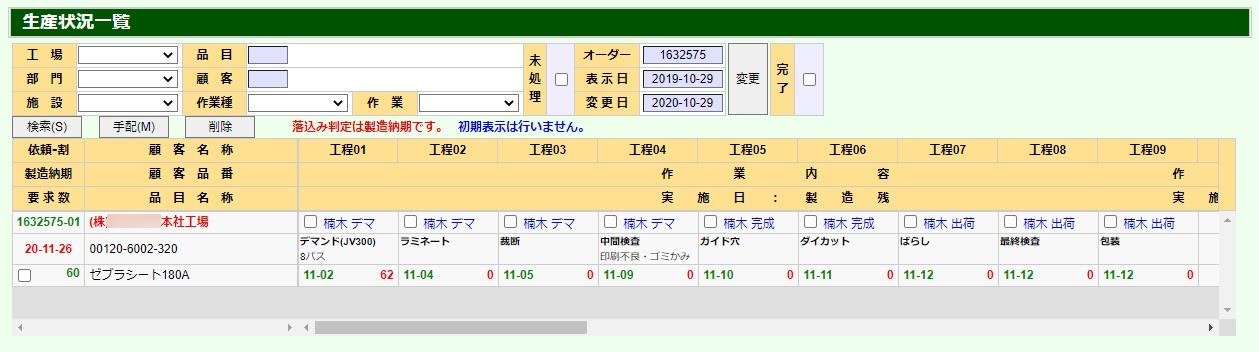
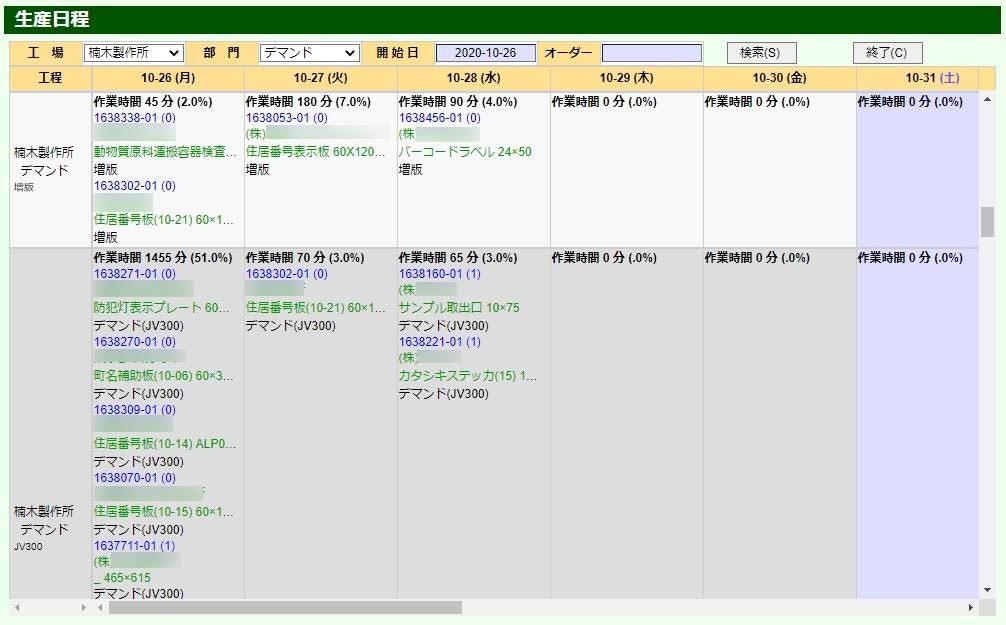
今のシステムは経理・給与・販売管理(移行開発中)を除く、製造業務のほぼ全般をWebシステムで運用しています。巷では業務システムはクライアント・サーバータイプ(VB, VC, Java 等)で作られているみたいですが、かなり早い段階からWebで開発している身としては、楽なのに何故Webで開発しないのかが不思議でした。実際WebでVBよりも高速な伝票入力画面を作ることができます。現役時代に納品したシステムはOSのバージョンアップを行っても問題無く使えていますし、カーソル移動も[Enter]キーで[tabIndex]順に移動できます。端末へのインストールも不要で遠地の端末が壊れても簡単に機器の入れ替えができます。ハードを更改してもシステムを更改する必要が無いのです。環境に依存しないので製造現場ではiPadで運用している部署も有ります。一度作ったシステムを要件が変わらないのに再度開発するのは、資産が残らないという意味で馬鹿らしいと感じています。
実運用画面のサンプル
実際に現場でどんな画面を使っているのかを見てみましょう。
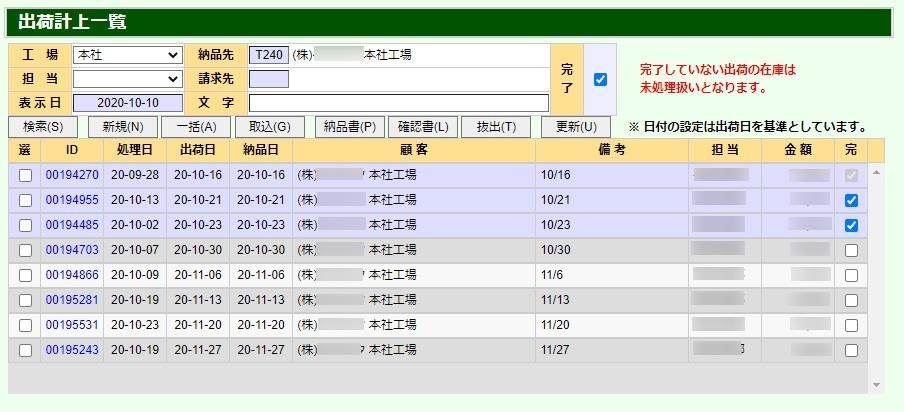
■ 出荷計上一覧(出荷予定・実績の一覧)
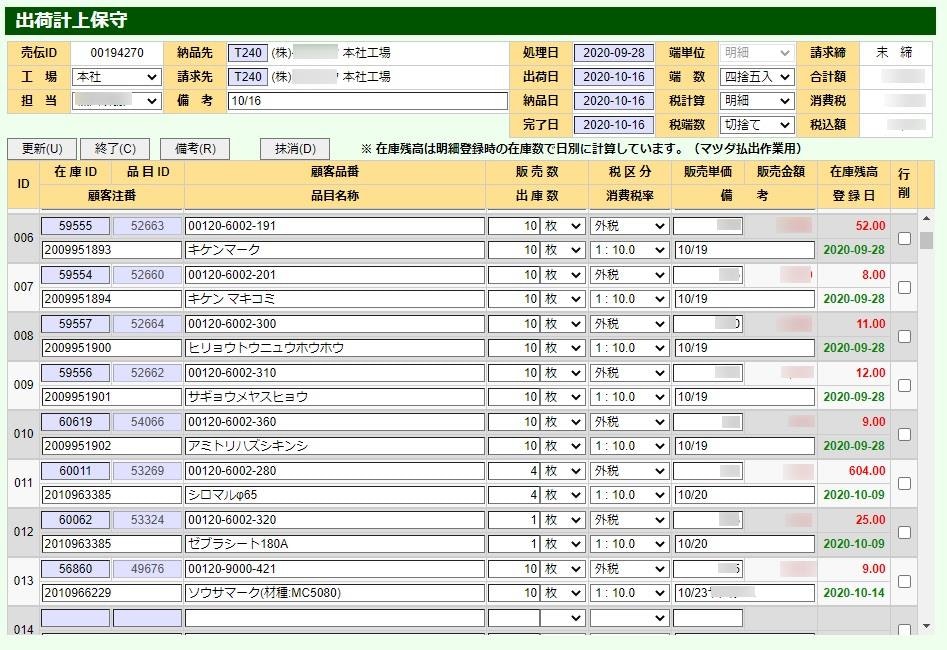
■ 出荷計上保守(俗に言う売上伝票、在庫出納と連動)
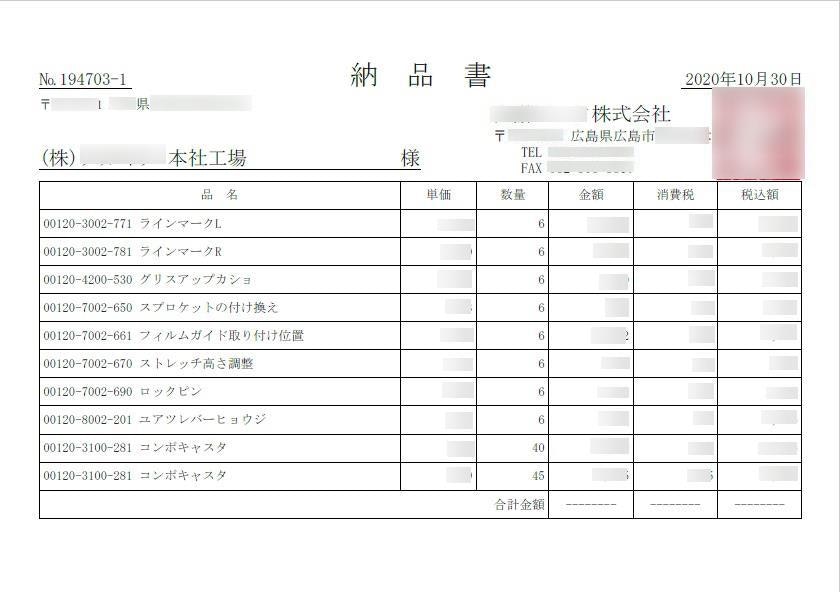
■ 納品書 先頭ページ (PDF出力)
■ 納品書 最終ページ (PDF出力)
■ 物品受領書 (PDF出力)
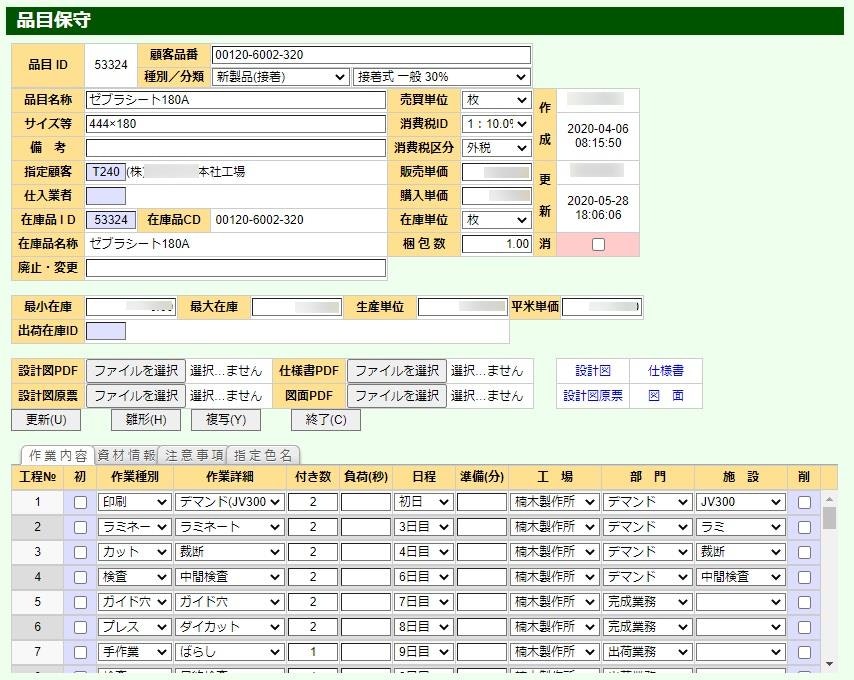
■ 品目保守(製品の材料・工程と工数、他各種情報)
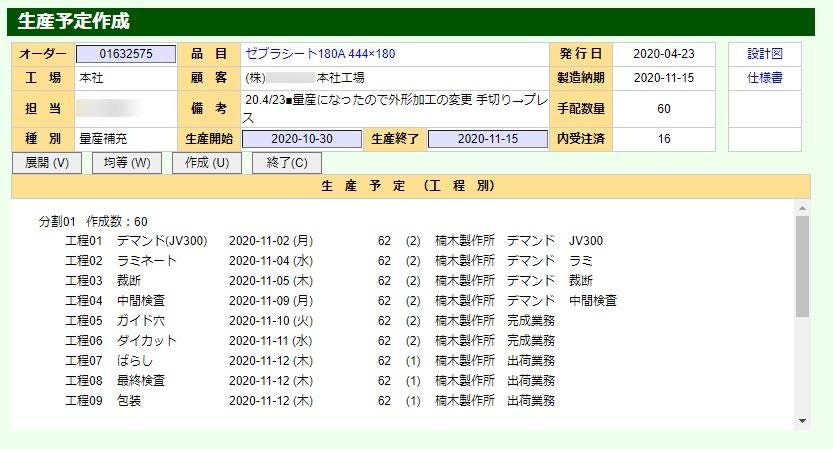
■ 生産予定作成(生産オーダーより生産予定を作成)
■ 生産状況一覧(生産ロットの進捗状況を把握)
■ 生産日程(カレンダー上で予定と進捗を確認)
挙げれば切が無いのでこれぐらいにしておきますが、これらはたった一人で設計・施工・導入したものです。意外とWebシステムって簡単に作れるので皆さんもWebで開発する事を強くお勧めします。開発環境
全てオープンソースです。Java8 (pdfBox), JavaScript, Tomcat9, mariaDB10, JQuery (ほんのチョットだけ), それと検索時に照合が出来ない事が有るので、入力時にANKは半角、カタカナは全角、濁音・半濁音は1文字に合成しています。殆どが手作りなので、皆さんも安価にリーズナブルなシステムを構築できる事請け合いです。生産計画作成画面はJavaScroptでコメントを入れて1,200行強位です。今日嵌って対応していた見積積算画面は少し凝っていて2,200行強でした (共通ライブラリ除く)。意外と手軽だと思いませんか。
まとめ
実は自分の周りに同じ様な事をしている人がいないので、最近疎外感を感じていたところでした。この投稿を切っ掛けにして多くの人にWebで業務システムを開発して貰いたいと思っています。本も買ったけどネットに転がっている情報でプログラムを作れているので、Webによる業務アプリケーション開発は決して敷居の高いものでは無いのです。みんなでWeb開発をやりましよう!
- 投稿日:2020-11-18T19:53:28+09:00
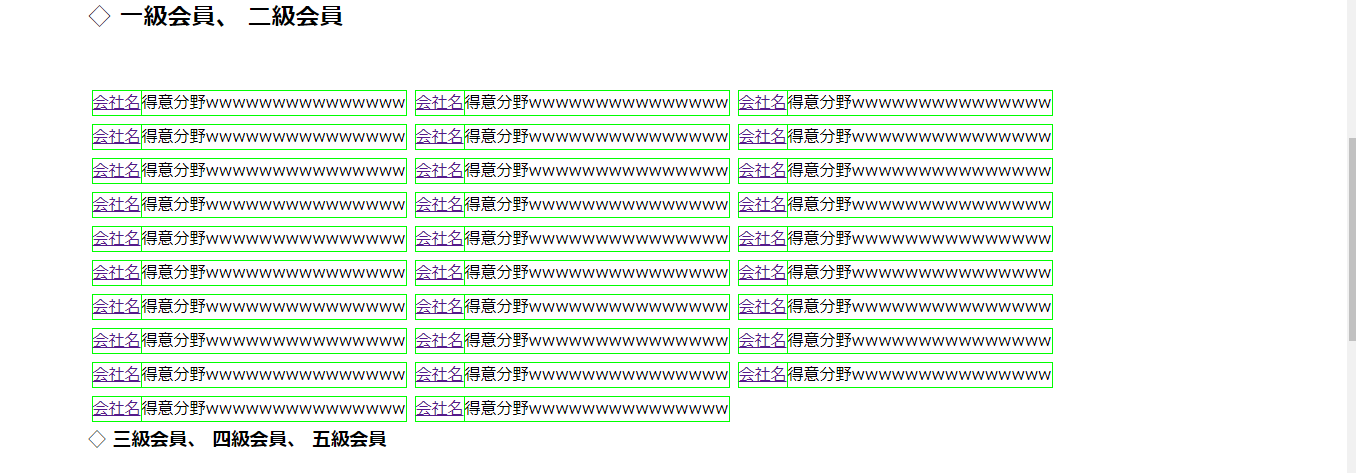
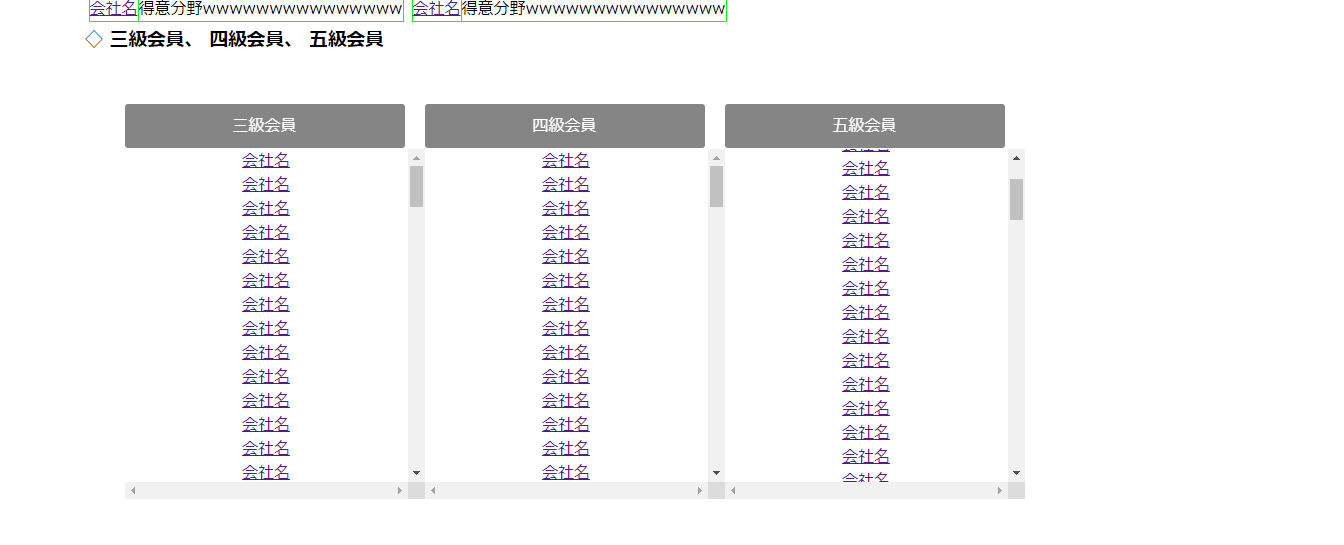
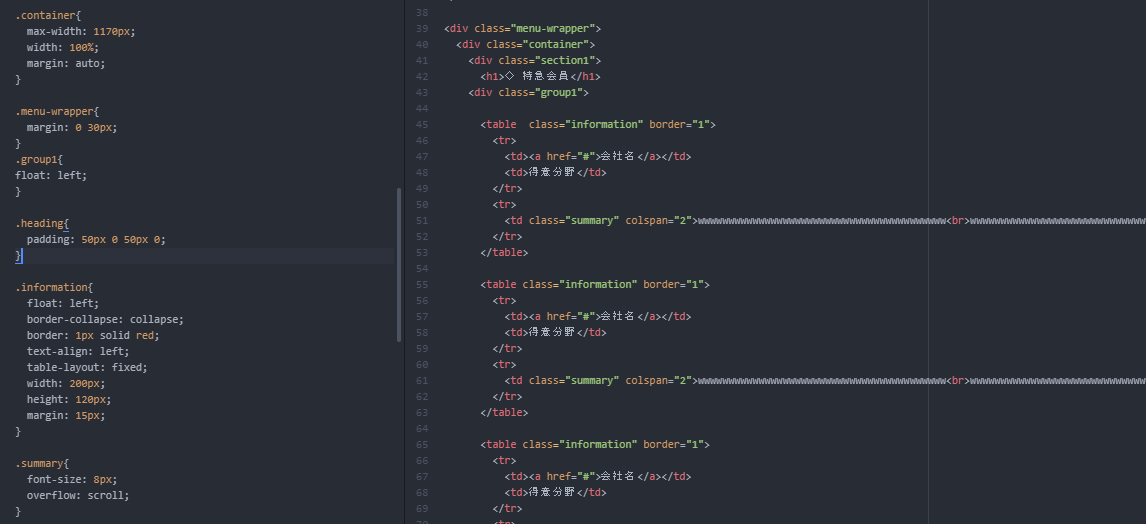
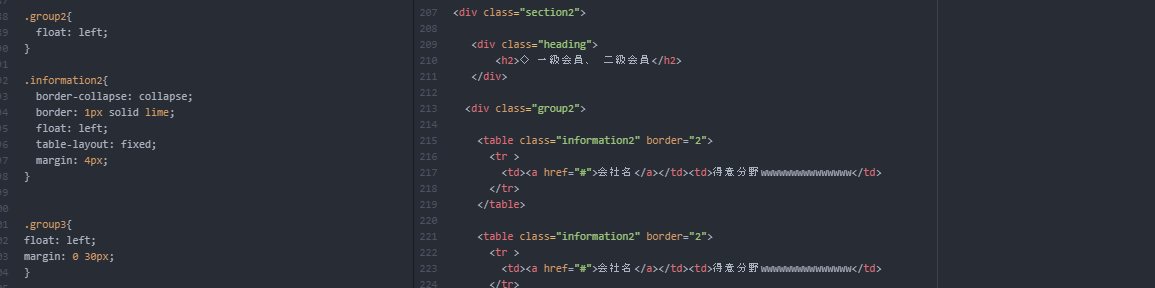
【超初心者】CSS text-alignが反映されないのですがどこをいじればいいですか?
この画像のところなのですが、tableの部分がtext-align: center;としても反映されません。
試したこと、margin: auto; text-align: center;
一通りすべてのクラスタにmarginとtext-alignを指定したのですができませんでした。
僕の書いたコードは下の画像です。
勉強初めて10日ほどなのおそらくめちゃくちゃなコードだと思うのですが
どこをなおしたらいいのかわかりません。
インラインスタイルシートにも書いてみたりしたのですができませんでした。
どなたか教えていただかると嬉しいです。
よろしくお願いします。

- 投稿日:2020-11-18T19:48:10+09:00
ビンゴゲームの制作
ビンゴゲームの制作
STARTボタンをクリックするとビンゴ用のカードを作り、その後に抽選ボタンをクリックするごとに抽選して、該当番号を埋めてくれるプログラムを制作します。
<body>
  <table id="table"></table><br>
  <button onclick="start()">START</button>
  <button onclick="lot()">抽選</button>
  <span id="result"></span><br>
  <span id="result2"></span>
</body>
まず、body要素内にtable要素とbutton要素を2つ、span要素を2つ作ります。
table要素にはビンゴ用のカードの表示、button要素はクリックするとカードを作成してくれるボタンと、クリックすると抽選してくれるボタンです。span要素は抽選の結果の表示と、ビンゴしたときの表示をします。let numbers = []; let first; function start() { numbers = numSet(); first = true; let result = document.getElementById("result"); result.textContent = ""; let table = document.getElementById("table"); table.innerHTML = ""; for(let r = 0; r < 5; r++) { let tr = document.createElement("tr"); for(let c = 0; c < 5; c++) { let td = document.createElement("td"); let s = Math.floor(Math.random()*numbers.length); td.value = numbers[s]; td.textContent = td.value; td.id = "num" + td.value; td.className = "judge"; td.index = r * 5 + c; td.j1 = false; td.j2 = false; td.j3 = false; numbers.splice(s, 1); tr.appendChild(td); } table.appendChild(tr); } }script要素内は、まず変数numbersとfirstを定義します。
numbersは1〜99までの数字を代入する配列です。
firstは関数startの処理の際に配列numbersの1〜99の数字の内ビンゴ用のカードで使用した数字が25個分無くなっているので、関数lot内で再度1〜99までの数字を代入するために使用します。関数startはビンゴ用のカードを作成する関数です。
最初に変数numbersに関数numSetを代入します。numSetは1〜99までの数字を返してくれる関数です。
変数firstにはtrueを代入します。後で関数lotを発火させたときに値をfalseにすることで、2回目以降に配列numbersに関数numSetが代入されないようにします。(抽選された数が重複しないようにするため)変数resultの定義と空の値を代入することで、新しいカードを作成した際に結果の文字表示を消去しています。
次にbody要素内のtable要素に二次元配列でビンゴカードの表示をさせます。「table.innerHTML = "";」で2回目以降にSTARTボタンをクリックしたときに前のカードを削除しています。
「let s = Math.floor(Math.random( )*numbers.length);」で配列numbersからランダムに要素を一つ取得しています。「td.value = numbers[s];」で取得した要素の数字をtd要素のvalueプロパティに代入しています。
td要素のj1プロバティは後で横の行が揃ったときに値をtrueに変えます。j2は縦の列、j3は斜めが揃ったときにtrueに変えます。
「numbers.splice(s, 1);」でビンゴ用のカードに使われた数字を削除しています。
配列.splice(x, y)で配列の要素x番目からy個の要素を削除することができます。(xは0から数える)function lot() { if(first){ numbers = numSet(); first = false; } let s = Math.floor(Math.random()*numbers.length); let result = document.getElementById("result"); result.textContent = `結果:${numbers[s]}`; let w = "num" + numbers[s]; let td = document.getElementById(w); if(td) { td.textContent = "●"; } let td2 = document.getElementsByClassName("judge"); let result2 = document.getElementById("result2"); result2.textContent = ""; if((td2.item(0).index == 0 && td2.item(0).textContent == "●" && td2.item(0).j1 == false) && (td2.item(1).index == 1 && td2.item(1).textContent == "●" && td2.item(1).j1 == false) && (td2.item(2).index == 2 && td2.item(2).textContent == "●" && td2.item(2).j1 == false) && (td2.item(3).index == 3 && td2.item(3).textContent == "●" && td2.item(3).j1 == false) && (td2.item(4).index == 4 && td2.item(4).textContent == "●" && td2.item(4).j1 == false)) { word(); td2.item(0).j1 =true; td2.item(1).j1 =true; td2.item(2).j1 =true; td2.item(3).j1 =true; td2.item(4).j1 =true; } else if ((td2.item(5).index == 5 && td2.item(5).textContent == "●" && td2.item(5).j1 == false) && (td2.item(6).index == 6 && td2.item(6).textContent == "●" && td2.item(6).j1 == false) && (td2.item(7).index == 7 && td2.item(7).textContent == "●" && td2.item(7).j1 == false) && (td2.item(8).index == 8 && td2.item(8).textContent == "●" && td2.item(8).j1 == false) && (td2.item(9).index == 9 && td2.item(9).textContent == "●" && td2.item(9).j1 == false)) { word(); td2.item(5).j1 =true; td2.item(6).j1 =true; td2.item(7).j1 =true; td2.item(8).j1 =true; td2.item(9).j1 =true; } else if ((td2.item(10).index == 10 && td2.item(10).textContent == "●" && td2.item(10).j1 == false) && (td2.item(11).index == 11 && td2.item(11).textContent == "●" && td2.item(11).j1 == false) && (td2.item(12).index == 12 && td2.item(12).textContent == "●" && td2.item(12).j1 == false) && (td2.item(13).index == 13 && td2.item(13).textContent == "●" && td2.item(13).j1 == false) && (td2.item(14).index == 14 && td2.item(14).textContent == "●" && td2.item(14).j1 == false)) { word(); td2.item(10).j1 =true; td2.item(11).j1 =true; td2.item(12).j1 =true; td2.item(13).j1 =true; td2.item(14).j1 =true; } else if ((td2.item(15).index == 15 && td2.item(15).textContent == "●" && td2.item(15).j1 == false) && (td2.item(16).index == 16 && td2.item(16).textContent == "●" && td2.item(16).j1 == false) && (td2.item(17).index == 17 && td2.item(17).textContent == "●" && td2.item(17).j1 == false) && (td2.item(18).index == 18 && td2.item(18).textContent == "●" && td2.item(18).j1 == false) && (td2.item(19).index == 19 && td2.item(19).textContent == "●" && td2.item(19).j1 == false)) { word(); td2.item(15).j1 =true; td2.item(16).j1 =true; td2.item(17).j1 =true; td2.item(18).j1 =true; td2.item(19).j1 =true; } else if ((td2.item(20).index == 20 && td2.item(20).textContent == "●" && td2.item(20).j1 == false) && (td2.item(21).index == 21 && td2.item(21).textContent == "●" && td2.item(21).j1 == false) && (td2.item(22).index == 22 && td2.item(22).textContent == "●" && td2.item(22).j1 == false) && (td2.item(23).index == 23 && td2.item(23).textContent == "●" && td2.item(23).j1 == false) && (td2.item(24).index == 24 && td2.item(24).textContent == "●" && td2.item(24).j1 == false)) { word(); td2.item(20).j1 =true; td2.item(21).j1 =true; td2.item(22).j1 =true; td2.item(23).j1 =true; td2.item(24).j1 =true; } if((td2.item(0).index == 0 && td2.item(0).textContent == "●" && td2.item(0).j2 == false) && (td2.item(5).index == 5 && td2.item(5).textContent == "●" && td2.item(5).j2 == false) && (td2.item(10).index == 10 && td2.item(10).textContent == "●" && td2.item(10).j2 == false) && (td2.item(15).index == 15 && td2.item(15).textContent == "●" && td2.item(15).j2 == false) && (td2.item(20).index == 20 && td2.item(20).textContent == "●" && td2.item(20).j2 == false)) { word(); td2.item(0).j2 =true; td2.item(5).j2 =true; td2.item(10).j2 =true; td2.item(15).j2 =true; td2.item(20).j2 =true; } else if ((td2.item(1).index == 1 && td2.item(1).textContent == "●" && td2.item(1).j2 == false) && (td2.item(6).index == 6 && td2.item(6).textContent == "●" && td2.item(6).j2 == false) && (td2.item(11).index == 11 && td2.item(11).textContent == "●" && td2.item(11).j2 == false) && (td2.item(16).index == 16 && td2.item(16).textContent == "●" && td2.item(16).j2 == false) && (td2.item(21).index == 21 && td2.item(21).textContent == "●" && td2.item(21).j2 == false)) { word(); td2.item(1).j2 =true; td2.item(6).j2 =true; td2.item(11).j2 =true; td2.item(16).j2 =true; td2.item(21).j2 =true; } else if ((td2.item(2).index == 2 && td2.item(2).textContent == "●" && td2.item(2).j2 == false) && (td2.item(7).index == 7 && td2.item(7).textContent == "●" && td2.item(7).j2 == false) && (td2.item(12).index == 12 && td2.item(12).textContent == "●" && td2.item(12).j2 == false) && (td2.item(17).index == 17 && td2.item(17).textContent == "●" && td2.item(17).j2 == false) && (td2.item(22).index == 22 && td2.item(22).textContent == "●" && td2.item(22).j2 == false)) { word(); td2.item(2).j2 =true; td2.item(7).j2 =true; td2.item(12).j2 =true; td2.item(17).j2 =true; td2.item(22).j2 =true; } else if ((td2.item(3).index == 3 && td2.item(3).textContent == "●" && td2.item(3).j2 == false) && (td2.item(8).index == 8 && td2.item(8).textContent == "●" && td2.item(8).j2 == false) && (td2.item(13).index == 13 && td2.item(13).textContent == "●" && td2.item(13).j2 == false) && (td2.item(18).index == 18 && td2.item(18).textContent == "●" && td2.item(18).j2 == false) && (td2.item(23).index == 23 && td2.item(23).textContent == "●" && td2.item(23).j2 == false)) { word(); td2.item(3).j2 =true; td2.item(8).j2 =true; td2.item(13).j2 =true; td2.item(18).j2 =true; td2.item(23).j2 =true; } else if ((td2.item(4).index == 4 && td2.item(4).textContent == "●" && td2.item(4).j2 == false) && (td2.item(9).index == 9 && td2.item(9).textContent == "●" && td2.item(9).j2 == false) && (td2.item(14).index == 14 && td2.item(14).textContent == "●" && td2.item(14).j2 == false) && (td2.item(19).index == 19 && td2.item(19).textContent == "●" && td2.item(19).j2 == false) && (td2.item(24).index == 24 && td2.item(24).textContent == "●" && td2.item(24).j2 == false)) { word(); td2.item(4).j2 =true; td2.item(9).j2 =true; td2.item(14).j2 =true; td2.item(19).j2 =true; td2.item(24).j2 =true; } if((td2.item(0).index == 0 && td2.item(0).textContent == "●" && td2.item(0).j3 == false) && (td2.item(6).index == 6 && td2.item(6).textContent == "●" && td2.item(6).j3 == false) && (td2.item(12).index == 12 && td2.item(12).textContent == "●" && td2.item(12).j3 == false) && (td2.item(18).index == 18 && td2.item(18).textContent == "●" && td2.item(18).j3 == false) && (td2.item(24).index == 24 && td2.item(24).textContent == "●" && td2.item(24).j3 == false)) { word(); td2.item(0).j3 =true; td2.item(6).j3 =true; td2.item(12).j3 =true; td2.item(18).j3 =true; td2.item(24).j3 =true; } else if ((td2.item(4).index == 4 && td2.item(4).textContent == "●" && td2.item(4).j3 == false) && (td2.item(8).index == 8 && td2.item(8).textContent == "●" && td2.item(8).j3 == false) && (td2.item(12).index == 12 && td2.item(12).textContent == "●" && td2.item(12).j3 == false) && (td2.item(16).index == 16 && td2.item(16).textContent == "●" && td2.item(16).j3 == false) && (td2.item(20).index == 20 && td2.item(20).textContent == "●" && td2.item(20).j3 == false)) { word(); td2.item(4).j3 =true; td2.item(8).j3 =true; td2.item(12).j3 =true; td2.item(16).j3 =true; td2.item(20).j3 =true; } numbers.splice(s, 1); if(!numbers.length) { result.textContent = "抽選は終わりました。"; } }関数lotはビンゴの抽選をする関数です。
最初のif文では配列numbersに1〜99の数字を代入していますが、抽選を開始した1回目だけ行うようにしています。2回目以降はfalseとなるので抽選された数字が出ることはありません。次にランダムに数字を出して、後で「let w = "num" + numbers[s];」と「let td = document.getElementById(w);」でtdに代入した値が、if文でビンゴカードに存在する数字のidと同じ場合はカードの数字を埋めます。
変数td2でビンゴカード上の全てのマスのデータを取得します。
「let result2 = document.getElementById(result2);」と「result2.textContent = "";」でビンゴした後に再抽選したときにビンゴの表示を消去しています。
次のif文でビンゴの判定をしています。
横の行、縦の列、斜めのそれぞれでインデックス番号が揃っているかと画面の表示が埋まっているか判定しています。該当する場合はword関数でビンゴの表示を行い、2回目以降にビンゴの表示をしないようにj1,j2,j3の値にtrueを代入します。
判定が終わったら、「numbers.splice(s, 1);」で抽選された要素を削除します。最後のif文では、全ての抽選が出尽くした際に抽選が終わった表示をするようにします。
    function numSet() {
      let i = [];
      for(let n = 1; n < 100; n++) {
        i.push(n);
      }
      return i;
    }
numSet関数では配列に1〜99の数字を代入して返すようにしています。
    function word() {
      let result2 = document.getElementById("result2");
      result2.textContent = "ビンゴです。おめでとうございます。";
    }
word関数ではビンゴしたときに画面にビンゴの表示を出すようにしています。
下記のコードをコピーしてファイルに貼り付ければ試すことができます。
<!DOCTYPE html>

<html>

<head>
  <meta charset="UTF-8">
  <title>bingo</title>

  <style>
    table {
      border: 3px double black;
      border-collapse: collapse;
    }
    td {
      width: 50px;
      height: 50px;
      border: 1px solid black;
      font-size: 30px;
      text-align: center;
    }
    button {
      width: 60px;
      height: 30px;
      margin: 0px 10px 0 0;
    }
    span {
      font-size: 20px;
      margin: 0;
    }
  </style>

  <script>
    let numbers = [];
    let first;

    function start() {
      numbers = numSet();
      first = true;
      let result = document.getElementById("result");
      result.textContent = "";

      let table = document.getElementById("table");
      table.innerHTML = "";
      for(let r = 0; r < 5; r++) {
        let tr = document.createElement("tr");
        for(let c = 0; c < 5; c++) {
          let td = document.createElement("td");
          let s = Math.floor(Math.random()*numbers.length);
          td.value = numbers[s];
          td.textContent = td.value;
          td.id = "num" + td.value;
          td.className = "judge";
          td.index = r * 5 + c;
          td.j1 = false;
          td.j2 = false;
          td.j3 = false;
          numbers.splice(s, 1);
          tr.appendChild(td);
        }
        table.appendChild(tr);
      }
    }

    function lot() {
      if(first){
        numbers = numSet();
        first = false;
      }
      let s = Math.floor(Math.random()*numbers.length);
      let result = document.getElementById("result");
      result.textContent = `結果:${numbers[s]}`;
      let w = "num" + numbers[s];
      let td = document.getElementById(w);
      if(td) {
        td.textContent = "●";
      }
      let td2 = document.getElementsByClassName("judge");
      let result2 = document.getElementById("result2");
      result2.textContent = "";
      if((td2.item(0).index == 0 && td2.item(0).textContent == "●" && td2.item(0).j1 == false) && (td2.item(1).index == 1 && td2.item(1).textContent == "●" && td2.item(1).j1 == false) && (td2.item(2).index == 2 && td2.item(2).textContent == "●" && td2.item(2).j1 == false) && (td2.item(3).index == 3 && td2.item(3).textContent == "●" && td2.item(3).j1 == false) && (td2.item(4).index == 4 && td2.item(4).textContent == "●" && td2.item(4).j1 == false)) {
        word();
        td2.item(0).j1 =true;
        td2.item(1).j1 =true;
        td2.item(2).j1 =true;
        td2.item(3).j1 =true;
        td2.item(4).j1 =true;
      } else if ((td2.item(5).index == 5 && td2.item(5).textContent == "●" && td2.item(5).j1 == false) && (td2.item(6).index == 6 && td2.item(6).textContent == "●" && td2.item(6).j1 == false) && (td2.item(7).index == 7 && td2.item(7).textContent == "●" && td2.item(7).j1 == false) && (td2.item(8).index == 8 && td2.item(8).textContent == "●" && td2.item(8).j1 == false) && (td2.item(9).index == 9 && td2.item(9).textContent == "●" && td2.item(9).j1 == false)) {
        word();
        td2.item(5).j1 =true;
        td2.item(6).j1 =true;
        td2.item(7).j1 =true;
        td2.item(8).j1 =true;
        td2.item(9).j1 =true;
      } else if ((td2.item(10).index == 10 && td2.item(10).textContent == "●" && td2.item(10).j1 == false) && (td2.item(11).index == 11 && td2.item(11).textContent == "●" && td2.item(11).j1 == false) && (td2.item(12).index == 12 && td2.item(12).textContent == "●" && td2.item(12).j1 == false) && (td2.item(13).index == 13 && td2.item(13).textContent == "●" && td2.item(13).j1 == false) && (td2.item(14).index == 14 && td2.item(14).textContent == "●" && td2.item(14).j1 == false)) {
        word();
        td2.item(10).j1 =true;
        td2.item(11).j1 =true;
        td2.item(12).j1 =true;
        td2.item(13).j1 =true;
        td2.item(14).j1 =true;
      } else if ((td2.item(15).index == 15 && td2.item(15).textContent == "●" && td2.item(15).j1 == false) && (td2.item(16).index == 16 && td2.item(16).textContent == "●" && td2.item(16).j1 == false) && (td2.item(17).index == 17 && td2.item(17).textContent == "●" && td2.item(17).j1 == false) && (td2.item(18).index == 18 && td2.item(18).textContent == "●" && td2.item(18).j1 == false) && (td2.item(19).index == 19 && td2.item(19).textContent == "●" && td2.item(19).j1 == false)) {
        word();
        td2.item(15).j1 =true;
        td2.item(16).j1 =true;
        td2.item(17).j1 =true;
        td2.item(18).j1 =true;
        td2.item(19).j1 =true;
      } else if ((td2.item(20).index == 20 && td2.item(20).textContent == "●" && td2.item(20).j1 == false) && (td2.item(21).index == 21 && td2.item(21).textContent == "●" && td2.item(21).j1 == false) && (td2.item(22).index == 22 && td2.item(22).textContent == "●" && td2.item(22).j1 == false) && (td2.item(23).index == 23 && td2.item(23).textContent == "●" && td2.item(23).j1 == false) && (td2.item(24).index == 24 && td2.item(24).textContent == "●" && td2.item(24).j1 == false)) {
        word();
        td2.item(20).j1 =true;
        td2.item(21).j1 =true;
        td2.item(22).j1 =true;
        td2.item(23).j1 =true;
        td2.item(24).j1 =true;
      }
      if((td2.item(0).index == 0 && td2.item(0).textContent == "●" && td2.item(0).j2 == false) && (td2.item(5).index == 5 && td2.item(5).textContent == "●" && td2.item(5).j2 == false) && (td2.item(10).index == 10 && td2.item(10).textContent == "●" && td2.item(10).j2 == false) && (td2.item(15).index == 15 && td2.item(15).textContent == "●" && td2.item(15).j2 == false) && (td2.item(20).index == 20 && td2.item(20).textContent == "●" && td2.item(20).j2 == false)) {
        word();
        td2.item(0).j2 =true;
        td2.item(5).j2 =true;
        td2.item(10).j2 =true;
        td2.item(15).j2 =true;
        td2.item(20).j2 =true;
      } else if ((td2.item(1).index == 1 && td2.item(1).textContent == "●" && td2.item(1).j2 == false) && (td2.item(6).index == 6 && td2.item(6).textContent == "●" && td2.item(6).j2 == false) && (td2.item(11).index == 11 && td2.item(11).textContent == "●" && td2.item(11).j2 == false) && (td2.item(16).index == 16 && td2.item(16).textContent == "●" && td2.item(16).j2 == false) && (td2.item(21).index == 21 && td2.item(21).textContent == "●" && td2.item(21).j2 == false)) {
        word();
        td2.item(1).j2 =true;
        td2.item(6).j2 =true;
        td2.item(11).j2 =true;
        td2.item(16).j2 =true;
        td2.item(21).j2 =true;
      } else if ((td2.item(2).index == 2 && td2.item(2).textContent == "●" && td2.item(2).j2 == false) && (td2.item(7).index == 7 && td2.item(7).textContent == "●" && td2.item(7).j2 == false) && (td2.item(12).index == 12 && td2.item(12).textContent == "●" && td2.item(12).j2 == false) && (td2.item(17).index == 17 && td2.item(17).textContent == "●" && td2.item(17).j2 == false) && (td2.item(22).index == 22 && td2.item(22).textContent == "●" && td2.item(22).j2 == false)) {
        word();
        td2.item(2).j2 =true;
        td2.item(7).j2 =true;
        td2.item(12).j2 =true;
        td2.item(17).j2 =true;
        td2.item(22).j2 =true;
      } else if ((td2.item(3).index == 3 && td2.item(3).textContent == "●" && td2.item(3).j2 == false) && (td2.item(8).index == 8 && td2.item(8).textContent == "●" && td2.item(8).j2 == false) && (td2.item(13).index == 13 && td2.item(13).textContent == "●" && td2.item(13).j2 == false) && (td2.item(18).index == 18 && td2.item(18).textContent == "●" && td2.item(18).j2 == false) && (td2.item(23).index == 23 && td2.item(23).textContent == "●" && td2.item(23).j2 == false)) {
        word();
        td2.item(3).j2 =true;
        td2.item(8).j2 =true;
        td2.item(13).j2 =true;
        td2.item(18).j2 =true;
        td2.item(23).j2 =true;
      } else if ((td2.item(4).index == 4 && td2.item(4).textContent == "●" && td2.item(4).j2 == false) && (td2.item(9).index == 9 && td2.item(9).textContent == "●" && td2.item(9).j2 == false) && (td2.item(14).index == 14 && td2.item(14).textContent == "●" && td2.item(14).j2 == false) && (td2.item(19).index == 19 && td2.item(19).textContent == "●" && td2.item(19).j2 == false) && (td2.item(24).index == 24 && td2.item(24).textContent == "●" && td2.item(24).j2 == false)) {
        word();
        td2.item(4).j2 =true;
        td2.item(9).j2 =true;
        td2.item(14).j2 =true;
        td2.item(19).j2 =true;
        td2.item(24).j2 =true;
      }
      if((td2.item(0).index == 0 && td2.item(0).textContent == "●" && td2.item(0).j3 == false) && (td2.item(6).index == 6 && td2.item(6).textContent == "●" && td2.item(6).j3 == false) && (td2.item(12).index == 12 && td2.item(12).textContent == "●" && td2.item(12).j3 == false) && (td2.item(18).index == 18 && td2.item(18).textContent == "●" && td2.item(18).j3 == false) && (td2.item(24).index == 24 && td2.item(24).textContent == "●" && td2.item(24).j3 == false)) {
        word();
        td2.item(0).j3 =true;
        td2.item(6).j3 =true;
        td2.item(12).j3 =true;
        td2.item(18).j3 =true;
        td2.item(24).j3 =true;
      } else if ((td2.item(4).index == 4 && td2.item(4).textContent == "●" && td2.item(4).j3 == false) && (td2.item(8).index == 8 && td2.item(8).textContent == "●" && td2.item(8).j3 == false) && (td2.item(12).index == 12 && td2.item(12).textContent == "●" && td2.item(12).j3 == false) && (td2.item(16).index == 16 && td2.item(16).textContent == "●" && td2.item(16).j3 == false) && (td2.item(20).index == 20 && td2.item(20).textContent == "●" && td2.item(20).j3 == false)) {
        word();
        td2.item(4).j3 =true;
        td2.item(8).j3 =true;
        td2.item(12).j3 =true;
        td2.item(16).j3 =true;
        td2.item(20).j3 =true;
      }
      numbers.splice(s, 1);
      if(!numbers.length) {
        result.textContent = "抽選は終わりました。";
      }
    }

    function numSet() {
      let i = [];
      for(let n = 1; n < 100; n++) {
        i.push(n);
      }
      return i;
    }

    function word() {
      let result2 = document.getElementById("result2");
      result2.textContent = "ビンゴです。おめでとうございます。";
    }
  </script>
</head>

<body>
  <table id="table"></table><br>
  <button onclick="start()">START</button>
  <button onclick="lot()">抽選</button>
  <span id="result"></span><br>
  <span id="result2"></span>
</body>
</html>
- 投稿日:2020-11-18T15:43:35+09:00
【jQuery】領域外のクリック時にメニューを閉じるようにする
jQueryでスマホ用メニューをクリックした際にメニュー以外の領域をクリックした際にメニューを閉じるようにしたい。
このサイトで✕ボタンでしかメニューが閉じないのは不便。
メニュー以外をクリックした際にこんな感じで閉じたい。
実装
今回のサイトはWordPressで作っていたため、テーマにのっとってコードを追記する必要があります。
そこで、devモードでコードを見ると、ハンバーガーメニューをクリックすると
menu-toggleクラスにactiveクラスが付与されるようにしていて、activeクラスがある場合はメニューがひらっきぱなしになるように組まれていました。//メニューが閉じてるとき <div class="menu-toggle"> //メニューを開いてるとき <div class="menu-toggle active">というわけで、メニュー外をクリックしたら、
menu-toggleの部分からactiveを取り除くコードを記載すればOKです。jQuery(document).ready(function($) { var nav = $('.menu-toggle'); $('.main-section').click(function() { //ここでnavの部分がactiveクラスを持っているか確認 if(nav.hasClass('active')) { $('.menu-toggle').removeClass('active'); } }); });
jQuery(document).ready(function($)としているのは、サイトのHTMLを完全に読み込んでからこのjQueryを実行させたいからです。


- 投稿日:2020-11-18T13:30:13+09:00
jQuery 備忘録
・js側で値の受け渡し方法
index.html<form id="modal-form"> <input type="hidden" id="modal-value-1" /> //値を入れたいhidden </form> <input type="text" id="modal-input-1" name="data[User][name]" /> //値を受け取るinputindex.jsvar inputVal = $("#̲modal-input-1").val(); //一度変数に受ける $("#modal-value-1").val(inputVal);
data属性を使って値を設定すれば、あらゆることに利用できる。
form.html<button class="add mon" data-daynum="1"> <button class="add tue" data-daynum="2"> <button class="add wed" data-daynum="3"> .....form.js$(document).on("click", "クラス名", function(){ let daynum = $(this).attr("data-daynum"); //daynumに曜日番号が入る 以下いろいろな処理 });
- 投稿日:2020-11-18T12:27:48+09:00
404エラーを返すWordPress投稿を修正する方法
WordPressは強力なCMSですが、わずかな調整によりWebサイトにアクセスできなくなる場合があります。ただし、WordPressの問題の解決策を見つけるのは非常に簡単です。WordPressユーザーが直面する最も一般的な問題のいくつかあります。例えば内部サーバーエラーまたはデータベース接続の確立エラーなどです。そして、ほとんどのWordPressユーザーがいつか直面するもう1つの一般的な問題は、WordPressの投稿が404エラーを返すことです。この記事では、404エラーを返すWordPressの投稿を修正する方法を紹介します。
通常、ユーザーはブログのメインページであるWordPress管理エリアにアクセスできますが、単一の投稿にアクセスすると、404 Notfoundエラーが発生する場合があります。そういった場合でもほとんどの場合、慌てる必要はありません。そういった時の原因は主に2つです。
①htaccessファイルが削除された
②書き換えルールに問題が発生したそこで行うべきアクションはパーマリンク設定を修正することです
「設定」⇨「パーマリンク」に移動し、「設定を保存」をする。ただこれだけ。
これにより、パーマリンク設定が更新され、書き換えルールがフラッシュされます。ほとんどの場合、このソリューションはWordPressの投稿404エラーを修正します。ただし、それが機能しない場合は、.htaccessファイルを手動で更新する必要があります。
FTPを使用してサーバーにログインし、/ wp-content /や/ wp-includes /などのフォルダーと同じ場所にある.htaccessファイルを変更します。最も簡単な方法は、アクセス許可を666に変更して、ファイルを一時的に書き込み可能にすることです。次に、元の解決策を繰り返します。権限を660に戻すことを忘れないでください。次のコードを.htaccessファイルに手動で追加することもできます。
BEGIN WordPress
<IfModule mod_rewrite.c>
RewriteEngine On
RewriteBase /
RewriteRule ^index\.php$ - [L]
RewriteCond %{REQUEST_FILENAME} !-f
RewriteCond %{REQUEST_FILENAME} !-d
RewriteRule . /index.php [L]
</IfModule>
# END WordPress
ローカルサーバーの修正
多くの場合、デザイナーや開発者は、テスト目的でローカルサーバーを使用してコンピューターにWordPressをインストールします。綺麗なパーマリンクを使用したい場合は、MAMP、WAMP、またはXXAMPのApache構成でrewrite_moduleを有効にする必要があります。
以上が404エラーに対しての処理になります。もしよろしかったらコメント待っています。
- 投稿日:2020-11-18T07:23:33+09:00
GoogleDriveの画像をwebに表示させる方法
GoogleDriveの画像リンクをimgタグに貼り付けて、web上で表示させる方法!!!
①画像の共有を『リンクを知っている人全員にする。』
②画像リンクを取得する。
『画像を右クリック->画像リンクを取得する』③コピーした画像リンクを加工する
加工前
https://drive.google.com/file/d/画像により異なる文字列/view?usp=sharing
↓
加工後
https://drive.google.com/uc?export=view&id=画像により異なる文字列


uc?export=view&id=   これを追加するだけ!
これでweb上でGoogleDriveの画像が表示される。
リンクの先頭はhttpsでもhttpでも可能だけど、個人的には警告出ないhttps推奨。
- 投稿日:2020-11-18T06:32:00+09:00
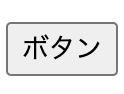
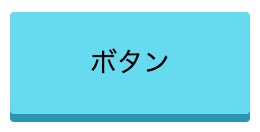
立体的なボタンの作成方法
完成形
今回は下記のような立体感のあるボタンを作成します!
HTMLで<button></button>タグを追加しボタンを作成する
index.html<!-- CSSでスタイルを設定するためclass="btn"を追加しておく --> <button class="btn">ボタン</button>下記のようなボタンが作成されます
CSSでボタンにスタイルを追加する
style.css.btn { border-radius: 2px; padding: 15px 40px; background-color: #60daf0; cursor: pointer; box-shadow: 0 4px #2693b4; border: none; outline: none; }すると下記のようなボタンが作成できます!
ボタンを押下した際の動きをつける
先ほどの手順ではボタン自体は作成できましたが、押下した際の動きはまだありません。
「active」ディレクティブで押下している間適用されるスタイルを追加しましょう!style.css.btn { border-radius: 2px; padding: 15px 40px; background-color: #60daf0; cursor: pointer; box-shadow: 0 4px #2693b4; border: none; outline: none; } /* ボタンを押下している間のスタイルを追加 */ .btn:active { box-shadow: none; position: relative; top: 4px; }★Point ボタンを押下した際にボタンの位置を下げる
①box-shadowの2番目に指定している「4px」で影の高さを指定
②押下時は4px位置を下げるというスタイルを適用することで、押下時の立体感を出すことが可能
※「position: relative;」とセットで適用してください。style.css.btn { border-radius: 2px; padding: 15px 40px; background-color: #60daf0; cursor: pointer; box-shadow: 0 4px #2693b4; /* ①2番目に指定している4pxで影の高さを指定 */ border: none; outline: none; } .btn:active { box-shadow: none; position: relative; /* position: relative;とセットで適用してください。 */ top: 4px; /* ②押下時は4px位置を下げるというスタイルを適用することで押下時の立体感を出すことが可能*/ }色の変化や、影の高さをアレンジするなど使い道がありそうです!
- 投稿日:2020-11-18T00:02:33+09:00
【初心者でもわかる】タップしたら電話がかけられるようにする方法(レスポンシブ対応)
どうも7noteです。タップしたら電話がかけられるようにする方法。PCは反応させないようにします。
ヘッダーやフッターなどに電話番号を掲載した際に、タップで電話をかけられるようにする方法です。
お問い合わせ窓口のページなどにも使いますね。実はけっこう簡単に実装することができるのですが、対策をしないとPCから見たときにも反応してしまうので、その対策方法も合わせて実装します。
ソース
index.html<a href="tel:00012345678">000-1234-5678</a> <!-- href属性に「tel:」と「電話番号」を記載する。 -->style.css/* 750px以上の幅(PC等)がある時だけ */ @media screen and (min-width: 768px) { a[href^="tel:"] { pointer-events: none; /* カーソルイベントを無効 */ } }解説
aタグのhref属性に、「tel:」と「電話番号」を書くことで動作します。
必ずaタグでなければいけない事と、番号の前に「tel:」をつける必要性があります。
「tel:」の後の電話番号はハイフン(-)ありでもなしでも動作するので好きな方が使えます。スマホのみ対応にする方法
style.cssに書いているようにaタグのhref属性が「tel:」から始まるものは、
pointer-events: none;で無効にすることができます。
@media screen and (min-width: 768px)の指定でPCにだけこれを無効にすることで、スマホからタップした時にだけ反応するようにできる仕組みです。おまけ(国際電話の場合)
<a href="tel:+81-90-0000-0000">090-0000-0000</a>国コードの入力が必要!!
参考:https://webliker.info/65145/
まとめ
簡単に実装できますし、aタグなのでテキストだけでなくボタンのようなデザインを作って「お電話はこちら!」というようなボタンにすることも可能です。
PCの時に誤ってクリックできてしまうと、無駄なアラートがでるのでしっかりと無効化の処理も忘れずに入れること!おそまつ!
~ Qiitaで毎日投稿中!! ~
【初心者向け】HTML・CSSのちょいテク詰め合わせ